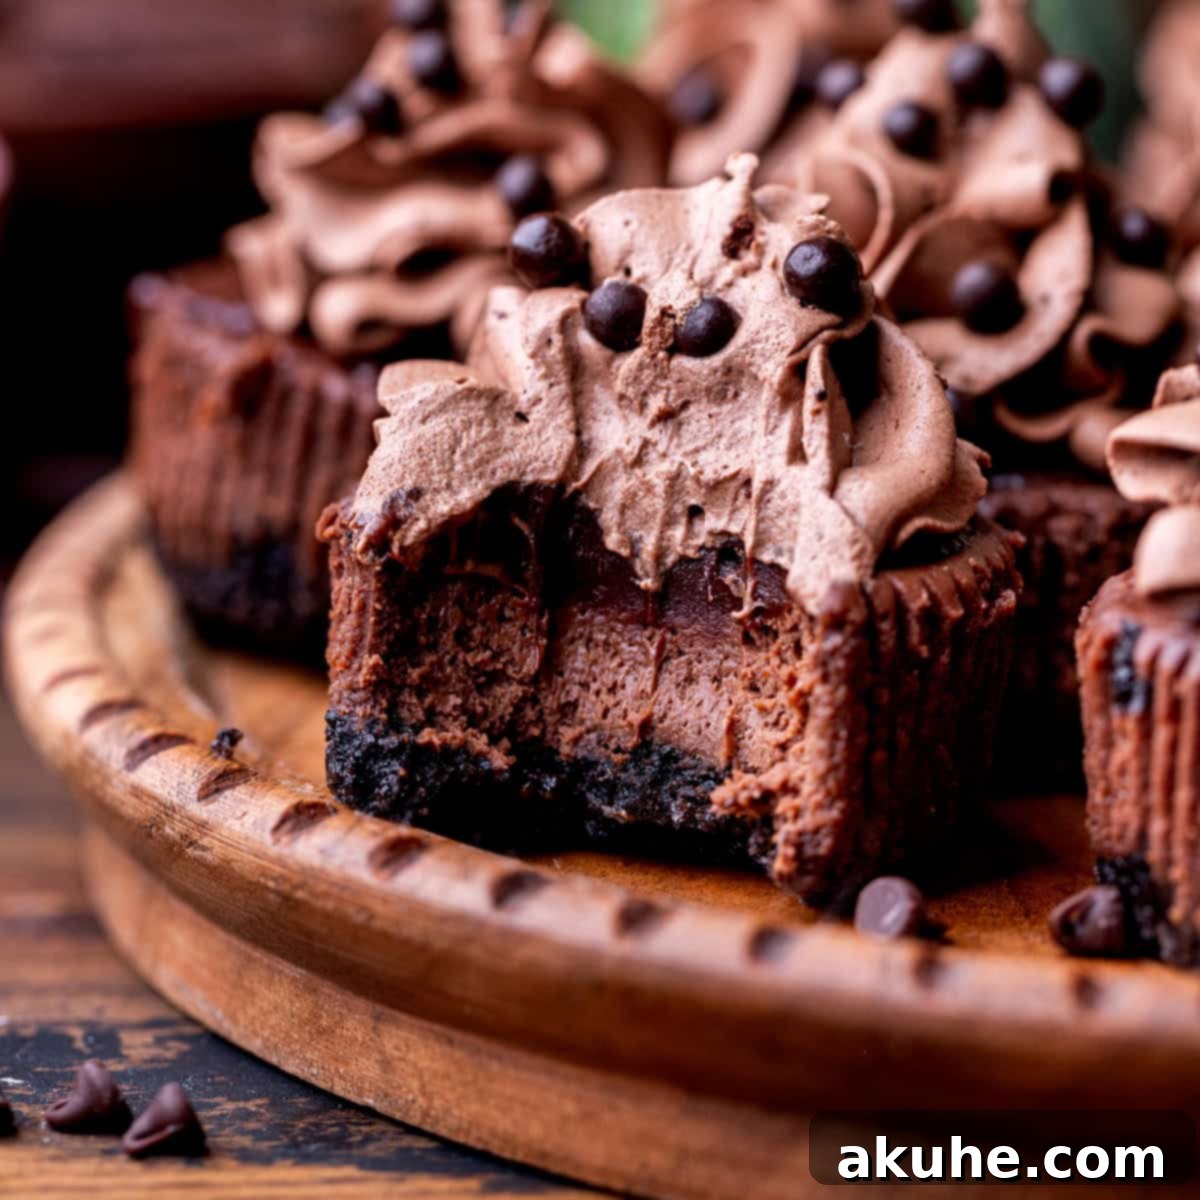
Welcome to the ultimate guide for creating irresistible mini chocolate cheesecakes! These delightful, bite-sized desserts are the perfect indulgence for any occasion, from casual backyard barbecues to elegant dinner parties. Forget the stress of a full-sized cheesecake; these individual portions are baked to perfection in a 12-cup muffin tin, requiring no cumbersome water bath. Each miniature masterpiece features a rich, dark Oreo crust, a sumptuously creamy chocolate cheesecake filling, and is elegantly crowned with a silky chocolate ganache and a cloud of fluffy chocolate whipped cream. Prepare to impress your guests and satisfy every chocolate lover’s dream with these convenient and utterly delicious treats.
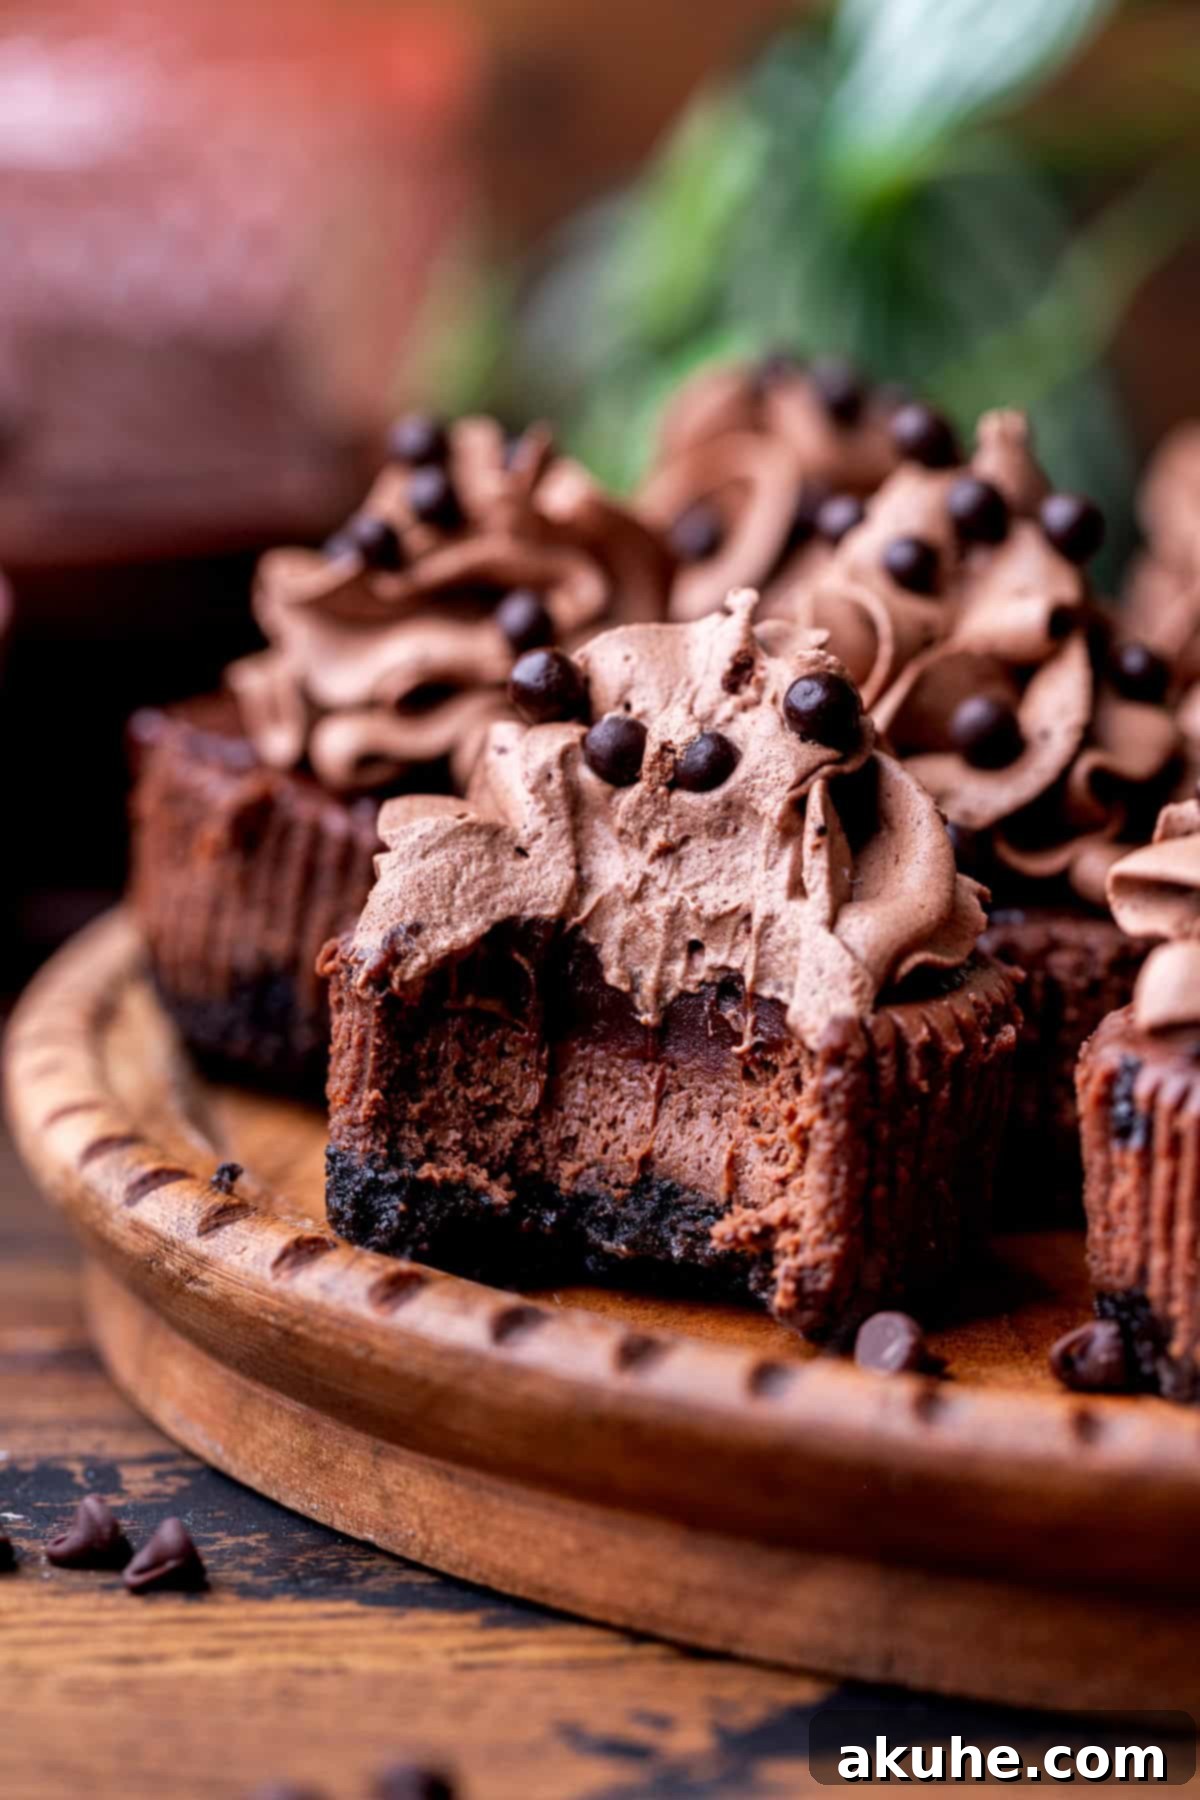
Mini cheesecakes offer a significant advantage over their larger counterparts, simplifying both the baking process and the serving experience. The convenience begins with their construction: no more worrying about delicate cracks that often plague full-sized cheesecakes, and absolutely no need for a messy water bath! This recipe is designed to be straightforward and forgiving, making it accessible even for novice bakers. Beyond the ease of preparation, these single-serve desserts are a game-changer for entertaining. Imagine a beautifully arranged platter of these tempting treats, ready for guests to simply grab and enjoy. Whether you’re hosting a large gathering or an intimate get-together, mini cheesecakes ensure perfect portion control and effortless distribution. And rest assured, while their size may be mini, their flavor and luxuriously creamy texture are every bit as rich and satisfying as a classic, grand cheesecake.
Discover the Irresistible Charm of Mini Chocolate Cheesecakes
These mini chocolate cheesecakes encapsulate everything wonderful about a decadent chocolate cheesecake, presenting it in an effortlessly convenient and delightful form. They are designed to deliver maximum flavor with minimal fuss, making them a go-to recipe for any dessert enthusiast.
- Effortless Baking Experience: One of the primary benefits of mini cheesecakes is their forgiving nature. Unlike larger cheesecakes that can be temperamental and prone to cracking or deflating, these individual portions are far more robust. This recipe has been crafted to minimize common cheesecake challenges, ensuring a smooth baking process and beautiful results every time. You won’t need a water bath, and the smaller size means less worry about temperature fluctuations affecting the delicate texture. This translates into less stress and more enjoyment in the kitchen, making it a perfect project for any skill level.
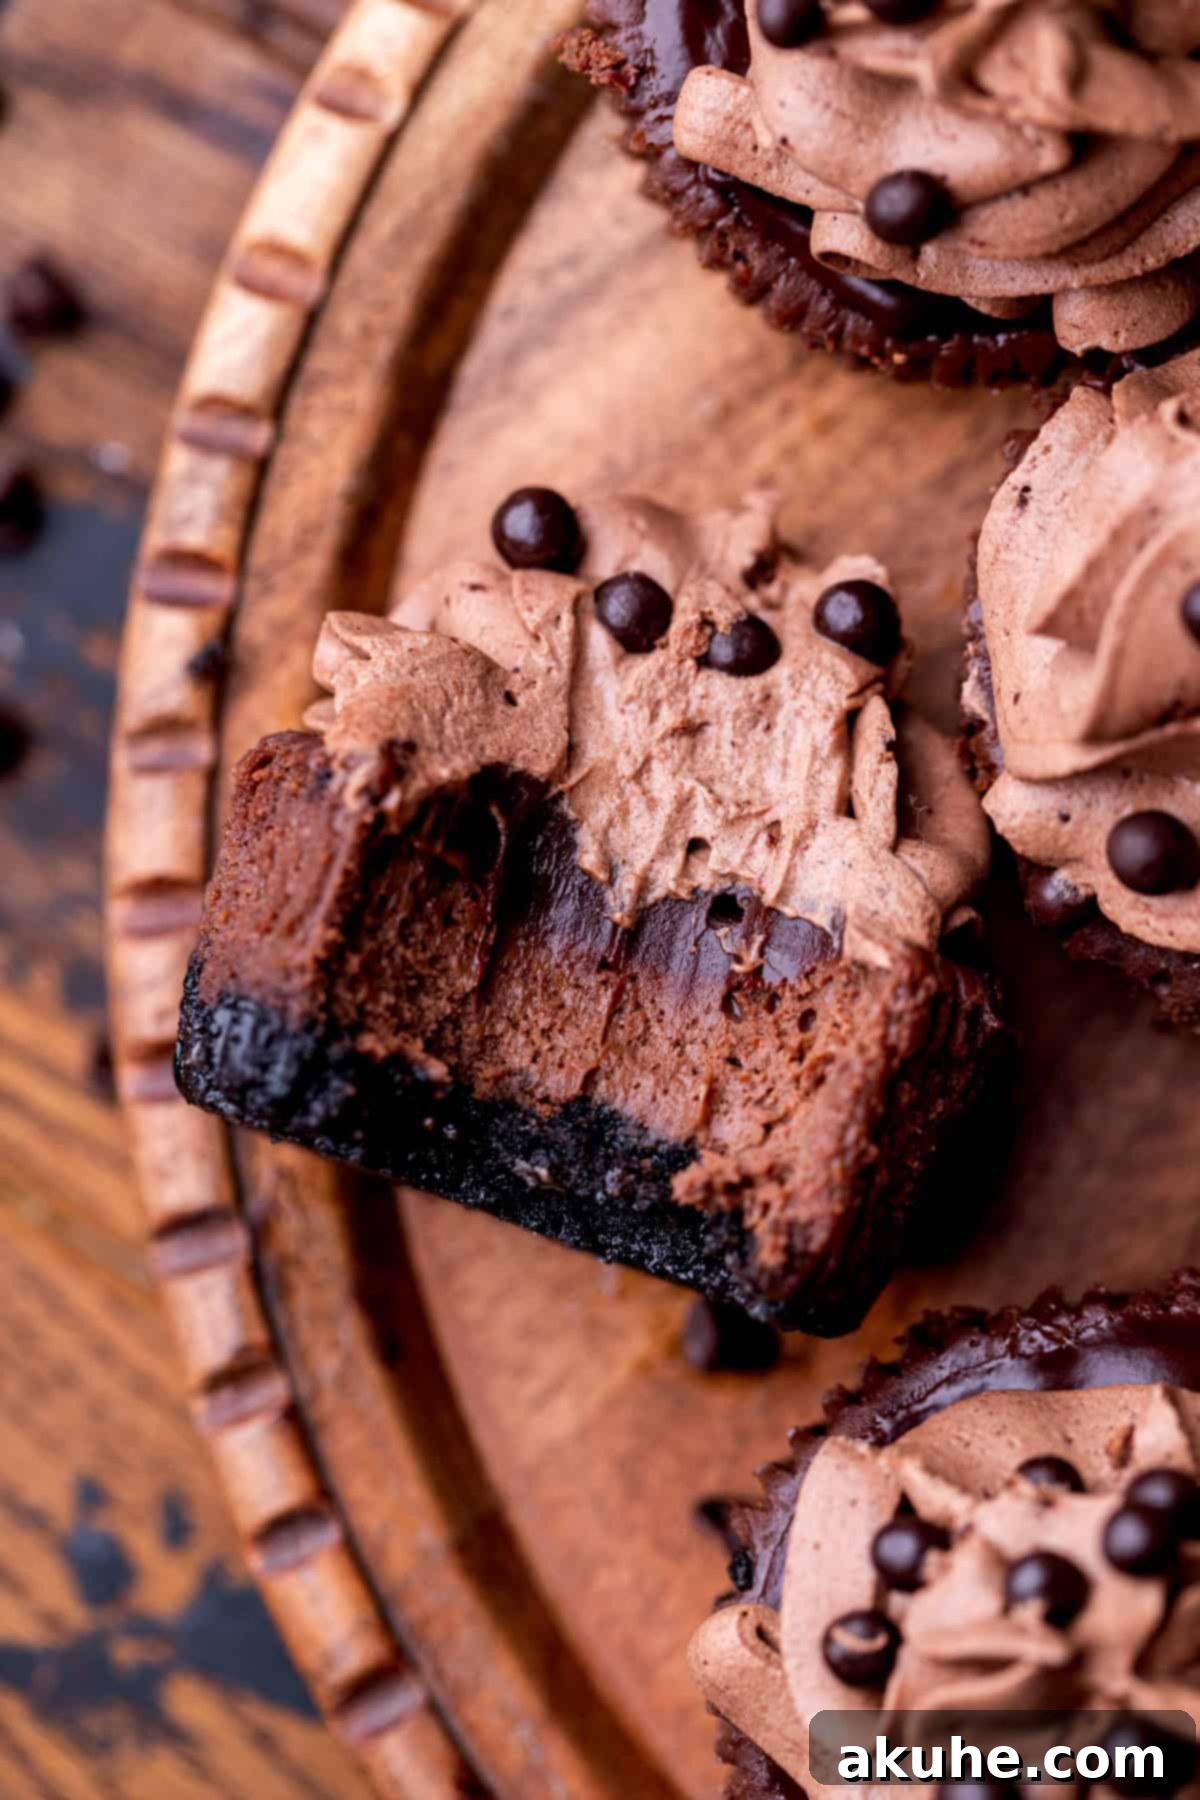
- Unforgettable Rich Chocolate Flavor: Prepare your taste buds for a symphony of chocolate. These cheesecakes boast a deeply satisfying flavor profile, meticulously built from the ground up. It begins with the iconic Oreo crust, providing a delightful crunch and a hint of classic chocolate cookie. This foundation supports a velvety smooth chocolate cheesecake filling, infused with just the right amount of cocoa. But the chocolate journey doesn’t end there; a glistening layer of decadent chocolate ganache adds an intense, luxurious richness, while a light and airy chocolate whipped cream topping provides a final, elegant flourish. Every component contributes to a harmonious and intensely chocolatey experience.
- Perfectly Portioned for Any Occasion: The single-serve nature of these mini cheesecakes is a true highlight. They eliminate the need for slicing and serving, which can often be cumbersome with a full-sized dessert. Each cheesecake is its own perfect portion, making them ideal for parties, potlucks, or simply as an easy-to-grab treat. You can elegantly display them on a dessert tray for guests to pick up at their leisure, or easily hand them out, ensuring everyone gets to enjoy their own personal chocolate delight without any fuss. This convenience makes entertaining a breeze and ensures a professional presentation every time.
If your heart beats for the rich allure of chocolate and the creamy indulgence of cheesecake, then these perfectly portioned, convenient desserts are absolutely essential for your next celebration or simply a delightful treat at home. They combine the best of both worlds into one unforgettable experience!
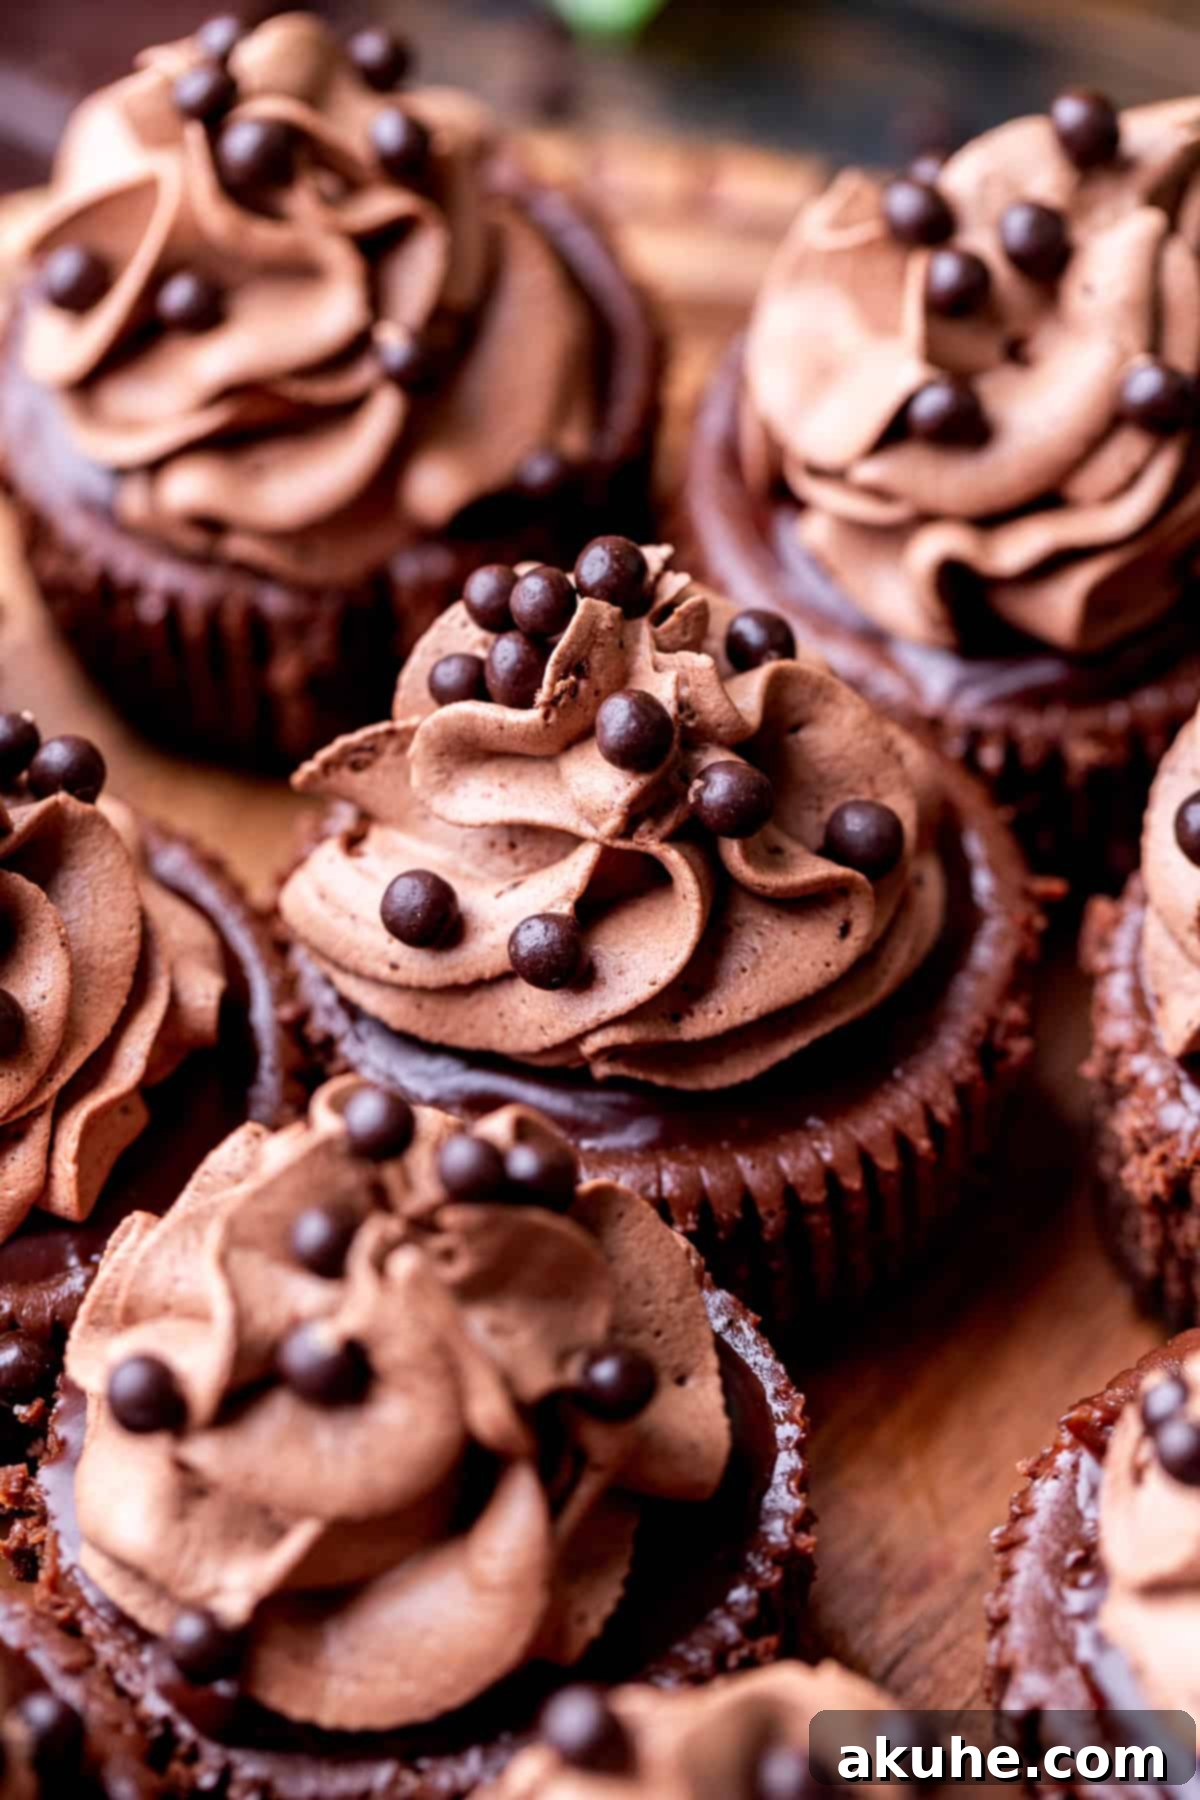
For an extra touch of sophistication and texture, the charming chocolate balls adorning the top of these mini cheesecakes are in fact gourmet chocolate pearls. These small, crispy spheres add a delightful crunch that beautifully complements the creamy smoothness of the cheesecake, making each bite even more luxurious.
Essential Tips for Baking Flawless Mini Chocolate Cheesecakes
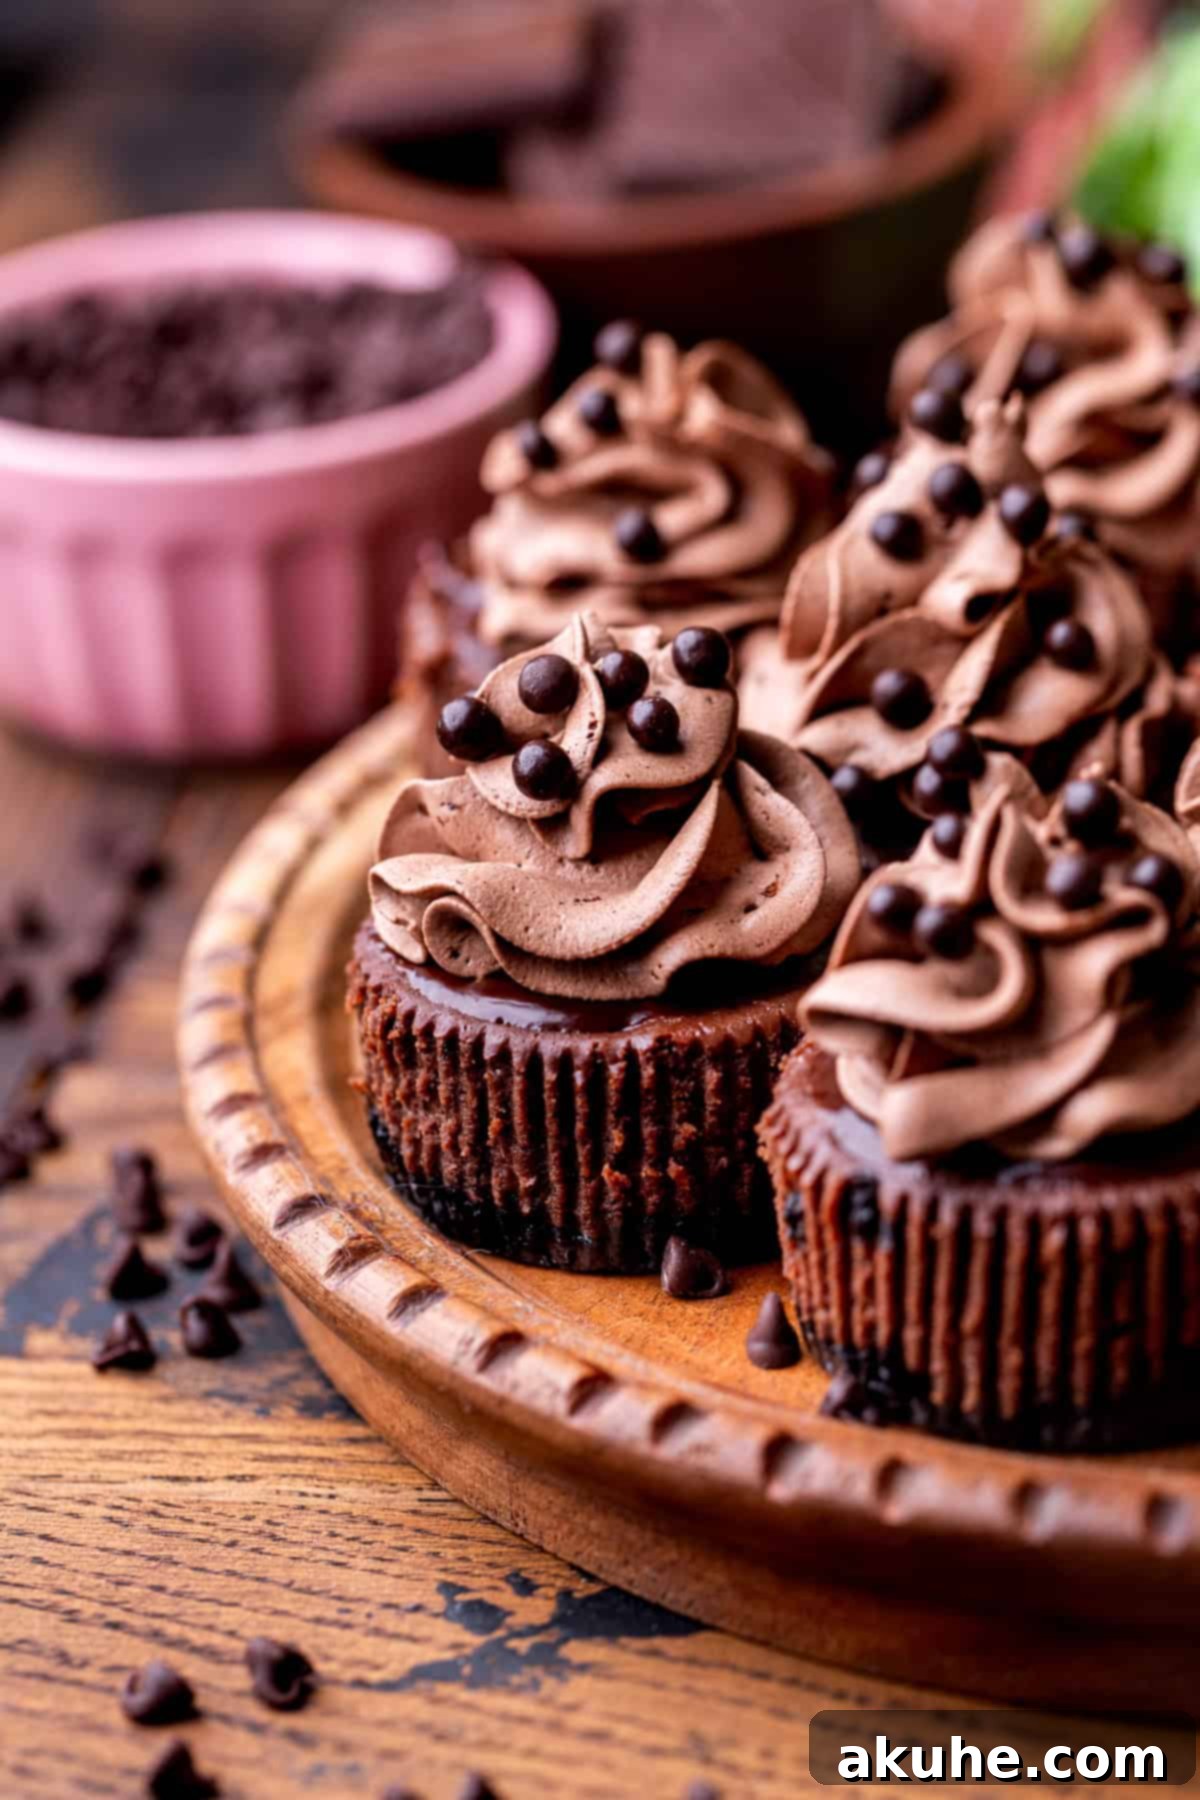
Achieving perfectly smooth, crack-free mini cheesecakes is simpler than you might think, especially with these insider tips. Follow these guidelines, and your creations will turn out just as stunning and delicious as the ones pictured in this recipe!
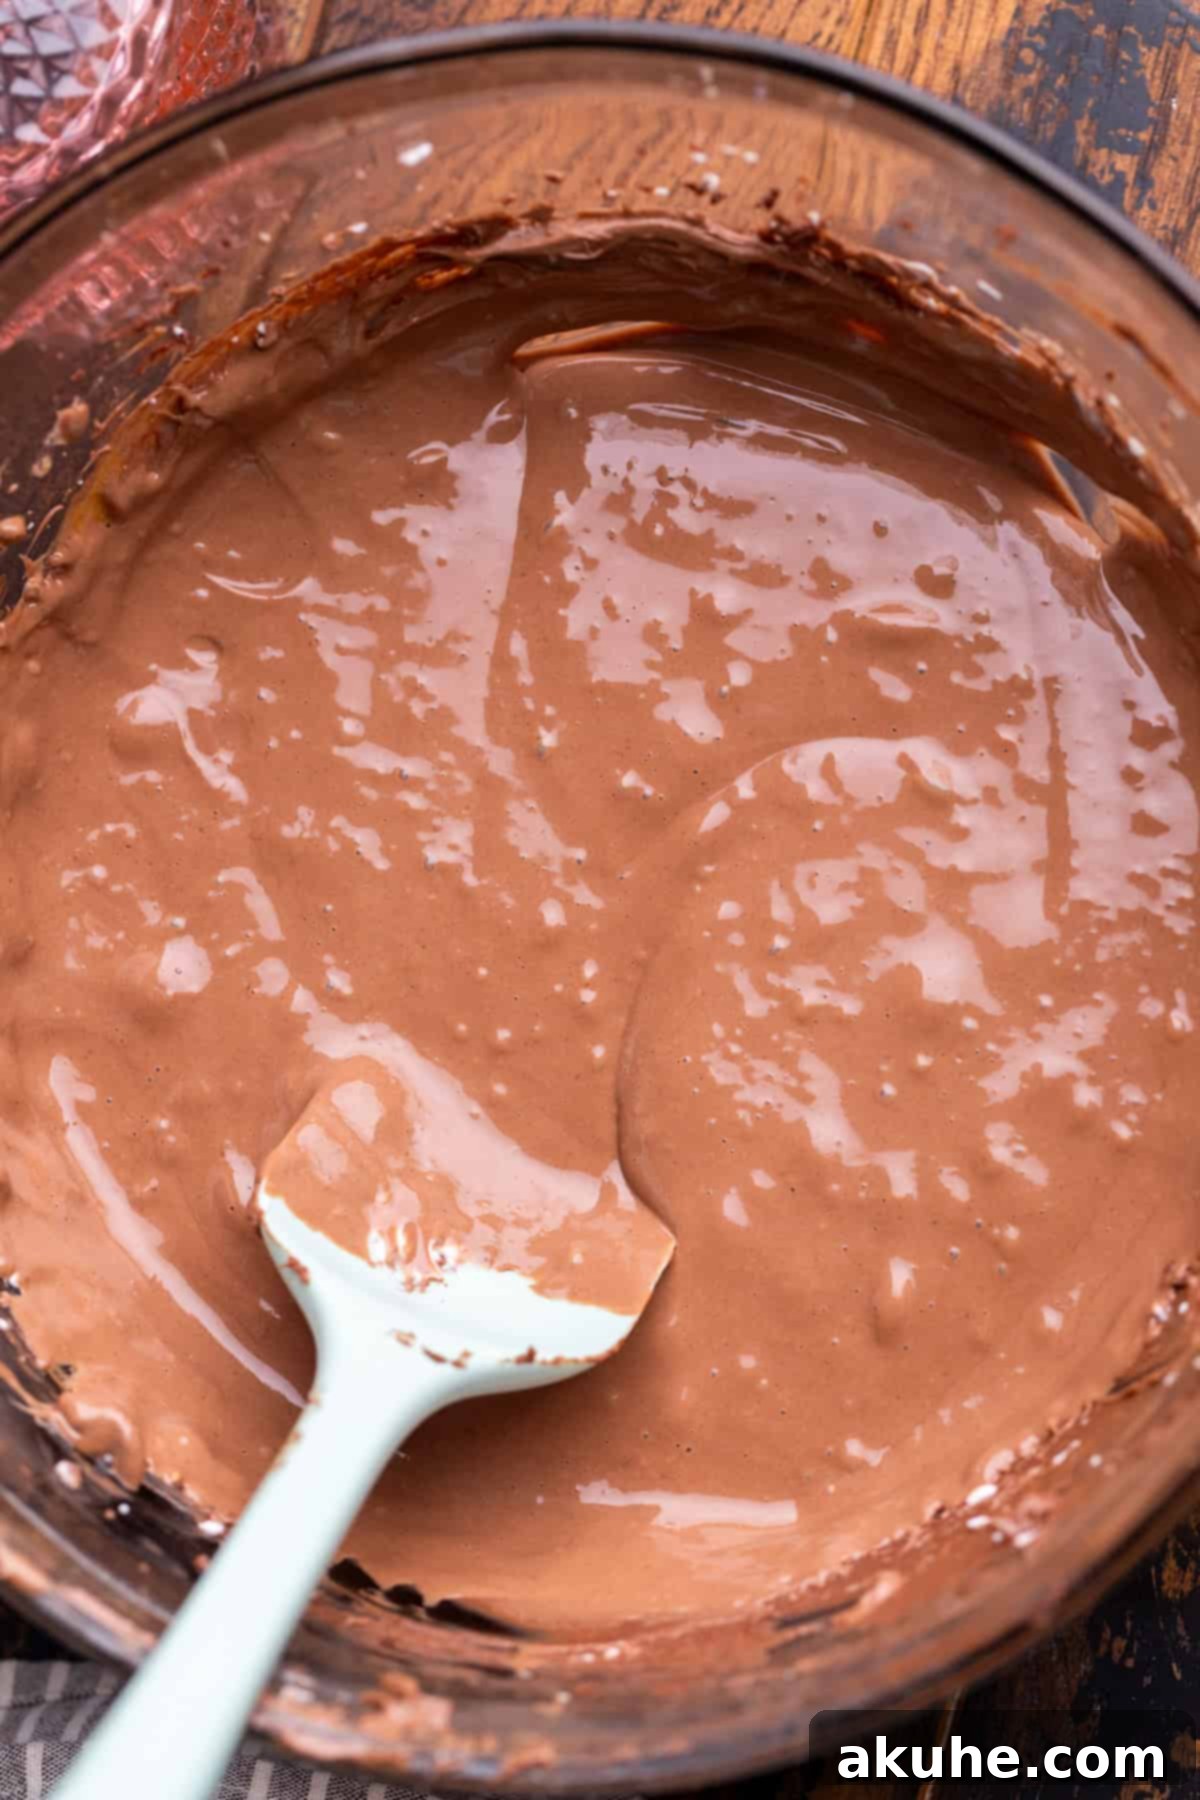
- Tip 1: Ensure Dairy Ingredients are at Room Temperature: This is perhaps one of the most crucial steps for any cheesecake recipe. Cold dairy ingredients (cream cheese, sour cream, eggs) tend to create lumps in the batter and can result in overmixing when trying to achieve a smooth consistency. Overmixing incorporates too much air, which can cause the cheesecake to puff up significantly during baking and then collapse, leading to cracks. By allowing all dairy ingredients to reach room temperature for at least two hours before you begin, they will blend together seamlessly, creating a silky-smooth batter without excessive mixing.
- Tip 2: Mix Eggs Gently and on Low Speed: Eggs are a binder and provide structure, but they are also a primary culprit for cracks if handled improperly. When adding the eggs to your cheesecake batter, do so at the lowest speed setting on your mixer, and mix only until they are just combined – literally a few seconds. The goal is to incorporate the eggs without whipping in excess air. Too much air will expand rapidly in the oven, only to contract quickly as the cheesecake cools, inevitably leading to cracks and a potentially sunken center.
- Tip 3: The Importance of Overnight Chilling: Patience is a virtue, especially when it comes to cheesecake. While it might be tempting to dive into these delicious treats as soon as they cool, proper chilling is non-negotiable for achieving the best texture. Chilling the cheesecakes overnight, or for a minimum of 6-8 hours, allows them to fully set, firm up, and develop their signature dense, creamy consistency. This also helps the flavors meld beautifully, resulting in a more deeply satisfying dessert experience.
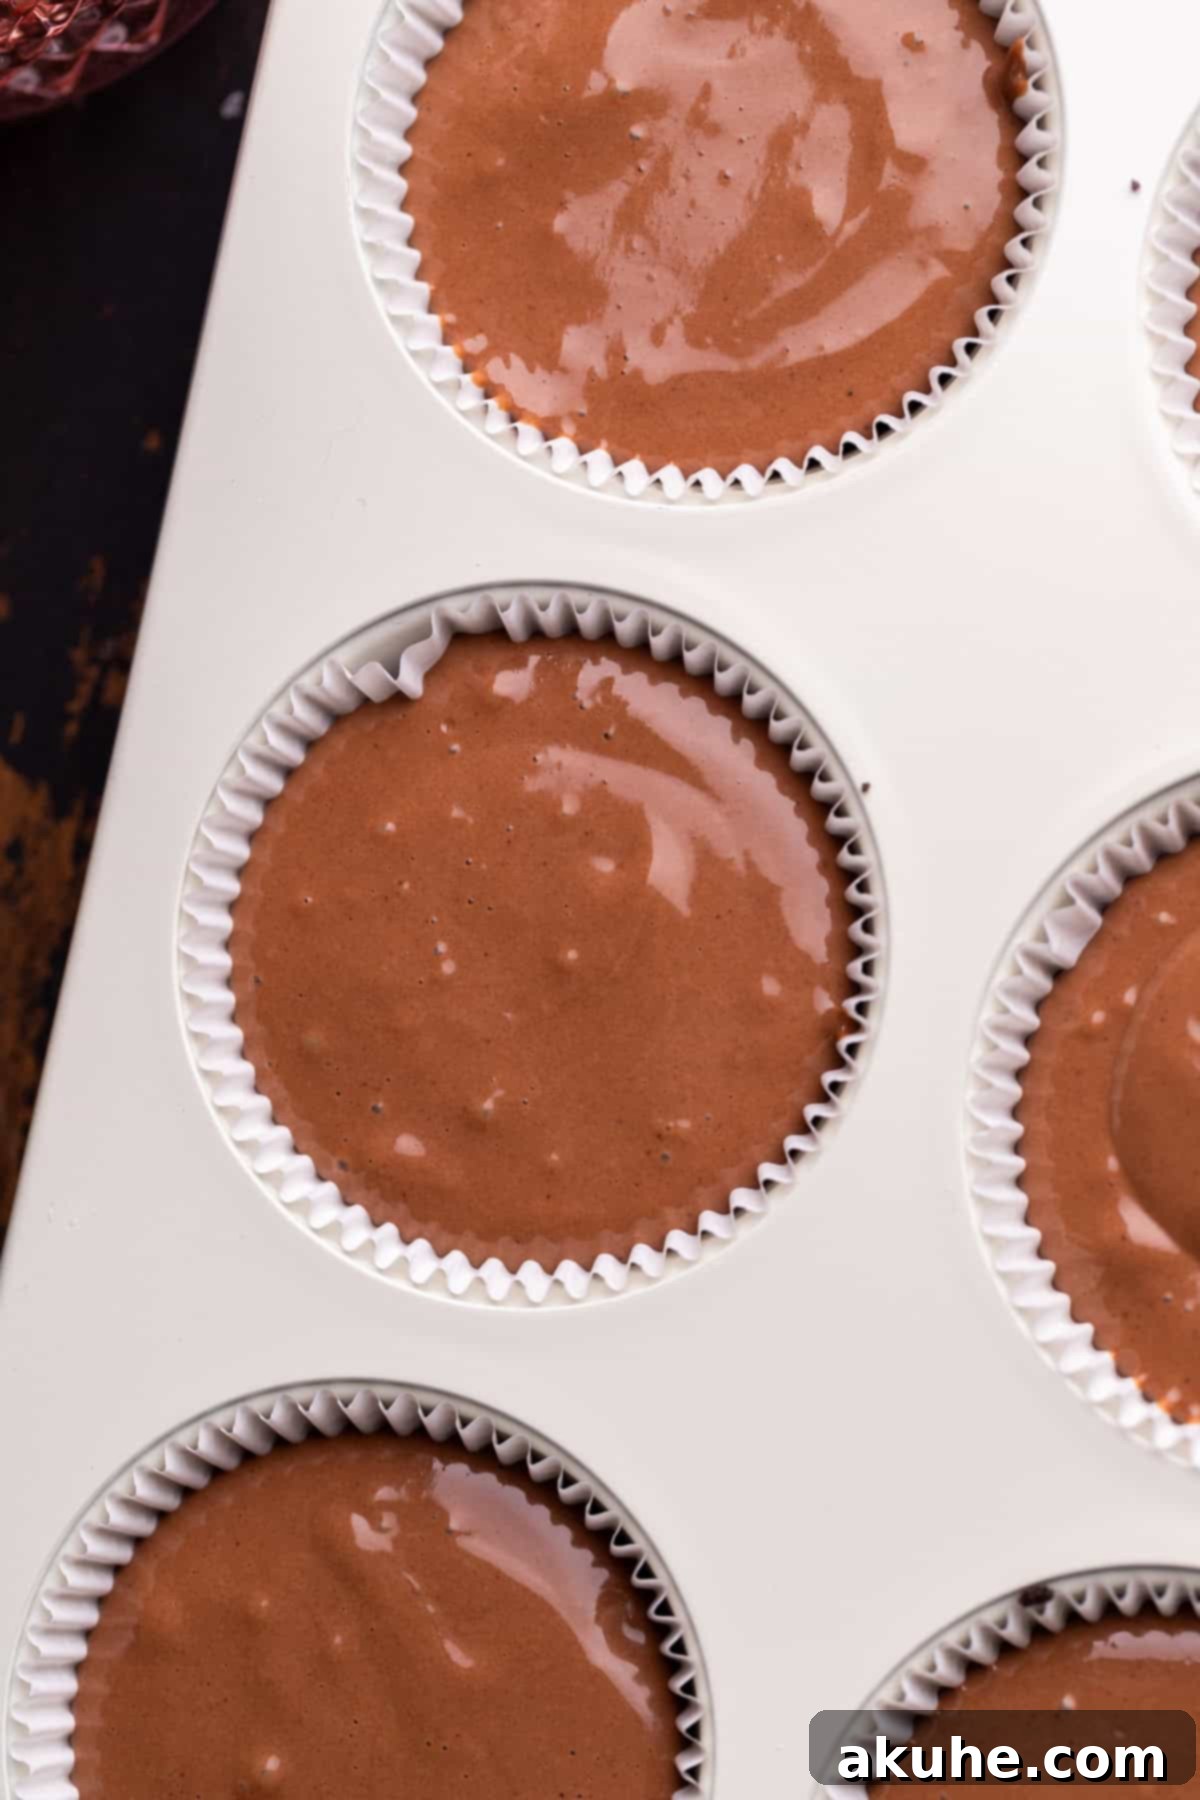
- Tip 4: Correct Muffin Cup Filling Technique: When portioning the cheesecake batter into your muffin liners, resist the urge to fill them to the very top edge of the pan. Instead, aim to fill each liner until the batter reaches about 1/4 inch from the top of the paper liner itself. This provides enough room for the cheesecake to rise slightly during baking without overflowing, and it helps prevent excessive doming or uneven surfaces, which makes decorating much easier and gives a more professional finish.
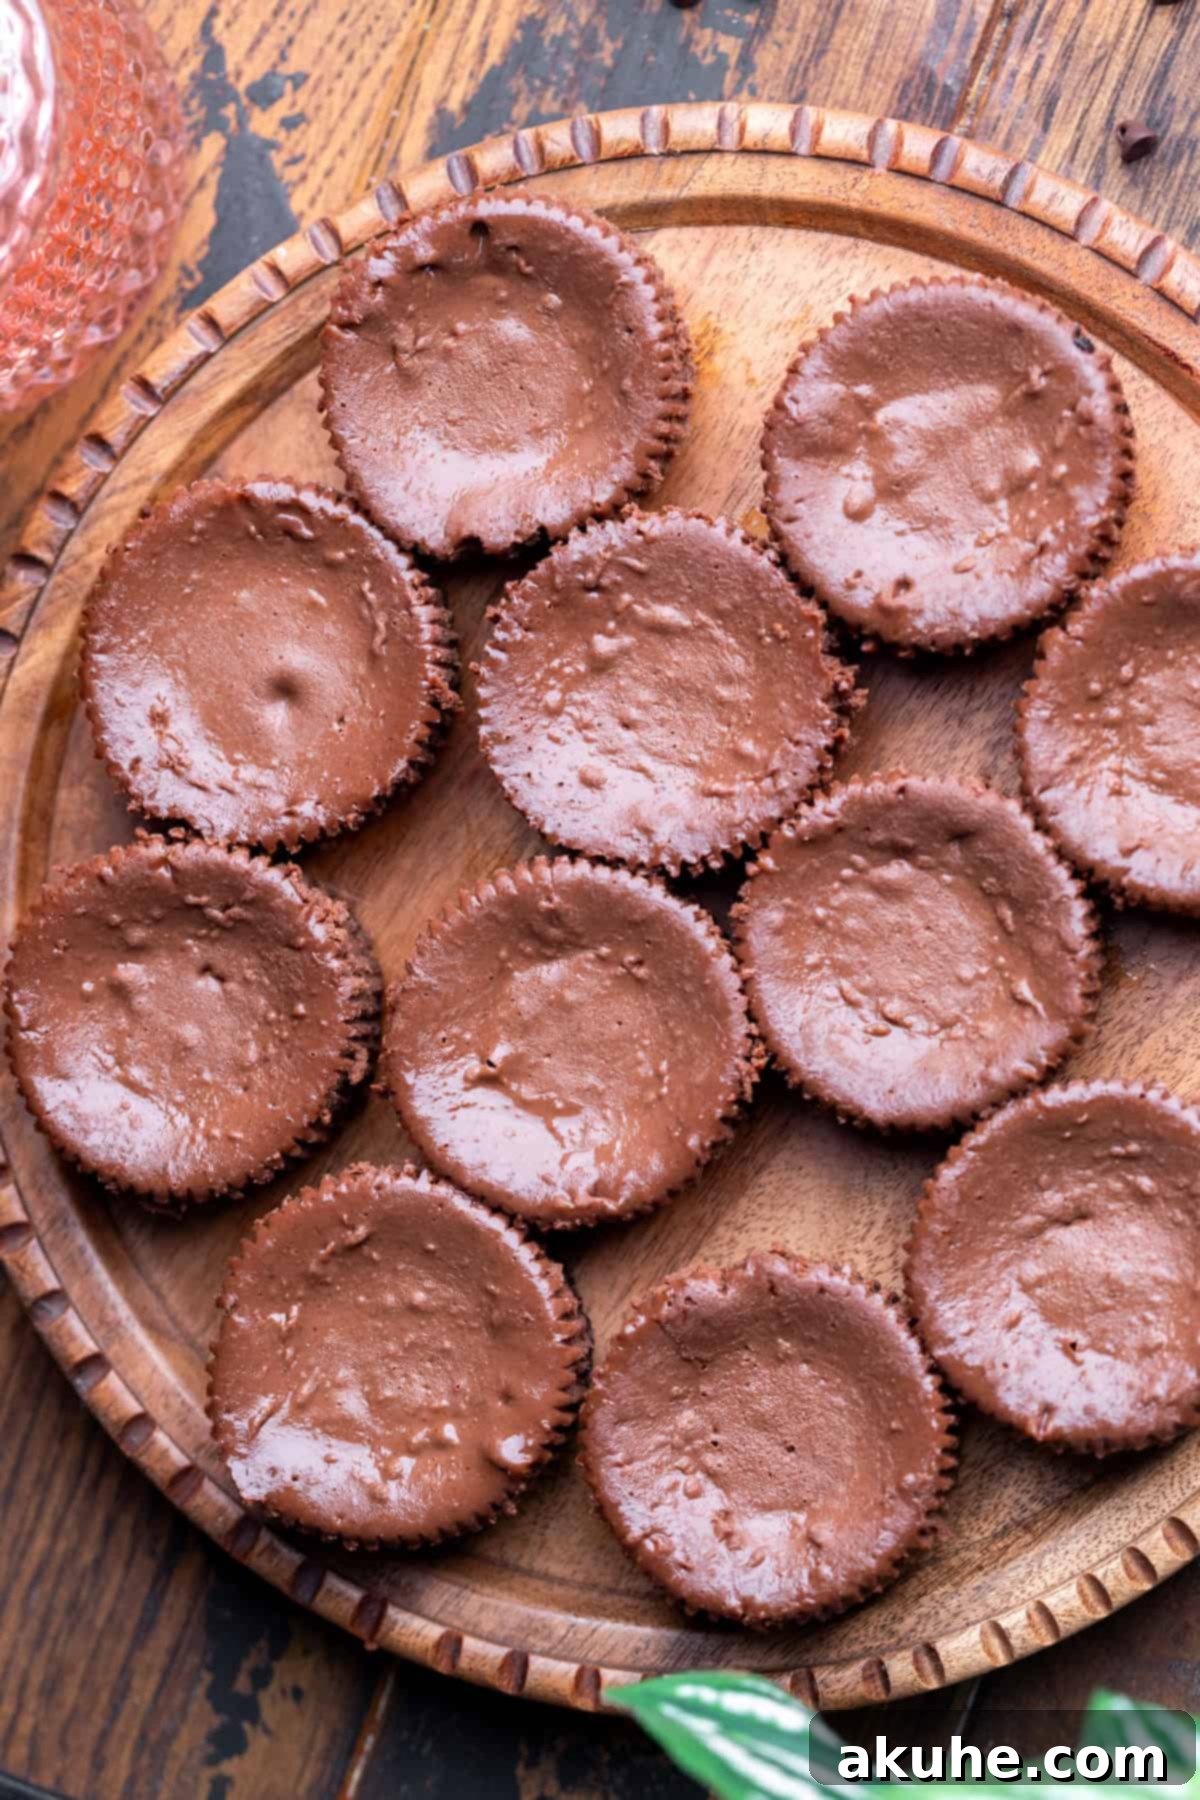
- Tip 5: Cool Gradually to Prevent Cracks: After baking, don’t immediately remove the cheesecakes from the oven. Instead, turn off the oven and crack the door open, allowing them to cool inside for about 15 minutes. This gradual cooling process prevents a sudden temperature shock, which can cause the cheesecakes to crack. After this initial cooling, transfer them to a wire rack to cool completely at room temperature before chilling.
How to Elegantly Decorate Your Mini Chocolate Cheesecakes
Once your mini cheesecakes have been thoroughly chilled to achieve their perfect firm and creamy texture, it’s time for the exciting final step: decorating them to perfection. This is where the visual appeal of these delightful desserts truly comes to life, turning a simple treat into a gourmet presentation.
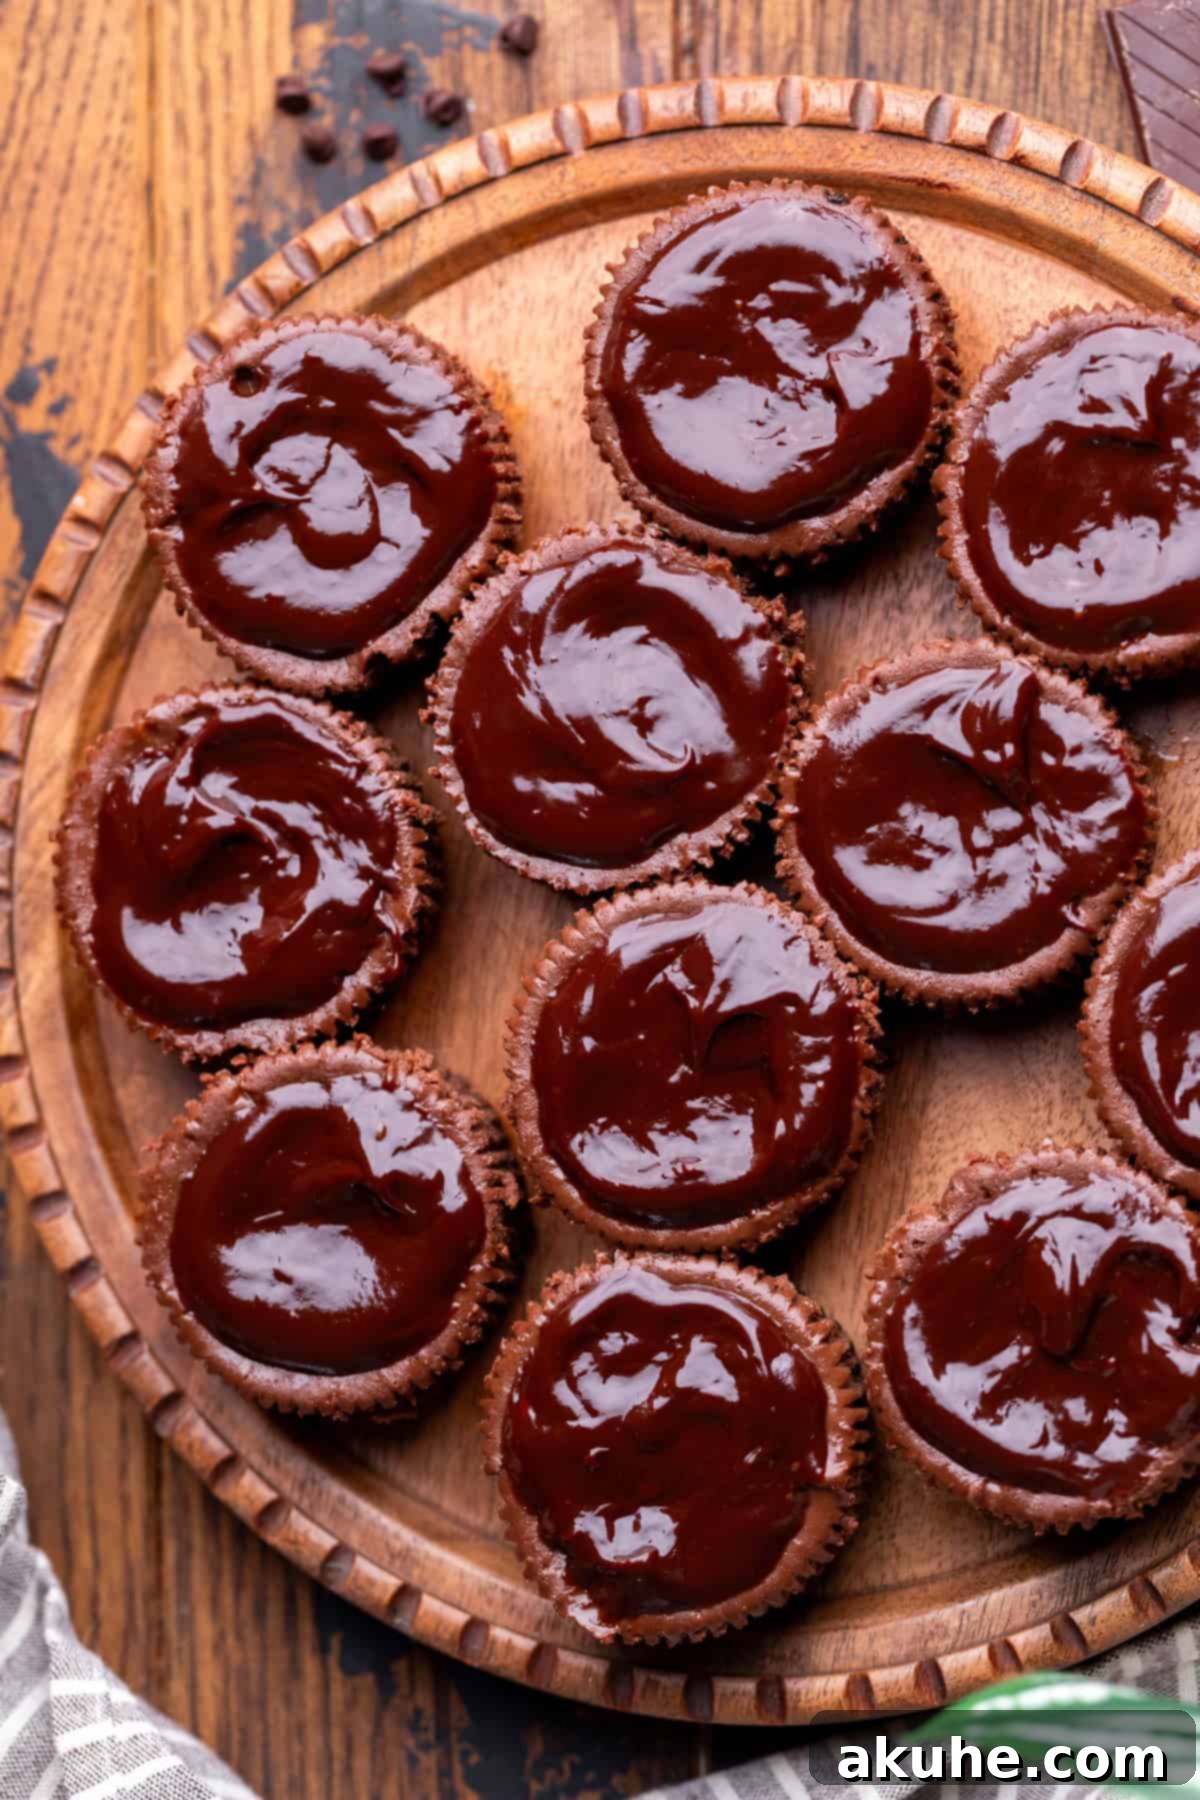
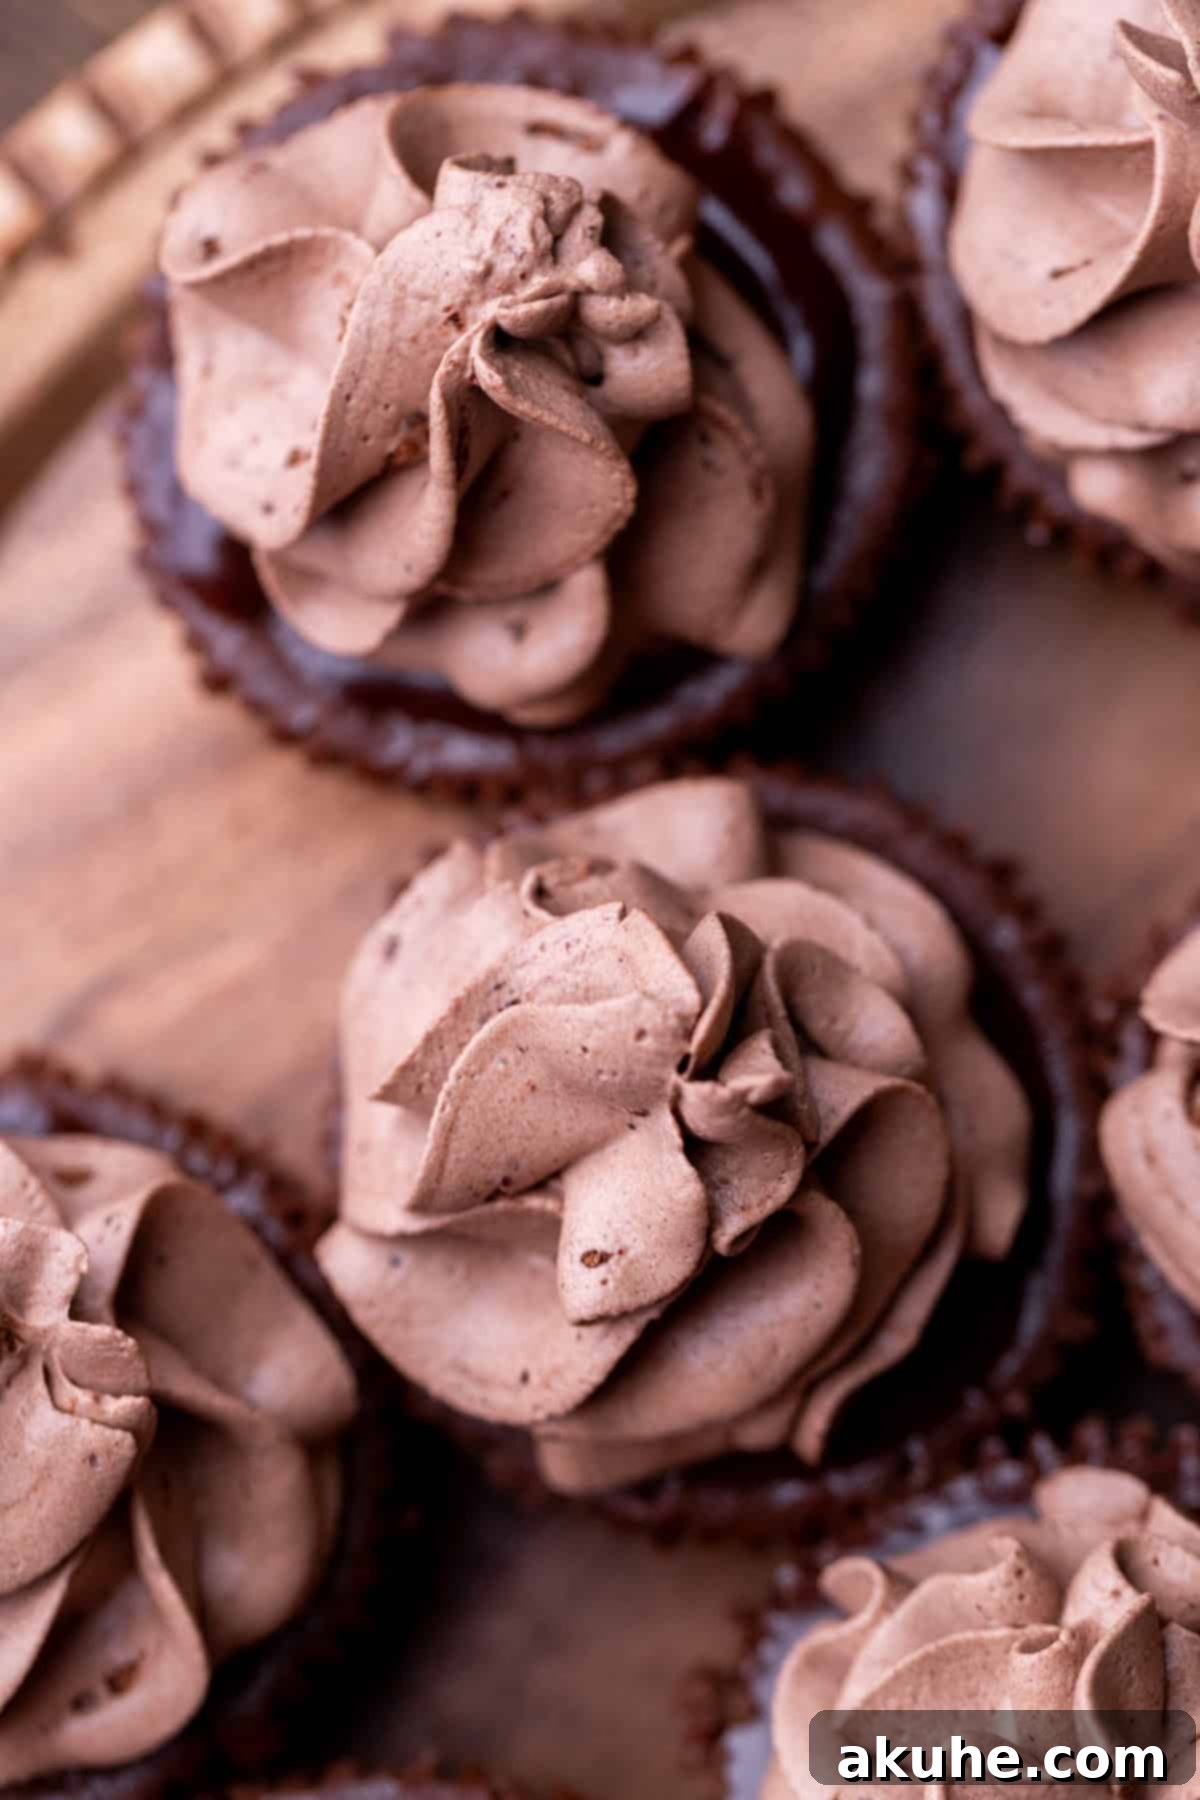
Begin by spooning a generous 1/2 tablespoon of the luxurious chocolate ganache over the top of each individual cheesecake. The ganache should be smooth and pourable but thick enough to hold its shape. Gently spread it to the edges using the back of the spoon or a small offset icing spatula, creating a smooth, glistening chocolate surface. Allow the ganache to set slightly in the refrigerator for about 10-15 minutes to firm up. Next, for that professional bakery finish, use a piping bag fitted with a Wilton 1M star tip to swirl the decadent chocolate whipped cream on top of the ganache. The elegant rosettes of whipped cream not only add a beautiful aesthetic but also introduce another layer of creamy chocolate goodness. For an extra festive touch, consider sprinkling some miniature chocolate chips, chocolate shavings, or even those beautiful chocolate pearls mentioned earlier, right before serving.
Frequently Asked Questions About Mini Chocolate Cheesecakes
We’ve gathered some common questions to help you master these delightful mini chocolate cheesecakes and customize them to your liking.
Can I make this recipe in a different pan?
Absolutely! This versatile recipe can easily be adapted into delectable cheesecake bars. If you prefer a bar-style dessert, simply follow the same ingredient measurements and preparation directions, but instead of a muffin tin, press the Oreo crust into an 8×8 inch square baking pan. Once baked and cooled, you can slice the cheesecake into squares or rectangles of your desired size. This is a fantastic option for a slightly larger, yet still easily shareable, dessert.
Is it possible to make this into a whole cheesecake?
While this specific recipe is optimized for mini cheesecakes without a water bath, the core flavors can certainly be scaled up for a full-sized dessert. For a truly grand chocolate experience, we highly recommend trying our Ultimate Triple Chocolate Cheesecake recipe, which is designed for a traditional springform pan and delivers an incredibly rich and decadent outcome. Alternatively, if you’re looking for another delightful bar variation with a chocolate twist, our Chocolate Cheesecake Brownie Bars recipe offers a unique combination of fudgy brownie and creamy cheesecake layers.
Why did the middle of my cheesecakes sink or crack?
Sinking or cracking in cheesecakes is a common concern, but often easily remedied. If your mini cheesecakes sank excessively in the middle or developed cracks, it’s typically due to one of three reasons: they were either slightly under-baked, baked for too long, or too much air was incorporated into the egg mixture during blending. Under-baking results in a weak structure that collapses, while over-baking can dry out the cheesecake, causing it to crack as it cools. Excessive air, as mentioned in our tips, creates bubbles that expand and then deflate. But don’t despair! Even if your cheesecakes aren’t picture-perfect, you can often camouflage these imperfections. Cracks can be beautifully covered by a generous layer of chocolate ganache, and a sunken center can be artfully filled and topped with a swirl of chocolate whipped cream. Nobody will ever know!
How should I store these delicious mini cheesecakes?
Proper storage is key to keeping your mini chocolate cheesecakes fresh and delicious. Once decorated, store them in an airtight container, such as a specialized cake carrier or a large Tupperware, in the refrigerator for up to 5 days. For longer-term storage, you can freeze the undecorated mini cheesecakes. Simply wrap each individual cheesecake tightly in plastic wrap, then place them in a freezer-safe bag or container. They can be frozen for up to 30 days. When you’re ready to enjoy them, thaw the frozen cheesecakes on the counter for about 1 hour before proceeding with the ganache and whipped cream decoration.
What kitchen equipment do I need for this recipe?
To successfully make these mini chocolate cheesecakes, you’ll need a few standard kitchen tools. Essential items include a 12-cup muffin tin, paper muffin liners, a food processor or blender for crushing the Oreos, a stand mixer or a hand mixer for the cheesecake batter and whipped cream, and a couple of mixing bowls. For decorating, a small saucepan for the ganache, a rubber spatula, and a piping bag with a Wilton 1M tip (or similar star tip) will be very helpful. A measuring cup or the bottom of a spice jar is also useful for compacting the crust.
Explore More Irresistible Cheesecake Creations
If you’ve fallen in love with these mini chocolate cheesecakes, you’ll be thrilled to discover our other popular cheesecake recipes:
- Chocolate Cheesecake Bars
- Classic New York Style Cheesecake
- Decadent S’mores Cheesecake
- Creamy Banana Pudding Cheesecake
- Rich Chocolate Peanut Butter Cheesecake
Loved this recipe? Be sure to leave a STAR REVIEW below to share your experience! We’d also love to see your beautiful creations – tag me on Instagram @stephaniesweettreats. For endless baking inspiration and more delightful dessert ideas, make sure to follow me on Pinterest.
Mini Chocolate Cheesecakes
Print Recipe
Pin Recipe
Leave a Review
Ingredients
US Units1x Servings
Oreo Crust
- ▢ 1 1/2 cups Oreo crumbs, 13 Oreos
- ▢ 3 TBSP Unsalted butter, melted
Chocolate Cheesecake
- ▢ 12 oz Cream cheese, full fat, room temperature
- ▢ 3/4 cup White granulated sugar
- ▢ 1/3 cup Unsweetened cocoa powder
- ▢ 1/4 cup Sour cream, room temperature
- ▢ 1 tsp Pure vanilla extract
- ▢ 2 Large eggs, room temperature
- ▢ 1 Egg yolk, room temperature
Chocolate Ganache
- ▢ 1/2 cup Semi-sweet chocolate chips
- ▢ 1/4 cup Heavy cream
Chocolate Whipped Cream
- ▢ 1 cup Heavy cream, cold
- ▢ 1/3 cup Powdered sugar
- ▢ 3 TBSP Unsweetened cocoa powder
- ▢ 1/2 tsp Pure vanilla extract
Instructions
Oreo Crust
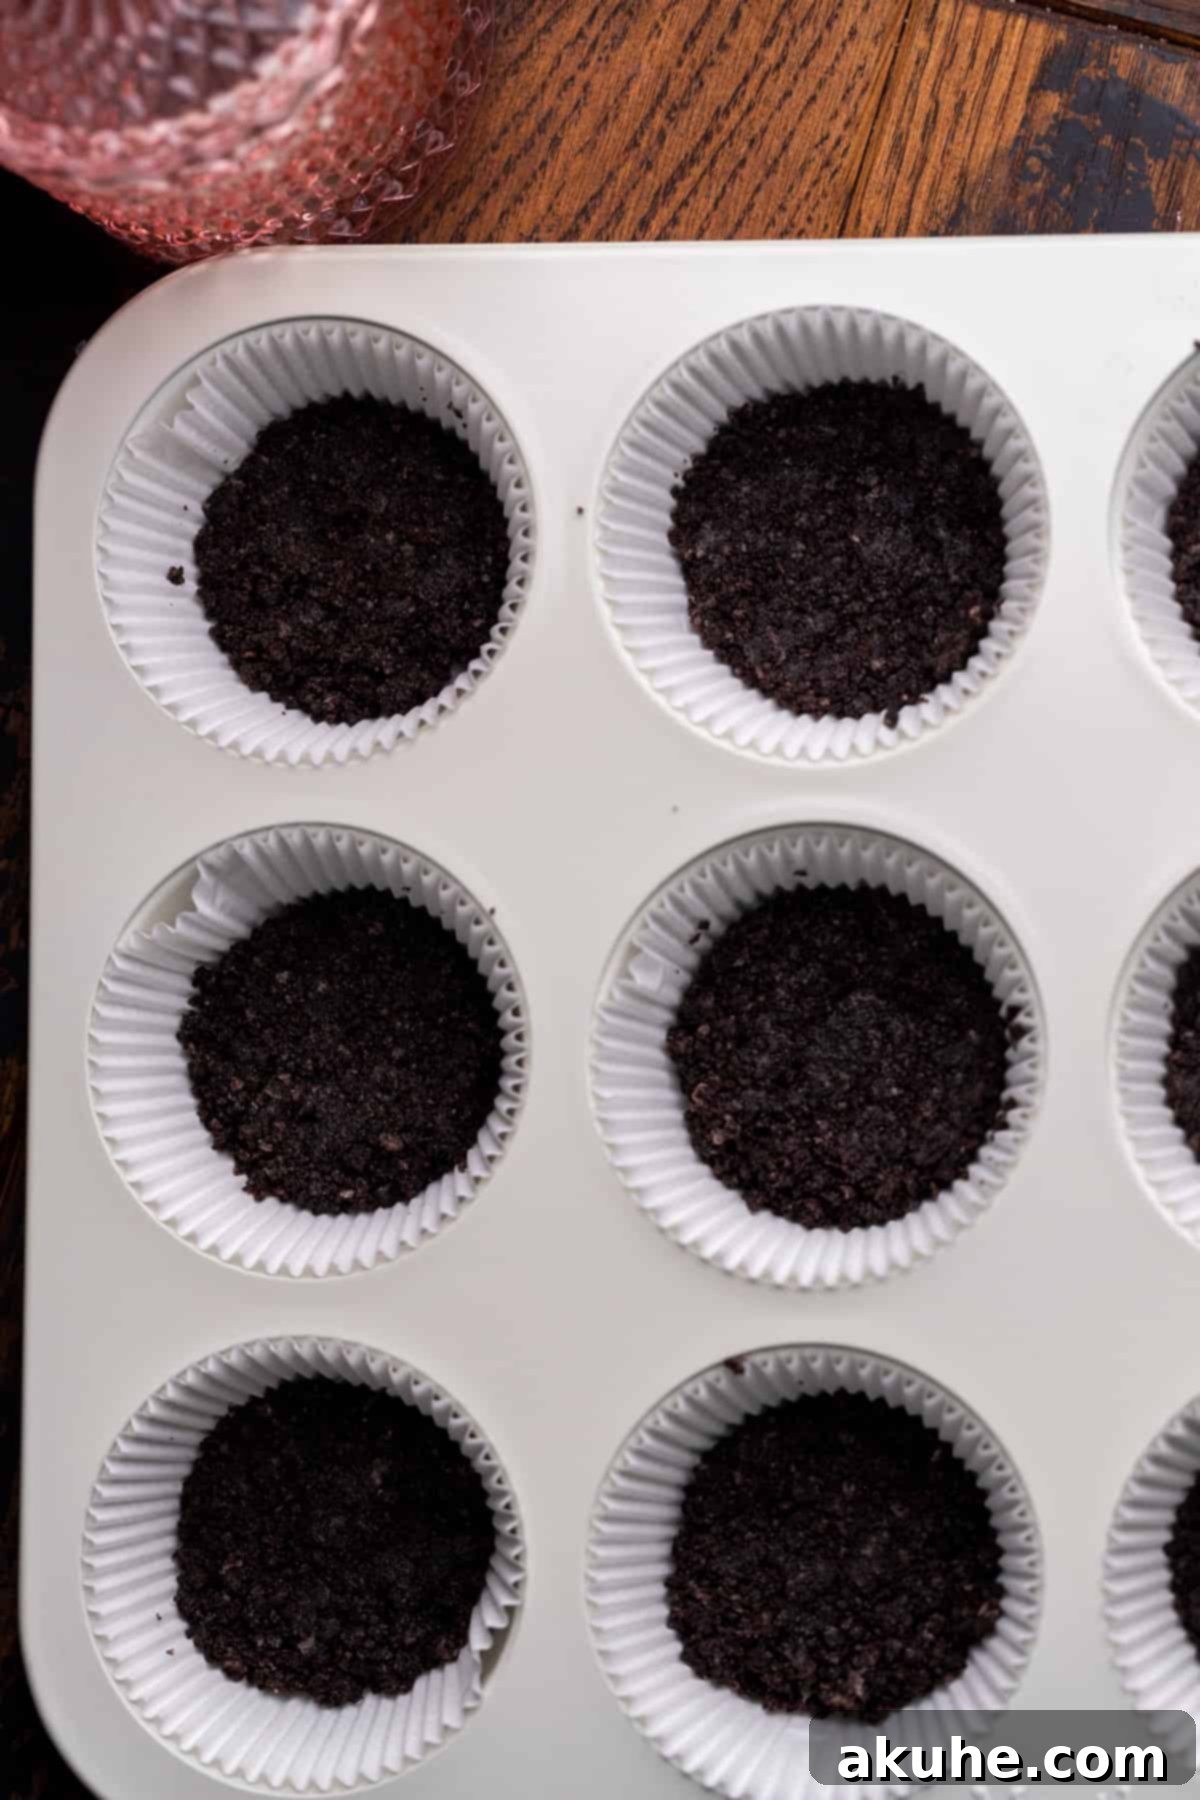
- Preheat oven to 325F (160C). Prepare a 12-cup muffin tin by lining each cup with paper muffin liners. Set aside.
- In a food processor or blender, crush the Oreo cookies into fine crumbs. Transfer the crumbs to a medium bowl. Add the melted butter and mix thoroughly with a fork until all crumbs are moist and well combined. The mixture should resemble wet sand.1 1/2 cups Oreo crumbs, 3 TBSP Unsalted butter
- Scoop 1 tablespoon of the Oreo crumb mixture into the bottom of each prepared muffin cup. Use a 1/8 measuring cup or the bottom of a spice jar to firmly press the crust down, creating a compact and even layer.
- Bake the crusts for 5 minutes. This helps to set them before adding the cheesecake batter.
Chocolate Cheesecake
- In a large mixing bowl, using an electric mixer, beat the room temperature cream cheese, white granulated sugar, and unsweetened cocoa powder on high speed for approximately 2 minutes, until the mixture is smooth and lump-free.12 oz Cream cheese, 3/4 cup White granulated sugar, 1/3 cup Unsweetened cocoa powder
- Add the room temperature sour cream and pure vanilla extract to the cream cheese mixture. Beat on medium speed until just smooth and fully incorporated. Reduce the mixer speed to low. Add the two large eggs and the single egg yolk, mixing only until they are just combined. Be careful not to overmix, as this can introduce too much air.1/4 cup Sour cream, 1 tsp Pure vanilla extract, 2 Large eggs, 1 Egg yolk
- Using a large cookie scoop, portion the cheesecake batter evenly into each muffin cup over the baked Oreo crusts. Fill the liners almost completely to the top, leaving about 1/4 inch of space from the top edge of the paper liner.
- Bake for 16-18 minutes. The cheesecakes are done when the edges appear set and firm, but the very center still has a slight jiggle when gently shaken.
- Once baked, turn off the oven and prop the oven door open slightly. Allow the cheesecakes to cool in the oven for 15 minutes. This gradual cooling prevents cracking. After 15 minutes, carefully remove the muffin tin from the oven. Use a small fork or knife to gently lift the cheesecakes out of the muffin pan and transfer them to a wire cooling rack to cool completely at room temperature.
- Chill the cooled cheesecakes in the refrigerator for at least 6 hours, or preferably overnight, to allow them to set fully and achieve the perfect creamy texture.
Chocolate Ganache
- In a small, heatproof bowl, place the semi-sweet chocolate chips. In a small saucepan, heat the heavy cream over medium-low heat until it is steaming and just begins to simmer around the edges (do not bring to a rolling boil). Immediately pour the hot cream over the chocolate chips.1/2 cup Semi-sweet chocolate chips, 1/4 cup Heavy cream
- Let the hot cream sit undisturbed over the chocolate chips for 1 minute and 30 seconds. This allows the heat to melt the chocolate. Then, gently stir with a rubber spatula, starting from the center and working your way out, until the ganache is completely smooth and glossy.
- Once the cheesecakes are thoroughly chilled, spoon about 1/2 tablespoon of ganache over the top of each cheesecake. Use an icing spatula or the back of a spoon to gently spread the ganache to the edges. Cover the cheesecakes and place them back in the fridge for at least 10 minutes to allow the ganache to set.
Chocolate Whipped Cream
- In a chilled metal mixing bowl, combine the cold heavy cream, powdered sugar, unsweetened cocoa powder, and pure vanilla extract. Using an electric mixer fitted with a whisk attachment, beat the mixture on high speed until stiff peaks form. Be careful not to overbeat, or it will become grainy.1 cup Heavy cream, 1/3 cup Powdered sugar, 3 TBSP Unsweetened cocoa powder, 1/2 tsp Pure vanilla extract
- Transfer the chocolate whipped cream to a piping bag fitted with a Wilton 1M tip (or your favorite star tip). Pipe beautiful swirls or rosettes on top of each ganache-set cheesecake. For an extra decorative touch, sprinkle with chocolate sprinkles or chocolate pearls if desired.
- Cover the decorated cheesecakes and store them in the refrigerator until you are ready to serve them. Enjoy your perfectly portioned chocolate delights!
