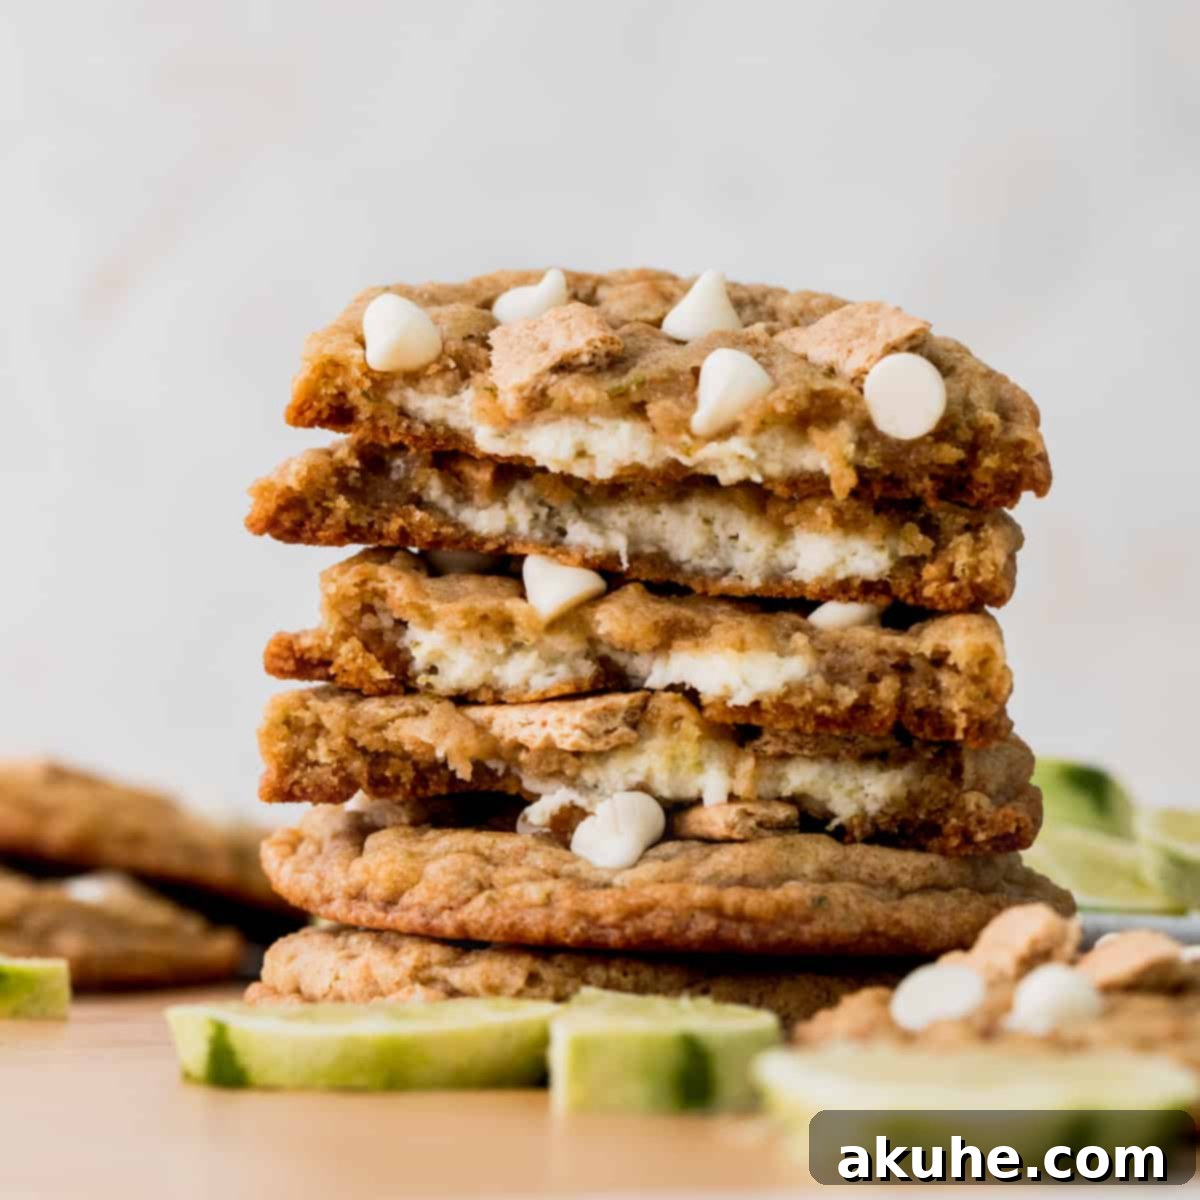
Imagine your favorite slice of tangy, sweet key lime pie, but in a delightful, portable cookie form. That’s exactly what you get with these incredible Key Lime Cookies! We’ve taken all the iconic flavors of the classic dessert – the bright citrus punch of fresh key limes, the comforting crunch of a graham cracker crust, and the silky creaminess of cheesecake filling – and infused them into a perfectly chewy cookie. Prepare to discover your new favorite summer treat!
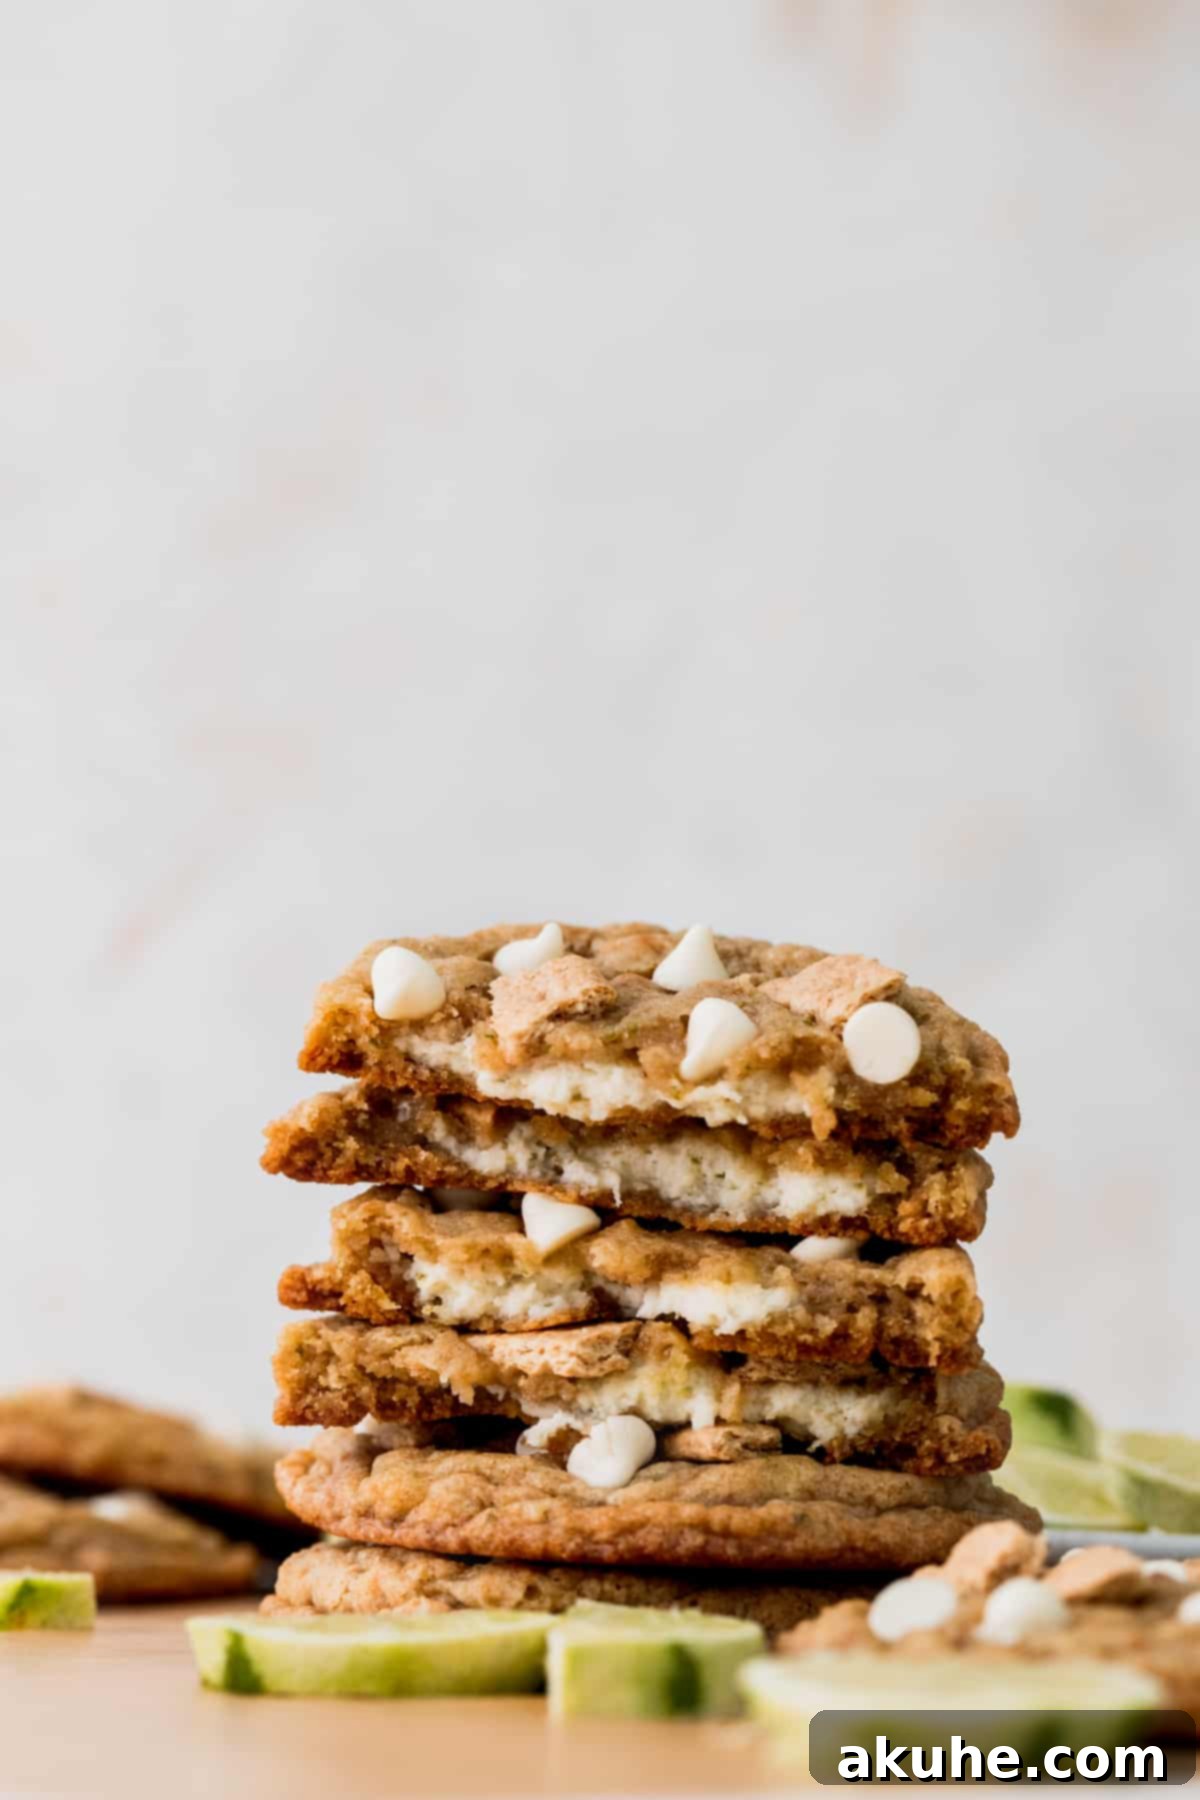
During the recipe development process for these unique Key Lime Cheesecake Cookies, my goal was clear: to create something truly distinct from other recipes out there. Many existing key lime cookie recipes tend to be either simple meltaways or direct copycats of popular mini pie-like cookies. While those can be tasty, I envisioned a cookie that offered a more substantial, satisfying experience, deeply echoing the layers of a traditional Key Lime Pie.
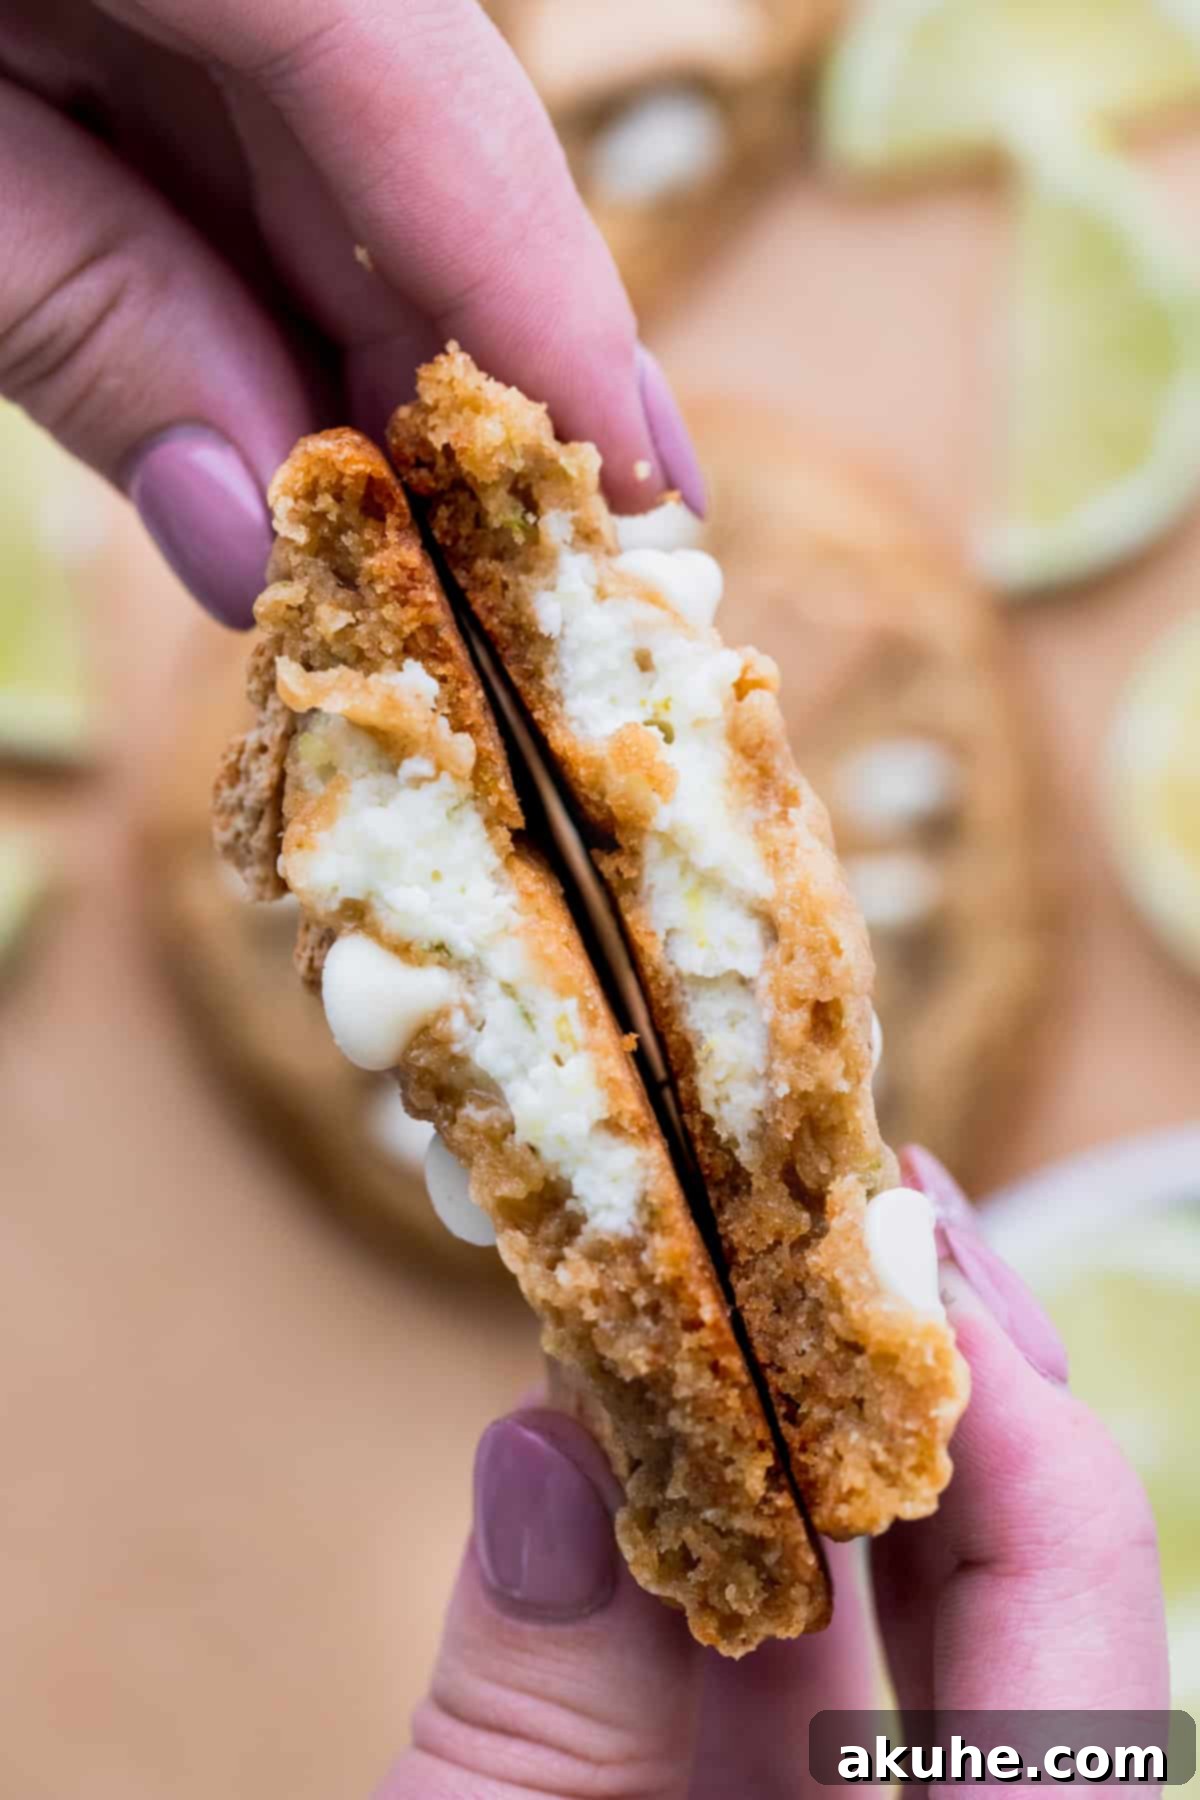
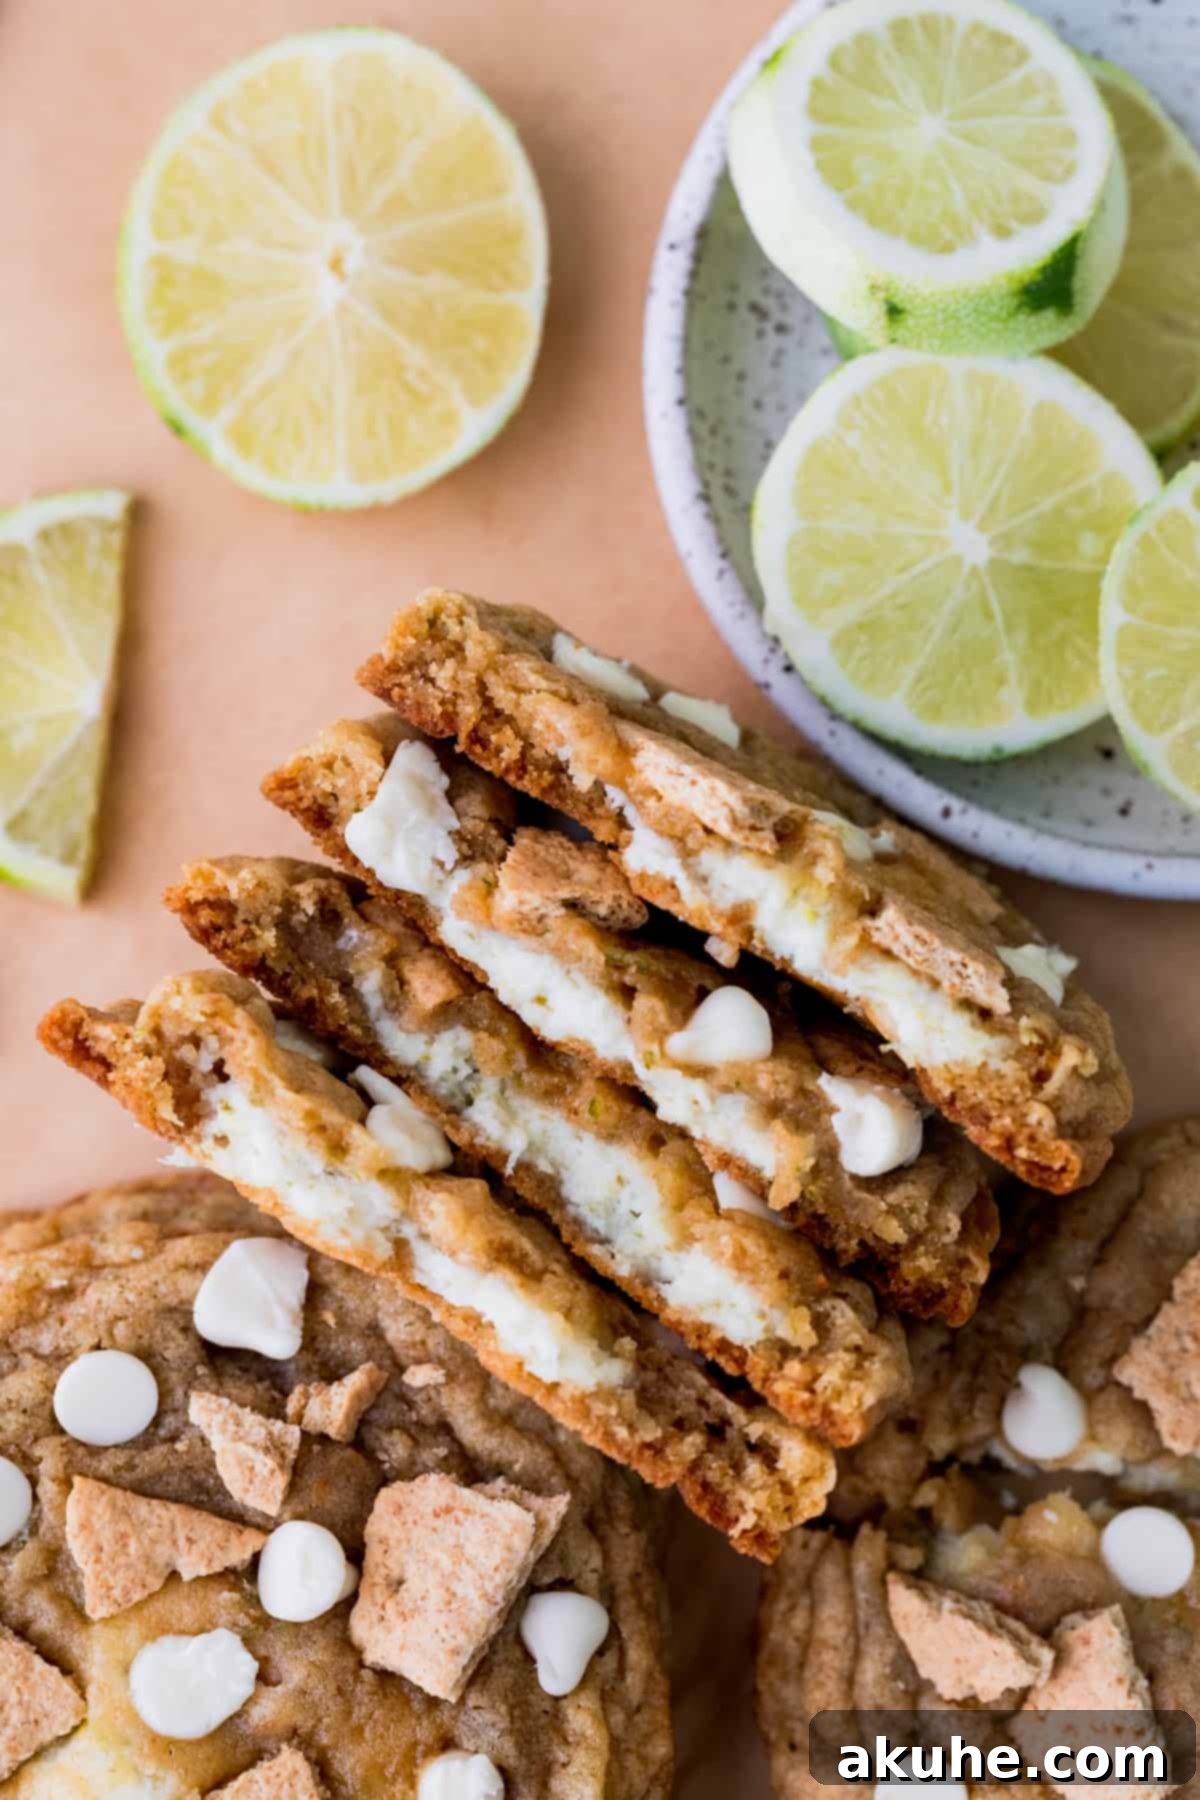
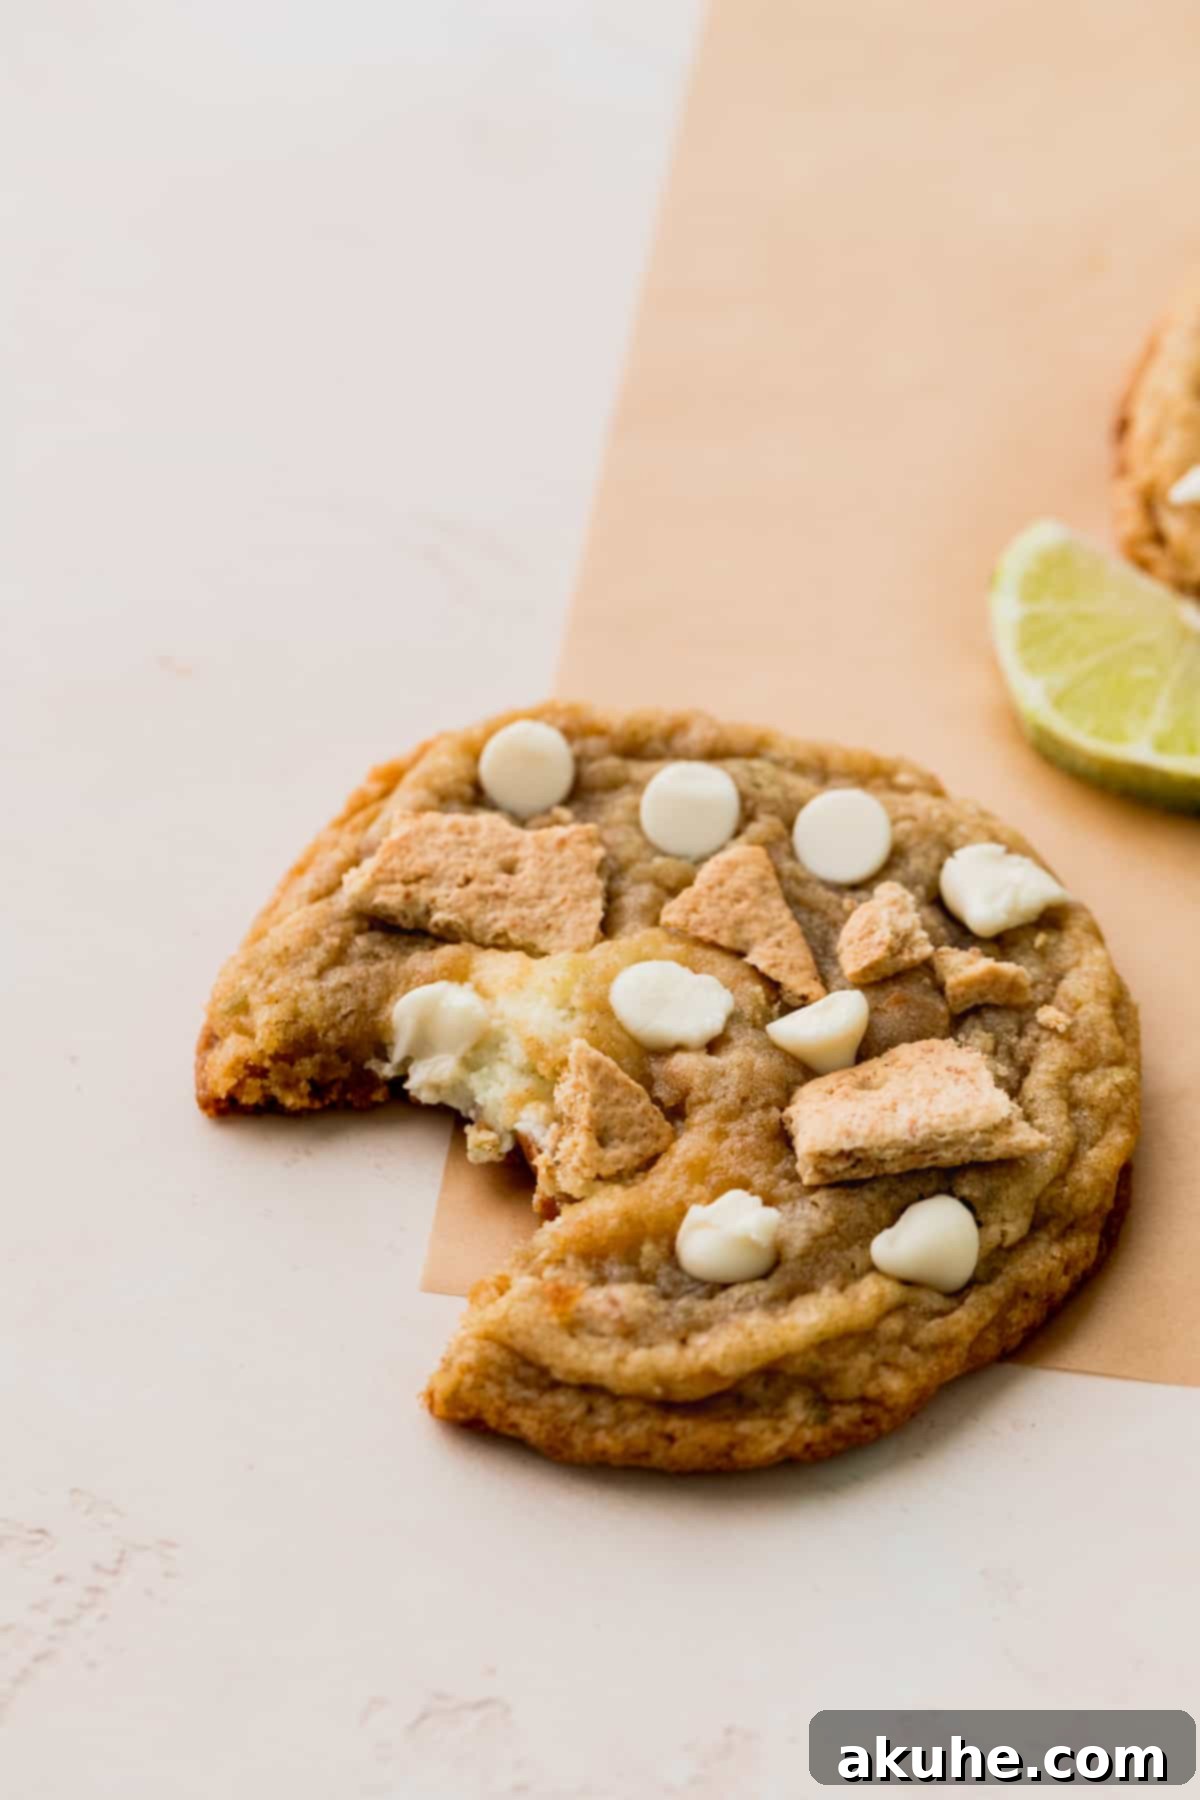
And these cookies deliver! Each bite offers an exquisite balance of textures and flavors. The cookie itself is wonderfully chewy, generously flavored with vibrant lime zest and wholesome graham cracker crumbs. But the true masterpiece lies within: a luxurious, tangy Key Lime Cheesecake filling that elevates these from mere cookies to an unforgettable dessert experience. They’re simply divine and guaranteed to impress!
Craving more refreshing dessert ideas? Don’t miss these other delightful summer recipes: Lemonade Bundt Cake, Strawberry Ice Cream Cheesecake, and Black Forest Cookies.
Why You’ll Love This Key Lime Cookie Recipe
These Key Lime Cookies are not just any cookies; they’re a meticulously crafted homage to one of the most beloved desserts. Here’s exactly why this recipe stands out and why you’ll want to make them again and again:
- Authentic Fresh Key Lime Flavor: We go all-in on the lime! Both the cookie dough and the decadent cheesecake filling are bursting with the bright, zesty aroma and tangy taste of fresh key limes. This isn’t just a hint of citrus; it’s a full-bodied, authentic key lime experience that dances on your palate with every bite. The combination of zest and juice ensures a vibrant, complex flavor profile that artificial extracts simply cannot replicate.
- Signature Graham Cracker Base: A true key lime pie isn’t complete without its iconic graham cracker crust. We’ve incorporated fine graham cracker crumbs directly into our chewy cookie dough, mirroring that classic pie crust flavor and subtle texture. This clever addition provides a delightful, familiar counterpoint to the vibrant lime, making these cookies taste even more like the real deal. It’s a foundational element that ties the cookie perfectly to its pie inspiration.
- Luxurious Key Lime Cheesecake Filling: What truly sets these cookies apart is their luscious, creamy center. Each cookie is generously stuffed with a homemade key lime cheesecake filling, replicating the smooth, tangy heart of a traditional key lime pie. Made with rich cream cheese and fresh lime zest, this filling adds an unparalleled layer of indulgence and a wonderful creamy contrast to the cookie’s chewy exterior. It’s the unexpected surprise that makes these cookies extraordinary.
- Perfectly Chewy Texture with Crisp Edges: Forget dry or crumbly cookies! Our recipe is designed to yield a cookie with a soft, irresistibly chewy center that melts in your mouth, complemented by delightfully crisp edges. This textural harmony is achieved through precise ingredient ratios and baking techniques, ensuring a satisfying bite every time. The contrast between the tender cookie and the smooth filling creates a truly dynamic eating experience.
Essential Ingredients for Perfect Key Lime Cookies
Crafting these extraordinary Key Lime Cheesecake Cookies requires a few key ingredients, each playing a vital role in achieving their signature flavor and texture. Pay close attention to these notes to ensure your baking success. For precise measurements, always refer to the detailed recipe card at the bottom of this page.
- Graham Crackers: You’ll need about one sleeve of classic graham crackers, which will be crushed into fine crumbs. These crumbs are essential for infusing that distinctive “pie crust” flavor directly into the cookie dough. If graham crackers aren’t readily available, plain digestive biscuits or vanilla wafers make excellent substitutes, offering a similar mild, sweet base. Ensure they are finely processed for the best cookie texture.
- Unsalted Butter: Always opt for unsalted butter when baking, as it gives you complete control over the salt content in your recipe. It’s crucial for your butter to be at room temperature – this means soft enough to indent with a finger but not melted. Taking it out of the fridge at least 2 hours before you plan to bake will achieve the perfect consistency, ensuring it creams smoothly with the sugars and creates a light, airy dough.
- Brown Sugar (Light): Light brown sugar contributes to the cookies’ beautiful chewiness and adds a subtle molasses flavor that complements the lime. Make sure to pack it firmly into your measuring cup for an accurate amount. The molasses in brown sugar also helps keep the cookies moist and tender.
- Large Egg plus Egg Yolk: This specific combination is key to the cookie’s perfect texture. While many cookie recipes call for two whole eggs, the vibrant lime juice in this recipe adds additional moisture. To compensate and prevent the cookies from spreading too much or becoming cakey, we use one large egg and one extra egg yolk. The extra yolk adds richness and helps create that desirable chewy, tender crumb without excessive moisture. Like butter, ensure these are at room temperature for optimal emulsification.
- Fresh Limes: The star of the show! You’ll need a few fresh key limes for both zest and juice. For the best flavor, use a microplane zester to extract only the bright green outer layer of the lime peel, avoiding the bitter white pith. A reliable citrus juicer will help you get every last drop of tangy juice. While key limes are ideal for their distinctive tartness, regular Persian limes can be used in a pinch, though the flavor will be slightly milder.
- Full-Fat Cream Cheese: For the most luxurious and stable cheesecake filling, always use full-fat cream cheese. Low-fat varieties contain more water and can result in a thinner, less rich filling. Just like the butter, your cream cheese should be softened to room temperature for at least 2 hours before mixing to ensure a smooth, lump-free cheesecake.
- White Chocolate Chips (Optional Topping): These add a lovely touch of sweetness and aesthetic appeal. When choosing white chocolate, prioritize quality. Brands like Ghirardelli offer genuine white chocolate made with cocoa butter. Be aware that some brands, like Nestlé, often produce “vanilla-flavored chips” that don’t contain real cocoa butter, resulting in a different texture and taste. Using high-quality white chocolate ensures a superior flavor and melt-in-your-mouth experience.
Step-by-Step Instructions: Preparing the Zesty Cheesecake Filling
The secret to these amazing Key Lime Cookies lies in their irresistible cheesecake center. Preparing this filling is straightforward, but it requires a mixer – either a stand mixer fitted with a paddle attachment or a reliable electric hand mixer will work perfectly. Let’s get started:
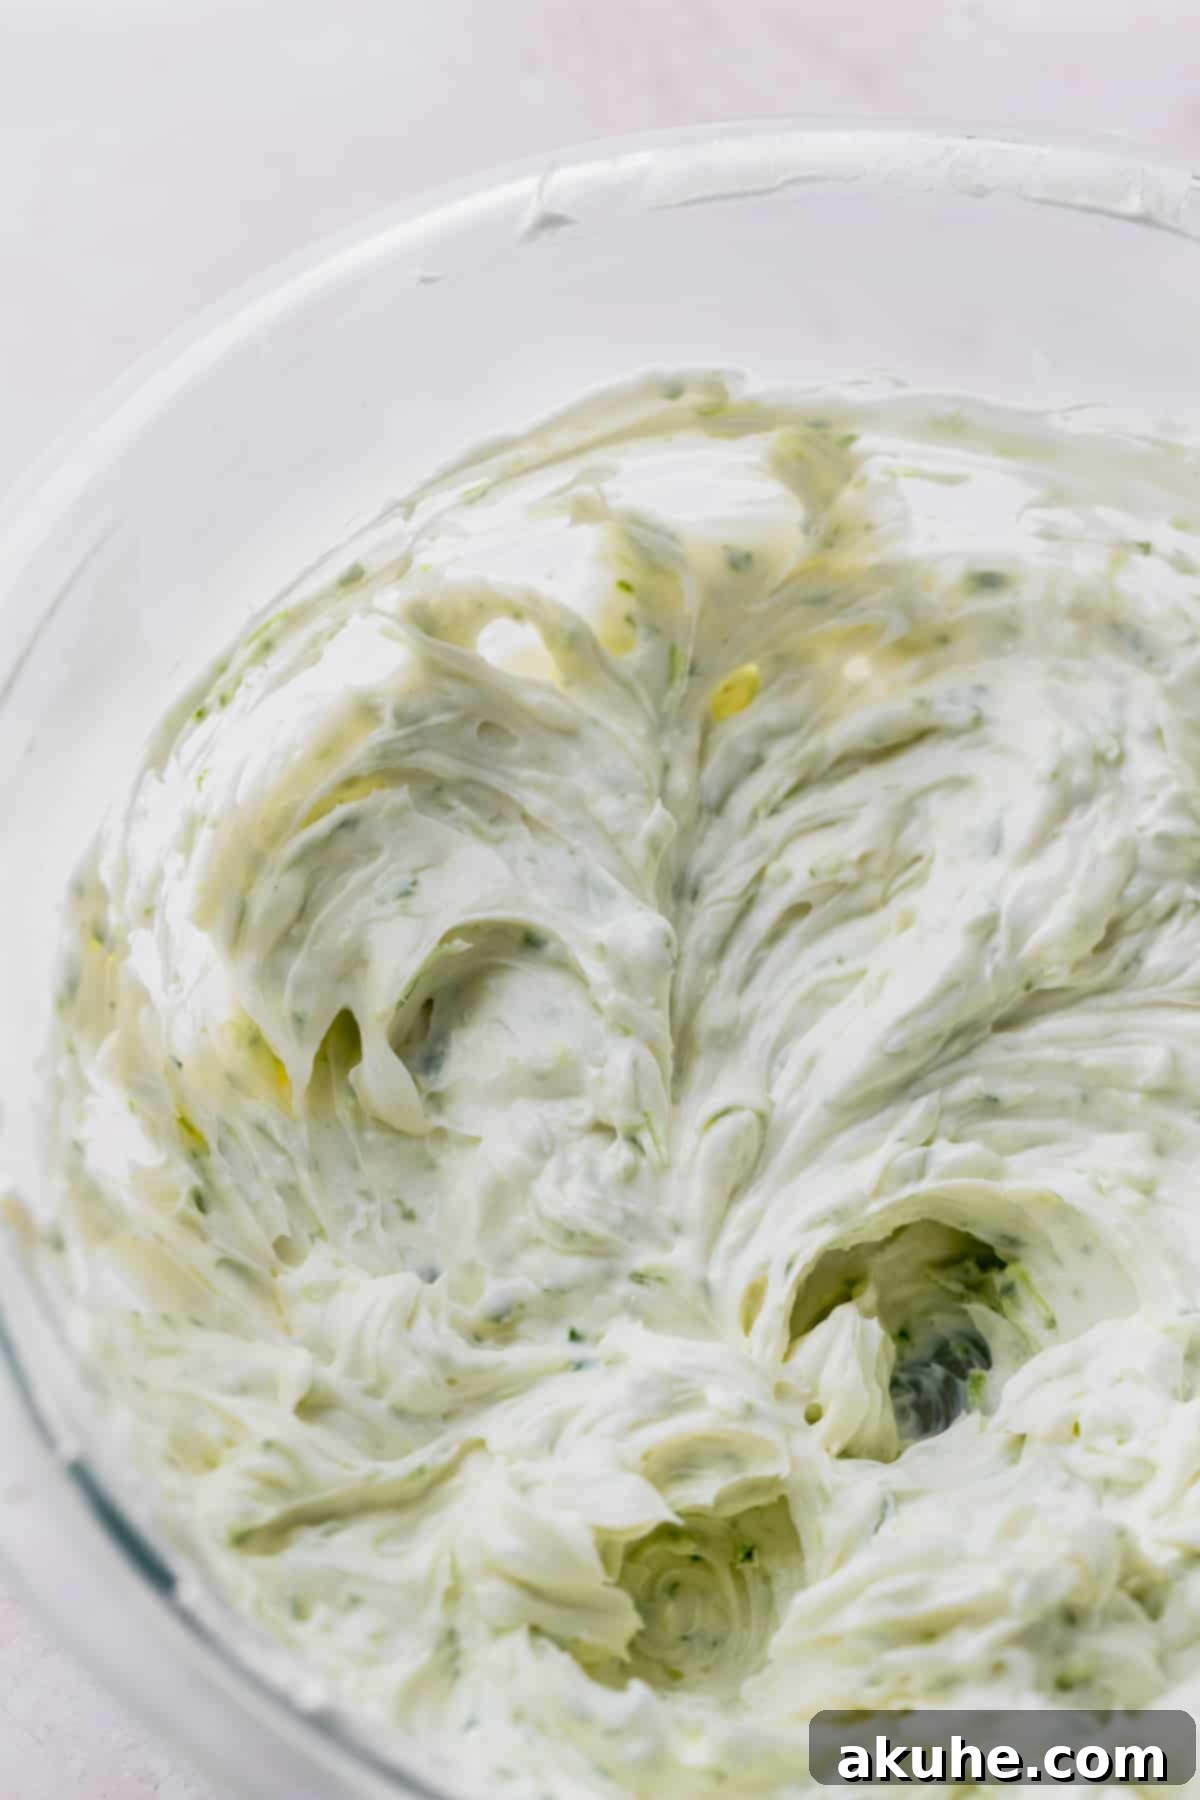
- Prepare Your Mixer and Cream Cheese: Ensure your room-temperature, full-fat cream cheese is ready. In a medium-sized mixing bowl, beat the softened cream cheese on high speed for exactly 1 minute. This crucial step ensures the cream cheese is incredibly smooth and light, making it easier to incorporate other ingredients without lumps.
- Infuse with Key Lime Flavor: Reduce the mixer speed to low and gradually add the sifted powdered sugar. Mix until it’s just combined and smooth. Next, incorporate the freshly grated key lime zest and the tangy key lime juice. Continue to mix on low speed until all ingredients are thoroughly blended and the filling achieves a wonderfully creamy, luscious consistency. Avoid overmixing once the lime juice is added.
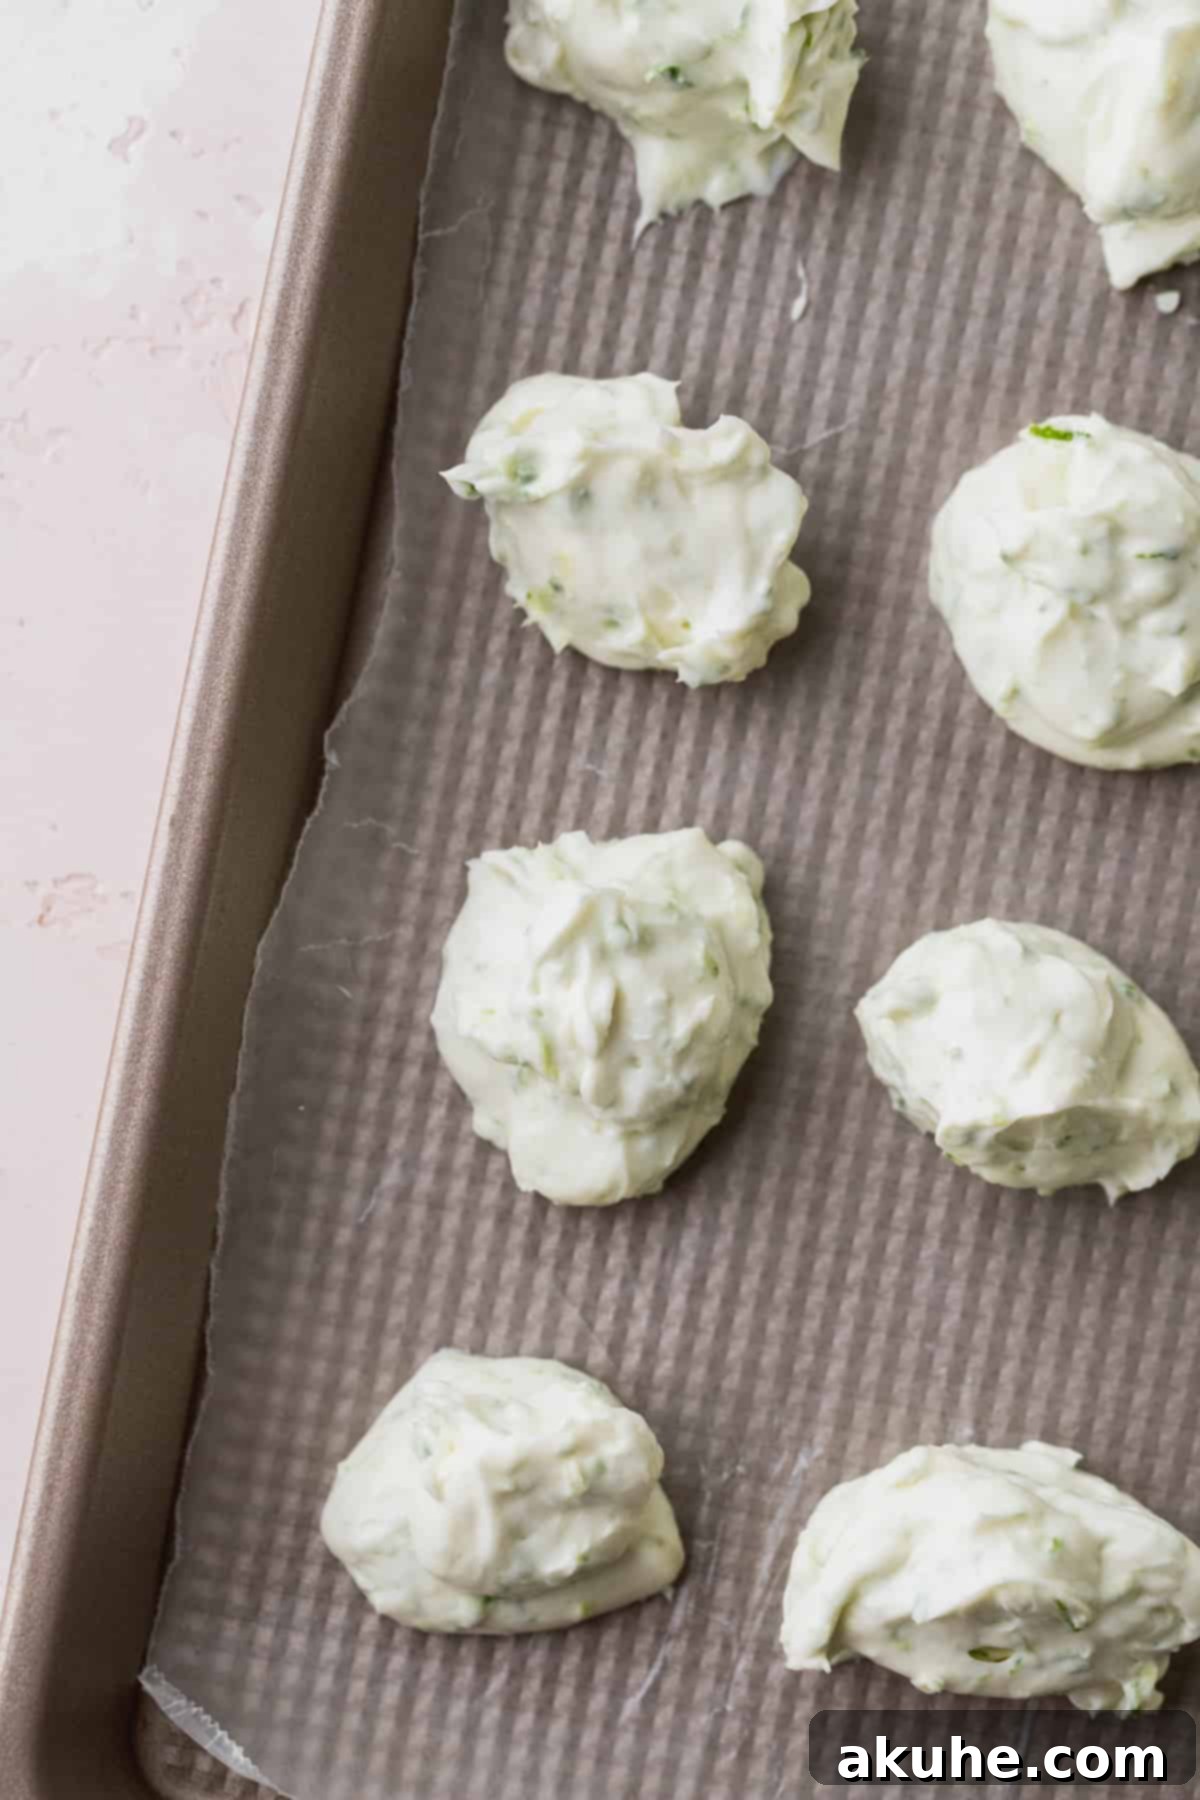
- Portion and Freeze the Filling: To create manageable centers for your cookies, line a baking sheet with wax paper or parchment paper. Using a heaping half Tablespoon, carefully dollop 16 portions of the cheesecake filling onto the prepared sheet. Each dollop should be roughly uniform in size. Once all dollops are placed, transfer the baking sheet to the freezer. Allow the cheesecake filling to freeze for at least 1 hour, or until each dollop is firm enough to handle easily without melting. This firming step is essential for successful stuffing of the cookies.
Step-by-Step Instructions: Crafting the Key Lime Cookie Dough
With your cheesecake filling firmly chilling, it’s time to prepare the delightful Key Lime Cookie dough. Precision and attention to detail will ensure beautifully chewy cookies with that perfect zesty kick.
- Combine Dry Ingredients: In a medium bowl, sift together the all-purpose flour, baking soda, and salt. Sifting helps to aerate the flour and remove any lumps, ensuring a smooth dough. Separately, use a food processor to pulse the graham crackers until they form a fine, even crumb. This step is crucial for incorporating the signature “pie crust” flavor seamlessly into the cookies. Add these fine graham cracker crumbs to your sifted dry ingredients, gently whisking to combine. Set this mixture aside.
- Cream Butter and Sugars: In a large mixing bowl, using your stand mixer with a paddle attachment or an electric hand mixer, beat the room-temperature unsalted butter, light brown sugar, and white granulated sugar on high speed for a full 2 minutes. This creaming process is vital; it incorporates air into the butter and sugar, which contributes significantly to the cookies’ light and chewy texture. The mixture should become pale and fluffy.
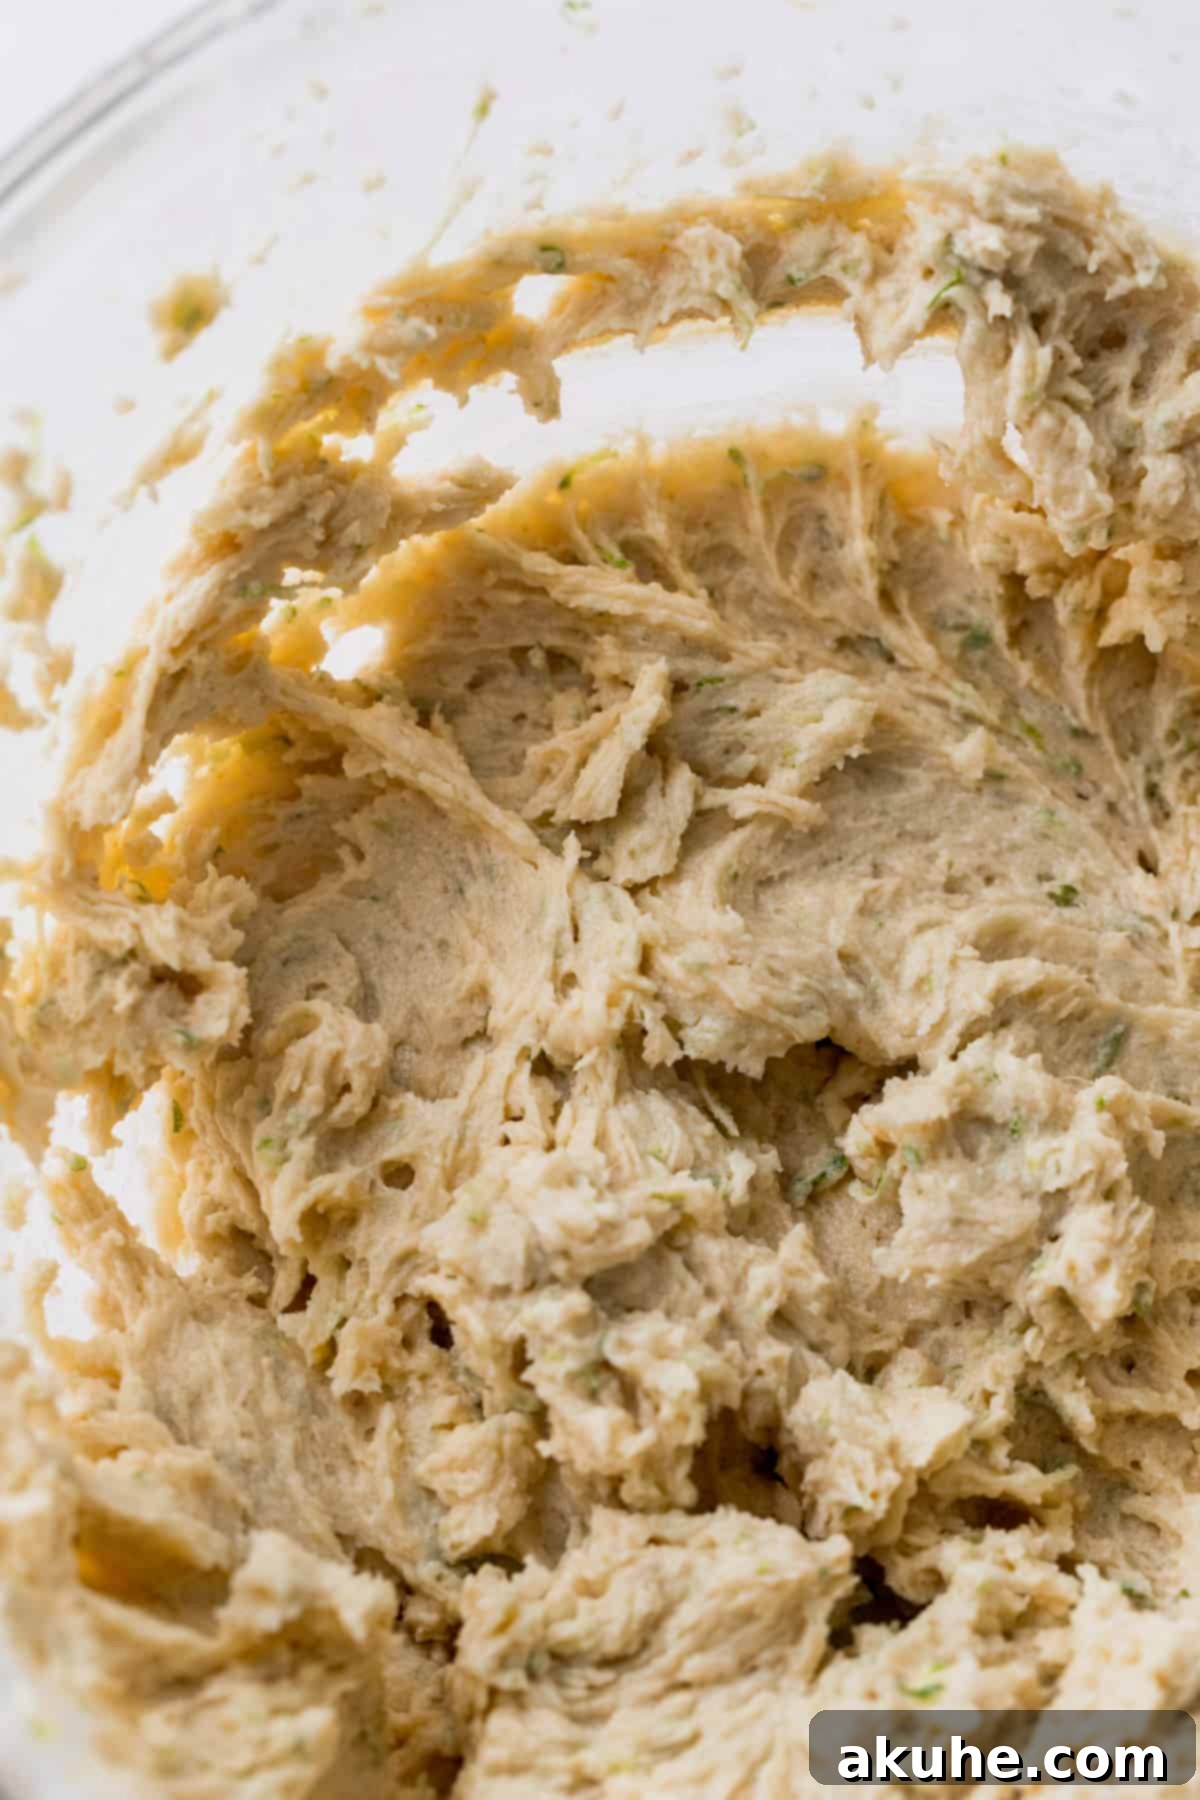
- Incorporate Wet Flavors and Eggs: Reduce the mixer speed to low. Add the pure vanilla extract, fresh lime zest, and tangy lime juice. Mix until these aromatic ingredients are just combined, ensuring the vibrant lime flavor is evenly distributed. Next, crack in the room-temperature large egg and the additional egg yolk. Increase the mixer speed to medium and beat until the mixture is thoroughly combined and appears light and fluffy. Scrape down the sides of the bowl as needed to ensure everything is well-integrated.
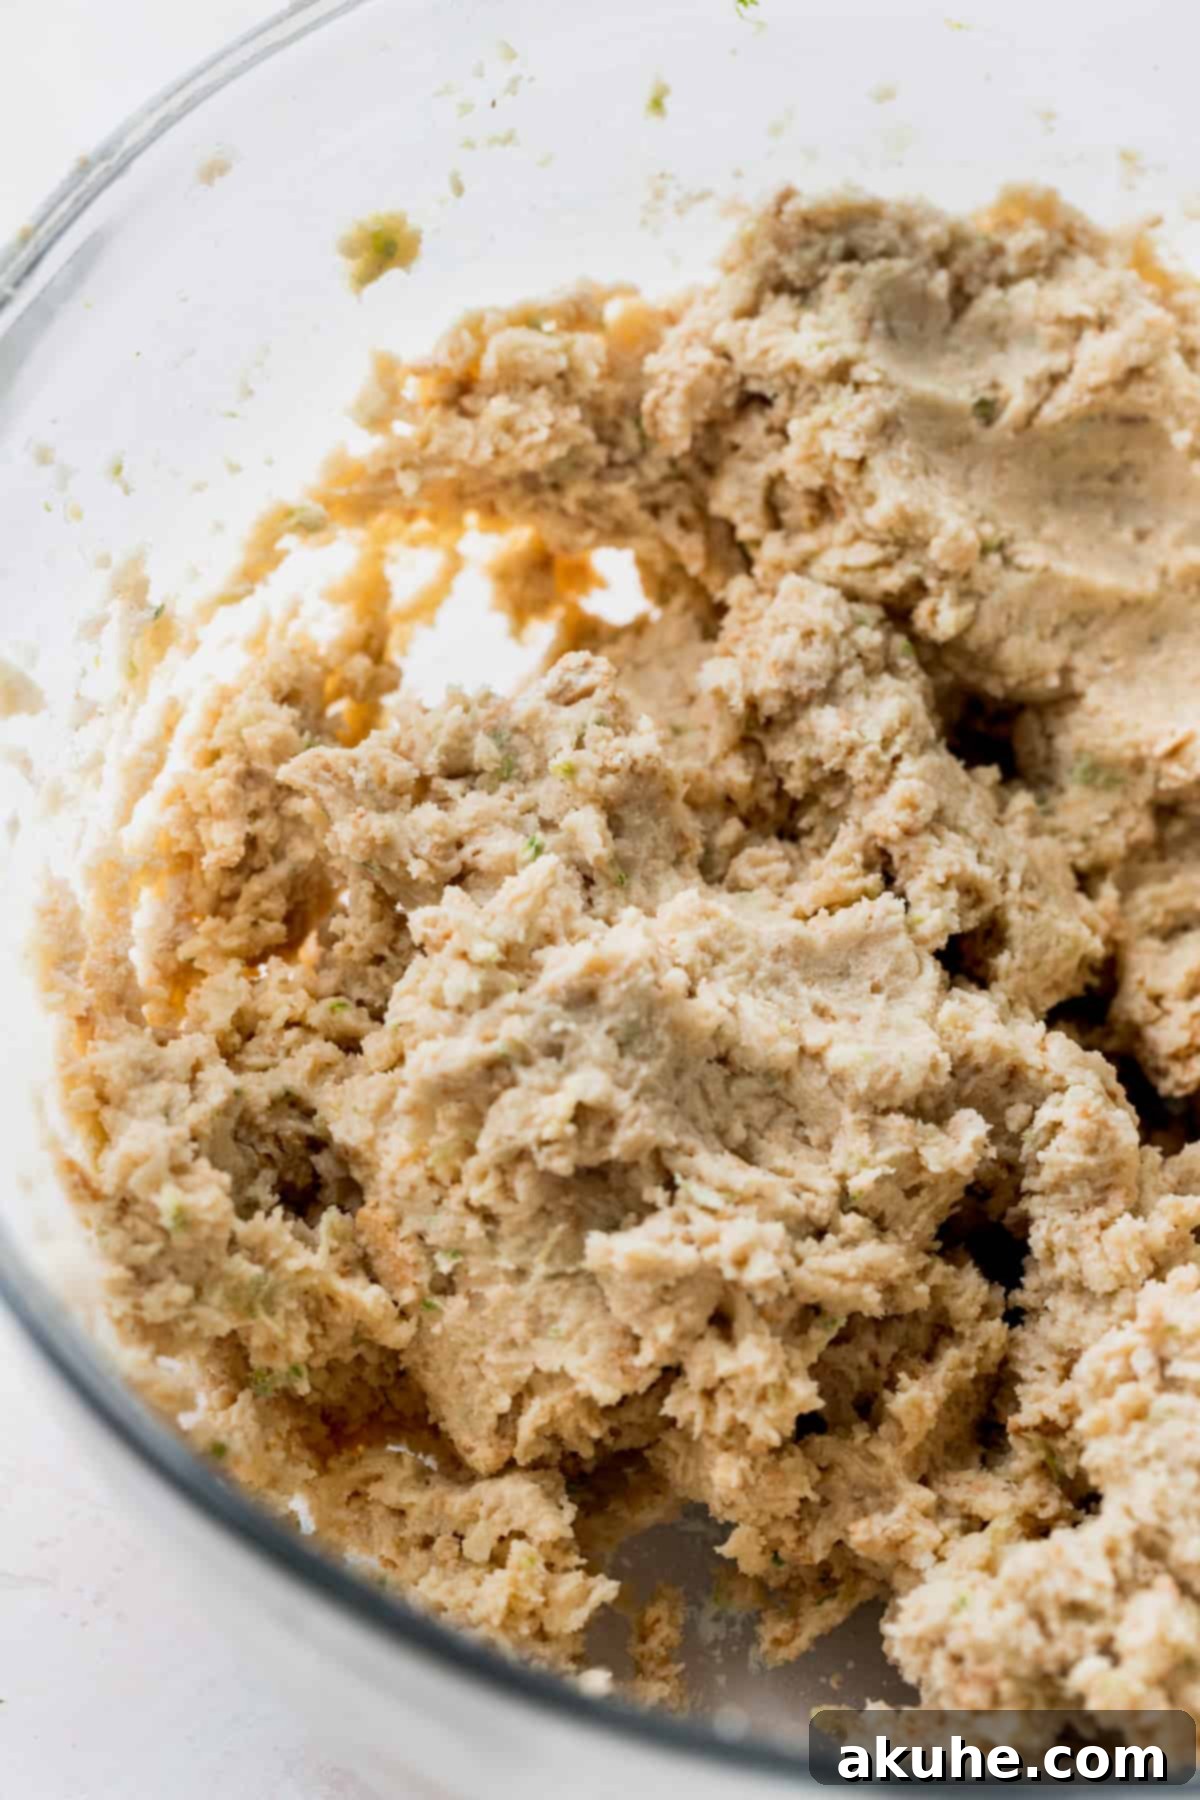
- Fold in Dry Ingredients and Chill Dough: With the wet ingredients well-mixed, gradually add the reserved flour mixture (containing the graham cracker crumbs) to the bowl. Mix on the lowest speed until the dry ingredients are just incorporated. Be careful not to overmix, as this can lead to tough cookies. Once a cohesive dough forms, cover the bowl with plastic wrap and chill the dough in the refrigerator for at least 40 minutes. This chilling period is important for firming up the dough, making it easier to handle and preventing excessive spreading during baking.
Assembling and Baking Your Key Lime Cookies
Now for the exciting part – bringing these incredible cookies to life with their cheesecake surprise!
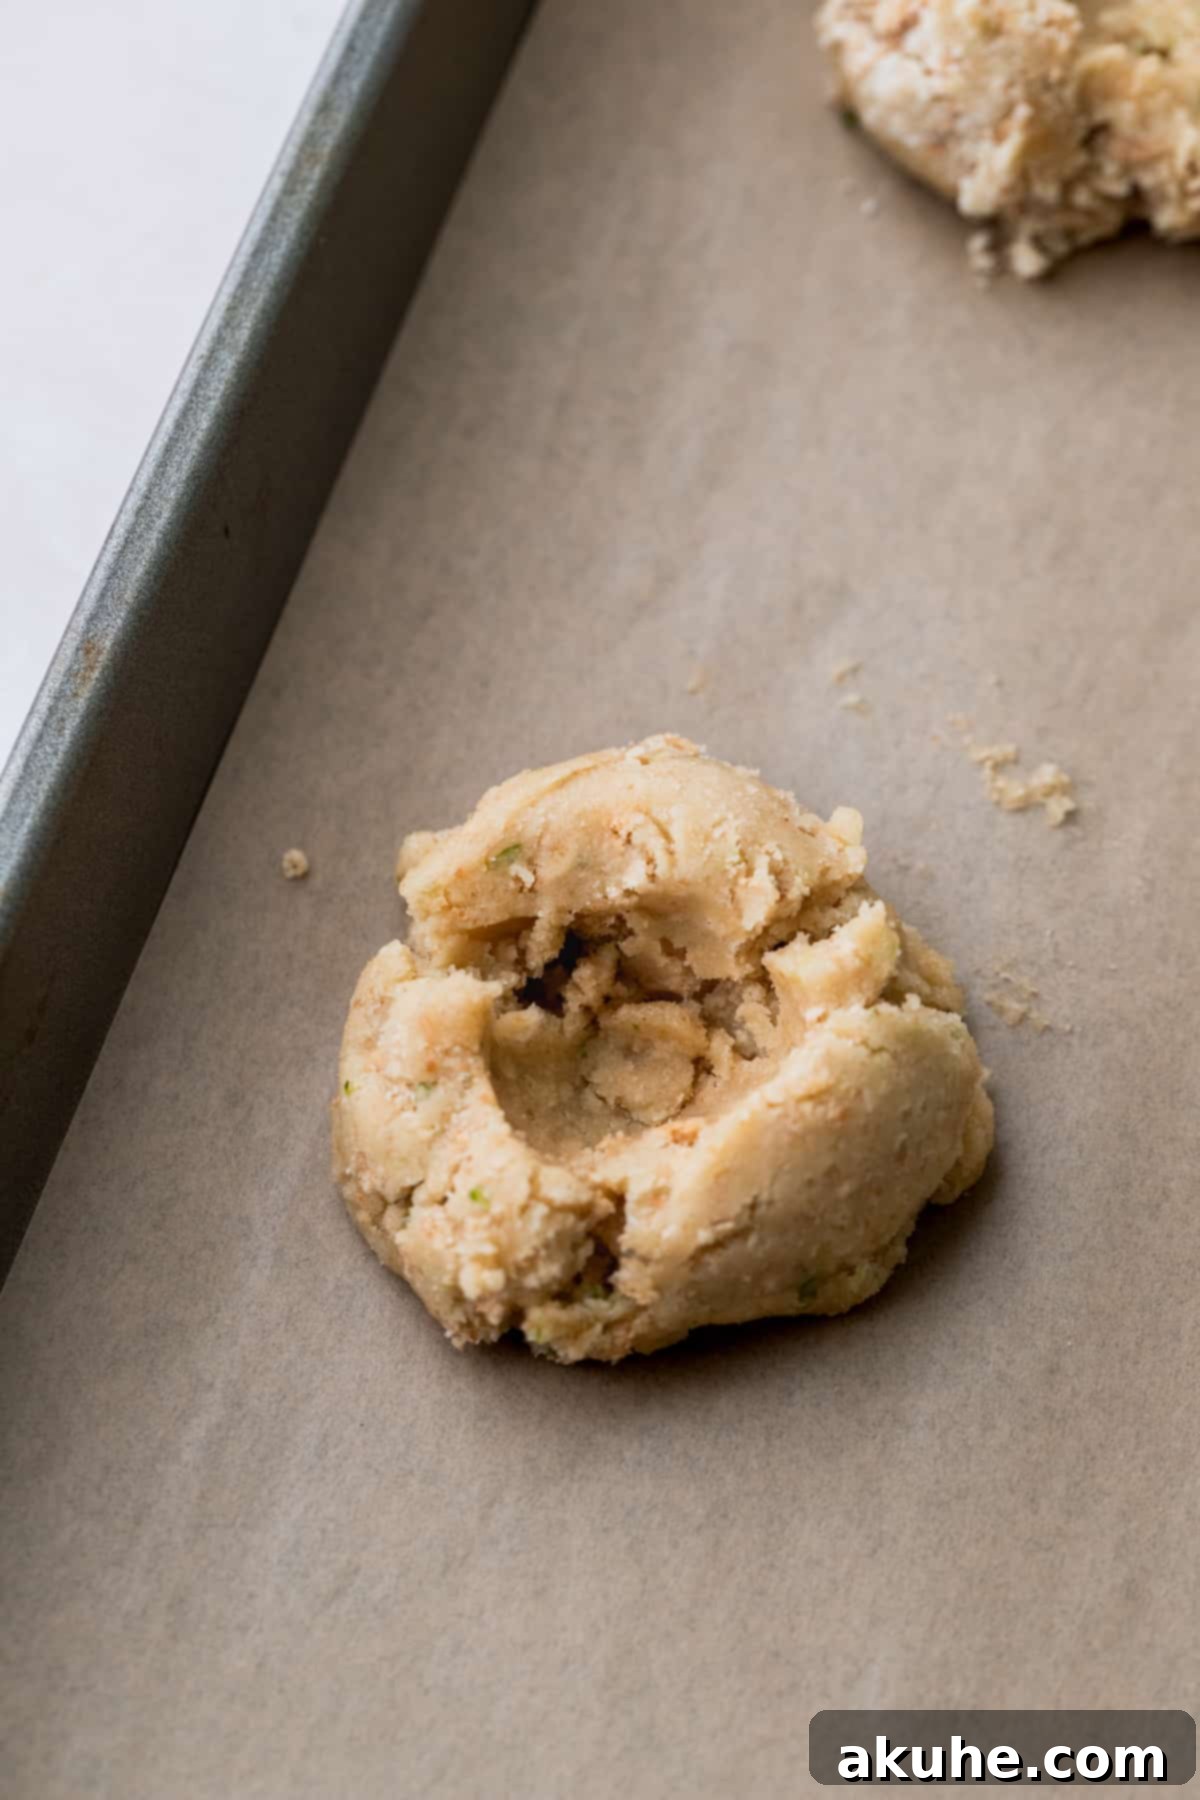
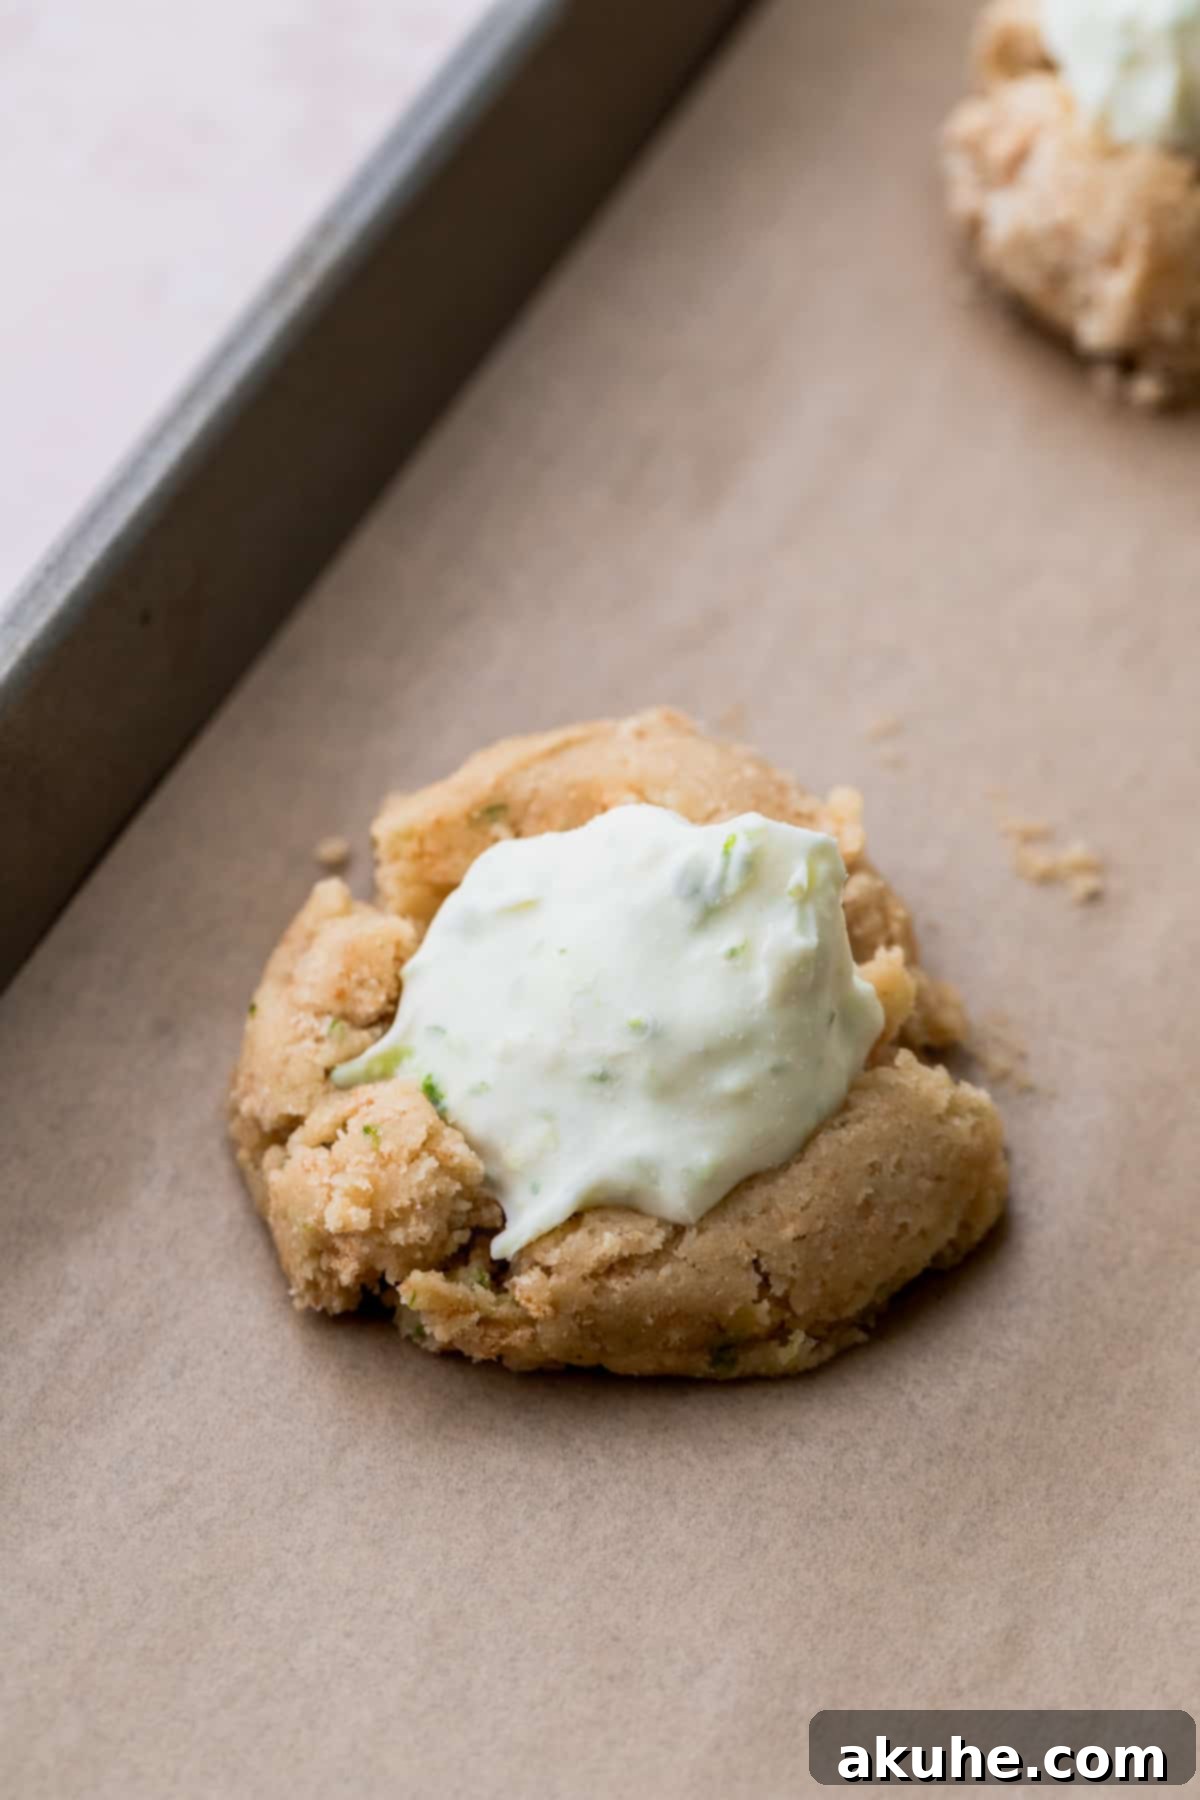
- Scoop and Prepare for Filling: Line two large cookie sheets with parchment paper. Using a 1-ounce cookie scoop (approximately 2 tablespoons), scoop out 32 uniform cookie dough balls. Place about 6 cookie dough balls onto one of the prepared sheets, ensuring they are spaced well apart. With a teaspoon, gently press an indentation or “hole” into the center of each cookie dough ball. This pocket will cradle your cheesecake filling.
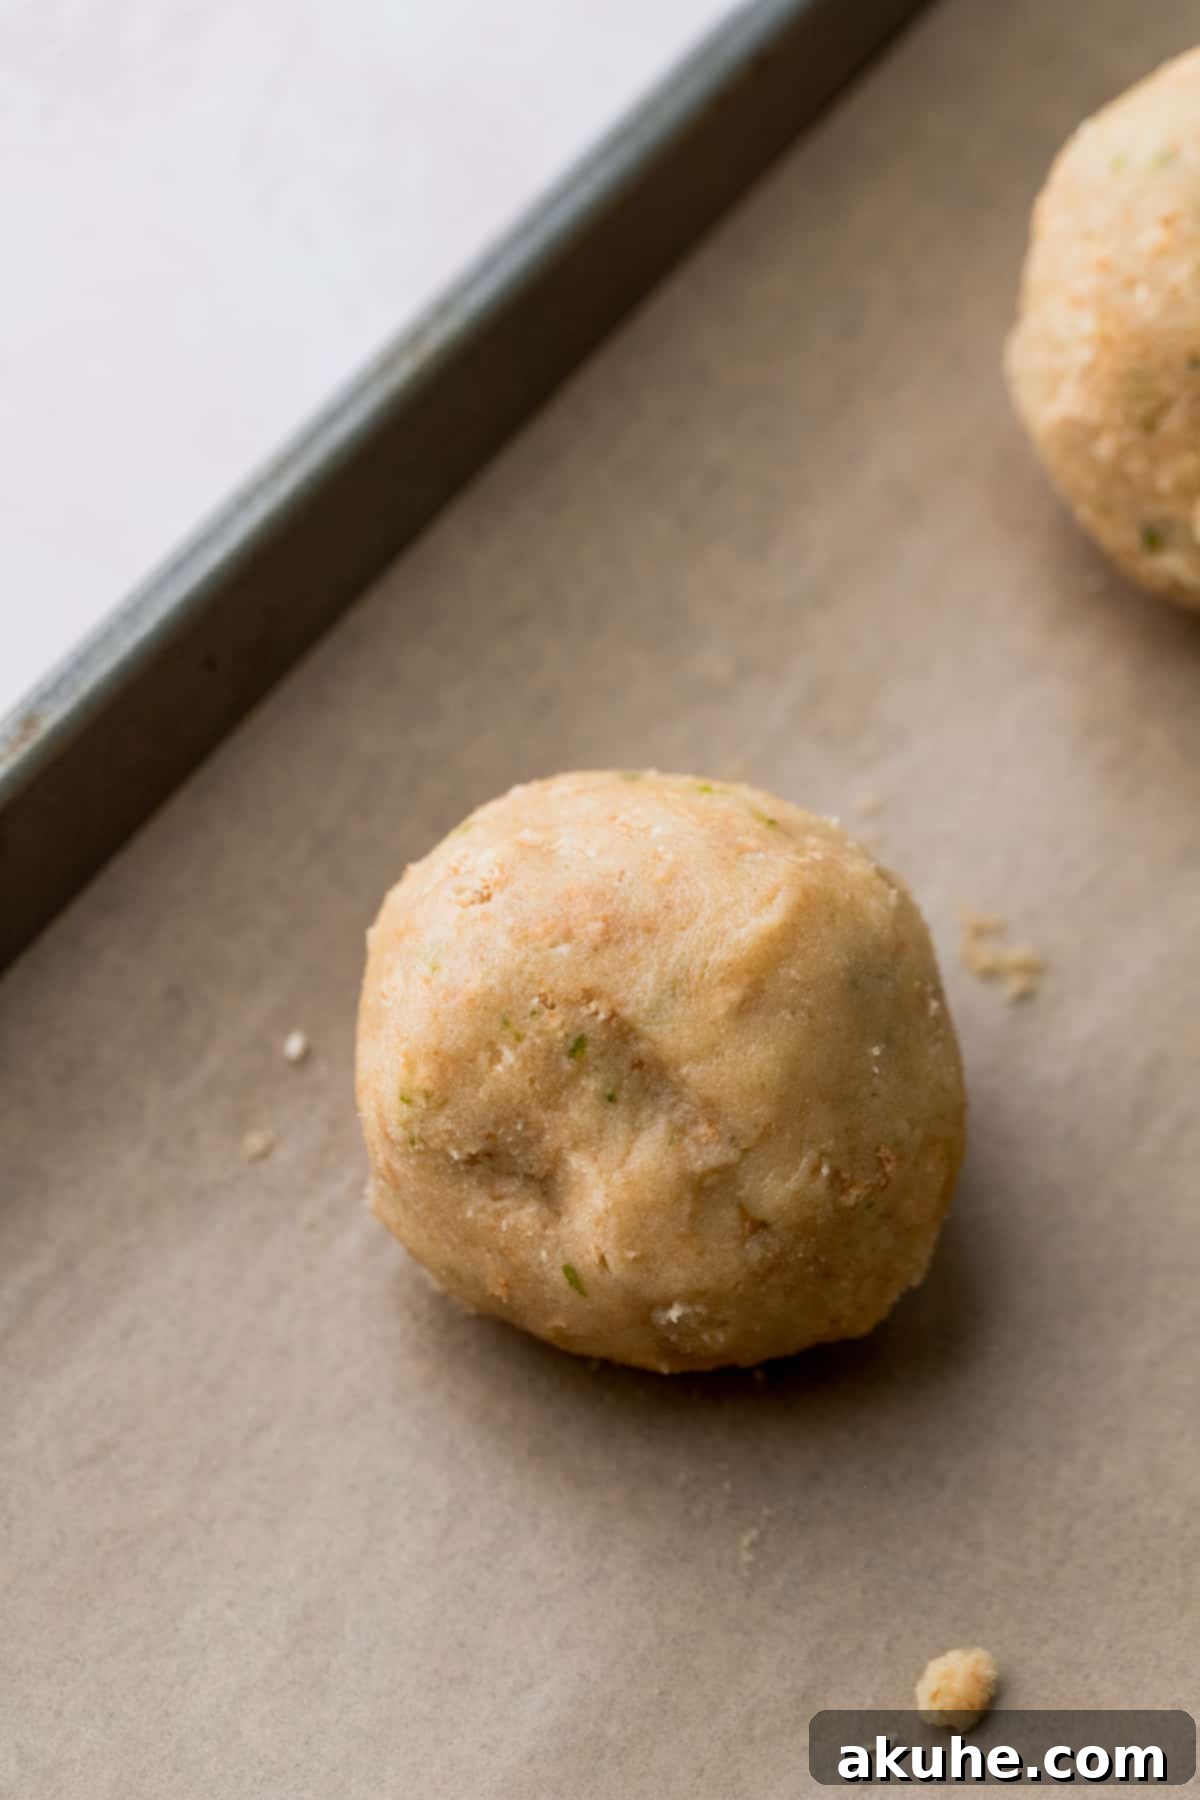
- Stuff with Cheesecake: Retrieve your frozen cheesecake dollops from the freezer. Carefully place one frozen dollop of the key lime cheesecake into the indentation of each cookie dough ball. Immediately scoop another 1-ounce portion of cookie dough and gently place it directly on top of the cheesecake-filled dough ball. Gently use your hands to roll and seal the two cookie dough portions around the cheesecake filling, forming a perfectly spherical ball. Ensure the filling is completely enclosed within the dough.
- The Crucial Chill: As you finish assembling the first batch of stuffed cookie dough balls (typically 6-8 per sheet), place that sheet directly into the freezer while your oven preheats. Keep the remaining assembled cookie dough balls (or the plain dough if you’re working in smaller batches) in the refrigerator. It is absolutely essential that the cookie dough balls are thoroughly cold before they enter the hot oven. This cold temperature helps prevent spreading and ensures the cookies maintain their shape and chewy texture.
- Bake to Perfection: Preheat your oven to 350°F (175°C). Bake one cookie sheet at a time for 13-15 minutes. The edges should be set and lightly golden, while the centers still appear slightly soft – remember, they will continue to set as they cool. For perfectly round cookies, immediately after removing them from the oven, use a large biscuit cutter or the back of a spoon to gently ‘scoot’ the warm cookies into a neat circular shape.
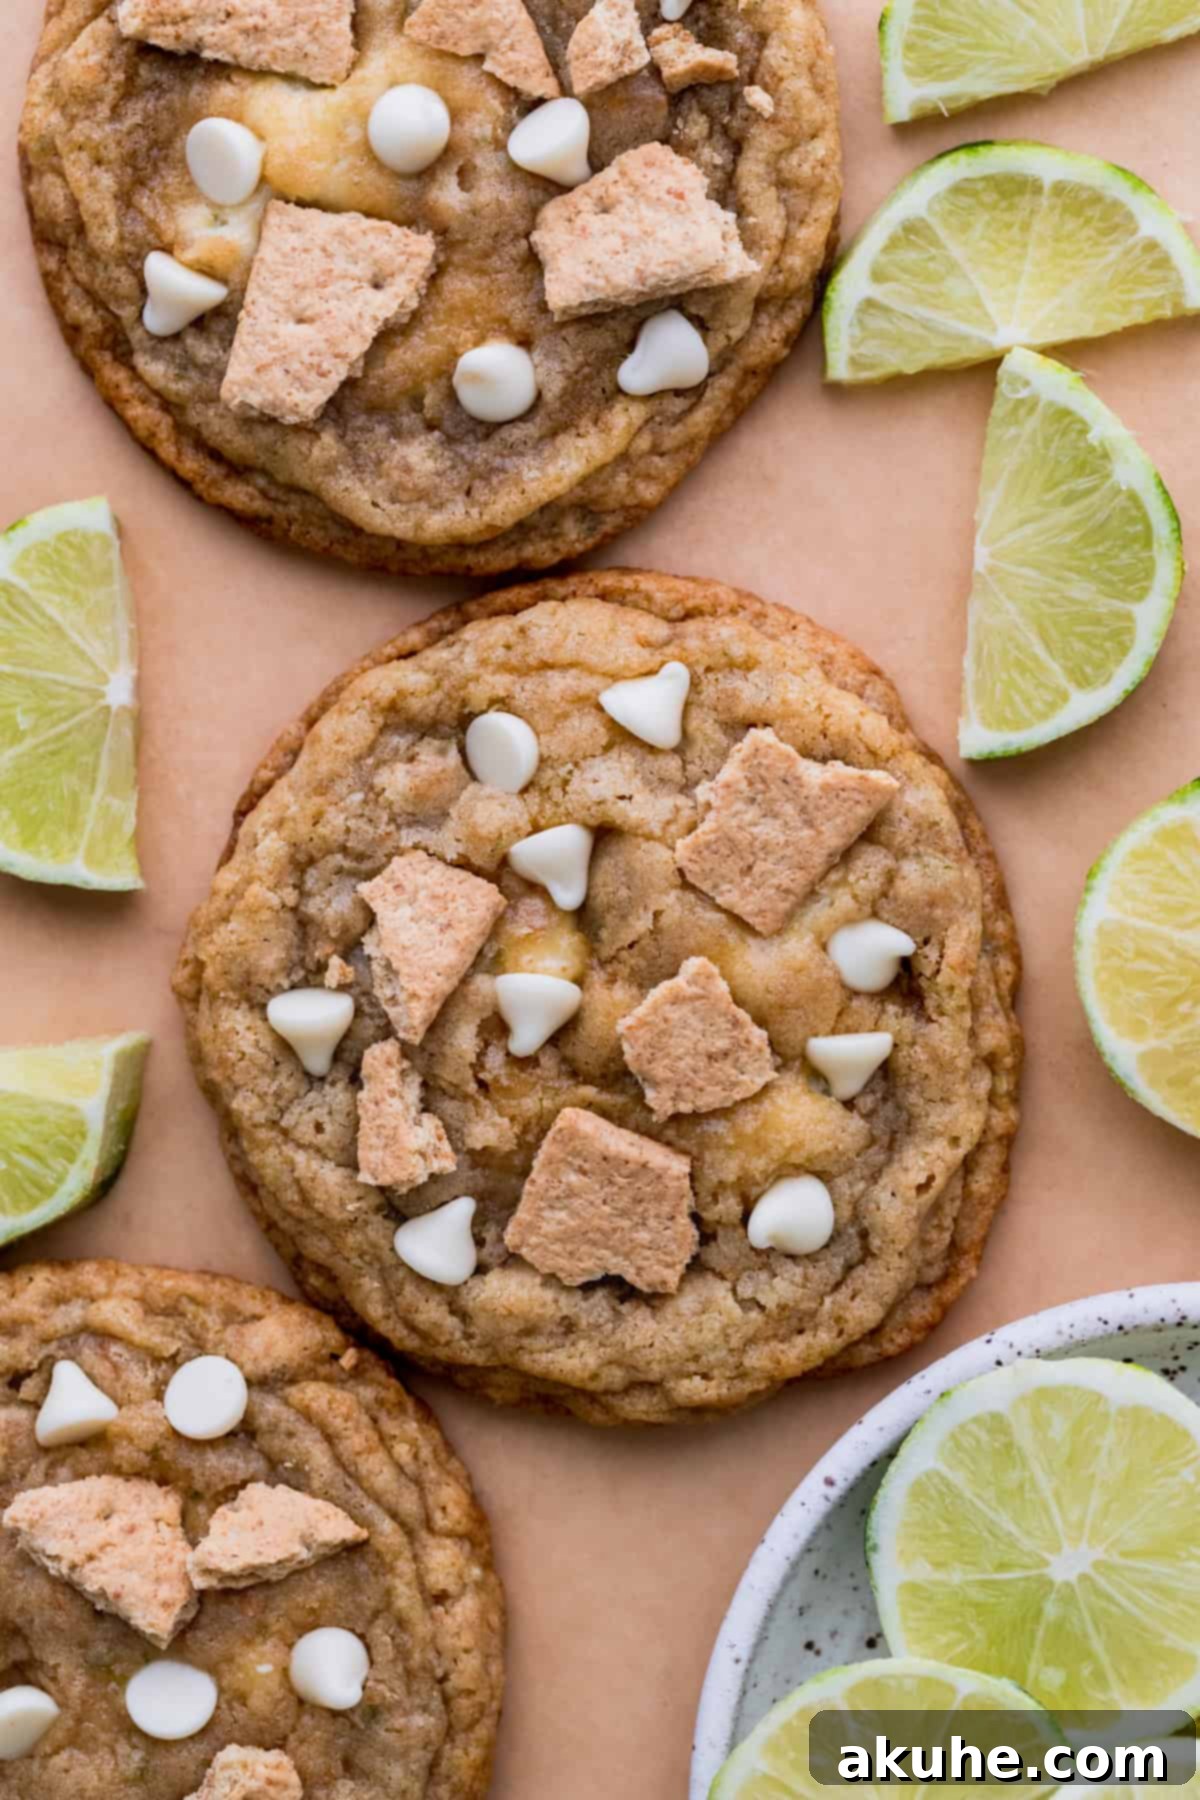
- Garnish and Cool: While the cookies are still warm from the oven, sprinkle them with a few extra graham cracker pieces and, if desired, a handful of high-quality white chocolate chips. Allow the cookies to cool on the baking sheet for about 5-10 minutes before carefully transferring them to a wire cooling rack to cool completely. Patience is key here! The lime flavor intensifies and the texture firms up as the cookies cool. Enjoy them at room temperature for the best experience.
Expert Baking Tips for Flawless Key Lime Cookies
Achieving bakery-quality Key Lime Cookies is within reach with a few tried-and-true baking tips. These pointers will help you navigate common challenges and ensure your cookies turn out perfectly every time:
- Accurate Flour Measurement is Key: Improper flour measurement is a common culprit for baking mishaps. Always “spoon and level” your flour: gently spoon flour into your measuring cup until it overflows, then use the back of a straight knife or a flat edge to level off the excess. Never scoop directly from the bag, as this compacts the flour, resulting in too much dry ingredient and potentially dense, crumbly cookies that won’t spread correctly. A kitchen scale offers the most accurate measurement.
- Preventing Cookie Spread: For perfectly shaped, chewy cookies, several factors are crucial. First, always line your baking sheets with parchment paper; it provides a non-stick surface and helps regulate heat. Second, and perhaps most important, ensure your stuffed cookie dough balls are thoroughly chilled and cold before entering the oven. Warm dough spreads rapidly. If you find your cookies are still spreading excessively, try adding an extra 1-2 tablespoons of all-purpose flour to your remaining dough – this can slightly adjust the dough’s consistency to prevent over-spreading.
- Embrace the Underbaked Look: For that coveted chewy center and slight crispness around the edges, aim to slightly underbake your cookies. When you pull them from the oven, the centers should still look a little soft or even slightly undercooked. Don’t worry, they will continue to “bake” and set on the hot pan during the first few minutes of cooling. This technique guarantees a moist, tender interior.
- Maintain Cheesecake Filling Firmness: The cheesecake filling is delicate and can soften quickly. To ensure easy handling and prevent messy filling, work in small batches when stuffing your cookie dough. Only take out 6-8 frozen cheesecake dollops at a time to fill your cookies. Keep the remaining tray of cheesecake dollops stashed away in the freezer until you are ready for the next batch. This practice prevents the filling from becoming too soft and difficult to enclose.
- Don’t Overcrowd Your Baking Sheets: While it might be tempting to fit as many cookies as possible on a single sheet, overcrowding can negatively impact baking. Cookies need space for proper air circulation, which ensures even baking and browning. Bake one sheet at a time, placing no more than 6-8 stuffed cookie dough balls per standard baking sheet. This allows for consistent heat distribution and prevents unevenly baked cookies.
- Room Temperature Ingredients for Best Results: As noted in the ingredients section, ensure your butter, cream cheese, and eggs are all at proper room temperature. This isn’t just a suggestion – it’s a fundamental rule in baking. Room temperature ingredients emulsify better, creating a smoother, more cohesive dough and filling, leading to superior texture and consistency in your final Key Lime Cookies.
Frequently Asked Questions About Key Lime Cookies
Here are answers to some common questions about making and enjoying these delightful Key Lime Cheesecake Cookies:
Absolutely! You can easily adapt this recipe to make smaller cookies, though they might be slightly less chewy due to their reduced size. For miniature cookies, use a 1 tablespoon cookie scoop for the dough, placing about 8 smaller cookie dough balls per baking sheet. For the cheesecake filling, use a heaping 1 teaspoon for each dollop. Adjust the baking time to 8-11 minutes, keeping a close eye on them to prevent overbaking.
Yes, you can! This is a fantastic way to prepare ahead or enjoy freshly baked cookies whenever a craving strikes. After rolling the stuffed cookie dough balls, arrange them on a baking sheet and freeze until solid. Once frozen, transfer them to an airtight container or a freezer-safe bag, ensuring they are well-sealed to prevent freezer burn. They can be stored in the freezer for up to 30 days. When you’re ready to bake, allow the cookie dough balls to thaw in the refrigerator for a few hours or on the counter until they are no longer rock solid, then proceed with baking as directed.
Yes, chilling the cookie dough overnight is perfectly fine and can even enhance the flavors. However, for the best results and easiest handling, I highly recommend forming the cookie dough into individual stuffed cookie dough balls first, then chilling them overnight. This prevents the dough from becoming too stiff and difficult to scoop or shape the next day, ensuring a smoother baking process.
While key limes offer a unique tartness and distinct aroma, you can certainly use regular Persian limes as a substitute. The flavor profile will be slightly different – less intensely floral and a bit more assertive in tartness – but your cookies will still be delicious and wonderfully lime-flavored. Ensure you use the same quantity of zest and juice as specified in the recipe for the best possible outcome.
To maximize yield from your limes, first, thoroughly wash and dry them. For zest, use a microplane zester and lightly graze the lime, only removing the bright green outer layer. Avoid the white pith directly underneath, as it’s bitter. For juice, roll the whole lime firmly on a countertop for a few seconds to break down the internal membranes. Then, cut it in half and use a citrus reamer or juicer to extract the juice. Warming the limes slightly in the microwave for 10-15 seconds can also help.
Storage and Freezing Instructions for Key Lime Cookies
To keep your delicious Key Lime Cheesecake Cookies fresh and delightful, proper storage is essential. Here’s how to ensure they maintain their incredible flavor and texture:
Storing Baked Cookies
Once completely cooled, store your baked Key Lime Cookies in an airtight container. Because of their creamy cheesecake filling, it’s best to keep them refrigerated. When stored properly in the fridge, these cookies will remain fresh and flavorful for up to 5 days. For the best taste and texture, allow them to come to room temperature for about 10-15 minutes before serving, as this enhances the lime flavor and softens the cookie perfectly.
Freezing Baked Cookies
These Key Lime Cookies freeze wonderfully, making them perfect for meal prep or enjoying a treat whenever you like. To freeze, place the completely cooled cookies in a single layer on a baking sheet and freeze for about an hour until solid. Then, transfer them to a freezer-safe airtight container or heavy-duty freezer bag, separating layers with parchment paper to prevent sticking. They can be stored in the freezer for up to 30 days without compromising quality. To enjoy, simply thaw the frozen cookies at room temperature for 1-2 hours before indulging. They taste just as fresh as the day they were baked!
More Delicious Cookie Recipes to Explore
If you’ve enjoyed baking these Key Lime Cookies, you might also love exploring these other fantastic dessert and cookie creations:
- Lemonade Bundt Cake
- Strawberry Ice Cream Cheesecake
- Black Forest Cookies
Key Lime Cookies with Cheesecake Filling
These Key Lime Cookies are like key lime pie in a cookie! They are wonderfully chewy, full of fresh lime zest, tangy lime juice, and graham cracker crumbs. The best part? Each cookie is generously filled with a creamy, delicious key lime cheesecake center.
Pin Recipe
Leave a Review
Ingredients
Key Lime Cheesecake Filling
- 8 oz Cream cheese, room temperature
- 1/3 cup Powdered sugar, sifted
- 2 Limes zested
- 1 TBSP Lime juice
Key Lime Cookies
- 2 cups All-purpose flour
- 1 tsp Baking soda
- 1 tsp Salt
- 1 1/4 cups Graham cracker crumbs (1 sleeve, plus extra for topping)
- 1 cup Unsalted butter, room temperature
- 1/2 cup Brown sugar, packed light brown sugar
- 1 cup White granulated sugar
- 1 tsp Pure vanilla extract
- 1 Large egg, room temperature
- 1 Egg yolk, room temperature
- 2 Limes zested
- 1 TBSP Lime juice
Instructions
Key Lime Cheesecake Filling
- In a small bowl, using a mixer, beat the cream cheese on high speed for 1 minute. Add the powdered sugar and mix on low until combined. Add the lime zest and lime juice and mix until combined.
- Place wax paper over a cookie sheet. Use a heaping 1/2 Tablespoon and spoon 16 dollops of cheesecake. Place in the freezer for at least an hour until cold and firm.
Key Lime Cookies
- Using a food processor, blend the graham crackers into fine crumbs. Place the crumbs in a large bowl. Add the flour, baking soda, and salt and set aside.
- Using a mixer, beat the butter, brown sugar, and white sugar on high speed for 2 minutes. Add in the vanilla, lime zest, and lime juice. Mix until combined.
- Add in the egg and egg yolk and mix on medium until combined. Add in dry ingredients and mix on low speed until just combined.
- Chill the cookie dough for at least 45 minutes. Prepare two cookie sheets with parchment paper.
- Use a 1oz cookie scoop and scoop 16 cookie dough balls. Place 6 cookie dough balls per cookie sheet spread out. Use a 1 teaspoon and press a hole into the cookie dough ball. Top with a frozen cheesecake dollop.
- Scoop another 16 cookie dough balls and place on top of the cheesecake dollop, sealing it. Use your hands to roll it into a complete ball.
- Preheat the oven to 350°F (175°C). Place the 1st batch of rolled cookies in the freezer to chill while the oven preheats. Place the rest of the cookie dough balls in the fridge. The cookie dough balls need to be cold before going in the oven.
- Bake for 14 minutes. Use a large biscuit cutter or a fork to gently scoot the cookies into a perfect circle right after baking. Then, bake for another 1-2 minutes until edges are lightly golden.
- Top the warm cookies with extra graham cracker pieces and white chocolate chips. Let the cookies sit on the hot pan for 10 minutes before transferring to a cooling rack. Cool completely before serving.
Notes
- Flour Measurement: Make sure flour is spooned and leveled or use a kitchen scale for accuracy. Compacted flour can dry out the cookies.
- High Altitude Baking: If baking at high altitude, consider adding an extra 2 tablespoons of flour to the cookie dough to help with spreading.
- Room Temperature Ingredients: Remember to pull out all dairy ingredients (butter, cream cheese, eggs) at least 2 hours before baking for optimal results.
- Cookie Dough Ball Assembly Tip: To keep the cheesecake filling firm, work with only 6 cookie dough balls at a time when stuffing. Keep the remaining cheesecake dollops in the freezer and the rest of the plain cookie dough in the fridge until ready to use. This prevents the filling from melting and makes rolling easier.
Nutrition Information (per serving)
- Calories:
- 315 kcal
- Carbohydrates:
- 40 g
- Protein:
- 3 g
- Fat:
- 18 g
- Saturated Fat:
- 10 g
- Polyunsaturated Fat:
- 1 g
- Monounsaturated Fat:
- 5 g
- Trans Fat:
- 1 g
- Cholesterol:
- 57 mg
- Sodium:
- 306 mg
- Potassium:
- 64 mg
- Fiber:
- 1 g
- Sugar:
- 21 g
- Vitamin A:
- 562 IU
- Vitamin C:
- 1 mg
- Calcium:
- 32 mg
- Iron:
- 1 mg
Did you make this recipe? Please leave a star rating and review below!
