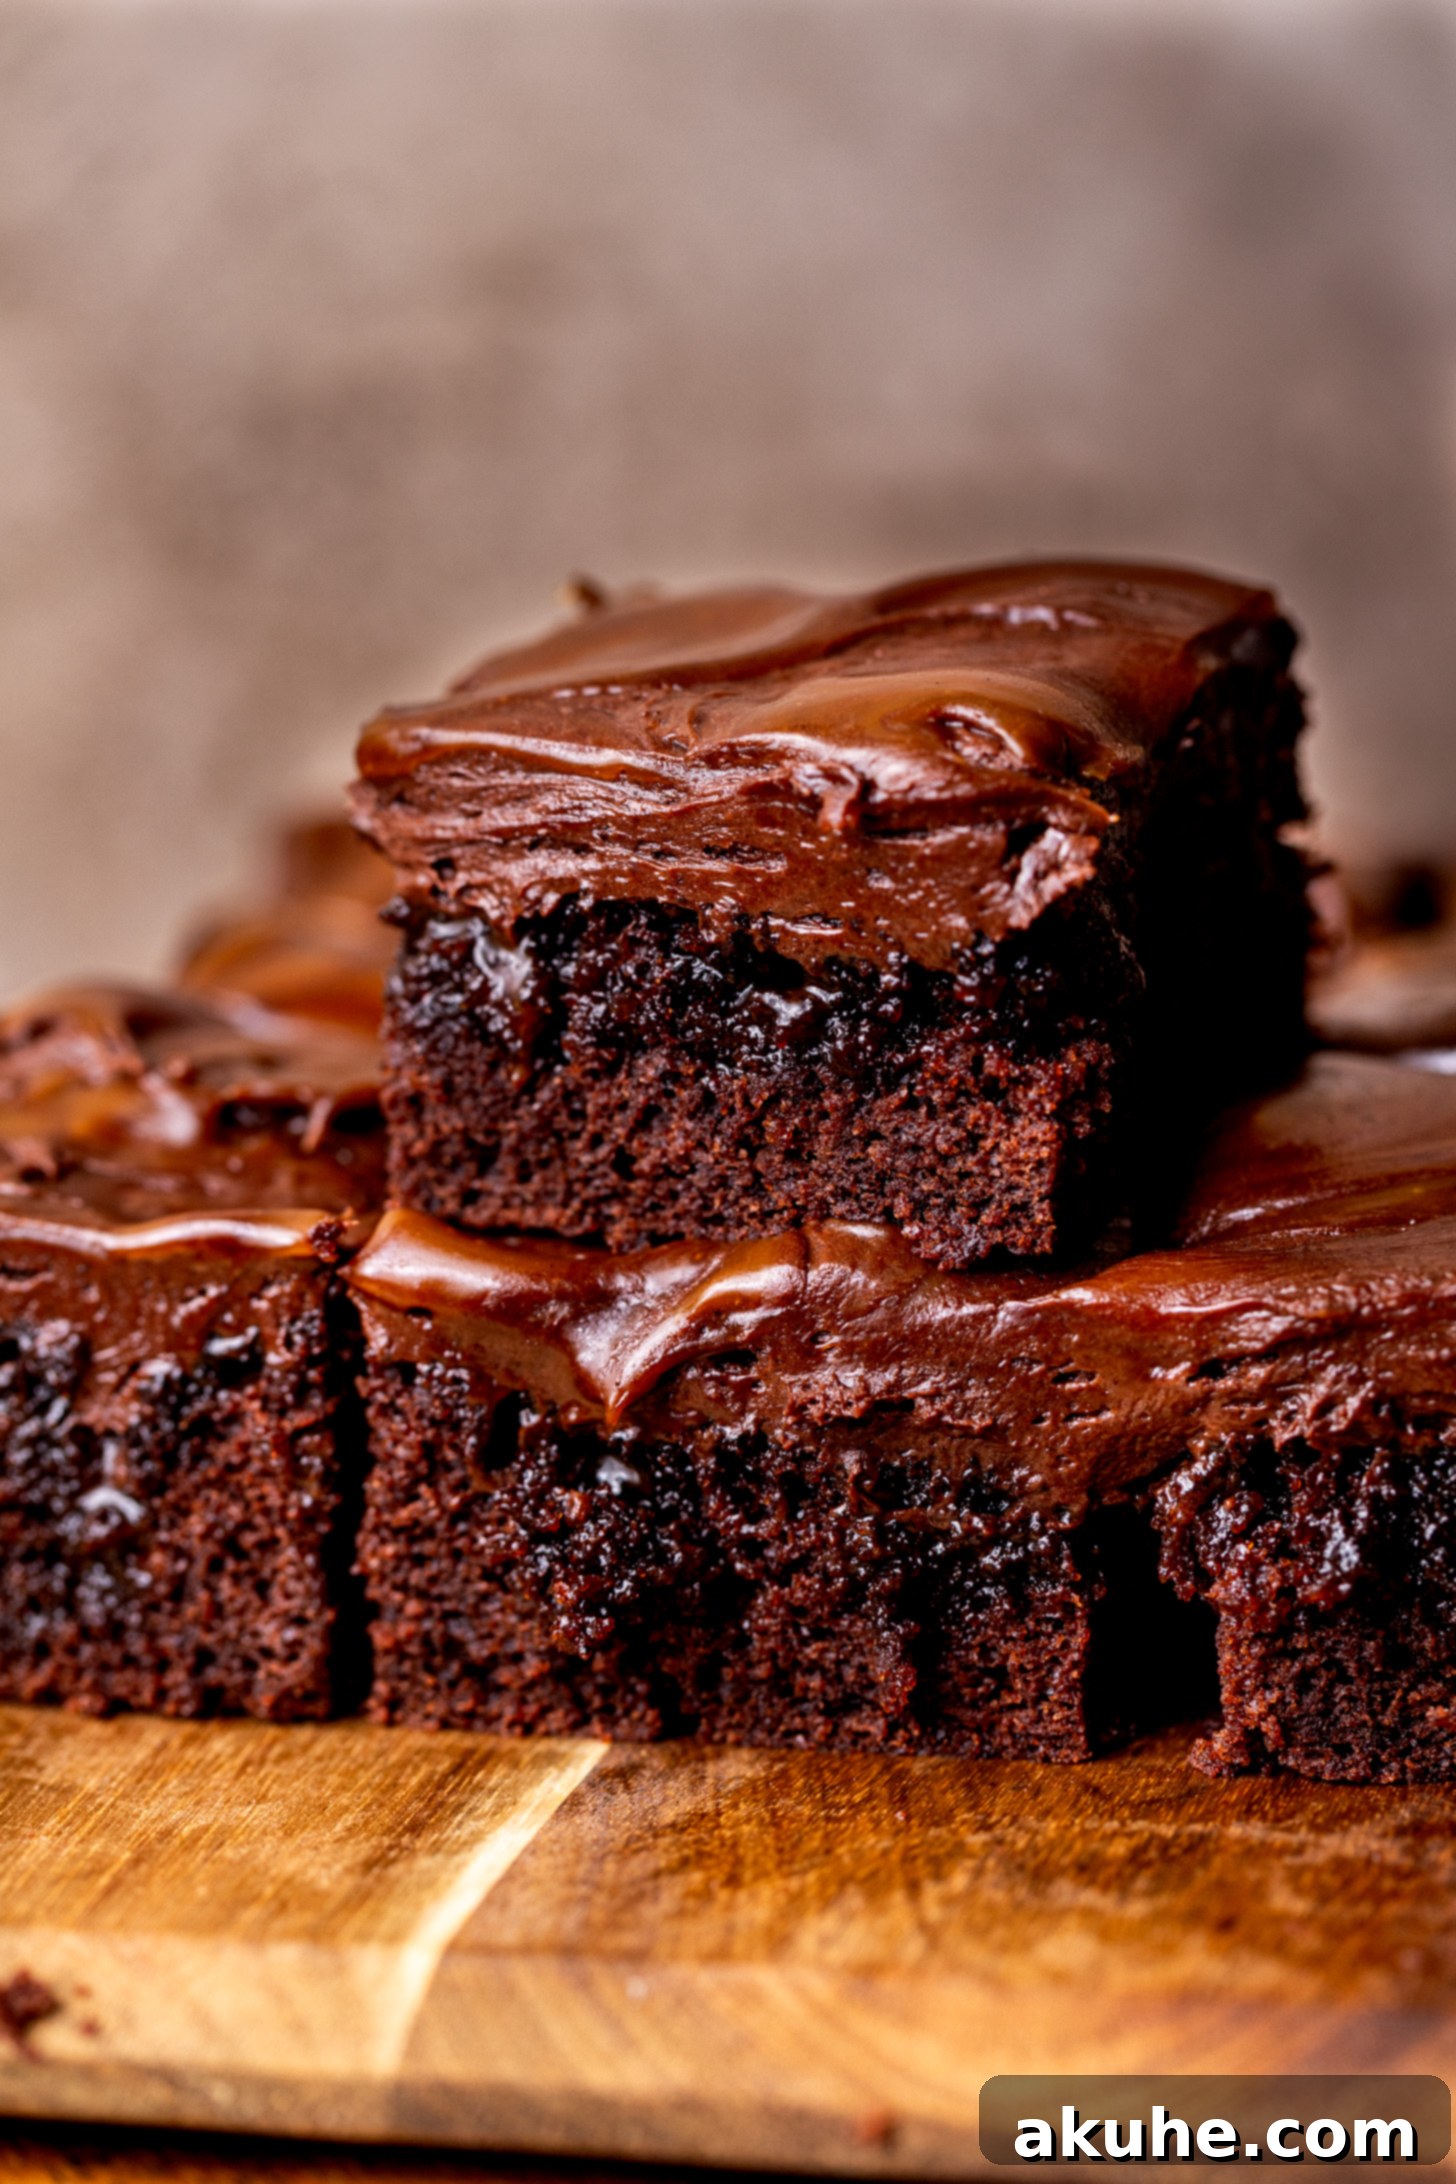
Dive into the exquisite world of this Chocolate Caramel Cake, a masterpiece that perfectly balances the deep, indulgent notes of rich cocoa with the luscious, buttery sweetness of homemade caramel. This isn’t just any ordinary cake; it features an unbelievably moist chocolate cake base, meticulously poked and generously infused with warm, gooey salted caramel. To elevate this delightful creation further, it’s crowned with a dreamy, silky chocolate cream cheese frosting, elegantly swirled with even more golden caramel. It truly is the quintessential dessert, especially as the crisp air of fall beckons for comforting, indulgent, and show-stopping treats.
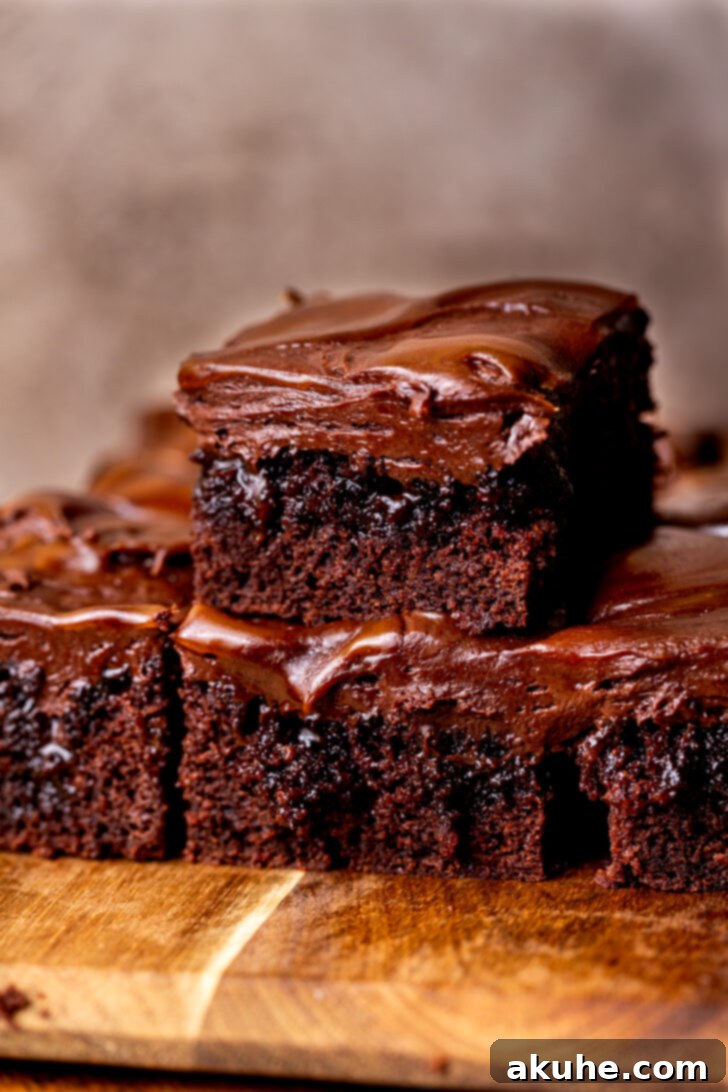
As a dedicated chocolate cake enthusiast, my passion intensifies tenfold when the magical essence of caramel is introduced. What truly sets this particular recipe apart and transforms it into an absolute showstopper is the ingenious technique of poking the baked chocolate cake and generously filling it with a decadent, homemade salted caramel. This unique method doesn’t merely add an explosion of flavor; it fundamentally transforms the cake’s texture, ensuring every single bite is supremely moist, wonderfully soft, and boasts an intense, irresistible caramel essence that permeates throughout the entire cake. It’s an experience far beyond a simple topping – it’s an integral part of the cake’s very soul, creating a depth of flavor that a regular caramel drizzle just can’t match.
Creating such a masterpiece might sound like a challenge reserved for professional bakers, but fear not! I’ve meticulously broken down every step with comprehensive tips, clever tricks, and clear process photos to guide you effortlessly through the creation of this unforgettable dessert. You’ll gain the confidence to bake like a pro, ensuring your chocolate caramel cake is nothing short of perfection, whether you’re making it for a special occasion or simply to treat yourself. If your heart sings for the divine combination of chocolate and caramel, you absolutely must explore my other creations, like the famously chewy caramel chocolate chip cookies, which promise a similar symphony of flavors in a bite-sized format.
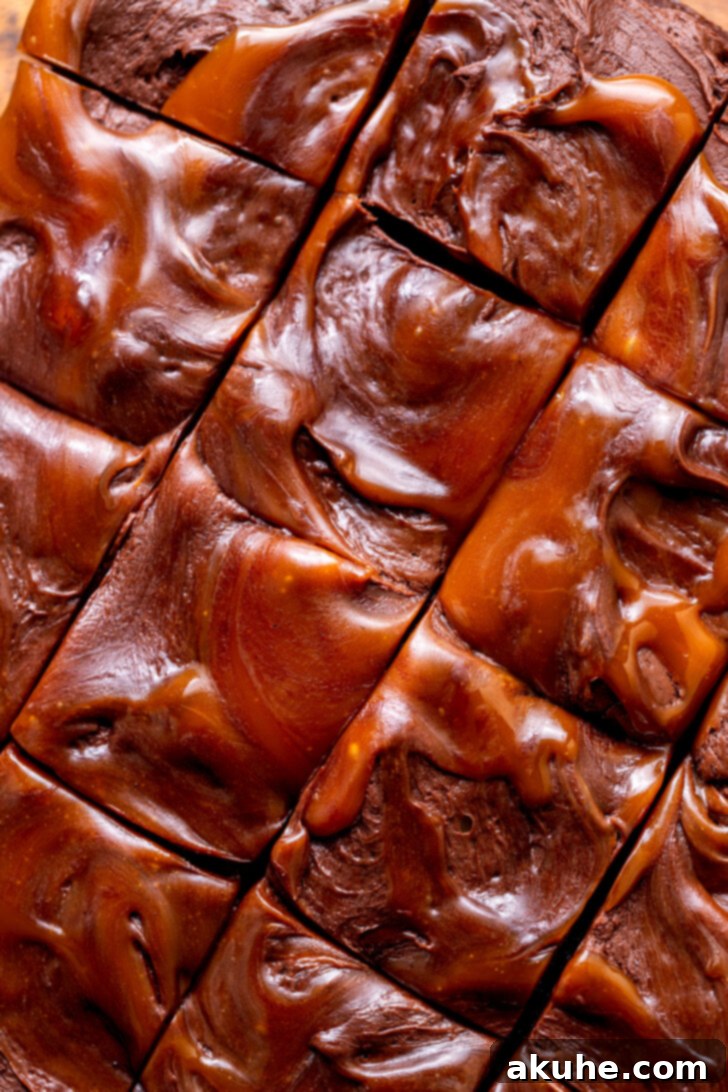
Essential Tips for Baking the Perfect Chocolate Caramel Cake
Achieving a chocolate caramel cake that looks and tastes like it came from a professional bakery is entirely within your reach with these expert tips and insights. These fundamental techniques will guide you to a consistently moist, flavorful, and beautifully decorated cake every time, ensuring your baking efforts are rewarded with spectacular results. For even more in-depth guidance on specific components, be sure to check out my dedicated posts on crafting a luscious homemade chocolate cream cheese frosting and a rich velvety homemade salted caramel.
- Precision with Flour Measurement (The Spoon & Level Method): The single most common cause of dry, dense cakes is incorrectly measured flour. Do not scoop your measuring cup directly into the flour bag, as this compacts the flour, adding far more than intended and resulting in a heavy cake. Instead, gently spoon the flour into your measuring cup until it overflows, then use the straight edge of a knife or a spoon handle to carefully level off the excess. For ultimate accuracy and professional-level consistency, especially in baking, a kitchen scale is always recommended. Measuring flour by weight (grams) eliminates guesswork and ensures consistent results every single time.
- Achieving a Smooth, Lump-Free Cake Batter: When combining your wet and dry ingredients, the goal is to mix just until no dry streaks of flour remain and the batter appears perfectly smooth. Overmixing is a common pitfall that can lead to a tough, chewy cake, as it overdevelops the gluten. However, ensuring there are absolutely no flour lumps is crucial for an even texture and a uniform crumb in your finished cake. A whisk or a rubber spatula can help gently incorporate ingredients without overworking the batter, striking the perfect balance between smooth and tender.
- Strategic Caramel Preparation for Success: Always begin your baking journey by making your homemade salted caramel first. This crucial step allows ample time for it to cool down to the proper consistency while your chocolate cake bakes and subsequently cools. Working with cooled caramel is essential for two key reasons: firstly, for safety (hot caramel can cause severe burns), and secondly, for consistency (cool caramel is thicker, more stable, and significantly easier to handle for both filling the cake and creating beautiful swirls without melting your delicate frosting).
- The Ideal Consistency for Chocolate Frosting: Our chocolate cream cheese frosting recipe is intentionally designed to be wonderfully thick and robust. This sturdy consistency is absolutely vital, particularly when it comes to incorporating the caramel swirl into the decoration. A thick frosting acts as a stable, unyielding base, preventing the warm or even room-temperature caramel from making the frosting too runny, or worse, causing it to separate and lose its structure. This ensures your decorative swirls hold their shape beautifully, creating a stunning and clean finish.
- Room Temperature Ingredients for Optimal Emulsification: For both the moist chocolate cake batter and the silky frosting, using room temperature ingredients (such as eggs, butter, sour cream, buttermilk, cream cheese, and heavy cream for the caramel) is paramount. Room temperature ingredients emulsify more effectively, meaning they blend together seamlessly and uniformly, creating a smoother, more homogenous batter and frosting. This ultimately leads to a finer, more tender crumb in your cake and a silkier, more luscious texture in your frosting. Remember to pull these ingredients out of the refrigerator at least 1-2 hours before you plan to start your baking process.
- Proper Pan Preparation for Effortless Release: To ensure your beautiful cake doesn’t stick to the pan and ruin your hard work, thoroughly prepare your 9×9 inch baking pan. Generously spray it with a high-quality nonstick baking spray (one that contains flour is often ideal for cakes). For an extra layer of insurance and a guaranteed clean release, line the bottom of the pan with a piece of parchment paper, allowing a slight overhang if possible, and then spray the parchment paper again. This double layer of protection guarantees an effortless release of your perfectly baked chocolate caramel cake, preserving its perfect shape.

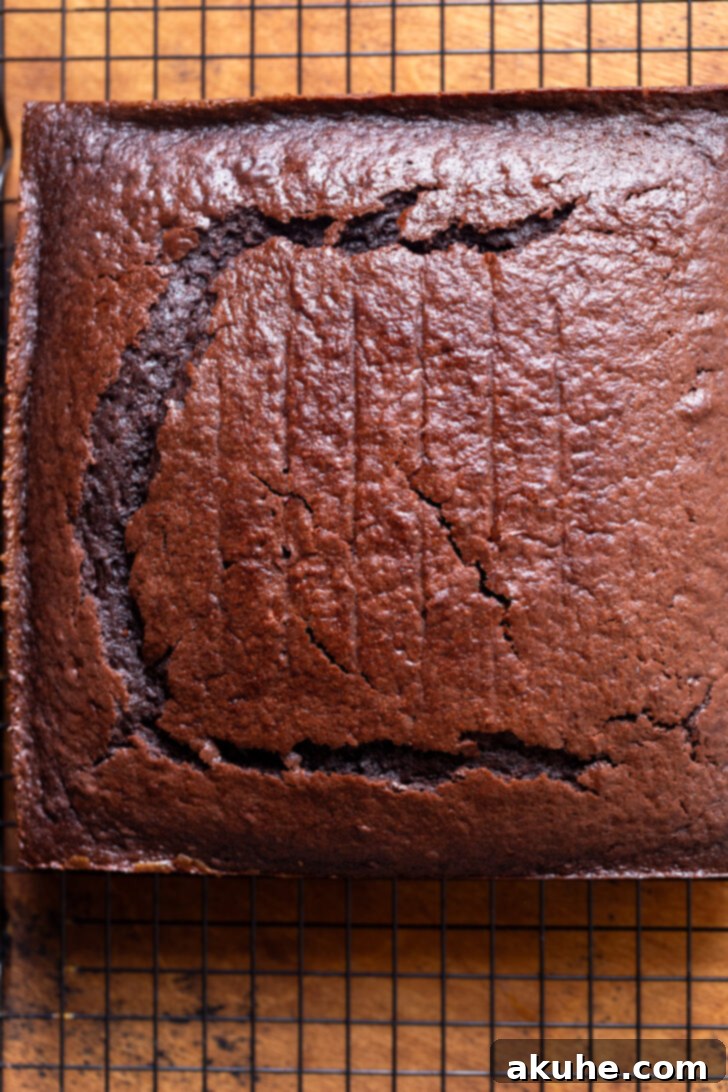
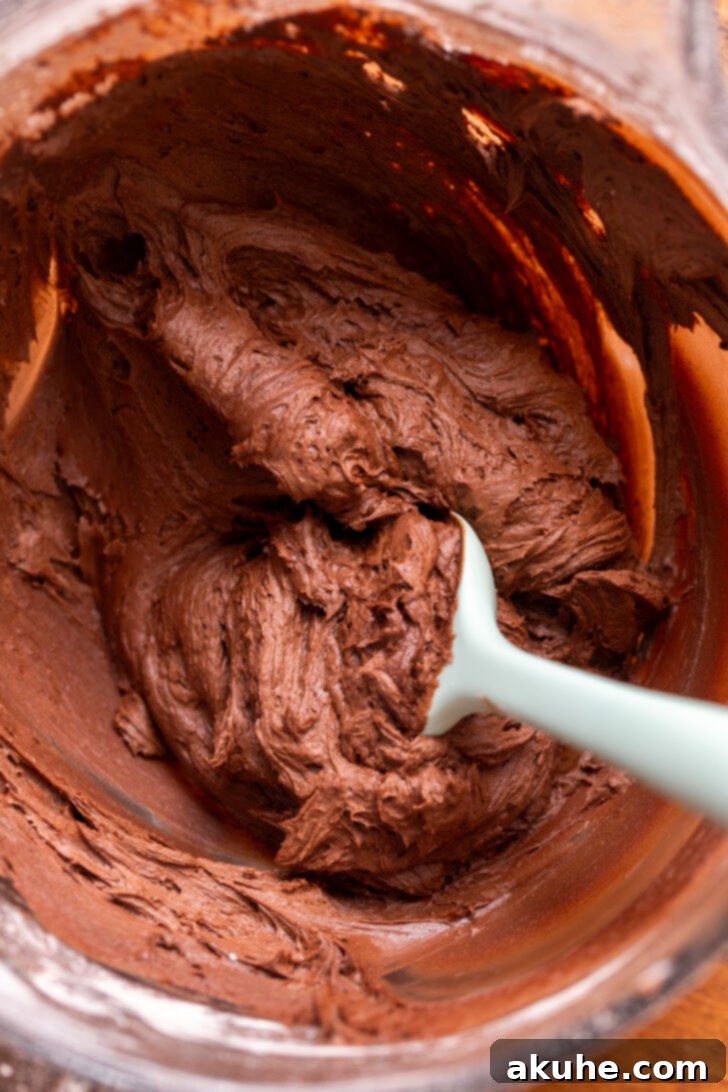
Mastering the Art of Decorating Your Chocolate Caramel Cake
The decoration phase is where your chocolate caramel cake truly comes to life, transforming from a simple yet delicious bake into a stunning centerpiece that will undoubtedly impress. Follow these detailed steps for a beautifully finished cake that tastes every bit as incredible as it looks, ensuring each element contributes to its overall charm and flavor.
- Leveling the Cake for a Professional Finish: Once your baked chocolate cake has cooled completely to room temperature (this is critical!), use a long, sharp serrated knife to carefully and evenly slice off any domed top. This crucial step creates a perfectly flat, stable surface, which is essential for applying an even layer of frosting and achieving a truly professional, bakery-quality appearance.
- The Secret to Caramel Infusion: Poking and Filling: This innovative step is the true secret to the cake’s extraordinary moisture and its deep, pervasive caramel flavor. Using the blunt end of a wooden spoon handle, a chopstick, or any similarly thin, round, sturdy object, gently poke holes across the entire surface of the cake. Aim to go about two-thirds of the way down into the cake, creating small, evenly spaced reservoirs that will eagerly welcome the caramel. Transfer your cooled homemade salted caramel (which should now be thick but still pourable) into a piping bag (or a sturdy Ziploc bag with one corner snipped off). Carefully and generously pipe the caramel directly into each of the poked holes, ensuring they are well-filled.
- Applying the Velvety Frosting Base: With your cake now gloriously infused with caramel, it’s time for the crowning layer of chocolate cream cheese frosting. Using an offset spatula, a palette knife, or even a regular butter knife, apply a generous, smooth, and even layer of frosting over the entire top surface of the cake. Gently smooth it out to create a flawless, inviting canvas for the final, artistic caramel swirl. Don’t worry too much about absolute perfection here, as the caramel swirl will add an organic beauty.
- Creating the Signature Caramel Swirl: The Grand Finale: For the artistic grand finale, take the remaining cooled caramel and spoon small, irregular dollops of it haphazardly over the top of the already frosted cake. Then, using the very tip of a spoon, a toothpick, or even a small offset spatula, gently drag through the caramel dollops and into the chocolate frosting below. This technique creates beautiful, enticing, and artistic swirls that not only enhance the cake’s visual appeal but also ensure every single bite delivers that delightful, irresistible caramel kick, blending perfectly with the chocolate.


Frequently Asked Questions About Chocolate Caramel Cake
Here are answers to some of the most common questions about baking and enjoying this incredible chocolate caramel cake. These insights will help you troubleshoot, plan ahead, and make the most of your baking experience.
- Can I prepare the cake layers in advance to save time?
- Absolutely! Preparing the cake layers ahead of time is a fantastic and highly recommended way to streamline your baking process, especially when you’re entertaining or have a busy schedule. Once your chocolate cake has fully cooled to room temperature, wrap it very tightly in several layers of plastic cling wrap. This airtight seal is absolutely crucial to prevent it from drying out and to maintain its moist texture. You can then refrigerate the wrapped cake for up to 5 days, or for an even longer storage solution, freeze it for an extended period of up to 30 days. If frozen, remember to remove the cake from the freezer and let it defrost at room temperature for approximately 1-2 hours (or overnight in the refrigerator) before you plan to frost and decorate it. This ensures a perfectly soft and pliable cake that’s ready for its delicious toppings.
- Is it possible to convert this delicious cake recipe into cupcakes?
- Yes, this chocolate caramel cake recipe is wonderfully versatile and can easily be adapted for making individual cupcakes! You should be able to yield approximately 18 standard-sized cupcakes from this batter. When making cupcakes, reduce the baking time significantly compared to a full cake; they will likely bake in about 18-22 minutes. Always test for doneness by inserting a toothpick into the center of a cupcake – it should come out clean. For an extra special touch and to truly capture the essence of the poke cake, I highly recommend filling the center of each cupcake with caramel after they have baked and cooled. You can use a small round cutter or even an apple corer to remove a small core from the center of each cupcake, pipe in some delicious caramel, then replace the removed cake piece (or simply frost over it). Top with a swirl of chocolate cream cheese frosting and a mini caramel drizzle, just like the larger cake!
- Can I use store-bought caramel instead of making it from scratch for this recipe?
- While homemade salted caramel truly elevates this cake with its superior rich flavor, perfect consistency, and fresh ingredients, you certainly can opt for a high-quality store-bought caramel sauce to save a significant amount of time and effort. If you choose this option, look for a thick, premium caramel sauce that is specifically labeled for baking or as a dessert topping. Be aware that thinner, more syrupy sauces might be absorbed too quickly by the cake or could potentially make the frosting too runny, so choose wisely and test a small amount first if unsure. However, for the ultimate decadent experience and control over the exact flavor and texture, the homemade version is always my strong preference and is highly recommended.
- What are the best practices for storing and freezing this finished chocolate caramel cake?
- To maintain its incredible freshness, moisture, and delightful flavor, this chocolate caramel cake should be stored in an airtight container in the refrigerator for up to 5 days. Ensure the container is truly airtight to prevent the cake from drying out and absorbing any lingering fridge odors. For longer storage, the cake freezes beautifully. For best results, wrap individual slices or the entire cake (if unfrosted, wrap tightly; if frosted, flash freeze until the frosting is firm, then wrap tightly in plastic wrap and then aluminum foil to protect it) in several layers of plastic wrap, followed by heavy-duty aluminum foil to prevent any freezer burn. It can be kept in the freezer for up to 30 days without significant loss of quality. When you’re ready to serve, transfer the frozen cake to the refrigerator to thaw overnight, or allow it to sit at room temperature for 1-2 hours before slicing and enjoying. This slow thawing process helps preserve its wonderfully moist and tender texture.
- What type of cocoa powder should I use for the best chocolate flavor in this cake?
- For this recipe, unsweetened cocoa powder is specified. You generally have two main types available: natural cocoa powder and Dutch-processed cocoa powder. Natural cocoa powder is acidic and reacts with baking soda to create lift in baked goods. Dutch-processed cocoa powder, on the other hand, has been treated with an alkali to neutralize its acidity, resulting in a darker color and a smoother, less bitter chocolate flavor. Because this particular recipe uses both baking powder and baking soda, a natural unsweetened cocoa powder is generally recommended to ensure the correct chemical reaction for optimal rise and texture. However, for an even richer, darker cake with a smoother flavor profile, Dutch-processed cocoa can be used if you ensure there’s enough leavening agent (baking powder) in the recipe to compensate for its lack of acidity. For a classic, balanced chocolate flavor, any good quality natural unsweetened cocoa powder will work perfectly.
- Can I substitute buttermilk if I don’t have any on hand for the cake?
- Yes, you can easily create a homemade buttermilk substitute if you find yourself without any store-bought buttermilk. For every 3/4 cup of buttermilk required in this recipe, simply pour 1 tablespoon of white vinegar or fresh lemon juice into a liquid measuring cup. Then, fill the rest of the cup with regular milk (dairy or non-dairy, full-fat or 2% is generally best for baking) until it reaches the 3/4-cup line. Stir it gently and let it sit undisturbed for about 5-10 minutes until it slightly curdles and thickens. This DIY buttermilk substitute provides the necessary acidity to react with the baking soda in the recipe, contributing significantly to the cake’s tender crumb and deliciously moist texture. Always ensure all your ingredients are at room temperature before you begin mixing them for the best possible results.
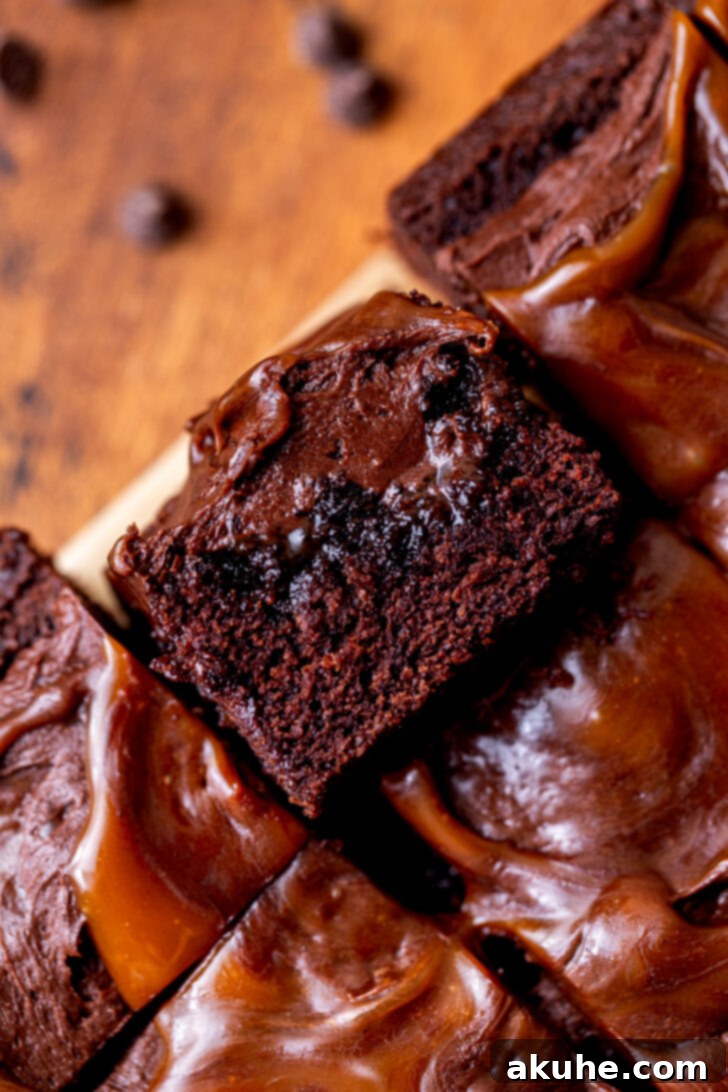
Explore More Irresistible Caramel Recipes
If you’ve fallen completely in love with the rich, buttery, and utterly satisfying notes of caramel in this exquisite cake, then you’re truly in for a treat! Caramel is an incredibly versatile and beloved ingredient, capable of bringing unparalleled warmth, depth, and a touch of luxury to a myriad of desserts. Here are some of my other favorite caramel-infused recipes that are sure to delight your taste buds, expand your baking repertoire, and satisfy any sweet craving:
- Decadent Pumpkin Caramel Cake: A delightful fusion of classic autumn spices and a luscious, gooey caramel swirl, perfect for fall festivities.
- Creamy Caramel Cheesecake: Indulge in a smooth, incredibly rich cheesecake generously topped with a decadent layer of homemade caramel, a true showstopper.
- Scrumptious Caramel Apple Cheesecake Bars: The perfect handheld dessert, these bars beautifully combine the comforting flavors of caramel and crisp apples with creamy cheesecake.
- Warm & Gooey Caramel Cinnamon Rolls: A beloved breakfast or brunch favorite, made extra special and irresistible with a sticky, sweet caramel glaze that melts in your mouth.
- Salted Caramel Fudge Brownies: Experience the ultimate chewy, fudgy brownies, elevated to new heights with a mesmerizing swirl of rich, salted caramel for a perfect balance of sweet and savory.

Did you love this recipe as much as I do? I’d be absolutely thrilled to hear from you! Don’t forget to leave astar review and share your baking success with our wonderful community! I genuinely love seeing your incredible creations – make sure to tag me on Instagram @stephaniesweettreats so I can admire your work. For endless inspiration, more mouth-watering dessert ideas, and daily baking motivation, be sure to follow me on Pinterest.
Watch the Recipe Come to Life: Chocolate Caramel Cake Video Guide
To provide you with the most comprehensive and confidence-boosting baking experience, I’ve prepared a detailed, step-by-step video guide specifically for this Chocolate Caramel Cake. Watch as I demonstrate each crucial step in real-time, from crafting the perfect homemade salted caramel from scratch, to achieving that signature moist and tender chocolate cake, and finally, expertly decorating it with the silky chocolate cream cheese frosting and those beautiful caramel swirls. This visual aid is designed to build your confidence, clarify any uncertainties, and ensure your baking journey is both enjoyable and results in a truly successful and spectacular dessert.
Step-by-step recipe video of chocolate caramel cake for visual guidance and confidence in baking.
Decadent Chocolate Caramel Cake Recipe

This ultimate chocolate caramel cake is designed to be the absolute star of any gathering, making it especially perfect for fall celebrations or any occasion demanding an extra special dessert! It features a deeply moist, incredibly flavorful chocolate cake, baked to perfection in a 9×9 inch pan, then luxuriously poked and filled with a generous amount of rich, homemade salted caramel. The entire indulgent creation is beautifully crowned with a light, fluffy, and creamy chocolate cream cheese frosting, and finished with an irresistible, artistic swirl of even more golden caramel, ensuring a burst of flavor in every forkful.
Author: Stephanie Rutherford
Prep Time: 1 hour
Cook Time: 25 minutes
Decorating Time: 15 minutes
Total Time: 1 hour 40 minutes
Yields: 16 slices
Ingredients
For the Homemade Salted Caramel
- 1 cup White granulated sugar
- 4 tablespoons Unsalted butter, cubed and at room temperature
- 1/2 cup Heavy cream, at room temperature
- 1 teaspoon Pure vanilla extract
- 1/2 teaspoon Salt
For the Moist Chocolate Cake
- 1 1/2 cups All-purpose flour (spooned & leveled for accuracy)
- 2 tablespoons Cornstarch (for extra tenderness)
- 3/4 cup Unsweetened cocoa powder (natural, not Dutch-processed, for optimal reaction)
- 1 teaspoon Baking powder
- 1/2 teaspoon Baking soda
- 1/2 teaspoon Salt
- 3/4 cup Oil (canola or vegetable, for moisture)
- 1 1/4 cup White granulated sugar
- 1 teaspoon Pure vanilla extract
- 3 Large eggs, at room temperature
- 1/3 cup Sour cream, at room temperature (or full-fat Greek yogurt, for richness)
- 3/4 cup Buttermilk, at room temperature
- 3/4 cup Hot water, steaming (helps bloom cocoa and create moist texture)
For the Silky Chocolate Cream Cheese Frosting
- 3/4 cup Unsalted butter, at room temperature
- 4 oz Cream cheese, at room temperature (full-fat for best texture)
- 1 1/2 cups Powdered sugar, sifted
- 1/2 cup Unsweetened cocoa powder, sifted
- 1 teaspoon Pure vanilla extract
Instructions
Crafting the Homemade Salted Caramel
- In a medium-sized, heavy-bottomed saucepan, evenly spread the 1 cup of white granulated sugar. Place it over medium heat. This is the dry caramel method. Continuously stir the sugar until all the crystals have completely melted and dissolved into a clear liquid. Continue cooking without stirring until the sugar transforms into a beautiful, rich amber color. This color change happens very rapidly (often in less than 30 seconds after melting), so watch it closely and remove from heat immediately to prevent burning, which would make the caramel bitter.
- Immediately remove the saucepan from the heat. Carefully add half of the cubed, room-temperature unsalted butter to the hot caramel. Stir vigorously with a heatproof whisk or spatula until the butter is fully melted and thoroughly incorporated. The mixture will bubble up significantly and may seize – this is a normal reaction. Repeat this process with the remaining butter, stirring until smooth.
- Next, slowly pour in half of the room-temperature heavy cream, stirring continuously as you pour. Again, expect some bubbling and steam. Once this portion of cream is combined, add the remaining heavy cream and mix until the caramel appears smooth and homogenous. Finally, stir in the pure vanilla extract and salt until fully blended.
- Return the pan to very low heat for approximately 2 minutes, stirring constantly. This gentle heating ensures all ingredients are perfectly blended, creates a wonderfully smooth texture, and helps thicken the caramel to the ideal consistency for filling and swirling.
- Pour the finished salted caramel into a clean, heatproof bowl and allow it to cool completely to room temperature before you plan to use it. It will thicken considerably as it cools, reaching that perfect gooey, yet manageable, texture.
Baking the Moist Chocolate Cake
- Preheat your oven to 350°F (175°C). Prepare a 9×9 inch baking pan by generously spraying it with a high-quality nonstick baking spray. For added insurance against sticking, line the bottom of the pan with a piece of parchment paper (an 8-inch parchment circle works perfectly), and then spray the parchment paper again.
- In a medium bowl, thoroughly sift together the all-purpose flour, cornstarch, unsweetened cocoa powder, baking powder, baking soda, and salt. Sifting is a crucial step for a lump-free batter and to ensure an even distribution of leavening agents, which contributes to a tender, even crumb. Set this dry mixture aside.
- In a separate, large mixing bowl, combine the oil, granulated sugar, vanilla extract, large eggs (ensure they are room temperature), sour cream (or Greek yogurt), and buttermilk (also room temperature). Whisk vigorously until all these wet ingredients are thoroughly combined and smooth. Slowly and carefully pour in the steaming hot water, mixing it in until fully incorporated into the batter.
- Gradually add the sifted dry ingredients into the wet mixture. Mix on low speed with an electric mixer, or by hand with a sturdy rubber spatula, until the batter is just smooth and no streaks of dry flour remain visible. Be extremely careful not to overmix, as this can develop the gluten too much, leading to a tough and less tender cake.
- Pour the prepared chocolate cake batter evenly into your greased and lined 9×9 inch pan. Bake for 30-35 minutes, or until a wooden toothpick inserted into the very center of the cake comes out clean with no wet batter attached.
- Once baked, let the cake sit in the hot pan for 10 minutes. This allows the cake to firm up slightly and become less fragile. After 10 minutes, carefully invert the cake onto a wire cooling rack and allow it to cool completely to room temperature before proceeding with any decorating. Attempting to frost or fill a warm cake will result in melted frosting and runny caramel.
Preparing the Silky Chocolate Cream Cheese Frosting
- In a medium bowl, thoroughly sift the powdered sugar and unsweetened cocoa powder together. This step is absolutely vital for achieving a smooth, lump-free frosting with a professional consistency. Set aside.
- Using an electric mixer (either a stand mixer fitted with the paddle attachment or a high-quality handheld mixer), beat the room-temperature unsalted butter on high speed for 2 minutes until it becomes light, fluffy, and visibly pale.
- Add the softened cream cheese (also at room temperature) to the whipped butter and continue to beat on high speed for another minute, until the mixture is completely smooth, creamy, and free of any cream cheese chunks. Make sure to scrape down the sides of the bowl with a rubber spatula periodically to ensure everything is well combined.
- With the mixer on low speed, gradually add the sifted powdered sugar and cocoa powder mixture to the butter and cream cheese. Mix carefully until just combined, being mindful not to create a cloud of powdered sugar.
- Finally, add the pure vanilla extract and beat on high speed for another 1-2 minutes until the frosting is incredibly smooth, delightfully thick, and perfectly pipeable and spreadable.
Assembling and Decorating the Decadent Chocolate Caramel Cake
- Once the cake is completely cool (this is essential for successful frosting), use a long, sharp serrated knife to carefully slice off any domed top, creating a flat and even surface. This provides a stable base and a professional appearance.
- Using the blunt end of a wooden spoon handle (or a similar narrow, round object like a chopstick), gently poke holes evenly spaced all over the top surface of the cake. Aim to go approximately two-thirds of the way down into the cake, creating channels for the caramel.
- Take your cooled salted caramel (it should be thick but still pourable). Transfer some of it into a piping bag (or a sturdy Ziploc bag with one corner snipped off). Carefully pipe the caramel generously into each of the poked holes, ensuring they are well-filled.
- Next, spread a generous and even layer of the chocolate cream cheese frosting over the entire top of the caramel-infused cake. Use an offset spatula or a flat knife to smooth it out, creating a beautiful, uniform canvas for the final caramel swirl.
- For the final artistic touch, take the remaining caramel and spoon small, irregular dollops randomly over the top of the frosted cake. Then, using the very tip of a spoon, a toothpick, or a small offset spatula, gently drag through the caramel dollops and into the chocolate frosting, creating beautiful, enticing, and unique patterns and swirls.
- Your stunning Chocolate Caramel Cake is now ready to be sliced and served! Enjoy this delightful and decadent blend of rich chocolate and gooey caramel.
Baker’s Notes for Success
- Flour Measurement Precision: Always use the “spoon and level” method for accurately measuring all-purpose flour. Even better, use a kitchen scale for precise results by weight. Compacted flour is a common culprit for dry, dense cakes.
- High Altitude Baking Adjustments: If you are baking at a high altitude (generally above 3,000 feet or 900 meters), you may need to add an extra 1-2 tablespoons of all-purpose flour to the cake batter. Lower atmospheric pressure can cause cakes to rise too quickly and then collapse, so this adjustment helps stabilize the structure.
- Ingredient Temperatures Matter: For the best possible results in both the cake and the frosting, ensure all dairy ingredients (butter, eggs, sour cream, buttermilk, cream cheese, heavy cream) are brought to room temperature before you begin mixing. This typically requires pulling them out of the refrigerator 1-2 hours before you start your baking process.
- Patience with Cooling: It is absolutely crucial that the cake is completely cooled to room temperature before you attempt to frost it and fill it with caramel. A warm cake will cause the frosting to melt and the caramel to run excessively, leading to a messy and less appealing final product.
Nutrition Information (Approximate per serving, based on 16 slices)
Calories: 436kcal
Carbohydrates: 64g
Protein: 4g
Fat: 30g
Saturated Fat: 13g
Polyunsaturated Fat: 4g
Monounsaturated Fat: 12g
Trans Fat: 1g
Cholesterol: 50mg
Sodium: 248mg
Potassium: 178mg
Fiber: 3g
Sugar: 30g
Vitamin A: 606IU
Vitamin C: 0.1mg
Calcium: 60mg
Iron: 2mg
Nutrition values provided are approximate and may vary based on specific brands of ingredients used and exact preparation methods.
Loved this recipe? Your feedback is incredibly valuable! If you enjoyed the delightful experience of baking and tasting this spectacular Chocolate Caramel Cake, I would be absolutely thrilled and immensely grateful if you could leave a star rating and a thoughtful review below. Your honest feedback helps other bakers discover and confidently enjoy this recipe too!
