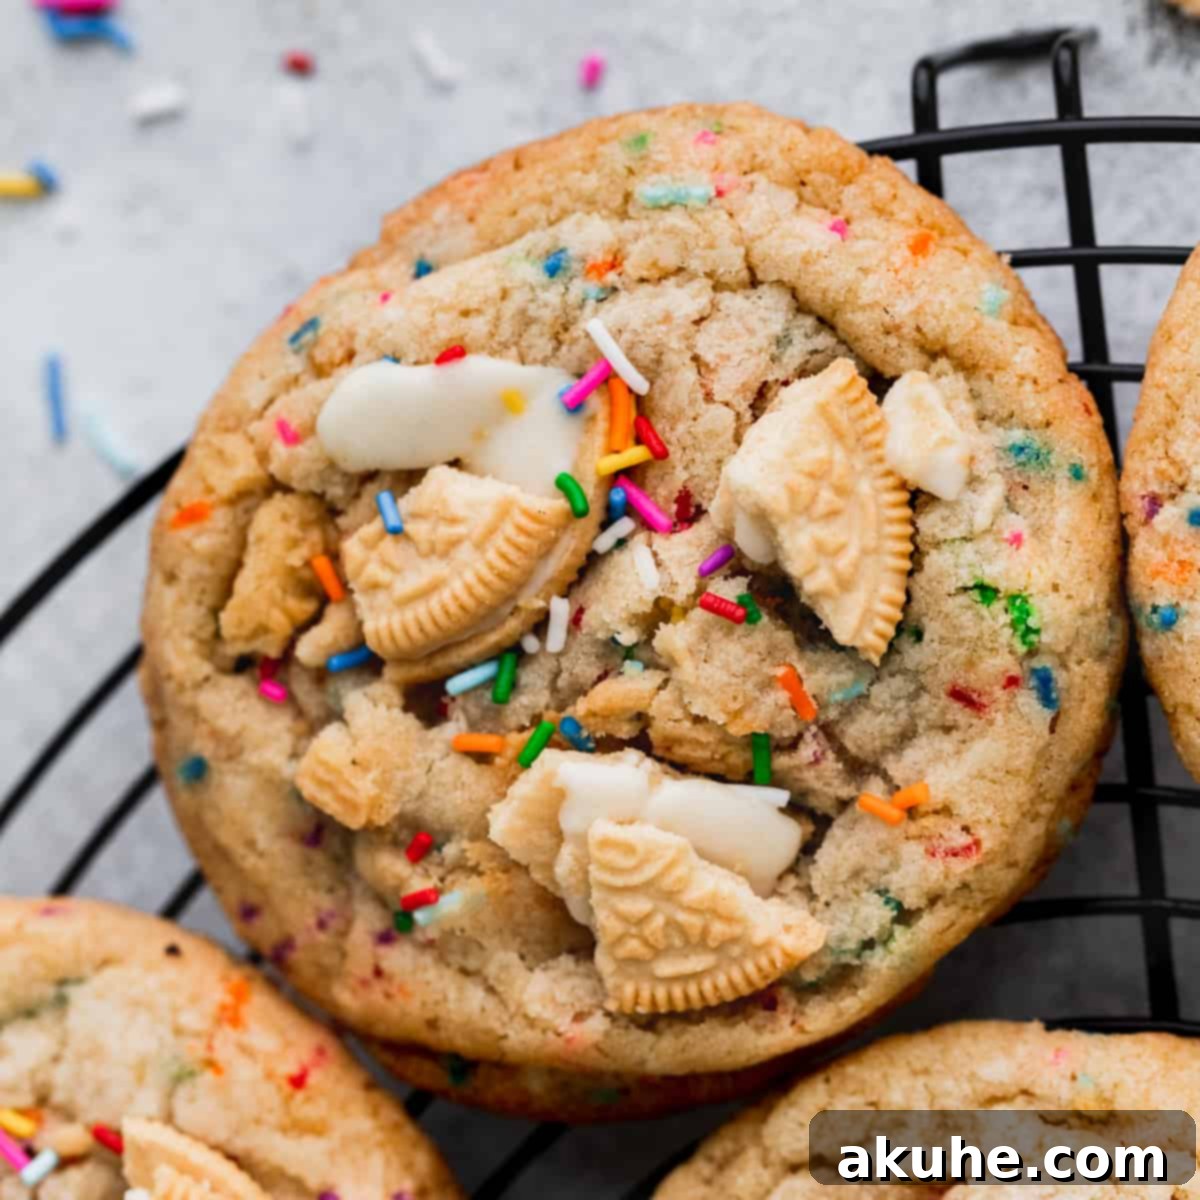
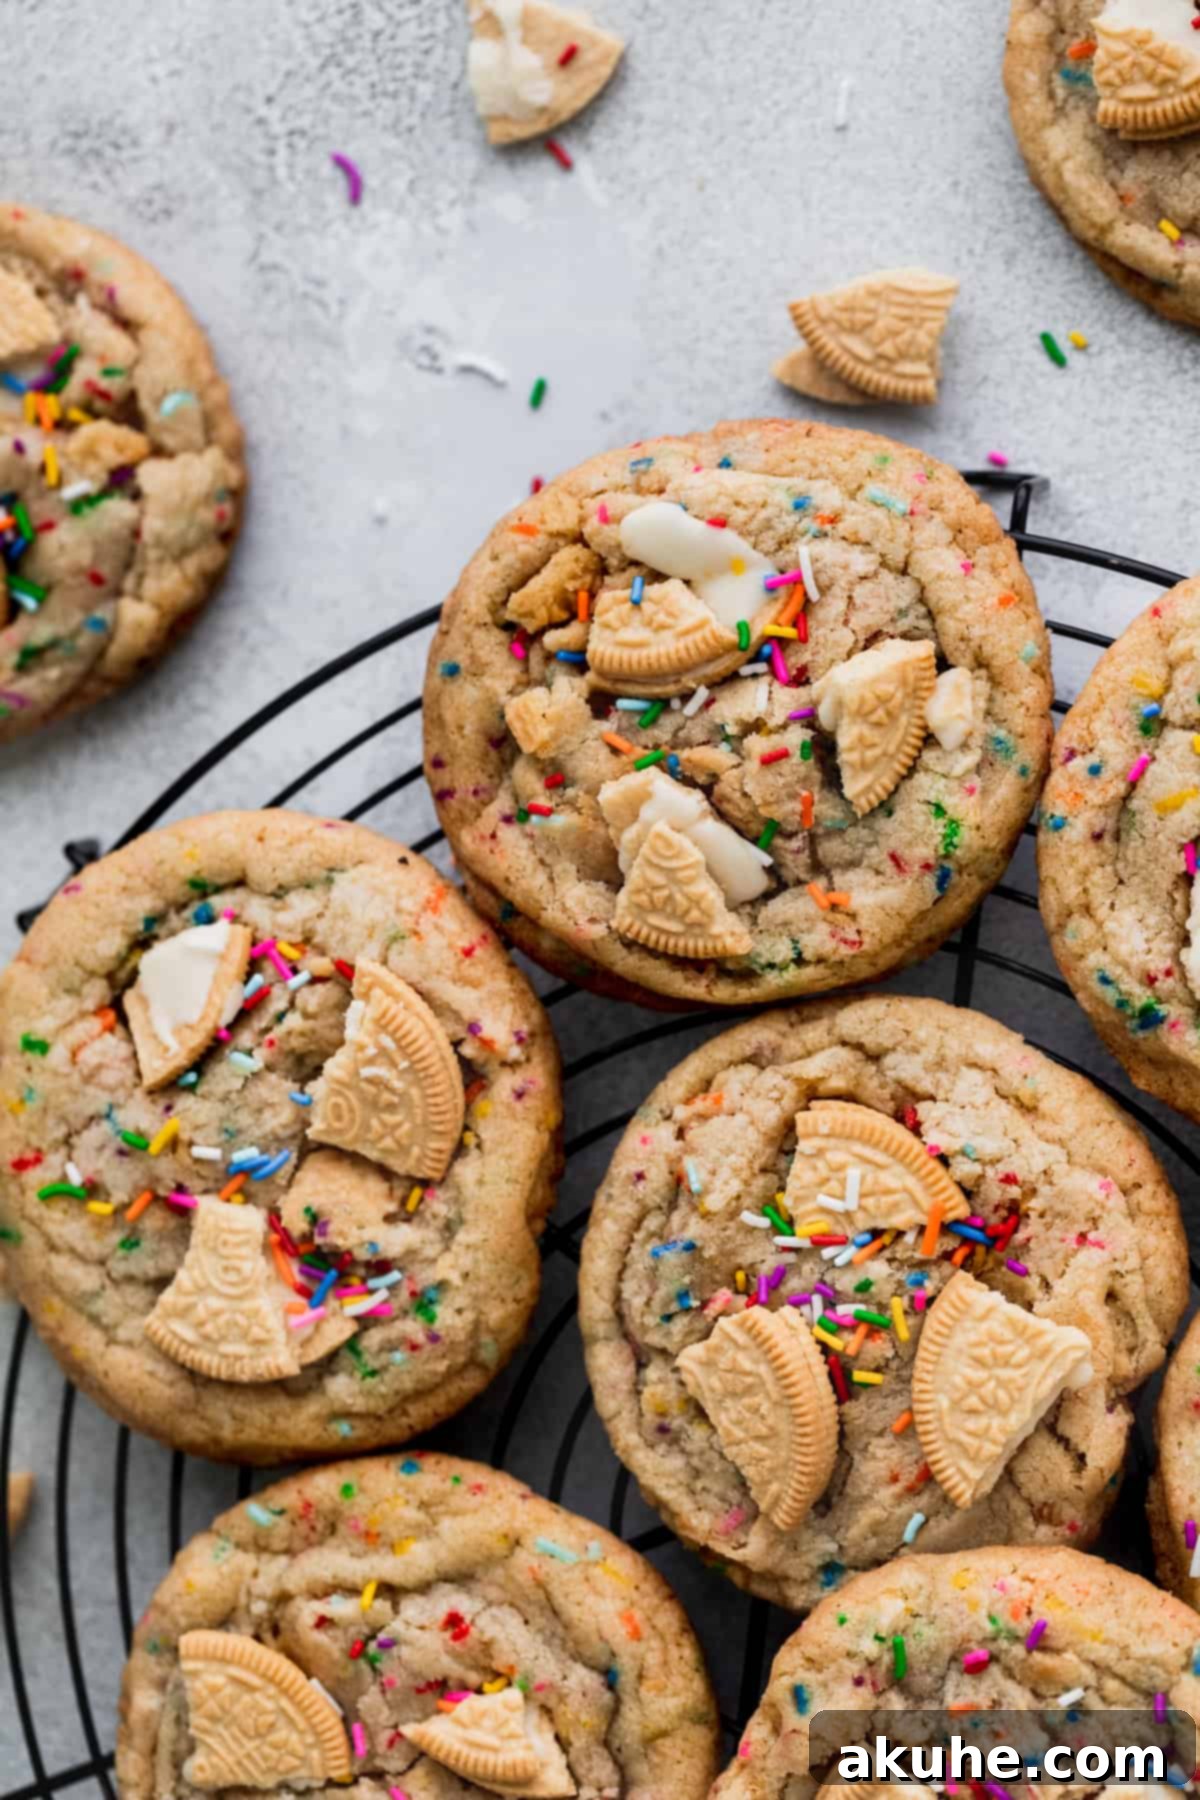
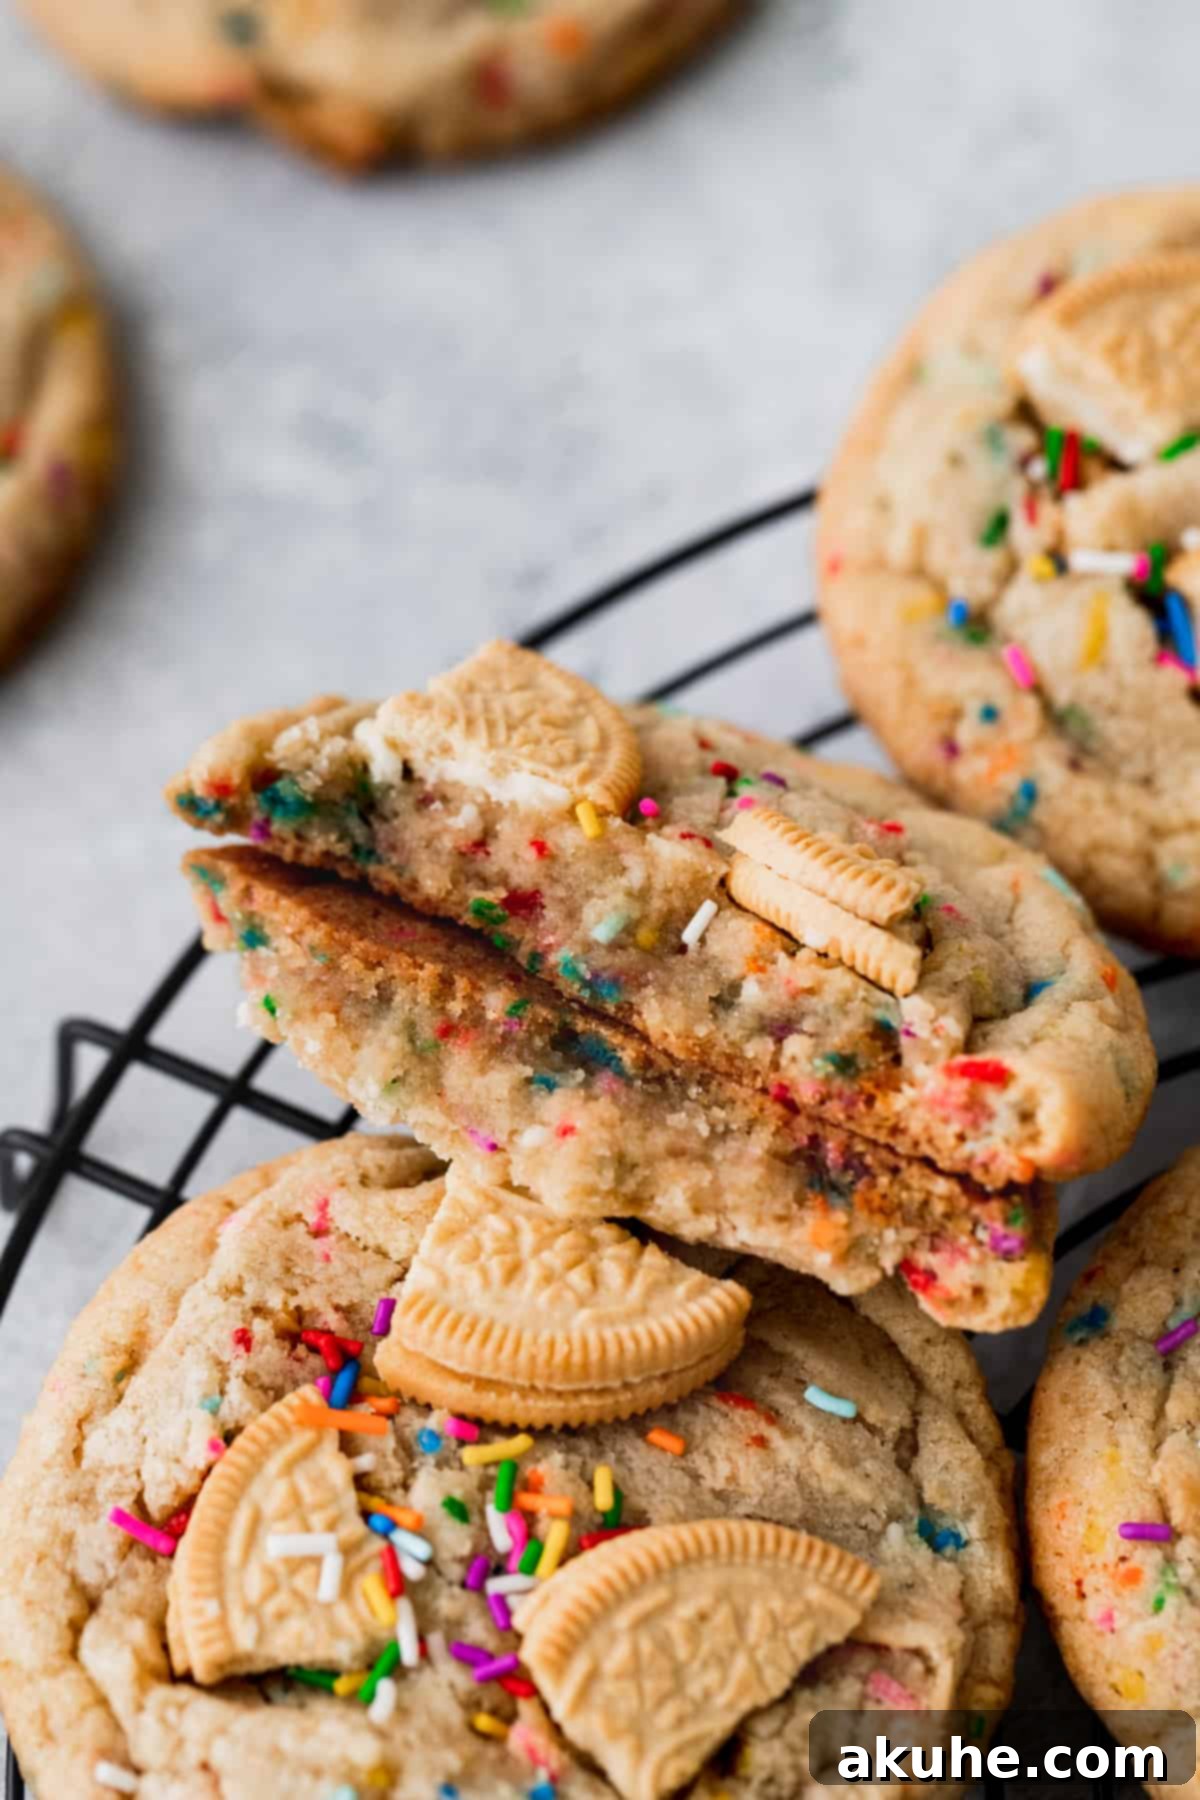
Imagine the pure joy of a birthday cake, now perfectly encapsulated in a delightful cookie! These Chewy Birthday Cake Cookies are not just any cookies; they’re a celebration in every bite. Crafted to taste exactly like a classic vanilla birthday cake, these large, soft-baked cookies are generously studded with vibrant rainbow sprinkles and crunchy golden Oreo pieces, offering an irresistible texture and a burst of festive flavor. With their wonderfully chewy centers and perfectly crisp edges, these cookies are truly the epitome of a perfect treat, designed to bring smiles to any occasion.
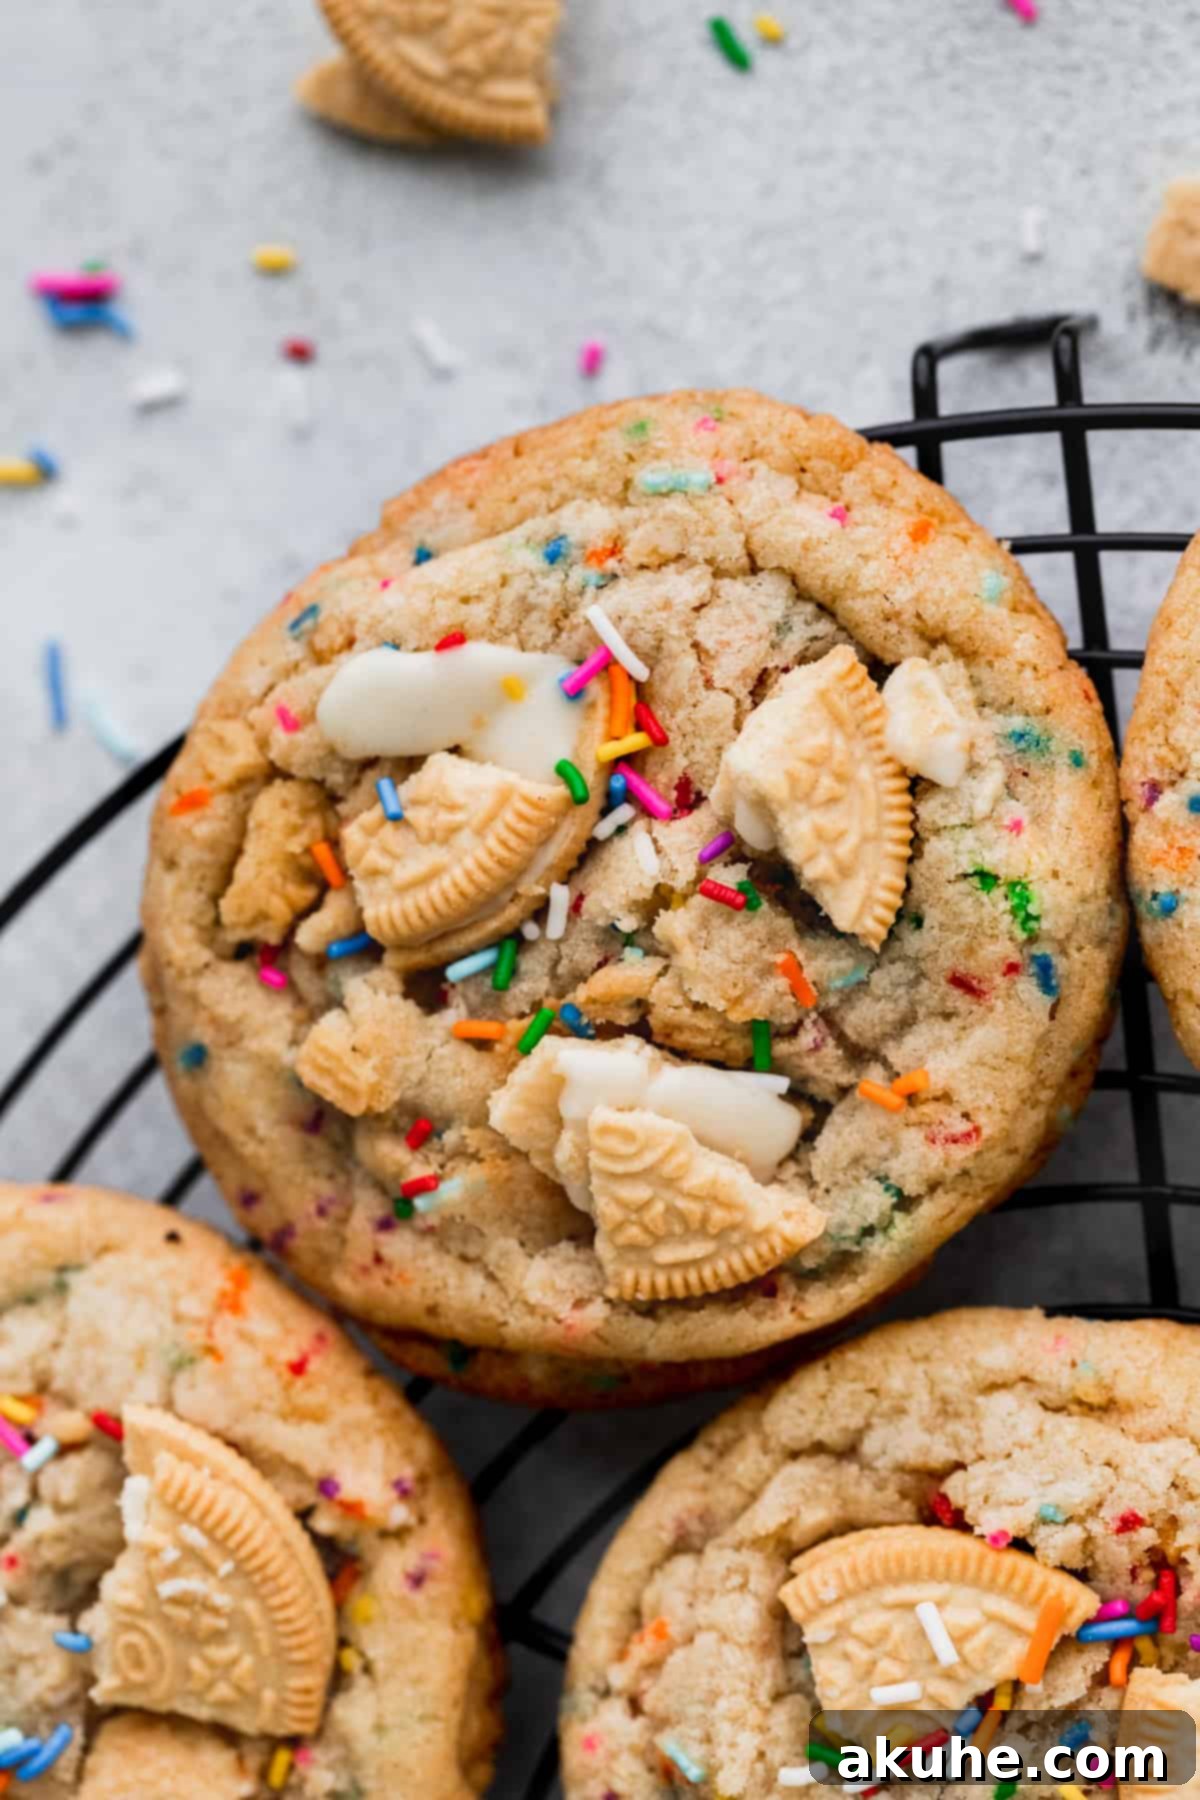
There’s something uniquely special about birthday traditions, and what better way to celebrate than with a homemade treat? This recipe was created with the pure intention of celebrating life’s sweet moments. Whether it’s your own birthday, a friend’s special day, or simply a Tuesday that needs a little extra sparkle, these funfetti cookies are designed to be a joyous project that anyone can enjoy baking and sharing. Their inviting aroma and festive appearance make them an instant crowd-pleaser and a perfect centerpiece for any gathering.
What makes these cookies taste so uncannily like a birthday cake? It’s all in the carefully balanced ingredients and specific techniques. We lean heavily on white granulated sugar rather than an equal blend of brown sugar, which contributes to that distinctively sweet, bright vanilla profile found in classic white birthday cakes. Additionally, opting for clear vanilla extract (or imitation vanilla) amplifies that sweet, nostalgic vanilla flavor without adding any color, ensuring your cookies retain their vibrant, celebratory hue. This careful attention to detail ensures every bite transports you straight to a birthday party.
If your heart beats for all things birthday, you’re in for a treat! Explore more delightful recipes like our Homemade Funfetti Birthday Cake, perfect for a grand celebration; our charming Mini Layered Cakes, ideal for individual servings; and the indulgent Cookie Dough Cupcakes, a dream for any cookie dough enthusiast.
Why These Birthday Cake Cookies Are a Must-Bake
Unlocking the secret to truly exceptional cookies lies in a recipe that consistently delivers on taste, texture, and ease. These Birthday Cake Cookies stand out for several compelling reasons, making them a top choice for both novice and experienced bakers alike. They offer a perfect blend of comfort and festivity, making every baking session a joy and every bite a celebration.
- Generously Large Chewy Cookies: Say goodbye to thin, brittle cookies! This recipe is engineered to produce impressively thick cookies with a sumptuously chewy center that practically melts in your mouth. The substantial size means more to love, ensuring each cookie is a satisfying experience with a delightful textural contrast of a soft interior and slightly crisp edge.
- Bursting with Rainbow Sprinkles: What’s a birthday without sprinkles? These cookies are not just topped, but truly filled with a kaleidoscope of rainbow jimmies. As they bake, the sprinkles soften slightly, infusing every nook and cranny with their charming color and subtle sweetness, making these cookies a visual and culinary delight.
- Crunchy Golden Oreo Inclusions: Adding another layer of texture and flavor, these cookies are loaded with both crushed golden Oreo crumbs and sizable pieces. The crumbs disperse a delicate vanilla flavor throughout the dough, while the larger chunks provide a satisfying crunch and bursts of that beloved creamy Oreo taste, enhancing the overall birthday cake experience.
- Surprisingly Easy to Make: Despite their impressive appearance and gourmet taste, these cookies are remarkably simple to prepare. They require only a minimal chill time, making them a fantastic project for a spontaneous baking craving or a fun activity to enjoy with children. The straightforward steps ensure a stress-free baking adventure, yielding professional-looking results every time.
- Perfect for Any Birthday Celebration: Beyond their name, these cookies embody the spirit of celebration. Their festive appearance, delightful flavor, and irresistible texture make them the ultimate treat for birthdays, anniversaries, graduations, or any moment that calls for a touch of joy and sweetness. They’re more than just cookies; they’re edible tokens of happiness.
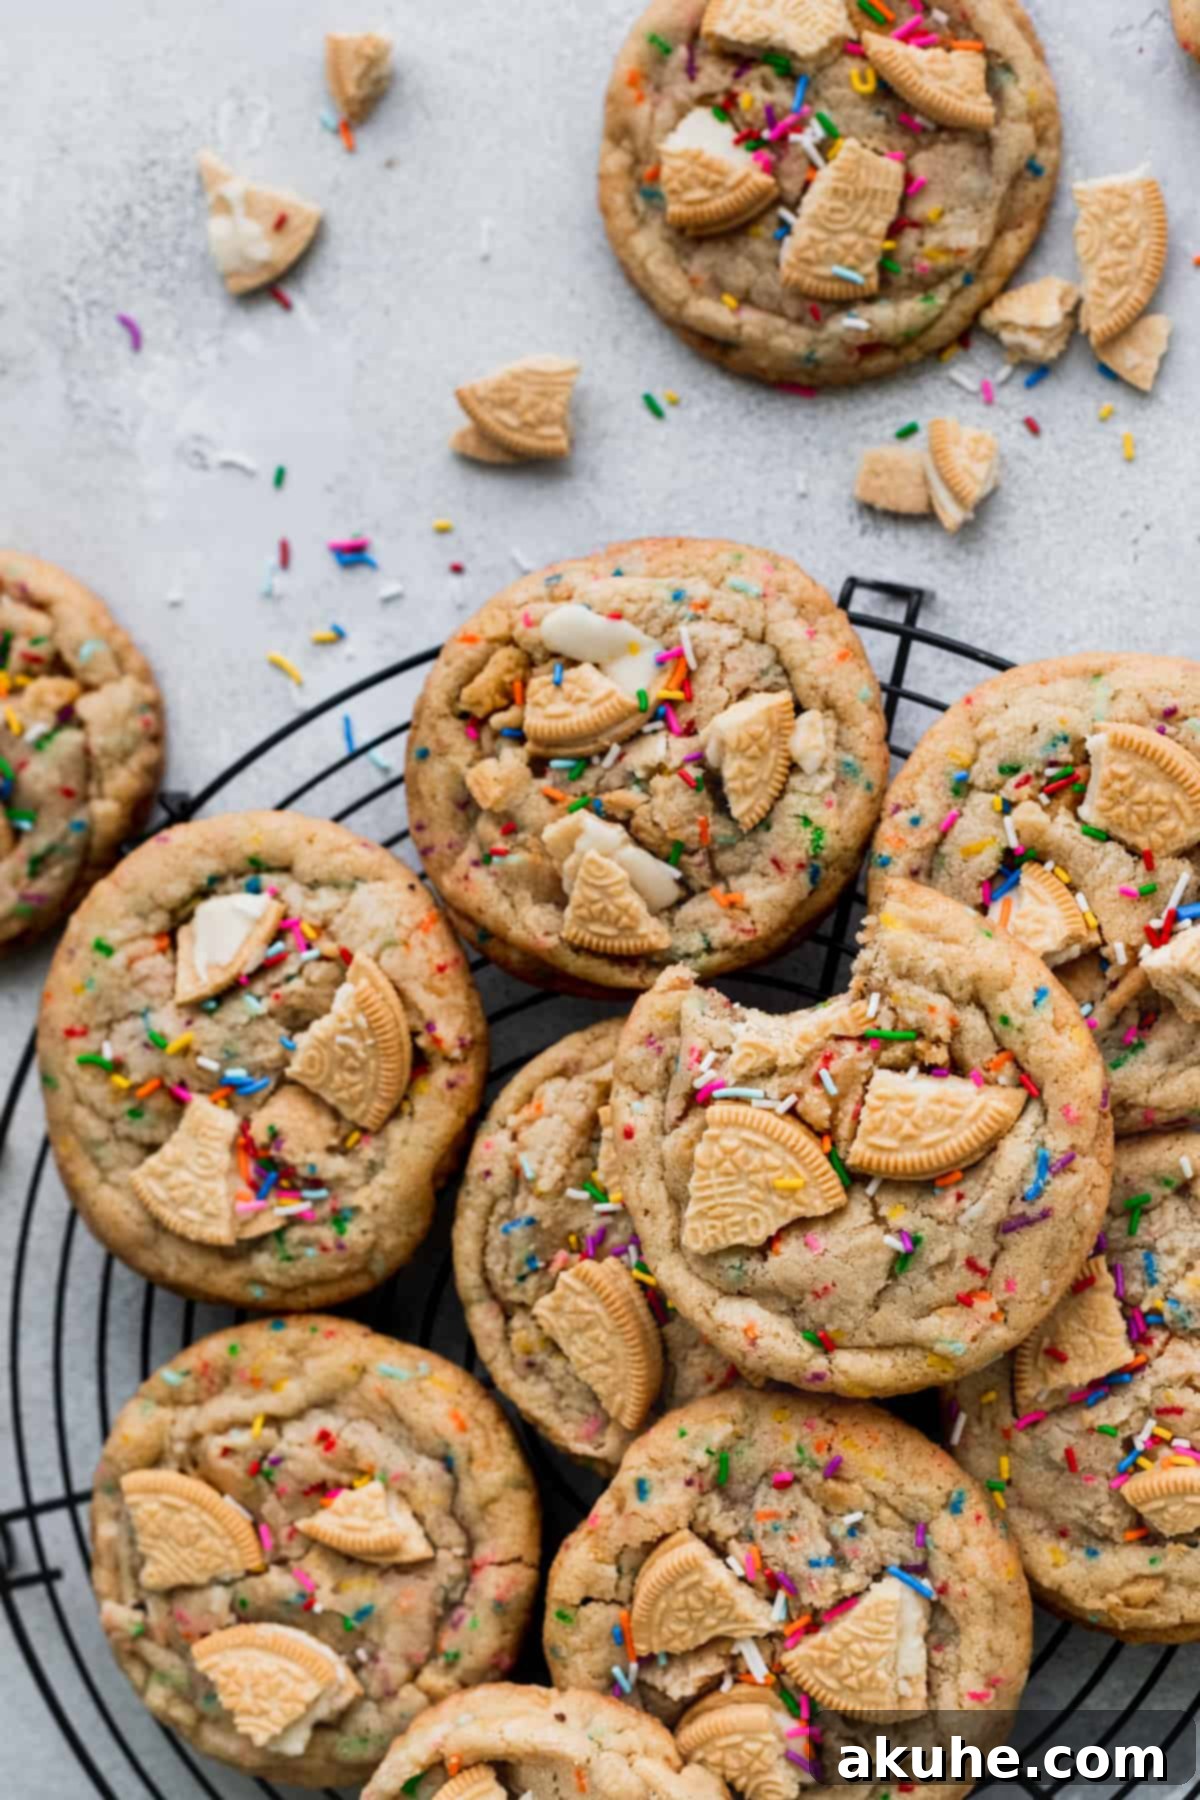
Essential Ingredient Notes for Perfect Birthday Cake Cookies
Crafting the perfect batch of Birthday Cake Cookies begins with understanding the role of each ingredient. Quality and preparation are key to achieving that ideal balance of flavor and texture. Here’s a detailed guide to the ingredients you’ll need and why they matter for truly delicious results.
- Unsalted Butter: Always opt for unsalted butter to control the overall saltiness of your cookies. It’s crucial to pull your butter out of the refrigerator at least 2 hours before you plan to bake. Room temperature butter creams beautifully with sugar, creating a light and fluffy base that contributes significantly to the cookies’ chewiness and spread. Cold butter won’t incorporate properly, leading to a denser, less desirable texture.
- Granulated Sugar: This recipe calls for a higher ratio of white granulated sugar compared to brown sugar. This specific ratio is intentional, as it helps achieve the bright, sweet, and pure vanilla flavor characteristic of a classic birthday cake. White sugar also promotes a crisper edge, perfectly complementing the chewy center.
- Light Brown Sugar: While white sugar dominates, light brown sugar plays a vital supporting role. It adds a subtle hint of molasses, contributing to the cookies’ moisture, chewiness, and depth of flavor. Using light brown sugar ensures the cookies remain tender and soft, preventing them from becoming overly crisp or dry.
- Clear Vanilla Extract (or Imitation Clear Vanilla): For that authentic, sweet vanilla birthday cake taste and to maintain the vibrant color of your sprinkles, clear vanilla extract is highly recommended. Unlike pure vanilla extract, which can tint your dough slightly brown, clear vanilla provides a strong, sweet vanilla flavor without altering the visual appeal. However, if clear vanilla isn’t available, pure vanilla extract will still yield delicious cookies, albeit with a slightly different flavor profile and color.
- Large Egg + Egg Yolk: The combination of one large egg and one egg yolk is a precise science in this recipe. Just like the butter, ensure your egg and egg yolk are at room temperature. The extra egg yolk adds richness, tenderness, and chewiness to the cookies. Using two whole eggs, as some recipes might, can lead to excessive spreading and a thinner, less chewy cookie. This specific ratio ensures your cookies hold their shape while remaining incredibly soft and moist.
- Rainbow Sprinkles (Jimmies): Not all sprinkles are created equal! For the best results, use rainbow jimmies. These sprinkles hold their shape and color well during baking, creating beautiful pops of color throughout your cookies. Avoid nonpareils, which tend to bleed color into the dough. These are a fantastic brand of sprinkles if you’re looking for high quality.
- Golden Oreos: These iconic vanilla sandwich cookies are the perfect complement to the birthday cake theme. We’ll be using both crushed crumbs and larger pieces from one regular pack of Golden Oreos. The vanilla flavor of Golden Oreos blends seamlessly with the cookie dough, while their texture adds an exciting crunch. While regular chocolate Oreos could be used, Golden Oreos truly elevate the vanilla-centric flavor profile.
Step-by-Step Instructions: Baking Festive Birthday Cake Cookies
Get ready to create some magic in your kitchen! Follow these detailed instructions to bake a batch of these irresistible rainbow sprinkle funfetti cookies. This recipe is designed for ease and uses either a stand mixer with a paddle attachment or a reliable electric hand mixer to ensure perfect results every time.
STEP 1: Prepare Dry Ingredients and Golden Oreos. In a large mixing bowl, begin by sifting your all-purpose flour. Sifting is a crucial step that prevents lumps from forming in your dough, ensuring a smooth and consistent texture. Once sifted, add in the baking soda and salt, whisking them together thoroughly until well combined. Set this dry mixture aside. Next, prepare your Golden Oreos. Using a food processor or a blender, pulse about 4-5 Golden Oreos until they form fine crumbs. Measure out ¼ cup of these crumbs and set them aside. Then, pulse another 8-10 Golden Oreos 2-3 times, aiming for larger, chunky pieces rather than fine crumbs. Measure out 1 cup of these Golden Oreo pieces. Keep both the crumbs and pieces separate and ready for incorporation later.
STEP 2: Cream Butter and Sugars. In a separate, larger mixing bowl (the bowl of your stand mixer or a large bowl for your hand mixer), combine the room temperature unsalted butter, light brown sugar, and white granulated sugar. Beat these ingredients together on high speed for a full 2 minutes. This creaming process is vital; it incorporates air into the butter and sugar mixture, creating a light and fluffy base that will result in a soft and tender cookie. Make sure the mixture becomes light in color and airy in texture.
STEP 3: Incorporate Wet Ingredients. Reduce the mixer speed to medium. Add the clear vanilla extract, the large egg, and the extra egg yolk to the creamed butter and sugar mixture. Increase the speed back to high and beat for another 1 minute. During this step, it’s important to frequently stop the mixer and scrape down the sides and bottom of the bowl with a rubber spatula. This ensures all ingredients are thoroughly combined and there are no unmixed pockets of butter or sugar.
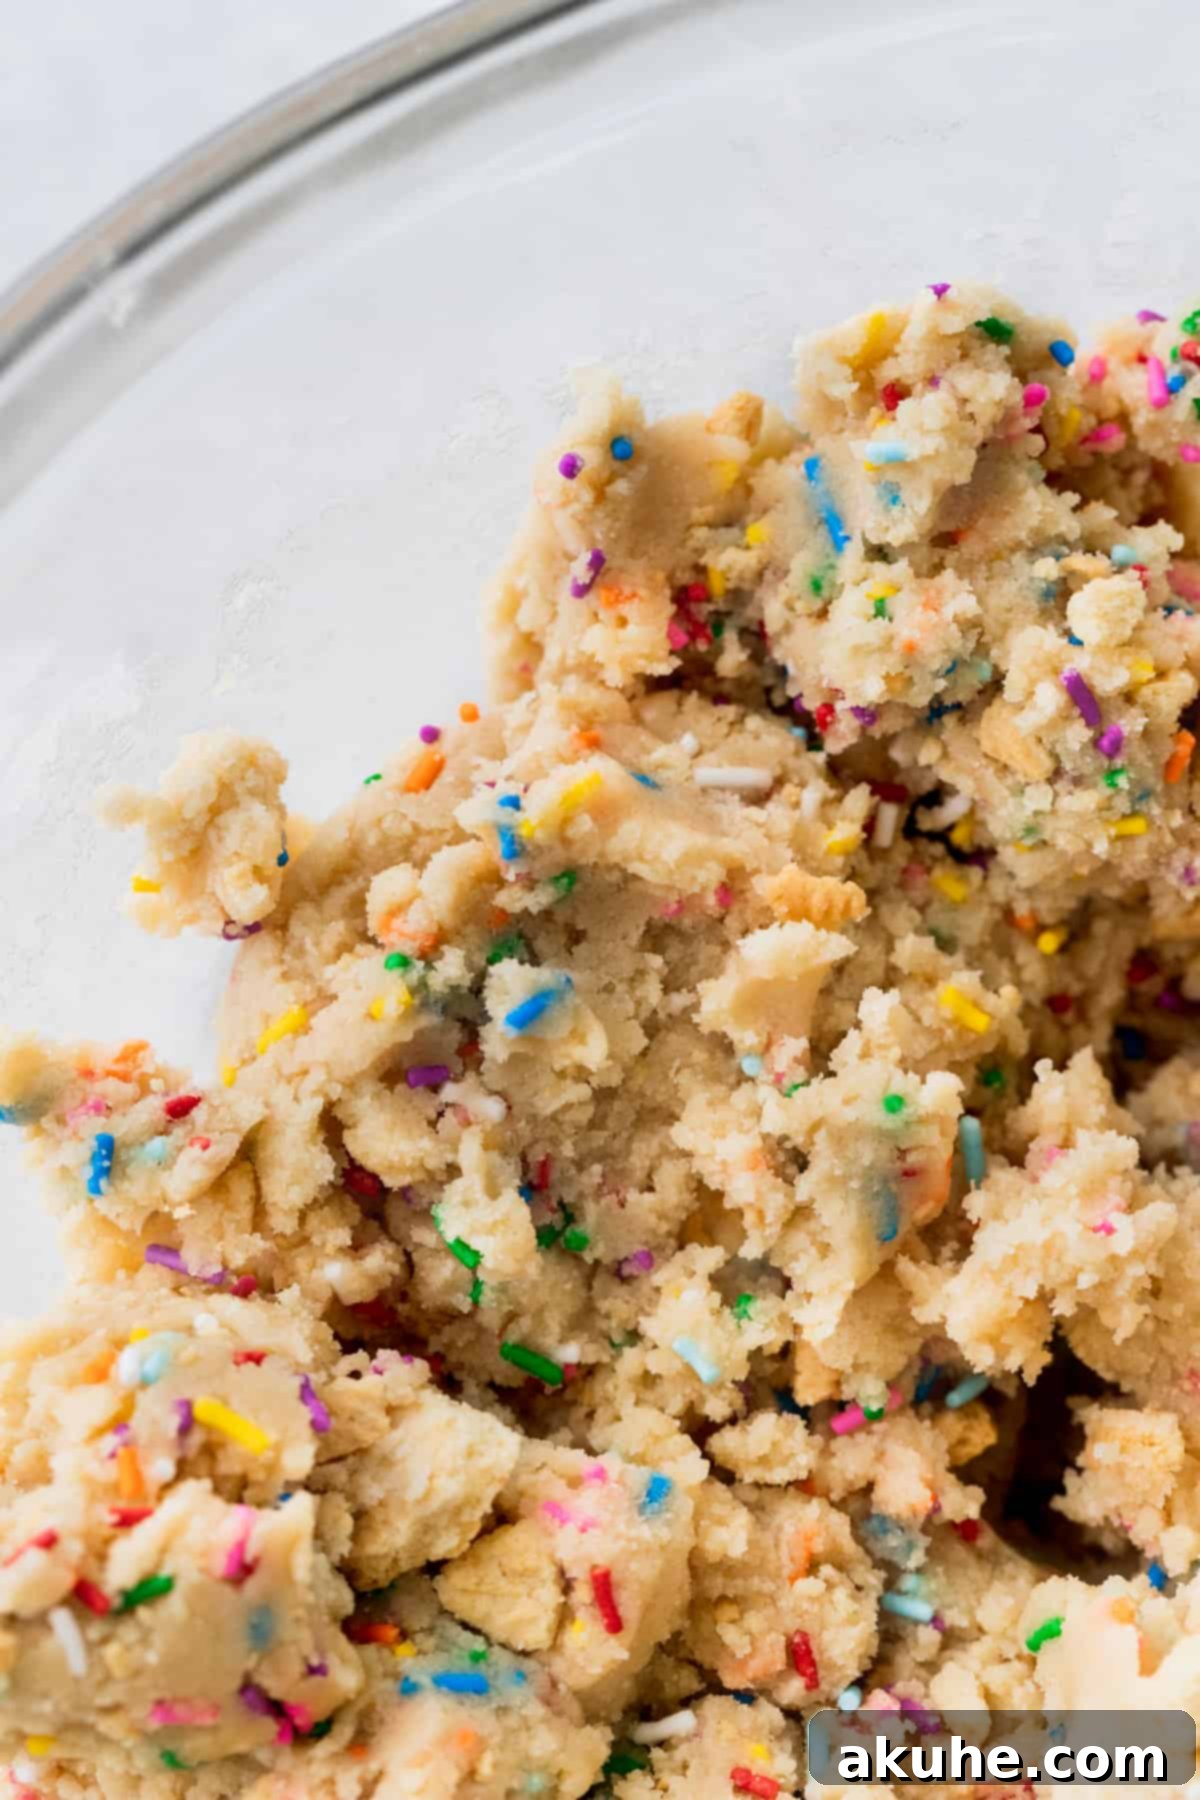
STEP 4: Gradually Add Dry Ingredients. With the mixer on low speed, slowly add the reserved flour mixture (flour, baking soda, and salt) to the wet ingredients. Mix until just combined. Be careful not to overmix the dough at this stage, as overmixing can develop the gluten in the flour, leading to tough cookies. The resulting dough will be noticeably thick—this is exactly what you want! A thick dough is key to preventing the cookies from spreading too much during baking, ensuring they retain their delightful chewiness and shape.
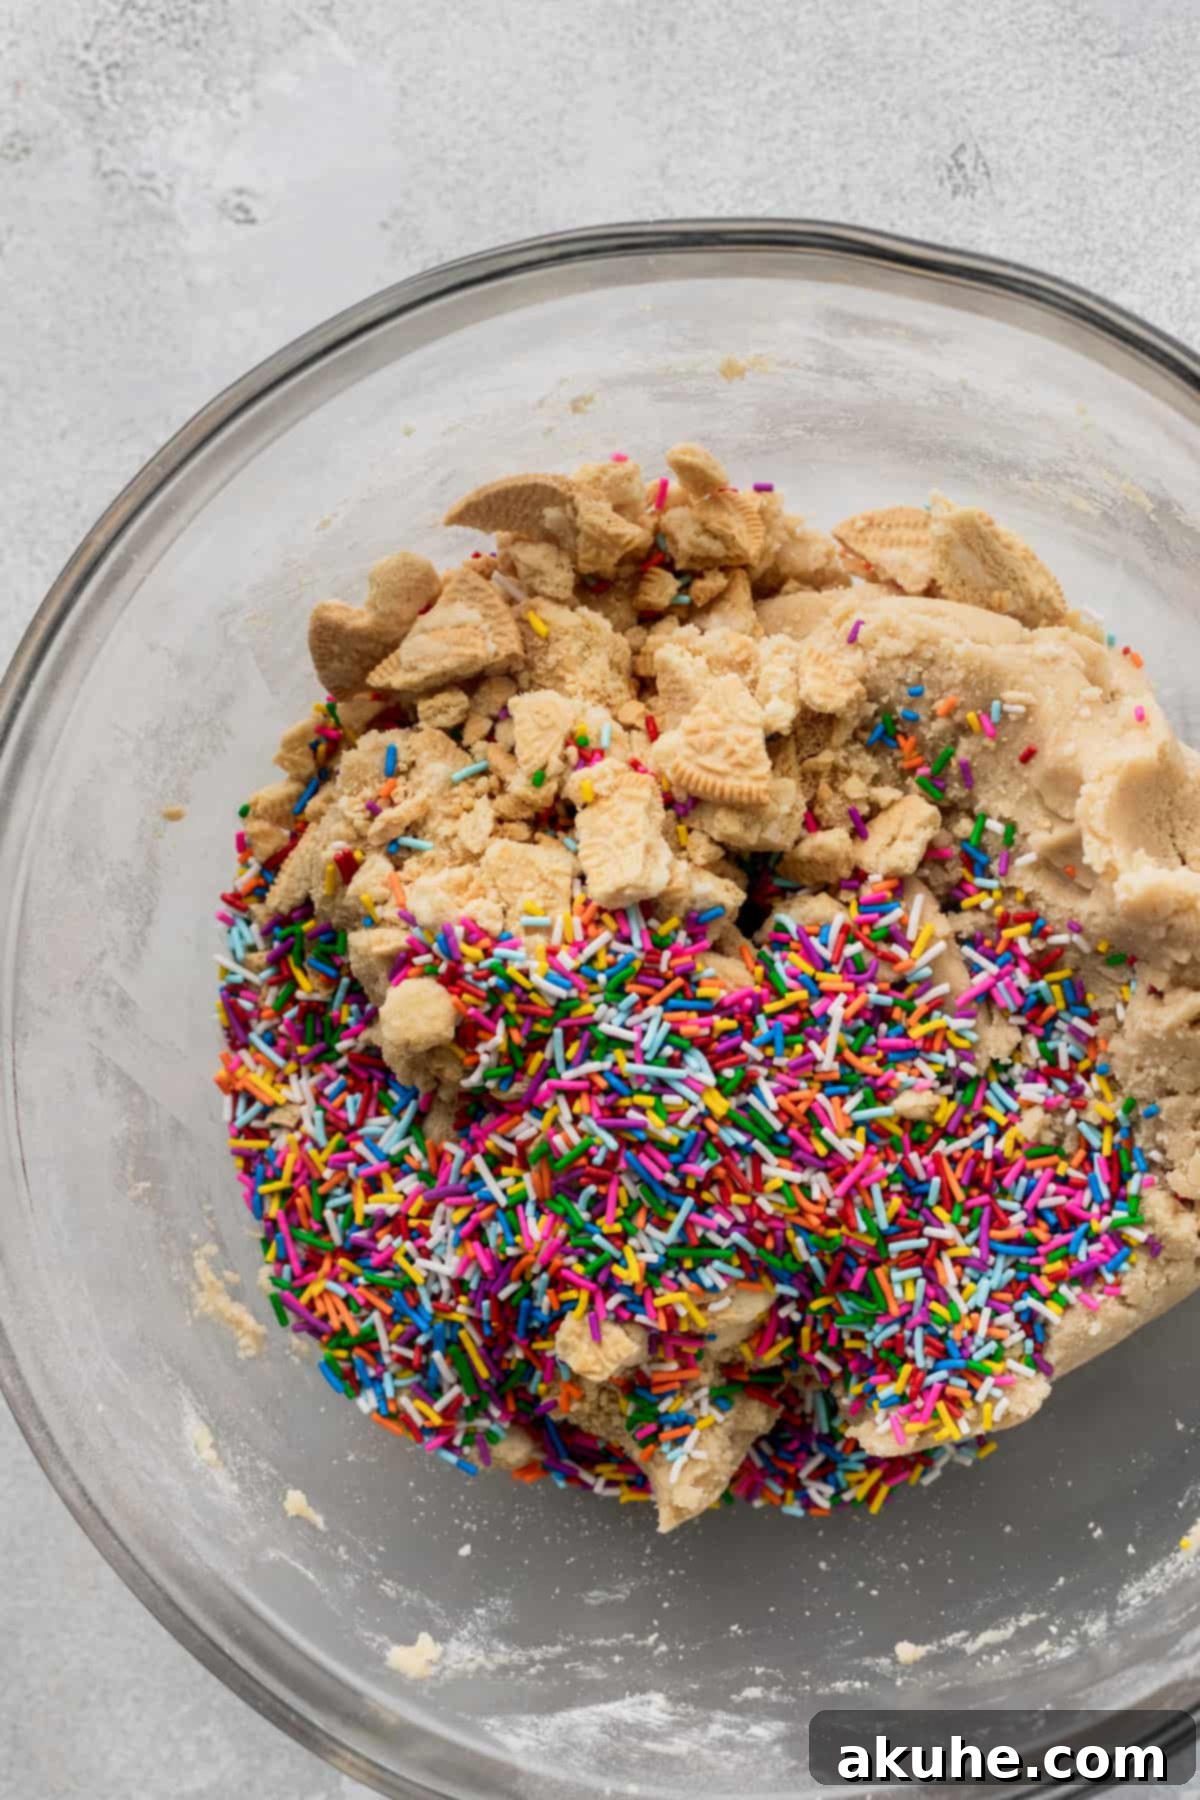
STEP 5: Fold in Sprinkles and Oreos. Once the dry ingredients are just incorporated, it’s time to add the fun! Gently fold in the rainbow sprinkles, the Golden Oreo crumbs, and the Golden Oreo pieces. Use a rubber spatula or mix on the lowest speed possible, just until the sprinkles and Oreos are evenly distributed throughout the dough. Again, avoid overmixing to preserve the texture of the cookies and prevent the sprinkles from bleeding too much color.
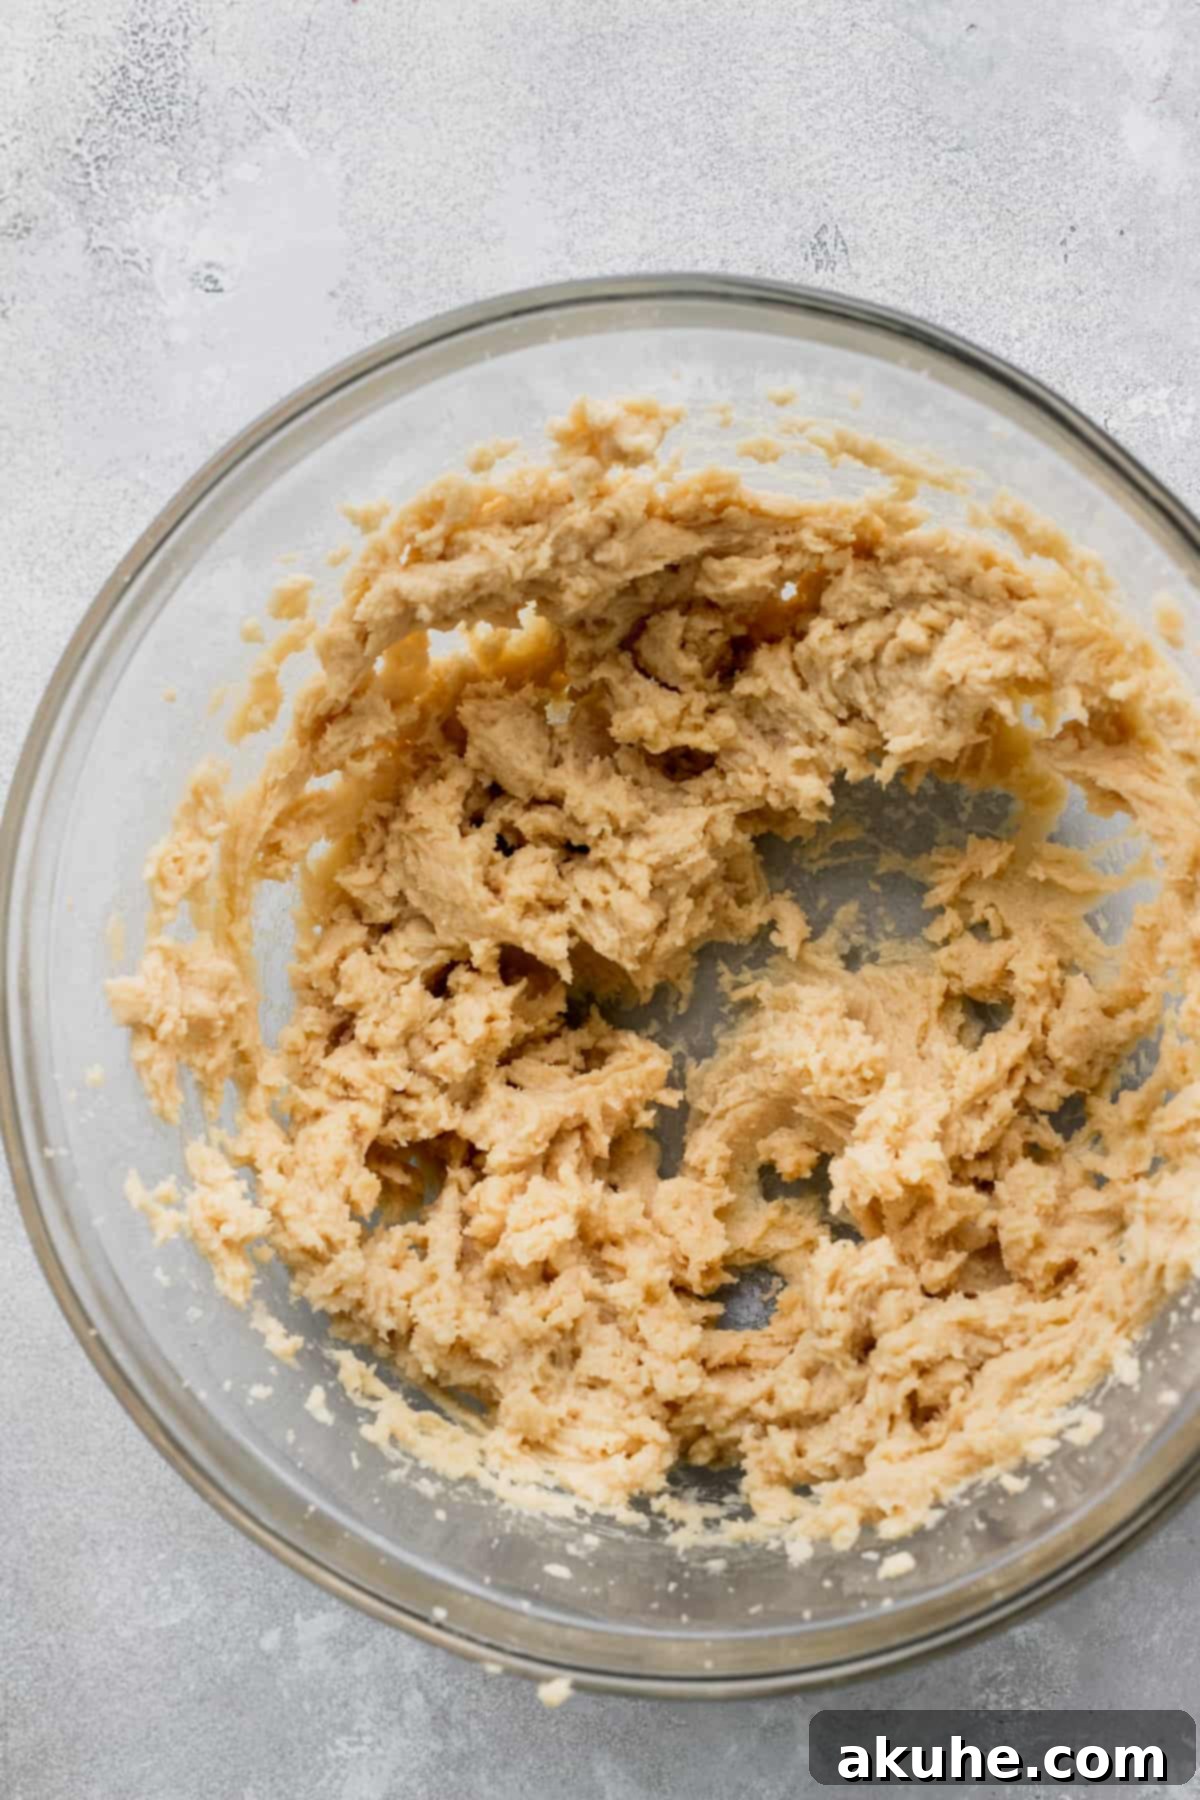
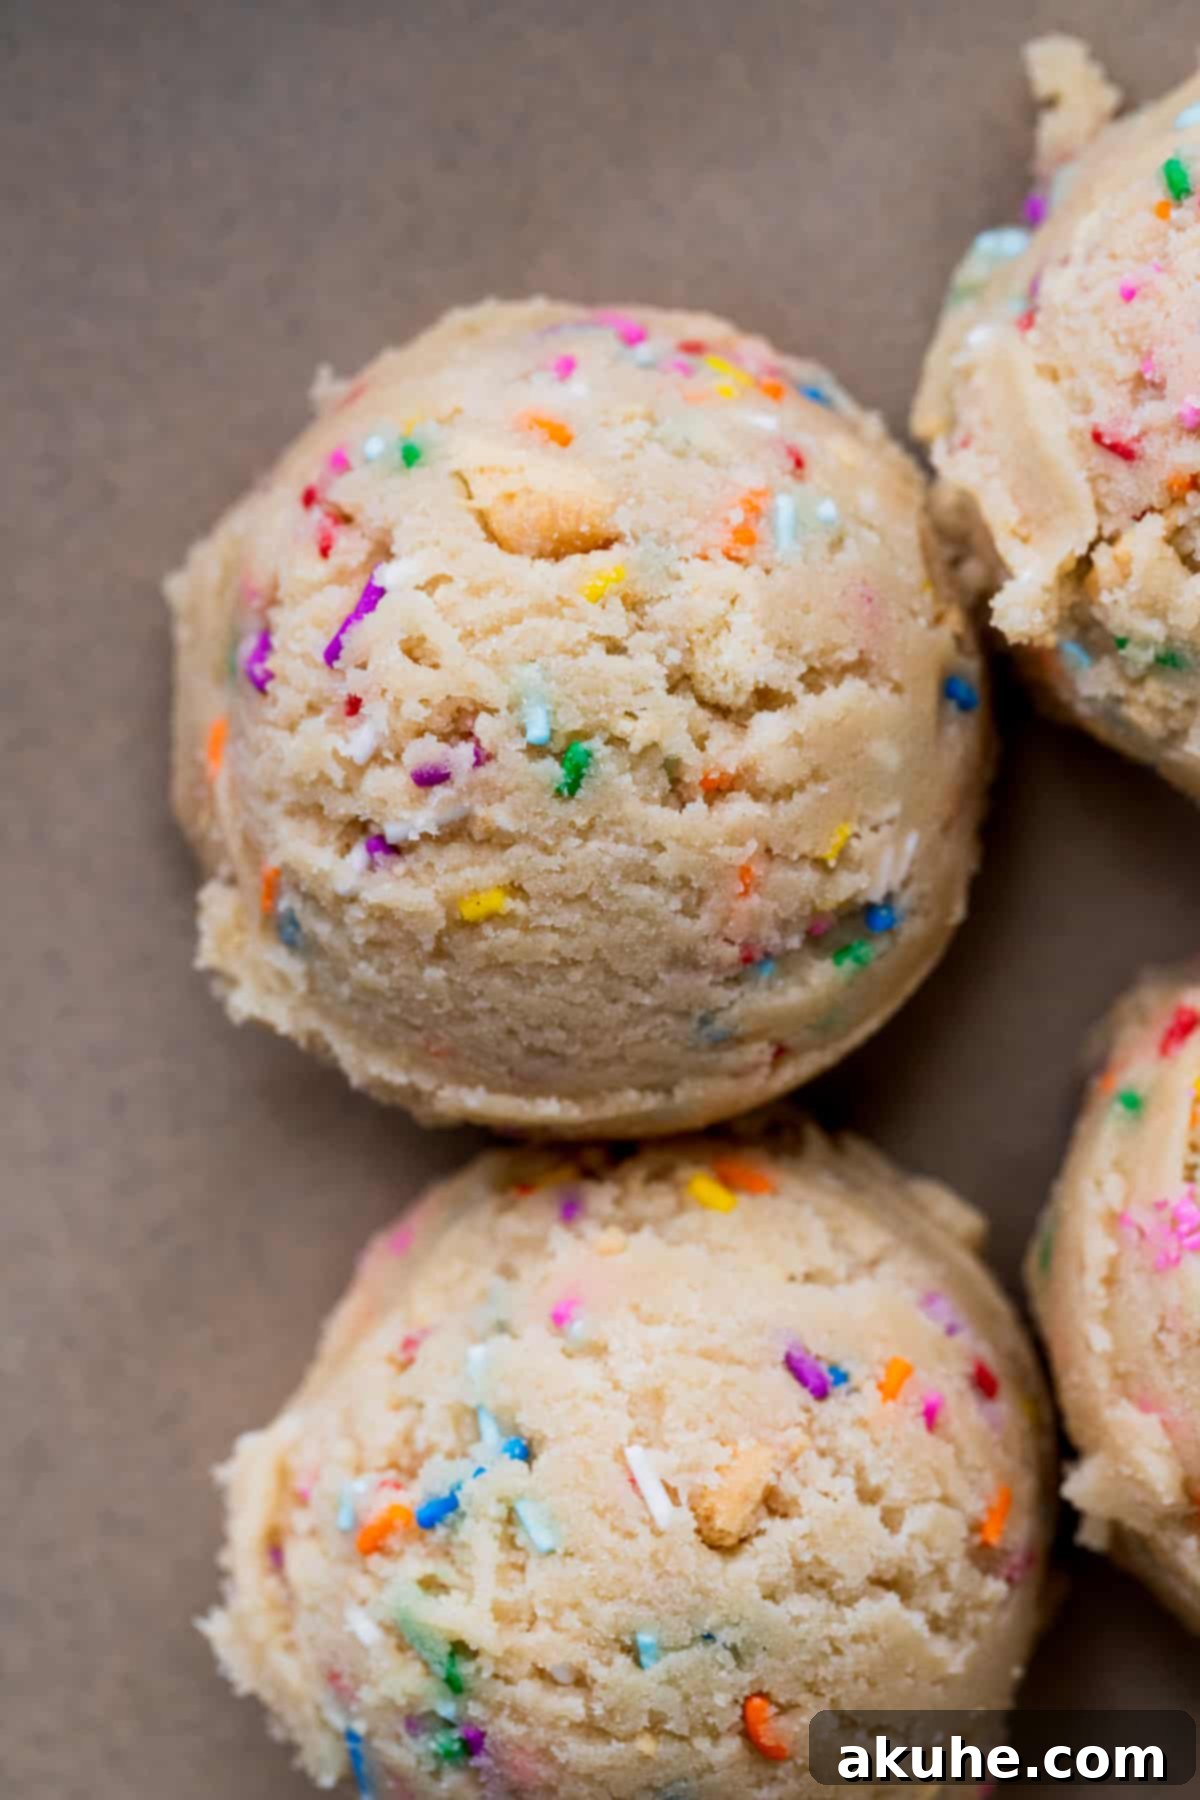
STEP 6: Scoop the Dough. Line two large baking sheets with parchment paper; this prevents sticking and ensures even baking. Using a large cookie scoop (a 3-ounce scoop works perfectly for generously sized cookies), portion out the cookie dough into uniform balls. Place no more than 6 cookie dough balls per prepared baking sheet, ensuring enough space between them for spreading. This generous spacing is crucial for allowing each cookie to bake evenly and achieve its signature large, chewy texture.
STEP 7: Chill the Dough. Once scooped, place the baking sheets with the cookie dough balls into the refrigerator. Chill the dough for approximately 20-30 minutes, or until the dough balls are firm and cold to the touch. This chilling period is a non-negotiable step that helps prevent the cookies from spreading too much in the oven, ensuring they bake up thick and chewy rather than flat and crispy.
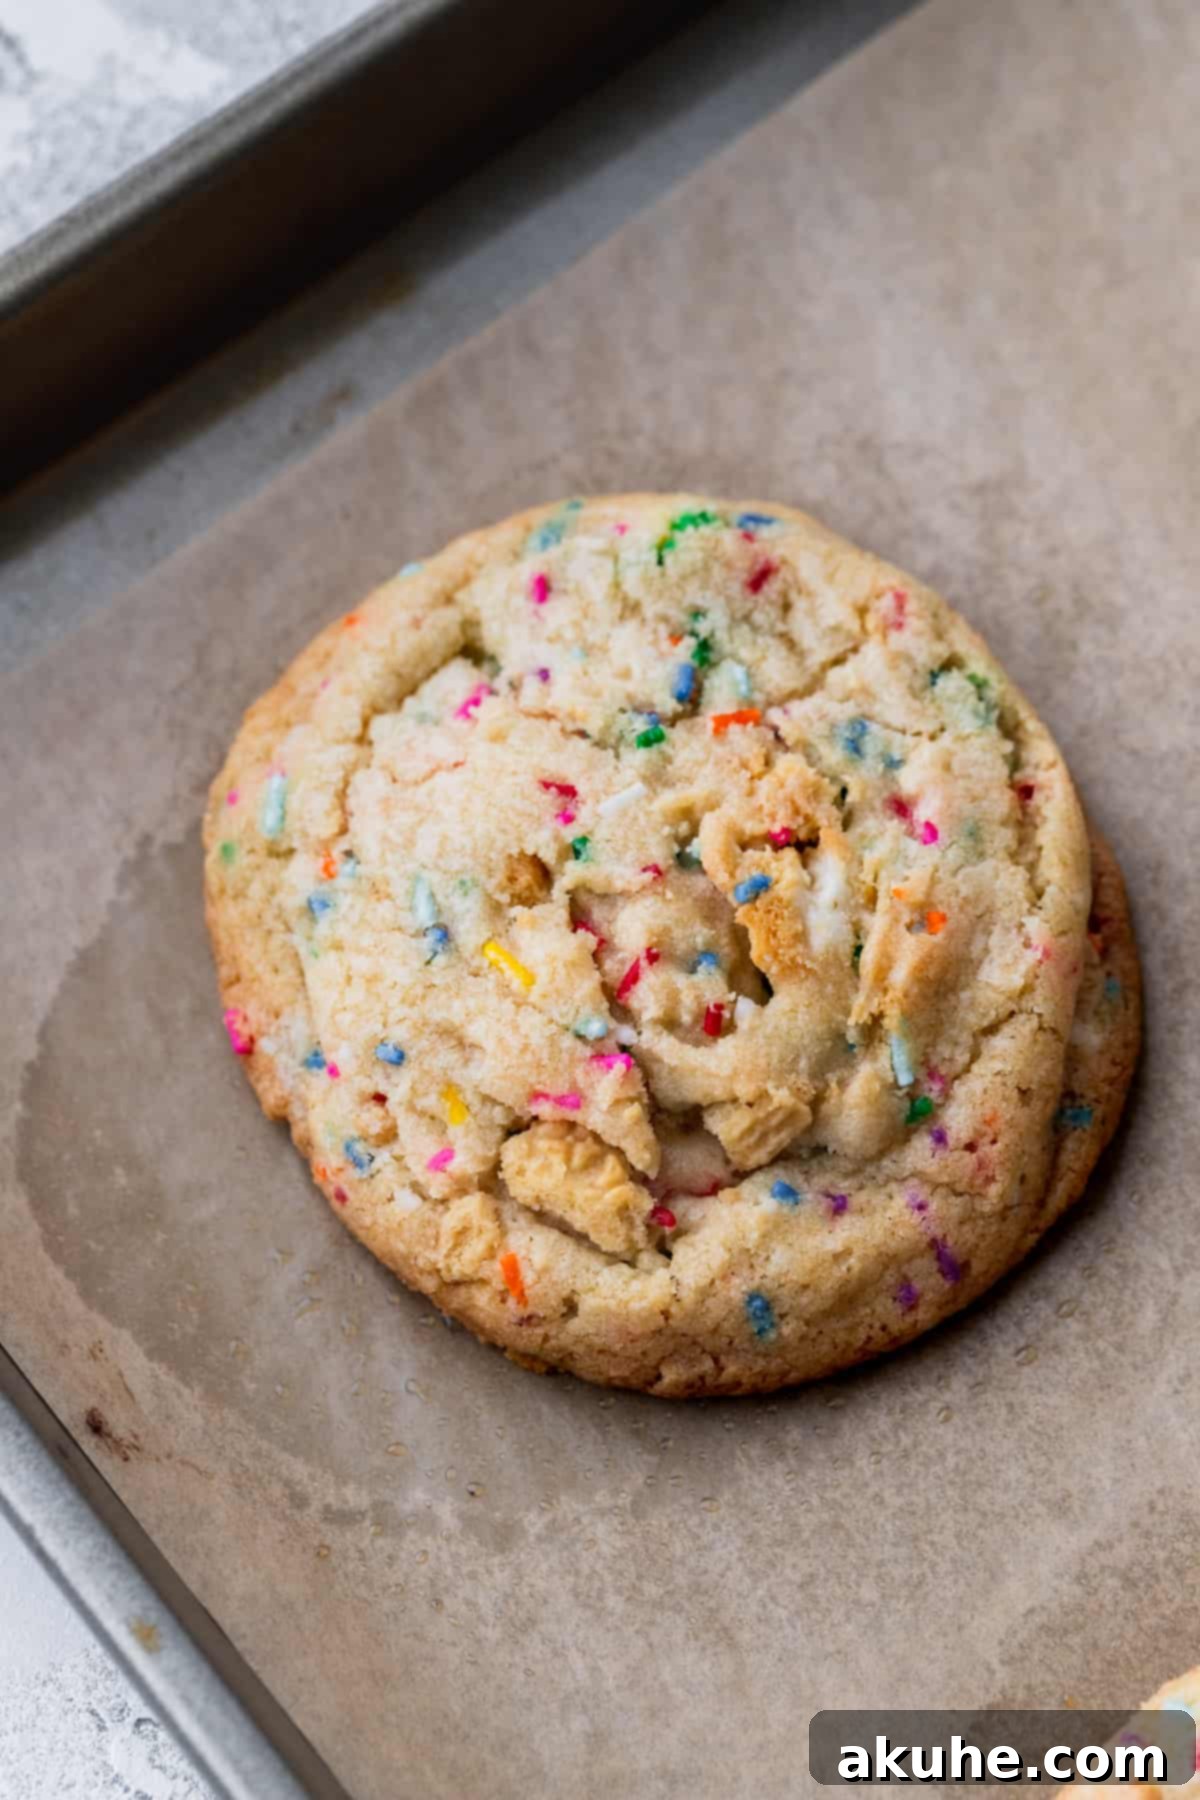
STEP 8: Bake and Finish. While the dough chills, preheat your oven to 350°F (175°C). Bake one cookie sheet at a time for 13-15 minutes. Baking one sheet at a time ensures consistent oven temperature and even baking. Look for edges that are lightly golden brown and centers that still appear slightly soft; they will continue to set as they cool. Immediately after removing the cookies from the oven, and while they are still warm, gently press a few extra golden Oreo pieces and rainbow sprinkles onto the tops of each cookie for a beautiful, fresh-from-the-bakery finish. Allow the cookies to cool on the hot baking sheet for 5 minutes before carefully transferring them to a wire cooling rack to cool completely. This resting period on the hot tray helps the cookies set without crumbling.
Expert Baking Tips for Flawless Birthday Cake Cookies
Achieving bakery-quality cookies isn’t just about following a recipe; it’s about understanding the subtle nuances of baking. These expert tips will help you perfect your Birthday Cake Cookies every time, ensuring they are thick, chewy, and absolutely delicious.
- Mastering the Art of No Spreading: To prevent your cookies from spreading too much and becoming thin and brittle, always use parchment paper on your baking sheets. This creates a non-stick surface and helps regulate heat. Most importantly, ensure your cookie dough is adequately chilled (at least 20-30 minutes) before baking. Cold dough spreads less, retaining its thickness. Finally, precise flour measurement is paramount. If your cookies still spread excessively, it’s often a sign of too little flour or ingredients that are too warm.
- The Importance of Proper Flour Measurement: Flour is often the culprit behind baking mishaps. For accuracy, always spoon your all-purpose flour into the measuring cup and then level it off with a straight edge. Never scoop flour directly from the bag with your measuring cup, as this compacts the flour, adding too much to your recipe. Excess flour can result in dry, crumbly cookies, while too little can cause them to spread too much. For ultimate precision, a kitchen scale is your best friend.
- Understanding Dough Thickness: This particular cookie dough is intentionally very thick. This density is a direct result of the high sugar content, the moisture from the eggs and butter, and the added bulk of the sprinkles and Golden Oreos. Initially, these inclusions could cause the cookies to spread excessively. To counteract this tendency and ensure a perfectly chewy, thick cookie, the recipe uses a specific ratio of a single egg plus an extra yolk, along with a slightly increased flour amount. This careful balance ensures the dough holds its structure and bakes beautifully.
- Aeration for Chewiness: When beating the wet ingredients—especially the butter and sugars, and then the egg and vanilla—make sure to beat them on high speed for the specified duration. This vigorous mixing incorporates a significant amount of air into the mixture. This aeration creates tiny pockets within the dough, which contribute to a lighter texture and that coveted chewy consistency in the final baked cookie. Don’t rush this step!
- Serving Suggestion: While these cookies are utterly delicious on their own, for an extra indulgent treat, serve them warm with a scoop of your favorite vanilla bean ice cream. The contrast of the warm, chewy cookie and cold, creamy ice cream is simply divine, making it an ideal dessert for any celebration.
- Don’t Overbake: Always err on the side of underbaking rather than overbaking. Cookies continue to bake and set as they cool on the hot baking sheet. Remove them from the oven when the edges are lightly golden and the centers still look slightly soft and gooey. This ensures a wonderfully chewy interior.
Frequently Asked Questions About Birthday Cake Cookies
Here are answers to some common questions about making and customizing these delightful Birthday Cake Cookies, ensuring your baking experience is as smooth and enjoyable as possible.
Absolutely! Using Birthday Cake Oreos is a fantastic idea and would only enhance the birthday cake flavor profile. The creamy filling with sprinkles inside Birthday Cake Oreos will add an extra layer of festivity and taste, making these cookies even more special. Feel free to use them interchangeably with Golden Oreos for a delightful twist.
Yes, that would be a truly decadent addition! A light swirl of buttercream frosting on top of these cookies would be absolutely divine. For a perfect frosting, you can use the whipped frosting recipe from my Christmas Sprinkle Cookies post. It’s light, fluffy, and pairs beautifully with these sweet cookies.
While these cookies are specifically designed to be baked large to achieve that signature thick, chewy center and slightly crisp edge, you can certainly adjust their size. If you prefer smaller cookies, use a 1-ounce cookie scoop (or a standard tablespoon size). Reduce the baking time to approximately 8-10 minutes, keeping a close eye on them to prevent overbaking. Remember, smaller cookies may have a less chewy center but will still be delicious!
You absolutely can! White chocolate chips would be a wonderful addition, complementing the vanilla and sprinkle flavors beautifully. Feel free to add about ½ cup of white chocolate chips to the dough along with the sprinkles and Golden Oreos. They will melt slightly during baking, creating pockets of creamy sweetness.
For the best results, use “jimmies” style rainbow sprinkles. These hold their shape and color well during baking. Avoid nonpareils (the tiny, round ball-shaped sprinkles) as they tend to melt and bleed color into the dough, which can make your cookies look muddy rather than vibrant.
Storing and Freezing Your Birthday Cake Cookies
Once you’ve baked a batch of these glorious Birthday Cake Cookies, you’ll want to ensure they stay fresh and delicious for as long as possible. Proper storage is key to preserving their wonderful texture and flavor.
Store these delectable birthday cake cookies in an airtight container at room temperature. Placed on your counter or in a pantry, they will remain wonderfully fresh and chewy for up to 5 days. For optimal freshness, you can also place a slice of bread in the container with the cookies; the bread will absorb moisture, keeping your cookies soft.
Freezing Baked Cookies
If you’ve baked too many (is there such a thing?!) or simply want to enjoy these treats at a later date, these cookies freeze beautifully. Once the baked cookies have cooled completely, transfer them to an airtight, freezer-safe container or a heavy-duty freezer bag. Lay them flat in a single layer if possible, or separate layers with parchment paper to prevent sticking. They can be frozen for up to 30 days. To enjoy, simply thaw them at room temperature for about 1 hour, or for a warm, fresh-from-the-oven feel, heat them briefly in the microwave for 10-20 seconds.
Alternatively, you can freeze raw cookie dough balls. After scooping the dough into balls as instructed, place them on a baking sheet lined with parchment paper and freeze for about 30 minutes, or until solid. Once firm, wrap each individual cookie dough ball tightly in plastic wrap, then transfer them to an airtight freezer-safe container or a freezer-safe bag. They will keep well in the freezer for up to 30 days. When you’re ready to bake, you can bake the frozen cookie dough balls straight from the freezer. Just add an extra 2-4 minutes to the recommended bake time, watching for those lightly golden edges.
Other Cookie Recipes To Try
If you loved these Chewy Birthday Cake Cookies, be sure to explore more delicious cookie creations on my blog! I’m always whipping up new and exciting treats to share with you.
I hope you absolutely loved baking and devouring these festive cookies! Please take a moment to leave a star review below and share your experience. Your feedback is incredibly valuable and helps other bakers discover these delightful recipes. Don’t forget to tag me on Instagram @stephaniesweettreats with your beautiful creations – I love seeing what you make! For even more baking inspiration and sweet ideas, make sure to follow me on Pinterest.
Chewy Birthday Cake Cookies
Print Recipe
Pin Recipe
Leave a Review
Ingredients
- 2 3/4 cup All-purpose flour
- 1 tsp Baking soda
- 1 tsp Salt
- 1 cup Unsalted butter, room temperature
- 1/2 cup Brown sugar , packed light brown sugar
- 1 cup White granulated sugar
- 1 tsp Clear vanilla extract
- 1 Large egg, room temperature
- 1 Egg yolk, room temperature
- 1/2 cup Rainbow sprinkles
- 1 cup Golden Oreo pieces
- 1/4 cup Golden Oreo crumbs
Instructions
- In a mixing bowl, sift the flour. Add in the baking soda and salt. Set aside. Using a food processor or blender, blend 4 Oreos into a fine crumb. Measure out 1/4 cup of crumbs. Pulse 8 Oreos 2-3 times into Oreo pieces. Measure out 1 cup of Oreo pieces. Set aside.2 3/4 cup All-purpose flour, 1 tsp Baking soda, 1 tsp Salt, 1 cup Golden Oreo pieces, 1/4 cup Golden Oreo crumbs
- Using a mixer in a separate bowl, beat the butter, brown sugar, and sugar. Beat on high speed for 2 minutes. Add in the clear vanilla, egg, and egg yolk. Mix on high for 1 minute.1 cup Unsalted butter, 1/2 cup Brown sugar, 1 cup White granulated sugar, 1 tsp Clear vanilla extract, 1 Large egg, 1 Egg yolk
- Add in the dry ingredients. Mix on low until combined. This will be a thick cookie dough. Add in the sprinkles, Oreo crumbs, and Oreo pieces. Mix on low until just combined.1/2 cup Rainbow sprinkles
- Prepare 2 cookie sheets lined with parchment paper. Use a 3oz cookie scoop to scoop large cookie dough balls. Place 6 balls per cookie sheet. Chill the cookie dough balls in the fridge until cold about 20 minutes.
- Preheat the oven to 350°F. Bake 1 cookie sheet at a time for 13-15 minutes. Bake until the edges are lightly golden brown.
- Top the cookies when warm with extra sprinkles and golden Oreo pieces. Let the cookies sit for 5 minutes before transferring to a cooling rack.
Notes
High altitude baking- Add an extra 2 TBSP of flour.
Pull out dairy ingredients 2 hours before baking.
