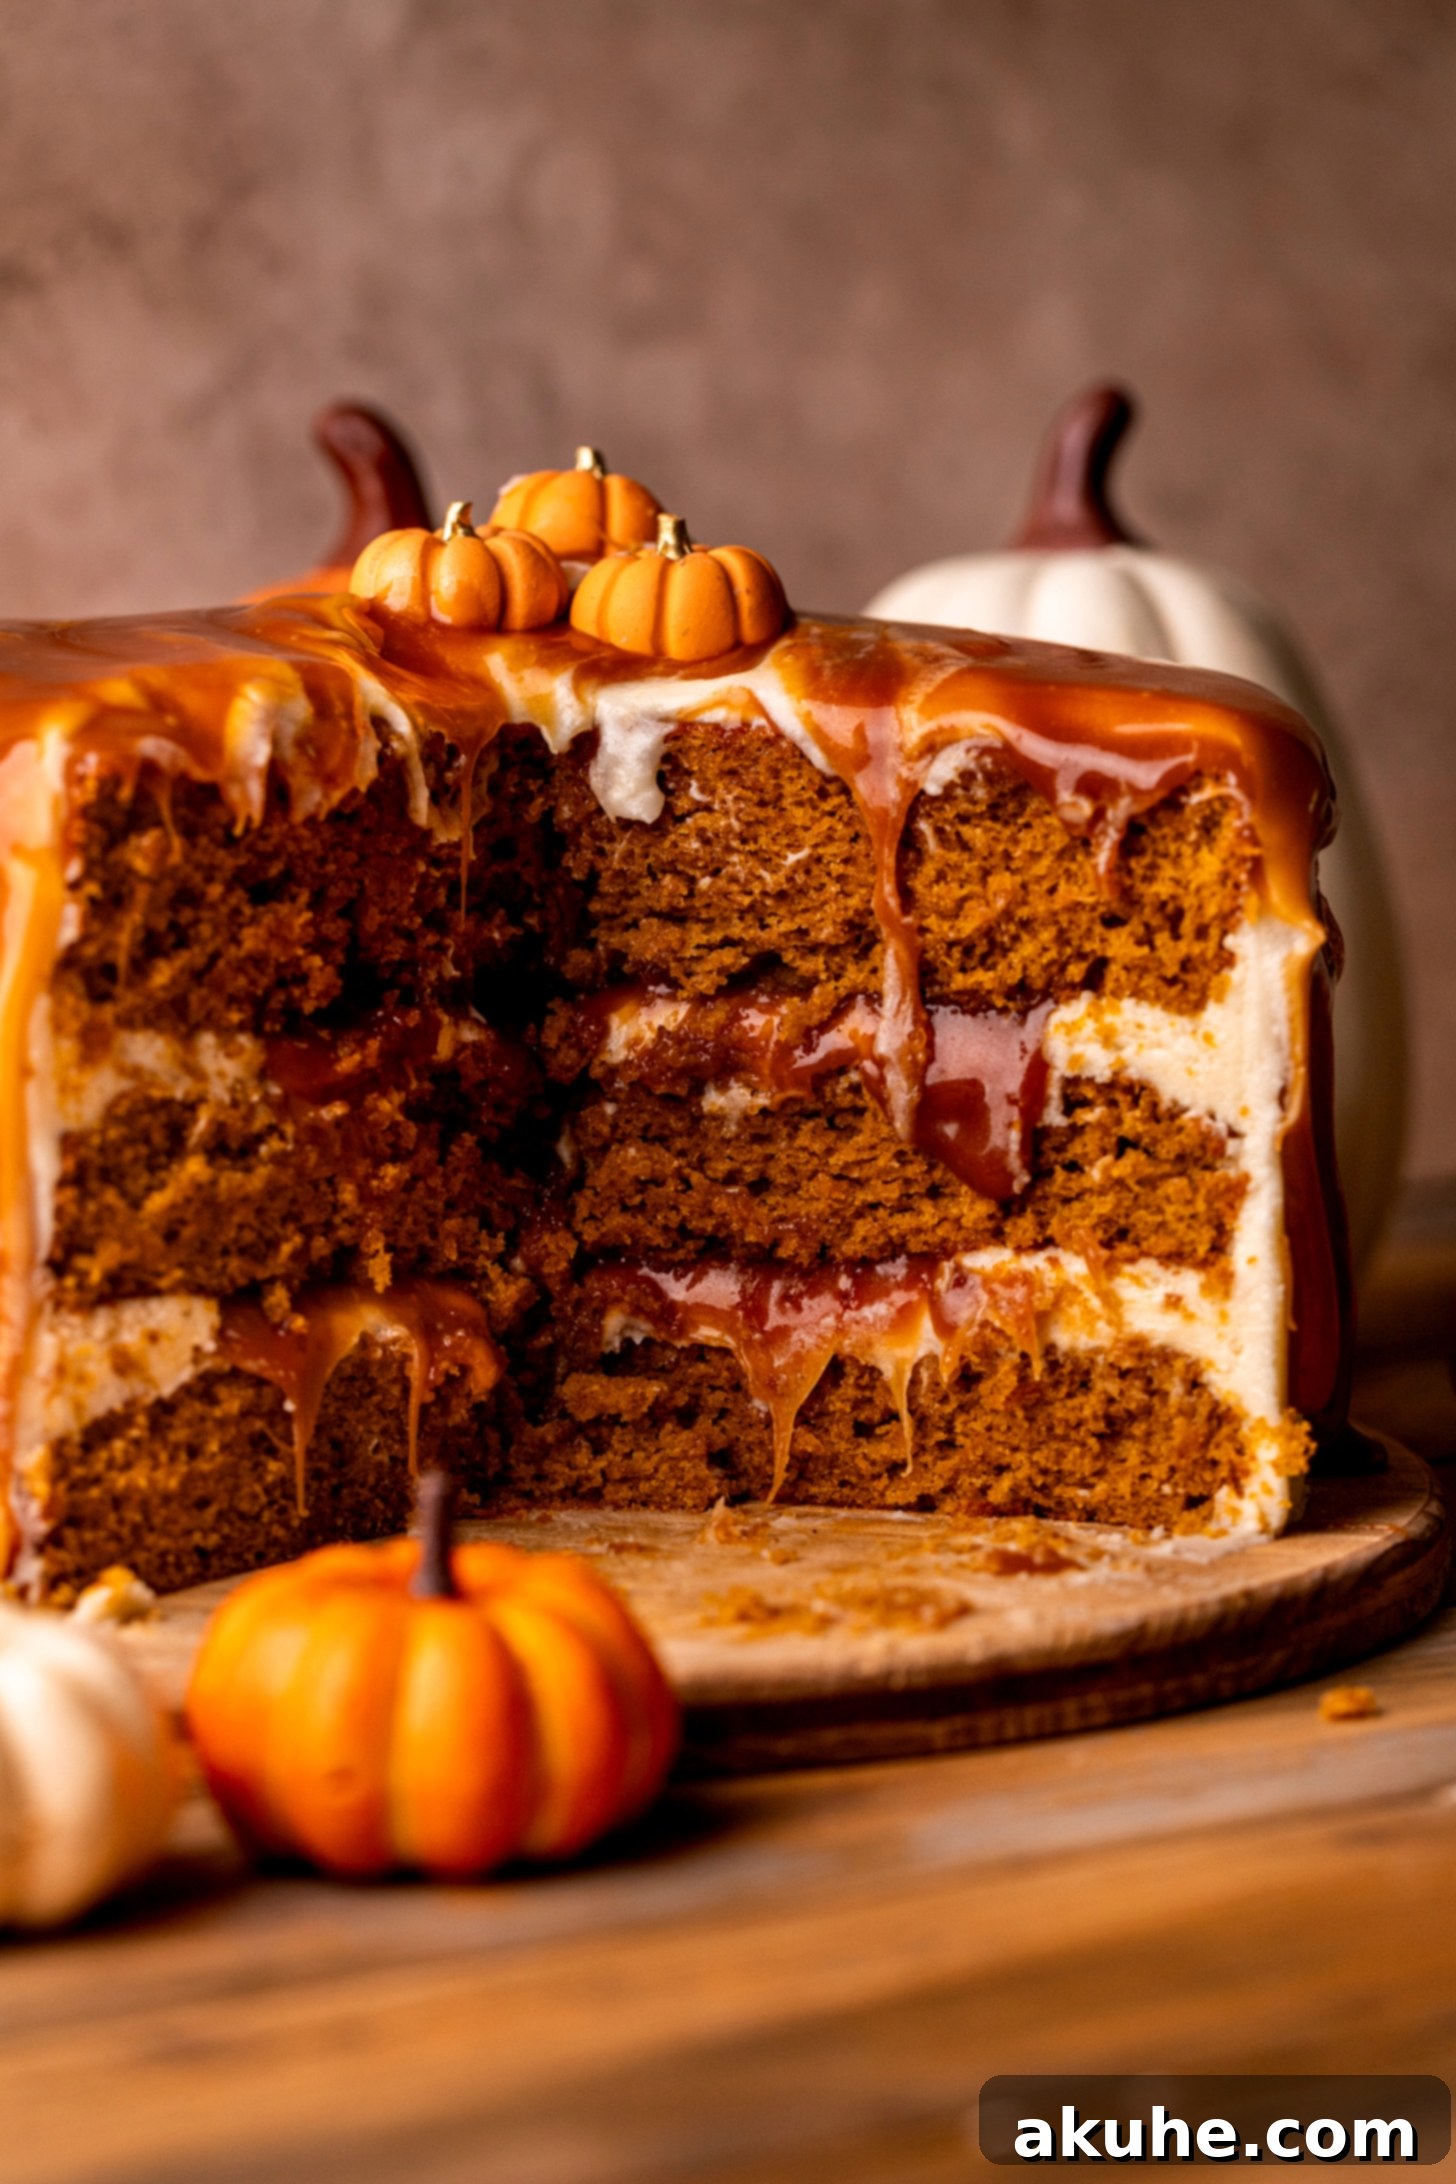
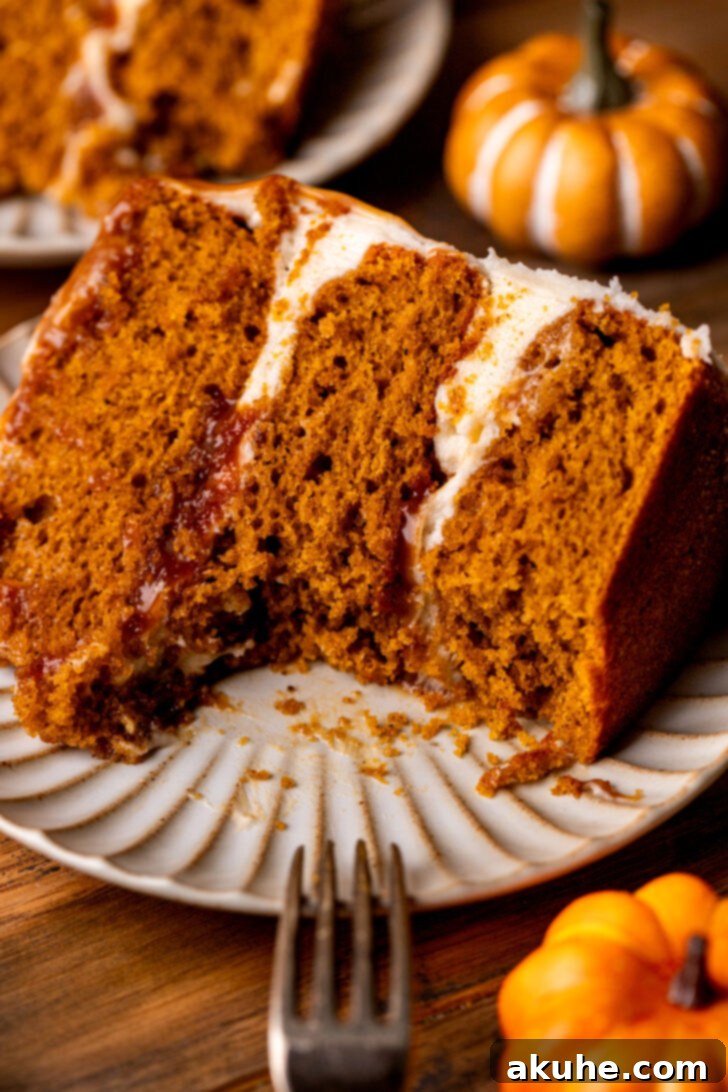
Prepare to be enchanted by the ultimate autumn dessert: a glorious Pumpkin Caramel Cake. This magnificent creation boasts layers of incredibly soft, spiced pumpkin cake, generously slathered with a luscious maple cream cheese frosting, and adorned with a rich, decadent salted caramel filling and artful drip. What sets this cake apart is its remarkable ability to remain wonderfully soft and moist, even when chilled – a true testament to its perfect balance of ingredients and technique.
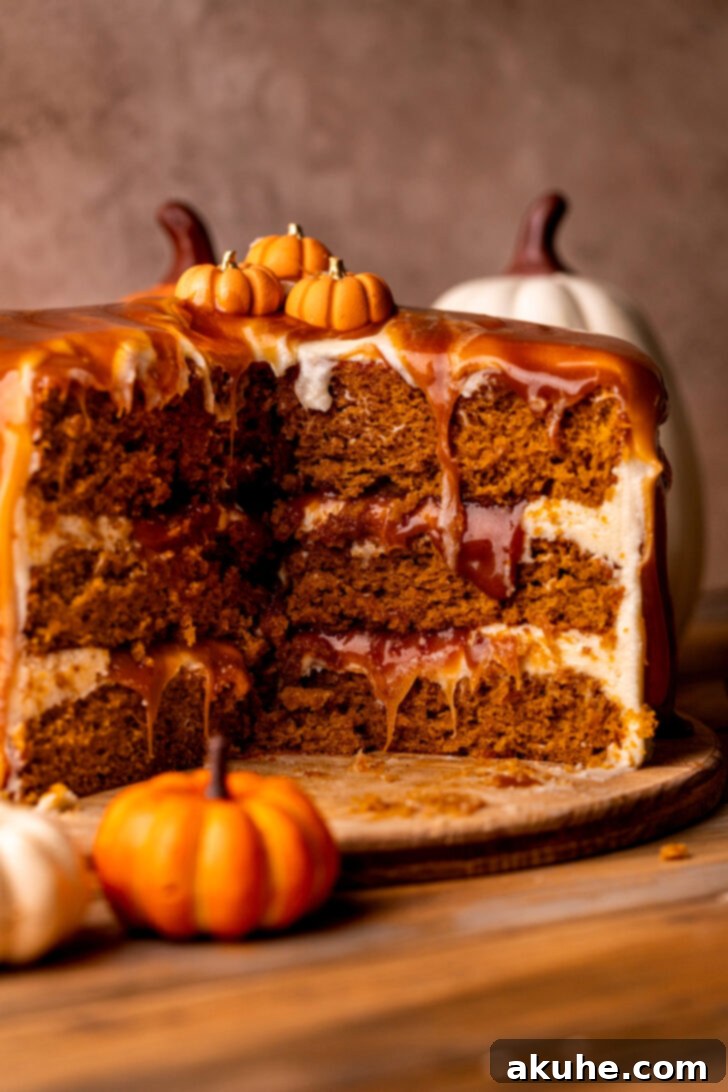
Indulge in the Ultimate Autumn Delight: The Exquisite Pumpkin Caramel Layer Cake
As the leaves begin to turn and the air grows crisp, there’s nothing quite like the comforting embrace of pumpkin and the luxurious sweetness of caramel. This pumpkin caramel cake is not just a dessert; it’s an experience, a celebration of fall that delights the senses. With rich caramel weaving its magic both inside and out, this cake serves as a delicious reminder of why pumpkin season is truly exceptional. The combination of warm, earthy pumpkin and buttery, sweet-and-salty caramel is a match made in heaven, a pairing that deserves far more recognition and indulgence.
Crafting this show-stopping cake might seem daunting, but fear not! I’ve distilled years of baking wisdom into a comprehensive guide, complete with essential tips, smart tricks, and detailed process photos, all designed to ensure your baking journey is smooth and successful. If you’re a devoted fan of pumpkin desserts, you’ll definitely want to explore other delights like my pumpkin caramel cheesecake bars, but first, let’s dive into creating this stunning layer cake.
Why This Pumpkin Caramel Cake Will Become Your New Fall Favorite
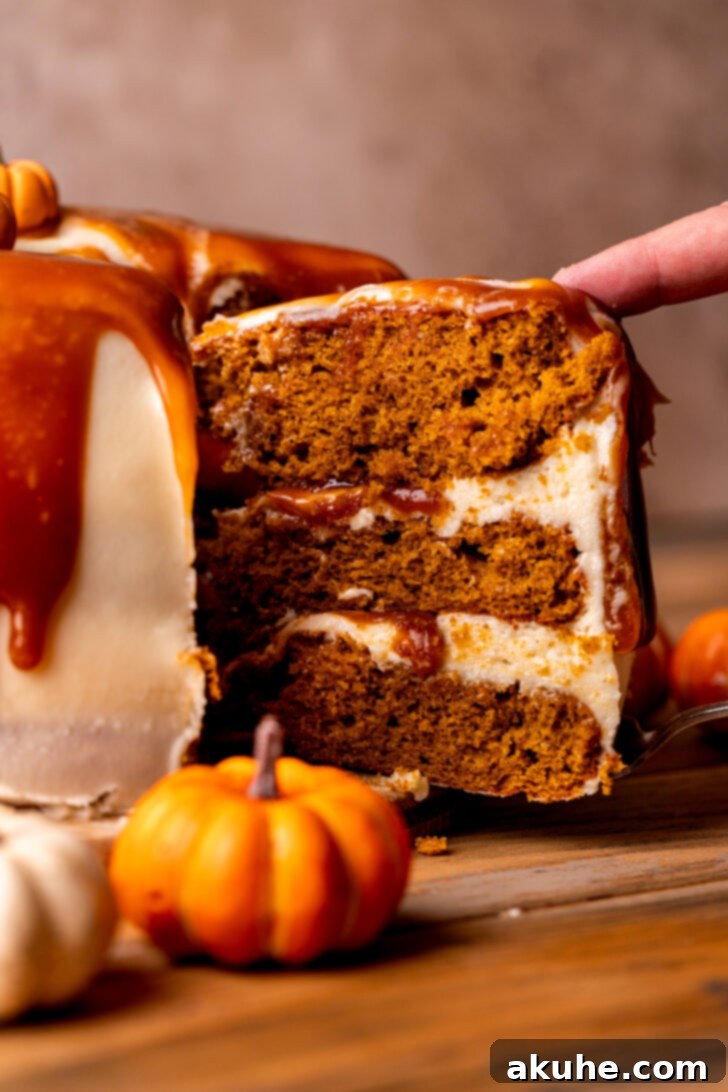
This Pumpkin Caramel Cake isn’t just another dessert; it’s a culinary masterpiece that captures the very essence of autumn. Each bite offers a harmonious blend of textures and flavors, making it an unforgettable treat for any occasion. Imagine sinking your teeth into tender, moist pumpkin cake layers, infused with a comforting blend of cinnamon, nutmeg, and pumpkin pie spice. This isn’t a dry or crumbly cake; it’s designed to be incredibly soft and retains its delightful moisture even after being refrigerated, ensuring every slice is as perfect as the first.
But the magic doesn’t stop there. Nestled between these exquisite layers is a generous slather of homemade salted caramel, offering that perfect balance of sweet and savory that keeps you coming back for more. The cake is then enveloped in a light, tangy maple cream cheese frosting, which provides a beautiful contrast to the richness of the pumpkin and caramel, elevating the entire experience. Finally, a cascade of golden caramel drips gracefully down the sides, adding both visual appeal and an extra burst of flavor. This cake is ideal for holiday gatherings, fall celebrations, or simply indulging your sweet cravings during the coziest season of the year.
The Divine Components: A Symphony of Flavors and Textures
The beauty of this Pumpkin Caramel Cake lies in the thoughtful interplay of its three main components, each perfectly crafted to contribute to the overall sublime experience. Understanding each element will not only make your baking process more insightful but also help you appreciate the depth of flavor in every bite.
The Luxuriously Soft Pumpkin Cake Layers
At the heart of this dessert are three robust, yet wonderfully soft, pumpkin cake layers. The secret to their incredible moistness lies in the careful balance of ingredients and a crucial step: managing the pumpkin puree’s moisture content. By gently pressing out excess water, we ensure the cake has a tender, airy crumb rather than becoming dense or gummy. Infused with classic fall spices like cinnamon, nutmeg, and pumpkin pie spice, these layers emit an intoxicating aroma as they bake, setting the perfect autumnal tone. The addition of sour cream also plays a vital role in keeping the cake incredibly moist and adding a subtle tang that complements the sweet pumpkin notes.
The Irresistible Salted Caramel Filling and Drip
No pumpkin caramel cake would be complete without truly exceptional caramel. Our homemade salted caramel is a showstopper, boasting a rich, deep amber hue and a complex flavor profile that perfectly marries sweetness with a hint of sea salt. This caramel serves a dual purpose: it acts as a luscious filling between the cake layers, creating pockets of gooey delight, and transforms into an elegant drip that cascades down the sides of the finished cake. Making caramel from scratch might seem intimidating, but with patience and attention to detail, you’ll achieve a smooth, pourable, and utterly delicious caramel that elevates the entire cake.
The Velvety Smooth Maple Cream Cheese Frosting
To crown this masterpiece, we have a dreamy maple cream cheese frosting. This isn’t just any frosting; it’s a light, airy, and tangy complement to the rich flavors of pumpkin and caramel. Made with cream cheese, unsalted butter, powdered sugar, and a hint of pure vanilla extract, the addition of maple syrup takes it to another level, infusing it with a delicate, woodsy sweetness that sings of autumn. The smooth, spreadable consistency makes it ideal for frosting the cake, creating a beautiful canvas for the caramel drip, while its slight tang cuts through the sweetness, ensuring a balanced and incredibly satisfying dessert.
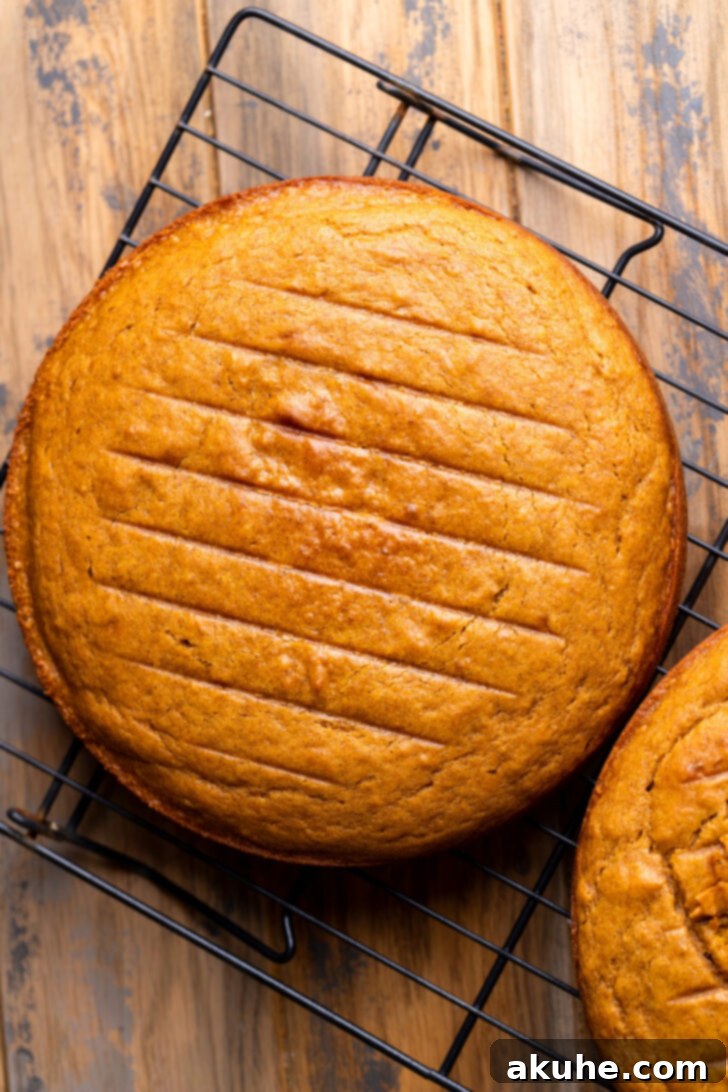
Mastering the Bake: Essential Tips for a Flawless Pumpkin Caramel Cake
Achieving baking perfection often comes down to a few key techniques and careful attention to detail. Here are my expert tips to ensure your Pumpkin Caramel Cake turns out just as stunning and delicious as the one pictured:
- Control Pumpkin Moisture: Pumpkin puree contains a significant amount of moisture, which can lead to a dense or gummy cake if not addressed. The recipe specifically calls for using paper towels to absorb excess liquid. Don’t skip this critical step! Spread the puree thinly on a large plate and press it with a stack of paper towels, repeating several times until a good amount of moisture has been removed. This ensures a light and fluffy cake crumb.
- Accurate Flour Measurement: Compacted flour is a common pitfall that can result in a dry, heavy cake. Instead of scooping your measuring cup directly into the flour bag, which can pack in too much, spoon the flour into your measuring cup and then level it off with the back of a knife. Alternatively, using a kitchen scale for precise weight measurements is always recommended for consistent results.
- Room Temperature Dairy for Optimal Blending: Ingredients like eggs, sour cream, butter, and cream cheese emulsify much better when they are at room temperature. Cold ingredients can cause the batter or frosting to become lumpy or seize, affecting the final texture. Plan ahead and take your dairy out of the refrigerator at least two hours before you begin baking to allow them to warm up naturally.
- Patience is Key for Perfect Salted Caramel: Making caramel requires a watchful eye and a steady hand. While it might be tempting to crank up the heat to speed up the process, caramel cooks very quickly once the sugar crystals start to melt. High heat can easily lead to burnt sugar, resulting in a bitter caramel. Cook it over medium heat, stirring gently, and remove it from the heat as soon as it reaches that beautiful amber color. Remember, it’s better to go slowly and achieve perfection.
- Prepare Your Cake Pans Properly: To ensure your cake layers release easily and bake evenly, always prepare your pans meticulously. Spray them generously with baking spray, then line the bottoms with parchment paper circles. Spray again over the parchment. This double layer of protection prevents sticking and tearing, especially important for moist cakes.
- Avoid Overmixing Your Batter: Once you add the dry ingredients to the wet, mix only until just combined. Overmixing develops the gluten in the flour, which can lead to a tough and chewy cake rather than a tender one. A few small lumps are perfectly acceptable and will usually bake out.
- Cool Cakes Completely: Resist the urge to frost warm cakes! Warm cakes will melt your frosting, leading to a messy and unstable structure. Allow your cake layers to cool completely on a wire rack before you even think about applying frosting. For best results, you can even wrap cooled cakes in plastic wrap and chill them in the refrigerator or freeze them briefly to make them easier to handle and level.
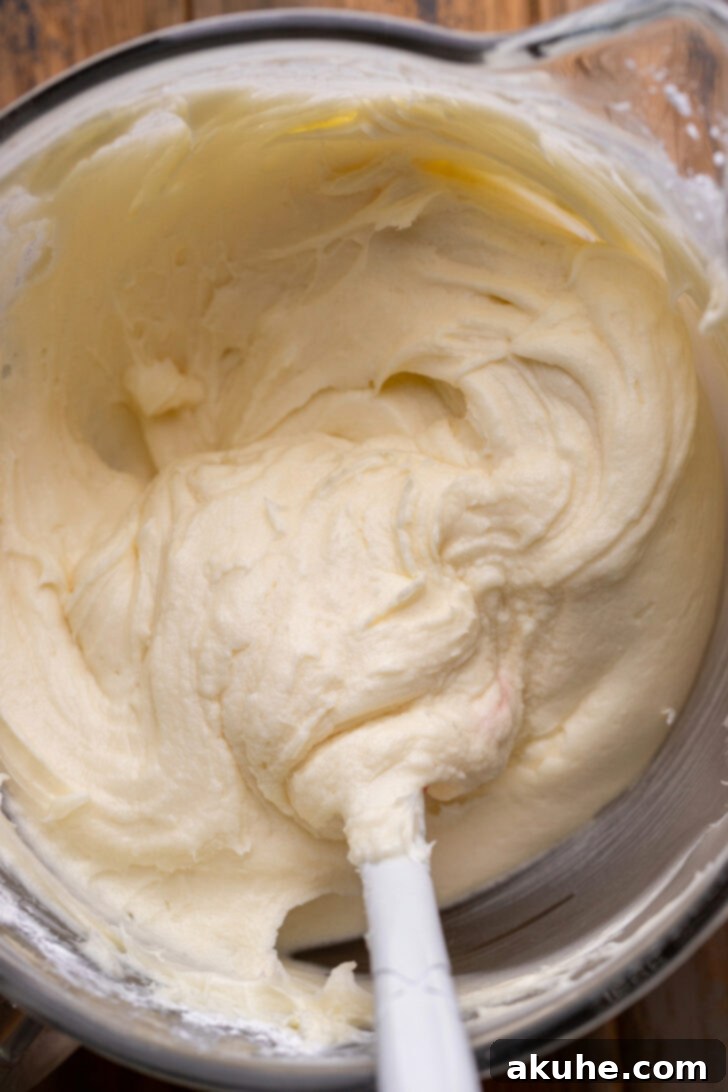
Assembling Your Masterpiece: A Guide to Decorating Your Layer Cake
Assembling and decorating this Pumpkin Caramel Cake is where your artistic touch comes to life. A well-constructed cake not only looks stunning but also ensures structural integrity and even distribution of all those delicious flavors. Follow these steps for a beautifully finished cake:
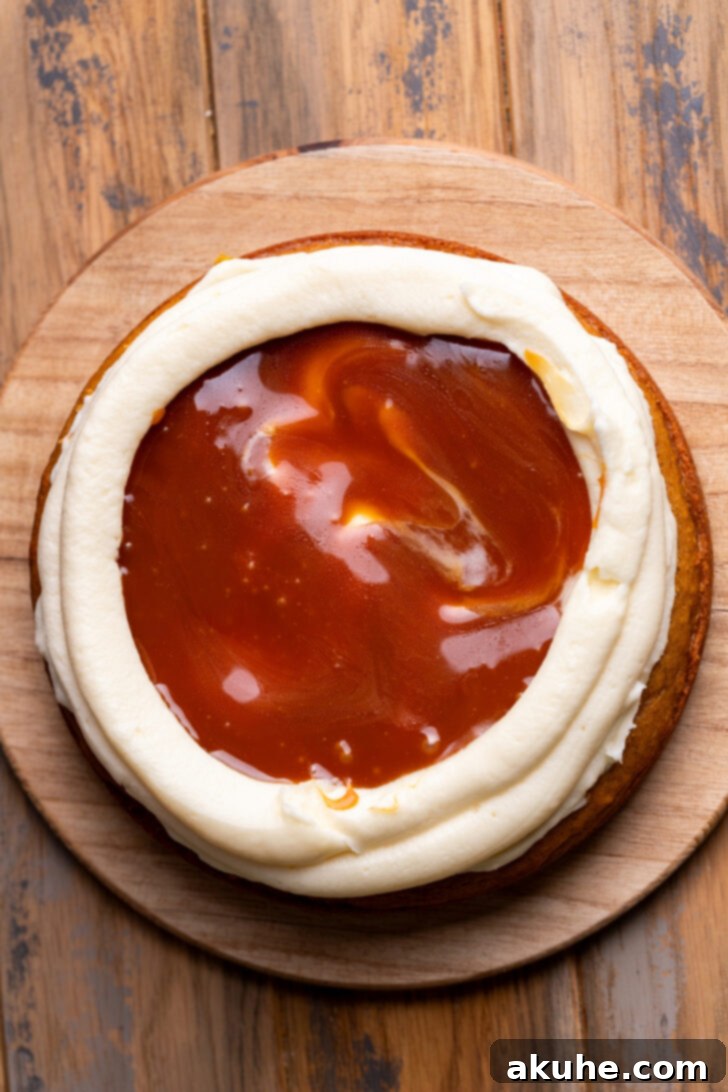
Begin by placing a small amount of frosting on your cake board or serving plate; this acts as an edible glue to keep your first cake layer stable. Place the first cooled cake layer onto this frosted spot. Evenly spread about ¾ cup of the maple cream cheese frosting over this layer. Next, using a piping bag fitted with a round tip, pipe a sturdy double border of frosting around the very edge of the cake. This creates a dam, crucial for holding the luscious caramel filling firmly in place and preventing any delicious leaks.
Into the center of this piped border, pour approximately ½ cup of your prepared salted caramel. Ensure your caramel is pourable; if it’s too stiff from cooling, gently warm it in the microwave for 10-15 seconds until it reaches the desired consistency. Carefully spread the caramel within the frosting border. Now, gently place the second cake layer directly on top. For the next step, apply a very thin layer of frosting all around the sides and top of the entire cake. This “crumb coat” is essential for sealing in any loose crumbs and creating a smooth canvas for your final frosting layer. Once applied, transfer the cake to the freezer for 10-15 minutes to allow the crumb coat to firm up. This step effectively locks the frosting onto the cake and prevents any caramel from leaking through.
Repeat the frosting and caramel filling process for the second layer. For the final, third cake layer, place it bottom-side up on top of the second frosted and filled layer. This technique creates a perfectly flat and professional-looking top surface for your cake. Apply another thin crumb coat and return the cake to the freezer for another 10-15 minutes.
Once the final crumb coat is firm, you can apply the remaining maple cream cheese frosting generously to the entire cake. Use an offset spatula or a bench scraper to smooth the sides and top for a polished, elegant finish. Chill the frosted cake in the freezer for another 10 minutes before adding the breathtaking caramel drip. Again, ensure your remaining caramel is warm enough to be pourable but not hot, so it flows beautifully down the sides. Pour about half of the caramel onto the top center of the cake, then use an offset spatula to gently push it towards the edges, encouraging it to naturally drip. Add the rest of the caramel as desired for a rich, inviting top layer. Finally, freeze the decorated cake for 10-15 minutes to set the caramel drip, locking in its irresistible sheen.
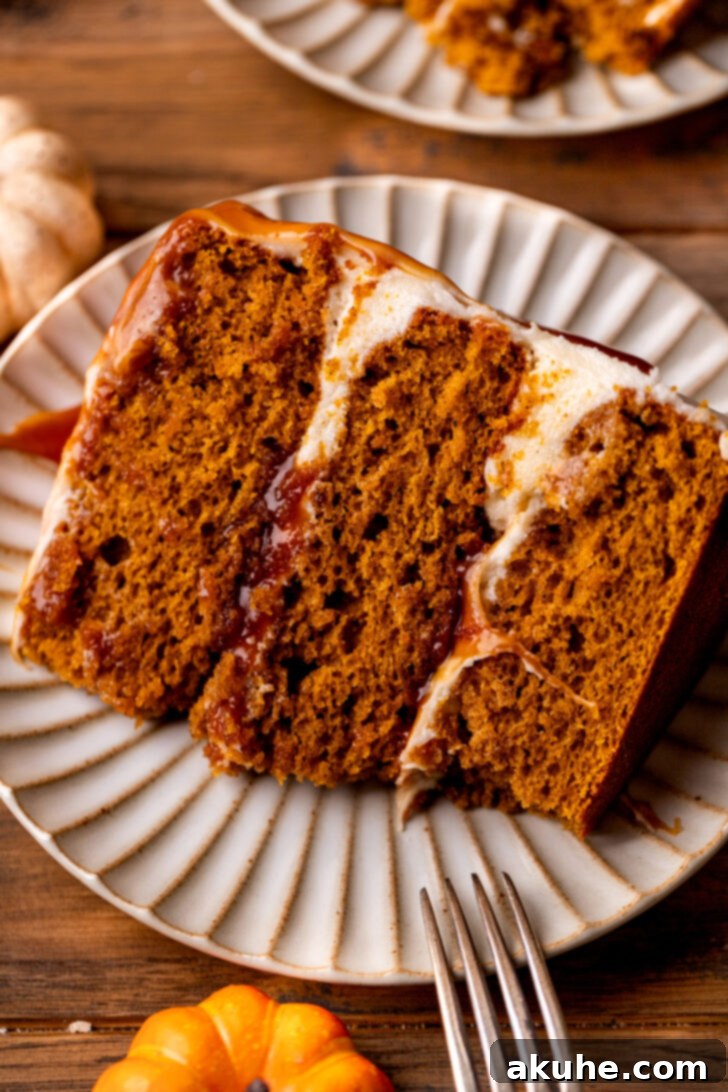
More Autumnal Delights: Explore Other Pumpkin Recipes
If your heart beats for the delightful flavors of pumpkin, this cake is just the beginning of your autumnal baking adventure! Explore more of my cherished pumpkin recipes to keep the cozy vibes going strong. You’ll love my rich and creamy double layer pumpkin cheesecake, a perfect blend of spicy pumpkin and smooth cheesecake. Or, for a delightful breakfast or brunch treat, try my comforting pumpkin coffee cake, guaranteed to make any morning feel special. Each recipe is designed to bring warmth and joy to your kitchen throughout the fall season and beyond.
If you absolutely loved this recipe, make sure to leave a star review! And don’t forget to tag me on Instagram @stephaniesweettreats with your beautiful creations. For more inspiration and sweet ideas, be sure to follow me on Pinterest.
Watch the Magic Unfold: Pumpkin Caramel Cake Video Guide
For those who prefer a visual guide, I’ve created a step-by-step recipe video to walk you through every stage of making this incredible Pumpkin Caramel Cake. From prepping the pumpkin puree to achieving the perfect caramel drip, watch closely as each detail comes to life. This video is designed to demystify the process and give you the confidence to bake a show-stopping dessert that will impress everyone.

Pumpkin Caramel Cake Recipe
Average Rating: 5 out of 5 stars from 2 reviews
Author: Stephanie Rutherford
This pumpkin caramel cake is a layered soft pumpkin cake, with maple cream cheese frosting, and salted caramel filling and drip! This cake even stays soft when cold!
Prep Time: 1 hr
Cook Time: 20 mins
Decorating Time: 1 hr
Total Time: 2 hrs 20 mins
Servings: 16 slices
Ingredients
Pumpkin Cake
- 3 cups All-purpose flour
- 2 tsp Baking powder
- 1 tsp Baking soda
- 1 tsp Salt
- 3 tsp Ground cinnamon
- 2 tsp Pumpkin pie spice
- 1/4 tsp Ground nutmeg
- 1 cup Oil (canola or vegetable oil)
- 2 cups Pumpkin puree (equivalent to 1 1/2 cans of standard pumpkin puree)
- 1 1/2 cups White granulated sugar
- 1/4 cup Brown sugar (packed light or dark)
- 4 Large eggs (room temperature)
- 2 TBSP Maple syrup
- 1 tsp Pure vanilla extract
- 1 cup Sour cream (room temperature or Greek yogurt)
Salted Caramel
- 2 cups White granulated sugar
- 1/2 cup Unsalted butter (room temperature and cubed)
- 1 cup Heavy cream (room temperature)
- 2 tsp Pure vanilla extract
- 1 tsp Salt
Maple Cream Cheese Frosting
- 2 cups Unsalted butter (room temperature)
- 12 oz Cream cheese (room temperature)
- 6 cups Powdered sugar (sifted)
- 1 tsp Pure vanilla extract
- Pinch of salt
- 2 TBSP Maple syrup
Instructions
Pumpkin Cake
- Preheat your oven to 350℉ (175°C). Prepare three 8-inch cake pans by spraying them thoroughly with baking spray. Line the bottoms of each pan with parchment paper circles and spray again to ensure a non-stick surface. Set aside.
- Spread the pumpkin puree thinly on a large plate or baking sheet. Using about 8 pieces of paper towels (in stacks of two), gently but firmly press them into the pumpkin puree to absorb excess moisture. Repeat this process four total times to significantly reduce the water content in the pumpkin.
- In a medium-sized bowl, sift together the all-purpose flour, baking soda, baking powder, salt, ground cinnamon, pumpkin pie spice, and ground nutmeg. Whisk these dry ingredients thoroughly to ensure they are well combined. Set this bowl aside.
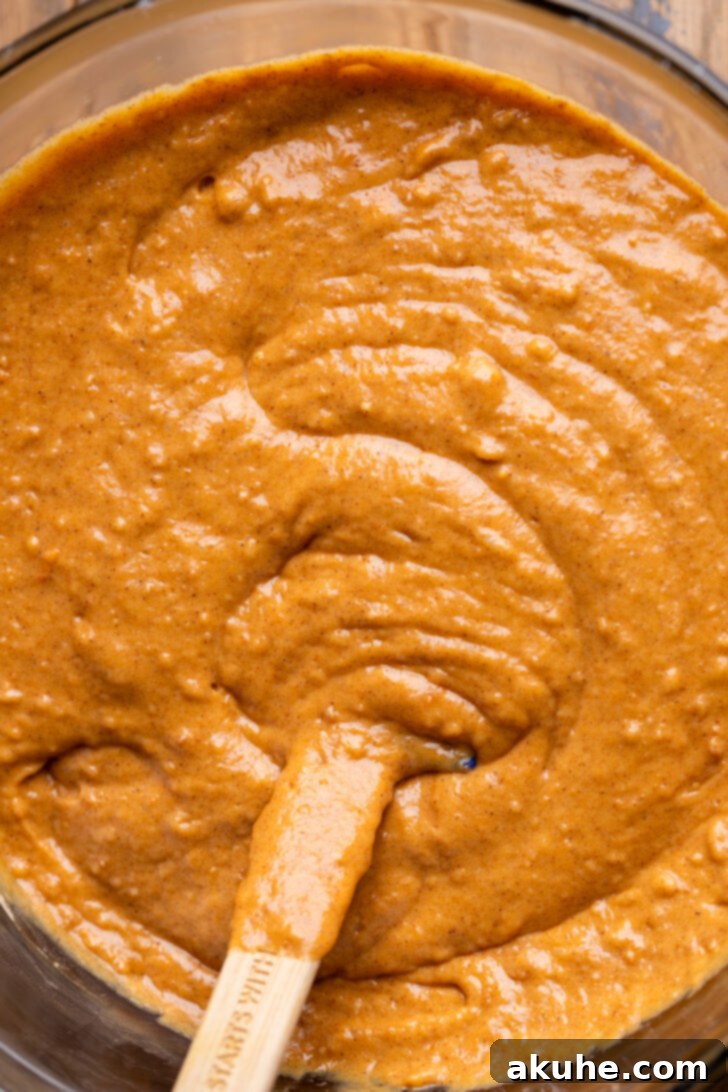
- In a large mixing bowl, combine the oil, white granulated sugar, brown sugar, moisture-reduced pumpkin puree, pure vanilla extract, maple syrup, room temperature eggs, and room temperature sour cream. Mix with a whisk or electric mixer until all wet ingredients are fully incorporated and the mixture is smooth.
- Gradually add the sifted dry ingredients into the wet mixture. Mix on low speed until the ingredients are just combined. Be careful not to overmix the batter, as this can lead to a tough cake. Divide the batter evenly among the three prepared cake pans.
- Bake the cake layers for 18-23 minutes. The cakes are done when a toothpick inserted into the center comes out clean or with only a few moist crumbs attached.
- Allow the hot cakes to cool in their pans for 10 minutes before carefully inverting them onto a wire cooling rack. It is crucial to let the cakes cool completely to room temperature before attempting to frost and decorate them.
Salted Caramel
- This salted caramel can be prepared ahead of time, either while your cakes are baking or even the day before you plan to assemble the cake.
- In a medium saucepan over medium heat, add the white granulated sugar. Allow the sugar to begin melting and liquefying around the edges before you start to mix it with a heat-proof whisk. Continue mixing until all the sugar crystals have completely melted and you have a smooth, clear liquid.
- Once the sugar is fully melted, let it cook for an additional 30 seconds until it develops a rich amber color. This stage happens quickly, so watch it very carefully to prevent burning. Immediately remove the saucepan from the heat. Carefully add half of the cubed, room temperature unsalted butter and whisk vigorously until the butter is fully melted and incorporated. Then, add the remaining butter and mix until smooth.
- Gradually pour in half of the room temperature heavy cream. The mixture will bubble up considerably; continue whisking until it’s fully combined and smooth. Add the rest of the heavy cream and mix again. Finally, stir in the pure vanilla extract and salt. If any sugar solids stick to the bottom of the pot, don’t worry; they will dissolve as the caramel continues to cook.
- Return the caramel mixture to low heat. Bring it to a gentle, bubbling simmer. Let it bubble for 2 minutes, stirring continuously to prevent it from scorching. This simmering process is essential for thickening the caramel to the ideal consistency for a cake filling.
- Pour the finished salted caramel into a heat-proof glass measuring cup or jar. Let it cool completely at room temperature. For faster cooling, you can place it in the refrigerator, stirring occasionally until it reaches a thick, pourable consistency.
Maple Cream Cheese Frosting
- In a large bowl, sift the powdered sugar to remove any lumps, ensuring a smooth frosting. Set aside.
- Using an electric mixer (stand mixer with paddle attachment or a hand mixer), beat the room temperature unsalted butter on high speed for 2 minutes until it is light and fluffy. Add the room temperature cream cheese and continue beating for another minute until the mixture is smooth and fully combined. Be sure to scrape down the sides of the bowl frequently with a rubber spatula to ensure all butter and cream cheese chunks are thoroughly incorporated.
- Add half of the sifted powdered sugar to the butter and cream cheese mixture. Mix on low speed until it is just combined. Then, add the remaining powdered sugar and continue mixing until fully incorporated into a smooth frosting.
- Stir in the pure vanilla extract, a pinch of salt, and the maple syrup. Increase the mixer speed to high and beat the frosting until it becomes smooth, creamy, and visibly lighter. Be careful not to overmix cream cheese frosting, as it can become too soft.
Assemble Your Cake
- To ensure your cake remains stable during assembly and serving, place a small dollop of maple cream cheese frosting on your chosen cake board or serving plate.
- Carefully place the first cooled pumpkin cake layer onto the frosted spot. Evenly spread approximately ¾ cup of the maple cream cheese frosting over this layer. Using a piping bag (with a round tip, if preferred), pipe a sturdy double border of frosting around the very edge of the cake layer. This creates a secure dam for your caramel filling.
- Pour about ½ cup of the cooled salted caramel into the center of the piped frosting border. If your caramel is too firm, warm it slightly in the microwave for 10-15 seconds until it is pourable but still thick. Gently spread the caramel within the frosting border. Carefully place the second cake layer on top.
- Apply a very thin layer of frosting around the sides and top of the entire cake. This is your “crumb coat,” which seals in any loose crumbs and prevents them from showing through your final frosting layer. It also helps to lock in the filling. Place the cake in the freezer for 10-15 minutes to allow this crumb coat to firm up.
- Repeat steps 2 and 3 for the second layer of cake. For the final, third cake layer, place it bottom-side up on top of the second frosted and filled layer. This creates a perfectly flat and level top surface for decorating. Apply another thin crumb coat and return the cake to the freezer for another 10-15 minutes.
- Once the crumb coat is firm, apply the remaining maple cream cheese frosting generously around the entire cake. Use an offset spatula or a cake scraper to smooth the sides and top to your desired finish. Freeze the cake for an additional 10 minutes before applying the caramel drip.
- For the elegant caramel drip, ensure your remaining salted caramel is warm enough to be pourable but not hot (test its consistency; microwave in 5-10 second intervals if too thick). If it’s too thick, it won’t drip properly. Pour about half of the caramel onto the top center of the cake. Using an offset spatula, gently push the caramel towards the edges, allowing it to naturally cascade down the sides of the cake. Add the rest of the caramel to the top for a full, rich caramel pool. Finally, place the finished cake back into the freezer for 10-15 minutes to set the caramel drip firmly.
Notes
- Flour Measurement: For the most accurate results and to prevent a dry cake, always spoon your all-purpose flour into the measuring cup and level it off with the back of a knife. Avoid compacting the flour by scooping directly from the bag.
- High Altitude Baking: If you are baking at a higher altitude, consider adding an extra 3 tablespoons of all-purpose flour to the cake batter. This adjustment helps to strengthen the cake’s structure under lower atmospheric pressure.
- Room Temperature Dairy: To ensure optimal emulsification and a smoother batter and frosting, it is crucial that all dairy ingredients (butter, eggs, sour cream, cream cheese, heavy cream) are at room temperature. Take them out of the refrigerator at least 2 hours before you plan to start baking.
Nutritional Information (Per Serving)
Calories: 827kcal, Carbohydrates: 121g, Protein: 5g, Fat: 59g, Saturated Fat: 29g, Polyunsaturated Fat: 6g, Monounsaturated Fat: 20g, Trans Fat: 1g, Cholesterol: 123mg, Sodium: 495mg, Potassium: 179mg, Fiber: 2g, Sugar: 53g, Vitamin A: 6248IU, Vitamin C: 2mg, Calcium: 109mg, Iron: 2mg
Did you bake this delightful cake? We’d love to hear from you! Please consider leaving a star rating and review below to share your experience with other bakers.
