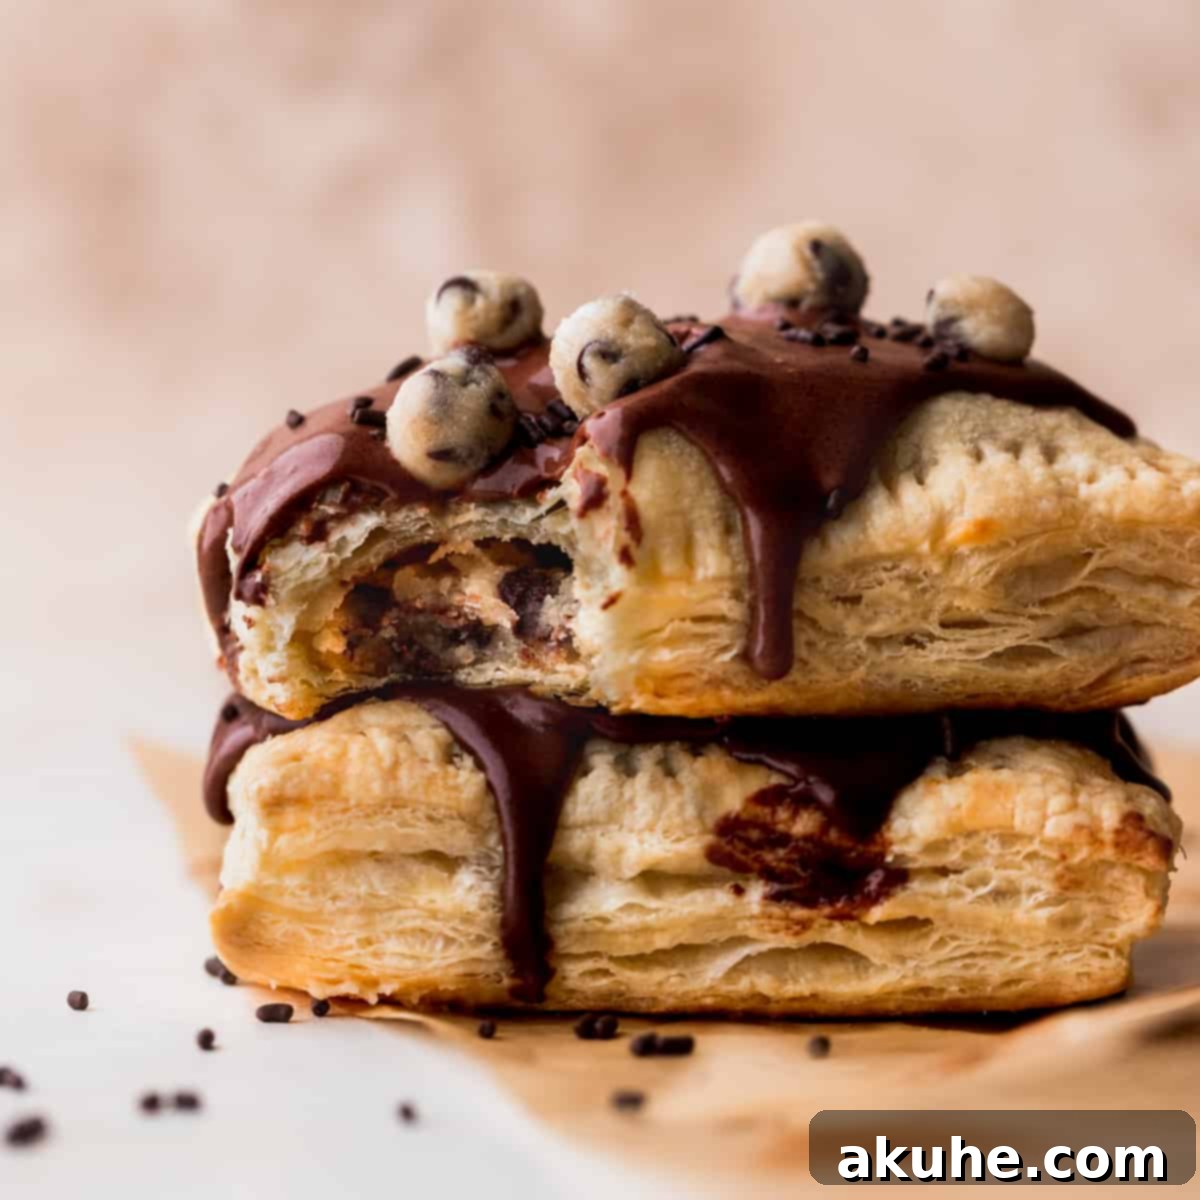
Irresistible Homemade Chocolate Cookie Dough Pop Tarts: Your New Favorite Breakfast Treat
Forget the store-bought versions – these homemade chocolate cookie dough pop tarts are a game-changer! Imagine flaky, golden puff pastry generously filled with a luscious, creamy edible cookie dough and cream cheese blend, all crowned with a decadent chocolate glaze. This recipe simplifies the art of creating gourmet pastries right in your kitchen, making it incredibly easy to whip up a batch of these extraordinary treats.
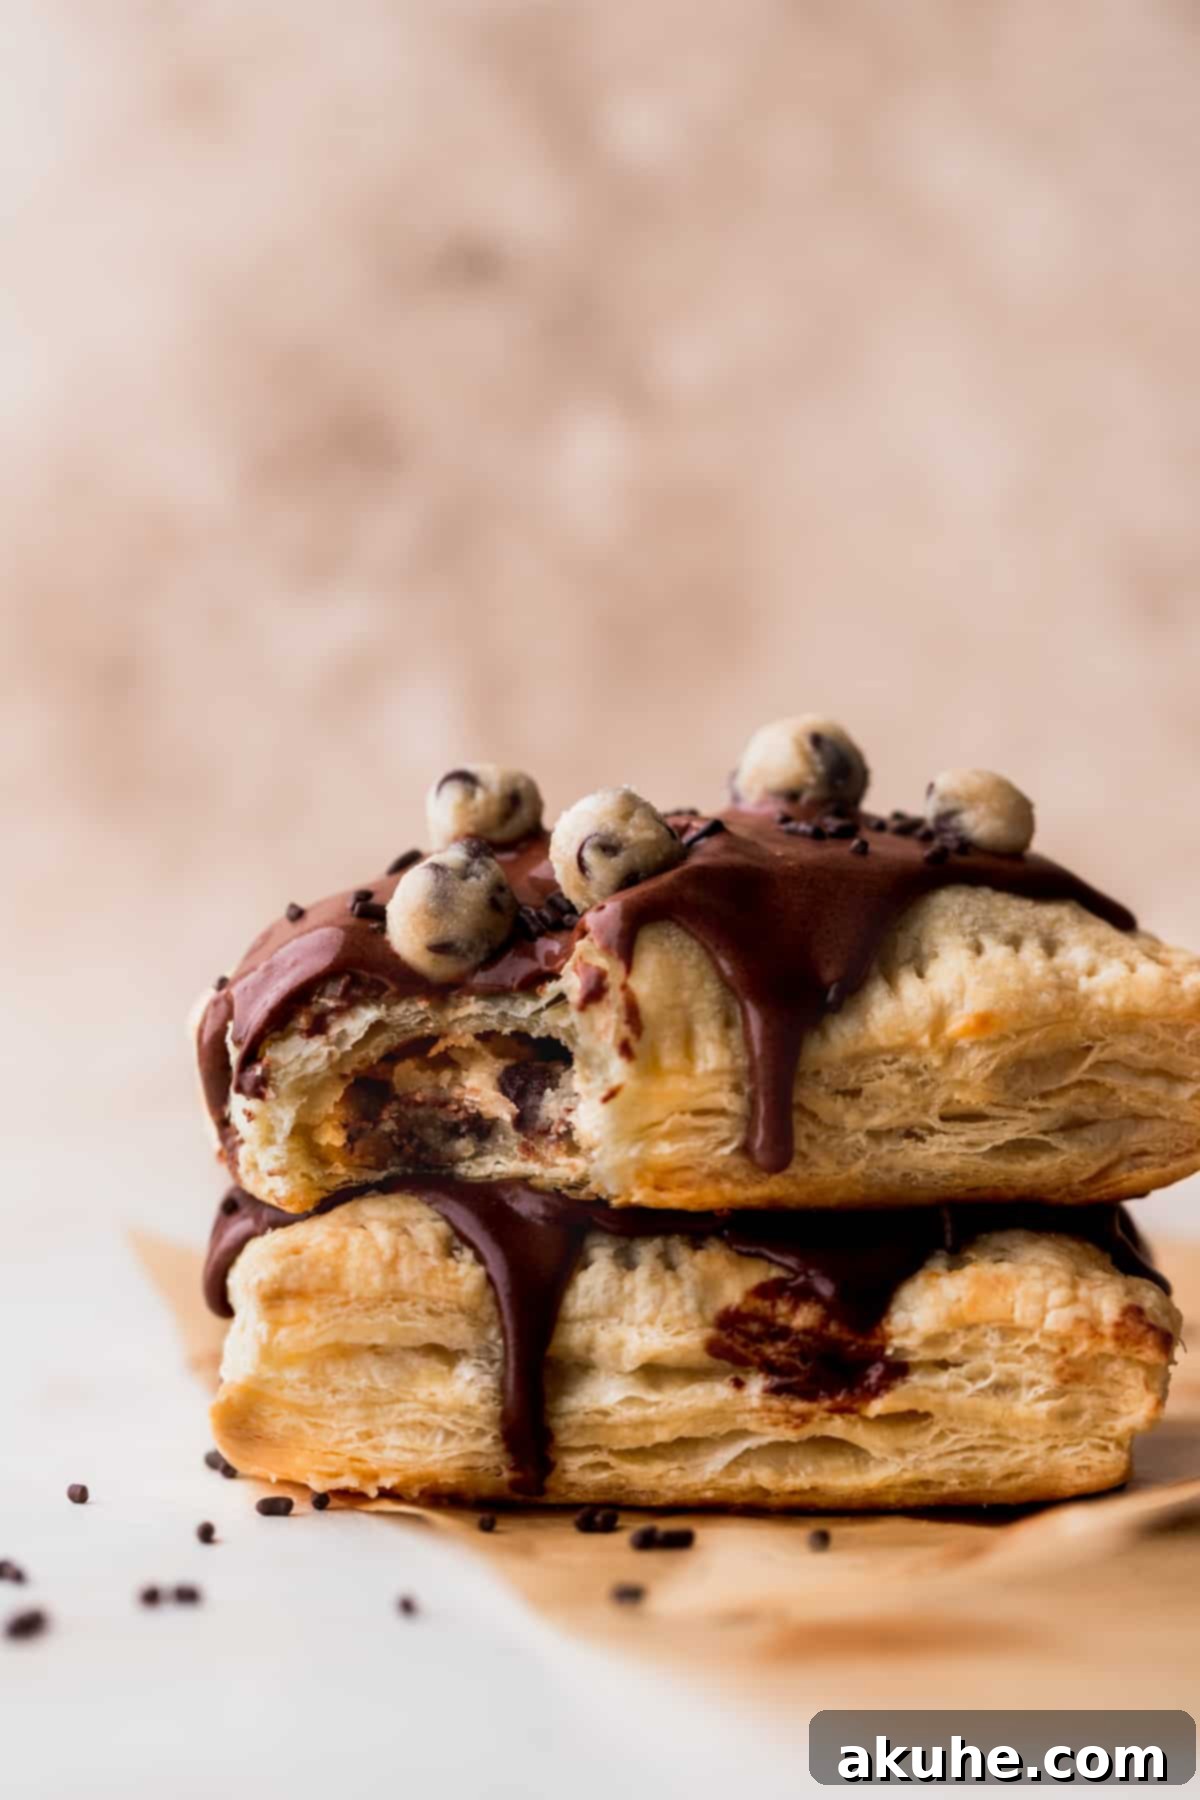
Crafting these delightful pastries is surprisingly straightforward, thanks to a clever shortcut: frozen puff pastry. While traditional pop tarts often involve making a shortcrust pastry from scratch, we’ve opted for the convenience of pre-made puff pastry to save you time and effort. This means you can focus entirely on perfecting the rich, delightful filling and the glossy, sweet glaze, transforming a simple ingredient into a truly spectacular breakfast or dessert.
The beauty of using frozen puff pastry lies in its ability to deliver an incredibly buttery and layered texture with minimal fuss. This ensures that every bite of your homemade pop tart is a symphony of crisp, airy pastry giving way to the soft, sweet center. It’s an elevated take on a nostalgic favorite that promises to be so much better than anything you’d find on a grocery store shelf, offering a taste of gourmet indulgence without the culinary complexity.
If you’re eager to explore more effortless and delicious breakfast or dessert ideas using puff pastry, be sure to check out our other popular recipes:
- Strawberry Danish
- Chocolate Cream Cheese Danish
- Easy Blueberry Danish
- Puff Pastry Apple Tart
Why You’ll Fall in Love with These Homemade Pop Tarts
These chocolate cookie dough pop tarts aren’t just easy to make; they’re packed with irresistible qualities that will make them a staple in your recipe collection. Here’s why they stand out as a must-try:
- Golden, Flaky Puff Pastry: Our secret weapon! Using high-quality frozen puff pastry creates a golden-brown, incredibly light, and buttery crust with hundreds of delicate layers. It provides the perfect contrast to the creamy filling, making each bite a textural delight that far surpasses the often-dense crust of conventional pop tarts. The ethereal flakiness truly sets these homemade versions apart.
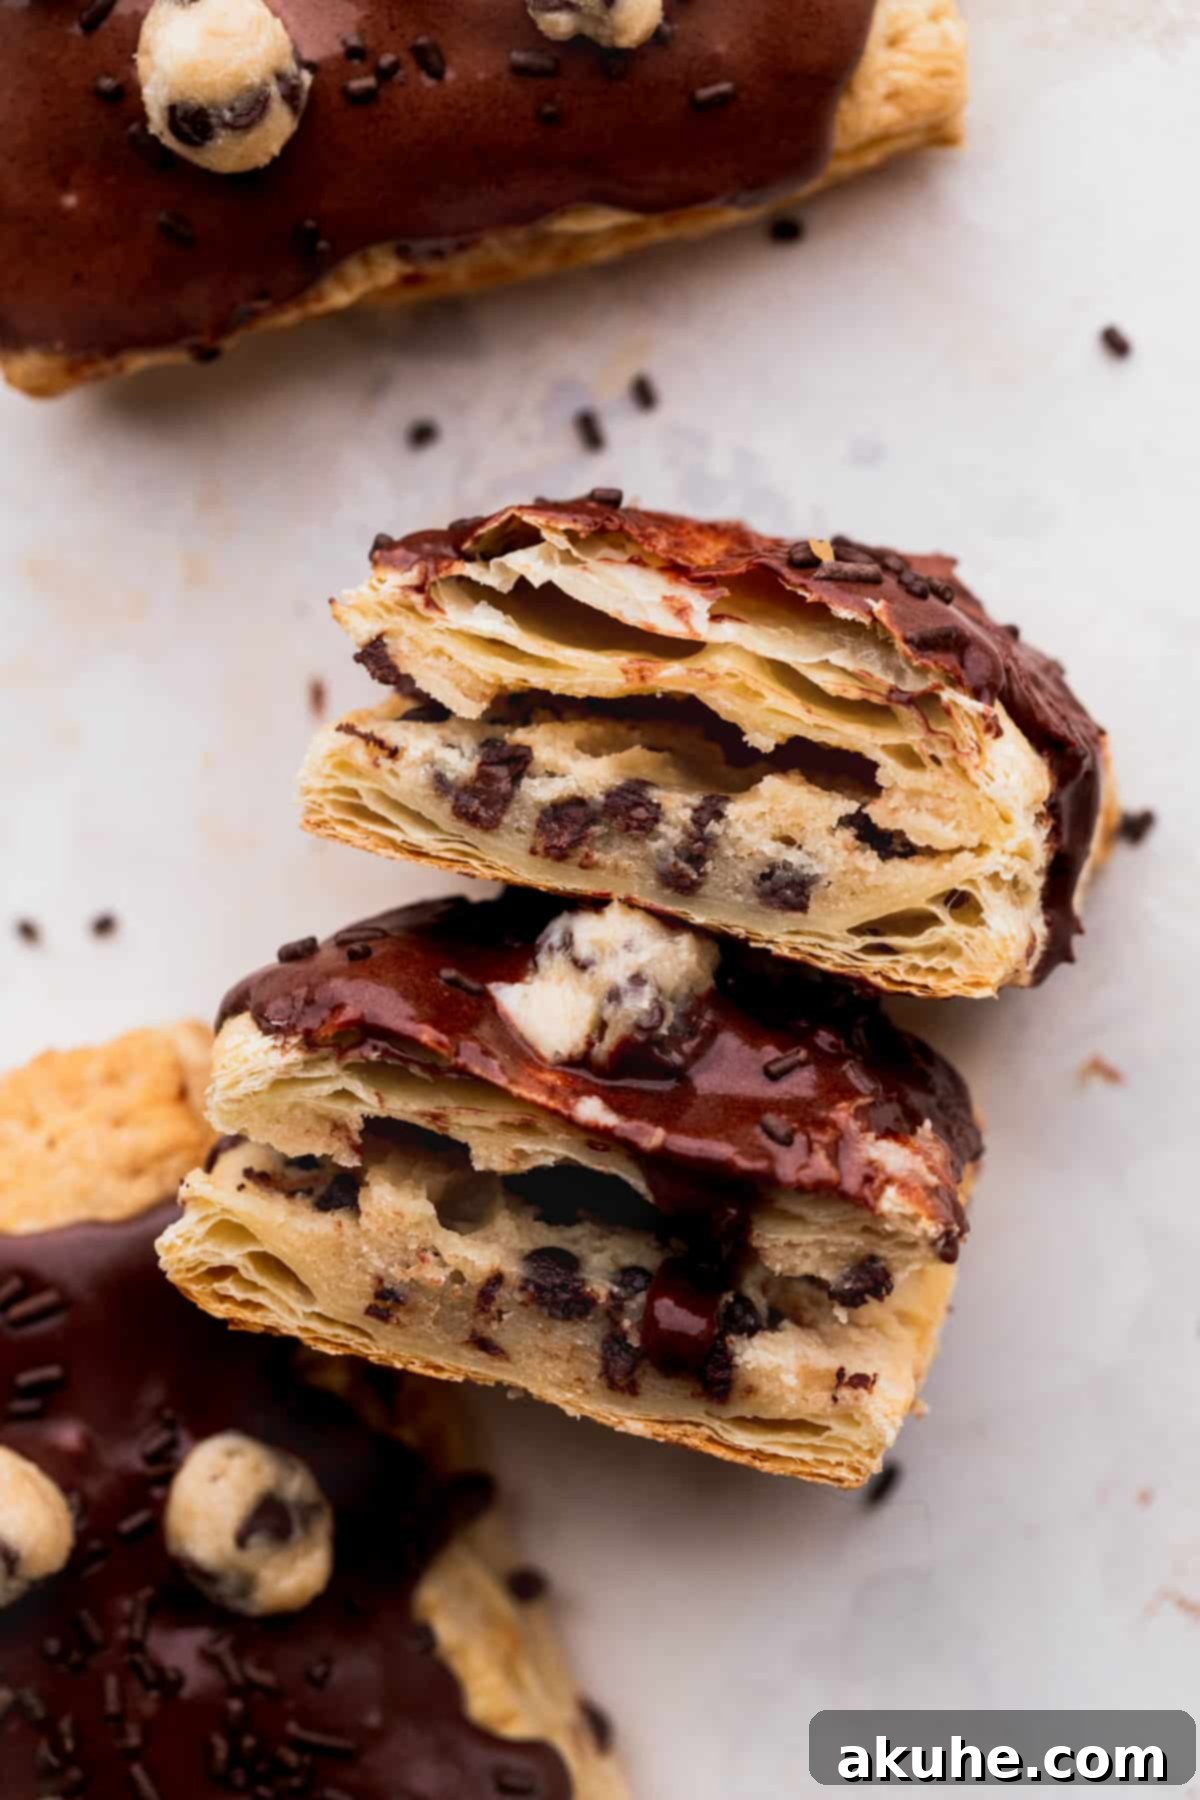
- Dreamy Cookie Dough Cream Cheese Filling: This isn’t just any cookie dough; it’s an edible, perfectly safe-to-eat blend combined with smooth, tangy cream cheese. The result is a rich, sweet, and slightly tart filling that’s bursting with classic chocolate chip cookie flavor. The cream cheese adds a wonderful depth and silkiness, making the filling truly special and addictive. It’s a luscious surprise in every bite.
- Decadent Chocolate Glaze: A rich, pourable chocolate glaze made with heavy cream provides the ideal finishing touch. It adds an extra layer of chocolatey sweetness and a beautiful sheen, completing the gourmet feel of these homemade treats. The glaze hardens slightly as it cools, giving that satisfying crackle when you bite into the pastry. This perfectly complements the sweetness of the filling.
- Effortlessly Easy to Make: Despite their sophisticated appearance and incredible flavor, these pop tarts are surprisingly simple to prepare. The frozen puff pastry eliminates the need for complex dough making, allowing you to create impressive pastries with minimal effort and time. They are perfect for busy mornings or spontaneous baking sessions, proving that homemade deliciousness doesn’t have to be complicated.
- Customizable and Fun: While the chocolate cookie dough is divine, this recipe offers a fantastic base for creativity. You can easily adapt the filling or glaze to your taste, making them a fun project for bakers of all skill levels. They’re also perfect for involving kids in the kitchen, offering a delightful activity that ends with a tasty reward.
- A Crowd-Pleaser: Whether for a special brunch, a party, or just a family treat, these pop tarts are universally loved. Their familiar shape with an elevated flavor profile makes them a guaranteed hit with both children and adults.
Essential Ingredients for Your Homemade Pop Tarts
While the recipe itself is simple, choosing the right ingredients makes all the difference in achieving that bakery-quality taste and texture. Here’s a closer look at what you’ll need and why each component is important:
- Frozen Puff Pastry: This is your primary shortcut and hero ingredient, significantly cutting down on prep time. You’ll typically find it in the frozen dessert or freezer aisle of your grocery store. Opt for a brand with good reviews for buttery flavor and flaky layers. Remember to give it ample time to thaw slightly before handling, as specified in the instructions, to ensure it’s pliable but still cold.
- Full-Fat Cream Cheese: For the creamiest, most luxurious filling, full-fat cream cheese is essential. Its richness and tang balance the sweetness of the cookie dough beautifully, creating a complex flavor profile. Ensure it’s softened to room temperature for at least two hours before you begin mixing to prevent lumps and ensure a smooth, uniform filling. This step is crucial for an even texture.
- Cornstarch (Optional but Recommended): A small amount of cornstarch in the cookie dough filling serves a vital purpose: it helps to create a softer, more tender texture. It prevents the filling from becoming too dense or rubbery during baking, contributing to that melt-in-your-mouth experience that is characteristic of good edible cookie dough. Don’t skip it if you want the best possible result!
- Unsalted Butter: Like the cream cheese, unsalted butter should be at room temperature. This is crucial for proper creaming with the sugars, allowing you to incorporate air and create a light, fluffy base for your cookie dough. Using unsalted butter also gives you precise control over the overall saltiness of the recipe.
- Light Brown Sugar: Light brown sugar adds a wonderful molasses flavor and essential moisture to the cookie dough, contributing to its classic taste and slightly chewy texture. When measuring, pack it firmly into your measuring cup to ensure you have the correct amount, providing the right level of sweetness and depth. Dark brown sugar can be used for a more intense molasses flavor if preferred.
- Granulated Sugar: Used in combination with brown sugar for the perfect balance of sweetness and texture in the cookie dough, and also in the cream cheese component for a smooth, sweet base.
- Milk: Any milk you prefer – whole, 2%, or even a non-dairy alternative like almond or oat milk – will work effectively. It helps to bring the cookie dough together and achieve the desired consistency, ensuring it’s pliable enough to spread but not too wet.
- Pure Vanilla Extract: Essential for that classic, warm cookie dough aroma and flavor. Using a good quality pure vanilla extract will significantly enhance the overall taste of your pop tarts.
- Mini Chocolate Chips: While regular chocolate chips can work in a pinch, mini chocolate chips are strongly recommended for this recipe. Their smaller size ensures an even distribution of chocolatey goodness throughout the filling, preventing large chunks that might tear the pastry or make spreading difficult. They melt perfectly to create delightful, uniform pockets of chocolate in every bite.
- All-Purpose Flour: The foundation of our edible cookie dough, giving it structure. Since this is an edible cookie dough that will be baked within the pop tart, heat treating the flour (as some edible cookie dough recipes require for raw consumption) is not strictly necessary, but always ensure it’s measured correctly for the right consistency.
- Salt: A crucial flavor enhancer that balances the sweetness of the sugars and chocolate, making all the flavors pop and preventing the pop tarts from tasting overly sweet.
- Powdered Sugar & Cocoa Powder: These two ingredients form the base for our rich chocolate glaze. Sifting the powdered sugar is key to achieving a lump-free, smooth glaze that pours beautifully. Cocoa powder adds that intense, deep chocolate flavor and color.
- Heavy Cream: Provides the richness and creamy texture for the chocolate glaze, allowing it to be pourable yet thick enough to coat the pop tarts beautifully without being too thin.
Step-by-Step Guide to Baking Your Chocolate Cookie Dough Pop Tarts
Creating these delightful pop tarts is a rewarding experience. Follow these detailed instructions carefully to ensure perfect results every time, from the flaky pastry to the luscious filling and glossy glaze.
STEP 1: Thaw the Puff Pastry. Begin by removing two sheets of frozen puff pastry from the freezer. Lay them flat on a clean surface and allow them to sit at room temperature for approximately 30-40 minutes. This thawing period is crucial; the pastry should be soft enough to unfold and roll without cracking, but still cool to the touch. While the pastry thaws, you can efficiently prepare your delicious filling components.
STEP 2: Prepare the Cream Cheese Component. In a medium mixing bowl, combine the softened full-fat cream cheese and 1/4 cup of white granulated sugar. Using an electric mixer, beat the mixture on high speed for about 2 minutes, or until it becomes completely smooth, light, and creamy with no lumps. Scrape down the sides of the bowl as needed to ensure everything is thoroughly combined. Set this perfectly smooth cream cheese mixture aside for later.
STEP 3: Create the Edible Cookie Dough. In a separate, larger mixing bowl, cream together the room-temperature unsalted butter, 6 tablespoons of light brown sugar, and 2 tablespoons of white granulated sugar. Beat on high speed for 2-3 minutes until the mixture is light, fluffy, and well combined, resembling whipped butter. Next, add the milk and pure vanilla extract, mixing on low speed until they are just incorporated into the butter-sugar mixture.
Reduce the mixer speed to low and gradually add the all-purpose flour, cornstarch, and salt to the wet ingredients. Mix until just combined and a soft dough forms; be careful not to overmix, as this can develop the gluten in the flour too much. Finally, fold in the mini chocolate chips until they are evenly distributed throughout the dough. The dough will have a somewhat thin and soft consistency, which is exactly what we want for a spreadable filling that melts beautifully.
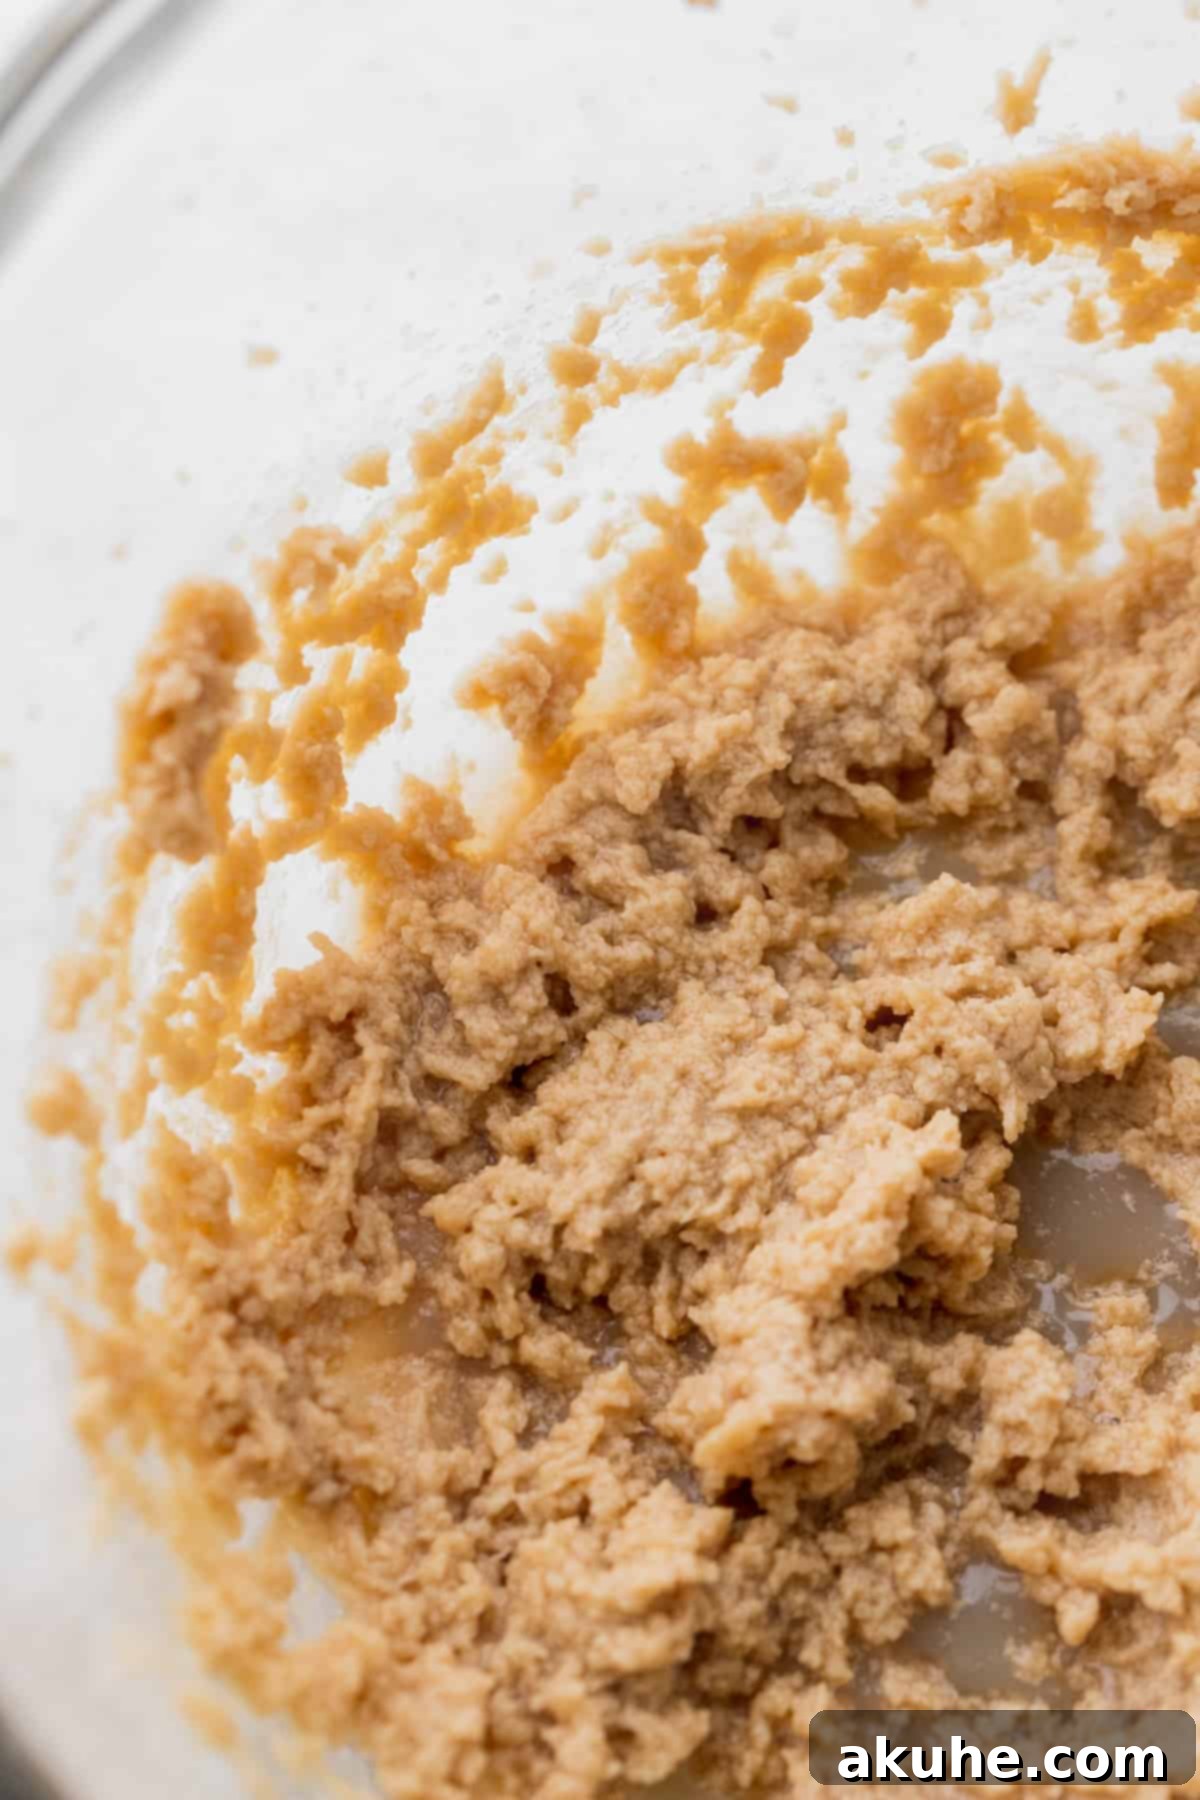
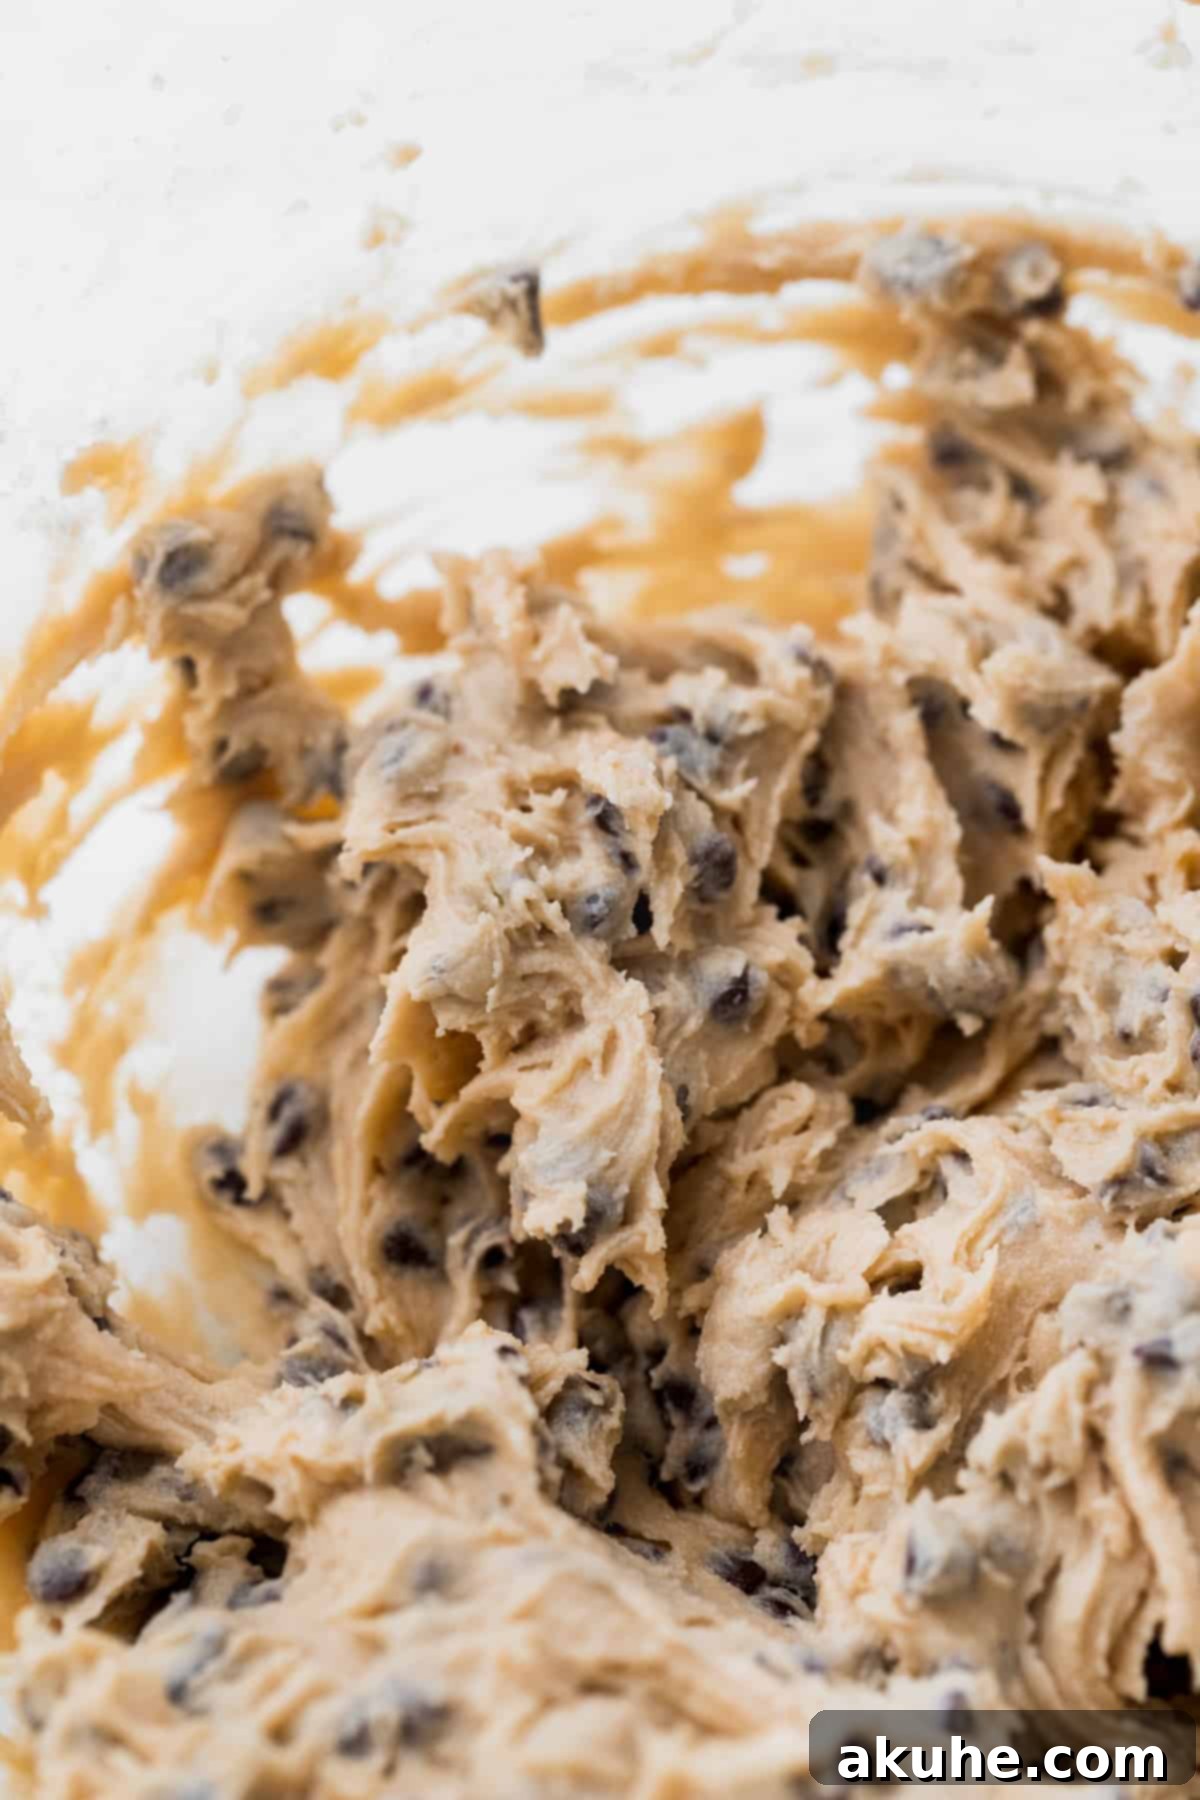
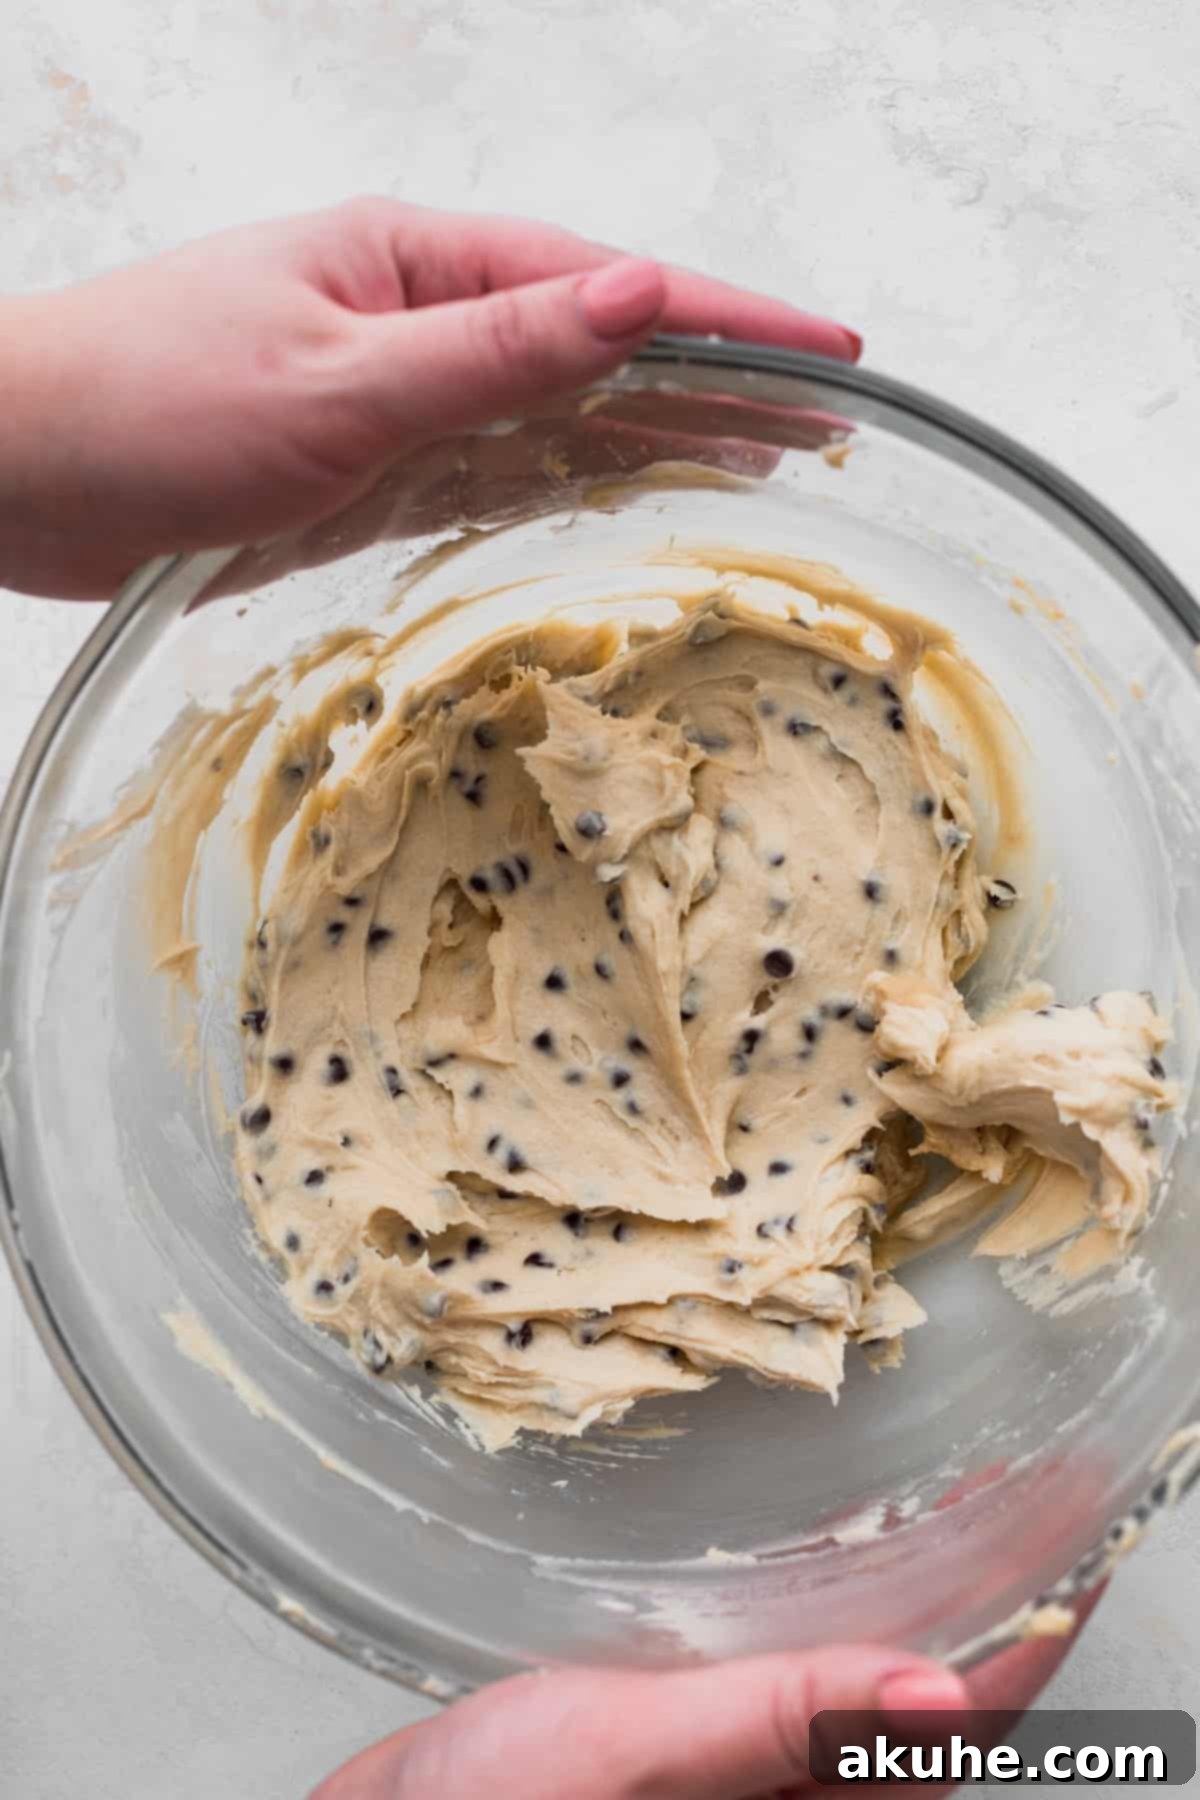
STEP 4: Combine Fillings and Reserve Dough. Gently fold the prepared cream cheese mixture into the cookie dough until just combined. Use a spatula to carefully incorporate the two mixtures, ensuring no streaks of cream cheese remain, but be careful not to overmix, as this can affect the texture. If you plan to make small cookie dough balls to decorate the tops of your pop tarts (highly recommended!), reserve about 1/3 cup of this combined filling mixture and place it in the freezer to firm up for easier rolling later.
STEP 5: Prepare and Cut the Puff Pastry. Lightly flour a clean work surface to prevent sticking. Carefully unfold each thawed puff pastry sheet and gently roll it out with a rolling pin. Roll just enough to smooth out any creases and ensure an even thickness, aiming for a consistent rectangle (approximately 9×12 inches, depending on your brand of pastry). Using a sharp knife or pastry wheel, cut each puff pastry sheet into 6 equal rectangles. You should now have a total of 12 rectangles, which will make 6 pop tarts.
STEP 6: Fill the Puff Pastry Rectangles. Line a large baking sheet with parchment paper. Arrange 6 of the puff pastry rectangles on the prepared baking sheet, ensuring they are spaced evenly to allow for puffing. Using a cookie scoop or a spoon, place approximately 2 tablespoons of the cookie dough cream cheese filling onto the center of each of these 6 rectangles. Gently smooth the filling, leaving a clear border of about 1/2 inch around all edges. This border is absolutely crucial for sealing the pop tarts and preventing the filling from leaking out during baking.
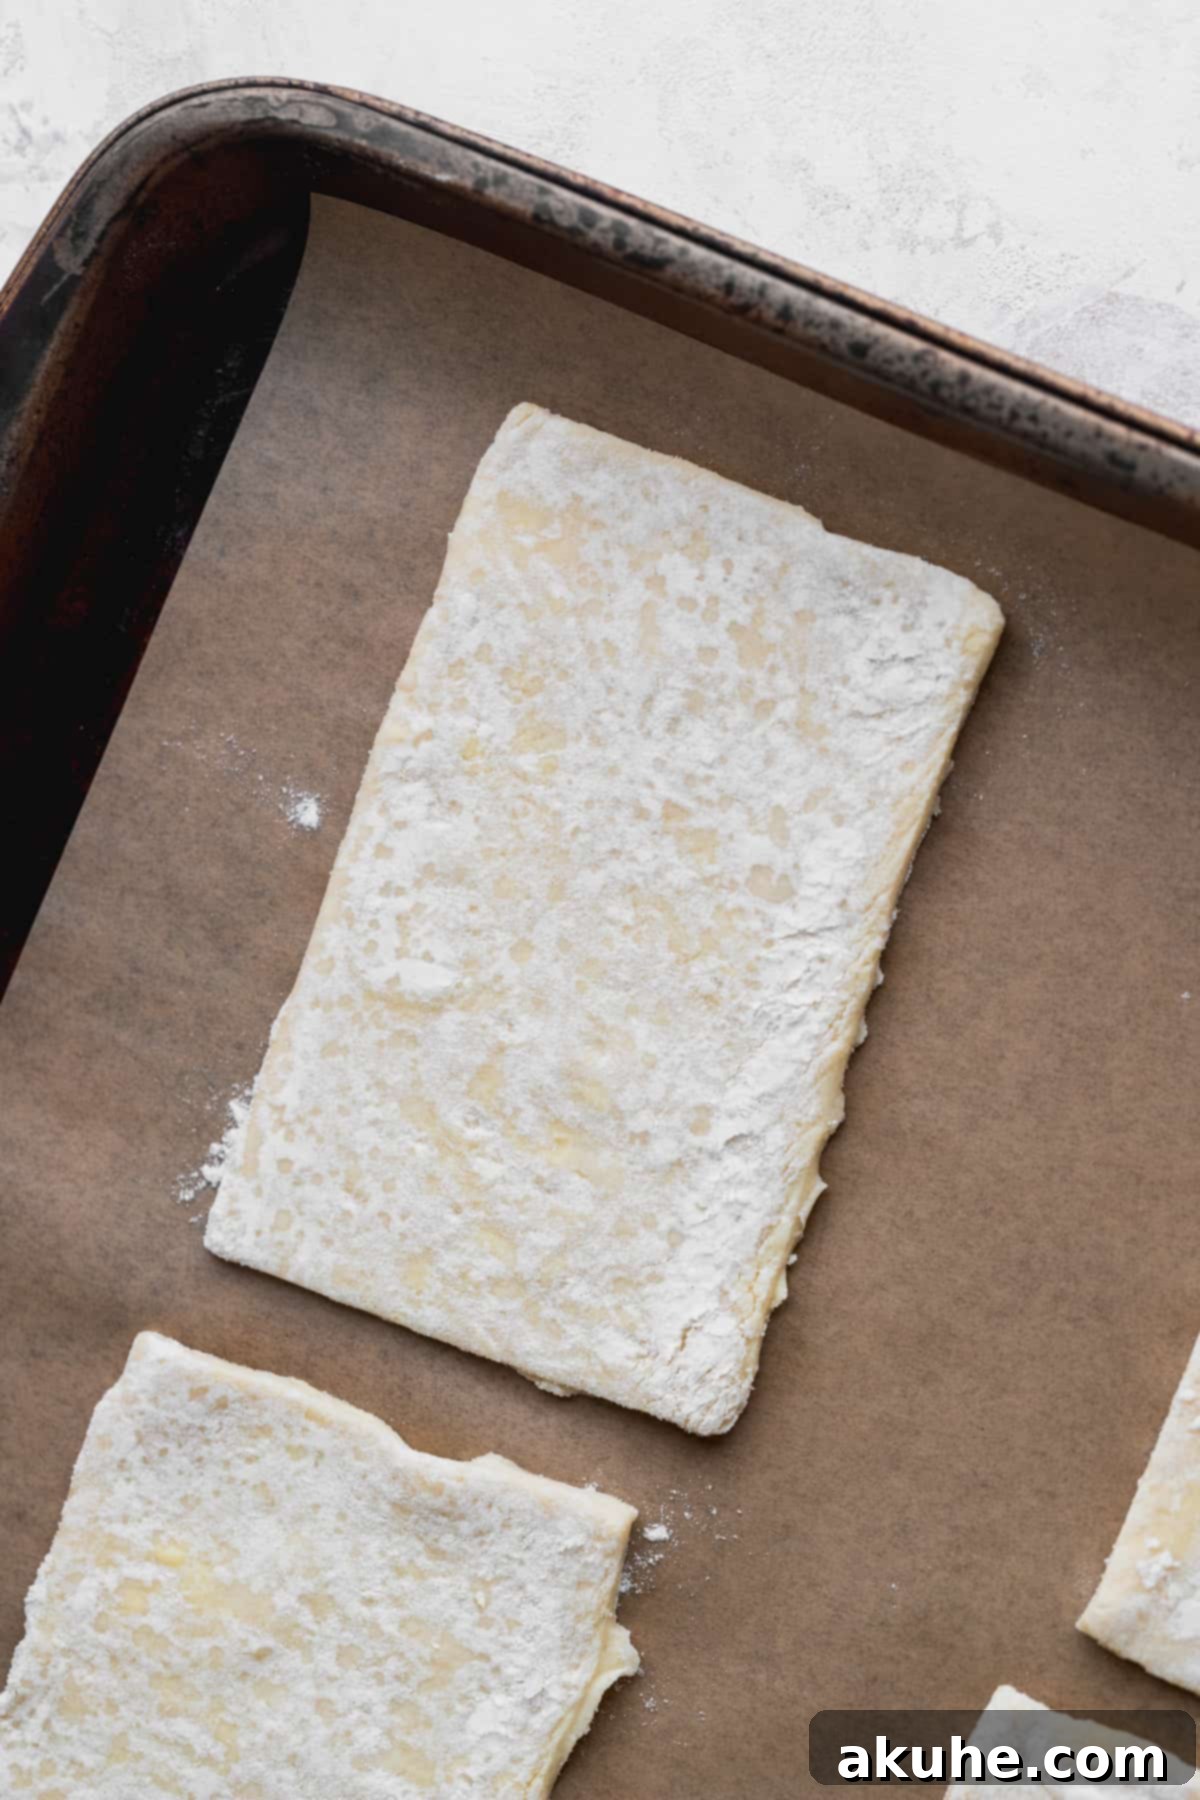
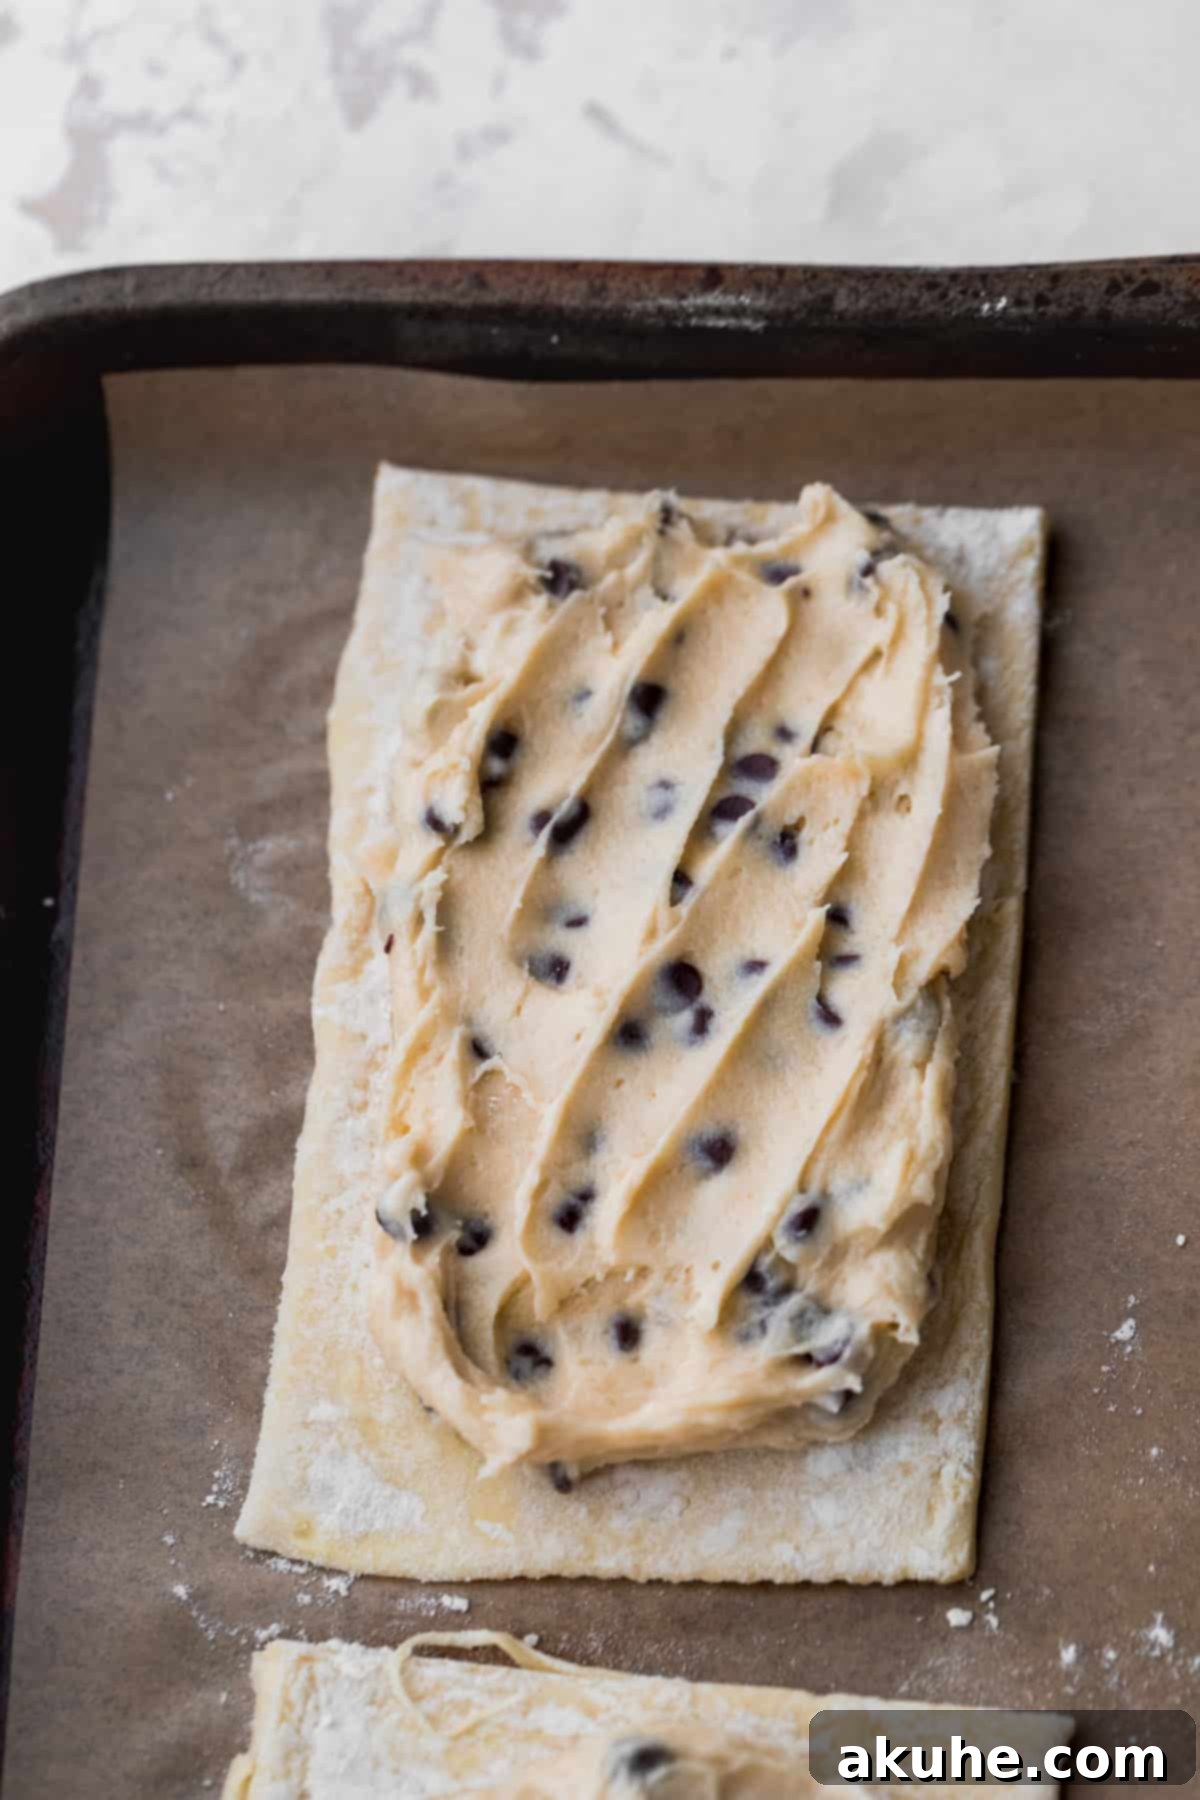
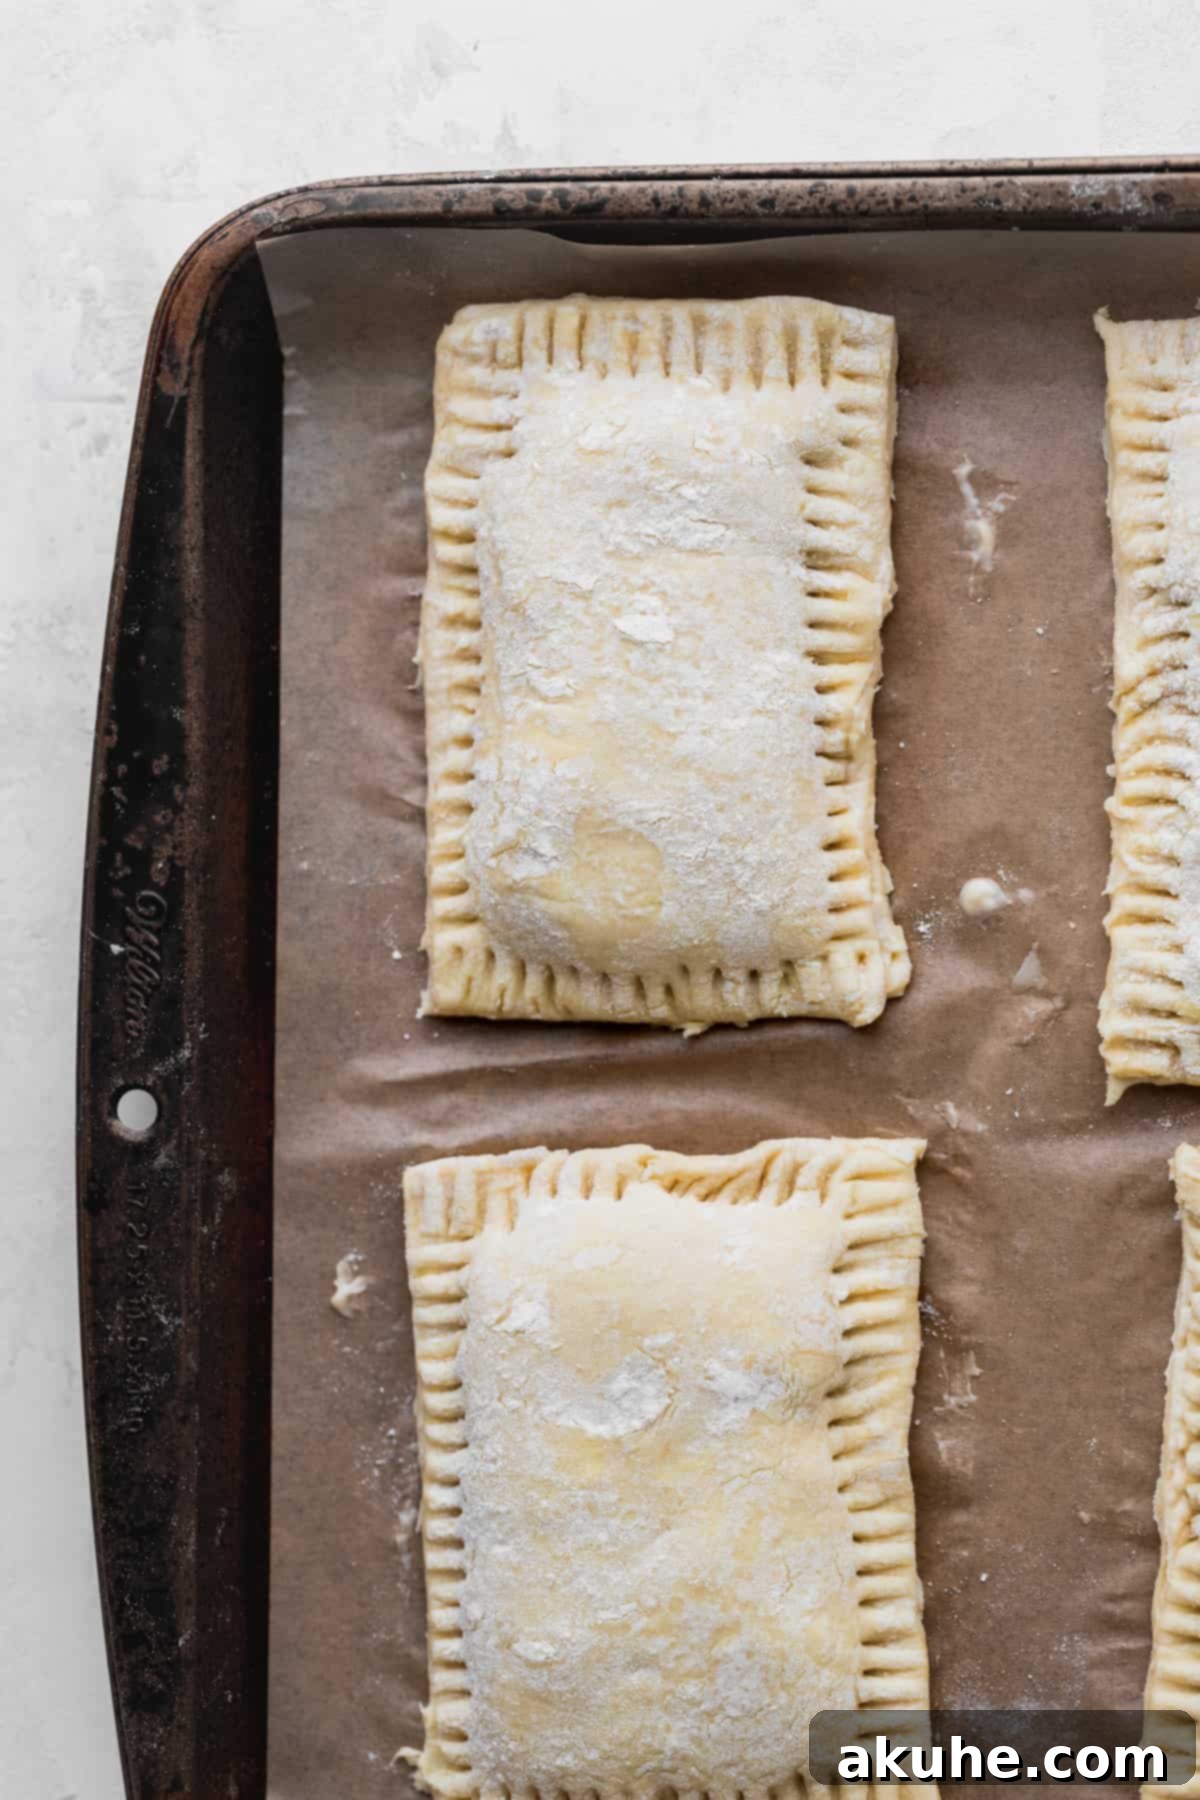
STEP 7: Seal and Crimp the Pop Tarts. Lightly dampen the edges of the filled puff pastry rectangles with a little water using your finger or a pastry brush. This creates a natural adhesive. Carefully place the remaining 6 plain puff pastry rectangles on top of the filled ones, aligning the edges as best as you can to form neat rectangles. Gently press down around the edges with your fingertips to seal the two pastry sheets together. Then, use the tines of a fork to firmly crimp all around the edges of each pop tart. This not only creates a charming decorative border but also ensures a secure seal, preventing any delicious filling from escaping during baking. You can also trim any extra uneven edges with a knife or pastry wheel for a neater, more professional appearance.
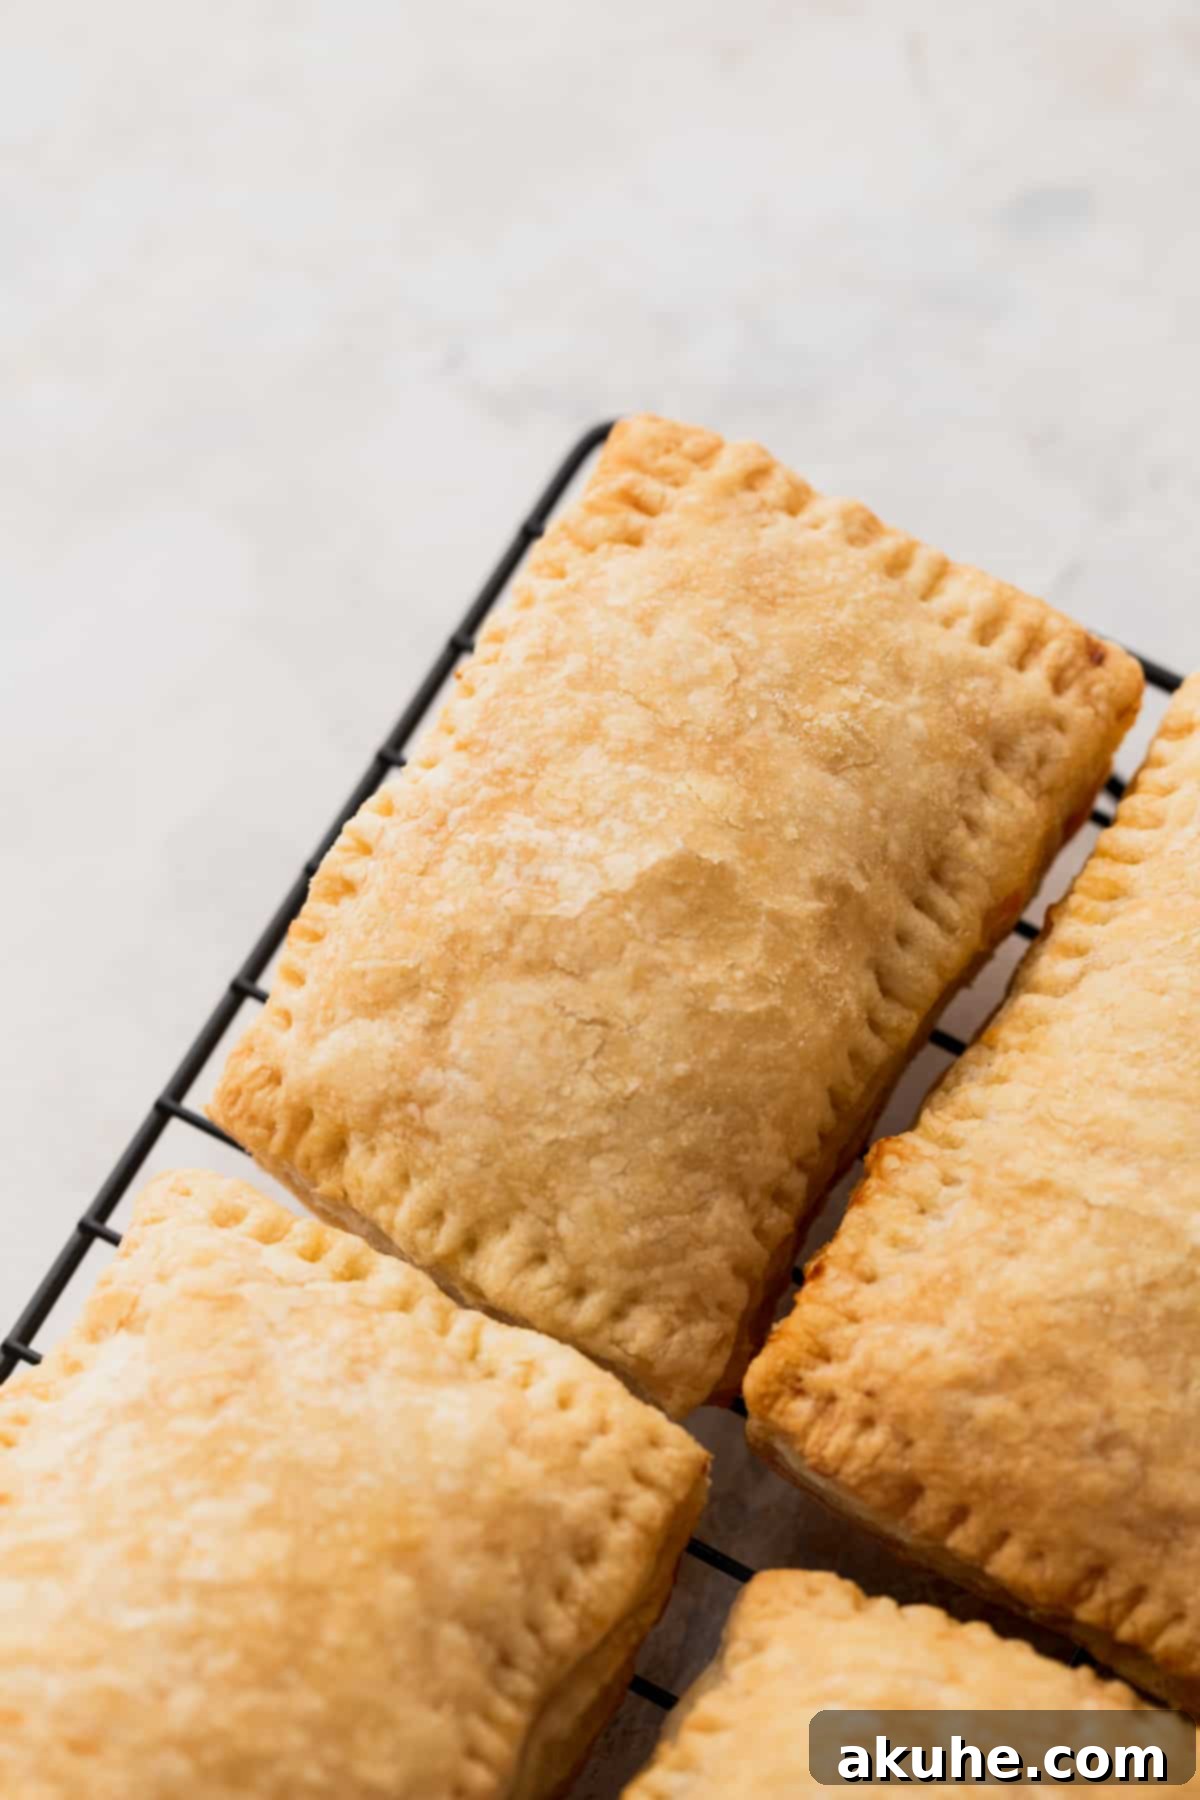
STEP 8: Chill and Bake to Golden Perfection. Preheat your oven to 375°F (190°C). While the oven is preheating, place the assembled pop tarts (still on their parchment-lined baking sheet) in the refrigerator for at least 15-20 minutes. This chilling step is absolutely crucial for maintaining the puff pastry’s flaky layers and preventing excessive shrinkage during baking. The cold butter in the pastry will create steam in the hot oven, leading to a much higher, flakier puff. Bake the pop tarts for 22-26 minutes, or until they are beautifully golden brown and impressively puffed up. Once baked, carefully transfer them to a wire rack to cool completely before decorating. This allows the filling to set and the pastry to crisp up.
The Art of Decorating Your Homemade Pop Tarts
Once your chocolate cookie dough pop tarts have cooled completely on a wire rack, it’s time for the delicious finishing touch: the chocolate glaze. Ensure the pop tarts are fully cooled; applying glaze to warm pastries will cause it to melt, become thin, and run off, making a sticky mess and poor presentation.
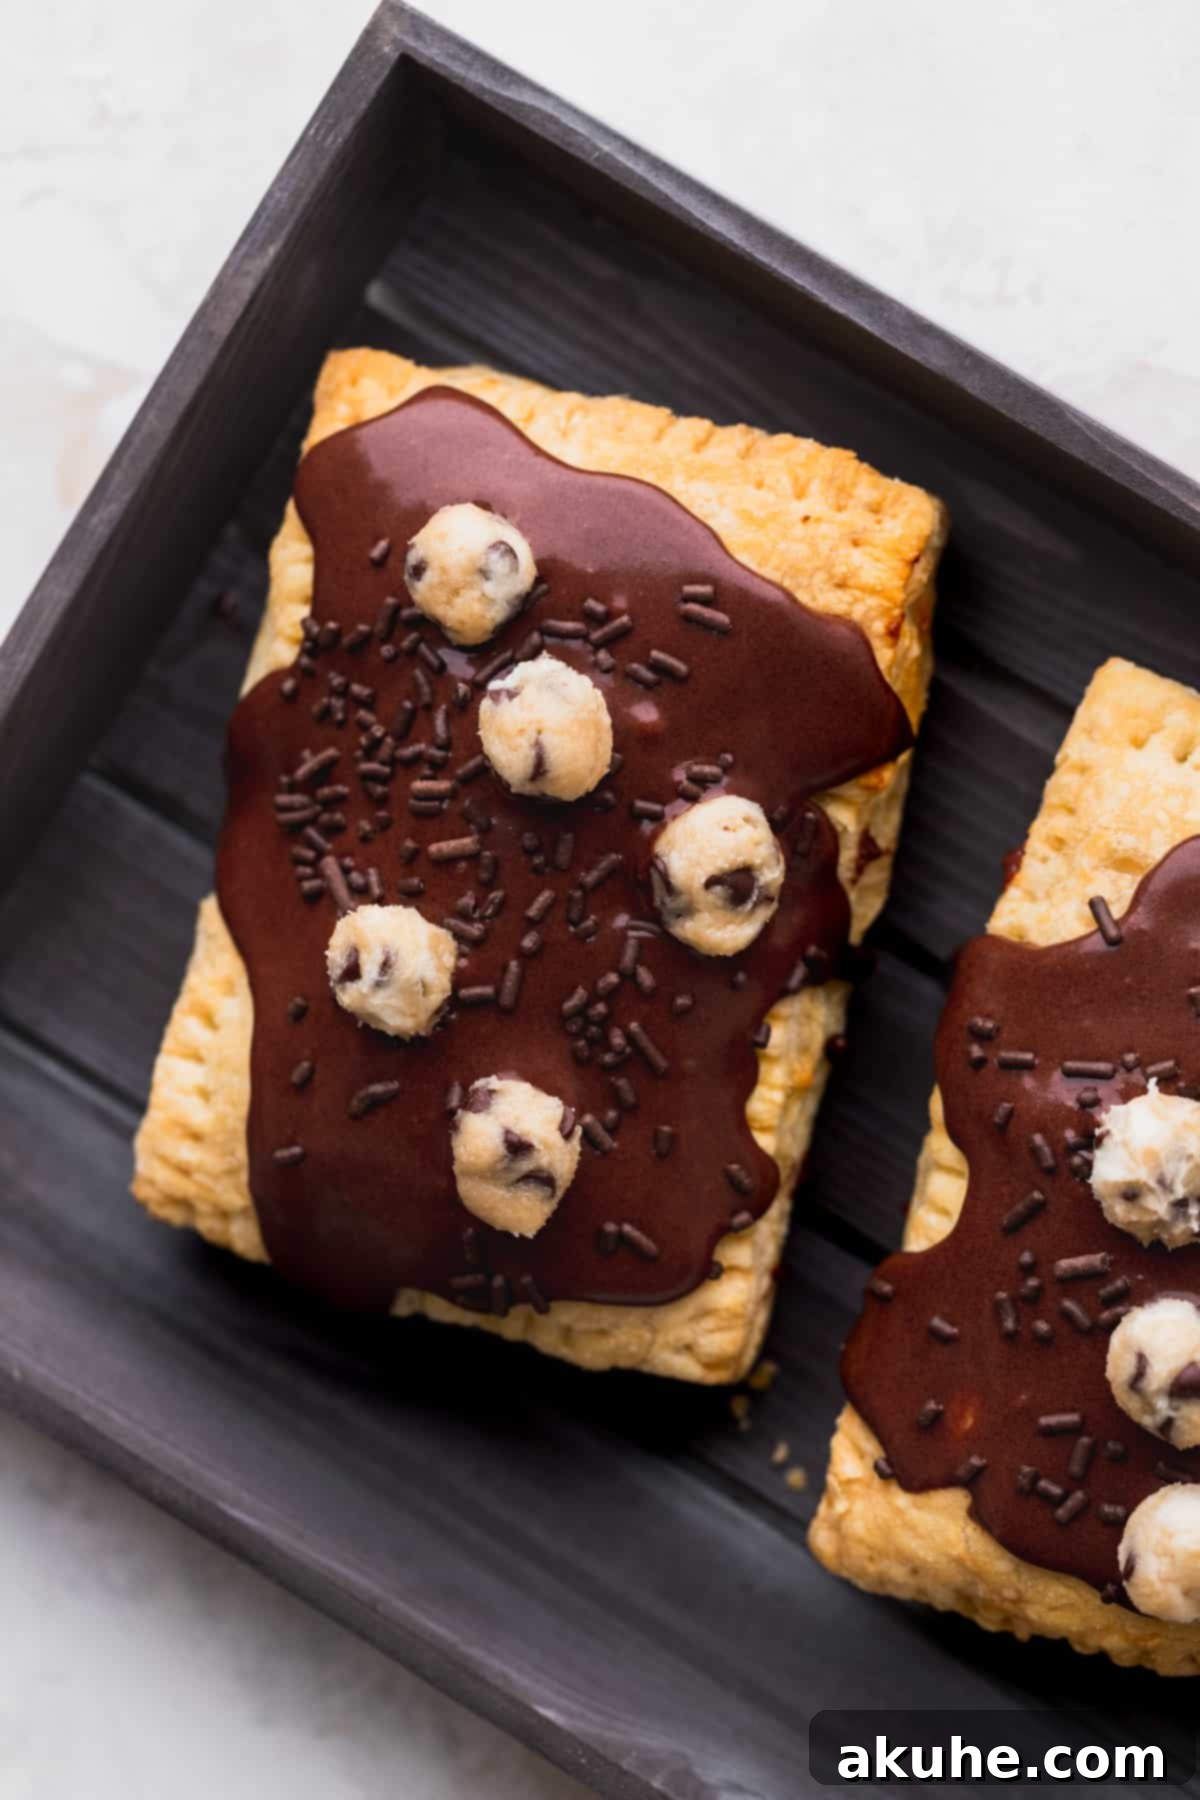
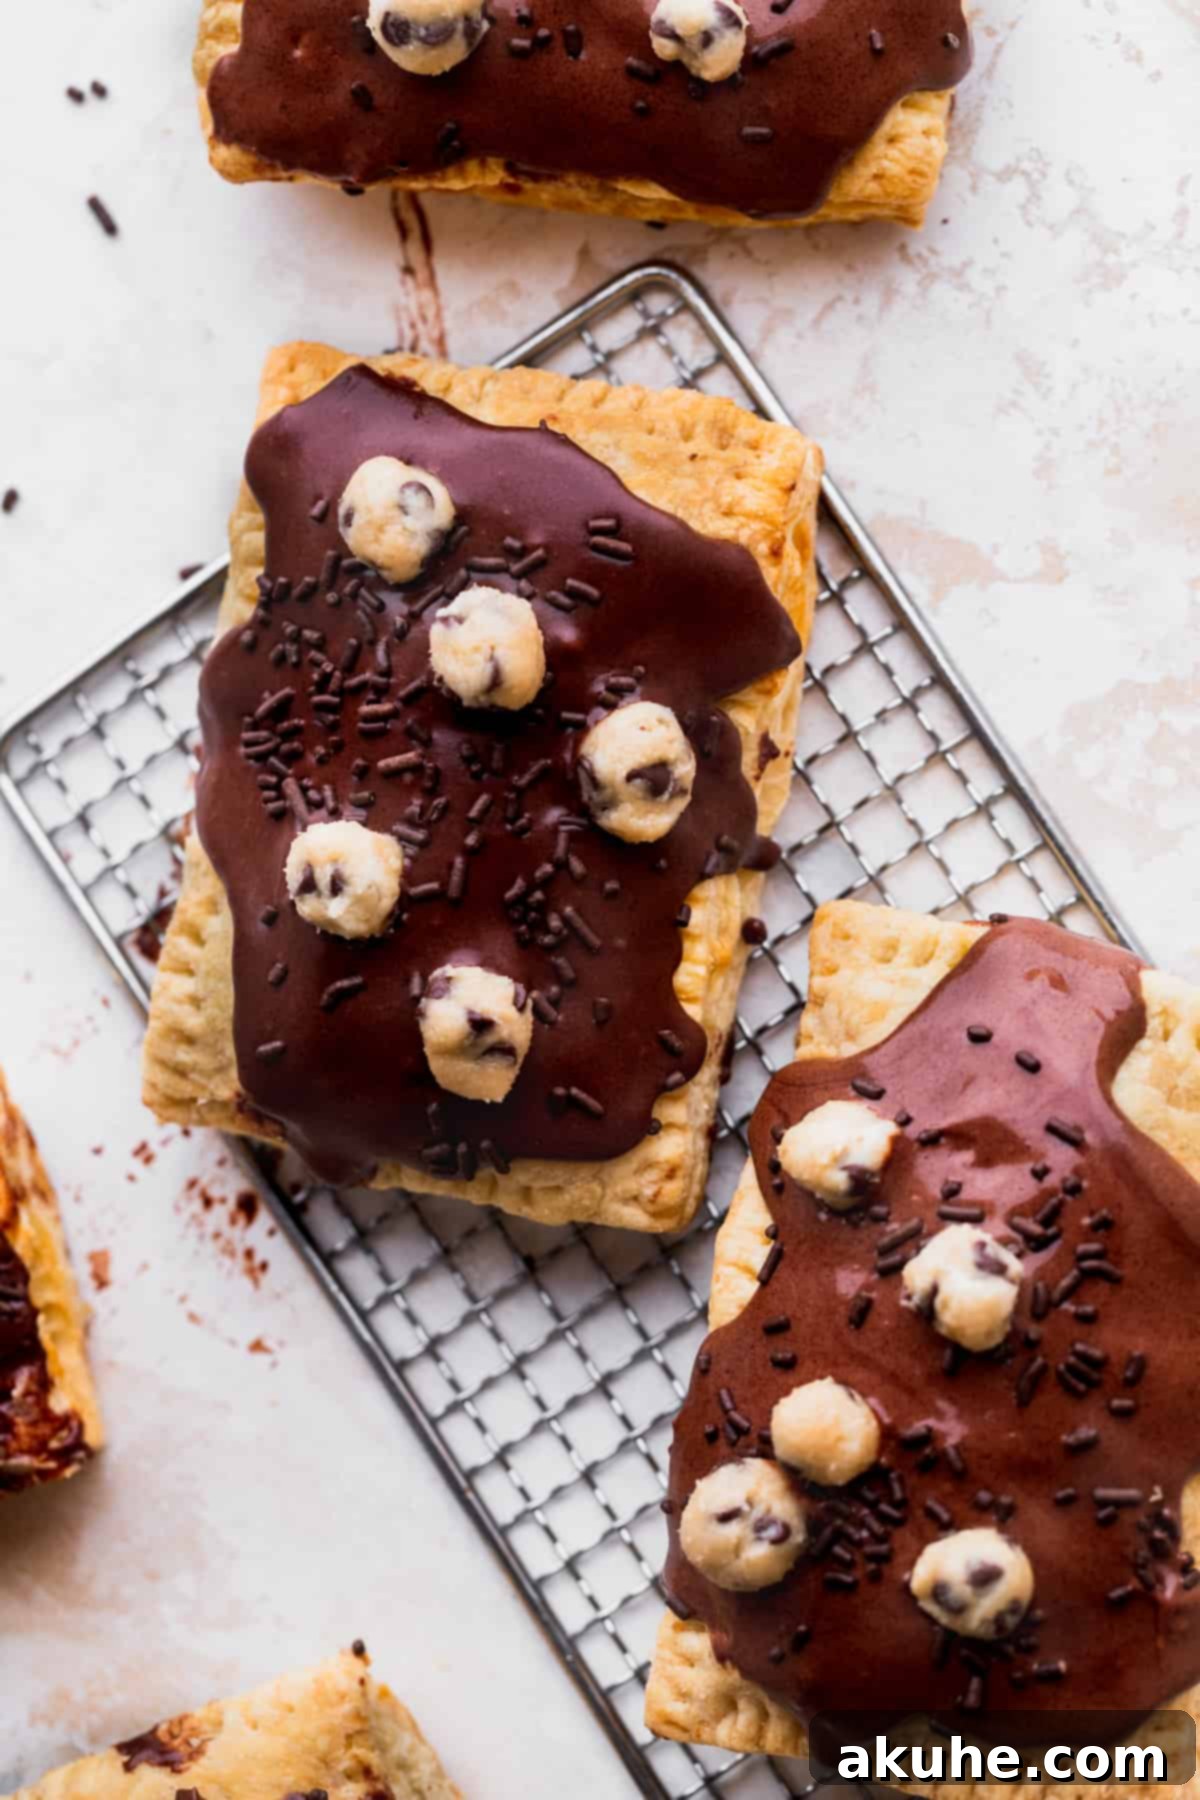
Prepare your chocolate glaze according to the recipe instructions, ensuring it has a smooth, pourable consistency. If it’s too thick, add a tiny bit more heavy cream (a teaspoon at a time) until it reaches the desired flow – think slightly thick pancake batter. If it’s too thin, sift in a tablespoon or two of extra powdered sugar until it thickens. Using a spoon or a small offset spatula, generously drizzle or spread the glaze evenly over the top of each pop tart. You can achieve a neat, even coat for a polished look or a more rustic, free-form drizzled appearance, depending on your preference.
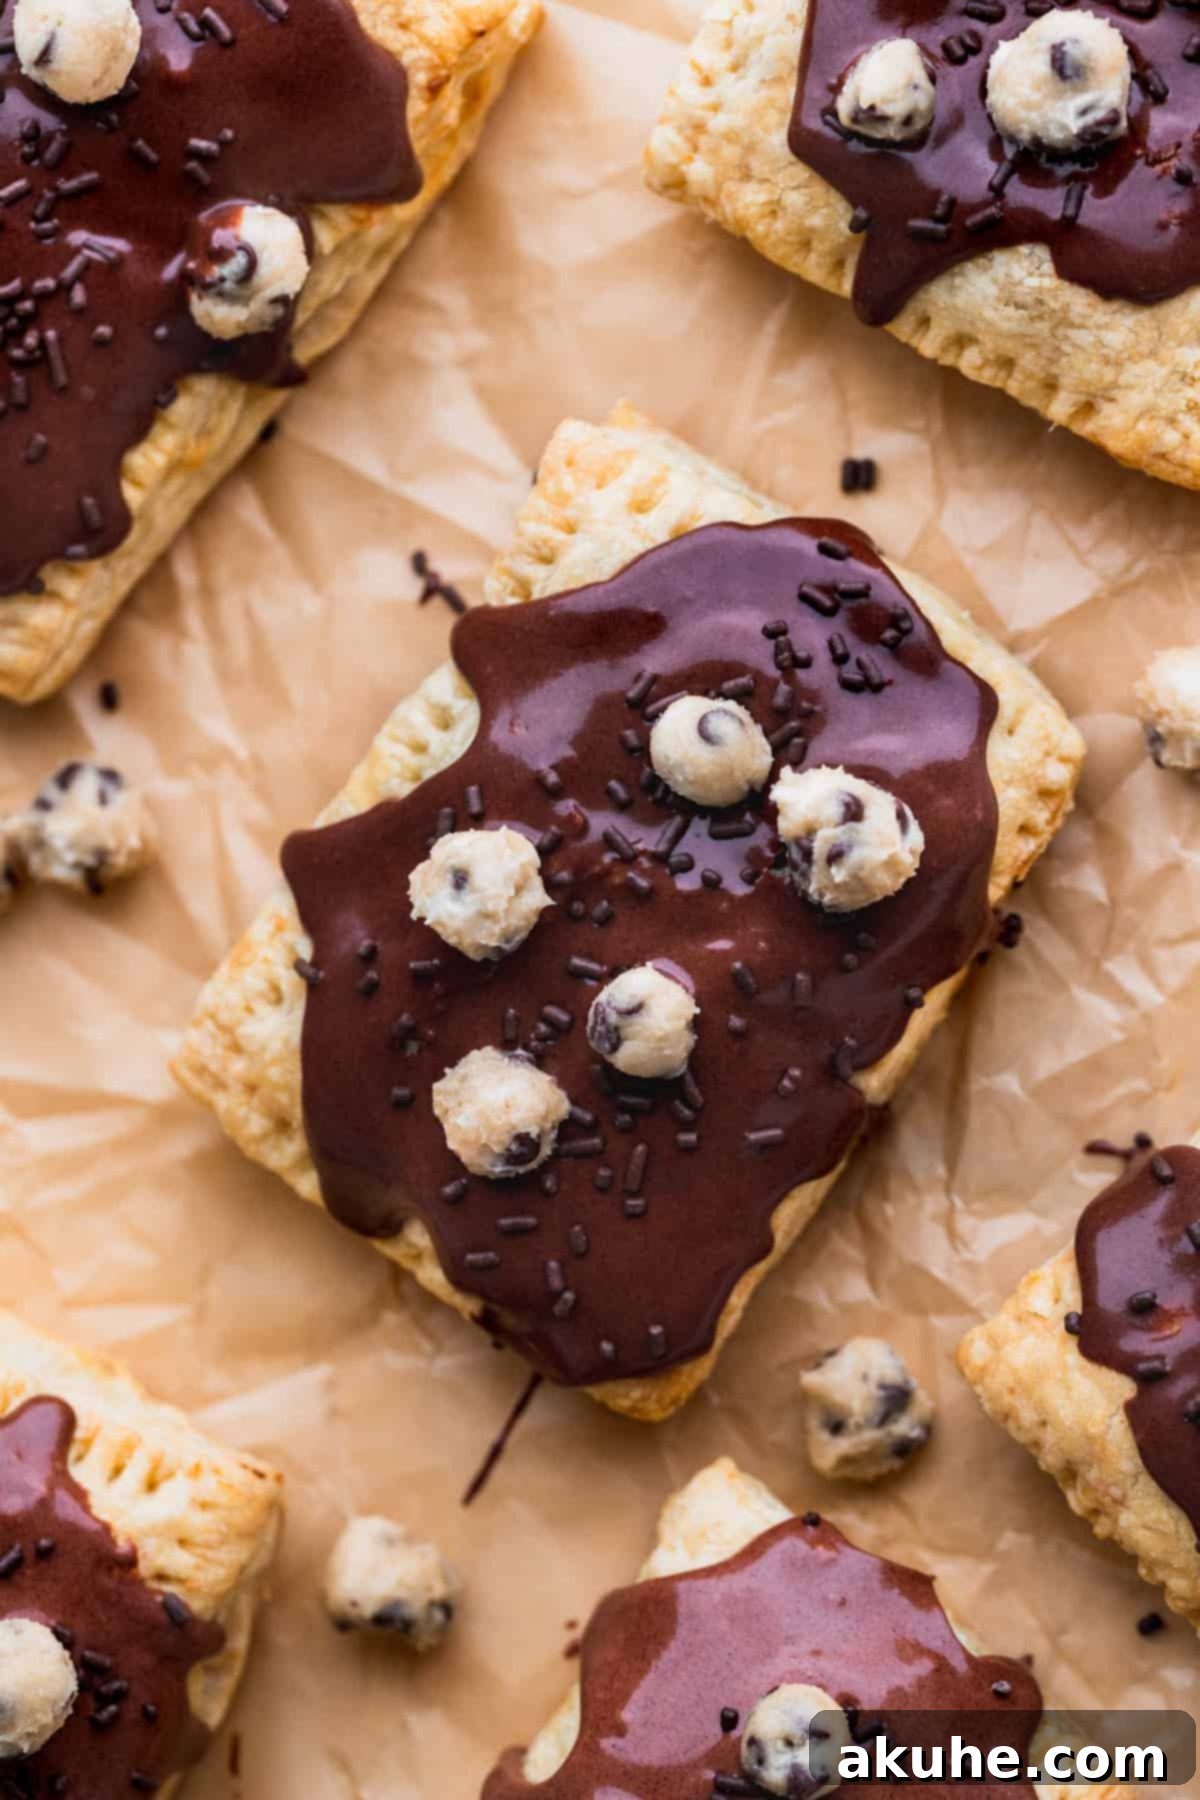
For an extra flourish, and to echo the delicious filling, consider topping your glazed pop tarts immediately with the small, chilled cookie dough balls you reserved earlier, along with a sprinkle of chocolate sprinkles. The glaze will begin to set quickly, so add your toppings while it’s still wet. These additions not only enhance the visual appeal but also add delightful bursts of texture and flavor, making your homemade pop tarts truly irresistible and gourmet-looking.
Expert Baking Tips for Flawless Pop Tarts
Achieving bakery-quality pop tarts at home is easy with a few insider tips and tricks. Master these to elevate your baking:
- Keep Puff Pastry Cold: This cannot be stressed enough. Puff pastry performs best when it’s kept as cold as possible. Work quickly when rolling and cutting, and always chill the assembled pop tarts before baking. This helps the butter in the pastry stay solid, creating those beautiful, flaky layers when it hits the hot oven. If your kitchen is particularly warm, you can even pop the pastry back into the fridge for a few minutes if it becomes too soft to handle between steps.
- Don’t Overfill: While tempting to stuff your pop tarts with as much delicious filling as possible, overfilling is the primary cause of leakage. Stick to the recommended 2 tablespoons of filling per rectangle, ensuring a generous 1/2-inch border is left completely clear around the edges. This allows for a proper, secure seal that prevents the filling from bubbling out during baking.
- Secure Sealing is Key: The small amount of water on the edges, followed by firm crimping with a fork, is absolutely vital for sealing the pop tarts. A good, tight seal prevents the filling from escaping, keeping your pop tarts neat, clean, and delicious. Press firmly but gently enough not to tear the pastry.
- Chill Cookie Dough Balls for Topping: If you’re adding the optional cookie dough balls for decoration, make sure the reserved dough is very cold and firm before attempting to roll them. This makes them much easier to handle, prevents them from becoming sticky, and helps them maintain their shape. Roll them into tiny, bite-sized pieces for the best presentation and even distribution.
- Parchment Paper is Your Best Friend: Always bake on parchment paper. It prevents sticking, makes cleanup an absolute breeze, and helps with even heat distribution for consistent baking. Silicone baking mats also work wonderfully.
- Monitor Baking Time Closely: All ovens vary, so consider the recommended baking time as a guideline. Keep a close eye on your pop tarts, especially towards the end of the baking cycle. They are done when the pastry is beautifully puffed and a rich golden brown. If they’re browning too quickly on top, you can loosely tent them with aluminum foil for the last few minutes to prevent over-browning.
- Cool Completely Before Glazing: Patience is a virtue when it comes to decorating! Glazing warm pop tarts will result in a messy, melted, and transparent glaze. Allow them to cool completely on a wire rack for at least 30-60 minutes before applying any glaze. A fully cooled pastry will allow the glaze to set beautifully and evenly.
Frequently Asked Questions About Homemade Pop Tarts
Yes, they can! For the best results, if you haven’t added the glaze yet, you can reheat them in a toaster oven or conventional oven at 300°F (150°C) for 5-10 minutes until warmed through and the pastry is crispy again. If they’re already glazed, microwaving them briefly (10-20 seconds) until warm is your best bet. The pastry won’t be as crispy when microwaved, but the filling will be wonderfully gooey, and the flavor will still be absolutely delicious!
For the absolute best flaky and crispy texture, these pop tarts are ideally enjoyed the same day they are baked. However, you can prepare the filling a day in advance and store it in an airtight container in the refrigerator. You can also assemble the unbaked pop tarts (up to the point of crimping the edges) and store them on a parchment-lined baking sheet, loosely covered, in the fridge for up to 12 hours. Bake them directly from the fridge, adding a few extra minutes to the baking time if needed, and ensure they reach a golden brown.
The chocolate glaze is technically optional, but it’s highly recommended! It adds an extra layer of sweetness, a beautiful presentation, and a rich chocolatey finish that truly elevates these pop tarts from great to outstanding. The slight crackle of the set glaze also adds a delightful textural element. If you prefer a less sweet option, you could simply dust them with powdered sugar instead, or omit any topping entirely.
Absolutely! Puff pastry is incredibly versatile and makes an excellent base for various fillings. While our chocolate cookie dough filling is divine, you could easily experiment with other options. Think fruit jams or preserves, cinnamon sugar with cream cheese, Nutella, or even other edible cookie dough flavors (like peanut butter or funfetti). Just ensure your chosen filling isn’t too wet, which could make the pastry soggy, and avoid fillings that expand excessively during baking.
To get that coveted extra-flaky puff pastry, always work with cold pastry. Avoid over-handling it, as the warmth from your hands can melt the butter layers. Chilling the assembled pop tarts before baking is also crucial, as it helps the butter create steam and lift the layers dramatically in the hot oven. A very hot oven at the start also contributes to achieving maximum puff and flakiness by rapidly setting the pastry structure.
Storing and Freezing Your Homemade Pop Tarts
Proper storage ensures your delicious chocolate cookie dough pop tarts remain fresh and enjoyable for as long as possible after all your hard work.
Storing Baked Pop Tarts
Once completely cooled and glazed, store these pop tarts in an airtight container at room temperature for up to 2-3 days. If you’re concerned about the cream cheese filling, or if your kitchen is particularly warm, they can be stored in the refrigerator for up to 5 days. For best flavor and texture, allow refrigerated pop tarts to come to room temperature before serving, or warm them slightly as described in the FAQ section for that freshly baked feel.
Freezing Recommendations
While some pastries freeze well, we generally do not recommend freezing these chocolate cookie dough pop tarts once baked and glazed. The delicate, flaky texture of the puff pastry can become soggy or lose its crispness upon thawing and reheating, significantly compromising the quality. Additionally, the cream cheese filling may change texture and consistency after freezing. For optimal enjoyment, it’s truly best to make and consume them fresh, savoring their perfect texture and flavor.
More Delicious Breakfast & Dessert Recipes to Explore
Loved these chocolate cookie dough pop tarts? We have a treasure trove of other easy and delicious recipes that are perfect for breakfast, brunch, or any time you crave a sweet treat. Be sure to explore our collection for more culinary inspiration and delightful baking adventures!
If you’ve tried this recipe and enjoyed creating these fantastic homemade pop tarts, we’d absolutely love to hear from you! Please leave a star rating and review below to share your experience, tips, or any variations you tried. Your feedback not only brightens our day but also helps other aspiring bakers in our community discover and enjoy this recipe. Don’t forget to tag us on Instagram @stephaniesweettreats with your beautiful creations – we love seeing your baking triumphs! For even more culinary ideas, sweet inspirations, and daily delights, follow us on Pinterest.
Chocolate Cookie Dough Pop Tarts
Stephanie Rutherford
Print Recipe
Pin Recipe
Leave a Review
30 minutes
20 minutes
30 minutes
1 hour
20 minutes
6
pop tarts
Ingredients
Pop Tarts
-
2
Frozen puff pastry sheets -
8
oz
Cream cheese,
room temperature -
1/4
cup
White granulated sugar
Cookie Dough
-
1 cup
All-purpose flour -
1/2
tsp
Cornstarch -
1/2
tsp
Salt -
6
TBSP
Unsalted butter,
room temperature -
6
TBSP
Brown sugar,
packed light or dark -
2
TBSP
White granulated sugar -
3
TBSP
Milk -
1
tsp
Pure vanilla extract -
3/4
cup
Mini chocolate chips
Chocolate Glaze
-
2
cup
Powdered sugar,
sifted -
3
TBSP
Cocoa powder -
1
TBSP
Pure vanilla extract -
1/4
cup
Heavy cream -
Chocolate sprinkles,
optional
Instructions
- Pull the frozen puff pastry sheets out for 30 minutes to thaw. While you wait make the filling.2 Frozen puff pastry sheets
Filling
- Beat the cream cheese and granulated sugar on high for 2 minutes until smooth. Set aside.8 oz Cream cheese, 1/4 cup White granulated sugar
- In a separate mixing bowl, beat the butter, brown sugar, and white granulated sugar. Beat on high for 2 minutes until light and fluffy. Add in milk and vanilla extract and mix until just combined.6 TBSP Unsalted butter, 6 TBSP Brown sugar, 2 TBSP White granulated sugar, 3 TBSP Milk, 1 tsp Pure vanilla extract
- Mix in all-purpose flour, cornstarch, and salt until just combined. Fold in the mini chocolate chips.1 cup All-purpose flour, 1/2 tsp Cornstarch, 1/2 tsp Salt, 3/4 cup Mini chocolate chips
- Take out 1/3 cup of the cookie dough mixture. Place it in the freezer until firm enough to roll into small balls later. Gently fold the reserved cream cheese mixture into the remaining cookie dough until just combined.
Assembly
- On a lightly floured surface, roll each puff pastry sheet until any seams are smooth and it forms an even rectangle. Cut each sheet into 6 even rectangles, yielding a total of 12 rectangles. Prepare a cookie sheet with parchment paper and place 6 of the puff pastry rectangles on it, spaced evenly.
- Using a cookie scoop or spoon, place about 2 tablespoons of the combined cookie dough filling onto the center of each of the 6 rectangles. Gently smooth the filling, ensuring to leave a clear border of approximately 1/2 inch around all edges.
- Lightly wet the edges of the filled rectangles with water using your finger. Place the remaining 6 plain puff pastry rectangles on top. Gently press down on the edges to seal them, then use a fork to crimp all around the edges to create a decorative, secure seal.
- Preheat oven to 375°F (190°C). While the oven preheats, place the assembled pop tarts in the fridge to chill the pastry for at least 15-20 minutes. This helps ensure flakiness.
- Bake for 20-24 minutes, or until the pastry is puffed and golden brown. Transfer to a wire rack and cool completely before decorating.
- With the reserved cookie dough from Step 1-3, roll it into very small little balls. These will be used for topping the pop tarts. Place them on a small cookie sheet and store in the fridge until ready to use.
Chocolate Glaze
- In a mixing bowl, sift the powdered sugar and cocoa powder together to ensure no lumps. Whisk in the pure vanilla extract and heavy cream. Stir until smooth and a pourable consistency is achieved. If the glaze is too thick, add a teaspoon of heavy cream at a time until desired consistency. If too thin, add 1 tablespoon of sifted powdered sugar.2 cup Powdered sugar, 3 TBSP Cocoa powder, 1 TBSP Pure vanilla extract, 1/4 cup Heavy cream
- Pour or drizzle the prepared glaze on top of the completely cooled pop tarts. Immediately top with chocolate sprinkles and the chilled mini cookie dough balls if using. Allow the glaze to set before serving.Chocolate sprinkles
Carbohydrates: 53g,
Protein: 4g,
Fat: 32g,
Saturated Fat: 19g,
Polyunsaturated Fat: 1g,
Monounsaturated Fat: 7g,
Trans Fat: 1g,
Cholesterol: 83mg,
Sodium: 341mg,
Potassium: 101mg,
Fiber: 1g,
Sugar: 40g,
Vitamin A: 993IU,
Vitamin C: 1mg,
Calcium: 90mg,
Iron: 1mg
