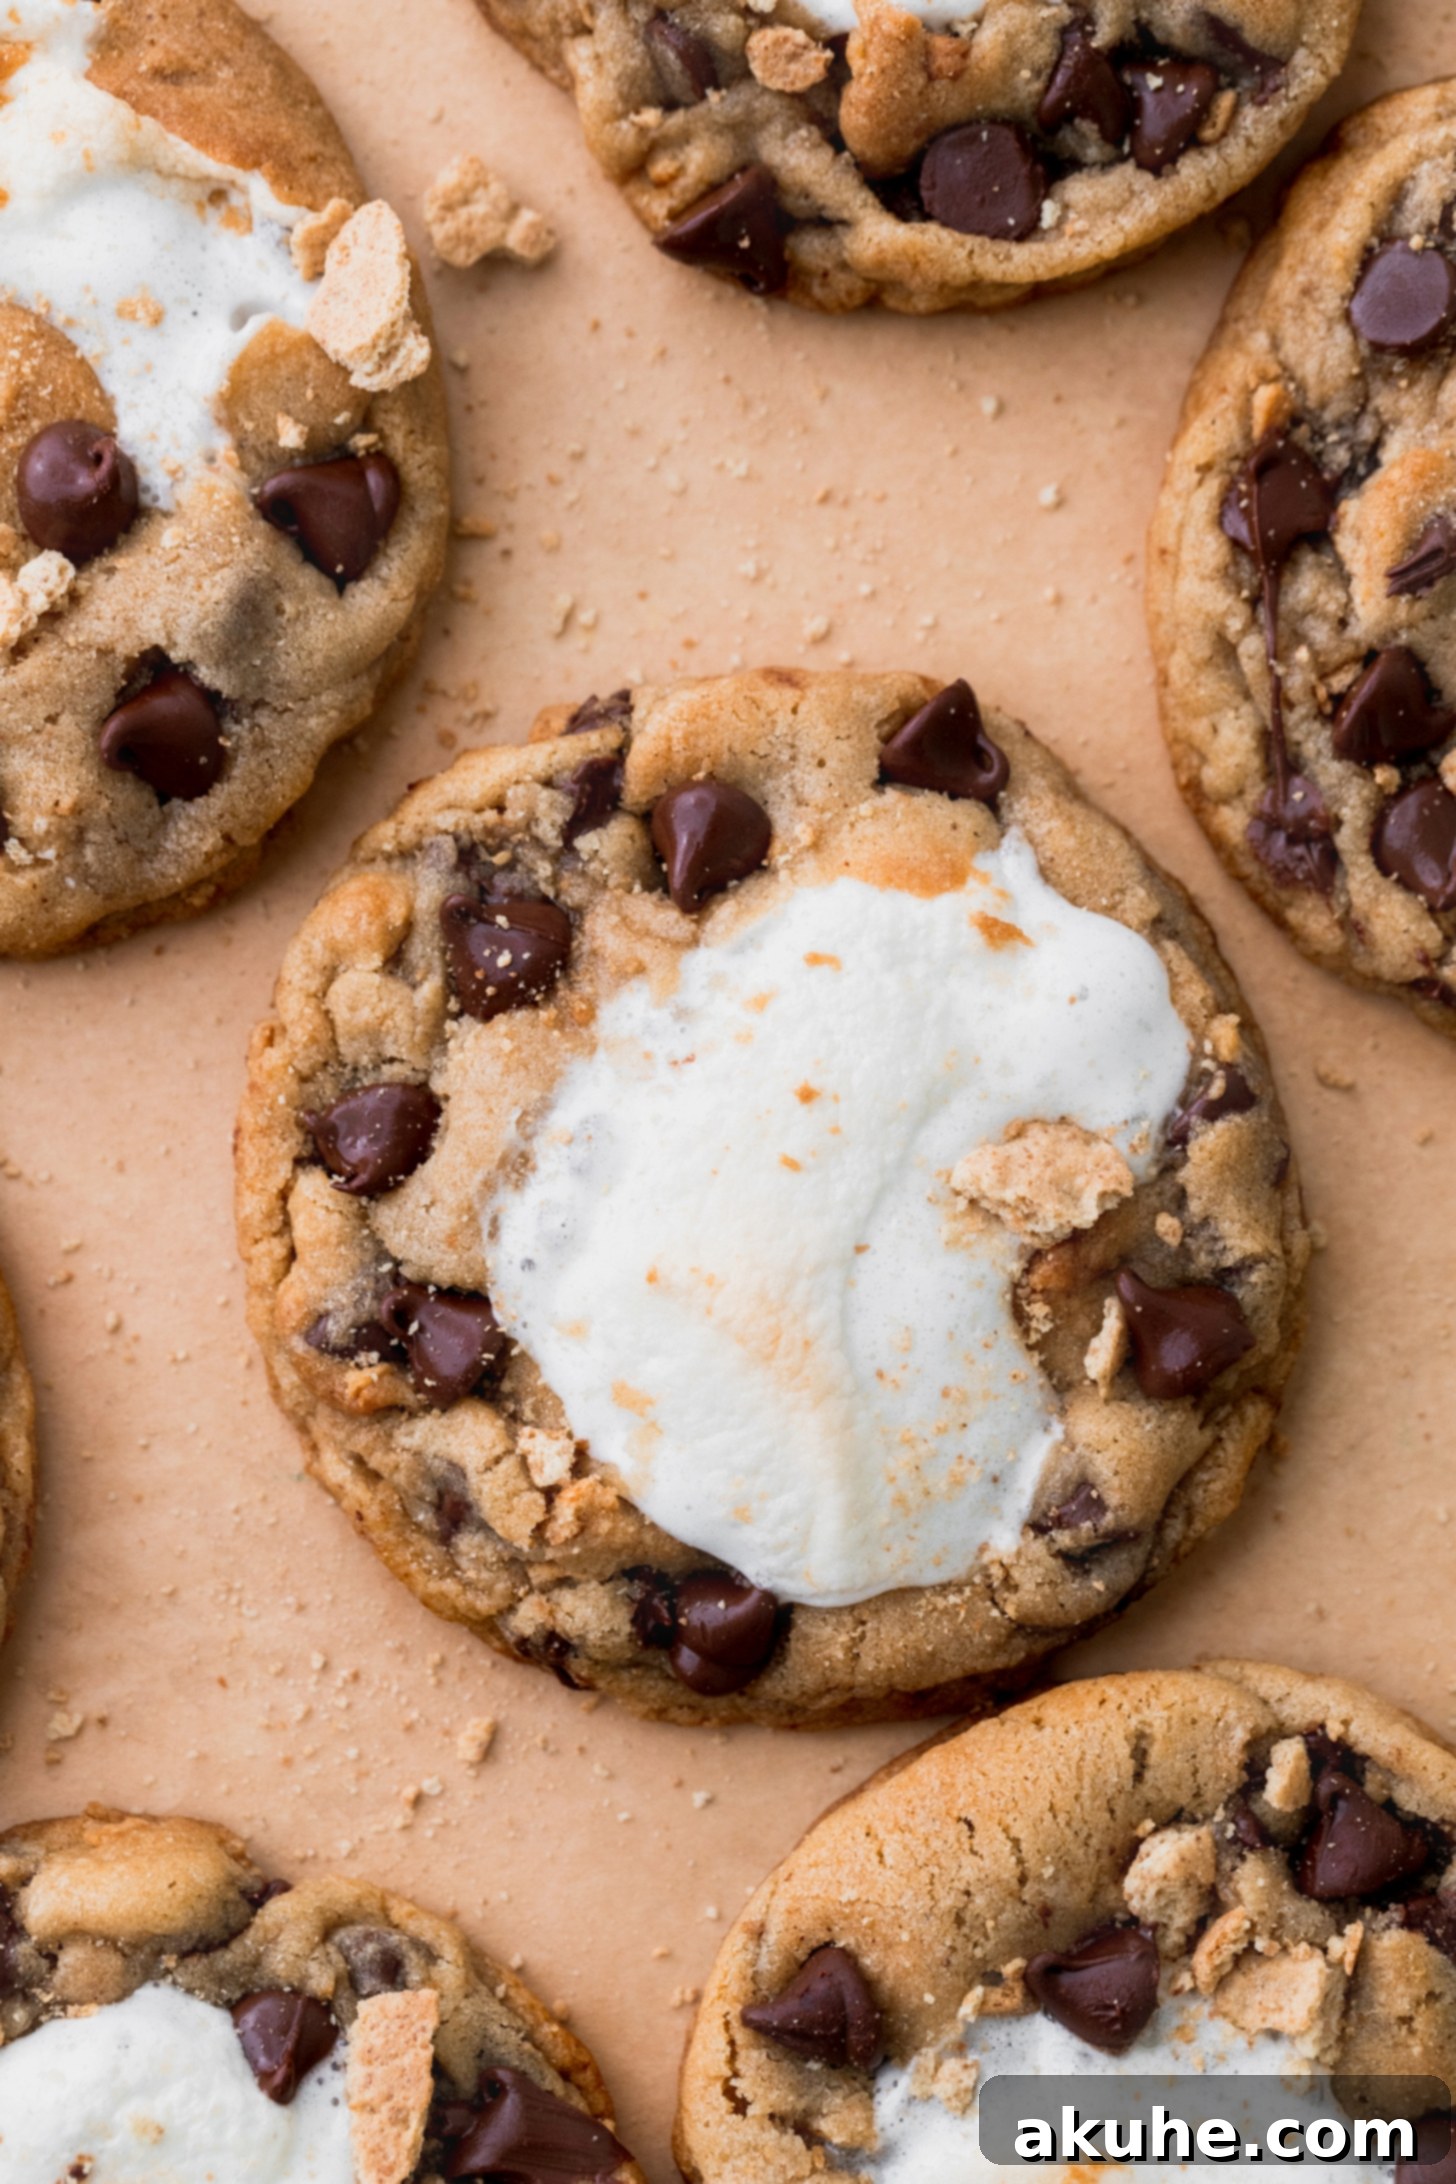
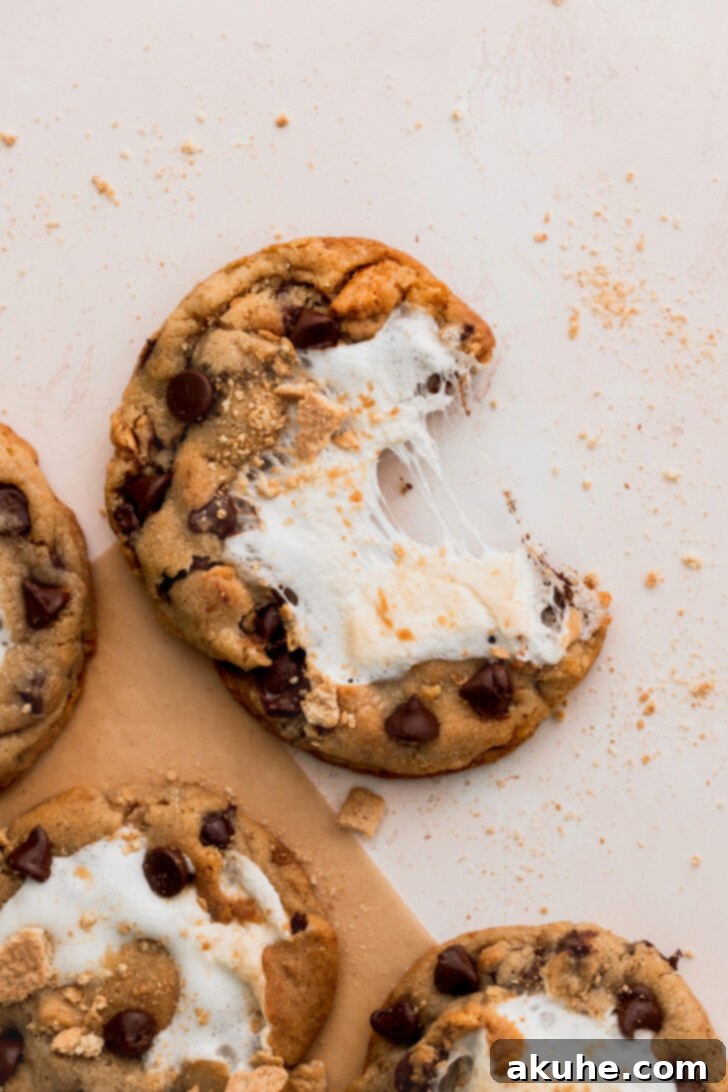
Welcome to the ultimate guide for crafting the most irresistible s’mores cookies you’ll ever taste! Imagine a cookie that captures the essence of a classic campfire treat – the chewy texture of a perfect chocolate chip cookie, infused with the rich, nutty notes of brown butter and delightful crunch of graham cracker pieces. But the real magic happens when you bite into the center and discover a warm, gooey, melted marshmallow, creating an unforgettable s’mores experience in every single bite. These aren’t just any cookies; they’re a revelation, promising a symphony of textures and flavors that will transport you straight to a cozy evening under the stars.
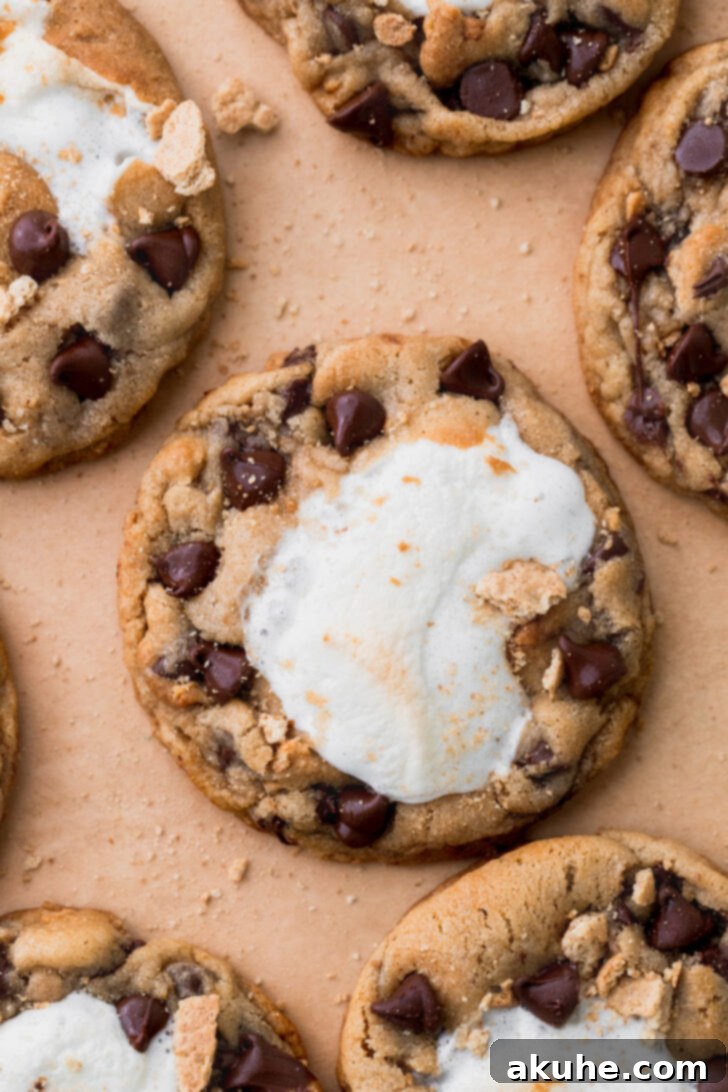
Finding the perfect s’mores cookie recipe can be a quest. Many attempts at recreating that iconic gooey marshmallow center often fall short, resulting in either a crisp, marshmallow-less cookie or a sticky, unmanageable mess. My journey to perfect these homemade s’mores cookies involved extensive testing. Initially, I experimented with mini marshmallows folded directly into the dough. While delicious, they tended to melt completely during baking, leading to a flatter, crispier cookie rather than the desired soft, chewy, and gooey delight. The quest for that perfect marshmallow ‘pool’ was ongoing.
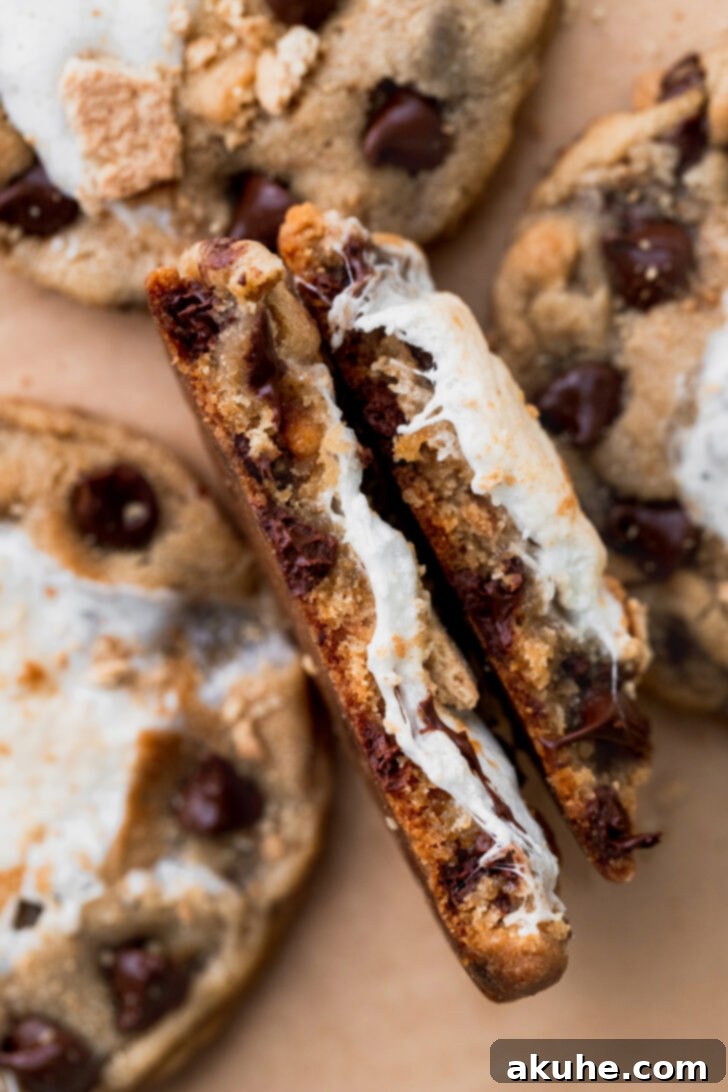
The breakthrough came with a simple yet brilliant modification: stuffing a single, standard-sized marshmallow into the center of each cookie dough ball. This method proved to be a game-changer. The larger marshmallow size, combined with strategic chilling, allows it to soften and melt into a luxurious, gooey core without completely disappearing. The result? A perfectly chewy cookie exterior giving way to an incredible, molten marshmallow surprise that truly defines the s’mores experience. This recipe delivers the ultimate s’mores cookies, guaranteed to be a hit at any gathering or a delightful treat for yourself!
Beyond the marshmallow magic, these cookies boast a foundation of rich brown butter, which imparts a deep, nutty flavor that elevates the entire cookie. Coupled with chunks of graham cracker and classic semi-sweet chocolate chips, every element works in harmony to create a truly exceptional dessert. I’ve gathered all my expert tips, tricks, and detailed process photos to guide you seamlessly through each step, ensuring your s’mores cookies turn out perfectly gooey and utterly delicious every time. If you adore s’mores-inspired treats, you’ll also love exploring my s’mores peanut butter cake for another delightful variation!
Essential Baking Tips for Perfect S’mores Cookies
Achieving bakery-quality s’mores cookies at home is easier than you think, especially with these tried-and-true tips. Precision in baking often makes all the difference, transforming a good cookie into an extraordinary one. For more in-depth guidance on a crucial ingredient, be sure to check out my detailed post on how to make brown butter.
- Tip 1: Accurate Flour Measurement is Key. When measuring flour, always use the spoon and level method. This means gently spooning the flour into your measuring cup until it overflows, then using a straight edge (like the back of a knife) to level off the excess. Dipping your measuring cup directly into the flour can compact it, leading to significantly more flour than needed. Too much flour results in a dry, dense dough that won’t spread properly in the oven, leaving you with thick, cakey cookies instead of the desired chewy texture.
- Tip 2: Master the Art of Brown Butter. Brown butter is a secret weapon for adding incredible depth and nutty complexity to these cookies. To achieve perfect brown butter, melt your butter over medium heat, stirring frequently. Watch for the milk solids to separate and settle at the bottom of the pan, gradually turning an amber or golden-brown color. You’ll notice a distinct nutty aroma as it browns. Be careful not to burn it! This process typically takes 5-8 minutes, and the resulting speckles at the bottom are where all that delicious flavor resides.
- Tip 3: The Frozen Marshmallow Trick. This is crucial for preventing your marshmallows from completely melting away and disappearing into the cookie dough. Before you begin baking, place your marshmallows in the freezer for at least 15-20 minutes, or even longer. Cold marshmallows will hold their shape better during the initial baking phase, allowing the cookie dough to set around them before they begin to soften and create that signature gooey center. This ensures you get that delightful marshmallow “pull” with every bite.
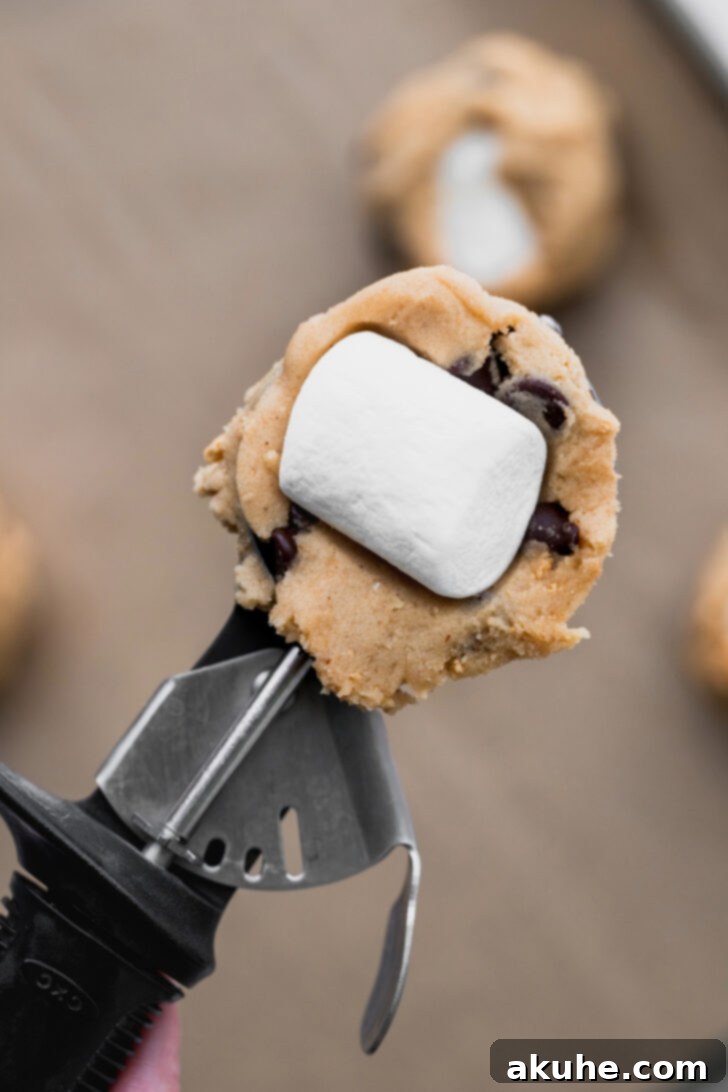
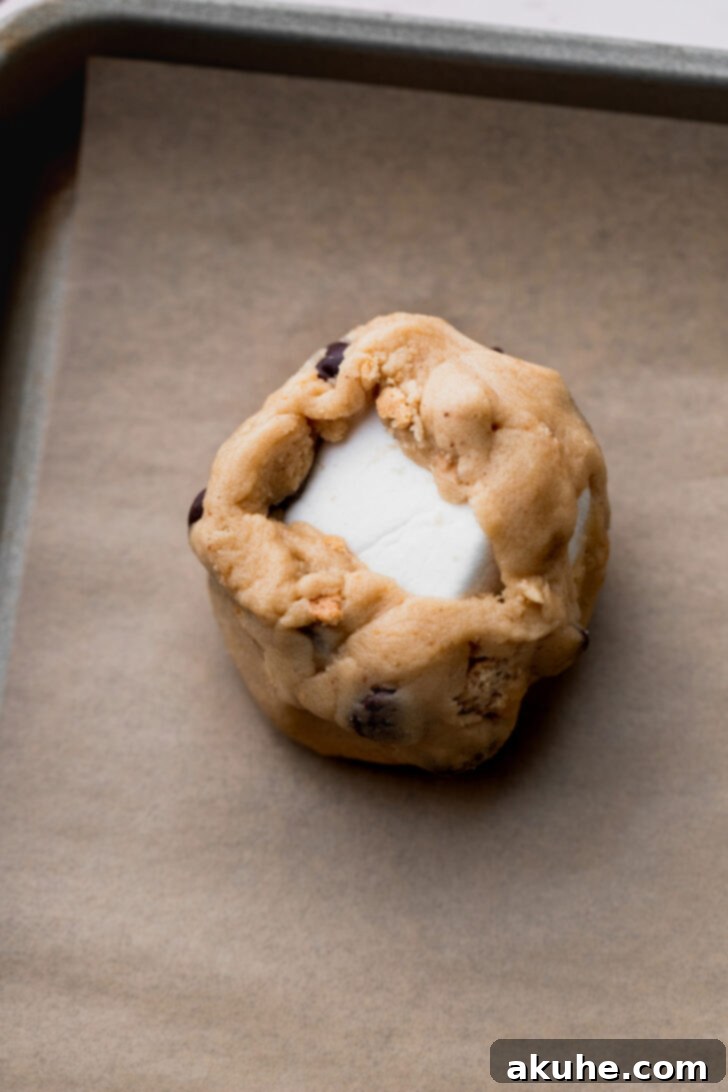
- Tip 4: Smart Marshmallow Stuffing Technique. Once you’ve scooped your cookie dough, create a deep indentation in the center of each ball using your thumb. Place a frozen marshmallow into this cavity. Then, gently work the cookie dough around the marshmallow, sealing it in. It’s perfectly fine, and even desirable, for a small part of the marshmallow to be slightly exposed. This exposure helps create those beautifully caramelized, toasted marshmallow edges that mimic a campfire s’more.
- Tip 5: Chill Your Cookie Dough. Don’t skip the chilling step! Chilling the cookie dough for at least 40 minutes (or even longer) allows the butter to solidify, preventing the cookies from spreading too much in the oven. More importantly for s’mores cookies, it buys valuable time for the dough to bake around the marshmallow before it completely melts, further enhancing that gooey core. Chilled dough also deepens the flavor profile, making for a richer, more complex cookie.
- Tip 6: Don’t Overbake Your S’mores Cookies. For that ultimate chewy and gooey texture, it’s essential to pull the cookies from the oven when they are just set around the edges and still appear slightly soft in the center. The residual heat from the baking sheet will continue to cook them as they cool, leading to a perfectly tender crumb. Overbaking will result in a drier, tougher cookie and a less gooey marshmallow. Look for golden-brown edges and a puffed-up marshmallow.
Ingredients You’ll Need for the Best S’mores Cookies
Crafting these extraordinary s’mores cookies begins with a selection of quality ingredients. Each component plays a vital role in achieving that perfect balance of chewy, crunchy, and supremely gooey. Ensure all your dairy and eggs are at room temperature unless specified, as this significantly impacts the texture of your cookie dough.
- Unsalted Butter: 1 cup, at room temperature. Half of this will be browned to impart a rich, nutty depth.
- Brown Sugar: 1 cup, packed (light or dark). Brown sugar contributes to the cookies’ chewiness and moisture.
- White Granulated Sugar: 1/2 cup. Balances the sweetness and helps with spread and crisp edges.
- Pure Vanilla Extract: 1 teaspoon. A classic flavor enhancer that complements all the other elements.
- Large Eggs: 2, at room temperature. Eggs bind the dough and add richness.
- All-Purpose Flour: 2 1/2 cups, spooned and leveled. Proper measurement is crucial for cookie structure.
- Baking Soda: 1 teaspoon. The leavening agent that helps the cookies rise and spread.
- Salt: 1 teaspoon. Balances sweetness and enhances all the flavors.
- Ground Cinnamon: 1/2 teaspoon. Adds a subtle warmth, reminiscent of graham crackers.
- Semi-Sweet Chocolate Chips: 1 1/2 cups. The essential chocolate component, melting beautifully within the cookie.
- Graham Cracker Pieces: 1 cup, in small pieces. Provides that iconic s’mores crunch and flavor.
- Marshmallows: 19 standard-sized marshmallows, frozen. The star of the show, delivering that gooey center.
Step-by-Step Guide to Baking Perfect S’mores Cookies
Follow these detailed instructions to create your own batch of utterly delicious s’mores cookies. Each step is designed to ensure maximum flavor and that irresistible gooey texture.
- Prepare the Brown Butter: Begin by browning half of the unsalted butter (1/2 cup). In a light-colored frying pan or skillet over medium heat, melt the butter. Continuously stir or swirl the pan as the butter melts, foams, and then the milk solids begin to separate and toast. Continue cooking until these milk solids at the bottom of the pan turn a rich amber color and the butter emits a fragrant, nutty aroma. This usually takes about 5-8 minutes. Immediately pour the hot brown butter into a heatproof bowl to stop the cooking process and allow it to cool completely to room temperature. The remaining 1/2 cup of butter should be softened at room temperature for later use.
- Combine Dry Ingredients and Graham Crackers: In a medium-sized mixing bowl, whisk together the all-purpose flour, baking soda, salt, and ground cinnamon until well combined. Set this mixture aside. Next, prepare your graham crackers. Using a food processor, pulse the graham crackers until they break down into small, distinct pieces. Be careful not to over-process them into a fine crumb; you want recognizable pieces for texture. Alternatively, place them in a zip-top bag and crush them with a rolling pin.
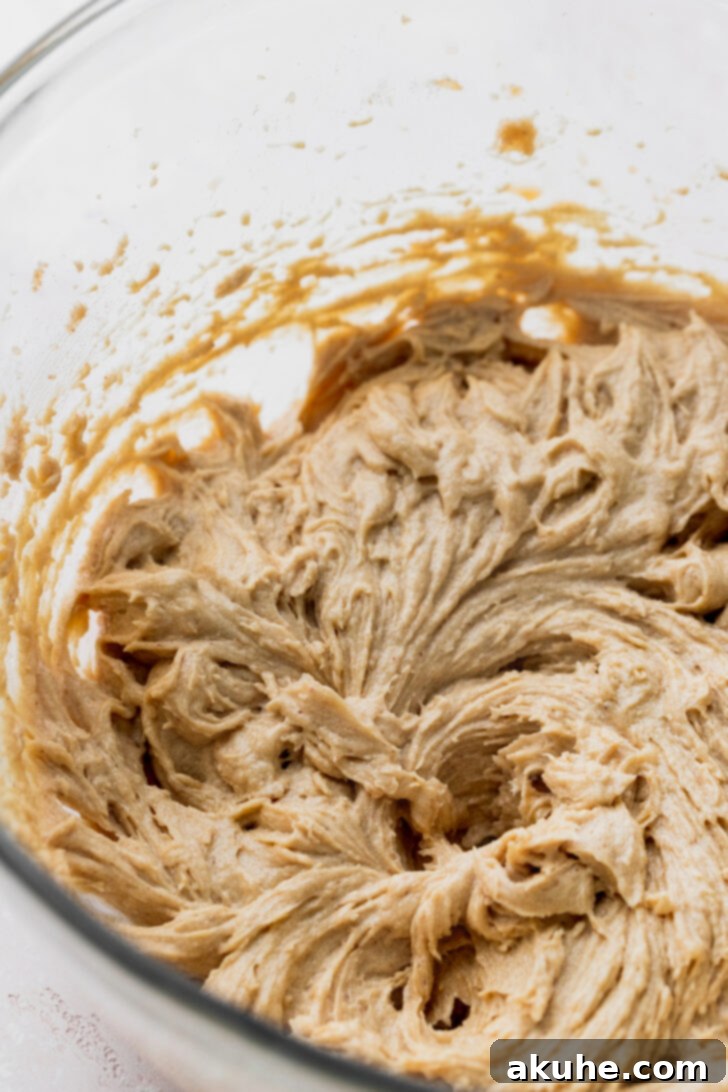
- Cream Wet Ingredients: In a large mixing bowl, using an electric mixer, combine the softened room-temperature butter, the cooled brown butter, brown sugar, and white granulated sugar. Beat these ingredients together on high speed for about 2 minutes, or until the mixture becomes light, pale, and fluffy. This creaming process incorporates air, contributing to the cookies’ tender texture. Reduce the mixer speed to medium, then add the pure vanilla extract and the two large eggs, one at a time, mixing until just combined after each addition. Be careful not to overmix at this stage.
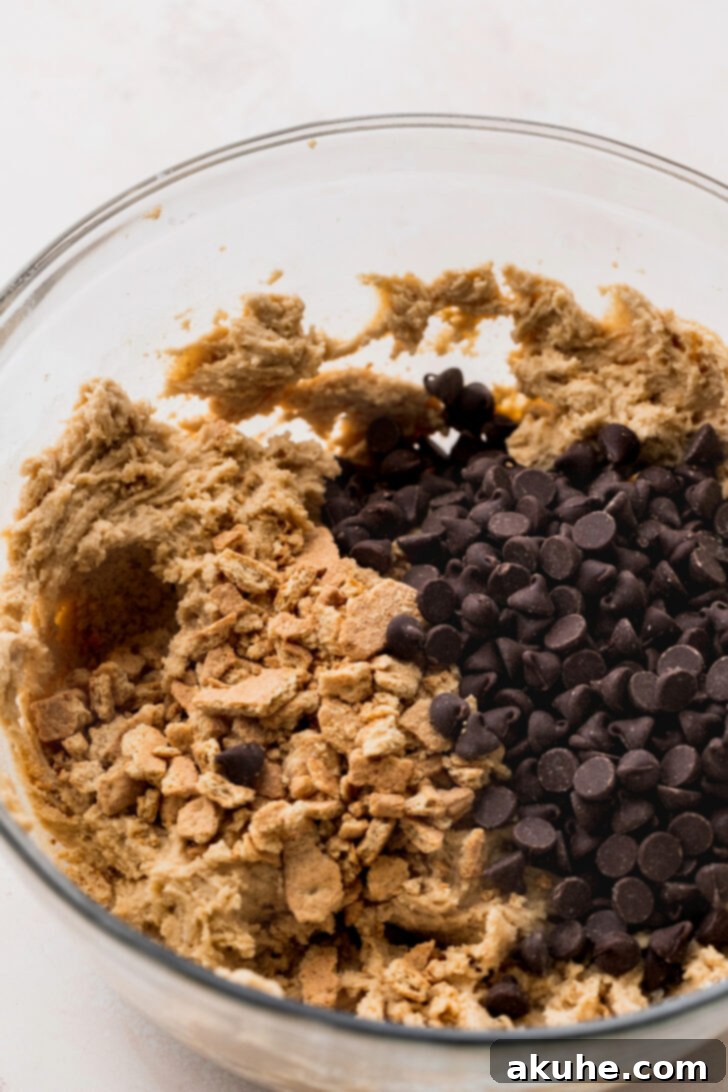
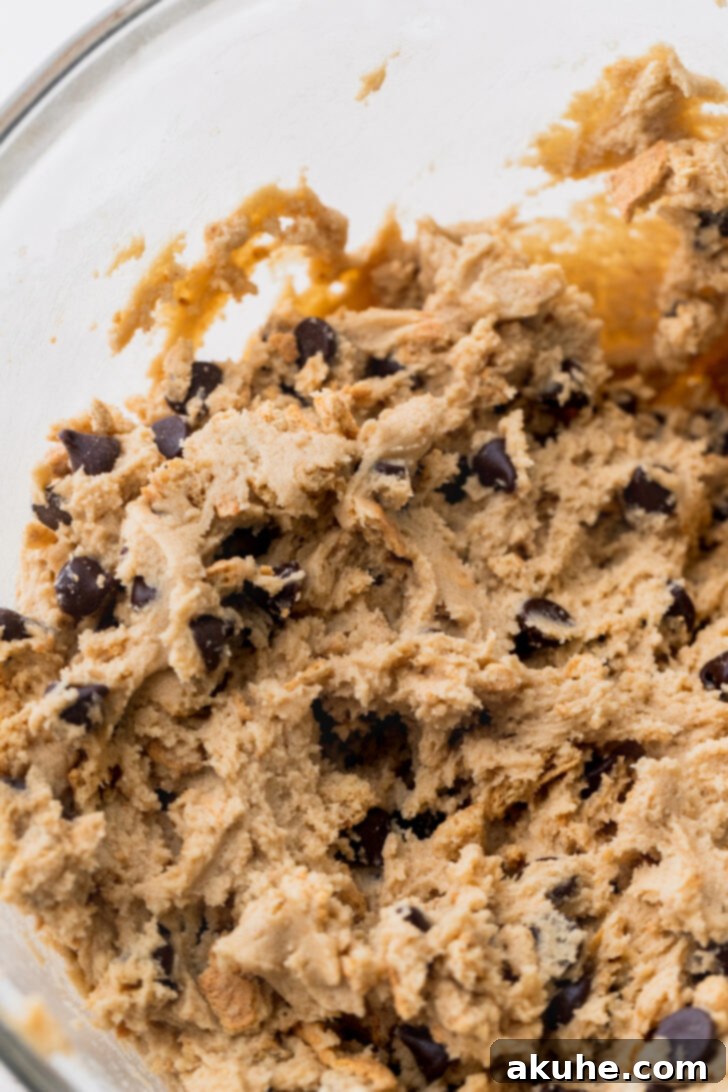
- Incorporate Dry Ingredients and Mix-ins: Gradually add the reserved dry ingredient mixture (flour, baking soda, salt, cinnamon) to the wet ingredients. Mix on low speed until the flour is just incorporated and no dry streaks remain. Be mindful not to overmix, as this can lead to tough cookies. Scrape down the sides of the bowl as needed. Finally, fold in the graham cracker pieces and semi-sweet chocolate chips on low speed, mixing just until they are evenly distributed throughout the dough.
- Chill the Dough: Cover the cookie dough bowl with plastic wrap and refrigerate it for at least 40 minutes. This chilling period is crucial as it allows the flavors to meld, the butter to firm up (which helps prevent excessive spreading during baking), and ensures the marshmallows have enough time to soften without completely melting.
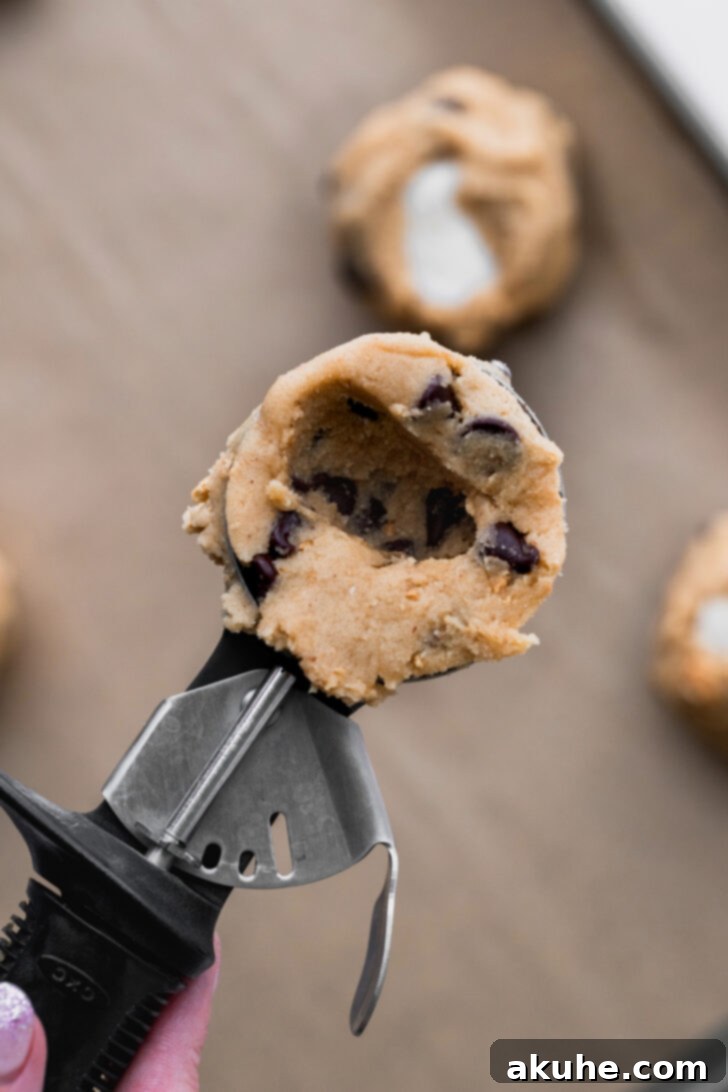
- Stuff the Marshmallows: Once the dough is chilled, use a large cookie scoop (approximately 3 ounces or 1/4 cup) to scoop out uniform portions of cookie dough. Ensure the dough is flush with the scoop, avoiding heaping scoops for consistent sizing. Take each dough ball and press your thumb into the center to create a deep hole or cavity. Carefully place one frozen marshmallow into this hole. Then, gently mold the cookie dough around the marshmallow, sealing it in. It’s okay, and even preferred, if a small portion of the marshmallow remains slightly visible at the top, as this will toast beautifully.
- Prepare for Baking: Preheat your oven to 350°F (175°C). Line two large baking sheets with parchment paper. Arrange no more than 6 cookie dough balls per baking sheet to allow for adequate spreading. While the oven preheats, place the first sheet of prepared cookie dough balls into the freezer. This brief freezing ensures the dough is thoroughly cold before it hits the hot oven, which further aids in preventing spreading and achieving that perfect gooey center. Keep the remaining cookie dough balls in the refrigerator.
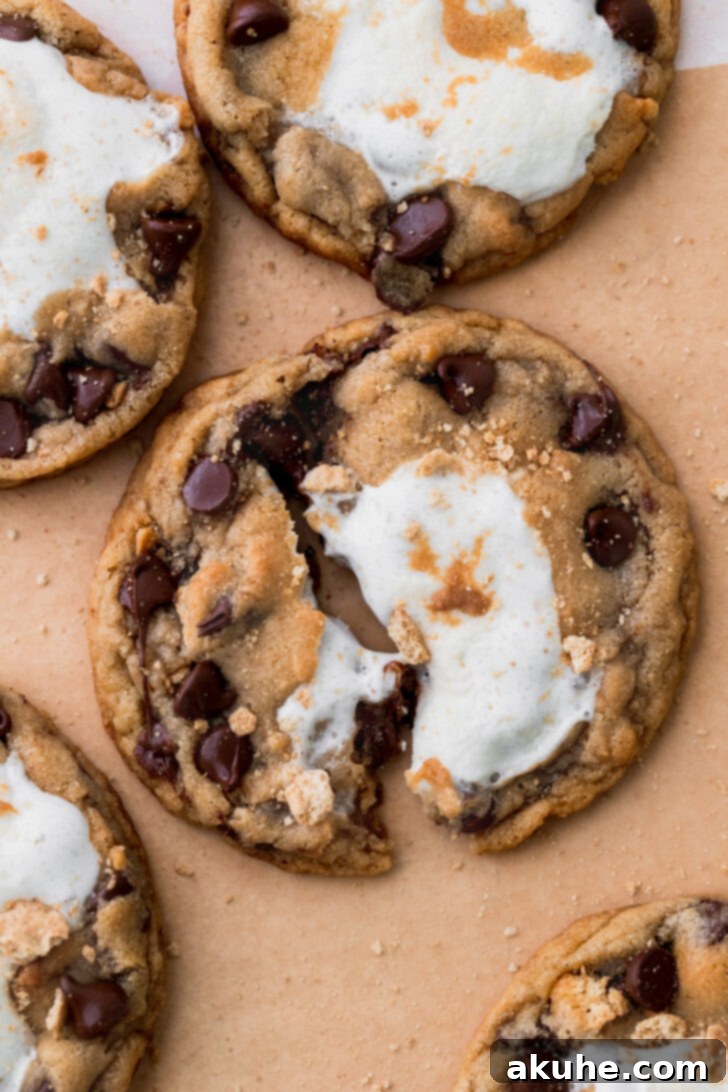
- Bake to Golden Perfection: Bake the cookies one sheet at a time for 12-14 minutes, or until the edges are golden brown and the marshmallow centers are visibly puffed up and golden. The centers of the cookies may still appear slightly soft, which is ideal for a chewy texture. Immediately after removing from the oven, if your cookies have spread irregularly, use a large biscuit cutter or the back of a spoon to gently scoot the edges of each cookie back into a perfect circular shape. For extra visual appeal and flavor, you can sprinkle a few additional graham cracker pieces and chocolate chips on top of the warm cookies immediately after baking.
- Cool Properly: Allow the baked s’mores cookies to cool on the hot baking sheets for at least 2 minutes. This brief cooling period helps them set and prevents them from breaking when transferred. After 2 minutes, carefully transfer the cookies to a wire cooling rack to cool completely. The gooey marshmallow inside will be extremely hot, so resist the urge to bite into them immediately! Cooling completely allows the flavors and textures to fully develop.
Craving more s’mores goodness? Don’t miss my delightful pumpkin s’mores cookies for a seasonal twist and the decadent s’mores cheesecake for a show-stopping dessert!
Recipe Notes & Expert Advice for Your S’mores Cookies
Beyond the step-by-step instructions, a few additional tips can truly elevate your s’mores cookie baking experience, ensuring consistent success and delicious results every time.
- Flour Measurement Precision: Always remember the spoon and level method for flour. This prevents compacting the flour and adding too much, which can make your cookies dry and prevent them from spreading properly. For ultimate accuracy, using a kitchen scale to measure flour by weight (grams) is highly recommended.
- High Altitude Baking Adjustments: If you’re baking at a high altitude, you might find that cookies spread more or dry out faster. To counteract this, consider adding an extra 1-2 tablespoons of all-purpose flour to your dry ingredients. This can help maintain the cookie’s structure.
- Room Temperature Ingredients are Non-Negotiable: Pull out your butter and eggs from the refrigerator at least 1-2 hours before you plan to start baking. Room temperature butter creams more smoothly with sugar, creating a light and airy base, while room temperature eggs emulsify better into the mixture, resulting in a more uniform dough and superior cookie texture.
- Storage Suggestions: Once completely cooled, store your s’mores cookies in an airtight container at room temperature for up to 3-4 days. For optimal freshness, you can gently reheat them in the microwave for 10-15 seconds to bring back that delightful gooey marshmallow center.
- Freezing Baked Cookies: These cookies freeze beautifully! Once completely cooled, place them in a single layer on a baking sheet and freeze until solid. Then, transfer the frozen cookies to a freezer-safe bag or airtight container for up to 2-3 months. Thaw at room temperature or reheat gently in the microwave or oven.
- Make-Ahead Dough Option: You can prepare the cookie dough (without stuffing the marshmallows) and refrigerate it for up to 2-3 days. When ready to bake, let the dough sit at room temperature for about 15-20 minutes to soften slightly before scooping and stuffing with frozen marshmallows. You can also freeze scooped, unstuffed dough balls.
S’mores Cookies: Frequently Asked Questions (FAQ)
Here are answers to some common questions you might have about making these incredible s’mores cookies:
- Q: Can I use mini marshmallows instead of large ones?
A: While you can, it’s not recommended for the ultimate gooey experience. Mini marshmallows tend to melt completely and incorporate into the dough, leading to a crispy cookie without that distinct gooey center. A standard-sized marshmallow provides the best ‘pool’ of melted goodness. If you only have mini marshmallows, consider using 2-3 per cookie, frozen, and wrapping the dough very tightly around them. - Q: Why are my s’mores cookies spreading too much?
A: Several factors can cause excessive spreading. Ensure your butter is at room temperature but not melted. Your flour should be spooned and leveled, not compacted. Crucially, don’t skip the chilling step for the dough. Also, make sure your oven temperature is accurate (an oven thermometer can help!) and that your baking sheets aren’t too hot when you place the dough on them. - Q: Can I use different types of chocolate?
A: Absolutely! While semi-sweet chocolate chips provide a classic balance, feel free to experiment. Milk chocolate will yield a sweeter cookie, while dark chocolate can add a sophisticated depth. You can also use chocolate chunks for a more varied melt. - Q: How long do these s’mores cookies stay fresh?
A: When stored in an airtight container at room temperature, these cookies are best enjoyed within 3-4 days. For that fresh-baked gooeyness, a quick 10-15 second warm-up in the microwave works wonders! - Q: Can I freeze the cookie dough?
A: Yes, you can! Form the dough balls (without the marshmallow) and freeze them on a baking sheet until solid. Then transfer them to a freezer-safe bag. When you’re ready to bake, thaw them slightly, stuff with a frozen marshmallow, and bake as directed, adding a few extra minutes to the baking time if baking from frozen.
If you absolutely loved this recipe, make sure to leave astar review and share your delicious creations! Tag me on Instagram @stephaniesweettreats so I can see your beautiful s’mores cookies. For even more baking inspiration and sweet ideas, be sure to follow me on Pinterest.
Recipe Video
Watch this step-by-step video to see exactly how to make these incredible s’mores cookies!

S’mores Cookies
Print Recipe
Pin Recipe
Leave a Review
Ingredients
- 1 cup Unsalted butter, room temperature. Half of it will be browned.
- 1 cup Brown sugar, packed light or dark
- 1/2 cup White granulated sugar
- 1 tsp Pure vanilla extract
- 2 Large eggs, room temperature
- 2 1/2 cups All-purpose flour
- 1 tsp Baking soda
- 1 tsp Salt
- 1/2 tsp Ground cinnamon
- 1 1/2 cups Semi-sweet chocolate chips
- 1 cup Graham cracker pieces, small pieces
- 19 Marshmallows
Instructions
- In a frying pan over medium heat, melt half of the butter. Stir until the milk deposits separate and turn amber in color. Pour the hot butter into a bowl and let cool to room temperature.
- In a medium bowl, mix the flour, baking soda, salt, and cinnamon. Set aside. Blend graham crackers in a food processor until small pieces are formed (not a fine crumb).
- Using a mixer, beat the remaining softened butter, cooled browned butter, brown sugar, and white sugar on high speed for 2 minutes until pale and fluffy. Add in the vanilla and eggs and mix on medium until just combined.
- Add in the dry ingredients and mix on low until just combined. Scrape the bowl. Add the graham cracker pieces and chocolate chips and mix on low until just combined.
- Chill the dough for 40 minutes.
- Use a large cookie scoop (3oz) and scoop the cookie dough (ensure it’s flush with the scoop). Press your thumb into the scoop to form a hole. Place a frozen marshmallow in the hole. Take the dough out of the scoop and gently form the dough around the marshmallow, leaving part of it showing.
- Place parchment paper on two cookie sheets. Place 6 cookie dough balls per sheet. Preheat the oven to 350°F (175°C). Place the first sheet of cookies into the freezer while the oven preheats. Keep the rest of the dough in the fridge.
- Bake for 12-14 minutes, until the edges are golden brown and the marshmallow is puffed up. Use a fork or biscuit cutter to scoot the cookies into perfect circles if needed. Optionally, top with extra graham cracker pieces and chocolate chips.
- Let cool on the hot cookie sheets for 2 minutes before transferring to a cooling rack. Cool completely.
Notes
High Altitude Baking: Add an extra 2 tablespoons of flour for high-altitude adjustments.
Room Temperature Ingredients: Pull out dairy ingredients (butter, eggs) at least 2 hours before baking to ensure they are at room temperature.
