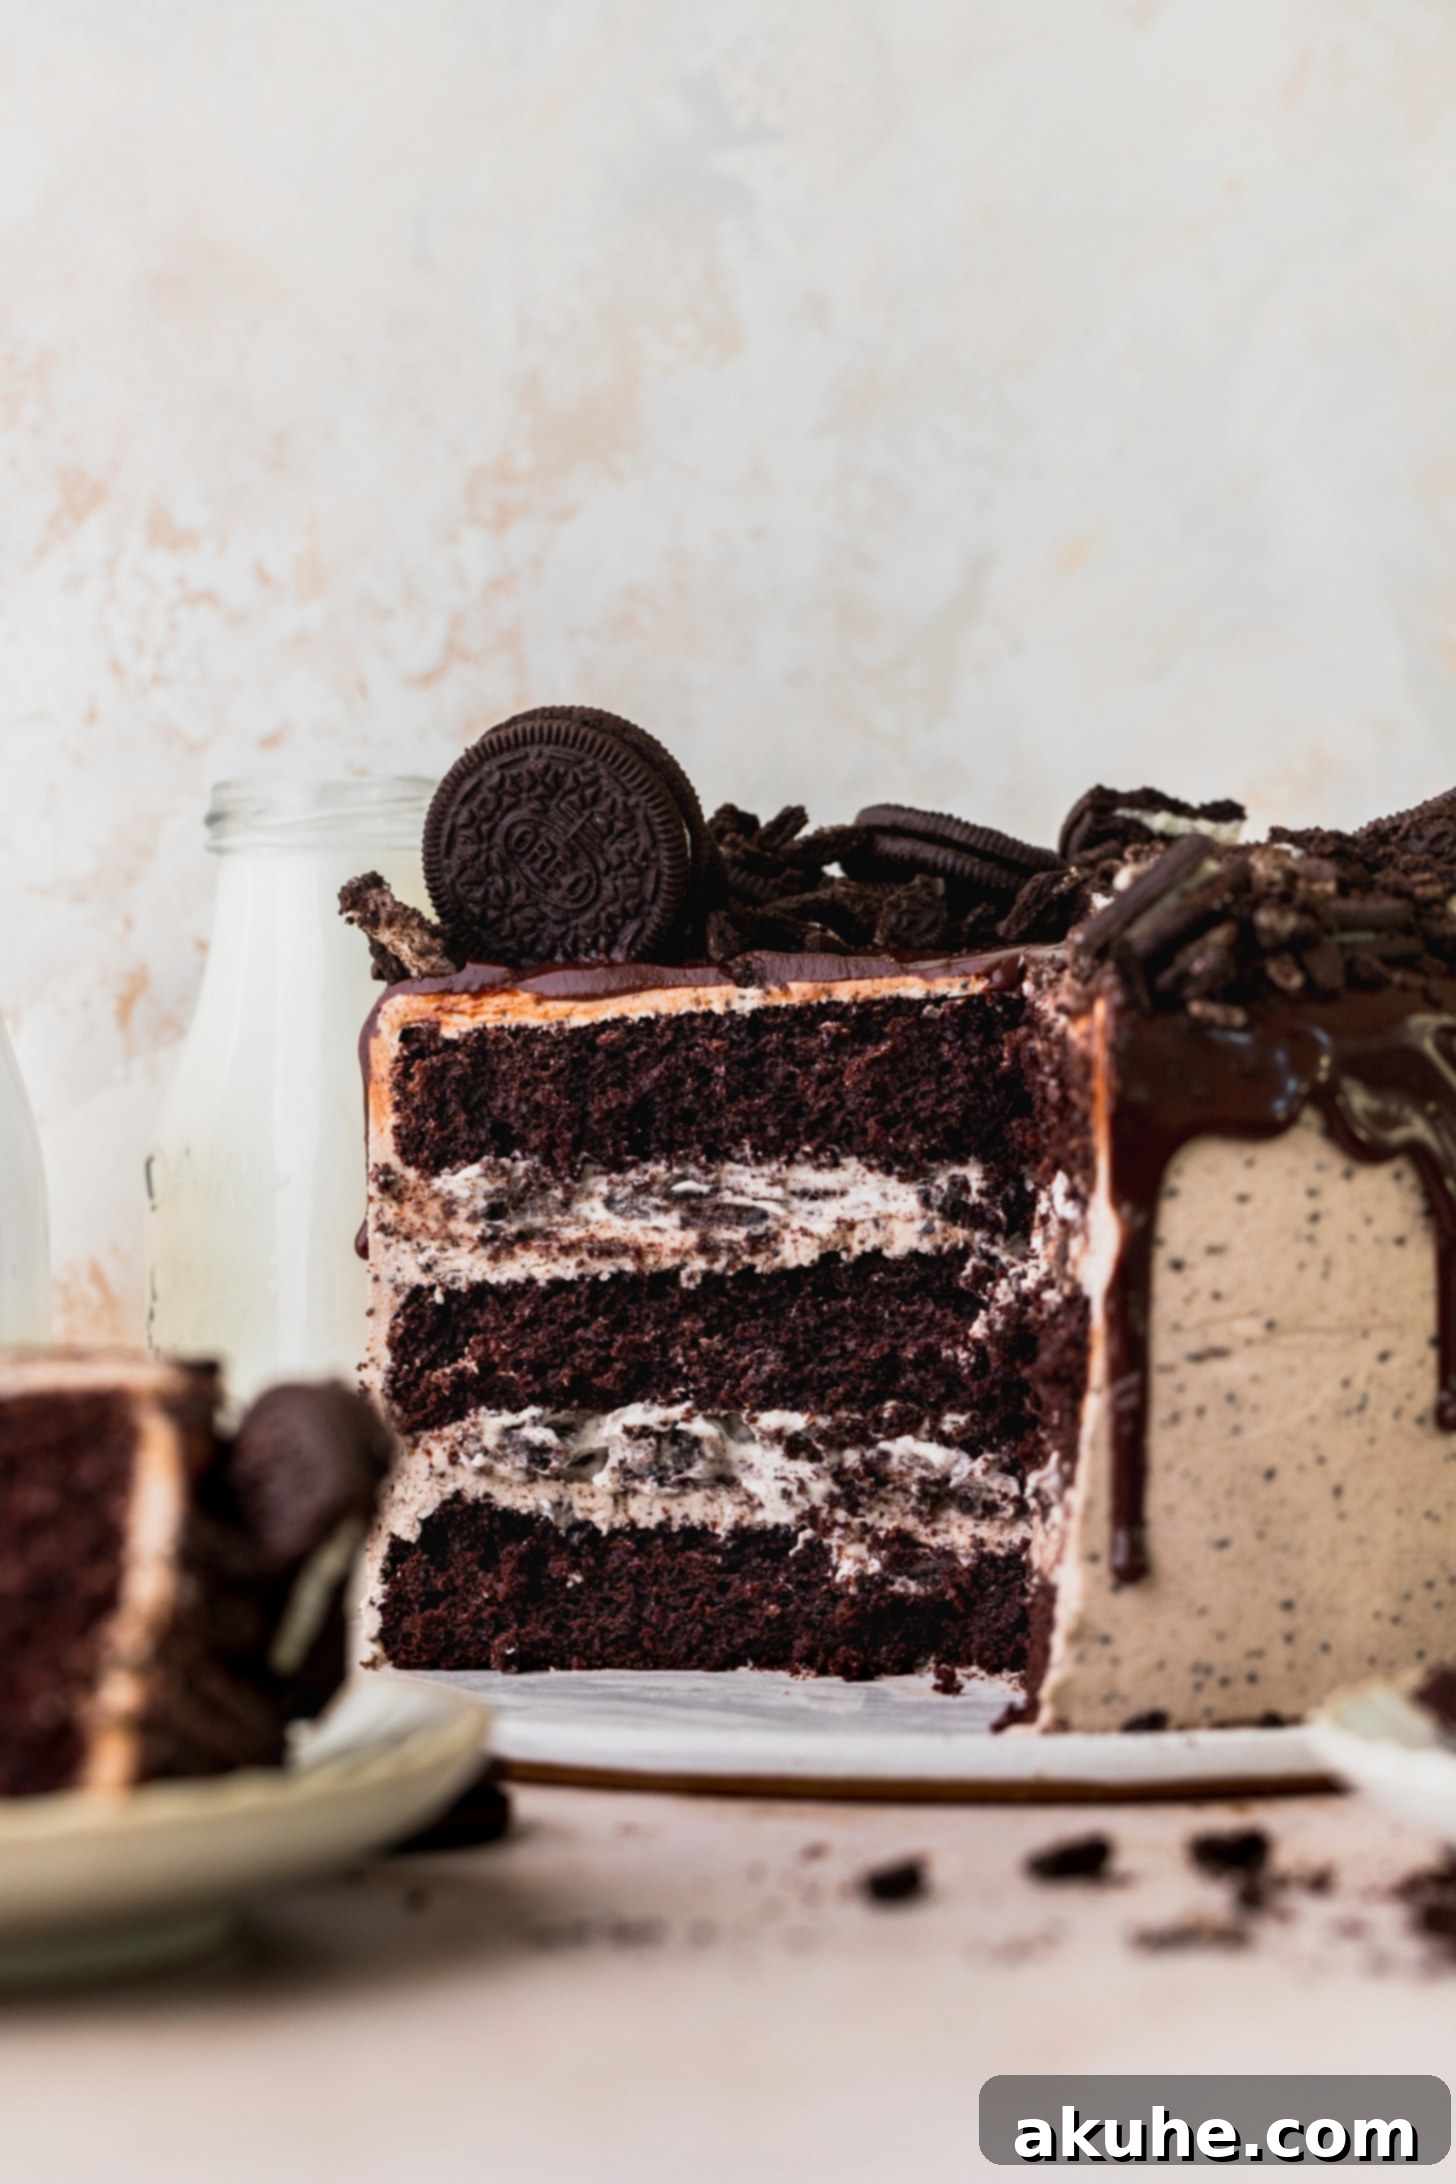
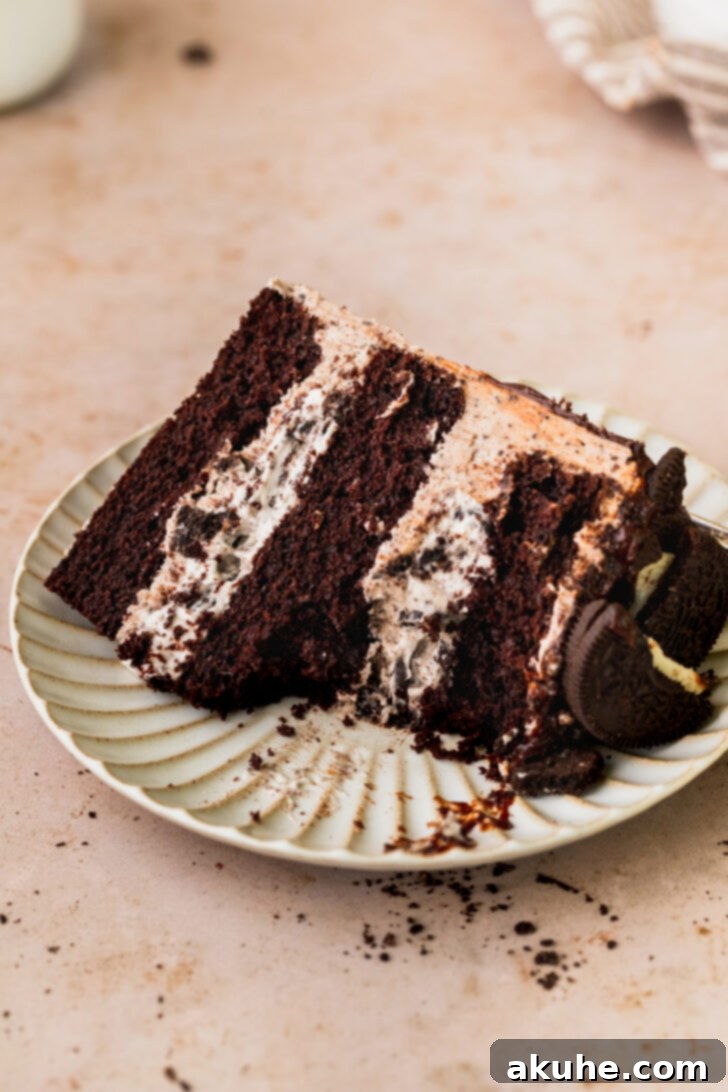
Indulge in the ultimate dessert experience with our exquisite Layered Oreo Cake. This isn’t just any chocolate cake; it’s a meticulously crafted masterpiece designed to delight every Oreo enthusiast. Imagine sinking your teeth into layers of incredibly soft, moist chocolate cake, perfectly complemented by a rich, creamy Oreo filling that tastes exactly like your favorite no-bake Oreo pie. Each bite delivers a symphony of textures and flavors, from the tender crumb of the cake to the delightful crunch of crushed Oreos nestled within the velvety cream.
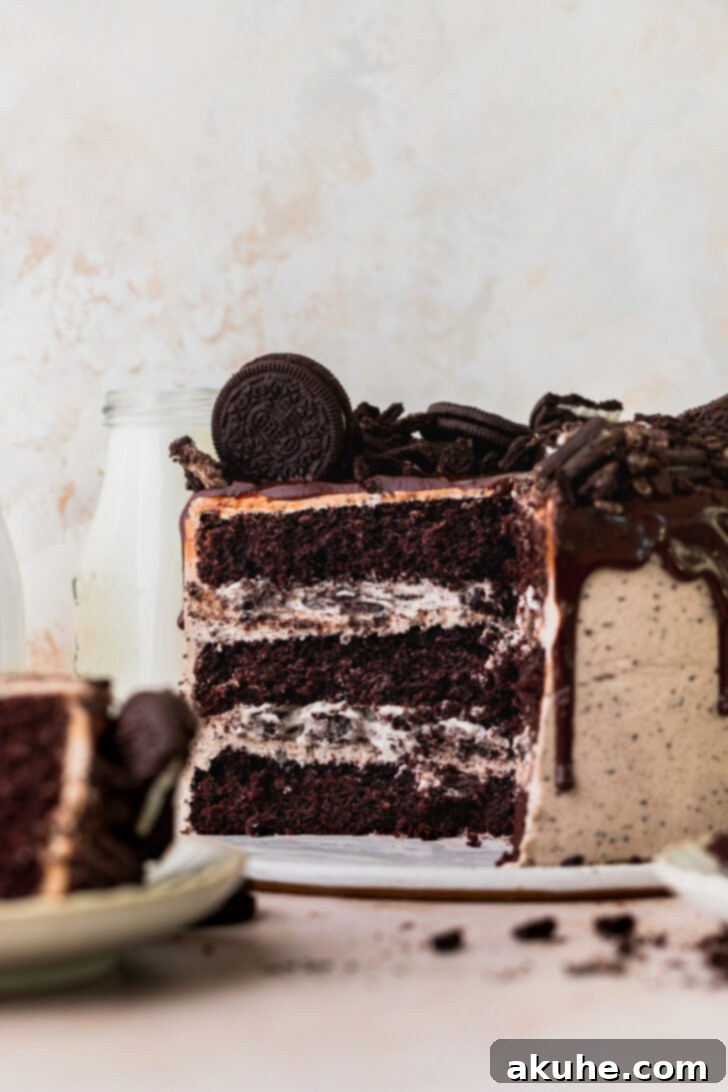
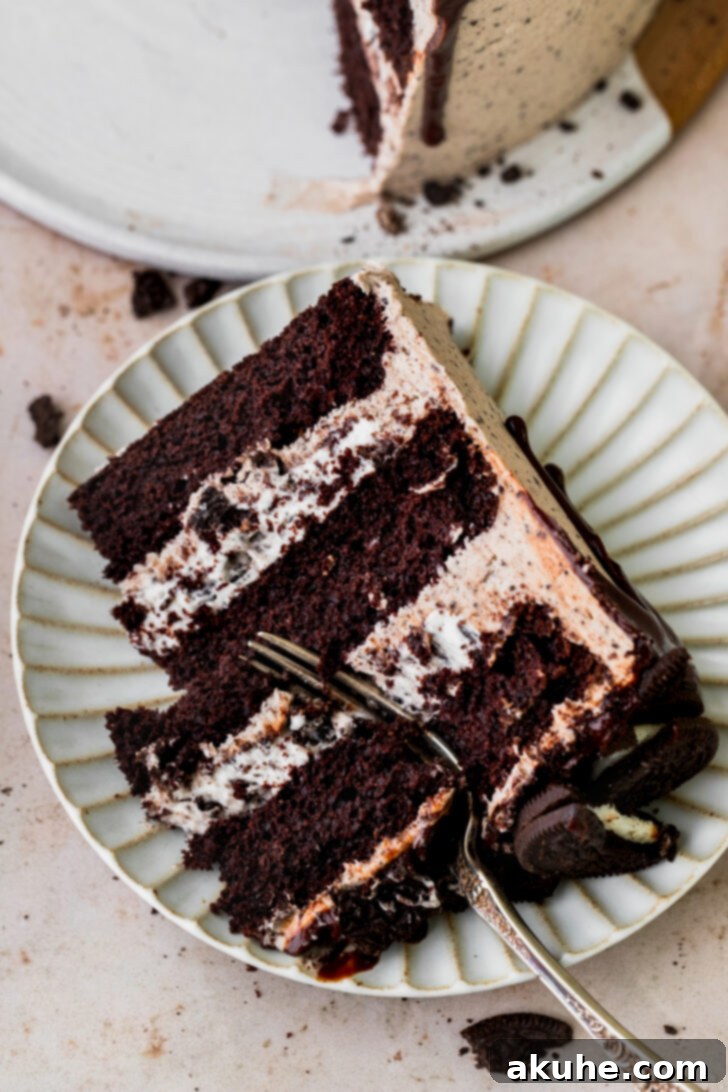
Our Ultimate Layered Oreo Cake is a true dream come true for any cookie and cream aficionado. The undeniable star of this dessert is undoubtedly the filling. It’s a beautifully whipped cream cheese base, generously studded with finely crushed Oreos, creating a texture and flavor profile that flawlessly mirrors the comforting taste of a homemade Oreo no-bake pie filling. This central layer provides a delightful coolness and a burst of familiar cookie flavor that perfectly balances the rich chocolate cake.
The chocolate cake layers themselves are a marvel of moistness and tenderness, designed to melt in your mouth. They serve as the perfect foundation for the generous application of our signature Oreo buttercream frosting, which blankets the entire cake in a cloud of creamy, cookie-infused sweetness. Rest assured, this dessert is absolutely packed with plenty of genuine Oreo cookies, ensuring an authentic and deeply satisfying experience in every forkful. Whether you’re a seasoned baker or a passionate home cook, you’ll find our detailed tips, tricks, and process photos invaluable for easily recreating this spectacular recipe in your own kitchen. And if your love for Oreo desserts knows no bounds, you simply must try our incredibly popular Oreo Chocolate Chip Cookies!
Unlocking the Secrets to the Perfect Oreo Cake: Essential Tips & Tricks
Achieving bakery-quality results at home is easier than you think when you follow a few golden rules. Here are my top tips and tricks to ensure your Ultimate Layered Oreo Cake turns out perfectly every single time, from its moist chocolate layers to its dreamy fillings and frosting.
- Mastering Flour Measurement: The Key to a Tender Crumb. One of the most common baking mistakes is incorrectly measuring flour. If you simply scoop your measuring cup directly into the flour bag, it will compact the flour, leading to an excess amount. This extra flour will absorb more moisture from your batter, resulting in a dense, dry, and crumbly cake. To avoid this, always “spoon and level” your flour. Gently spoon the flour into your measuring cup until it overflows, then use a straight edge (like the back of a knife) to level off the excess. For ultimate precision, especially in baking, consider using a kitchen scale – 1 cup of all-purpose flour typically weighs around 120-125 grams. This simple step makes a world of difference in the texture of your final cake.
- The Power of Room Temperature Ingredients: Emulsion Perfection. It might seem like a minor detail, but bringing your dairy ingredients – butter, cream cheese, buttermilk, and eggs – to room temperature at least 2 hours before you start baking is absolutely crucial. Room temperature ingredients emulsify much more effectively. When butter is soft, it creams together with sugar to create tiny air pockets, which contribute to a light and fluffy cake texture. Cold ingredients, on the other hand, won’t combine smoothly, leading to a lumpy batter or frosting that can separate, resulting in a less uniform and less tender final product. Plan ahead for this step; it’s a game-changer!
- Timing is Everything: Freshness for Flavor and Stability. For components like the whipped cream cheese filling, the Oreo buttercream, and especially the chocolate ganache drip, timing is key. These elements are best prepared right before you need them. The whipped cream cheese filling, while robust, will hold its structure best when chilled and then combined with Oreos just before assembly. Similarly, ganache should be made and allowed to cool to the perfect consistency for dripping (warm but not hot) immediately before application. This ensures optimal texture, stability, and ease of handling during the critical assembly phase, preventing a runny drip or a stiff frosting.
- Don’t Overmix Your Batter: Preserve Tenderness. Once you’ve combined your wet and dry ingredients for the chocolate cake, mix them only until they are *just* combined. Overmixing develops gluten in the flour, which can lead to a tough, chewy cake rather than the desired soft and moist crumb. A few small lumps in the batter are perfectly acceptable and will typically bake out. Resist the urge to keep mixing until perfectly smooth; gentle handling is key to a tender cake.
- Achieving Level Cake Layers: The Foundation for a Professional Look. After your cakes have cooled, you’ll likely notice a slight dome on top. For a beautiful, professional-looking layered cake, it’s essential to level these domes. Use a long, serrated knife or a specialized cake leveler to carefully trim the tops of each cooled cake layer, creating flat, even surfaces. This step ensures your stacked cake is stable and doesn’t lean, and allows for even distribution of filling between layers.
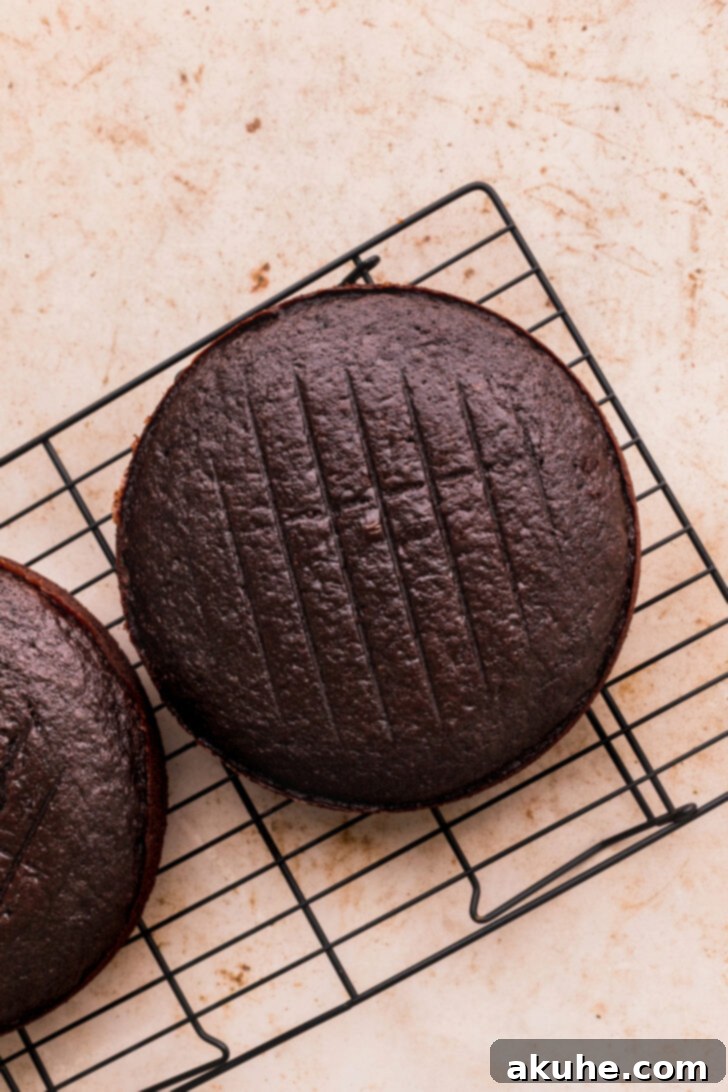
- The Importance of Cooling: Patience is a Virtue. Never rush the cooling process. After baking, allow your cake layers to cool in their pans for about 10-15 minutes. This helps them firm up and prevents them from breaking when you remove them. Then, carefully invert them onto a wire rack to cool *completely*. Attempting to frost a warm cake will result in melted frosting and a sliding mess. Complete cooling can take several hours, so plan accordingly. If you’re pressed for time, you can wrap cooled layers tightly in plastic wrap and chill them in the refrigerator for quicker cooling, or even freeze them for later use.
Crafting Each Delectable Component of Your Oreo Cake
Each element of this Ultimate Layered Oreo Cake contributes to its overall show-stopping appeal and incredible flavor. Let’s delve into how to perfectly craft each one.
The Ultimate Moist Chocolate Cake Base
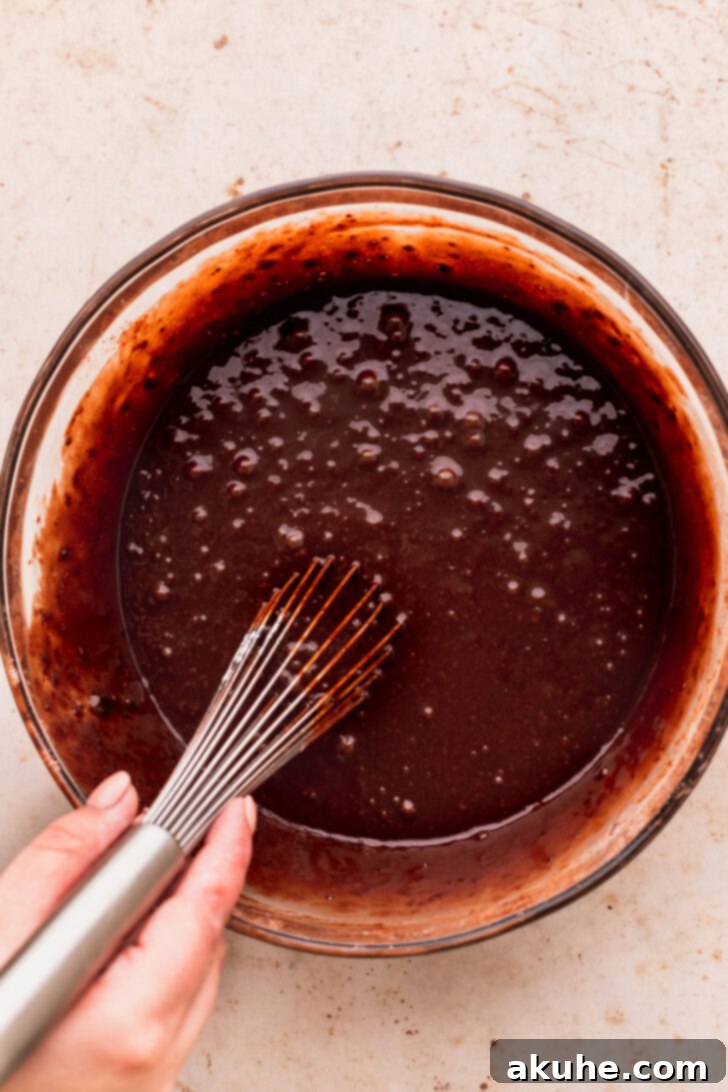
Our chocolate cake isn’t just dark; it’s rich, deeply chocolatey, and incredibly moist. This is achieved through a combination of Dutch process cocoa powder for intense color and flavor, buttermilk for tenderness, and hot water which ‘blooms’ the cocoa, unlocking its full potential. The addition of oil also contributes to its luxurious moisture, ensuring a cake that remains soft for days. Preheat your oven precisely and prepare your pans diligently – these foundational steps set the stage for baking success.
Irresistible Oreo Cream Cheese Filling
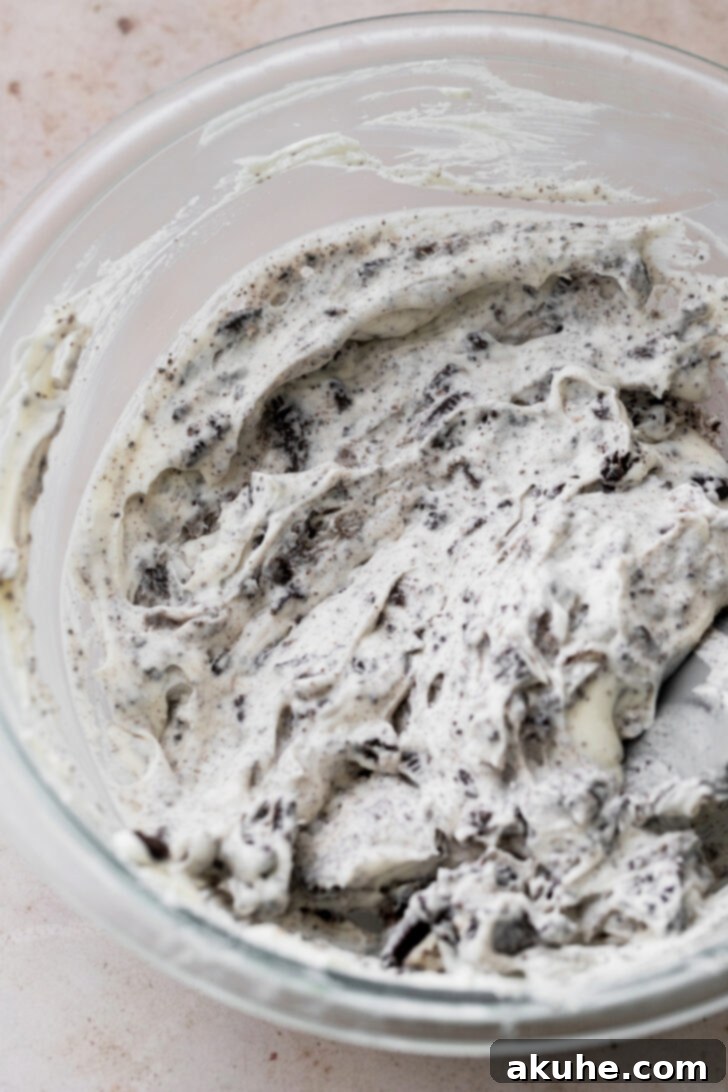
This filling is the heart of the cake, mimicking the beloved taste of a no-bake Oreo pie. It starts with a base of whipped cream cheese, made light and airy, then combined with heavy cream, powdered sugar, and vanilla for a stable yet melt-in-your-mouth texture. The genius lies in folding in chunky chopped Oreos just before assembly. This ensures bursts of cookie crunch and distinct Oreo flavor in every spoonful, creating a delightful contrast with the creamy base. Make sure your cream cheese is at room temperature for the smoothest possible mixture.
Rich and Creamy Oreo Buttercream Frosting
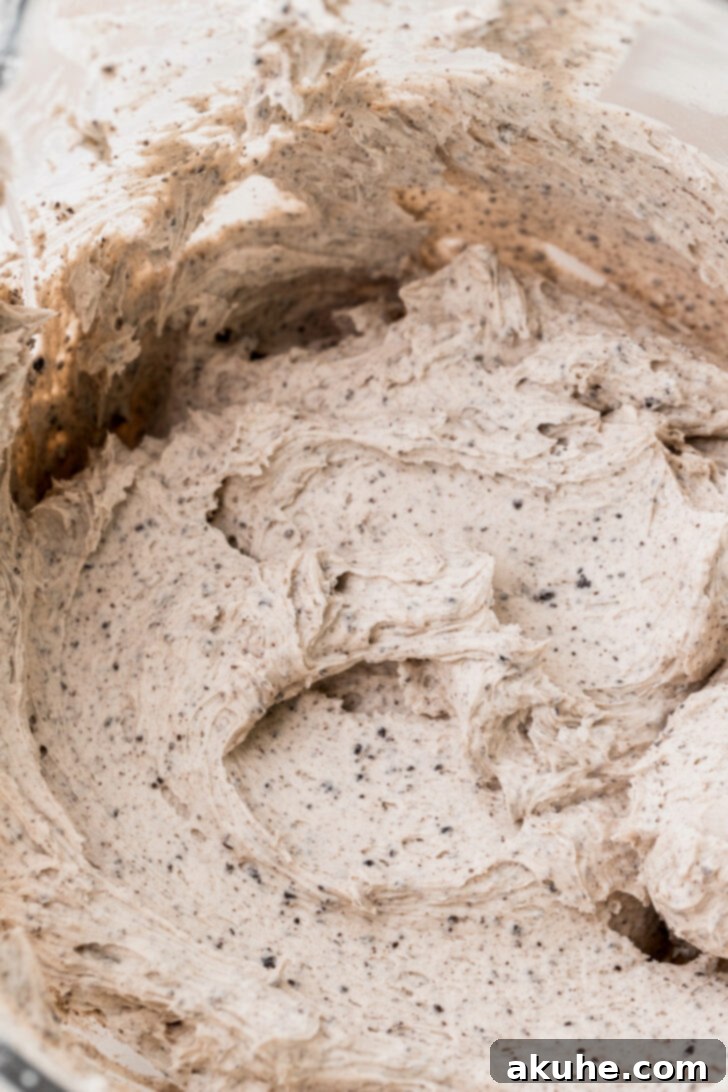
Our Oreo buttercream is more than just frosting; it’s an experience. Combining the classic richness of butter with the tangy smoothness of cream cheese, it creates a perfectly balanced sweet and slightly tart flavor. The key to its signature Oreo flavor is finely crushed Oreos, blended into almost a powder. This allows the cookie flavor to infuse throughout the buttercream without creating overly chunky textures. Sifting the powdered sugar is crucial for a lump-free, silky-smooth finish that spreads beautifully over your cake layers. Beat the butter and cream cheese thoroughly to achieve maximum aeration and fluffiness before gradually adding the sugar and Oreo crumbs.
The Glossy Chocolate Ganache Drip
The final elegant touch, the chocolate ganache drip, is simpler to achieve than you might think. This glossy, rich chocolate layer not only adds visual appeal but also an extra layer of chocolatey decadence. Made from just two ingredients – semi-sweet chocolate chips and heavy whipping cream – the secret is in the temperature and stirring. Heating the cream to steaming, pouring it over the chocolate, and letting it sit allows the chocolate to melt perfectly before stirring. Cooling it to the right consistency is vital: too hot, and it will run off the cake; too cold, and it won’t drip smoothly. A warm, pourable consistency is ideal for creating those enticing drips.
Assembling Your Masterpiece: Step-by-Step Oreo Cake Construction
Now for the exciting part: bringing all your perfectly baked and prepared components together to create the stunning Ultimate Layered Oreo Cake. Patience and precision during assembly will ensure a beautiful and stable finished product.
- Prepare Your Base: Begin by placing a small dollop of your Oreo buttercream onto the center of your chosen cake stand or serving platter. This acts as an anchor to prevent your cake from sliding. Carefully place the first cooled chocolate cake layer directly on top of this frosting, bottom side down.
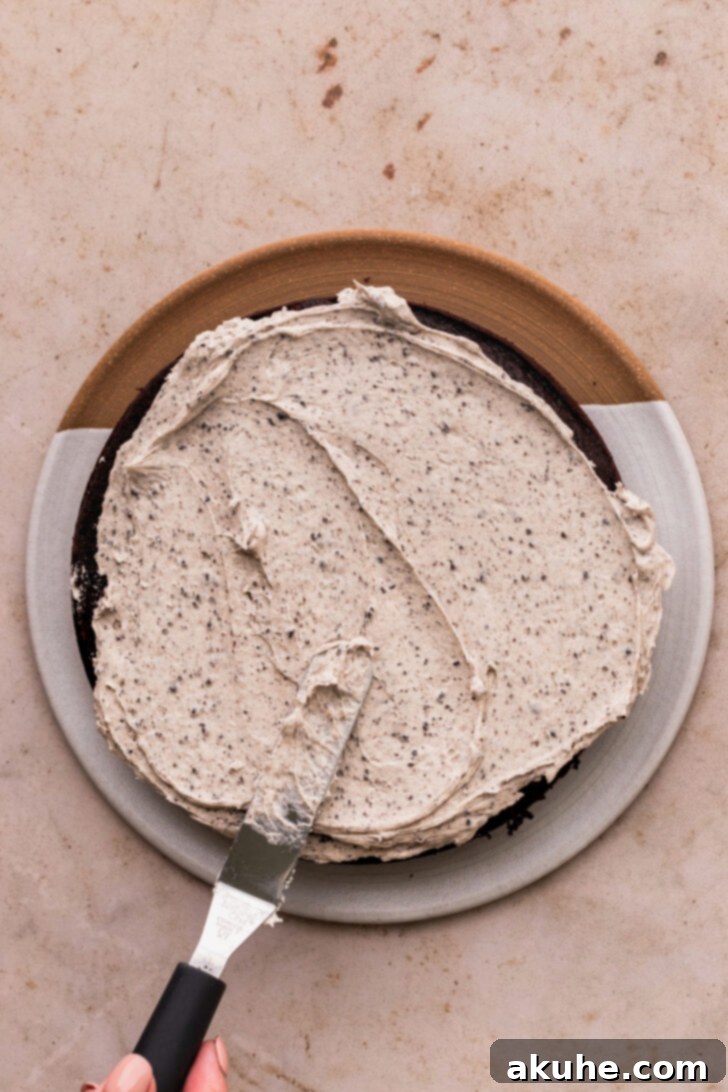
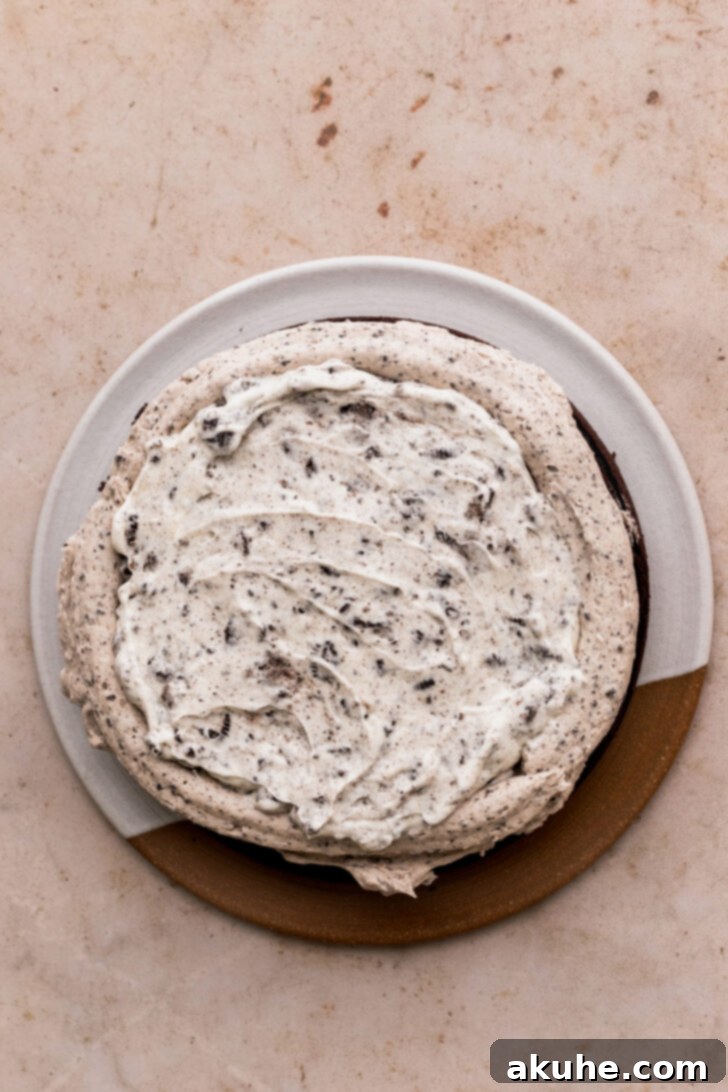
- First Layer of Frosting and Filling: Spread approximately 3/4 cup of the luscious Oreo buttercream evenly over the top surface of the first cake layer, extending almost to the very edge. Next, using a piping bag fitted with a round tip (or simply a spoon), pipe a sturdy border of buttercream around the perimeter of the cake layer. This creates a “dam” that will securely hold your creamy filling in place. Inside this border, gently spread half of your prepared Oreo whipped cream cheese filling. Ensure an even layer for consistent flavor in every slice.
- Second Layer & Repeat: Carefully place the second cooled chocolate cake layer directly on top of the filling and frosting. Gently press down to ensure it’s level and secure. Repeat the process from Step 2: spread another 3/4 cup of Oreo buttercream, pipe a frosting border, and spread the remaining half of the Oreo whipped cream cheese filling within the border.
- Top Layer & Crumb Coat: Position the third and final chocolate cake layer on top. For the neatest finish, place this layer with its flat bottom side facing upwards. This provides a perfectly smooth and level surface for your top frosting layer. Now, apply a very thin, light layer of Oreo buttercream all around the entire cake – the top and sides. This is known as a “crumb coat,” and its purpose is to trap any loose cake crumbs, preventing them from mixing into your final decorative layer. Once the crumb coat is applied, place the cake in the freezer for 15-20 minutes to allow it to set firm. This chilling step is vital for a clean, professional finish.
- Final Frosting & Chilling for Drip: After the crumb coat has set, remove the cake from the freezer. Apply the remaining Oreo buttercream generously to the top and sides of the cake. Use an offset spatula or a bench scraper to smooth the frosting, creating sharp edges and a polished appearance. Aim for a smooth and even surface. If you intend to add the chocolate ganache drip, place the beautifully frosted cake back into the freezer for another 10-15 minutes. A very cold cake is essential for the ganache to drip beautifully and set quickly without melting the buttercream.
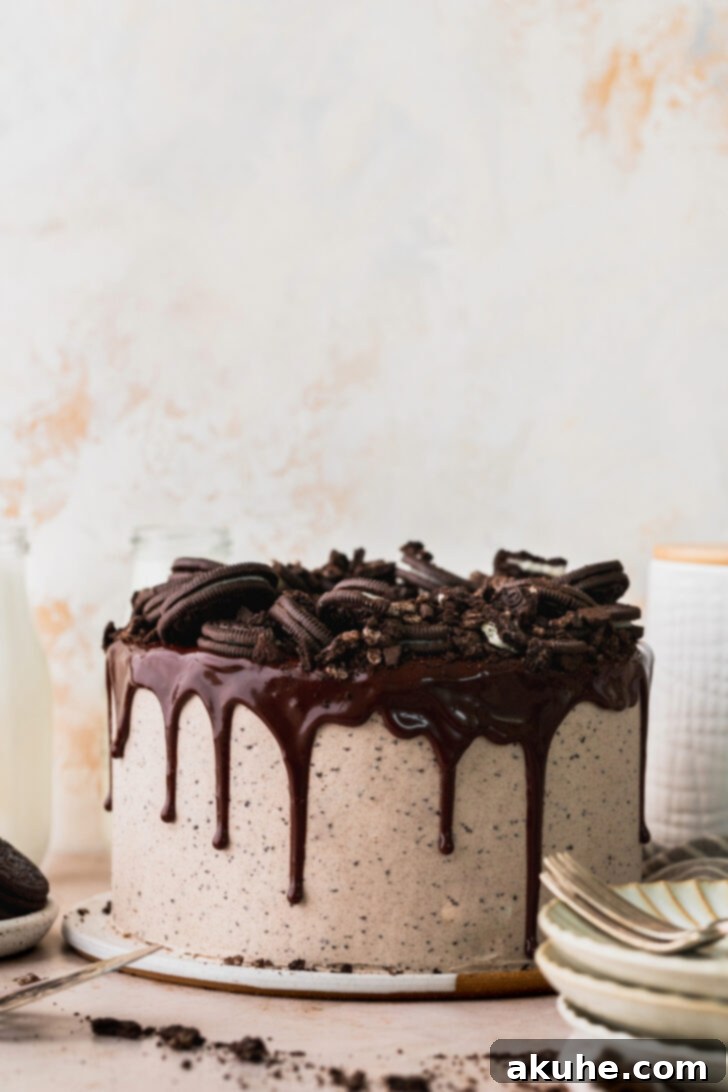
- The Perfect Chocolate Ganache Drip: Once your cake is thoroughly chilled, ensure your chocolate ganache has cooled to the ideal warm, pourable consistency (not hot, not too thick). Carefully pour about half of the ganache onto the very center of the top of the cake. Using an offset spatula or the back of a spoon, gently push the chocolate towards the edges of the cake, allowing it to naturally cascade down the sides in enticing drips. Once you’re happy with the drips, pour the remaining ganache over the top of the cake, spreading it evenly to cover the entire surface, creating a smooth, glistening finish.
- Final Touches: For the ganache to set beautifully, place the cake back into the freezer for a final 10 minutes. Once the chocolate is firm, your cake is ready for its final adornment. Arrange 5-8 whole or halved Oreo cookies artfully on top of the cake for a classic, recognizable decoration. Now, stand back and admire your magnificent creation – it’s ready to be sliced, served, and savored!
Serving and Storing Your Oreo Dream Cake
Once your Ultimate Layered Oreo Cake is fully assembled and decorated, it’s ready to impress! For the best tasting experience, allow the cake to come to a slightly cooler room temperature for about 15-20 minutes before slicing. This allows the frosting and filling to soften just enough, enhancing their creamy texture and flavor. Use a sharp, thin-bladed knife, wiping it clean between each slice for neat, professional-looking portions.
Storage Instructions:
- Room Temperature: This cake contains cream cheese in both the filling and frosting, making refrigeration necessary for extended storage. It can safely sit at cool room temperature for up to 2-3 hours.
- Refrigerator: For longer freshness, store any leftover cake in an airtight container in the refrigerator for up to 3-5 days. To prevent the cake from drying out and absorbing refrigerator odors, ensure it is well-covered. When serving from the fridge, allow individual slices to sit at room temperature for about 15-30 minutes to bring out the best flavor and texture.
- Freezer: Unfrosted cake layers can be wrapped tightly in plastic wrap and then foil, and frozen for up to 1 month. Thaw in the refrigerator overnight before frosting and assembling. A fully frosted and decorated cake can also be frozen for longer storage. Place the cake on a freezer-safe plate or board, uncovered, until the frosting is firm (about 1-2 hours). Then, wrap it tightly in several layers of plastic wrap, followed by a layer of aluminum foil. It can be stored in the freezer for up to 2-3 months. Thaw slowly in the refrigerator overnight before serving.
Craving more Oreo delights? Explore our other sensational recipes like these Oreo Cinnamon Rolls and our indulgent Oreo Cheesecake.
If you adore this recipe, please consider leaving a star review! We’d love to see your creations – tag us on Instagram @stephaniesweettreats. For endless baking inspiration, follow us on Pinterest.
Ultimate Layered Oreo Cake
Print Recipe
Pin Recipe
Leave a Review
Ingredients
Chocolate Cake
- 2 cups All-purpose flour
- 1/4 cup Cornstarch
- 1 cup Dutch process cocoa powder
- 1 tsp Baking soda
- 2 tsp Baking powder
- 1 tsp Salt
- 1 3/4 cups White granulated sugar
- 1 cup Buttermilk, room temperature
- 1 cup Oil, vegetable or canola
- 4 Large eggs, room temperature
- 1 tsp Pure vanilla extract
- 1 cup Hot Water, hot and steaming
Whipped Cream Cheese Filling
- 4 oz Cream cheese, room temperature
- 1 tsp Pure vanilla extract
- 1 1/2 cups Sifted powdered sugar
- 1/2 cup Heavy cream, cold
- 12 Oreos, chopped into small and medium pieces
Oreo Buttercream
- 9 Oreos, fine crumbs
- 2 cups Unsalted butter, room temperature
- 16 oz Cream cheese, room temperature
- 5 cups Powdered sugar, sifted
- 1 tsp Pure vanilla extract
Chocolate Ganache Drip
- 1 cup Semi-sweet chocolate chips
- 3/4 cup Heavy whipping cream
- 5-8 Oreos for decoration
Instructions
Chocolate Cake
- Preheat oven to 350F (175°C) and generously spray three 8-inch cake pans with non-stick baking spray. For extra protection against sticking, place a parchment circle on the bottom of each pan and spray again.
- In a large mixing bowl, combine the dry ingredients: all-purpose flour, cornstarch, baking powder, baking soda, salt, and Dutch process cocoa powder. Whisk them together thoroughly to ensure even distribution.
- In a separate bowl, whisk together the wet ingredients: oil, white granulated sugar, buttermilk, vanilla extract, and large eggs until well combined. In a heatproof measuring cup or small saucepan, heat 1 cup of water until it’s hot and steaming (but not boiling). Slowly and carefully pour the hot water into the wet ingredient mixture while continuously whisking. This technique helps to “bloom” the cocoa, intensifying the chocolate flavor.
- Pour the combined wet ingredients into the bowl with the dry ingredients. Mix with a whisk or a rubber spatula until *just* combined. Be careful not to overmix, as this can develop the gluten too much, leading to a tough cake. A few small lumps are perfectly fine.
- Divide the batter evenly among the three prepared cake pans. You can use a kitchen scale for precise division. Bake for 20-24 minutes, or until a toothpick inserted into the center of a cake comes out clean with no wet batter.
- Once baked, remove the cakes from the oven and let them cool in their pans for exactly 10 minutes. This allows them to firm up slightly. After 10 minutes, carefully invert the cakes onto a wire cooling rack and allow them to cool completely before attempting to frost or assemble. Cooling thoroughly prevents the frosting from melting.
Whipped Cream Cheese Filling
- In a medium bowl, beat the room temperature cream cheese, pure vanilla extract, and sifted powdered sugar using an electric hand mixer on high speed for about 1 minute until smooth and creamy, with no lumps. Scrape down the sides of the bowl as needed.
- In a separate, chilled metal bowl with a whisk attachment (if using a stand mixer) or a very cold bowl and hand mixer, beat the cold heavy cream until soft peaks form. Gradually add the remaining powdered sugar and continue to beat until firm peaks form.
- Gently fold the whipped cream into the cream cheese mixture using a rubber spatula. Mix until just combined and smooth.
- Cover the whipped cream cheese filling and chill it in the refrigerator until you are ready to assemble the cake. Just before using, gently fold in the 12 chopped Oreos. This ensures the cookies retain some of their crunch and texture within the creamy filling.
Oreo Buttercream
- Prepare your ingredients: Sift the 5 cups of powdered sugar into a large bowl. In a food processor, blend 9 Oreos into a fine crumb consistency. Set aside.
- In a large mixing bowl, using an electric mixer with the paddle attachment, beat the room temperature unsalted butter on high speed for 2 minutes until light and fluffy. Stop and scrape down the sides of the bowl. Add the room temperature cream cheese and beat on high for another 1 minute until well combined and smooth. Scrape the bowl again.
- Gradually add half of the sifted powdered sugar to the butter and cream cheese mixture, mixing on low speed until just combined. Add the remaining powdered sugar and mix again on low speed until fully incorporated. Incorporate the pure vanilla extract and the fine Oreo crumbs. Increase the mixer speed to high and beat for 2-3 minutes until the buttercream is wonderfully creamy, light, and fluffy.
Chocolate Ganache Drip
- Prepare this ganache just before you are ready to apply it to the cake. Place the semi-sweet chocolate chips in a medium, heatproof bowl. In a separate microwave-safe bowl, heat the heavy whipping cream in the microwave for 1 minute, or until it is hot and steamy but not boiling. Pour the hot cream over the chocolate chips and let it sit undisturbed for 2 minutes to allow the chocolate to melt.
- After 2 minutes, stir the mixture gently with a whisk or spatula until it becomes a glossy, smooth, and uniform ganache. If any small chocolate chunks remain, microwave the ganache in 10-second intervals, stirring well after each interval, until completely melted and smooth. Let it cool slightly to a warm, pourable consistency (around 90-95°F or 32-35°C) before applying to the cake – it should be thick enough to drip slowly, but still liquid.
Assembly
- To secure your cake, spread a small dab of Oreo buttercream onto the center of your serving platter or cake stand. Place the first cooled chocolate cake layer directly on top of this frosting, bottom side down.
- Spread approximately 3/4 cup of the luscious Oreo buttercream evenly over the top surface of the first cake layer, extending almost to the very edge. Next, using a piping bag fitted with a round tip (or simply a spoon), pipe a sturdy border of buttercream around the perimeter of the cake layer. This creates a “dam” that will securely hold your creamy filling in place. Inside this border, gently spread half of your prepared Oreo whipped cream cheese filling. Ensure an even layer for consistent flavor in every slice.
- Place the second cooled chocolate cake layer directly on top of the filling and frosting. Gently press down to ensure it’s level and secure. Repeat the process from Step 2: spread another 3/4 cup of Oreo buttercream, pipe a frosting border, and spread the remaining half of the Oreo whipped cream cheese filling within the border.
- Position the third and final chocolate cake layer on top. For the neatest finish, place this layer with its flat bottom side facing upwards. This provides a perfectly smooth and level surface for your top frosting layer. Now, apply a very thin, light layer of Oreo buttercream all around the entire cake – the top and sides. This is known as a “crumb coat,” and its purpose is to trap any loose cake crumbs, preventing them from mixing into your final decorative layer. Once the crumb coat is applied, place the cake in the freezer for 15-20 minutes to allow it to set firm. This chilling step is vital for a clean, professional finish.
- After the crumb coat has set, remove the cake from the freezer. Apply the remaining Oreo buttercream generously to the top and sides of the cake. Use an offset spatula or a bench scraper to smooth the frosting, creating sharp edges and a polished appearance. Aim for a smooth and even surface. If you intend to add the chocolate ganache drip, place the beautifully frosted cake back into the freezer for another 10-15 minutes. A very cold cake is essential for the ganache to drip beautifully and set quickly without melting the buttercream.
- Once your cake is thoroughly chilled, ensure your chocolate ganache has cooled to the ideal warm, pourable consistency (not hot, not too thick). Carefully pour about half of the ganache onto the very center of the top of the cake. Using an offset spatula or the back of a spoon, gently push the chocolate towards the edges of the cake, allowing it to naturally cascade down the sides in enticing drips. Once you’re happy with the drips, pour the remaining ganache over the top of the cake, spreading it evenly to cover the entire surface, creating a smooth, glistening finish.
- For the ganache to set beautifully, place the cake back into the freezer for a final 10 minutes. Once the chocolate is firm, your cake is ready for its final adornment. Arrange 5-8 whole or halved Oreo cookies artfully on top of the cake for a classic, recognizable decoration. Now, stand back and admire your magnificent creation – it’s ready to be sliced, served, and savored!
Baker’s Notes
Flour Measurement: Always spoon your flour into the measuring cup and level it off with a straight edge. Dipping the cup directly into the flour can compact it, leading to too much flour and a dry, dense cake. For precision, use a kitchen scale (1 cup all-purpose flour is approximately 120-125 grams).
High Altitude Baking: If baking at high altitudes, you may need to make slight adjustments. Consider adding an extra 2 tablespoons of all-purpose flour to help stabilize the cake structure.
Room Temperature Dairy: For the best emulsion and smoothest batters and frostings, ensure all dairy ingredients (butter, cream cheese, buttermilk, eggs) are at room temperature for at least 2 hours before you begin baking.
Cooling Completely: It’s crucial for cake layers to cool *completely* before frosting. Warm cakes will melt your frosting and lead to a messy, unstable cake.
Nutrition Information
Did you make this recipe?
Please leave a star rating and review below!
