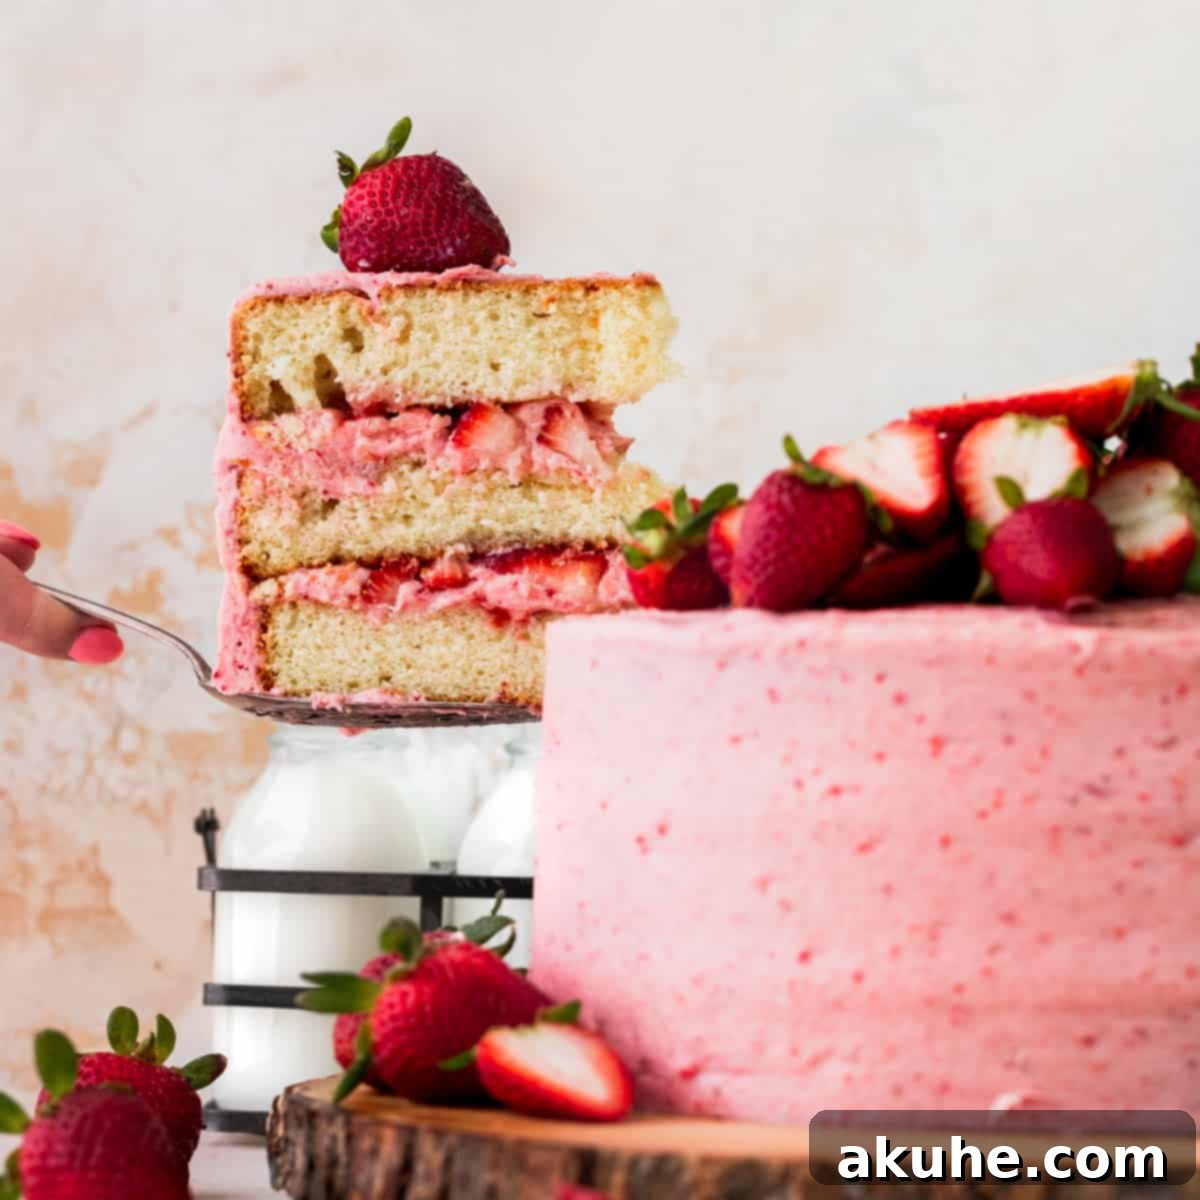
Indulge in the ultimate summer dessert with this exquisite Strawberry Vanilla Cake! This spectacular layered vanilla cake is generously packed with fresh strawberries, reminiscent of a classic strawberry shortcake, but elevated to a celebratory masterpiece. Each bite promises an experience of pure bliss, featuring incredibly soft and moist vanilla cake layers, enveloped in a dreamy strawberry cream cheese frosting, and bursting with a vibrant, fresh strawberry filling. Perfectly balanced in flavor and texture, this cake is destined to become a beloved favorite for any special occasion or simply to savor the abundance of strawberry season.
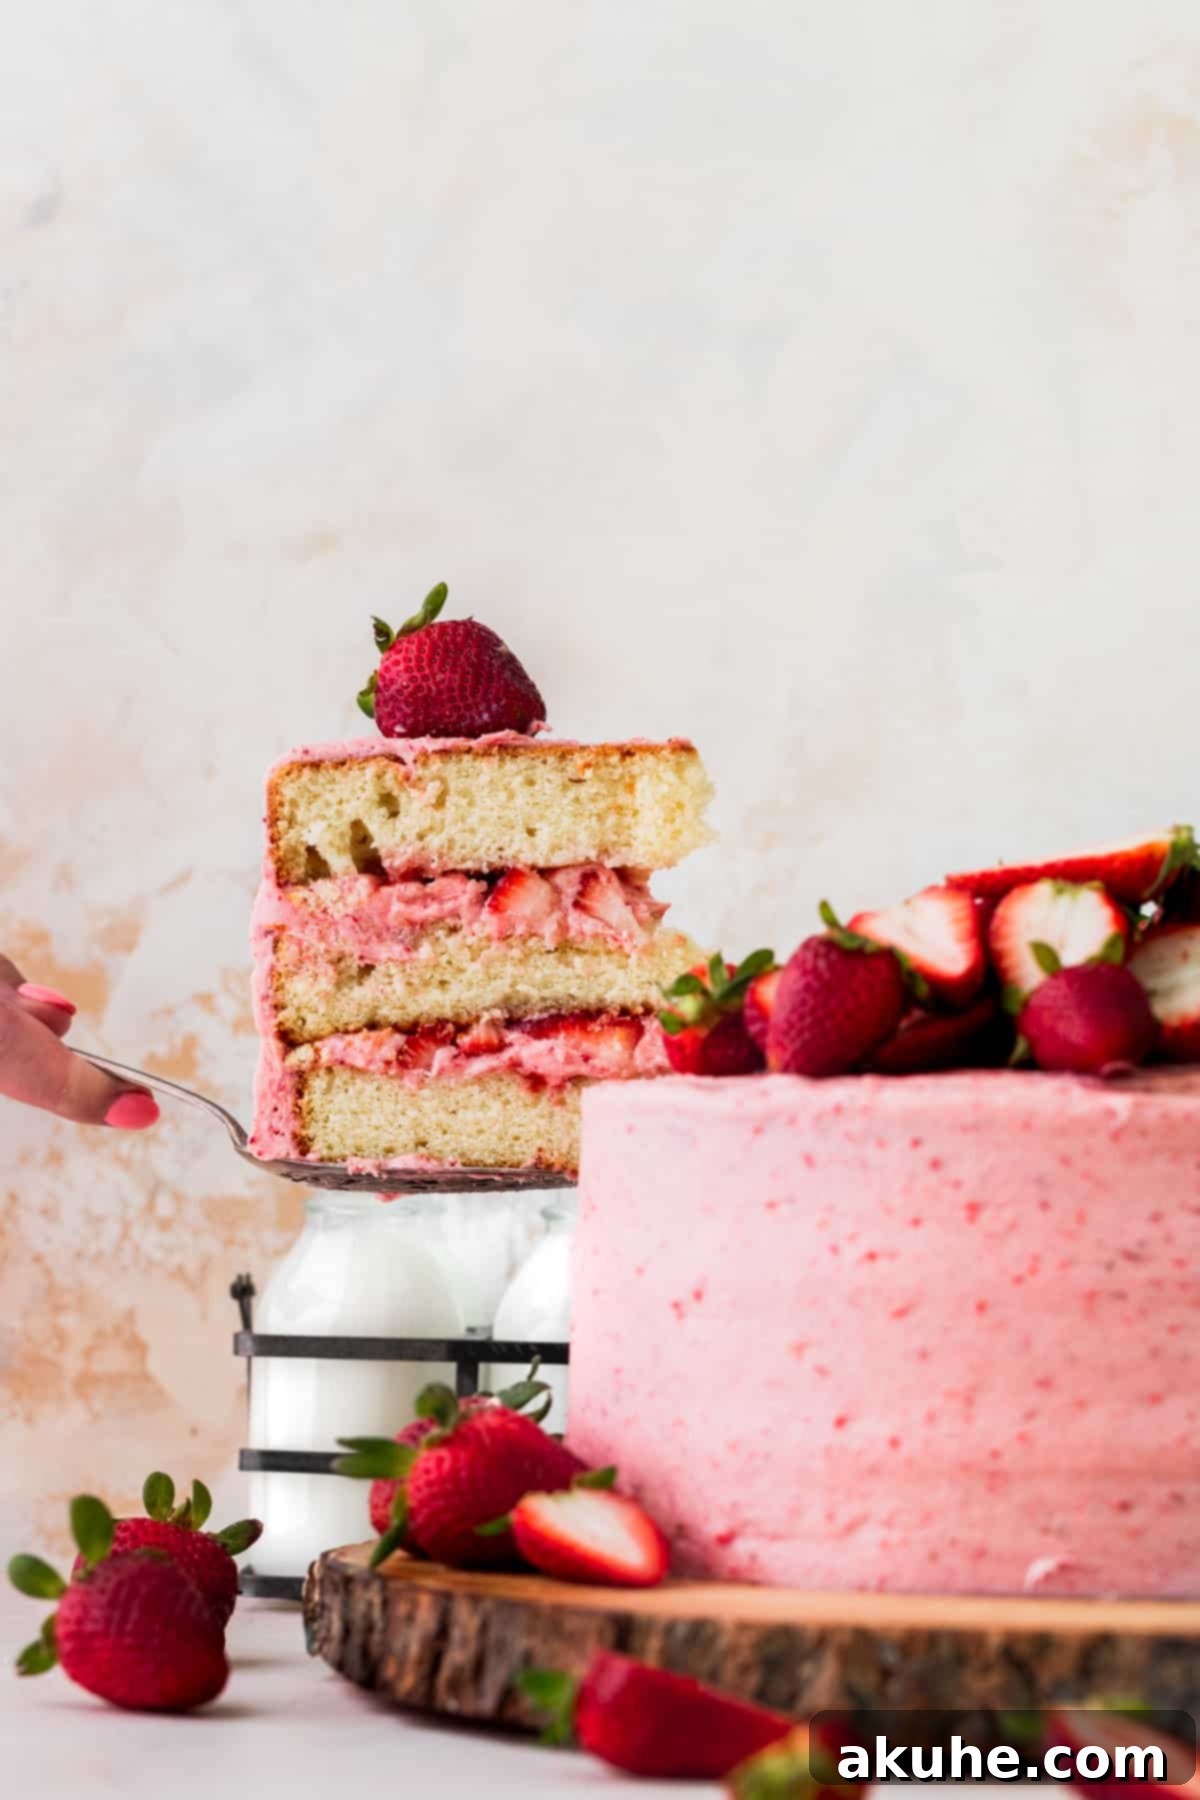
Crafted to be the ideal centerpiece for summer gatherings, from backyard BBQs to elegant brunches, this cake celebrates the peak of strawberry season. The homemade strawberry filling, made with ripe, juicy berries, captures the essence of a traditional strawberry shortcake, adding a refreshing burst of fruitiness to every forkful. But what truly sets this dessert apart is its extraordinary strawberry cream cheese frosting. This isn’t just any frosting; it’s a flavor powerhouse, combining the intense fruity notes of freeze-dried strawberries with the familiar sweetness of strawberry jam, resulting in a rich, tangy, and irresistibly smooth topping that perfectly complements the soft vanilla cake. Prepare to impress your guests and delight your taste buds with this unforgettable Strawberry Vanilla Cake.
For those who adore strawberry desserts as much as we do, be sure to explore more delightful recipes such as our Sweet Strawberry Rolls, luscious Strawberry Filled Cupcakes, and the decadent Strawberry White Chocolate Cheesecake. Each offers a unique way to enjoy the incredible flavor of fresh strawberries.
Why This Strawberry Vanilla Cake Recipe Stands Out
This Strawberry Vanilla Cake isn’t just another dessert; it’s a meticulously crafted recipe designed for maximum flavor and an unforgettable experience. Here’s why it deserves a spot on your baking list:
- Unbelievably Fluffy & Moist Vanilla Cake: Our vanilla cake layers are engineered for perfection. By combining both butter and oil, we achieve a cake that is not only rich in flavor but also supremely moist and tender. The butter provides that classic, deep flavor profile, while the oil ensures a delicate crumb and prevents dryness, giving you an extra soft cake that practically melts in your mouth. This fluffy vanilla base acts as the perfect canvas for the vibrant strawberry elements.
- Bursting with Fresh Strawberry Filling: The heart of this cake is its incredible strawberry filling. Made with fresh, ripe strawberries, a touch of sugar to enhance their natural sweetness, and a hint of strawberry jam for added depth, this filling is truly packed with intense, natural strawberry flavor. Each spoonful offers a delightful contrast in texture and a refreshing pop of fruit that perfectly complements the vanilla cake. It’s like having a summer berry patch in every slice!
- Rich & Flavorful Strawberry Cream Cheese Frosting: Forget bland frostings! This recipe features a strawberry cream cheese frosting that delivers a powerfully authentic strawberry taste. We achieve this intense flavor by incorporating both finely ground freeze-dried strawberries, which offer a concentrated berry essence, and sweet strawberry jam. The tangy cream cheese provides a beautiful counterpoint to the sweetness, creating a balanced and utterly addictive frosting that ties all the elements together. Its creamy texture and vibrant taste make it the star of the show.
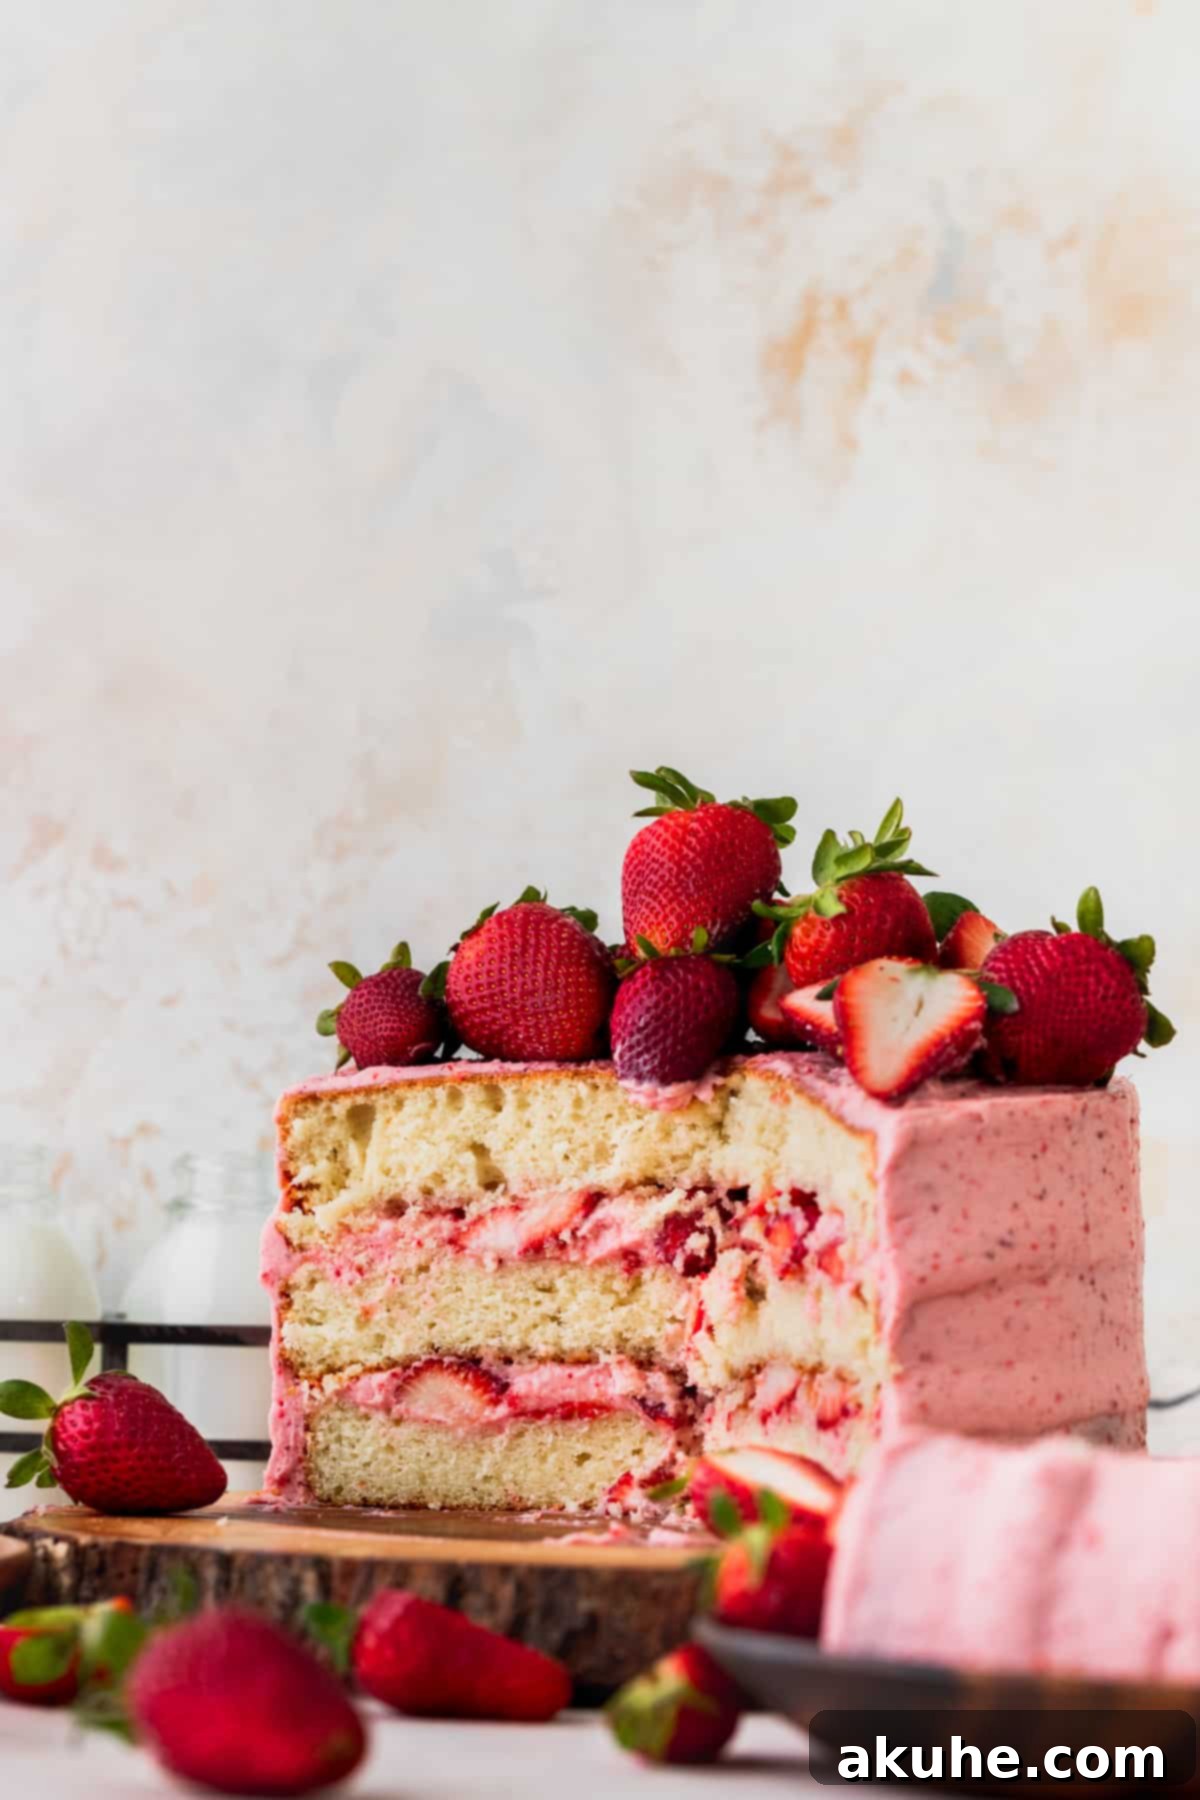
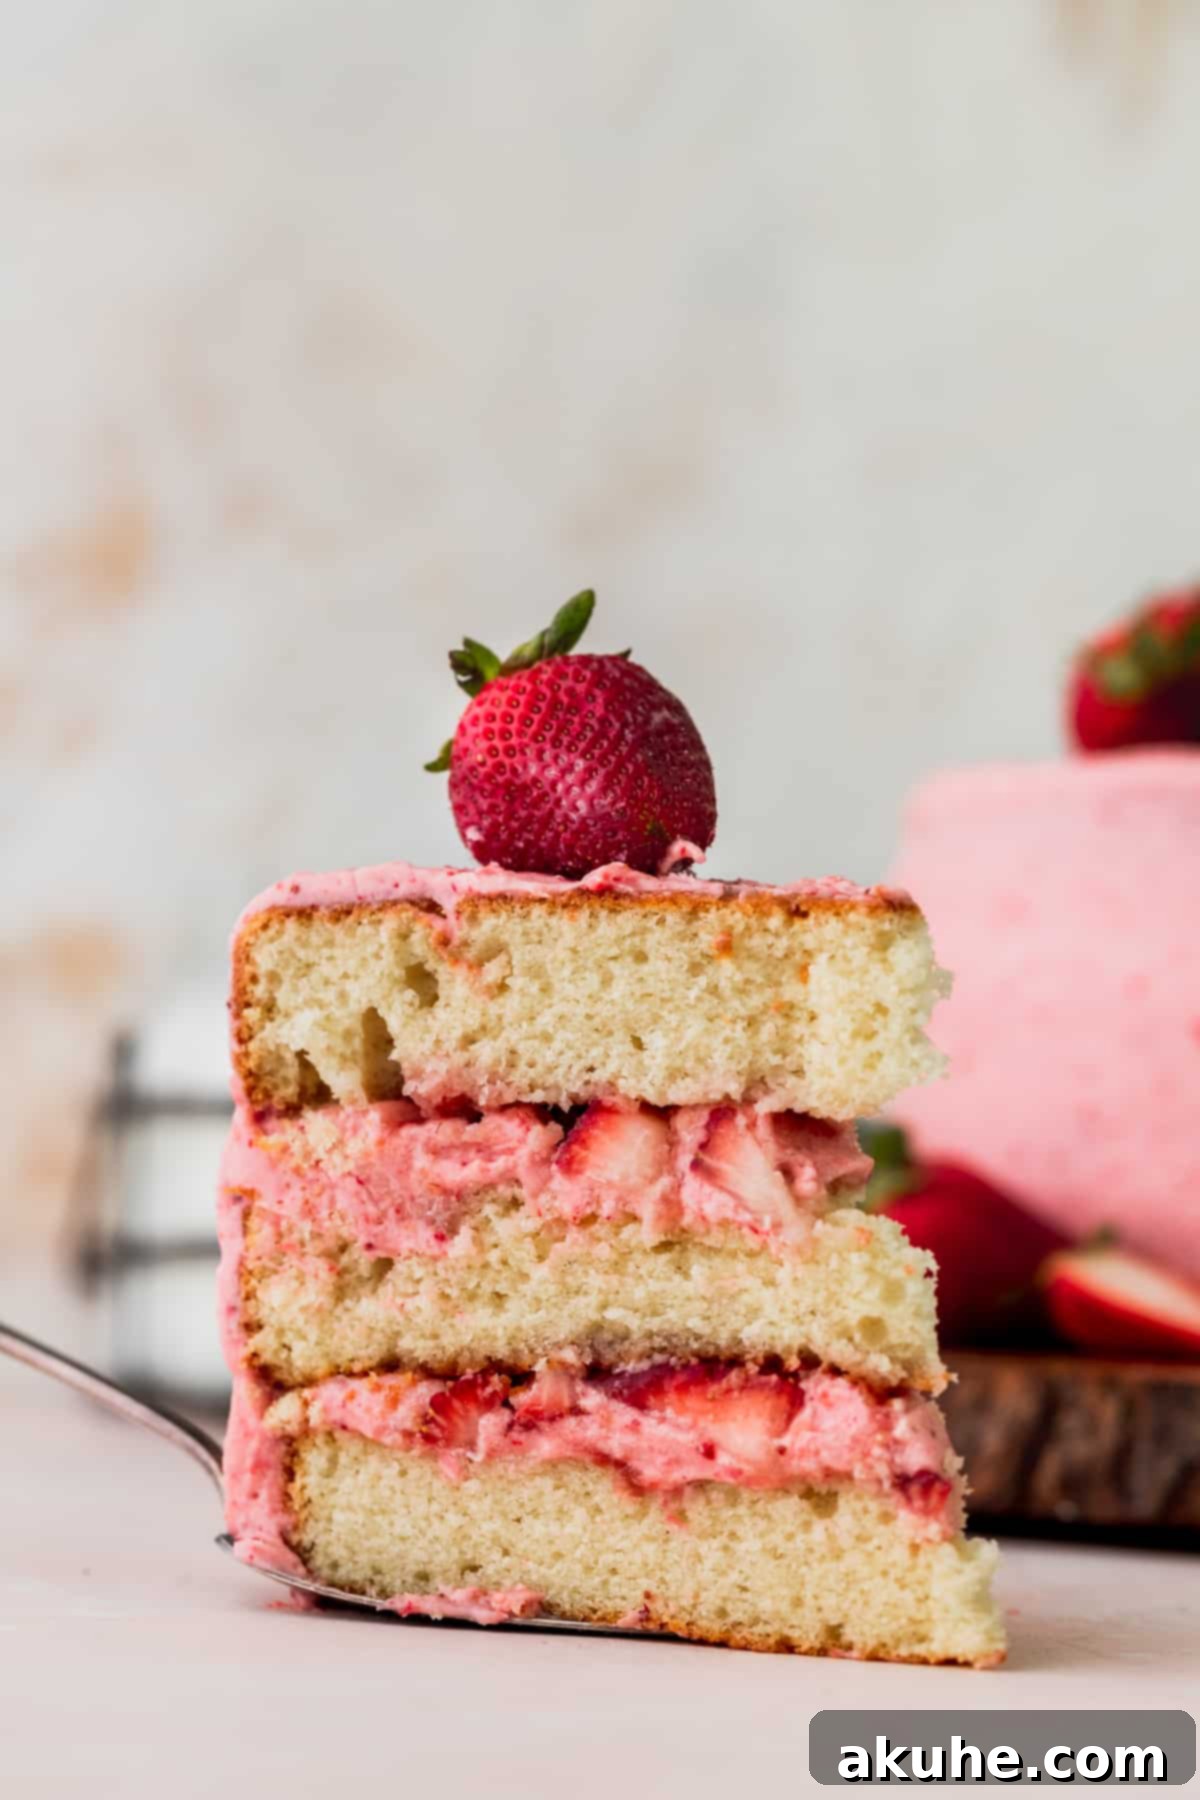
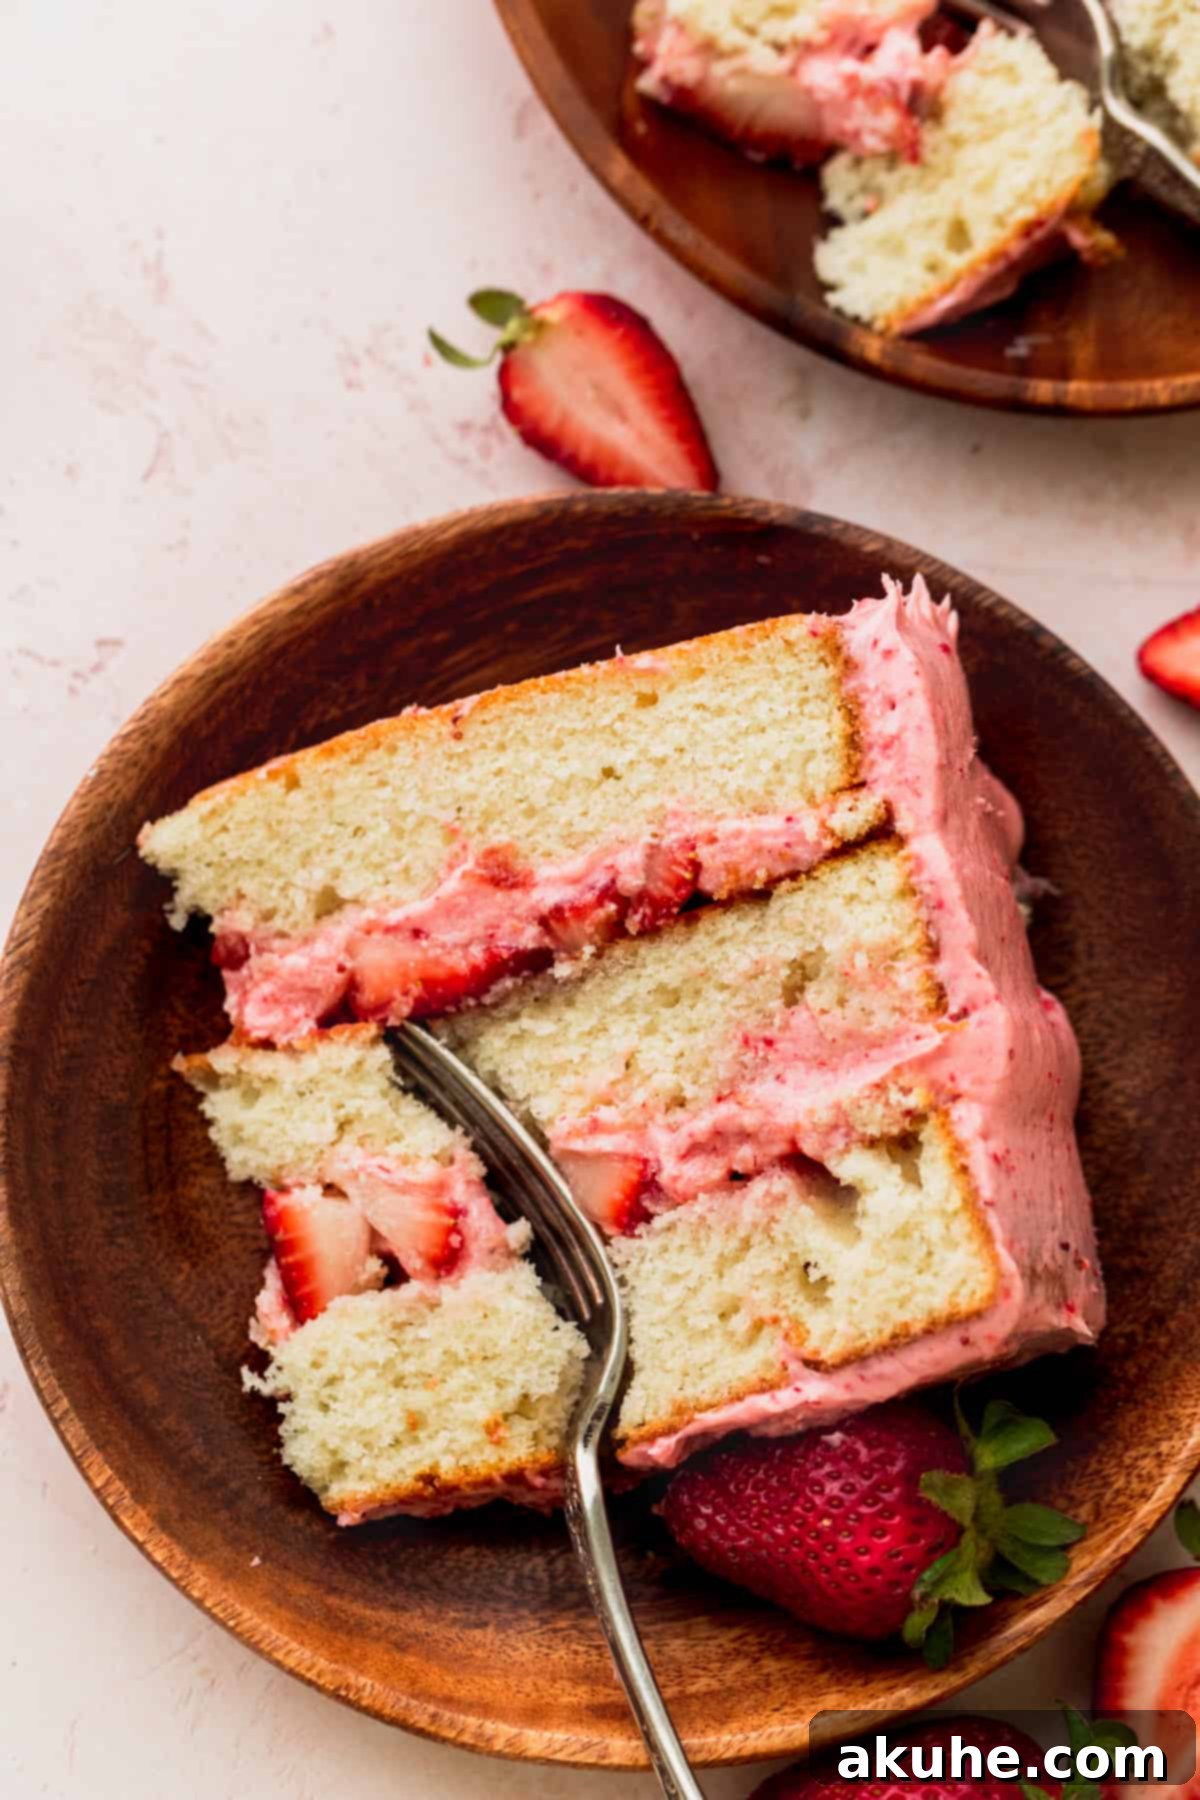
- Stunning Three-Layer Presentation: This is a majestic three-layer cake, designed to impress visually as much as it delights the palate. When you slice into it, the distinct layers of fluffy vanilla cake, luscious pink frosting, and vibrant red strawberry filling create a striking visual impact. The generous distribution of strawberries throughout the filling and as a garnish truly stands out, making it a showstopper for any celebration and a testament to homemade baking at its finest.
Essential Ingredient Notes for Your Strawberry Vanilla Cake
Success in baking often hinges on understanding your ingredients. Here are detailed notes to ensure your Strawberry Vanilla Cake turns out perfectly. For a complete list of quantities, refer to the recipe card below.
- Unsalted Butter: This recipe uses butter in both the cake and the frosting, but at different temperatures. For the cake batter, ensure your unsalted butter is at **room temperature**. This means taking it out of the fridge at least two hours before baking so it can properly cream with sugar, creating a light and airy cake structure. For the frosting, however, the butter should be **slightly cold** – pull it out about 30 minutes before use. This helps create a stable, fluffy cream cheese frosting that holds its shape beautifully.
- Oil (Canola or Vegetable): The addition of a neutral oil like canola or vegetable oil is key to achieving an extra moist cake. While butter provides flavor, oil contributes to a tender, delicate crumb that stays fresh longer, preventing the cake from drying out.
- Sour Cream: Use **full-fat sour cream** for the best results in the cake batter. Like the butter, it needs to be at **room temperature**. Sour cream adds incredible moisture, richness, and a slight tang that enhances the cake’s flavor and tenderness.
- Large Eggs: Always use **large eggs** and ensure they are at **room temperature**. Room temperature eggs emulsify better with the other ingredients, leading to a smoother, more uniform batter and a lighter cake texture. Pull them out with your butter and sour cream.
- Buttermilk: Opt for **full-fat or reduced-fat buttermilk**. Similar to sour cream, buttermilk adds moisture, tenderness, and a slight tang that activates the baking soda, contributing to the cake’s lift and soft texture. Ensure it’s at **room temperature** for optimal incorporation.
- Cream Cheese: For the frosting, **full-fat cream cheese** is a must for the best flavor and texture. It also needs to be at **room temperature** to cream smoothly with the butter, preventing lumps and ensuring a silky, decadent frosting.
- Powdered Sugar: To achieve a perfectly smooth, grit-free frosting, it is absolutely essential to **sift your powdered sugar**. This removes any lumps, resulting in a velvety texture that’s a joy to spread and pipe.
- Freeze-Dried Strawberries: These are a secret weapon for an intense, natural strawberry flavor in the frosting without adding excess moisture. You can find them on Amazon or often in the dried fruits or snack aisle of larger grocery stores. They need to be **grounded to a fine powder** using a food processor or blender.
- Strawberry Jam: Use your **favorite high-quality strawberry jam** for both the filling and the frosting. It adds concentrated fruit flavor, sweetness, and a lovely vibrant color.
- Fresh Strawberries: The star of the show! Always use **fresh, ripe strawberries** for the filling and for decorating the cake. Their natural sweetness and slight tartness are irreplaceable. Wash and quarter them just before use.
Smart Ingredient Substitutions to Keep in Mind
While sticking to the original recipe offers the best results, sometimes substitutions are necessary. Here are some reliable swaps for your Strawberry Vanilla Cake ingredients:
- Sour Cream Alternative: If you don’t have sour cream on hand, **plain full-fat Greek yogurt** makes an excellent substitute. It provides a similar level of moisture and tanginess, contributing to a wonderfully tender cake.
- Buttermilk Substitute: No buttermilk? No problem! You can easily make your own. Combine **1 cup of regular milk (dairy or non-dairy)** with **1 tablespoon of fresh lemon juice or white vinegar**. Stir it gently and let it sit for 5-10 minutes until it slightly curdles. This homemade buttermilk will work perfectly in the cake batter.
- Freeze-Dried Strawberries Alternative: If freeze-dried strawberries are hard to find, you can still achieve a delicious strawberry frosting. Increase the **strawberry jam to 1/4 cup** and decrease the **heavy cream to 1-2 tablespoons** as needed to maintain the frosting’s consistency. While the flavor might be slightly less intense, it will still be wonderfully fruity.
- Berry Variations: While this is a strawberry cake, don’t limit yourself! This recipe is adaptable. You can also incorporate **fresh blueberries, raspberries, or even a mix of berries** in the filling for a delightful twist. Just be mindful of their moisture content and adjust sugar if necessary.
Step-by-Step Instructions: Crafting the Perfect Vanilla Cake Layers
Creating these remarkably soft and moist vanilla cake layers is simpler than you might think. For this recipe, a stand mixer with a paddle attachment or a powerful electric hand mixer will be your best friend.
STEP 1: Prepare Your Baking Environment. Begin by preheating your oven to 350°F (175°C). This ensures a consistent baking temperature from the moment your cakes enter the oven. Next, prepare three 8-inch round cake pans. Generously spray them with a nonstick baking spray that contains flour (or grease and flour them the traditional way). Crucially, line the bottoms of each pan with 8-inch parchment paper circles. This prevents sticking and ensures your beautiful cake layers release effortlessly. Give the parchment-lined pans another light spray for extra assurance.
STEP 2: Combine the Dry Ingredients. In a large mixing bowl, meticulously sift the all-purpose flour. Sifting is a critical step as it removes any lumps and aerates the flour, contributing to a lighter cake crumb. After sifting, add the baking powder, baking soda, and salt to the bowl. Whisk these dry ingredients together thoroughly until they are well combined. Set this mixture aside for later.
STEP 3: Cream the Butter, Oil, and Sugar. In the bowl of your stand mixer (or a large bowl with a hand mixer), combine the room-temperature unsalted butter, neutral oil (canola or vegetable), and white granulated sugar. Beat this mixture on high speed for a full 3 minutes. This creaming process is vital; it incorporates air into the butter and sugar, which will make your cake wonderfully light and fluffy. The mixture should become noticeably pale, light, and airy.
STEP 4: Introduce the Wet Ingredients. Reduce the mixer speed to medium. Add the room-temperature sour cream and pure vanilla extract to the creamed butter mixture. Mix until just combined, being careful not to overmix at this stage. Stop the mixer and use a rubber spatula to scrape down the sides and bottom of the bowl, ensuring all ingredients are incorporated evenly. Next, add the large eggs one at a time, mixing well after each addition until just incorporated. Once all eggs are in, increase the mixer speed to high and beat for 1 minute until the mixture is light and well-emulsified.
STEP 5: Alternate Dry and Wet Additions. This step requires a gentle touch to avoid overmixing, which can lead to a tough cake. With the mixer on its lowest speed, begin by adding one-third of your dry ingredient mixture to the wet ingredients. Mix until just barely combined. Then, add half of the room-temperature buttermilk and mix on low speed until just incorporated. Repeat this process: add another third of the dry ingredients, mix, then add the remaining buttermilk, mix. Finish by adding the final third of the dry ingredients and mix only until no streaks of flour remain. Be very careful not to overmix the batter once the flour is added. Use your rubber spatula to scrape the sides and bottom of the bowl one last time, ensuring all ingredients are thoroughly blended without excessive mixing.
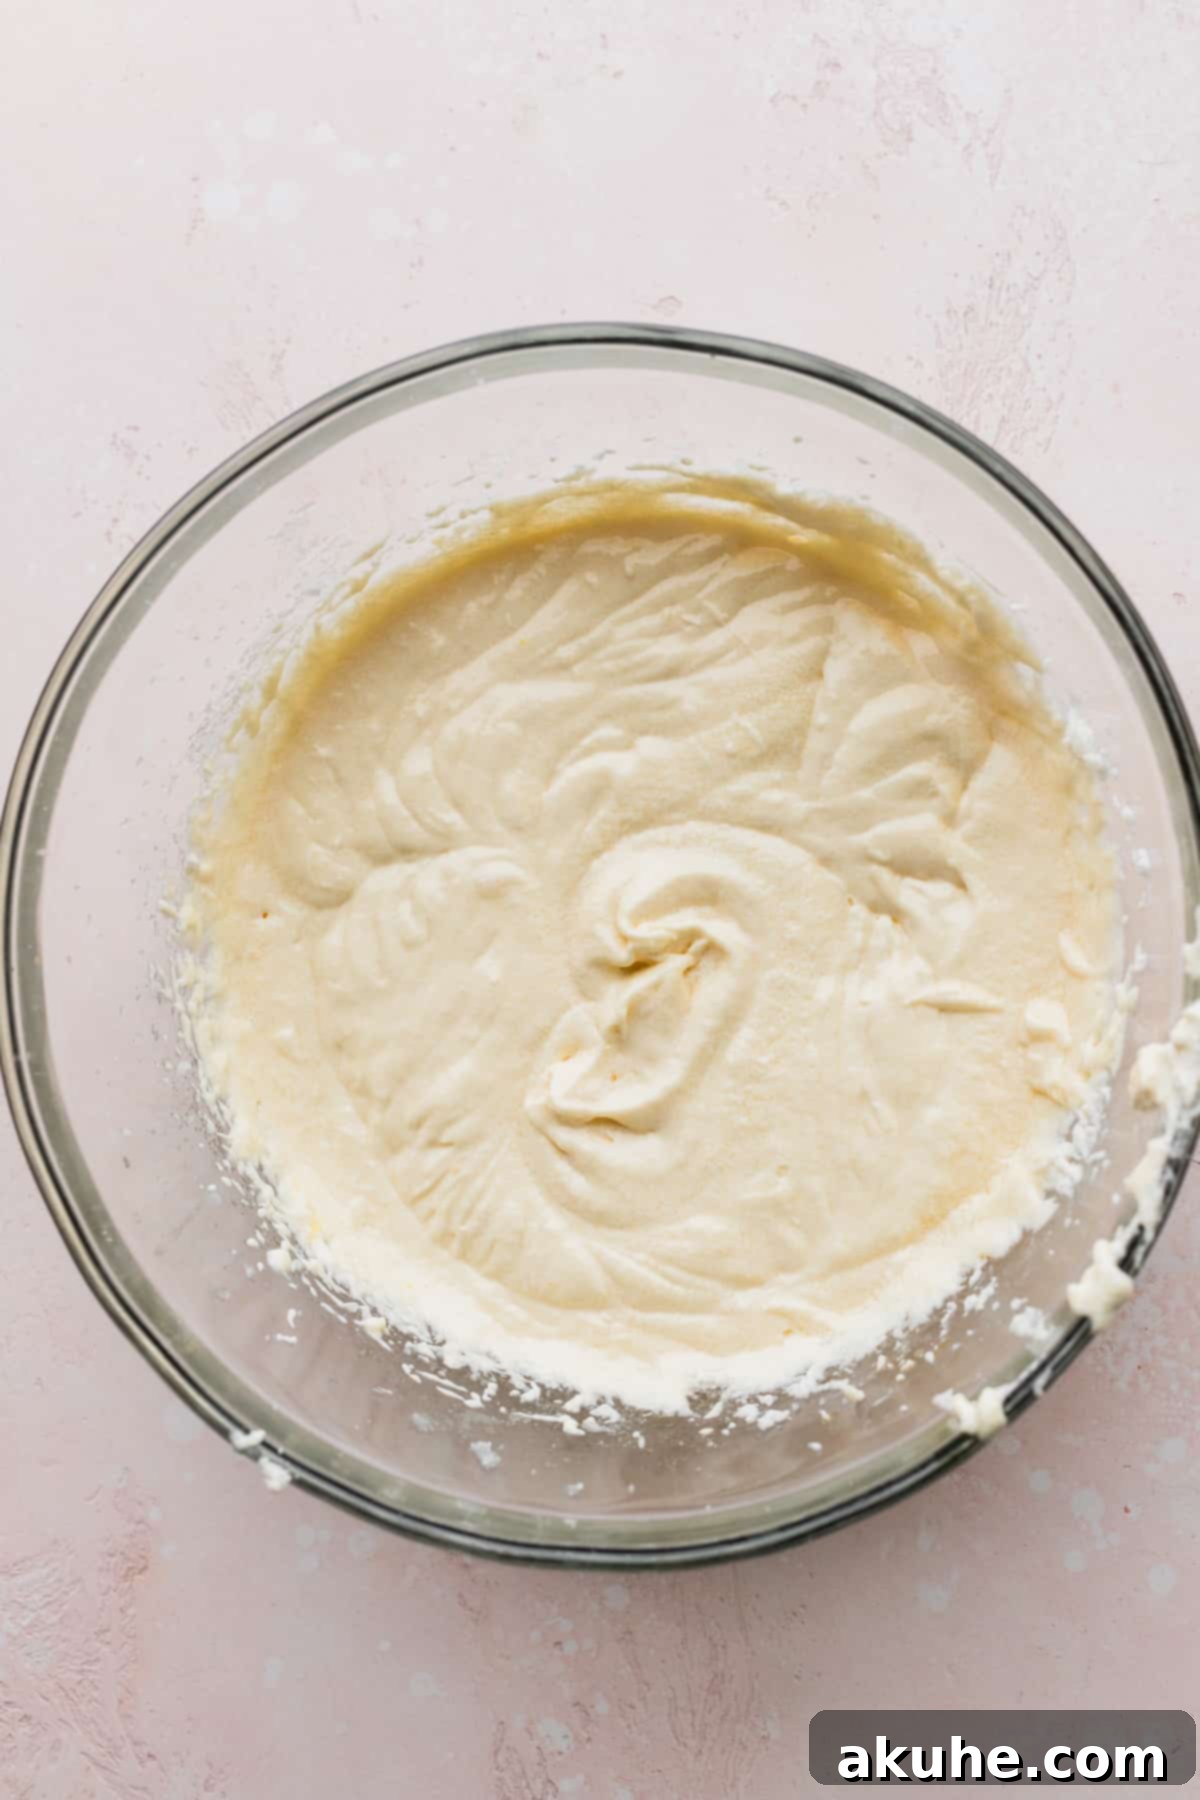
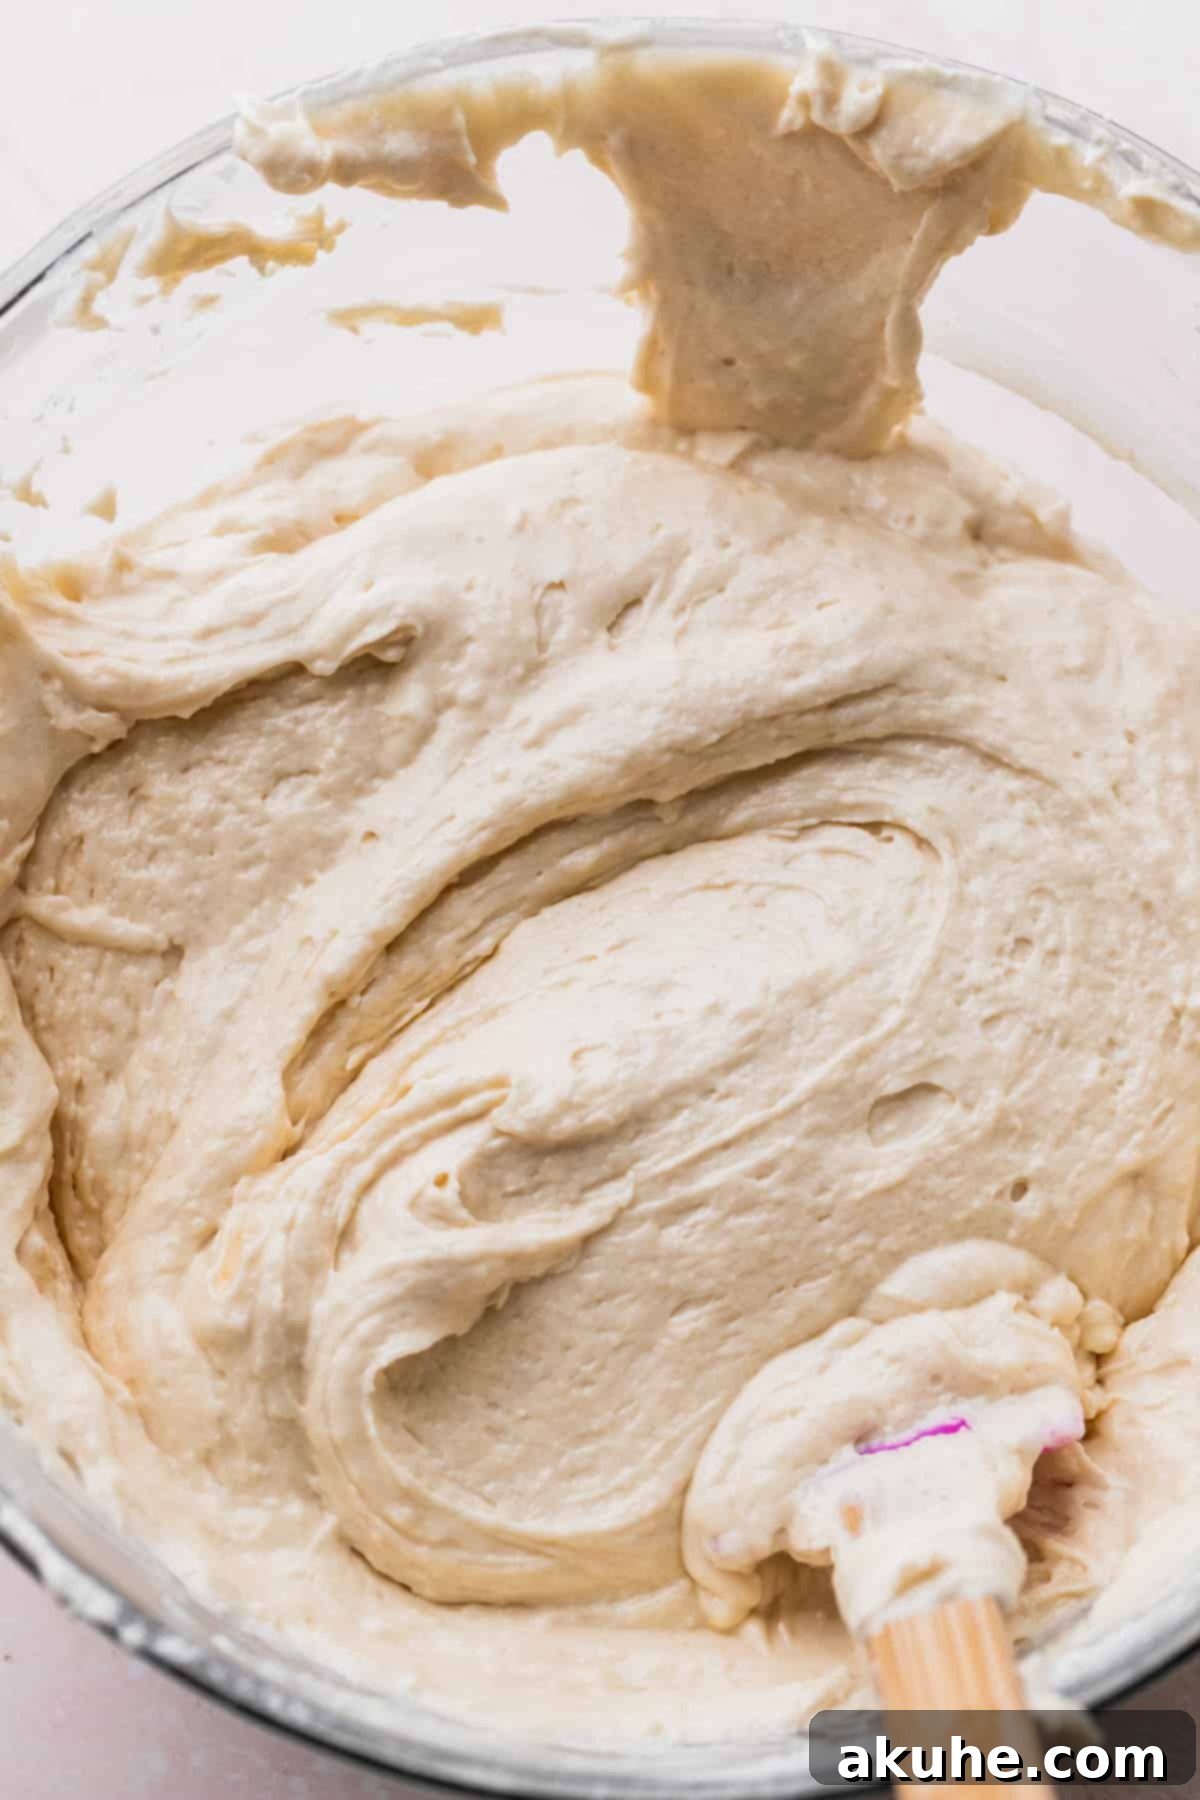
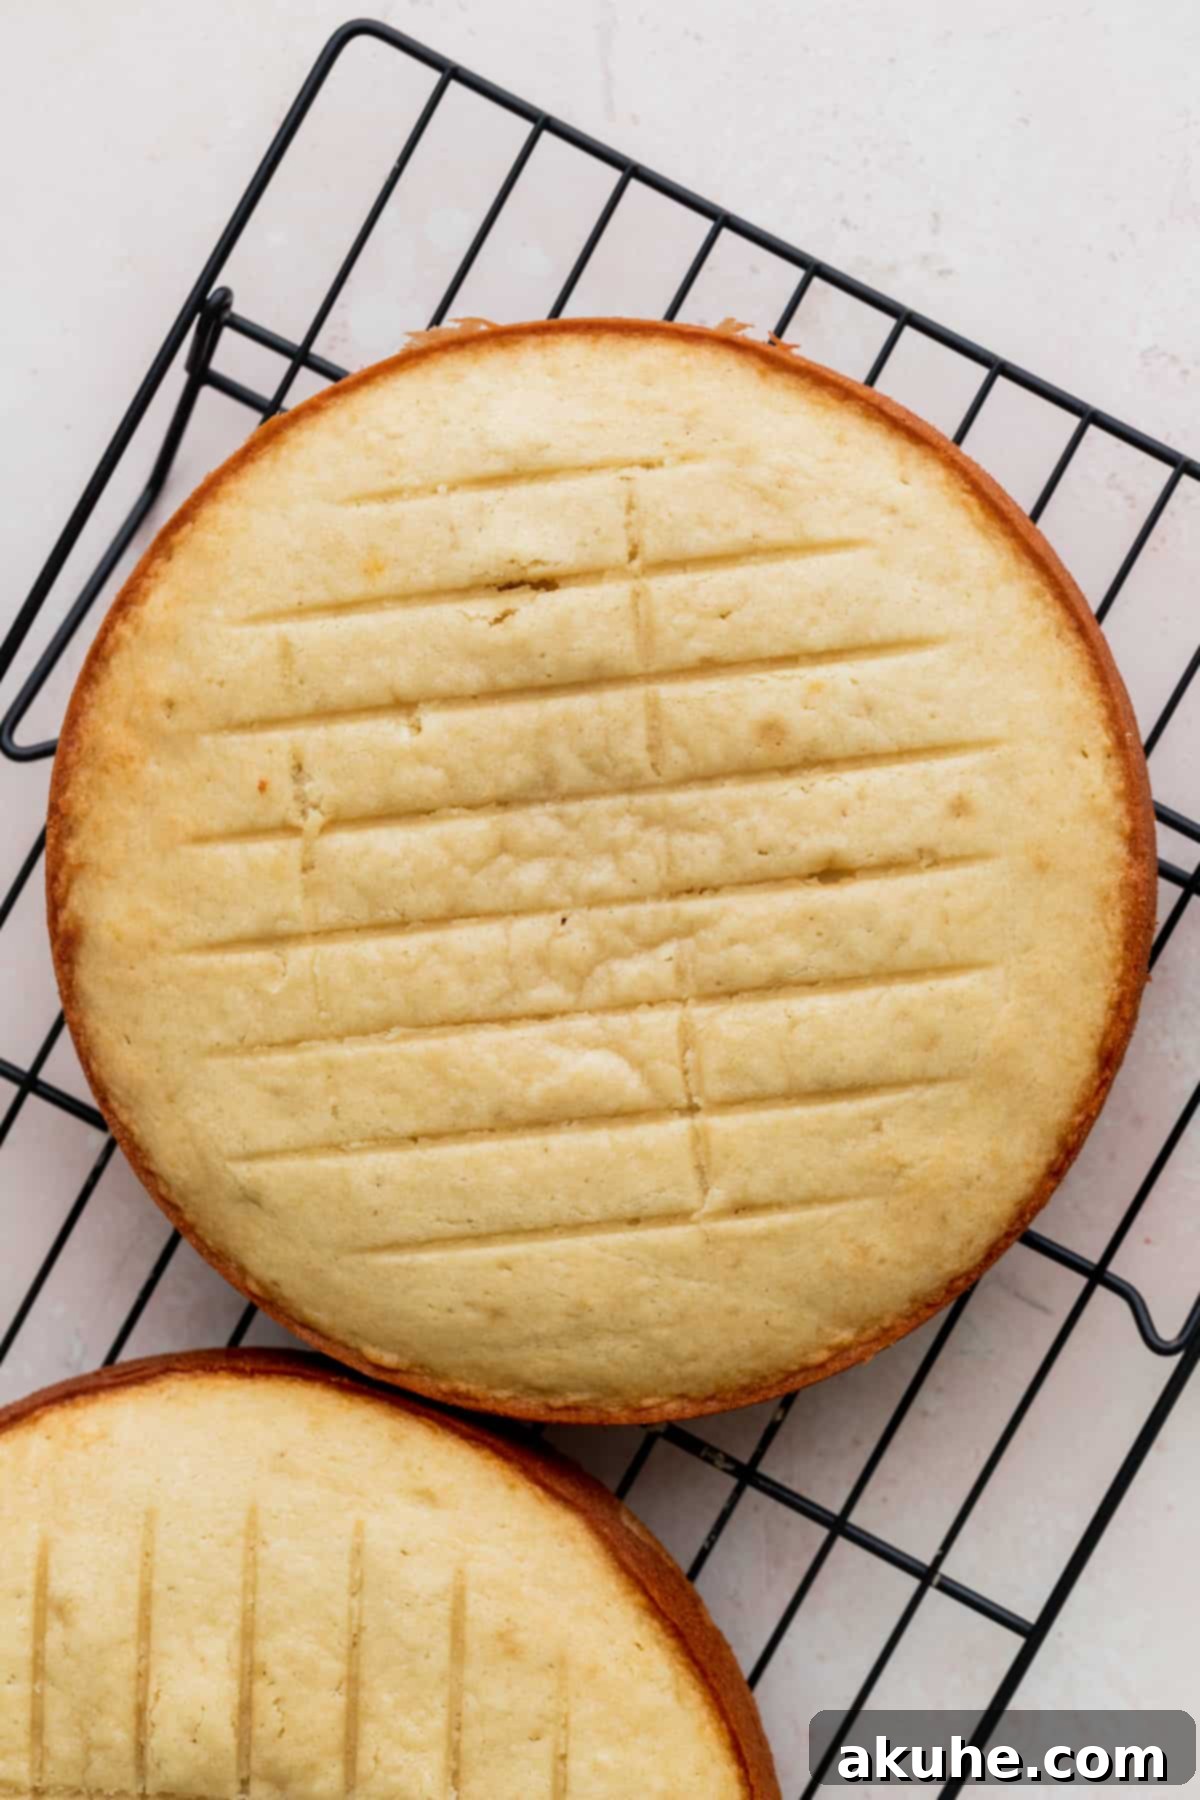
STEP 6: Bake the Cake Layers. Divide the cake batter evenly among your three prepared 8-inch cake pans. You can use a kitchen scale for precision to ensure each layer is uniform. Place the pans into the preheated oven and bake for approximately 22-25 minutes. Baking times can vary slightly depending on your oven, so start checking at 22 minutes. The cakes are done when a wooden skewer or toothpick inserted into the center comes out clean or with a few moist crumbs attached.
STEP 7: Cool Completely. Once baked, remove the cake pans from the oven and let them cool on a wire cooling rack for about 10-15 minutes. This allows the cakes to firm up slightly before handling. After this initial cooling period, carefully invert the cakes onto the cooling rack, remove the pans, and gently peel off the parchment paper circles. Allow the cake layers to cool completely to room temperature before attempting to frost or assemble. Attempting to frost warm cakes will cause your frosting to melt and slide off, leading to a messy outcome.
Step-by-Step Instructions: Mastering the Strawberry Filling and Frosting
Now that your vanilla cake layers are cooling, let’s prepare the star components: the vibrant strawberry filling and the luscious strawberry cream cheese frosting. These two elements truly bring the “strawberry” to your Strawberry Vanilla Cake.
Crafting the Strawberry Cream Cheese Frosting
STEP 1: Prepare Frosting Ingredients. For the best results, start by preparing your ingredients. Take your unsalted butter out of the refrigerator approximately 30 minutes before you begin; it should be slightly cold but still pliable, not rock hard or fully at room temperature. This specific temperature helps in creating a stable frosting. While the butter is tempering, sift your powdered sugar meticulously to ensure a lump-free, smooth frosting. Next, take your freeze-dried strawberries and grind them into a very fine powder using a food processor or a high-speed blender. Add this fine strawberry powder directly to your sifted powdered sugar and whisk them together. Ensure your full-fat cream cheese is at room temperature to prevent lumps and allow for a smooth blend.
STEP 2: Beat Butter and Cream Cheese. In the bowl of your stand mixer fitted with the paddle attachment (or using a large bowl with a hand mixer), combine the slightly cold unsalted butter and the room-temperature full-fat cream cheese. Beat these two ingredients on high speed for about 3 minutes. The mixture should become incredibly light, airy, and very fluffy. This crucial step incorporates air, making your frosting wonderfully soft and spreadable. Don’t rush this process.
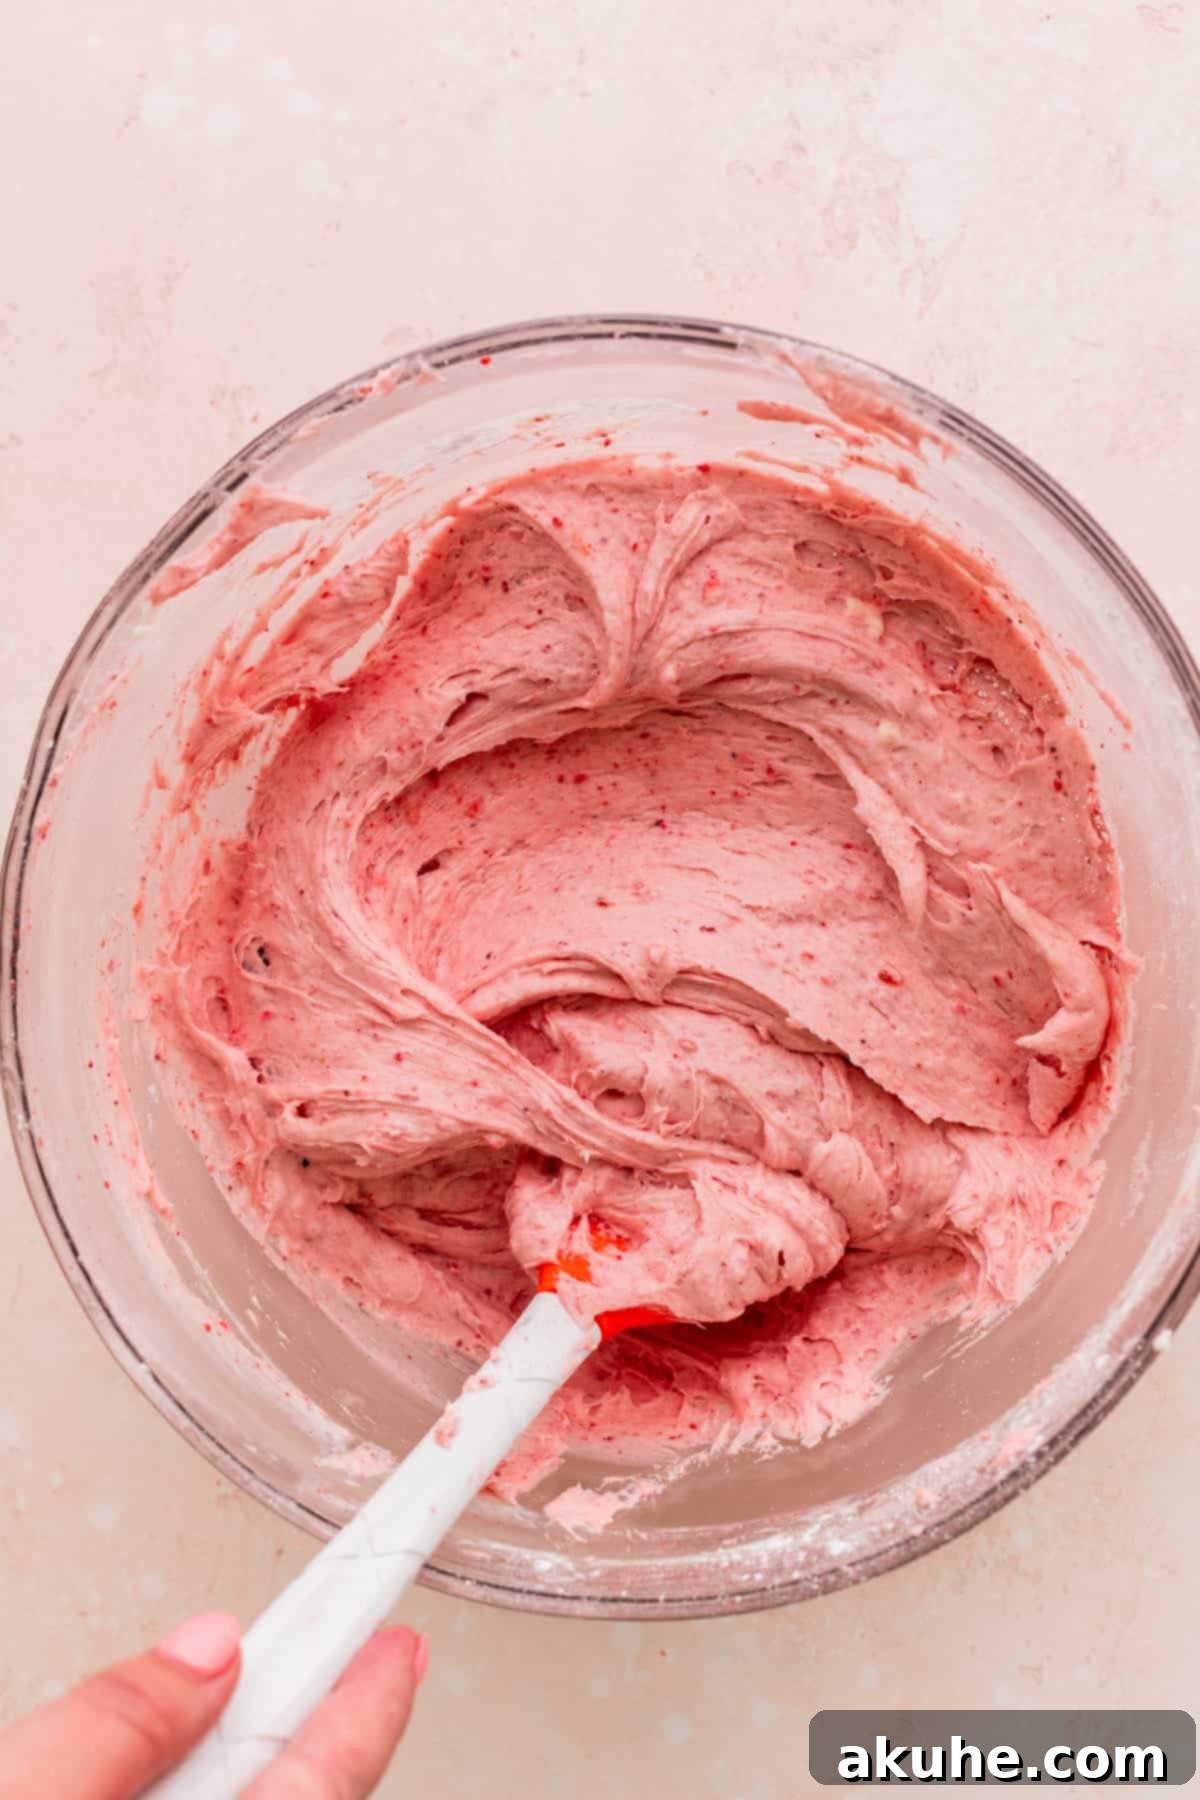
STEP 3: Gradually Incorporate Powdered Sugar and Freeze-Dried Strawberries. Reduce the mixer speed to low. Slowly add the sifted powdered sugar and grounded freeze-dried strawberry mixture to the butter and cream cheese. Mix on low speed until the sugar is mostly incorporated. At this point, the frosting will appear very thick and stiff. Scrape down the sides of the bowl to ensure all dry ingredients are blended in.
STEP 4: Add Remaining Wet Ingredients and Finish. With the mixer still on low speed, add the strawberry jam, pure vanilla extract, salt, and heavy cream. Mix until all ingredients are just combined. Once incorporated, increase the mixer speed to high and beat for an additional 1-2 minutes. This final beating will transform the thick mixture into a beautifully creamy, fluffy, and spreadable strawberry cream cheese frosting. The goal is a light, airy texture that holds its shape. Taste and adjust sweetness or strawberry flavor if desired.
Preparing the Fresh Strawberry Filling
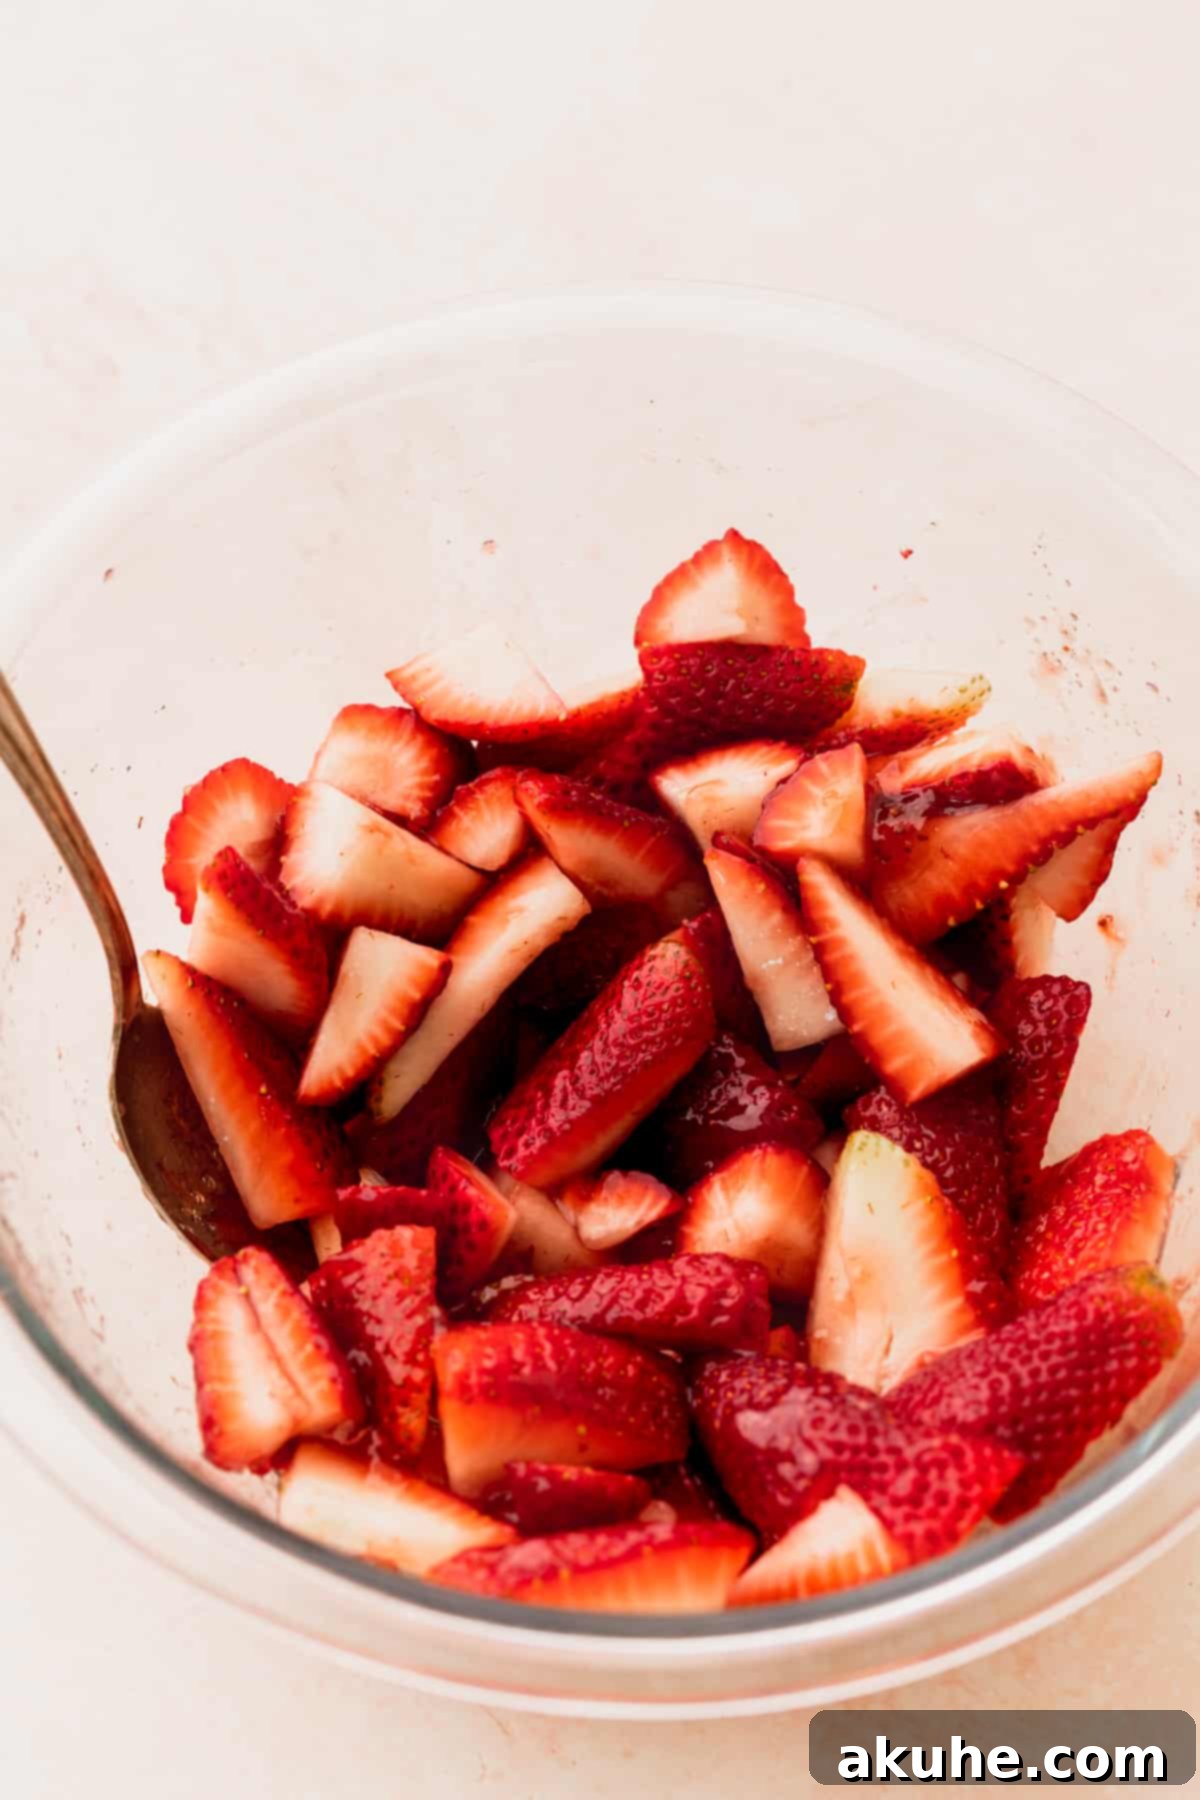
STEP 5: Create the Strawberry Filling. This filling is best made right before you plan to assemble the cake to ensure maximum freshness and juiciness. In a medium-sized bowl, combine your washed and quartered fresh strawberries. Add the tablespoon of strawberry jam and the teaspoon of white granulated sugar. Gently mix everything together until the strawberries are evenly coated. Let this mixture sit for about 5-10 minutes. During this brief resting period, the sugar will naturally draw out the delicious juices from the fresh strawberries, creating a luscious, flavorful syrup that enhances the filling. This vibrant, juicy filling is now ready to be layered into your cake!
Expert Tips for Assembling Your Strawberry Vanilla Cake
Assembling a layered cake can seem daunting, but with these tips, you’ll create a professional-looking dessert with ease:
- Secure the Base: To prevent your cake from sliding around during decorating, pipe or spread a small dollop of strawberry cream cheese frosting onto the center of your cake board or serving platter. This acts as an edible “glue” to anchor your first cake layer firmly in place.
- First Layer & Filling: Carefully place your first completely cooled cake layer onto the frosted spot on your board. Using an offset icing spatula, spread approximately 3/4 cup of the strawberry cream cheese frosting evenly over the top of this layer. Next, using a piping bag fitted with a round tip (or simply snipping the end off a disposable bag), pipe a sturdy border of frosting around the very edge of the cake layer. This “dam” will contain your luscious strawberry filling. Spoon half of the prepared strawberry filling inside the frosting border and spread it evenly.
- Second Layer & Filling: Gently place the second cooled cake layer directly on top of the filling. Repeat the frosting and filling steps: spread 3/4 cup of frosting, pipe a border, then add the remaining half of the strawberry filling within the border, spreading it evenly.
- Final Layer Placement: For the top layer, it’s a pro trick to place the final cake layer **bottom side facing up**. This typically provides the flattest, most even surface for decorating, ensuring your finished cake looks clean and polished.
- The Essential Crumb Coat: Apply a very thin, light layer of strawberry cream cheese frosting all over the sides and top of the cake. This is known as a “crumb coat,” and its purpose is to trap any loose cake crumbs, preventing them from mixing into your final decorative frosting layer. Once applied, place the cake in the freezer for about 15-20 minutes (or in the refrigerator for 30 minutes) to allow this crumb coat to firm up. This step is crucial for achieving a smooth, clean final frosting.
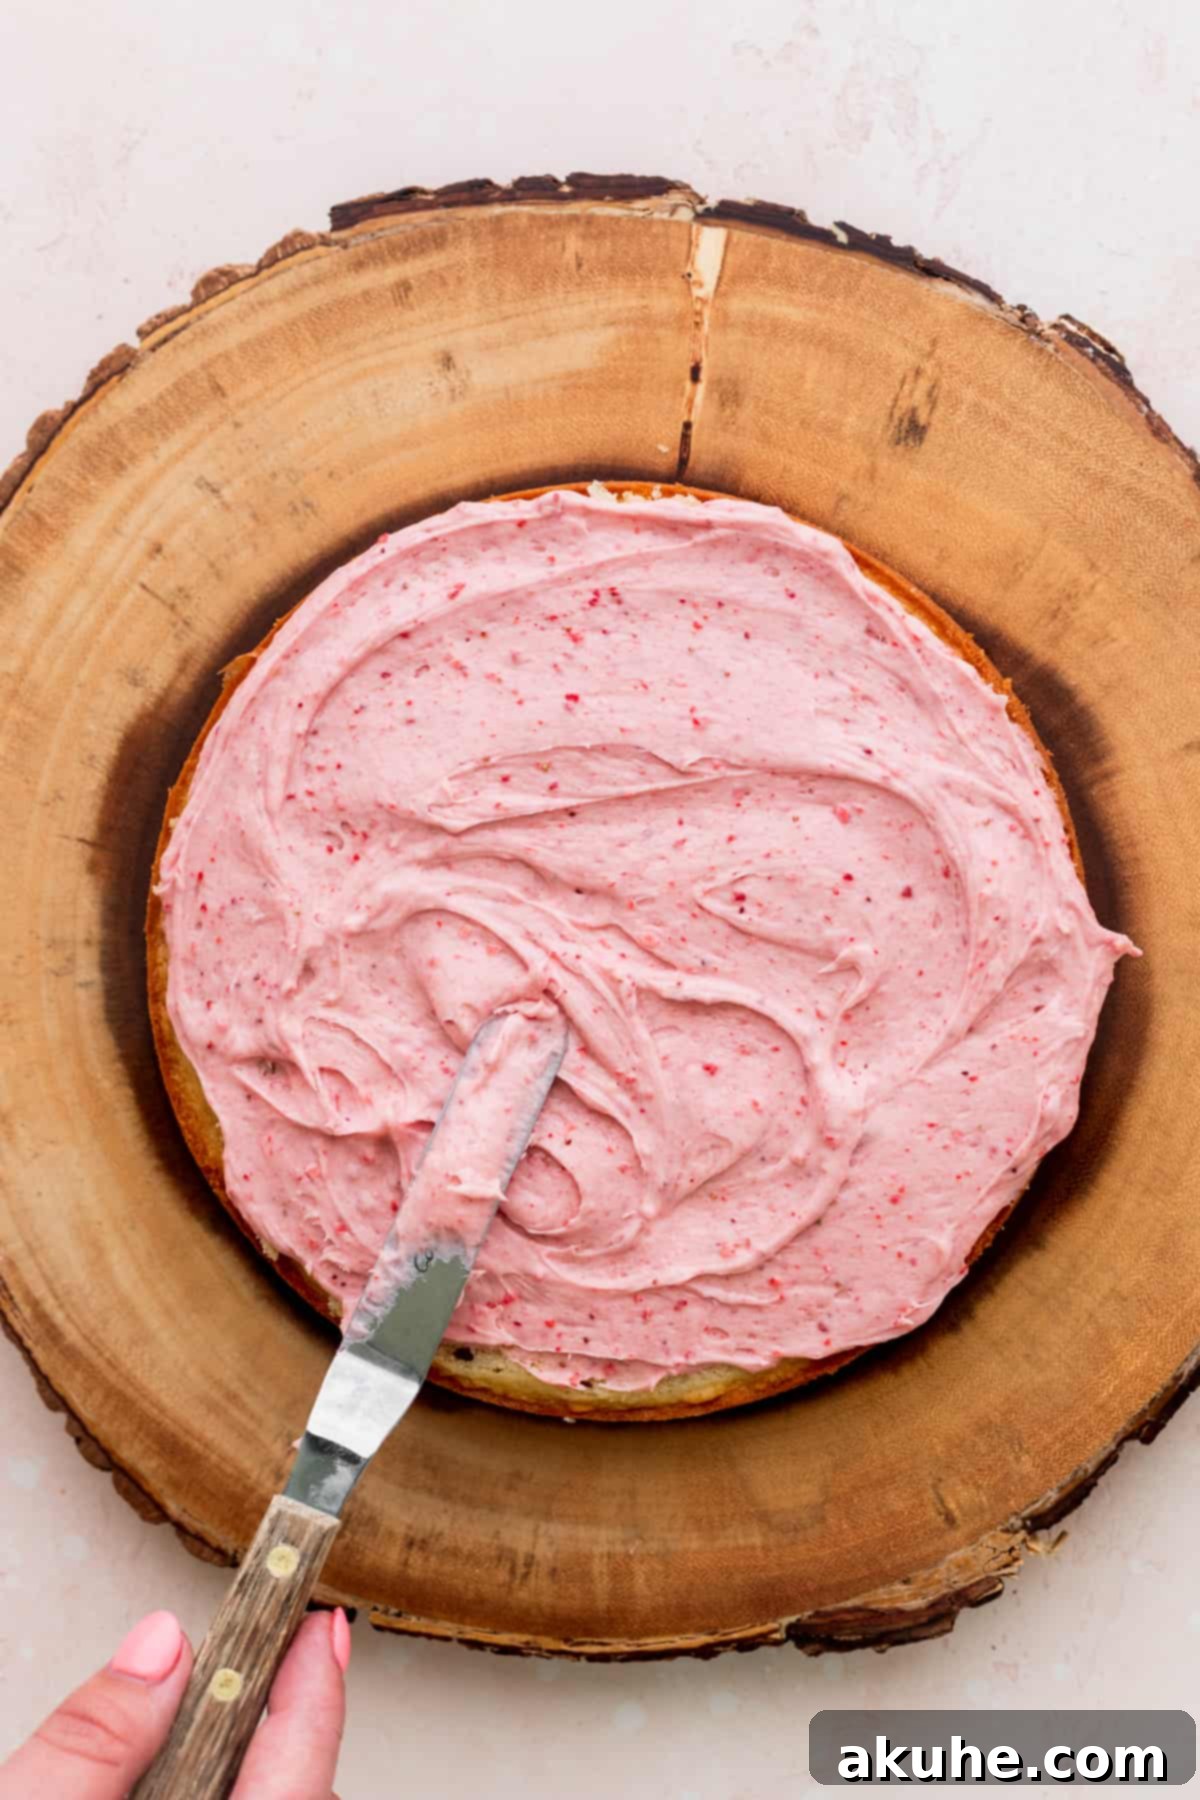
- The Grand Finale: Once your crumb coat is firm, remove the cake from the freezer/refrigerator. Now, apply the remaining strawberry cream cheese frosting evenly over the entire cake, using your offset spatula, cake scraper, or piping bag to create your desired finish.
Decorating The Cake
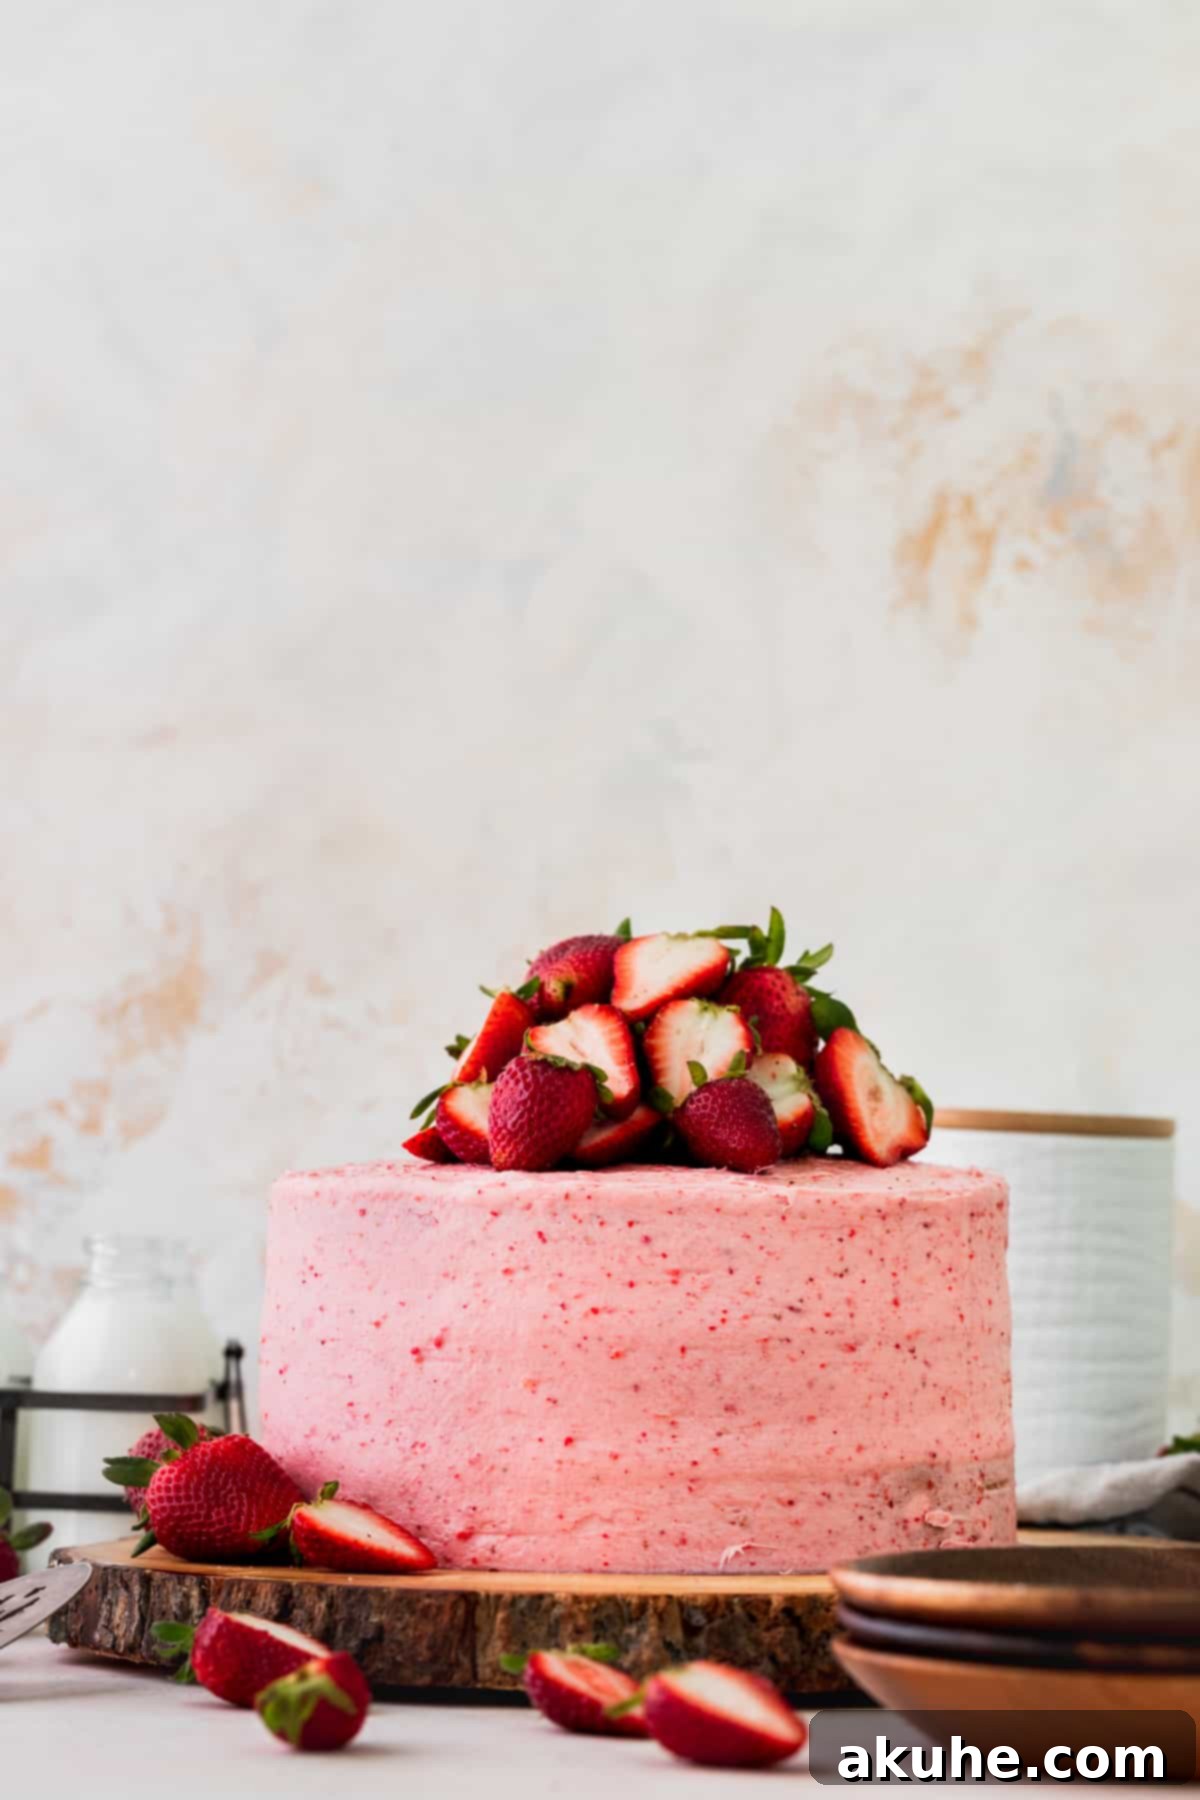
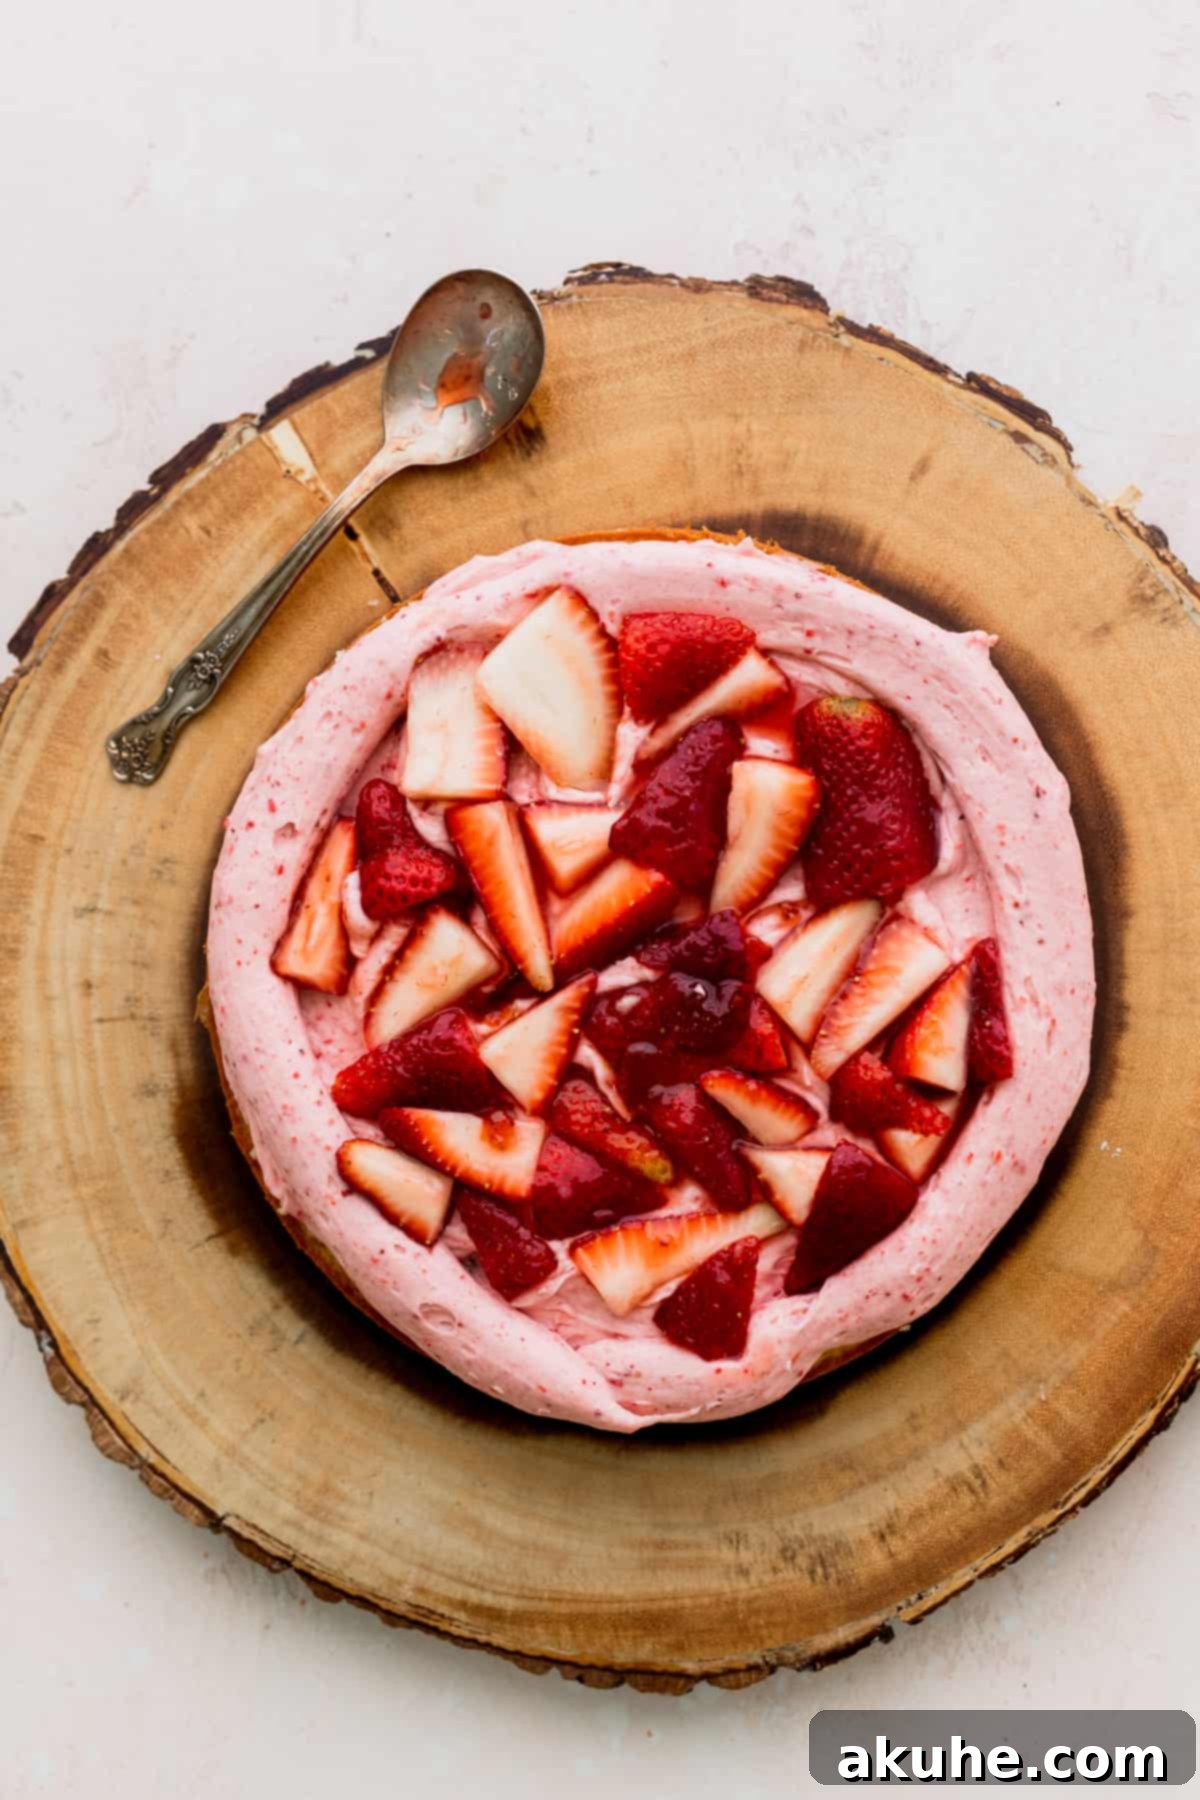
For a beautifully rustic yet elegant finish, I simply took a spoon and created gentle swirls in the top layer of the strawberry frosting. To complete the look and add a final touch of fresh flavor, I adorned the top of the cake with an assortment of fresh, whole, and halved strawberries. This simple decoration highlights the natural beauty of the fruit and provides a lovely visual appeal.
Frequently Asked Questions (FAQ) About This Cake
Here are some common questions and helpful answers regarding this delightful Strawberry Vanilla Cake:
This versatile recipe can be adapted to several different cake pan sizes, though baking times may vary. You can make:
- Three 6-inch cake pans (check for doneness around 25-30 minutes).
- Two 9-inch cake pans (bake for approximately 30-35 minutes).
- One 9×13-inch sheet cake pan (bake for 35-45 minutes).
If you decide to halve the recipe, it will yield:
- Two 6-inch cake pans (bake for about 20-25 minutes).
- One 9-inch cake pan (bake for about 25-30 minutes).
- One 8×8-inch or 9×9-inch square cake pan (bake for approximately 30-40 minutes).
Always use the toothpick test to confirm doneness, as oven temperatures can vary.
Absolutely! This recipe adapts beautifully to cupcakes. Simply halve the recipe to make approximately 12 standard-sized cupcakes. Fill your cupcake liners about two-thirds full and bake for 18-22 minutes at 350°F (175°C), or until a toothpick inserted into the center comes out clean. You’ll have perfect strawberry vanilla cupcakes ready for frosting.
Yes, you certainly can! While the fresh strawberry filling provides a wonderful texture and burst of flavor, using only strawberry jam is a convenient and delicious alternative. If you prefer not to use fresh strawberries, simply use an equivalent amount of your favorite strawberry jam for the filling layers. You might want to warm the jam slightly to make it easier to spread.
Creative Recipe Variations for Your Strawberry Vanilla Cake
This Strawberry Vanilla Cake recipe is fantastic as is, but it’s also wonderfully adaptable! Here are a few ideas to customize it to your taste or time constraints:
- Time-Saving Filling: If you’re short on time, you can certainly skip preparing the fresh strawberry filling. Instead, simply use your favorite store-bought strawberry jam or preserves directly as the filling between the cake layers. This will still provide a lovely fruity flavor with minimal effort.
- Simplified Single-Layer Cake: For a less elaborate yet equally delicious dessert, transform this into a one-layer cake. Bake the entire batter in a 9×13-inch pan (adjusting baking time as noted in the FAQ). Once cooled, frost the top generously with the strawberry cream cheese frosting and garnish with fresh strawberries. It’s an easier, quicker option perfect for casual gatherings.
- Berry Blend Cake: Instead of solely strawberries, consider using a mix of your favorite berries for the filling. Blueberries, raspberries, or a medley of summer berries would add a delightful complexity and visual appeal.
- Cupcake Transformation: As mentioned in the FAQ, this recipe is easily converted into cupcakes. This is a fantastic option for portion control or for serving at events where individual servings are preferred.
Special Tools for Baking Success
Having the right tools can make all the difference in your baking experience. Here are some of my highly recommended special tools for achieving the perfect Strawberry Vanilla Cake:
- Quality Cake Pans: Investing in good quality cake pans is essential for even baking. I personally use and recommend Wilton 8-inch cake pans. They conduct heat well, ensuring your cake layers rise beautifully and bake evenly.
- Pre-cut Parchment Paper Circles: Save yourself time and hassle with these convenient 8-inch parchment paper circles. They fit perfectly at the bottom of your pans, guaranteeing an easy release every time without the need for tracing and cutting from a roll.
- Nonstick Baking Spray with Flour: A good baking spray can prevent sticking nightmares. I specifically use and recommend a nonstick spray that contains flour. It creates an excellent barrier, ensuring your delicate cake layers come out clean.
- Offset Icing Spatula: An offset spatula is a game-changer for spreading frosting and fillings smoothly and evenly. Its angled blade keeps your knuckles clear of the cake surface, allowing for precise application.
- Cake Turntable: For effortless frosting and decorating, a good quality cake turntable is indispensable. I prefer a sturdy one like the Ateco cast iron turntable because it spins seamlessly without any jerky movements, allowing for perfectly smooth sides and elegant designs.
- Metal Cake Scraper: To achieve those perfectly smooth, professional-looking cake sides, a metal cake scraper is a must-have. It helps to level and smooth frosting with precision, giving your cake a polished finish.
- Large Piping Bags: These 18-inch piping bags are fantastic as they hold a generous amount of frosting, reducing the need for frequent refills during decoration. This makes the frosting process much more efficient.
- Wilton 1M Piping Tip: This classic Wilton 1M star piping tip is incredibly versatile. It’s perfect for piping beautiful borders, rosettes, stars, or any decorative flourishes on your cake, adding that special touch.
Storing and Freezing Your Strawberry Vanilla Cake
To keep your Strawberry Vanilla Cake as fresh and delicious as possible, proper storage is key. Since it contains fresh strawberries and cream cheese frosting, refrigeration is essential.
This cake needs to be stored in an **airtight container**, such as a cake carrier, in the **refrigerator**. Storing it properly will ensure it remains fresh and flavorful for a maximum of 3-4 days. While it’s best enjoyed fresh, allowing the cake to come to room temperature for 1-2 hours before serving will enhance its flavors and soften the cake layers and frosting, providing the best possible eating experience.
Freezing Instructions
Freezing can be a fantastic way to prepare components ahead of time or to preserve leftovers:
- Freezing Cake Layers Ahead of Time: If you’re planning to bake in stages, the vanilla cake layers can be baked and frozen in advance. Once the cake layers have completely cooled, wrap each layer tightly in several layers of plastic wrap, then an additional layer of aluminum foil. Freeze them for up to 30 days. When you’re ready to assemble and decorate, simply thaw the wrapped layers at room temperature for about 1 hour before frosting.
- Freezing Individual Cake Slices: To enjoy your delicious Strawberry Vanilla Cake over a longer period, you can freeze individual slices. Place leftover slices on a baking sheet and freeze until firm. Once firm, wrap each slice tightly in plastic wrap, then place them in an airtight freezer-safe container or freezer bag. They can be stored in the freezer for up to 30 days. To enjoy, simply thaw individual slices at room temperature for 1-2 hours before eating.
Other Delicious Cake Recipes To Try
If you loved this layered cake, be sure to explore more of our delightful cake creations!
Craving More Strawberries? Try These Recipes!
- Irresistible Strawberry Cookies
- Decadent Strawberry Brownies
- Classic Strawberry Shortcake
- Easy Strawberry Sheet Cake
- Delicious Strawberry Cheesecake Cookies
Did you absolutely adore this recipe? We’d be thrilled if you could leave a STAR REVIEW below! Don’t forget to tag us on Instagram @stephaniesweettreats with your beautiful creations. For more baking inspiration and ideas, make sure to follow us on Pinterest. Happy baking!
Strawberry Vanilla Cake Recipe Card
This strawberry vanilla cake features three fluffy vanilla cake layers, generously filled with a vibrant strawberry filling and adorned with a rich strawberry cream cheese frosting and fresh strawberries. It’s the perfect showstopping dessert for any occasion!

Recipe Details
- Author: Stephanie Rutherford
- Prep Time: 1 hour
- Cook Time: 24 minutes
- Decorating Time: 1 hour
- Total Time: 2 hours 24 minutes
- Yields: 16 slices
- Summary: This three-layered fluffy vanilla cake is bursting with a fresh strawberry filling and decorated with a delectable strawberry cream cheese frosting, topped with beautiful fresh strawberries.
Ingredients
For the Vanilla Cake:
- 3 1/2 cups All-purpose flour (sifted)
- 2 tsp Baking powder
- 1 tsp Baking soda
- 1 tsp Salt
- 3/4 cup Unsalted butter, room temperature
- 1/4 cup Oil (canola or vegetable oil recommended)
- 1 1/2 cups White granulated sugar
- 1/2 cup Sour cream, room temperature (full-fat)
- 1 TBSP Pure vanilla extract
- 4 Large eggs, room temperature
- 1 cup Buttermilk, room temperature (full-fat or reduced-fat)
For the Strawberry Filling:
- 1 1/2 cups Fresh strawberries, washed and quartered (measure the quarters, not the whole berry)
- 1 TBSP Strawberry jam (store-bought is fine)
- 1 tsp White granulated sugar
For the Strawberry Cream Cheese Frosting:
- 8 oz Cream cheese, room temperature (full-fat)
- 1 1/2 cups Unsalted butter, slightly cold
- 6 cups Powdered sugar, sifted
- 2 oz Freeze-dried strawberries, grounded to a fine crumb
- 1 tsp Pure vanilla extract
- 1/2 tsp Salt
- 1 TBSP Strawberry jam
- 1/4 cup Heavy cream
- Fresh strawberries, for decoration
Instructions
Vanilla Cake:
- Preheat your oven to 350°F (175°C). Prepare three 8-inch cake pans by spraying generously with nonstick baking spray with flour. Line the bottoms of the pans with 8-inch parchment paper circles, then spray again.
- In a mixing bowl, sift the all-purpose flour. Add the baking powder, baking soda, and salt. Whisk these dry ingredients together thoroughly and set aside.
- Using a stand mixer with a paddle attachment (or an electric hand mixer), beat the room-temperature butter, oil, and white granulated sugar on high speed for 3 minutes until the mixture is light, fluffy, and almost white in color.
- Reduce the mixer speed to medium. Add the room-temperature sour cream and pure vanilla extract, mixing until just combined. Scrape down the sides of the bowl with a rubber spatula.
- Add the large eggs one at a time, mixing well after each addition. Once all eggs are incorporated, increase the speed to high and beat for 1 minute until the mixture is light and well-emulsified.
- With the mixer on low speed, gradually add one-third of the dry ingredients, mixing until just combined. Then, add half of the room-temperature buttermilk and mix until just incorporated. Repeat this process with another third of the dry ingredients, followed by the remaining buttermilk. Finish by adding the last third of the dry ingredients. Mix only until no streaks of flour remain, being careful not to overmix. Scrape down the bowl thoroughly.
- Divide the cake batter evenly among the three prepared cake pans. Bake for 22-25 minutes, or until a wooden skewer or toothpick inserted into the center comes out clean.
- Let the cakes cool in their hot pans for 10-15 minutes on a wire rack. Then, carefully invert them onto the cooling rack, remove the pans, and gently peel off the parchment paper. Allow the cake layers to cool completely to room temperature before proceeding.
Strawberry Cream Cheese Frosting:
- Prepare your ingredients: Take butter out 30 minutes before use (it should be slightly cold). Sift powdered sugar. Grind freeze-dried strawberries to a fine powder using a food processor and mix with the sifted powdered sugar. Ensure cream cheese is at room temperature.
- In a large mixing bowl with a mixer, beat the slightly cold butter and room-temperature cream cheese on high speed for 3 minutes until very light and fluffy.
- Reduce the mixer speed to low. Gradually add the powdered sugar and ground freeze-dried strawberries mixture to the bowl. Mix until mostly incorporated. The mixture will be very thick. Scrape down the sides of the bowl.
- Add the strawberry jam, pure vanilla extract, salt, and heavy cream. Mix on low speed until just combined. Increase the mixer speed to high and beat for 1-3 minutes until the frosting is light, creamy, and fluffy.
Strawberry Filling:
- Prepare this filling right before you are ready to assemble the cake to ensure maximum freshness.
- In a medium bowl, combine the washed and quartered fresh strawberries, strawberry jam, and white granulated sugar. Gently mix and let sit for 5-10 minutes. The sugar will draw out the juices, creating a delicious natural syrup.
Assembly:
- To secure your cake, pipe or spread a small amount of frosting onto the center of your cake board or serving platter. Place the first cooled cake layer on top.
- Spread approximately 3/4 cup of the strawberry cream cheese frosting evenly over the first cake layer using an offset icing spatula. Using a piping bag, pipe a sturdy border of frosting around the edge of the cake layer.
- Spoon half of the prepared strawberry filling inside the frosting border and spread it evenly.
- Carefully place the second cooled cake layer on top of the filling. Repeat the frosting and filling steps: spread 3/4 cup of frosting, pipe a border, then add the remaining half of the strawberry filling within the border, spreading evenly.
- Place the final cake layer on top, with the bottom side facing up. This provides the flattest surface for decorating.
- Apply a very thin, light layer of frosting all over the cake (a “crumb coat”) to trap any loose crumbs. Place the cake in the freezer for 15-20 minutes (or refrigerator for 30 minutes) to allow the crumb coat to firm up.
- Once the crumb coat is firm, remove the cake and apply the remaining strawberry cream cheese frosting evenly over the entire cake.
- Decorate the top of the cake with fresh strawberries as desired. For a simple elegant look, create swirls in the frosting with a spoon and then arrange whole or halved fresh strawberries on top.
Notes:
- Flour Measurement: Always spoon and level your flour, or better yet, use a kitchen scale for accuracy. Compacted flour can lead to a dry cake.
- High Altitude Baking: For those baking at high altitudes, consider adding an extra 3 tablespoons of all-purpose flour to the cake batter to adjust for the lower atmospheric pressure.
- Room Temperature Ingredients: Remember to pull out dairy ingredients (butter, sour cream, buttermilk, eggs, cream cheese) at least 2 hours before baking for optimal results, except for the frosting butter which should be slightly cold (30 minutes out).
Nutrition Information (per slice, approximately):
- Calories: 547kcal
- Carbohydrates: 95g
- Protein: 5g
- Fat: 38g
- Saturated Fat: 21g
- Polyunsaturated Fat: 2g
- Monounsaturated Fat: 11g
- Trans Fat: 1g
- Cholesterol: 93mg
- Sodium: 408mg
- Potassium: 160mg
- Fiber: 1g
- Sugar: 25g
- Vitamin A: 1114IU
- Vitamin C: 52mg
- Calcium: 86mg
- Iron: 2mg
Did you make this recipe? Please leave a star rating and review below! We’d love to hear your feedback.
