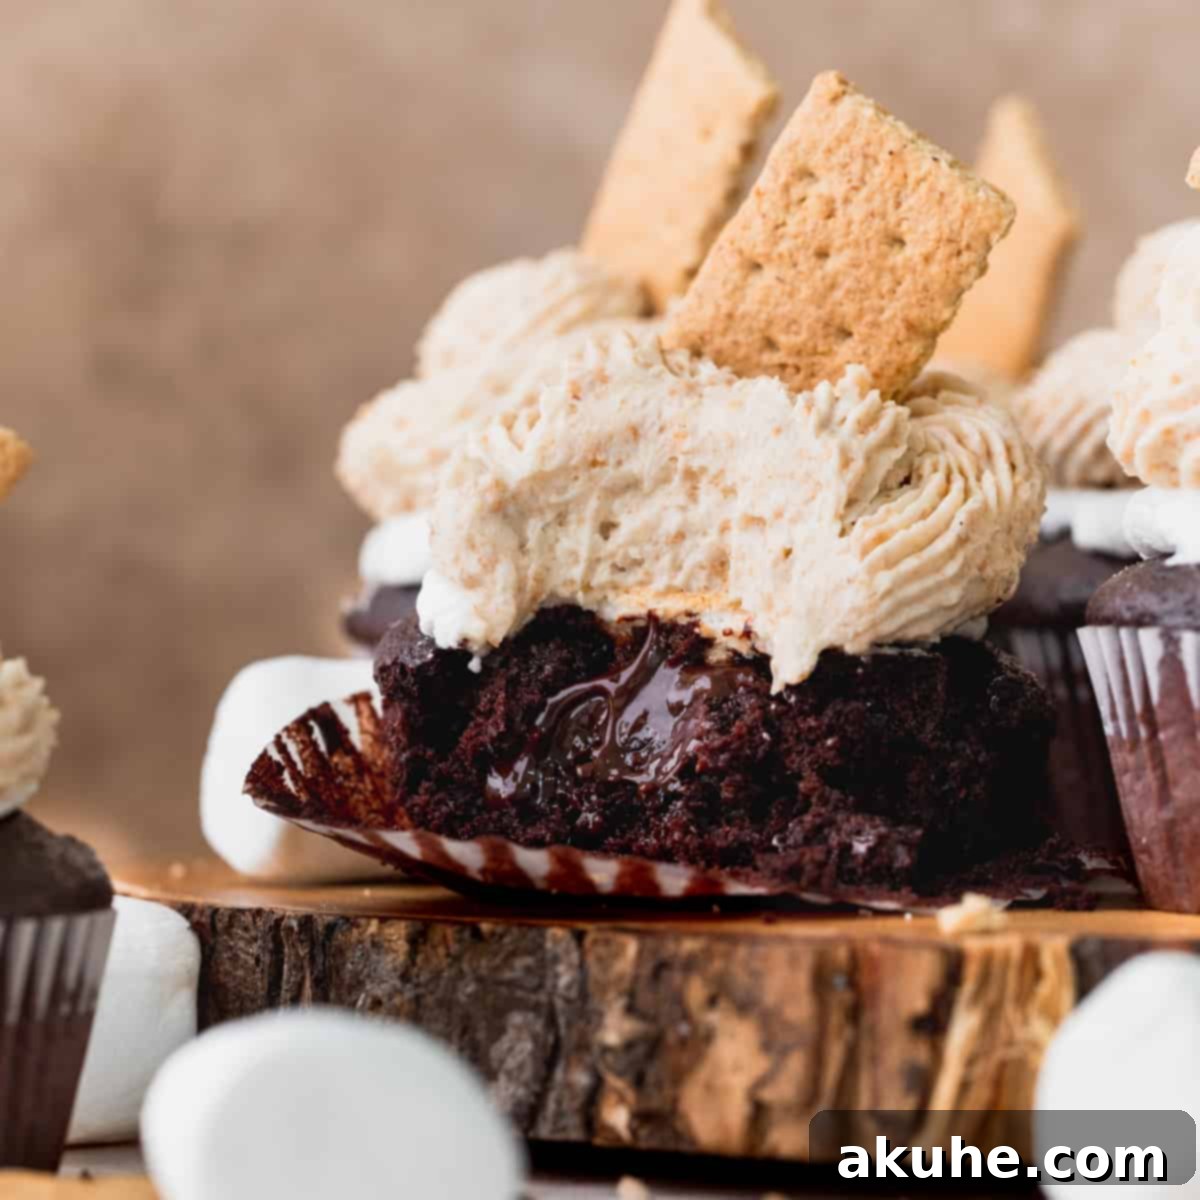
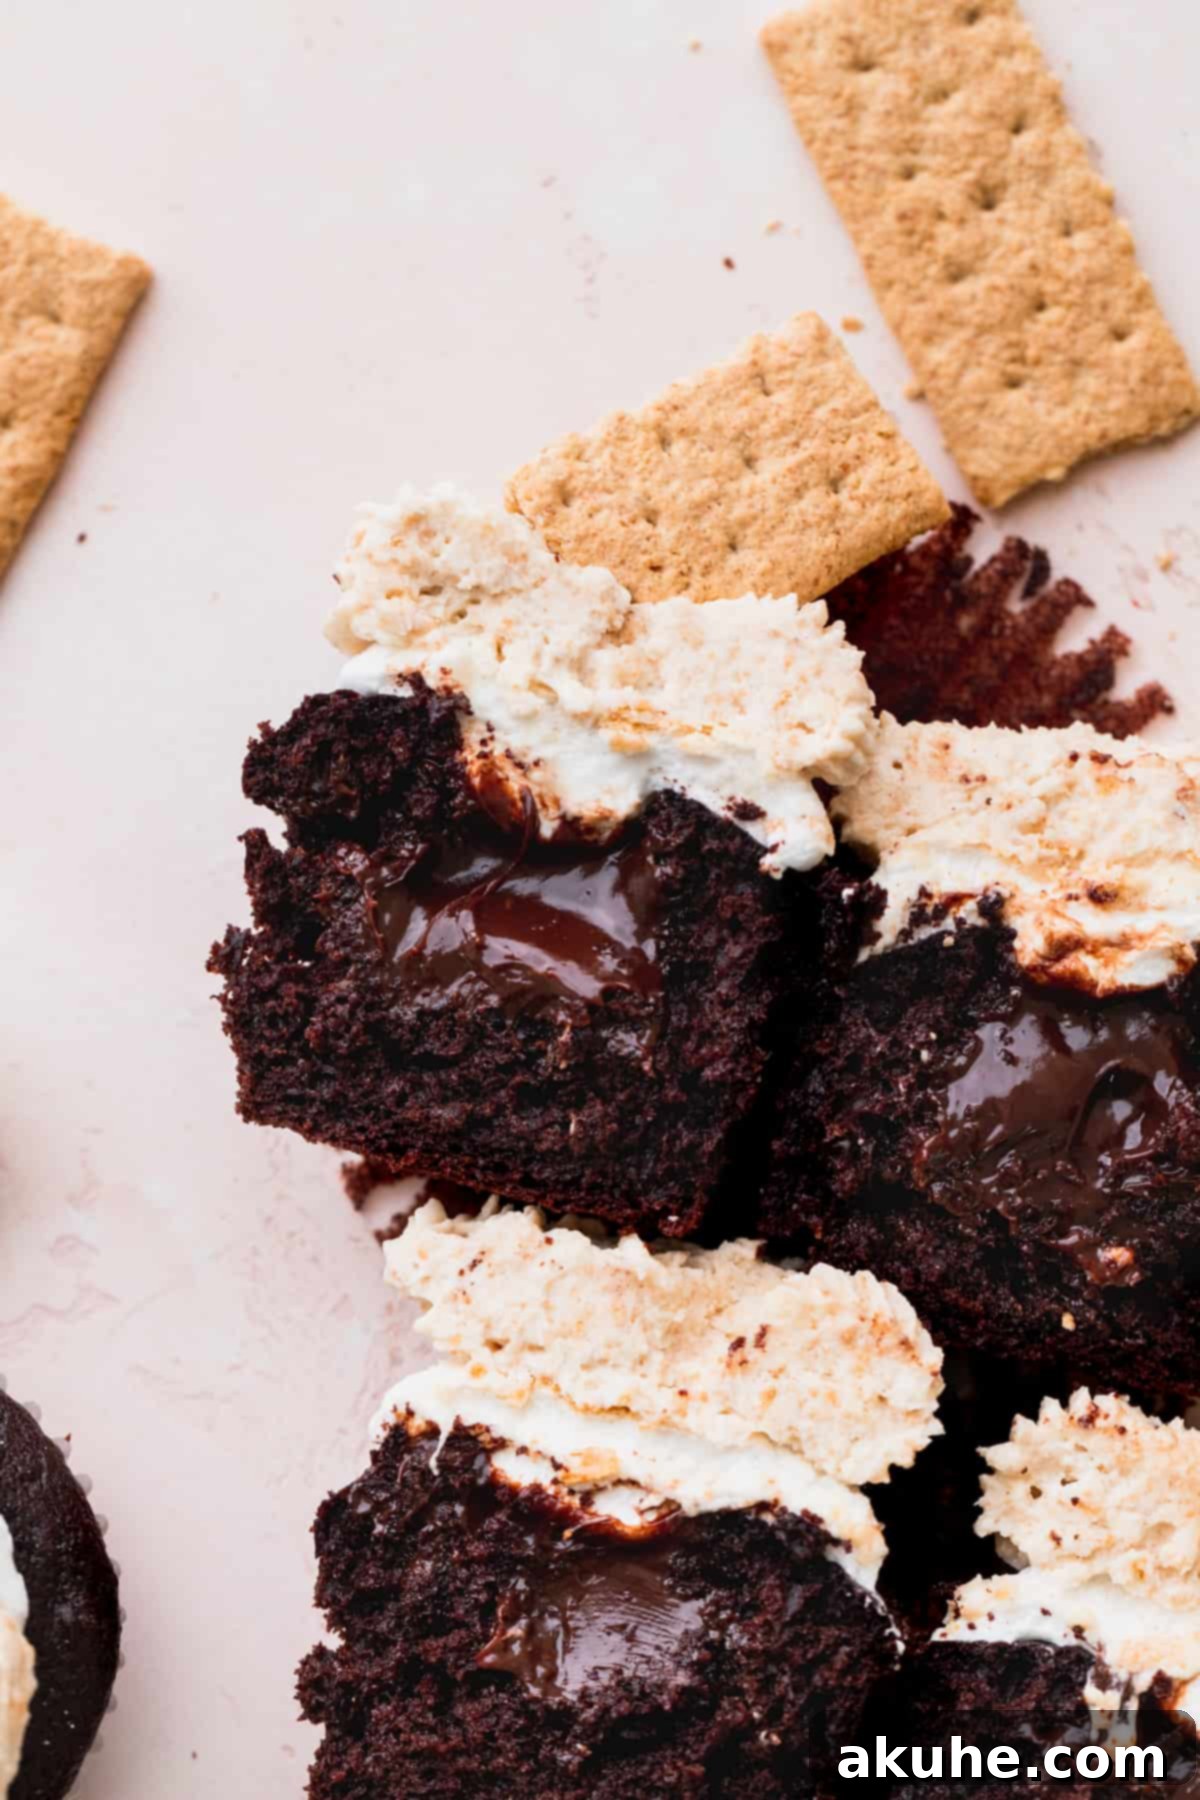
Get ready to delight your taste buds with the ultimate dessert mash-up: S’mores Cupcakes! Imagine biting into a perfectly moist chocolate cupcake, discovering a molten core of rich chocolate ganache, all crowned with a beautifully toasted marshmallow, and finished with a velvety smooth graham cracker cream cheese frosting. This isn’t just a cupcake; it’s a nostalgic journey back to campfire nights, transformed into an elegant, handheld treat. Each element of a classic s’more – the crisp graham cracker, the melted chocolate, and the gooey toasted marshmallow – is meticulously layered into these decadent cupcakes, creating an unparalleled dessert experience that will truly impress your friends and family.
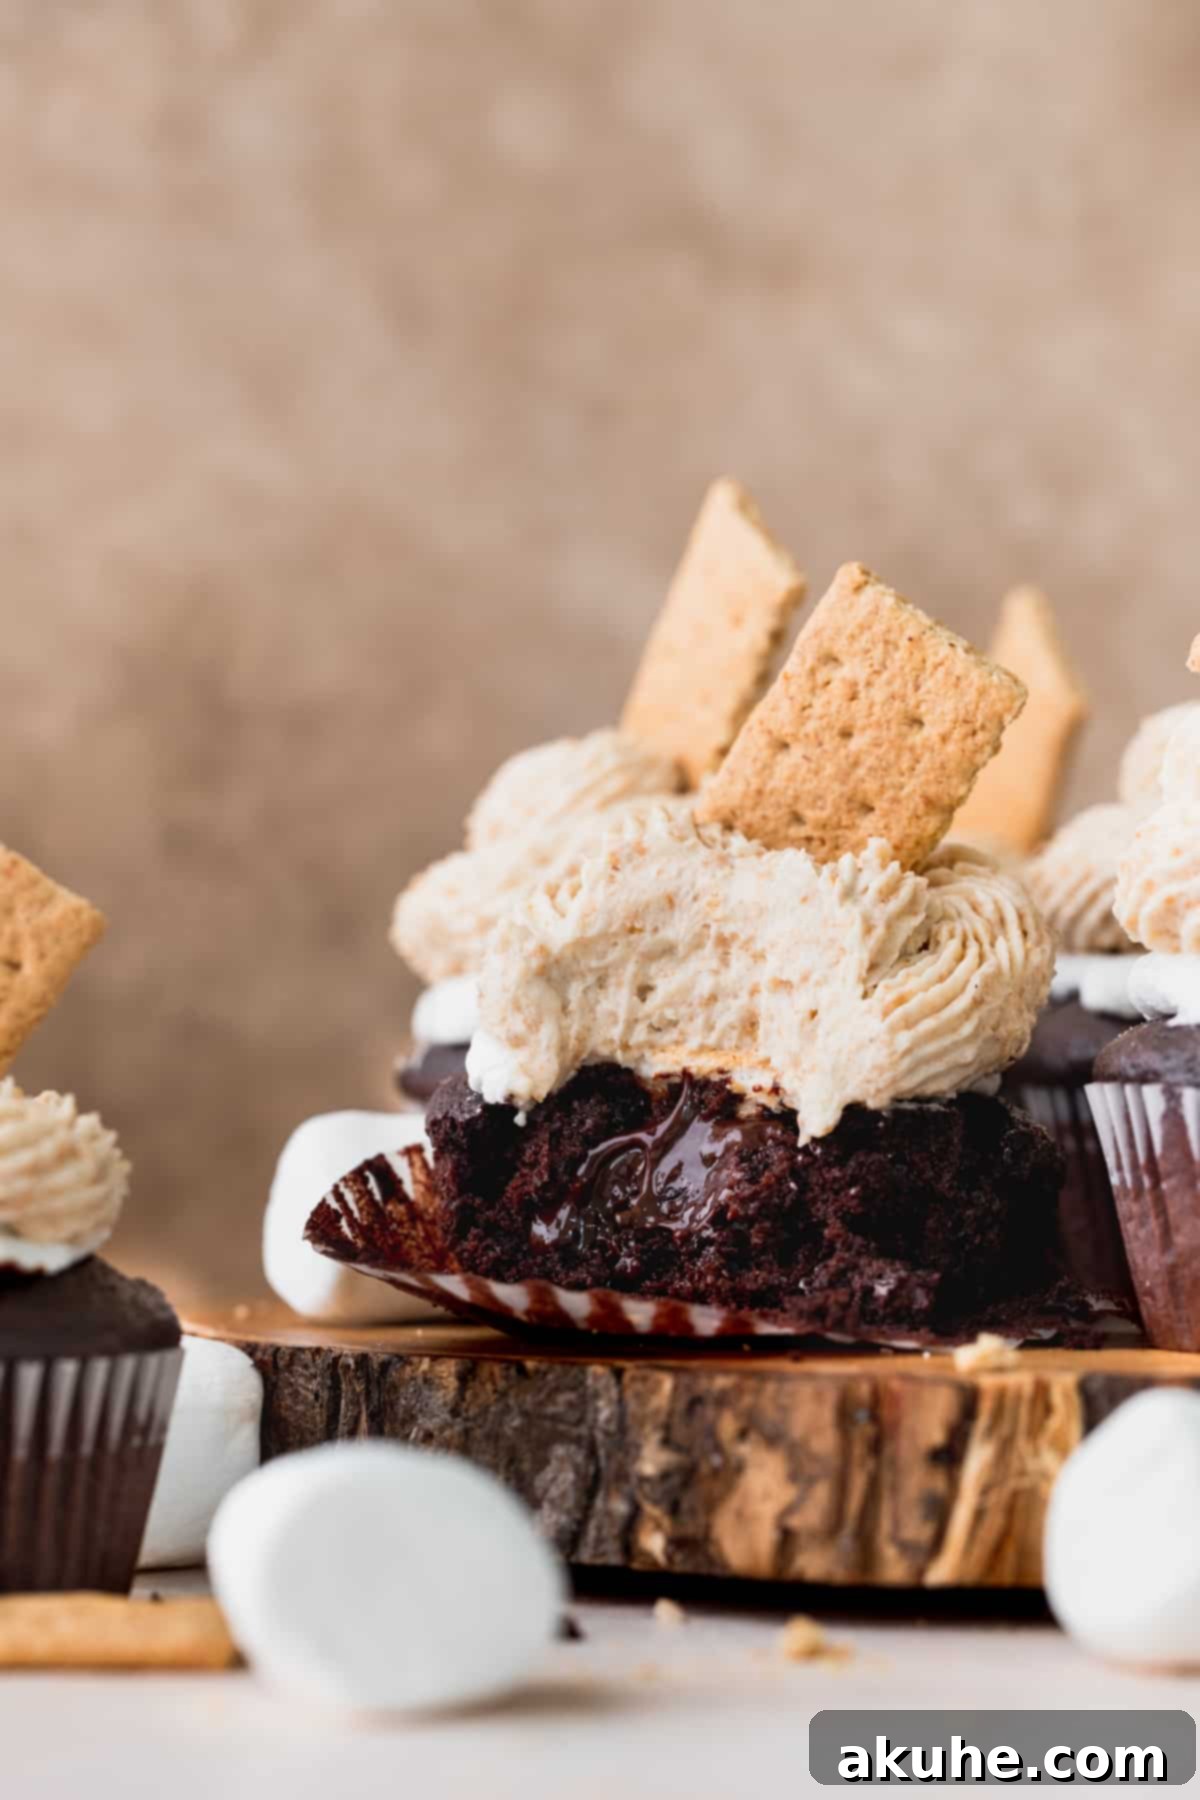
My love for s’mores runs deep, inspiring me to create a dessert that captures their essence while elevating them to a new level of sophistication. These S’mores Cupcakes are more than just a tribute; they are a celebration of those beloved flavors. I wanted to design a recipe that was not only incredibly delicious but also visually stunning, ensuring every bite delivers that quintessential s’mores experience. The balance of sweetness, the subtle saltiness from the frosting, and the varying textures make these cupcakes an irresistible indulgence. Prepare to wow everyone with these miniature masterpieces!
Why These S’mores Cupcakes Stand Out
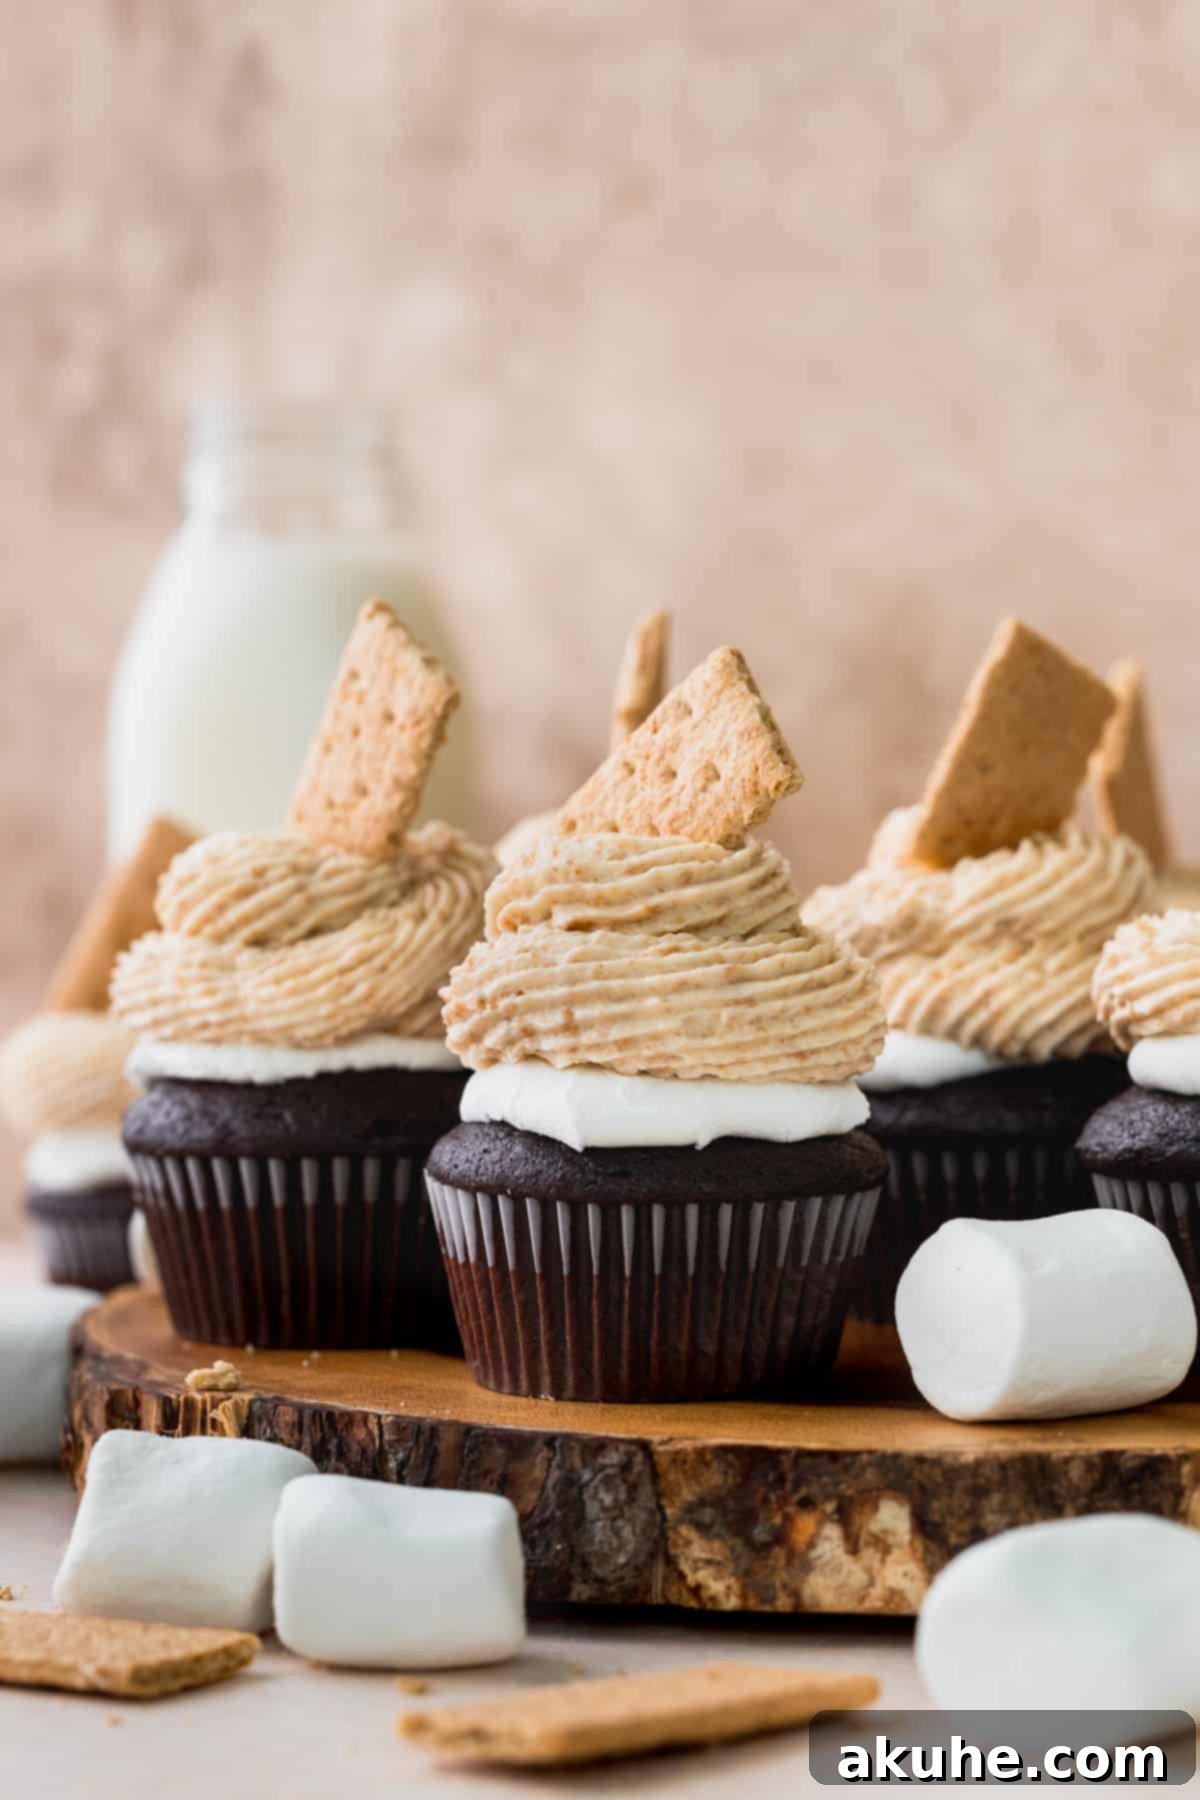
Creating a truly exceptional s’mores cupcake means meticulously integrating each core component of the classic treat. This recipe isn’t about just topping a chocolate cupcake with a marshmallow; it’s about a thoughtful assembly that ensures every flavor note sings in harmony. Here’s what makes these S’mores Cupcakes an absolute must-try:
- Incredibly Moist Chocolate Cupcakes: Forget dry, crumbly cupcakes. Our recipe yields a chocolate cupcake that is not only rich in flavor but also supremely moist and tender. The secret lies in a carefully balanced blend of wet and dry ingredients, including hot water and buttermilk, which activate the cocoa powder for a deep, complex chocolate taste. Plus, they’re surprisingly easy to make, requiring no electric mixer for a beautifully smooth batter. This simplicity ensures even novice bakers can achieve bakery-quality results.
- Decadent Chocolate Ganache Filling: To truly capture the “chocolate bar” element of a s’more, these cupcakes are generously filled with a luscious chocolate ganache. This velvety filling isn’t just an afterthought; it adds an intense layer of rich, melty chocolate that perfectly complements the cake and marshmallow. It’s the unexpected gooey center that elevates these from simple cupcakes to a truly gourmet experience, ensuring a burst of chocolate in every bite.
- Perfectly Toasted Gooey Marshmallow Topping: No s’more is complete without a perfectly toasted marshmallow. Each cupcake is topped with a fluffy marshmallow, gently broiled to achieve that iconic golden-brown, slightly caramelized exterior and wonderfully gooey interior. The trick is to toast it just right – enough to melt and develop flavor, but not burn. After toasting, a gentle press ensures the marshmallow beautifully covers the entire top of the cupcake, ready for frosting.
- Heavenly Graham Cracker Cream Cheese Frosting: This isn’t your average frosting. Our unique graham cracker cream cheese frosting is a game-changer. It’s light, tangy from the cream cheese, and studded with finely ground graham cracker crumbs, bringing that essential crunch and honeyed flavor profile to the party. A touch of extra salt helps to brilliantly balance the overall sweetness of the cupcake, creating a harmonious flavor that will leave you craving more. This frosting truly encapsulates the graham cracker component in a smooth, spreadable form.
Essential Ingredient Insights
Understanding the role of each ingredient is key to baking success. While a full list is provided in the recipe card below, here are some important notes to help you achieve the best S’mores Cupcakes:
- Unsweetened Cocoa Powder: For a truly deep and rich chocolate flavor that isn’t overly sweet, I highly recommend using Dutch-processed cocoa powder. Its alkalized nature gives a darker color and a smoother, less bitter chocolate taste compared to natural cocoa powder. This makes a significant difference in the final depth of your chocolate cupcakes.
- Eggs: Always use large eggs and ensure they are at room temperature. Cold eggs can cause your batter to seize or curdle, preventing proper emulsification and resulting in a less smooth and moist cupcake. Plan ahead and pull them out of the refrigerator at least 2 hours before you start baking.
- Oil: Canola oil or vegetable oil are excellent choices as they are neutral in flavor, allowing the chocolate to shine. They also contribute to the cupcakes’ moist texture more effectively than butter alone, as oil is 100% fat while butter contains water. Avoid strong-flavored oils like extra virgin olive oil unless you specifically want that taste.
- Buttermilk: Full-fat or reduced-fat buttermilk both work beautifully. Similar to eggs, buttermilk should be at room temperature for optimal blending with other ingredients. The acidity in buttermilk reacts with baking soda to create a tender crumb and adds a subtle tang that enhances the chocolate flavor. If you don’t have buttermilk, a simple homemade substitute works (see substitutions section).
- Hot Water: Steaming hot water, almost boiling, is crucial for blooming the cocoa powder. This process brings out the full depth of chocolate flavor and creates a thin batter consistency that results in an incredibly moist cupcake. Heat it on the stove or in the microwave until visibly steaming, but handle with care.
- Chocolate Chips: For the ganache, semi-sweet or dark chocolate chips are ideal. They provide a rich, balanced chocolate flavor that prevents the ganache from becoming overly sweet when combined with the other cupcake elements. Milk chocolate chips are generally too sweet and might overwhelm the delicate balance of the s’mores profile.
- Marshmallows: Standard, regular-sized marshmallows are perfect for topping these cupcakes. They provide the right amount of fluffy, gooey texture when toasted. Mini marshmallows might melt too quickly or be harder to manage for topping.
- Cream Cheese: Opt for full-fat cream cheese for the frosting. It provides the best structure, richness, and tangy flavor, ensuring your frosting is creamy and holds its shape beautifully. Like butter, it should be softened at room temperature for smooth blending – about 2 hours before use.
- Unsalted Butter: For the frosting, slightly cold unsalted butter works best. This is contrary to many frosting recipes that call for fully softened butter, but a slightly firmer butter helps create a more stable and less greasy cream cheese frosting, especially with the added graham cracker crumbs. Remove it from the fridge about 30 minutes before you begin.
- Powdered Sugar: Always sift your powdered sugar for the frosting. This simple step is vital to prevent any gritty texture, ensuring your cream cheese frosting is wonderfully smooth and luxurious.
- Graham Crackers: One sleeve of graham crackers (typically found in a standard box) will yield the perfect amount of fine crumbs needed for the frosting. Finely crush them in a food processor or by hand to ensure a smooth, yet textured frosting.
Smart Substitutions for Your S’mores Cupcakes
While the original recipe delivers the best results, sometimes you need flexibility. Here are some smart substitutions you can make:
- Oil: If canola or vegetable oil isn’t on hand, a light-tasting olive oil can be used in a pinch. However, avoid coconut oil as its distinct flavor can interfere with the delicate s’mores profile.
- Buttermilk: No buttermilk? No problem! Create your own by adding 1/2 tablespoon of lemon juice or white vinegar to 1/2 cup of regular milk. Stir it gently and let it sit for about 10 minutes until it slightly curdles. This creates a similar acidic environment that helps activate the baking soda.
- Chocolate Ganache Filling: If you prefer a simpler cupcake or are short on time, you can absolutely skip the ganache filling. The cupcakes will still be delicious with just the marshmallow and frosting. For an alternative filling, slightly melted marshmallow fluff can be used for an extra marshmallowy kick.
- Marshmallows: For those with dietary restrictions, vegan marshmallows are an excellent substitute and will toast similarly under the broiler or with a kitchen torch.
- Cream Cheese Frosting: If you’re not a fan of cream cheese or want a more classic buttercream, you can substitute the cream cheese in the frosting with additional unsalted butter. Use 1 cup of softened butter and adjust the powdered sugar to about 2 1/2 cups for a stable, flavorful buttercream. You might need slightly less heavy cream.
- Graham Crackers: Outside the US, graham crackers might be hard to find. Digestive biscuits are a fantastic alternative and will provide a similar texture and mild, slightly sweet flavor to the frosting.
Step-By-Step Instructions: Crafting the Perfect Chocolate Cupcakes
Creating these moist chocolate cupcakes is a straightforward process, designed for delicious results every time. Follow these steps carefully:
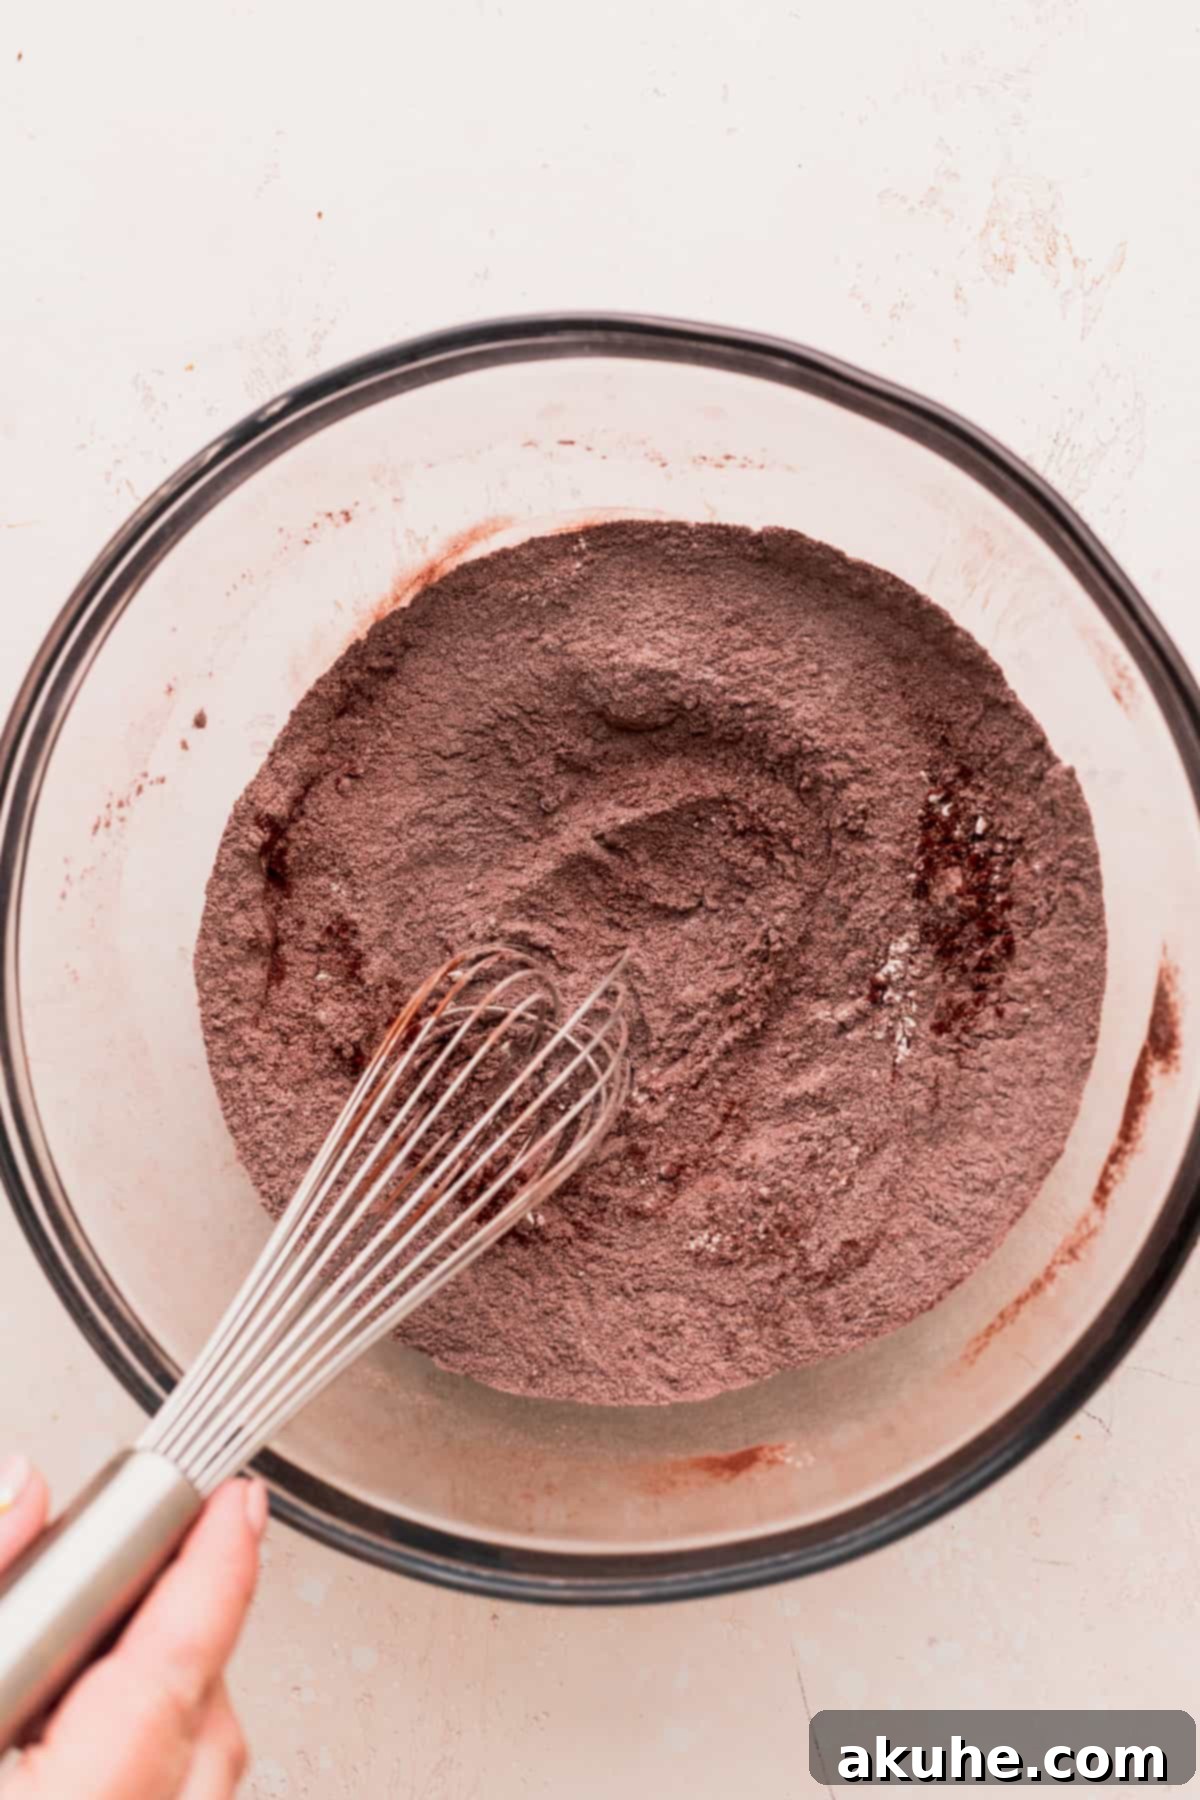
STEP 1: Prepare Your Workspace and Dry Ingredients. Begin by preheating your oven to 350°F (175°C). Line a standard 12-cup cupcake tin with paper liners; this will ensure easy removal and clean-up. In a large mixing bowl, the foundation of your cupcakes starts by sifting together the all-purpose flour and unsweetened cocoa powder. Sifting is crucial for preventing lumps and ensuring a light, even texture. Next, add the white granulated sugar, baking powder, baking soda, and salt to the sifted mixture. Use a whisk to gently combine these dry ingredients, ensuring they are evenly distributed. This pre-mixing step helps in creating a consistent crumb structure in your finished cupcakes.
STEP 2: Combine the Wet Ingredients. In a separate, medium-sized bowl, whisk together the wet ingredients: canola or vegetable oil, large room-temperature eggs, pure vanilla extract, and room-temperature buttermilk. Ensure these are well combined. Now, for a critical step: heat 1/2 cup of water until it’s steaming hot (you can do this on the stove or in the microwave). Very slowly, pour this hot water into your wet ingredient mixture while continuously whisking. It’s important to add it gradually to avoid cooking the eggs, allowing the hot water to dissolve the cocoa and create a smooth, emulsified liquid mixture that will contribute significantly to the cupcakes’ moisture and rich chocolate flavor.
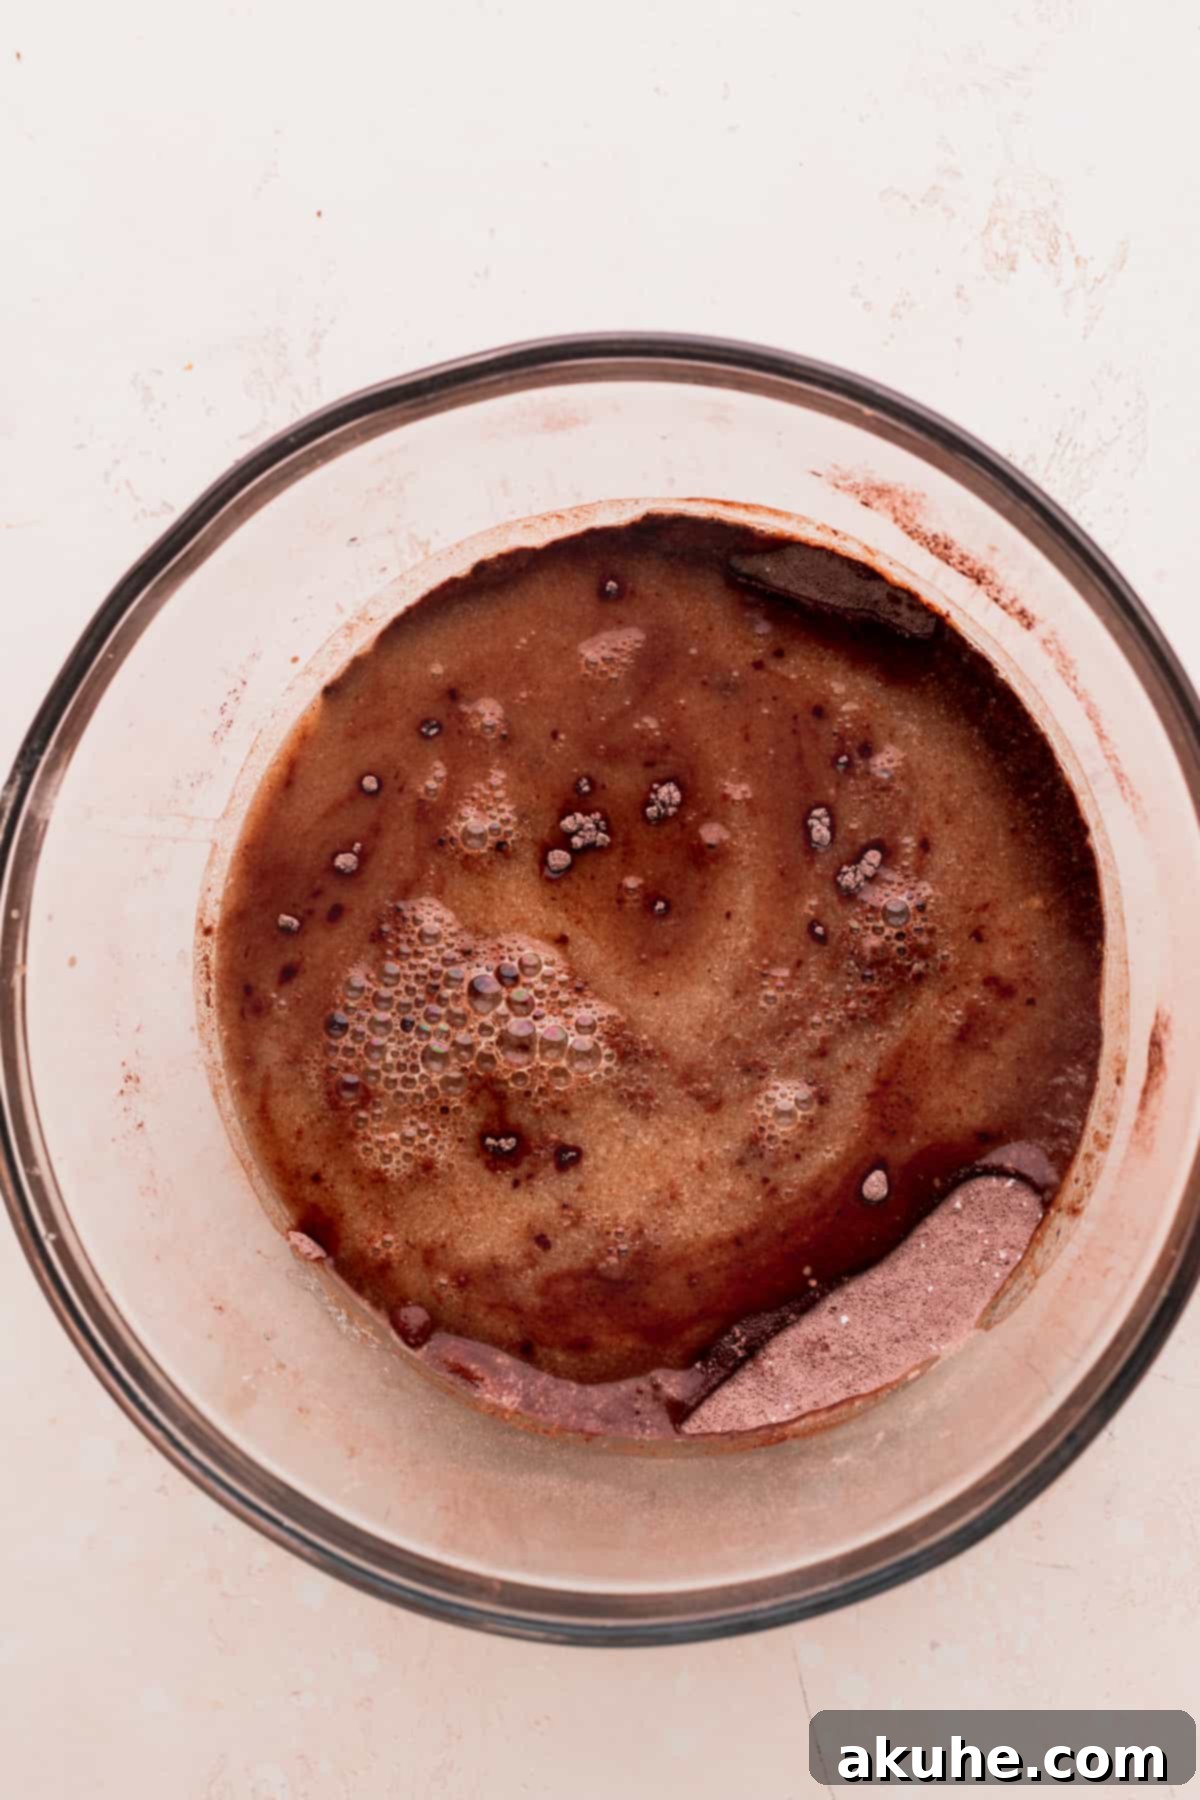
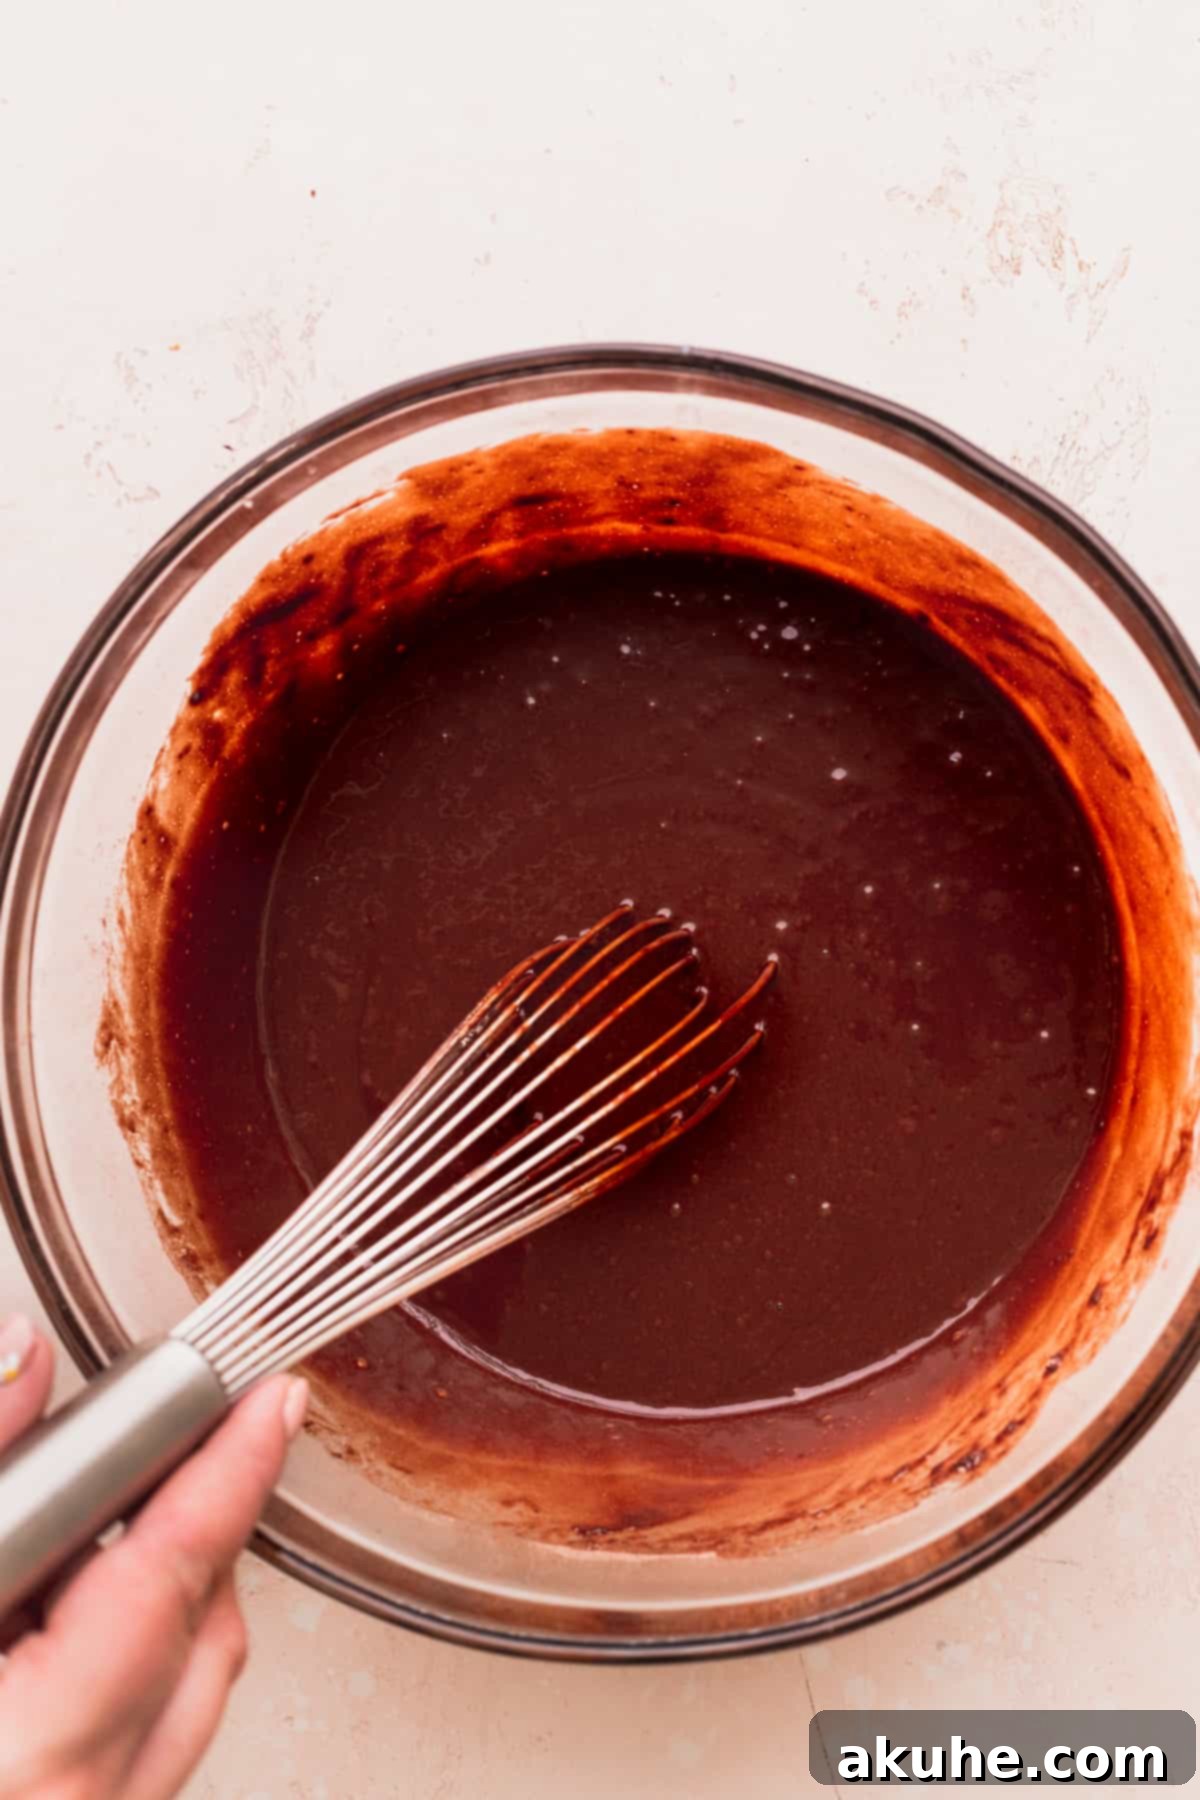
STEP 3: Combine Wet and Dry Mixtures. Now, carefully pour the entire wet ingredient mixture into the bowl containing your dry ingredients. Using your whisk, mix until they are *just* combined. It’s crucial not to overmix the batter; overmixing can develop the gluten in the flour too much, leading to tough, dry cupcakes. A few small lumps are perfectly fine. Don’t be alarmed by the batter’s consistency – it will be noticeably runny, which is exactly what we’re looking for to ensure maximum moisture in the baked cupcakes.
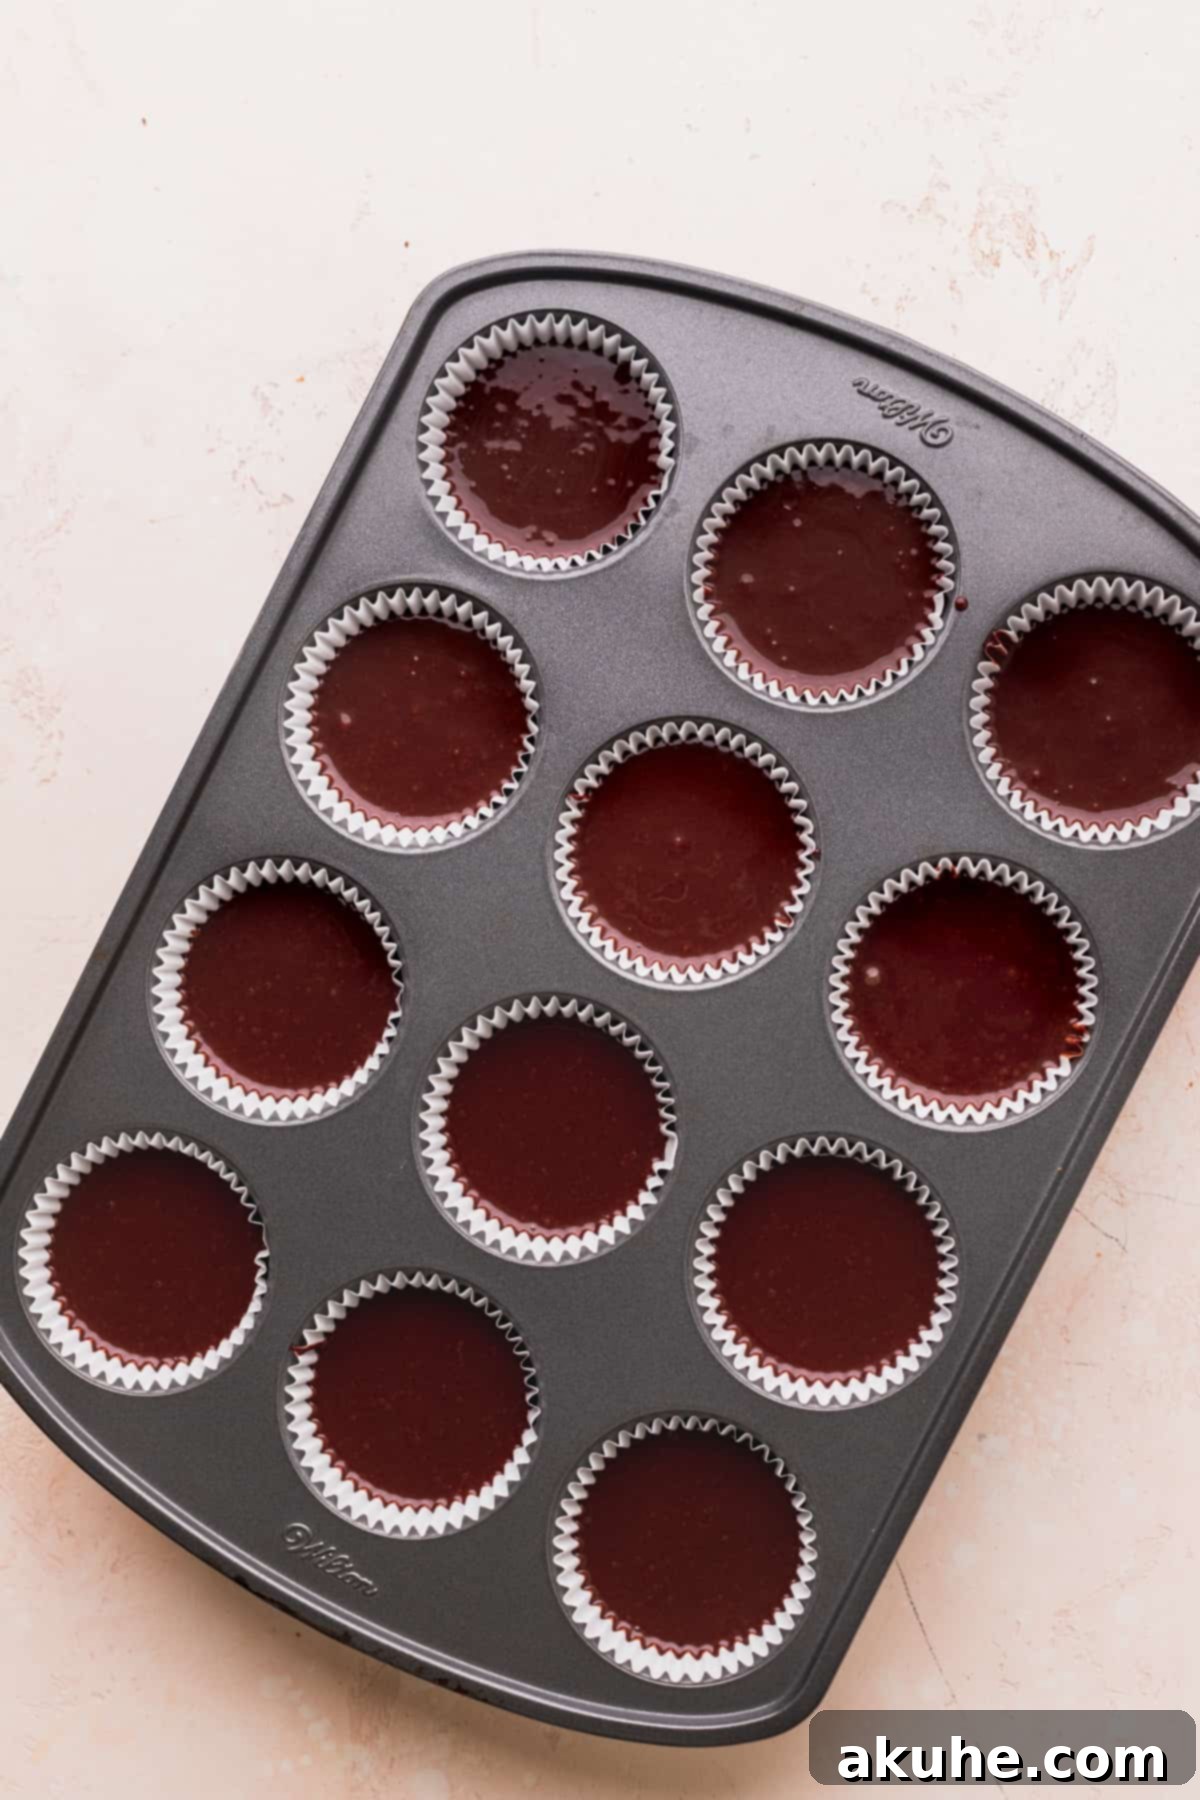
STEP 4: Portion and Prepare for Baking. With your prepared cupcake pan lined, it’s time to scoop the batter. Fill each cupcake liner approximately 3/4ths full. This ensures that the cupcakes have enough room to rise beautifully without overflowing, creating that classic domed top. An ice cream scoop can be very helpful for consistent portioning.
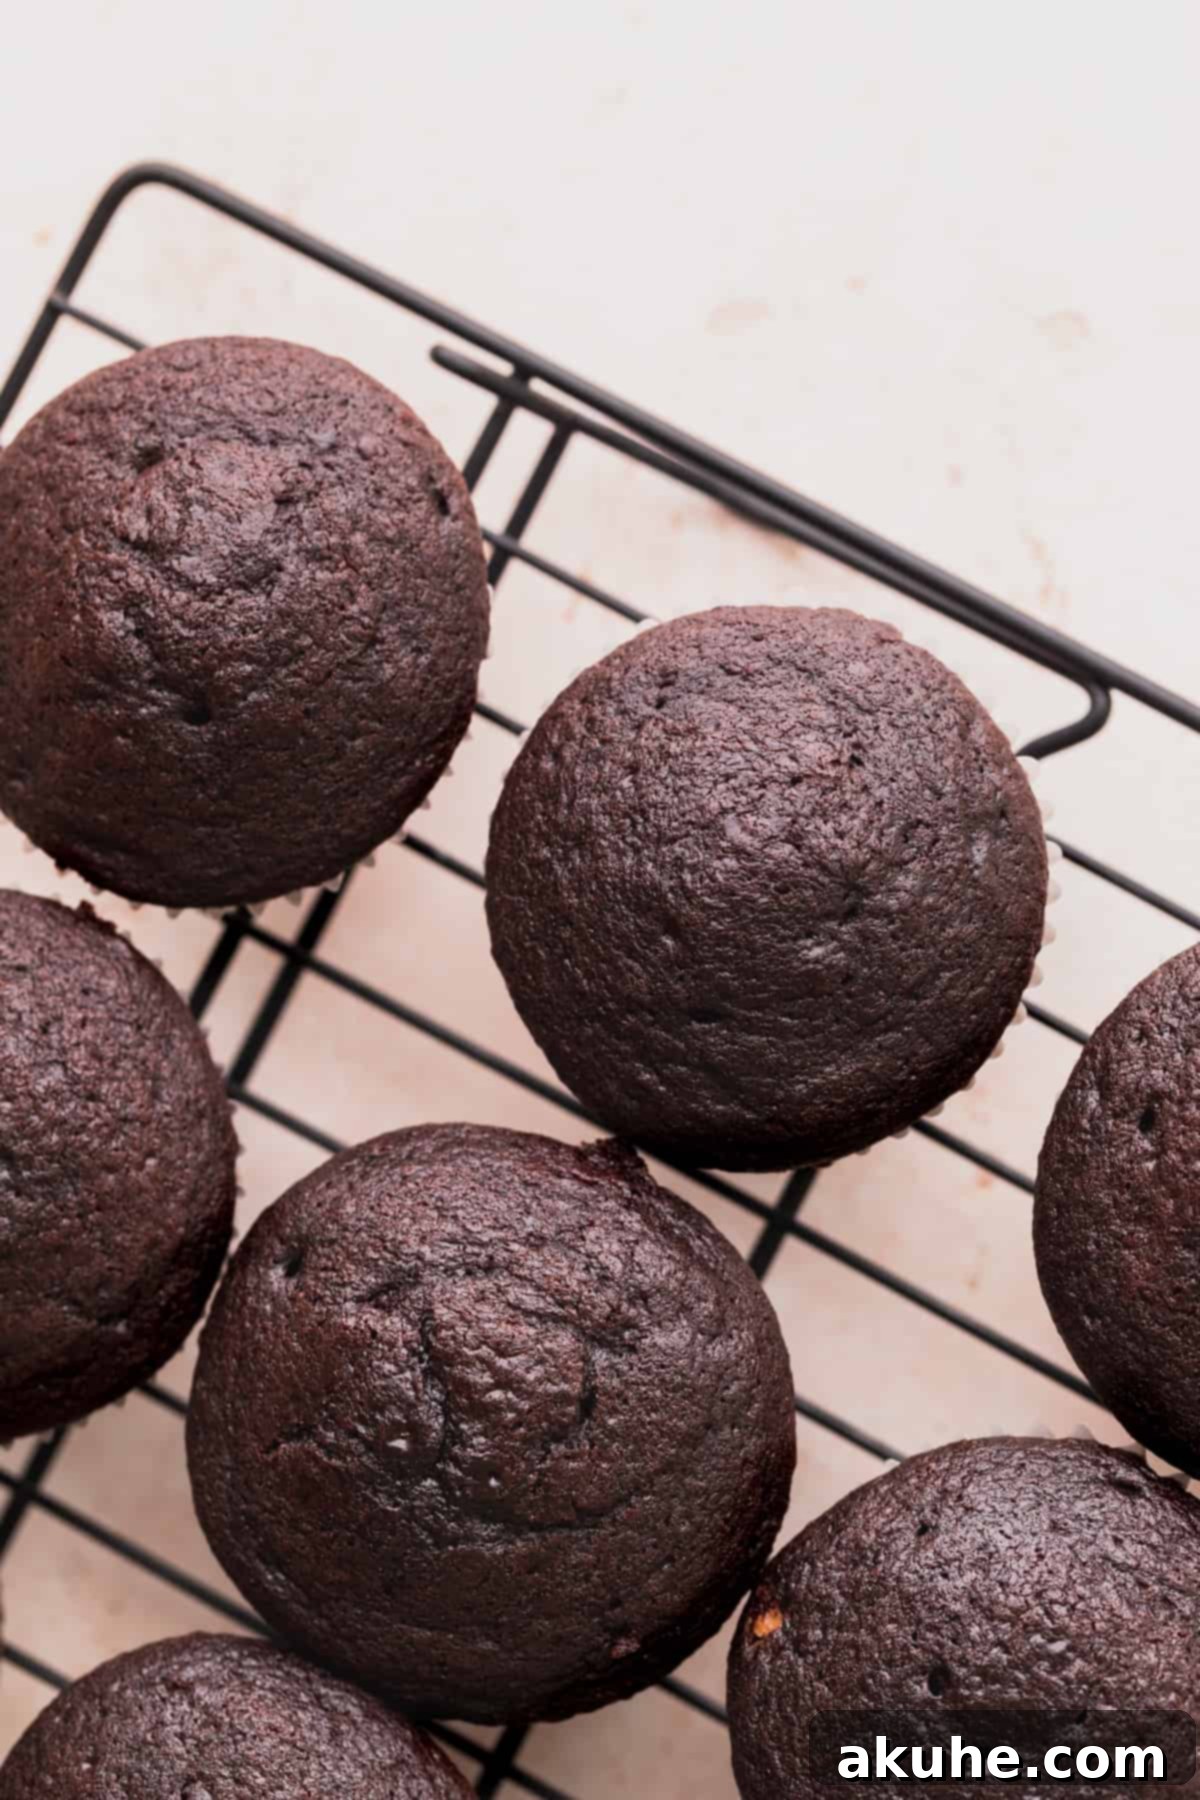
STEP 5: Bake to Perfection and Cool. Place the cupcake pan into your preheated oven. Bake for approximately 16-18 minutes. Baking times can vary slightly depending on your oven, so keep an eye on them. You’ll know they’re done when a toothpick inserted into the center of a cupcake comes out clean, or with just a few moist crumbs attached. Once baked, remove the pan from the oven and let the cupcakes cool in the pan for about 10 minutes. This allows them to set slightly before transferring. Then, carefully transfer the warm cupcakes to a wire rack to cool completely. Cooling completely is essential before filling and frosting to prevent melting or premature spoilage.
Step-By-Step Instructions: Filling and Frosting Your S’mores Cupcakes
Once your chocolate cupcakes are baked and cooled, it’s time to bring them to life with the rich ganache, toasted marshmallows, and that irresistible graham cracker frosting.
STEP 1: Prepare the Rich Chocolate Ganache. Ideally, you can start preparing the chocolate ganache while your cupcakes are baking. This allows it sufficient time to cool and thicken to the perfect consistency for filling. In a medium, heat-proof bowl, place your semi-sweet chocolate chips. In a small saucepan, heat the heavy cream until it’s steaming but not boiling. Immediately pour the hot cream over the chocolate chips. Let it sit undisturbed for about 2 minutes. This allows the heat from the cream to begin melting the chocolate. After 2 minutes, gently whisk the mixture until it’s completely smooth and glossy. If you notice any stubborn chocolate chunks, microwave the ganache in 10-15 second intervals, stirring well after each, until perfectly smooth. Set it aside to cool to room temperature, allowing it to thicken slightly, making it easier to fill the cupcakes without being too runny.
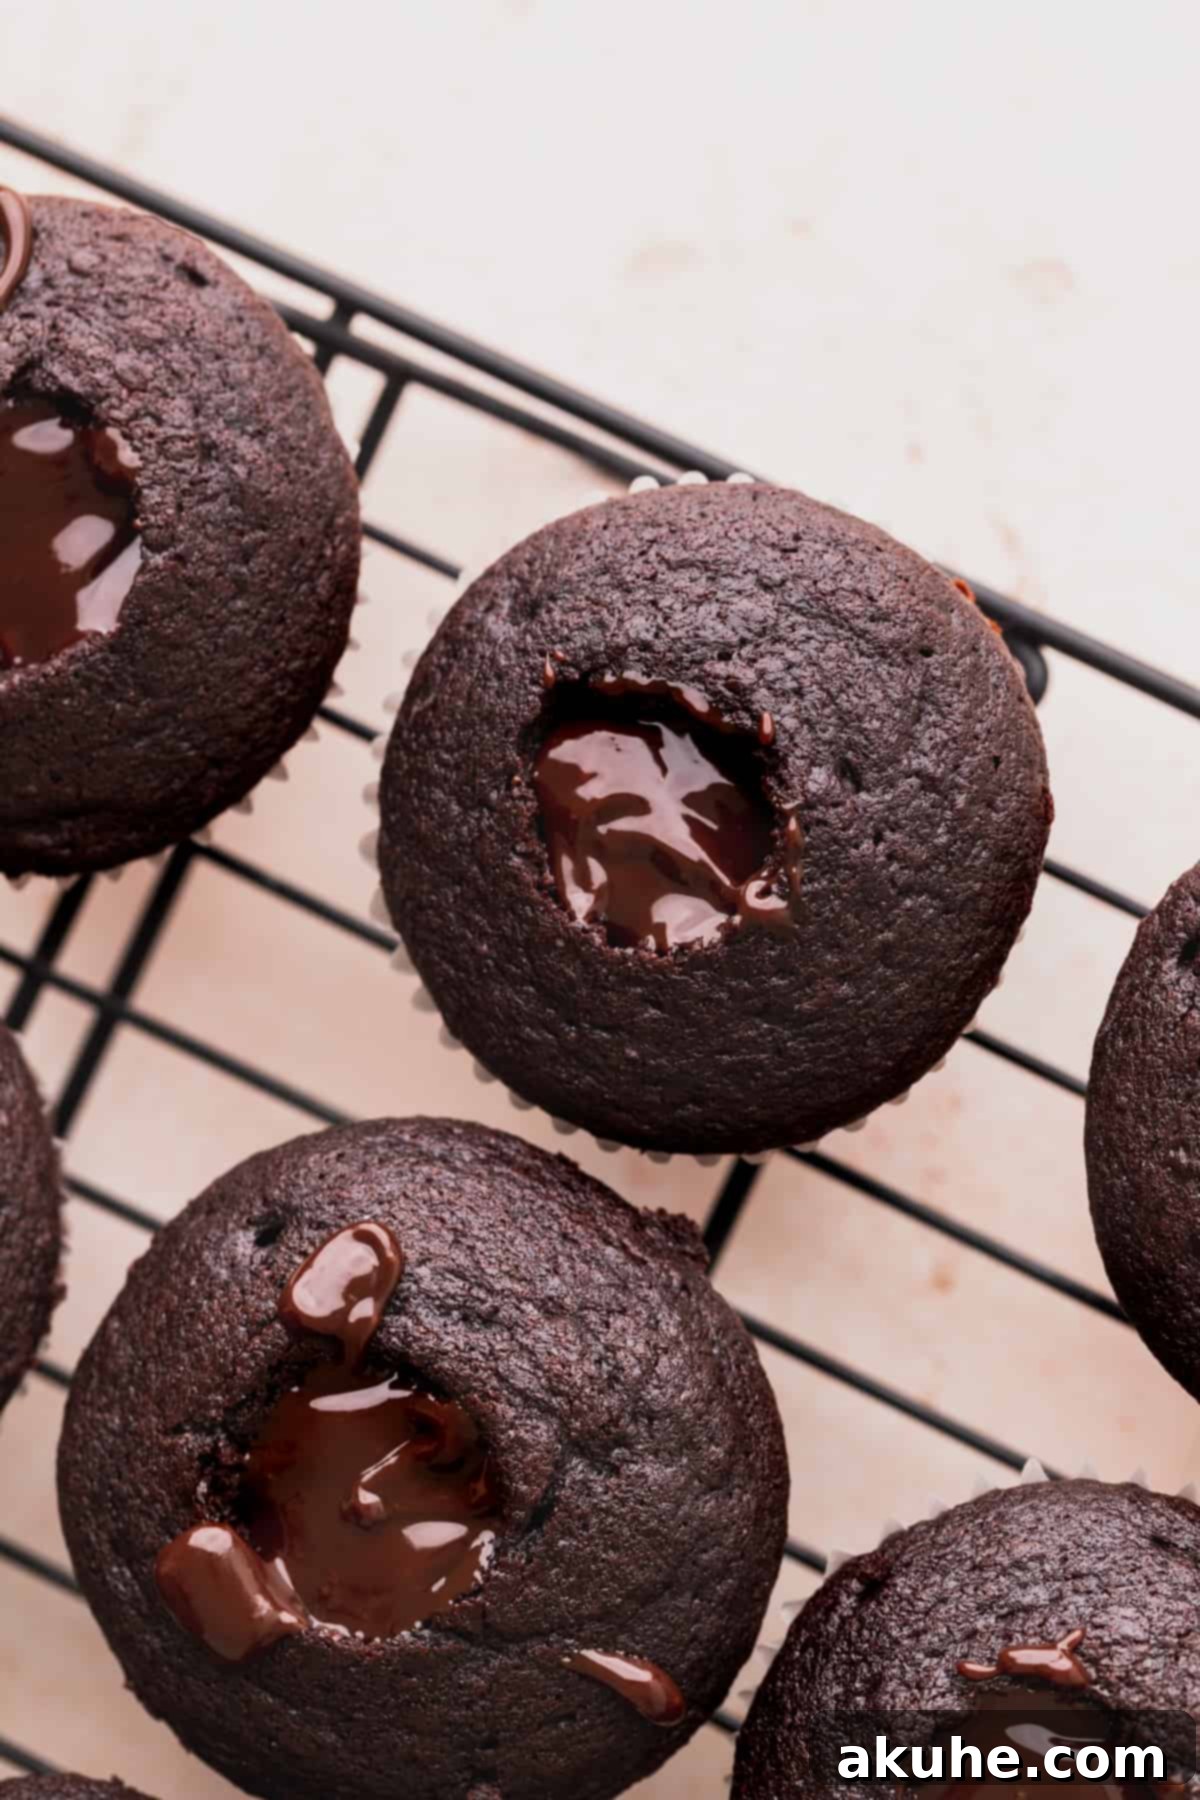
STEP 2: Fill the Cupcakes with Ganache. Once your cupcakes are completely cool, it’s time for the delicious filling. Using a cupcake corer (highly recommended for precision) or a small, sharp knife, carefully cut a hole into the center of each cupcake. Aim to go about two-thirds of the way down, being careful not to cut through the bottom. Gently remove the cupcake core (you can snack on these or discard them). Now, using a 1/2 tablespoon or a small spoon, fill each cored cupcake cavity generously with the cooled chocolate ganache, filling it all the way to the top. This ensures a delightful surprise in every bite.
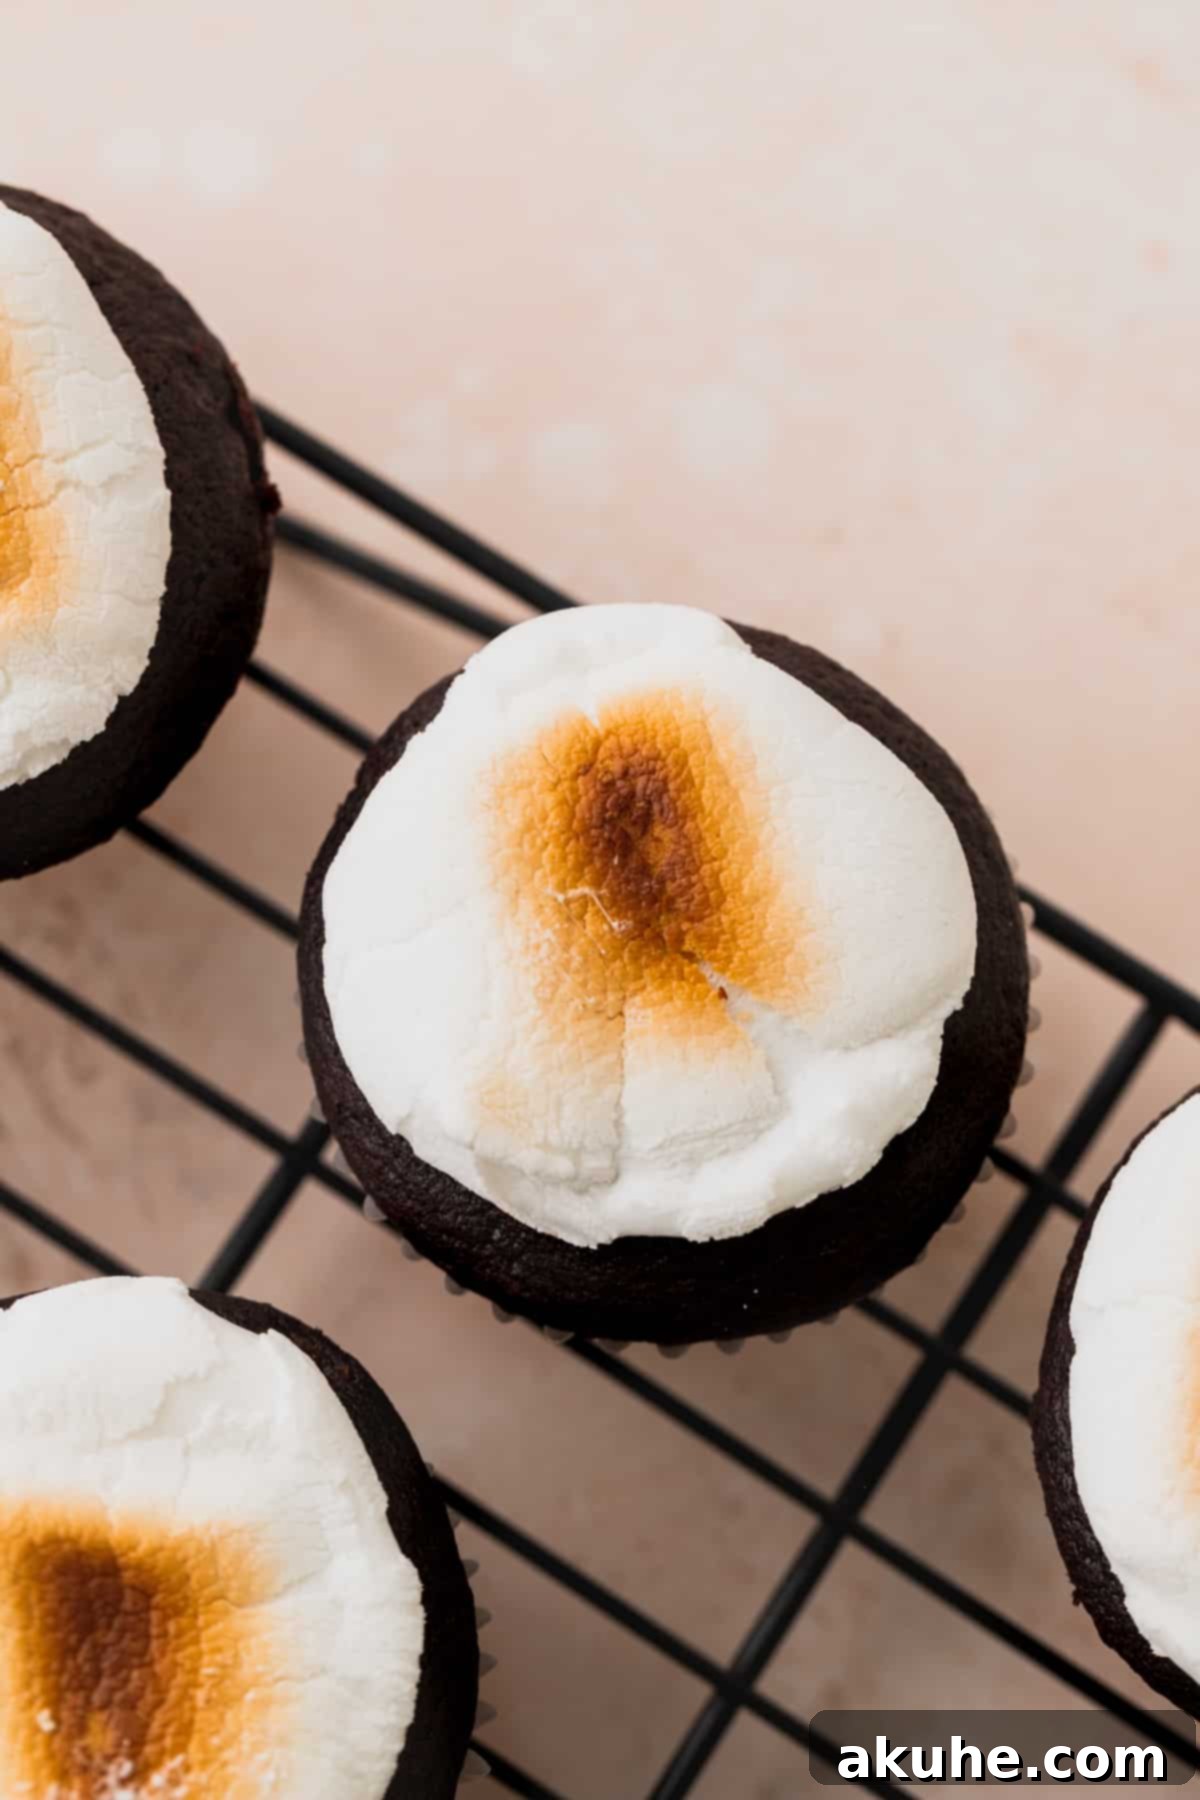
STEP 3: Toast the Marshmallows to Perfection. Now for the iconic s’mores topping! Place your ganache-filled cupcakes on a baking sheet. Carefully top each cupcake with a regular-sized marshmallow. Preheat your oven broiler. Place the baking sheet under the broiler for 2-3 minutes. Keep a very close eye on them, as marshmallows can go from perfectly toasted to burnt in seconds! You’re looking for a beautiful golden-brown, caramelized exterior, just like a campfire-toasted s’more. Alternatively, if you have one, a kitchen torch offers even more control for perfectly toasted marshmallows. Once toasted, gently use the back of a spoon to lightly squish the warm, gooey marshmallow down, allowing it to spread slightly and cover the top of the cupcake base. Transfer the cupcakes to a cooling rack to let the marshmallows set a little.
STEP 4: Prepare Ingredients for Graham Cracker Cream Cheese Frosting. For the best cream cheese frosting texture, timing is important. Take your unsalted butter out of the fridge and let it sit on the counter for about 30 minutes. You want it slightly cold, not fully softened. Meanwhile, in a large mixing bowl, sift the powdered sugar thoroughly to eliminate any lumps – this is key for a smooth frosting. Next, take your graham crackers and process them in a food processor until they form a very fine crumb. This fine texture is important so the crumbs integrate smoothly into the frosting without making it chunky. Add these fine graham cracker crumbs to the sifted powdered sugar and whisk them together until evenly combined.
STEP 5: Cream the Butter and Cream Cheese. In the bowl of a stand mixer fitted with a paddle attachment (or using a hand mixer), combine the slightly cold unsalted butter and room-temperature full-fat cream cheese. Beat these ingredients together on high speed for about 3 minutes. The mixture should become light, fluffy, and visibly increased in volume. Stop the mixer periodically to scrape down the sides and bottom of the bowl with a rubber spatula, ensuring everything is fully incorporated and no unmixed butter or cream cheese remains.
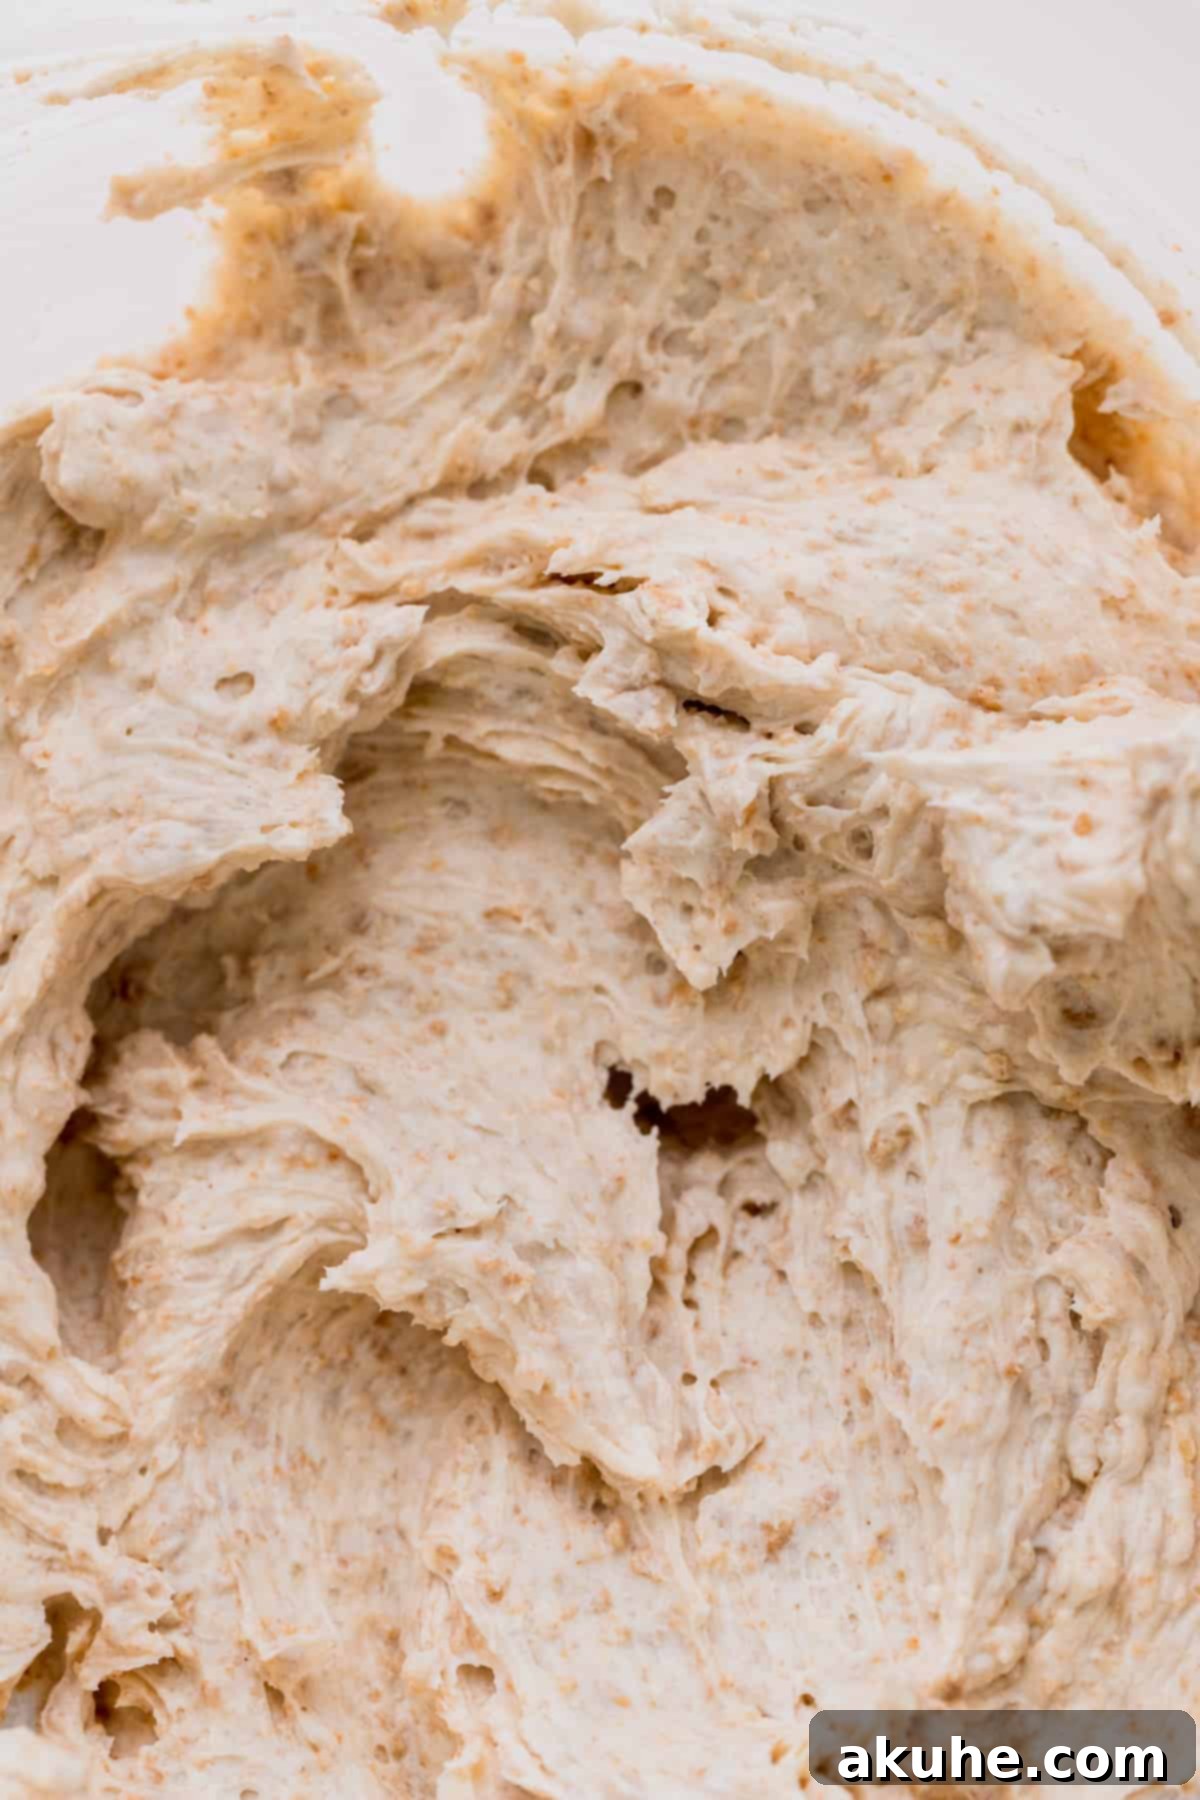
STEP 6: Finish the Frosting. Reduce your mixer speed to low. Gradually add the powdered sugar and graham cracker crumb mixture into the creamed butter and cream cheese. Mix on low speed until just combined. At this stage, the frosting will be quite thick. Next, add the pure vanilla extract, salt (which helps to cut through the sweetness and enhance the flavors), and the heavy cream. Increase the mixer speed to high and beat for another 2 minutes, or until the frosting is light, fluffy, and perfectly creamy. Again, scrape down the bowl halfway through to ensure consistency. If your frosting still feels too thick, you can add 1 additional tablespoon of heavy cream, beating again until the desired consistency is reached. The goal is a pipeable, smooth, and delicious frosting.
Decorating Your S’mores Cupcakes
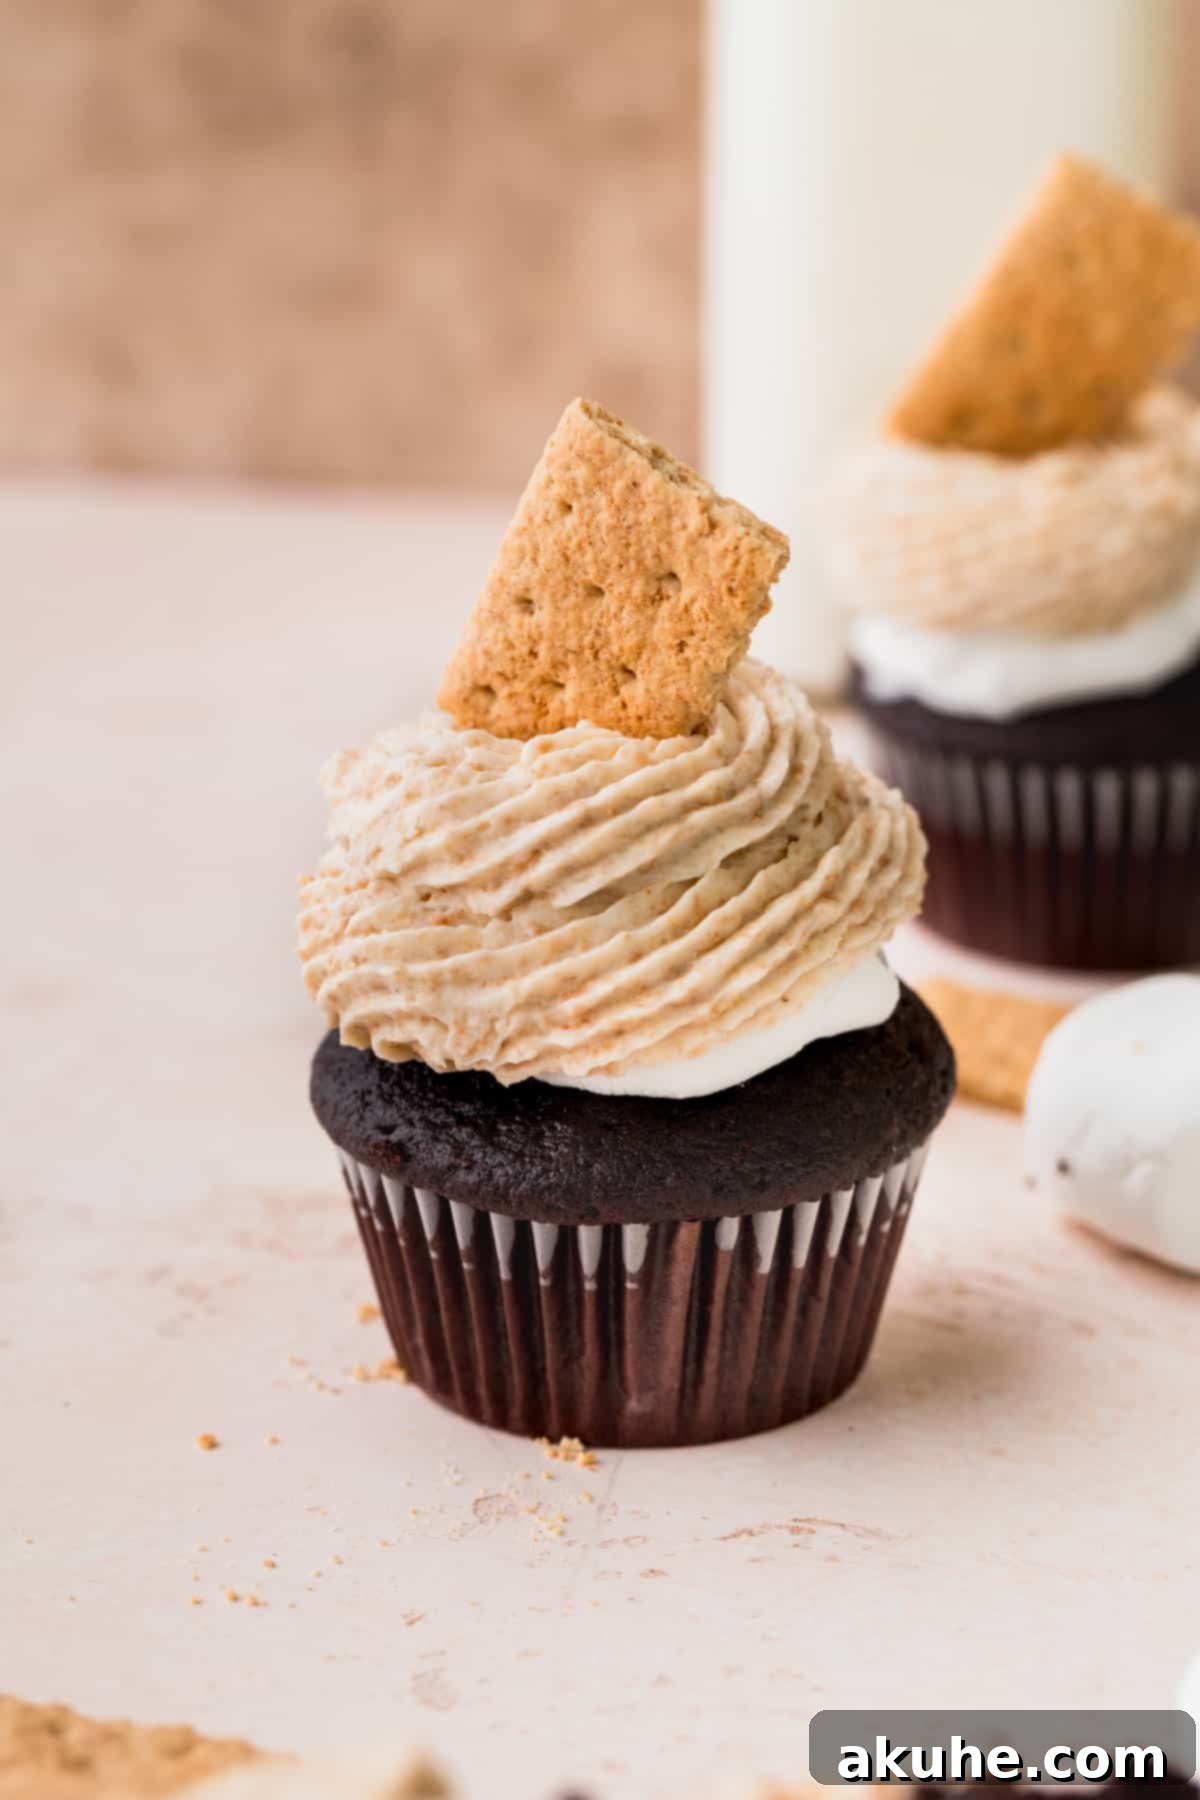
With your delectable graham cracker cream cheese frosting ready, it’s time to add the finishing touch! For a beautiful presentation, I recommend using a Wilton 1M star tip. Fit a piping bag with this tip, fill it with your frosting, and pipe a generous, elegant swirl directly on top of each toasted marshmallow. The swirl not only looks professional but also adds another layer of that fantastic graham cracker flavor. You can also garnish with a small piece of graham cracker or a sprinkle of extra graham cracker crumbs for visual appeal and an added textural contrast.
Expert Baking Tips for Flawless Cupcakes
- Accurate Flour Measurement is Key: The most common culprit for dry cupcakes is too much flour. Always use the “spoon and level” method: spoon flour into your measuring cup until it overflows, then level off the excess with a straight edge (like a knife). Never scoop flour directly from the bag, as this compacts it, leading to significantly more flour than intended and a dense, dry cupcake. For ultimate accuracy, use a kitchen scale to weigh your flour.
- Handling Cupcake Cores: When you core the cupcakes for the ganache filling, you’ll be left with the removed tops. Feel free to discard these, or better yet, enjoy them as a baker’s treat!
- Setting the Frosting: After piping the graham cracker cream cheese frosting onto your S’mores cupcakes, it’s highly recommended to chill them briefly. Freezing the decorated cupcakes for about 10 minutes, or storing them in the refrigerator for at least 30 minutes, allows the frosting to firm up. This is crucial for a cleaner presentation and to prevent the frosting from becoming too soft and messy, especially if serving them in a warm environment. Allow them to sit at room temperature for a short while before serving for optimal texture.
- Room Temperature Ingredients: Many recipes, especially for baking, call for room temperature ingredients like eggs, butter, and dairy. This isn’t just a suggestion! Room temperature ingredients emulsify much better, creating a smoother, more uniform batter and a lighter, airier texture in your baked goods. Plan ahead and take these ingredients out of the fridge at least 1-2 hours before you start.
- Don’t Overmix: When combining wet and dry ingredients for the cupcake batter, mix only until just combined. Overmixing develops gluten, which can lead to tough, chewy cupcakes rather than soft and tender ones. A few small lumps are perfectly acceptable.
Frequently Asked Questions (FAQ) About S’mores Cupcakes
Absolutely! For an even more intense marshmallow experience, you can use slightly melted marshmallow fluff as a delicious alternative to the chocolate ganache filling. Simply warm it gently in the microwave for a few seconds until it’s spoonable, then fill your cored cupcakes. This will give a different, but equally delightful, gooey center.
Yes, these cupcakes are excellent for making ahead! You can bake the chocolate cupcakes and allow them to cool completely. Once cool, wrap them tightly in plastic wrap and freeze them for up to 30 days. When you’re ready to serve, thaw the frozen cupcakes at room temperature for about 1 hour before proceeding with filling, toasting the marshmallows, and frosting. The frosting can also be made ahead and stored in an airtight container in the fridge for a few days.
Yes, this versatile recipe can certainly be transformed into a S’mores cake! Pour the batter into an 8×8 inch or 9×9 inch baking pan. The baking time will need to be adjusted; it will likely take longer, around 30-40 minutes, but always check for doneness with a toothpick. You would then spread the ganache over the cooled cake, top with marshmallows and broil, and finally frost with the graham cracker cream cheese frosting.
Several factors contribute to moist cupcakes. First, ensure you’re measuring your flour correctly (spoon and level, or weigh it). Second, avoid overmixing the batter, as this develops gluten and can lead to a tough, dry texture. Third, make sure not to overbake; start checking for doneness at the minimum recommended time. Lastly, the inclusion of oil, buttermilk, and hot water in this recipe are all key to maintaining moisture.
A food processor is your best friend for achieving super fine graham cracker crumbs. Simply break the graham crackers into pieces and pulse until they form a fine, sandy consistency. If you don’t have a food processor, place the crackers in a sturdy zip-top bag and crush them with a rolling pin until very fine. The finer the crumbs, the smoother your frosting will be.
Storing and Freezing Your S’mores Cupcakes
To maintain their freshness and deliciousness, proper storage of your S’mores Cupcakes is essential:
These decadent S’mores cupcakes should be stored in an airtight container to prevent them from drying out or absorbing other odors from the refrigerator. Place them in the fridge, where they will stay fresh for up to 5 days. For the absolute best flavor and texture, allow the cupcakes to sit at room temperature for about 1 hour before serving. This softens the frosting and ganache slightly, enhancing the overall eating experience.
Freezing Instructions
If you have leftover S’mores cupcakes or wish to prepare them well in advance, they freeze beautifully! Place the decorated cupcakes in a single layer in an airtight container. If stacking, place a piece of parchment paper between layers to prevent sticking. Freeze for up to 30 days. When you’re ready to enjoy them, thaw the frozen cupcakes at room temperature for 1-2 hours. This gradual thawing process helps to preserve their texture and prevents the marshmallow from becoming too firm.
Explore More S’mores Delights
If you’re captivated by the magic of s’mores, you’ll love exploring these other irresistible recipes from our collection: Pumpkin S’mores Cookies, S’mores Cookie Bars, and S’mores Fluffy Marshmallow Brownies. Don’t forget to leave a STAR REVIEW if you loved this recipe! Make sure to tag me on Instagram @stephaniesweettreats. To get more ideas follow me on Pinterest.
S’mores Cupcakes
Print Recipe
Pin Recipe
Leave a Review
1 hour
16 minutes
1 hour
2 hours 16 minutes
12 cupcakes
Ingredients
Chocolate Cupcakes
- 1 cup All-purpose flour
- 1/2 cup Unsweetened cocoa powder, dutch process cocoa powder for a more rich cupcake
- 3/4 cup White granulated sugar
- 1 tsp Baking powder
- 1/2 tsp Baking soda
- 1/2 tsp Salt
- 2 Large eggs, room temperature
- 1 tsp Pure vanilla extract
- 1/2 cup Oil, canola or vegetable
- 1/2 cup Buttermilk, room temperature
- 1/2 cup Hot water, steaming hot water
Chocolate Ganache
- 1 cup Semi-sweet chocolate chips
- 1/2 cup Heavy cream
- 12 Marshmallows
Graham Cracker Cream Cheese Frosting
- 4 oz Cream cheese, room temperature
- 3/4 cup Unsalted butter, slightly cold
- 3 1/2 cups Powdered sugar, sifted
- 1 1/4 cup Graham cracker crumbs, fine crumb. 1 packet of graham crackers.
- 1 tsp Pure vanilla extract
- 1 tsp Salt
- 3 TBSP Heavy cream
Instructions
Chocolate Cupcakes
- Preheat the oven to 350°F. Line a 12 cup cupcake tin with cupcake liners. Set aside.
- In a large bowl, sift the flour and cocoa powder together. Add the sugar, baking powder, baking soda, and salt. Mix until combined.1 cup All-purpose flour, 1/2 cup Unsweetened cocoa powder, 3/4 cup White granulated sugar, 1 tsp Baking powder, 1/2 tsp Baking soda, 1/2 tsp Salt
- In a separate bowl, mix oil, vanilla, eggs, and buttermilk. Heat the hot water on the stove until steaming. Slowly whisk the hot water into the wet ingredients.2 Large eggs, 1 tsp Pure vanilla extract, 1/2 cup Oil, 1/2 cup Buttermilk, 1/2 cup Hot water
- Pour the wet ingredients into the dry. Whisk until just combined. Fill the cupcake liners 3/4ths full with the chocolate cake batter.
- Bake for 16-18 minutes. Bake until a toothpick inserted comes out clean.
- Let the cupcakes sit in the hot pan for 10 minutes. Then, transfer to a cooling rack and cool completely.
Chocolate Ganache
- While the cupcakes are baking, start the ganache.
- Pour the chocolate chips into a bowl. Heat the heavy cream in a saucepan and heat until steaming. Pour the hot cream over the chocolate chips. Let it sit for 2 minutes.1 cup Semi-sweet chocolate chips, 1/2 cup Heavy cream
- Stir until it is smooth and glossy. If any chocolate chunks remain, heat in the microwave in 15 second intervals. Mix well. Let it sit until the cupcakes are completely cooled.
- Use a cupcake corer or a sharp knife to create a hole in the cupcake that goes 2/3rds down. Don’t go too far. Toss the tops of the cupcakes. Use a 1/2 Tablespoon to fill the cupcakes with chocolate to the top of the cupcake.
- Set the oven to broil. Place the filled cupcakes on a cookie sheet. Top with the marshmallow. Place in the oven for 2-3 minutes until the top of the marshmallow is toasted.12 Marshmallows
- Use a spoon to squish the marshmallow down. Place the cupcakes on a cooling rack to cool.
Graham Cracker Cream Cheese Frosting
- Pull the butter out of the fridge and set on the counter for 30 minutes. This gets the butter to be slightly cold. Sift the powdered sugar into a large bowl. Blend the graham cracker crumbs using a food processor, it needs to be a fine crumb. Pour the crumbs into the powdered sugar.3/4 cup Unsalted butter, 3 1/2 cups Powdered sugar, 1 1/4 cup Graham cracker crumbs
- Using a mixer, beat the cream cheese and butter. Beat for 3 minutes on high. Scrape the bowl and slowly add in the powdered sugar/ graham cracker crumbs and mix on low.4 oz Cream cheese
- Add the vanilla, salt, and heavy cream. Beat on high speed for 2 minutes. Use a rubber spatula to scrape the bowl halfway through. It should be a creamy frosting. If too thick still, add 1 Tablespoon of heavy cream and beat again.1 tsp Pure vanilla extract, 1 tsp Salt, 3 TBSP Heavy cream
- Pipe the frosting on top of the cupcakes and freeze for 10 minutes before serving. Or keep in the fridge.
Notes
High altitude baking – Add an extra 1 TBSP of flour.
Pull out dairy ingredients 2 hours before baking.
Carbohydrates: 81g,
Protein: 5g,
Fat: 37g,
Saturated Fat: 17g,
Polyunsaturated Fat: 4g,
Monounsaturated Fat: 13g,
Trans Fat: 1g,
Cholesterol: 57mg,
Sodium: 483mg,
Potassium: 210mg,
Fiber: 3g,
Sugar: 25g,
Vitamin A: 706IU,
Vitamin C: 1mg,
Calcium: 76mg,
Iron: 2mg
Did you make this recipe?
Please leave a star rating and review below!
