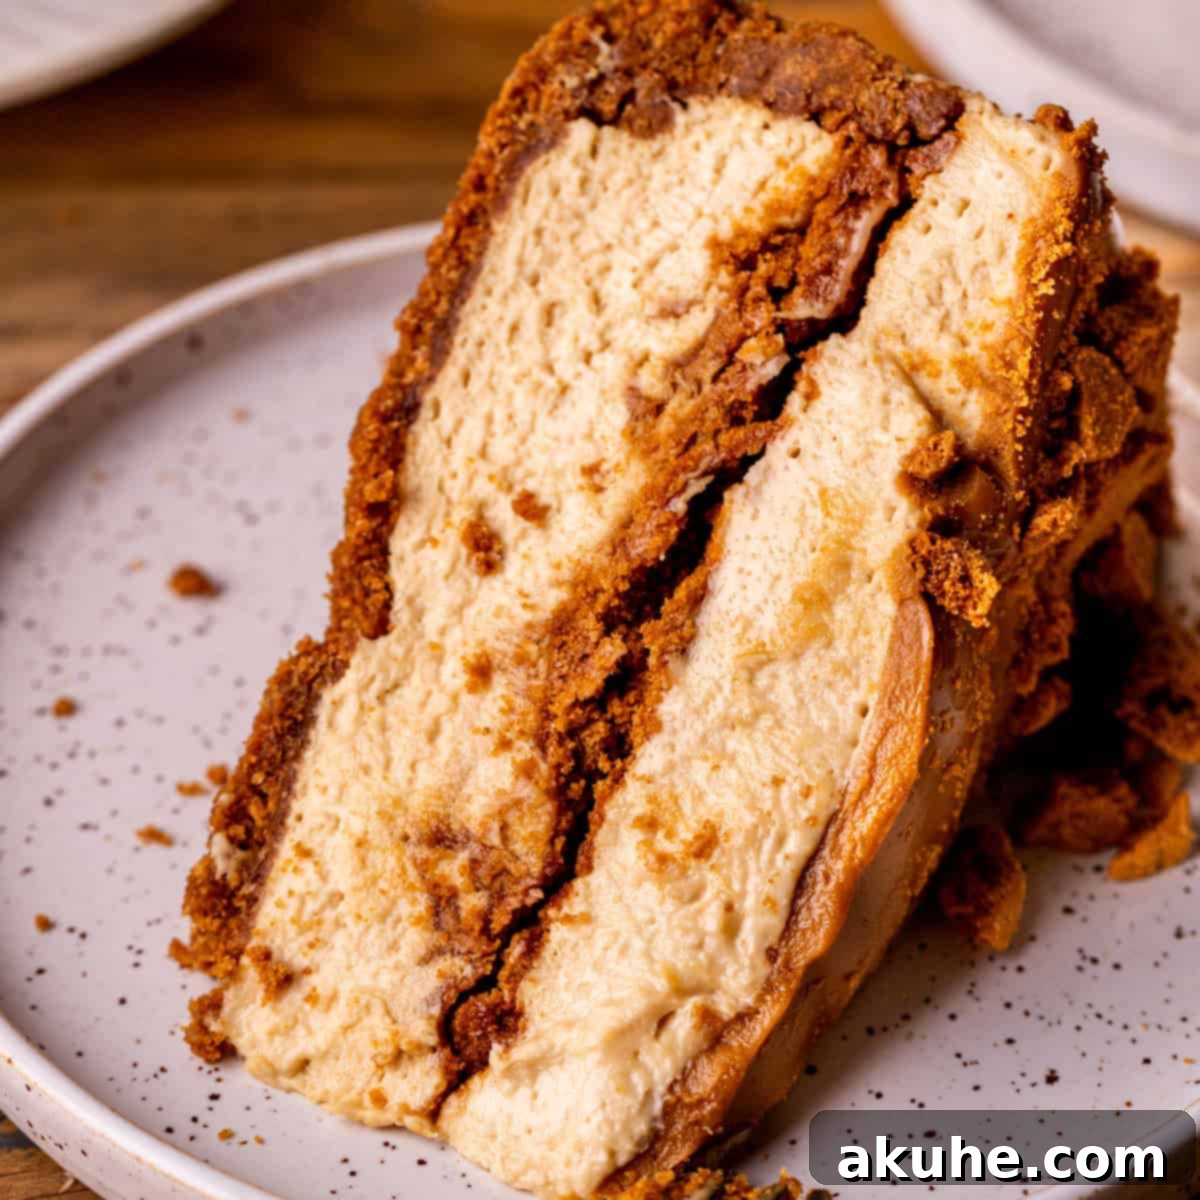
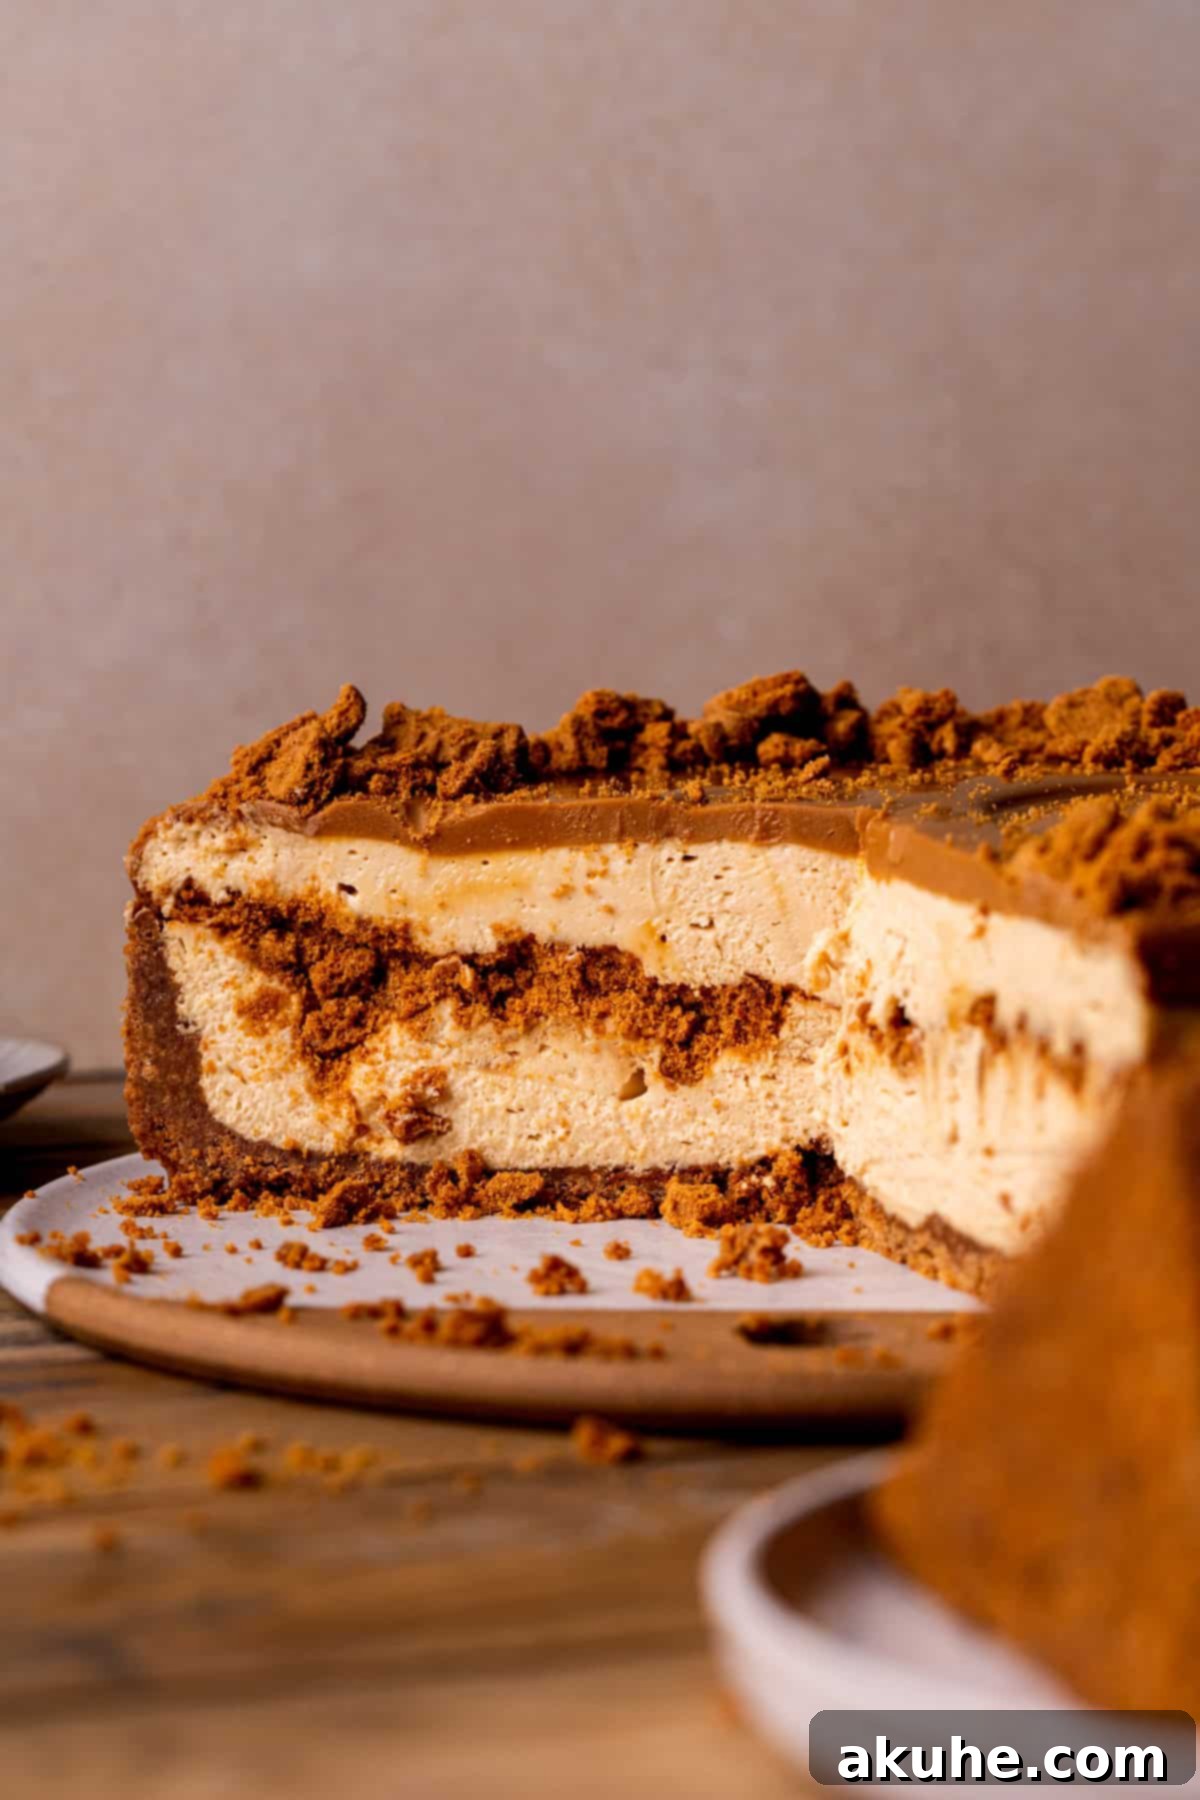
Indulge in pure bliss with this incredibly decadent **No-Bake Biscoff Cheesecake**! Imagine a luscious dessert featuring a perfectly spiced Biscoff cookie crust, a velvety-smooth cookie butter cheesecake filling, and a delightful middle layer of melted cookie butter generously sprinkled with crunchy Biscoff crumbles. To top it all off, a final drizzle of rich cookie butter and more crushed cookies creates an irresistible masterpiece that requires absolutely no oven time.
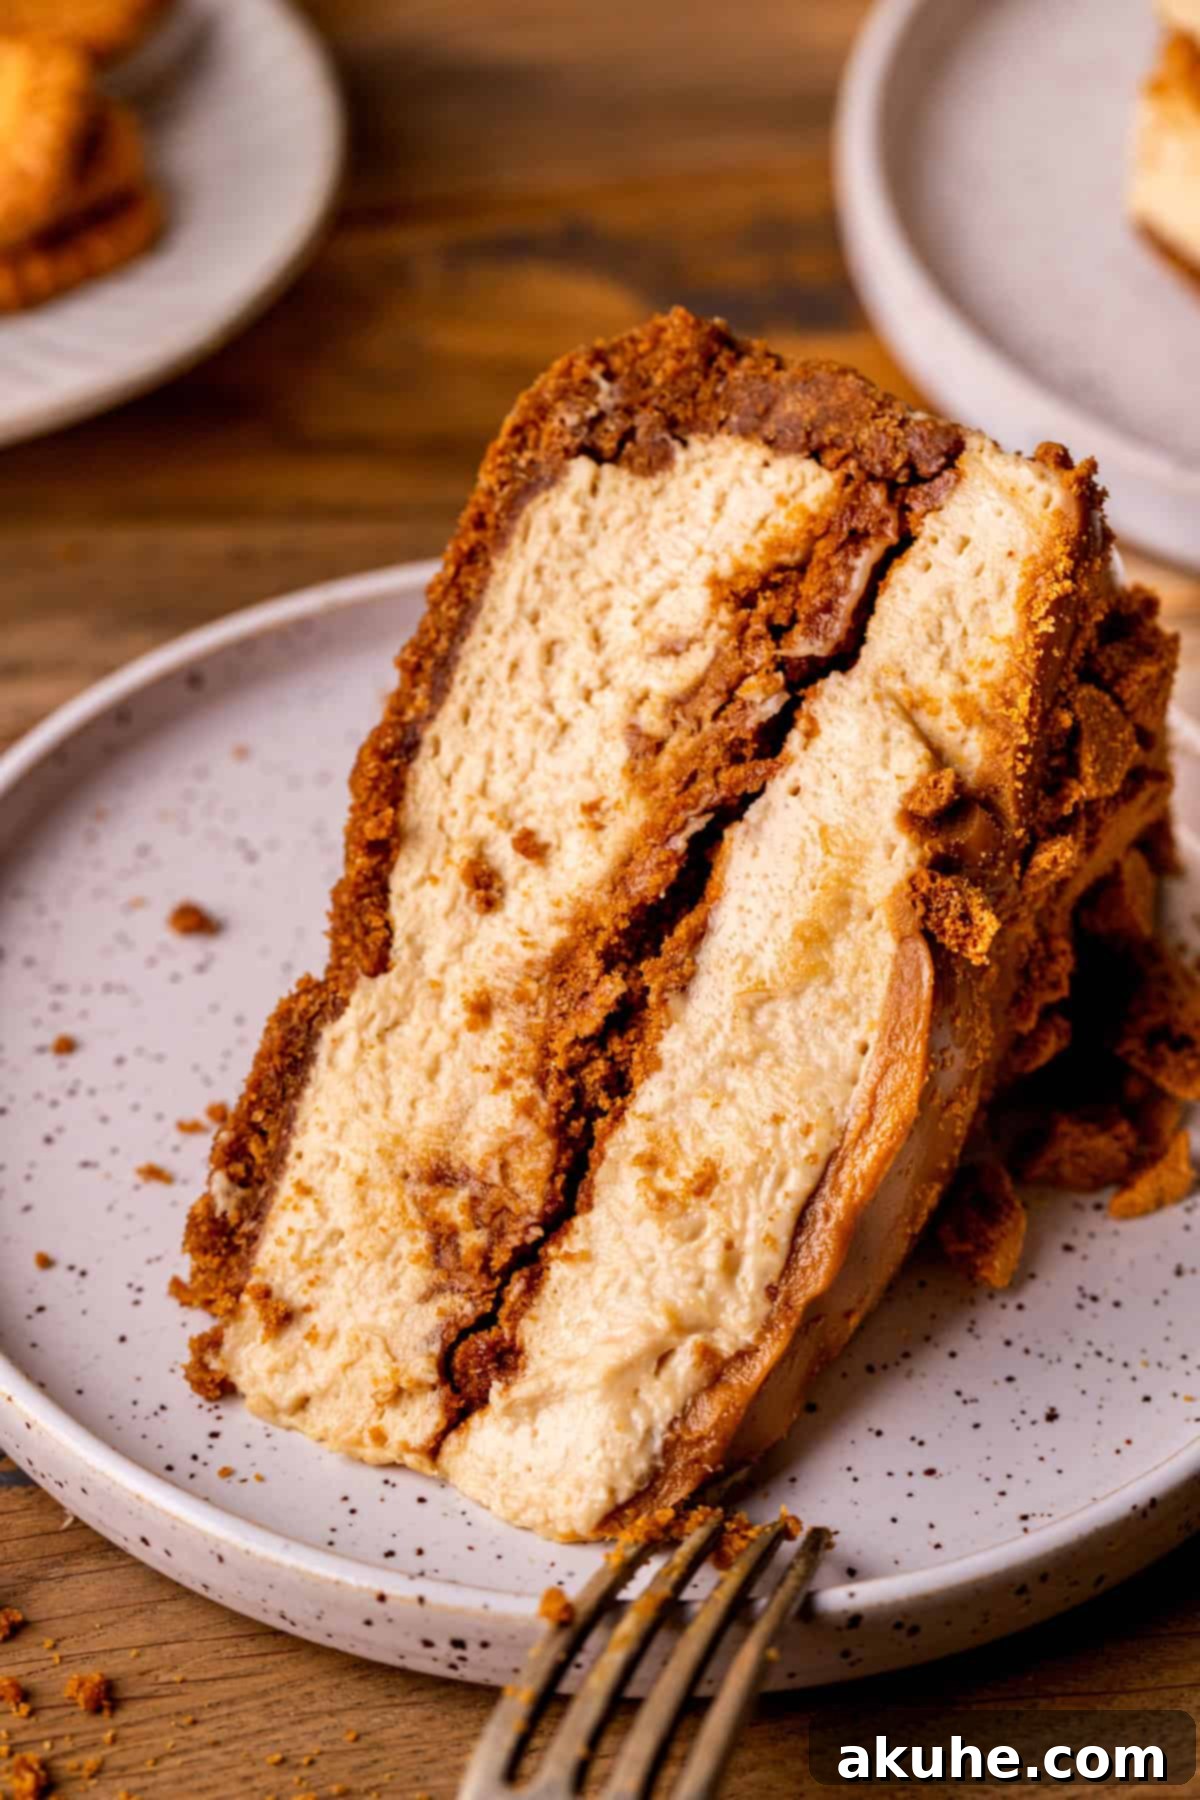
Are you searching for a show-stopping dessert that’s both easy to prepare and guarantees to impress? Look no further! This No-Bake Biscoff Cheesecake is the answer to your sweet cravings. It combines the irresistible caramelized flavor of Lotus Biscoff cookies and spread with the creamy texture of a classic cheesecake, all without the hassle of baking. Perfect for gatherings, holidays, or a special treat, this recipe promises a delightful experience from the first bite to the last. For more delightful cheesecake creations, be sure to explore our Banana Pudding Cheesecake, Chocolate Peanut Butter Cheesecake, and Carrot Cake Cheesecake.
Why This No-Bake Biscoff Cheesecake is a Must-Try
This recipe isn’t just another dessert; it’s a culinary experience designed for ease and maximum flavor. Here’s why this No-Bake Biscoff Cheesecake will become your new favorite:
- Irresistible Biscoff Cookie Crust: Forget bland crusts! Our Biscoff cookie crust forms the perfect foundation, infusing every slice with those iconic spiced caramel notes and a satisfying crunch. It’s the ideal counterpoint to the creamy filling.
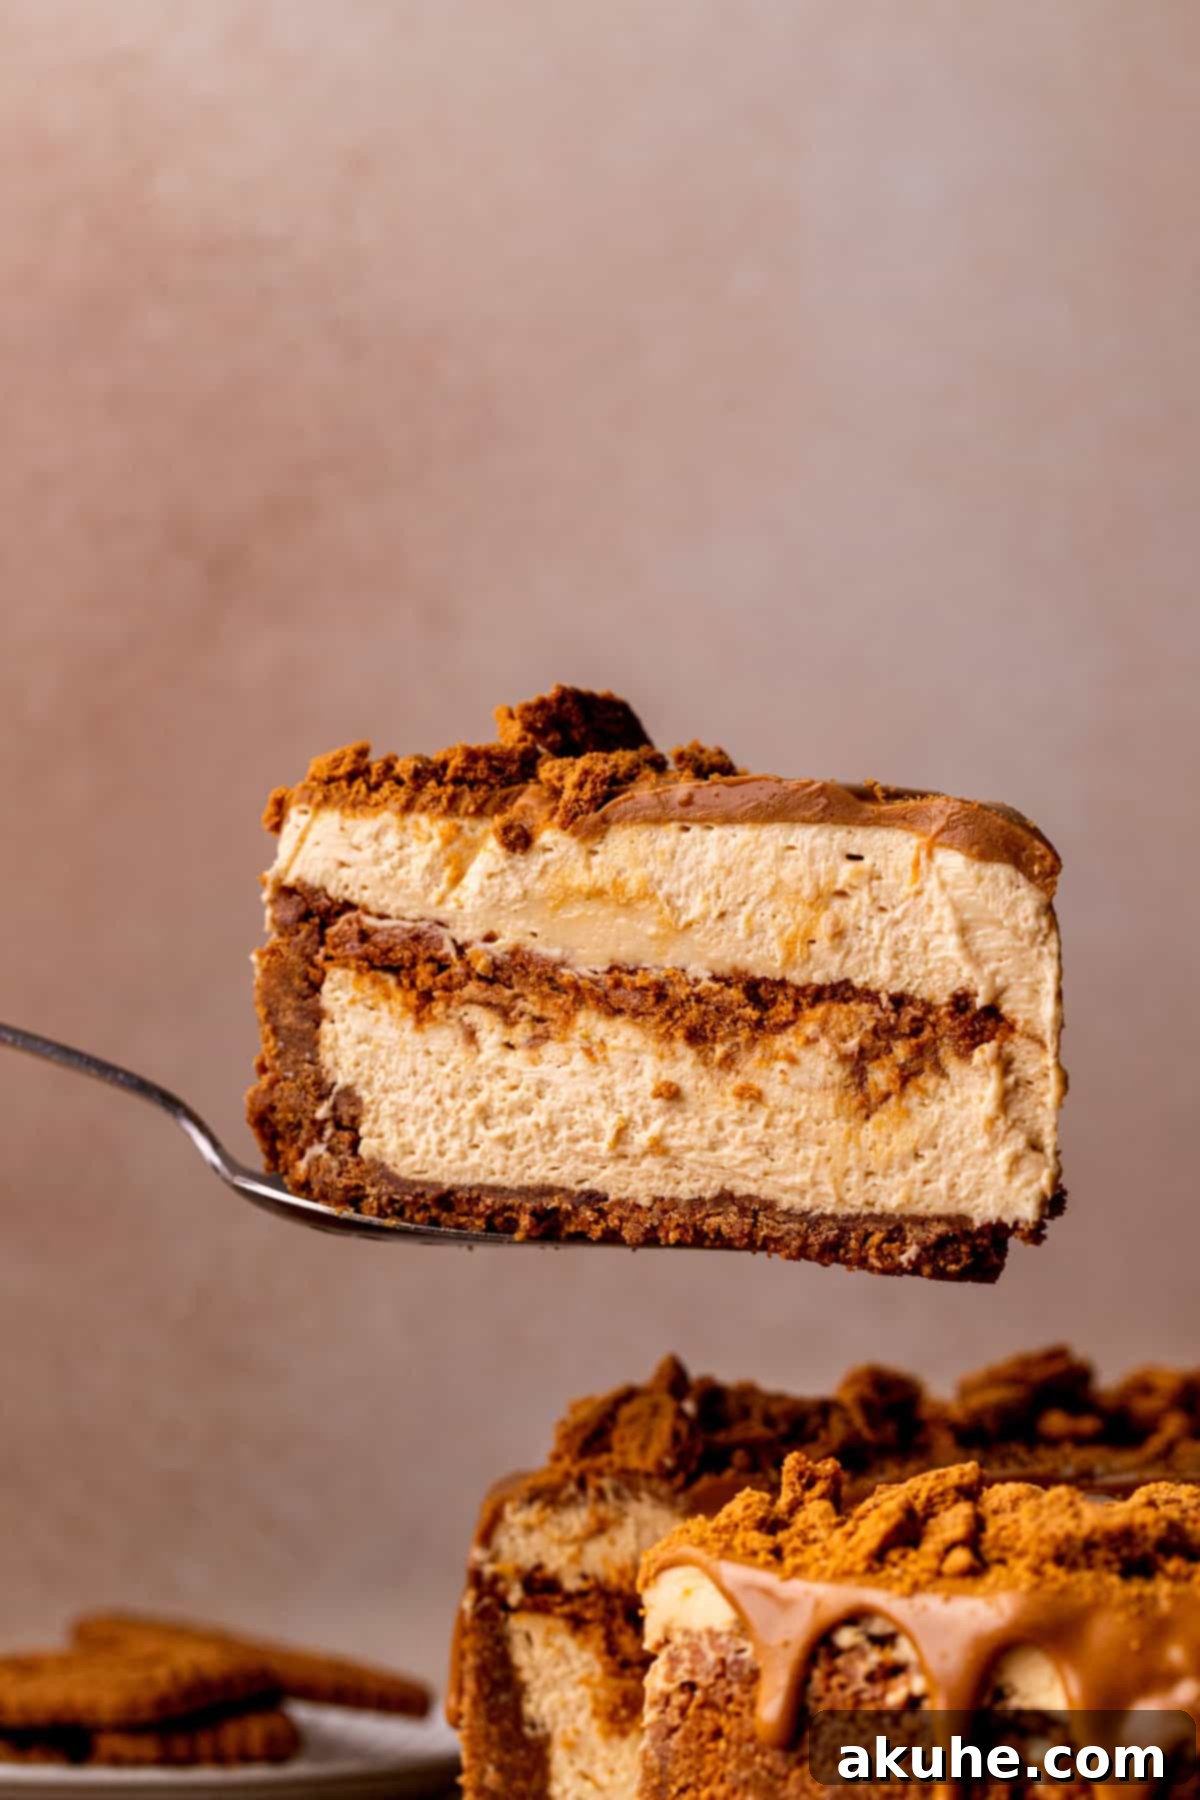
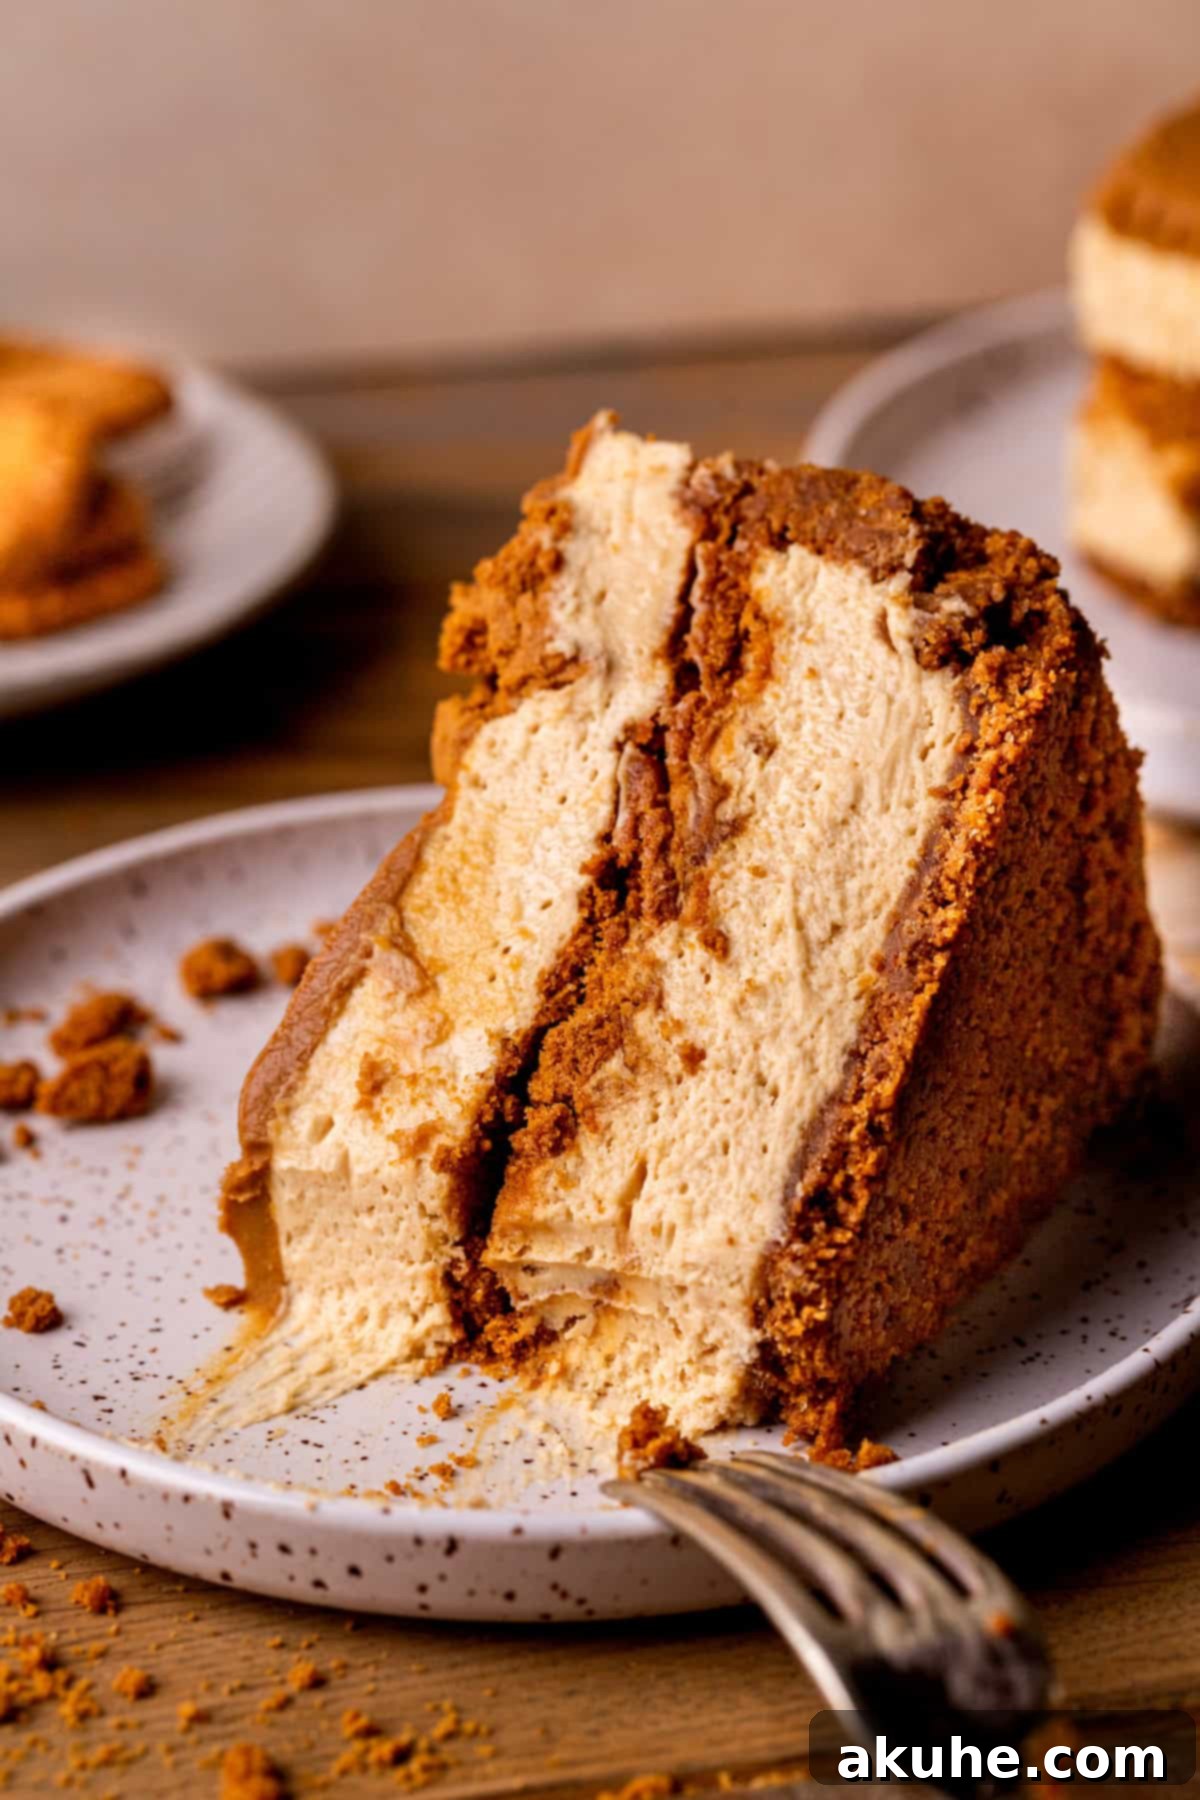
- Luxurious Cookie Butter Filling: The heart of this dessert is its incredibly creamy cheesecake filling, generously swirled with smooth Biscoff cookie butter. We take it a step further by incorporating crushed Biscoff cookies directly into the filling, adding a delightful textural surprise and an extra layer of flavor.
- Decadent Cookie Butter Topping: A luscious layer of melted cookie butter spread over the chilled cheesecake ensures that the rich, caramelized Biscoff flavor shines through in every single bite. It creates a smooth, glossy finish that is as appealing to the eye as it is to the palate.
- Effortless Preparation (No Baking Required!): The best part? No oven needed! This creamy, dreamy cheesecake simply requires a quick assembly in a springform pan, followed by a chilled rest in the refrigerator. It’s the ultimate stress-free dessert for any occasion, perfect for bakers of all skill levels.
Essential Ingredient Notes for Your Perfect No-Bake Biscoff Cheesecake
Achieving the perfect texture and flavor in your no-bake cheesecake starts with understanding your ingredients. While a full list is available in the recipe card below, here are some crucial notes to ensure success:
- Unsalted Butter: You’ll need melted unsalted butter for the cookie crust. It acts as the binding agent, holding the cookie crumbs together firmly. Using unsalted butter allows you to control the overall saltiness of your dessert. Don’t worry if it’s still warm after melting; it won’t affect the crust’s setting.
- Full-Fat Cream Cheese: This is a non-negotiable ingredient for a truly rich and stable cheesecake. Full-fat cream cheese provides the necessary structure and creamy texture that low-fat versions simply cannot replicate. Remember to pull it out of the fridge at least two hours before you start to ensure it reaches room temperature. This step is vital for a smooth, lump-free cheesecake batter that blends beautifully.
- Full-Fat Sour Cream: Similar to cream cheese, full-fat sour cream adds a wonderful tang that balances the sweetness of the cheesecake and contributes to its luxurious creaminess. Like the cream cheese, it should be at room temperature before mixing to ensure seamless incorporation and prevent a curdled appearance.
- Heavy Cream (or Heavy Whipping Cream): This is key for creating the light, airy texture of your no-bake cheesecake. It’s imperative that your heavy cream is very cold when you whip it. Cold cream whips up faster, holds its peaks better, and produces a more stable whipped cream, which is crucial for the cheesecake to set properly.
- Powdered Sugar (Confectioners’ Sugar): To ensure a silky-smooth cheesecake filling without any grainy texture, always sift your powdered sugar before adding it to the mixture. This removes any lumps and helps it dissolve uniformly.
- Biscoff Cookie Butter: The star of the show! We highly recommend using authentic Biscoff cookie butter for its distinctive caramelized flavor and consistent texture. While other brands exist, they may vary in taste and consistency, which could alter the final outcome of your cheesecake. For best results, stick with the original for that signature Biscoff delight.
Ingredient Substitutions & Considerations
While this recipe is crafted for optimal flavor and texture, here are some considerations regarding ingredient substitutions:
- Dairy-Free Alternatives: Unfortunately, this recipe relies heavily on dairy products like cream cheese, sour cream, and heavy cream for its structure and richness. Substituting all these components with dairy-free alternatives would significantly alter the consistency and may prevent the cheesecake from setting correctly. Therefore, we do not recommend this recipe for a dairy-free dessert.
- Gluten-Free Options: This recipe has not been tested with gluten-free alternatives for Biscoff cookies or cookie butter. Lotus Biscoff cookies contain wheat, making them unsuitable for a gluten-free diet. Finding a gluten-free Biscoff substitute that maintains the same iconic flavor and texture can be challenging. If you need a gluten-free dessert, it might be best to seek out a recipe specifically designed with gluten-free ingredients and verified results.
Step-By-Step Instructions – Crafting Your Biscoff Cookie Crust
The foundation of this exquisite no-bake cheesecake is its flavorful Biscoff cookie crust. Follow these simple steps to create a perfectly crisp and aromatic base:
STEP 1: Prepare Your Pan. Begin by lightly spraying a 9-inch springform pan with a nonstick baking spray. This crucial step helps with easy removal later. To further ensure a clean release, line the bottom of the pan with a circle of parchment paper, and then give it another quick spray. This double layer of protection is your secret to a flawless crust.
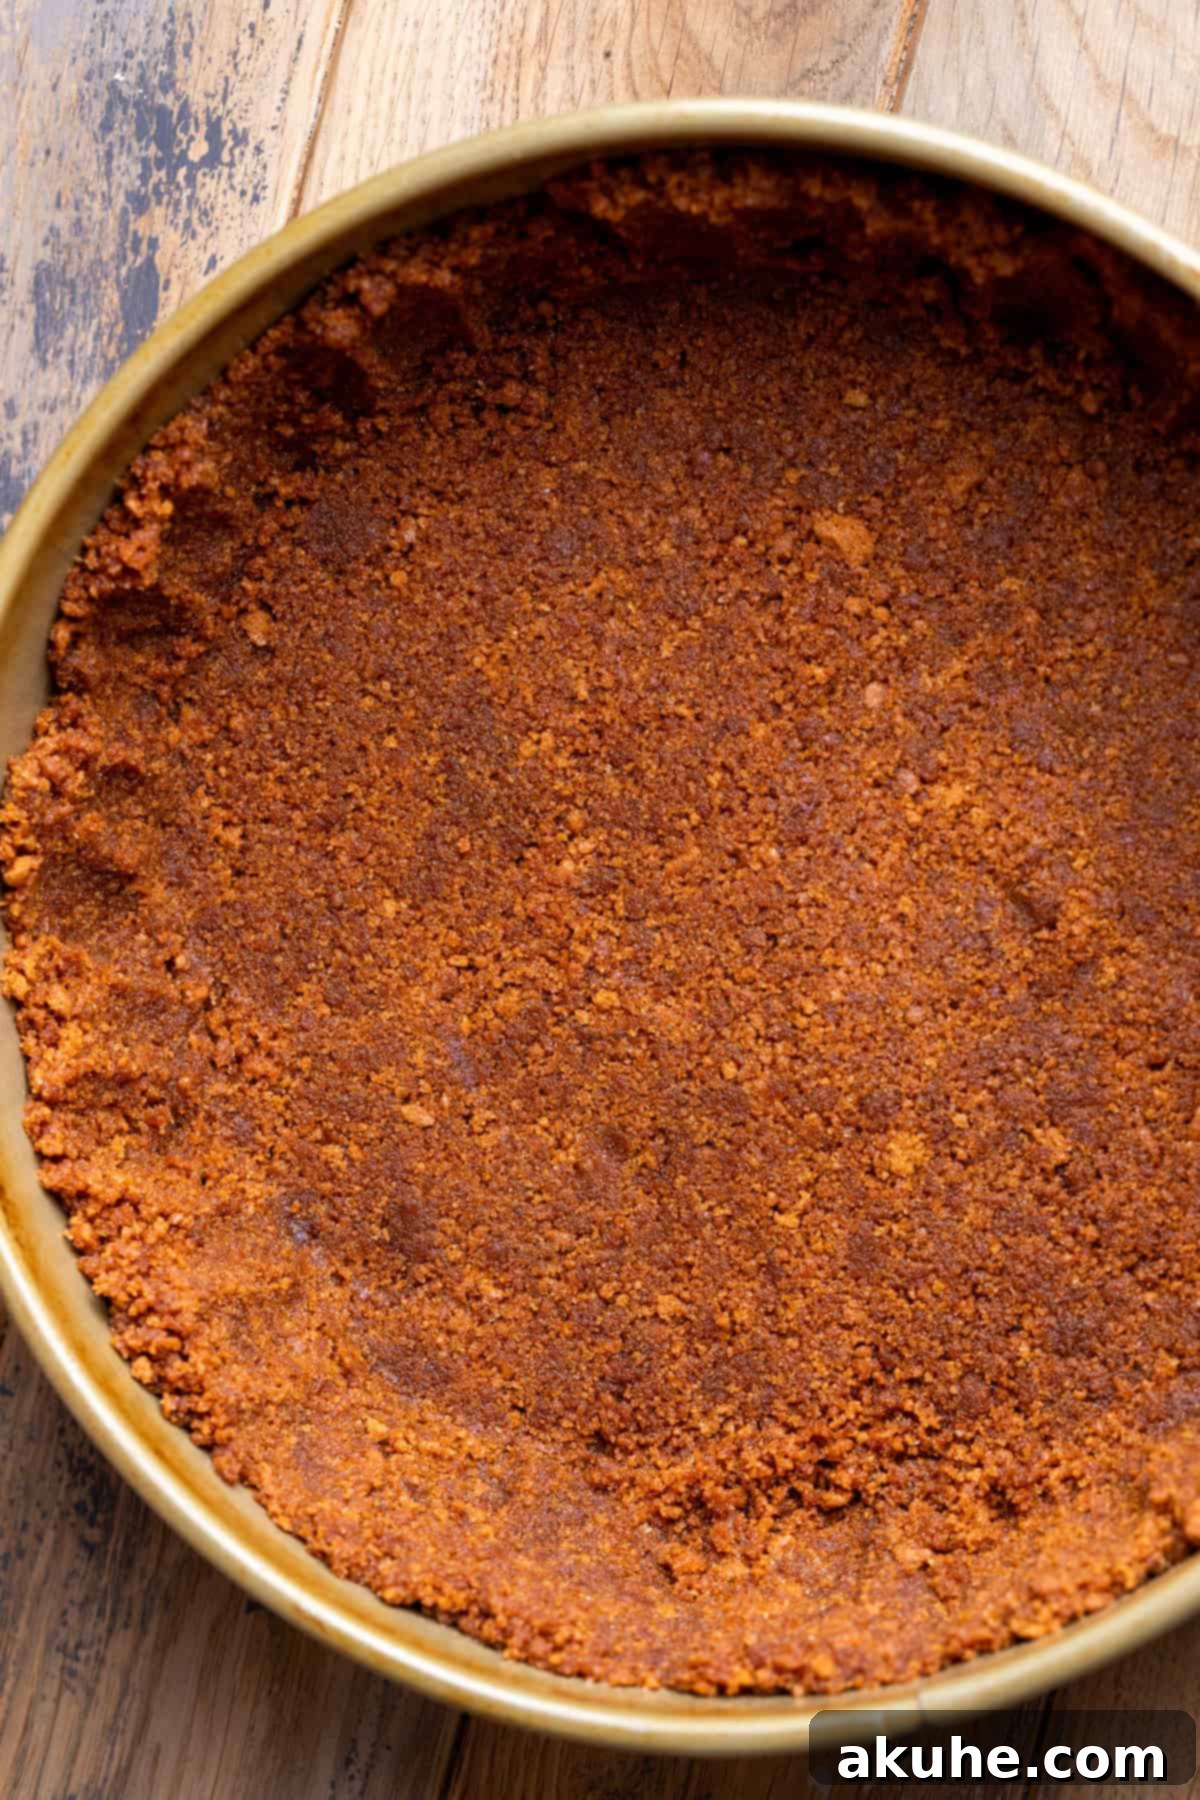
STEP 2: Create the Cookie Crumbs. In a food processor, add your Biscoff cookies and pulse until they are transformed into fine, uniform crumbs. The finer the crumbs, the more cohesive and sturdy your crust will be. Once you have your crumbs, add the packed brown sugar and melted unsalted butter. Process again until the mixture is thoroughly combined and resembles the texture of wet sand. This indicates that the butter has evenly coated the crumbs, preparing them to bind together.
STEP 3: Form the Crust. Pour the Biscoff crumb mixture into your prepared springform pan. Use your clean hands to evenly press the mixture over the bottom of the pan and halfway up the sides. For a truly compact and even bottom layer, use the flat bottom of a measuring cup or a glass to firmly press down the crumbs. This ensures a solid base that won’t crumble when sliced.
STEP 4: Chill to Set. Once the crust is perfectly formed, place the springform pan into the freezer. Allowing it to chill and set while you prepare the cheesecake batter is essential. This helps the butter solidify and firm up the crust, preventing it from becoming soggy when the filling is added.
Step-By-Step Instructions – Preparing Your Velvety Biscoff Cookie Butter Cheesecake Filling
Now, let’s create the star of the show: the rich and creamy Biscoff cookie butter cheesecake filling. An electric mixer is essential for achieving the right consistency for this no-bake delight. A stand mixer fitted with a whisk attachment is ideal, but a hand mixer will also work beautifully.
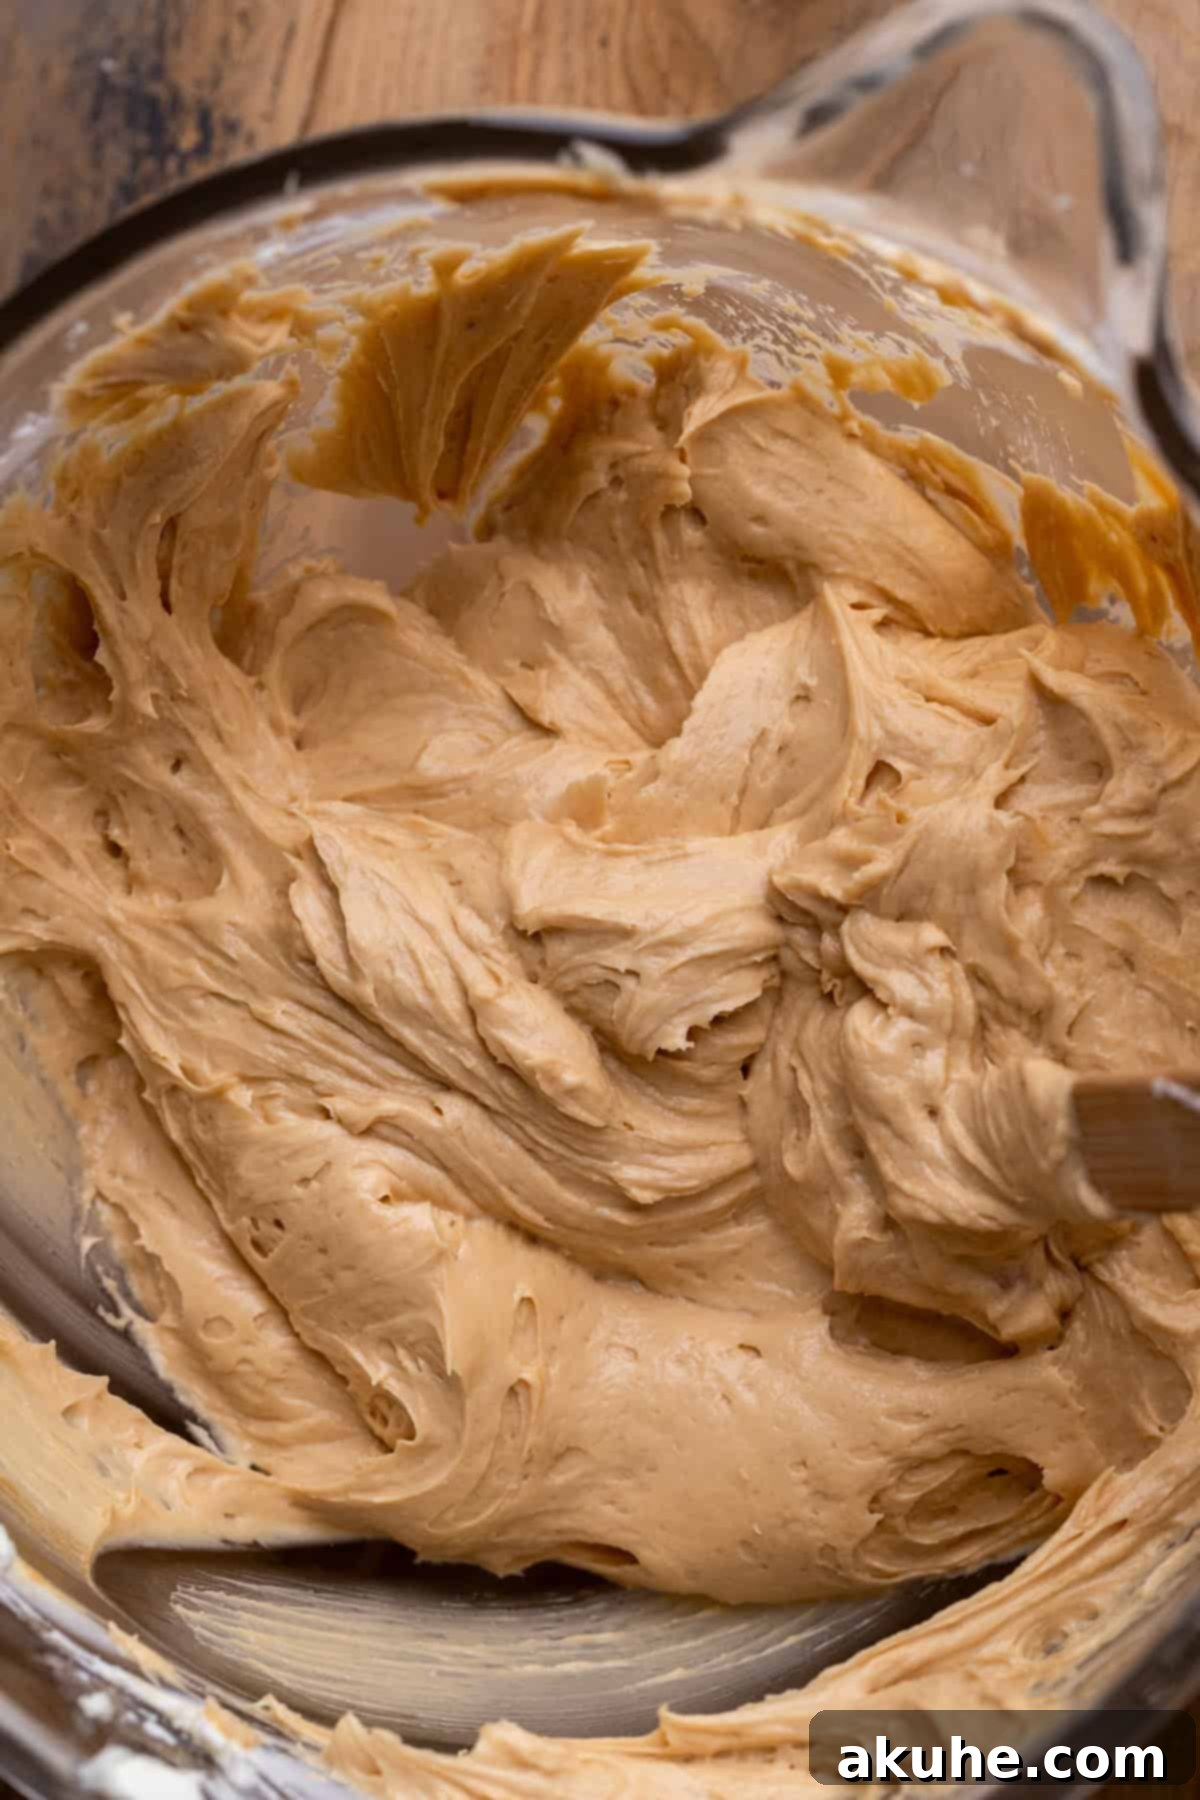
STEP 1: Cream the Cheese and Sugar. In a large mixing bowl, combine your room temperature cream cheese and white granulated sugar. Using your electric mixer, beat these ingredients on high speed for at least 2 minutes. This step is crucial for incorporating air and ensuring the mixture is light, fluffy, and completely lump-free. Don’t forget to stop and scrape down the sides of the bowl with a rubber spatula once or twice to ensure everything is thoroughly combined.
STEP 2: Infuse with Flavor. To the cream cheese mixture, add the room temperature sour cream, Biscoff cookie butter, and pure vanilla extract. Continue mixing on medium speed until all the ingredients are fully incorporated and the batter is smooth and uniform. Again, use your spatula to scrape down the sides of the bowl, ensuring no unmixed pockets remain.
STEP 3: Whip the Heavy Cream. In a separate, preferably chilled metal bowl (metal bowls help keep the cream colder), attach the whisk attachment to your mixer. Pour in the cold heavy cream and sifted powdered sugar. Beat on high speed until stiff peaks form. Stiff peaks mean that when you lift the whisk, the peaks of cream stand upright and hold their shape. Be careful not to overmix, as this can turn the cream grainy.
STEP 4: Gently Combine. This step requires a delicate touch. Pour the freshly whipped cream into the Biscoff cheesecake batter. Using a rubber spatula, gently fold the whipped cream into the batter. The key here is to be very gentle, using an under-and-over motion, to avoid deflating the air you’ve just incorporated into the whipped cream. This air is essential for the cheesecake’s light and airy, yet stable, texture. Continue folding until no streaks of white cream remain.
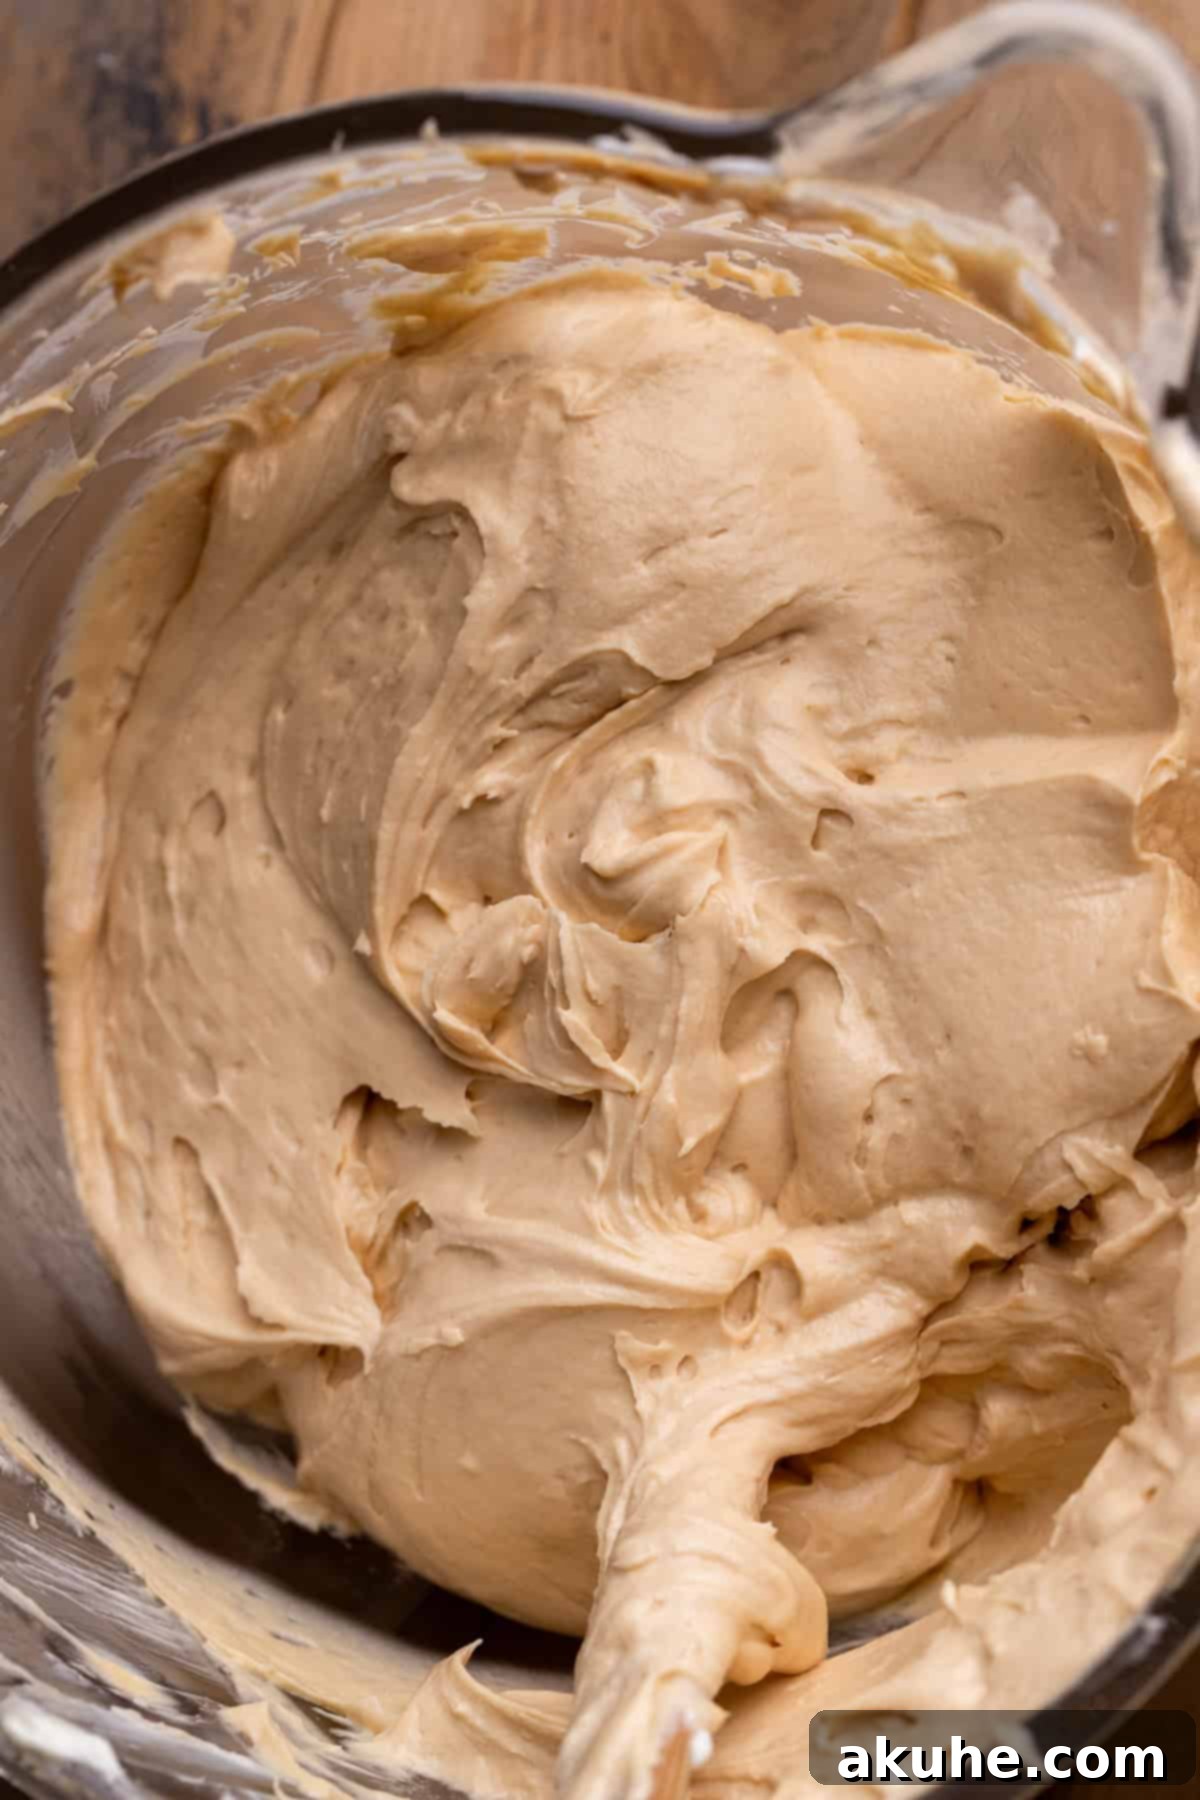
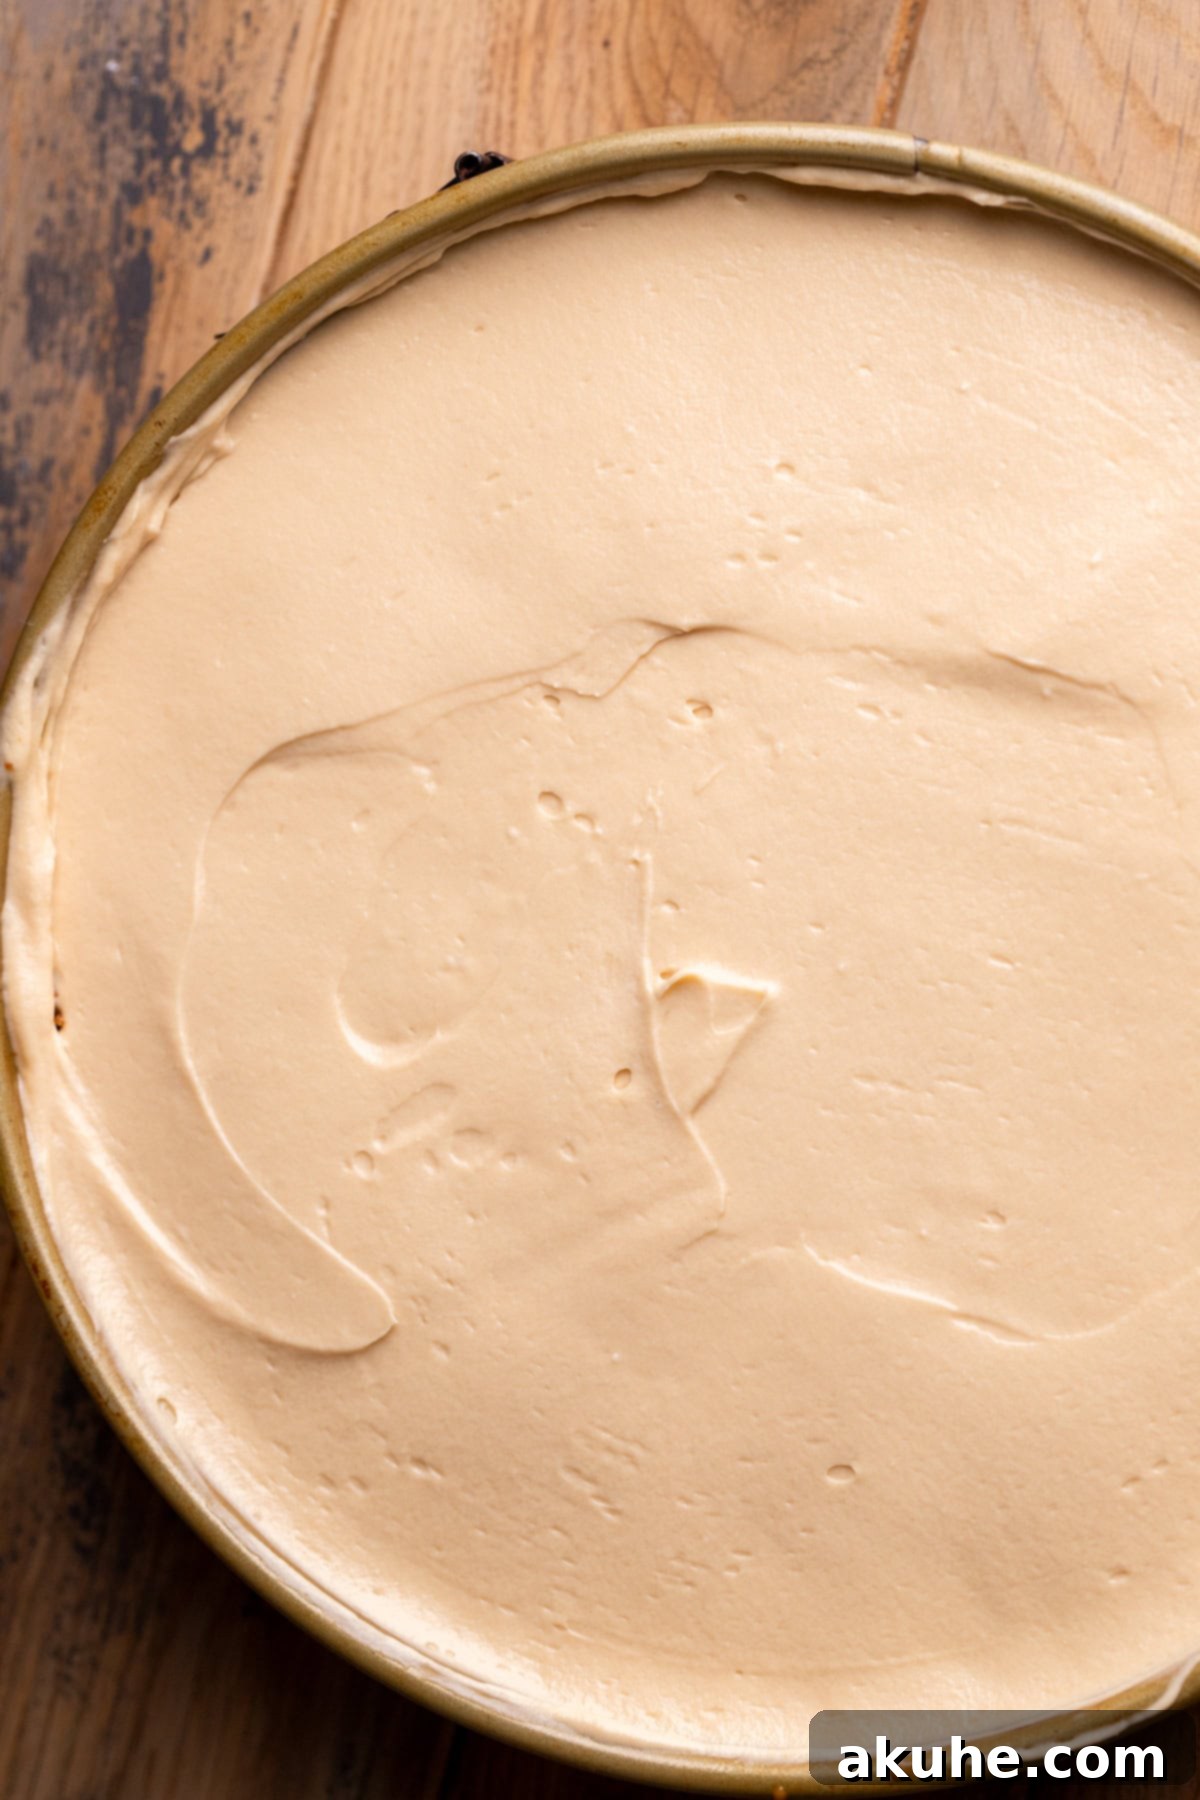
STEP 5: Assemble the Layers. Retrieve your chilled Biscoff cookie crust from the freezer. Pour exactly half of the cheesecake batter over the crust, spreading it gently and evenly with an offset spatula. Now for a delightful surprise layer: drizzle about 1/4 cup of melted Biscoff cookie butter over this first layer of batter, then generously sprinkle with 1 cup of Biscoff cookie crumbs. Finally, carefully pour the remaining half of the cheesecake batter over the cookie and cookie butter layer, spreading it smoothly to cover.
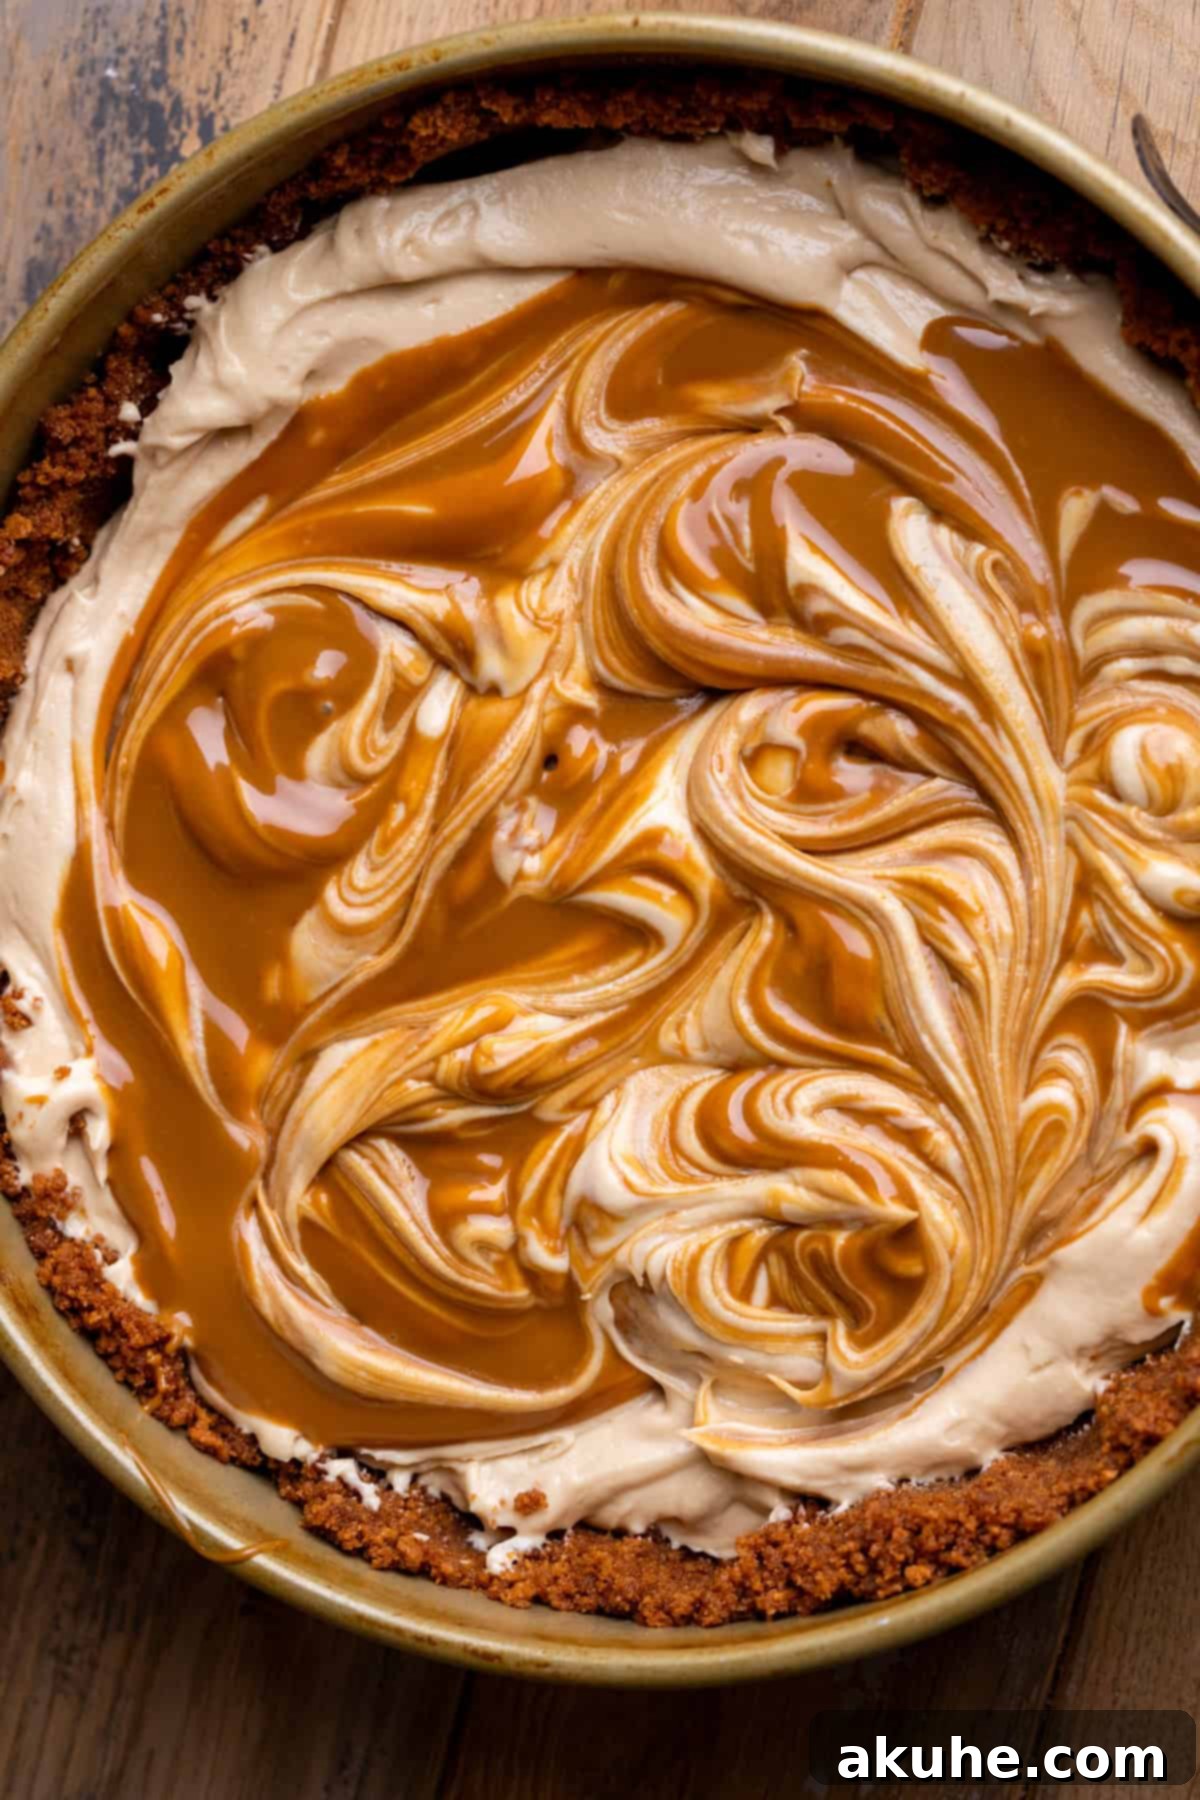
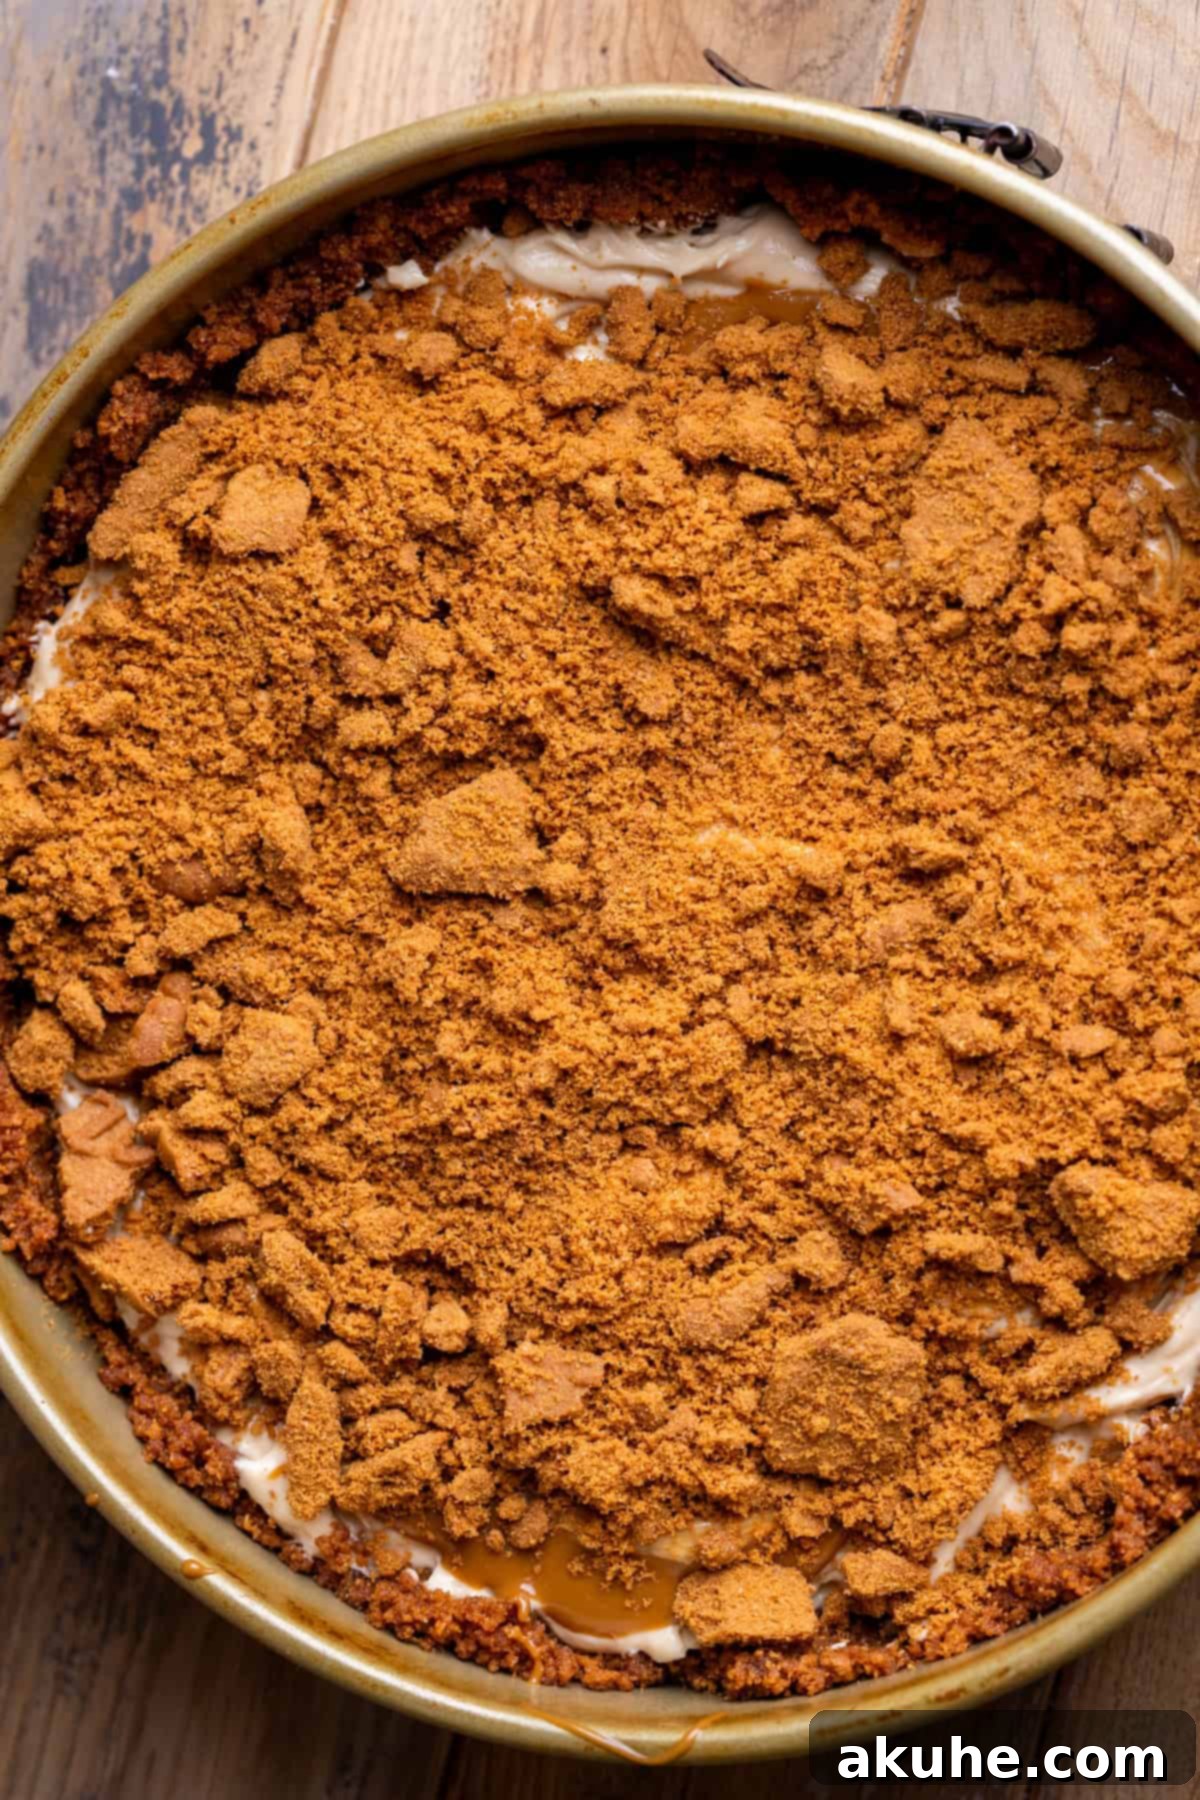
STEP 6: Chill for Perfection. Once assembled, cover the springform pan tightly with aluminum foil to protect the cheesecake. Place it in the refrigerator to chill for a minimum of 6 hours, or ideally, overnight. This extended chilling time is absolutely crucial for the cheesecake to firm up and set properly, allowing all the flavors to meld beautifully. Patience is key to a perfectly sliceable and decadent dessert!
Step-By-Step Instructions – The Decadent Cookie Butter Topping
The final touch to your magnificent No-Bake Biscoff Cheesecake is a generous layer of luscious cookie butter topping and a sprinkle of extra cookie crumbs. This step not only adds visual appeal but intensifies the Biscoff experience.
STEP 1: Melt the Cookie Butter. Measure out the Biscoff cookie butter for your topping and place it in a microwave-safe bowl. Microwave it for about 30 seconds on high power. Stir it with a spoon until it’s smooth, pourable, and free of any lumps. If it’s not quite fluid enough, microwave in additional 10-second intervals, stirring after each, until it reaches the desired consistency.
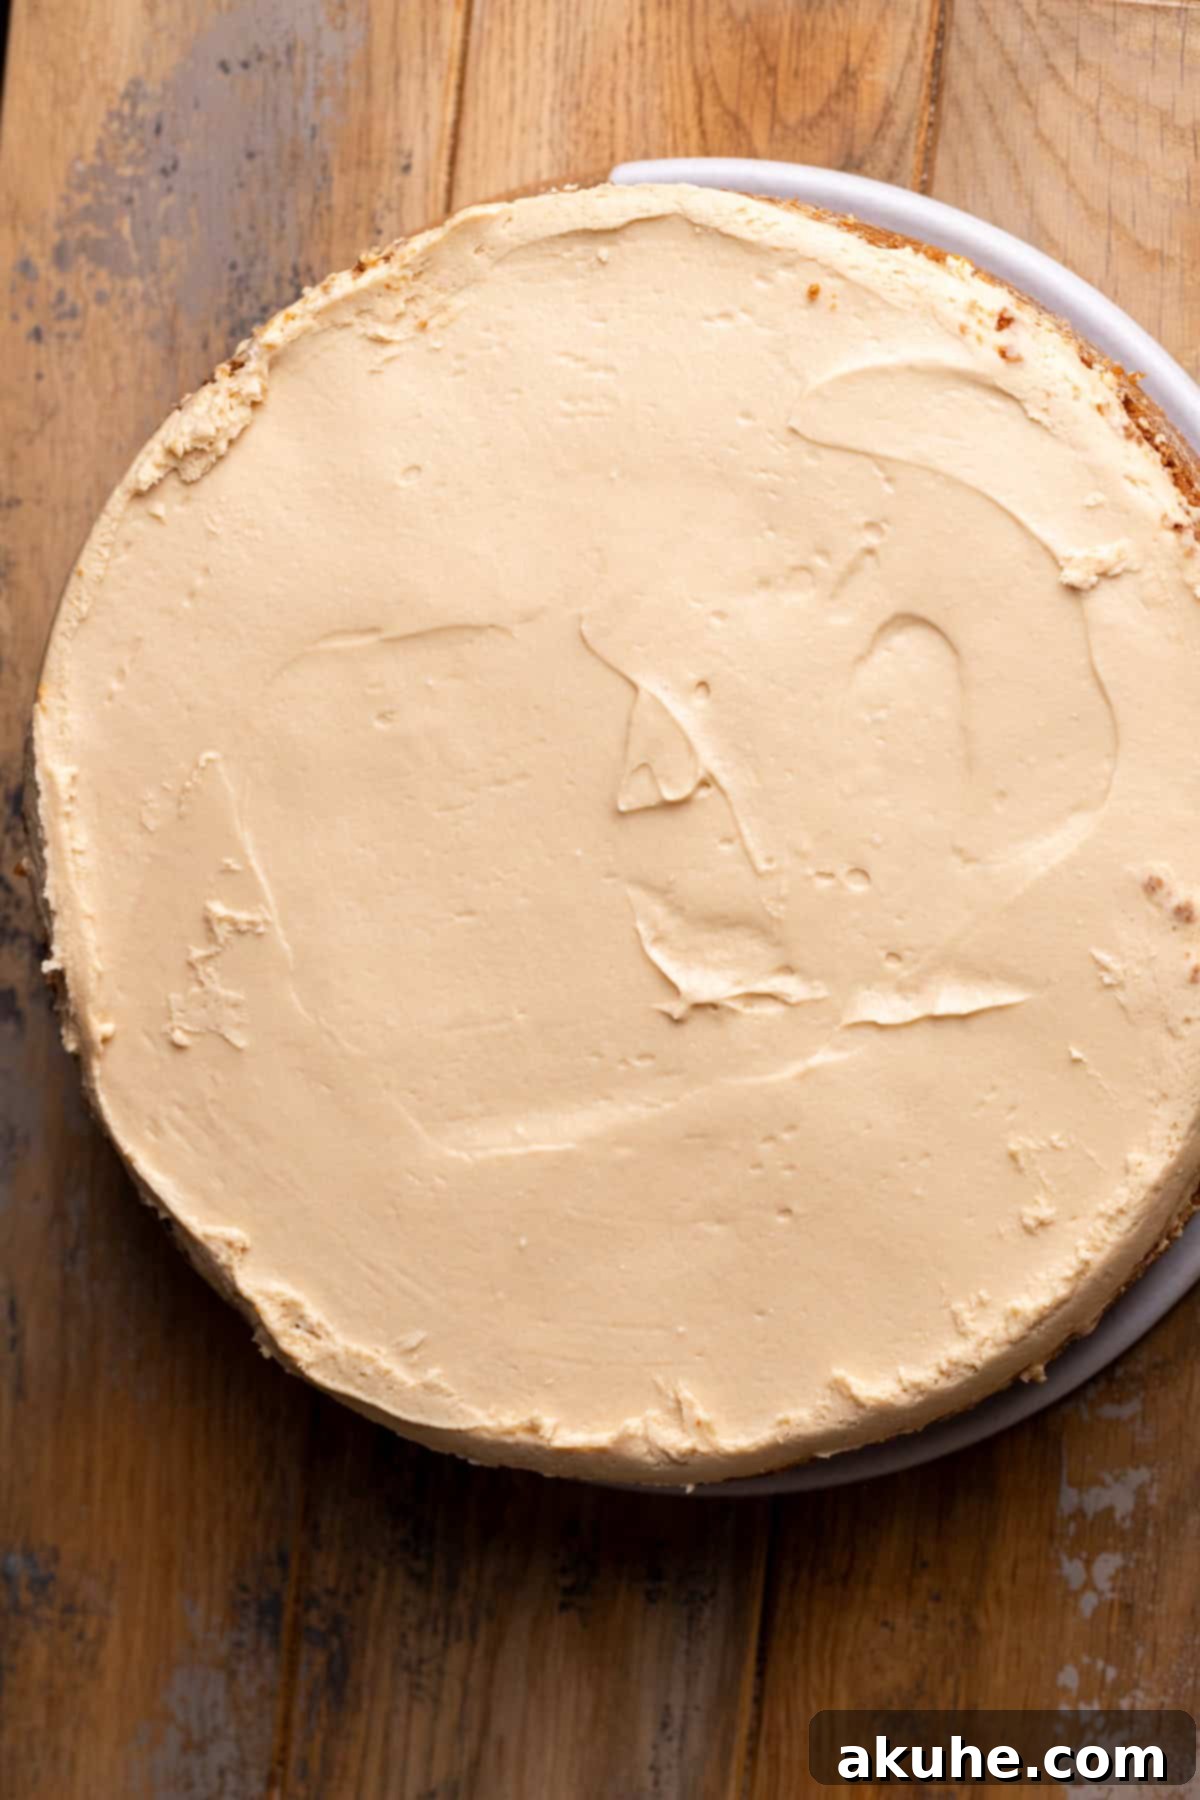
STEP 2: Prepare the Cheesecake for Decorating. Once your cheesecake has thoroughly chilled and set (at least 6 hours or overnight), carefully remove it from the refrigerator. Unlatch and remove the sides of the springform pan. Gently slide an offset spatula or thin knife between the crust and the pan base to loosen, then carefully remove the parchment paper circle from the bottom. Transfer the cheesecake to your desired serving platter or cake stand.
STEP 3: Decorate Your Masterpiece. Pour the melted Biscoff cookie butter evenly over the top of the chilled cheesecake. Using an offset spatula, gently spread the cookie butter all the way to the edges, creating a smooth and glossy layer. While the topping is still soft, generously decorate it with additional crushed Biscoff cookie crumbs. You can create a uniform layer or design a pattern as desired. The crumbs will adhere to the melted cookie butter, adding texture and visual interest. Your Biscoff cheesecake is now ready to be admired and devoured!
Pro Tips for Cheesecake Perfection
Achieving a flawless no-bake Biscoff cheesecake is simpler than you think with these expert tips:
- Effortless Pan Release: For the easiest removal of your cheesecake from the pan, always start by spraying your springform pan with a nonstick baking spray. Then, line the bottom of the pan with a 9-inch parchment paper circle and spray it again. This double protection ensures your cheesecake slides right out of the pan without sticking or tearing, giving you a beautifully intact dessert.
- The Art of Gentle Folding: When combining the whipped cream with the cheesecake batter, extreme care is paramount. This is arguably the most critical step for the cheesecake’s final texture. If you’re too rough or overmix, you’ll knock all the precious air out of the whipped cream. This air is what gives the no-bake cheesecake its light, stable structure. Without it, your cheesecake mixture will be too loose and will not set properly in the fridge, resulting in a runny, disappointing dessert. Fold gently and patiently until just combined.
- Patience is a Virtue (and Key to Setting!): No-bake cheesecakes rely on extended chilling time to set their creamy filling. Resist the urge to cut into it early! This cheesecake truly needs a long chill, ideally overnight, or a minimum of 6 hours. This allows the ingredients to firm up, resulting in a perfectly sliceable cheesecake with a stable texture.
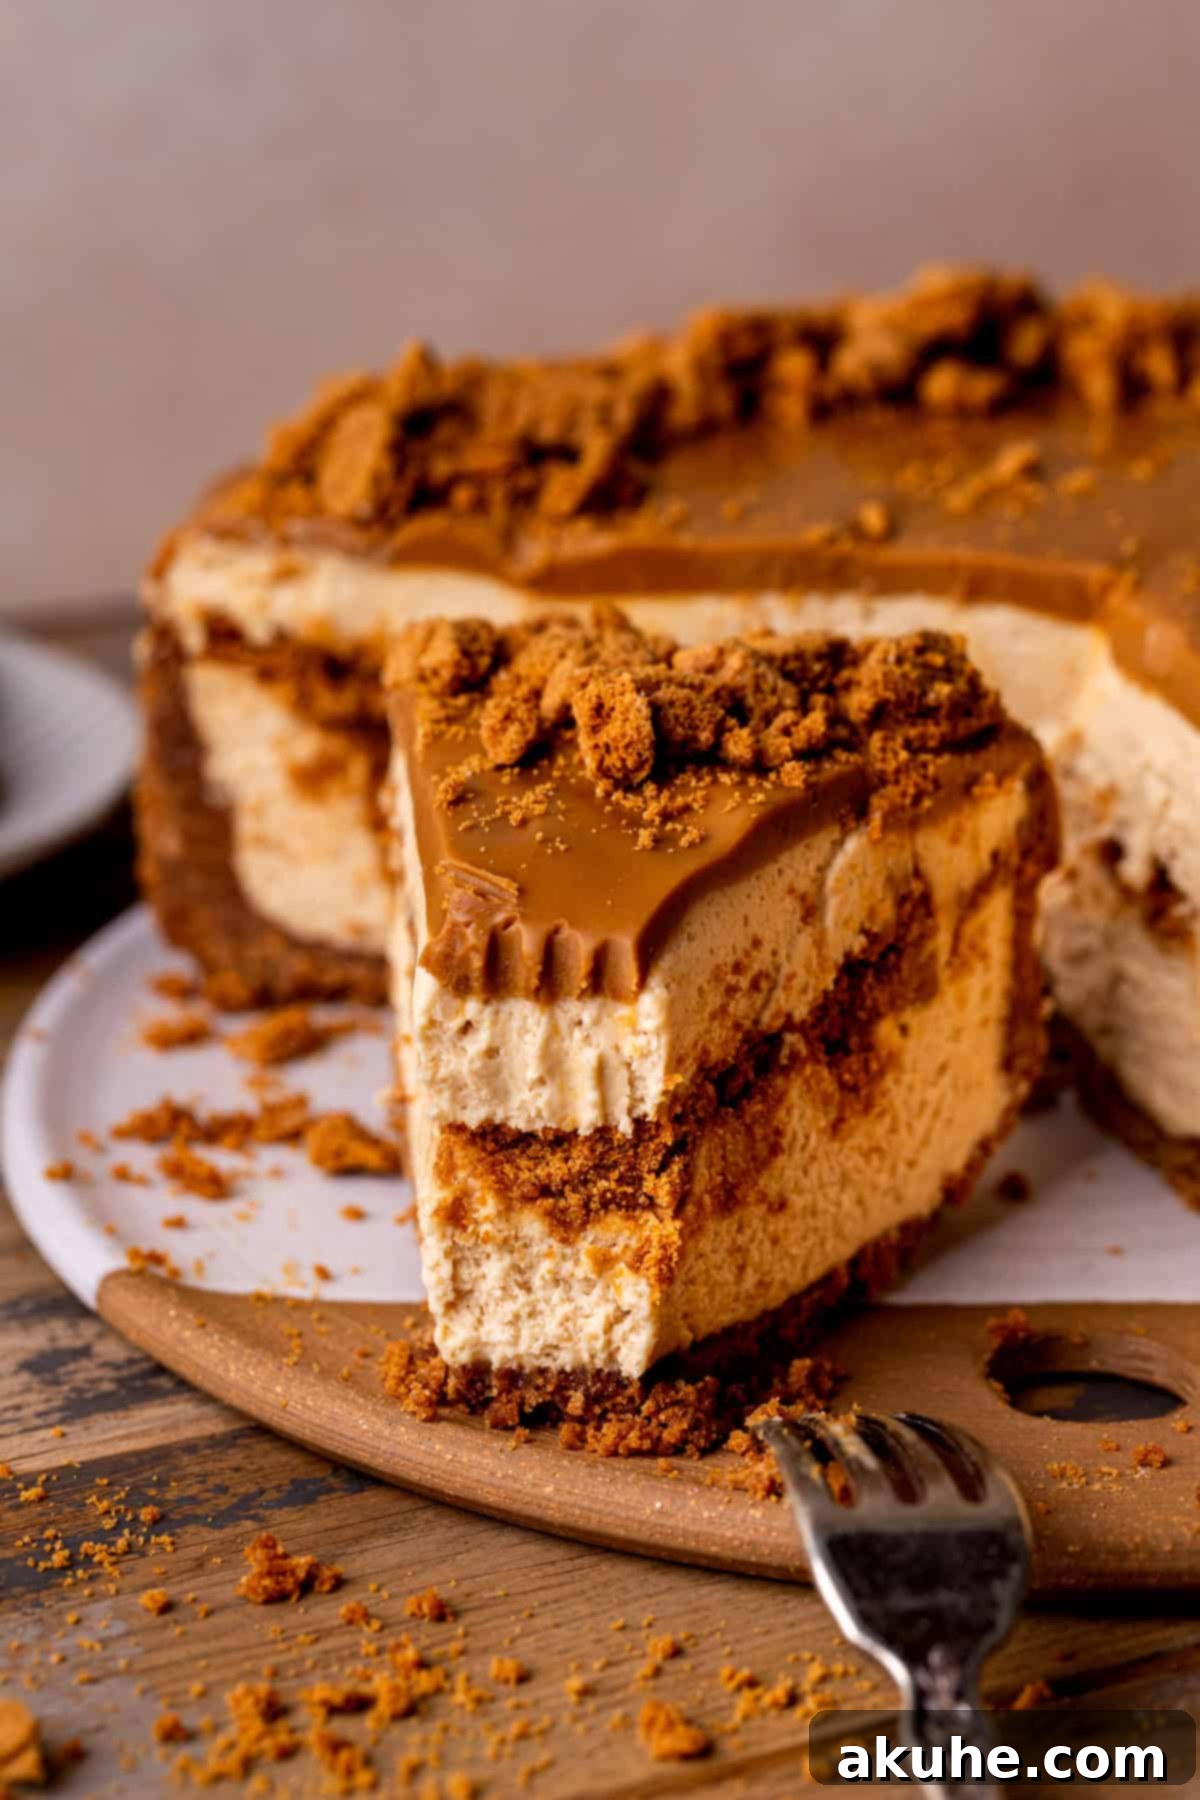
- Achieving Pristine Slices: To get those clean, bakery-worthy slices, use a sharp, thin knife. After each cut, rinse the knife under hot water and wipe it clean with a paper towel. The warmth of the blade helps it glide through the cheesecake smoothly, preventing it from sticking and creating messy cuts. Repeat this process for every slice for a professional finish.
Frequently Asked Questions (FAQ)
There are typically two main reasons why a no-bake cheesecake fails to set. Firstly, you might have overmixed the whipped cream into the cream cheese mixture. Whipped cream provides the airy structure, and if you deflate it by mixing too vigorously, the cheesecake won’t have the necessary stability. Secondly, insufficient chilling time is a common culprit. This cheesecake requires a minimum of 6 hours, but ideally, it should chill overnight (12+ hours) in the refrigerator to become firm and sliceable. Patience is truly key for achieving the perfect set.
Absolutely! This recipe is wonderfully adaptable for mini cheesecakes. To do so, you can divide the recipe into thirds to make approximately 12 individual mini cheesecakes. Line a standard muffin pan with paper liners. For the crust, you’ll press a tablespoon or two of the cookie mixture into the bottom of each liner. Then, fill each with the cheesecake batter. The chilling time for mini cheesecakes might be slightly shorter, around 3-4 hours, but chilling overnight is still recommended for the best results.
Yes, with a few adjustments! If you desire a much thicker cheesecake, you can use an 8-inch springform pan instead of a 9-inch. This will result in a taller, more substantial dessert, but the chilling time may need to be slightly extended to ensure it sets all the way through. Alternatively, for convenient cheesecake bars, you can divide the recipe in half and use an 8×8-inch square pan. Line the square pan with parchment paper, leaving an overhang on the sides to easily lift the bars out once set. The chilling time remains similar.
Yes, you can certainly prepare parts of the cheesecake in advance to streamline your process. The Biscoff cookie crust can be made up to 2-3 days ahead of time and stored tightly covered in the refrigerator or even frozen. You can also crush extra Biscoff cookies for the filling and topping a few days prior. However, the cheesecake filling itself is best assembled and chilled immediately after mixing the wet ingredients, as the whipped cream provides its structure and is freshest when incorporated right before chilling.
Recipe Variations to Explore
While this No-Bake Biscoff Cheesecake is spectacular on its own, don’t hesitate to experiment with these variations to customize it to your liking:
- Time-Saving Store-Bought Crust: If you’re short on time or prefer a simpler approach, you can absolutely skip the homemade crust section and opt for a pre-made graham cracker or cookie crust available at most grocery stores. Just ensure it’s a 9-inch crust to fit the recipe, and consider adding a thin layer of melted Biscoff cookie butter to the bottom of the store-bought crust for an extra flavor boost.
- Simplified Filling (No Middle Layer): While the layer of melted cookie butter and crumbled cookies in the middle adds a wonderful textural and flavor dimension, it’s not strictly necessary. If you want to save a bit of time or effort, you can omit this middle filling layer and simply pour all the cheesecake batter directly over the crust. The cheesecake will still be incredibly delicious, just with a more uniform texture.
- Chocolate Biscoff Fusion: For chocolate lovers, consider folding 1/2 cup of mini chocolate chips into the cheesecake batter before pouring it into the crust. You could also drizzle melted milk or dark chocolate over the finished cheesecake topping for a delicious chocolate-Biscoff combination.
- Caramel Drizzle Enhancement: Elevate the dessert with an extra drizzle of homemade or store-bought caramel sauce over the Biscoff cookie butter topping. The rich caramel notes pair perfectly with the spiced cookies.
- Nutty Crunch Addition: For an added layer of crunch and flavor, sprinkle some finely chopped toasted pecans or walnuts over the middle cookie layer or on top of the finished cheesecake.
Special Tools for Success
While this recipe is straightforward, having the right tools can make the process even smoother and ensure a professional-looking finish:
- Springform Pan: A high-quality 9-inch springform pan is essential for cheesecakes. Its removable sides allow for easy release of the delicate dessert without damaging its structure. If you prefer a taller, more dramatic cheesecake, an 8-inch springform pan can be used, though it will result in a thicker cheesecake requiring a slightly longer chilling time.
- Parchment Paper Circles: Using pre-cut 8-inch parchment paper circles for the bottom of your pan is a game-changer. It eliminates the need to meticulously cut circles from a roll of parchment paper, saving you time and ensuring a perfect fit, which greatly aids in cleanly releasing the cheesecake from the base.
- Nonstick Baking Spray: A reliable nonstick spray (especially one with flour) is crucial for greasing your springform pan. It creates a barrier that prevents the crust from sticking, making the unmolding process effortless and ensuring your cheesecake maintains its beautiful shape.
- Offset Spatula: An offset spatula is an incredibly versatile tool that is perfect for spreading the cheesecake filling evenly in the pan and for smoothly applying the cookie butter topping. Its angled blade allows for precise spreading without dipping your hand into the mixture.
Storing and Freezing Your No-Bake Biscoff Cheesecake
To enjoy your delicious no-bake Biscoff cheesecake for as long as possible, proper storage is key:
Refrigeration: Store the no-bake Biscoff cheesecake in an airtight container, such as a cake carrier or a large container with a tight-fitting lid. This will protect it from drying out and absorbing other refrigerator odors. When stored correctly, the cheesecake will remain fresh and delicious for up to 5 days in the fridge.
Freezing Individual Slices: To freeze individual portions, first cut the cheesecake into desired slices. Tightly wrap each slice individually in plastic wrap, ensuring no air is exposed to prevent freezer burn. Then, place the wrapped slices into a freezer-safe bag or container. They can be frozen for up to 30 days. To enjoy, simply remove a slice from the freezer and let it thaw at room temperature for 1-2 hours, or in the refrigerator overnight.
Freezing the Whole Cheesecake (Undecorated): You can also freeze the entire cheesecake before you apply the final cookie butter topping. First, ensure the cheesecake has been thoroughly chilled overnight in the refrigerator to fully set. Once firm, wrap the entire cheesecake (still on its base, or transferred to a freezer-safe cardboard round) tightly with multiple layers of plastic wrap, followed by a layer of aluminum foil to provide maximum protection against freezer burn. It can be frozen for up to 30 days. When you’re ready to serve, transfer the frozen cheesecake to the refrigerator and let it thaw for approximately 24 hours before unwrapping and decorating with the melted cookie butter and crushed cookies.
Other No-Bake Cheesecake Recipes To Try
Discover More Biscoff Delights!
- Biscoff Cupcakes
- Ultimate Biscoff Cheesecake
- Biscoff Butter Cookies
- Lotus Biscoff Cake
- Biscoff Brownies
We hope you loved this recipe! If you tried it, please consider leaving a STAR REVIEW below. We’d also love to see your creations on Instagram – tag us @stephaniesweettreats. For more baking inspiration and delicious ideas, be sure to follow us on Pinterest.
5 out of 5 stars based on 4 reviews
No Bake Biscoff Cheesecake
Print Recipe
Pin Recipe
Leave a Review
Ingredients
Biscoff Cookie Crust
- 3 cups Biscoff cookie crumbs
- 2 TBSP Brown sugar, packed light or dark
- 10 TBSP Unsalted butter, melted
Biscoff Cookie Butter Cheesecake
- 24 oz Cream cheese, room temperature
- 3/4 cup White granulated sugar
- 1/2 cup Sour cream, room temperature
- 1 cup Biscoff cookie butter
- 1 tsp Pure vanilla extract
- 1 1/4 cup Heavy cream
- 1/2 cup Powdered sugar
- 1/4 cup Biscoff cookie butter, melted for center
- 1 cup Biscoff cookie crumbs, for center
Biscoff Cookie Butter Topping
- 3/4 cup Biscoff cookie butter, melted
- 1/2 cup Crushed Biscoff cookies, for decorating
Instructions
Biscoff Cookie Crust
- Spray a 9-inch springform pan with baking nonstick spray. Line the bottom with a parchment paper circle and spray again.
- Using a food processor, blend the cookies into fine crumbs. Add in the brown sugar and melted butter and mix. It should have the texture of wet sand.3 cups Biscoff cookie crumbs, 2 TBSP Brown sugar, 10 TBSP Unsalted butter
- Pour the crumbs into the pan. Use your hands to press the crust halfway up the sides of the pan. Use the bottom of a measuring cup to compact the crust down firmly.
- Place in the freezer to set while you prepare the cheesecake batter.
Biscoff Cookie Butter Cheesecake
- Using an electric mixer, beat the room temperature cream cheese and granulated sugar on high speed for 2 minutes. Scrape the bowl using a rubber spatula to ensure thorough mixing.24 oz Cream cheese, 3/4 cup White granulated sugar
- Add in the room temperature sour cream, Biscoff cookie butter, and vanilla extract. Mix on medium speed until thoroughly combined and smooth. Remember to scrape the bowl again.1/2 cup Sour cream, 1 cup Biscoff cookie butter, 1 tsp Pure vanilla extract
- In a separate, chilled metal bowl with a whisk attachment, beat the cold heavy cream and sifted powdered sugar on high speed until stiff peaks form.1 1/4 cup Heavy cream, 1/2 cup Powdered sugar
- Pour the whipped cream into the cheesecake batter. Use a rubber spatula to gently fold the whipped cream into the batter. Be very gentle to avoid deflating the air from the whipped cream.
- Pour half of the cheesecake batter into the chilled pan. Drizzle the 1/4 cup of melted cookie butter on top of this layer of batter. Top with the 1 cup of cookie crumbs. Then, gently top with the rest of the cheesecake batter, spreading smoothly.1/4 cup Biscoff cookie butter, 1 cup Biscoff cookie crumbs
- Cover the pan with aluminum foil and place in the fridge for at least 6 hours or, ideally, overnight to set completely.
Cookie Butter Topping
- Melt the 3/4 cup of Biscoff cookie butter in a microwave-safe bowl in the microwave for 30 seconds. Stir with a spoon until smooth and pourable.3/4 cup Biscoff cookie butter
- Once the cheesecake is fully set, take it out of the fridge and carefully remove it from the springform pan, discarding the parchment paper circle. Pour the melted cookie butter on top of the cheesecake. Spread it evenly with an offset spatula. Decorate with the 1/2 cup of crushed Biscoff cookies.1/2 cup Crushed Biscoff cookies
