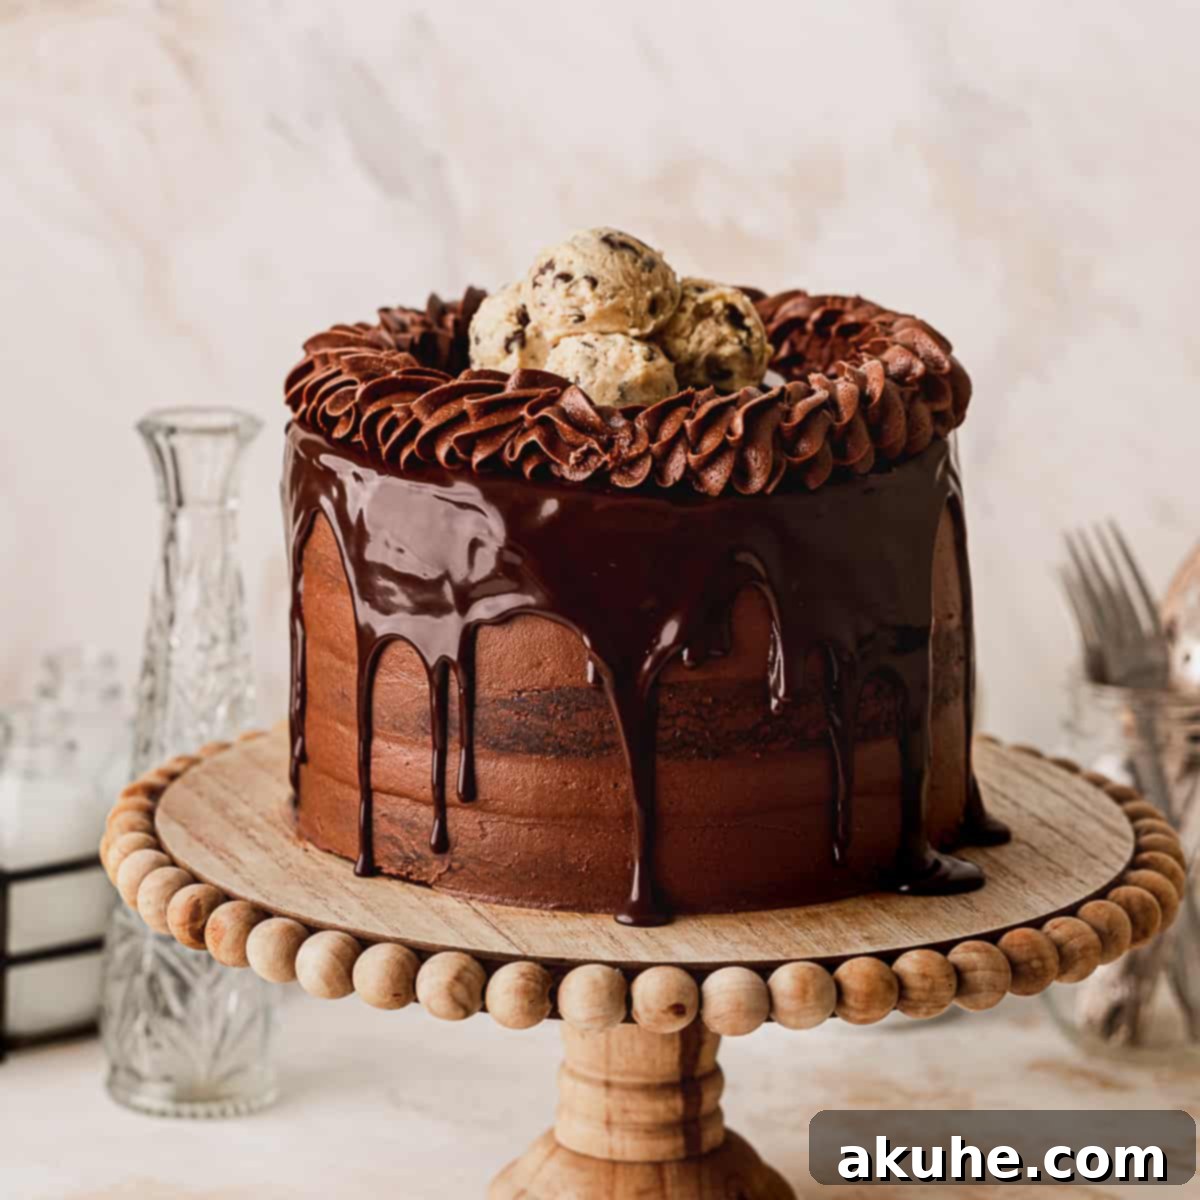
Prepare to embark on an unparalleled journey of chocolate indulgence with this extraordinary **Chocolate Cookie Brownie Cake**. This isn’t just a dessert; it’s a meticulously crafted culinary masterpiece that unites the fudgy richness of a brownie, the comforting chewiness of a chocolate chip cookie, and the celebratory grandeur of a layered cake. Every bite is a symphony of textures and flavors, promising an unforgettable experience for any chocolate and cookie enthusiast.
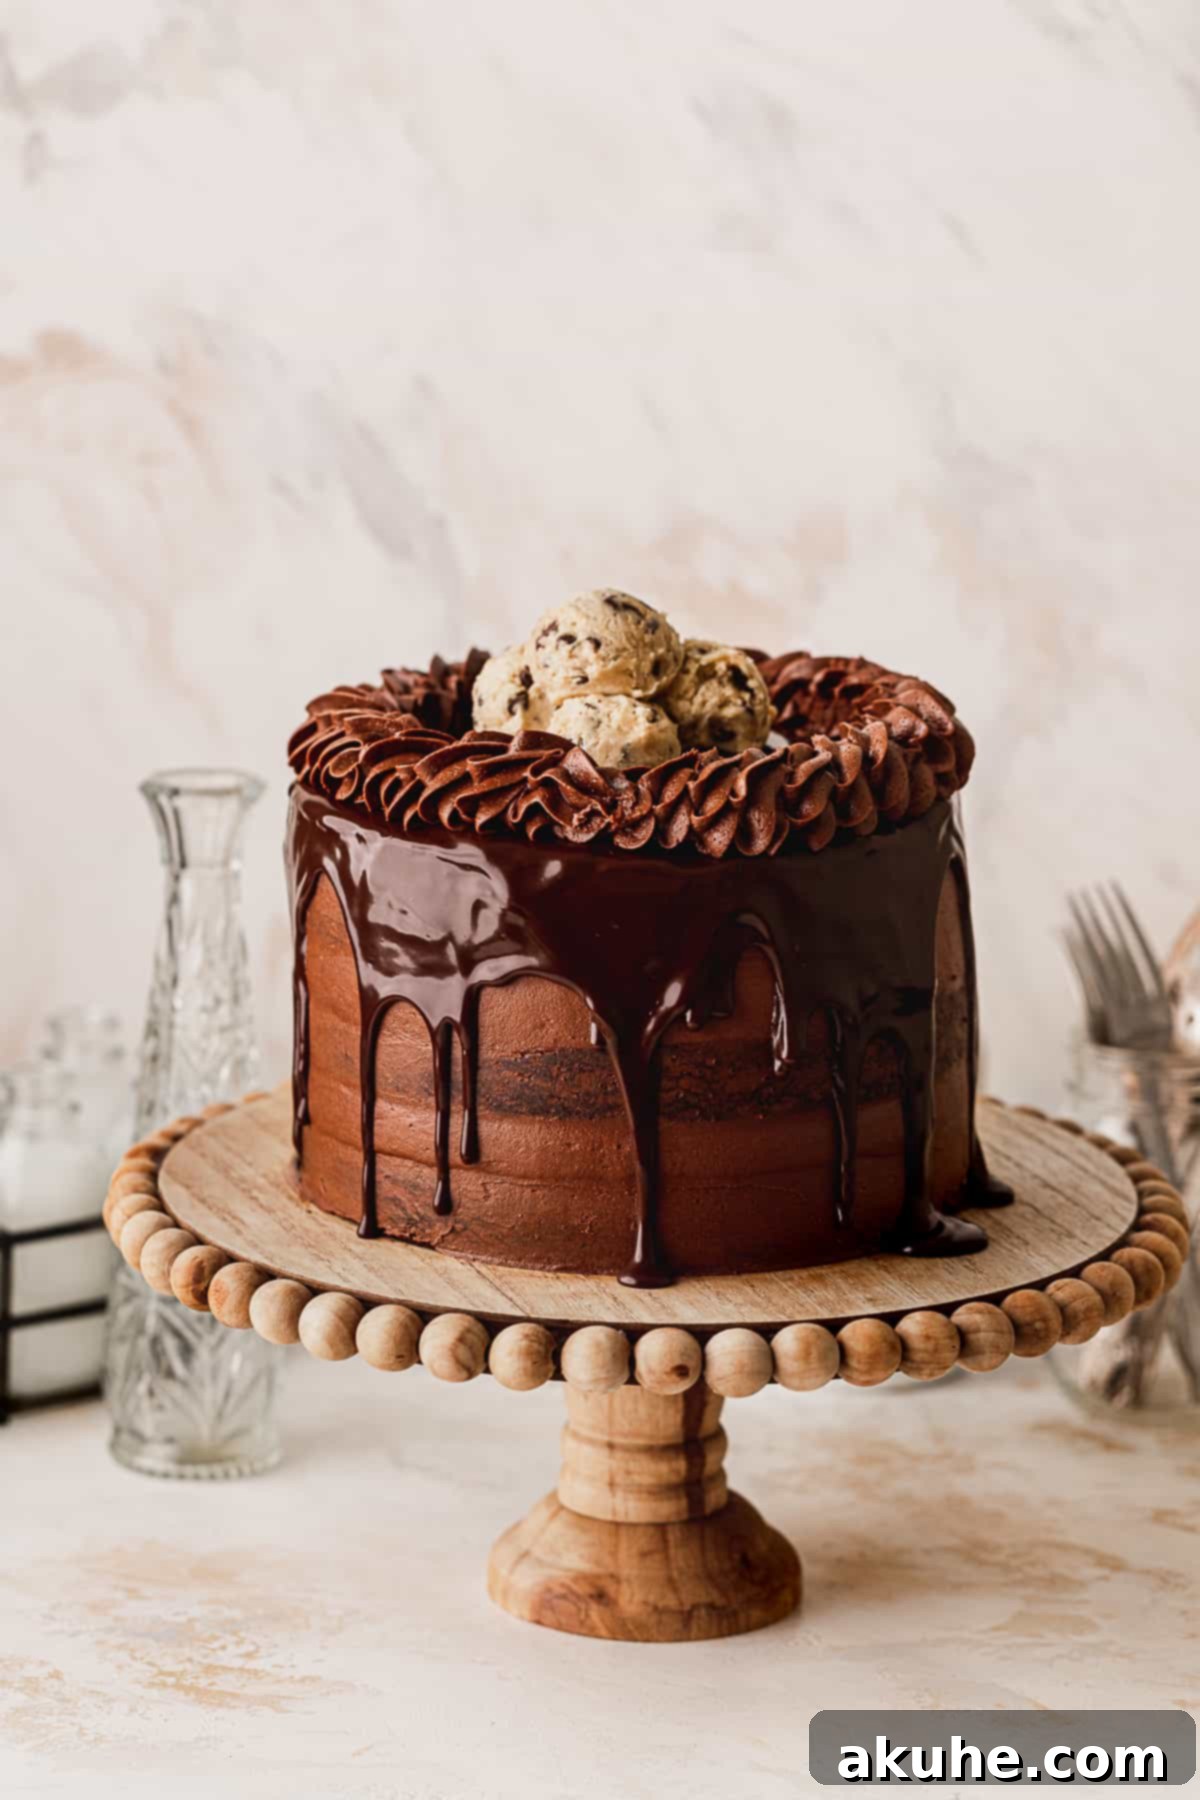
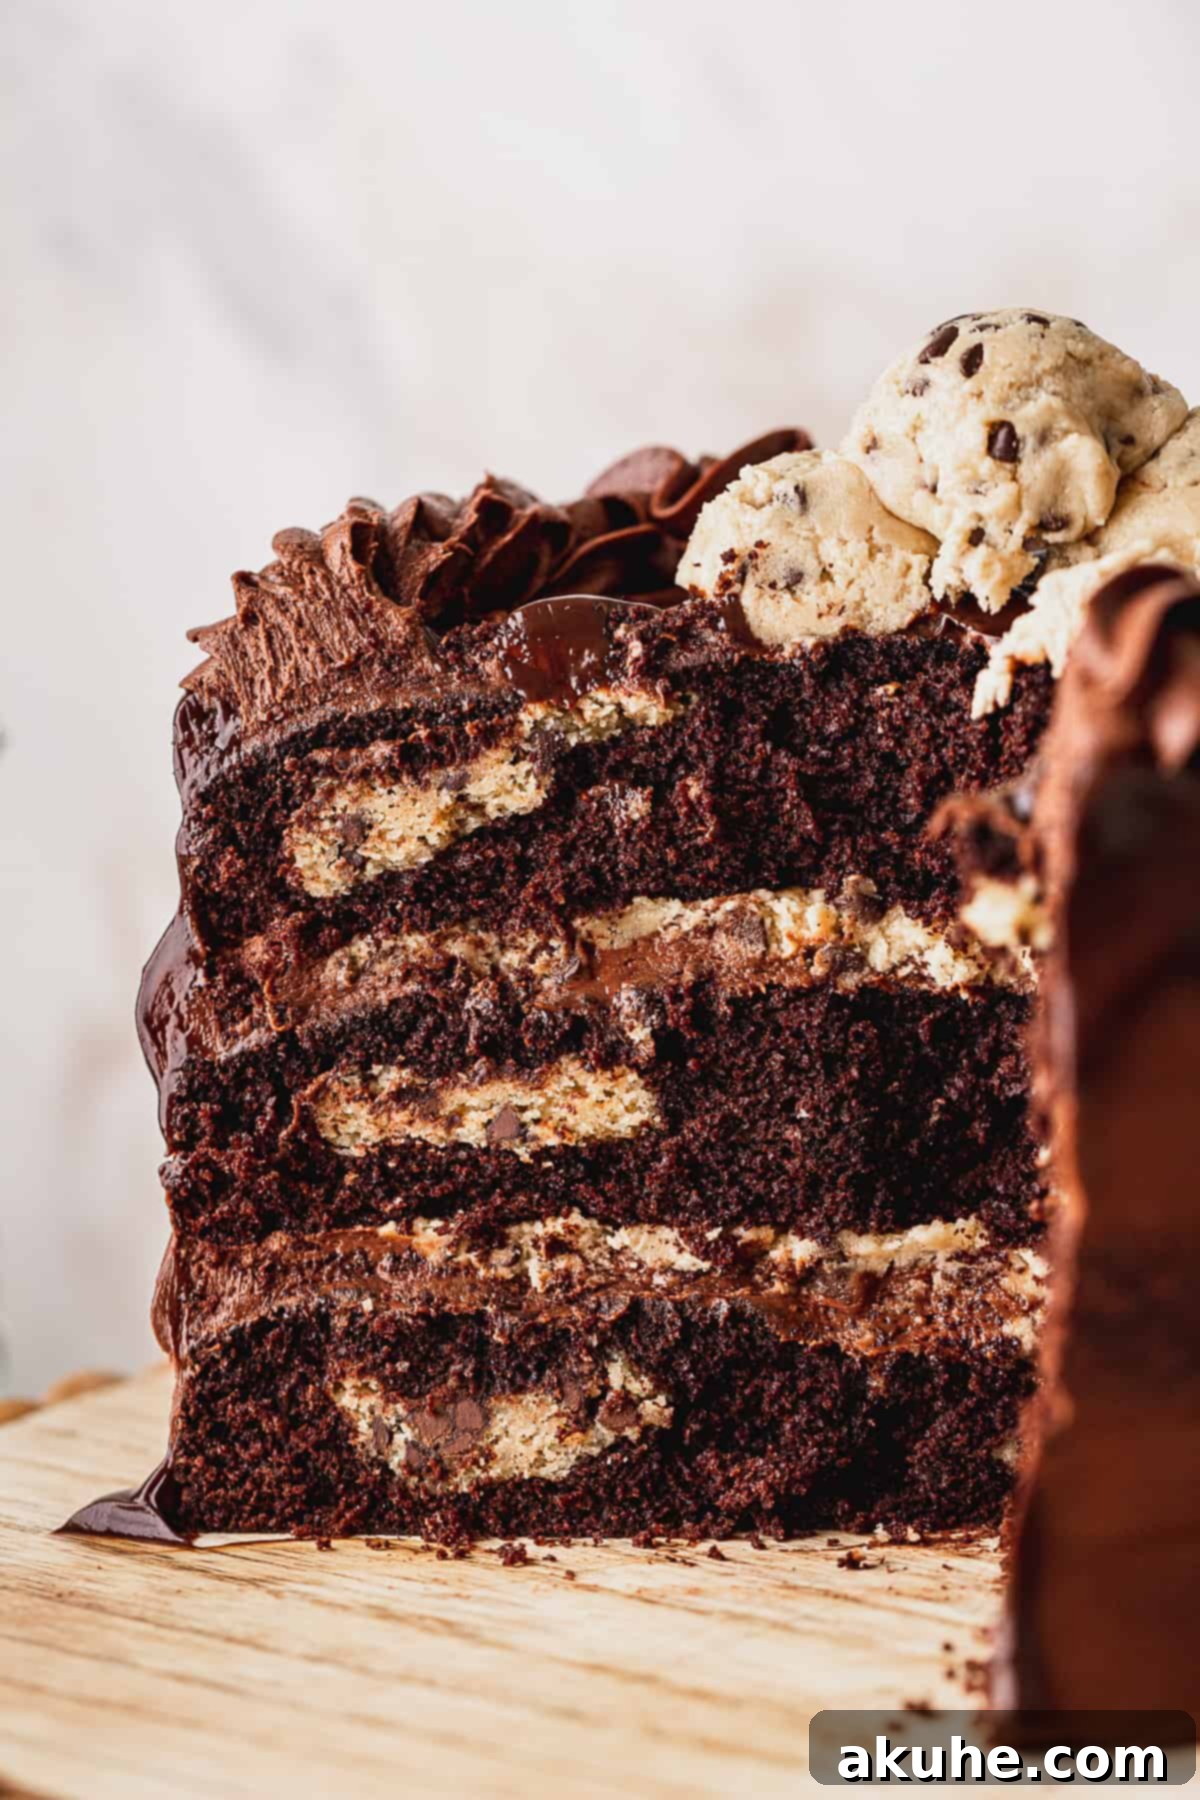
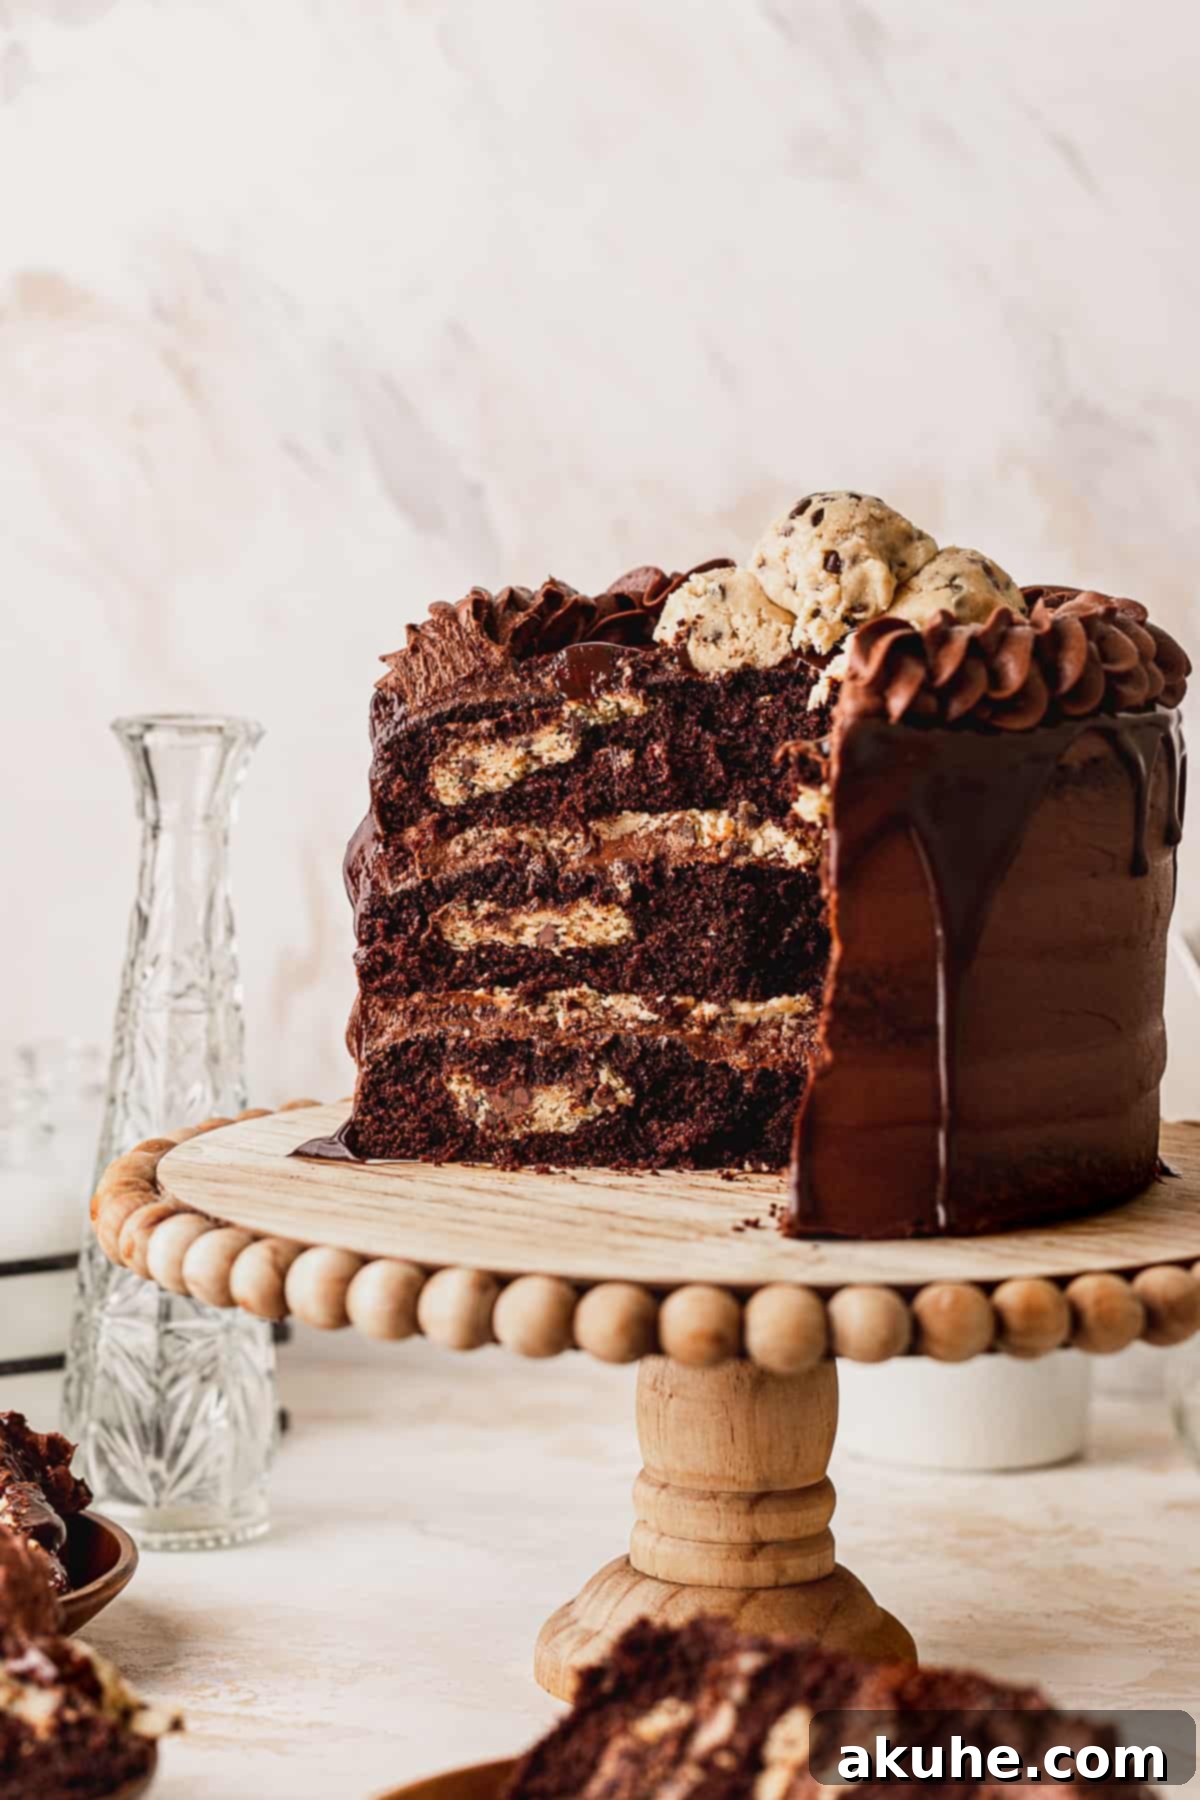
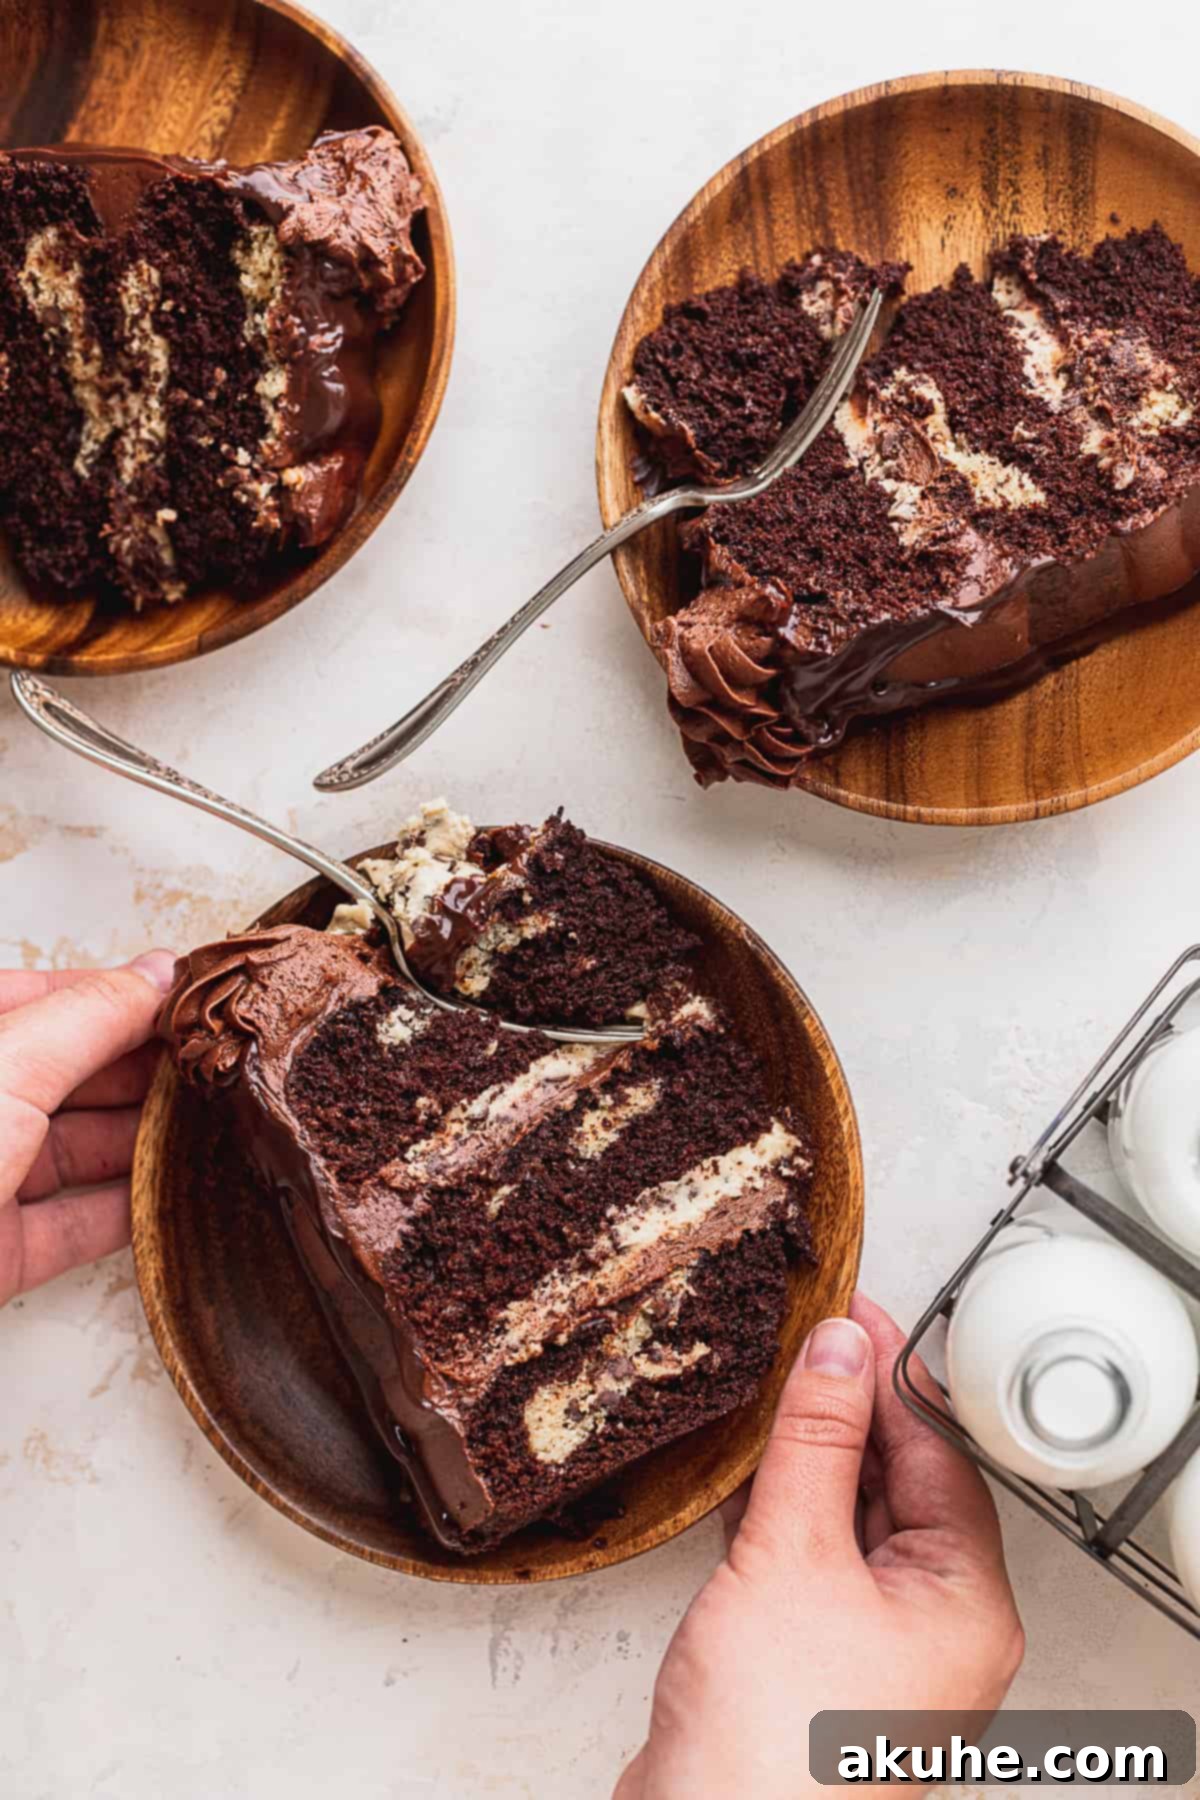
Imagine decadent, deeply chocolatey brownie cake layers, each incredibly moist and tender, baked to perfection. But the magic doesn’t stop there. Nestled within these layers are generous pockets of delectable, baked cookie dough, offering delightful bursts of buttery, chocolate-studded goodness. This magnificent creation is then lavishly filled and frosted with a silky-smooth, intensely rich chocolate fudge frosting, providing a luxurious counterpoint to the cake’s robust chocolate profile. To elevate the experience further, the cake features an irresistible edible cookie dough filling between layers, offering that beloved “unbaked” texture that everyone craves. Finally, a glossy chocolate drip cascades elegantly down the sides, crowned with even more irresistible cookie dough, making this not only a treat for the taste buds but also a feast for the eyes.
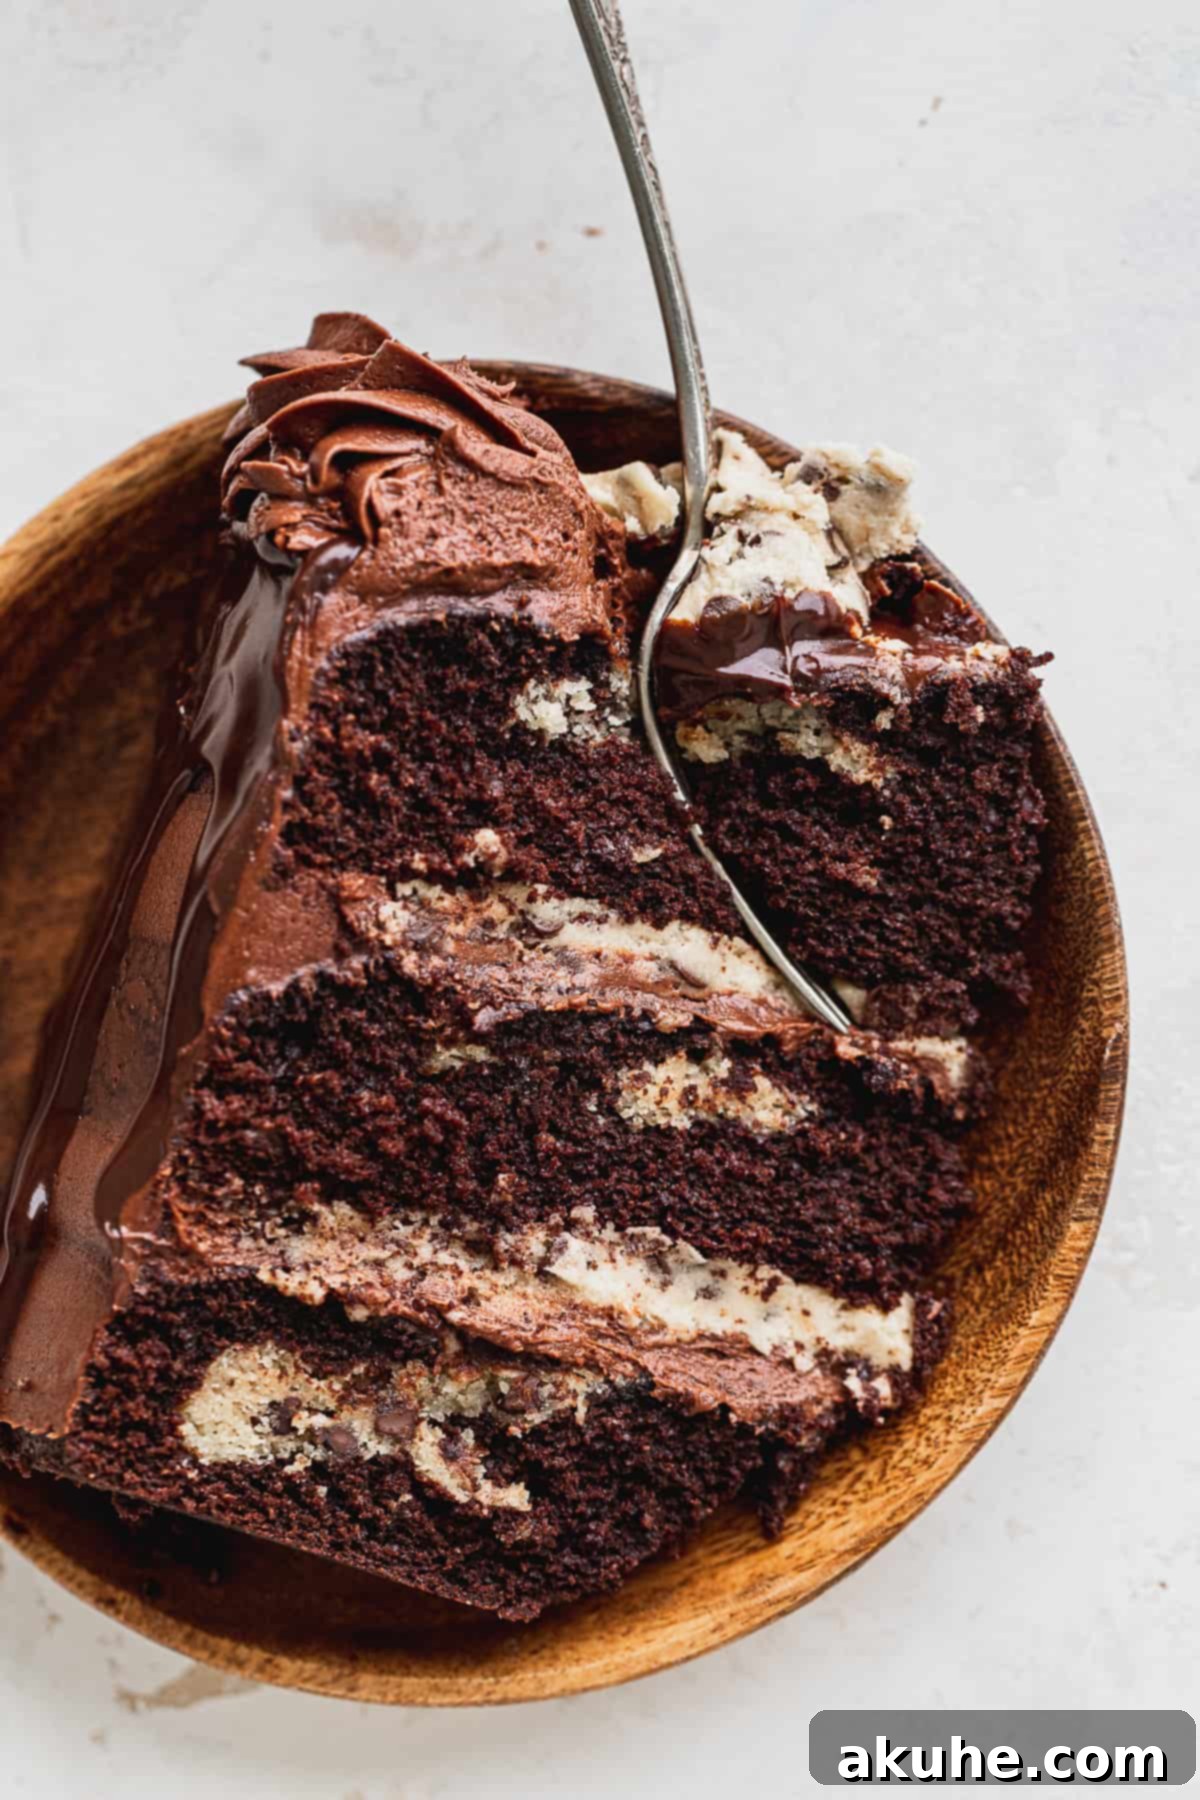
This truly is the ultimate celebration cake, perfect for birthdays, holidays, or simply transforming an ordinary day into something extraordinary. Its layered structure boasts deep chocolate cake infused with both premium cocoa powder and melted chocolate, ensuring every crumb is bursting with intense flavor. The inclusion of edible cookie dough baked directly into the cake layers guarantees a delightful surprise in every slice, merging two classic favorites into one harmonious dessert. The star of the show, beyond the stunning cake itself, is undoubtedly the lavish chocolate fudge frosting – a rich, creamy, and utterly irresistible topping that brings all the components together in pure bliss.
If you find yourself captivated by the allure of chocolate, explore more of our delightful chocolate recipes, such as our Mini Chocolate Cake, the ever-popular Chocolate Peanut Butter Cake, and the refreshing Chocolate Mint Cake. Each offers a unique chocolate experience, but none quite match the decadent grandeur of this sensational Chocolate Cookie Brownie Cake.
Why This Chocolate Cookie Brownie Cake Will Become Your New Favorite
Prepare to fall in love with every aspect of this incredible hybrid dessert. From its irresistible layers to its decadent frosting, here’s why this **Chocolate Cookie Brownie Cake** is destined to become a staple in your recipe collection and a showstopper at any gathering:
- Ultra-Moist Brownie Cake Layers: These are no ordinary chocolate cake layers. Crafted with a generous amount of cocoa powder and melted dark chocolate, they deliver an incredibly deep, rich, and intense chocolate flavor that brownie lovers adore. The texture is fudgy yet tender, creating a perfect base for the other components. Every bite melts in your mouth, leaving a lingering taste of premium chocolate.
- Gooey Cookie Dough Baked In: What makes this cake truly unique are the delightful “globs” of edible cookie dough baked right into each cake layer. Each layer features approximately five perfectly placed cookie dough discs, transforming a simple chocolate cake into an exciting textural adventure. As the cake bakes, these cookie dough pockets become slightly chewy and gooey, adding an unexpected layer of flavor and texture that perfectly complements the soft brownie cake.
- Luxurious Chocolate Fudge Frosting: This isn’t just any frosting; it’s a sublime chocolate cream cheese frosting elevated with a hint of chocolate ganache and rich Dutch process cocoa powder. The cream cheese adds a beautiful tang that balances the sweetness, while the ganache infuses an extra layer of deep, complex chocolate flavor and a wonderfully smooth, velvety consistency. It’s perfectly spreadable and pipes beautifully, ensuring a gorgeous finish.
- Decadent Edible Cookie Dough Filling: Beyond the baked-in cookie dough, this cake boasts a generous layer of creamy, edible cookie dough as a filling between the cake layers. Prepared with heat-treated flour for safety, this filling offers that classic, irresistible raw cookie dough taste and texture that is truly addictive. It provides a fantastic textural contrast to the soft cake and rich frosting, making each slice an adventure in indulgence.
- Visually Stunning & Impressive: With its beautifully layered structure, elegant chocolate drip, and whimsical cookie dough topping, this cake is an absolute showstopper. It looks incredibly professional and complex, yet our detailed instructions make it achievable for home bakers of all skill levels. It’s guaranteed to elicit gasps of delight and compliments from your guests.
- Perfect for Any Celebration: Whether it’s a birthday, anniversary, holiday gathering, or just a special treat for friends and family, this cake is designed to impress. Its dual appeal of brownies and cookies makes it a crowd-pleaser for all ages, ensuring everyone finds something to love.
Essential Ingredients for Your Chocolate Cookie Brownie Cake
The success of any exceptional dessert lies in the quality and proper preparation of its ingredients. Here are some key notes to help you gather and prepare everything needed to create this spectacular **Chocolate Cookie Brownie Cake**:
- Room Temperature Dairy Ingredients: This is a crucial step that many overlook! Ensure your butter, cream cheese, buttermilk, and eggs are at room temperature. This typically means pulling them out of the refrigerator at least two hours before you plan to start baking. Room temperature ingredients emulsify more effectively, creating a smoother, more uniform batter and a lighter, fluffier texture in your final cake and frosting.
- Mini Chocolate Chips: For the cookie dough, mini chocolate chips are absolutely necessary. Their smaller size ensures even distribution throughout the dough and prevents them from sinking to the bottom during baking. Regular-sized chocolate chips would be too large and could create an uneven texture, disrupting the delicate balance of the cookie dough baked into the cake.
- High-Quality Melted Chocolate: For the brownie cake layers, using a good quality semi-sweet or dark chocolate will make a significant difference in flavor. We recommend a Lindt 70% chocolate for a deep, rich cocoa flavor without being overly sweet. The melted chocolate contributes to the cake’s intense flavor and fudgy texture.
- Dutch Process Cocoa Powder: Opt for Dutch process cocoa powder over natural cocoa powder. Dutch process cocoa has been treated with an alkali to reduce its acidity, resulting in a darker color, a smoother, less bitter chocolate flavor, and a richer, more mellow taste profile. This is key for achieving the deep, decadent flavor in both the brownie cake and the chocolate fudge frosting. We highly recommend this specific brand for superior results.
- Buttermilk: Real buttermilk from the store is always the best choice for this recipe. Its acidity reacts with baking soda to create a light and tender crumb, and it adds a subtle tang and incredible moisture to the cake. If store-bought buttermilk is unavailable, a simple homemade substitute can be made (see the Substitutions section).
- Full-Fat Cream Cheese: For the most luscious and stable chocolate fudge frosting, use full-fat cream cheese. Low-fat or whipped varieties will yield a runnier frosting that lacks the richness and structure needed to hold up the cake layers beautifully. Ensure it’s softened to room temperature for a smooth, lump-free frosting.
Step-by-Step Instructions for Crafting Your Chocolate Cookie Brownie Cake
Creating this magnificent **Chocolate Cookie Brownie Cake** involves a few distinct stages: preparing the safe-to-eat cookie dough, baking the fudgy brownie cake layers, and whipping up the luscious chocolate fudge frosting and ganache. Follow these detailed steps for a truly rewarding baking experience:
Cookie Dough Preparation
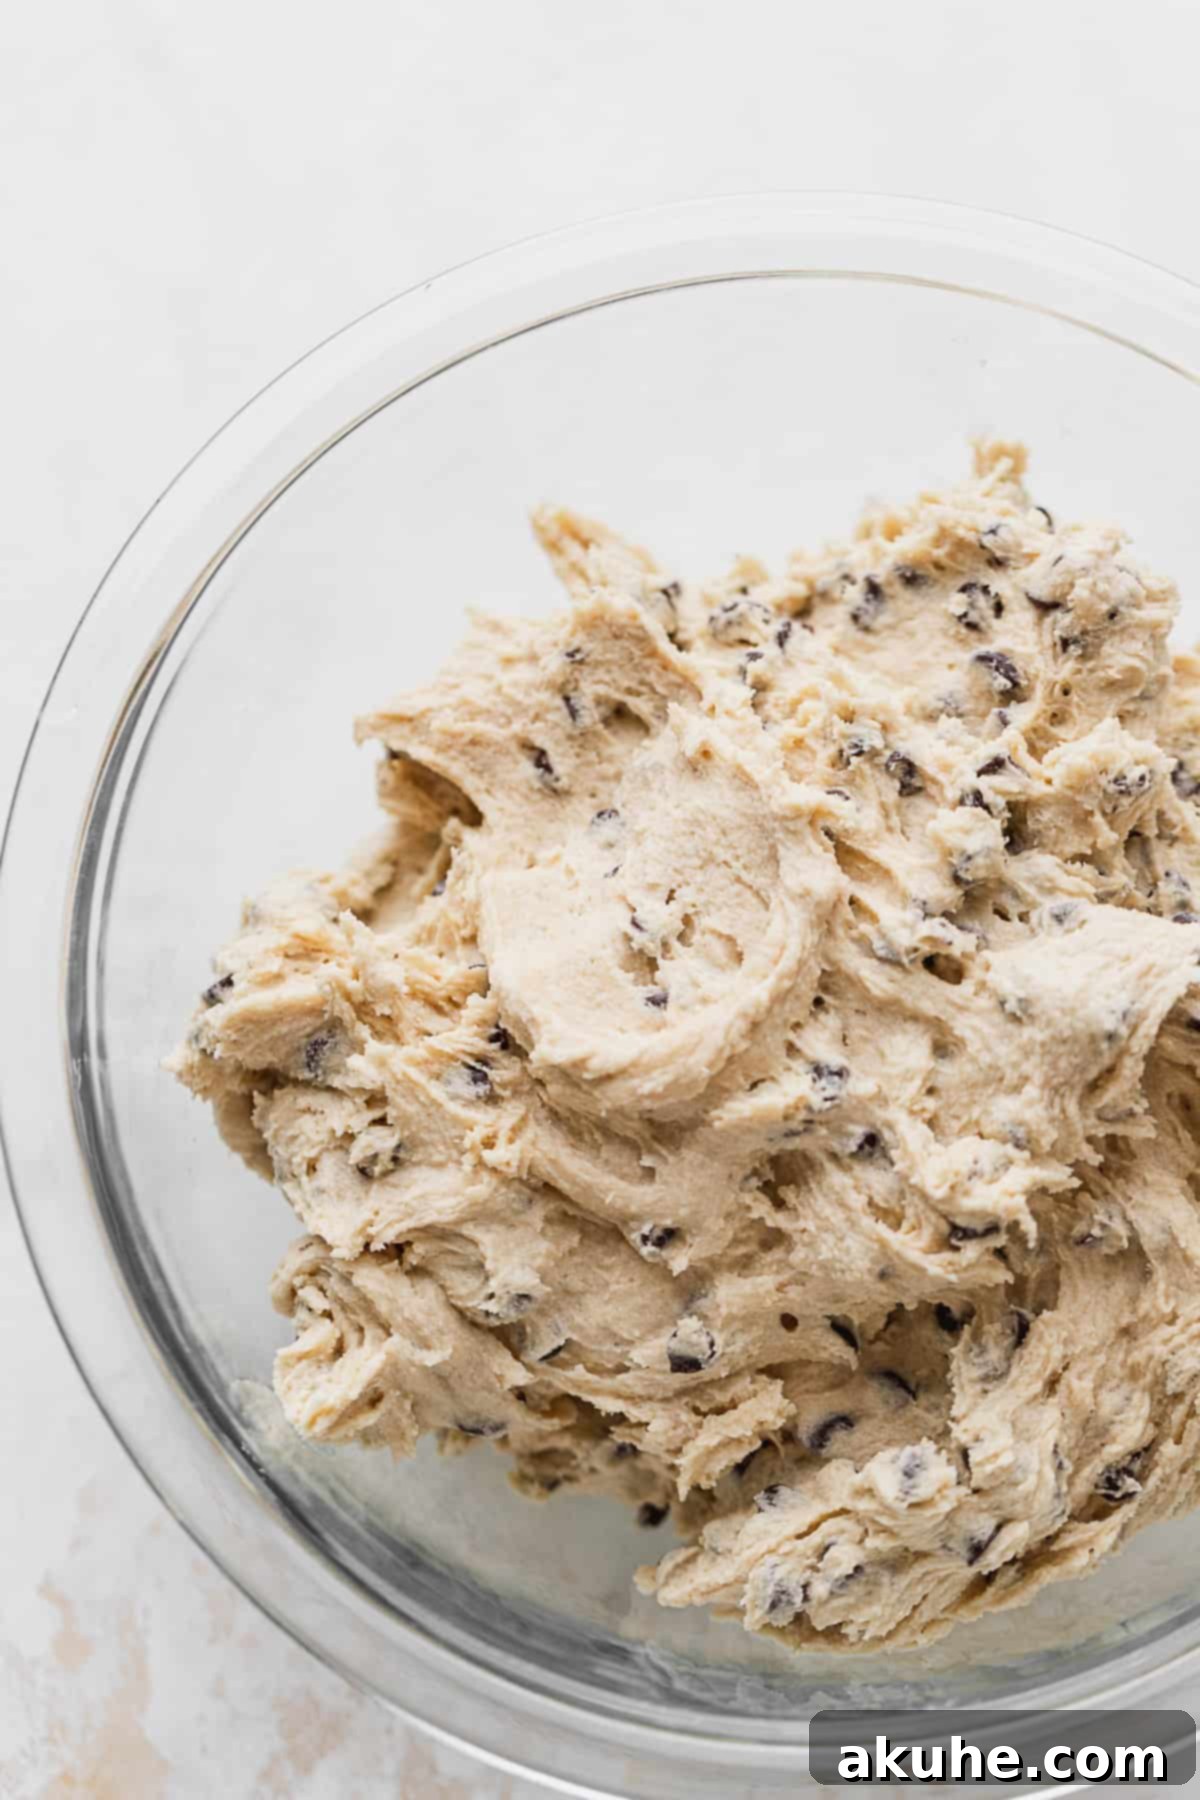
STEP 1: Prepare Edible Cookie Dough. For safety, begin by toasting your all-purpose flour. Preheat your oven to 300°F (150°C). Spread the measured flour thinly on a baking sheet and bake for 5 minutes. This process heats the flour to a safe temperature, eliminating any potential raw flour concerns. Allow it to cool completely before proceeding. Once cooled, sift the flour with cornstarch and salt into a bowl. In a separate bowl, cream together the softened unsalted butter, packed brown sugar, and white granulated sugar until light and fluffy (about 2 minutes on medium-high speed). Mix in the milk and pure vanilla extract, scraping down the bowl as needed. Gradually add the dry ingredients to the wet ingredients, mixing until just combined. Fold in the mini chocolate chips until evenly distributed.
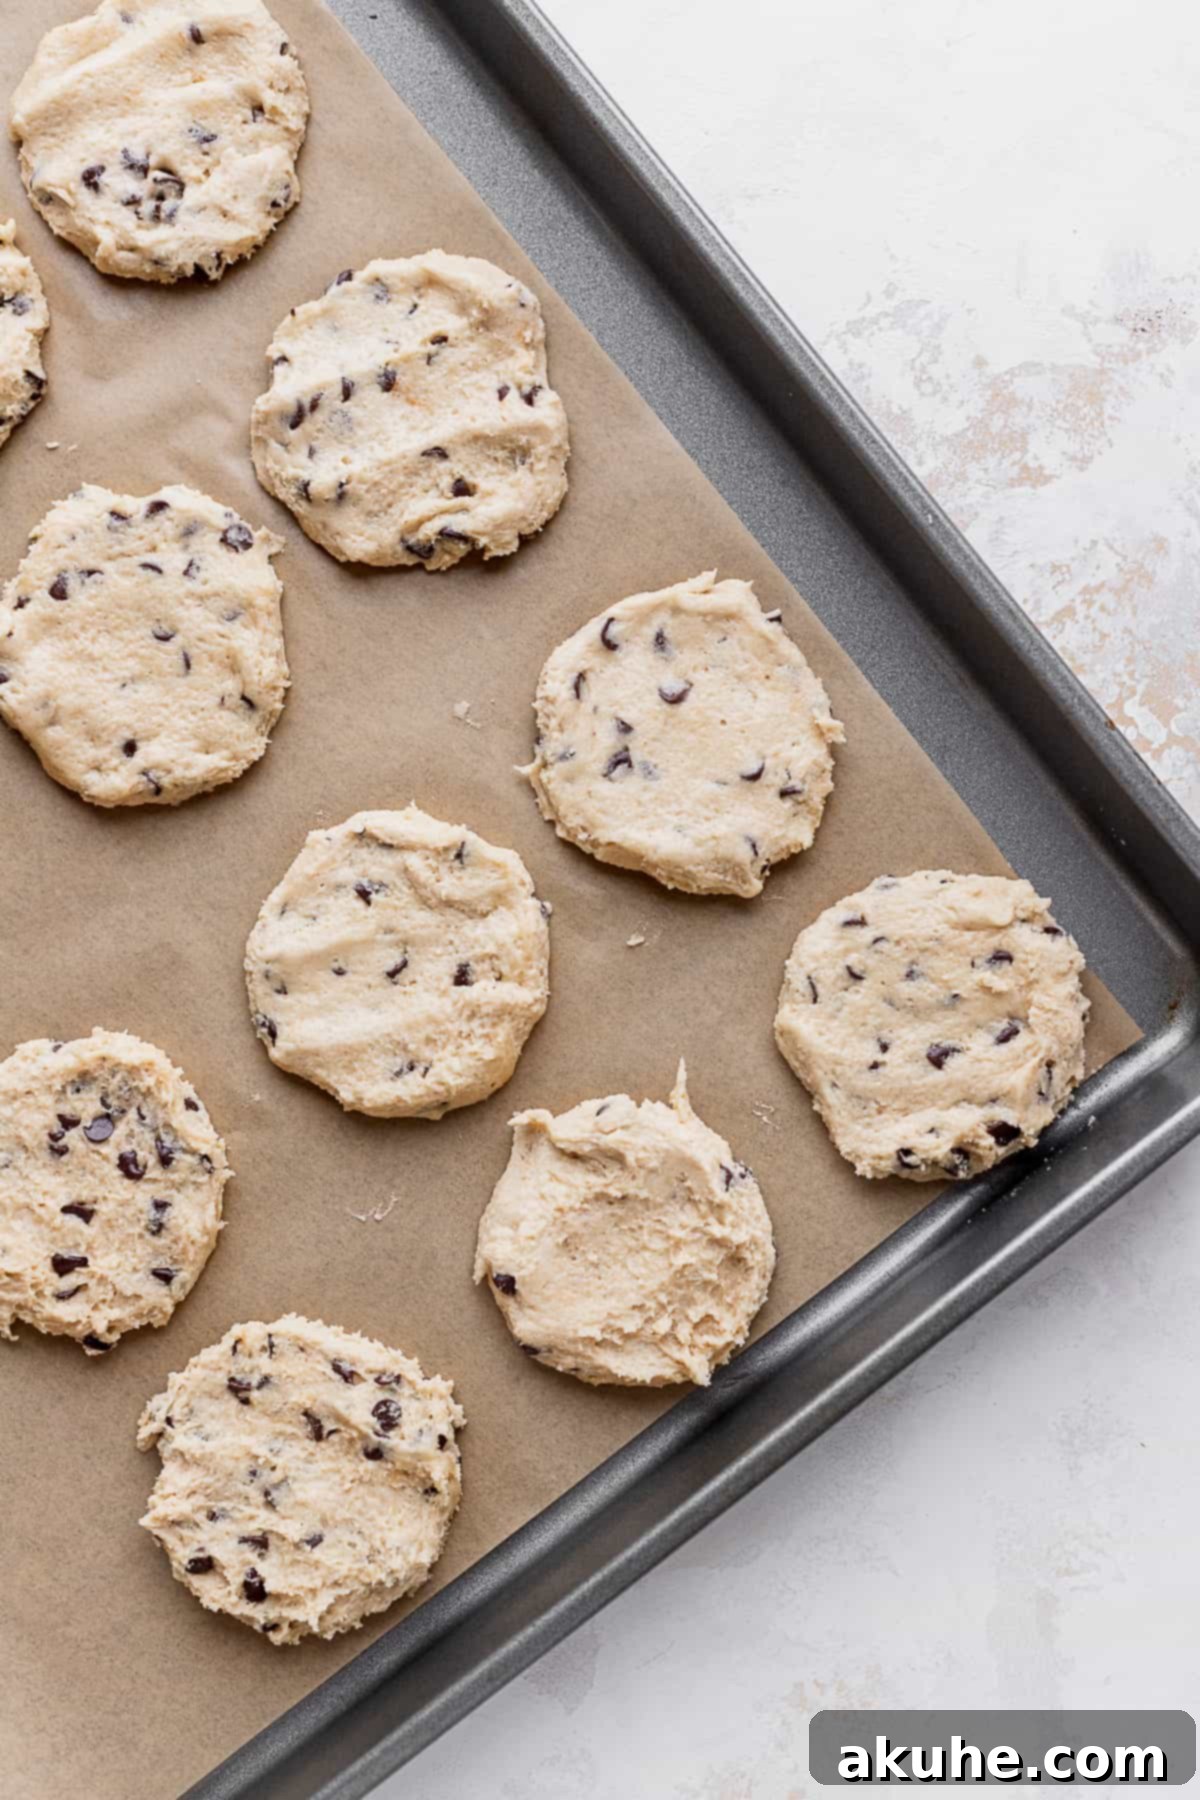
STEP 2: Form and Chill Cookie Dough Discs. Line a baking sheet with parchment paper. Using a 1-ounce cookie scoop (or roughly 2 tablespoons), portion out 15 balls of cookie dough. Gently flatten each ball into a disc shape using your hand. These discs will be baked into your cake layers. Place all cookie dough discs, along with the remaining unflattened cookie dough for the filling, in the refrigerator to chill thoroughly while you prepare the cake batter. Chilling helps the dough maintain its shape during baking.
Brownie Cake Baking
STEP 3: Prepare Chocolate and Dry Ingredients. Preheat your oven to 350°F (175°C). Lightly grease three 8-inch round cake pans with non-stick baking spray, line the bottoms with parchment paper circles, and spray again. In a microwave-safe bowl, melt the chopped semi-sweet chocolate in 20-second intervals, stirring well after each, until mostly melted. Continue stirring until completely smooth, then set aside to cool slightly. In a large mixing bowl, sift together the all-purpose flour, Dutch process cocoa powder, baking powder, and baking soda. Whisk in the salt, white granulated sugar, and brown sugar until thoroughly combined, ensuring no lumps remain.
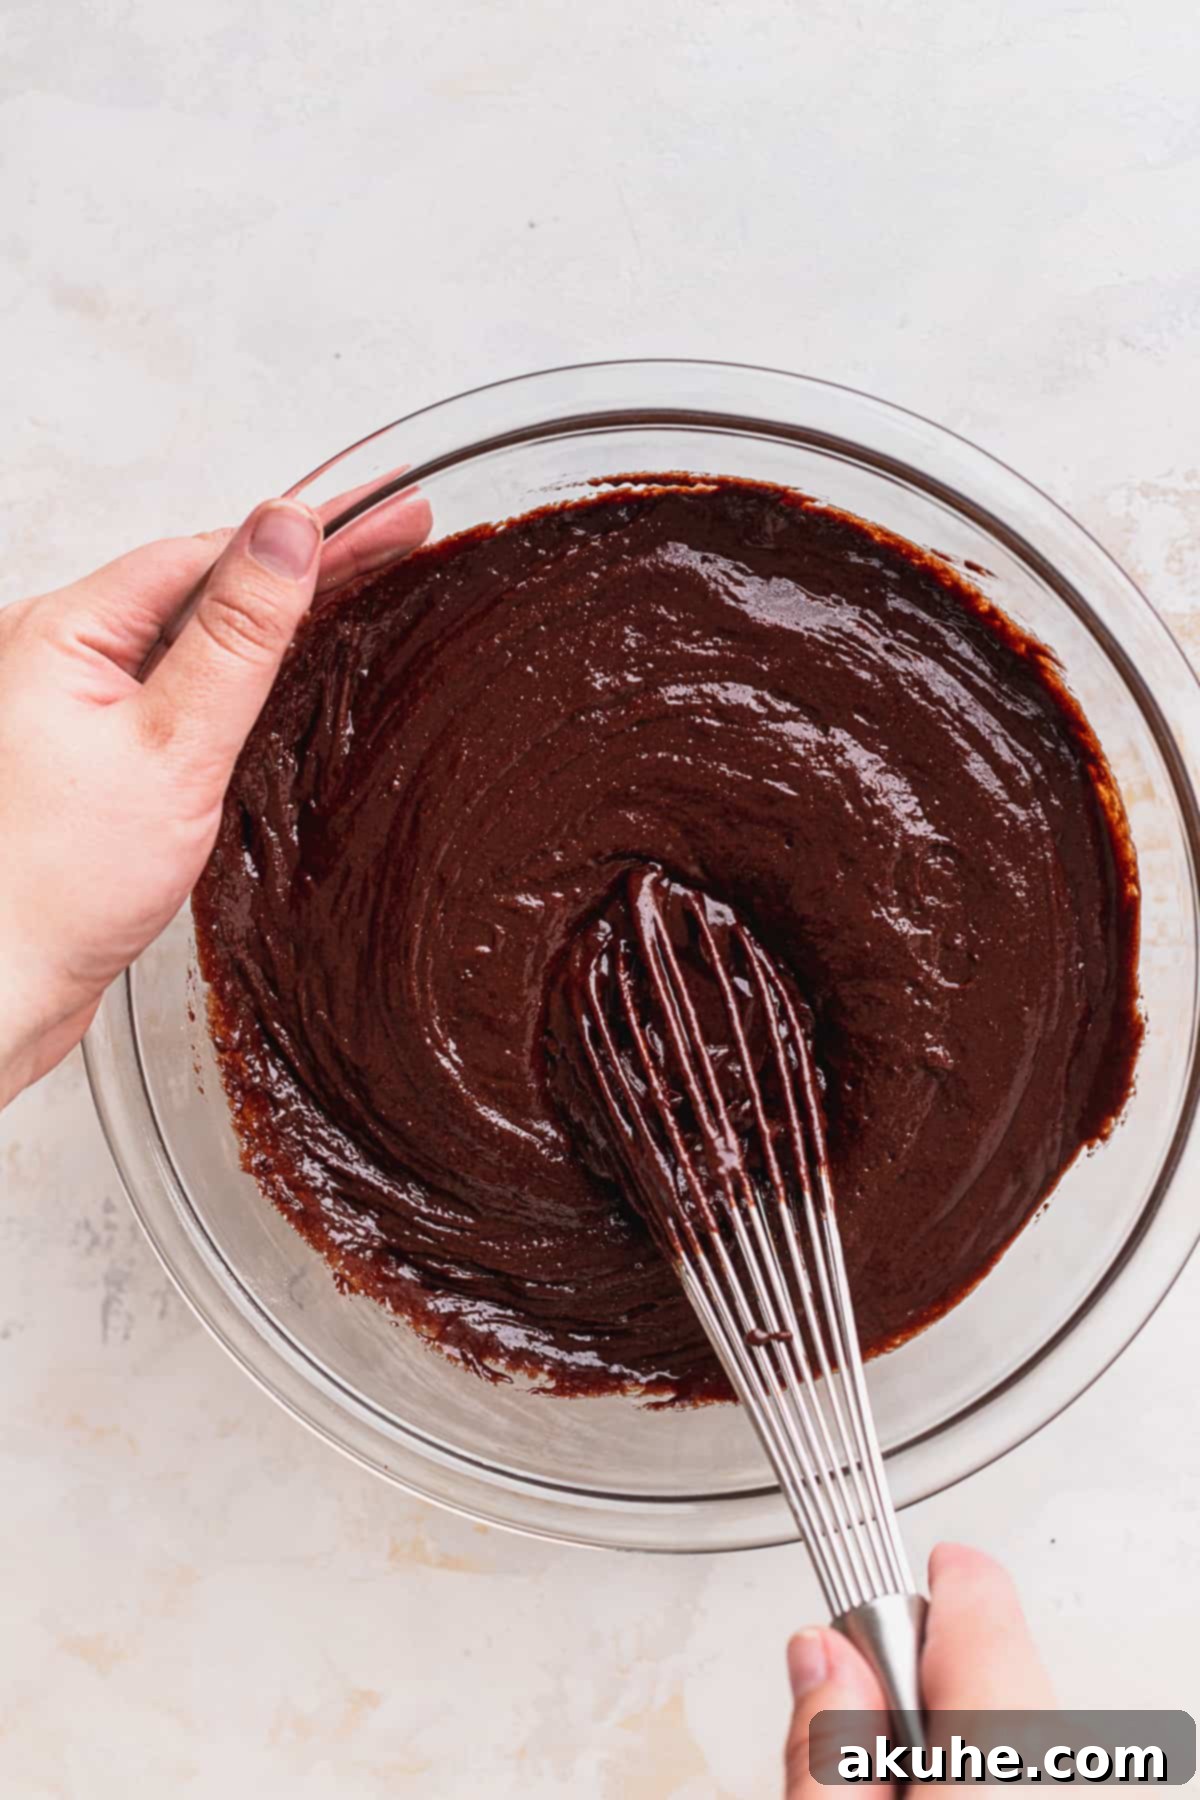
STEP 4: Combine Wet and Dry Ingredients. In a separate medium bowl, whisk together the room temperature eggs, canola or vegetable oil, pure vanilla extract, and room temperature buttermilk. Once the melted chocolate has cooled slightly (it should still be liquid but not hot), pour it into the wet ingredients and mix until well combined. Gradually pour the wet ingredient mixture into the large bowl of dry ingredients. Whisk gently until the batter is just smooth. Be careful not to overmix, as this can lead to a tough cake.
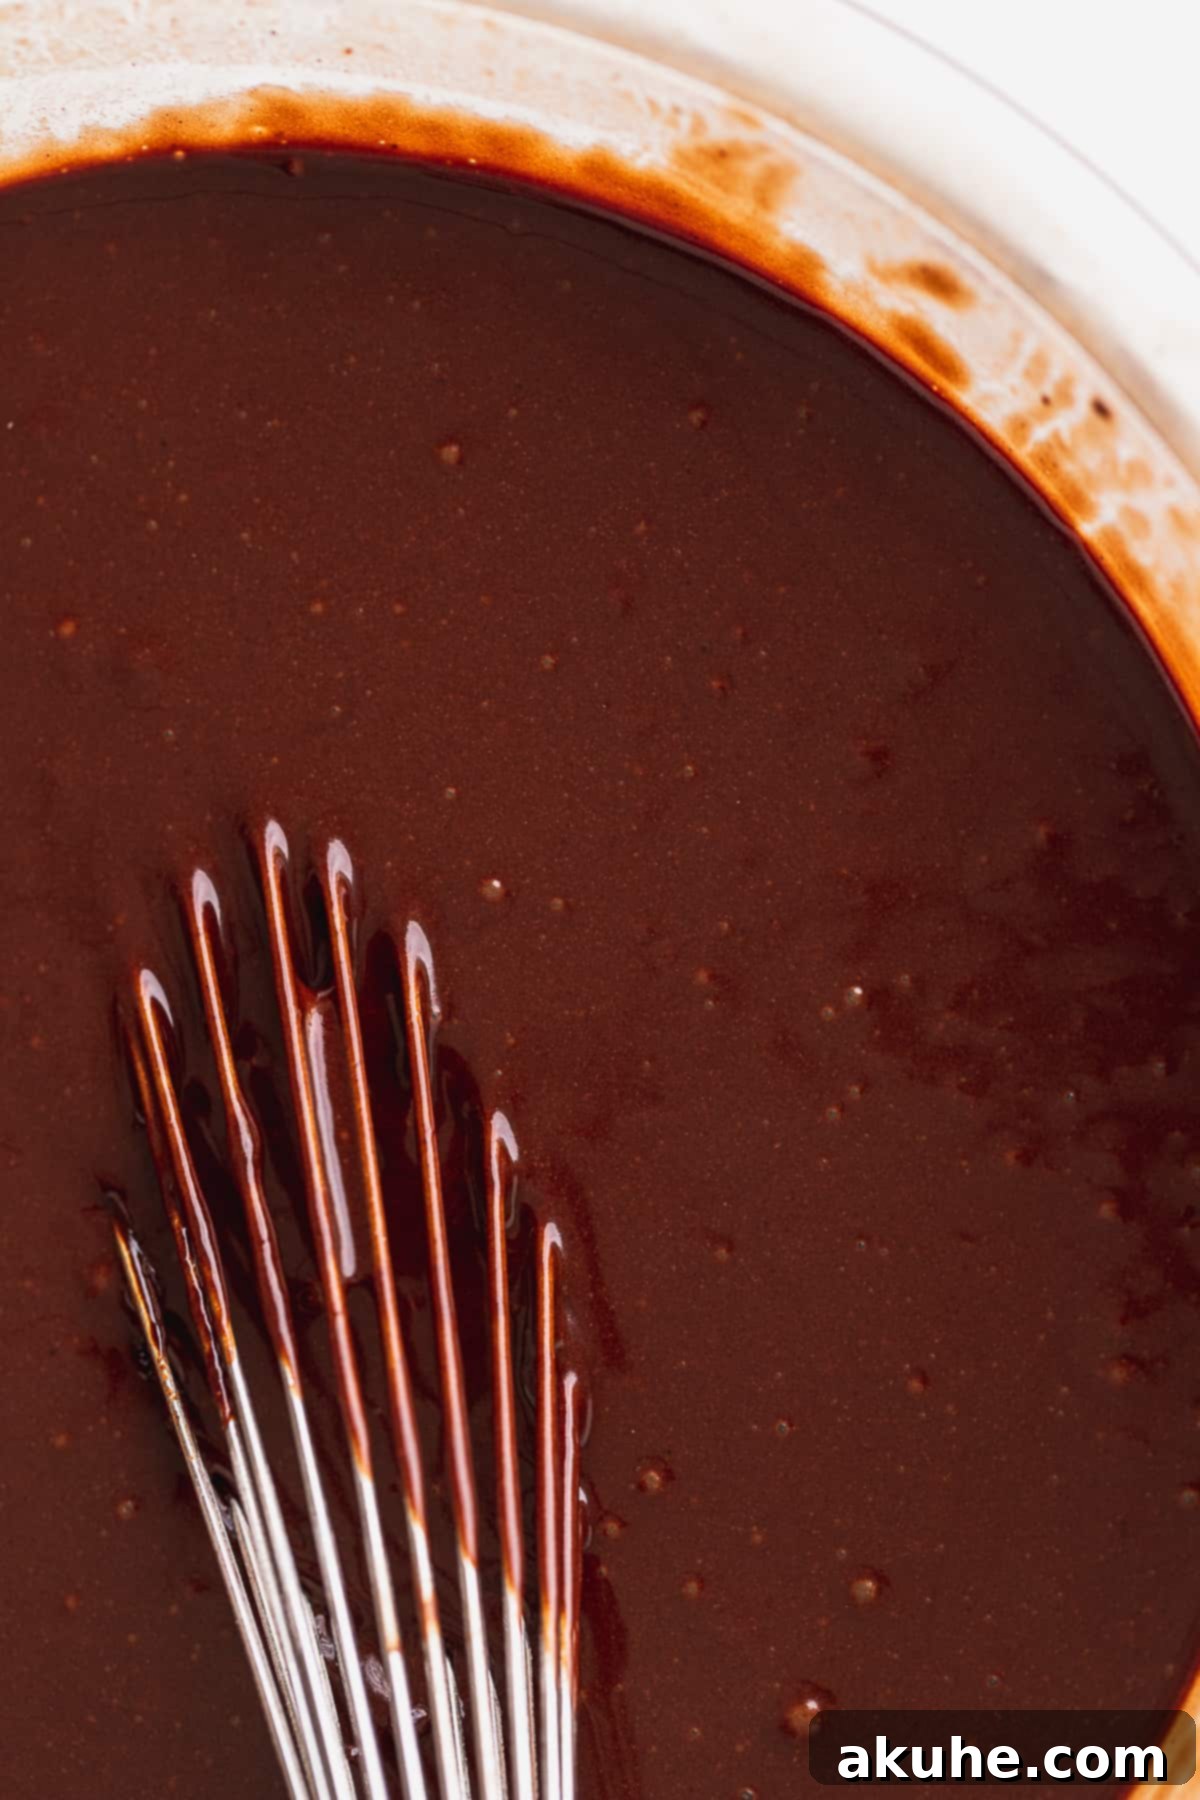
STEP 5: Add Hot Water and Bake. Slowly and carefully pour the hot water (steaming from the stove, but not boiling) into the cake batter while gently whisking. Mixing it in slowly helps prevent the eggs from cooking prematurely. Distribute the finished cake batter evenly among the three prepared 8-inch cake pans.
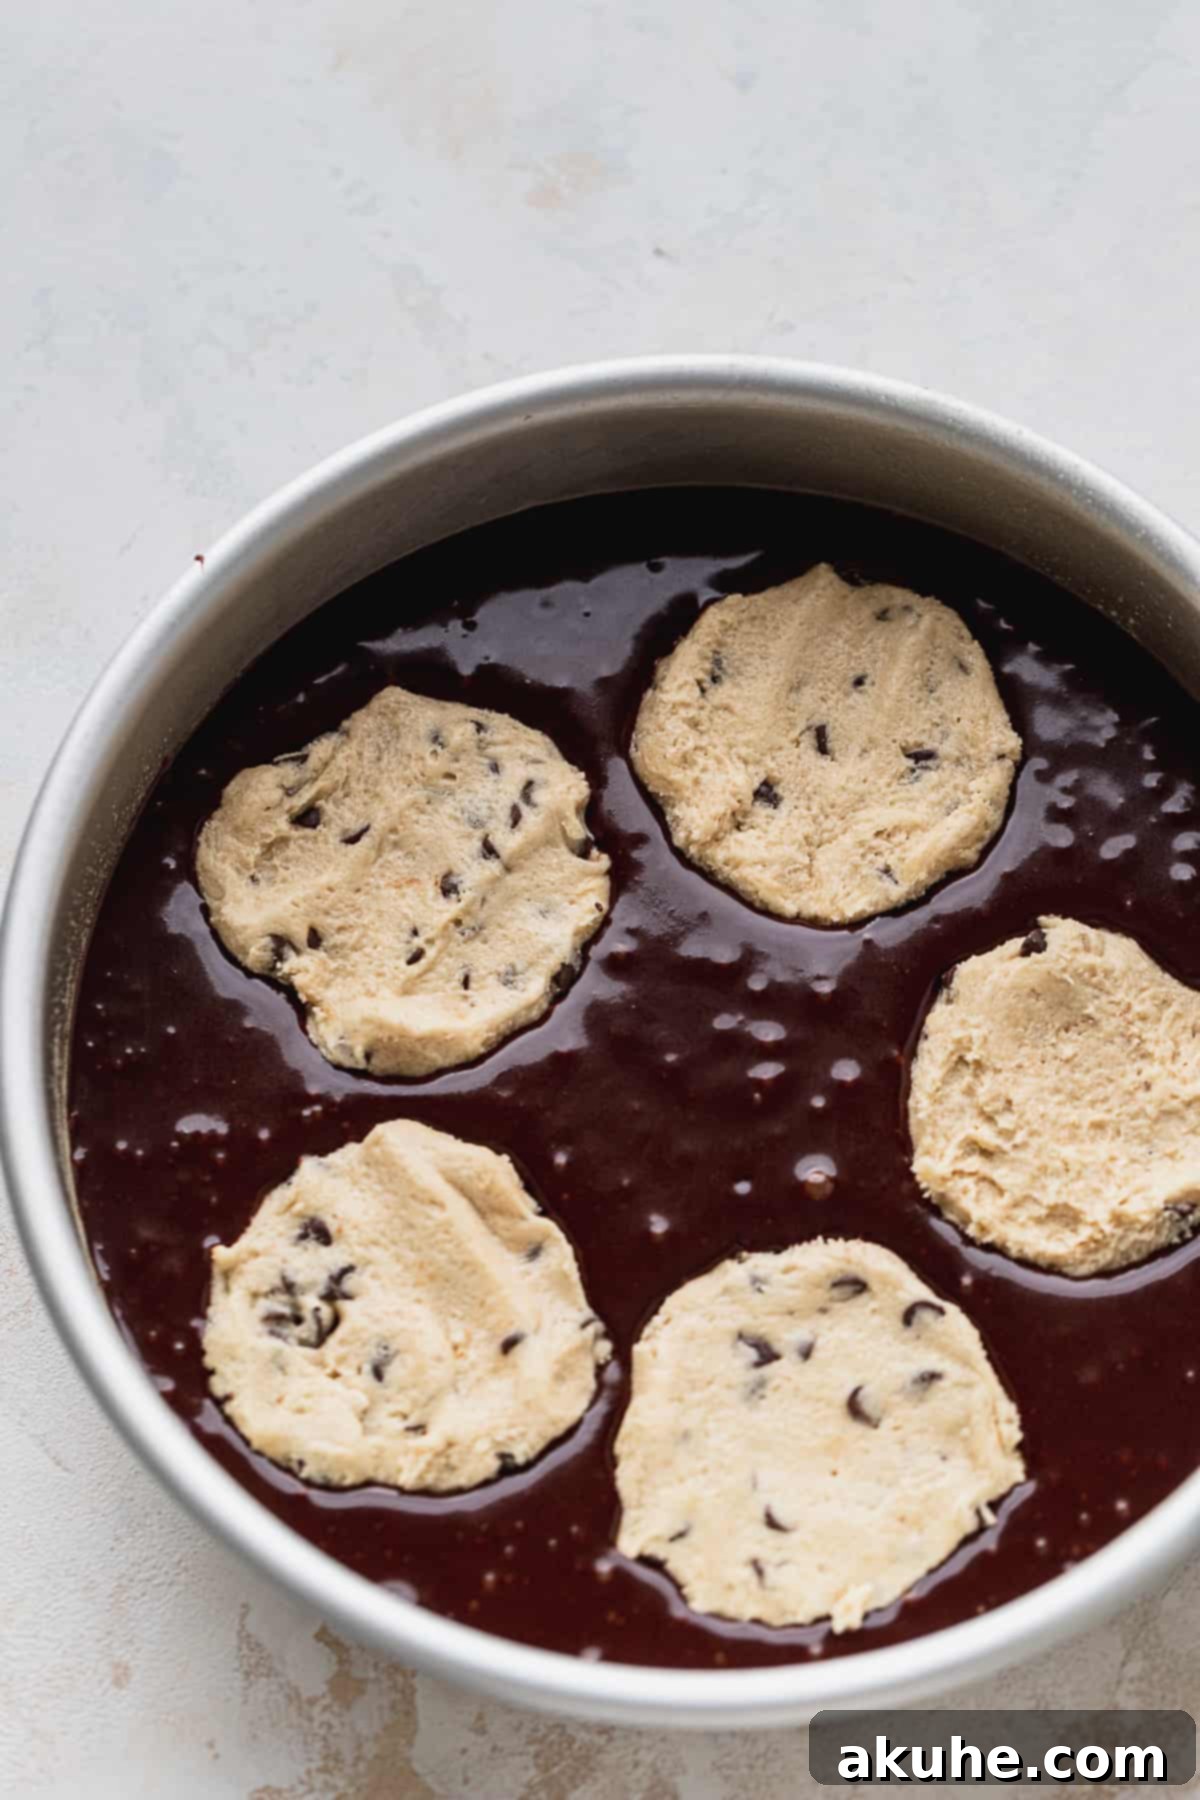
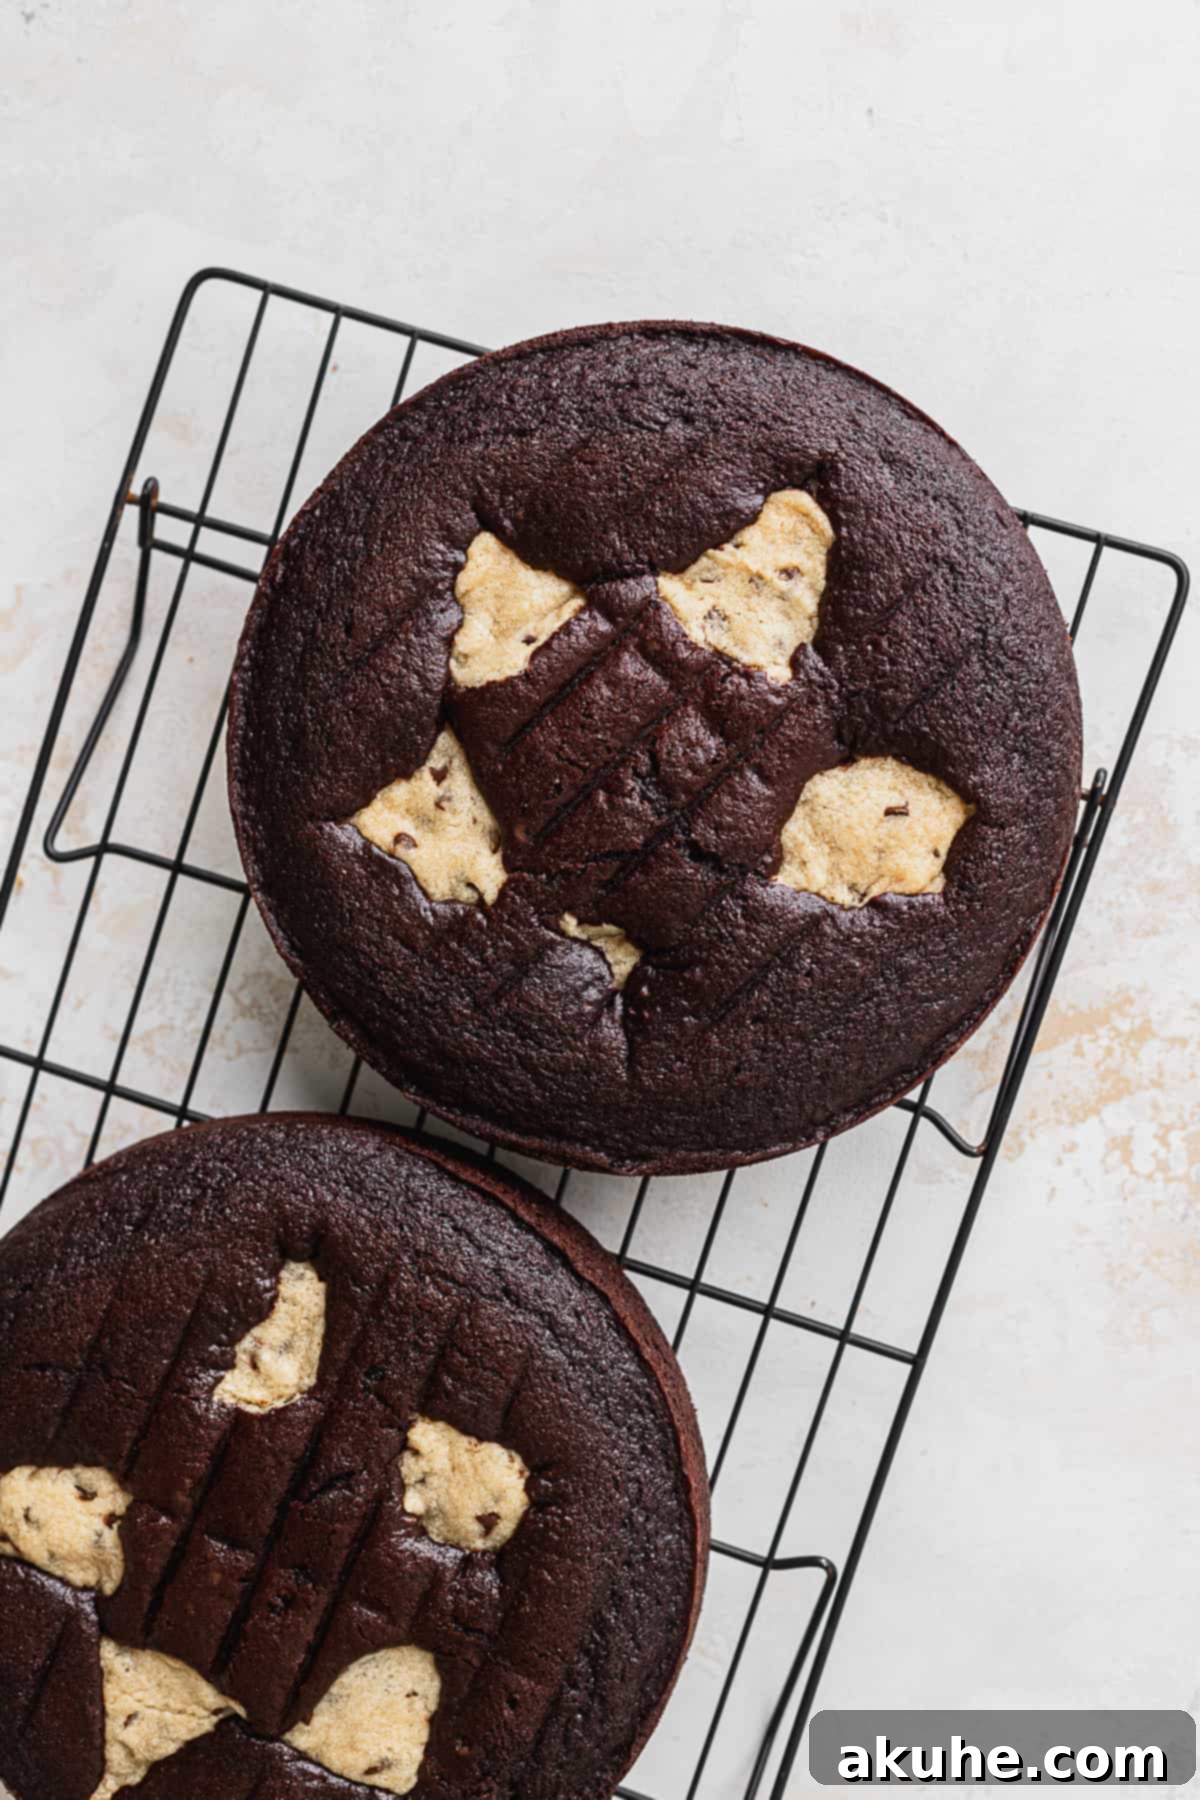
STEP 6: Add Cookie Dough and Bake. Retrieve the chilled cookie dough discs from the refrigerator. Evenly arrange five cookie dough discs on top of the batter in each cake pan. Bake for 30-34 minutes, or until a wooden skewer or toothpick inserted into the center of the cake comes out with moist crumbs, but no wet batter. Avoid overbaking to maintain the cake’s signature fudgy texture. Let the cakes cool in their pans for 10-15 minutes before carefully inverting them onto a wire cooling rack to cool completely. Ensure the cakes are entirely cool before attempting to frost them.
Chocolate Ganache & Fudge Frosting
STEP 7: Prepare Chocolate Ganache. In a heatproof bowl, place your semi-sweet chocolate chips. Heat the heavy cream in a small saucepan over medium-low heat until it just begins to steam and simmer around the edges (do not let it boil vigorously). Pour the hot cream over the chocolate chips. Let it sit undisturbed for 1 minute and 30 seconds to allow the chocolate to melt. Then, gently stir from the center outwards until the mixture is completely smooth and glossy. If any small chocolate chunks remain, microwave the ganache in 10-second intervals, stirring after each, until fully melted and smooth. Let the ganache cool slightly before using in the frosting.
STEP 8: Whip Cream Cheese and Butter. In the bowl of a stand mixer fitted with the paddle attachment, beat the room temperature cream cheese and slightly cold unsalted butter on high speed for 2-3 minutes until the mixture is incredibly light, fluffy, and well-combined. This aeration is key to a perfectly smooth frosting. Meanwhile, ensure your powdered sugar and Dutch process cocoa powder are sifted together to prevent any lumps in the frosting. Gradually add the sifted powdered sugar and cocoa powder to the cream cheese and butter mixture, mixing on low speed until fully incorporated. The mixture will be quite thick at this stage.
STEP 9: Finish the Fudge Frosting. Add the pure vanilla extract, salt, and the prepared (and slightly cooled) chocolate ganache to the frosting mixture. Beat on low speed until everything is smoothly combined. Increase the mixer speed to medium-high and beat for another 1-2 minutes until the frosting is light, airy, and silky smooth. It will lighten slightly in color and become beautifully creamy. This ensures a stable and delicious frosting for your cake.
Expert Tips for Assembling Your Stunning Cake
Assembling a layered cake can seem daunting, but with these tips, you’ll achieve a beautiful and stable **Chocolate Cookie Brownie Cake** worthy of any celebration. Precision and patience are your best friends here!
- Chilled Cake Layers are Key: Decorating a slightly cold cake is significantly easier. Chilling the cooled cake layers in the refrigerator for 20-30 minutes before frosting helps firm them up, making them less prone to tearing and crumbling. This also makes leveling and handling much simpler.
- Freshly Made Frosting: Always prepare your chocolate fudge frosting just before you plan to assemble and decorate the cake. This ensures it’s at the ideal consistency – creamy and spreadable – for easy application. If it sits too long, it might stiffen, requiring a quick whip to bring it back to life.
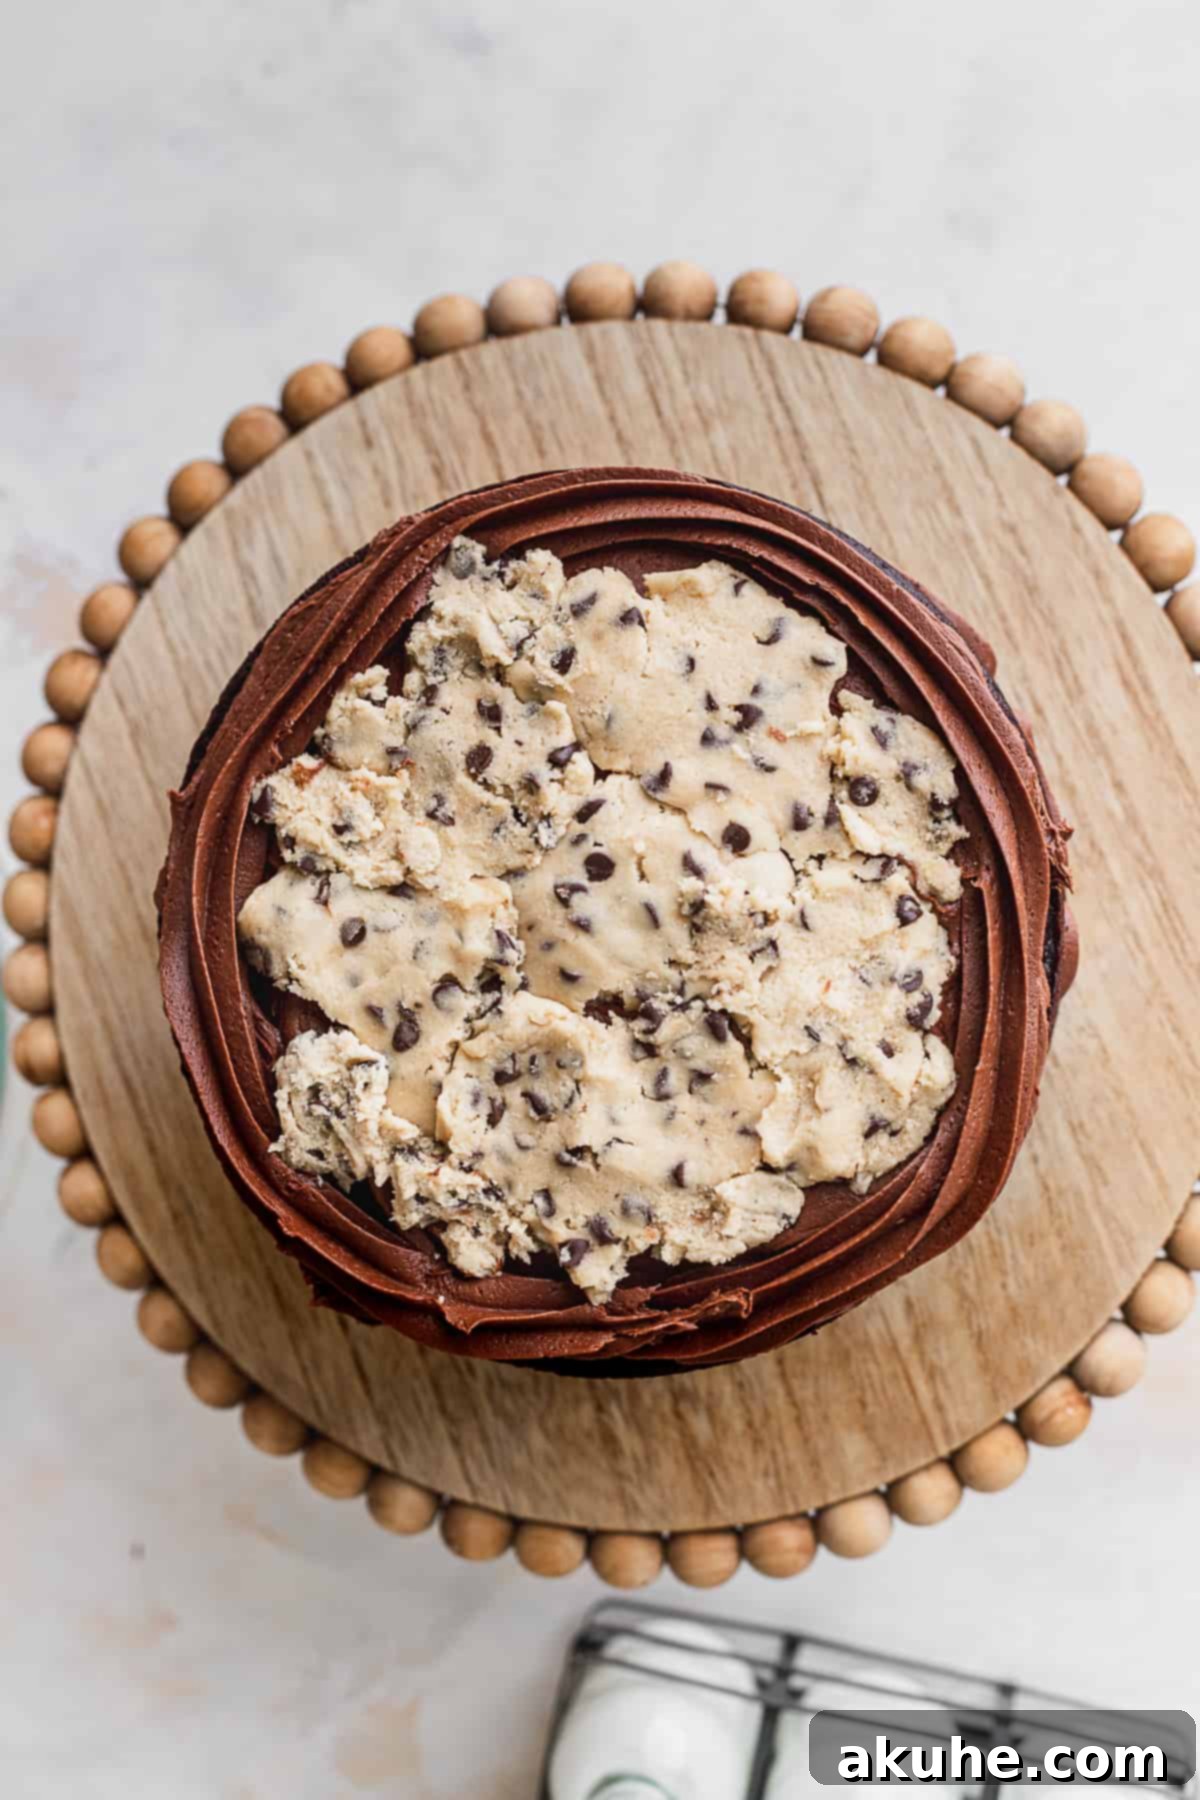
- The Frosting Border Technique: When adding the cookie dough filling, first spread a layer of frosting on the cake. Then, pipe a sturdy border of frosting around the very edge of each cake layer. This creates a “dam” that effectively seals in the edible cookie dough filling, preventing it from oozing out when you stack the next layer.
- Reserve Cookie Dough for Decoration (Optional): For that extra visual appeal, consider saving a small portion of the remaining edible cookie dough (the unflattened portion designated for filling) to crumble or shape on top of the finished cake. This adds a charming rustic touch and hints at the delightful surprise inside. If you prefer, you can use all of it as filling.
- Evenly Distribute Cookie Dough Filling: When placing the edible cookie dough for the filling, take small amounts and flatten them into thin, small discs. Arrange these discs evenly over the frosting layer within the piped border. This ensures that every slice gets a consistent amount of that delicious, chewy cookie dough.
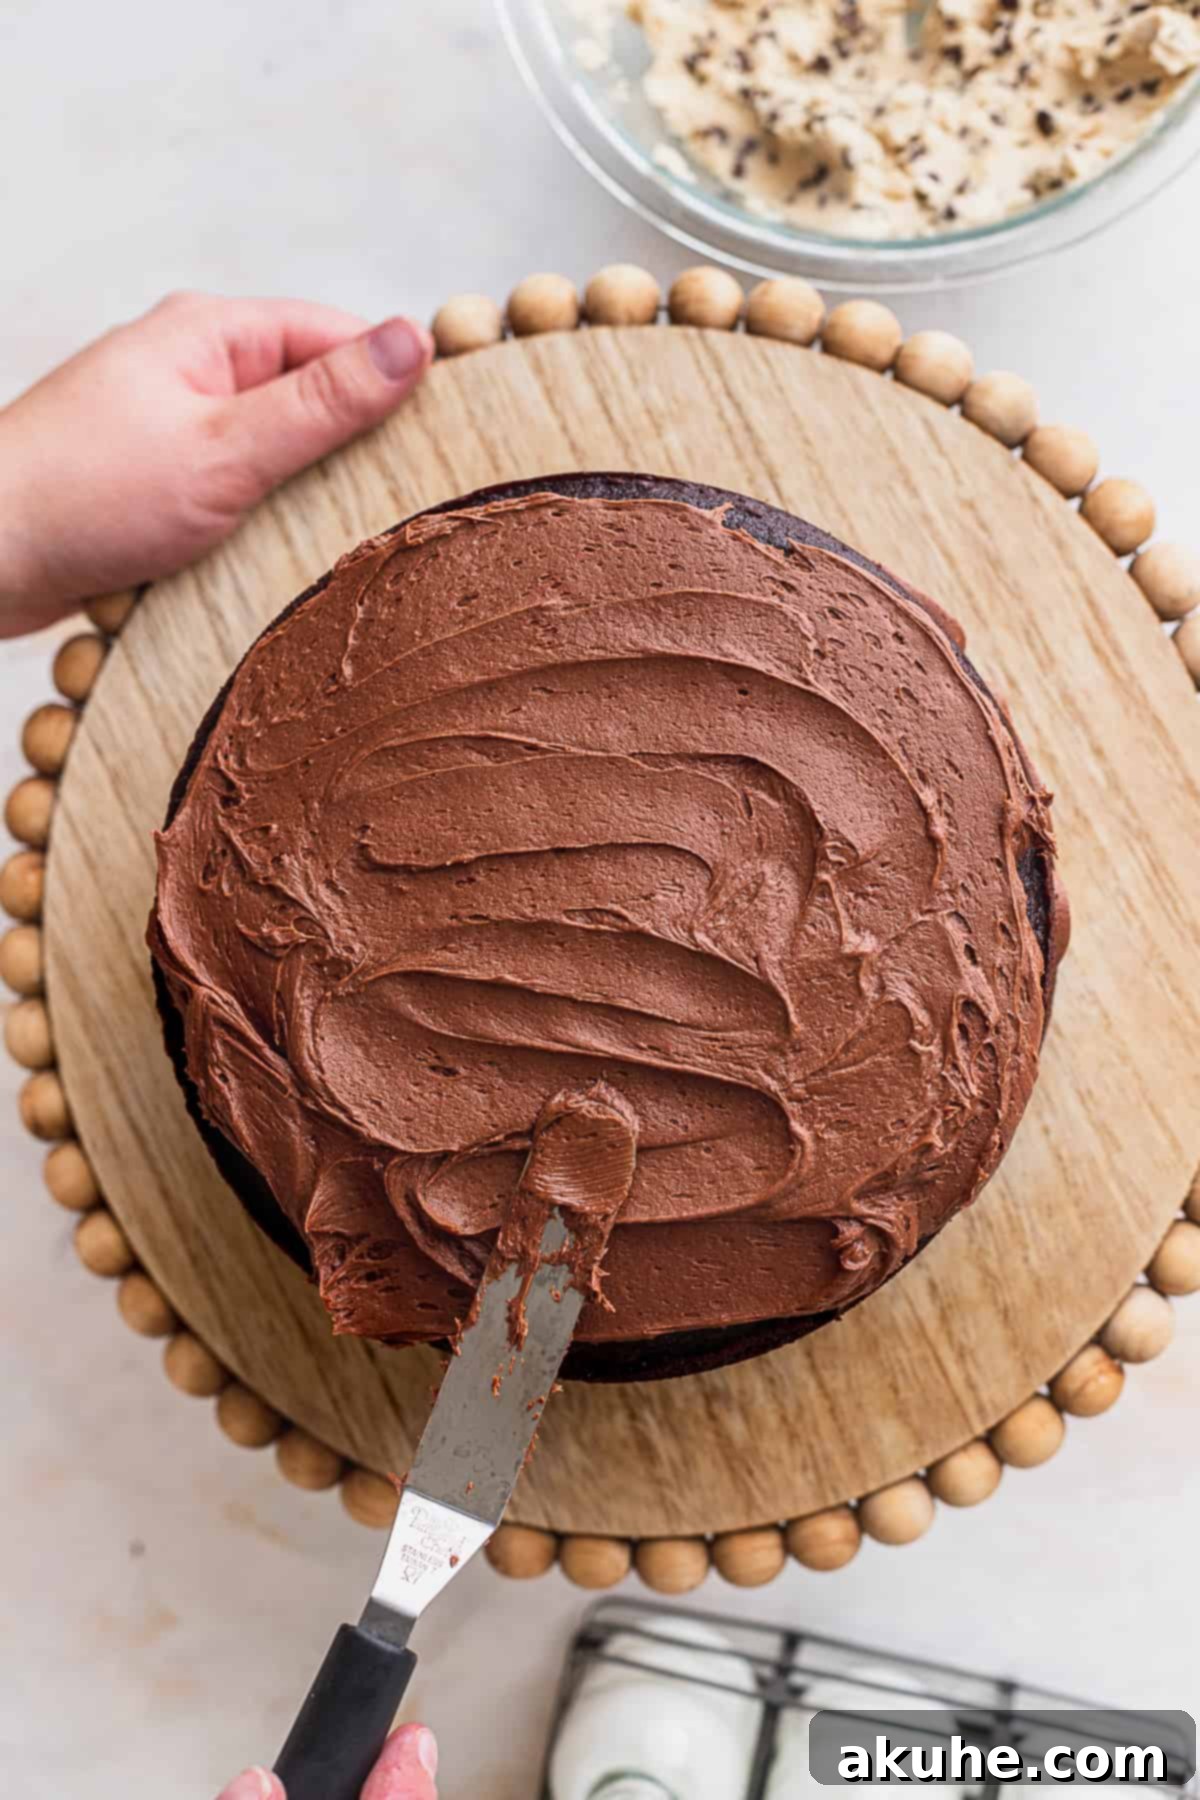
- Achieving a Semi-Naked Look: For a trendy “semi-naked” cake like the one pictured, apply a very thin, translucent layer of frosting over the entire cake (sides and top). The cake should be visible through this light coating. The top will generally have a slightly thicker layer of frosting compared to the sides, creating a lovely contrast.
- For a Fully Frosted Cake (Crumb Coat Method): If you desire a completely smooth, fully frosted cake, start by applying a very thin “crumb coat” of frosting over the entire cake. This traps any loose crumbs. Freeze the cake for 15 minutes to allow this crumb coat to firm up completely. Once firm, apply the final, thicker layer of frosting smoothly and evenly.
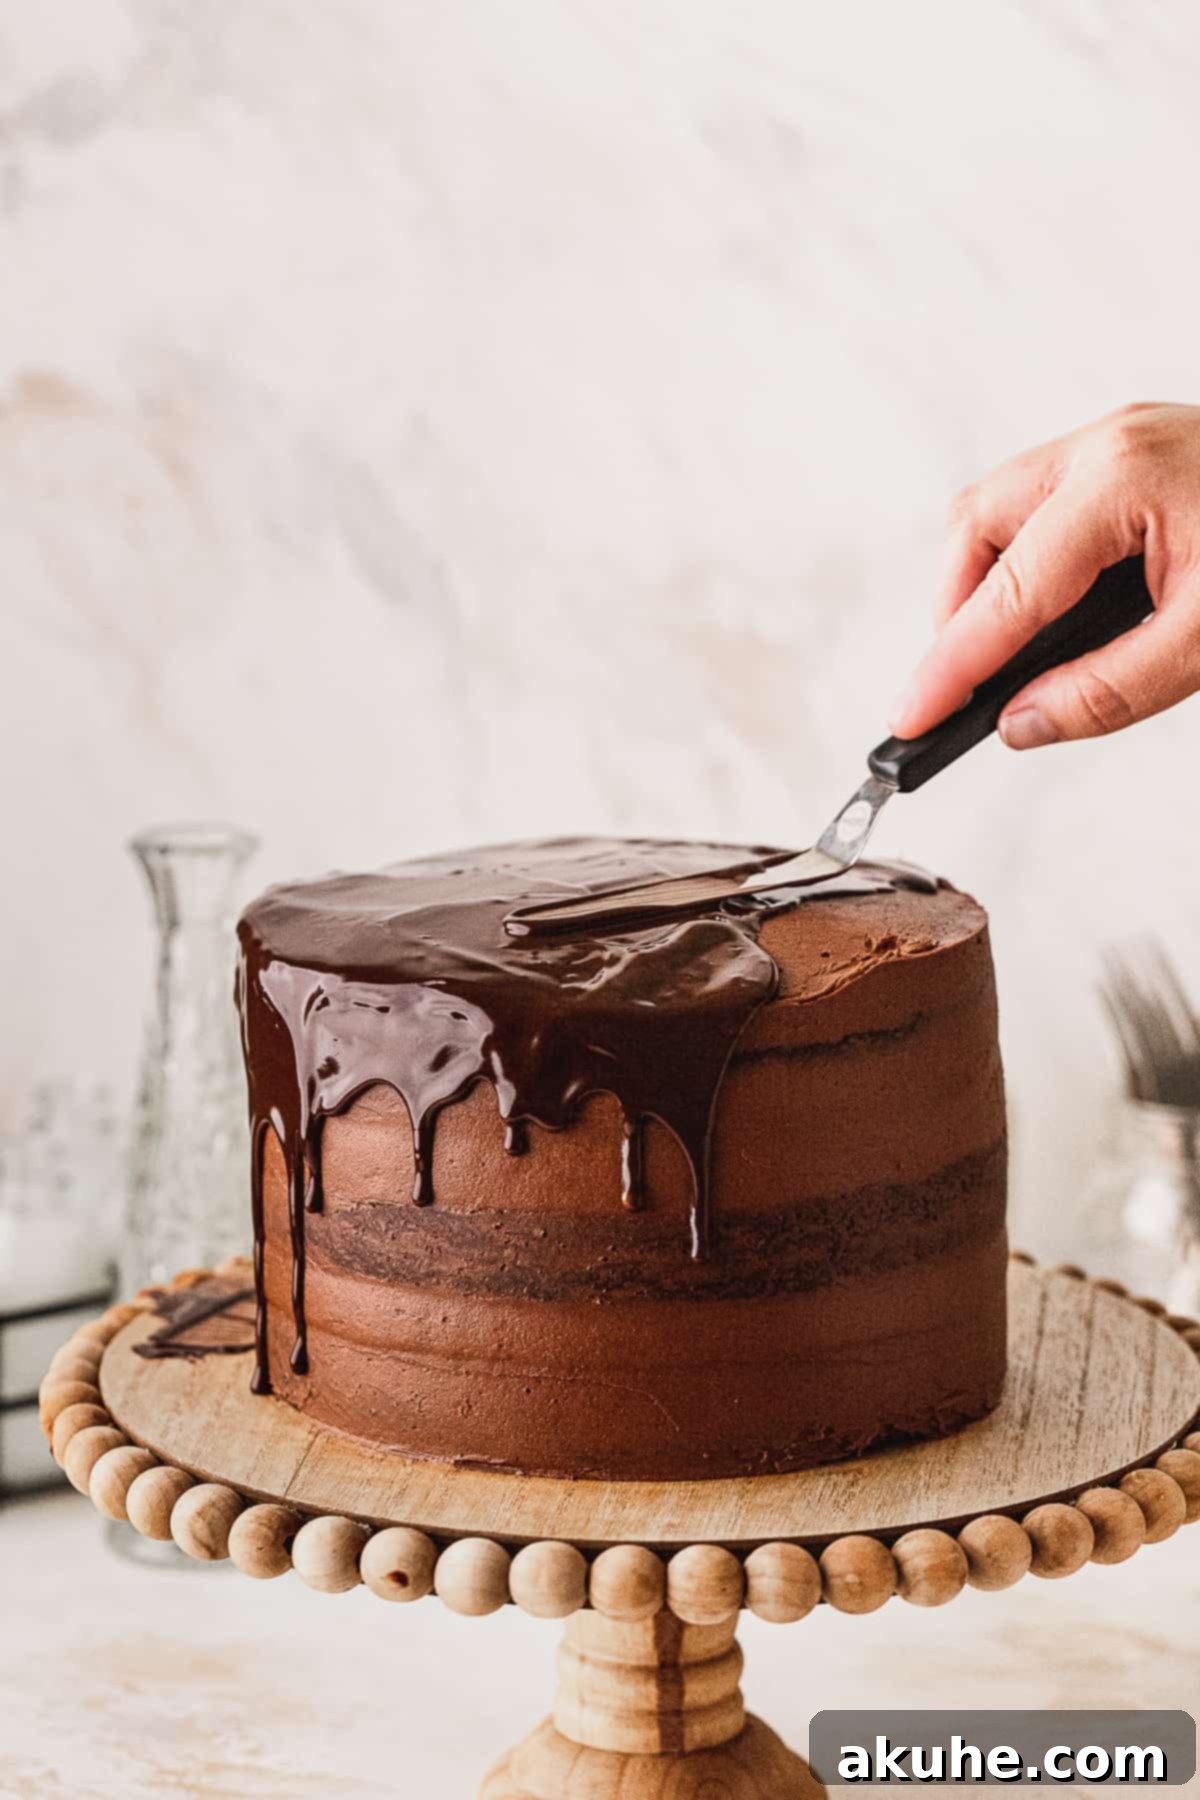
- Chill for a Perfect Chocolate Drip: Before attempting to add the chocolate ganache drip, freeze the assembled and frosted cake for at least 10-15 minutes. A very cold cake is essential because it causes the warm ganache to set quickly upon contact, creating beautifully defined drips that won’t slide all the way down or pool at the bottom.
- Freeze Again for Top Decorations: If you plan to pipe additional frosting decorations or add more cookie dough to the top of the cake, freeze the cake again for another 10 minutes after applying the chocolate drip. This step is crucial for solidifying the ganache, ensuring that any subsequent frosting or toppings will sit securely on top without sliding off the edges of the drip.
Helpful Substitutions for Your Chocolate Cookie Brownie Cake
Baking can be flexible! If you’re missing an ingredient or simply want to experiment with different flavors, here are some reliable substitutions that can be made for your **Chocolate Cookie Brownie Cake** without compromising too much on taste or texture:
- Cookie Dough Variations: While classic chocolate chip cookie dough is divine, you can easily customize the flavor. For a delightful twist, add 1/4 cup of smooth peanut butter to the cookie dough recipe. This creates a wonderful peanut butter cookie dough that pairs exquisitely with the chocolate brownie cake and fudge frosting, adding another layer of richness.
- Melted Chocolate Options: The recipe calls for semi-sweet chocolate, but you have flexibility. You can use dark chocolate for an even more intense, less sweet chocolate flavor in your brownie cake. Alternatively, milk chocolate can be used, but be aware that it will result in a significantly sweeter cake. Adjust the sugar in the cake recipe slightly if you opt for milk chocolate to maintain balance.
- Buttermilk Alternative: If you don’t have store-bought buttermilk on hand, don’t worry! You can easily make a homemade substitute. Simply pour 1 cup of regular cow’s milk (dairy or non-dairy can work, but dairy is best) into a measuring cup and add 1 tablespoon of fresh lemon juice or white vinegar. Stir gently and let it sit for 5-10 minutes. The milk will curdle slightly and thicken, mimicking the acidity and consistency of true buttermilk.
- Frosting Flavor Swap: While our chocolate fudge frosting is incredibly decadent, if you’re a true cookie dough aficionado, you might consider a cookie dough frosting! To do this, simply double our separate cookie dough frosting recipe (linked here) and use it in place of the chocolate fudge frosting. This will create an even more intense cookie dough experience throughout the entire cake.
Frequently Asked Questions (FAQ) about Chocolate Cookie Brownie Cake
Absolutely! The edible cookie dough can be prepared 2-3 days in advance. Store it tightly wrapped in plastic cling wrap in the refrigerator. This can be a great time-saver when planning to bake your cake.
Yes, you can certainly bake the cake layers in advance. Once fully cooled, wrap each cake layer tightly in several layers of plastic cling wrap. You can store them in the freezer for up to 1 week. When ready to assemble, simply thaw the frozen cake layers at room temperature for about 1 hour before decorating. This allows for excellent flexibility in your baking schedule.
Yes, this recipe is wonderfully versatile and can be made into cupcakes! You will need to halve the entire recipe (for both cake and cookie dough, and frosting) to yield a manageable batch of cupcakes. Baking times will also be significantly shorter, so keep a close eye on them.
It certainly can! This recipe works well as a sheet cake. However, be sure to halve the amount of frosting called for, as a single layer sheet cake will require less frosting than a multi-layered round cake.
While I haven’t personally tested this specific recipe with egg substitutes, it may be possible with commercial egg replacers or flax eggs. If you successfully make this cake using an egg substitute, please share your experience and results in the comments!
Storing and Freezing Your Chocolate Cookie Brownie Cake
To ensure your magnificent **Chocolate Cookie Brownie Cake** remains fresh and delicious for as long as possible, proper storage is essential. Here are our recommendations:
Storing
Store the entire chocolate cookie brownie cake or any leftover slices in an airtight container in the refrigerator. A dedicated cake carrier is ideal for this, as it protects the frosting and maintains moisture. Stored correctly, the cake will remain fresh and flavorful for up to 5 days. For the best taste and texture, allow slices to come to room temperature for about 20-30 minutes before serving.
Freezing
This chocolate cookie brownie cake freezes beautifully, making it perfect for preparing ahead or enjoying individual portions later. To freeze, slice the cake into individual servings. Wrap each slice tightly in plastic cling wrap, ensuring no air is exposed to prevent freezer burn. Then, place the wrapped slices in an airtight freezer-safe container or a heavy-duty freezer bag. The cake slices can be frozen for up to 30 days. To enjoy, simply remove a slice from the freezer and let it thaw at room temperature for approximately 1 hour before eating. It will taste just as fresh and delicious as the day it was baked!
Explore More Indulgent Cake Recipes
We hope you’ve thoroughly enjoyed creating and savoring this incredible Chocolate Cookie Brownie Cake! We’d love to hear your thoughts. Make sure to leave us a star review below to share your experience.
For more baking inspiration and delightful recipes, make sure to tag us on Instagram @stephaniesweettreats. We love seeing your creations! To discover even more sweet ideas and treats, be sure to follow us on Pinterest.
Chocolate Cookie Brownie Cake
14 slices
Ingredients
Cookie Dough
- 2 cups All-purpose flour
- 1 tsp Cornstarch
- 1 tsp Salt
- 3/4 cup Unsalted butter, room temperature
- 3/4 cup Brown sugar, packed light or dark
- 1/4 cup White granulated sugar
- 1/3 cup Milk
- 1 tsp Pure vanilla extract
- 1 cup Mini chocolate chips
Brownie Cake
- 4 oz Chopped semi-sweet chocolate, I used 70%
- 2 cups All-purpose flour
- 1 cup Dutch process cocoa powder
- 2 tsp Baking powder
- 1 tsp Baking soda
- 1 tsp Salt
- 1 1/2 cups White granulated sugar
- 1/4 cup Brown sugar, packed light or dark
- 3 Large eggs, room temperature
- 3/4 cup Oil, canola or vegetable
- 2 tsp Pure vanilla extract
- 1 cup Buttermilk, room temperature
- 3/4 cup Hot water
Chocolate Fudge Frosting
- 8 oz Cream cheese, room temperature
- 1 1/2 cups Unsalted butter, slightly cold
- 6 cups Powdered sugar, sifted
- 1 cup Cocoa powder, sifted
- 2 tsp Pure vanilla extract
- 1/2 tsp Salt
- 1/4 cup Chocolate ganache
Chocolate Ganache
- 1 cup Semi-sweet chocolate chips
- 3/4 cup Heavy cream
Instructions
Cookie Dough
- Preheat the oven to 300°F (150°C). Measure out the flour and spread it evenly on a cookie sheet. Bake for 5 minutes. This important step cooks the flour, making it safe to eat. Let it cool completely before using in the cookie dough.2 cups All-purpose flour
- In a medium mixing bowl, sift together the cooled flour, cornstarch, and salt. Set this dry mixture aside. In the bowl of a stand mixer, beat the room temperature unsalted butter, brown sugar, and white granulated sugar together on medium-high speed for about 2 minutes. The mixture should become very light, fluffy, and pale in color.1 tsp Cornstarch, 1 tsp Salt, 3/4 cup Unsalted butter, 3/4 cup Brown sugar, 1/4 cup White granulated sugar
- Add the pure vanilla extract and milk to the butter mixture, mixing until just combined. Be sure to scrape down the sides and bottom of the bowl to ensure everything is well-incorporated. Gradually add the prepared dry ingredients to the wet mixture, mixing on low speed until just combined. Finally, fold in the mini chocolate chips until they are evenly distributed throughout the dough.1/3 cup Milk, 1 tsp Pure vanilla extract, 1 cup Mini chocolate chips
- Line a clean cookie sheet with parchment paper. Using a 1 oz cookie scoop, portion out 15 balls of cookie dough. Gently flatten each ball into a disc shape with your hands. These discs will be baked into the cake layers. Place these discs, along with any remaining unflattened cookie dough (which will be used for the filling), in the refrigerator to chill thoroughly. Chilling is important to help the dough hold its shape.
Brownie Cake
- Preheat your oven to 350°F (175°C). Prepare three 8-inch round cake pans by spraying them generously with baking non-stick spray. Line the bottom of each pan with an 8-inch parchment paper circle, then spray again to ensure easy release.
- Place the chopped semi-sweet chocolate in a microwave-safe bowl. Heat in the microwave for 20 seconds, then stir well. Continue heating in 10-second intervals, stirring vigorously after each, until the chocolate is mostly melted. The residual heat will melt the remaining chunks as you stir, creating a smooth and glossy mixture. Set aside to cool to room temperature.4 oz Chopped semi-sweet chocolate
- In a large mixing bowl, sift together the all-purpose flour, Dutch process cocoa powder, baking powder, and baking soda. Whisk these dry ingredients together thoroughly. Then, mix in the salt, white granulated sugar, and brown sugar until evenly distributed. In a separate medium mixing bowl, combine the room temperature eggs, oil (canola or vegetable), pure vanilla extract, room temperature buttermilk, and the cooled melted chocolate. Whrsk these wet ingredients until well blended.2 cups All-purpose flour, 1 cup Dutch process cocoa powder, 2 tsp Baking powder, 1 tsp Baking soda, 1 tsp Salt, 1 1/2 cups White granulated sugar, 1/4 cup Brown sugar, 3 Large eggs, 3/4 cup Oil, 2 tsp Pure vanilla extract, 1 cup Buttermilk
- Pour the combined wet ingredients into the large bowl containing the dry ingredients. Whisk gently until the batter is just smooth and no streaks of dry flour remain. Be careful not to overmix, as this can develop gluten and lead to a tough cake. Next, slowly pour the hot water (it should be steaming, not boiling rapidly) into the batter while continuously whisking very gently. This step helps activate the cocoa and creates a wonderfully tender crumb; pouring slowly prevents the eggs from scrambling.3/4 cup Hot water
- Divide the cake batter evenly among the three prepared cake pans. Then, take the chilled, flattened cookie dough discs from the refrigerator and evenly place five discs into the batter of each cake pan.
- Bake the cake layers for 30-34 minutes. To check for doneness, insert a toothpick into the center of a cake. If it comes out with moist crumbs but no wet batter, the cake is ready. Avoid overbaking to keep the brownie layers moist and fudgy.
- Once baked, allow the cakes to cool in their hot pans for 10-15 minutes. This helps them firm up slightly before you attempt to move them. After this initial cooling, carefully invert the cakes onto a wire cooling rack to cool completely. It’s crucial that the cake layers are entirely cool before you proceed with decorating to prevent the frosting from melting.
Chocolate Ganache
- Place the semi-sweet chocolate chips into a heatproof bowl. In a small saucepan, heat the heavy cream over medium-low heat until it begins to steam and gentle bubbles form around the edges (do not bring to a rolling boil). Pour the hot cream directly over the chocolate chips. Let the mixture sit undisturbed for 1 minute and 30 seconds to allow the chocolate to soften and melt. Then, gently stir from the center outwards until the ganache is completely smooth, glossy, and emulsified. If any stubborn chocolate chunks remain, you may heat the ganache in the microwave for brief 10-second intervals, stirring after each, until perfectly smooth. Set aside to cool slightly before incorporating into the frosting.1 cup Semi-sweet chocolate chips, 3/4 cup Heavy cream
Chocolate Fudge Frosting
- To achieve the perfect frosting consistency, set your unsalted butter out on the counter for about 30 minutes before you begin, allowing it to become slightly cold but still pliable. This “slightly cold” temperature is ideal for creating a stable cream cheese frosting. While the butter is resting, sift the powdered sugar and Dutch process cocoa powder together into a bowl to remove any lumps. This ensures a wonderfully smooth frosting.1 1/2 cups Unsalted butter, 6 cups Powdered sugar, 1 cup Cocoa powder
- In the bowl of a stand mixer fitted with the paddle attachment, beat the slightly cold butter and room temperature cream cheese on high speed for approximately 2 minutes. The mixture should become incredibly light, fluffy, and well-aerated. Stop the mixer and scrape down the sides and bottom of the bowl thoroughly. Gradually add the sifted powdered sugar and cocoa powder mixture, starting on low speed to avoid a cloud of powder, then increasing to medium until fully incorporated. At this stage, the frosting will be quite thick.8 oz Cream cheese
- Add the pure vanilla extract, salt, and the cooled chocolate ganache to the frosting. Mix on low speed until all ingredients are just combined. Then, increase the mixer speed to high and beat for about 1 minute. This final beat will make the frosting incredibly creamy, smooth, and silky, and it will lighten slightly in color.2 tsp Pure vanilla extract, 1/2 tsp Salt, 1/4 cup Chocolate ganache
Assembly
- Take the remaining edible cookie dough (for filling) out of the fridge about 20 minutes before assembling so it softens slightly. If desired, separate a small amount of cookie dough to use for topping the cake later. Place a small dollop of frosting on your cake board or serving platter; this acts as an adhesive to keep the bottom cake layer securely in place.
- Place the first cake layer (bottom side down for a flat top) onto the prepared board. Spread about 3/4 cup of the chocolate fudge frosting evenly over this layer. Using a piping bag, pipe a border of frosting around the very edge of the cake layer. This creates a “dam” for the filling. Evenly distribute half of the remaining edible cookie dough (flattened into small discs) over the frosting within the piped border. Carefully place the second cake layer on top, bottom side down, and gently press to secure. Repeat the frosting and cookie dough filling steps for the second layer.
- Carefully place the final cake layer on top, again bottom side down for a flat surface. Apply a very thin layer of frosting all around the entire cake – this is your “crumb coat.” It should be transparent enough that you can still see the cake through it, trapping any loose crumbs. Freeze the cake for 15 minutes to allow this crumb coat to set firmly. Once set, apply the remaining frosting to finish frosting the entire cake, aiming for a smooth and even surface.
- To prepare for the chocolate drip, gently re-warm the remaining chocolate ganache in the microwave in 15-second intervals, stirring after each, until it’s pourable but not hot. Freeze the frosted cake for 10-15 minutes before applying the ganache. A cold cake is crucial as it causes the warm ganache to set quickly, creating defined, beautiful drips down the sides. Carefully pour the ganache over the top of the cake, allowing it to drip naturally down the edges.
- If you wish to pipe additional frosting decorations or add the reserved cookie dough on top, freeze the cake again for another 10 minutes after applying the chocolate drip. This step solidifies the ganache, preventing any new decorations from sliding off. Keep the finished cake refrigerated until you are ready to serve to maintain its structure and freshness.
Notes
High Altitude Baking: If you are baking at a high altitude, you may need to make a slight adjustment to the cake recipe. Consider adding an extra 2 tablespoons of all-purpose flour to the cake batter to help with structure.
Room Temperature Ingredients: For all ingredients specified as “room temperature” (e.g., dairy and eggs), ensure they are pulled out from the refrigerator at least 2 hours before you begin your baking process. This helps achieve a smooth batter and a consistent cake texture.
Calories: 940kcal
,
Carbohydrates: 147g
,
Protein: 10g
,
Fat: 63g
,
Saturated Fat: 32g
,
Polyunsaturated Fat: 5g
,
Monounsaturated Fat: 20g
,
Trans Fat: 1g
,
Cholesterol: 119mg
,
Sodium: 653mg
,
Potassium: 394mg
,
Fiber: 6g
,
Sugar: 55g
,
Vitamin A: 1390IU
,
Vitamin C: 1mg
,
Calcium: 150mg
,
Iron: 5mg
