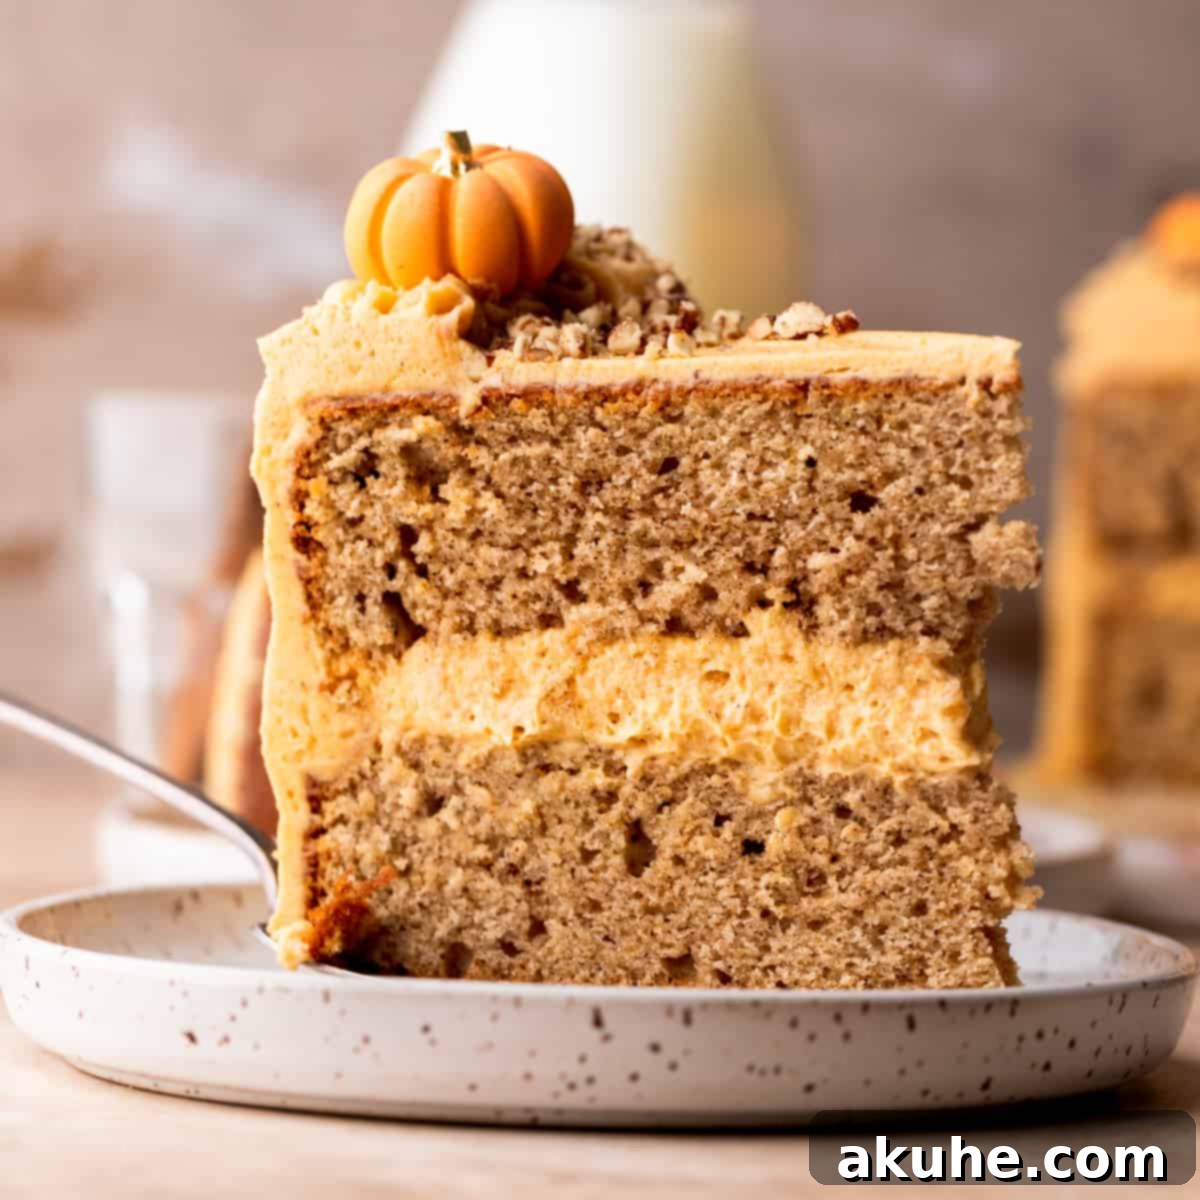
Welcome to the ultimate autumn indulgence: our spectacular Chai Cake with Spiced Pumpkin Frosting. This isn’t just any dessert; it’s a culinary celebration that perfectly captures the cozy essence of fall. Imagine a wonderfully soft, incredibly moist chai spice cake, generously layered and crowned with a luscious, perfectly spiced pumpkin frosting. Every bite is an experience, reminiscent of your favorite chai pumpkin spice latte from a high-end cafe, but elevated to a sophisticated dessert.
This recipe transforms the comforting warmth of chai into a multi-layered masterpiece, ideal for holiday gatherings, a special weekend treat, or simply to brighten a crisp autumn evening. The blend of seven carefully selected spices ensures a deep, authentic chai flavor without the need for tea bags, making the process straightforward while delivering exceptional taste.
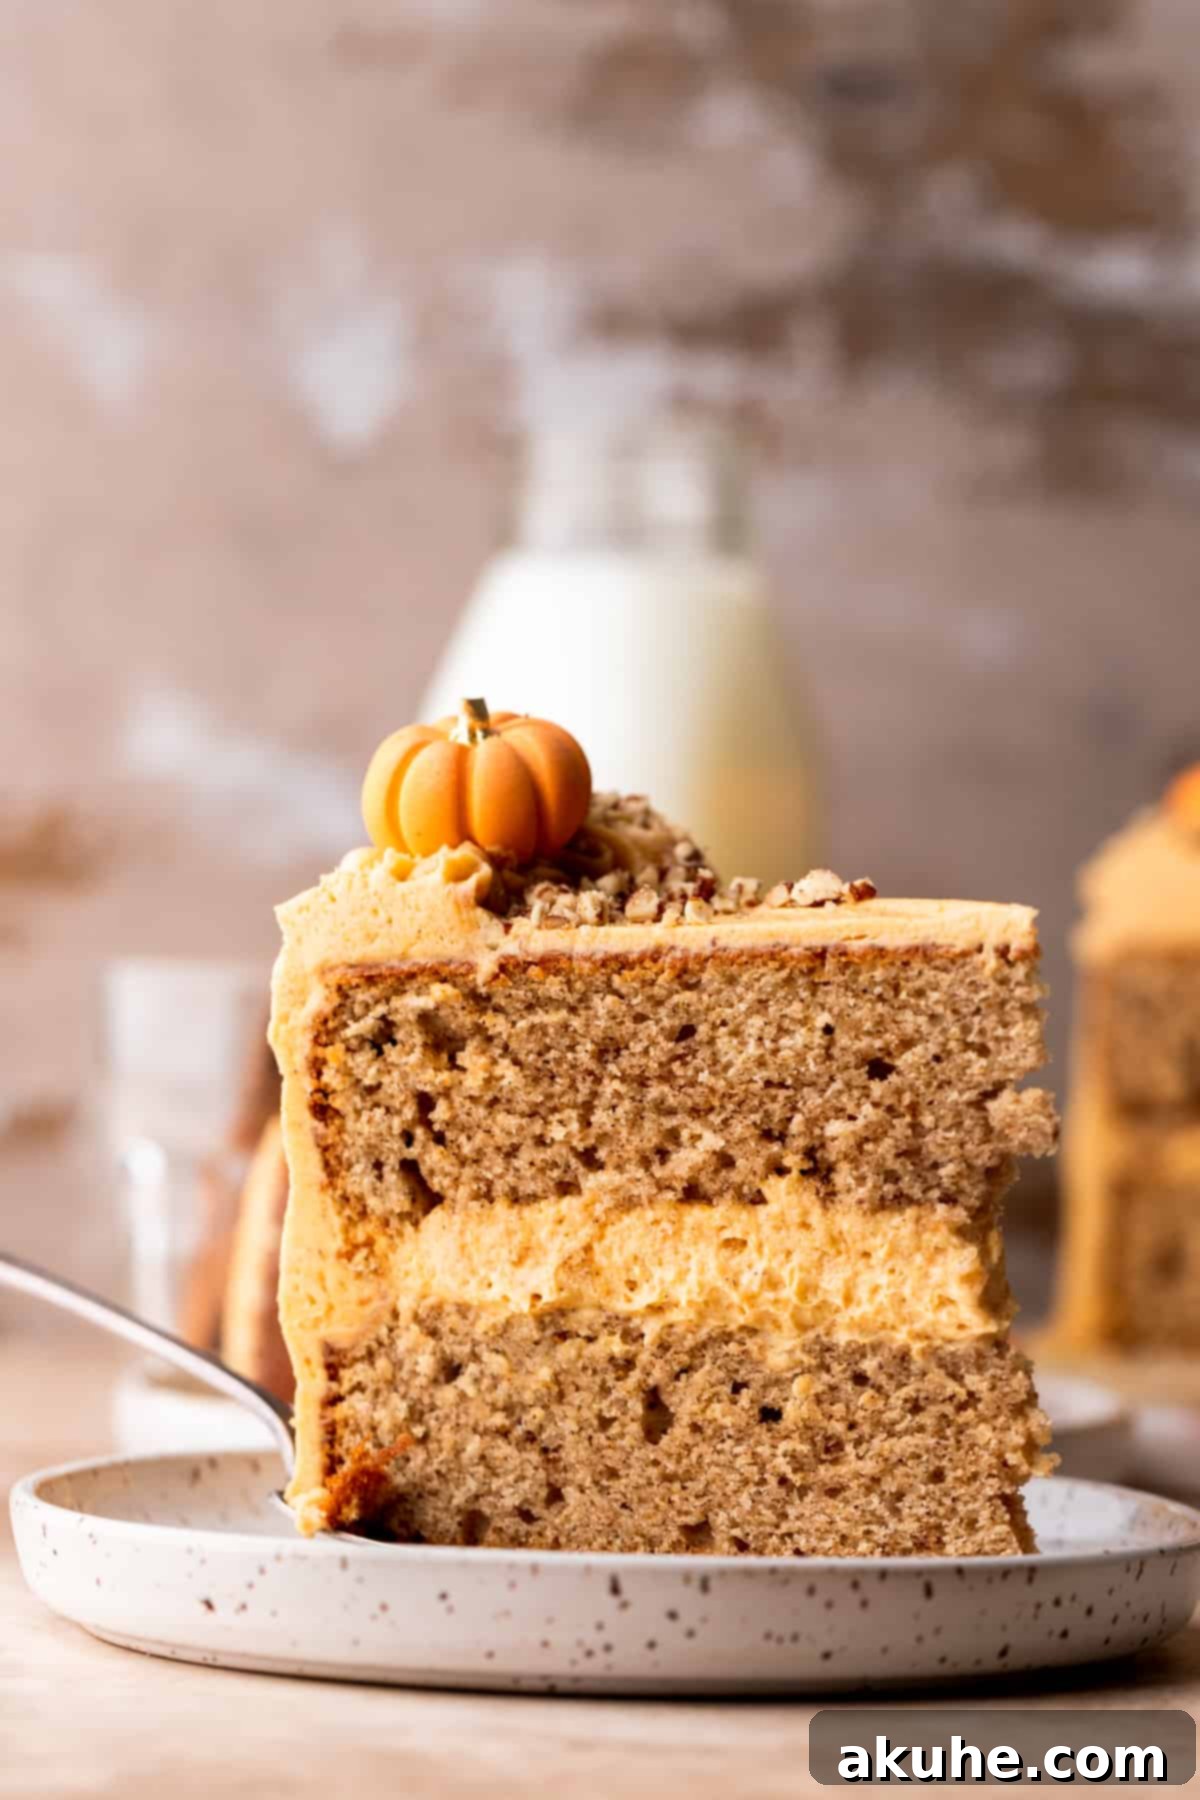
What truly sets this cake apart is the luxurious pumpkin buttercream frosting. Crafted with real pumpkin puree and a medley of warm spices, it complements the chai cake layers beautifully, creating a harmonious blend of flavors that will tantalize your taste buds. This two-layer cake strikes the perfect balance between ease of preparation and impressive presentation, making it accessible for home bakers of all skill levels.
If you adore spiced treats, be sure to explore more of our delightful recipes such as the Moist Chai Spiced Sheet Cake, a comforting Pumpkin Carrot Cake, and a heartwarming Caramel Apple Spice Cake. Each offers its own unique twist on classic flavors, perfect for any occasion.
Why This Chai Cake Recipe is Your New Fall Favorite
Our Chai Cake with Spiced Pumpkin Frosting is designed to be an unforgettable baking experience, offering both delicious results and a manageable process. Here’s what makes this recipe truly stand out:
- Rich Chai Cake Layers: We’ve created two perfectly moist and tender cake layers, infused with a symphony of seven authentic chai spices. Unlike recipes that rely on tea bags, our blend of ground spices delivers an intense, fragrant flavor that permeates every crumb, ensuring a truly satisfying chai experience. The texture is incredibly soft, light, and melts in your mouth, making it utterly irresistible.
- Decadent Pumpkin Buttercream Frosting: The star complement to our chai cake is this incredibly flavorful pumpkin buttercream. It’s not just pumpkin-flavored; it’s bursting with the richness of pumpkin puree and a carefully balanced mix of spices. A key technique involves blotting the pumpkin puree to remove excess moisture, resulting in a frosting with perfect consistency – rich, creamy, and gloriously fluffy, never watery or too thin.
- Surprisingly Easy to Assemble: Despite its impressive appearance, this is a two-layer cake, which simplifies the assembly process significantly. You won’t be tackling multiple intricate tiers, making it a perfect project for bakers looking for a show-stopping dessert without the extensive fuss. Our step-by-step instructions ensure a smooth and enjoyable baking journey.
- A Symphony of Fall Flavors: This cake brings together the best of autumn. The exotic warmth of chai spices meets the comforting sweetness of pumpkin, creating a flavor profile that is both familiar and exciting. It’s the taste of fall personified, guaranteed to evoke cozy memories and delight your guests.
Essential Ingredient Notes for Success
Achieving the perfect Chai Cake relies on understanding the role of each ingredient and preparing them correctly. Below are important notes on key ingredients to ensure your cake turns out flawlessly. For a complete list of quantities, please refer to the detailed recipe card at the end of this article.
- The Spice Blend: Our signature chai flavor comes from a carefully measured combination of ground cardamom, ground cloves, ground cinnamon, ground ginger, a touch of pumpkin pie spice, ground nutmeg, and even a pinch of black pepper. Each spice plays a vital role in building the complex, aromatic profile characteristic of authentic chai. Ensure your spices are fresh for the most vibrant flavor.
- Unsalted Butter: Always opt for unsalted butter in baking to control the overall saltiness of your recipe. It’s crucial that your butter is softened to room temperature – not melted, and not cold from the fridge. This typically means pulling it out about 2 hours before you plan to start baking. Room temperature butter creams beautifully with sugar, creating an airy base for your cake batter.
- Sour Cream (or Greek Yogurt): Full-fat sour cream or plain Greek yogurt adds incredible moisture and a tender crumb to the cake. Like butter, it should be at room temperature to incorporate smoothly into the batter without curdling or affecting the emulsification.
- Large Eggs: Room temperature eggs are essential for a well-emulsified batter. Cold eggs can cause the butter to seize, resulting in a lumpy batter and a less tender cake. Take them out of the refrigerator at least 2 hours before baking.
- Buttermilk: Full-fat or reduced-fat buttermilk contributes to the cake’s tender texture and adds a subtle tang that balances the sweetness. Its acidity reacts with the baking soda, helping the cake rise beautifully. Ensure it’s also at room temperature for optimal mixing.
- Powdered Sugar: For the pumpkin frosting, sifting your powdered sugar is a non-negotiable step. This removes any lumps, guaranteeing a silky-smooth, grit-free buttercream. Don’t skip this for the best frosting texture!
- Pumpkin Puree: Use 100% pure canned pumpkin puree (like Libby’s), never pumpkin pie filling, which contains added spices and sugar. A critical step for the frosting is to remove excess moisture from the pumpkin puree. Spread it thinly on a plate lined with a few layers of paper towels, then gently blot the top with more paper towels. Repeat this process 3-4 times until the puree is visibly thicker and less watery. This prevents the frosting from becoming runny and ensures a rich, concentrated pumpkin flavor.
Smart Ingredient Substitutions and Adaptations
Baking should be enjoyable and adaptable to various dietary needs or pantry availability. Here are some smart substitutions you can make for this Chai Cake recipe:
- Dairy-Free Options: If you’re looking to make this recipe dairy-free, you’re in luck! Most dairy components in this cake can be swapped with your favorite dairy-free alternatives. Use plant-based butter (ensure it’s suitable for baking), dairy-free sour cream or full-fat coconut cream, and a plant-based milk combined with a tablespoon of vinegar for a homemade dairy-free buttermilk substitute.
- Gluten-Free Baking: While this specific recipe hasn’t been officially tested with gluten-free flour, many readers have successfully adapted similar cake recipes. If you’re experienced in gluten-free baking, you might try a high-quality 1:1 gluten-free baking flour blend that contains xanthan gum. If you do experiment with a gluten-free version, please share your results – your insights help the entire baking community!
- Buttermilk Hack: No buttermilk on hand? No problem! You can easily make your own. Simply measure out 1 cup of regular milk (dairy or non-dairy) and stir in 1 tablespoon of white vinegar or lemon juice. Let the mixture sit for about 5-10 minutes until it slightly curdles. This homemade buttermilk substitute will work perfectly in this recipe, providing the necessary acidity and moisture.
Step-by-Step Guide to Baking Your Dream Chai Cake
Creating this delicious Chai Cake is a rewarding process, and with these detailed instructions, you’ll achieve perfection. You’ll need a stand mixer with a paddle attachment or a reliable hand mixer, and two 8-inch round cake pans for the layers.
STEP 1: Prepare Your Dry Ingredients with Precision. In a medium-sized mixing bowl, thoroughly whisk together the all-purpose flour, baking powder, baking soda, salt, and all of your aromatic chai spices: ground cardamom, ground cloves, ground cinnamon, ground ginger, pumpkin pie spice, ground nutmeg, and black pepper. Whisking ensures an even distribution of leavening agents and spices, preventing pockets of unmixed ingredients in your cake.
STEP 2: Cream Butter and Sugar for a Light Base. In a large mixing bowl, using your stand mixer fitted with the paddle attachment (or a hand mixer), beat the softened unsalted butter and white granulated sugar together on high speed for a full 3 minutes. This crucial step incorporates air into the mixture, resulting in a lighter, more tender cake. After creaming, reduce the speed to medium and add the vanilla extract, room-temperature sour cream, and eggs, one at a time, mixing until just combined after each addition. Avoid overmixing once the eggs are in.
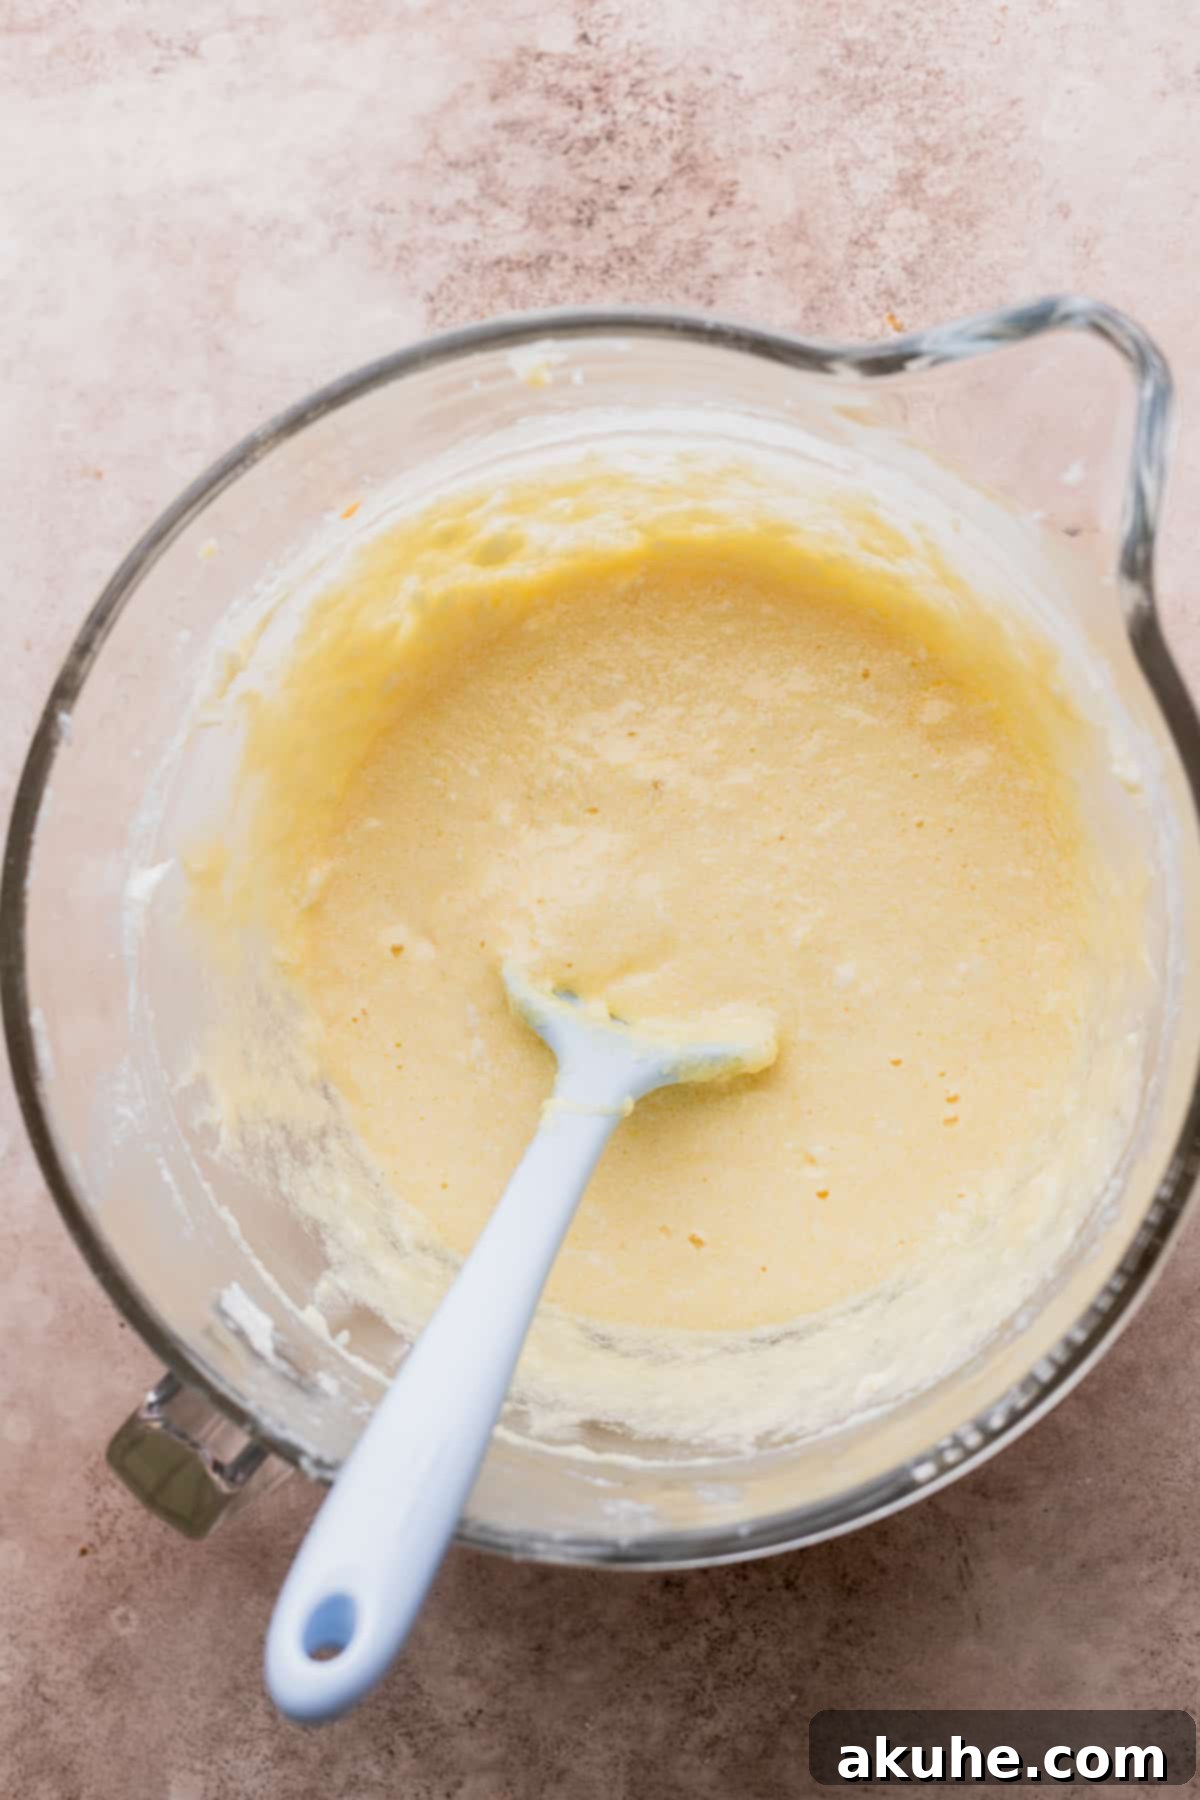
STEP 3: Alternate Dry and Wet for Perfect Batter Consistency. With your mixer on low speed, gradually add the dry ingredient mixture and the buttermilk to your wet ingredients, alternating between the two. Begin and end with the dry ingredients. Start by adding one-third of the dry mixture, mix until just combined, then add half of the buttermilk, mix, then another third of the dry, followed by the remaining buttermilk, and finally the last third of the dry mixture. This method prevents overmixing and ensures a smooth, well-combined batter. Once the batter is ready, divide it evenly between your two prepared 8-inch cake pans.
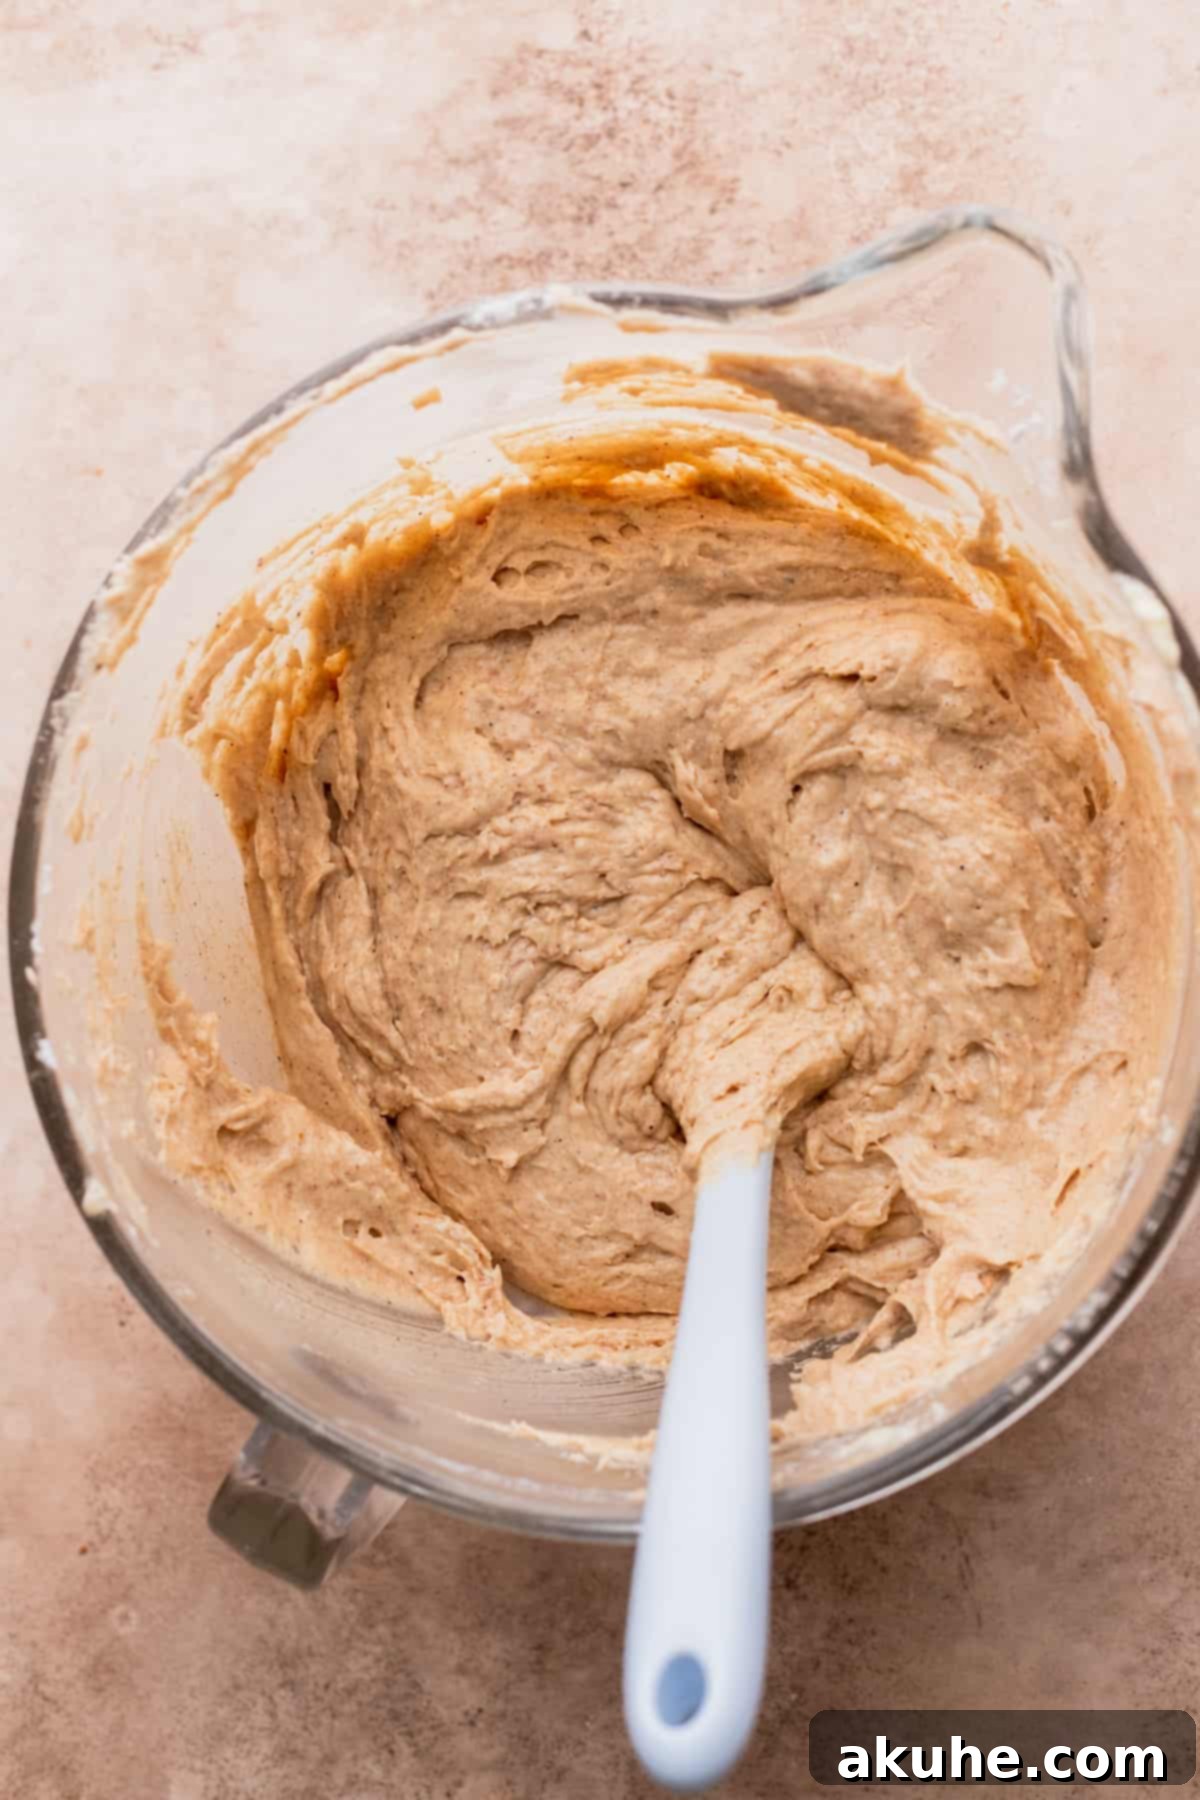
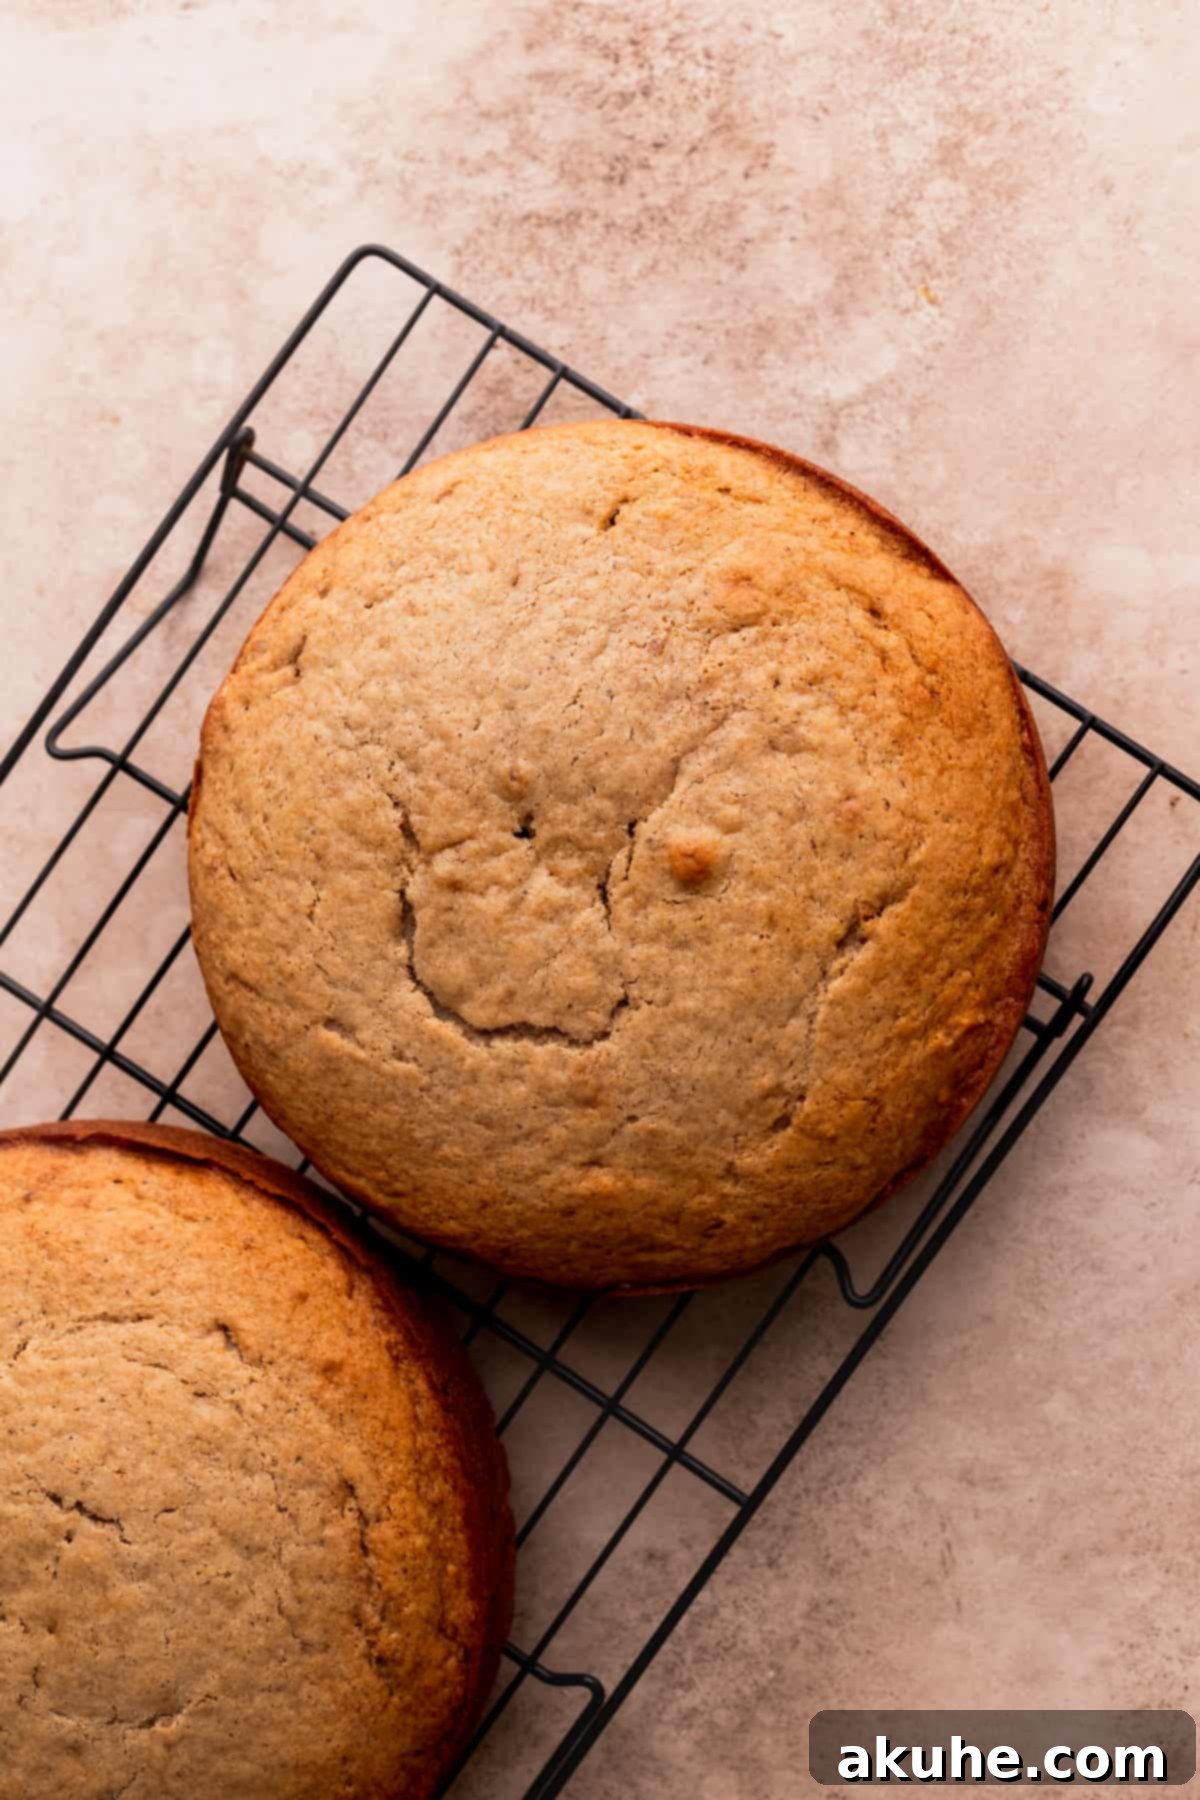
STEP 4: Bake to Golden Perfection and Cool. Bake the cake layers in your preheated oven for approximately 26-30 minutes. Baking times can vary, so look for visual cues: the cakes should be golden brown, spring back when lightly touched in the center, and a toothpick inserted into the middle should come out clean. Once baked, remove the pans from the oven and let the cakes cool in their hot pans for 10 minutes. This allows them to firm up slightly before you attempt to invert them. After 10 minutes, carefully flip the cakes onto a wire cooling rack to cool completely. It’s crucial that the cake layers are entirely cool before you even think about frosting them; warm cakes will melt your beautiful buttercream!
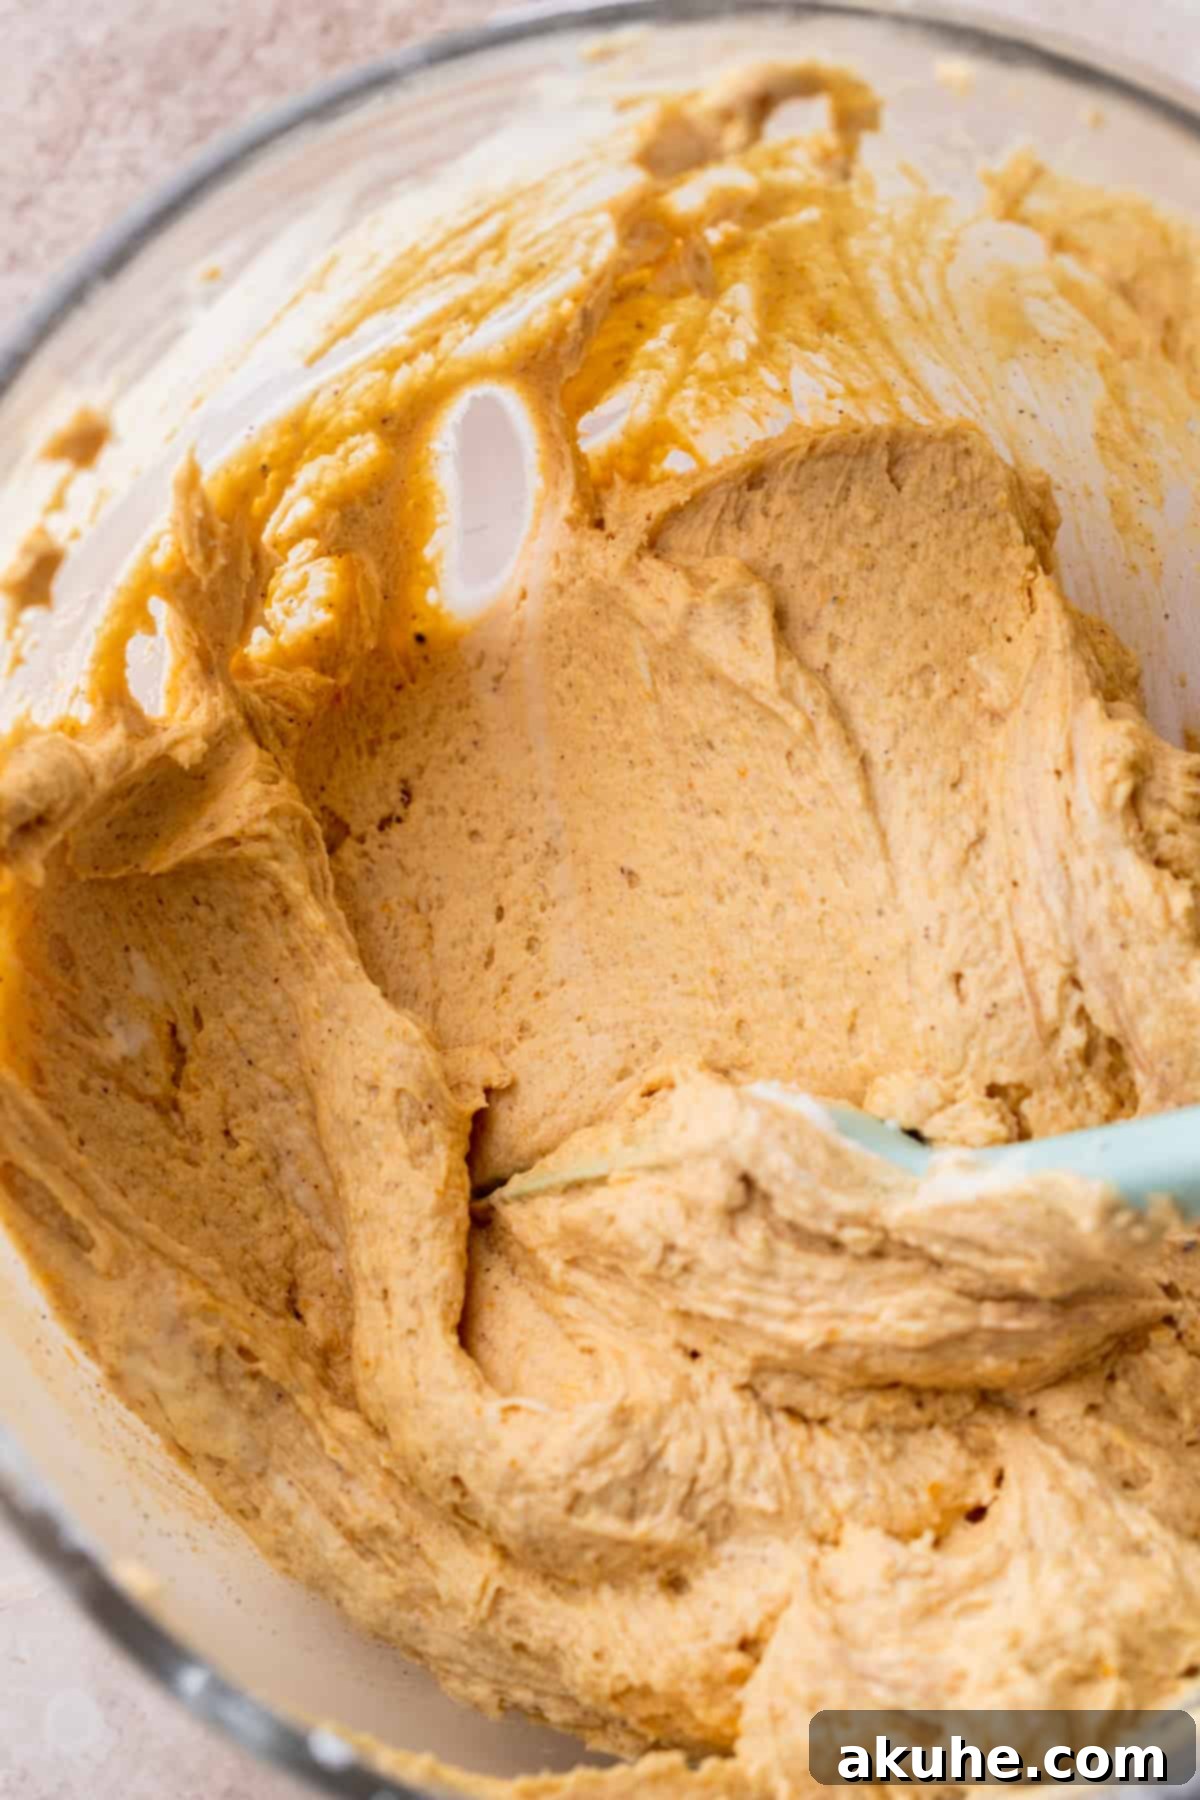
STEP 5: Craft Your Velvety Pumpkin Frosting. Before you start mixing the frosting, ensure your powdered sugar is sifted into a large mixing bowl – this is key for a smooth texture. Next, prepare your pumpkin puree: spread it thinly on a plate and use paper towels to blot out as much excess moisture as possible. The goal is a thicker, almost pasty consistency. Now, in your mixer, beat the room-temperature unsalted butter on high speed for 3 minutes until it’s light and fluffy. Gradually add half of the sifted powdered sugar, mixing on low speed until fully incorporated. Scrape down the sides of the bowl, then add the remaining powdered sugar and mix again until just combined. Finally, add the blotted pumpkin puree, pure vanilla extract, ground cinnamon, ground nutmeg, and a pinch of salt. Beat the mixture on high speed for several minutes until the frosting is wonderfully fluffy, light, and perfectly creamy. The salt helps to balance the sweetness and enhance the spice flavors.
Expert Tips for Assembling Your Chai Cake
Assembling a layered cake can seem daunting, but with a few simple tricks and the right tools, you can achieve a professional-looking finish. Here are our top tips for decorating your beautiful Chai Cake:
- Helpful Cake Decorating Tools: While not strictly essential, these tools can make cake decorating much easier: a turntable for effortless rotation, various icing offset spatulas and a straight icing spatula for smooth spreading, a cake scraper for perfectly straight sides, a cake leveler (or a long serrated bread knife) for even layers, and a cake carrier for transport and storage.
- Leveling Your Cake Layers: For a stable and beautifully stacked cake, ensure your layers are perfectly flat. If your cakes have domed tops after baking, use a serrated knife or a dedicated cake leveler to carefully trim off the crowns, creating flat surfaces. This makes stacking easier and prevents the cake from leaning.
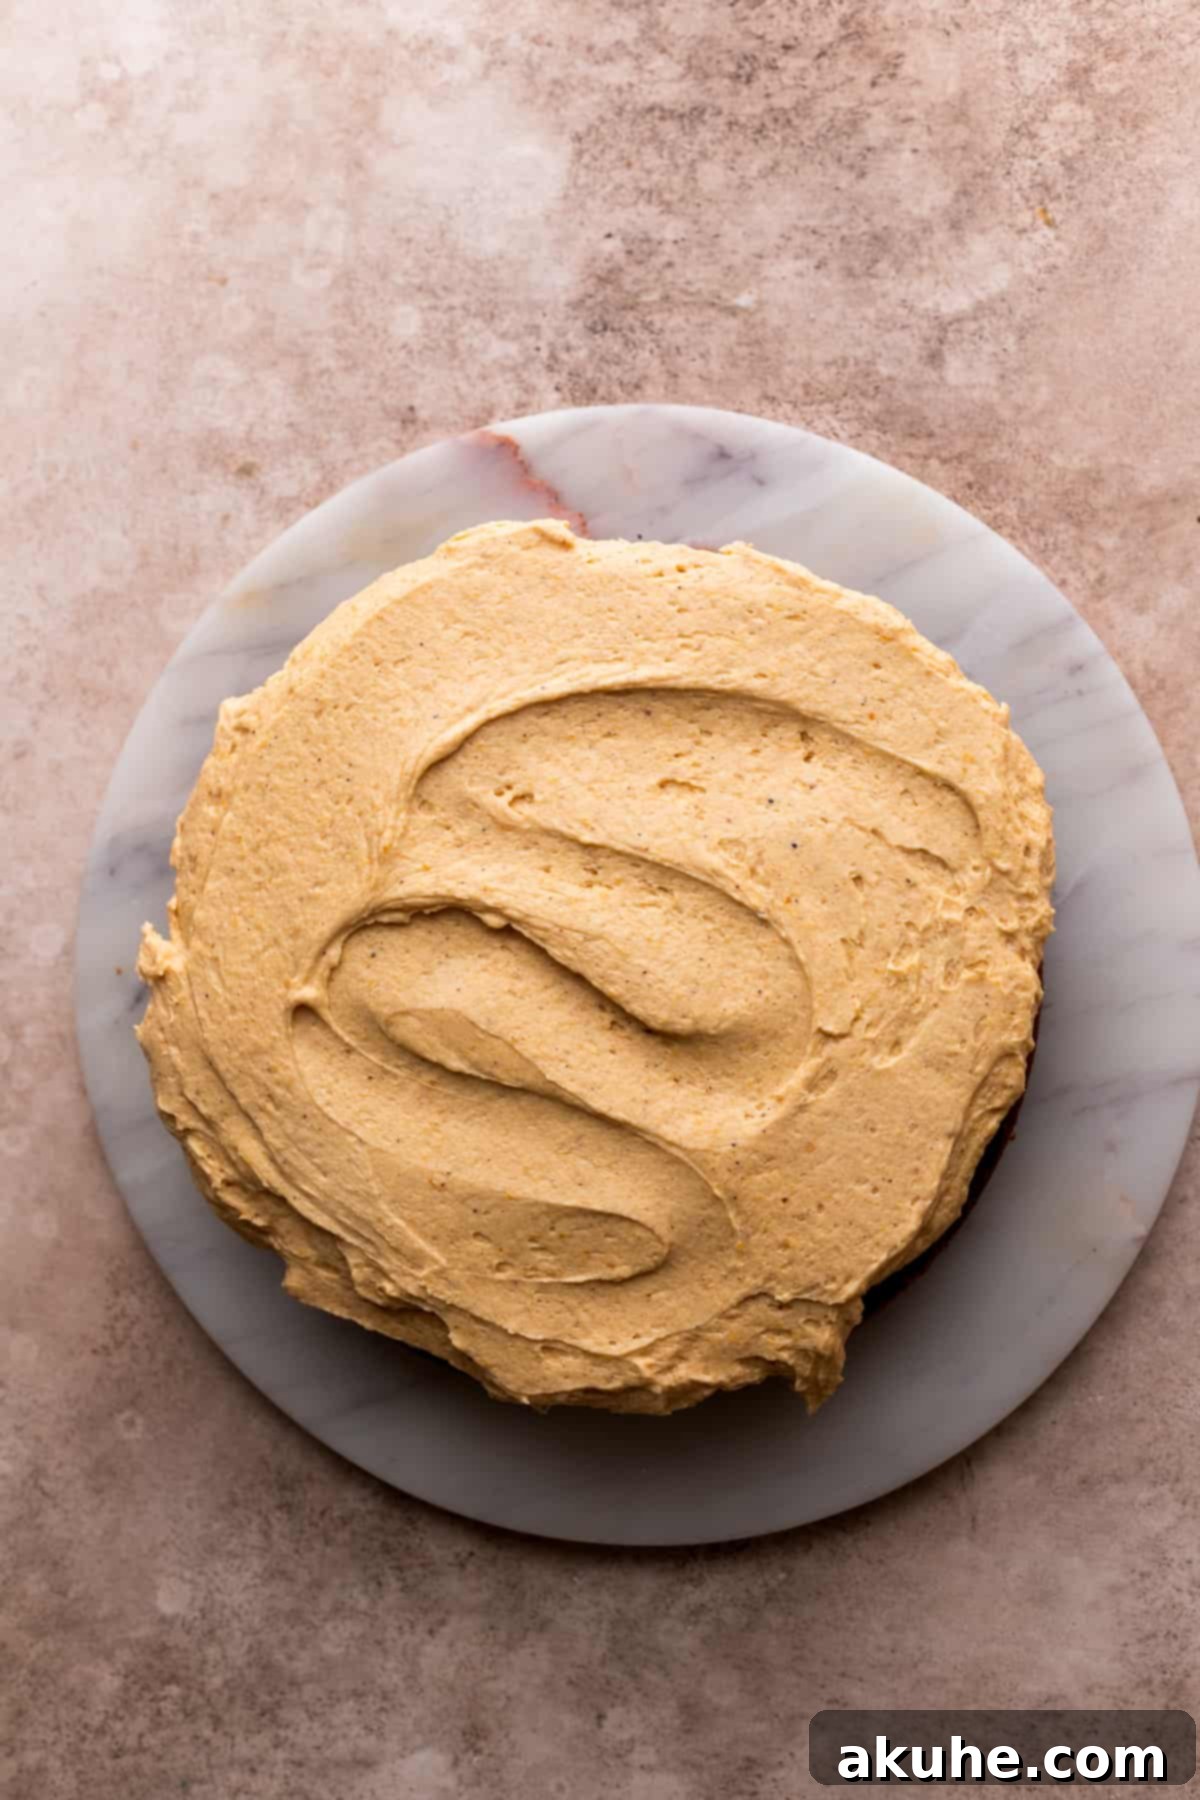
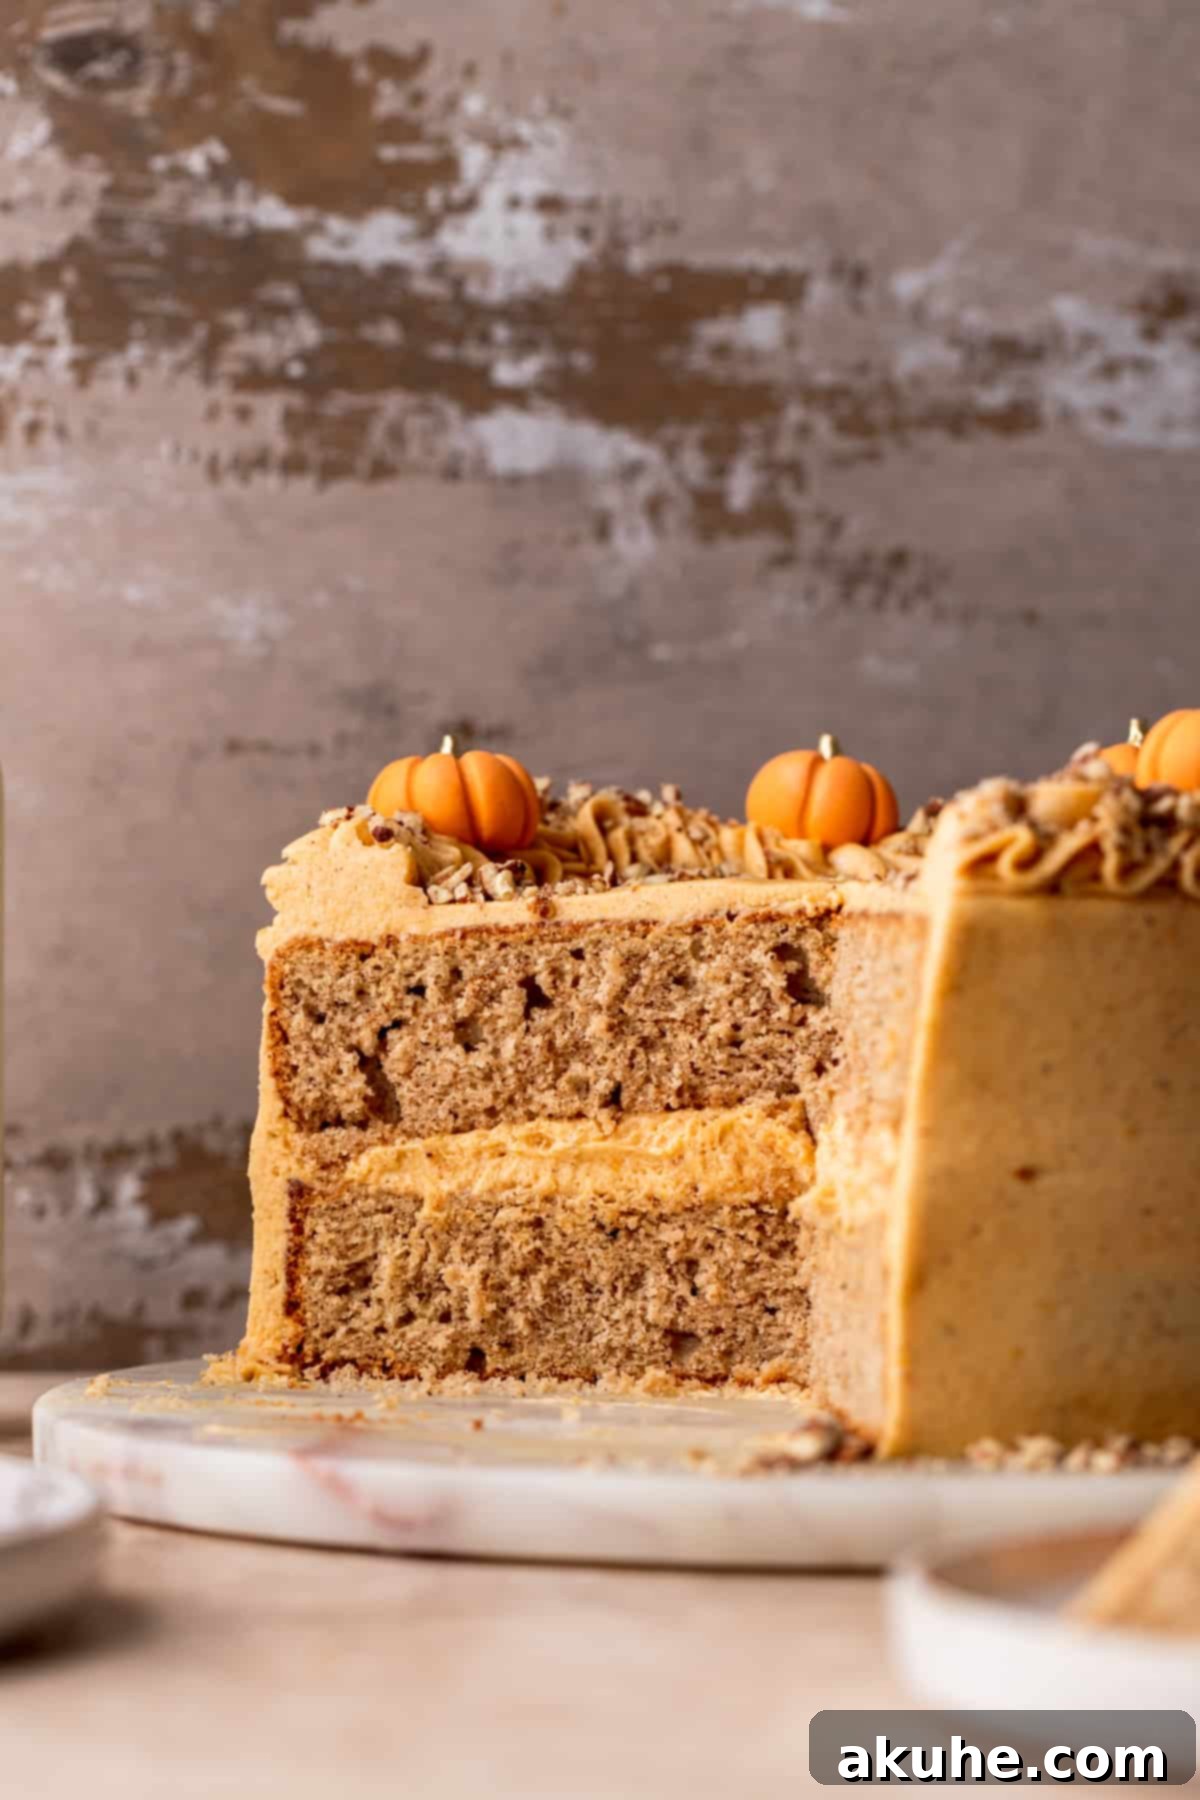
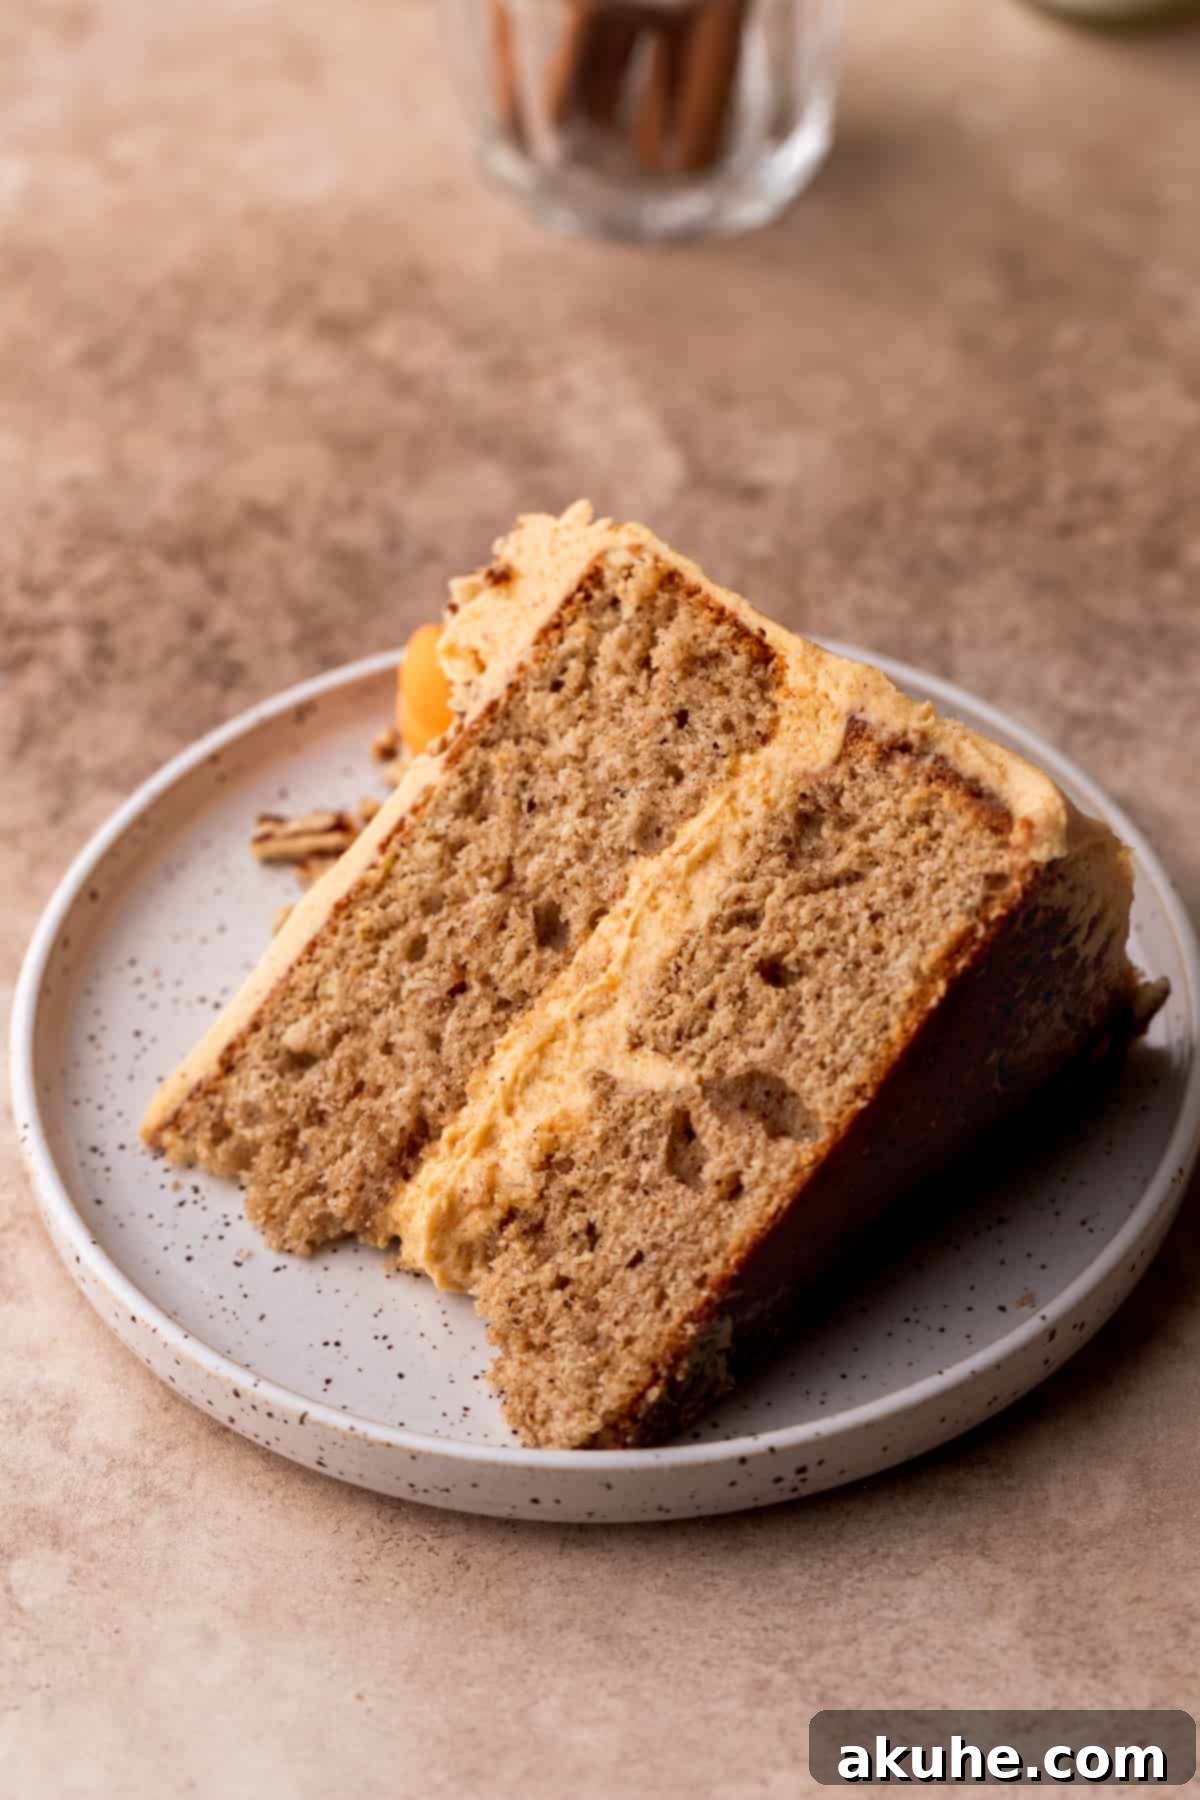
- First Layer and Filling: Place your first cooled, leveled cake layer on your serving plate or cake stand. Spread about 1 ½ cups of your luscious pumpkin frosting evenly over this layer. For the second layer, carefully place it on top with its bottom facing upwards. This usually provides a flatter, smoother top surface for decorating.
- The Crumb Coat: This is a crucial step for a pristine finish. Apply a very thin, light layer of frosting all over the entire cake – top and sides. This “crumb coat” traps any loose crumbs, preventing them from mixing into your final decorative frosting layer. Once applied, transfer the cake to the freezer for about 15-20 minutes, or until the crumb coat is firm to the touch. This sets the foundation for a perfectly smooth exterior.
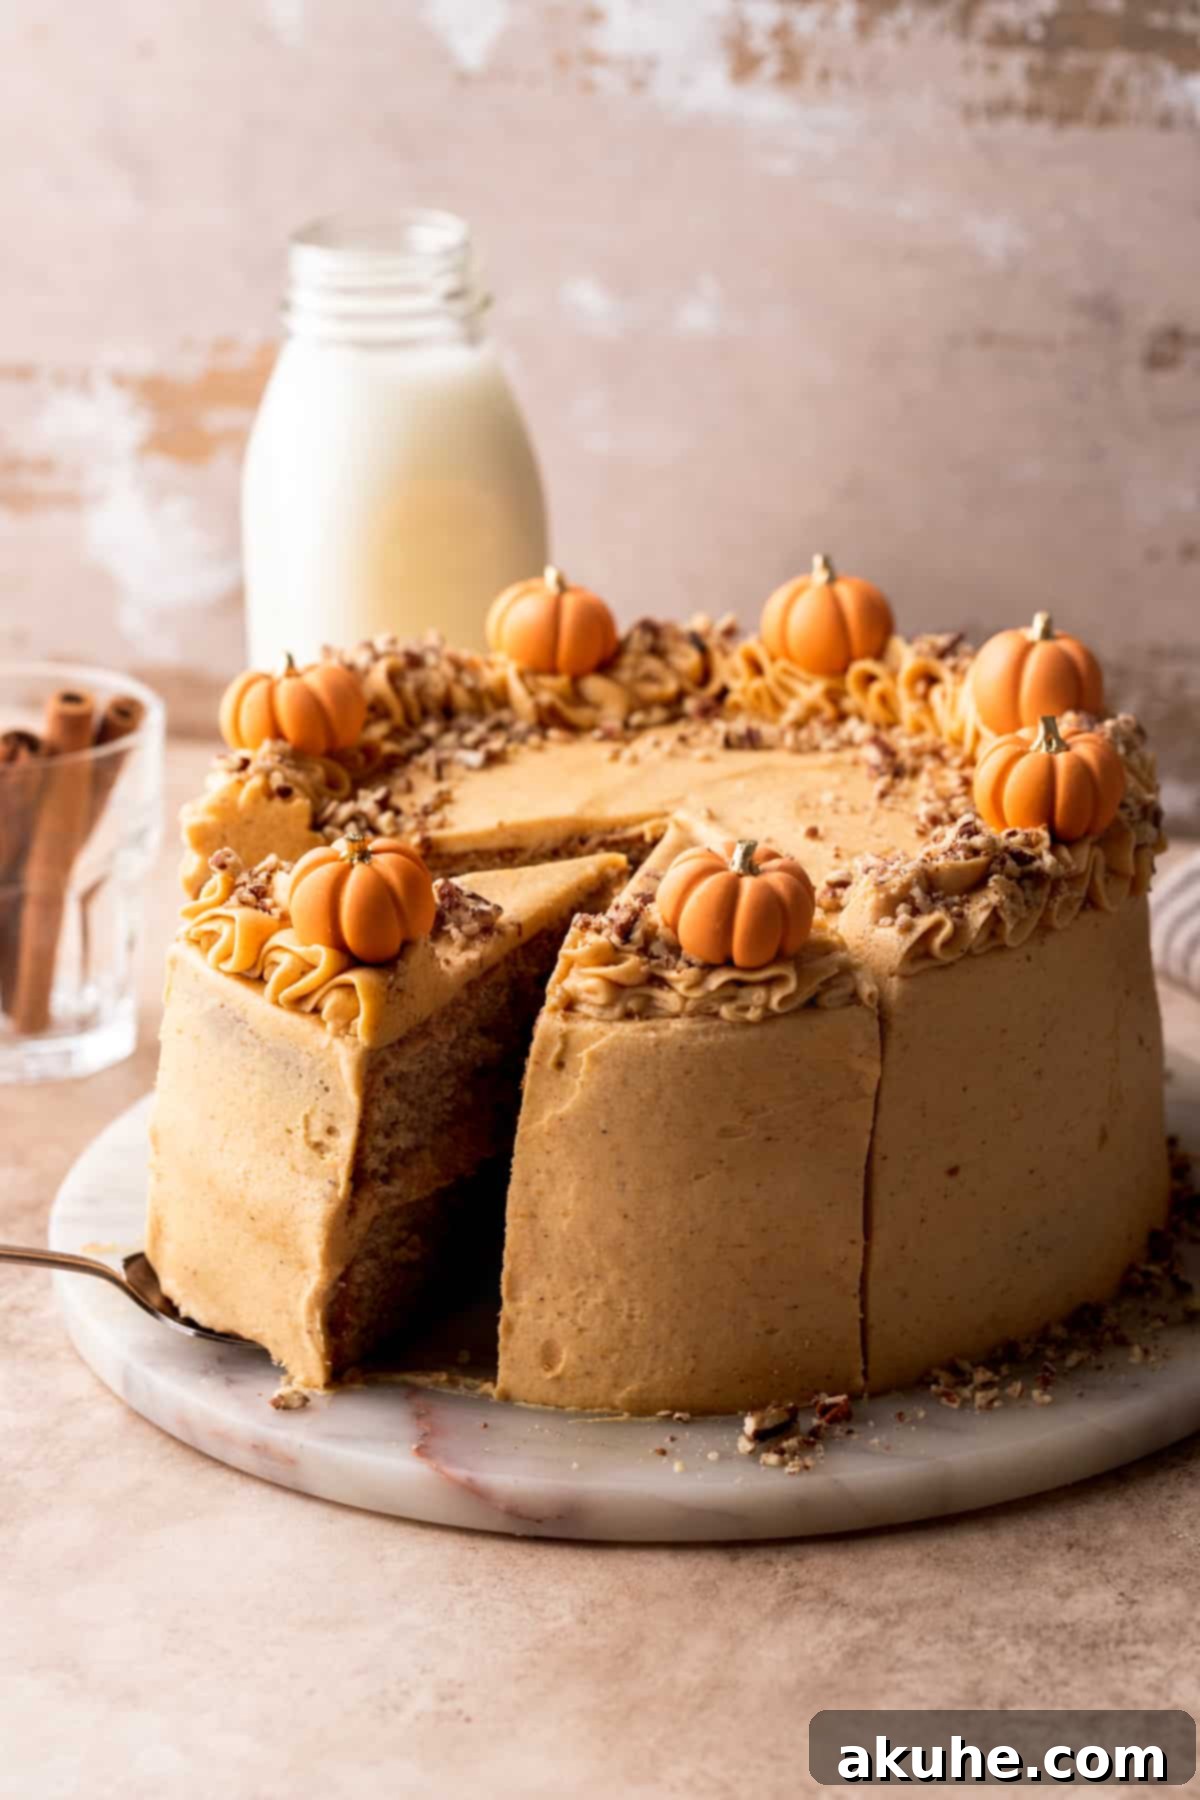
- Final Frosting and Decoration: After the crumb coat has chilled, remove the cake from the freezer and apply the remaining frosting more generously. Use your spatulas and cake scraper to achieve a smooth, even finish on the top and sides. For a decorative border, fit a piping bag with a 1M Wilton tip (a classic choice for beautiful swirls) and pipe a border around the top edge of the cake. For an extra festive touch, consider adding small decorative elements like these adorable mini fondant pumpkins!
Frequently Asked Questions About Chai Cake
Have some lingering questions about this recipe? We’ve got you covered with answers to common inquiries:
Absolutely! This recipe is incredibly versatile and works wonderfully for cupcakes. You can expect to yield about 24 standard-sized cupcakes from this batch. If you only need a smaller quantity, simply halve the recipe to make 12 cupcakes. When baking, reduce the oven time to approximately 18-20 minutes, or until a toothpick inserted comes out clean.
This recipe is designed for two 8-inch cake pans, but it can be adapted for other sizes. You can use two 9-inch cake pans, which might result in slightly thinner layers and a slightly reduced baking time. Alternatively, you can make an impressive tiered cake with four 6-inch cake pans. If you prefer a simpler, single-layer sheet cake, a 9×13-inch cake pan will also work; however, you’ll want to halve the frosting recipe for this pan size to avoid excess.
Yes, absolutely! Preparing the cake layers in advance is an excellent time-saving strategy, especially if you’re baking for a special event. In fact, for this very cake, the layers were baked ahead. Once your cake layers have cooled completely to room temperature, wrap each layer tightly in several layers of plastic wrap. They can be stored at room temperature for up to 24 hours, or in the refrigerator for up to 3 days. When you’re ready to decorate, simply pull them out at least 1 hour beforehand to allow them to come closer to room temperature for easier frosting.
Several factors contribute to a moist cake. First, ensure you’re measuring your flour correctly; spoon and level it rather than scooping directly from the bag, which can compact it. Second, avoid overmixing the batter once the flour is added, as this develops gluten and can lead to a tough, dry cake. Third, don’t overbake! Use the toothpick test and remove cakes from the oven as soon as they’re done. Finally, storing your cake properly (as described below) helps retain moisture.
If your pumpkin frosting is too thin, it likely has too much moisture. Gradually add more sifted powdered sugar, a tablespoon at a time, beating well after each addition until you reach the desired consistency. If it’s too thick, add a very small amount of milk (dairy or non-dairy), 1/2 teaspoon at a time, until it’s spreadable. Remember, ensuring your pumpkin puree is thoroughly blotted of excess moisture is key to starting with the right consistency.
Exciting Recipe Variations to Try
While the Chai Cake with Spiced Pumpkin Frosting is perfect as is, you can always experiment with delightful variations to suit your taste or occasion:
- Cinnamon Cream Cheese Frosting: If pumpkin isn’t your preference, consider a luscious cinnamon cream cheese frosting instead. Combine softened cream cheese, butter, powdered sugar, vanilla extract, and a generous amount of ground cinnamon for a tangy, sweet, and spiced alternative that pairs beautifully with the chai cake layers.
- Single-Layer Sheet Cake: For a less formal dessert or when serving a crowd, easily adapt this to a one-layer sheet cake. Bake the entire batter in a 9×13-inch pan. You may need to adjust the baking time slightly. This also makes transport and serving a breeze.
- Add-ins for Texture: Consider folding in finely chopped toasted pecans or walnuts into the cake batter for an added crunch and nutty flavor that complements the spices. Alternatively, a swirl of caramel sauce between the layers could add another layer of decadence.
Recommended Special Tools for Effortless Baking
Having the right tools can make a significant difference in your baking experience, ensuring smoother processes and more professional results. Here are some of our top recommendations for making this Chai Cake:
- Quality Cake Pans: We highly recommend using sturdy 8-inch cake pans, preferably those made from aluminum for even heat distribution. Wilton pans are a popular and reliable choice among bakers.
- Pre-cut Parchment Paper Circles: Save yourself time and hassle by investing in 8-inch parchment paper circles. These fit perfectly into the bottom of your pans, ensuring your cakes never stick and release cleanly, eliminating the need to cut circles from a roll.
- Baking Spray with Flour: For extra insurance against sticking, use a nonstick baking spray that contains flour. This creates a foolproof nonstick barrier, guaranteeing easy release every time.
- Offset Spatula: An offset spatula is an invaluable tool for spreading frosting or fillings smoothly and evenly. Its angled blade keeps your knuckles away from the cake surface, allowing for precise application.
- Cake Turntable: A good quality cake turntable, such as an Ateco cast iron model, is a game-changer for decorating. Its smooth, seamless spin allows you to frost and decorate your cake with ease, achieving professional-looking results without jerky movements.
- Metal Cake Scraper: To achieve perfectly smooth and straight sides on your frosted cake, a metal cake scraper is essential. It helps you get those crisp edges and a flawless finish.
- Large Piping Bags: These 18-inch piping bags are fantastic as they hold more frosting, reducing the need for frequent refills and allowing for continuous decorating.
- Wilton 1M Piping Tip: For elegant swirls, rosettes, and decorative borders on your cake, the Wilton 1M piping tip is a classic and versatile choice that every baker should have in their toolkit.
Storing and Freezing Your Chai Cake
To keep your Chai Cake with Spiced Pumpkin Frosting fresh and delicious for as long as possible, proper storage is key. Here’s how to do it:
Storage: Once decorated, store your chai cake in an airtight container, such as a cake carrier, to protect it from drying out and absorbing odors from the refrigerator. Keep it in the fridge for up to 5 days. While refrigeration helps preserve the frosting, the cake actually tastes best when served at room temperature. For optimal flavor and texture, remove the cake from the refrigerator at least 1-2 hours before serving, allowing it to gently warm up.
Freezing Instructions
This cake also freezes beautifully, allowing you to enjoy a slice of fall comfort whenever a craving strikes. For best results:
Individual Slices: Cut the cake into individual slices. Wrap each slice tightly in plastic wrap, then either place them in an airtight freezer-safe container or wrap them again in aluminum foil. This double-layer protection prevents freezer burn. Store in the freezer for up to 30 days.
Whole Cake (Uncut): If freezing an entire unfrosted cake layer, wrap it tightly in several layers of plastic wrap and then aluminum foil. For a frosted cake, flash freeze it uncovered until the frosting is firm (about 1-2 hours), then wrap it thoroughly. This prevents the frosting from smushing. Thaw whole cakes overnight in the refrigerator.
Thawing: When you’re ready to enjoy a frozen slice, simply remove it from the freezer and let it thaw at room temperature for about 1 hour. This allows the cake and frosting to return to their optimal texture and flavor profile.
Other Delicious Cake Recipes To Try
If you’ve loved this chai cake, we encourage you to explore more of our delightful cake creations. Each recipe is designed to bring joy to your kitchen and your taste buds.
Explore More Spiced Pumpkin Recipes
For those who can’t get enough of fall’s favorite flavor, here are more pumpkin-spiced treats to bake and savor:
- Decadent Chocolate Stuffed Pumpkin Cupcakes
- Moist Pumpkin Bread with Sweet Cinnamon Icing
- Easy and Delicious Pumpkin Pie Cookie Bars
- Warm and Gooey Pumpkin Spice Cinnamon Rolls
- Hearty Pumpkin Oatmeal Cookies
We hope you absolutely adore this Chai Cake with Spiced Pumpkin Frosting! If you loved baking and tasting this recipe, please make sure to leave a STAR REVIEW below! Your feedback means the world to us. Don’t forget to share your beautiful creations on Instagram by tagging me @stephaniesweettreats. For endless baking inspiration and more delicious ideas, make sure to follow me on Pinterest. Happy baking!
Chai Cake
Print Recipe
Pin Recipe
Leave a Review
Ingredients
Chai Cake
- 3 1/2 cups All-purpose flour
- 2 tsp Baking powder
- 1 tsp Baking soda
- 1 tsp Salt
- 1/2 tsp Cardamon
- 1/2 tsp Ground cloves
- 2 tsp Ground cinnamon
- 1 1/2 tsp Ground ginger
- 1/2 tsp Pumpkin pie spice
- 1/4 tsp Ground nutmeg
- 1/8 tsp Black pepper
- 1 cup Unsalted butter, room temperature
- 1 1/2 cups White granulated sugar
- 2 tsp Pure vanilla extract
- 1/4 cup Sour cream, room temperature
- 4 Large eggs, room temperature
- 1 cup Buttermilk, room temperature
Pumpkin Frosting
- 2 cups Unsalted butter, room temperature
- 3/4 cup Pumpkin puree, blotted
- 6 cups Powdered sugar, sifted
- 1 tsp Pure vanilla extract
- 1 1/2 tsp Ground cinnamon
- 1/4 tsp Ground nutmeg
- 1/2 tsp Salt
Instructions
Chai Cake
- Preheat the oven to 350°F. Spray two 8-inch cake layers with baking nonstick spray. Line the bottoms of the pan with 8-inch parchment paper circles and spray again.
- In a medium bowl, mix the all-purpose flour, baking powder, baking soda, salt, cardamon, cloves, cinnamon, ginger, pumpkin pie spice, nutmeg, and black pepper.
- Using a mixer, beat the butter and sugar on high speed for 3 minutes. Add the sour cream and vanilla and mix until combined. On medium speed mix the eggs in one at a time.
- Add 1/3rd of the dry ingredients and half of the buttermilk and mix on low speed. Add another 1/3rd of the dry ingredients and the rest of the buttermilk. Finish with the rest of the dry ingredients.
- Pour the cake batter evenly between the two cake pans. Bake for 25-30 minutes until a toothpick inserted comes out clean.
- Let the cakes sit in the hot pans for 10 minutes. Then, transfer to a cooling rack. Cool the cakes completely before decorating.
Pumpkin Frosting
- In a large bowl, sift the powdered sugar. Place paper towels on the counter. Add the pumpkin puree to it and take it over the sink and squeeze out a bit of the moisture.
- Using a mixer, beat the butter on high speed for 3 minutes. Scrape the bowl and add in half of the powdered sugar. Mix on low speed until combined. Add the rest of the powdered sugar and mix until just combined.
- Add the pumpkin puree, vanilla, cinnamon, nutmeg, and salt. Mix on high speed until creamy.
Assembly
- Use a serrated knife to cut the domes off the cakes to create flat layers.
- Place the first cake layer down and spread 1 1/2 cups of frosting evenly over the cake. Top with the second cake layer, with the bottom of the cake facing up for a flatter surface.
- Apply a very light layer of frosting all over the cake (crumb coat). Freeze for 15 minutes to set.
- Frost the rest of the cake with the remaining pumpkin frosting, smoothing the sides and top as desired.
Notes
High altitude baking: Add an extra 3 TBSP of flour for better structure.
Room Temperature Ingredients: Pull out dairy ingredients (butter, sour cream, buttermilk, eggs) 2 hours before baking to ensure they are at room temperature for optimal mixing and cake texture.
,
,
,
,
,
,
,
,
,
,
,
,
,
,
,
,
