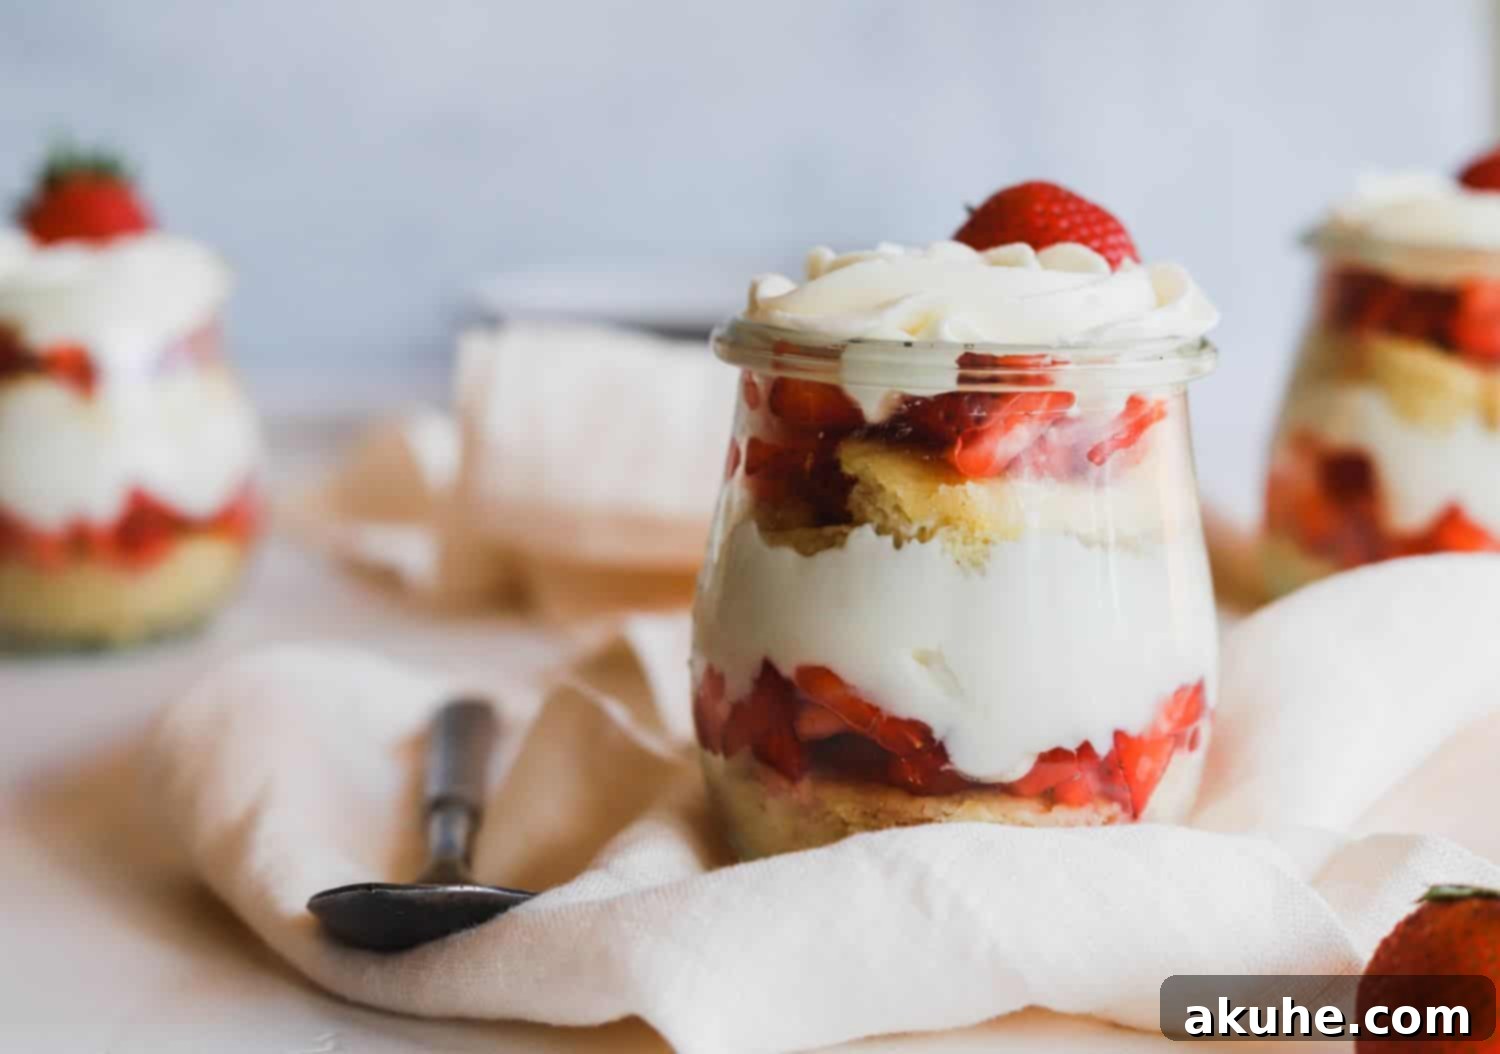
Indulge in Summer Bliss: The Ultimate Easy Strawberry Shortcake Trifles with Lemon Cake
Few desserts capture the essence of summer quite like a refreshing Strawberry Shortcake Trifle. This delightful treat layers a moist, buttery lemon cake with a rich, tangy whipped cream cheese, and an abundance of sweet, fresh strawberries dusted with sugar. It’s a symphony of textures and flavors that promises a light, invigorating indulgence perfect for any warm-weather gathering or a simple afternoon treat. Forget complicated recipes; our easy strawberry shortcake trifles are designed for effortless elegance, bringing joy with every spoonful and perfectly embodying the carefree spirit of summer.
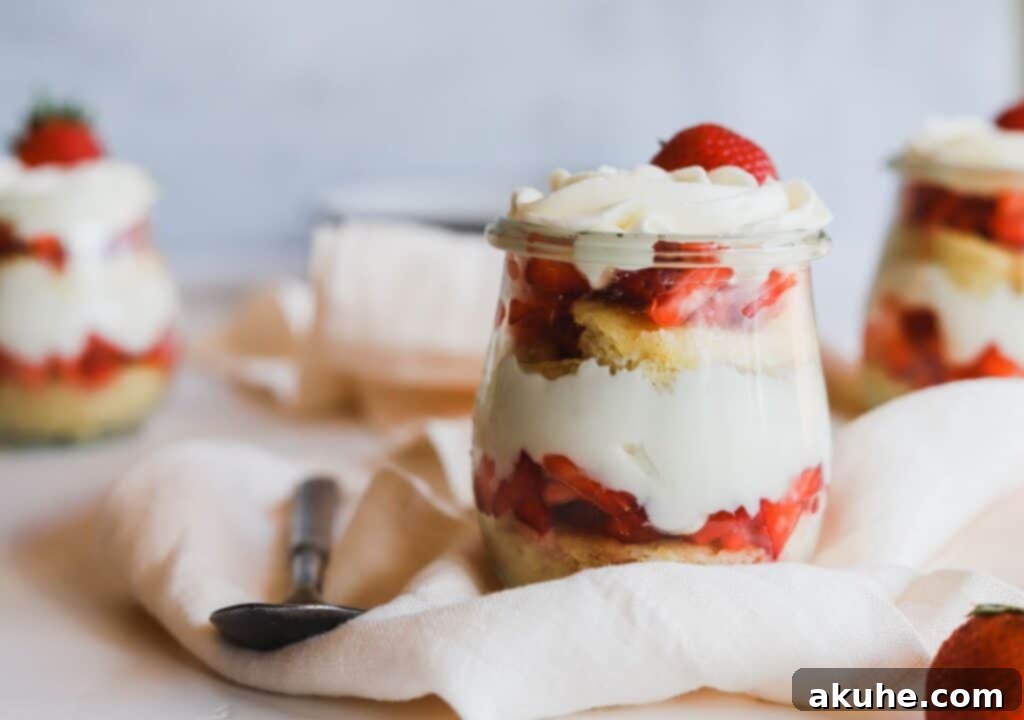
The BEST Easy Strawberry Shortcake Trifles – A Perfect Summer Dessert
What makes a dessert truly “the best”? For these strawberry shortcake trifles, it’s the harmonious blend of a wonderfully moist and subtly zesty lemon cake, the creamy decadence of whipped cream cheese, and the vibrant sweetness of ripe, fresh strawberries. This combination creates a dessert that is not only incredibly delicious but also remarkably light, making it the ultimate refreshment for those balmy summer days. It’s a dessert that feels gourmet yet remains incredibly approachable for home bakers of all skill levels, delivering maximum flavor with minimal fuss.
Crafting these exquisite trifles is a straightforward process, thoughtfully broken down into four manageable parts, ensuring a stress-free and enjoyable baking experience from start to finish:
- Part 1: Master the Moist Lemon Cake. Our signature lemon cake is the foundational layer of this trifle. Infused with the bright zest of an entire lemon, it’s exceptionally moist and tender, providing the perfect tangy counterpoint to the sweet, creamy layers above.
- Part 2: Prepare the Luscious Strawberries. Simplicity is key here. Fresh strawberries are meticulously rinsed, gently patted dry, and then cut into uniform small cubes. A light dusting of sugar enhances their natural sweetness and helps them release their delicious juices, creating a flavorful burst in every bite.
- Part 3: Whip Up the Dreamy Cream Cheese Layer. This is where the magic happens! We combine the richness of traditional cream cheese frosting with the airy lightness of freshly whipped cream to create a truly irresistible topping. It’s luscious, tangy, and incredibly smooth – a delightful complement to both the cake and the berries.
- Part 4: Elegantly Assemble the Trifles. The final step is also the most satisfying and quick. In less than 15 minutes, you can artfully layer these delicious components into beautiful individual servings, ready to impress your guests or simply treat yourself to a delightful homemade dessert.
Crafting the Perfect Lemon Cake for Your Trifles
The star of our strawberry shortcake trifles is undoubtedly the tender, aromatic lemon cake. Baked in a 9×9 inch baking pan, this recipe is specifically designed for a cake that rises beautifully, creating a substantial yet airy base for your trifle layers. The high sides of a quality baking pan are ideal for containing its impressive rise in the oven, ensuring a uniformly baked and perfectly shaped cake that’s easy to work with when assembling your trifles.
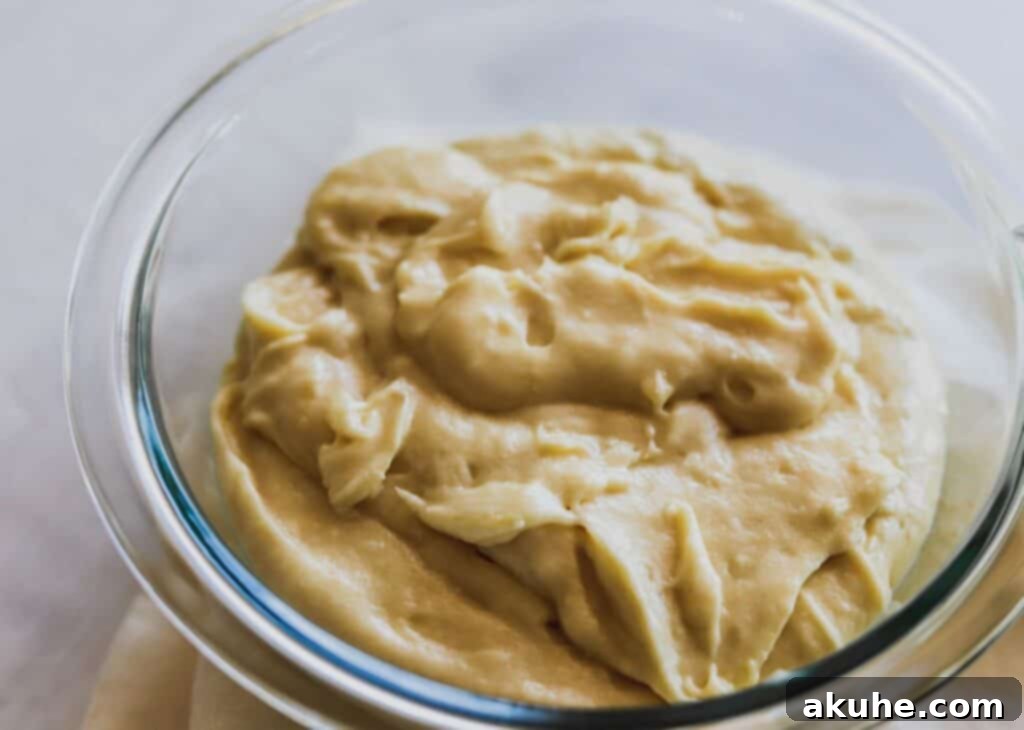
The process begins by meticulously sifting together all your dry ingredients – all-purpose flour, cornstarch, salt, baking soda, and baking powder – into a medium-sized bowl. Sifting is a crucial preparatory step that ensures your cake has a light, airy texture and prevents any lumps from forming, leading to a smoother batter and a more uniform crumb. In a separate, larger mixing bowl, a stand mixer or hand mixer is used to cream together softened unsalted butter and granulated sugar until the mixture transforms into a pale, light, and fluffy consistency. This creaming process is vital for incorporating air into the mixture, which in turn contributes significantly to the cake’s tender and delicate crumb.
Next, the bright, invigorating zest of an entire small lemon is added to the butter mixture, infusing the cake with its signature citrus aroma and a wonderful burst of fresh flavor. A touch of pure vanilla extract is then mixed in until fully smooth and well combined. Eggs are incorporated one at a time, ensuring each is fully blended into the mixture before adding the next. This careful addition creates a stable emulsion, which is key to the cake’s structure and contributes to its exceptional moisture.
Finally, the sifted dry ingredients and room-temperature sour cream are alternately added to the wet mixture. It’s best to begin and end with the dry ingredients, mixing gently and only until they are just combined. Be careful not to overmix the batter at this stage, as excessive mixing can develop the gluten in the flour too much, leading to a tough and dense cake. The sour cream, a secret ingredient for many moist cakes, adds an incredible amount of moisture and a delicate tang, perfectly balancing the sweetness and richness of the cake layers.
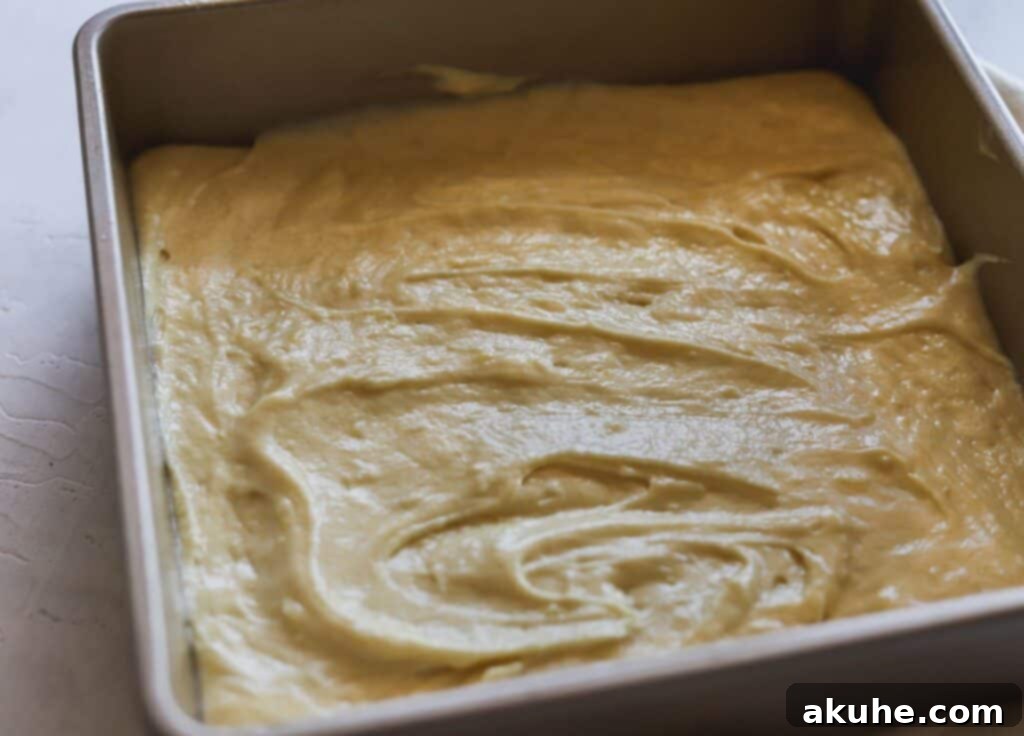
Once the batter is smoothly combined, it’s transferred to your prepared 9×9 inch baking pan. Bake for approximately 13-18 minutes in a preheated oven, or until the edges are lightly golden brown and a toothpick inserted into the center comes out clean. Allow the cake to cool in the pan for about 10 minutes before carefully transferring it to a wire rack to cool completely. This initial cooling period in the pan prevents the cake from breaking apart and allows it to set properly, ensuring it holds its shape beautifully for assembly.
Can This Lemon Cake Be Made Gluten-Free?
Absolutely! For those with gluten sensitivities or preferences, this lemon cake recipe is easily adaptable without compromising on flavor or texture. Simply substitute the all-purpose flour with a high-quality 1:1 gluten-free flour blend. These blends are specifically formulated to mimic the properties of wheat flour, ensuring a similar texture and rise in your baked goods. If you happen to be baking at a high altitude, a common and effective tip is to add an additional 1 tablespoon of gluten-free flour to your mixture. This slight adjustment helps to stabilize the cake structure in lower atmospheric pressure, preventing it from collapsing and ensuring a perfect bake every time.
The Creamy Delight: Crafting Whipped Cream Cheese
The whipped cream cheese layer is a defining element of these trifles, offering a luxurious, tangy sweetness that beautifully complements the bright lemon cake and fresh, sweet strawberries. To achieve its signature smooth and fluffy texture, a reliable mixer – whether it’s a powerful stand mixer equipped with both paddle and whisk attachments or a sturdy hand mixer – is an essential tool in your kitchen.
The single most crucial factor for perfect whipped cream cheese with an exquisite consistency is ensuring your cream cheese is at room temperature. Cold cream cheese will be firm and lumpy, making it difficult to incorporate smoothly and resulting in a grainy texture in your final product. Allowing it to soften for at least an hour on the counter before you begin will make a significant difference, yielding a much softer, more pliable, and ultimately smoother base for whipping. This seemingly small detail is vital for achieving that dreamy, melt-in-your-mouth quality.
Begin by beating the room-temperature cream cheese on medium speed for approximately one minute until it becomes wonderfully smooth and fluffy. This initial step ensures a uniform and light consistency. Next, add the pure vanilla extract for a hint of warmth and depth of flavor, along with the sifted powdered sugar. Sifting the powdered sugar is absolutely vital; it prevents any small clumps from forming, which could otherwise make your whipped cream cheese grainy and detract from its luxurious texture. Mix these ingredients until they are just combined and appear smooth.
For the next transformative step, if using a stand mixer, switch from the paddle attachment to the whisk attachment. This is critical for incorporating the necessary air and achieving those desired stiff peaks. Gradually add the very cold heavy cream to the mixture. Beat on high speed until stiff peaks form. The mixture should be visibly light, airy, and fluffy, yet firm enough to hold its shape when piped. This delightful whipped cream cheese is then ready to be used immediately, providing a fresh, creamy, and tangy contrast that truly elevates your trifle layers.
Preparing Whipped Cream Cheese in Advance
While this whipped cream cheese is undoubtedly best enjoyed fresh for peak texture and flavor, for convenience, you can certainly prepare it a little ahead of time. The entire trifle recipe can realistically be completed within one afternoon, offering a perfect project for a leisurely day. However, if your schedule demands it, preparing the whipped cream cheese a few hours prior to assembly is perfectly acceptable. Simply cover the bowl tightly with plastic wrap to prevent a crust from forming and store it in the refrigerator to maintain its freshness and texture.
When you’re ready to assemble your trifles, take the whipped cream cheese out of the refrigerator approximately one hour before use. This allows it to come closer to room temperature, making it much easier to work with, especially for piping. If it seems a little stiff or deflated after chilling, simply re-whip it on high speed for about one minute until it regains its light and fluffy consistency. Avoid using it straight from the fridge if it’s too cold, as it might be too firm for easy piping or smooth spreading, and the texture might be compromised.
Assembling Your Easy Strawberry Shortcake Trifles
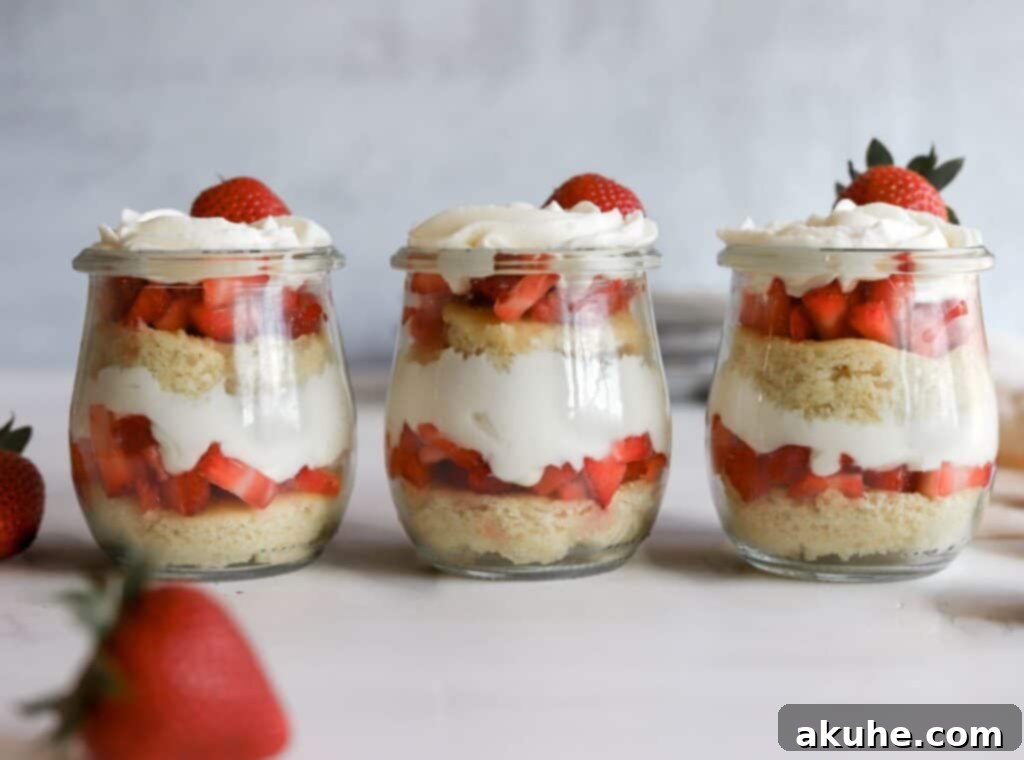
The final step in creating these delightful desserts is the assembly, where all your meticulously prepared components come together to form visually stunning and incredibly delicious trifles. We love using cute tulip jars for individual servings, as they offer the perfect portion size and add a charming, elegant touch to any presentation. However, feel free to use any clear glass jars, elegant glasses, or even a large traditional trifle bowl that suits your aesthetic preference and the number of servings you need. The key is to create appealing, distinct layers that beautifully showcase the vibrant colors and enticing textures of each component.
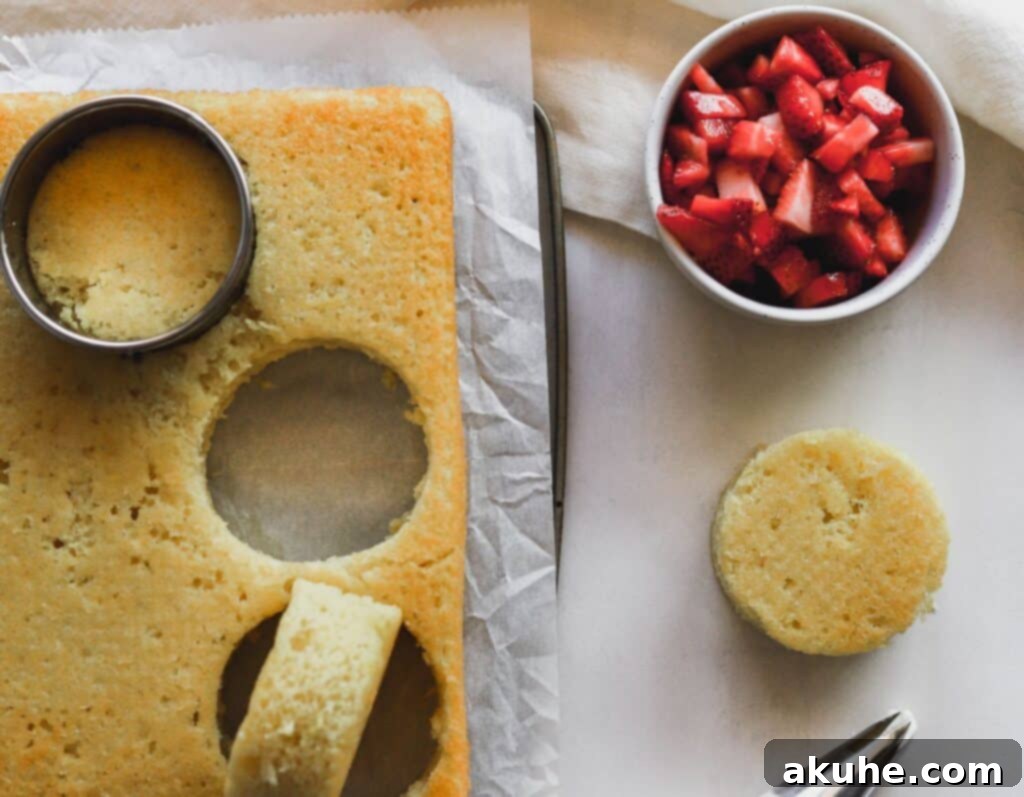
Before you begin layering, here’s a quick and helpful tip for easier assembly: place your completely cooled lemon cake in the freezer for about 10 minutes. This slight chill firms up the cake, making it significantly less prone to crumbling when you cut and handle it, ensuring clean, precise shapes. To achieve perfectly uniform cake circles that fit snugly into your chosen jars, a biscuit cutter is an invaluable tool. Select a cutter that is just slightly smaller than the opening of your jar to ensure a tight and stable fit at the bottom. If your cake layers turn out particularly thick, as they often do with a 9×9 inch pan, consider carefully splitting each cake circle in half horizontally to create more even and delicate layers within your trifle, enhancing both appearance and texture.
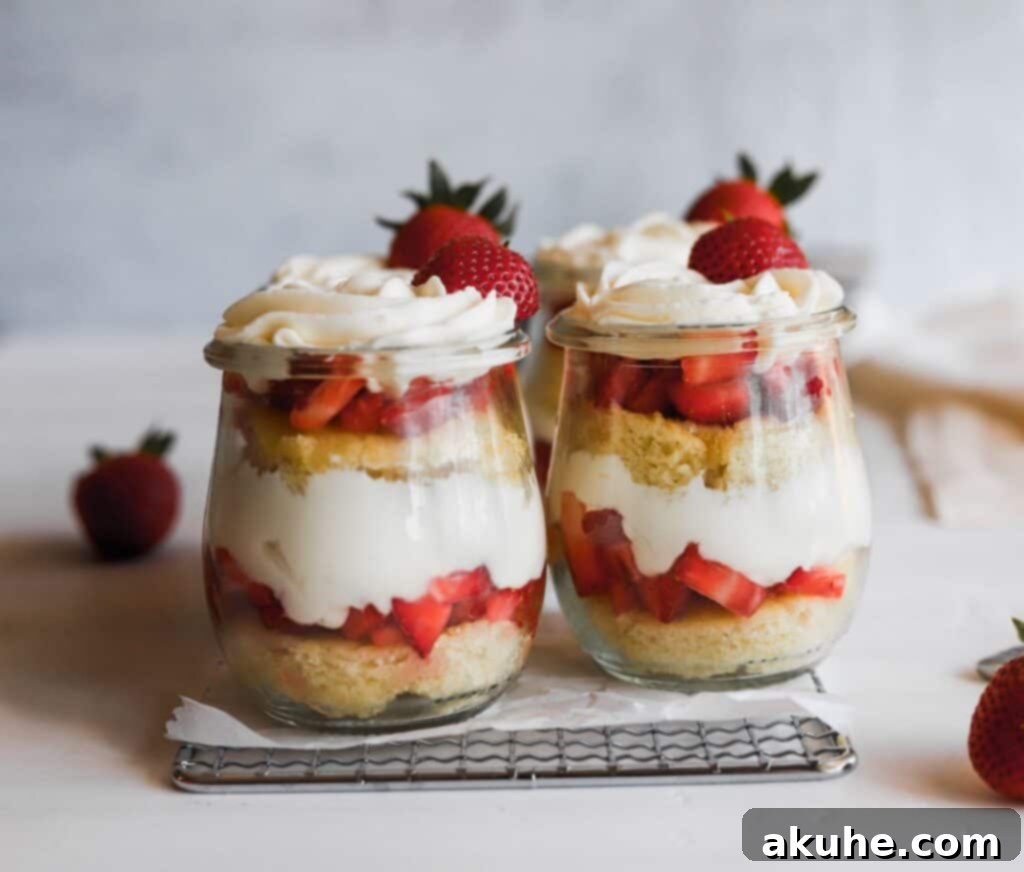
To assemble, start by placing your first cake layer at the very bottom of each jar. Gently press it down with your fingers to ensure it’s firmly seated and creates a solid base. Next, spoon a generous, light layer of your prepared sugared strawberries over the cake, making sure it completely covers the surface. This creates a juicy barrier and allows the strawberry flavors to seep slightly into the cake. Then, using a piping bag fitted with a large star tip (such as the Wilton 1M tip for beautiful swirls), pipe a layer of the decadent whipped cream cheese on top of the strawberries. Repeat this layering process: add another cake layer, followed by more strawberries, and finally, finish with a glorious, crowning swirl of whipped cream cheese on top. Garnish with a fresh strawberry slice or a delicate mint leaf for an extra touch of elegance and visual appeal.
Storing Your Delicious Strawberry Shortcake Trifles
Once assembled, these easy strawberry shortcake trifles are so tempting that they rarely last long! However, if you’ve made a batch for future enjoyment or find yourself with leftovers, proper storage is absolutely key to maintaining their freshness and deliciousness. To store your trifles, simply cover each jar tightly with plastic cling wrap or an airtight lid, then promptly place them in the refrigerator.
These trifles will keep beautifully in the fridge for up to 3 days. Beyond this period, the strawberries tend to release more juice, which can seep into the cake layer and make it a bit soggy, affecting the overall texture and appeal of the dessert. For optimal taste and texture, it’s always best to enjoy them within the first 1-2 days after assembly. The good news is that this recipe yields about 4 individual trifles, making them perfectly portioned for immediate enjoyment without too much worry about extended storage – they’re likely to disappear quickly!
Why Individual Trifles are a Game Changer
While a large trifle bowl certainly makes a grand statement as a centerpiece, individual trifles offer numerous advantages that can truly elevate your dessert experience, especially for entertaining. First and foremost, they provide perfectly portioned servings, making them incredibly convenient for gatherings where guests can easily grab their own beautifully presented dessert without the fuss of cutting and serving from a communal dish. This also ensures that each person receives an equal share of every delicious layer, from the moist lemon cake to the juicy strawberries and creamy topping.
Furthermore, individual trifles are incredibly visually appealing. Served in clear jars, mason jars, or elegant glasses, they exquisitely showcase the vibrant layers of red strawberries, pristine white cream cheese, and golden cake, creating a stunning presentation that adds a sophisticated touch to any table setting. They are also incredibly convenient for meal prepping, packing for picnics, or taking to outdoor events, as they are self-contained, easy to transport, and minimize mess. The “grab-and-go” nature of individual trifles means less cleanup and more enjoyment, allowing everyone to savor their dessert at their own pace and convenience.
Creative Variations and Customizations for Your Trifles
While the classic strawberry shortcake trifle is a timeless favorite and utterly delicious on its own, this recipe serves as an excellent canvas for creativity. Don’t hesitate to experiment with different fruits, cake flavors, or additional elements to personalize your dessert and suit various tastes or occasions. The possibilities are truly endless!
- Berry Bonanza: Instead of solely strawberries, consider incorporating a vibrant mix of other fresh berries like blueberries, raspberries, and blackberries for a colorful and flavor-rich medley that adds extra layers of tartness and sweetness.
- Chocolate Indulgence: For chocolate lovers, a delicate layer of chocolate shavings or mini chocolate chips sprinkled between the cream cheese and strawberries can add a delightful crunch and a hint of rich cocoa. You could even swap the lemon cake for a light chocolate sponge for an ultimate chocolate-strawberry combination.
- Enhanced Citrus Twist: To intensify the lemon theme, consider brushing the cake layers with a light lemon syrup or a limoncello liqueur before adding the other components. A fine sprinkle of fresh lemon zest on top of the whipped cream cheese can also brighten the overall flavor profile wonderfully.
- Tropical Flair: For an exotic twist, incorporate finely diced mango or pineapple along with the strawberries. These fruits add a wonderful tang and sweetness, making the trifle perfect for those with adventurous palates or tropical-themed parties.
- Nutty Crunch: A light sprinkling of toasted chopped almonds, pistachios, or pecans on top of the whipped cream cheese can add a lovely textural contrast and a sophisticated nutty flavor.
- Different Cake Bases: While our homemade lemon cake is sublime, you could also experiment with other complementary cake bases. Consider a vanilla bean cake for a more classic flavor, an almond cake for a delicate nutty note, or even a light coconut cake for a tropical twist that pairs wonderfully with strawberries.
These variations allow you to adapt the trifle for different seasons, special occasions, or even dietary preferences, ensuring that this easy dessert remains a versatile and cherished staple in your recipe collection, always ready to impress and delight.
Frequently Asked Questions (FAQ) About Strawberry Shortcake Trifles
Can I use store-bought cake for this recipe?
Yes, absolutely! For an even quicker assembly, you can certainly use a good quality store-bought pound cake, angel food cake, or even vanilla sponge cake. Just ensure it’s a plain flavor that won’t overpower the delicate combination of lemon, strawberry, and cream cheese. Cut it into cubes or use a biscuit cutter as described for the homemade cake to fit your jars.
What kind of jars or containers can I use?
Any clear glass jars, such as mason jars, tulip jars, or even stemless wine glasses, work wonderfully for individual servings. The key is that they are transparent to beautifully showcase the distinct layers. For larger gatherings or a more traditional presentation, a classic large trifle bowl is also a fantastic and impressive option.
Can I make these trifles completely ahead of time?
You can prepare the lemon cake and the whipped cream cheese ahead of time and store them separately in the refrigerator. The strawberries can also be cut and sugared up to a few hours in advance. For the absolute best texture and to prevent the cake from becoming soggy, it’s generally recommended to assemble the trifles no more than 12-24 hours before serving. If assembling further in advance, consider leaving the top layer of strawberries and cream cheese until closer to serving time.
How do I ensure my whipped cream cheese is not runny?
The most important steps are to use room-temperature cream cheese, thoroughly beat it until completely smooth, and most crucially, use very cold heavy cream. Also, ensure you beat the heavy cream until stiff peaks visibly form. If the mixture still seems a little soft after these steps, you can chill it in the refrigerator for 15-30 minutes and then re-whip it briefly to achieve the desired consistency.
Can I use frozen strawberries?
While fresh strawberries are highly recommended for their vibrant flavor and firm texture, you can use frozen strawberries in a pinch. If opting for frozen, thaw them completely first. It is absolutely crucial to drain any excess liquid that thaws out (this can be quite a bit) to avoid a watery trifle. Then, toss them with sugar as directed. Be aware that the texture of thawed frozen berries might be slightly softer than fresh ones.
More Delightful Dessert Recipes to Explore
If you’ve enjoyed making and tasting these delicious strawberry shortcake trifles, then you’ll love exploring some of our other fantastic dessert creations. Each recipe is crafted to bring joy and sweetness to your table, perfect for any occasion or simply as a delightful homemade treat. Dive into more tempting ideas and discover your next favorite!
- Strawberry Cheesecake Bars
- Cookie Dough Cheesecake Bars
- Easy Angel Food Cupcakes
- S’mores Chocolate Chip Cookies
We hope you’re inspired to create these easy strawberry shortcake trifles and share the joy of this fantastic summer dessert! Don’t forget to capture your beautiful creations and tag us on Instagram @stephaniesweettreats. Your feedback is invaluable, so please leave a star rating and review below if you’ve tried this recipe – we love hearing from you! For more sweet ideas, baking tips, and culinary inspiration, be sure to follow us on Pinterest. Happy baking!
Easy Strawberry Shortcake Trifle
By Stephanie Rutherford
This easy strawberry shortcake trifle is perfect for a summertime dessert. It has a fluffy lemon cake, whipped cream cheese, and strawberries. This is the best summer recipe.
Prep Time: 30 mins
Cook Time: 15 mins
Total Time: 45 mins
Servings: 4 people
Ingredients
Lemon Cake
- 1 cup All-purpose flour
- 1 1/2 TBSP Cornstarch
- 1/4 tsp Salt
- 1/4 tsp Baking soda
- 1/4 tsp Baking powder
- 6 TBSP Unsalted butter, room temperature
- 1/2 cup White granulated sugar
- 1 Zest of a small lemon
- 3/4 tsp Pure vanilla extract
- 2 Large eggs, room temperature
- 1/2 cup Sour cream, room temperature
Strawberries
- 1 lb Strawberries, rinsed, dried, and cut into small cubes.
- 2 TBSP White granulated sugar
Whipped Cream Cheese
- 4 oz Cream cheese, room temperature
- 1/2 tsp Pure vanilla extract
- 3/4 cup Powdered sugar, sifted
- 1 cup Heavy cream, cold
Instructions
Lemon Cake
- Preheat oven to 350F and spray a 9X9 pan with non stick baking spray. Set aside.
- In a medium bowl, sift together flour, cornstarch, baking soda, baking powder, salt. Set aside.
- Use a mixer and cream together the butter and sugar on medium. Mix for 1 minute until the butter is light and fluffy. Zest 1 small lemon and add it to the bowl. Add vanilla and mix for 30 seconds until combined.
- Add eggs one at a time on low. Mix until combined. Scrape the bowl.
- Add 1/3 of the dry ingredients and 1/2 of the sour cream and mix until combined. Add the next 1/3 of the dry ingredients and the rest of the sour cream. Then, add the rest of the dry ingredients. Scrape the bowl and mix for 10-15 seconds.
- Pour the cake batter into the baking pan. Bake for 13-18 minutes. The cake is finished baking when the edges are slightly golden brown and when a toothpick is inserted, it comes out clean.
- Cool in the pan for 10 minutes before transferring to a cooling rack. Allow the cake to cool completely. Before assembling the cake, place in the freezer for 10 minutes.
Strawberries
- Cut 1 lb of rinsed and dried strawberries into small cubes. Place strawberries in a small bowl.
- Sprinkle sugar on top of strawberries and stir. Let it sit for 5 minutes before using.
Whipped Cream Cheese
- Using a mixer with a paddle attachment, beat the room temperature cream cheese for 1 minute until smooth. Add the sifted powdered sugar and vanilla and mix until combined. Scrape the bowl.
- Switch to a whisk attachment, and add in the heavy cream. Beat on high until stiff peaks form. Use immediately.
Assembly
- Use a biscuit cutter or a knife to cut out circles of cake that will fit the jar you are using. Place cake on the bottom of the jar, it should fit tightly.
- Add a light layer of strawberries on top of the cake. It should completely cover the cake. Use a piping bag, to evenly pipe the whipped cream cheese on top of the strawberries.
- Add another layer of cake, followed by strawberries and whipped cream cheese. Store the jars covered and in the fridge.
Notes
For high altitude baking – add 1 TBSP of flour.
Nutrition Information
Calories: 300 kcal per serving
