Irresistible Mini Oreo Cheesecakes: Your Ultimate Guide to Bite-Sized Bliss
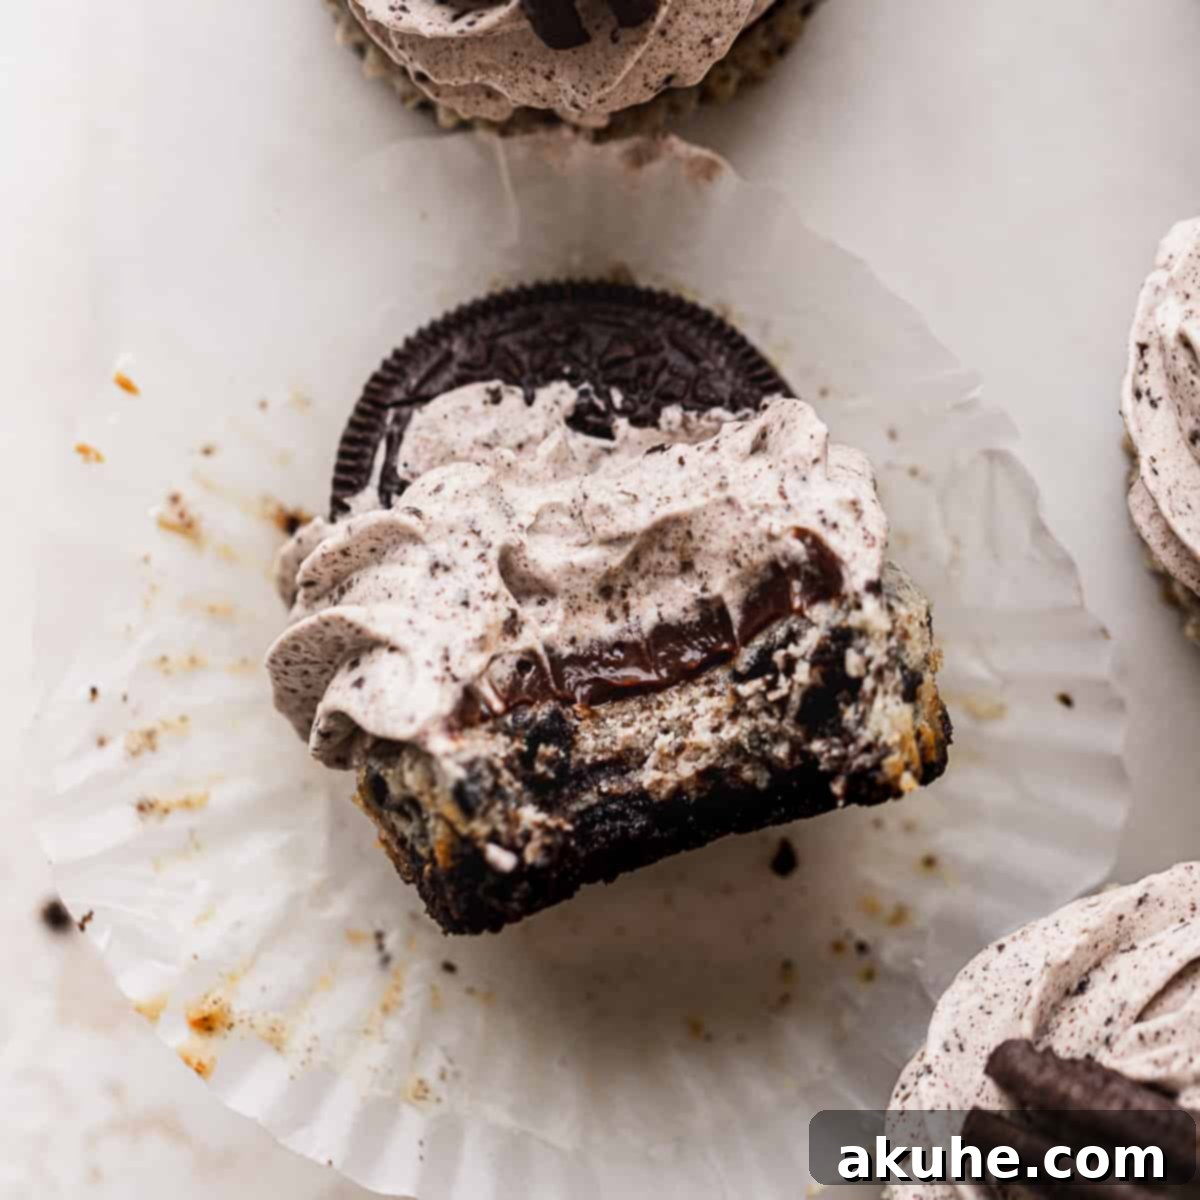
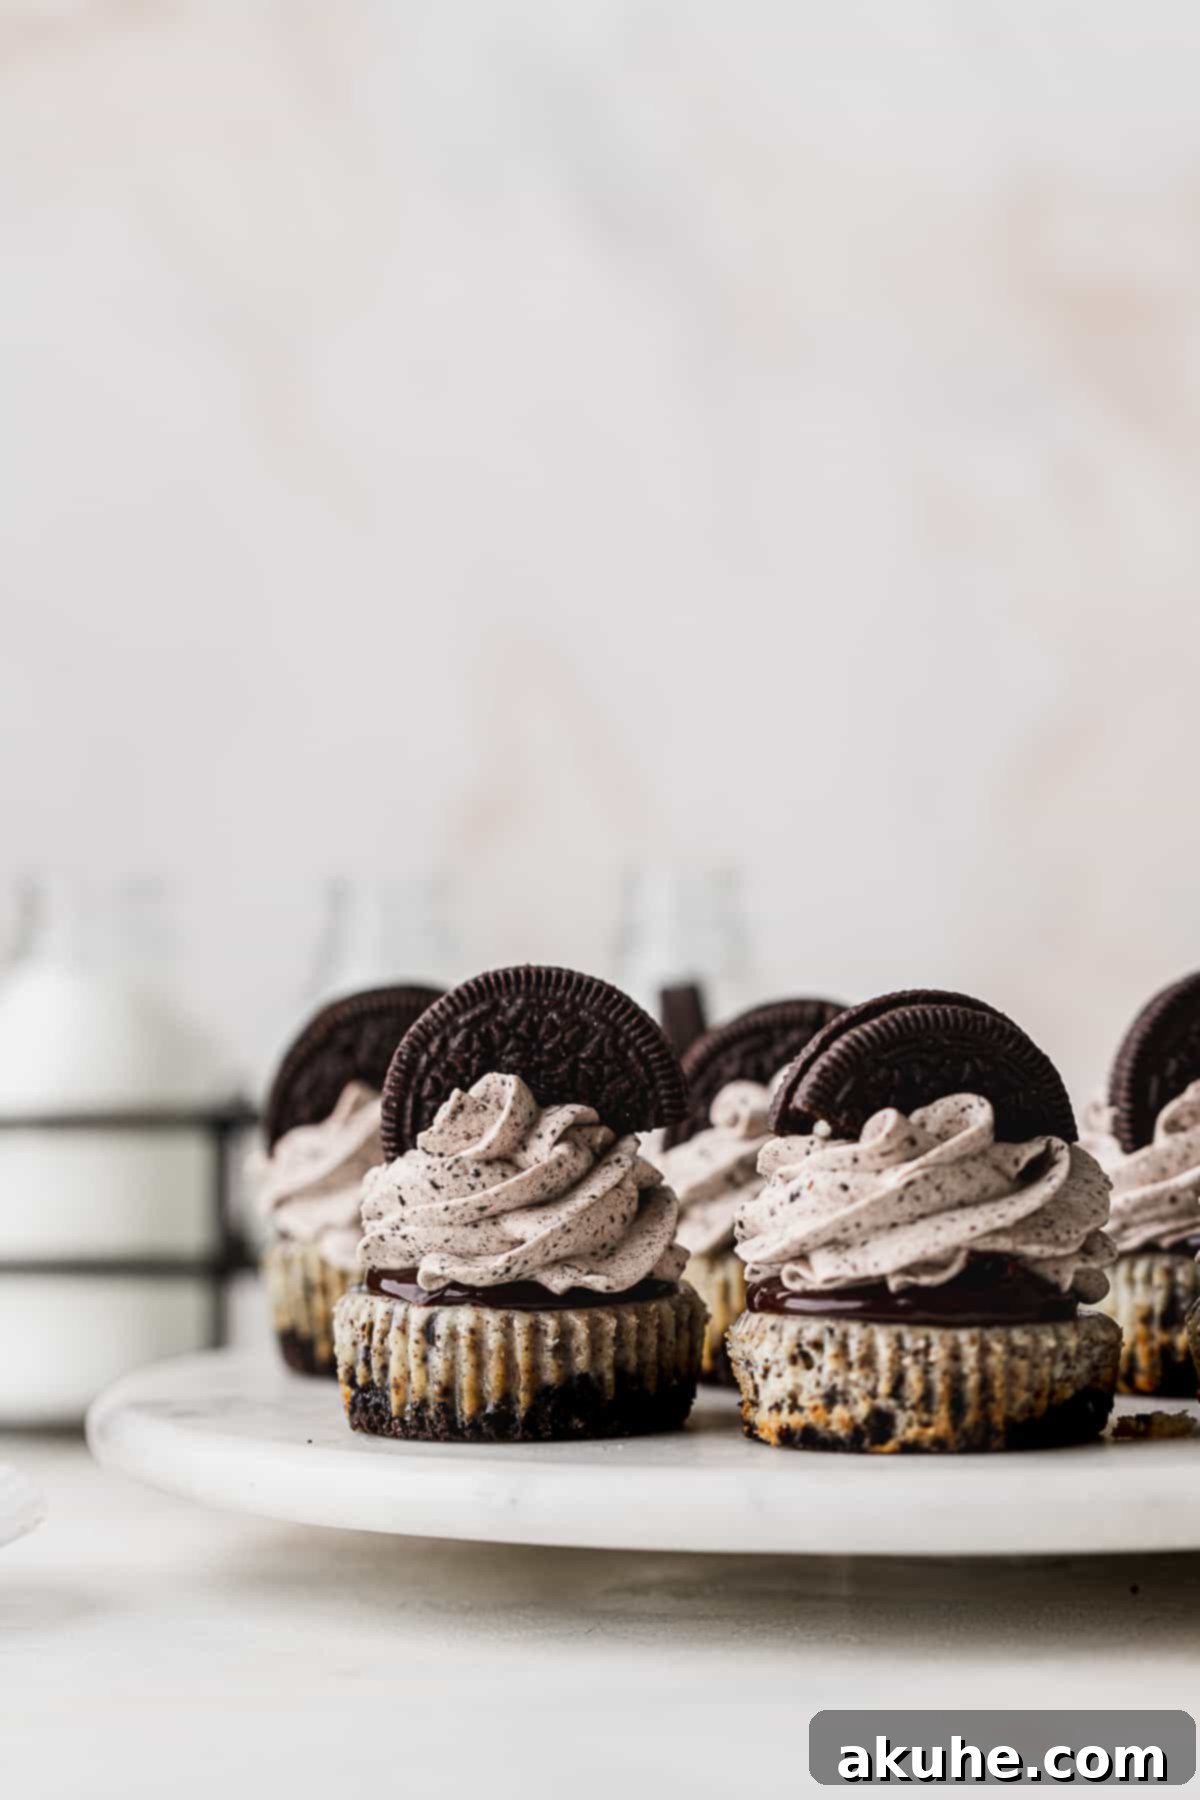
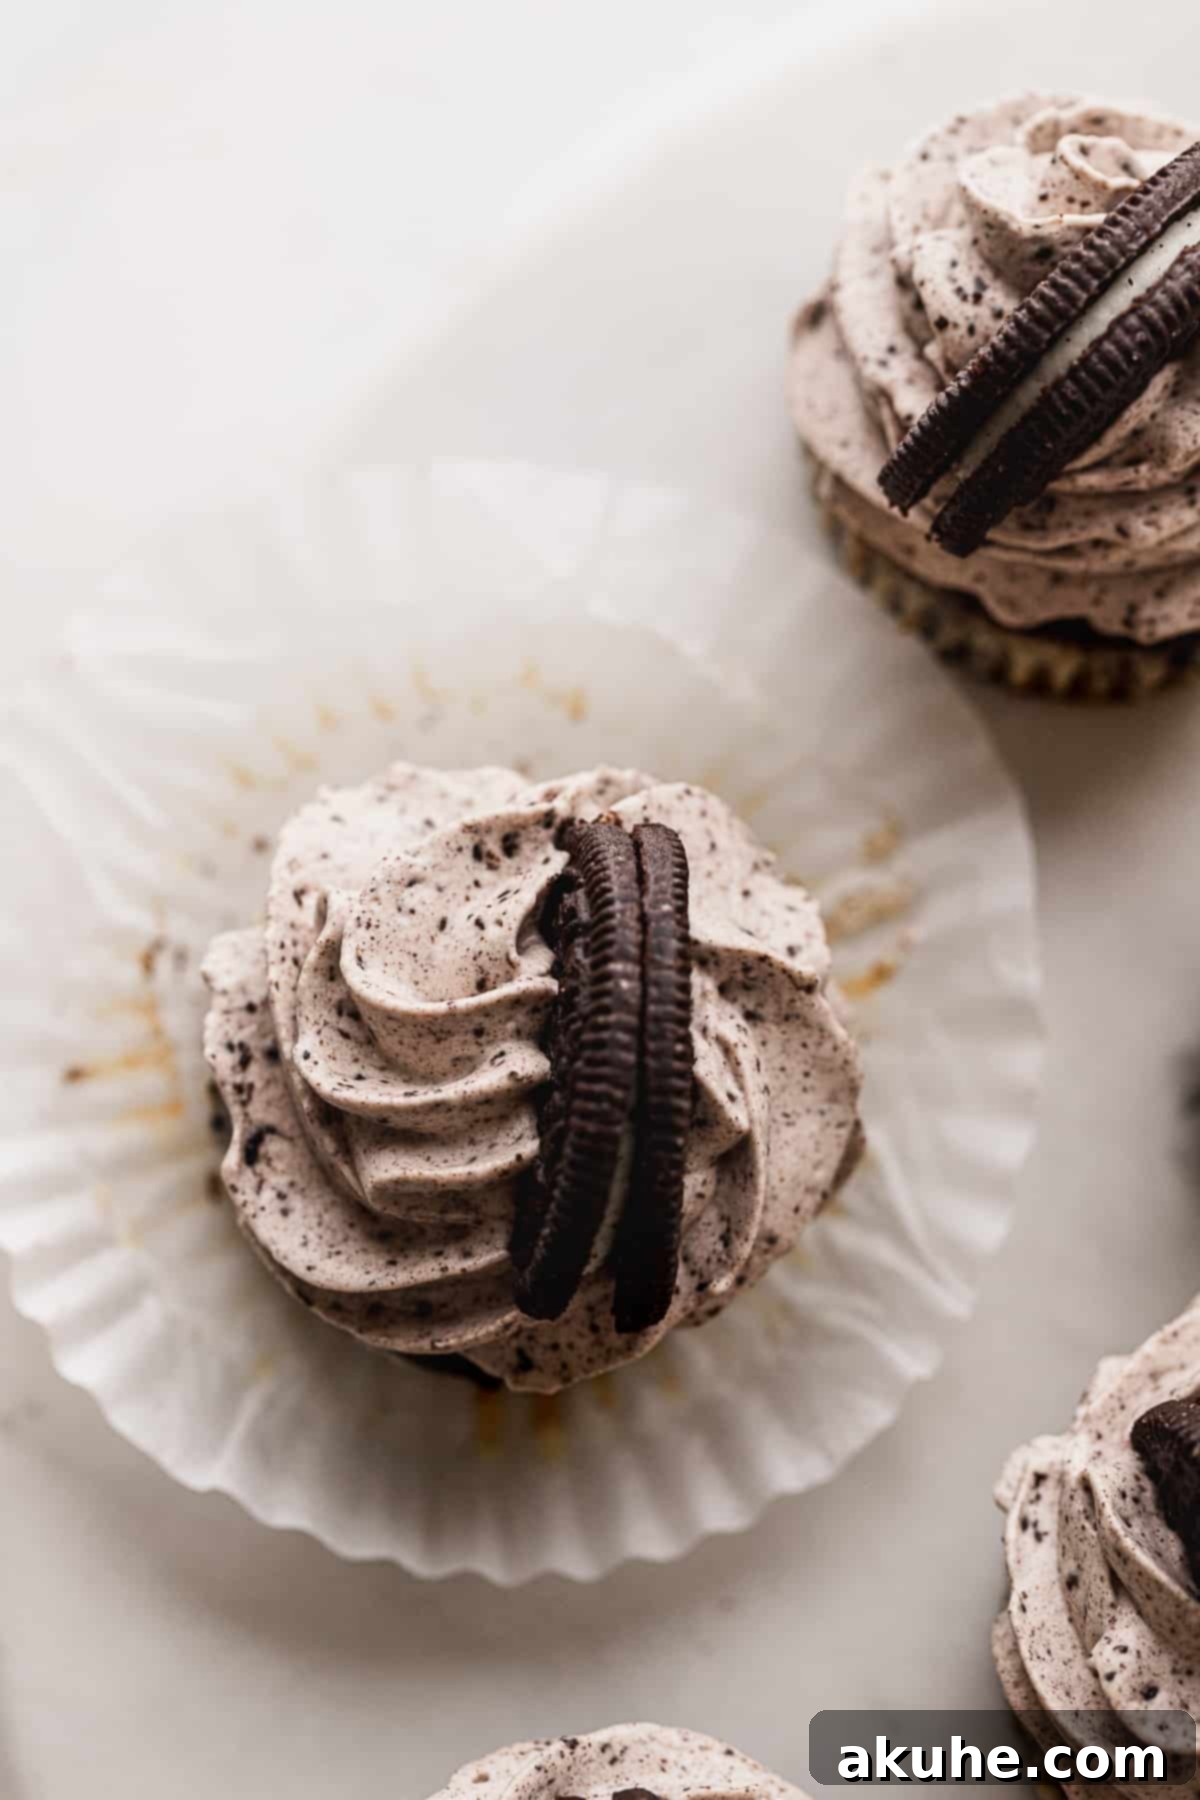
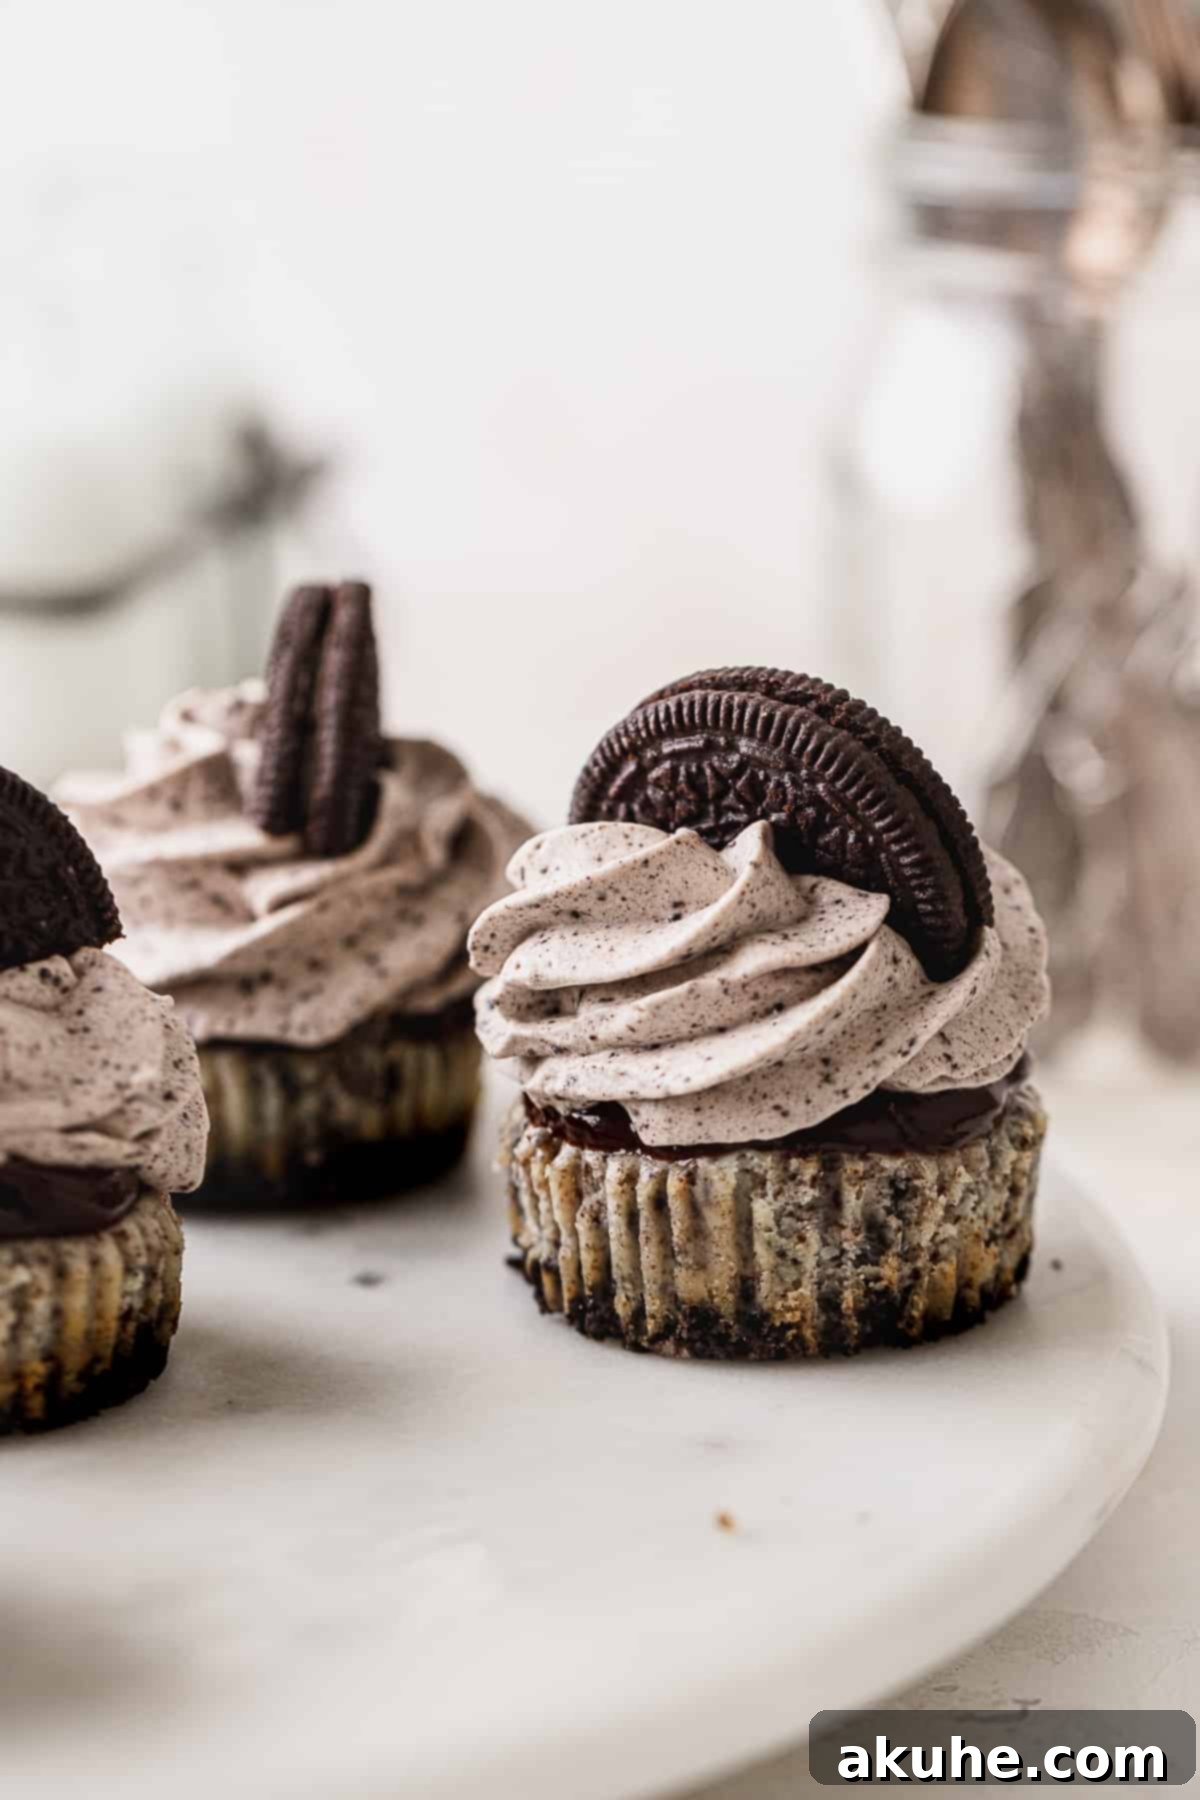
Prepare to fall in love with these utterly delightful mini Oreo cheesecakes! Imagine the perfect individual dessert, brimming with your favorite cookie. Each bite-sized treat boasts a perfectly crunchy Oreo cookie crust, a rich and creamy cheesecake filling generously studded with Oreo crumbs and pieces, all crowned with a decadent layer of warm hot fudge and a swirl of fluffy Oreo whipped cream. If you’re an Oreo enthusiast, these cheesecakes are not just a dessert, they’re an experience waiting to happen.
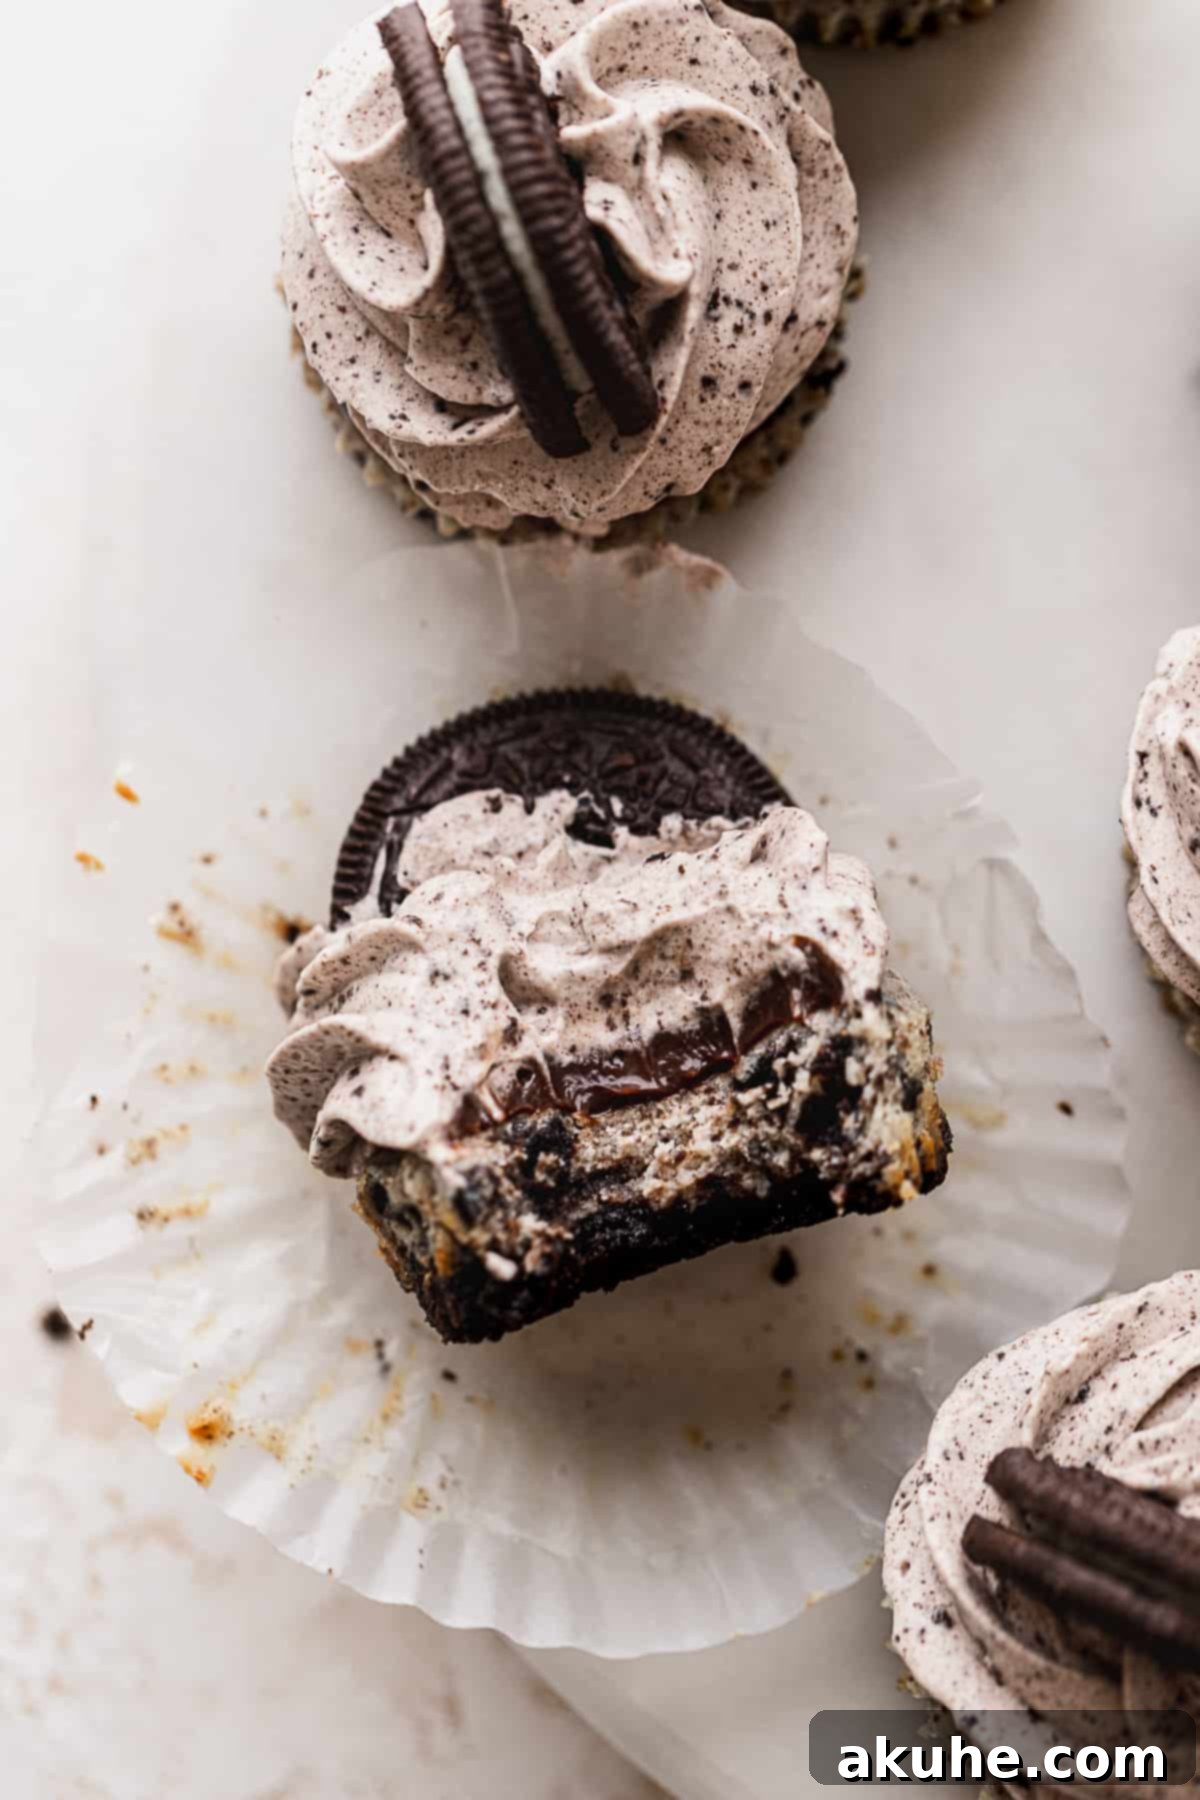
These mini Oreo cheesecakes aren’t just delicious; they are incredibly easy to make, making them an ideal choice for any baker, regardless of experience. Their individual portions are not only charming but also perfect for entertaining. Whether you’re hosting a grand celebration like a baby shower, a birthday party, or simply craving a special treat for yourself, these cheesecakes are guaranteed to be a crowd-pleaser and a perfect ending to any meal.
Craving even more Oreo goodness? Explore these other fantastic Oreo dessert recipes: Oreo cupcakes, Oreo chocolate chip cookies, and Oreo blondies. Each offers a unique way to enjoy the classic cookie everyone adores.
Why These Mini Oreo Cheesecakes Are a Must-Try
There are countless reasons to adore these mini Oreo cheesecakes. This recipe is specifically designed to maximize flavor and ease, ensuring a delightful baking and eating experience:
- Explosion of Oreo Flavor: This recipe doesn’t hold back! Oreos are incorporated into every layer of these small cheesecakes, from the base to the topping. You’ll find a delightful crunch in the crust, a creamy, cookie-filled center, and a final flourish of Oreo in the whipped cream, delivering an intense and satisfying cookie experience in every bite.
- Irresistible Oreo Crust: The foundation of these cheesecakes is a simple yet incredibly flavorful Oreo crust. Made with finely crushed Oreo crumbs and perfectly balanced with melted butter, it provides a sturdy, chocolatey base that complements the rich cheesecake filling beautifully. It’s a classic combination that never disappoints.
- Creamy Oreo Cheesecake Filling: The star of the show, this baked cheesecake filling is incredibly smooth and velvety, generously mixed with both fine Oreo crumbs for integrated flavor and larger Oreo pieces for delightful textural contrast. Every spoonful offers a burst of creamy cheesecake and crunchy cookie.
- Luxurious Hot Fudge Topping: A generous drizzle of high-quality hot fudge elevates these mini cheesecakes to an even more decadent level. Its warm, rich chocolate flavor melts slightly into the cool cheesecake, creating a truly indulgent experience.
- Fluffy Oreo Whipped Cream: To complete this masterpiece, a homemade whipped cream, lightly sweetened and infused with even more Oreo crumbs, is piped on top. This light and airy topping adds a contrasting texture and a final touch of Oreo magic, making each cheesecake truly special.
- Effortless Baking – No Water Bath Needed!: Forget the fuss and stress of a traditional water bath! This recipe is specifically formulated to bake perfectly in the oven without one, significantly simplifying the process while still yielding cheesecakes that are smooth, creamy, and free from cracks. It’s baking made easy!
Essential Ingredients for Perfect Mini Oreo Cheesecakes
Crafting the perfect mini Oreo cheesecakes starts with selecting the right ingredients. Here are some key notes to ensure your cheesecakes turn out rich, creamy, and utterly delicious:
- Oreos: For the best results, stick to regular Oreo cookies. Avoid using “Double Stuf” or similar varieties, as the extra cream filling can introduce too much moisture, affecting the crust’s texture and the cheesecake’s consistency. Feel free to experiment with different regular Oreo flavors if you’re feeling adventurous – mint Oreos or golden Oreos could offer a delightful twist!
- Room Temperature Dairy Ingredients: This is a crucial step for a smooth, lump-free cheesecake batter. Ensure your cream cheese, sour cream, and egg are brought to room temperature at least two hours before you plan to start baking. This allows them to blend seamlessly, creating a uniform, creamy batter without overmixing.
- Cream Cheese: Always opt for full-fat cream cheese in block form, not the spreadable tubs. The high-fat content is essential for achieving that classic rich, dense, and creamy cheesecake texture that makes these treats so irresistible.
- Sour Cream: Like the cream cheese, full-fat sour cream is recommended. It adds a subtle tang that balances the sweetness of the Oreos and chocolate, while also contributing to the cheesecake’s moist and tender crumb.
- Hot Fudge: While any good quality hot fudge will work, using a premium jarred hot fudge will make a noticeable difference in the overall decadence of your topping. You can typically find it in the ice cream toppings aisle of your grocery store.
Recommended Equipment
Having the right tools on hand will make the baking process much smoother and more enjoyable. Here’s a list of essential equipment for making these mini Oreo cheesecakes:
- 12-Cup Muffin Tin: Essential for baking individual cheesecakes.
- Paper Cupcake Liners: A must-have for easy removal and serving. Do not skip these!
- Food Processor or Blender: For quickly crushing Oreos into fine crumbs and larger pieces.
- Electric Mixer (Stand or Handheld): Crucial for beating the cream cheese and whipping the cream to achieve perfect consistency.
- Large Mixing Bowls: Several bowls will be needed for different components, including a cold metal bowl for the whipped cream.
- Rubber Spatula: Ideal for scraping down the sides of the bowl and gently folding in ingredients.
- Measuring Cups and Spoons: For accurate ingredient measurements.
- 1-Tablespoon and 1-Ounce Cookie Scoop: The tablespoon scoop is great for portioning the crust, and a 1-ounce cookie scoop ensures uniform cheesecake portions.
- Cooling Rack: For allowing the cheesecakes to cool completely after baking.
- Airtight Container/Cake Carrier: For proper storage and chilling.
- Piping Bag and Star Tip (Optional): For elegantly piping the Oreo whipped cream.
Step-by-Step Instructions for Making Mini Oreo Cheesecakes
Follow these detailed steps to create your perfect batch of mini Oreo cheesecake bites. This recipe utilizes either a stand mixer or a hand mixer for efficiency and best results.
Part 1: Preparing the Oreo Crust
- Prepare Your Muffin Tin: Preheat your oven to 325°F (160°C). Line a 12-cup muffin tin with paper cupcake liners. These liners are absolutely essential for preventing sticking and ensuring easy removal of your finished cheesecakes.
- Crush the Oreos: Using a food processor or a high-powered blender, finely crush approximately 18 Oreo cookies until they form fine crumbs. This will be about 1 1/2 cups of crumbs for the crust. Set aside any additional Oreos you’ll need for the cheesecake batter and whipped cream, crushing them into both fine crumbs and larger pieces as specified in the ingredient list.
- Combine and Portion the Crust: In a mixing bowl, combine the 1 1/2 cups of fine Oreo crumbs with 3 tablespoons of melted unsalted butter. Mix thoroughly with a fork until the crumbs are evenly moistened and resemble wet sand. This mixture should be lightly damp.
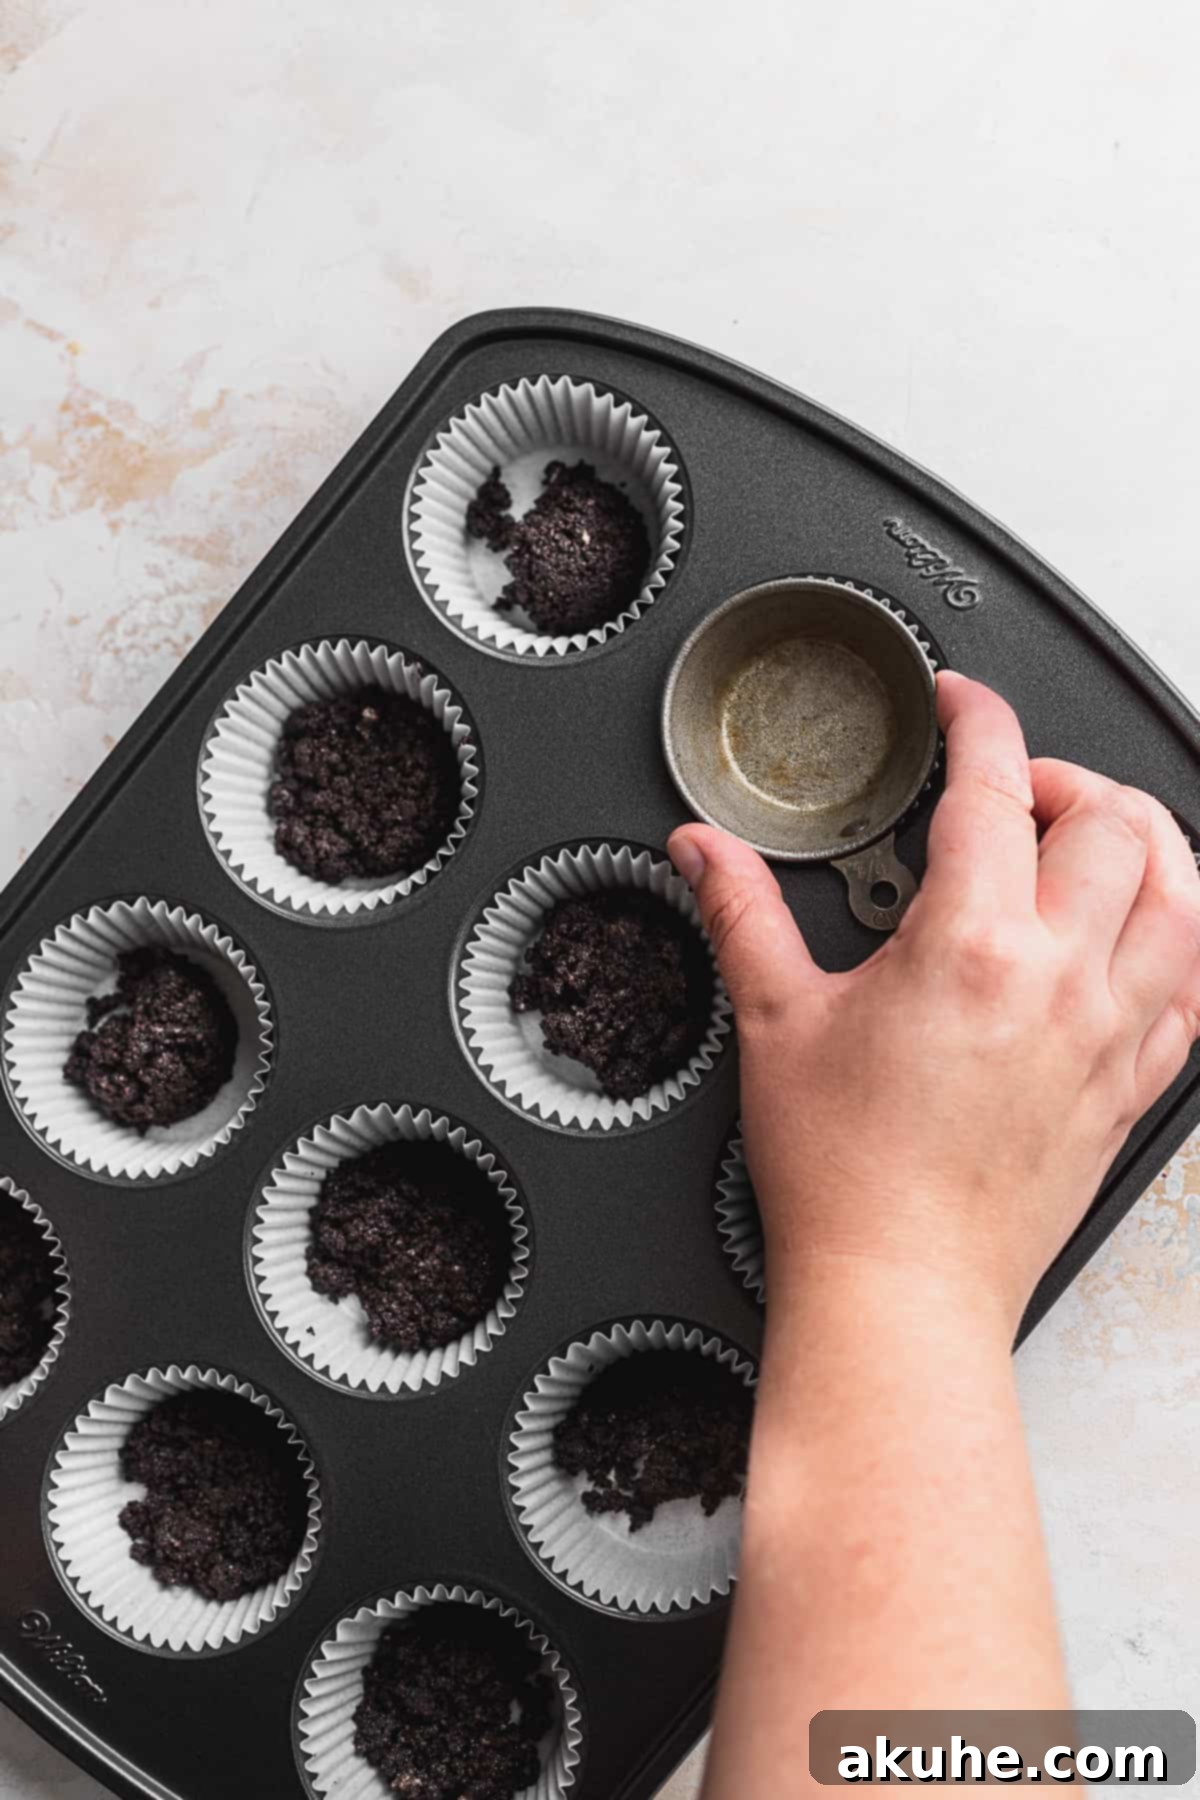
- Form the Crusts: Scoop approximately 1 tablespoon of the Oreo crumb mixture into the bottom of each lined muffin cup. Use a small, flat-bottomed object, such as the bottom of a spice jar or a 1/4-cup measuring cup, to firmly compact the crust into an even layer at the bottom of each liner. This creates a solid base for your cheesecake.
Part 2: Crafting the Oreo Cheesecake Filling
- Prepare Dairy and Sugar: Ensure your 8 ounces of cream cheese is at room temperature. In a large mixing bowl, beat the softened cream cheese on high speed for about 1 minute until it is completely smooth and creamy, with no lumps. Add 1/4 cup of white granulated sugar and continue beating on high speed for another minute, scraping down the sides of the bowl with a rubber spatula to ensure everything is well combined.
- Incorporate Wet Ingredients: Reduce the mixer speed to low. Add 1/8 cup of room temperature sour cream, 1 tablespoon of heavy cream, and 1 teaspoon of pure vanilla extract to the cream cheese mixture. Mix until just combined and smooth.
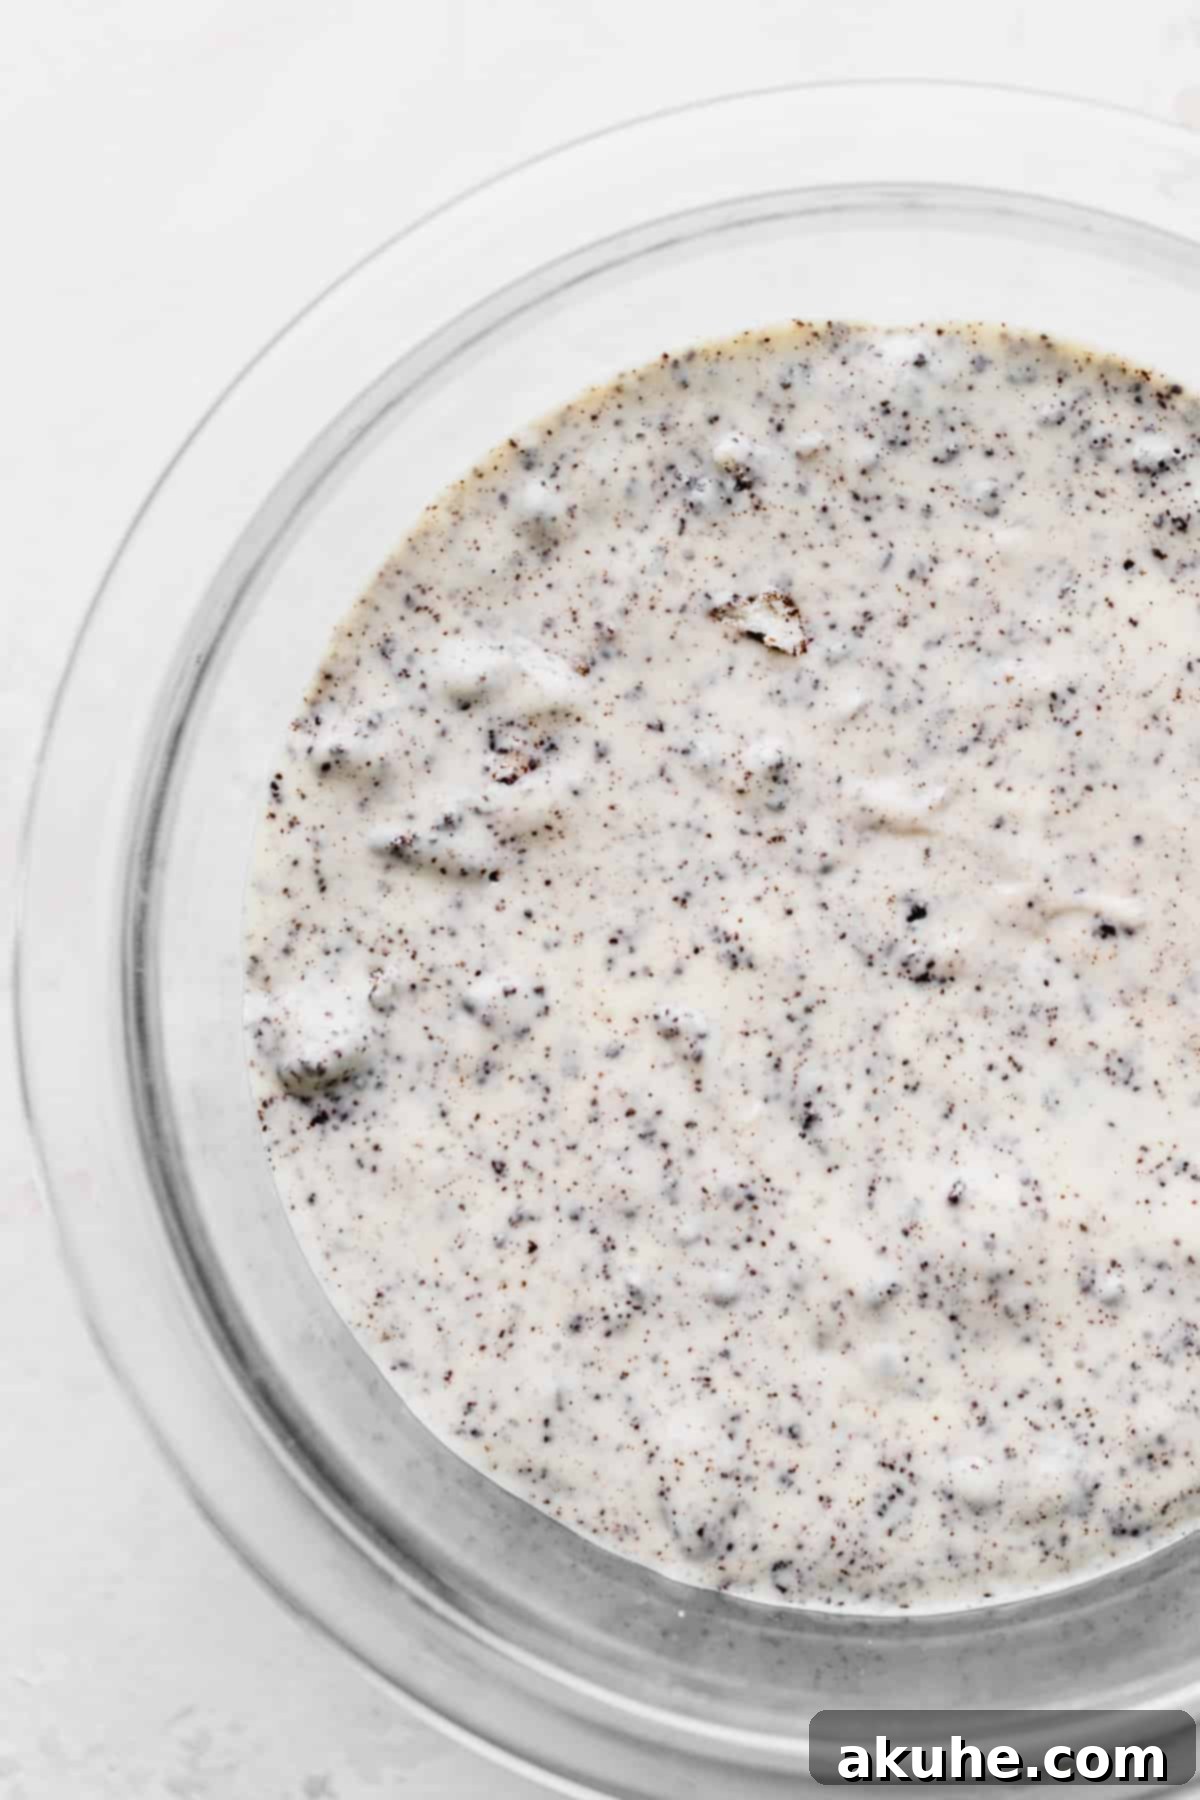
- Add the Egg and Oreos: With the mixer still on low speed, add the single large room temperature egg. Mix only until the egg is just incorporated into the batter. Overmixing at this stage can introduce too much air, leading to cracks. Remove the bowl from the mixer and use a rubber spatula to gently fold in 1/8 cup of fine Oreo crumbs and 1/4 cup of larger Oreo pieces.
- Fill the Muffin Tin: Using a 1-ounce cookie scoop or a spoon, divide the cheesecake batter evenly among the 12 muffin cups, filling each almost to the top. Make sure to use all of the batter.
Part 3: Baking and Chilling
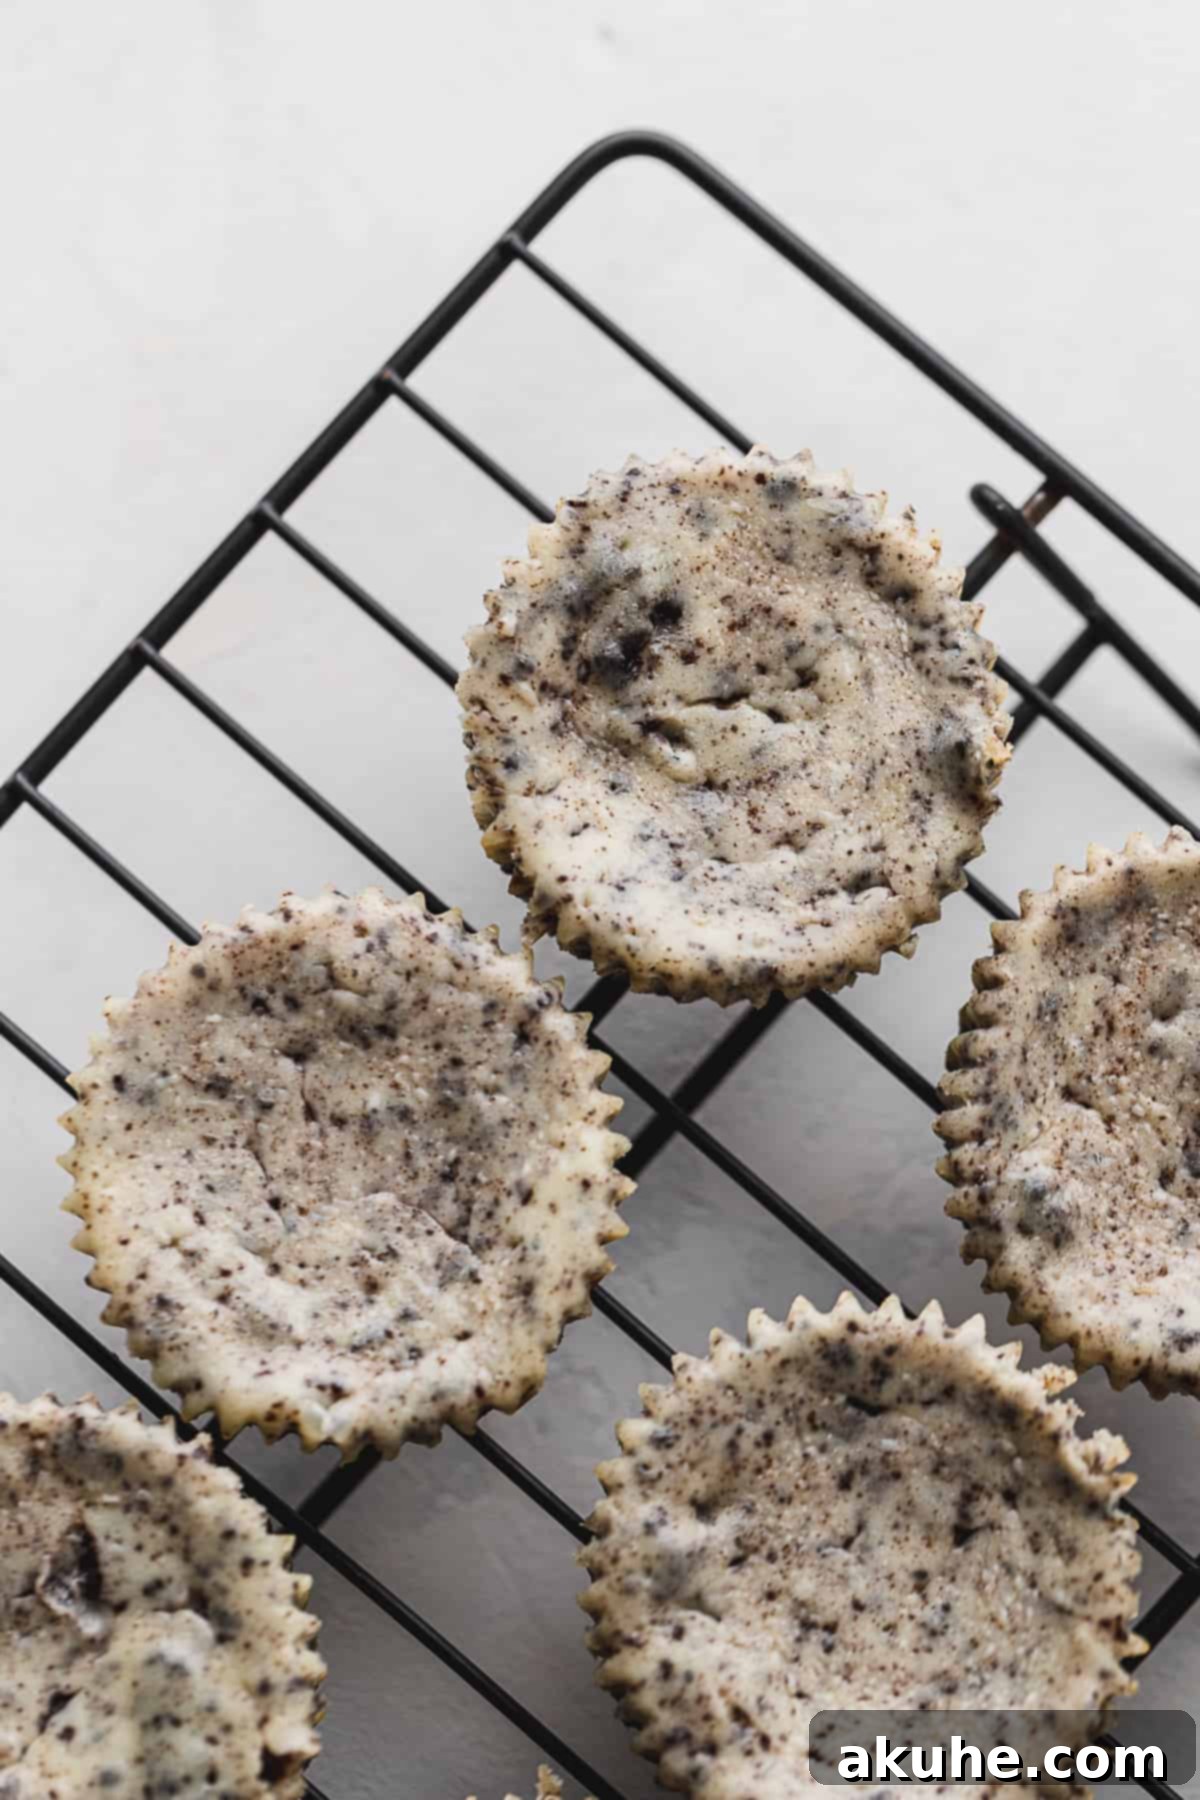
- Bake the Cheesecakes: Bake the mini cheesecakes in the preheated oven for 18-22 minutes. The cheesecakes are done when the edges are lightly set and slightly golden, the centers are still slightly jiggly but bouncy to the touch, and there are no visible cracks.
- Slow Cooling: Once baked, turn off the oven, prop the oven door open slightly, and let the cheesecakes sit inside for an additional 15 minutes. This gradual cooling process helps prevent cracks.
- Final Cool and Chill: Carefully remove the muffin tin from the oven and transfer the cheesecakes to a wire cooling rack. Allow them to cool completely at room temperature. Once cooled, cover the muffin tin loosely with plastic wrap or transfer the cheesecakes to an airtight container and chill in the refrigerator for at least 6 hours, or ideally, overnight. Chilling is essential for them to set properly and develop their full flavor and texture.
Part 4: Decadent Toppings
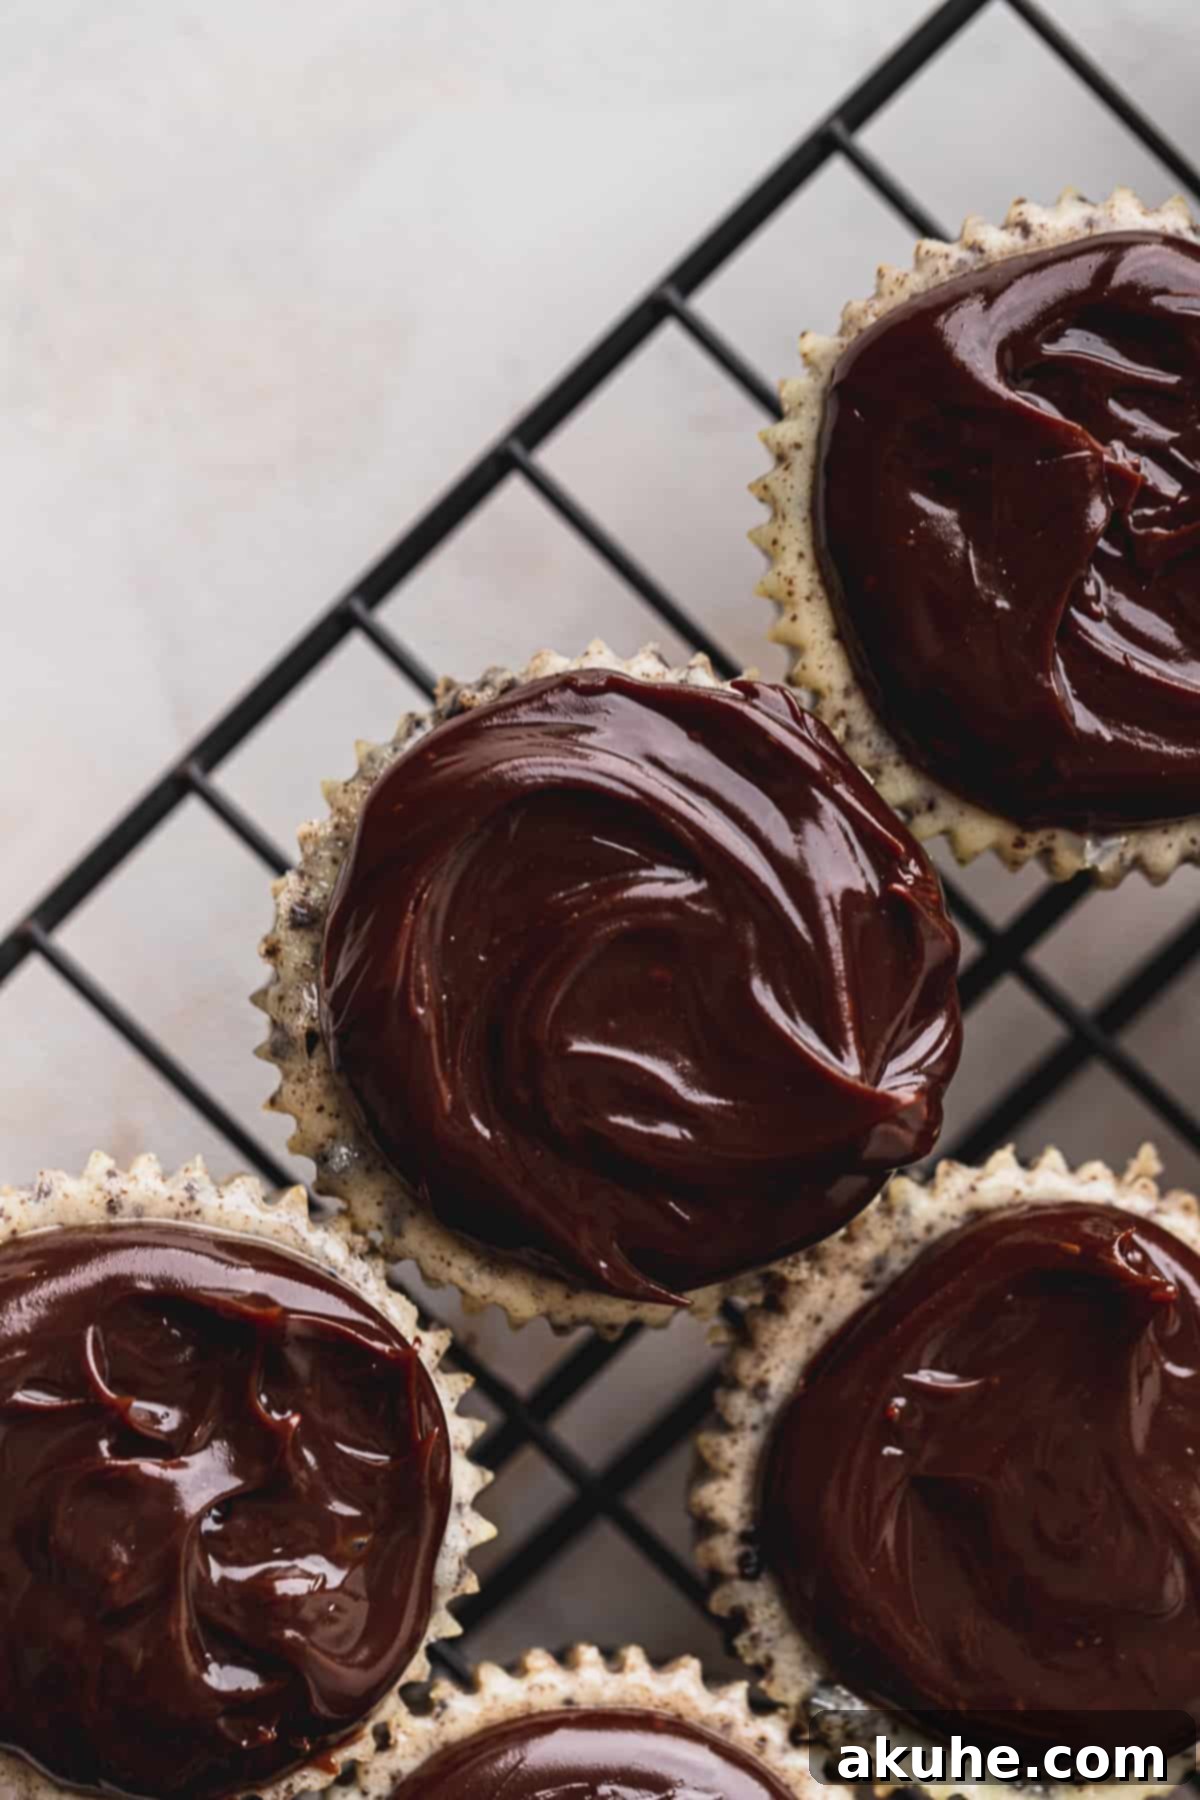
- Melt the Hot Fudge: Once the cheesecakes are thoroughly chilled, prepare the hot fudge. Remove the lid from your container of hot fudge and warm it gently in a microwave-safe bowl. Heat in 30-second intervals, stirring in between, until it is melted and pourable.
- Top with Hot Fudge: Carefully remove the paper liners from the chilled mini cheesecakes. Using a 1/2 tablespoon scoop, place a generous spoonful of melted hot fudge on top of each cheesecake. Spread it gently to cover the top. You can also sprinkle additional Oreo pieces on top of the fudge for extra crunch.
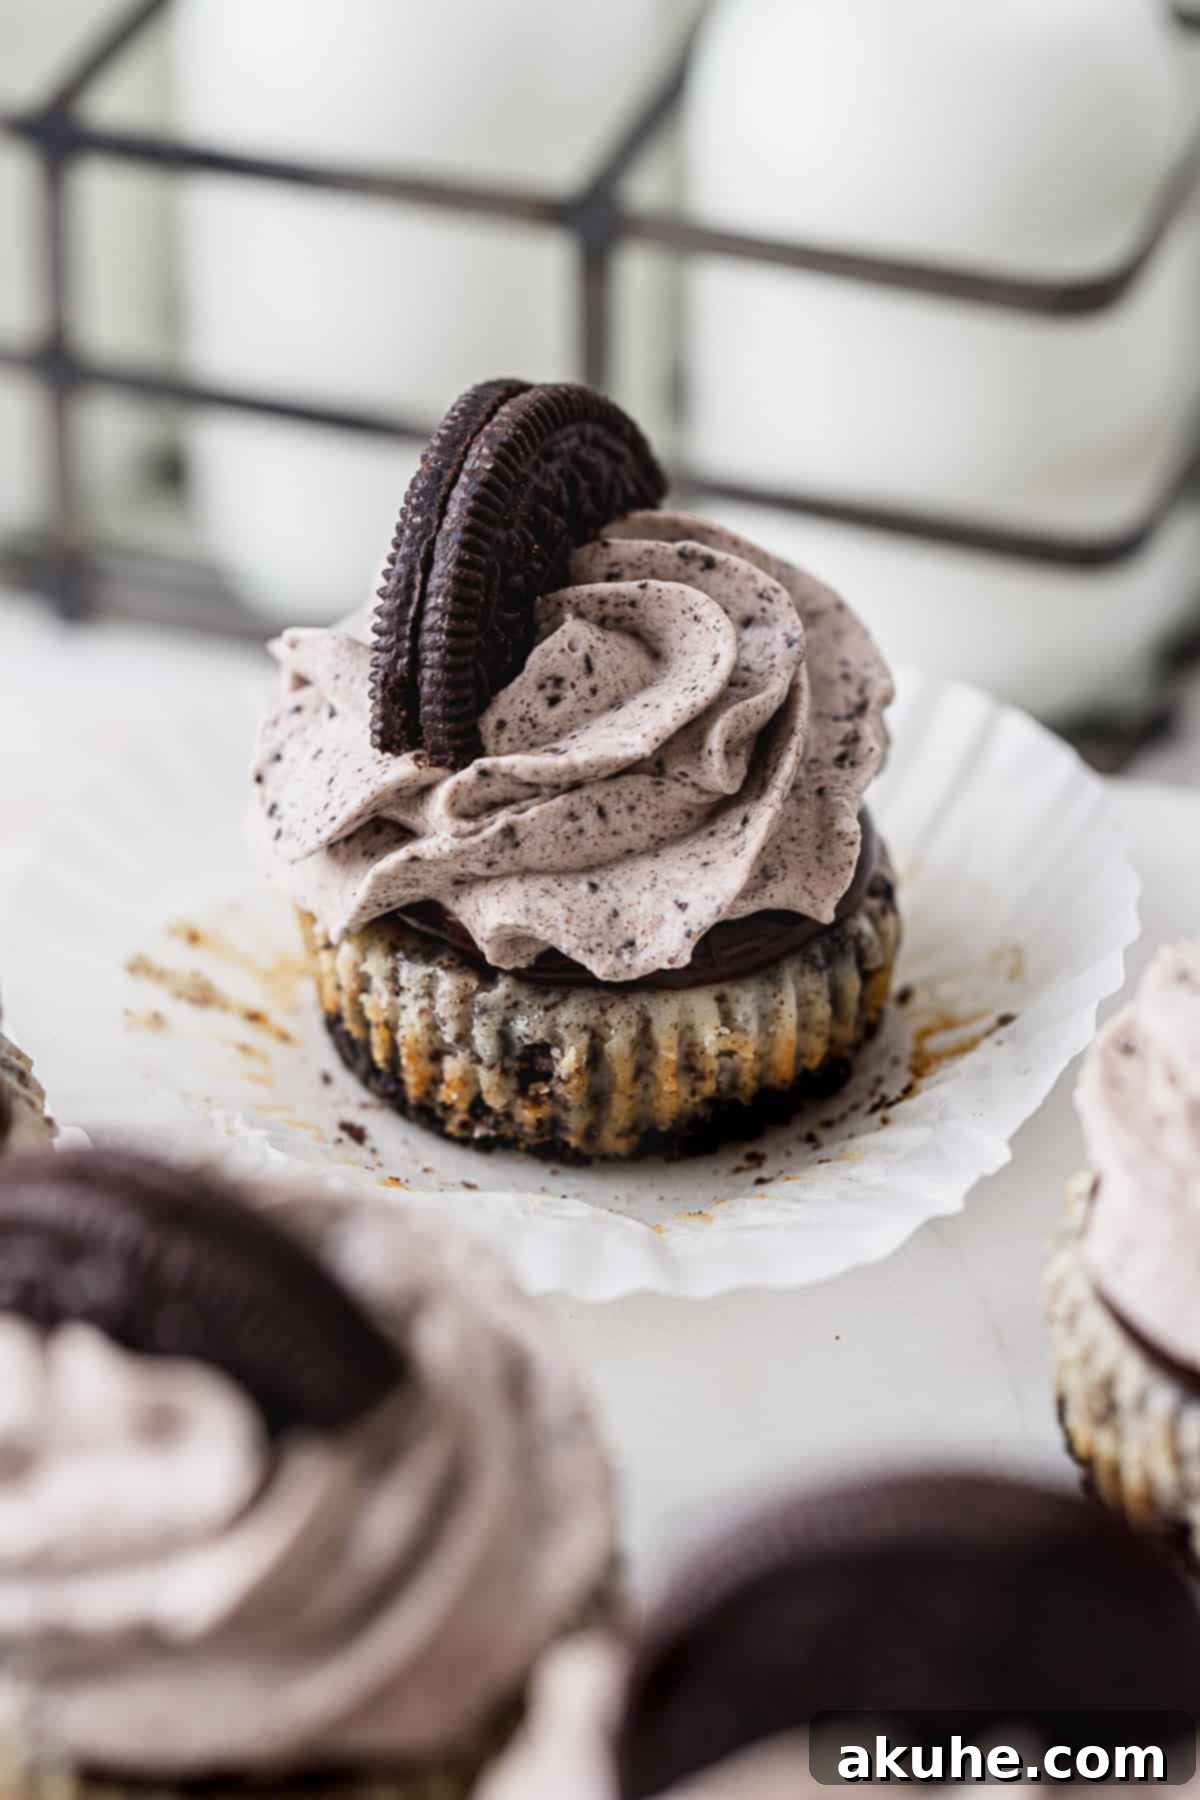
- Prepare Oreo Whipped Cream: For best results, freeze a metal mixing bowl and a whisk attachment for 10-15 minutes before starting. In the cold bowl, combine 1 cup of cold heavy cream, 2 tablespoons of powdered sugar, and 1/2 teaspoon of pure vanilla extract. Beat on high speed until stiff peaks form. Gently fold in 1/2 cup of finely crushed Oreo crumbs (from about 6 Oreos).
- Decorate and Serve: Transfer the Oreo whipped cream to a piping bag fitted with your favorite star tip (or a spoon if you prefer a rustic look). Pipe a generous swirl of whipped cream on top of each hot fudge-covered cheesecake. For a final flourish, garnish each mini cheesecake with an extra half Oreo cookie. Serve immediately and enjoy!
Expert Baking Tips for Flawless Mini Cheesecakes
Achieving perfectly smooth and crack-free mini cheesecakes is easier than you think with these simple tips:
- Room Temperature is Key: Always ensure your cream cheese, sour cream, and egg are at room temperature. This is arguably the most critical step, as cold ingredients do not emulsify well, leading to a lumpy batter and a higher chance of cracks during baking.
- Beat Cream Cheese Thoroughly: Before adding any other ingredients, beat the cream cheese on its own until it’s incredibly smooth and fluffy. Then, add the sugar and beat again until fully incorporated and no lumps remain. This creates a stable base for your batter.
- Minimize Air with Eggs: Once you add the egg to the batter, mix it on the lowest speed possible and only until it is just combined. Overmixing after the egg has been added introduces too much air, which expands during baking and contracts during cooling, often resulting in cracks. After mixing, use a rubber spatula to gently fold the batter, further reducing air pockets.
- Slow and Steady Cooling: Temperature shock is a common culprit for cracked cheesecakes. After the baking time is complete, do not immediately pull the cheesecakes from the oven. Instead, turn off the oven, crack the door open slightly (you can place a wooden spoon in the door to keep it ajar), and let the cheesecakes slowly cool inside for about 15 minutes. This gradual temperature change helps them set without cracking.
- Don’t Overbake: Overbaking will dry out your cheesecakes and almost guarantee cracks. Look for edges that are set and a center that still has a slight wobble when gently shaken. They will continue to set as they cool.
Frequently Asked Questions (FAQ)
Can I use low-fat cream cheese or sour cream?
For the best results, it’s highly recommended to use full-fat cream cheese and sour cream. The fat content is crucial for achieving the rich, creamy texture and decadent flavor that makes these mini cheesecakes so delicious. Low-fat versions may result in a more watery and less satisfying cheesecake.
Can this recipe be made without eggs?
This specific recipe has not been tested with egg substitutes. Eggs play a vital role in the structure and richness of cheesecake. If you do attempt an egg substitute, please let us know your results!
Can these mini cheesecakes be made gluten-free?
Absolutely! Many brands offer gluten-free Oreo cookies. Simply substitute regular Oreos with gluten-free Oreos in all layers of the recipe, and your mini cheesecakes will be perfectly suitable for a gluten-free diet.
Can these cheesecakes be prepared ahead of time?
Yes, these mini cheesecakes are an excellent make-ahead dessert! You can bake them 2-3 days before you plan to serve them. Store them covered in an airtight container in the refrigerator. Wait to add the hot fudge and whipped cream until just before serving for the freshest taste and appearance.
What if my cheesecakes crack during baking?
Cracking often occurs due to temperature shock or overmixing. Ensure your dairy ingredients are at room temperature, avoid over-beating the batter once the egg is added, and follow the slow cooling method (leaving them in the turned-off oven with the door ajar). Even if they do crack slightly, the hot fudge and Oreo whipped cream toppings will beautifully conceal any imperfections!
Storing and Freezing Your Mini Oreo Cheesecakes
To keep your mini Oreo cheesecakes fresh and delicious, proper storage is essential. Store them in an airtight container, such as a specialized cake carrier, in the refrigerator for up to 5 days. For the best flavor and texture, it’s advisable to add the hot fudge and Oreo whipped cream topping just before serving.
Freezing Instructions
These mini cheesecakes freeze beautifully, making them perfect for future indulgence or meal prep. To freeze, ensure they are completely cooled and undecorated (without hot fudge or whipped cream). Wrap each cheesecake tightly in plastic wrap, then place them in an airtight freezer-safe container or a freezer bag. They can be frozen for up to 30 days.
When you’re ready to enjoy, thaw the frozen cheesecakes in the refrigerator for 1-2 hours (or at room temperature for about 30-60 minutes) before decorating with hot fudge and Oreo whipped cream. This thawing process will ensure they return to their creamy texture.
Other Cheesecake Recipes To Try
If you’ve loved these mini Oreo cheesecakes, be sure to explore more delightful cheesecake creations on our site! We have a variety of recipes to satisfy every cheesecake craving.
We absolutely adore seeing your culinary creations! If you make this recipe, please share a photo and tag us on Instagram @stephaniesweettreats. Your feedback means the world to us, and we hope you loved these as much as we do! For more delicious baking ideas and inspiration, remember to follow us on Pinterest.
Mini Oreo Cheesecakes
Author: Stephanie Rutherford
These mini Oreo cheesecakes are packed with so much Oreo flavor! Featuring a crunchy Oreo crust, a creamy baked cheesecake filling with Oreo crumbs and pieces, and topped with rich hot fudge and fluffy Oreo whipped cream.
Prep Time: 30 mins
Cook Time: 20 mins
Chilling Time: 6 hrs
Total Time: 6 hrs 50 mins
Servings: 12 cheesecakes
Ingredients
Oreo Crust
- 1 1/2 cups Oreo crumbs (fine crumb)
- 3 TBSP Unsalted butter (melted)
Oreo Cheesecake
- 8 oz Cream cheese (room temperature)
- 1/4 cup White granulated sugar
- 1/8 cup Sour cream (room temperature)
- 1 TBSP Heavy cream
- 1 tsp Pure vanilla extract
- 1 Large egg (room temperature)
- 1/8 cup Oreo crumbs (about 2 Oreos blended into fine crumbs)
- 1/4 cup Oreo pieces (about 3 Oreos)
Oreo Whipped Cream & Toppings
- 1 container Hot fudge (melted)
- 1/2 cup Oreo pieces (about 5-6 Oreos, for topping)
- 1 cup Heavy cream (cold)
- 2 TBSP Powdered sugar
- 1/2 tsp Pure vanilla extract
- 1/2 cup Oreo crumbs (about 6 Oreos blended into fine crumbs, for whipped cream)
- Extra half Oreos (for decoration)
Instructions
Oreo Crust
- Use a food processor or blender to blend Oreos into a fine crumb. Place in a mixing bowl and add melted butter. Use a fork to mix until lightly wet.
- Preheat oven to 325°F (160°C). Line a 12-cup muffin tin with muffin liners. Use 1 TBSP of crust per hole. Use a spice jar or 1/4 measuring cup to compact crust firmly.
Oreo Cheesecake
- Prepare the Oreo crumbs and Oreo pieces as specified. Using an electric mixer, beat the cream cheese on high for 1 minute until smooth. Add in the sugar and beat again for 1 minute, then scrape the bowl.
- Add in sour cream, heavy cream, and vanilla extract. Mix on high until combined and smooth. Add in the egg and mix on low until just combined. Take off the mixer and gently fold in the Oreo crumbs and Oreo pieces with a rubber baking spatula.
- Use a 1-ounce cookie scoop and scoop the batter evenly into the muffin tin, utilizing all of the batter.
- Bake for 18-22 minutes. The cheesecake should be just baked, bouncy to the touch with light golden edges and no cracks. Turn off the oven, prop open the door, and let sit for 15 minutes.
- Transfer to a cooling rack. Let them cool completely. Cover in an airtight container and chill for at least 6 hours or overnight for best results.
Oreo Whipped Cream & Toppings
- Remove cheesecakes from wrappers. Heat the hot fudge in a microwave-safe bowl for 30-50 seconds until melted. Scoop 1 heaping 1/2 TBSP onto each mini cheesecake. Top with extra Oreo pieces.
- Freeze a metal bowl with a whisk attachment for 10 minutes. Add cold heavy cream, powdered sugar, vanilla, and 1/2 cup Oreo crumbs to the cold bowl. Beat on high until stiff peaks form.
- Pipe whipped cream on top of the mini cheesecakes. Garnish with a half Oreo.
Notes
- All ingredients specified as “room temperature” should be pulled out at least 2 hours before baking to ensure optimal texture.
- These mini cheesecakes achieve their best flavor and texture if chilled overnight.
Nutrition Facts (per cheesecake)
Calories: 185kcal, Carbohydrates: 7g, Protein: 2g, Fat: 18g, Saturated Fat: 11g, Polyunsaturated Fat: 1g, Monounsaturated Fat: 5g, Trans Fat: 1g, Cholesterol: 58mg, Sodium: 71mg, Potassium: 47mg, Fiber: 1g, Sugar: 5g, Vitamin A: 666IU, Vitamin C: 1mg, Calcium: 36mg, Iron: 1mg
