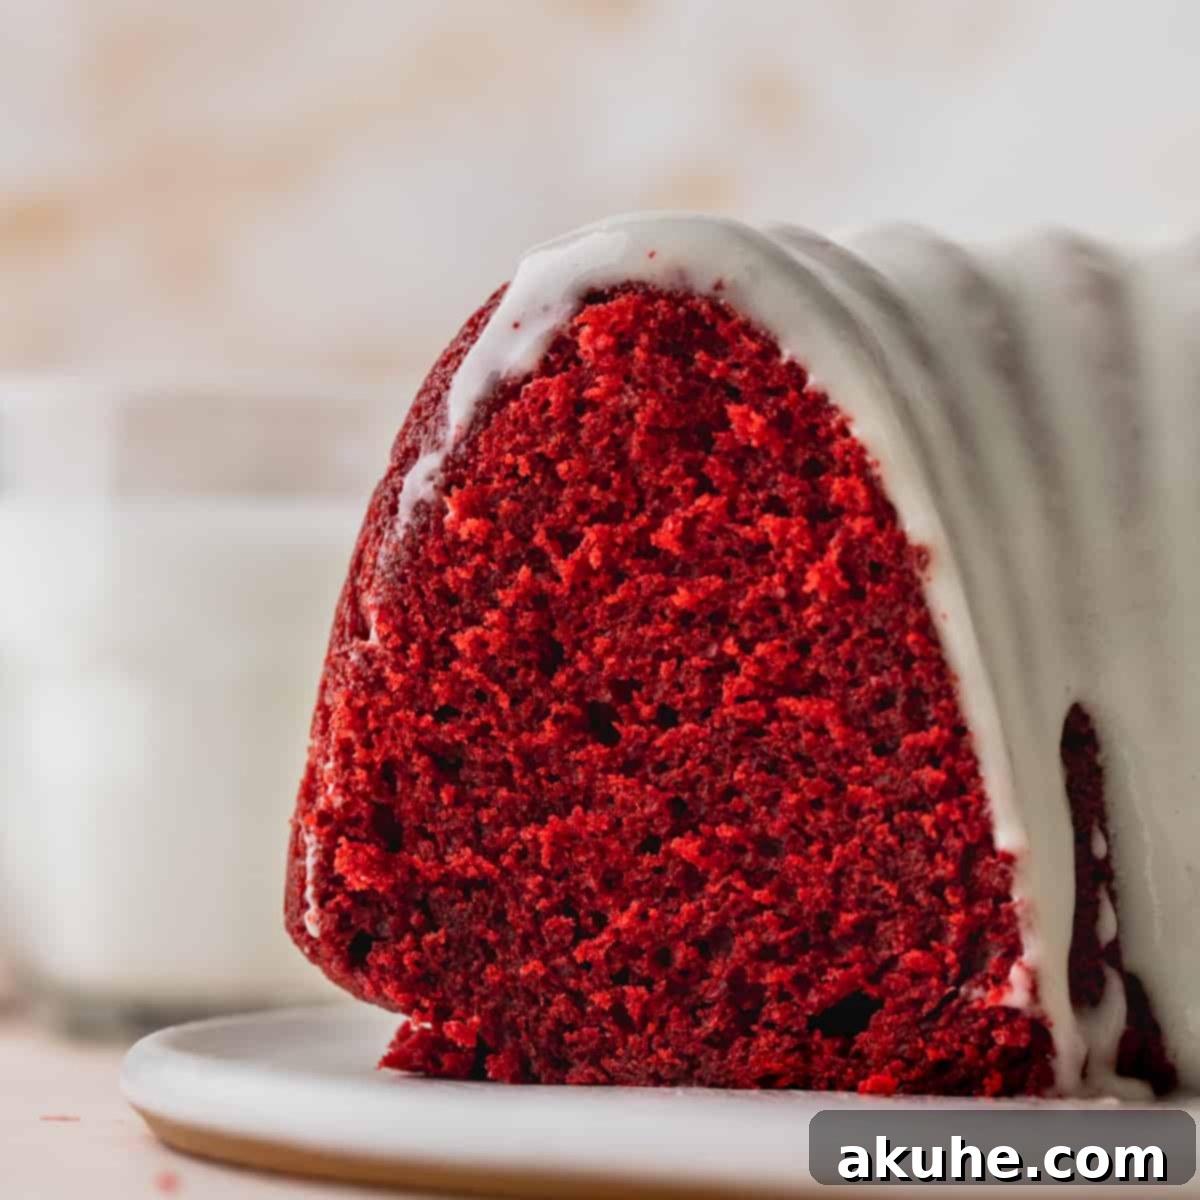
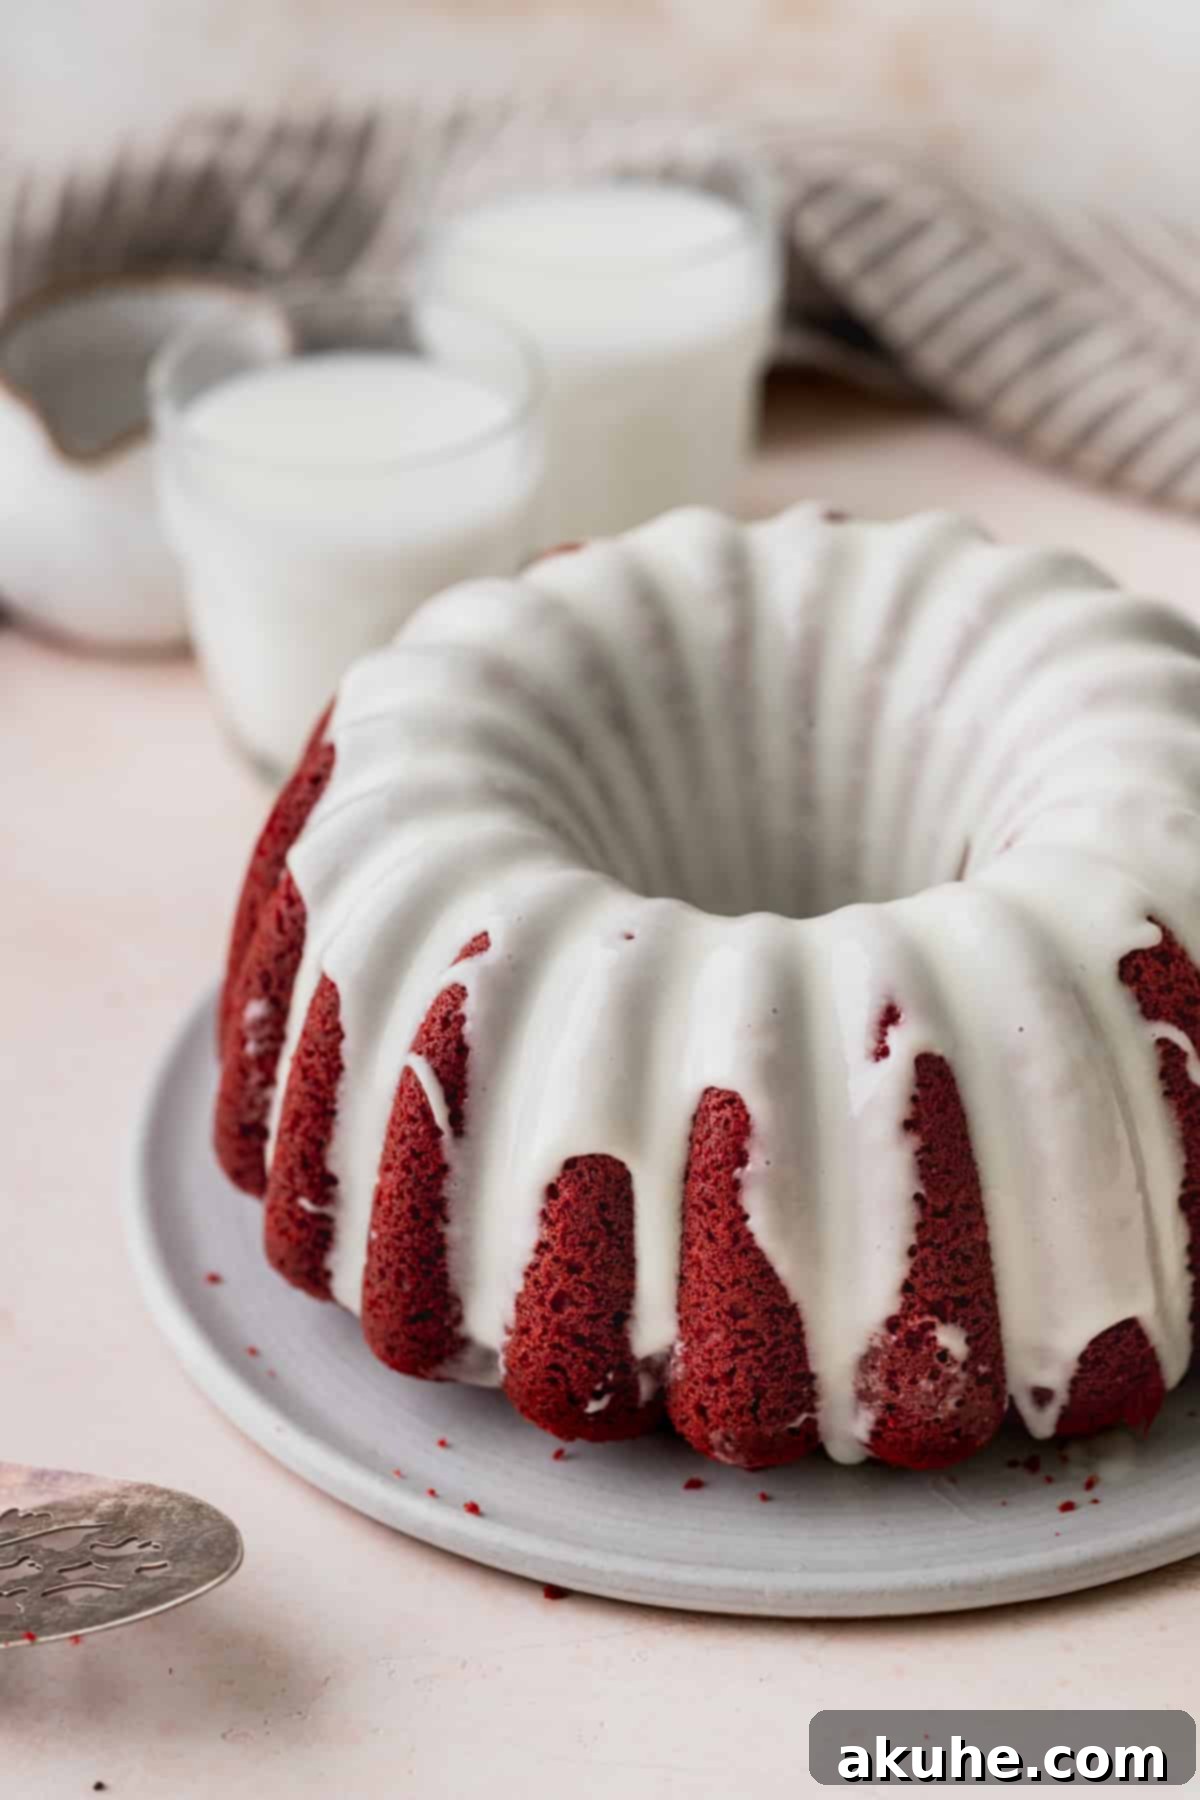
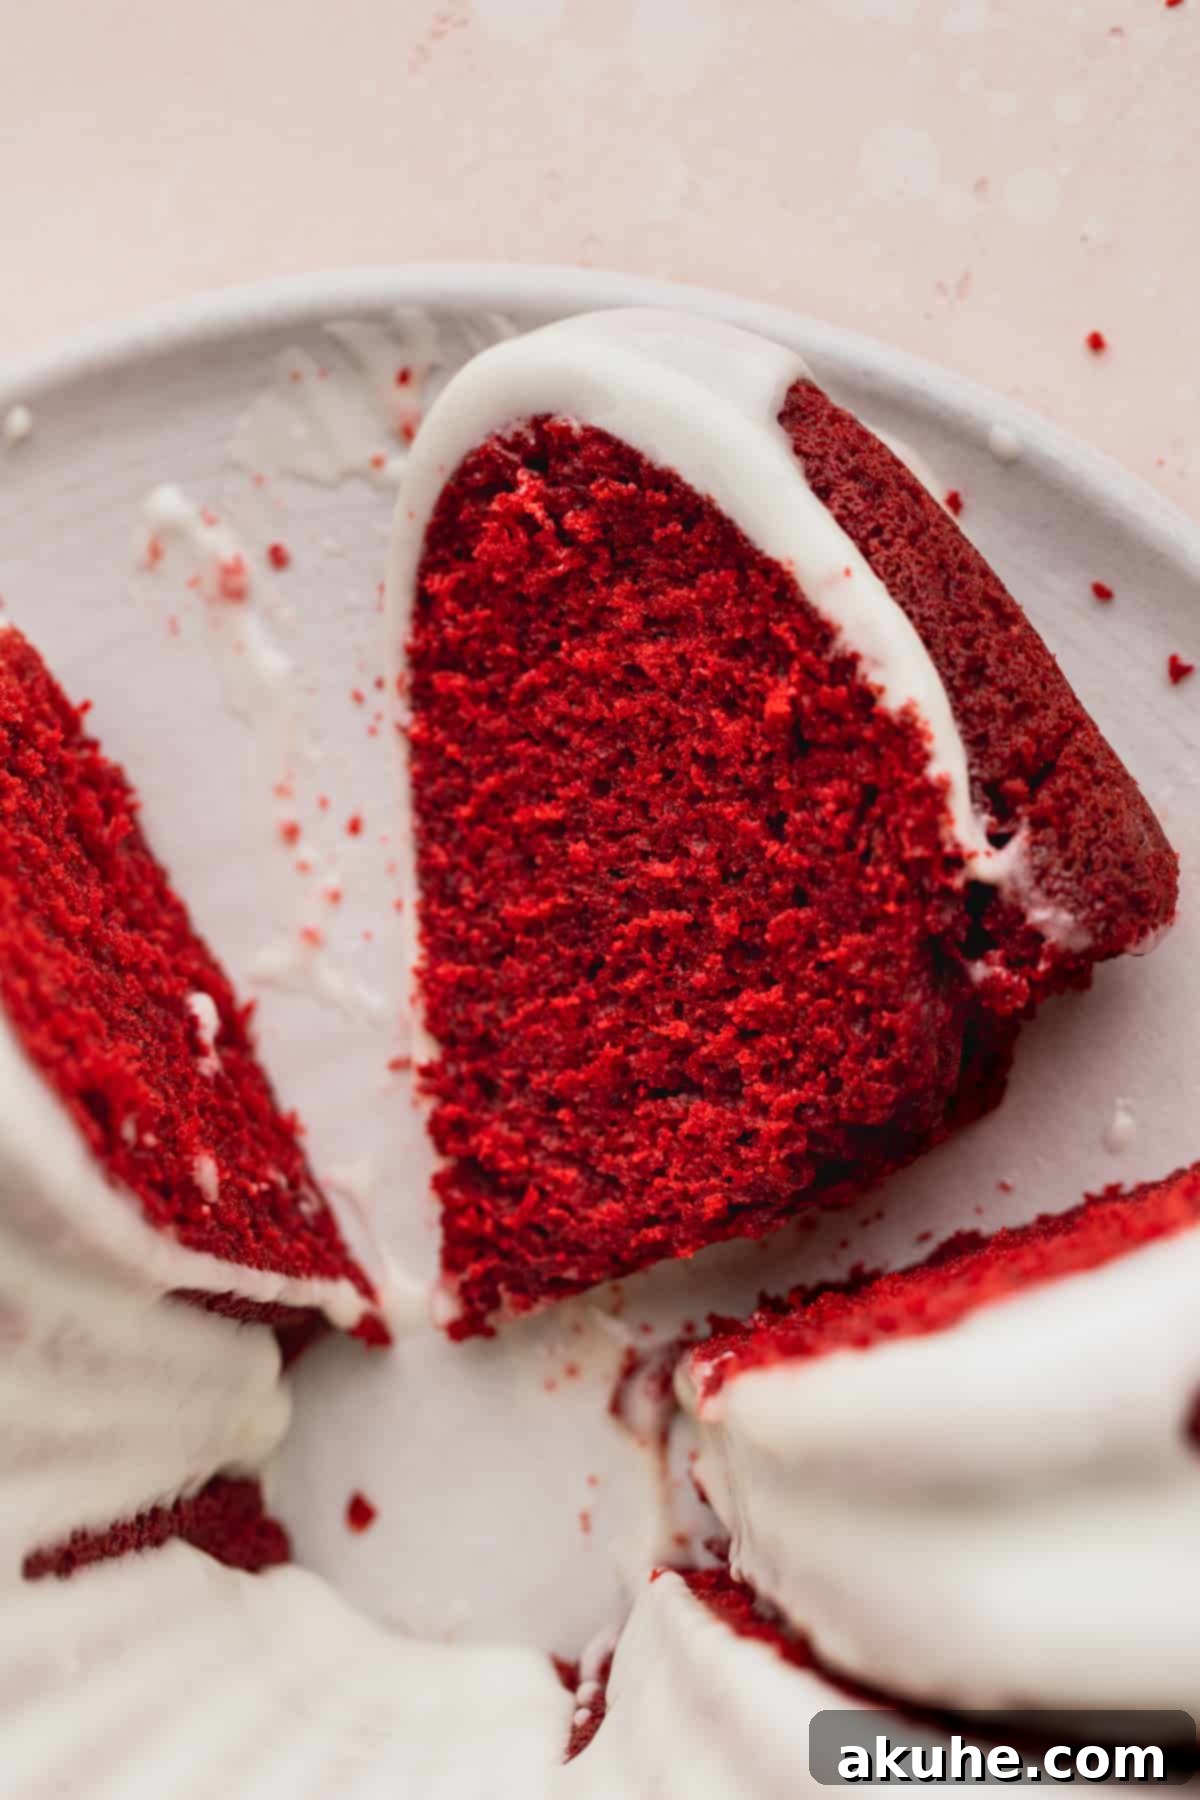
Prepare to fall in love with the ultimate dessert sensation: the Red Velvet Bundt Cake! This truly spectacular cake is more than just a treat; it’s a showstopper, a vibrant centerpiece perfect for Valentine’s Day, anniversaries, birthdays, or any special occasion demanding a touch of elegance and irresistible flavor. Imagine a cake that’s not only visually stunning with its deep, rich crimson hue but also incredibly moist, tender, and bursting with that classic, subtly chocolatey red velvet taste. Topped with a luscious, tangy cream cheese glaze that cascades beautifully down its fluted sides, this bundt cake is a dessert dream come true.
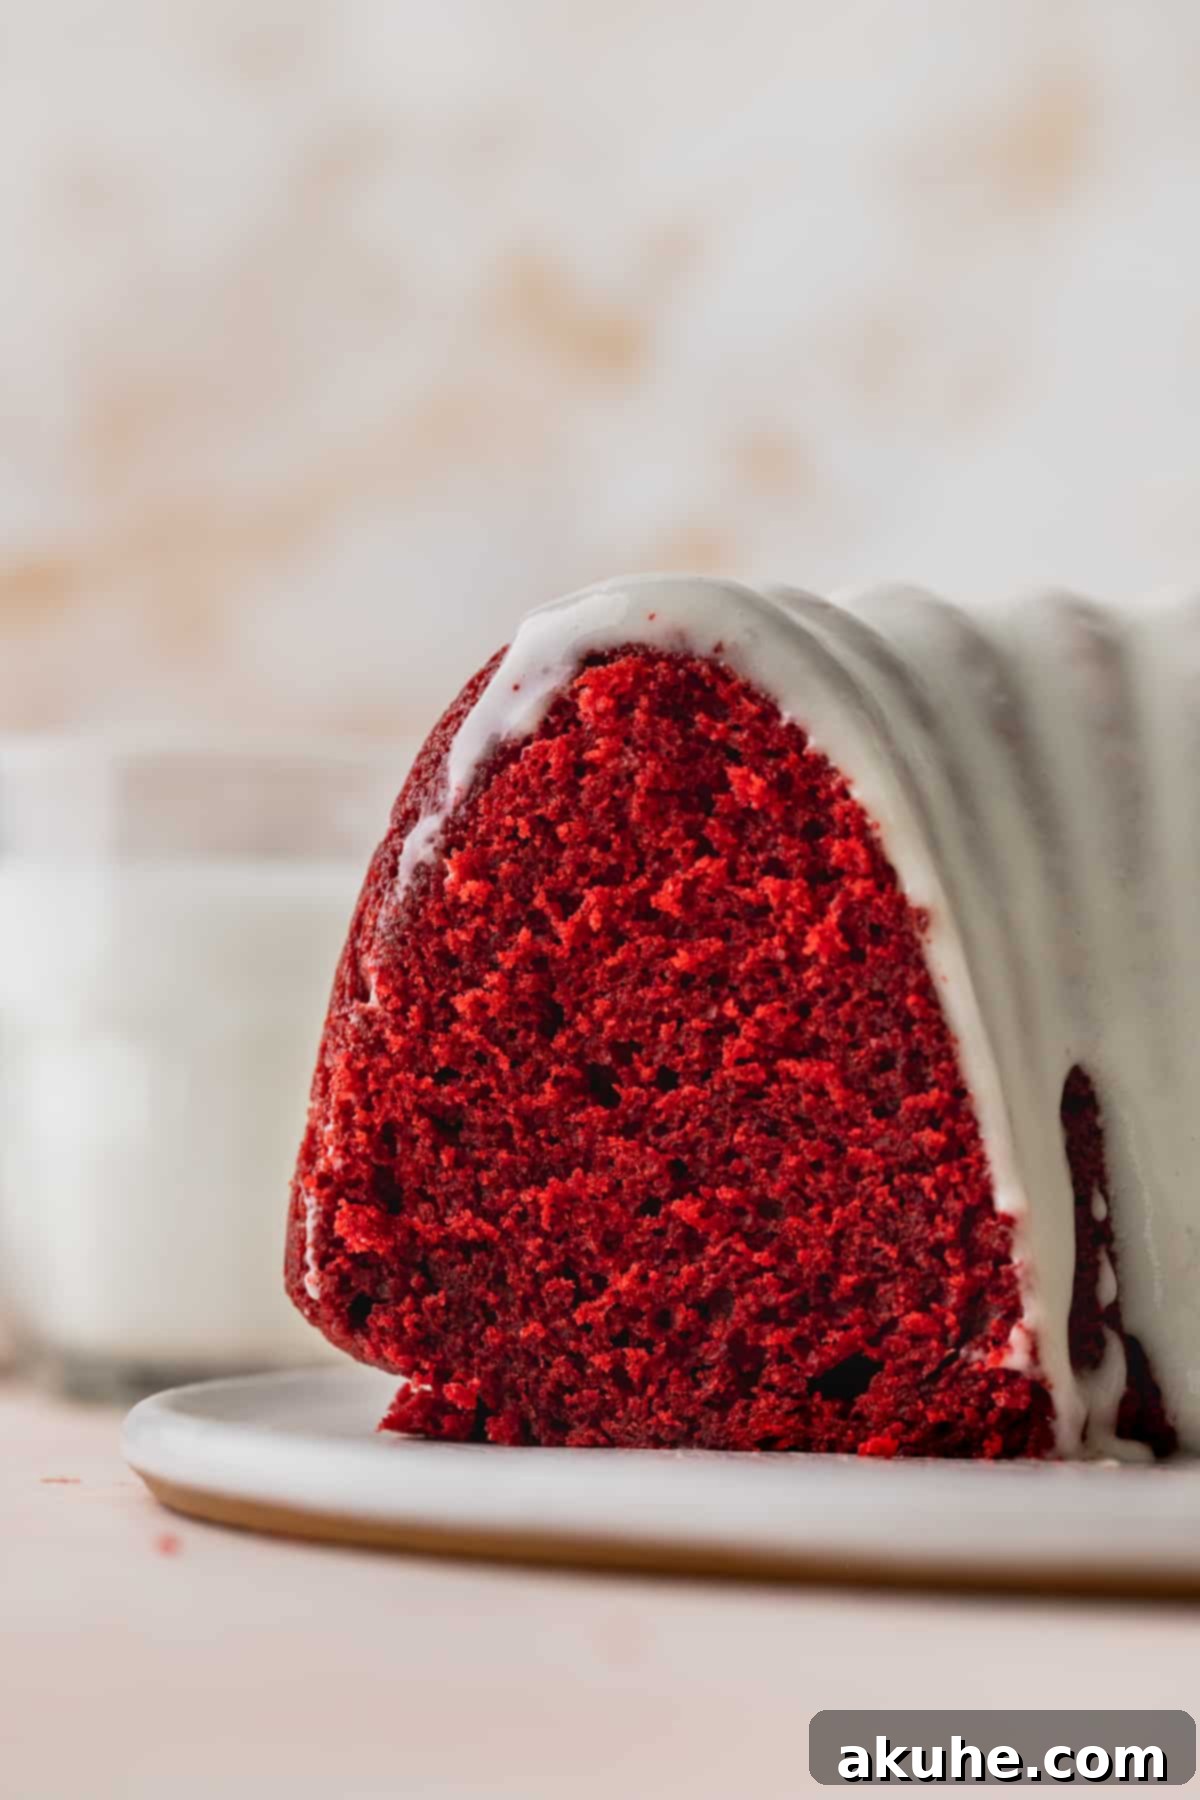
For years, I was skeptical about red velvet cake, often finding it either too dry or tasting overwhelmingly of food dye. However, after countless experiments and a passion for perfecting classic recipes, I’ve developed this Red Velvet Bundt Cake that will convert even the biggest skeptics. This recipe guarantees an incredibly soft, velvety texture with just the right hint of cocoa – not too overpowering, but enough to create that signature red velvet depth. The secret lies in a carefully balanced blend of ingredients and the choice of a high-quality food coloring that delivers maximum impact without any unpleasant aftertaste.
If you’re planning a romantic dinner or a celebratory gathering, this easy Red Velvet Bundt Cake is sure to impress. Its elegant shape, achieved effortlessly with a bundt pan, makes it look far more complicated to bake than it actually is. It’s a versatile dessert that brings joy and beauty to any table, proving that delicious baking doesn’t have to be daunting. Whether you’re an experienced baker or a novice, you’ll find this recipe straightforward and incredibly rewarding.
Looking to round out your celebratory menu? Consider these delightful companions: heart shaped brownies for a charming bite, sweet strawberry hand pies, or a decadent chocolate covered strawberry cake. Each of these treats pairs wonderfully with the festive spirit of our Red Velvet Bundt Cake.
Why This Red Velvet Bundt Cake Will Be Your New Favorite
There are countless reasons why this particular Red Velvet Bundt Cake stands out from the rest. It’s a recipe designed for success, flavor, and pure baking enjoyment. Here’s why you’ll absolutely adore it:
- Unbelievably Moist Red Velvet Cake: The cornerstone of a perfect red velvet is its texture. This recipe achieves an exceptionally soft, tender, and moist crumb that practically melts in your mouth. We use a powerful combination of buttermilk and sour cream, both key acidic ingredients that not only react with the leavening agents for a beautiful rise but also contribute immensely to the cake’s luxurious, supple texture and rich flavor. Say goodbye to dry, crumbly cakes!
- Pure Red, No Dye Aftertaste: Many red velvet cakes suffer from an unpleasant chemical taste due to excessive food coloring. Our recipe, however, calls for just the right amount of high-quality red food coloring, ensuring a vibrant, striking crimson hue without compromising the delicate, mild chocolate flavor that defines red velvet. You get all the visual appeal with none of the usual food dye drawbacks.
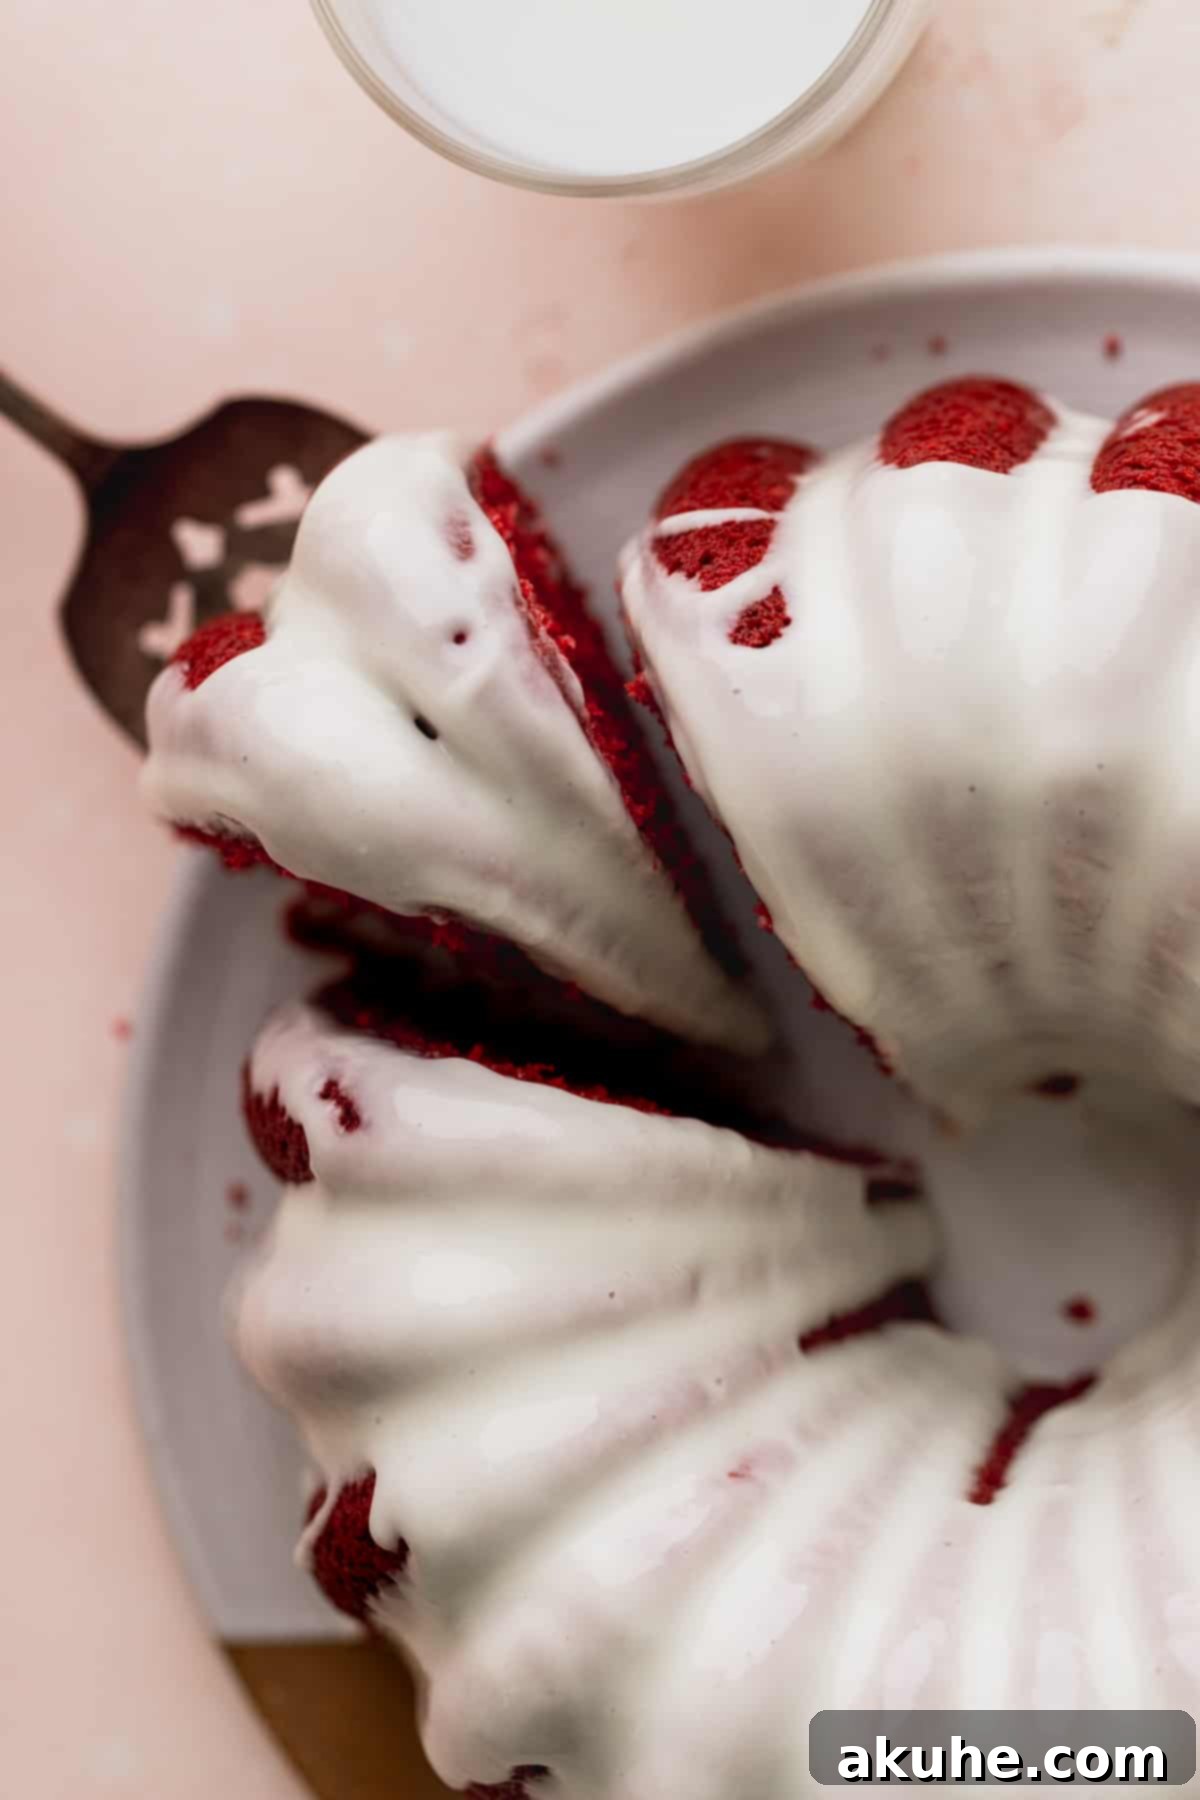
- Decadent Cream Cheese Glaze: A red velvet cake simply isn’t complete without its signature companion: cream cheese. Our easy-to-make cream cheese glaze is the perfect balance of sweet and tangy, providing a creamy counterpoint to the cake’s richness. It’s pourable, allowing it to gracefully drape over the bundt cake’s intricate design, creating an exquisite finish that’s as delightful to look at as it is to taste.
- Effortlessly Elegant: Don’t let the sophisticated appearance fool you. This Red Velvet Bundt Cake is incredibly easy to prepare. The beauty of a bundt pan means you simply pour the batter in, bake, and unmold a gorgeously shaped cake. No intricate layering or frosting techniques required, making it perfect for both beginner bakers and seasoned pros looking for a stunning yet simple dessert.
- Perfect for Any Occasion: While often associated with Valentine’s Day, this cake’s vibrant color and delightful flavor make it suitable for Christmas, anniversaries, birthdays, or just a special weekend treat. It’s a versatile dessert that always makes an impression.
Ingredient Notes: The Secrets to Perfect Red Velvet
Each ingredient in this Red Velvet Bundt Cake recipe plays a crucial role in achieving its iconic flavor, color, and texture. Understanding their purpose will help you bake with confidence and ensure a perfect result every time.
- Unsweetened Cocoa Powder: For that classic red velvet depth and a base for the vibrant color, use standard unsweetened cocoa powder, like Hershey’s. Don’t be tempted by Dutch-processed cocoa here, as its alkalinity will mute the red hue. The acidity in regular cocoa powder reacts with buttermilk and vinegar to enhance the cake’s reddish tones.
- Oil: Instead of butter, this recipe calls for a neutral-flavored oil such as canola oil or vegetable oil. Oil is superior for creating an incredibly moist cake that stays soft for days, as it remains liquid at room temperature, unlike butter. It contributes to the tender crumb without adding any heavy flavor.
- Buttermilk: This acidic dairy product is indispensable for red velvet cake. It tenderizes the cake, adds a subtle tang, and most importantly, reacts with the baking soda and cocoa powder to create that signature red hue and ensure a light, fluffy rise. If you don’t have buttermilk on hand, you can easily make a substitute: simply add 1 tablespoon of lemon juice or white vinegar to 1 1/4 cups of whole milk and let it sit for 10 minutes until it slightly curdles before using.
- White Distilled Vinegar: A non-negotiable for traditional red velvet cakes. White vinegar further enhances the acidity, which is crucial for activating the baking soda, promoting a superior rise, and intensifying the red color through its reaction with the cocoa powder and buttermilk. It also contributes to the cake’s tender crumb and characteristic flavor.
- Eggs: Always use large eggs and bring them to room temperature for at least 2 hours before baking. Room temperature eggs emulsify better with other ingredients, creating a smoother, more uniform batter and a finer crumb in the finished cake.
- Sour Cream: Full-fat sour cream is a game-changer for moisture and richness in this cake. Like buttermilk, its acidity tenderizes the cake, while its fat content adds a luxurious mouthfeel and keeps the cake incredibly moist. Make sure to pull it out of the fridge at least 2 hours before baking so it can reach room temperature.
- Red Food Coloring: The key to a show-stopping red velvet cake is a vibrant color without any compromise on taste. We highly recommend Americolor Super Red Gel Food Coloring. This concentrated gel provides an intense, brilliant red with only a small amount, completely avoiding the metallic or bitter taste often associated with liquid food dyes.
- Cream Cheese (for Glaze): For the best cream cheese glaze, use full-fat cream cheese. Like the eggs and sour cream, it should be at room temperature. This ensures a smooth, lump-free glaze that’s easy to beat and pour, creating that perfect consistency that lovingly coats your cake.
Step-By-Step Instructions: Crafting Your Perfect Red Velvet Bundt Cake
Baking this stunning Red Velvet Bundt Cake is simpler than you might think! You won’t even need an electric mixer for the cake batter itself, making cleanup a breeze. Just follow these easy steps to achieve a deliciously moist and vibrant dessert.
PREP WORK: Before you begin, preheat your oven to 350°F (175°C). This ensures your oven is at the correct temperature when the cake goes in, promoting an even bake. Generously spray your bundt pan with a baking non-stick spray that contains flour (e.g., Baker’s Joy or Pam Baking). Make sure to get into all the crevices of the pan to prevent sticking – this is a critical step for a beautiful release!
STEP 1: Combine the Dry Ingredients. In a large mixing bowl, the foundation of your Red Velvet Bundt Cake begins. Use a fine-mesh sieve to sift together the all-purpose flour and unsweetened cocoa powder. Sifting is crucial here to prevent any lumps in your batter and to ensure the cocoa powder is evenly distributed. Once sifted, add the granulated sugar, baking powder, baking soda, and salt to this mixture. Whisk them together thoroughly until all dry ingredients are well combined and uniform. This initial step ensures consistent leavening and flavor throughout the cake.
STEP 2: Mix the Wet Ingredients. In a separate medium-sized bowl, combine all your liquid components that will bring the cake to life. Whisk together the oil, room temperature buttermilk, white distilled vinegar, room temperature eggs, pure vanilla extract, room temperature sour cream, and the red food coloring. Whisk vigorously until all these wet ingredients are fully incorporated, and the mixture achieves a vibrant, consistent red color. This ensures the food coloring is evenly distributed for that signature red velvet look.
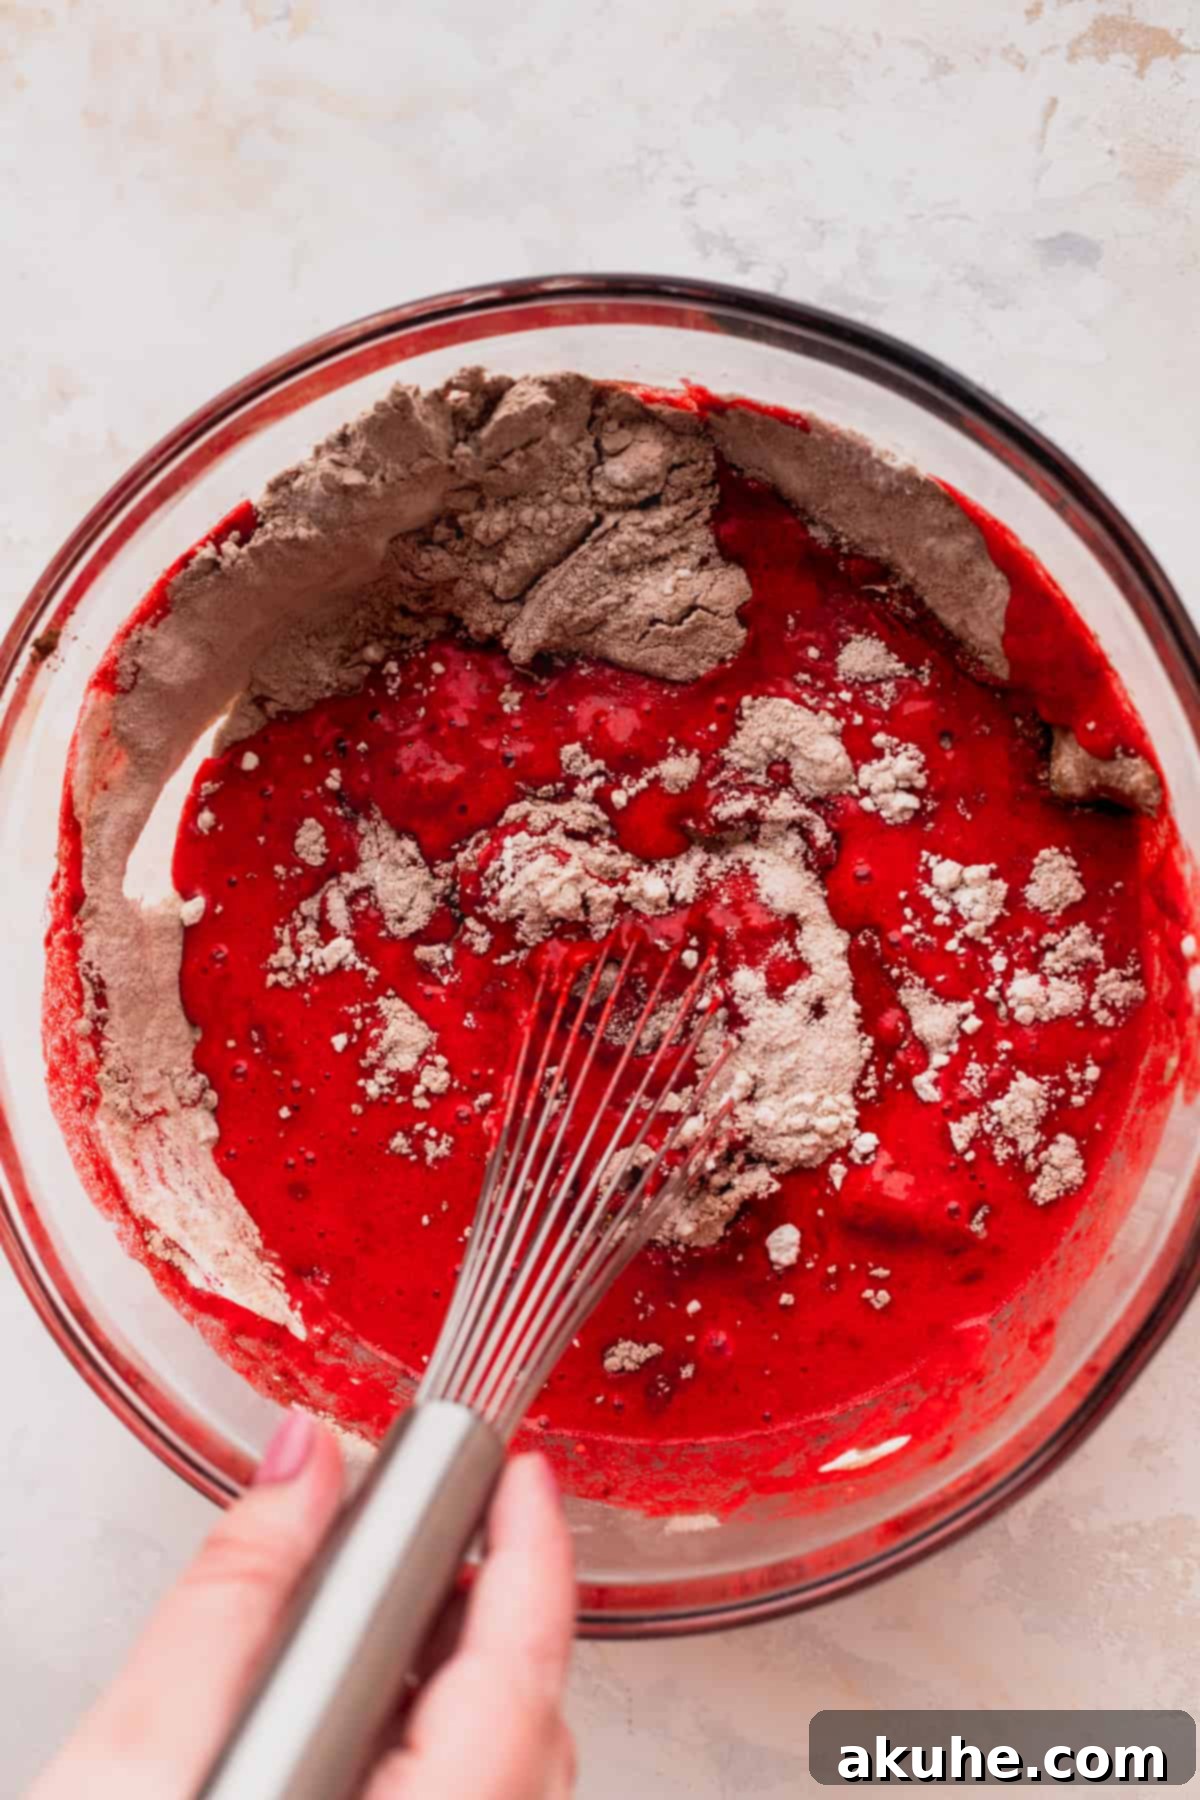
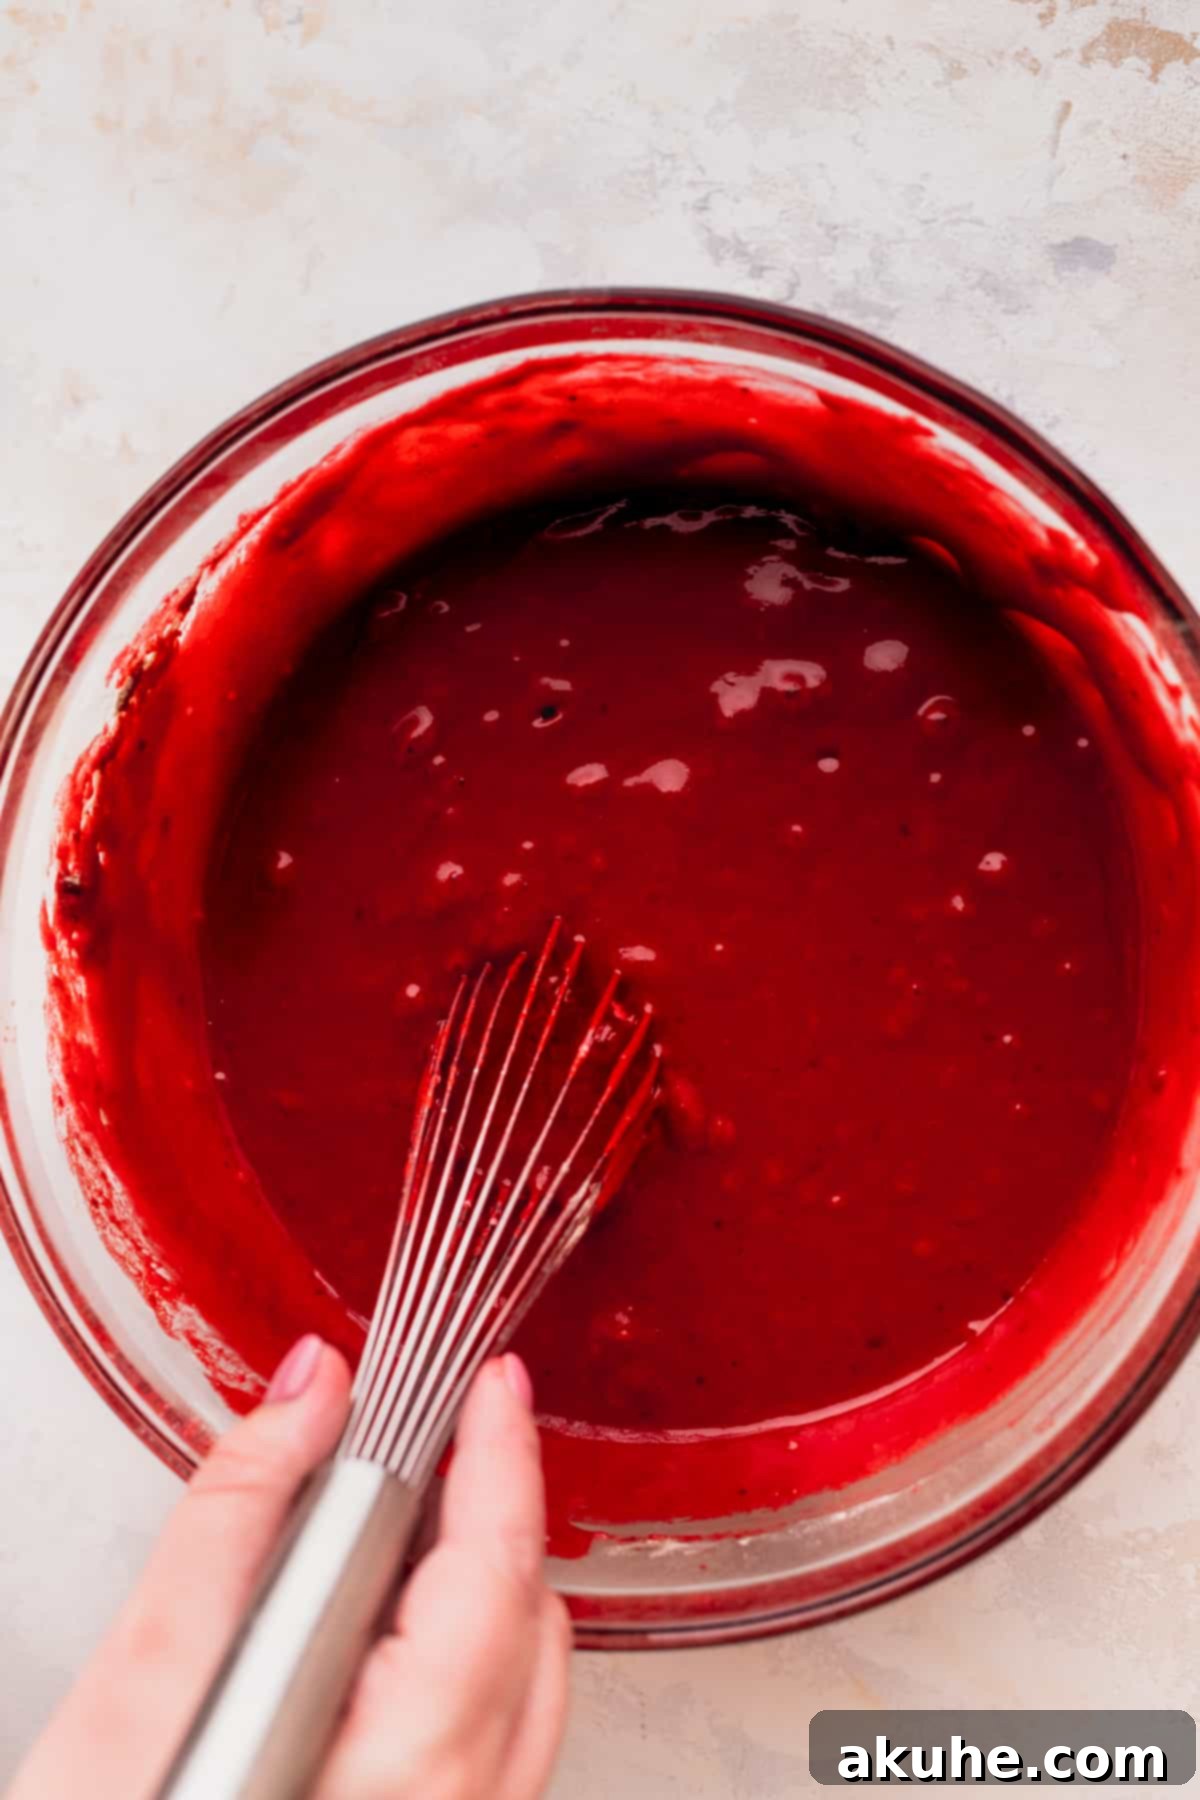
STEP 3: Combine Wet and Dry Ingredients to Form the Batter. Now it’s time to bring everything together. Pour the vibrant wet ingredients directly into the bowl with your dry mixture. Start by mixing with a whisk until just barely combined. Then, switch to a rubber spatula and gently fold the mixture until no streaks of dry flour remain. Be careful not to overmix the batter; a few small lumps are perfectly fine and often lead to a more tender cake. Overmixing can develop the gluten in the flour too much, resulting in a tough cake.
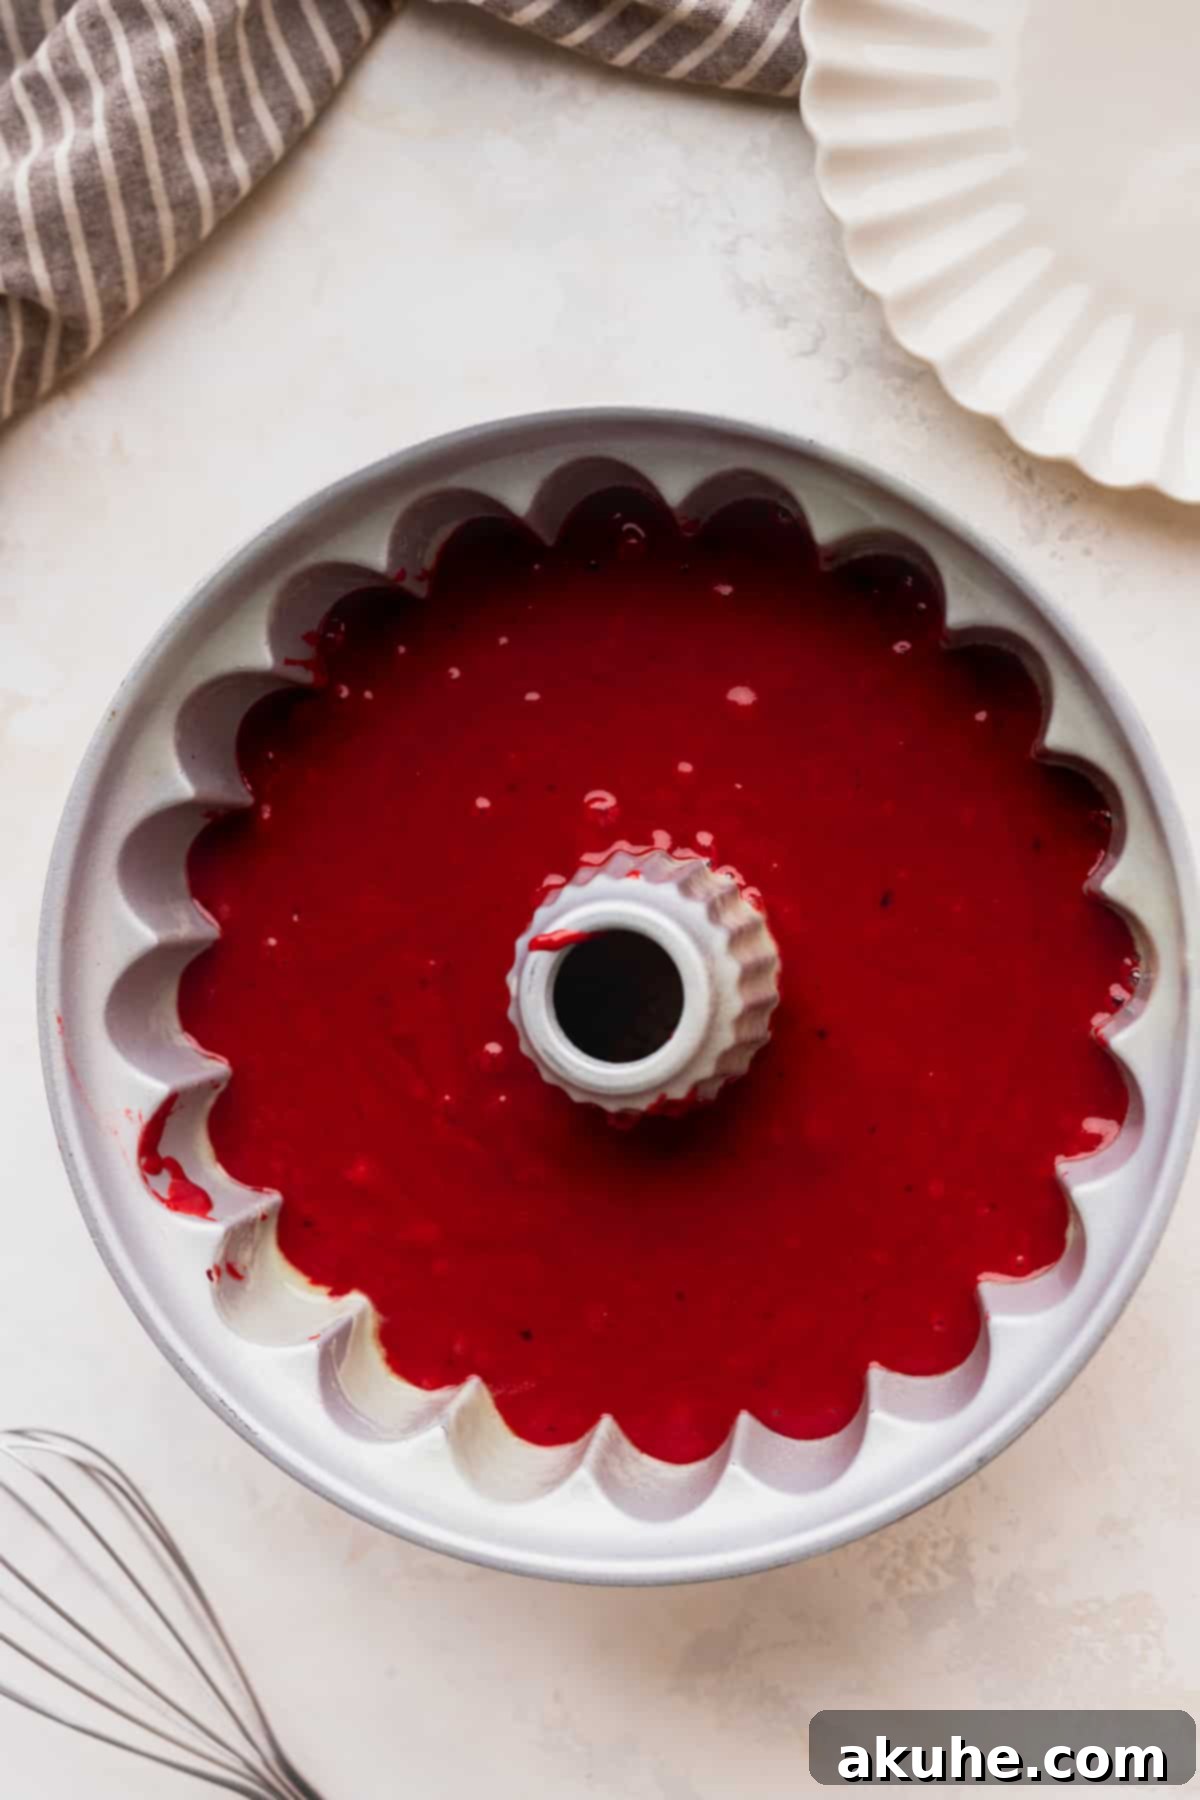
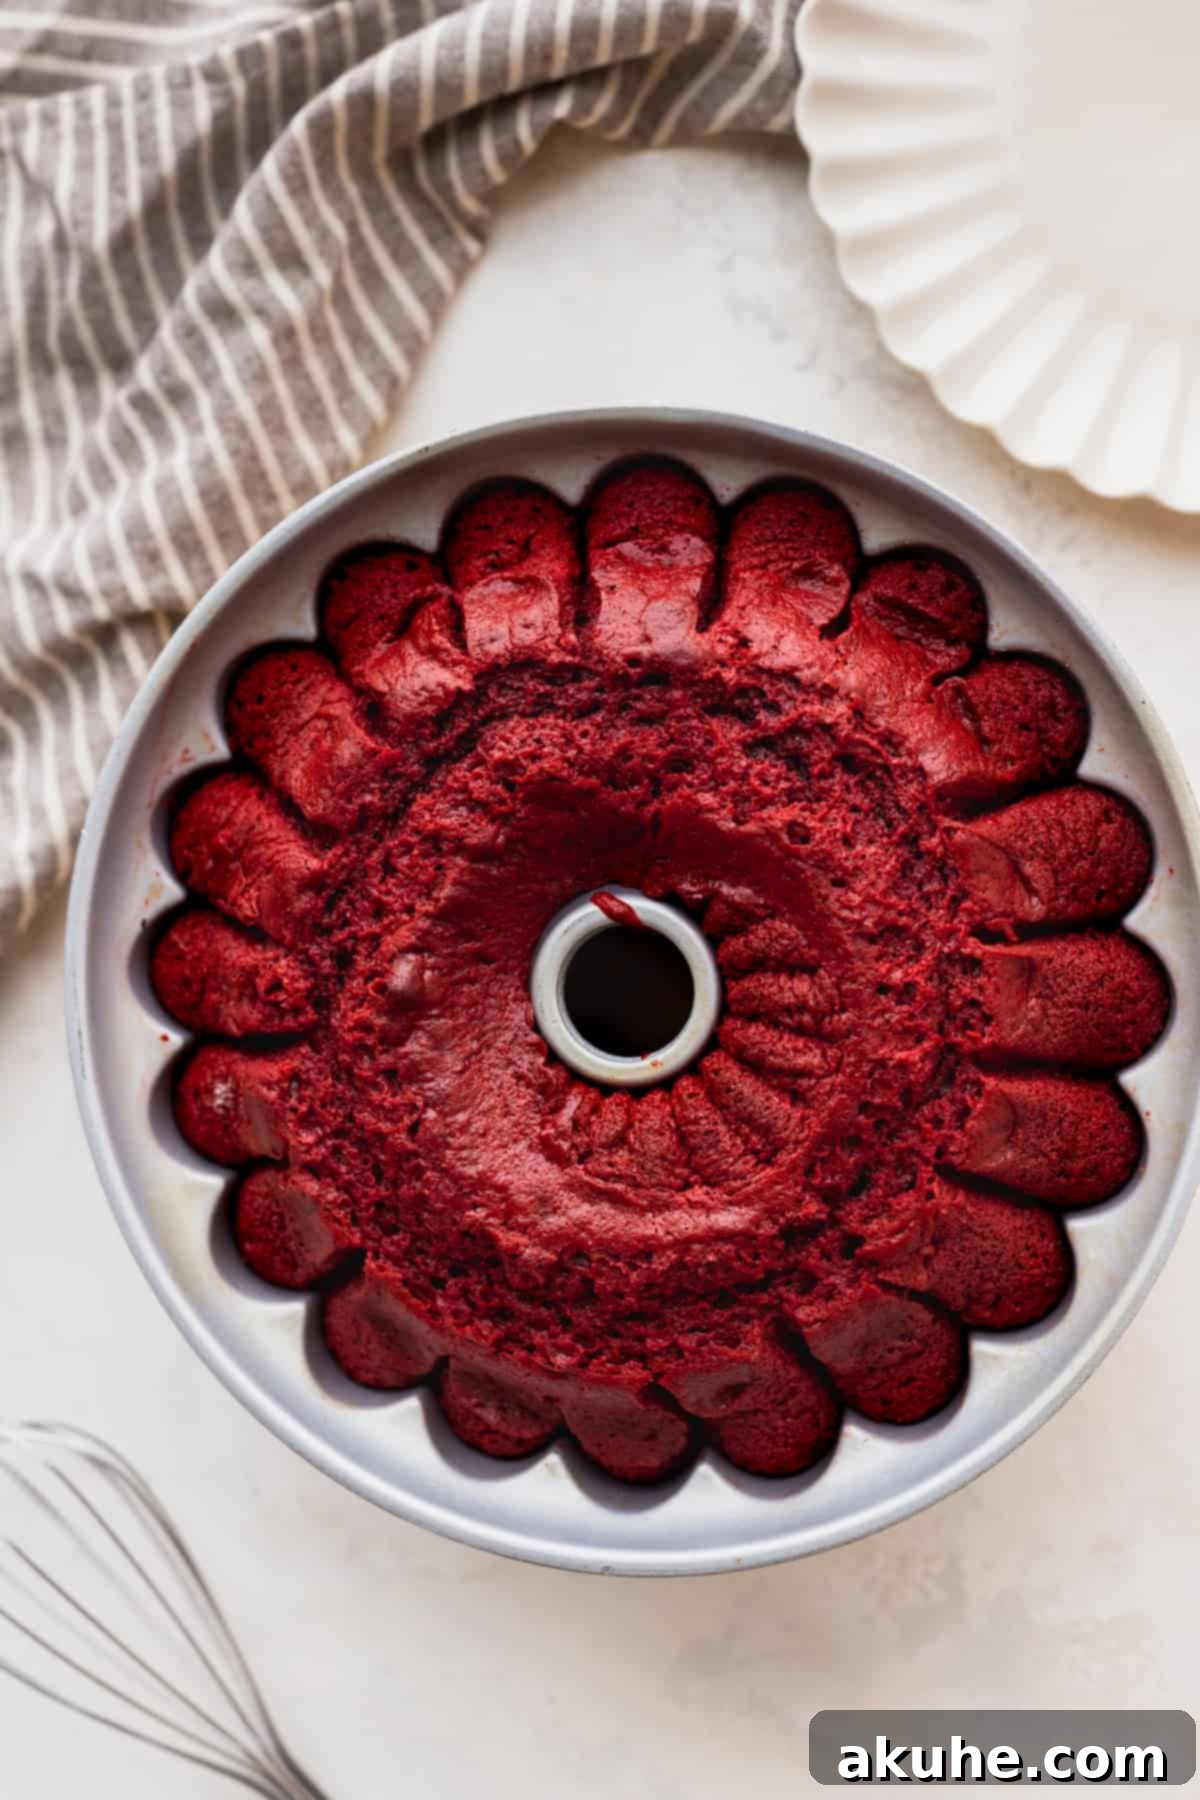
STEP 4: Bake the Cake to Perfection. Carefully pour the prepared red velvet batter into your generously greased bundt pan. For specific guidance on bundt pan sizes and how much batter to use, please refer to the “What Bundt Pans To Use” section below. Place the filled bundt pan into your preheated oven and bake for approximately 40-50 minutes. The cake is done when a wooden skewer or toothpick inserted into the thickest part comes out clean or with only a few moist crumbs attached. Once baked, remove the cake from the oven and let it cool in the pan for about 10-15 minutes on a wire rack. This allows the cake to set and firm up before unmolding. After 10-15 minutes, carefully invert the bundt cake onto the cooling rack and allow it to cool completely before glazing. Cooling completely is crucial to prevent the glaze from melting and running off.
STEP 5: Prepare the Cream Cheese Glaze. While the cake cools, prepare the irresistible cream cheese glaze. In a mixing bowl, use a hand mixer to beat the room temperature cream cheese on high speed for about 1 minute until it’s smooth and creamy. Gradually add in the sifted powdered sugar, starting on low speed to avoid a cloud of sugar, then increasing to high speed until the mixture is completely smooth. Finally, add the milk and vanilla extract. Beat again until the glaze is smooth, pourable, and reaches your desired consistency. If it’s too thick, add a tiny bit more milk; if too thin, whisk in a tablespoon more of powdered sugar.
STEP 6: Drizzle and Enjoy the Glaze. Once your Red Velvet Bundt Cake has cooled completely, it’s time for the grand finale. Place the cooled cake on a wire rack set over a baking sheet or a large piece of parchment paper. This setup will catch any excess glaze drips, making cleanup much easier. Generously pour the prepared cream cheese glaze evenly over the top of the bundt cake, allowing it to cascade down the sides and pool slightly at the bottom. Let the glaze set for a few minutes before slicing and serving. The visual appeal of the vibrant red cake against the pristine white glaze is truly stunning!
Choosing and Preparing the Right Bundt Pan
The type and preparation of your bundt pan are crucial for a successful Red Velvet Bundt Cake. The bundt pan used for this recipe is a 10-cup capacity pan. Here’s what you need to know:
- 10-Cup Bundt Pan: If you’re using a standard 10-cup bundt pan (like this one), you will find that all of the batter might not fit. It’s best to fill the pan approximately 3/4ths full to allow for proper rising and to prevent overflow. Don’t worry about the leftover batter; you can easily bake it into one or two delicious cupcakes. This provides a delightful bonus treat or a quick taste test!
- 12-Cup Bundt Pan: If you own a larger 12-cup bundt pan, you can confidently use all of the batter. This will result in a slightly larger and perhaps taller cake, perfectly filling the pan without the need for additional cupcakes.
- Pan Preparation is Key: Regardless of the size, meticulous pan preparation is non-negotiable for a bundt cake. Use a high-quality baking spray that contains flour. Spray every nook, cranny, and intricate detail of the pan liberally. Even after spraying, a light dusting of flour can provide extra insurance against sticking, especially if your pan has a very elaborate design. A stuck bundt cake can be a heartbreaking experience, so take your time with this step!
Expert Baking Tips for a Flawless Red Velvet Bundt Cake
Achieving a perfectly moist, tender, and beautifully red Red Velvet Bundt Cake involves a few insider tricks. Keep these expert baking tips in mind to ensure your cake turns out flawlessly every time:
- Do Not Overmix the Batter: This is arguably the most crucial tip for any cake, especially red velvet. When combining the wet and dry ingredients, mix only until they are just incorporated. The batter will initially appear lumpy, and that’s perfectly fine. Continue mixing only until most of the lumps disappear and no dry streaks of flour remain. Overmixing develops the gluten in the flour, which leads to a tough, dense, and less tender cake. A gentle hand will ensure a delicate, velvety crumb.
- Ensure Room Temperature Ingredients: As noted in the ingredient section, eggs, buttermilk, sour cream, and cream cheese should all be at room temperature. This isn’t just a suggestion; it’s vital. Room temperature ingredients emulsify better, creating a smoother, more homogeneous batter. This results in a cake with a finer, more even crumb and a better rise. Plan ahead and pull them out of the fridge 1-2 hours before you start baking.
- Proper Bundt Pan Preparation: To prevent the dreaded sticking, your bundt pan needs impeccable preparation. Always use a high-quality baking nonstick spray that contains flour. Don’t just give it a quick spritz; thoroughly coat the entire inside surface of your prepared pan, making sure to get into every single ridge and design element. This creates a barrier between the cake and the metal, ensuring a clean release and preserving the cake’s beautiful shape.
- Cool Completely Before Glazing: Patience is a virtue when it comes to glazing. It’s imperative that your bundt cake is completely cooled before you pour on the cream cheese glaze. If the cake is even slightly warm, the glaze will melt, become runny, and simply slide off, leaving you with a sticky mess and an unglazed cake. Allow a few hours for the cake to cool thoroughly on a wire rack.
- Glaze Like a Pro: For a neat and easy glazing process, place your completely cooled bundt cake on a wire rack, and then place that wire rack on top of a cookie sheet or a large piece of parchment paper. This simple setup will effectively catch any excess glaze that drips down, preventing a sticky countertop and making cleanup a breeze.
- Measure Flour Correctly: For accurate results, always spoon your flour into the measuring cup and then level it off with the back of a knife. Do not scoop the flour directly with the measuring cup, as this compacts it, leading to too much flour and a dry, dense cake. Better yet, use a kitchen scale for precise measurement.
Frequently Asked Questions About Red Velvet Bundt Cake
Here are answers to some common questions about this delightful Red Velvet Bundt Cake:
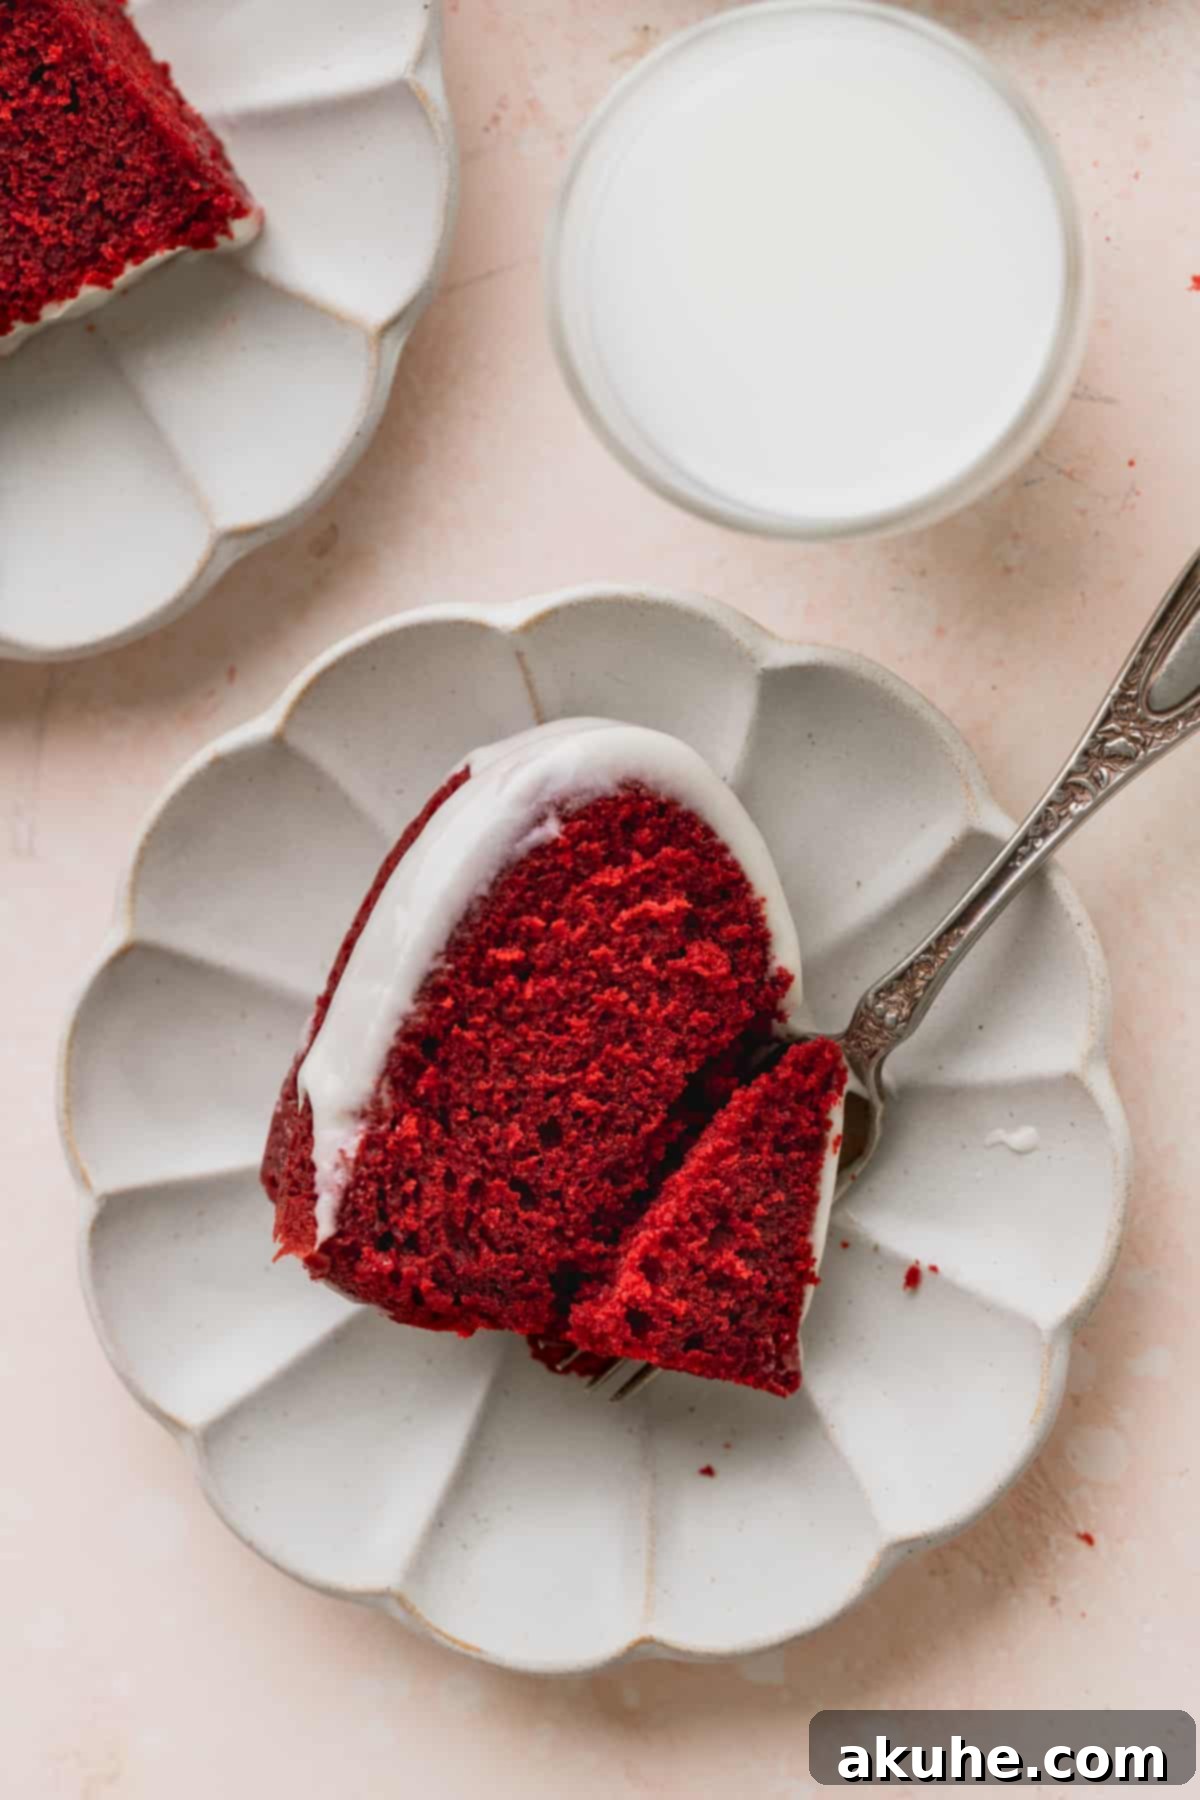
Authentic red velvet cake possesses a unique and sophisticated flavor that’s hard to describe if you haven’t experienced it done right! It’s characterized by a mild, almost undetectable cocoa flavor, a slight tang from the buttermilk and vinegar, and a distinct moistness. When properly made (like this cake!), it’s a wonderfully balanced experience – rich, tangy, and subtly chocolatey, perfectly complemented by cream cheese frosting.
While butter adds a lovely flavor to many cakes, I strongly recommend sticking with oil for this particular Red Velvet Bundt Cake recipe. The oil is key to achieving the exceptional moisture and tenderness that this cake is known for. Butter, being solid at room temperature, can result in a drier cake that quickly loses its freshness. Oil helps the cake remain incredibly moist and soft for several days.
Absolutely! This versatile red velvet batter works beautifully for layered cakes. This recipe yields enough batter to make three perfectly sized 8-inch cake layers. If you choose to make a layered cake, you’ll want a thicker, more traditional cream cheese frosting to hold the layers together and cover the cake. You can use this fantastic recipe for cream cheese frosting, adjusting the quantities if needed to ensure ample coverage for three layers.
Thorough pan preparation is the secret! Use a high-quality baking spray that contains flour (like Baker’s Joy or Pam Baking). Spray every inch of the pan, making sure to get into all the intricate designs and crevices. After spraying, you can even dust the pan lightly with a tablespoon of flour, rotating the pan to coat evenly, then tapping out any excess. This creates an extra layer of non-stick protection.
Several factors can lead to a dry red velvet cake. Common culprits include over-measuring flour (especially if scooping directly instead of spooning and leveling), overmixing the batter (which develops gluten and makes the cake tough), overbaking (which dries out moisture), or not using enough wet ingredients or fat (which this recipe expertly balances with oil, buttermilk, and sour cream).
Storing and Freezing Your Red Velvet Bundt Cake
To keep your Red Velvet Bundt Cake tasting fresh and delicious, proper storage is essential. Here’s how to store it, whether you plan to enjoy it within a few days or save it for later:
Once the cream cheese glaze has set, transfer the entire Red Velvet Bundt Cake (or individual slices) to an airtight container. Store the cake in the refrigerator for up to 5 days. While it can be stored at room temperature for a short period (1-2 days) if your home isn’t too warm, the cream cheese glaze makes refrigeration the safest and best option for extended freshness. For the most enjoyable experience, allow the cake to come to room temperature for about 30-60 minutes before serving. This softens the cake and glaze, enhancing its flavors and tender texture.
Freezing Instructions
If you wish to extend the life of your delicious Red Velvet Bundt Cake, it freezes beautifully! This is a fantastic option for meal prepping desserts or saving leftovers for a future craving:
- Freezing Individual Slices: For ultimate convenience, it’s best to freeze the cake in individual slices. First, ensure the cake and glaze are completely cooled and set.
- Wrapping: Tightly wrap each individual slice (or the entire cake if freezing whole, though slices are easier to thaw) in plastic wrap, making sure it’s sealed airtight. Then, wrap it again in aluminum foil. This double layer of protection prevents freezer burn and helps maintain moisture.
- Storage Duration: Store the wrapped slices in the freezer for up to 30 days. Beyond this, the quality might start to decline, though it would still be safe to eat.
- Thawing: When you’re ready to enjoy a slice, simply remove it from the freezer. Unwrap it and let it thaw at room temperature for 1-2 hours. You can also gently warm it in the microwave for a few seconds if you prefer a slightly warm cake, but be careful not to overheat and melt the glaze too much.
Explore More Bundt Cake Recipes
If you’ve enjoyed the ease and elegance of baking with a bundt pan, you’ll be delighted to discover many other fantastic bundt cake recipes to try! Bundt cakes are celebrated for their beautiful designs and often simpler preparation compared to layered cakes. Keep an eye out for future recipes on our site, covering everything from classic flavors to seasonal delights. The possibilities are endless when it comes to these charming cakes.
We absolutely love seeing your culinary creations! If you bake this Red Velvet Bundt Cake, please make sure to leave us a star review below. Your feedback helps us and other bakers! Also, don’t forget to tag us on Instagram @stephaniesweettreats. We can’t wait to see your beautiful cakes! For more delicious inspiration and baking ideas, make sure to follow us on Pinterest.
⭐
⭐
⭐
⭐
Red Velvet Bundt Cake
Stephanie Rutherford
Print Recipe
Pin Recipe
Leave a Review
15 minutes
45 minutes
1 hour
10
slices
Ingredients
Red Velvet Bundt Cake
-
3
cups
All-purpose flour -
1/4
cup
Unsweetened cocoa powder -
1 3/4
cups
White granulated sugar -
1
tsp
Baking soda -
1/2
tsp
Baking powder -
1
tsp
Salt -
1
cup
Oil, Canola or vegetable -
1 1/4
cup
Buttermilk, room temperature -
3/4
tsp
White vinegar -
3
Large eggs, room temperature -
2
tsp
Pure vanilla extract -
1/4
cup
Sour cream, room temperature -
1 1/2
tsp
Red food coloring, Use Americolor Super Red gel food coloring.
Cream Cheese Glaze
-
4
oz
Cream cheese, room temperature -
1 1/2
cups
Powdered sugar, sifted -
3-4
TBSP
Milk -
1/2
tsp
Pure vanilla extract
Instructions
Red Velvet Cake
- Preheat oven to 350°F (175°C). Spray a 10-cup bundt pan thoroughly with baking non-stick spray, making sure to coat all crevices.
- In a large mixing bowl, sift the flour and cocoa powder together. Add the sugar, baking soda, baking powder, and salt, then whisk until well combined.3 cups All-purpose flour,
1/4 cup Unsweetened cocoa powder,
1 3/4 cups White granulated sugar,
1 tsp Baking soda,
1/2 tsp Baking powder,
1 tsp Salt - In a separate bowl, mix the oil, buttermilk, vinegar, eggs, vanilla, sour cream, and red food coloring. Whisk until combined and bright red.1 cup Oil,
1 1/4 cup Buttermilk,
3/4 tsp White vinegar,
3 Large eggs,
2 tsp Pure vanilla extract,
1/4 cup Sour cream,
1 1/2 tsp Red food coloring - Pour the wet ingredients into the dry. Mix until just combined using a whisk, then switch to a rubber spatula to ensure no dry streaks remain. Do not overmix.
- Pour batter into the bundt pan. For a 10-cup bundt pan, use about 7/8 of the batter. For a 12-cup bundt pan, use all of the batter.
- Bake for 40-50 minutes, or until a toothpick inserted comes out clean. Let the cake sit in the pan for 10-15 minutes, then invert onto a cooling rack.
- Allow the cake to cool completely on the wire rack before preparing and applying the glaze.
Cream Cheese Glaze
- Using a hand mixer, beat the room temperature cream cheese on high for 1 minute until smooth. Add the sifted powdered sugar and mix on low until combined, then increase to high until smooth. Incorporate the milk and vanilla extract, mixing until the glaze is smooth and pourable.4 oz Cream cheese,
1 1/2 cups Powdered sugar,
3-4 TBSP Milk,
1/2 tsp Pure vanilla extract - Place the completely cooled cake on a wire rack set over a cookie sheet to catch any drips. Pour the glaze evenly over the cake, allowing it to coat the sides beautifully. Let the glaze set before serving.
Notes
High Altitude Baking: If you are baking at a high altitude, you may need to adjust the recipe slightly. A common adjustment is to add an extra 3 tablespoons of flour to help with cake structure.
Room Temperature Dairy: For the best emulsification and a smoother batter, pull out all dairy ingredients (buttermilk, sour cream, cream cheese) at least 2 hours before baking to ensure they reach room temperature.
Calories:
549
kcal
,
Carbohydrates:
86
g
,
Protein:
6
g
,
Fat:
29
g
,
Saturated Fat:
5
g
,
Polyunsaturated Fat:
7
g
,
Monounsaturated Fat:
16
g
,
Trans Fat:
1
g
,
Cholesterol:
19
mg
,
Sodium:
439
mg
,
Potassium:
145
mg
,
Fiber:
2
g
,
Sugar:
37
g
,
Vitamin A:
245
IU
,
Vitamin C:
1
mg
,
Calcium:
78
mg
,
Iron:
2
mg
Did you make this recipe?
Please leave a star rating and review below!
