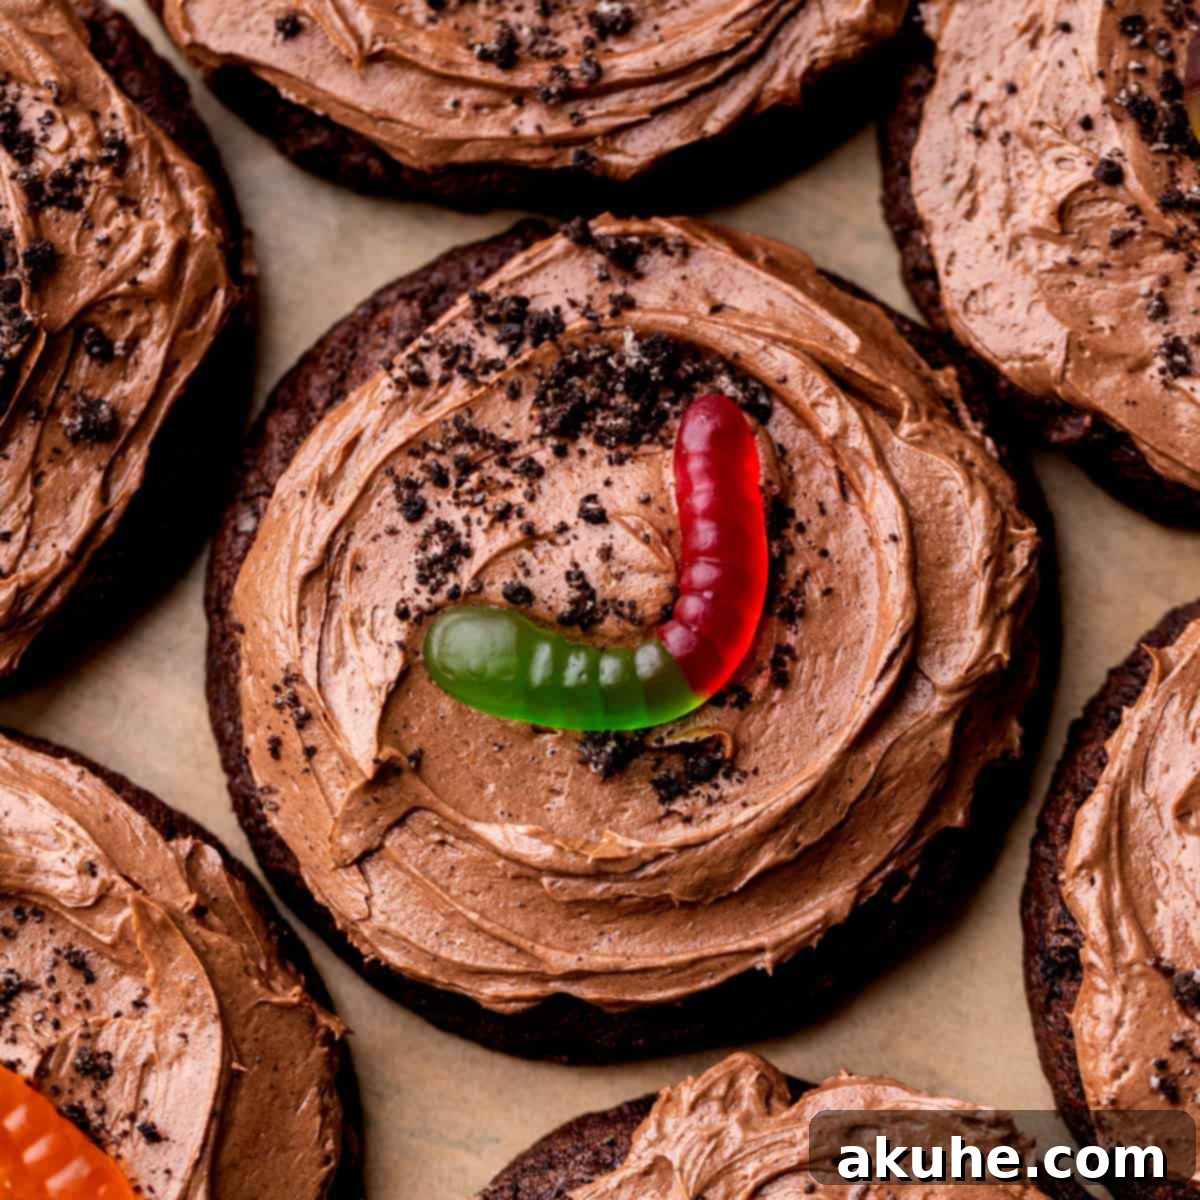
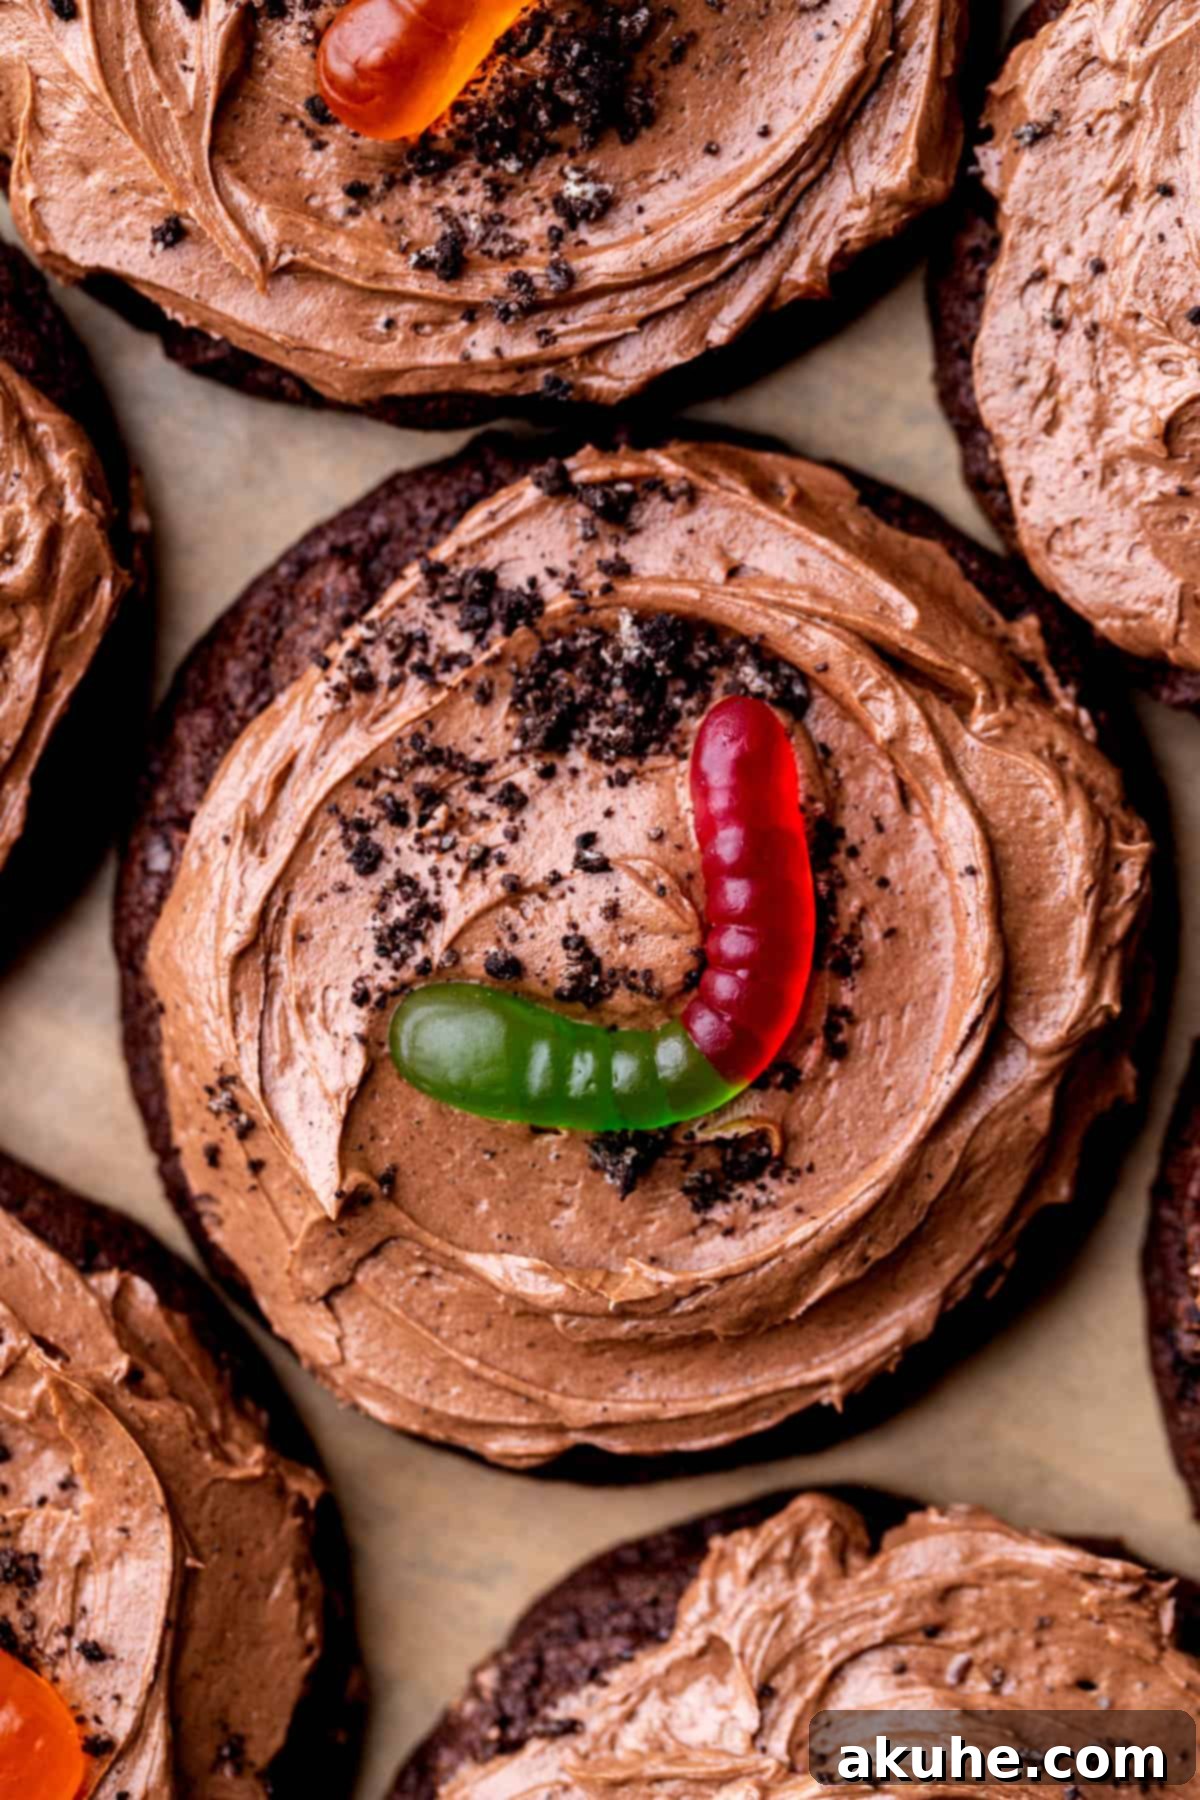
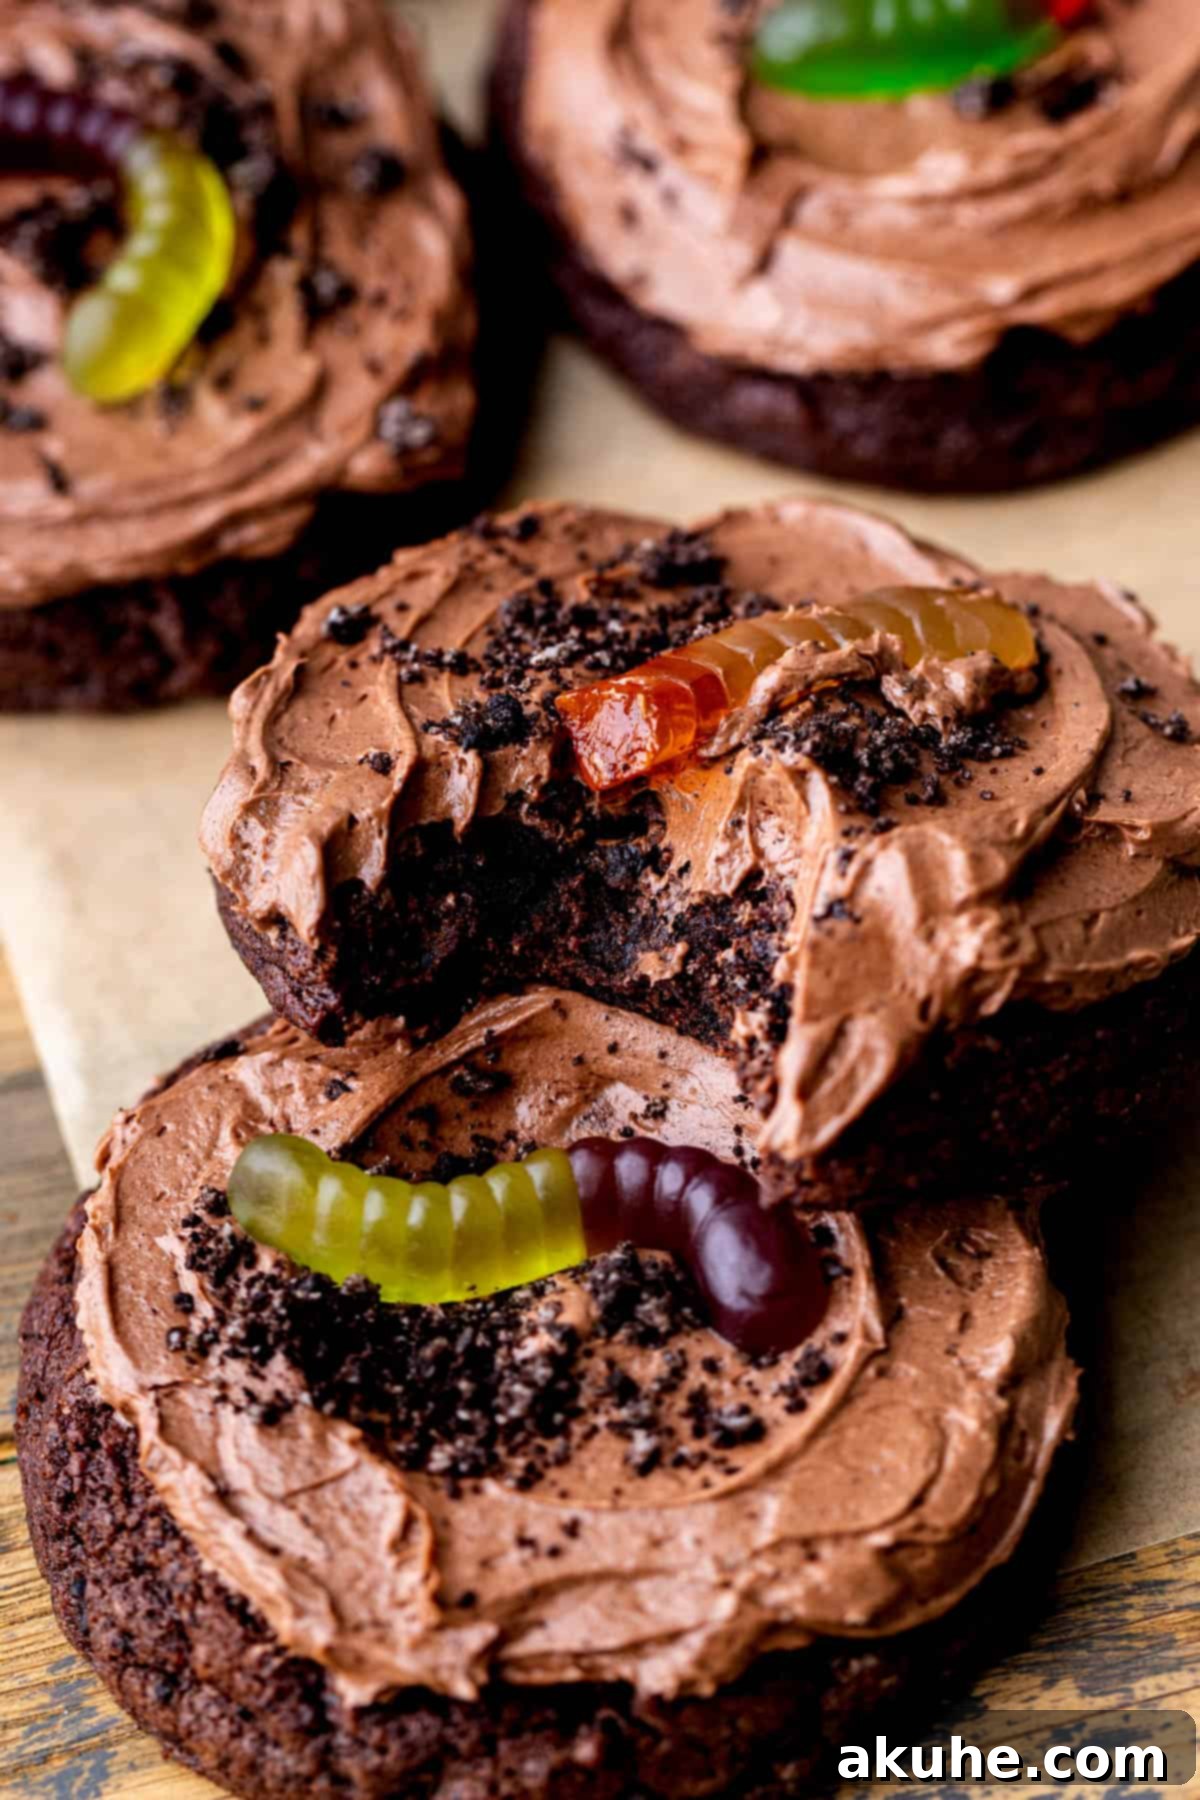
Prepare to delight your taste buds and spark a little childhood nostalgia with these incredible Dirt Cake Cookies! Imagine a soft, chewy chocolate cookie base infused with real Oreo crumbs, generously topped with a rich, creamy chocolate frosting, a shower of crunchy Oreo “dirt,” and, of course, a playful gummy worm peeking out. These aren’t just cookies; they’re a miniature, portable version of the beloved classic dirt cake, perfectly capturing all the fun, flavor, and whimsy in every single bite. They are undeniably a favorite treat for a reason, promising smiles from kids and adults alike.
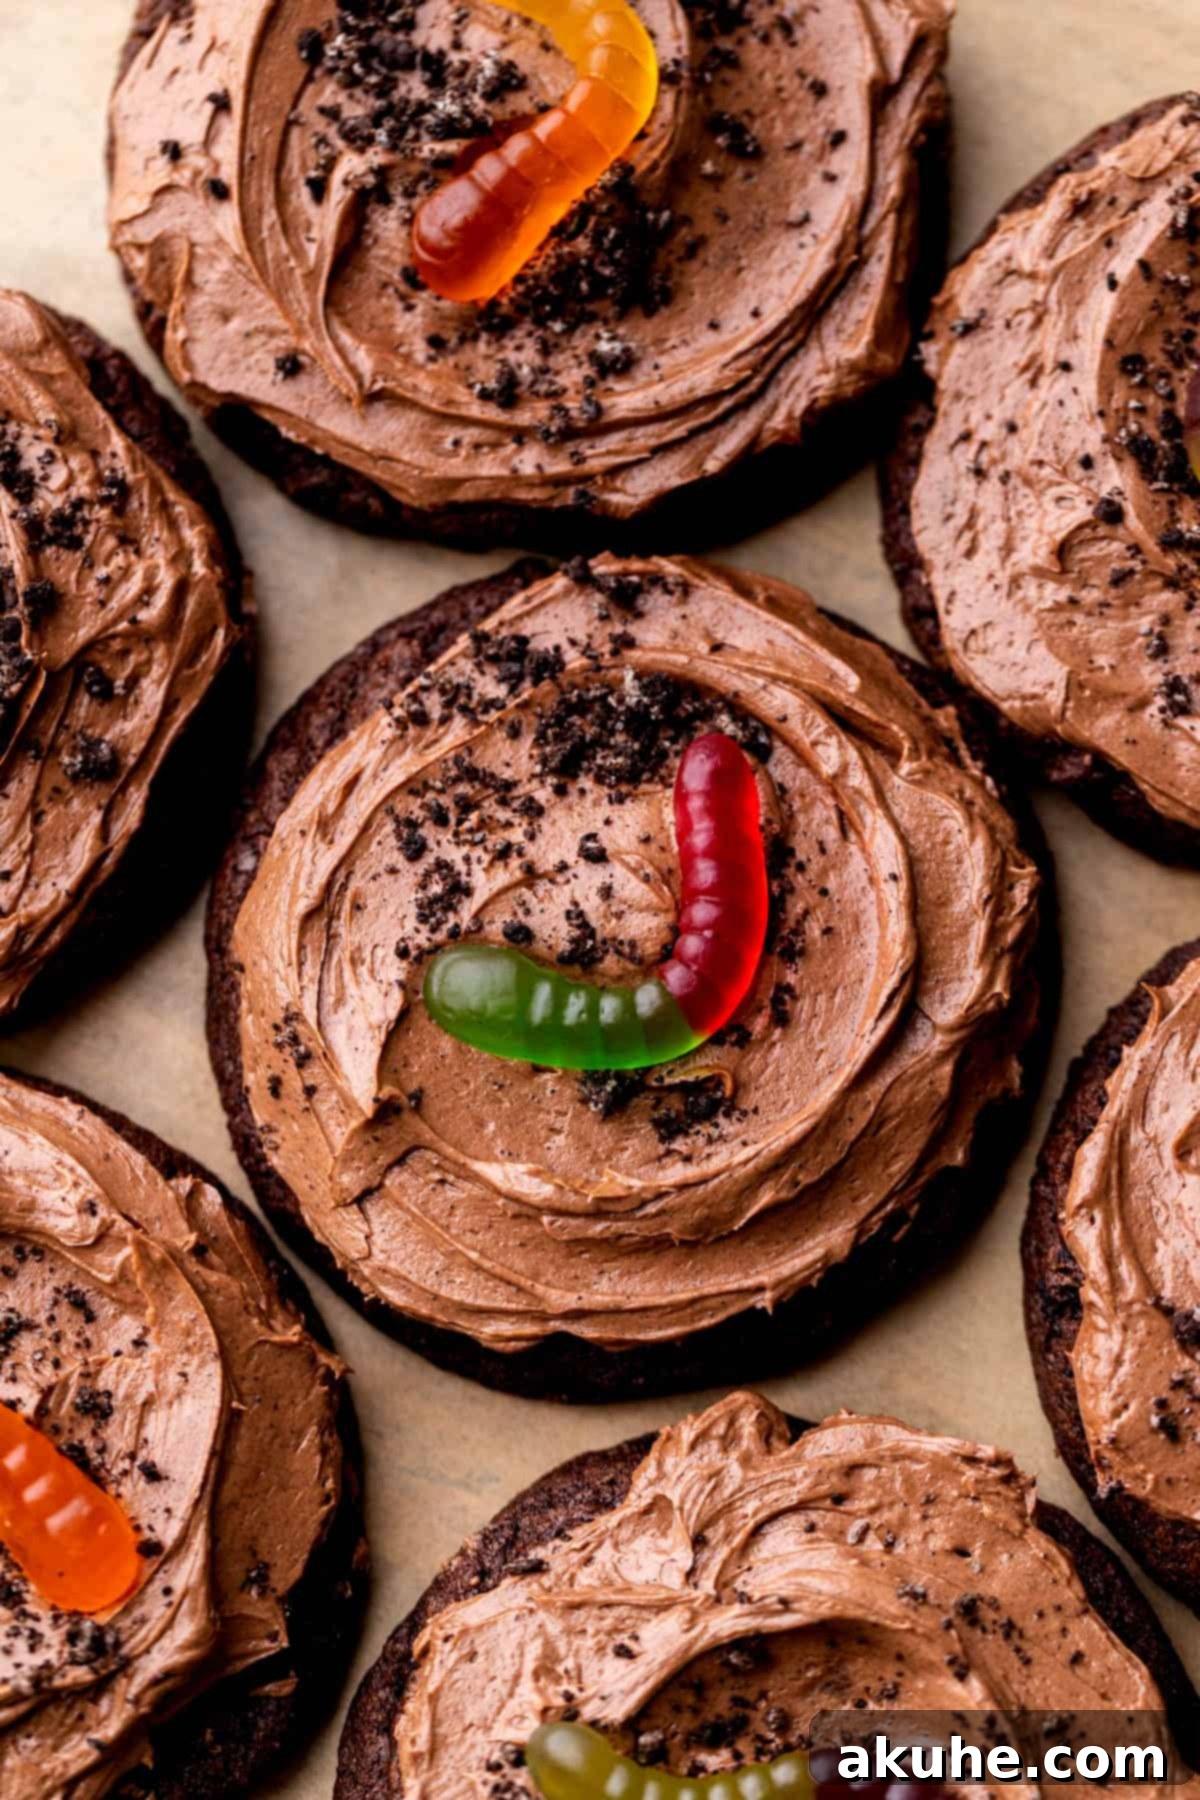
Our recipe elevates the concept of classic dirt cake by transforming it into a convenient, handheld cookie form. We start with homemade chocolate cookies, crafted to be perfectly chewy and bursting with chocolate flavor, further enhanced by the inclusion of crushed Oreo crumbs directly into the dough. This creates an unparalleled foundation for the luxurious chocolate frosting and the whimsical gummy worms that complete the iconic “dirt” look. These cookies are not only simple to make but also incredibly versatile, making them the ultimate dessert for any occasion. Whether you’re planning a lively family reunion, a kid’s birthday party, or simply craving a fun and decadent chocolate treat, these dirt cake cookies are guaranteed to be a hit. Best of all, their straightforward preparation means you won’t spend all day baking, leaving you more time to enjoy the delightful results.
If you’re a devoted fan of Oreo-inspired desserts, you’ll love exploring other delicious creations. Be sure to try our recipes for Oreo Cheesecake, a creamy dream of a dessert; decadent Oreo Brownies, perfect for serious chocolate cravings; and fluffy Oreo Donuts, a delightful breakfast or dessert option. Each offers a unique way to enjoy the beloved cookie.
Why You’ll Love This Dirt Cake Cookie Recipe
This dirt cake cookie recipe stands out for its irresistible blend of classic flavors, playful presentation, and surprisingly easy preparation. Here’s a closer look at what makes these cookies an absolute must-try for any baking enthusiast or dessert lover:
- A Fun Twist on Classic Dirt Cake: The beloved classic dirt cake is renowned for its rich flavor and the sheer fun of “eating worms in dirt.” This recipe brilliantly captures all that delightful flavor and playful spirit, but in a more convenient, individually-portioned cookie form. No spoons needed – just pure cookie joy! It’s the perfect way to bring a smile to anyone’s face, making them ideal for themed parties or a delightful surprise treat.
- Intense Chocolate Flavor: For all the chocolate aficionados out there, these cookies are a dream come true. They boast a deep, rich chocolate flavor that permeates both the chewy cookie base and the silky-smooth frosting. Using high-quality cocoa powder ensures a luxurious chocolate experience from the first bite to the last, making them an ultimate indulgence for any chocolate lover.
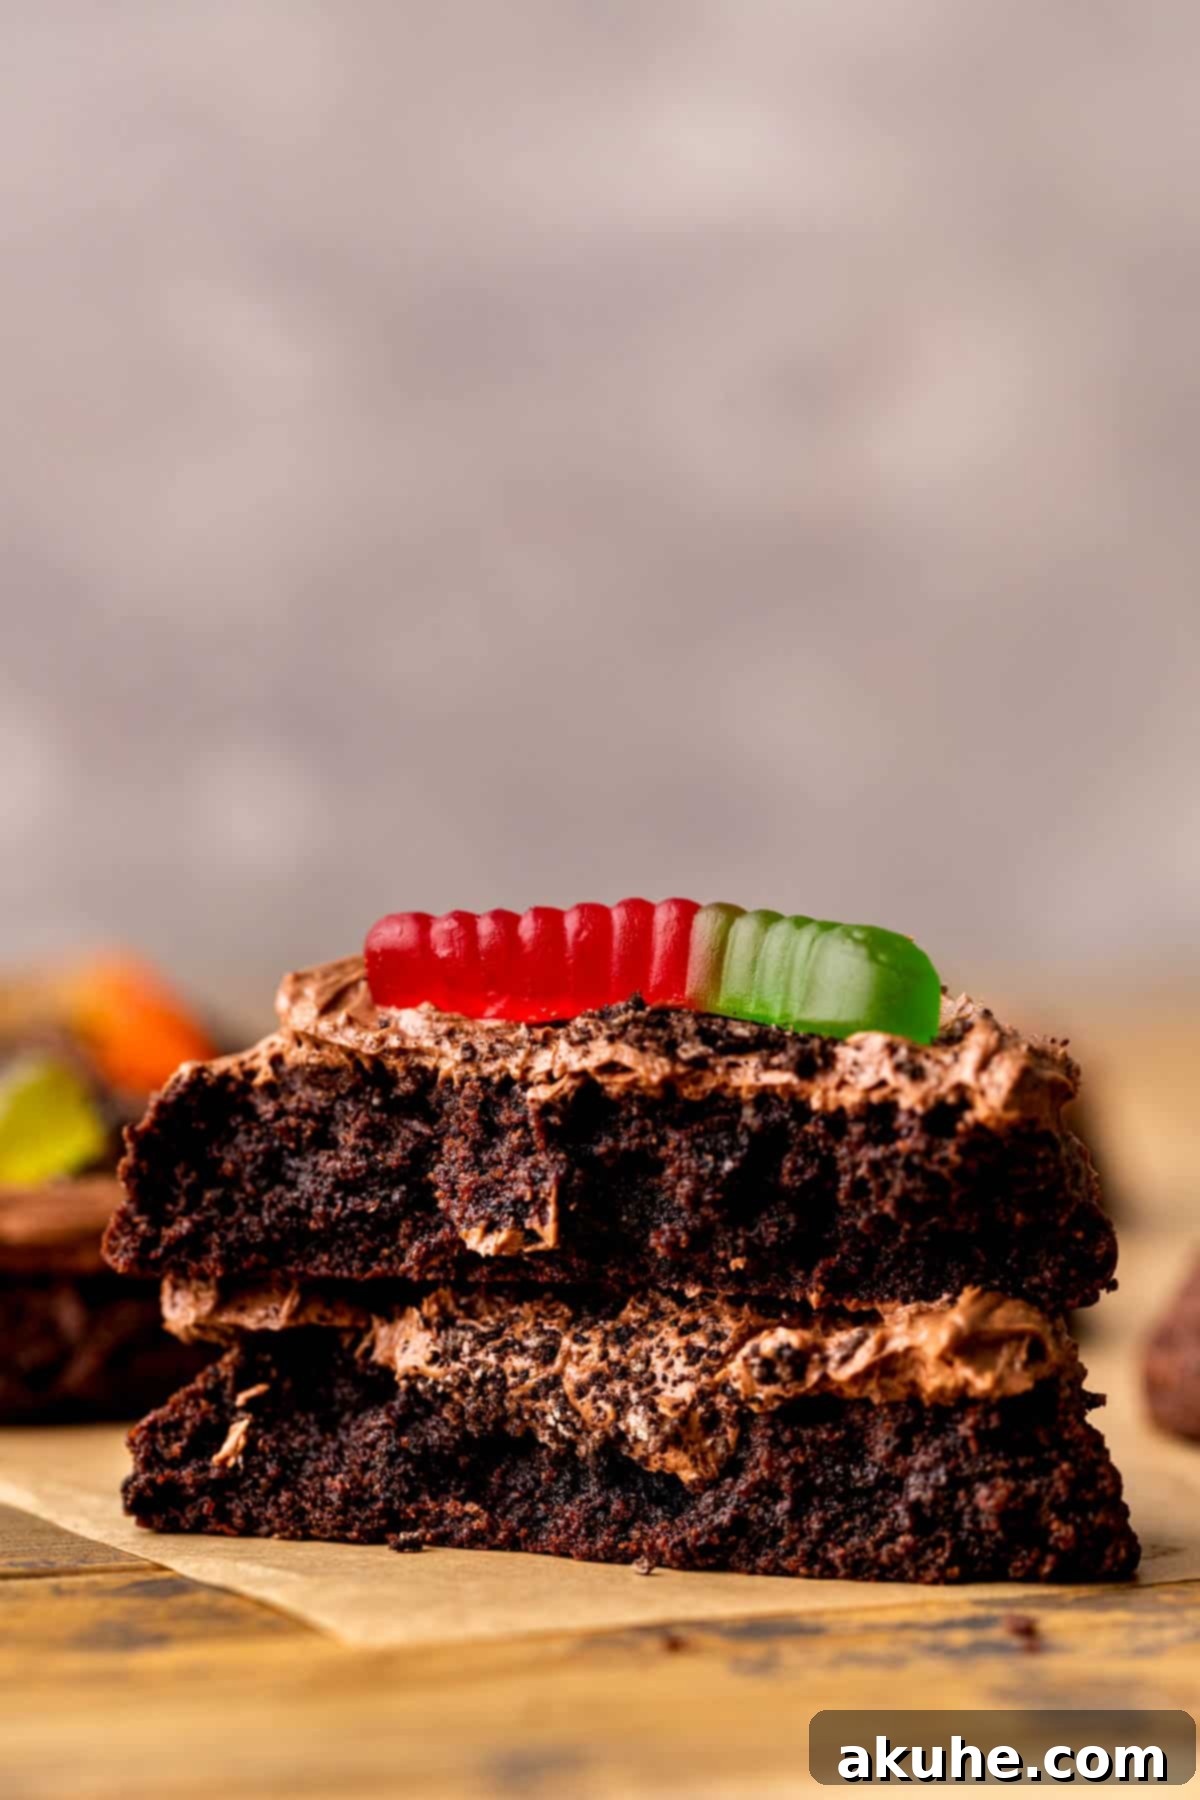
- Perfectly Chewy Texture: The foundation of these incredible treats is a perfectly chewy chocolate cookie. This delightful texture provides a wonderful contrast to the creamy chocolate frosting, creating a harmonious mouthfeel that is both satisfying and addictive. The chewiness ensures the cookies are substantial and hold up well, making them easy to handle and enjoy.
- Authentic Oreo “Dirt” Experience: What would dirt cake be without its iconic “dirt”? Our recipe utilizes crushed Oreo cookie crumbs to create a deliciously authentic and visually appealing “dirt” layer for your gummy worms to playfully “dig” in. The textural contrast of the soft frosting with the slightly crunchy Oreo crumbs adds another layer of enjoyment to these unique cookies.
- Effortlessly Easy to Make: Despite their impressive appearance and fantastic flavor, this cookie recipe is incredibly simple to follow. You don’t need to be an expert baker to achieve outstanding results. The straightforward steps and accessible ingredients make it a perfect project for bakers of all skill levels, ensuring that delicious, fun dirt cake cookies are within everyone’s reach.
Essential Ingredient Notes for Perfect Dirt Cake Cookies
Selecting the right ingredients and preparing them properly is crucial for achieving the best results with your Dirt Cake Cookies. Here are some detailed notes on the key components for both the cookies and the frosting:
- Unsweetened Cocoa Powder: For a truly rich, deep chocolate flavor and a beautiful dark “dirt” color, I highly recommend using Dutch process cocoa powder. Unlike natural cocoa, Dutch process cocoa has been treated with an alkali to neutralize its acidity, resulting in a smoother, less bitter taste and a darker hue. This enhances the overall chocolate experience. This is a great option if you need a recommendation.
- Unsalted Butter: You’ll need unsalted butter for both the cookies and the frosting. For the cookie dough, ensure the butter is melted and then cooled before incorporating it into the wet ingredients. This step is vital to prevent the dough from becoming greasy and to control the cookie’s spread during baking. For the frosting, ensure the butter is at room temperature to achieve a smooth, creamy consistency.
- Brown Sugar: This recipe calls for brown sugar, which contributes to the cookies’ chewy texture and adds a subtle molasses flavor that complements the chocolate beautifully. While light brown sugar was used in testing, dark brown sugar can also be used for a slightly deeper flavor profile. Make sure to pack the brown sugar firmly into your measuring cup.
- Eggs: Always use large eggs and ensure they are at room temperature. Cold eggs can cause the butter mixture to seize and can lead to a less uniform dough. Pull them out of the refrigerator at least 2 hours before you plan to start baking to allow them to warm up naturally.
- Oreos: The star of our “dirt” theme! Opt for regular Oreos over double-stuffed varieties. Double-stuffed Oreos contain extra cream filling, which can introduce too much moisture into your cookie dough and alter its texture. Stick to classic chocolate Oreos for that authentic brown “dirt” color and flavor. You’ll need both finely crushed crumbs and slightly larger pieces for texture.
- Powdered Sugar: Essential for a smooth, luscious chocolate frosting. It is absolutely crucial to sift your powdered sugar before adding it to the butter. Powdered sugar often clumps, and sifting will prevent any gritty texture in your frosting, ensuring a perfectly smooth and creamy finish.
- Vanilla Extract: Use pure vanilla extract for the best flavor. It enhances the chocolate and brings warmth to both the cookies and the frosting.
Step-by-Step Instructions: Crafting Your Chewy Chocolate Oreo Cookies
Follow these detailed steps to create the perfect chewy chocolate Oreo cookie base for your dirt cake masterpiece. For optimal results, an electric mixer (either a stand mixer with a paddle attachment or a hand mixer) will be your best friend.
STEP 1: Prepare Oreo Crumbs and Dry Ingredients. Begin by preparing your Oreos. Using a food processor, pulse regular Oreos until you have a mixture of medium-sized pieces and finer crumbs. Measure out the required amounts and set them aside. In a separate, medium-sized mixing bowl, combine your dry ingredients: sift together the all-purpose flour, unsweetened cocoa powder, baking soda, and salt. Sifting is important to prevent lumps and ensure even distribution in your dough.
STEP 2: Cream Butter and Sugars. In a large mixing bowl, using your electric mixer, beat the cooled melted unsalted butter with both the brown sugar (packed) and white granulated sugar. Beat this mixture on high speed for a full 2 minutes. This creaming process incorporates air, which contributes to the cookies’ light and chewy texture. Ensure the melted butter has cooled sufficiently to avoid cooking the eggs in the next step.
STEP 3: Incorporate Wet and Dry Ingredients. Reduce your mixer speed to medium. Add the pure vanilla extract and the room temperature large eggs to the butter and sugar mixture. Mix until they are just combined, being careful not to overmix. Next, gradually add the sifted flour mixture to the wet ingredients. Mix on low speed until the dry ingredients are just incorporated into the wet, stopping as soon as no dry streaks remain. Finally, gently fold in the reserved Oreo pieces and Oreo crumbs until they are evenly distributed throughout the dough. Avoid overmixing once the flour is added, as this can develop gluten and result in tough cookies.
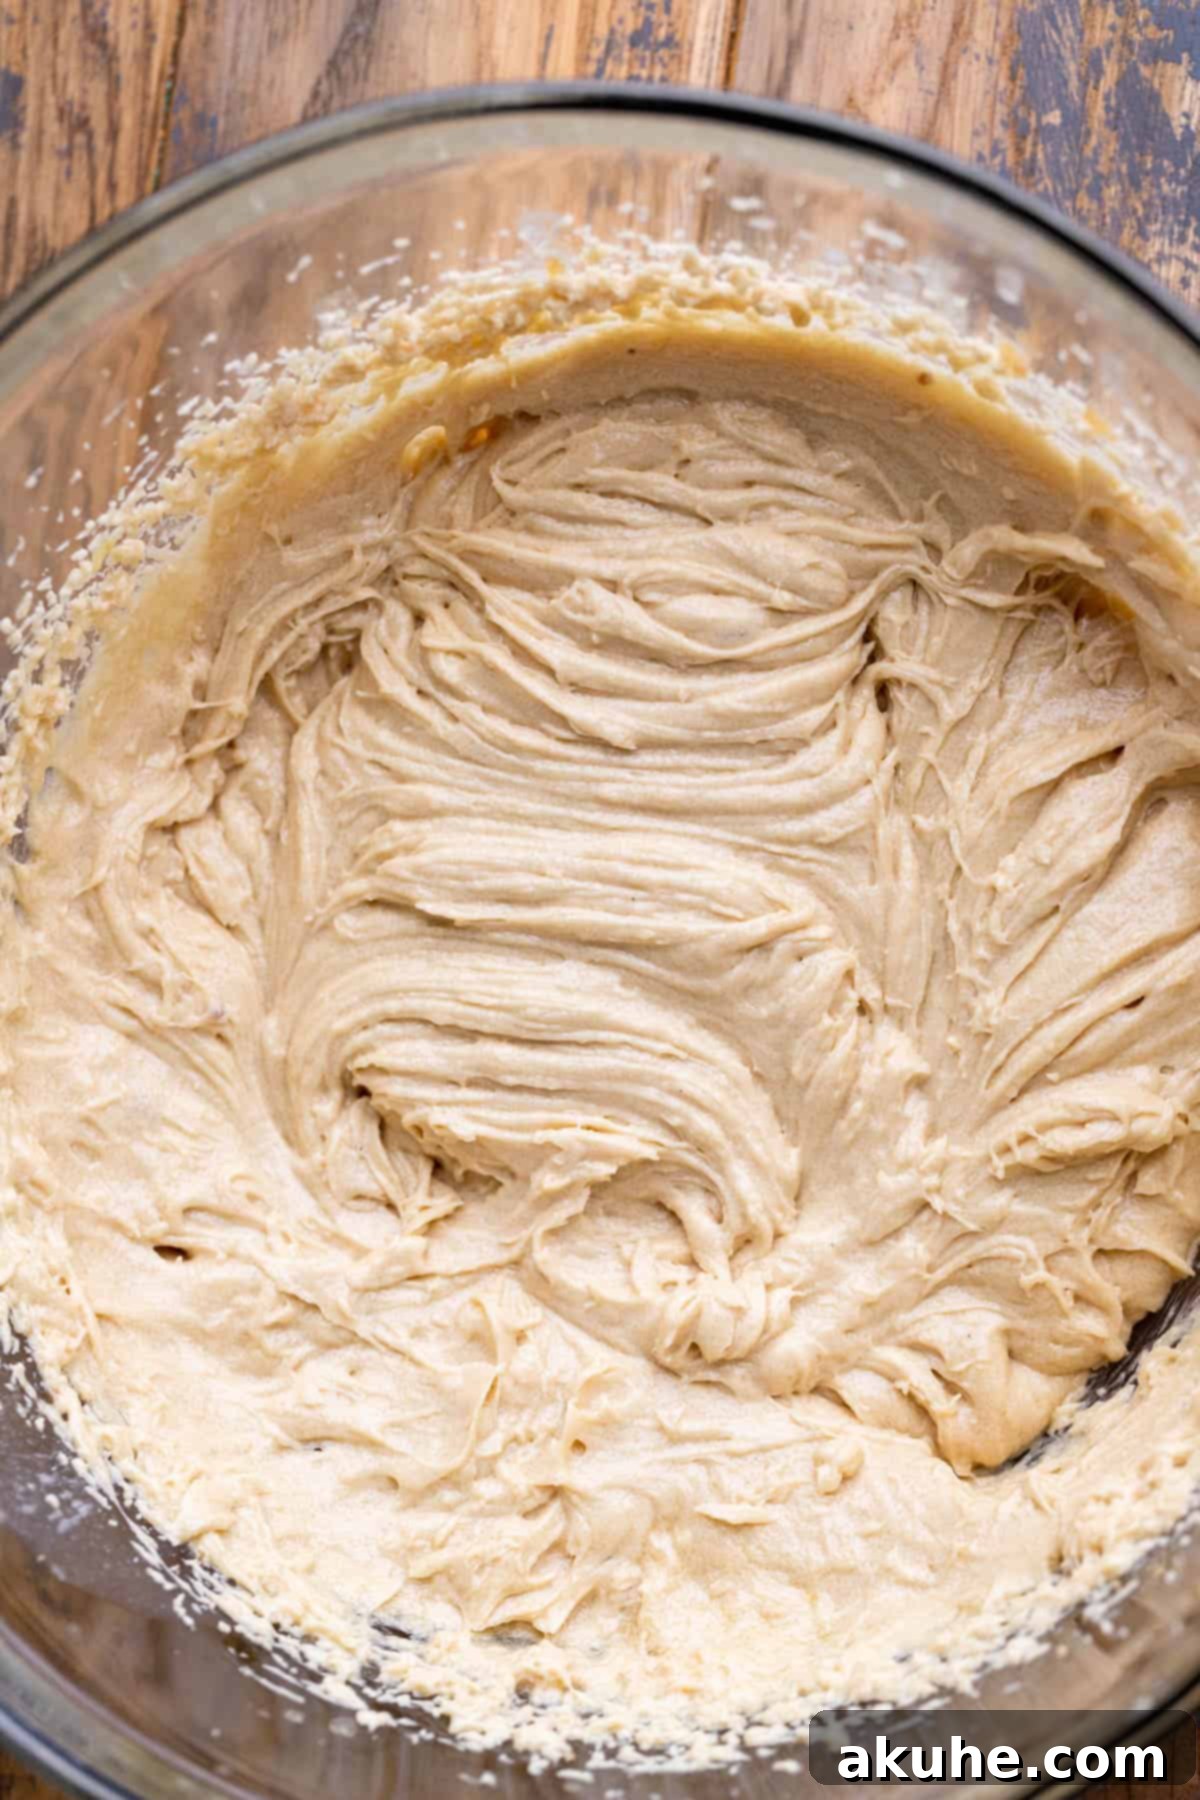
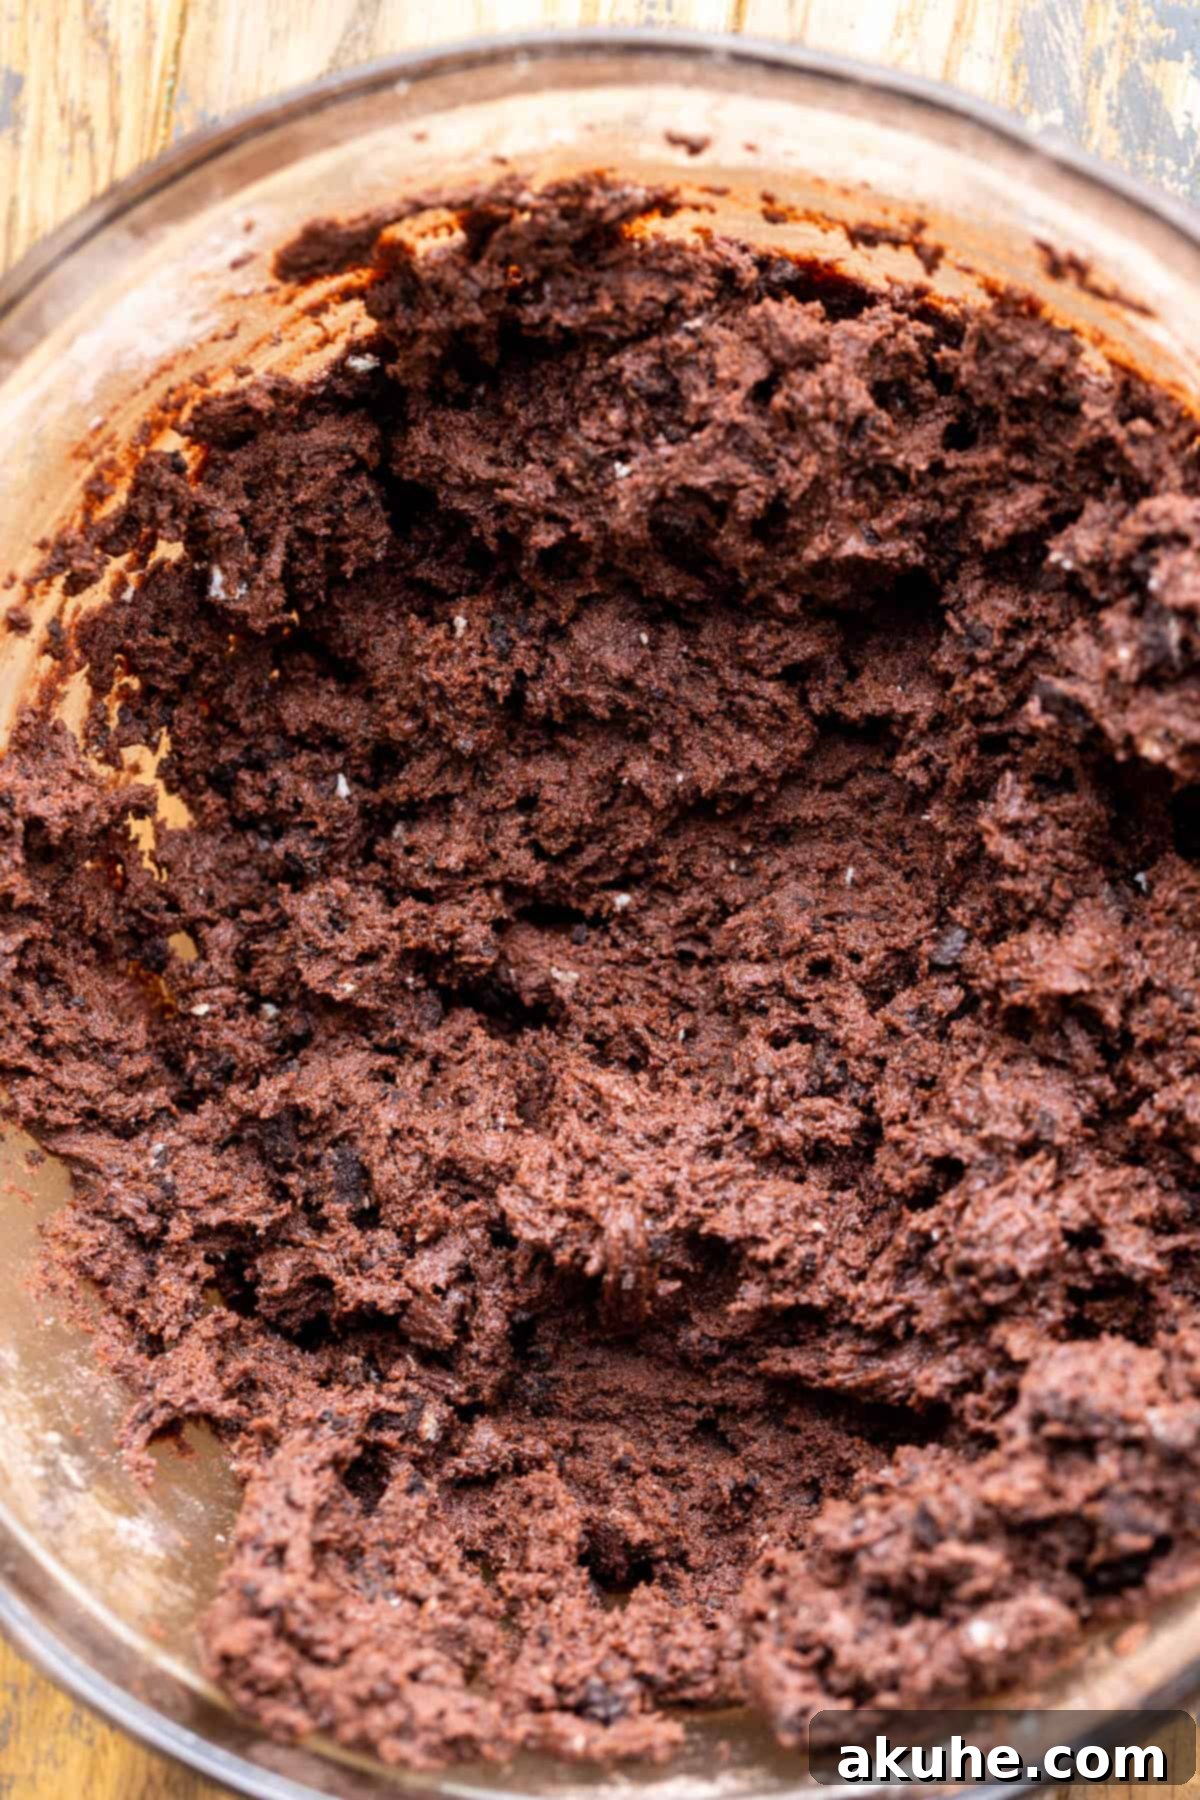
STEP 4: Prepare for Baking. Preheat your oven to 350°F (175°C). While the oven heats, line two large cookie sheets with parchment paper. Parchment paper is essential for preventing sticking and ensuring even baking. Once lined, allow your cookie dough to rest in the bowl for at least 10 minutes. This resting period helps the flour fully hydrate and reduces the likelihood of the cookies spreading too much during baking.
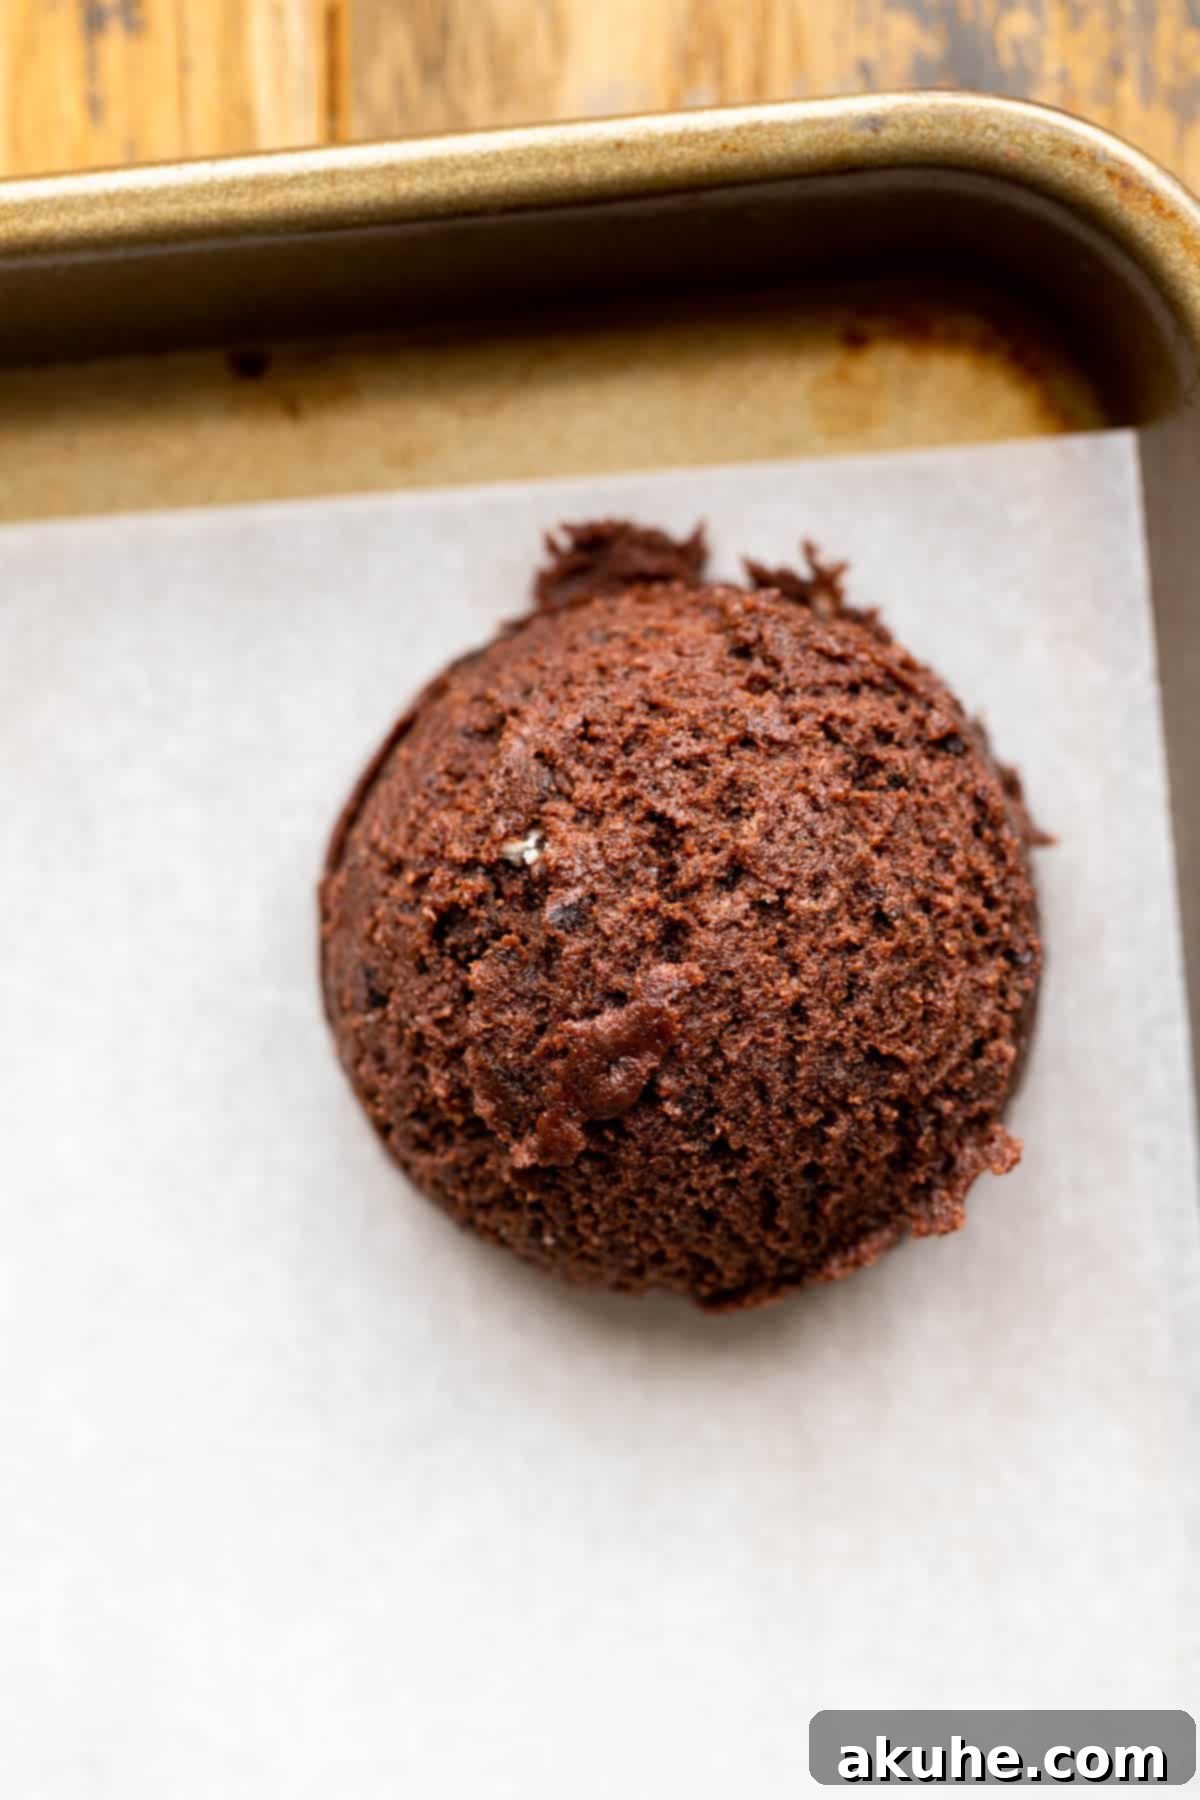
STEP 5: Scoop the Cookie Dough. Using a large cookie scoop (approximately 2 tablespoons or 2 ounces), portion out the cookie dough into uniform balls. Place no more than 6 cookie dough balls on each prepared cookie sheet, ensuring adequate space between them to allow for proper spreading. Overcrowding the baking sheet can lead to uneven baking and cookies that merge together.
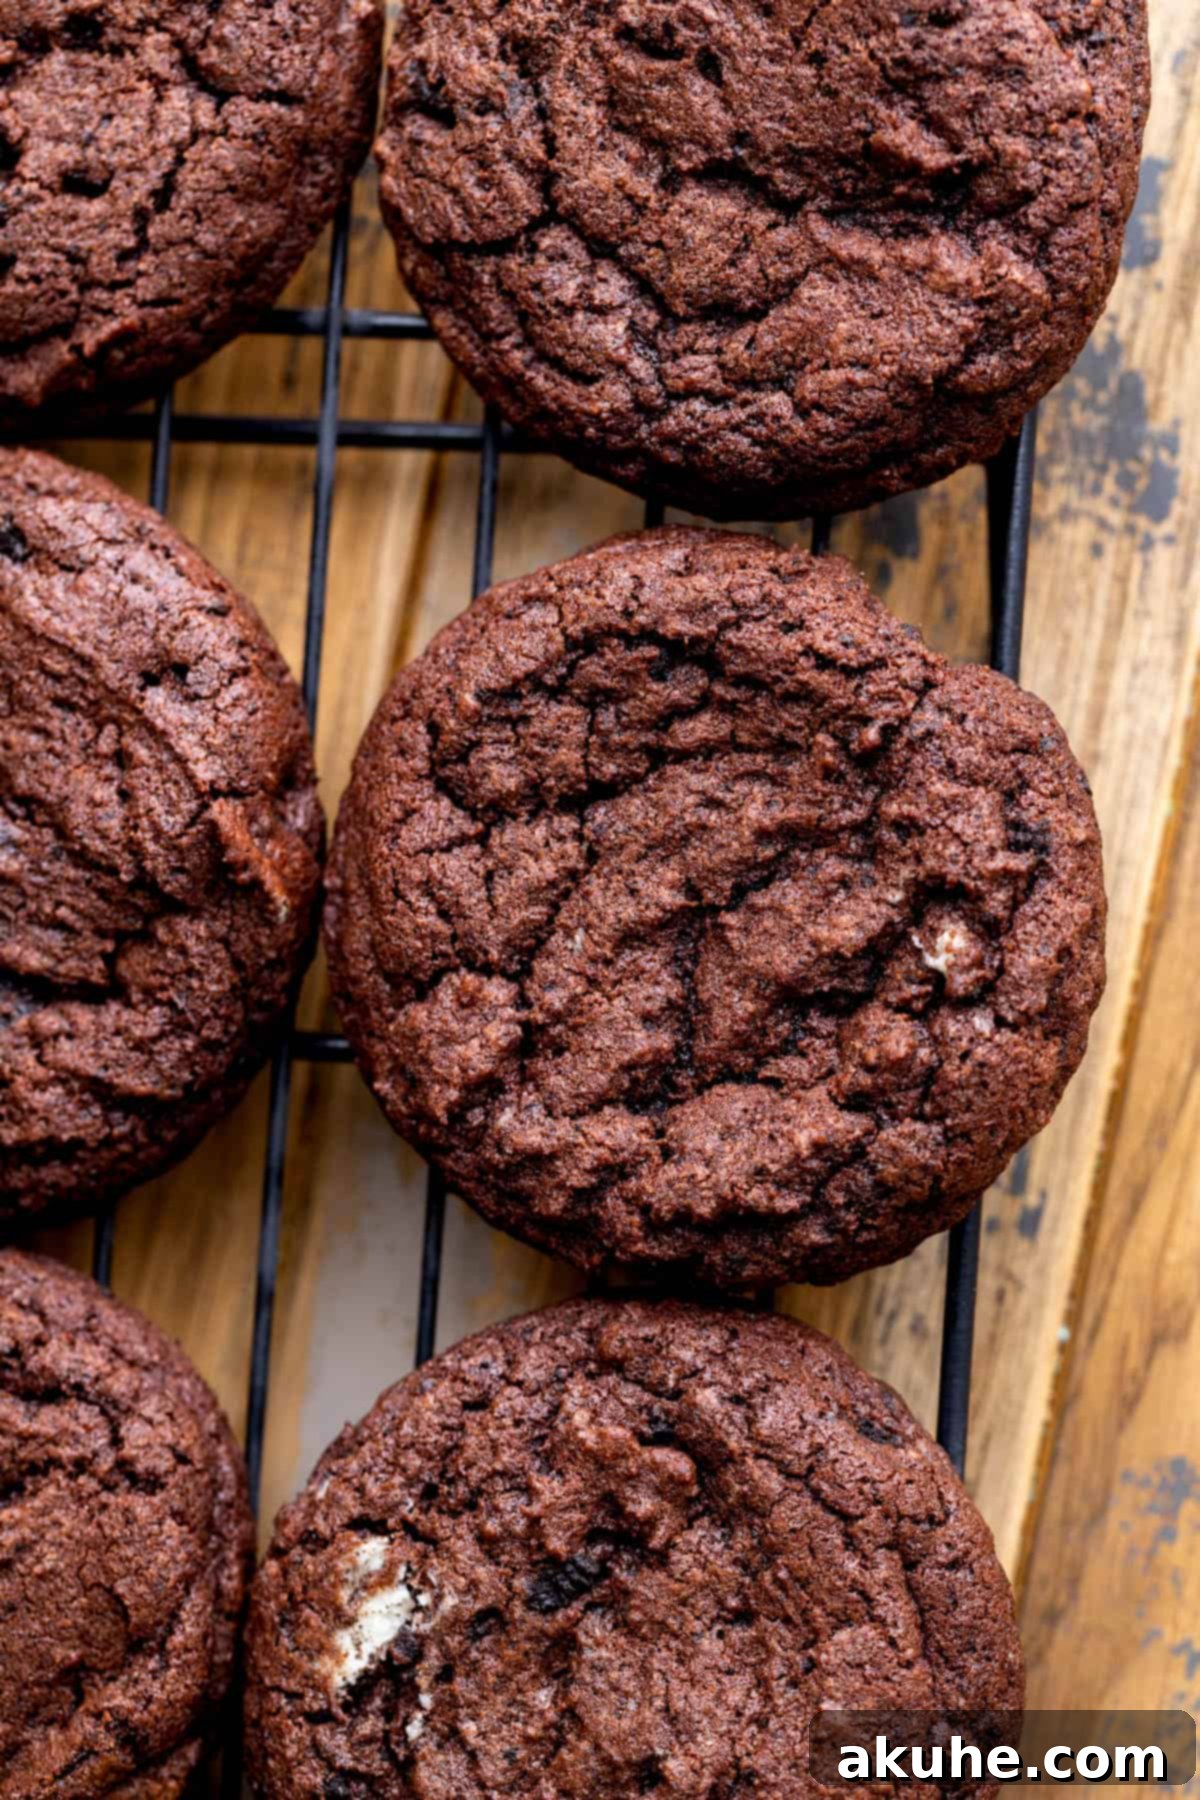
STEP 6: Bake to Perfection. To ensure consistent baking, bake one cookie sheet at a time. Place the sheet in the center rack of your preheated oven and bake for 12-14 minutes. The exact baking time may vary slightly depending on your oven. Look for edges that are set and a center that still appears slightly soft; this indicates a perfectly chewy cookie.
STEP 7: Cool Completely. Once baked, remove the cookie sheet from the oven and allow the cookies to cool on the hot pan for 5 minutes. This crucial step allows them to continue baking slightly and firm up without becoming brittle. After 5 minutes, carefully transfer the cookies to a wire rack to cool completely. It’s imperative that the cookies are fully cooled before you begin decorating them with frosting to prevent the frosting from melting or sliding off.
Step-by-Step Instructions: Decadent Chocolate Frosting and Festive Decoration
Now that your chewy chocolate cookies are cooled, it’s time to create the luscious chocolate frosting and transform them into festive dirt cake cookies!
STEP 1: Beat the Butter. In a clean mixing bowl, using your electric mixer, beat the room temperature unsalted butter on high speed for a full 3 minutes. This aerates the butter, making it light and fluffy, which is key for a smooth, creamy frosting.
STEP 2: Incorporate Dry Frosting Ingredients. Reduce the mixer speed to low. Gradually add the sifted powdered sugar and sifted unsweetened cocoa powder to the butter. Mix on low speed until these dry ingredients are just combined with the butter. Starting on low speed prevents a “powdered sugar cloud” from forming in your kitchen!
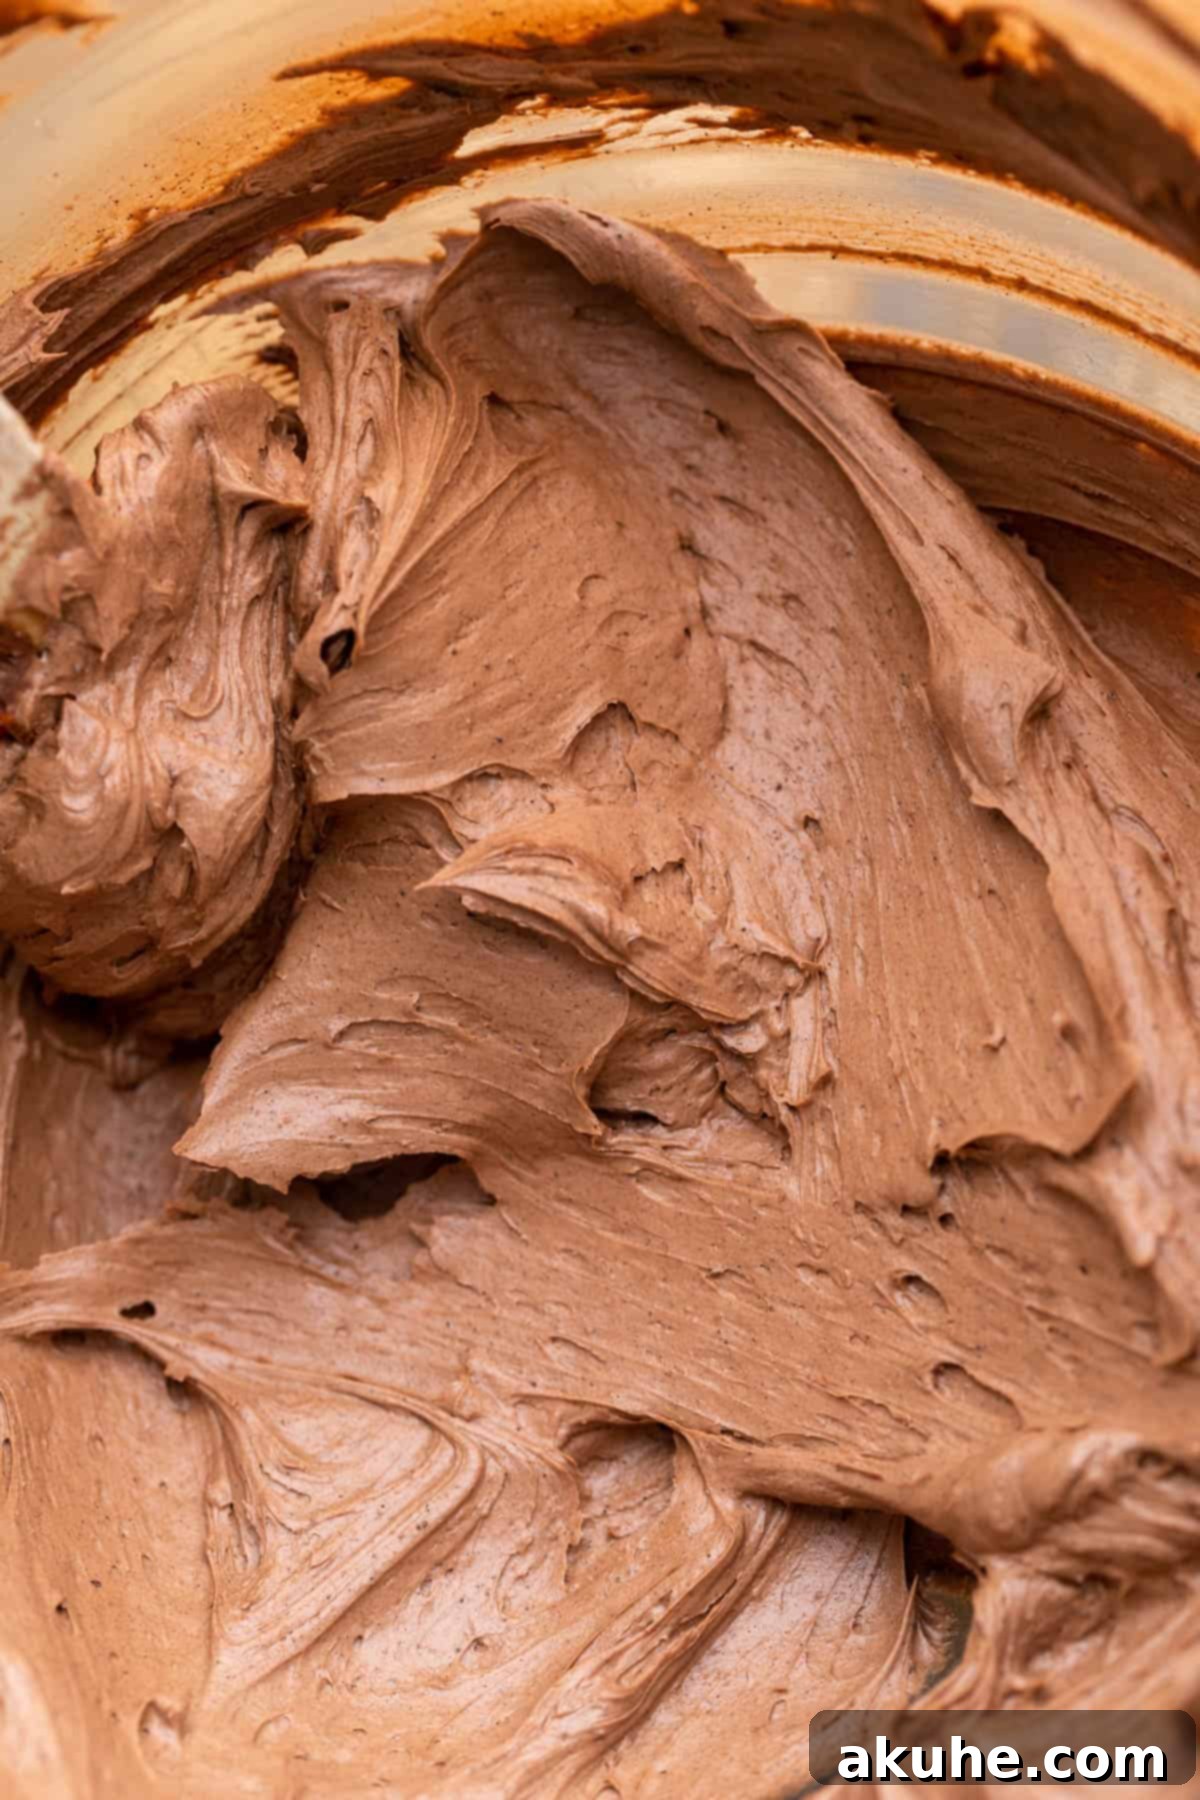
STEP 3: Achieve Smooth, Creamy Frosting. Increase the mixer speed to high. Add the pure vanilla extract and salt. Continue to beat the frosting on high speed for another 2-3 minutes, or until it becomes wonderfully smooth, light, and creamy. Scrape down the sides of the bowl as needed to ensure everything is fully incorporated.
STEP 4: Frost and Decorate Your Cookies. Once your cookies are completely cool, use a small cookie scoop (about 1 tablespoon or 1 ounce) to dollop a generous amount of chocolate frosting onto the center of each cookie. Using an offset spatula, gently spread the frosting evenly over the top of the cookie, creating a smooth “dirt” surface. Immediately after frosting, sprinkle a generous amount of extra Oreo crumbs over the frosting. For the grand finale, carefully place one or two gummy worms on top of the crushed Oreo “dirt,” positioning them as if they are wiggling out of the ground. Repeat for all remaining cookies.
Expert Baking Tips for Flawless Dirt Cake Cookies
Even with a straightforward recipe, a few expert tips can make all the difference in achieving perfectly chewy, delicious dirt cake cookies. Pay attention to these details for professional-level results:
- Mastering Flour Measurement: One of the most common baking errors is incorrect flour measurement. Always use the “spoon and level” method: spoon flour into your measuring cup until it overflows, then use a straight edge (like the back of a knife) to level off the excess. Never scoop flour directly from the bag with your measuring cup, as this compacts the flour, resulting in too much flour. Excess flour can dry out your cookies, making them dense and preventing them from spreading properly, leading to thick, cake-like cookies instead of chewy ones. For ultimate precision, consider using a kitchen scale to measure flour by weight (usually grams).
- Preventing Excessive Spreading: If your cookies are spreading too much, first ensure you are always using parchment paper on your cookie sheets. This helps regulate temperature and prevents sticking. If spreading is still an issue, it could be that your melted butter was too warm when added to the sugar, or your kitchen environment is exceptionally warm. As a quick fix, you can chill the scooped cookie dough balls for 10-15 minutes in the refrigerator before baking. This helps solidify the butter, which in turn limits spreading in the oven.
- High Altitude Baking Adjustments: Bakers at higher altitudes often need to make slight modifications to recipes to account for lower atmospheric pressure. If you live at a high altitude, adding an extra 2 tablespoons of all-purpose flour to the dough can significantly help prevent excessive spreading and maintain the cookies’ structure, ensuring they turn out perfectly chewy rather than flat.
- The Secret to Chewy Centers: For that coveted chewy center, it’s essential to remove the cookies from the oven when they appear slightly underdone in the middle. The edges should be set, but the center will still look soft and perhaps a bit puffy. This is key because the cookies will continue to cook and firm up as they cool on the hot baking sheet and then on the wire rack. Overbaking will result in dry, crumbly cookies, so trust your instincts and err on the side of slightly underdone for maximum chewiness.
- Room Temperature Ingredients are Non-Negotiable: Always ensure your butter and eggs are at room temperature as specified in the ingredient notes. This allows them to cream together properly, creating an emulsified mixture that traps air effectively, leading to a lighter, more uniform batter and a better overall cookie texture.
- Don’t Rush the Cooling Process: It can be tempting to frost warm cookies, but patience is a virtue here. Ensure your cookies are completely cool before applying frosting. Applying frosting to warm cookies will cause it to melt, slide off, and create a messy, unappealing result. A fully cooled cookie provides a stable base for your delicious “dirt” topping.
Frequently Asked Questions About Dirt Cake Cookies
Absolutely! If you prefer smaller, bite-sized cookies, simply use a smaller cookie scoop (around 1 tablespoon) to portion your dough. You should be able to get approximately 12 smaller cookie dough balls per cookie sheet. Adjust baking time accordingly; smaller cookies will bake faster, usually between 8-10 minutes. Keep a close eye on them to prevent overbaking.
Yes, freezing cookie dough is a fantastic way to prepare ahead! Scoop the cookie dough into balls and place them on a parchment-lined baking sheet. Freeze them for about 30-60 minutes until firm. Once firm, transfer the frozen cookie dough balls to an airtight container or a freezer-safe bag. They can be stored in the freezer for up to 30 days. When you’re ready to bake, let the cookie dough balls thaw at room temperature for about 30 minutes before baking as directed in the recipe, or add a couple of extra minutes to the baking time if baking from frozen.
You can certainly chill the cookie dough overnight to enhance its flavor and texture. For best results, I recommend shaping the dough into individual cookie dough balls first before chilling. Arrange them on a plate or small baking sheet, then wrap them tightly in plastic wrap to prevent them from drying out. Store in the refrigerator overnight. When ready to bake, allow the chilled dough balls to sit at room temperature for about 15-20 minutes before baking. This helps ensure they spread properly.
Any brand of standard gummy worms will work perfectly! Feel free to choose your favorite flavors or colors to add a vibrant and playful touch to your dirt cake cookies. The classic multi-colored gummy worms always look great peeking out of the Oreo “dirt.”
While homemade frosting offers the best flavor and texture, you can use a high-quality store-bought chocolate frosting if you’re short on time. Look for one that is rich and creamy. You might need to add a splash of milk or heavy cream and beat it slightly to achieve a spreadable consistency for easy decoration. Be sure to still top it with the Oreo crumbs and gummy worms for the full dirt cake effect!
Storing and Freezing Your Dirt Cake Cookies
Proper storage is key to keeping your delicious Dirt Cake Cookies fresh and maintaining their delightful texture. Here’s how to store and freeze them effectively:
Storing
To store your decorated dirt cake cookies, first allow the chocolate frosting to fully set. This can be achieved by placing them in the refrigerator for about 15-30 minutes, or until the frosting is firm to the touch. Once set, transfer the cookies to an airtight container. They will stay fresh at room temperature for up to 5 days. Layering them with parchment paper can also help prevent the frosting from getting squished or sticking together, keeping your cookies looking as perfect as when you made them.
Freezing
These cookies freeze beautifully, making them an excellent make-ahead dessert! To freeze baked and decorated cookies, place them in a single layer on a cookie sheet or a similar flat surface. Freeze them for 1-2 hours, or until the frosting is completely solid. This “flash freezing” step prevents the frosting from smudging or sticking when the cookies are stacked. Once flash-frozen, transfer the cookies to a freezer-safe airtight container or a heavy-duty freezer bag. They can be stored in the freezer for up to 30 days. To enjoy, simply thaw the cookies at room temperature for 1-2 hours before eating. This method ensures your cookies remain intact and delicious, ready for whenever a craving strikes!
Other Irresistible Cookie Recipes To Try
If you’ve loved making these Dirt Cake Cookies, you might enjoy exploring other fantastic cookie recipes. Diversify your baking repertoire with more delightful treats that are sure to please any crowd.
We hope you enjoyed making these fun and delicious Dirt Cake Cookies! If you loved this recipe, please consider leaving a STAR REVIEW below. Your feedback helps us share more amazing recipes with fellow bakers. Don’t forget to tag us on Instagram @stephaniesweettreats with your creations! For more baking inspiration and delightful ideas, make sure to follow us on Pinterest. Happy Baking!
Dirt Cake Cookies Recipe

These dirt cake cookies are chewy chocolate Oreo cookies topped with chocolate frosting, Oreo crumbs, and a gummy worm! A fun and delicious treat for all ages.
Pin Recipe
Leave a Review
Prep Time: 40 mins
Cook Time: 13 mins
Decorating Time: 15 mins
Total Time: 1 hr 8 mins
Servings: 18 Large cookies
Ingredients
Chocolate Cookies
- 2 1/4 cups All-purpose flour
- 1/2 cup Unsweetened cocoa powder
- 1 tsp Baking soda
- 1 tsp Salt
- 1 cup Unsalted butter, melted and cooled
- 1 cup Brown sugar, packed light or dark
- 1/2 cup White granulated sugar
- 1 tsp Pure vanilla extract
- 2 Large eggs, room temperature
- 3/4 cup Oreo pieces
- 1/2 cup Oreo crumbs, plus extra to top the cookies
Chocolate Frosting
- 1 1/4 cup Unsalted butter, room temperature
- 1 3/4 cup Powdered sugar, sifted
- 1/4 cup Unsweetened cocoa powder, sifted
- 1 tsp Pure vanilla extract
- 1/4 tsp Salt
- Oreo crumbs, for decoration
- Gummy worms
Instructions
Chocolate Oreo Cookies
- Using a food processor, pulse Oreos into small and medium pieces, then blend some to a fine crumb. Set aside. In a medium mixing bowl, sift together the all-purpose flour, unsweetened cocoa powder, baking soda, and salt.
- In a separate large bowl, using an electric mixer, beat the cooled melted unsalted butter, brown sugar, and white granulated sugar on high speed for 2 minutes.
- Add the pure vanilla extract and room temperature large eggs to the butter mixture. Mix on medium speed until just combined. Gradually add the sifted dry ingredients and mix on low speed until just combined.
- Gently fold in the reserved Oreo pieces and Oreo crumbs until just incorporated into the dough.
- Preheat the oven to 350°F (175°C). Line two cookie sheets with parchment paper. Let the cookie dough rest in the bowl for 10 minutes to help prevent excessive spreading.
- Use a large cookie scoop (approx. 2 tablespoons) to portion the cookie dough. Place 6 cookie dough balls per cookie sheet, ensuring adequate spacing.
- Bake one cookie sheet at a time for 12-14 minutes. The edges should be set, but the center should still look slightly soft for chewy cookies.
- Let the cookies cool on the hot pan for 5 minutes before transferring them to a wire rack. Ensure cookies cool completely before decorating.
Chocolate Frosting
- Using an electric mixer, beat the room temperature unsalted butter on high speed for 3 minutes until light and fluffy.
- Reduce speed to low. Gradually add the sifted powdered sugar and sifted unsweetened cocoa powder. Mix until just combined.
- Add the pure vanilla extract and salt. Increase speed to high and beat until the frosting is smooth and creamy (2-3 minutes).
- Once cookies are completely cool, use a small cookie scoop (approx. 1 tablespoon) to dollop frosting onto each cookie. Spread evenly with an offset icing spatula. Sprinkle with extra Oreo crumbs and top with a gummy worm.
Notes
- Flour Measurement: Always use the spoon and level method for flour or weigh it with a kitchen scale to avoid dense cookies.
- High Altitude Baking: Add an extra 2 tablespoons of flour to your dough to help with cookie spread.
- Room Temperature Ingredients: For optimal mixing and texture, pull out all dairy ingredients (butter, eggs) at least 2 hours before baking.
Nutrition Information (per serving)
| Nutrient | Value |
|---|---|
| Calories | 338 kcal |
| Carbohydrates | 44 g |
| Protein | 3 g |
| Fat | 24 g |
| Saturated Fat | 15 g |
| Polyunsaturated Fat | 1 g |
| Monounsaturated Fat | 6 g |
| Trans Fat | 1 g |
| Cholesterol | 61 mg |
| Sodium | 230 mg |
| Potassium | 95 mg |
| Fiber | 2 g |
| Sugar | 18 g |
| Vitamin A | 709 IU |
| Calcium | 24 mg |
| Iron | 1 mg |
