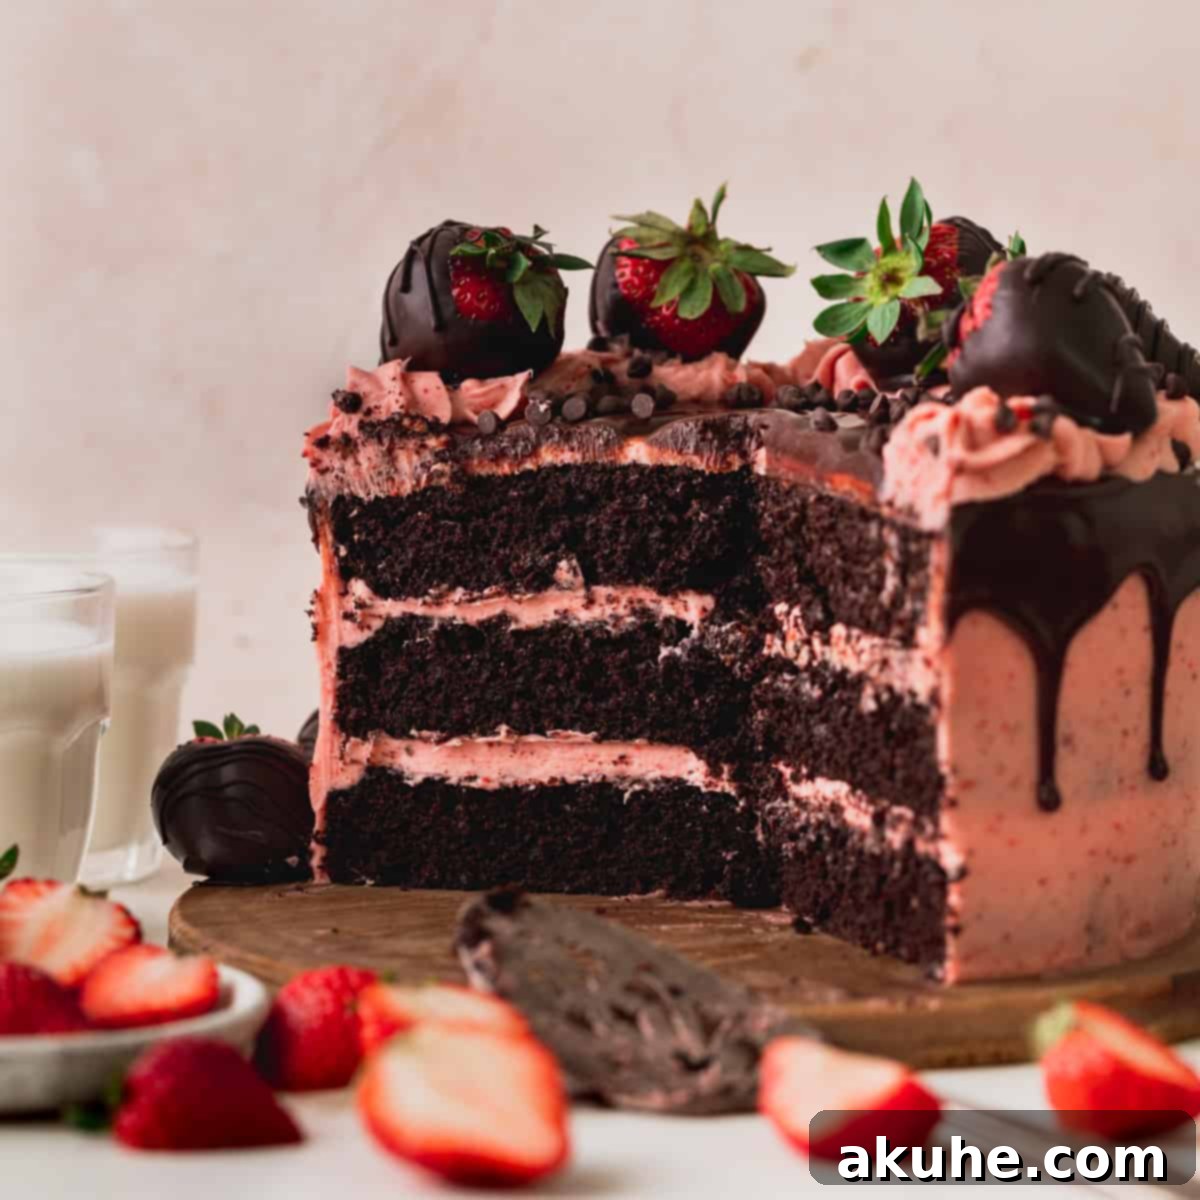
Indulge in the Ultimate Decadence: The Chocolate Covered Strawberry Cake
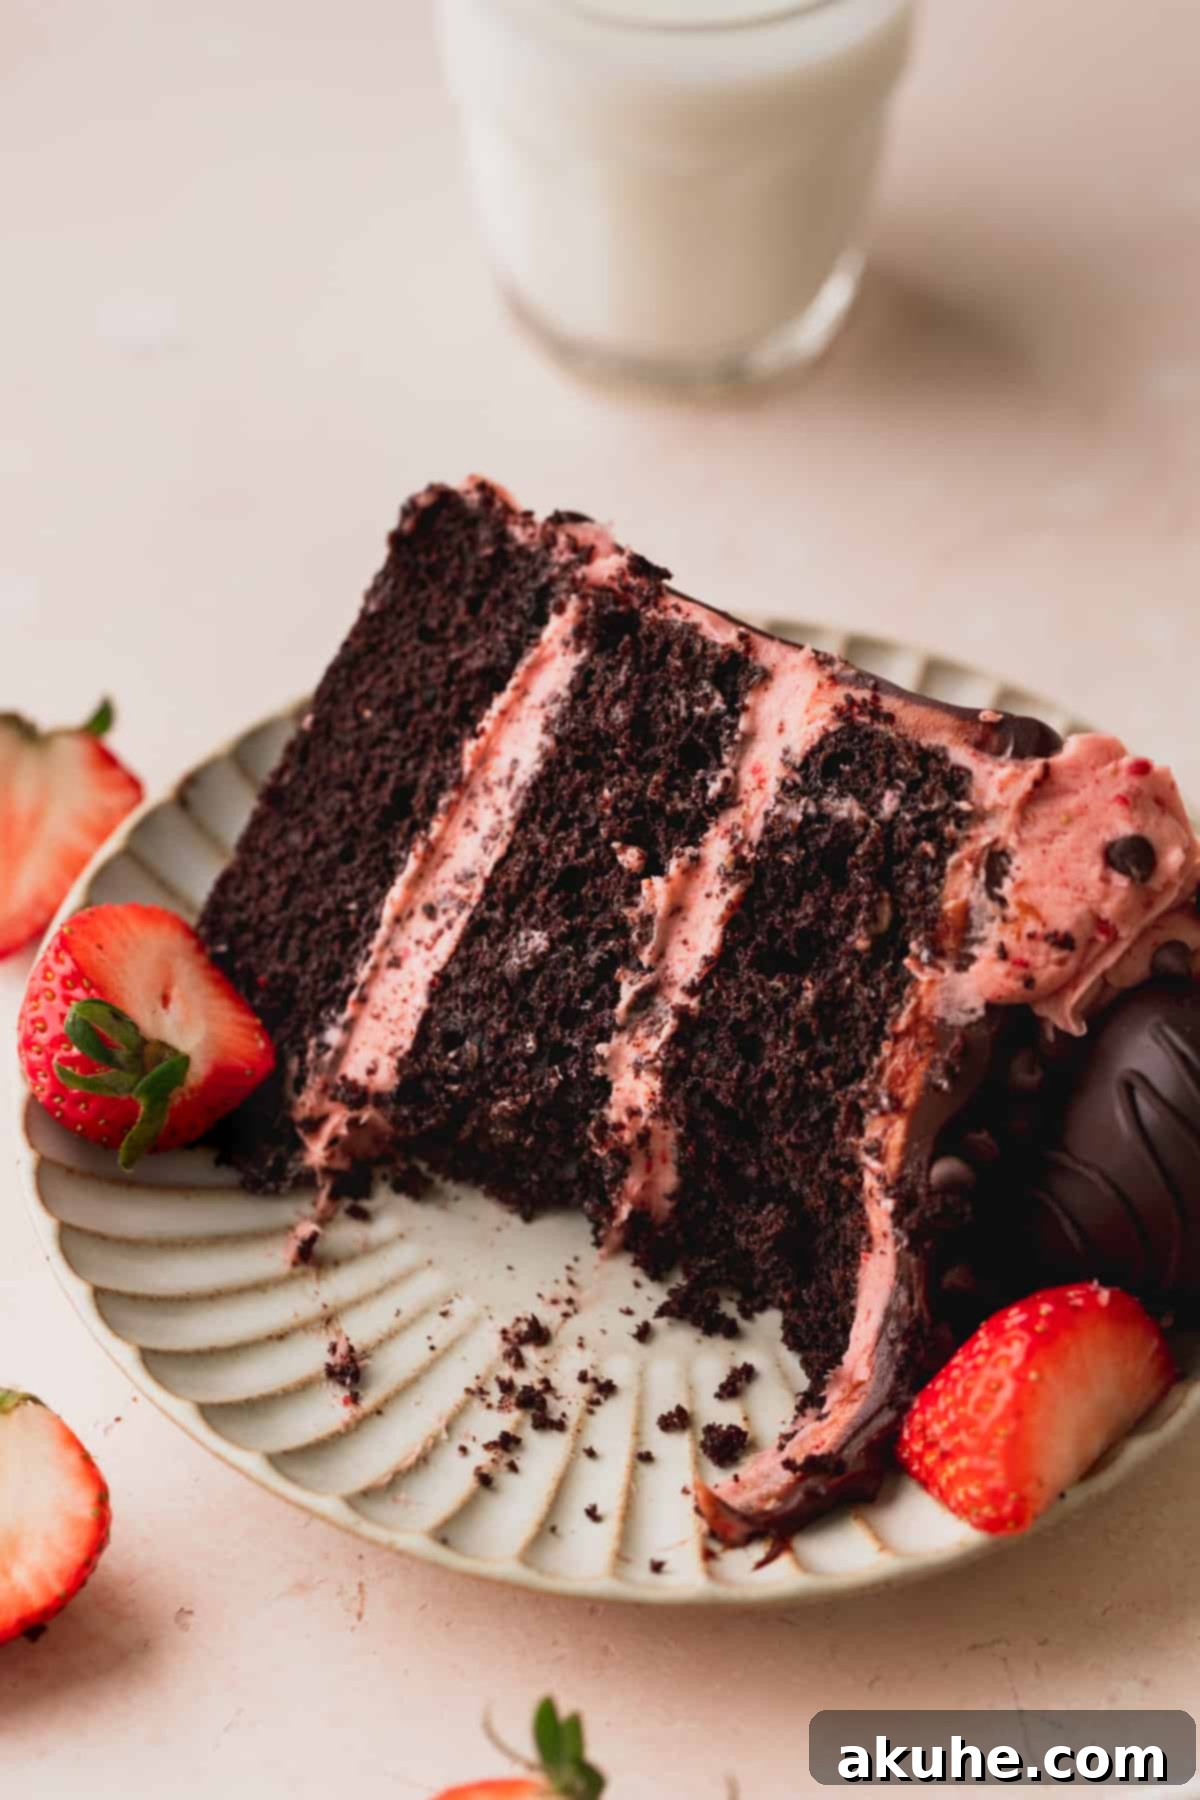
Prepare to be enchanted by a dessert that perfectly marries two beloved flavors: rich chocolate and sweet, succulent strawberries. This exquisite **Chocolate Covered Strawberry Cake** is a masterpiece of layers, featuring an intensely moist and rich brownie-style chocolate cake, generously filled with a vibrant strawberry cream cheese frosting, and elegantly adorned with a luxurious chocolate drip and fresh, hand-dipped chocolate-covered strawberries. It’s not just a cake; it’s an experience, a celebration of flavor that promises to be the showstopper at any gathering, especially for romantic occasions like Valentine’s Day or simply to treat yourself to something truly special.
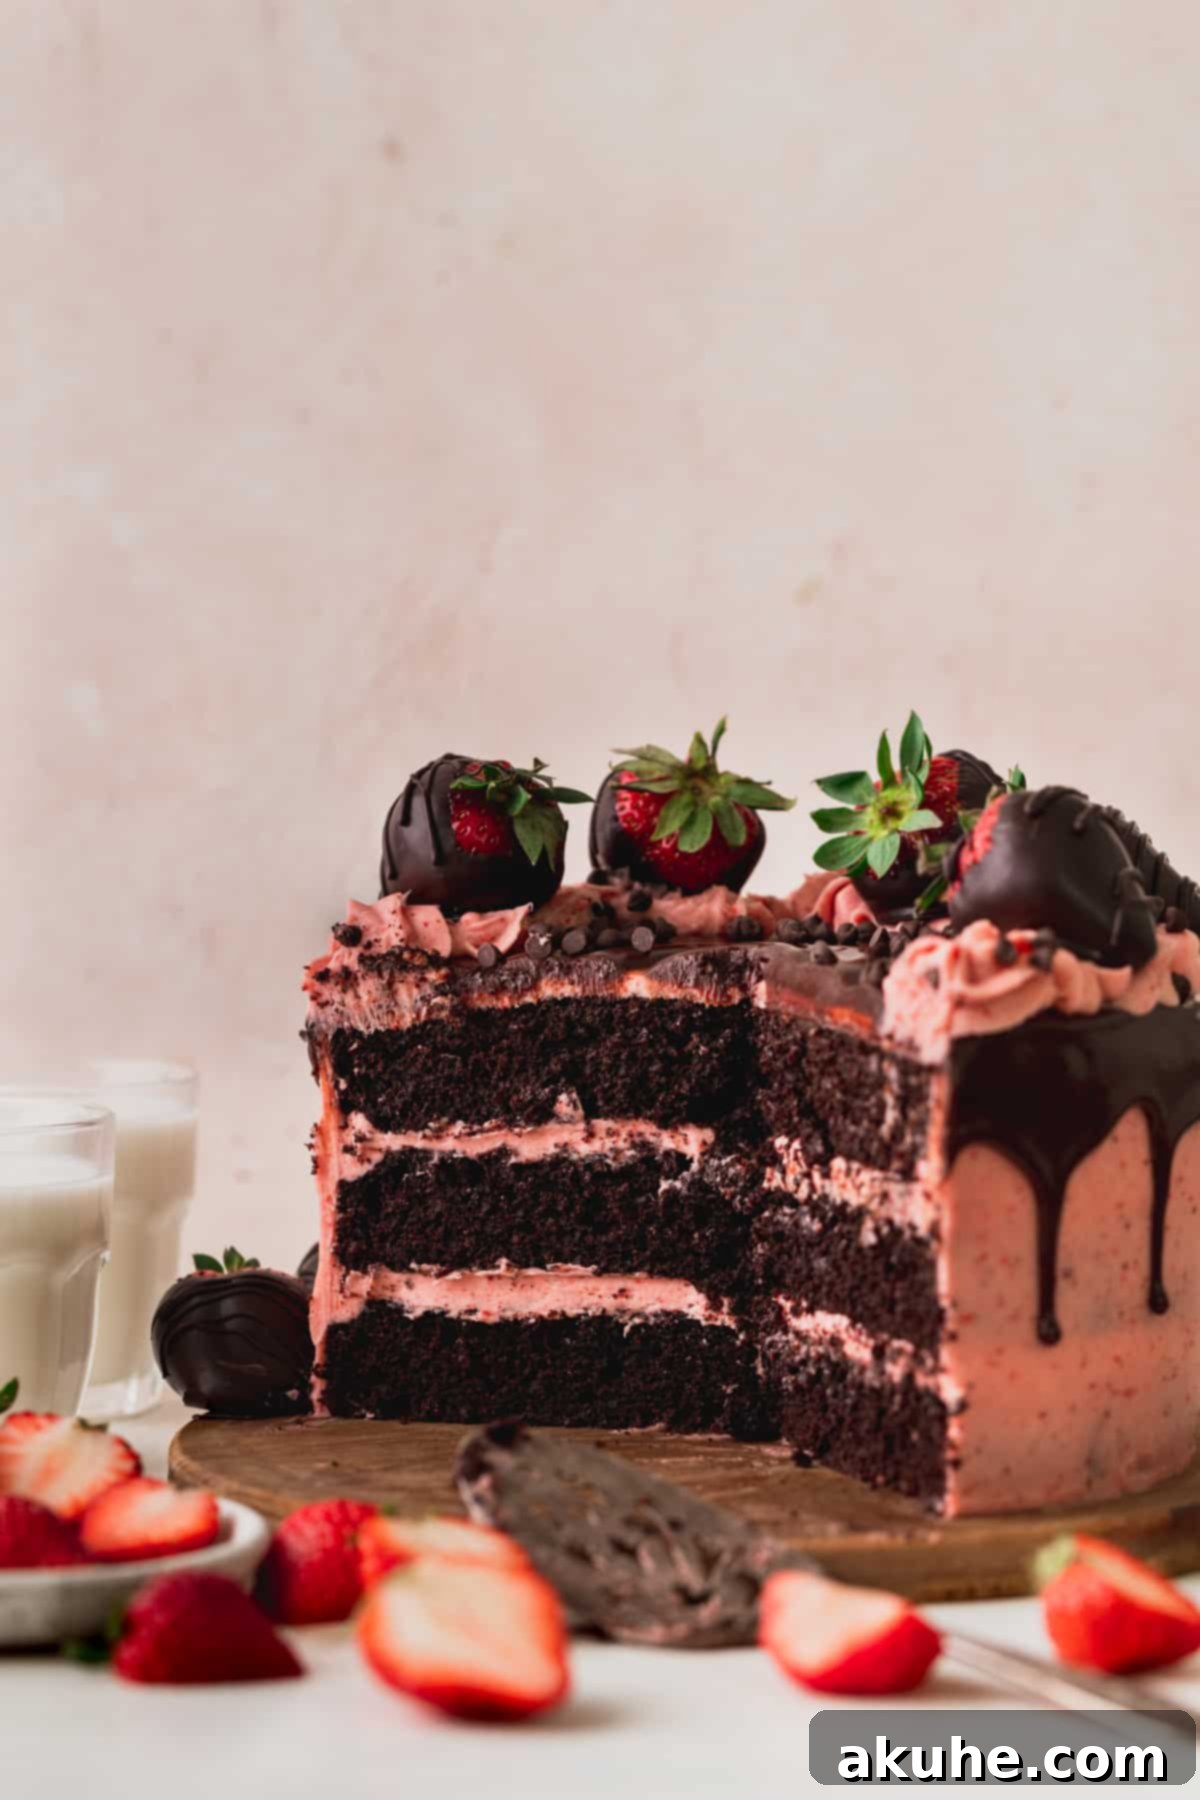
Imagine biting into a cake that delivers an unparalleled chocolate intensity, balanced beautifully by the bright, fruity tang of real strawberries. This dessert is designed to captivate your senses, from its visually appealing presentation to its unforgettable taste. Whether you’re an experienced baker or looking for a delightful challenge, this recipe guides you through creating a truly spectacular cake that will earn rave reviews.
If you find yourself captivated by the allure of strawberries in your baking, you might also enjoy exploring other delightful strawberry creations such as a light and airy strawberry sheet cake, the charmingly rustic strawberry semi-naked cake, or adorable strawberry filled cupcakes. Each offers a unique way to savor the sweet essence of this beloved berry.
Why This Chocolate Covered Strawberry Cake Will Become Your New Favorite
This isn’t just another cake recipe; it’s a carefully crafted indulgence designed to deliver maximum flavor and enjoyment. Here’s why you’ll absolutely fall in love with making and eating this incredible creation:
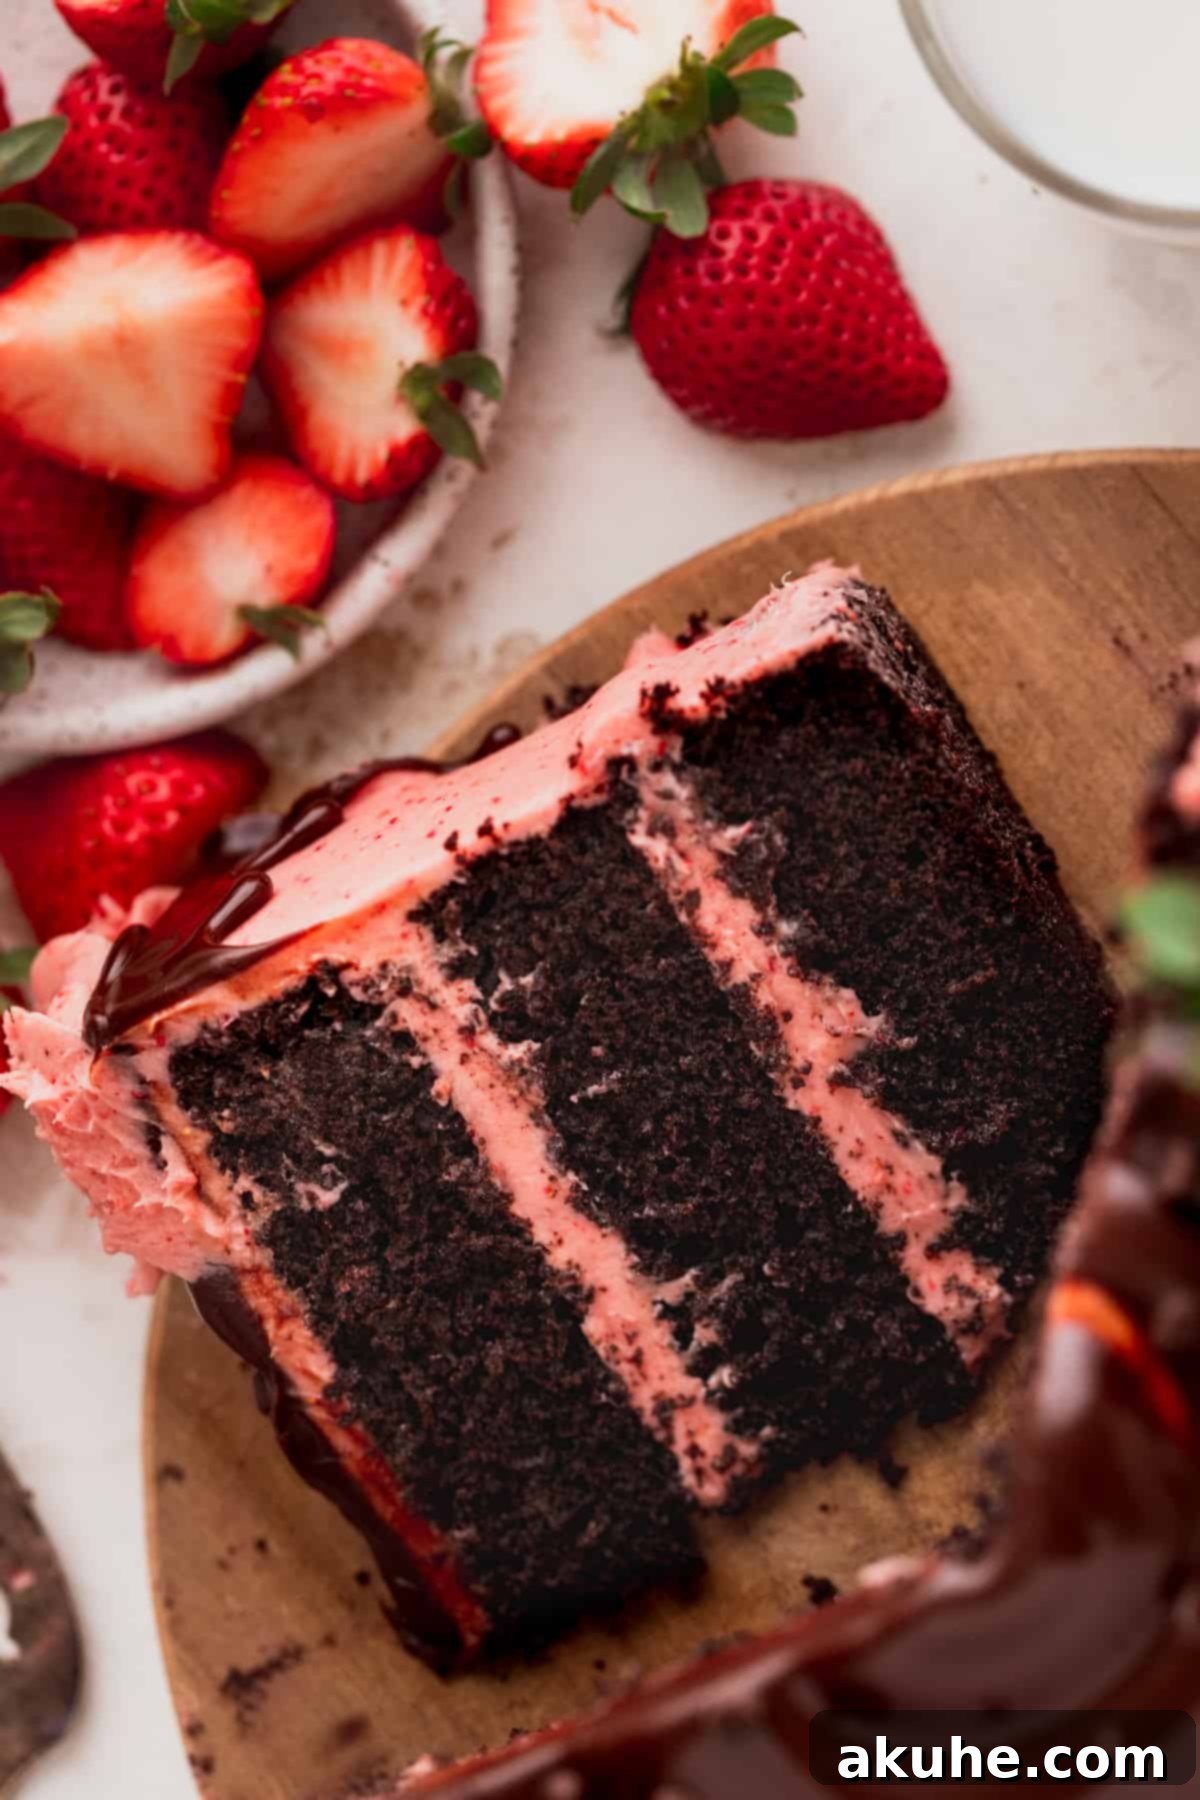
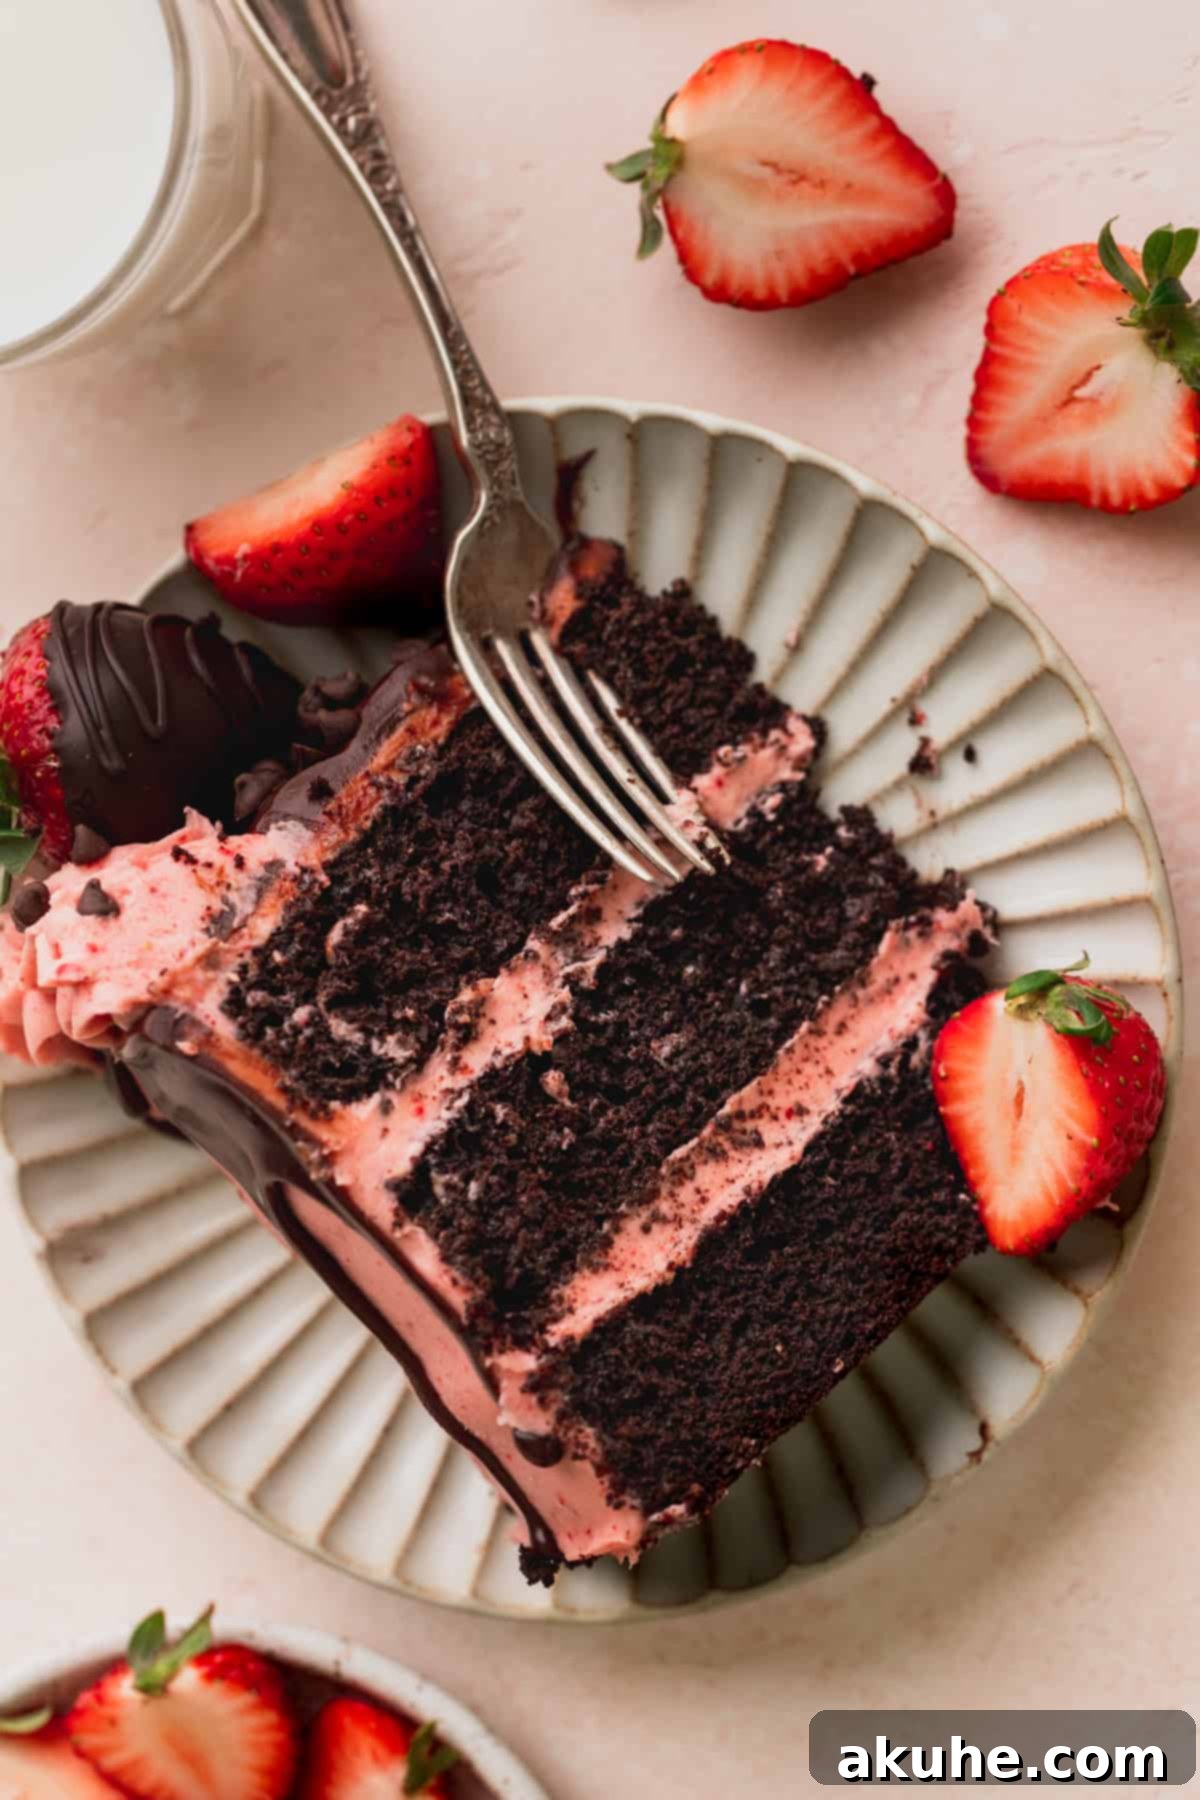
- Decadent Chocolate Brownie Cake: Far from an ordinary chocolate cake, our recipe features a rich, dense, and ultra-moist brownie-style cake. It’s packed with intense chocolate flavor, thanks to a powerful combination of both high-quality cocoa powder and melted semi-sweet chocolate in the batter. This dual chocolate approach ensures a deep, complex flavor that’s truly irresistible, making each layer a luscious foundation for the cake.
- Luxurious Strawberry Cream Cheese Frosting: The heart of this cake’s unique flavor profile lies in its exquisite frosting. Made with real, ground freeze-dried strawberries, this cream cheese frosting offers an incredibly potent and natural strawberry flavor, unlike anything achieved with artificial extracts. The freeze-dried berries intensify the fruity notes, creating a vibrant, tangy, and creamy counterpoint to the rich chocolate layers. It’s smooth, luscious, and utterly addictive.
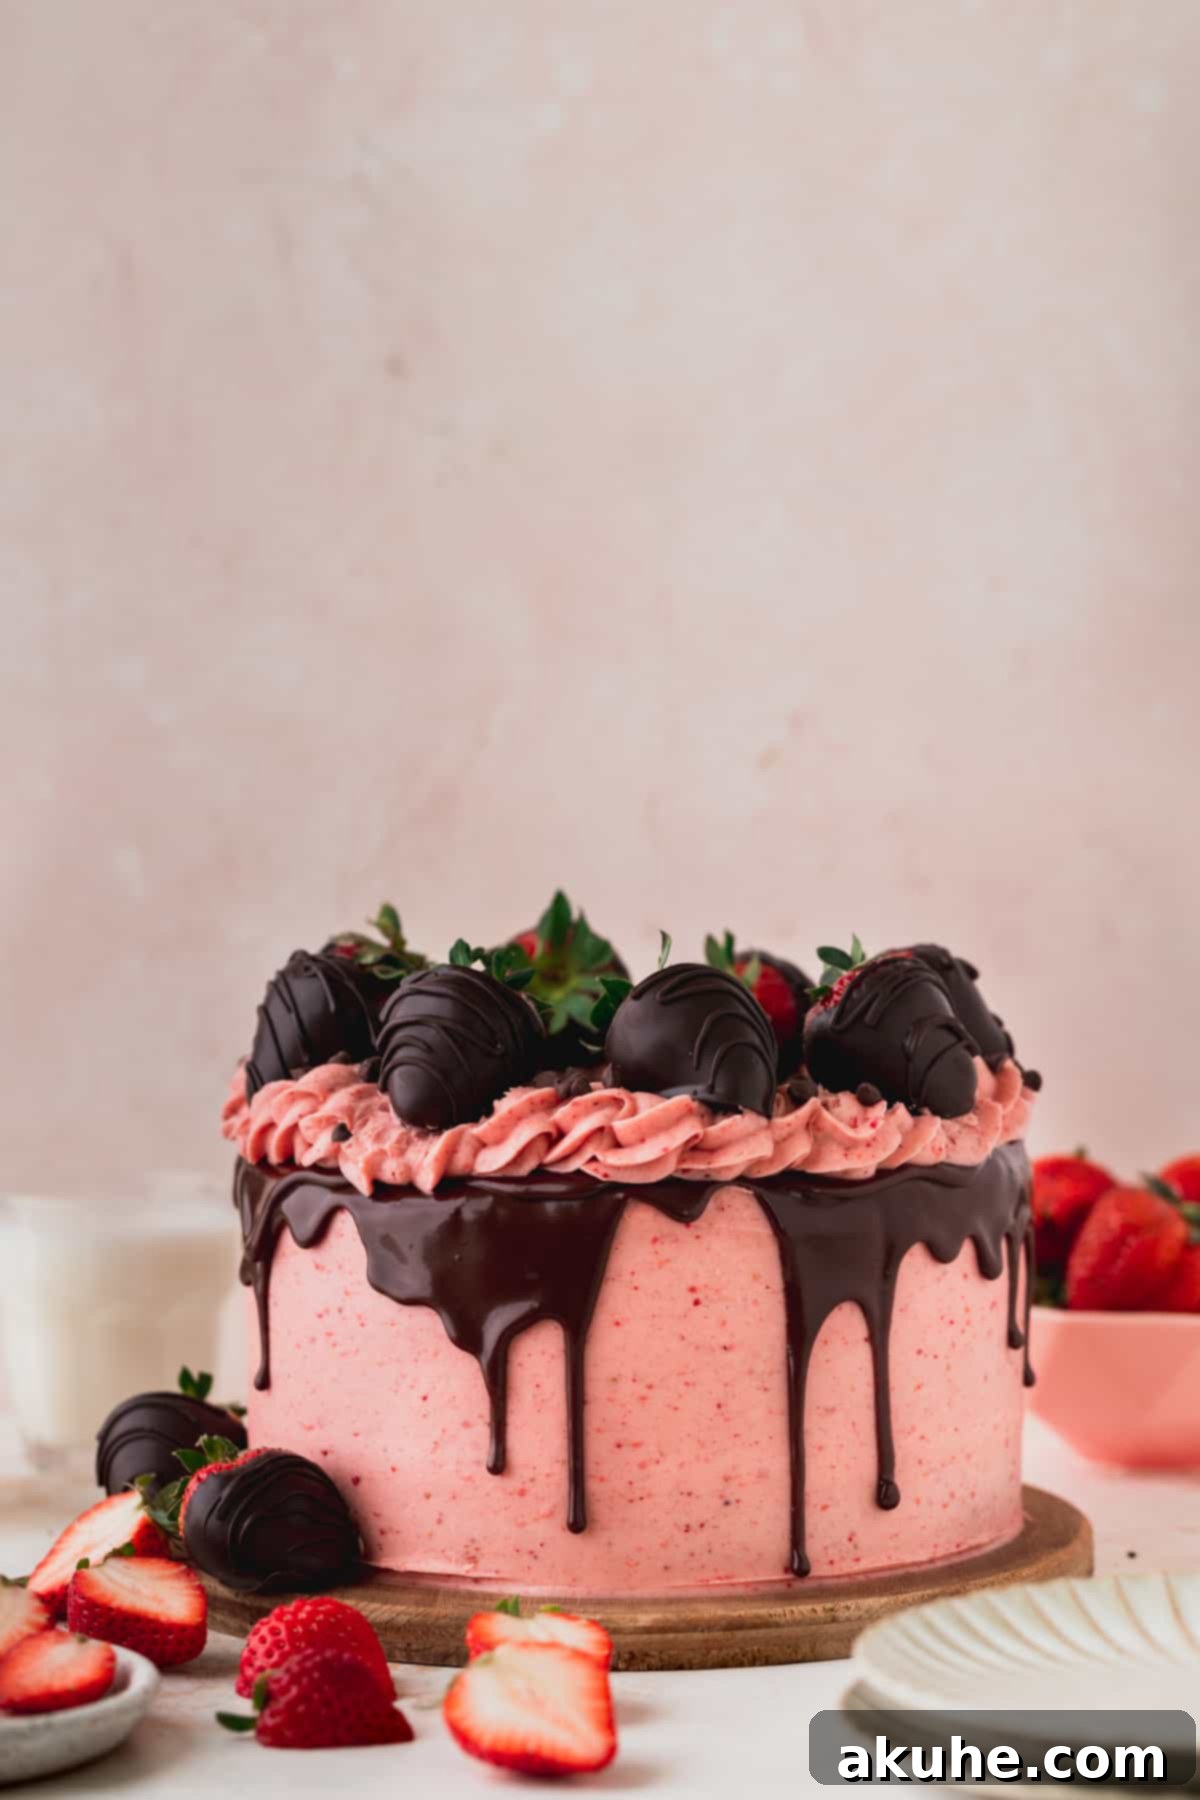
- Elegant Chocolate Drip: A chocolate cake wouldn’t be complete without a visually stunning chocolate ganache drip cascading down its sides. This simple yet sophisticated touch adds another layer of chocolatey goodness and enhances the cake’s overall aesthetic appeal. It transforms a delicious cake into a work of art, promising an extra burst of chocolate with every slice.
- Perfectly Adorned with Chocolate Covered Strawberries: While optional, the inclusion of fresh, chocolate-dipped strawberries as a topping brings the entire cake together, both visually and harmoniously in flavor. These beautiful berries not only add a touch of fresh fruitiness and texture but also reinforce the cake’s theme, creating a truly Instagram-worthy dessert that tastes as good as it looks. Each berry is a little jewel, adding a pop of color and natural sweetness.
Key Ingredient Insights for Baking Success
The success of any exceptional cake lies in the quality and preparation of its ingredients. Understanding the role of each component can elevate your baking from good to extraordinary. Here are some detailed notes on the ingredients for this Chocolate Covered Strawberry Cake:
- Dutch Process Cocoa Powder: For this recipe, Dutch process cocoa powder is highly recommended over natural cocoa. It has been treated with an alkali to neutralize its acidity, resulting in a darker color and a smoother, less bitter, and more mellow chocolate flavor. This contributes to the deep, rich hue and profound taste of our brownie cake layers. Popular brands include Hershey’s Dark, or you can find other quality options like this one.
- Oil (Canola, Vegetable, or Light Olive Oil): Using oil instead of butter in the cake batter contributes significantly to the cake’s ultimate moisture and tenderness. Oil remains liquid at room temperature, which helps keep the cake moist for longer. You can use neutral-flavored canola or vegetable oil, or even a light olive oil for a subtle, sophisticated note without overpowering the chocolate.
- Buttermilk: Buttermilk is a fantastic ingredient for cakes, contributing to a tender crumb and a subtle tang that enhances the overall flavor. If you don’t have buttermilk on hand, you can easily make a substitute: simply add 1 tablespoon of lemon juice or white vinegar to a 1 1/4 cup measuring cup, then fill the rest with whole milk. Let it sit for 5-10 minutes until it slightly curdles before using.
- Eggs: Always ensure your eggs are at room temperature before baking. Room temperature eggs emulsify much better with other ingredients, creating a smoother, more uniform batter and contributing to a lighter, more evenly baked cake texture. Take them out of the fridge at least 2 hours before you plan to start baking.
- Hot Water (or Hot Coffee): Adding steaming hot water (or hot coffee for an even deeper chocolate flavor) at the end of the wet ingredients helps to “bloom” the cocoa powder, intensifying its chocolate flavor. The heat also helps to dissolve the sugar more effectively, resulting in a smoother batter and a more moist cake. Ensure it’s hot, but not boiling.
- Cream Cheese: For the best strawberry cream cheese frosting, always opt for full-fat cream cheese. It provides the richest flavor and the firmest, most stable consistency for frosting. Like eggs, make sure your cream cheese is softened to room temperature for at least 2 hours prior to mixing to ensure a smooth, lump-free frosting.
- Powdered Sugar: Sifting your powdered sugar is a non-negotiable step for a silky-smooth frosting. Powdered sugar can clump easily, and sifting removes these lumps, guaranteeing a truly luscious and grit-free texture.
- Freeze-Dried Strawberries: These are the secret weapon for an intensely natural strawberry flavor and a beautiful pink hue in your frosting. You’ll need a 2 oz bag, which you’ll grind into a fine powder. The concentrated flavor of freeze-dried fruit is superior to fresh strawberries in a frosting, which can add too much moisture and dilute the flavor.
Step-by-Step Guide to Crafting Your Chocolate Covered Strawberry Cake
Creating this magnificent cake is a rewarding process. Follow these detailed steps to bake your rich chocolate cake layers and whip up the vibrant strawberry cream cheese frosting. For another incredible chocolate dessert, consider trying this chocolate peanut butter cake.
Crafting the Brownie Cake Layers
- Prepare Your Pans & Melt Chocolate: Preheat your oven to 350°F (175°C). Prepare three 8-inch round cake pans by generously spraying them with baking spray, lining the bottoms with parchment paper circles, and then spraying the parchment paper again. This ensures your cakes release perfectly. Separately, gently melt the semi-sweet chocolate bar in the microwave using 30-second intervals, stirring well after each, until smooth and fully melted. Set it aside to cool slightly.
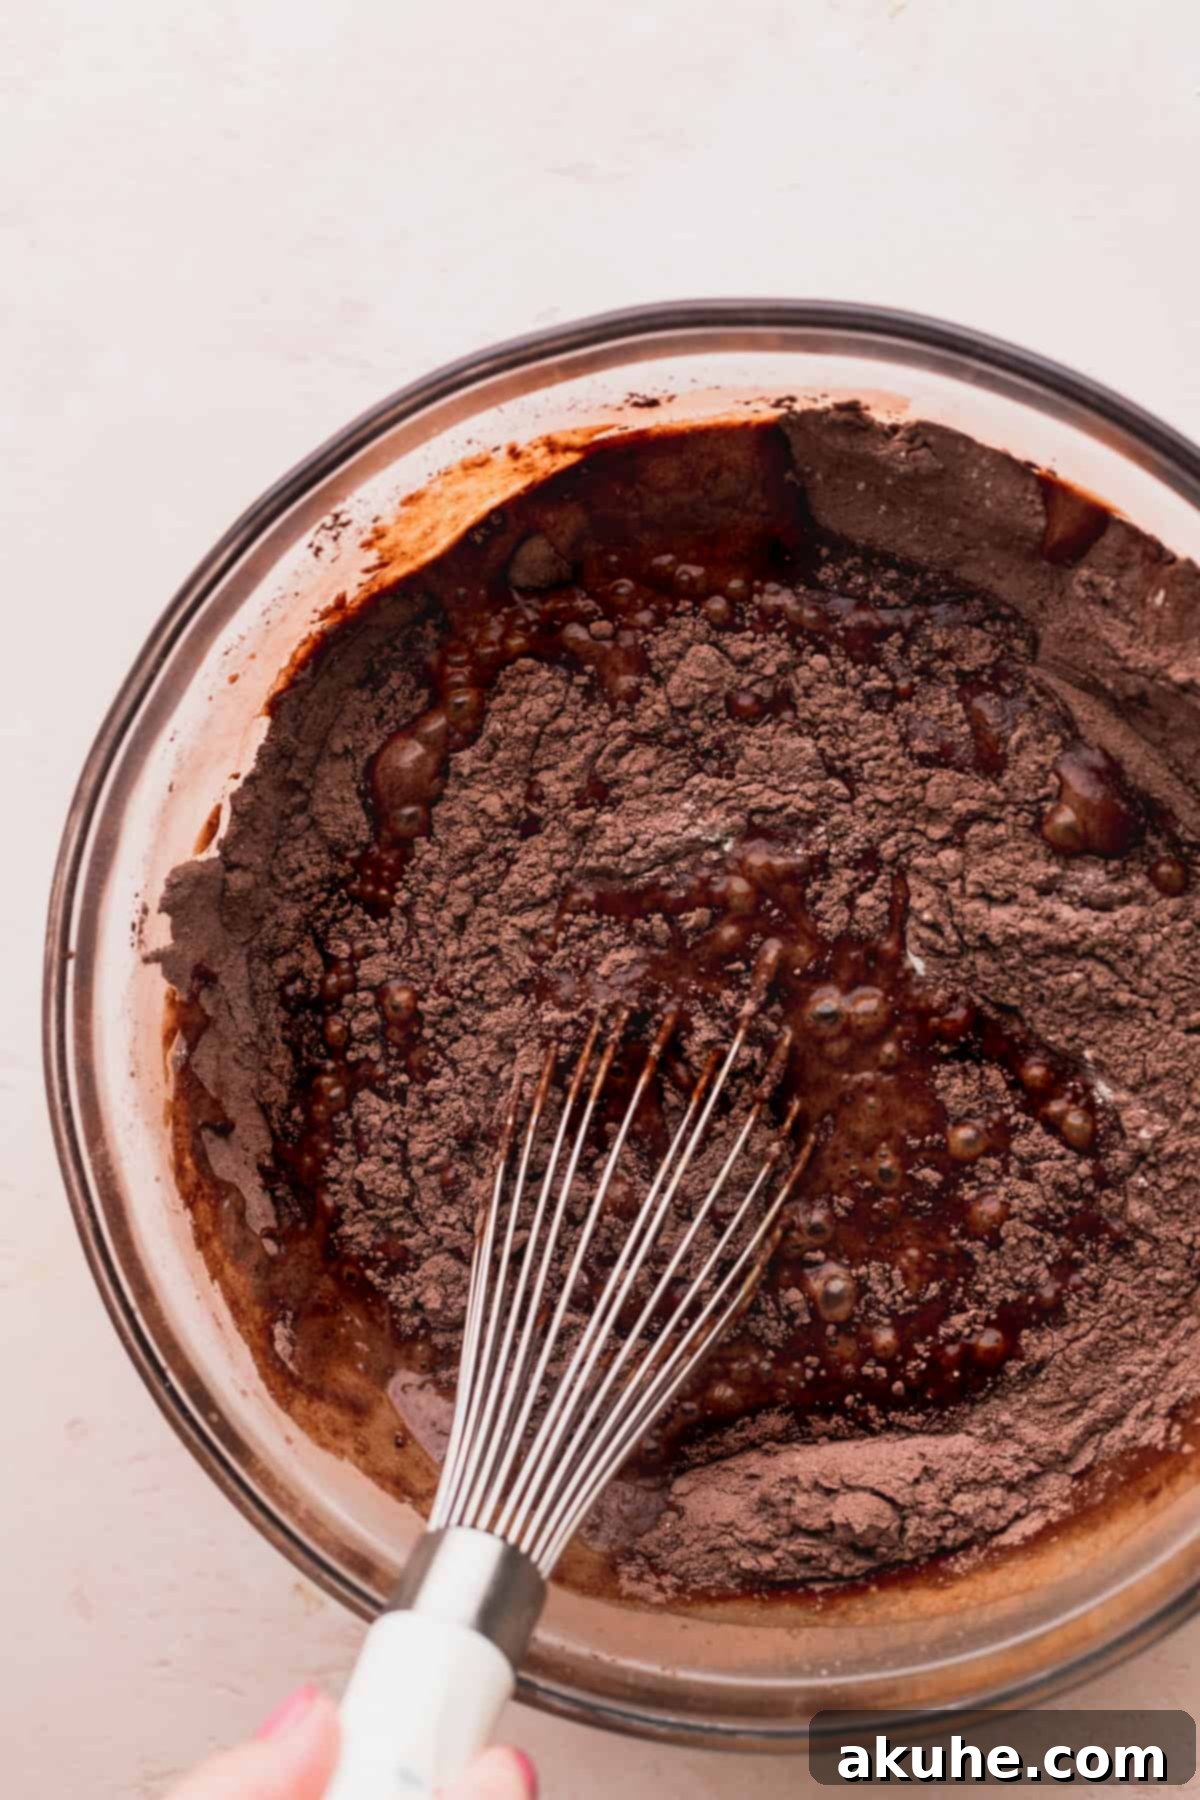
- Combine Dry Ingredients: In a large mixing bowl, meticulously sift together the all-purpose flour and Dutch process cocoa powder to eliminate any lumps and aerate the mixture. Then, whisk in the granulated sugar, baking powder, baking soda, and salt. Set this dry mixture aside.
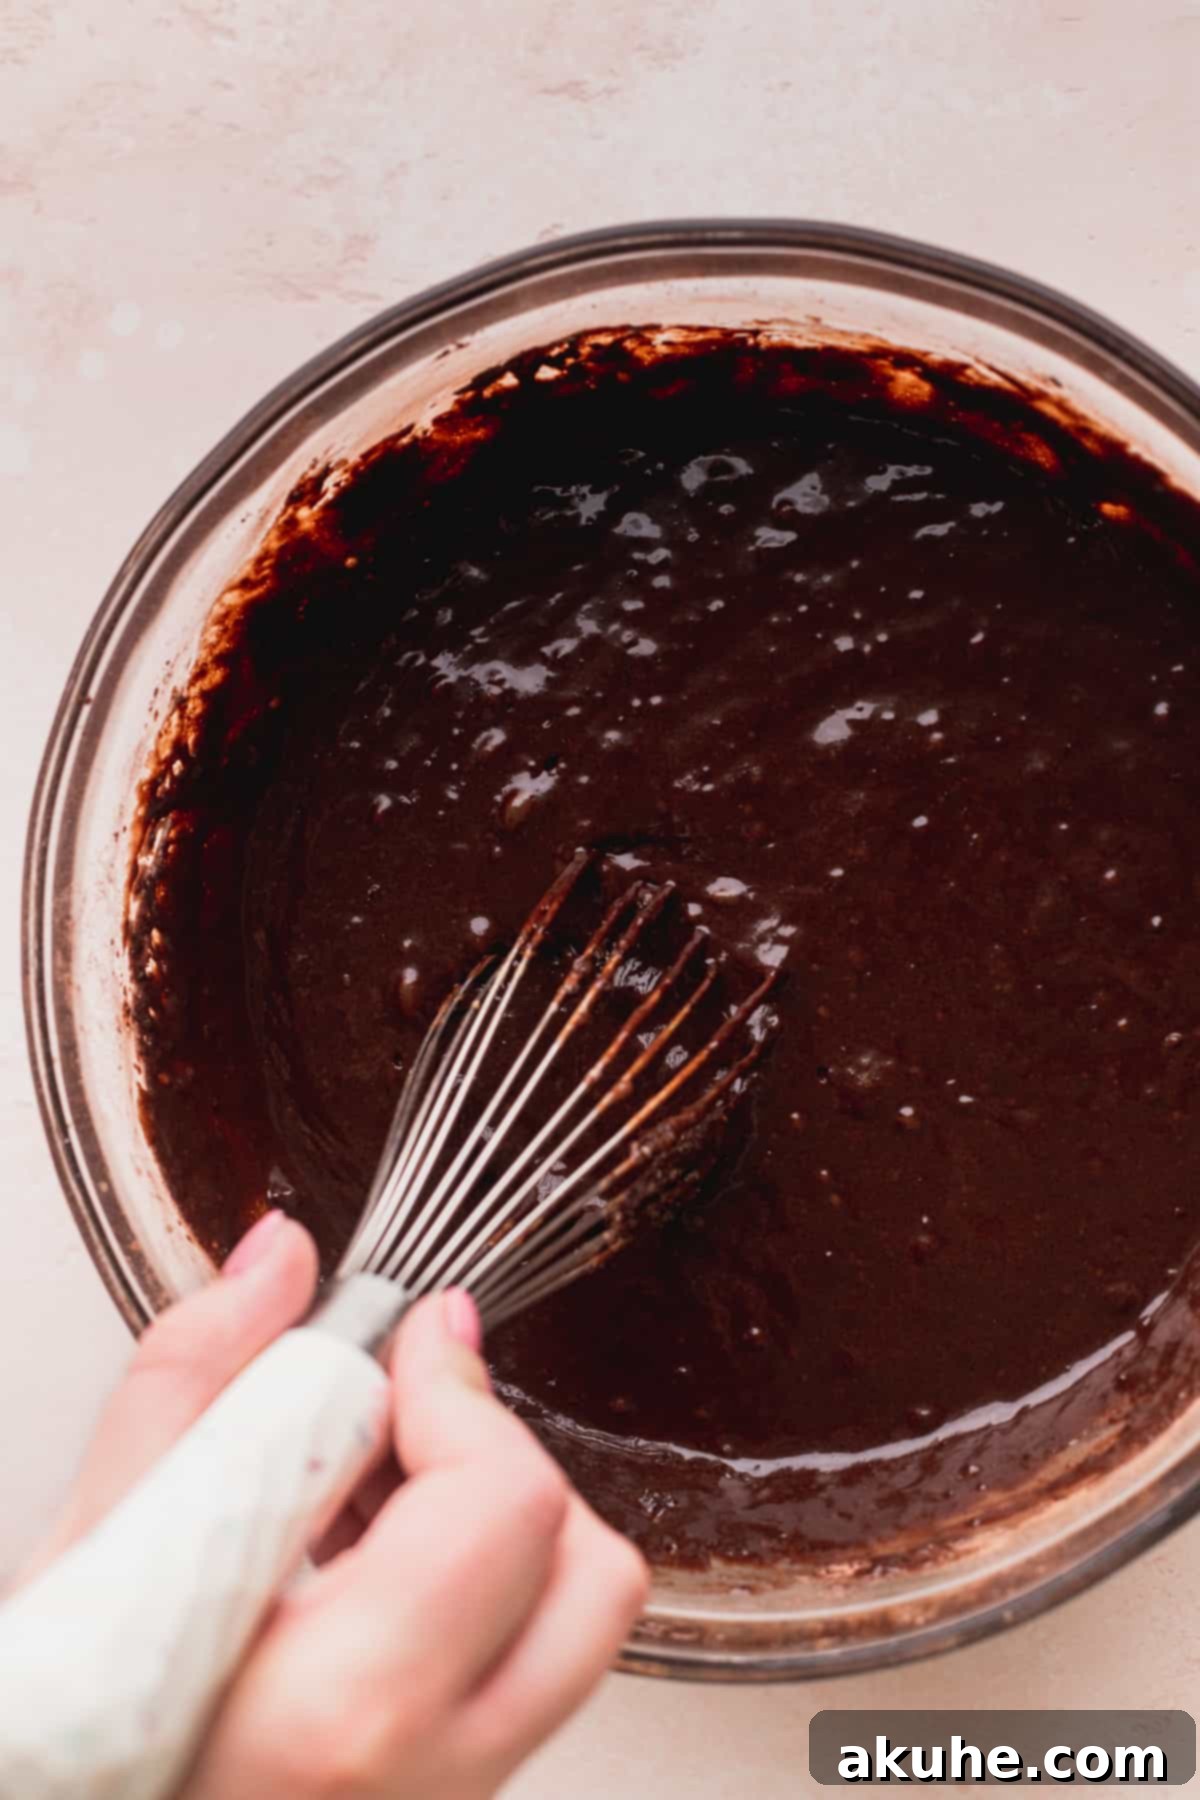
- Prepare Wet Ingredients: In a separate bowl, combine the oil, pure vanilla extract, room-temperature buttermilk, and room-temperature large eggs. Stir until well blended. Slowly pour in the slightly cooled melted chocolate, mixing gently. Now, carefully add the steaming hot water (or coffee) to the wet ingredients. Pour it in gradually, whisking continuously, to prevent the eggs from cooking.
- Form the Cake Batter: Pour the entire wet ingredient mixture into the bowl with the dry ingredients. Gently whisk until just combined. Be careful not to overmix, as this can lead to a tough cake. Overmixing develops the gluten in the flour too much. Divide the batter evenly among the three prepared 8-inch cake pans.
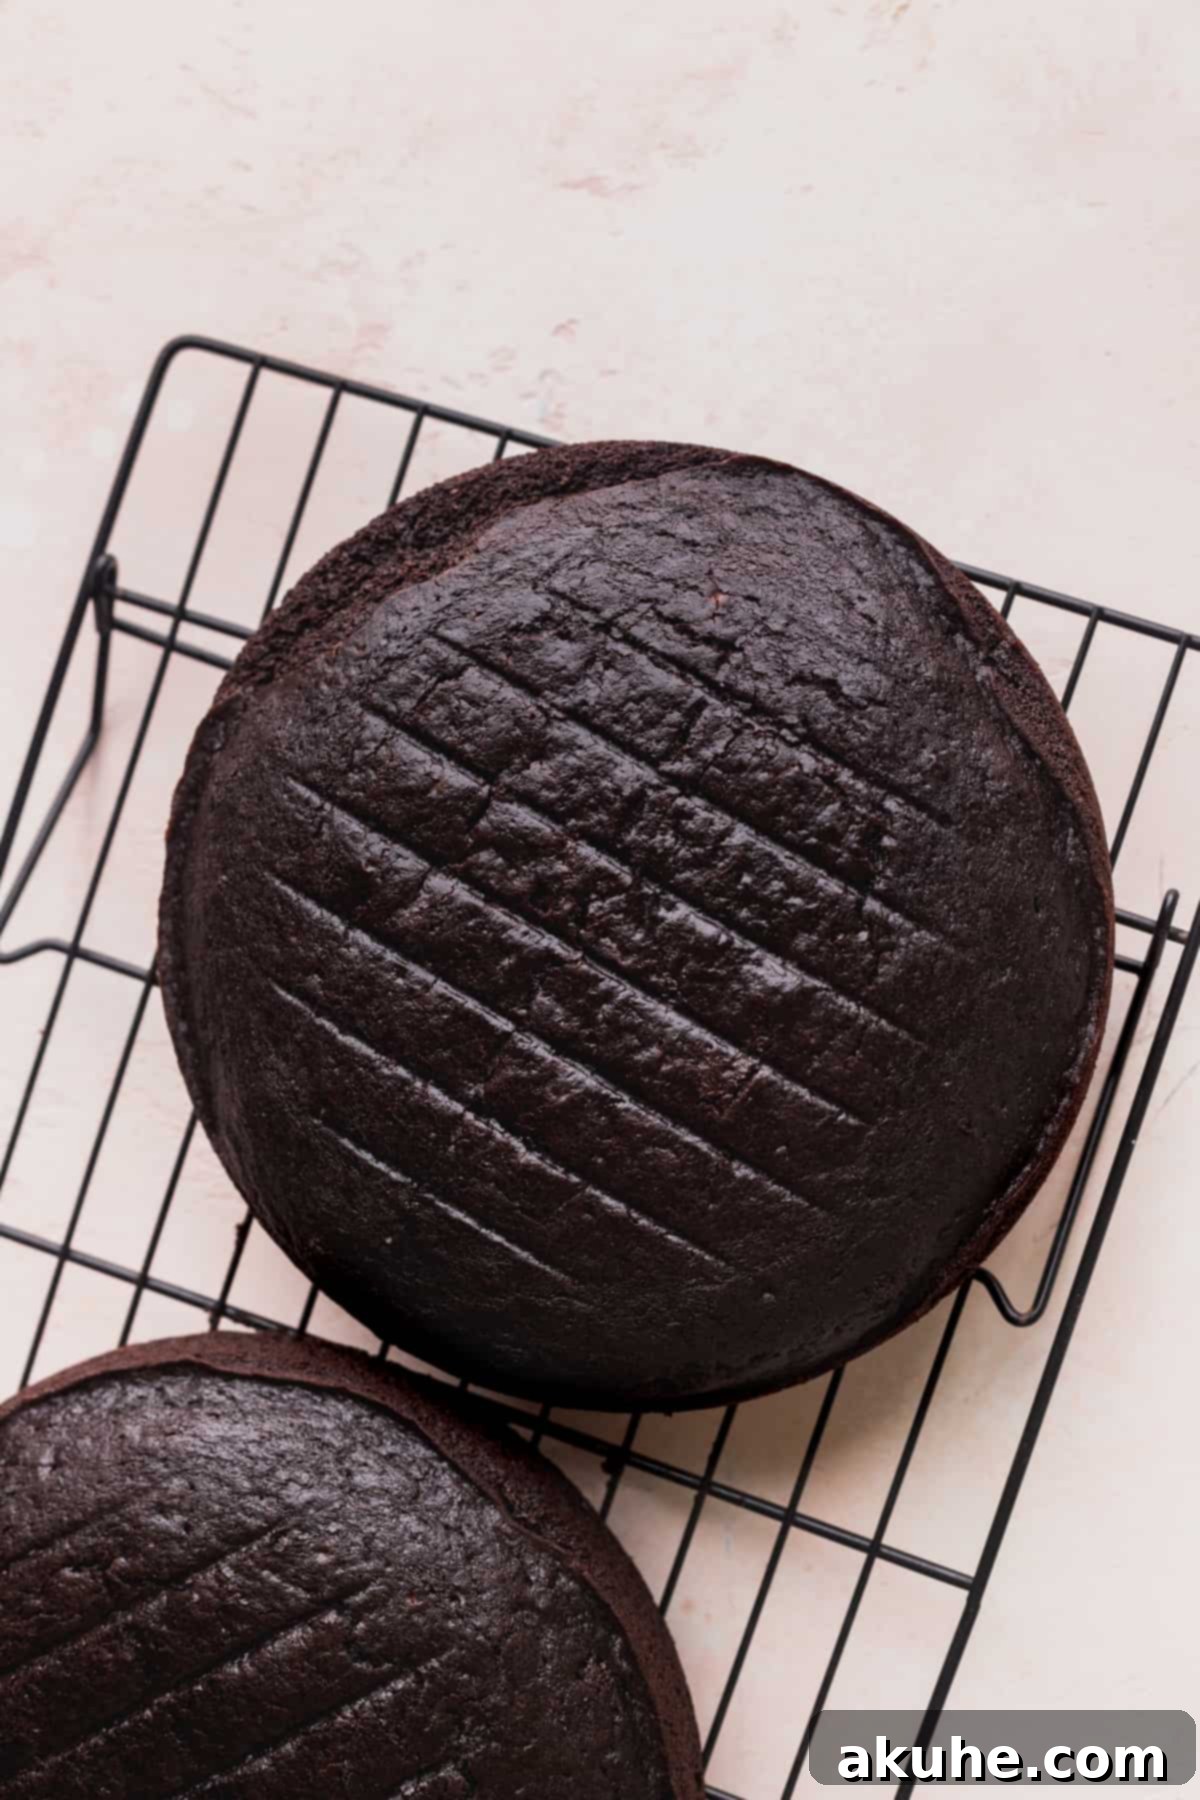
- Bake to Perfection: Transfer the cake pans to the preheated oven and bake for approximately 25-28 minutes, or until a wooden toothpick inserted into the center of a cake comes out clean with no wet batter clinging to it. The exact baking time may vary based on your oven.
- Cool Completely: Once baked, let the cakes cool in their pans for about 10-15 minutes. This allows them to firm up slightly before you attempt to remove them. After 10-15 minutes, carefully invert the cakes onto a wire cooling rack and allow them to cool completely to room temperature before attempting to frost. Chilling the cooled cakes further in the freezer can also make them easier to handle during assembly.
Creating the Luscious Strawberry Cream Cheese Frosting
- Prepare Strawberries and Sugar: To achieve a slightly cold butter, take it out of the fridge for about 30 minutes before starting the frosting. Meanwhile, sift the powdered sugar into a large bowl to ensure a smooth, lump-free frosting. Using a blender or food processor, grind the freeze-dried strawberries into a fine powder and mix them thoroughly with the sifted powdered sugar. This step is crucial for achieving that intense, natural strawberry flavor and vibrant color.
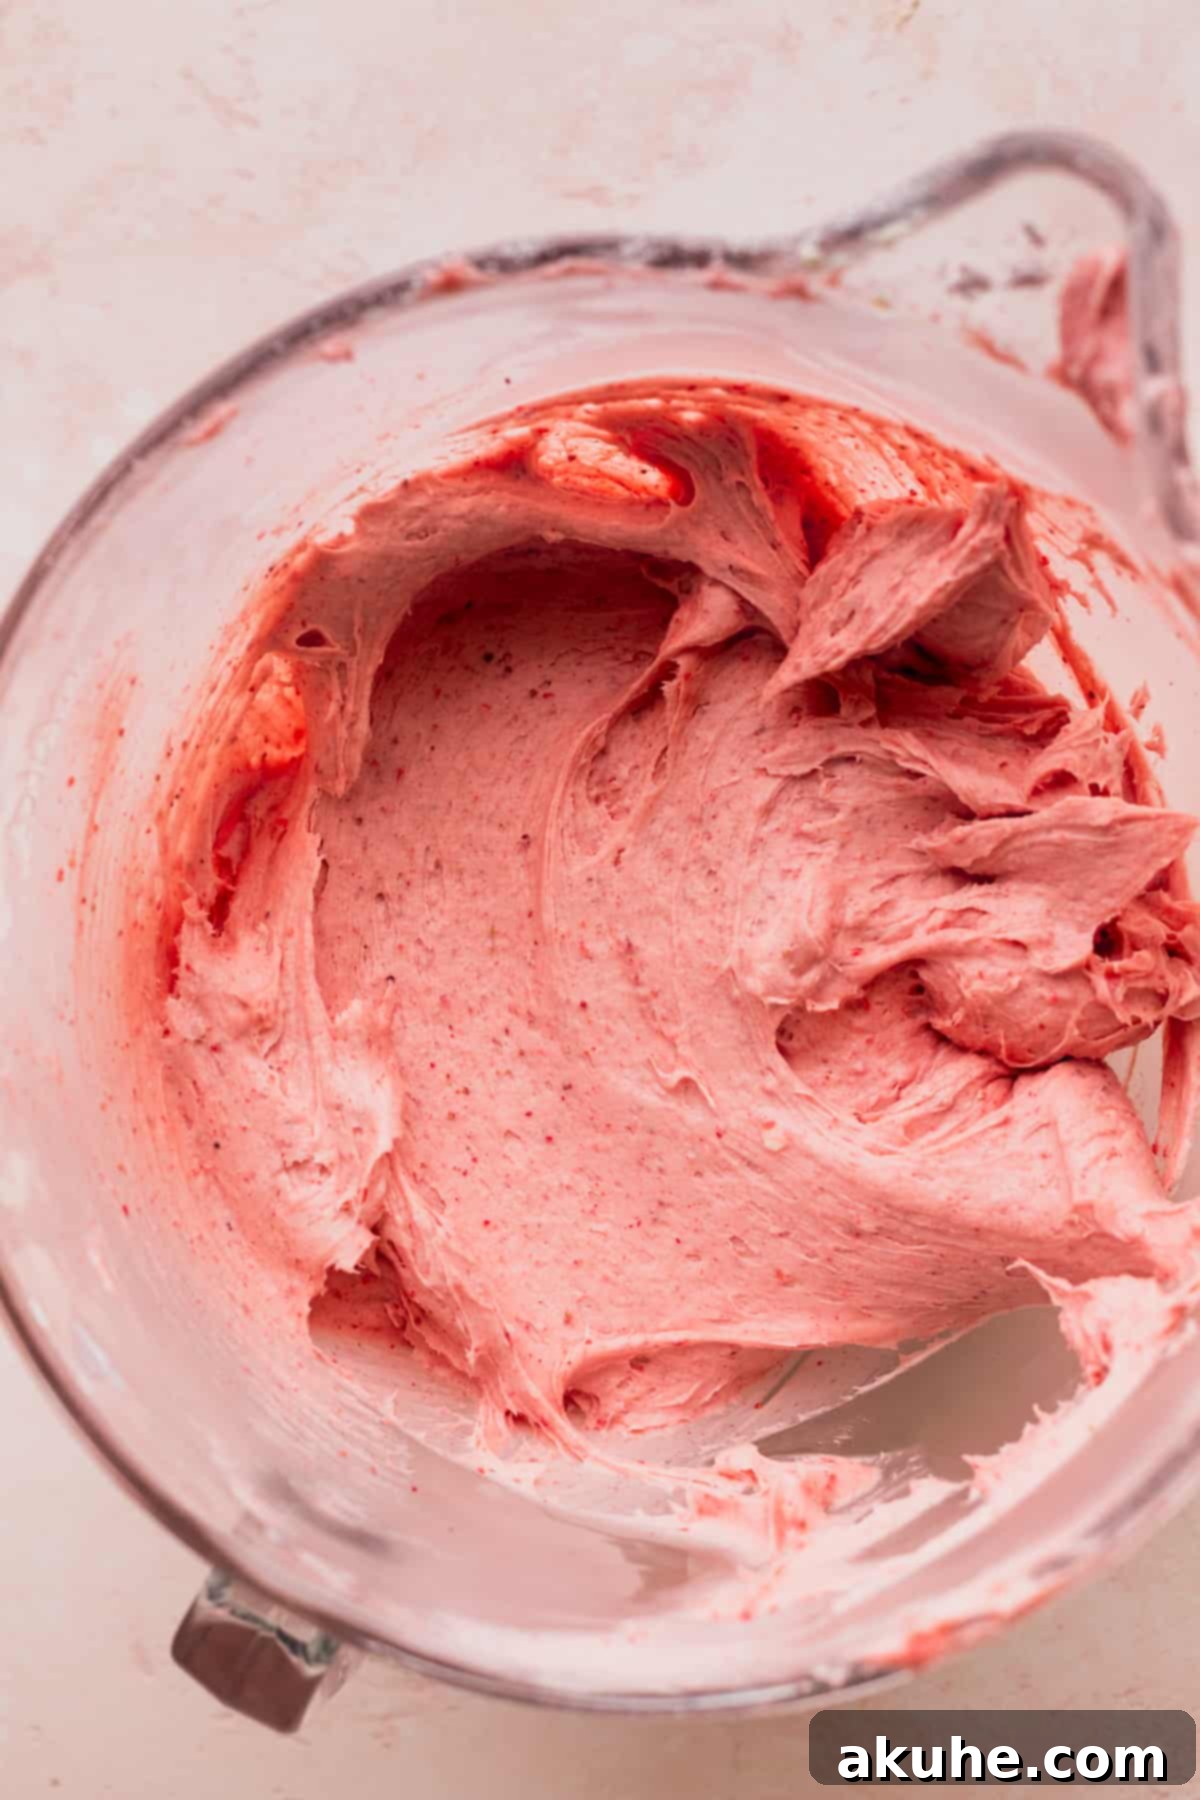
- Cream Butter and Cream Cheese: In the bowl of a stand mixer fitted with the paddle attachment, or using a hand mixer, beat the slightly cold unsalted butter and room-temperature full-fat cream cheese together on high speed for 2-3 minutes. Scrape down the sides and bottom of the bowl frequently to ensure everything is thoroughly combined and creamy. This step is vital for creating an airy and smooth frosting base.
- Add Remaining Ingredients: With the mixer on low speed, slowly add the powdered sugar and ground freeze-dried strawberry mixture to the butter and cream cheese. Mix until just combined. Then, pour in the pure vanilla extract, salt, and heavy cream. Increase the mixer speed to high and beat for another 1-2 minutes until the frosting is light, fluffy, and perfectly smooth. Avoid over-beating once the powdered sugar is incorporated, as this can incorporate too much air and make the frosting less stable.
Expert Tips for Assembling Your Masterpiece Cake
Assembling a layered cake can seem daunting, but with a few professional tips, you can achieve a beautifully smooth and stable finish. The key is patience and temperature control:
- Chill Your Cake Layers: Your cake layers will be significantly easier to handle and frost if they are cold. Once your brownie cake layers have cooled completely on a wire rack, wrap them individually in plastic wrap and place them in the freezer for at least 30 minutes, or even an hour, while you prepare your frosting. Cold cakes are less prone to tearing and produce fewer crumbs, making for a cleaner finish. If your cakes have any domes, use a serrated knife to level them, creating flat surfaces for stable layers.
- Secure the First Layer: Before placing your first cake layer, dollop a small amount of frosting onto the center of your serving plate or cake stand. This acts as an adhesive, securing the cake and preventing it from sliding around during frosting.
- Layer and Fill Evenly: Place the first chilled cake layer onto your prepared board. Using an offset spatula or a piping bag, spread approximately 1 cup of strawberry cream cheese frosting evenly over the top, extending almost to the edges. Repeat this process with the second cake layer. Finally, place the last cake layer on top, ensuring all layers are stacked as straight as possible.
- The Essential Crumb Coat: To prevent crumbs from marring your beautiful outer frosting layer, apply a very thin “crumb coat.” This is a light, almost transparent layer of frosting spread over the entire cake (top and sides). You should still be able to see parts of the cake through this thin layer. The goal is to trap any loose crumbs. Once applied, place the cake back into the freezer for 15-20 minutes to firm up the crumb coat. This effectively locks in all the crumbs, providing a clean canvas for your final frosting.
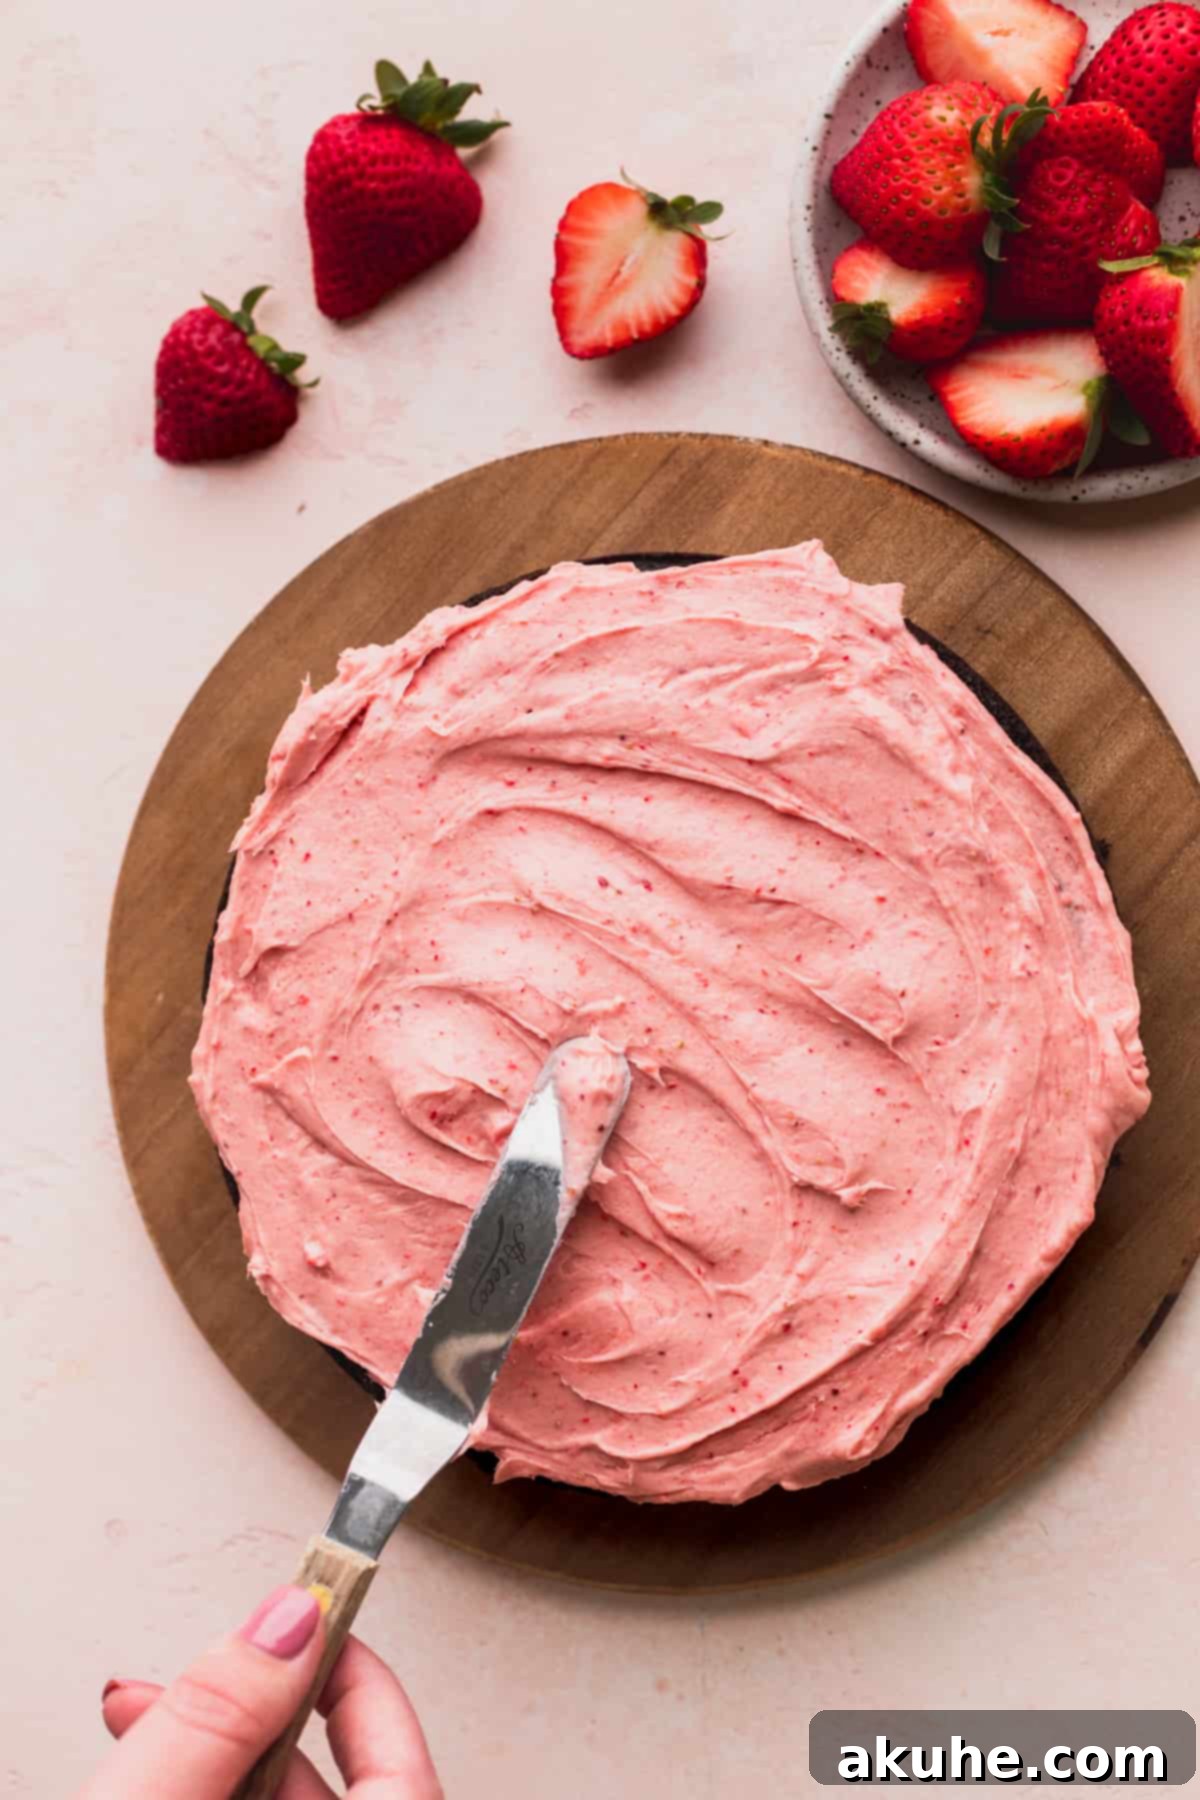
- Apply the Final Frosting Layer: After the crumb coat has chilled and hardened, remove the cake from the freezer. Now you can apply the remaining frosting more generously, creating a smooth and perfect finish. Use your offset spatula to spread and smooth the frosting over the top and sides of the cake. Take your time to achieve a professional look.
Decorating Your Chocolate Covered Strawberry Cake
The decoration is where your cake truly comes to life! The chocolate drip and chocolate-covered strawberries add that final touch of elegance and indulgence.
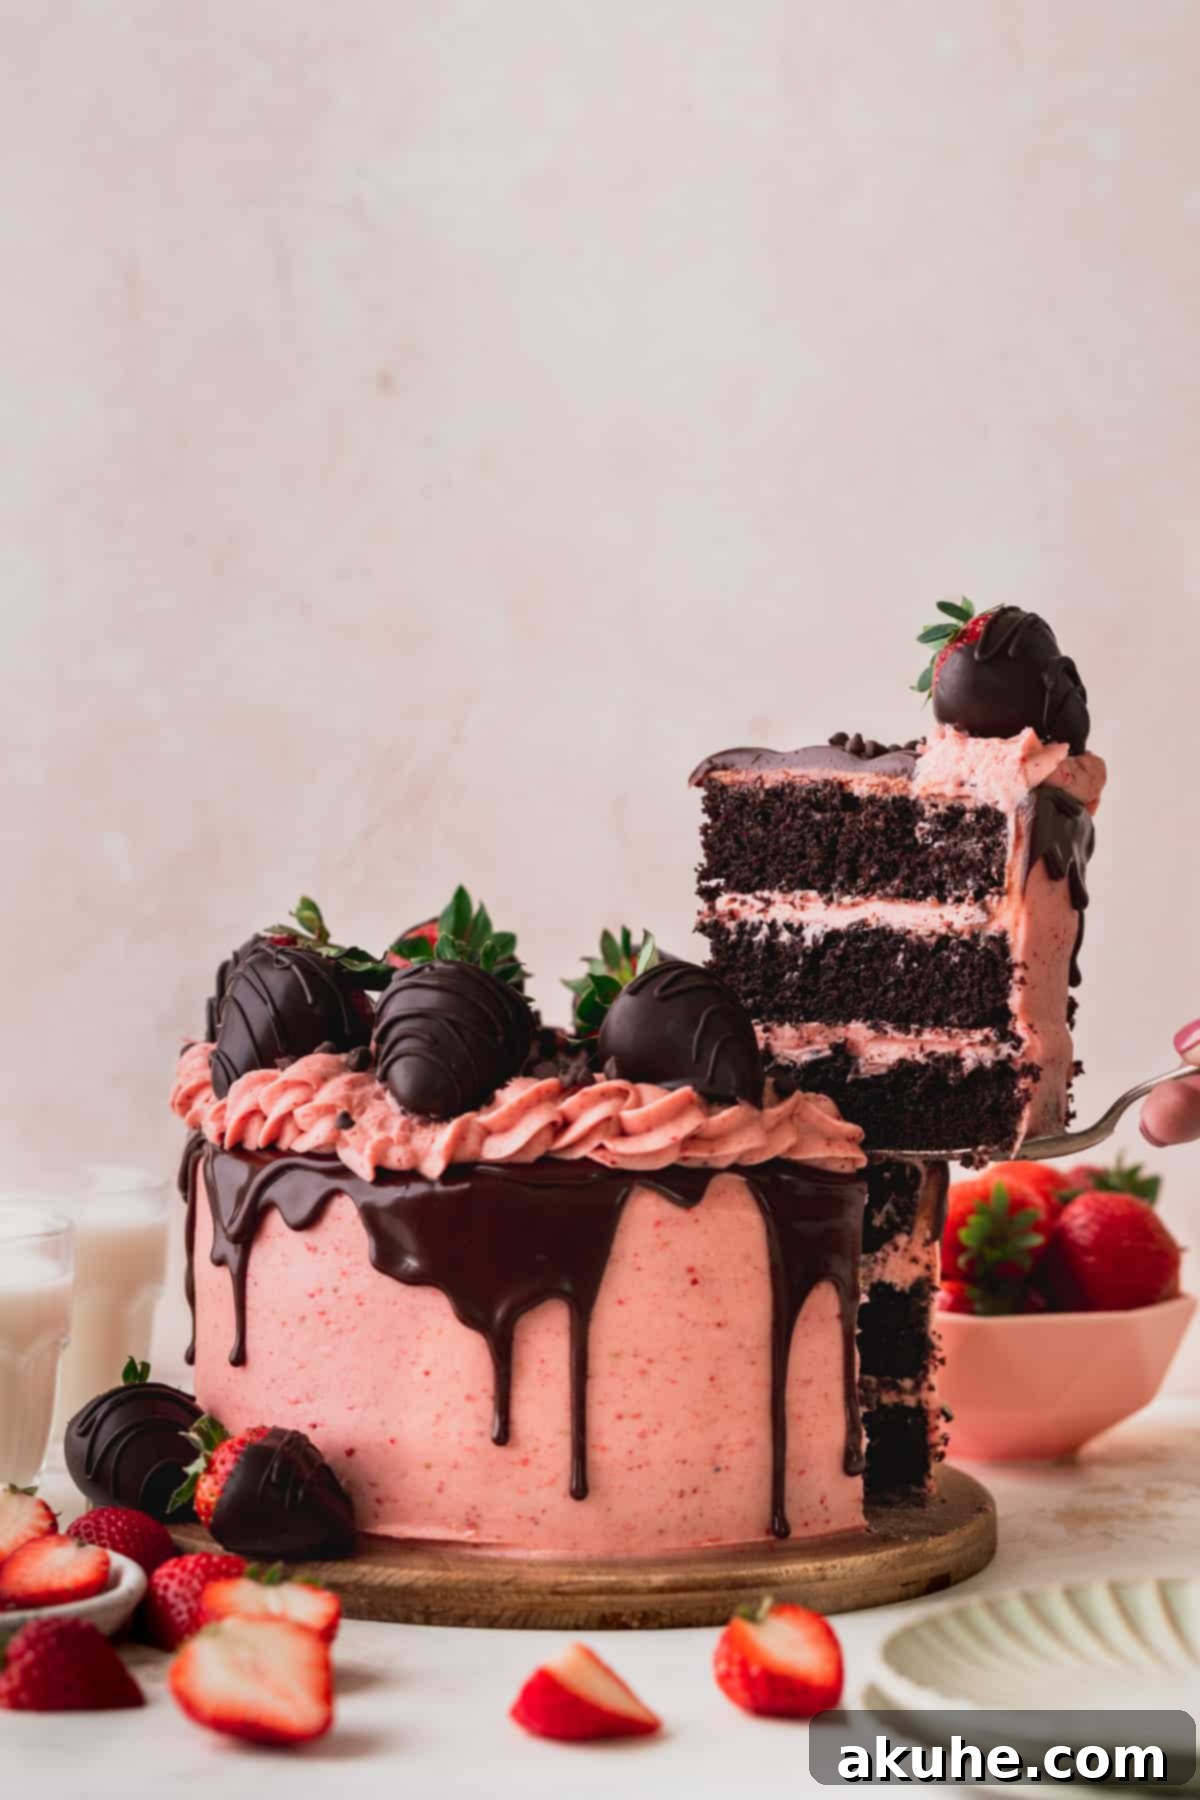
- Prepare for the Chocolate Drip: For the best chocolate drip, ensure your frosted cake is thoroughly chilled. After applying the final frosting layer, place the cake in the freezer for at least 10-15 minutes. This firm, cold surface helps the warm ganache set quickly upon contact, creating beautifully defined drips that won’t run too far down the cake.
- Mastering the Chocolate Ganache Drip: Prepare your chocolate ganache (instructions for this are in the recipe card below). It is crucial that the chocolate ganache is at room temperature – or slightly warm, but not hot – before you apply it. If it’s too hot, it will melt your frosting; if it’s too cold, it won’t drip smoothly. Pour about half of the ganache directly onto the center of the chilled cake. Using an offset spatula, gently push the ganache towards the edges, allowing it to naturally cascade down the sides in luscious drips. Alternatively, for more controlled drips, you can use a squeeze bottle to apply the ganache directly to the edges, creating individual drips of varying lengths.
- Extra Frosting for Piping: If you wish to pipe decorative elements on top of your cake, such as borders or swirls, you might need a little extra frosting. The recipe below provides specific quantities for additional strawberry cream cheese frosting that will give you ample volume for elaborate decorations. Remember to chill the cake again for 10 minutes after applying the drip, before adding any piped decorations. This ensures the ganache is set and won’t be disturbed.
Additional Frosting for Elaborate Decorations
Should you desire more frosting for intricate piping work or a thicker overall layer, use the following quantities:
- 10 oz Cream cheese (full fat, room temperature)
- 2 cups Unsalted butter (slightly cold)
- 8 cups Powdered sugar (sifted)
- 2 oz Freeze-dried strawberries (grounded)
- 1 tsp Vanilla extract (pure)
- 1/2 tsp Salt
- 1/2 cup Heavy cream
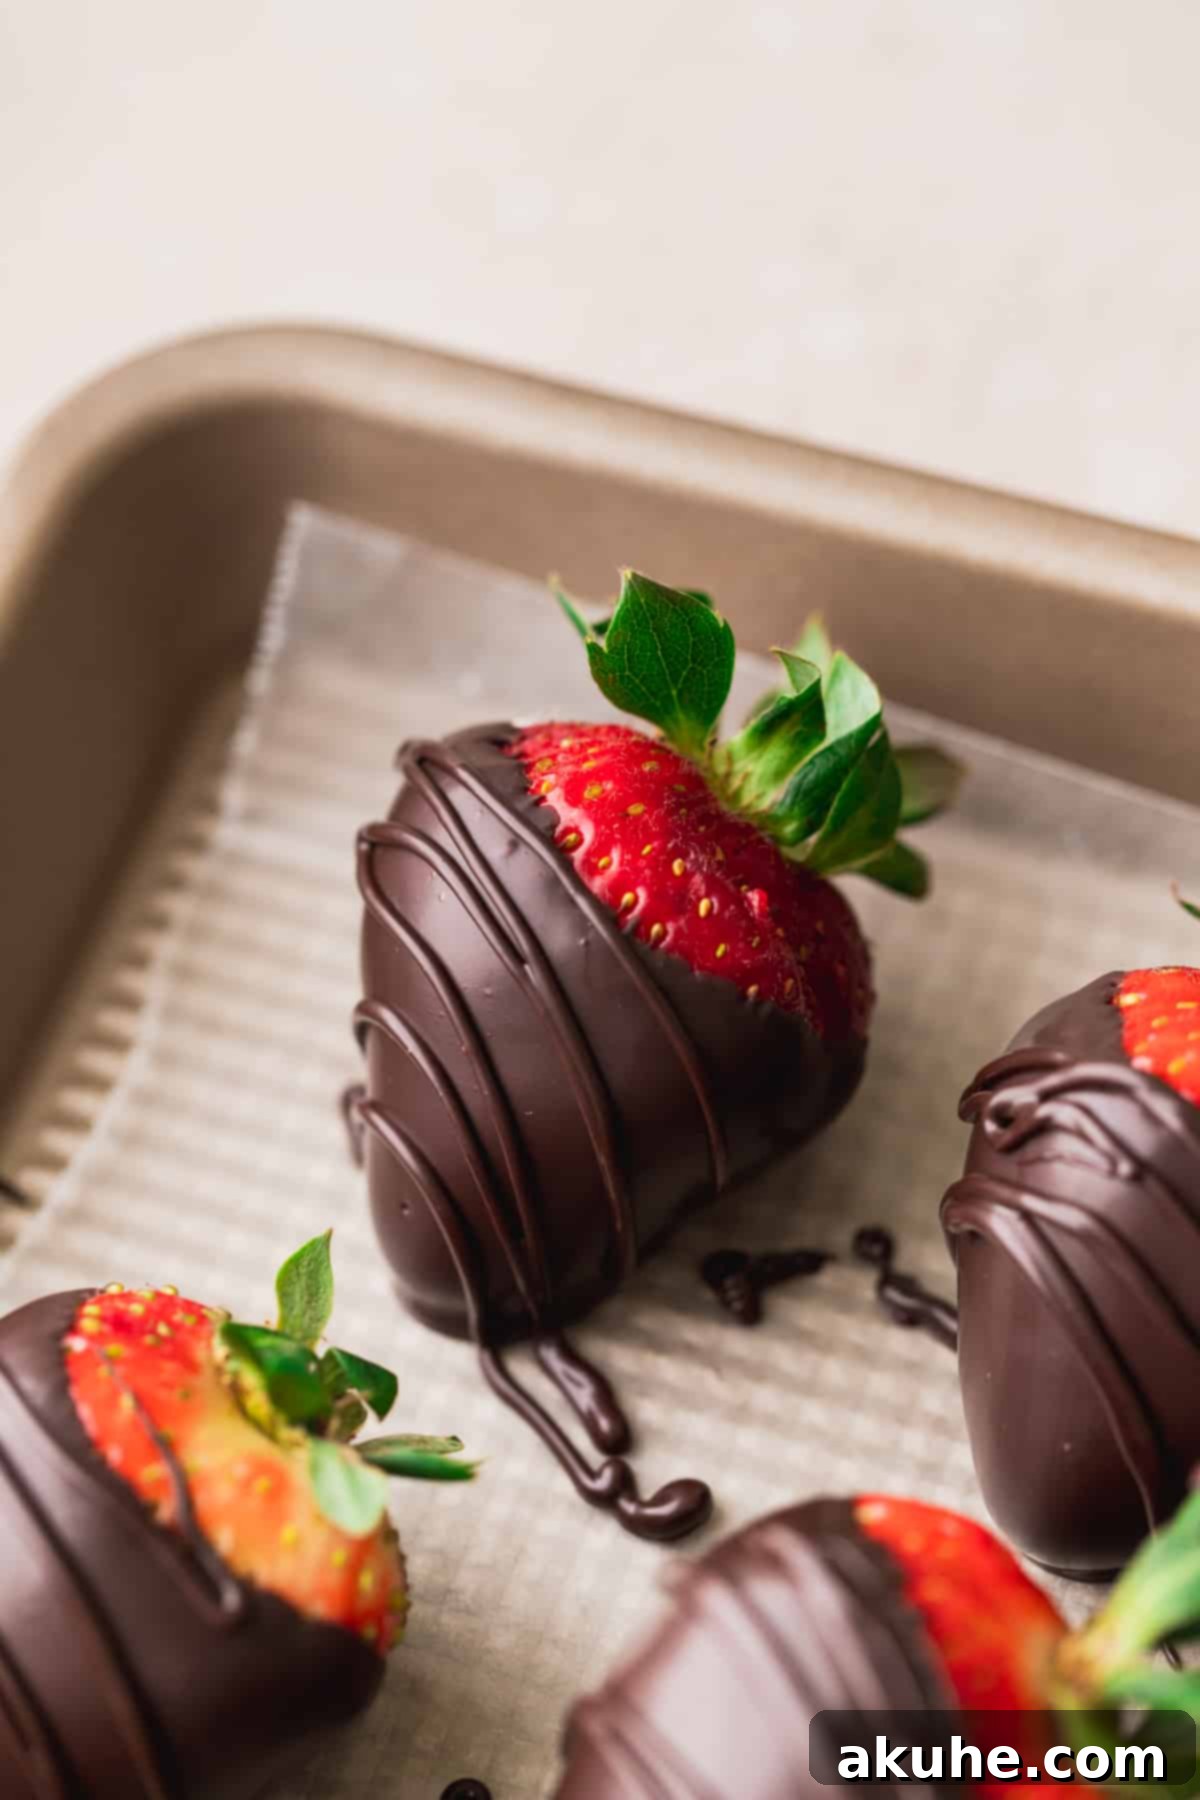
Crafting Perfect Chocolate Covered Strawberries
These elegant toppings are surprisingly simple to make and add a beautiful fresh element to your cake:
- Choose Your Chocolate: For the best results, use chocolate melting wafers or high-quality chocolate chips for dipping. These are formulated to melt smoothly and harden quickly, creating a crisp, shiny shell around your strawberries. You can find excellent options at most grocery stores or craft stores.
- Prepare Your Strawberries: The most crucial step is to ensure your strawberries are completely dry. Any moisture will cause the chocolate to seize or not adhere properly. Gently wash the strawberries and then meticulously pat them dry with paper towels. Leave the green caps on for an attractive presentation and an easy handle for dipping.
- Melt the Chocolate: Melt your chosen chocolate using a double boiler method or in the microwave in short intervals (30 seconds at a time), stirring thoroughly after each interval until smooth and fully melted.
- Dip and Chill: Hold each strawberry by its green cap and dip it into the melted chocolate, twirling gently to coat about two-thirds of the berry. Allow any excess chocolate to drip off. Place the dipped strawberries on a baking sheet lined with wax paper or parchment paper. Once all strawberries are dipped, refrigerate them for about 15-20 minutes, or until the chocolate has completely set and is firm to the touch. Once hardened, they are ready to adorn your cake.
Frequently Asked Questions About This Delicious Cake
- How long do chocolate-covered strawberries last on the cake?
- For the best quality and appearance, chocolate-covered strawberries are best enjoyed within 1 to 3 days when stored on the cake in the refrigerator. After this period, the strawberries may start to soften, release moisture, and eventually spoil, impacting both the texture and the chocolate coating.
- Can this recipe be adapted to make cupcakes?
- Absolutely! This versatile recipe can easily be transformed into delicious cupcakes. Simply halve the cake and frosting recipe quantities to yield approximately 12 standard-sized cupcakes. The baking time will also be significantly shorter, typically ranging from 18-22 minutes, or until a toothpick inserted into the center comes out clean.
- What other size cake pans can I use for this recipe?
- This recipe is quite adaptable to various pan sizes. For alternative layer cakes, you could use three to four thick 6-inch cake layers (adjusting baking time), two 9-inch cake layers (which will be slightly thicker and require a longer baking time), or two thinner 10-inch layers. If you prefer a single-layer sheet cake, you can bake the entire batter in a 9×13-inch cake pan, which will yield a delightful, easy-to-serve dessert. Adjust baking times accordingly and always rely on the toothpick test for doneness.
Storing and Freezing Your Chocolate Covered Strawberry Cake
To ensure your chocolate covered strawberry cake remains fresh and delicious, proper storage is essential. Given its cream cheese frosting, refrigeration is key.
This cake should be stored in the refrigerator within an airtight container. When stored correctly, it will maintain its peak freshness and flavor for up to 5 days. For the absolute best flavor and texture experience, allow the cake to come to room temperature for at least 30 minutes to an hour before serving. This allows the frosting to soften slightly and the chocolate cake to become incredibly moist and tender.
Freezing for Future Indulgence
This recipe is also excellent for preparing ahead or saving leftovers:
- Freezing Cake Layers: The baked brownie cake layers can be frozen well in advance. Once completely cooled, wrap each cake layer tightly in several layers of plastic wrap, then an additional layer of aluminum foil. This double wrapping protects against freezer burn. Frozen cake layers can be stored for up to 30 days. When ready to use, thaw them in the refrigerator overnight or at room temperature for about an hour before unwrapping and decorating.
- Freezing Individual Slices: If you have leftover slices of the fully assembled and frosted chocolate covered strawberry cake, you can freeze them for later enjoyment. Wrap individual slices tightly in plastic wrap, ensuring they are completely sealed, and then place them in a freezer-safe container or bag. These individual portions can be frozen for up up to 30 days. To serve, simply remove a slice from the freezer and let it thaw at room temperature for 1-2 hours until softened. This is a perfect way to have a delightful treat ready whenever a craving strikes!
More Cake Recipes to Explore
If you loved creating this chocolate covered strawberry cake, be sure to explore more delightful recipes on the blog! Your feedback is highly valued – please take a moment to leave a star review below and share your experience!
Don’t forget to tag me on Instagram @stephaniesweettreats if you make this cake. I love seeing your creations! For more baking inspiration and ideas, be sure to follow me on Pinterest.
Chocolate Covered Strawberry Cake
This chocolate covered strawberry cake features three incredibly moist brownie-style chocolate layers. It’s generously filled and topped with a luscious strawberry cream cheese frosting, beautifully finished with a rich chocolate ganache drip, and crowned with elegant chocolate-covered strawberries. A truly show-stopping dessert for any special occasion.
Print Recipe
Pin Recipe
Leave a Review
Ingredients
Brownie Cake
- 2 1/2 cups All-purpose flour
- 1 cup Dutch process cocoa powder
- 1 3/4 cup White granulated sugar
- 2 1/2 tsp Baking powder
- 1 1/2 tsp Baking soda
- 1 tsp Salt
- 3.5 oz Semi-sweet chocolate bar, melted (Lindt 70% recommended)
- 3/4 cup Oil (canola or vegetable)
- 2 tsp Pure vanilla extract
- 1 1/4 cup Buttermilk, room temperature
- 4 Large eggs, room temperature
- 3/4 cup Hot water, steaming
Strawberry Cream Cheese Frosting
- 8 oz Cream cheese, room temperature (full fat)
- 1 1/2 cups Unsalted butter, slightly cold
- 6 cups Powdered sugar, sifted
- 2 oz Freeze dried strawberries, finely grounded
- 1 tsp Pure vanilla extract
- 1/2 tsp Salt
- 1/3 cup Heavy cream
Chocolate Drip
- 1 cup Semi-sweet chocolate chips
- 3/4 cup Heavy cream
- Chocolate covered strawberries (for topping, see instructions below)
Instructions
Brownie Cake
- Preheat oven to 350°F (175°C). Spray three 8-inch cake pans with baking spray. Line the bottoms of the pans with 8-inch parchment circles and spray again.
- Melt the semi-sweet chocolate bar in the microwave in 30-second intervals, stirring well after each, until smooth. Set aside to cool.
- In a large mixing bowl, sift together the all-purpose flour and Dutch process cocoa powder. Add in granulated sugar, baking powder, baking soda, and salt. Whisk to combine. Set aside.
- In a separate bowl, mix the oil, pure vanilla extract, room-temperature buttermilk, and room-temperature large eggs. Stir until well combined. Heat the water on the stove until steaming (not boiling). Slowly mix the hot water into the wet ingredients, whisking continuously to prevent the eggs from cooking.
- Pour the wet ingredients into the dry mixture. Whisk gently until just combined, being careful not to overmix. Divide the batter evenly among the three prepared cake pans.
- Bake for 25-27 minutes, or until a wooden toothpick inserted into the center of a cake comes out clean.
- Let the cakes cool in their pans for 10 minutes before transferring them to a wire cooling rack to cool completely. Ensure they are fully cooled before decorating.
Strawberry Cream Cheese Frosting
- Take unsalted butter out of the fridge 30 minutes before starting. Sift the powdered sugar into a large bowl. Using a blender or food processor, grind the freeze-dried strawberries into a fine powder and add to the sifted powdered sugar, mixing well.
- In a stand mixer, beat the slightly cold butter and room-temperature cream cheese on high speed for 2 minutes, scraping down the bowl as needed.
- Slowly add the powdered sugar/grounded strawberry mixture to the butter and cream cheese, mixing on low speed until combined. Add in the pure vanilla extract, salt, and heavy cream. Increase speed to high and beat for 1-2 minutes until light and fluffy.
Chocolate Drip (Ganache)
- Place the semi-sweet chocolate chips into a heatproof bowl. In a small saucepan over medium-low heat, heat the heavy cream until it is hot and steaming (just simmering, not boiling). Pour the hot cream over the chocolate chips.
- Let the mixture sit undisturbed for 1-2 minutes to allow the chocolate to melt. Then, stir with a whisk until the ganache is smooth and glossy. If any chocolate chunks remain, microwave in 15-second intervals, stirring after each, until smooth. Allow the ganache to cool to room temperature before pouring over the cake; if it’s too warm, it will melt the frosting.
Assembly
- Place the completely cooled cake layers in the freezer for 30 minutes to chill. If necessary, use a serrated knife to level any domes on the cakes for an even stack.
- Place a small dollop of frosting on your serving board or cake stand to secure the first cake layer in place.
- Place the first cake layer down. Spread about 1 cup of strawberry cream cheese frosting evenly over the top. Repeat with the second cake layer. Place the final cake layer on top.
- Apply a very light, thin layer of frosting over the entire cake (top and sides) as a “crumb coat.” You should still be able to see bits of the cake through this layer. Freeze the cake for 15-20 minutes to set the crumb coat and lock in any loose crumbs.
- Remove the cake from the freezer and apply the remaining frosting more generously to the top and sides, smoothing it out for a beautiful finish. Freeze the frosted cake for another 10 minutes before applying the drip.
- Apply the cooled chocolate ganache drip onto the chilled cake. You can pour half of the ganache on top and gently push it to the edges with an offset spatula, allowing it to naturally drip down, or use a squeeze bottle for more controlled drips.
- Finally, top the cake with your prepared chocolate-covered strawberries.
Notes
Flour: Always measure flour by spooning it into a measuring cup and leveling it off, or for best accuracy, use a kitchen scale. Compacted flour can result in a dry and dense cake.
High Altitude Baking: If baking at high altitudes, consider adding an extra 2 tablespoons of all-purpose flour to the cake batter to help stabilize the structure.
Temperature Matters: For optimal results, ensure all dairy ingredients (buttermilk, eggs, cream cheese, butter) are at room temperature. Take them out of the refrigerator at least 2 hours before you plan to start baking.
Nutrition Information (per slice, approx.)
Calories: 604kcal, Carbohydrates: 98g, Protein: 6g, Fat: 44g, Saturated Fat: 21g, Polyunsaturated Fat: 4g, Monounsaturated Fat: 16g, Trans Fat: 1g, Cholesterol: 84mg, Sodium: 459mg, Potassium: 272mg, Fiber: 4g, Sugar: 30g, Vitamin A: 971IU, Vitamin C: 43mg, Calcium: 101mg, Iron: 3mg
Please leave a star rating and review below!
