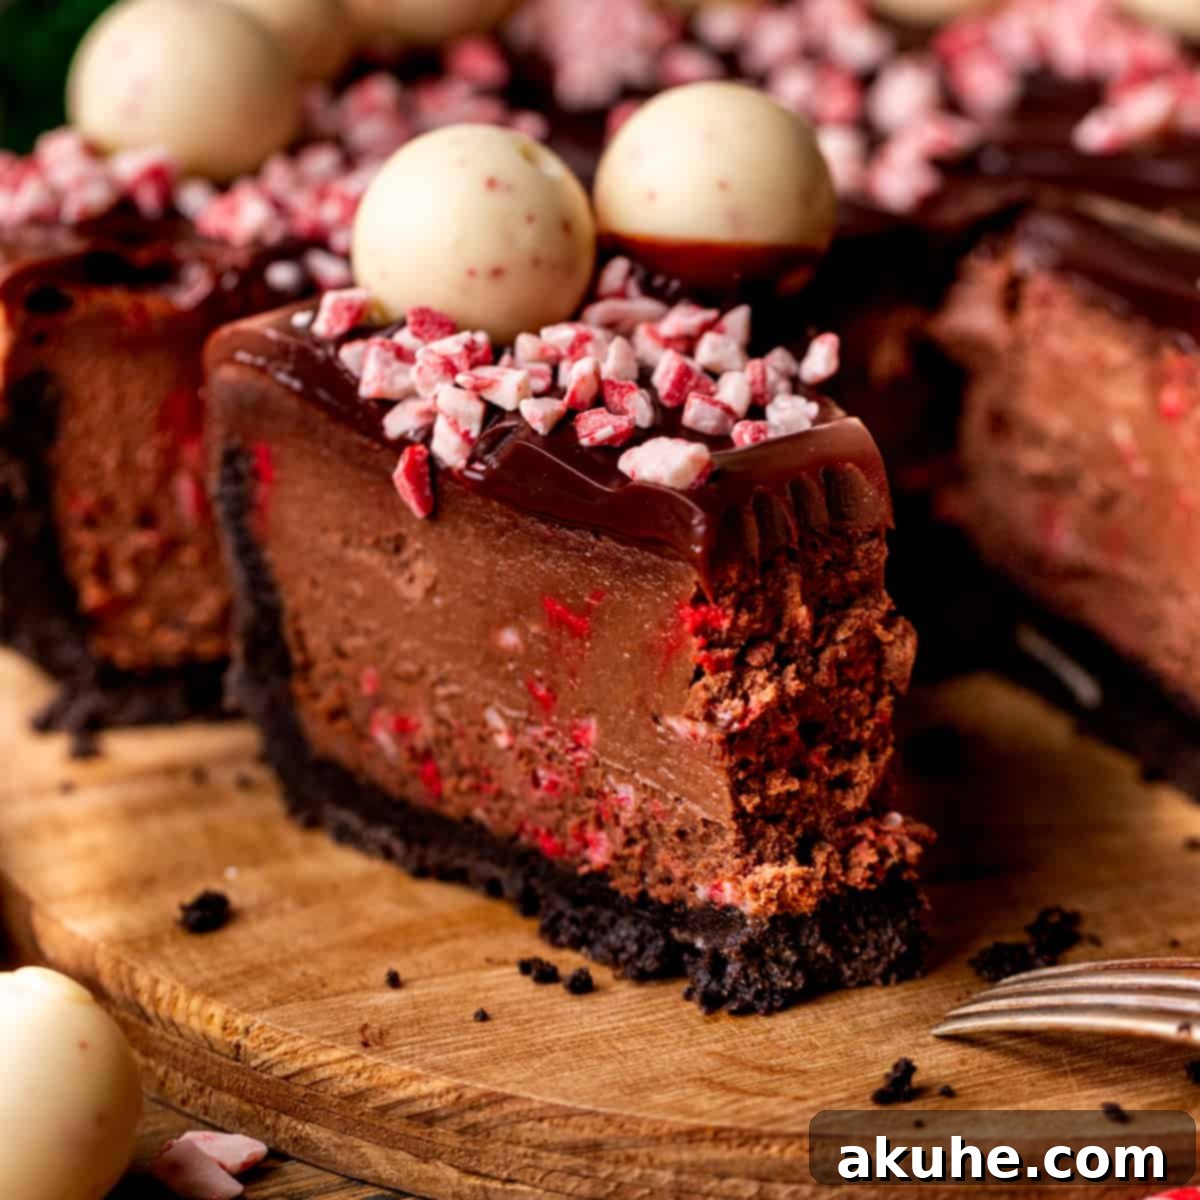
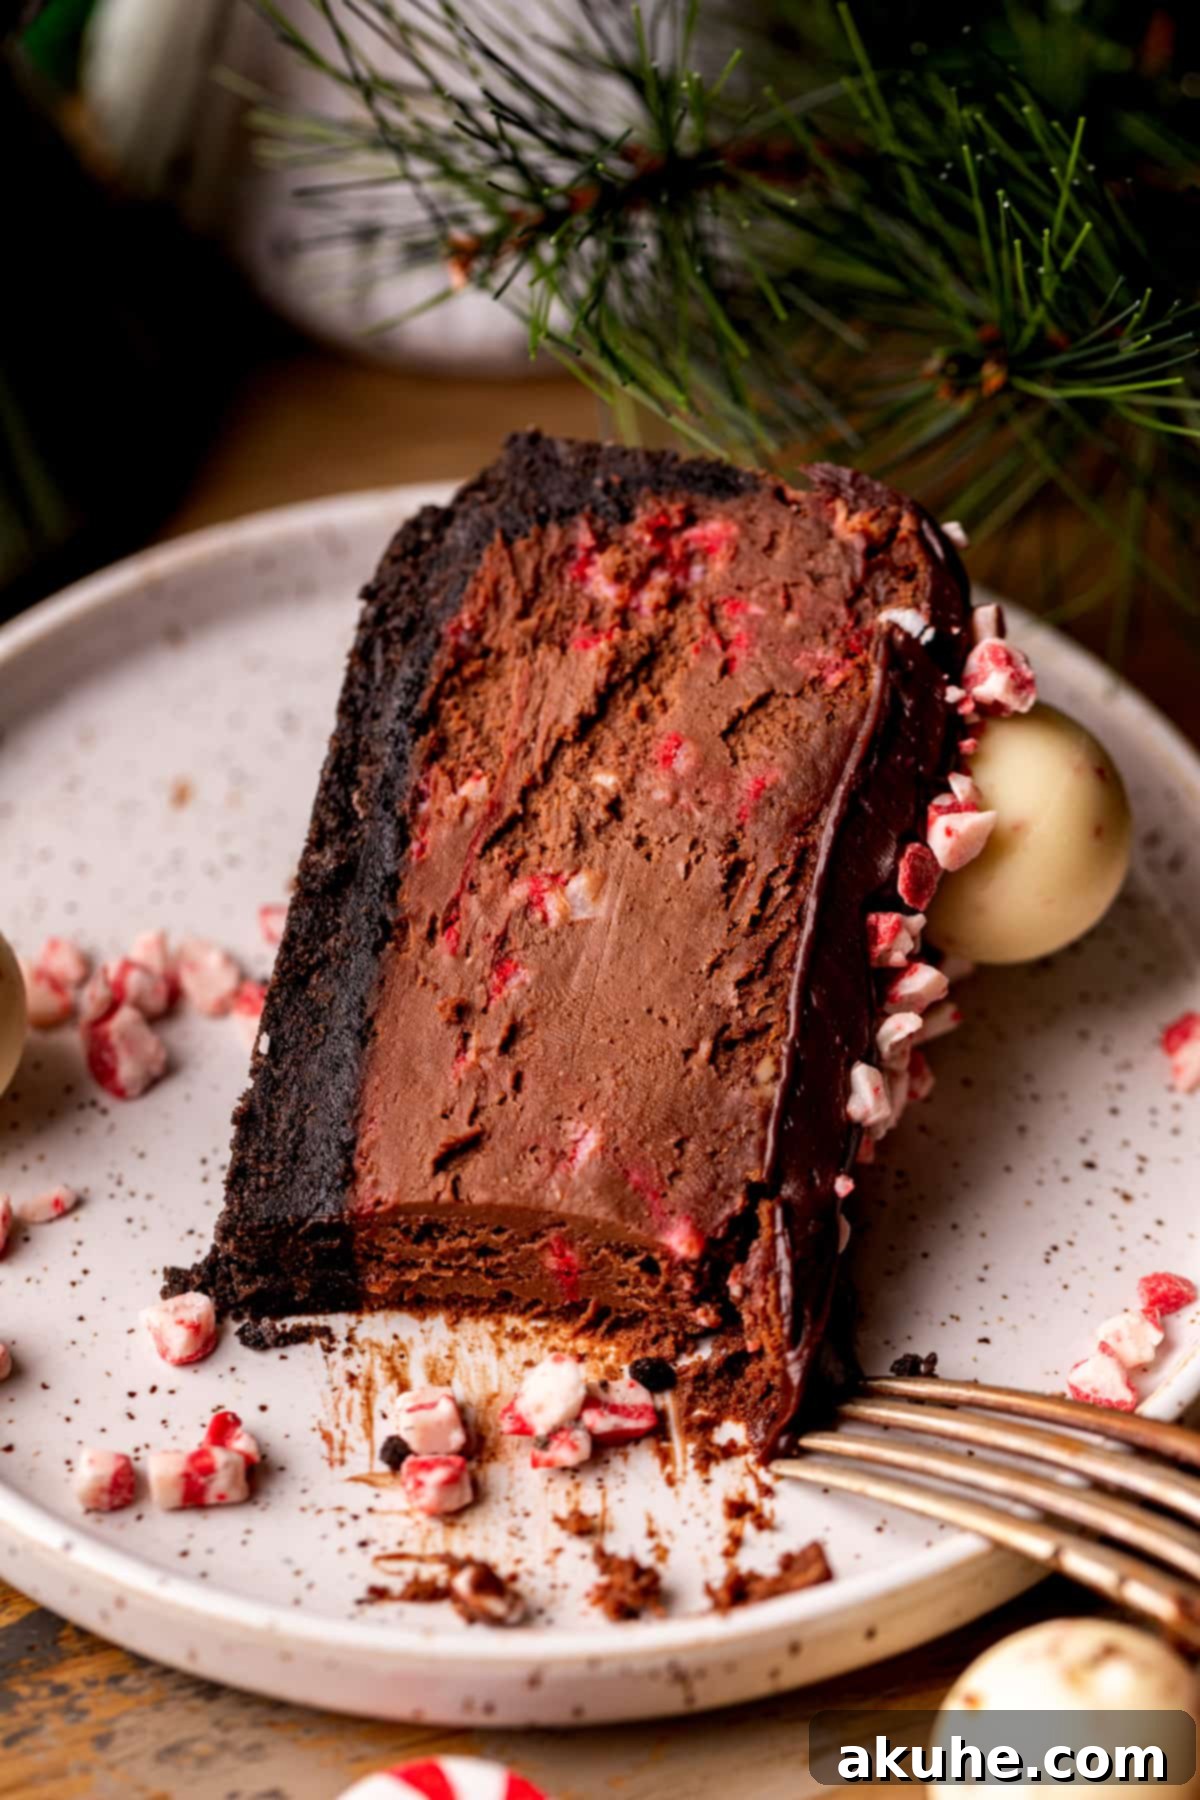
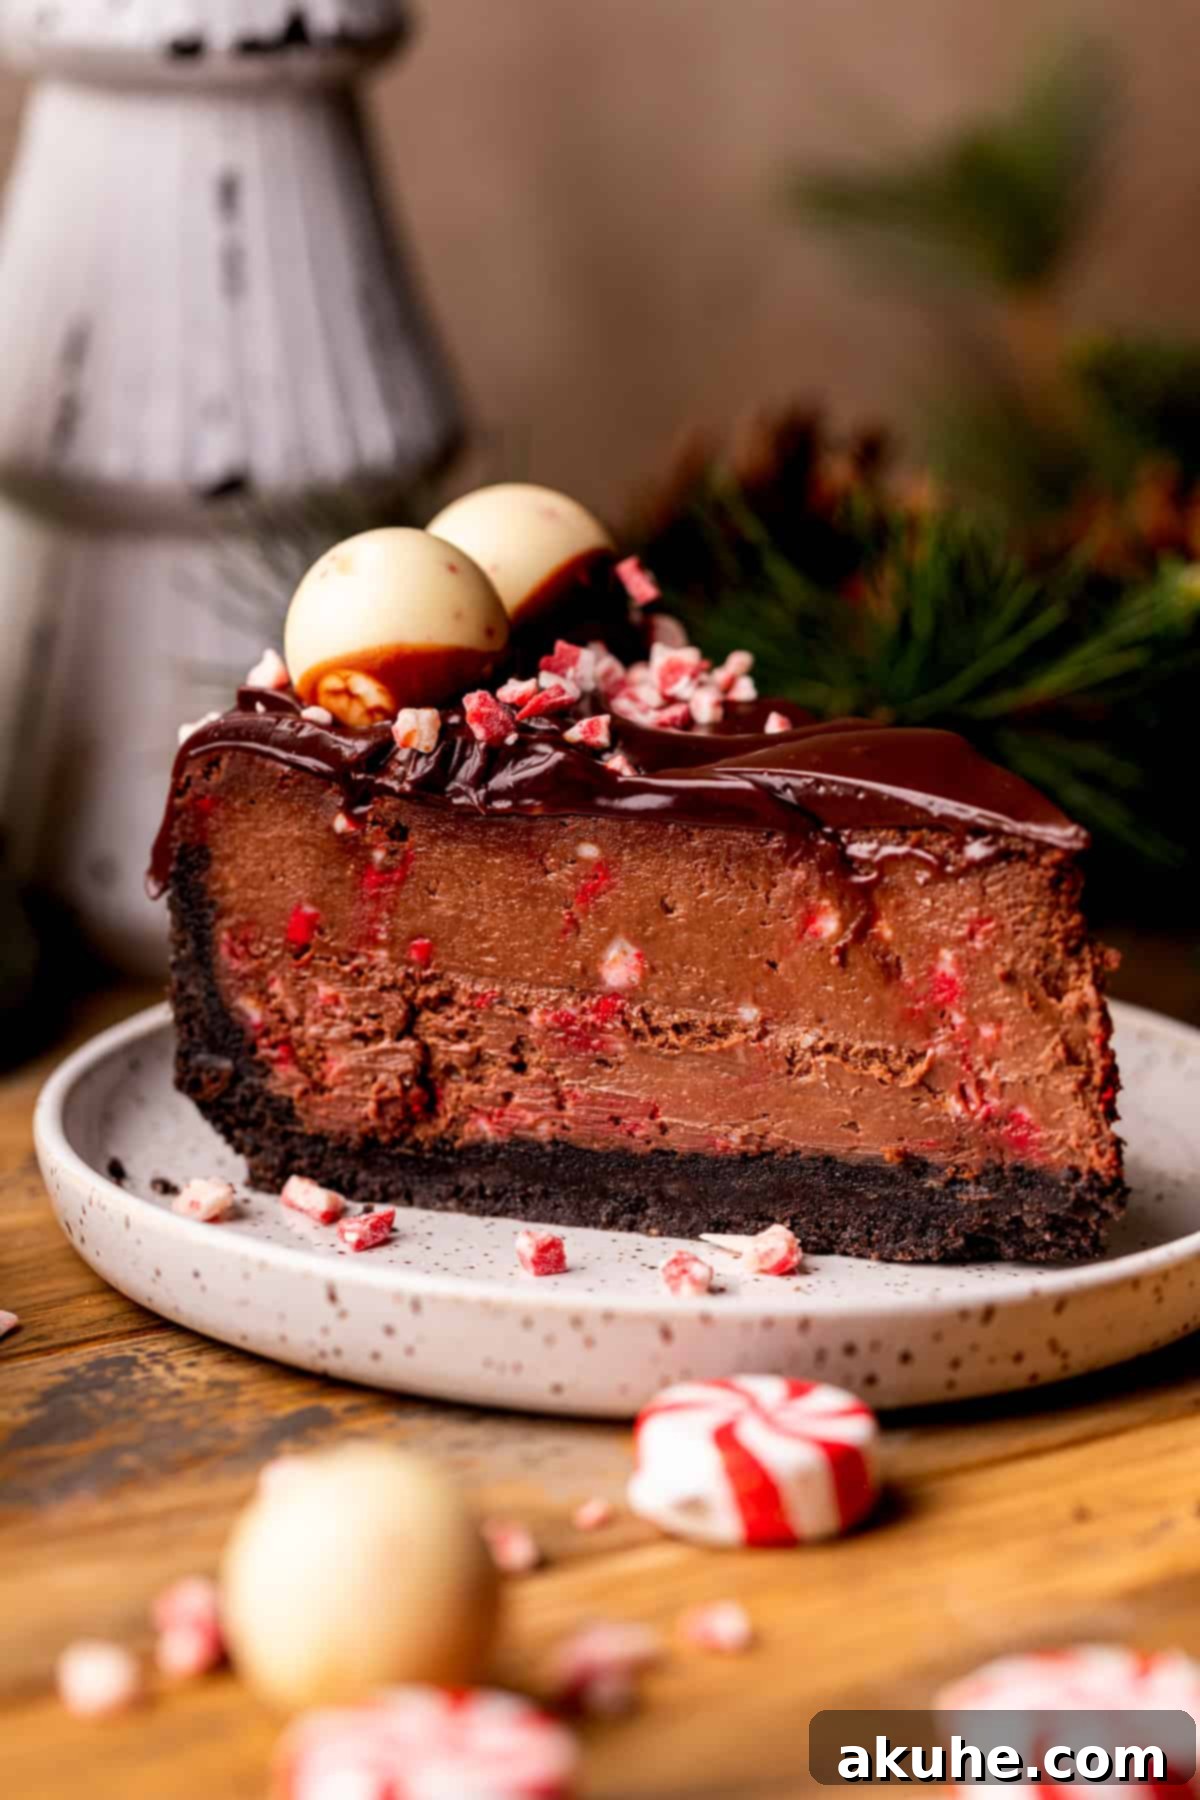
Indulge in the ultimate festive treat with this exquisite Chocolate Peppermint Cheesecake. Designed to capture the spirit of the holiday season, this decadent dessert features a rich Oreo crust, a luxuriously smooth and intensely chocolatey cheesecake generously studded with vibrant peppermint chips, all crowned with a luscious chocolate ganache. For a final flourish, it’s beautifully decorated with additional peppermint chips and elegant Lindt peppermint truffles, ensuring every slice is a feast for the eyes and the palate.
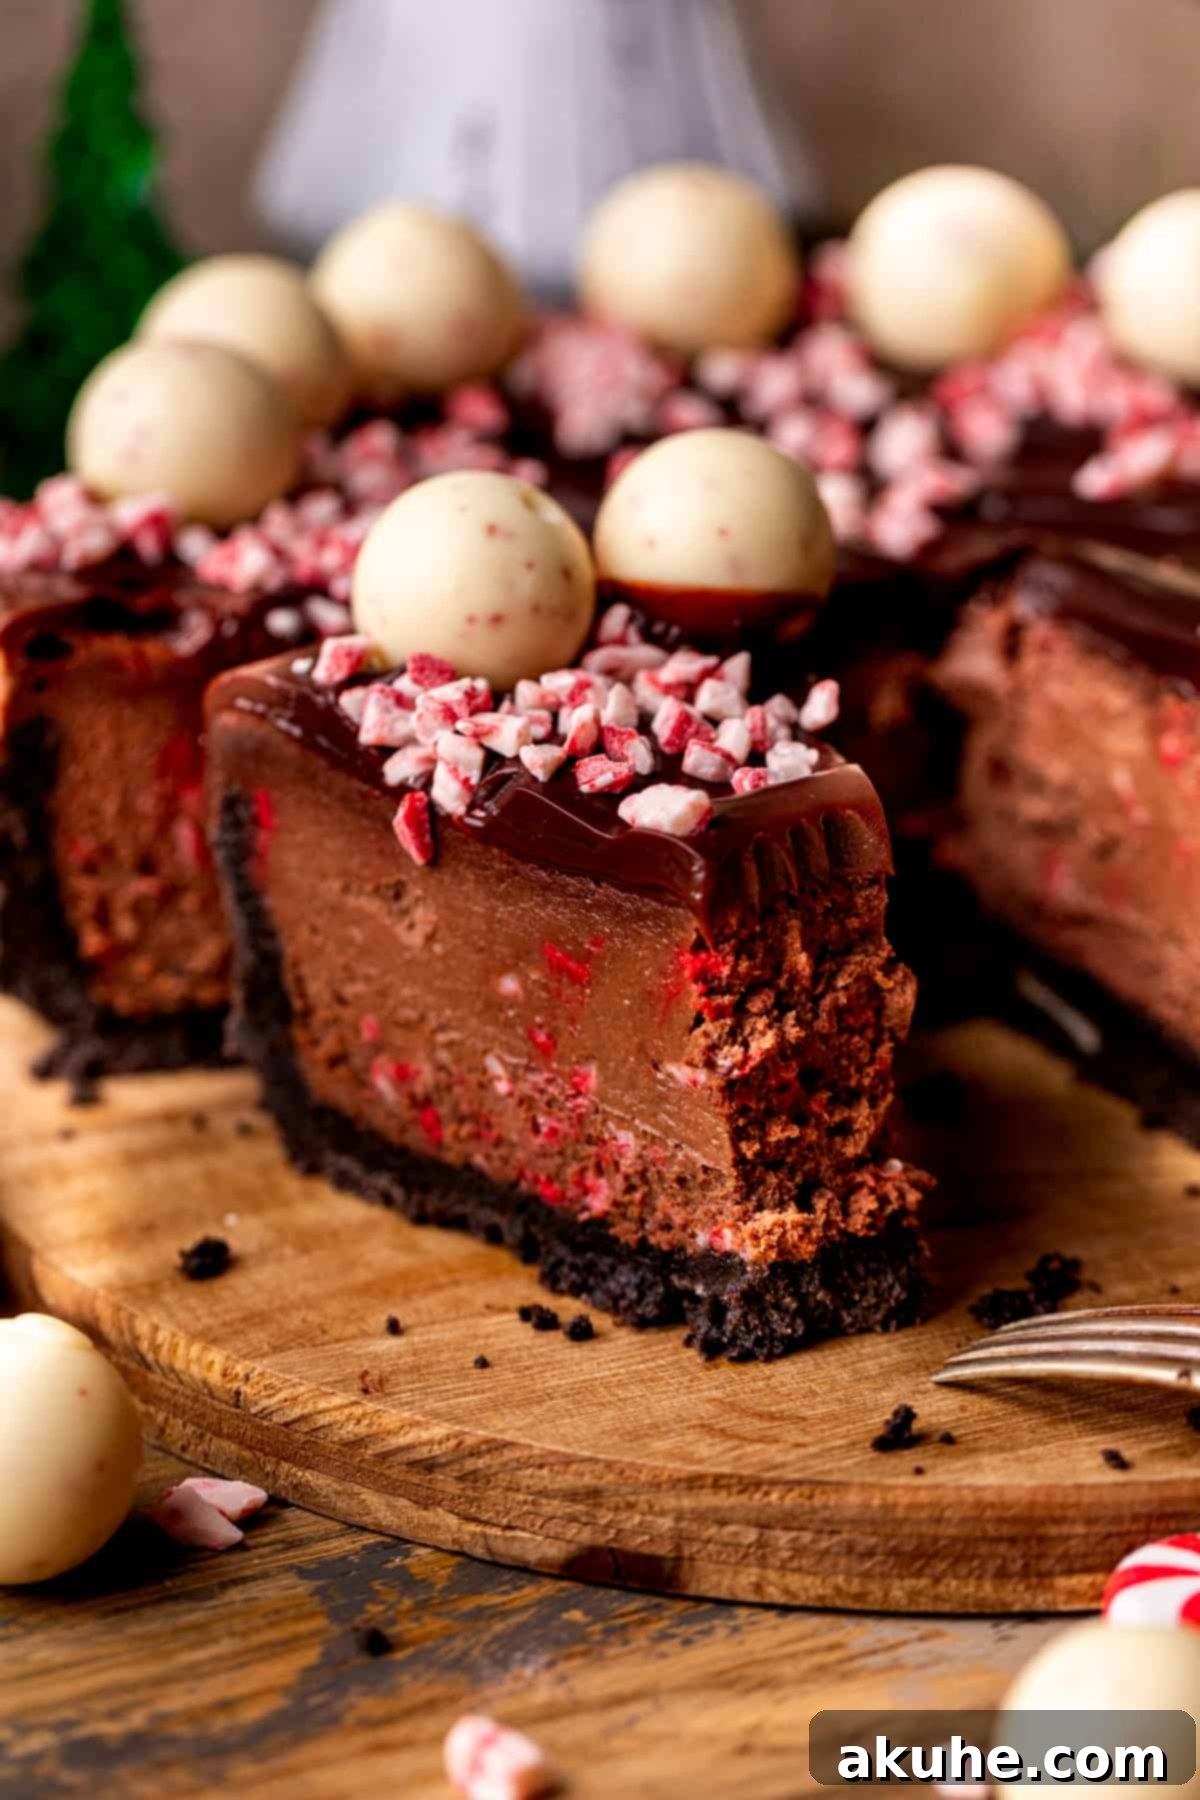
This chocolate peppermint cheesecake isn’t just a dessert; it’s an experience. It’s the perfect showstopper for your holiday gatherings, offering a symphony of flavors that will leave your guests utterly delighted and impressed. The deep, rich chocolate foundation perfectly complements the refreshing burst of peppermint, creating a balanced and unforgettable taste. If you’re a fan of classic flavor combinations like Andes Mints or simply adore the pairing of chocolate and mint, you will undoubtedly fall in love with every creamy, crumbly bite of this cheesecake.
Seeking more chocolate-infused delights for your dessert repertoire? Explore these other tempting recipes: try our Halloween Chocolate Cake for a spooky twist, satisfy cravings with Chocolate Cheesecake Bars, or enjoy the comforting sweetness of Chocolate Cinnamon Rolls.
Why This Decadent Chocolate Peppermint Cheesecake Recipe is a Must-Try
Crafting the perfect cheesecake can seem daunting, but this chocolate peppermint cheesecake recipe is designed for success, delivering exceptional results that make it a truly special treat. Here’s why this recipe stands out and promises to be your new go-to holiday dessert:
- The Ultimate Christmas Dessert Experience: Elevate your holiday celebrations with a dessert that embodies festive cheer. This chocolate peppermint cheesecake not only tastes phenomenal but also looks stunning, making it an impressive centerpiece for any Christmas party or holiday meal. Its vibrant colors and inviting aroma instantly set a joyful mood, guaranteeing gasps of delight from your guests. It’s more than just a dessert; it’s a memorable holiday moment on a plate.
- Harmonious Chocolate and Peppermint Flavor Profile: While peppermint is a star, this cheesecake never forgets its chocolatey roots. We’ve meticulously balanced the intense cocoa notes with the cool, invigorating flavor of peppermint. The result is a cheesecake that offers a deep, rich chocolate taste upfront, followed by a refreshing peppermint finish, preventing either flavor from overpowering the other. This perfect harmony makes each bite a delightful surprise.
- Achieving the Dreamy Creamy Cheesecake Texture: The hallmark of an exceptional cheesecake is its texture, and this recipe delivers a consistently smooth, velvety, and incredibly creamy cheesecake. We provide essential tips and techniques to ensure your cheesecake is free from cracks and boasts that melt-in-your-mouth quality that makes it utterly irresistible and impossible to stop at just one slice. Prepare for a truly luxurious dessert experience!
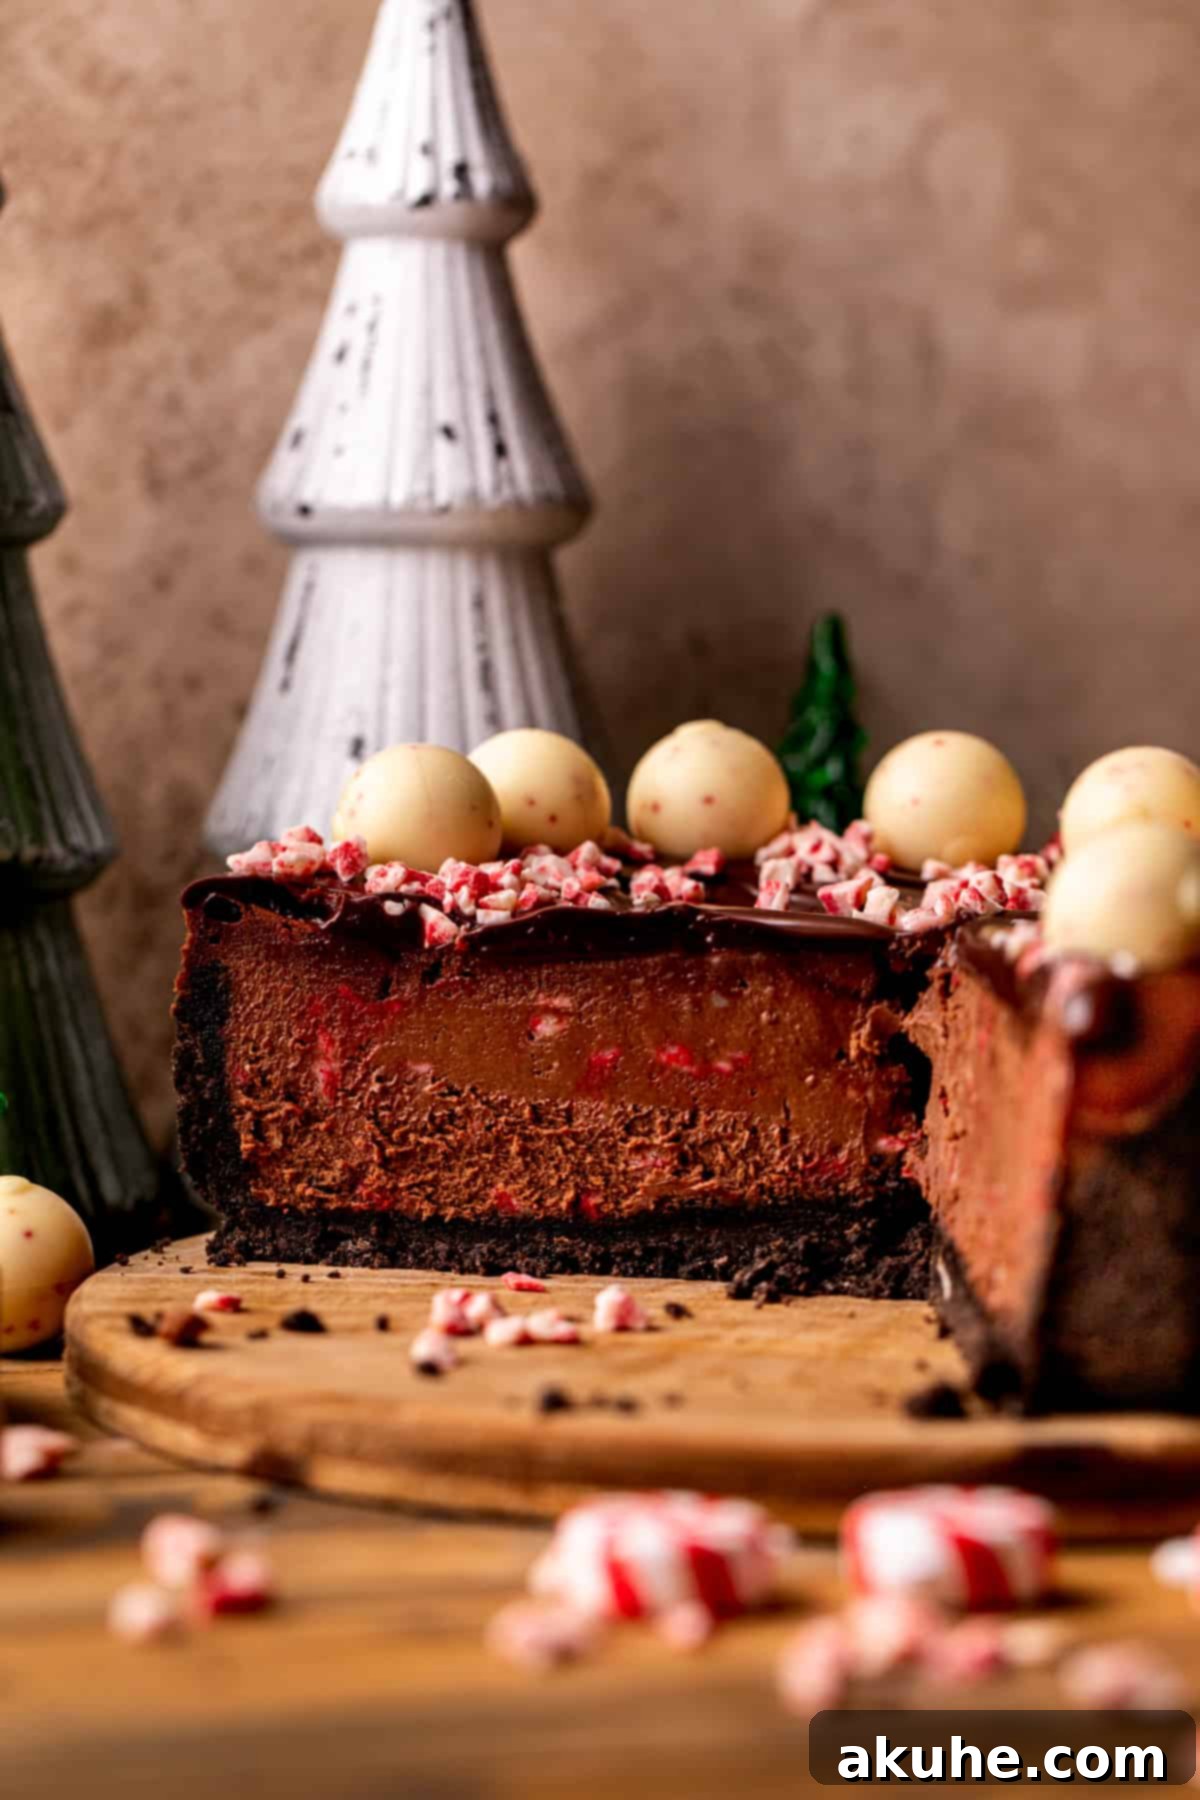
Essential Ingredient Notes for Your Chocolate Mint Cheesecake
The quality and preparation of your ingredients are paramount to achieving the perfect chocolate peppermint cheesecake. Here are some detailed notes to guide you. For a comprehensive list with exact measurements, please refer to the complete recipe card found further down this page.
- Unsalted Butter: For the crust, unsalted butter is melted. Using unsalted butter allows you to control the overall salt content of your dessert. You can easily melt it in the microwave in short bursts, stirring frequently, to avoid burning. Ensure it’s fully melted for proper incorporation with the Oreo crumbs.
- Sour Cream & Heavy Cream: Both sour cream and heavy cream contribute significantly to the cheesecake’s characteristic tang and incredibly creamy texture. It is crucial to bring both to room temperature at least two hours before you begin baking. Room temperature dairy ingredients blend much more smoothly, preventing lumps in your batter and ensuring a uniform, silky consistency.
- Cream Cheese: Opt for full-fat cream cheese for the richest flavor and the most luxurious, dense texture. Just like sour cream and heavy cream, ensure your cream cheese is at room temperature. Cold cream cheese will result in a lumpy batter that’s difficult to smooth out, potentially leading to cracks during baking.
- Eggs: Use large, room-temperature eggs. Room temperature eggs emulsify better with the other ingredients, creating a cohesive and stable batter. We use whole eggs, not just egg whites, because the fatty yolk adds essential richness and helps prevent a dry cheesecake.
- Baking Spray: Don’t mistake this for regular cooking spray! A baking spray specifically formulated with flour is essential for ensuring your cheesecake doesn’t stick to the pan and comes out perfectly clean. It creates a non-stick barrier that’s more effective than oil alone.
- Chocolate Bar: For the ultimate chocolate flavor, I highly recommend using a high-quality semi-sweet chocolate bar, such as Lindt 70% cocoa. Its rich, deep flavor truly shines in the cheesecake. However, feel free to substitute with your favorite brand of semi-sweet chocolate, or even a good quality dark chocolate if you prefer a less sweet, more intense chocolate profile.
- Peppermint Candies (Chips): Andes Mints or Andes Peppermint Crunch baking chips are ideal for this dessert, offering a delightful minty flavor and a beautiful visual appeal. If these are unavailable, you can substitute with other crushed peppermint candies, such as candy canes, ensuring they are finely chopped for even distribution and texture.
Ingredient Substitutions and Adaptations
While this recipe is crafted for optimal flavor and texture, here are some suggestions for common dietary adjustments:
- Dairy-Free Adaptation: For those with dairy sensitivities or a preference for plant-based options, you can generally substitute your favorite dairy-free cream cheese, sour cream alternative, and heavy cream alternative. Ensure these products are designed for baking for the best results.
- Gluten-Free Consideration: I have not personally tested this recipe with gluten-free ingredients. However, you can likely achieve a gluten-free version by using gluten-free Oreo-style cookies for the crust. For the cheesecake filling itself, most ingredients are naturally gluten-free. If you successfully make a gluten-free version, please share your experience!
Step-By-Step Instructions – Crafting the Perfect Oreo Crust
The foundation of this incredible chocolate peppermint cheesecake begins with a perfectly crisp and flavorful Oreo crust. Follow these simple steps to prepare and bake it:
STEP 1: Prepare Your Baking Environment. Begin by preheating your oven to 325°F (160°C). This ensures the oven is at the correct temperature for even baking. Next, take a 9-inch springform pan and generously spray the entire interior with a good quality baking nonstick spray that contains flour. This is a crucial step for easy cheesecake release. For an added layer of protection against sticking, line the bottom of the pan with a 9-inch parchment paper circle, then spray the parchment paper again.
STEP 2: Create the Oreo Crumb Mixture. Place your whole Oreos (from a family-size pack, yielding about 3 cups of crumbs) into a food processor. Process them until they are transformed into fine, uniform crumbs. Transfer these fine Oreo crumbs to a small mixing bowl. Pour the melted unsalted butter over the crumbs. Using a fork, mix thoroughly until all the crumbs are evenly moistened and resemble wet sand.
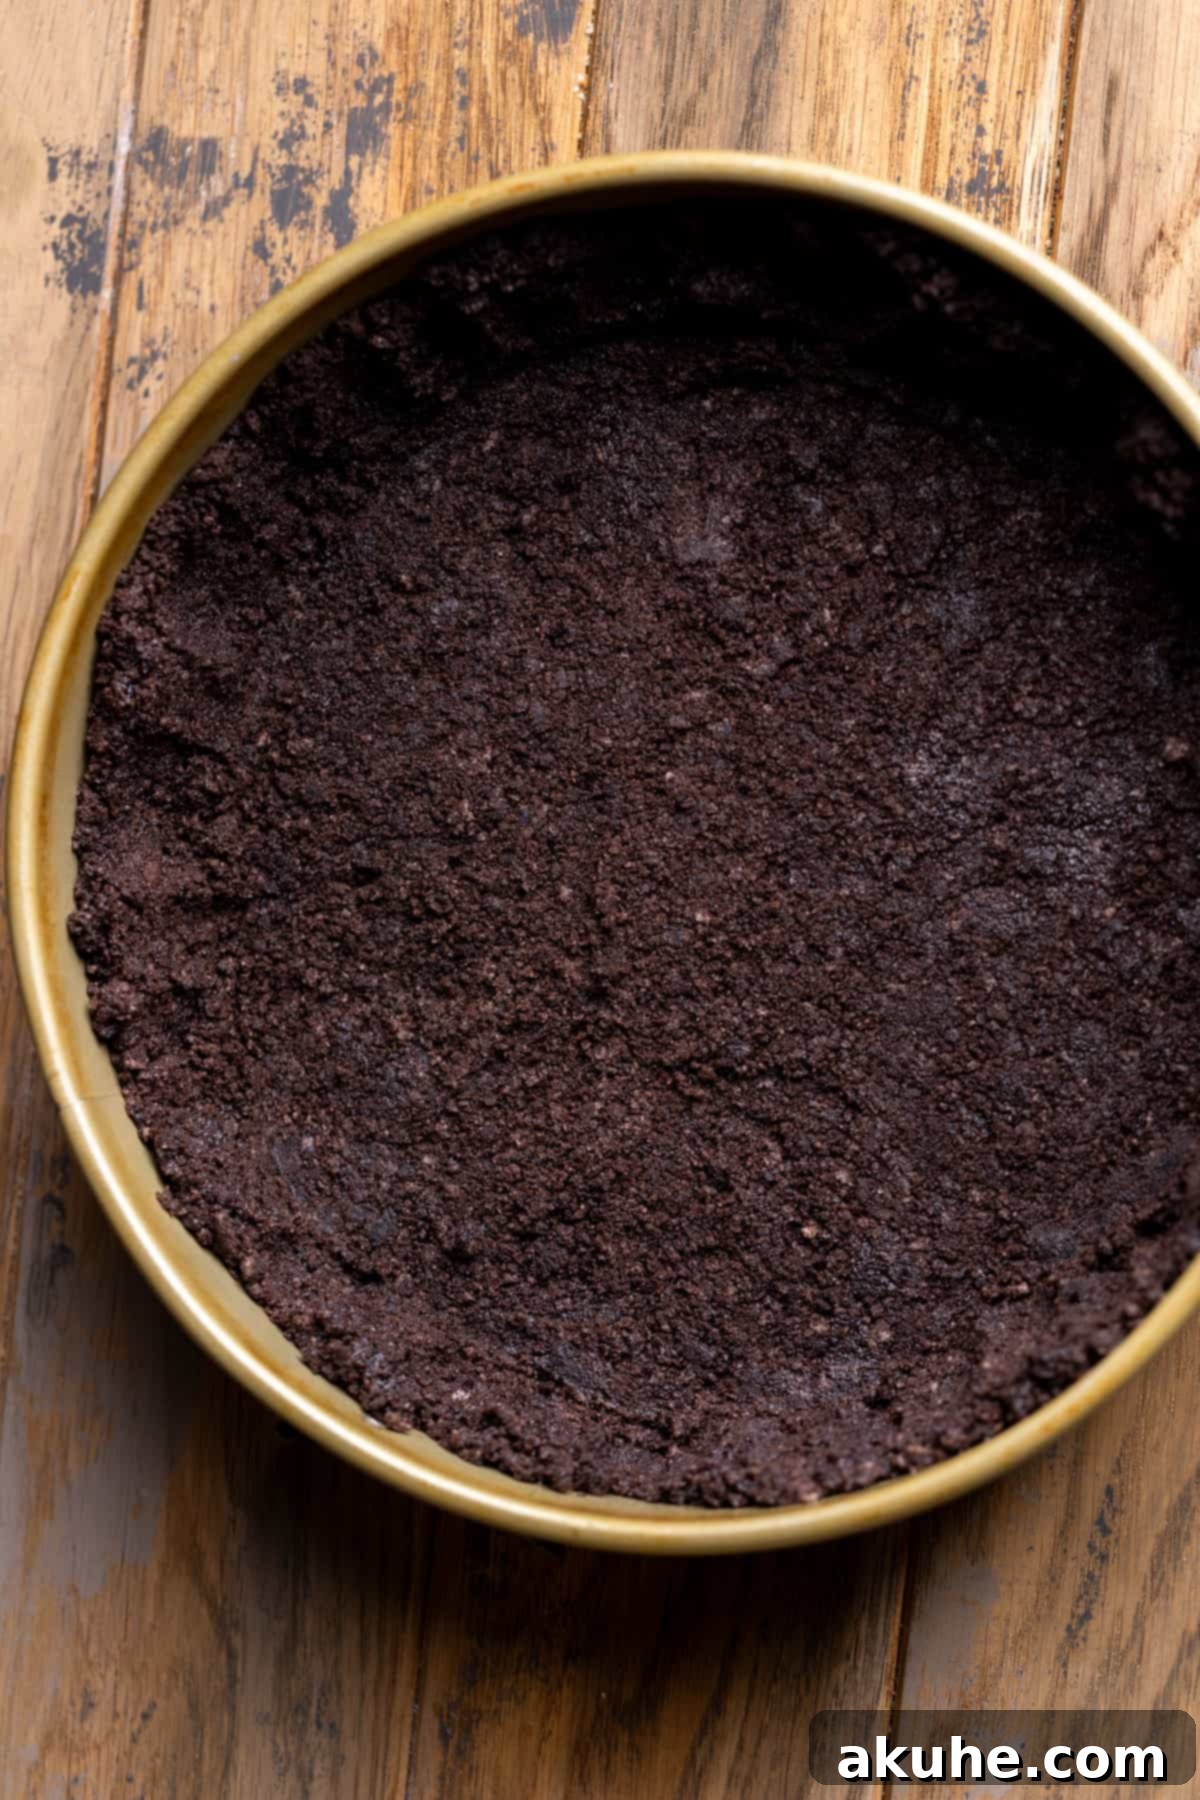
STEP 3: Form the Crust in the Pan. Carefully pour the buttered Oreo crumb mixture into your prepared springform pan. Use your clean hands or the bottom of a measuring cup to firmly press the crumbs evenly across the bottom of the pan. Continue to press the crumbs halfway up the sides of the pan, creating a neat, sturdy border. Ensure the bottom of the crust is compacted tightly to prevent crumbling once baked.
STEP 4: Bake the Crust to Golden Perfection. Place the pan with the formed crust into your preheated oven. Bake for precisely 12 minutes. This brief baking time helps to set the crust, making it firm and preventing it from becoming soggy once the cheesecake batter is added. Once baked, remove from the oven and set aside to cool slightly while you prepare the filling.
Step-By-Step Instructions – Assembling the Chocolate Peppermint Cheesecake
Now that your crust is ready, let’s dive into creating the rich, creamy chocolate peppermint cheesecake filling that will be the star of your holiday table.
STEP 1: Melt the Chocolate. Place your high-quality semi-sweet chocolate bars (chopped if not in chips) into a microwave-safe bowl. Heat the chocolate in 20-second intervals in the microwave. After each interval, remove the bowl and stir the chocolate thoroughly. This method prevents the chocolate from overheating and burning. Continue this process until the chocolate is completely melted and beautifully smooth. Set aside to cool slightly.
STEP 2: Beat Cream Cheese, Sugar, and Cocoa Powder. In the bowl of an electric mixer fitted with the paddle attachment, combine the room-temperature cream cheese, granulated white sugar, and unsweetened cocoa powder. Beat these ingredients together on high speed for a full 2 minutes. It’s crucial for the mixture to be completely smooth and free of any cream cheese chunks. If you notice any lumps after 2 minutes, scrape down the sides of the bowl with a rubber spatula and continue beating on high speed until the mixture is perfectly smooth and airy.
STEP 3: Incorporate Wet Ingredients and Eggs. Reduce the mixer speed to medium. Add the room-temperature sour cream, heavy cream, pure vanilla extract, and the slightly cooled melted chocolate to the cream cheese mixture. Mix until all these ingredients are just combined and the batter is uniform. Next, add the large room-temperature eggs, one at a time, mixing on low speed until each egg is just incorporated. Avoid overmixing once the eggs are added, as this can introduce too much air, which may cause cracks in your baked cheesecake.
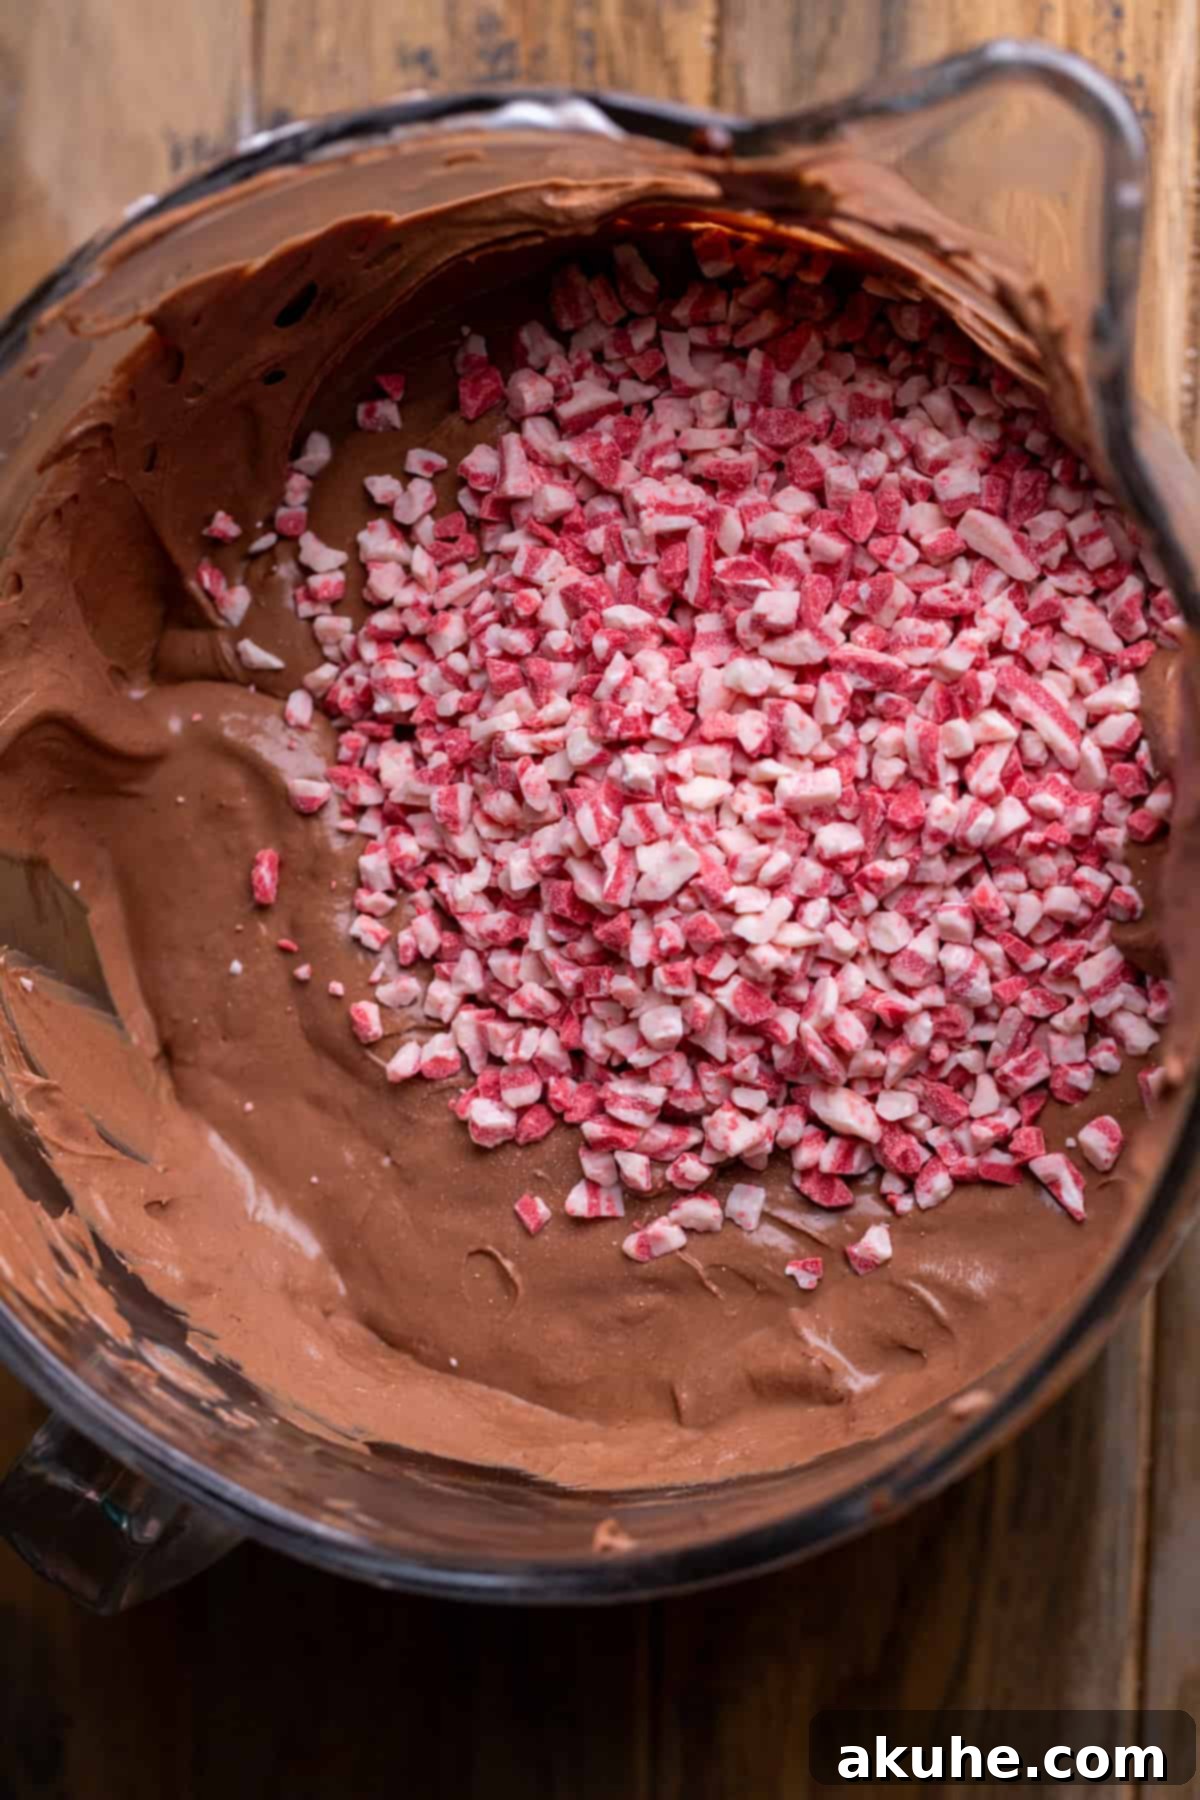
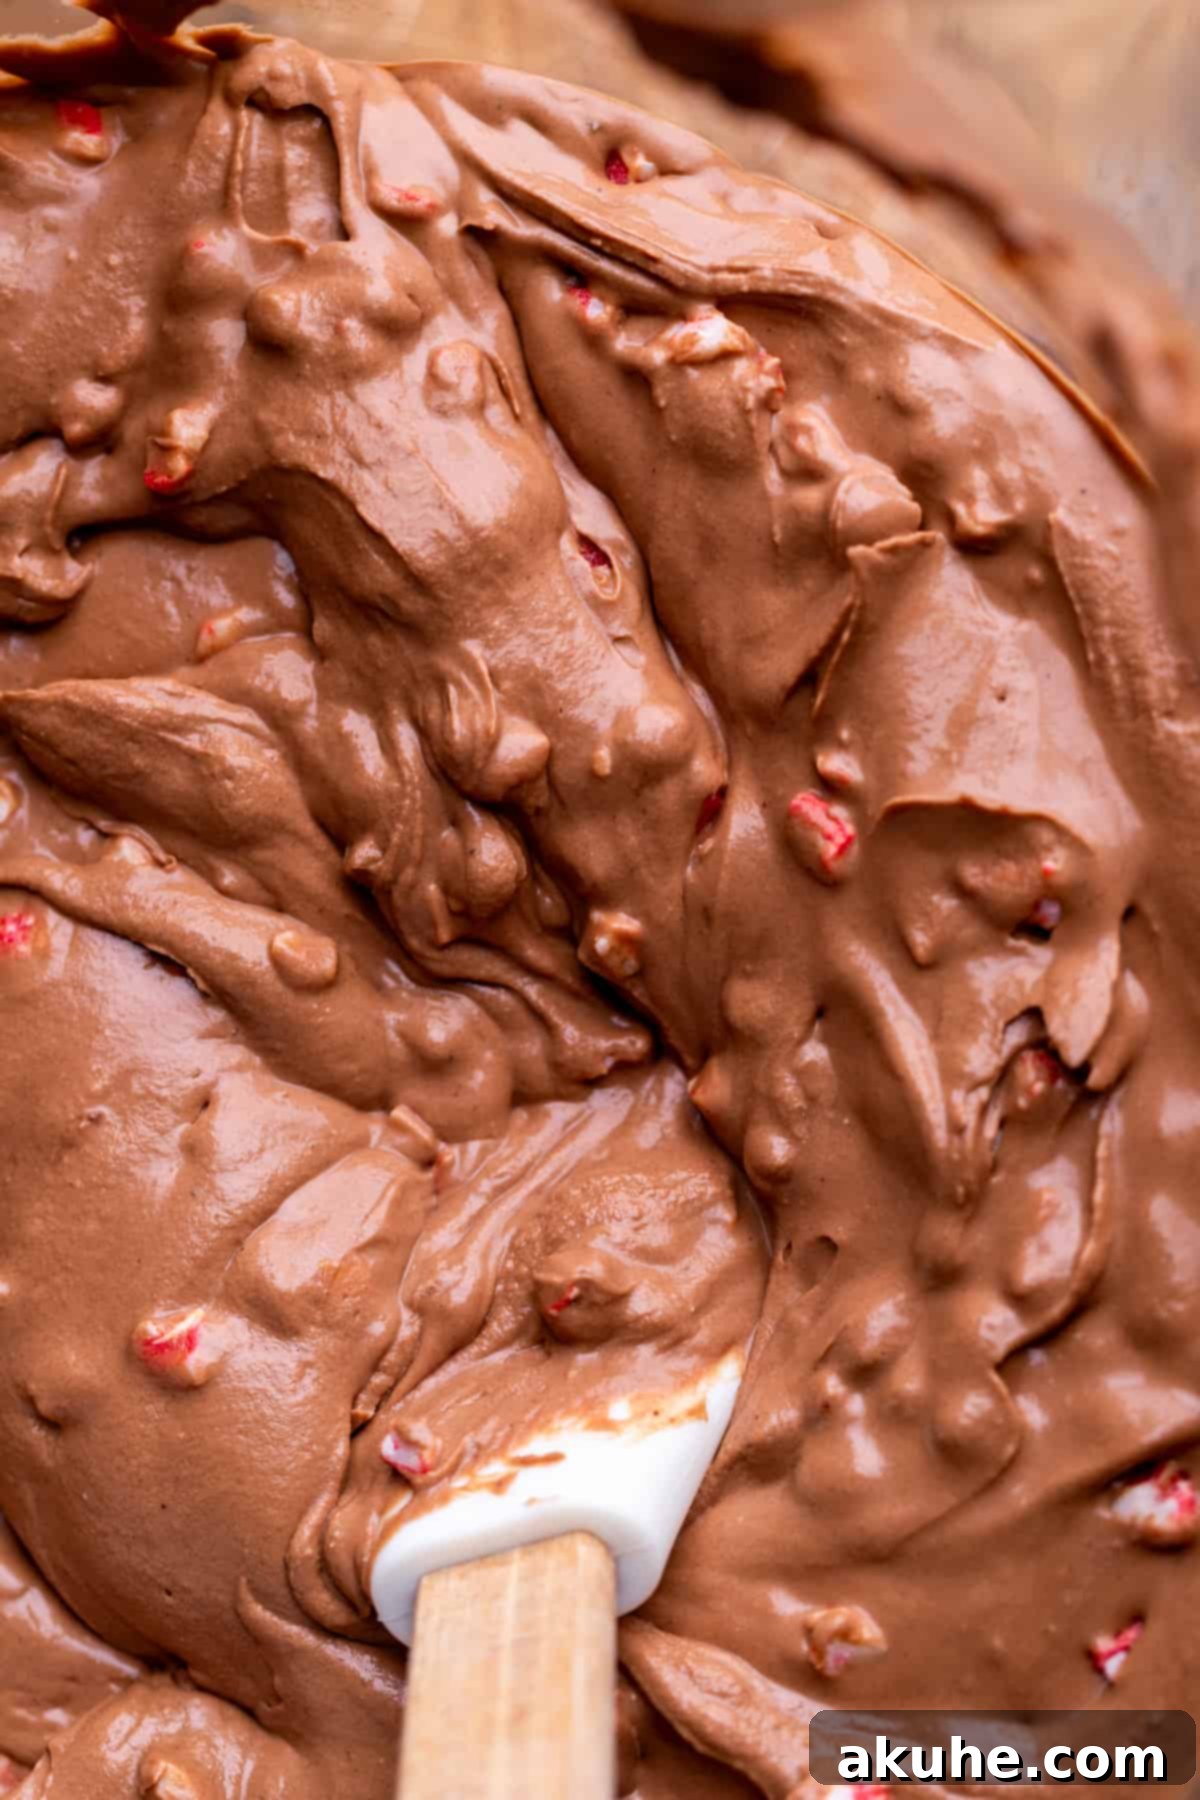
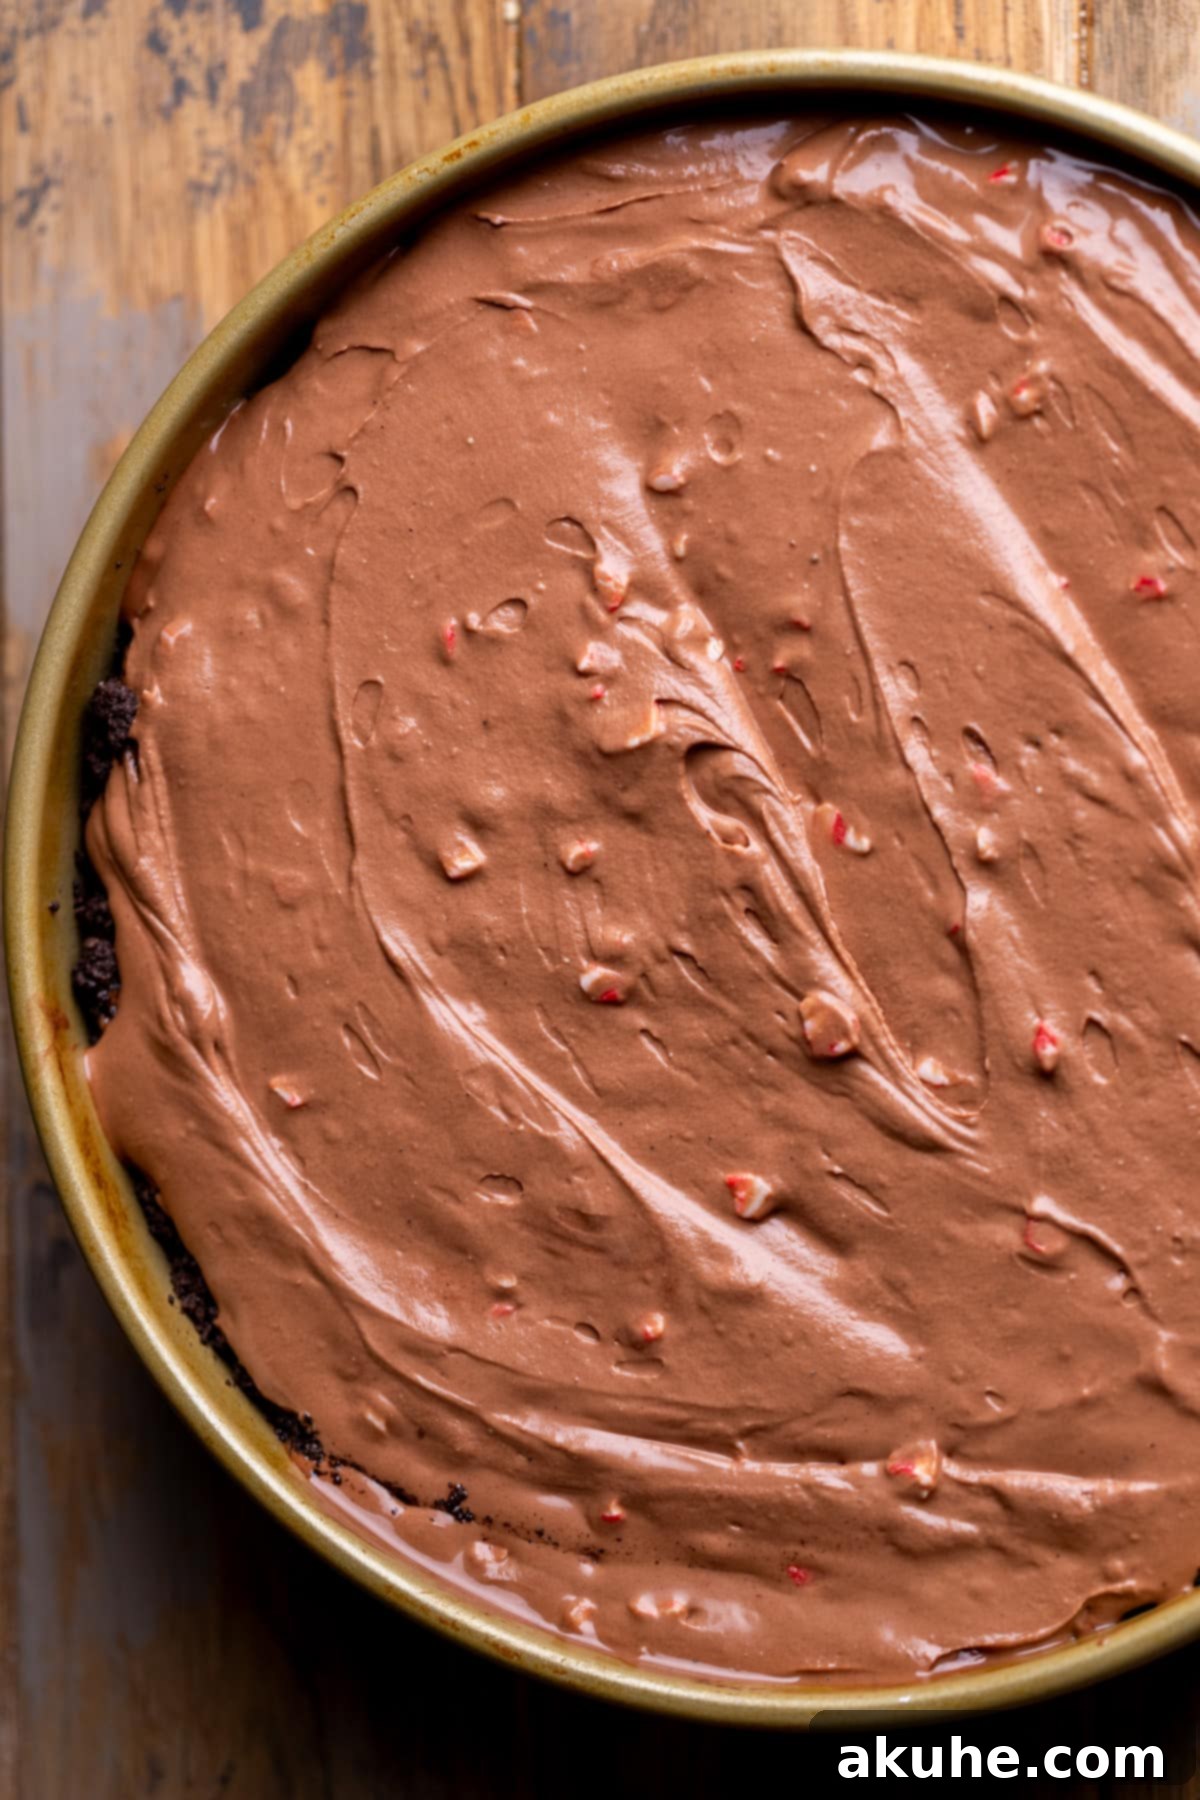
STEP 4: Fold in Peppermint Chips and Pour Batter. Remove the bowl from the electric mixer. Using a rubber spatula, gently fold in the Andes peppermint chips. Be careful not to overmix, as vigorous stirring can crush the chips too much. Once the peppermint chips are evenly distributed, carefully pour the smooth and creamy chocolate peppermint cheesecake batter into your prepared Oreo crust in the springform pan. Use the spatula to gently level the top.
STEP 5: Prepare the Water Bath. A water bath (bain-marie) is essential for baking a crack-free cheesecake with a silky-smooth texture. Please refer to the detailed “Water Bath Tips” section below for two effective methods to set up your water bath.
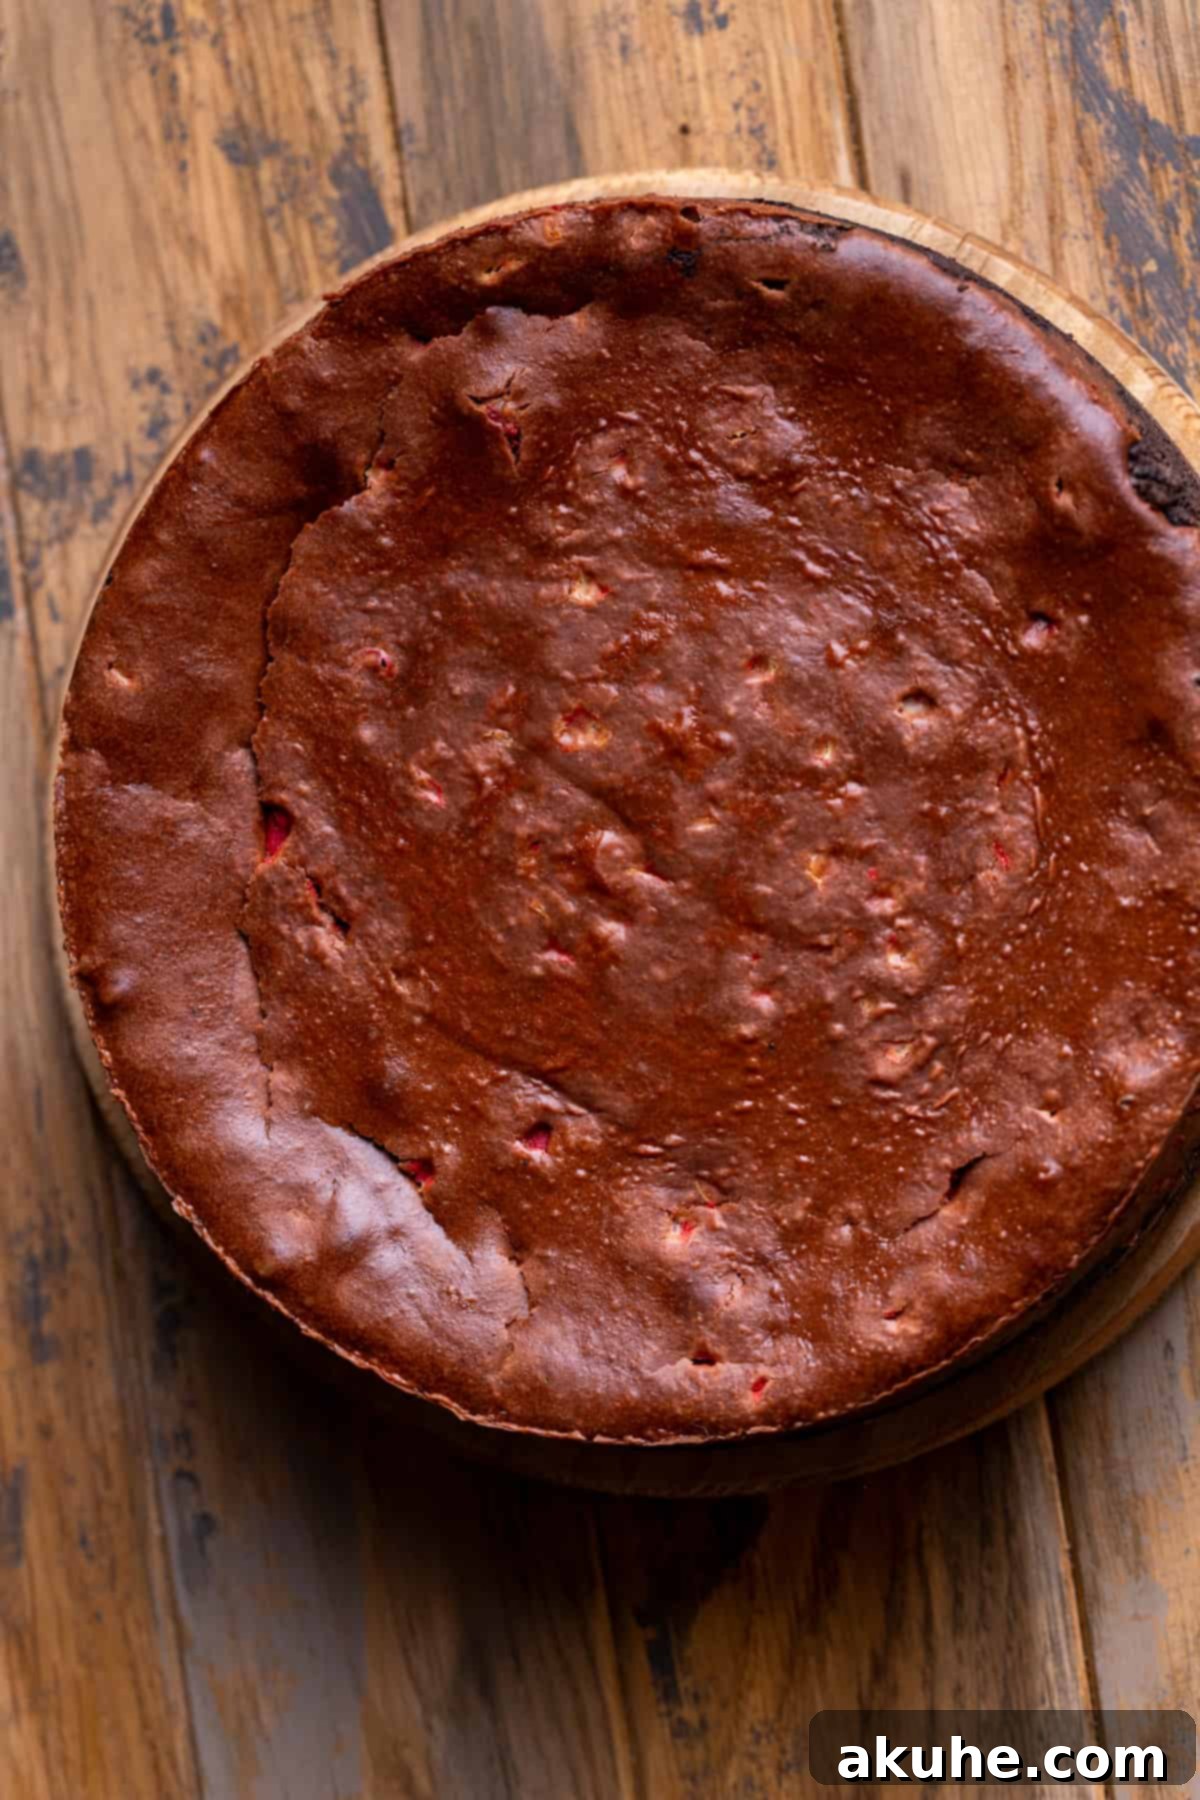
STEP 6: Bake the Cheesecake to Perfection. Carefully place your springform pan (within the water bath setup) into the preheated oven. Bake for approximately 70-80 minutes. The cheesecake is done when the edges appear set and firm, but the very center still has a slight, delicate jiggle when you gently nudge the pan. Avoid overbaking, as this can lead to a dry texture and cracks.
STEP 7: Gradual Cooling for Flawless Texture. Once the cheesecake is baked, turn off the oven but leave the cheesecake inside. Crack the oven door open slightly (about 1-2 inches) and allow the cheesecake to cool slowly in the diminishing heat for 30 minutes. This gradual cooling process is crucial for preventing sudden temperature changes that cause cracks. After 30 minutes, carefully remove the cheesecake from the water bath and transfer it to a wire rack to cool completely at room temperature.
STEP 8: Chill Thoroughly. Once the cheesecake has cooled completely at room temperature, cover the entire springform pan tightly with aluminum foil. Transfer the covered cheesecake to the refrigerator and chill for a minimum of 6 hours, or ideally, overnight. This chilling period is vital for the cheesecake to fully set, firm up, and develop its rich flavors and signature dense, creamy texture.
Step-By-Step Instructions – Preparing the Decadent Chocolate Ganache
No chocolate peppermint cheesecake is complete without a glossy, rich chocolate ganache topping. Here’s how to create this simple yet luxurious finishing touch.
STEP 1: Prepare Your Ingredients. Place your semi-sweet chocolate chips into a heat-safe mixing bowl. In a small saucepan, gently heat the heavy cream over medium-low heat. Stir occasionally, and heat just until the cream begins to steam and small bubbles form around the edges – do not let it come to a rolling boil.
STEP 2: Create and Melt the Ganache. Once the heavy cream is steaming hot, immediately pour it over the chocolate chips in the bowl. Do not stir right away; allow the hot cream to sit undisturbed over the chocolate chips for 2 minutes. This gives the chocolate time to soften and melt from the residual heat. After 2 minutes, gently begin stirring from the center outwards, using a whisk or spatula, until the mixture is completely smooth, glossy, and homogeneous. If any small chocolate chunks remain, you can heat the ganache in the microwave for very short 15-second intervals, stirring well after each, until perfectly smooth.
STEP 3: Decorate Your Masterpiece. Once your cheesecake is thoroughly chilled (after at least 6 hours or overnight), carefully remove it from the springform pan and gently peel away the parchment paper from the bottom. Place the cheesecake on your desired serving platter. Pour the slightly cooled (but still pourable) chocolate ganache evenly over the top of the cheesecake, allowing it to naturally drip down the sides for a beautiful effect. Immediately decorate with a generous sprinkle of additional peppermint chips and artfully placed Lindt peppermint truffles for an extra touch of elegance and flavor. Serve chilled for the best experience.
Mastering the Water Bath for Perfect Cheesecake
The water bath, or bain-marie, is not just a suggestion; it’s a critical technique for baking cheesecakes. It provides a moist, steamy environment in the oven, which is essential for gentle, even baking. Without it, the dry heat of the oven can cause the edges of the cheesecake to bake too quickly and dry out, leading to unsightly cracks on the surface.
Here are two proven techniques for setting up your water bath, both utilizing a large roasting pan and hot, steaming water:
- The “Double Pan” Method (My Preferred Method): For ultimate protection against water seepage, place your 9-inch springform pan containing the cheesecake inside a larger 10-inch round cake pan. Then, carefully place this entire cake pan (with the springform inside) into your large roasting pan. Fill the roasting pan with hot tap water (or freshly boiled water) until it comes about halfway up the sides of the 10-inch cake pan. This method completely isolates your springform pan, guaranteeing no water can reach your crust, ensuring it remains perfectly crisp.
- The “Foil Wrap” Method: Begin by wrapping the exterior of your 9-inch springform pan (containing the cheesecake) tightly twice with heavy-duty aluminum foil. Ensure the foil extends well above the waterline of your roasting pan and is sealed without any gaps. Place the foil-wrapped springform pan directly into the roasting pan. Carefully fill the roasting pan with hot water, again, about halfway up the sides of the foil-wrapped springform pan. While effective, this method carries a slight risk of water finding its way through the foil seams and into the crust, potentially making it soggy.
My top recommendation is the first method. It offers an impenetrable barrier against water, making the entire cheesecake baking process much less stressful and ensuring a flawless, non-soggy crust every time.
Expert Tips for Preventing Cheesecake Cracks
A smooth, uncracked cheesecake surface is a badge of honor for any baker. Here’s a detailed guide to common pitfalls and how to avoid them:
- Ensure a Super Creamy Batter: The initial beating of cream cheese, sugar, and cocoa powder is paramount. Beat these ingredients on high speed, ensuring everything is incredibly creamy and smooth before adding other liquids. Any lingering chunks of cream cheese can create inconsistencies in the batter, leading to tension and cracks during baking. Scrape down the bowl frequently to ensure even mixing.
- Minimize Air When Adding Eggs: Once the eggs are introduced, the goal is simply to combine them, not to whip air into the batter. Add eggs one at a time and mix on the lowest speed possible until just incorporated. Too much air in the batter can create large bubbles that expand rapidly in the oven, causing the cheesecake to rise excessively and then fall too quickly upon cooling, which inevitably leads to cracks.
- The Indispensable Water Bath: As emphasized in the previous section, a water bath is truly essential. It creates a humid environment in the oven that helps the cheesecake bake gently and evenly, preventing the edges from drying out and baking faster than the center. This even cooking reduces stress on the cheesecake’s structure, significantly minimizing the risk of cracks.
- Implement Gradual Cooling: Sudden temperature changes are a primary culprit for cheesecake cracks. After the cheesecake finishes baking, do not remove it from the oven immediately. Instead, turn off the oven and crack the door open (leaving it slightly ajar) for 30 minutes. This allows the cheesecake to cool down slowly and gradually, adapting to the temperature change without shocking its delicate structure.
- Avoid Rapid Temperature Shifts: If you were to take the hot cheesecake directly from the oven and place it on a cool counter, the rapid change in temperature would almost certainly cause it to crack. The slow cooling process in the oven is vital for maintaining the cheesecake’s integrity.
Effortless Cheesecake Removal from the Springform Pan
Getting your beautifully baked cheesecake out of the pan and onto a serving platter can be a moment of truth. With proper preparation, it should be a breeze:
First and foremost, before you even start mixing your crust, make sure to generously spray the inside of your springform pan with a high-quality baking non-stick spray (the kind that contains flour). Next, carefully line the bottom of the pan with a 9-inch parchment paper circle. Then, spray the parchment paper again to ensure a double layer of non-stick protection.
After your cheesecake has been baked, cooled, and thoroughly chilled in the refrigerator (ideally overnight), the springform pan should detach quite easily. Simply release the clasp on the side of the pan. If for any reason it doesn’t release cleanly, very gently run a thin, sharp knife around the edge of the cheesecake, making sure it’s completely loosened from the sides of the pan before unclasping.
Once the ring is removed, you should be able to slide the cheesecake onto its side to effortlessly remove the bottom of the pan and the parchment paper circle, leaving you with a perfectly presented cheesecake.
Frequently Asked Questions (FAQ) About Chocolate Peppermint Cheesecake
Absolutely! To create delightful mini chocolate peppermint cheesecakes, simply divide the cheesecake batter into thirds. This will yield approximately 12 individual mini cheesecakes. Bake them in a standard muffin pan lined with paper cupcake liners for about 18-20 minutes, or until the centers are set. For more detailed instructions on baking mini cheesecakes, you can refer to our Mini Oreo Cheesecakes recipe.
This recipe is quite versatile! If you prefer chocolate peppermint cheesecake bars, you can halve the recipe (using 16 oz of cream cheese) and bake it in an 8×8 or 9×9 inch baking pan. For a slightly taller cheesecake, an 8-inch springform pan works wonderfully with the full recipe. If you wish to use a 6-inch springform pan, you will need to halve the recipe, but still use 16 oz of cream cheese to achieve a good height. Remember that baking times will vary; cheesecakes baked in larger, shallower pans will generally cook faster than in smaller, taller ones, so adjust your baking time accordingly and monitor for doneness.
Achieving picture-perfect slices is easy with a few simple tricks. First, ensure your chocolate peppermint cheesecake is thoroughly chilled, ideally overnight. A very cold cheesecake holds its shape much better. Second, use a sharp, thin-bladed knife. For the absolute cleanest cuts, run your knife under hot water and wipe it clean after every single slice. This prevents sticky crumbs from transferring and ensures each slice is as pristine as the last.
Creative Recipe Variations to Explore
While this chocolate peppermint cheesecake is perfect as is, you can easily customize it to suit your preferences or what you have on hand:
- Explore Alternate Crusts: If you have a beloved cheesecake crust recipe, feel free to use it! While the Oreo crust is fantastic, a classic graham cracker crust is always a delicious option. For inspiration, check out the graham cracker crust recipe from our Apple Pie Cheesecake recipe, which provides a wonderful textural contrast.
- Go Ganache-Free or Add Whipped Cream: While the chocolate ganache adds an extra layer of decadence, it’s not strictly necessary. If you prefer to omit it, you can decorate the top of the chilled cheesecake directly with extra peppermint chips, chocolate shavings, or even a dusting of cocoa powder. A generous dollop of homemade whipped cream is always a welcome and lighter alternative to the rich ganache, adding a lovely creamy finish to your chocolate cheesecake.
Recommended Special Tools for Cheesecake Success
Having the right tools can make all the difference in achieving a professional-looking and tasting cheesecake. Here are a few special items that will prove invaluable:
- Springform Pan: A good quality springform pan is non-negotiable for cheesecakes. I typically use a sturdy 9-inch springform pan for this recipe. If you prefer a taller, more dramatic cheesecake, an 8-inch springform pan works wonderfully with the same recipe, yielding a more substantial dessert.
- Parchment Paper Circles: Save yourself time and effort with pre-cut 8-inch parchment paper circles. These are perfect for lining the bottom of your springform pan, ensuring effortless release and preventing the crust from sticking without the hassle of cutting your own from a roll.
- Baking Spray with Flour: A specialized nonstick baking spray that contains flour is far superior to regular cooking spray for cheesecakes. It creates an excellent non-stick barrier that helps your cheesecake release cleanly and prevents the delicate sides from tearing.
- Offset Spatula: While not strictly necessary, an offset spatula is a fantastic tool for easily and smoothly spreading cheesecake batter, ganache, or frosting. Its angled blade provides better leverage and control, making it easier to achieve a perfectly even surface.
Storing and Freezing Your Chocolate Peppermint Cheesecake
To ensure your chocolate peppermint cheesecake remains fresh and delicious, proper storage is key.
Refrigeration: Store the cheesecake in the refrigerator in an airtight container, such as a cake carrier, to prevent it from absorbing other odors and drying out. When stored correctly, this cheesecake will remain fresh and delightful for up to 5 days.
Freezing Individual Slices: For longer storage or convenient portion control, you can freeze individual slices. Place slices in an airtight container or wrap each slice tightly in plastic wrap followed by aluminum foil. Freeze for up to 30 days. To enjoy, thaw individual slices in the refrigerator for 1-2 hours before serving. This method is great for having a quick dessert on hand.
Freezing the Whole Cheesecake (Before Decorating): If you wish to bake ahead, you can freeze the entire cheesecake before adding the ganache and final decorations. Ensure the baked cheesecake has fully cooled and chilled in the refrigerator overnight first. Then, wrap the cooled cheesecake tightly in several layers of plastic wrap, followed by a layer of aluminum foil. This comprehensive wrapping protects against freezer burn. It can be frozen for up to 30 days. When ready to serve, thaw the wrapped cheesecake in the refrigerator for 1-2 hours before unwrapping, preparing the ganache, and decorating as usual.
Other Cheesecake Recipes to Explore
If you’ve loved this chocolate peppermint creation, you might enjoy exploring other delicious cheesecake recipes for every occasion!
Discover More Festive Holiday Recipes!
Beyond cheesecakes, the holiday season offers a bounty of delightful baking opportunities. Expand your holiday baking with these other inviting recipes:
- Pecan Pie Cinnamon Rolls for a comforting breakfast or brunch.
- Pumpkin Pie Cookie Bars – a delightful fusion of two fall favorites.
- Apple Cider Cinnamon Rolls, perfect for a cozy autumn morning.
- Pumpkin Caramel Cookies, a chewy and sweet seasonal delight.
- Sticky Buns for a rich, gooey, and irresistible treat.
We hope you adore this chocolate peppermint cheesecake as much as we do! If you loved this recipe, please make sure to leave a STAR REVIEW below. We’d also love to see your beautiful creations – tag us on Instagram @stephaniesweettreats. For more culinary inspiration and sweet ideas, be sure to follow us on Pinterest. Happy baking!
Chocolate Peppermint Cheesecake
Print Recipe
Pin Recipe
Leave a Review
Ingredients
Oreo Crust
- 3 cups Oreo crumbs, fine crumb (from a whole pack of family size Oreos)
- 4 TBSP Unsalted butter, melted
Chocolate Peppermint Cheesecake
- 24 oz Cream cheese, room temperature, full-fat recommended
- 1 cup Granulated sugar
- 3 TBSP Unsweetened cocoa powder
- 1/2 cup Sour cream, room temperature (or plain Greek yogurt)
- 1/2 cup Heavy cream, room temperature
- 1 tsp Pure vanilla extract
- 8 oz Semi-sweet chocolate bars, such as Lindt 70% (approximately two standard bars)
- 4 Large eggs, room temperature
- 1 1/2 cups Andes peppermint chips, or crushed peppermint candies
Chocolate Ganache
- 1 cup Semi-sweet chocolate chips
- 1/2 cup Heavy cream
- Andes peppermint chips, for decoration
- Lindt peppermint truffles, for decoration
Instructions
Oreo Crust
- Preheat the oven to 325℉ (160°C). Spray a 9-inch springform pan generously with baking nonstick spray that contains flour. Line the bottom with a 9-inch parchment paper circle and spray the parchment paper again.
- Using a food processor, blend the Oreos into fine, uniform crumbs. In a small bowl, combine the Oreo crumbs and melted butter. Use a fork to mix until the crumbs are thoroughly moistened.
- Pour the crumb mixture into the prepared pan. Use your hands to firmly press the crumbs across the bottom and halfway up the sides of the pan. Use the bottom of a measuring cup to compact the crust evenly.
- Bake the crust for 12 minutes. Remove from oven and let cool slightly.
Chocolate Peppermint Cheesecake
- Place the semi-sweet chocolate bars (chopped) into a microwave-safe bowl. Heat in the microwave in 20-second intervals, stirring well between each, until completely melted and smooth. Set aside to cool slightly.
- In an electric mixer, beat the room-temperature cream cheese, granulated sugar, and unsweetened cocoa powder on high speed for 2 minutes. Scrape down the bowl with a rubber spatula and continue beating until the mixture is perfectly smooth with no lumps.
- Reduce mixer speed to medium. Add the room-temperature sour cream, heavy cream, vanilla extract, and the slightly cooled melted chocolate. Mix until just combined. Add the room-temperature eggs, one at a time, mixing on low speed until just incorporated. Do not overmix after adding eggs.
- Remove the bowl from the mixer. Use a rubber spatula to gently fold in the Andes peppermint chips until evenly distributed throughout the batter. Pour the cheesecake batter into the prepared springform pan with the Oreo crust.
- Prepare a water bath using one of the following methods. Both require a large roasting pan and hot steaming water.
1. Place the springform pan inside a 10-inch cake pan. Place the cake pan into the roasting pan and fill the roasting pan with hot water halfway up the cake pan. This method effectively prevents water from reaching the crust.
2. Tightly wrap the springform pan twice with heavy-duty aluminum foil. Place the wrapped springform pan inside the roasting pan. Fill the roasting pan with hot water halfway up the foil-wrapped springform pan. This method works well but has a slight risk of water leaking into the crust.
- Carefully place the water bath setup into the preheated oven. Bake for 70-80 minutes, or until the edges are set and the center has a slight jiggle.
- Turn off the oven, crack the oven door open slightly, and let the cheesecake cool slowly in the oven for 30 minutes. This gradual cooling prevents cracks.
- Remove the springform pan from the water bath and transfer it to a wire rack to cool completely at room temperature. Once cool, cover the pan tightly with aluminum foil and chill in the refrigerator for at least 6 hours, or ideally, overnight.
Chocolate Ganache
- Place semi-sweet chocolate chips into a heat-safe bowl. Heat the heavy cream in a small saucepan over medium-low heat until it is steaming and just begins to simmer around the edges (do not boil).
- Pour the hot cream over the chocolate chips. Let it sit undisturbed for 2 minutes to allow the chocolate to melt. Then, gently stir until the ganache is fully melted, smooth, and glossy. If any chocolate chunks remain, microwave in 15-second intervals, stirring after each, until smooth.
- Once the cheesecake is thoroughly chilled, take it out of the springform pan and remove the parchment paper from the bottom. Place on a serving platter. Pour the slightly cooled ganache over the top of the cheesecake, allowing it to drizzle down the sides. Decorate immediately with additional peppermint chips and Lindt peppermint truffles. Serve chilled.
