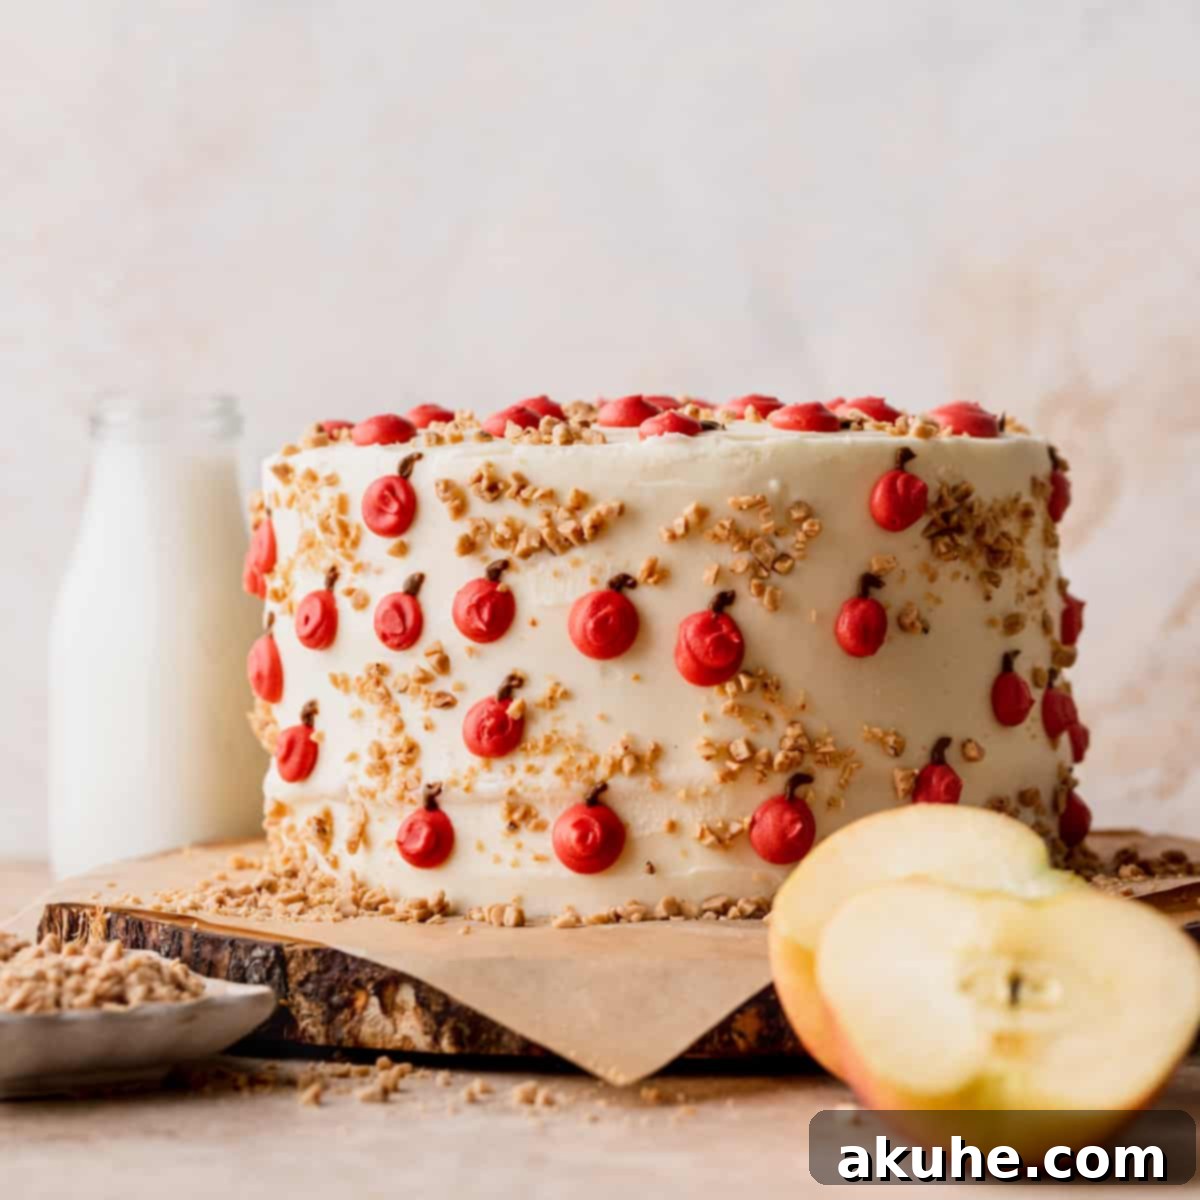
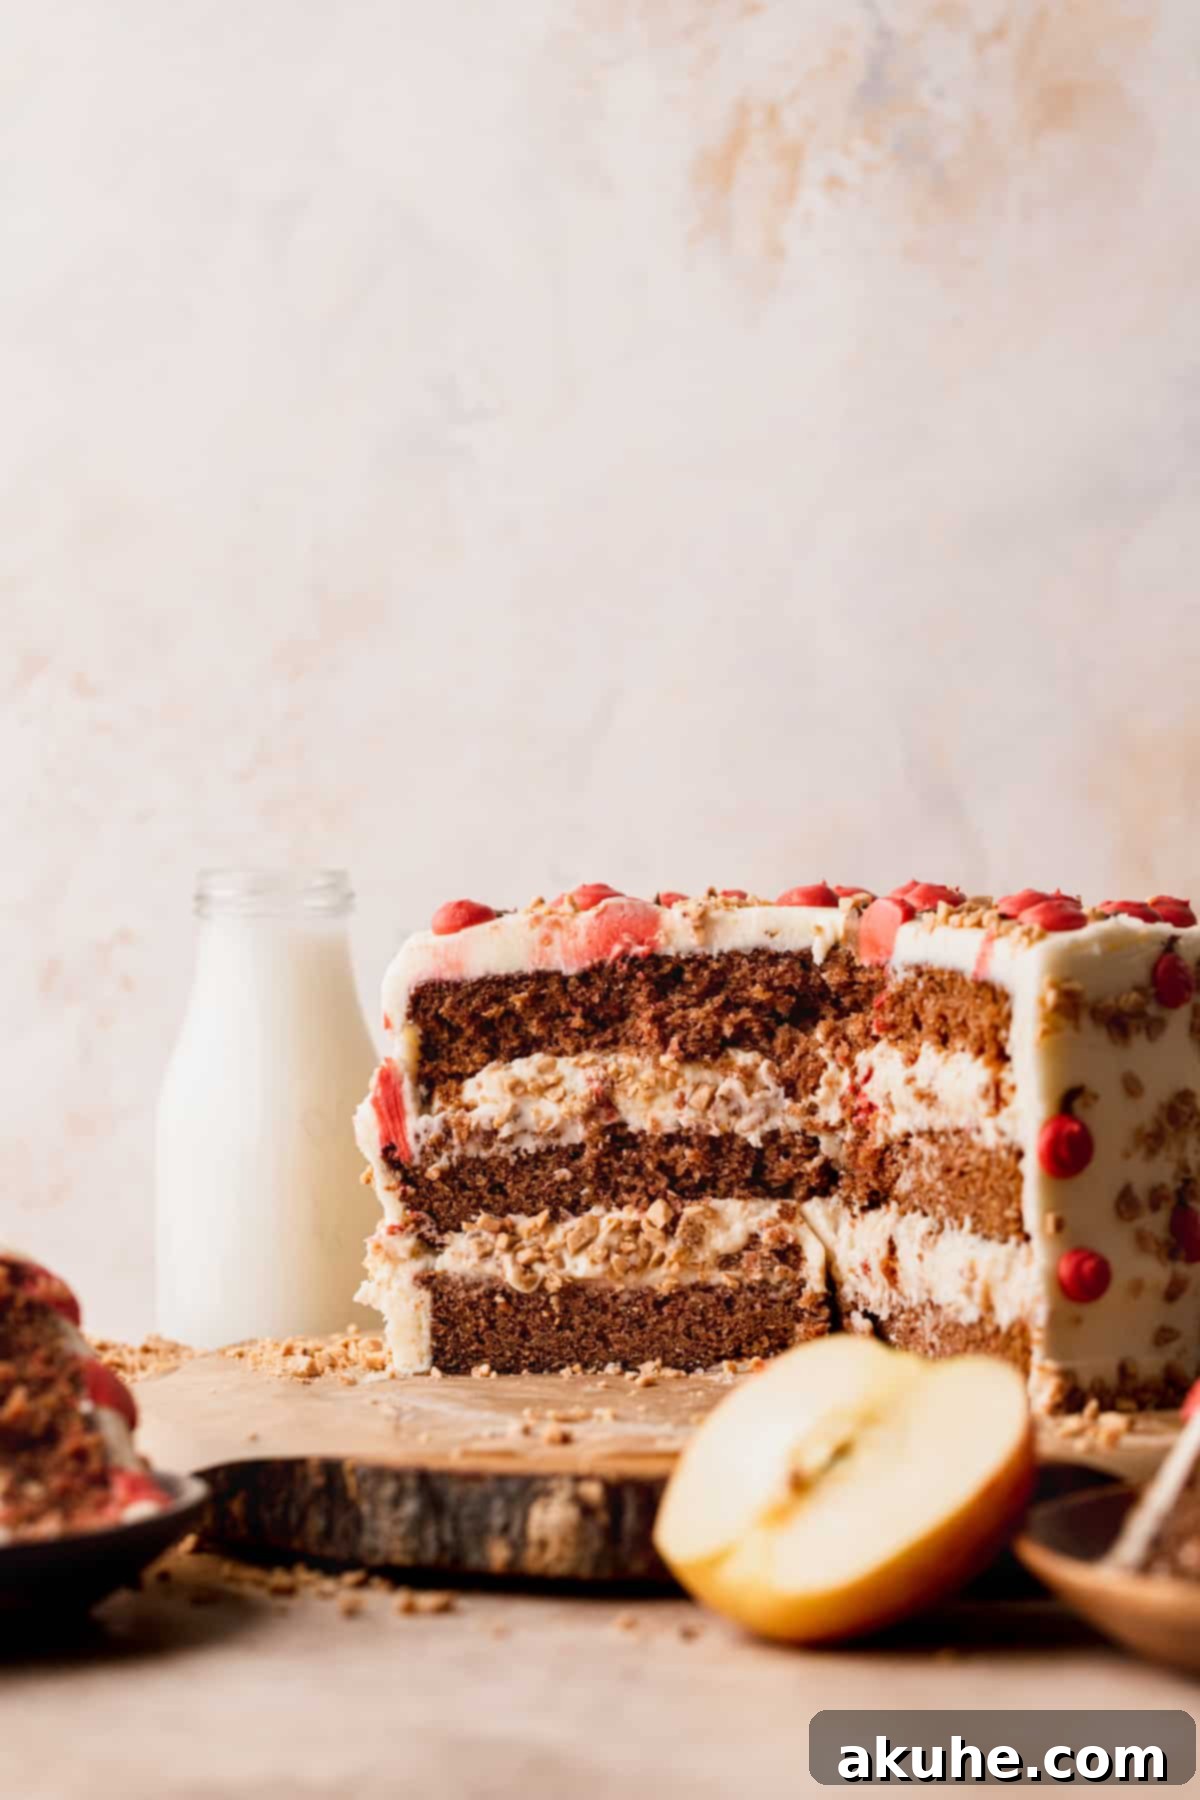
As autumn leaves begin to fall and the air grows crisp, there’s nothing quite like the comforting aroma of freshly baked goods filling your home. This exquisite Apple Toffee Layered Cake is the ultimate fall dessert, perfectly capturing the essence of the season in every delightful bite. Imagine moist, tender apple spice cake layers, generously studded with fresh, shredded apples and a blend of warm, inviting spices. But the indulgence doesn’t stop there. Each layer is lovingly embraced by a luscious toffee whipped cream cheese filling, adding a delightful creamy texture and irresistible caramel notes. Crowned with smooth, tangy cream cheese frosting and beautifully adorned with charming piped apple decorations and crunchy toffee bits, this cake is a true showstopper. It’s not just a dessert; it’s a celebration of autumn, an ideal way to utilize that bounty of fresh apples and bring joy to any gathering. Get ready to impress your family and friends with this truly unforgettable creation!
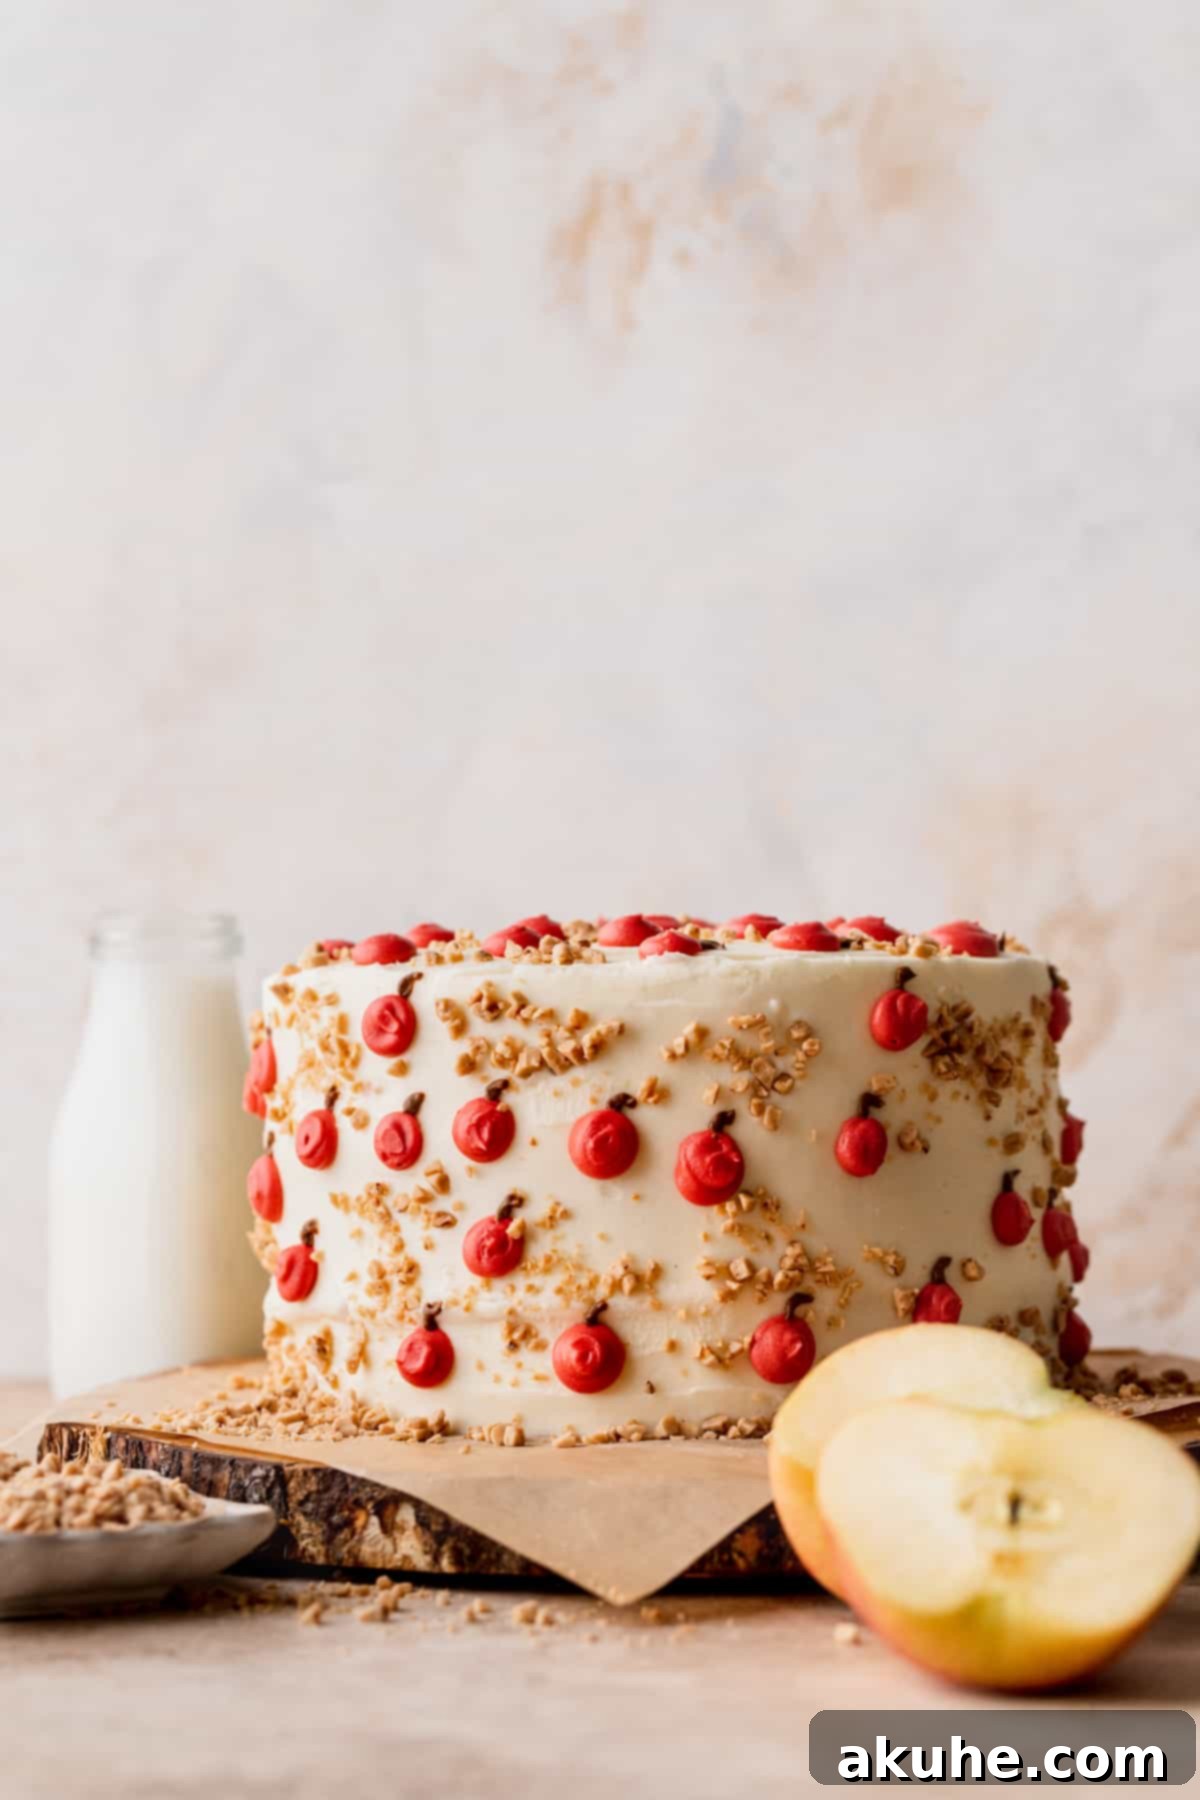
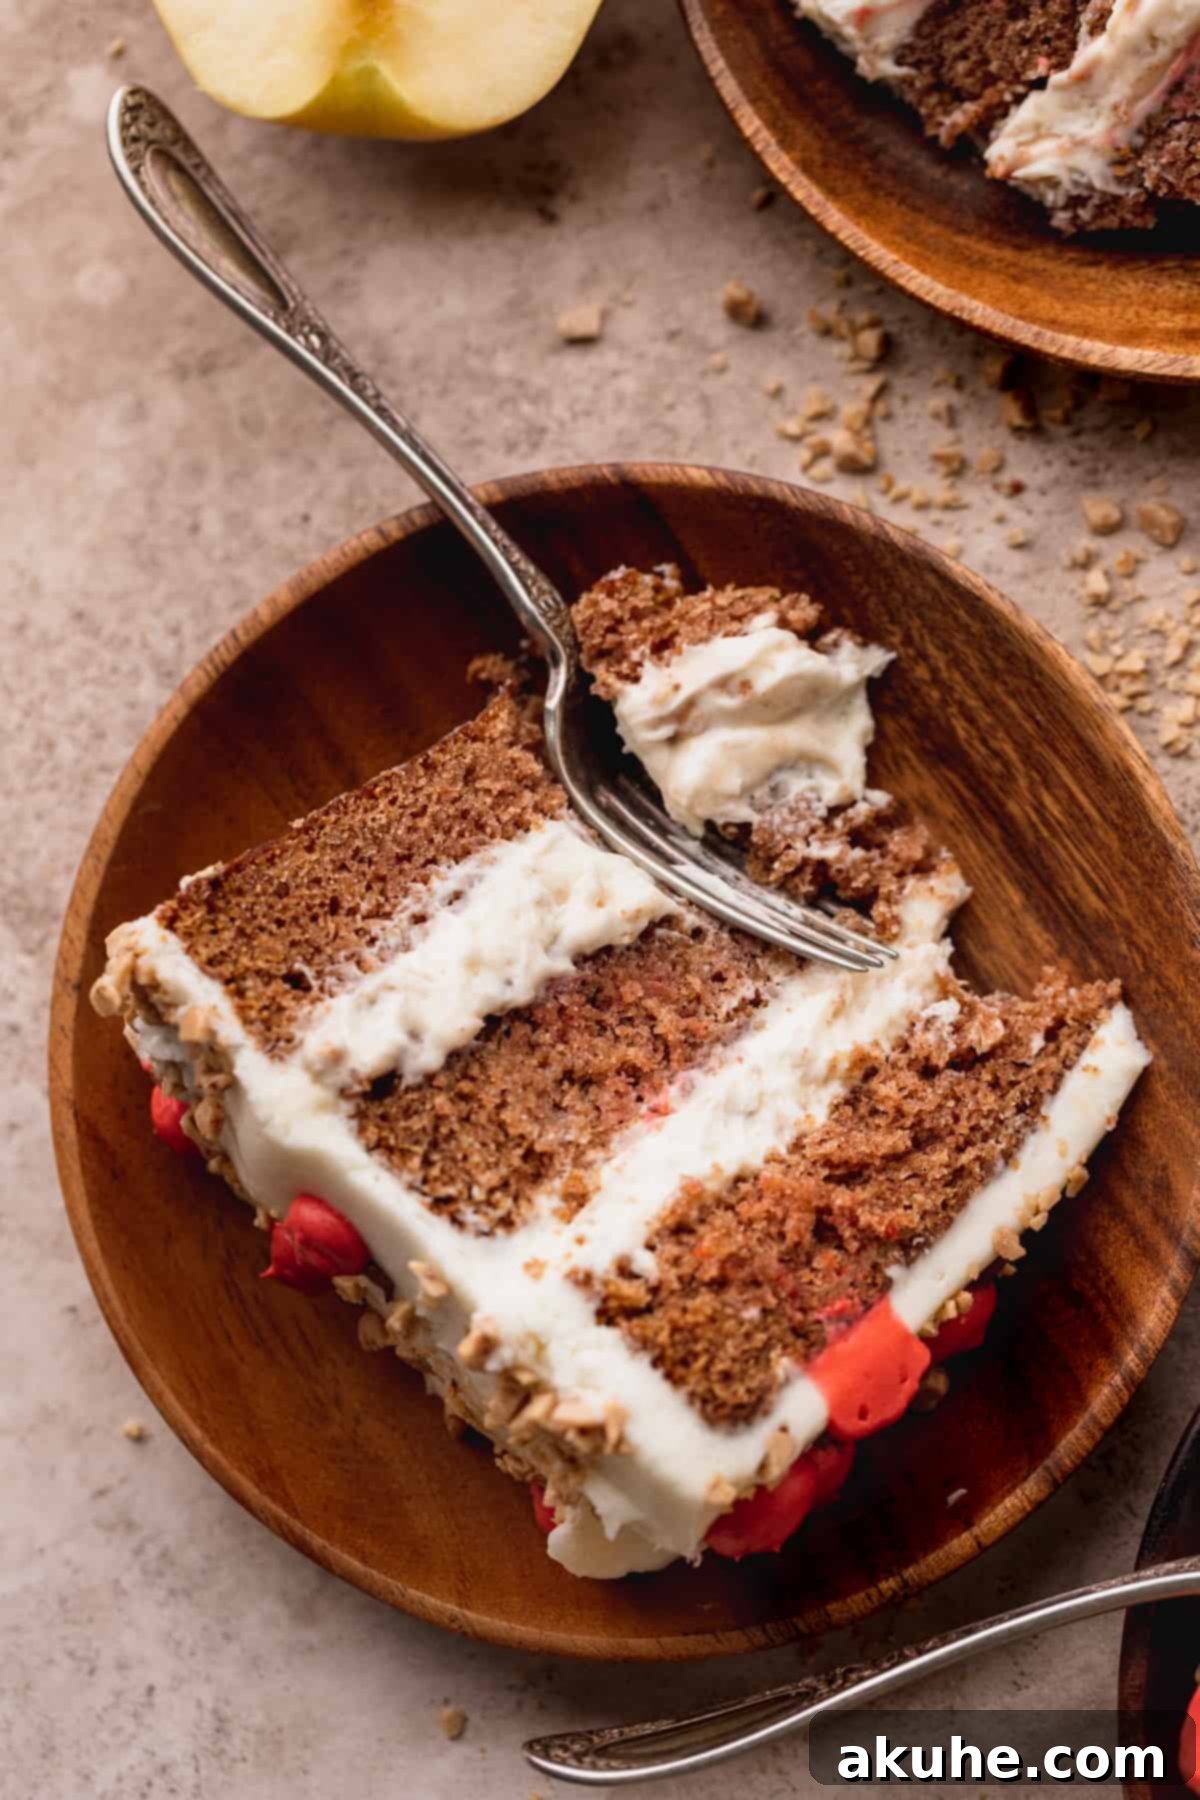
This magnificent apple cake stands out as a true masterpiece among layered cakes, thanks to its star ingredient: fresh shredded apples. Unlike simple apple-flavored cakes, this recipe incorporates real apple pieces directly into the batter, ensuring a naturally sweet and intensely fruity apple flavor that permeates every crumb. But it’s not just about the apples; a generous blend of aromatic spices elevates this cake to a whole new level. Think cozy cinnamon, warm nutmeg, and a hint of spicy ginger, all working in harmony to create a truly comforting and complex flavor profile that is synonymous with autumnal baking.
Toffee pieces are ingeniously integrated into both the cake’s decoration and its luxurious filling, providing not just an extra layer of sweetness but also a delightful textural contrast. The subtle crunch from these toffee bits adds an exciting element to the otherwise soft and moist cake, making each spoonful a multi-sensory experience. This combination of tender cake, creamy filling, and crunchy toffee creates a dessert that is both sophisticated and incredibly satisfying.
If your quest for irresistible apple desserts continues, be sure to explore other delightful recipes. Indulge in the comforting embrace of a classic Apple Cider Donut Cake, experience the rich decadence of a Caramel Apple Spice Cake, or savor the convenience and deliciousness of Caramel Apple Cheesecake Bars. Each recipe offers a unique way to celebrate the versatility of apples in baking, promising a treat for every palate.
Why This Apple Toffee Cake Will Become Your New Fall Favorite
Prepare to fall in love with this Apple Toffee Layered Cake! It’s more than just a dessert; it’s an experience that brings together beloved fall flavors and textures in perfect harmony. Here’s why this recipe deserves a prime spot in your baking repertoire:
- Incredibly Moist Apple Spice Cake Layers: Our cake batter is infused with finely shredded fresh apples, resulting in an exceptionally moist and tender crumb that practically melts in your mouth. This isn’t just an apple-flavored cake; it’s a true apple cake, reminiscent of a comforting carrot cake but with the bright, sweet essence of apples taking center stage. The blend of warming spices like cinnamon, nutmeg, and ginger makes each bite feel like a cozy autumn embrace.
- Dreamy Toffee Whipped Cream Cheese Filling: The star of the filling is a light, airy, and incredibly flavorful whipped cream cheese, made even more irresistible with the generous addition of crunchy toffee pieces. This creamy, sweet, and slightly tangy filling provides a beautiful contrast to the spice cake, with the toffee bits adding unexpected bursts of buttery, caramelized goodness. It’s a filling that truly elevates the entire cake.
- Classic Cream Cheese Frosting Perfection: No spice cake, especially one as magnificent as this, would be complete without a generous slathering of decadent cream cheese frosting. Our recipe delivers a frosting that is perfectly balanced – sweet, tangy, and wonderfully smooth. It complements the rich apple and toffee flavors without overpowering them, creating a harmonious symphony of taste and texture in every single bite.
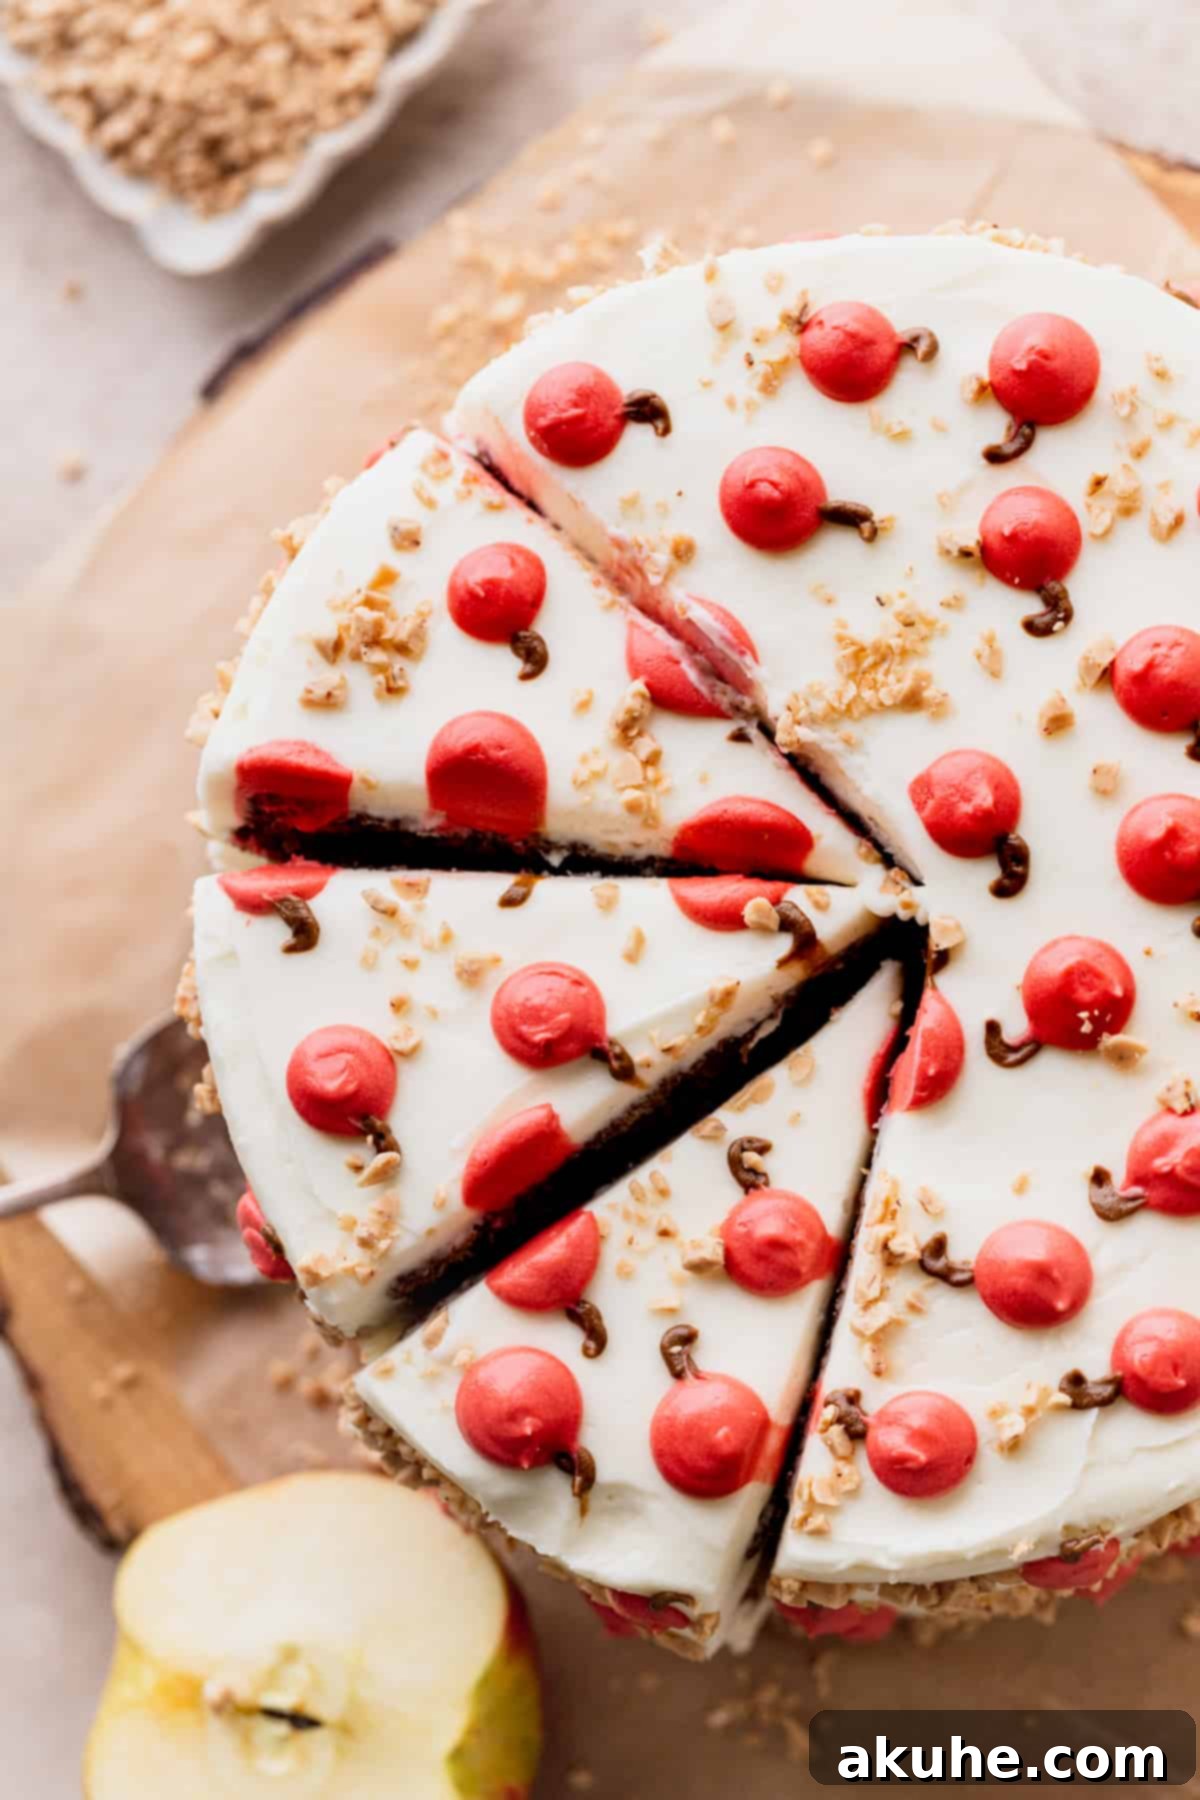
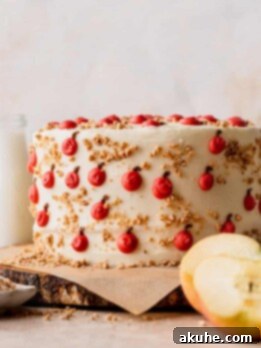
- Charming Apple Decorations for a Festive Touch: Beyond its incredible taste, this cake is a visual delight. The simple yet elegant piped apple decorations on top add a cute and festive touch, making it ideal for holiday gatherings, fall celebrations, or just a special weekend treat. It’s an easy way to elevate your baking and add a personal, artistic flair that will surely impress.
Essential Ingredient Notes for Your Perfect Apple Toffee Cake
Achieving baking perfection often comes down to understanding your ingredients. Here are some detailed notes to ensure your Apple Toffee Layered Cake turns out absolutely flawless:
- Room Temperature Dairy Ingredients: This is a crucial step for a smooth, homogenous batter and frosting. Ensure your butter, cream cheese, sour cream, and eggs are all at room temperature, ideally by pulling them out of the refrigerator at least 2 hours before you plan to start baking. Room temperature ingredients emulsify better, creating a lighter, fluffier cake texture and preventing curdling in your frosting.
- Oil: For the cake, we recommend using a neutral-flavored oil such as canola oil or vegetable oil. These oils contribute significant moisture to the cake without imparting any strong flavors, allowing the apple and spice notes to shine.
- Brown Sugar: Whether you choose light or dark brown sugar, ensure it’s packed tightly when measuring. Brown sugar not only adds moisture and a rich, molasses-like sweetness to the cake but also contributes to its beautiful golden-brown color and tender texture.
- Sour Cream: Opt for full-fat sour cream in this recipe. Its higher fat content adds richness, moisture, and a subtle tang that enhances the overall flavor profile of the cake, making it incredibly tender and flavorful.
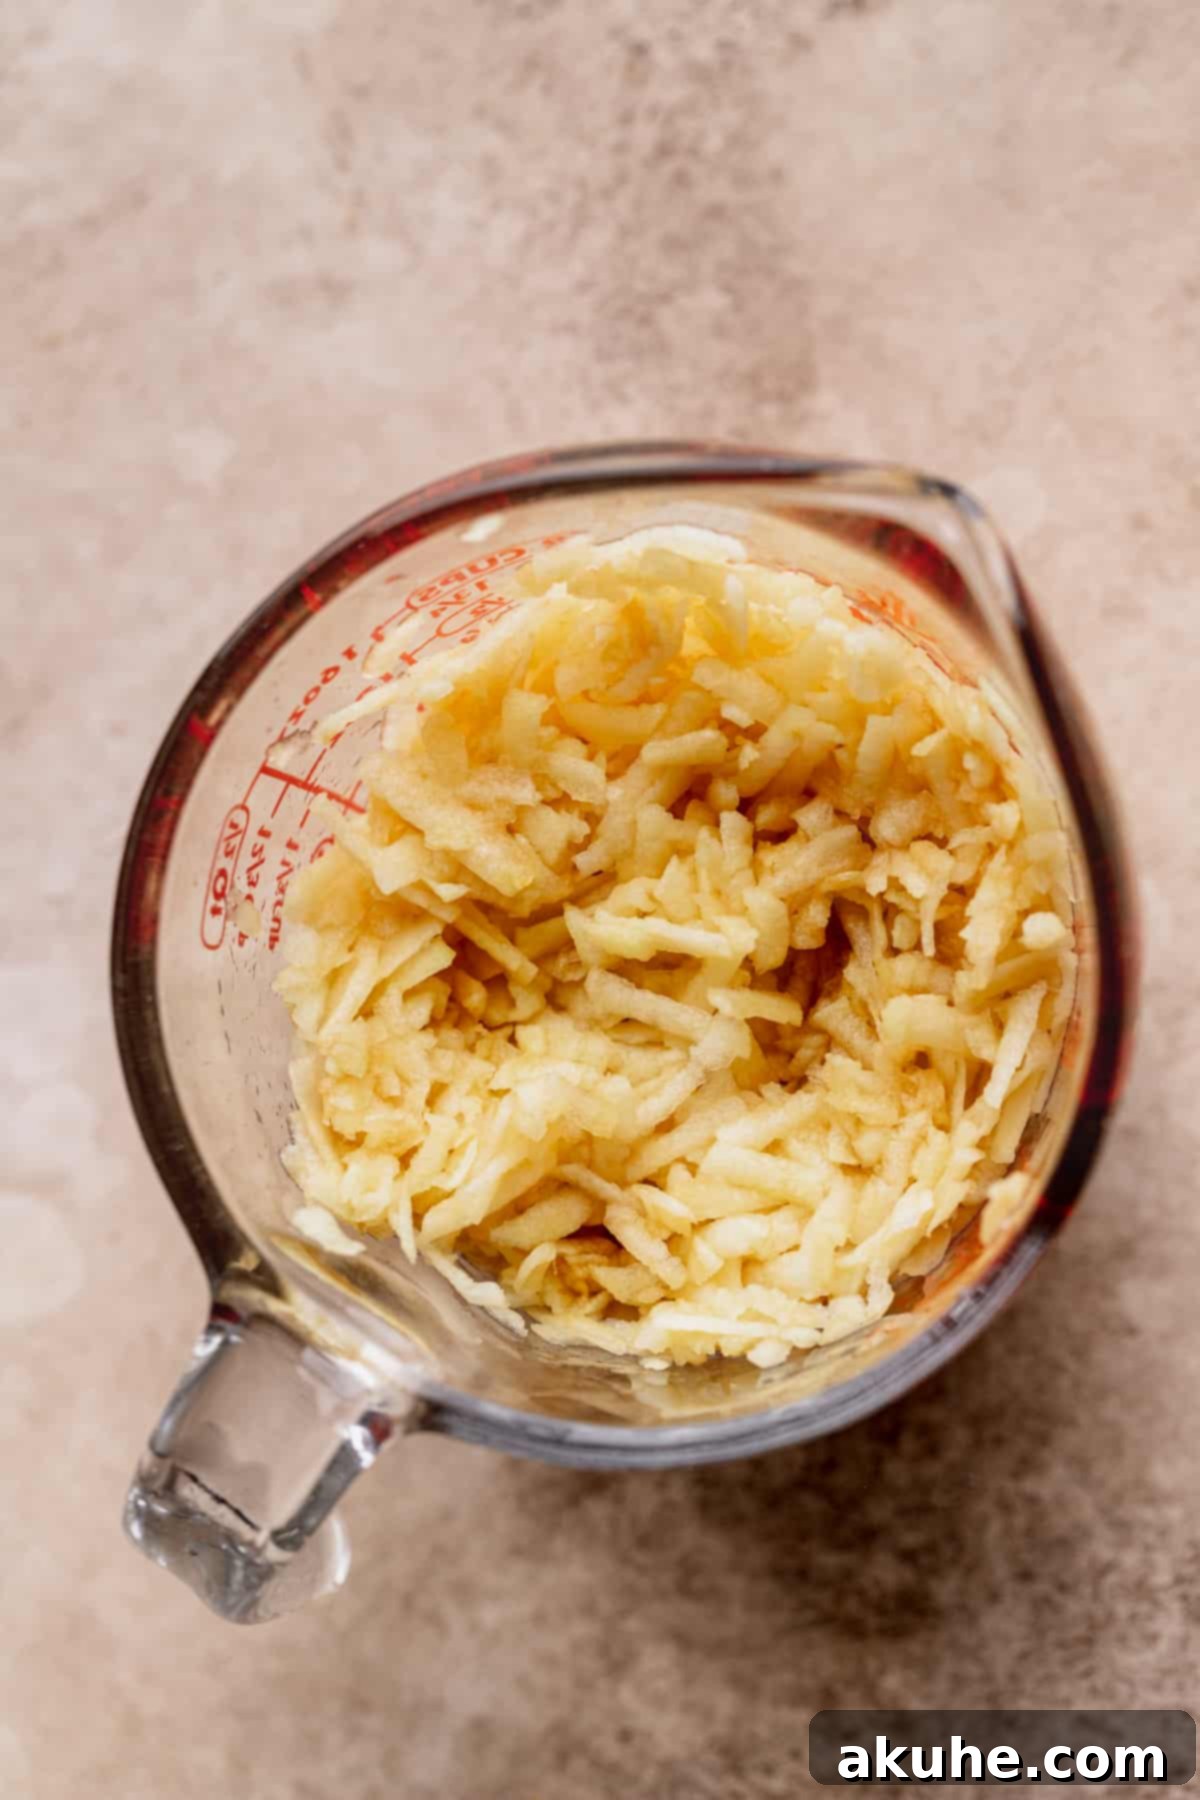
- Apples: The Heart of the Cake: For the best results, select sweet, firm apples like Gala, Fuji, Honeycrisp, or Golden Delicious. Avoid tart varieties like Granny Smith, as they can alter the cake’s sweetness balance. You’ll need about three medium-sized apples for this recipe. Always peel the fresh apples before shredding. Carefully cut the apple away from the core, then use the largest holes on your box grater to shred them. This ensures you get substantial pieces of apple that remain distinct and moist within the cake layers.
- Buttermilk: Buttermilk reacts with the baking soda to create a beautifully tender crumb and adds a lovely subtle tang. If you don’t have buttermilk on hand, don’t worry! You can easily make your own by combining 1/2 cup of whole milk with 1/2 tablespoon of lemon juice or white vinegar. Let this mixture sit for 5-10 minutes until it slightly curdles, then it’s ready to use. This homemade version works perfectly.
- Cream Cheese (for Frosting & Filling): Always use full-fat brick-style cream cheese for both the filling and frosting. Spreadable tub cream cheese often contains too much water, which can result in a runny frosting and filling. Ensure it’s softened to room temperature for optimal smoothness.
- Toffee Pieces: The recipe calls for toffee pieces, and you have flexibility here. You can use standard toffee bits or opt for the chocolate-covered version for an extra layer of indulgence. Brands like Heath Bar Bits are commonly available and work wonderfully. The crunch and buttery caramel flavor of the toffee are essential for this cake’s unique character. We recommend these ones.
- Powdered Sugar: To ensure your frosting and filling are lump-free and silky smooth, always sift your powdered sugar (also known as confectioners’ sugar). This simple step makes a significant difference in the final texture.
Clever Ingredient Substitutions & Dietary Considerations
Baking should be an enjoyable and adaptable experience. While the recipe is designed for optimal flavor and texture, here are some thoughtful substitutions and considerations for various dietary needs:
- Dairy-Free Alternatives: For those with dairy sensitivities or following a dairy-free diet, most dairy components in this recipe can be successfully substituted. Look for your favorite high-quality dairy-free butter sticks, cream cheese alternatives, sour cream substitutes, and plant-based milk (like almond or oat milk) for the buttermilk hack. Ensure these alternatives are suitable for baking and have a similar consistency to their dairy counterparts for the best results.
- Gluten-Free Exploration: This recipe has not been officially tested with gluten-free flour blends. However, many readers have success using a 1:1 gluten-free baking flour blend (ensure it contains xanthan gum) as a direct substitute for all-purpose flour. If you decide to experiment with a gluten-free version, we’d love to hear about your experience and results! Baking gluten-free can sometimes require minor adjustments in liquid or baking time, so proceed with a keen eye.
- Buttermilk Substitute (Expanded): Beyond the 1/2 cup milk + 1/2 TBSP lemon juice method, you can also create a homemade buttermilk substitute by combining 1 cup of whole milk with 1 tablespoon of white vinegar or lemon juice. Stir gently and let it sit for about 10 minutes. The acid will curdle the milk, mimicking the properties of true buttermilk, which is essential for the cake’s tenderness and crumb.
Step-by-Step Guide to Baking Your Apple Toffee Layered Cake
Baking this stunning Apple Toffee Layered Cake is a rewarding process, and with these detailed steps, you’ll achieve professional-level results right in your own kitchen. Before you begin, gather your essential tools: a stand mixer with a paddle attachment (or a reliable electric hand mixer), a rubber spatula, and three 8-inch round cake pans.
STEP 1: Prepare Your Baking Pans & Apples. Start by preheating your oven to 350°F (175°C). Prepare your three 8-inch cake pans by generously greasing them with baking non-stick spray, then lining the bottoms with parchment paper circles. Spray again over the parchment to ensure easy release. Next, focus on your apples. Peel your chosen apples, carefully cut the flesh away from the core, and then shred them using the largest holes on your box grater. Don’t be alarmed if the shredded apples begin to brown slightly; this is a natural oxidation process and will not affect the final taste or appearance of your cake. Set the shredded apples aside.
STEP 2: Combine the Dry Ingredients. In a large mixing bowl, sift together the all-purpose flour, baking soda, salt, ground cinnamon, ground nutmeg, and ground ginger. Sifting is an important step as it prevents any flour lumps from forming in your batter, ensuring a smooth and even texture throughout the cake. Use a whisk to thoroughly combine these dry ingredients until they are uniformly distributed. Set this bowl aside. You might find a sifter helpful for this step.
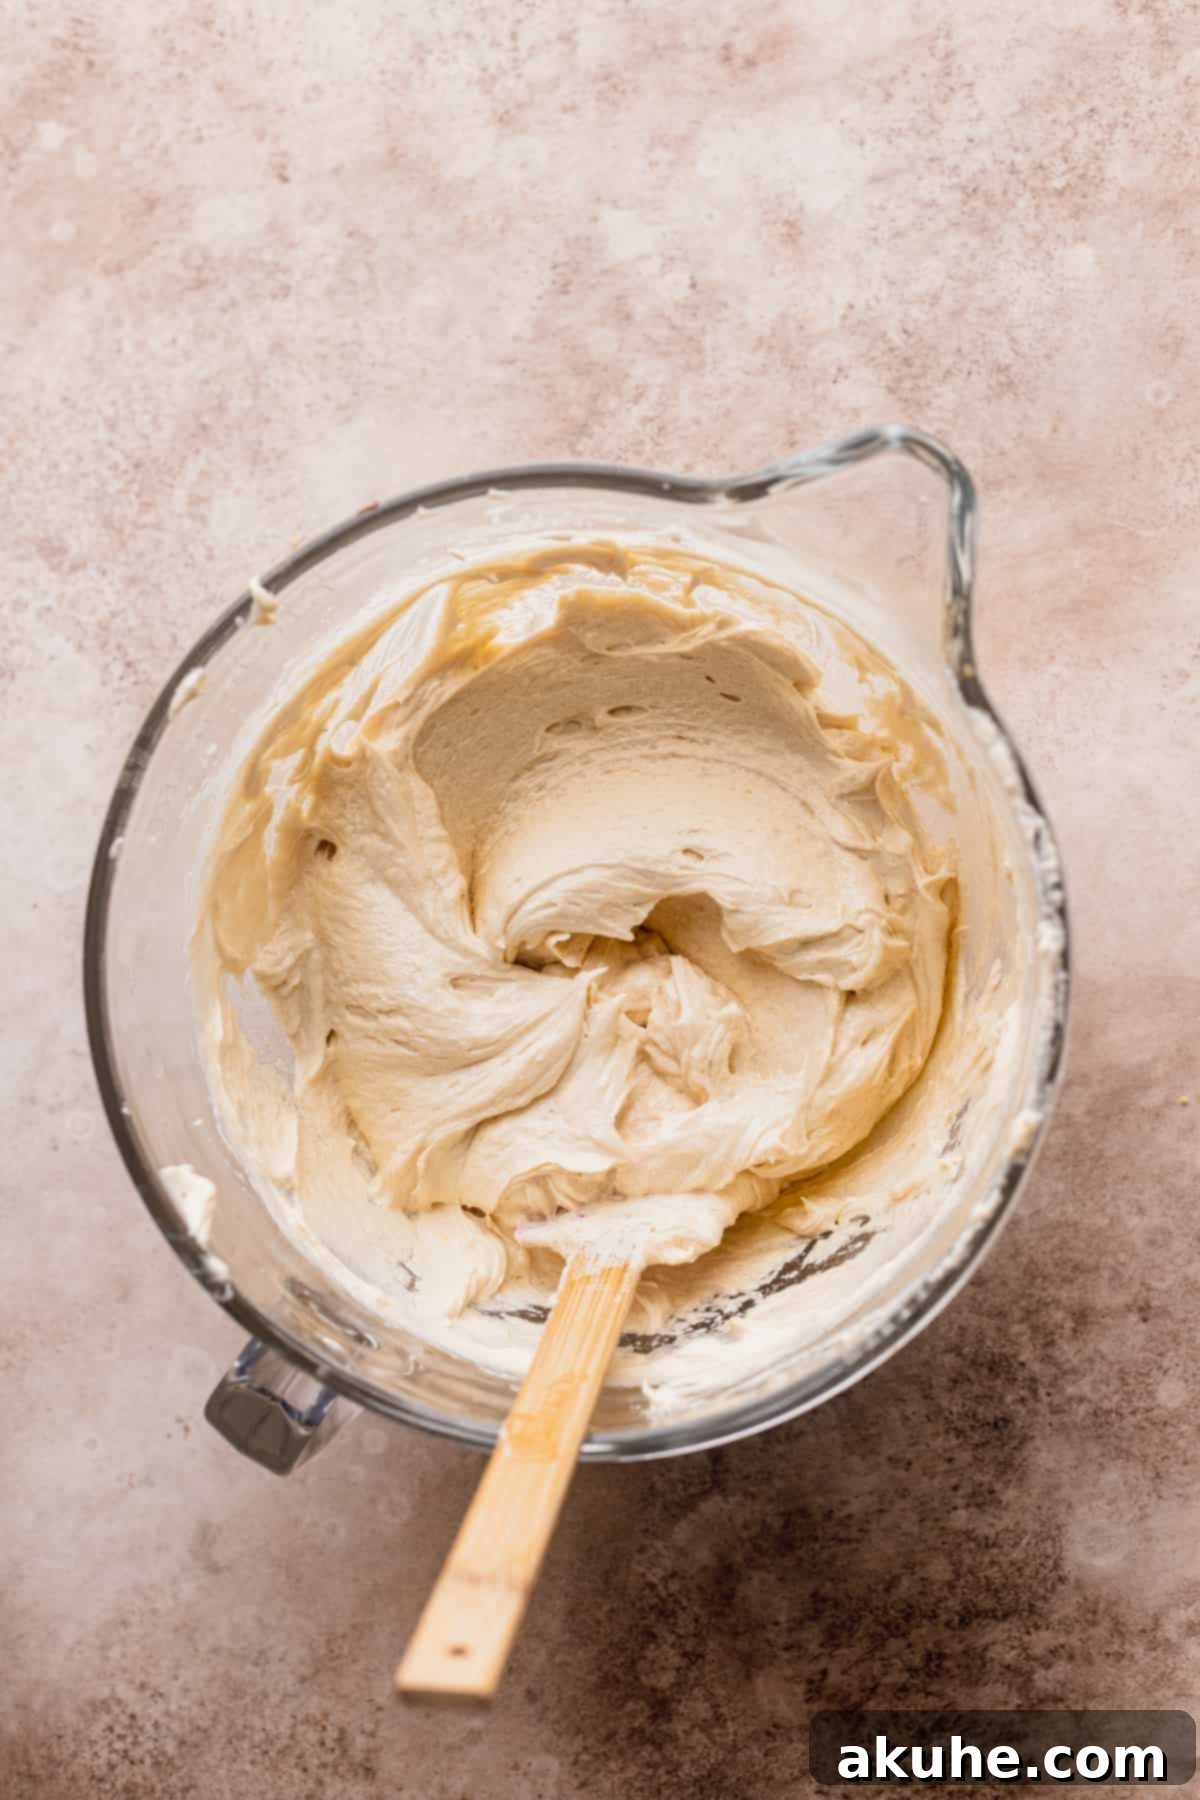
STEP 3: Cream Together the Wet Ingredients. In the bowl of your stand mixer fitted with the paddle attachment (or using an electric hand mixer in a large bowl), combine the room temperature unsalted butter, neutral oil (canola or vegetable), white granulated sugar, and packed brown sugar. Beat these ingredients on high speed for approximately 2 minutes. The mixture should become noticeably light in color and fluffy in texture, indicating that air has been properly incorporated. Next, add the room temperature sour cream and pure vanilla extract, mixing until just combined. Finally, add the large eggs one at a time, beating well after each addition to ensure full incorporation. Scrape down the sides of the bowl with your rubber spatula, then continue to mix on medium speed for another minute until the mixture is exceptionally light and fluffy, as shown in the picture below.
STEP 4: Integrate Apples, Buttermilk, and Dry Ingredients. This step requires careful handling to maintain the cake’s tender crumb. First, take your shredded apples and firmly wring out any excess juice. This prevents the cake from becoming too wet or dense. In a separate small bowl, mix the squeezed shredded apples with the room temperature buttermilk. Now, with your mixer on low speed, gradually add one-third of the dry ingredient mixture to the wet batter, mixing until just combined. Follow with half of the buttermilk and apple mixture, mixing gently. Repeat this process: add another one-third of the dry ingredients, then the remaining buttermilk and apple mixture. Finish by adding the last one-third of the dry ingredients, mixing only until no streaks of flour remain. Be careful not to overmix, as this can lead to a tough cake.
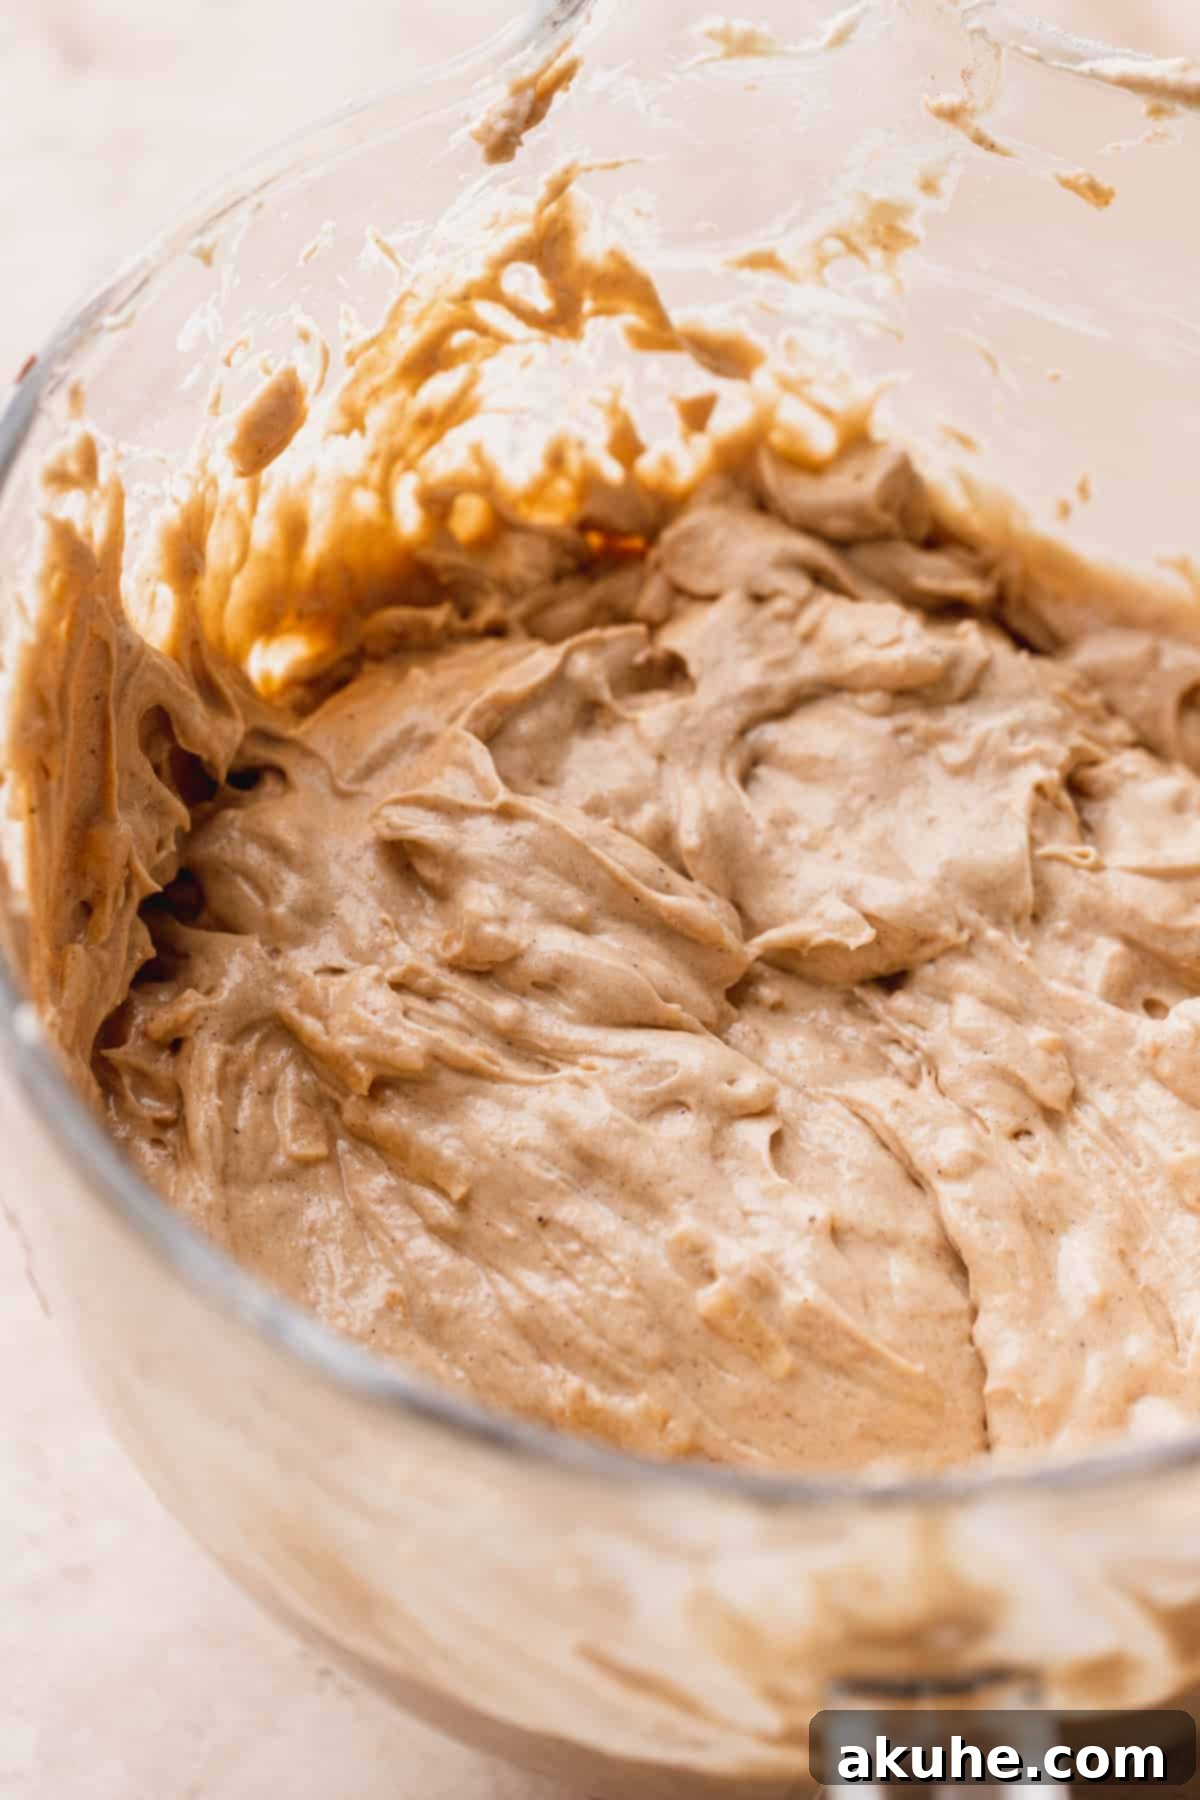
STEP 5: Bake the Apple Cake Layers. Divide the cake batter evenly among your three prepared 8-inch cake pans. Use a spatula to gently level the tops. Transfer the pans to your preheated oven and bake for approximately 26-30 minutes. Baking times can vary slightly depending on your oven, so keep an eye on them. The cakes are done when a wooden skewer or toothpick inserted into the center comes out clean. It’s completely normal for these apple spice cake layers to appear quite brown on top due to the sugar content and the apples; this rich color indicates a beautifully caramelized crust. Once baked, remove the pans from the oven and let the cakes cool in their pans on a wire rack for 10-15 minutes before carefully inverting them onto the rack to cool completely. Ensuring they are fully cooled is crucial before frosting to prevent melting and sliding. You can find 8-inch cake pans here.
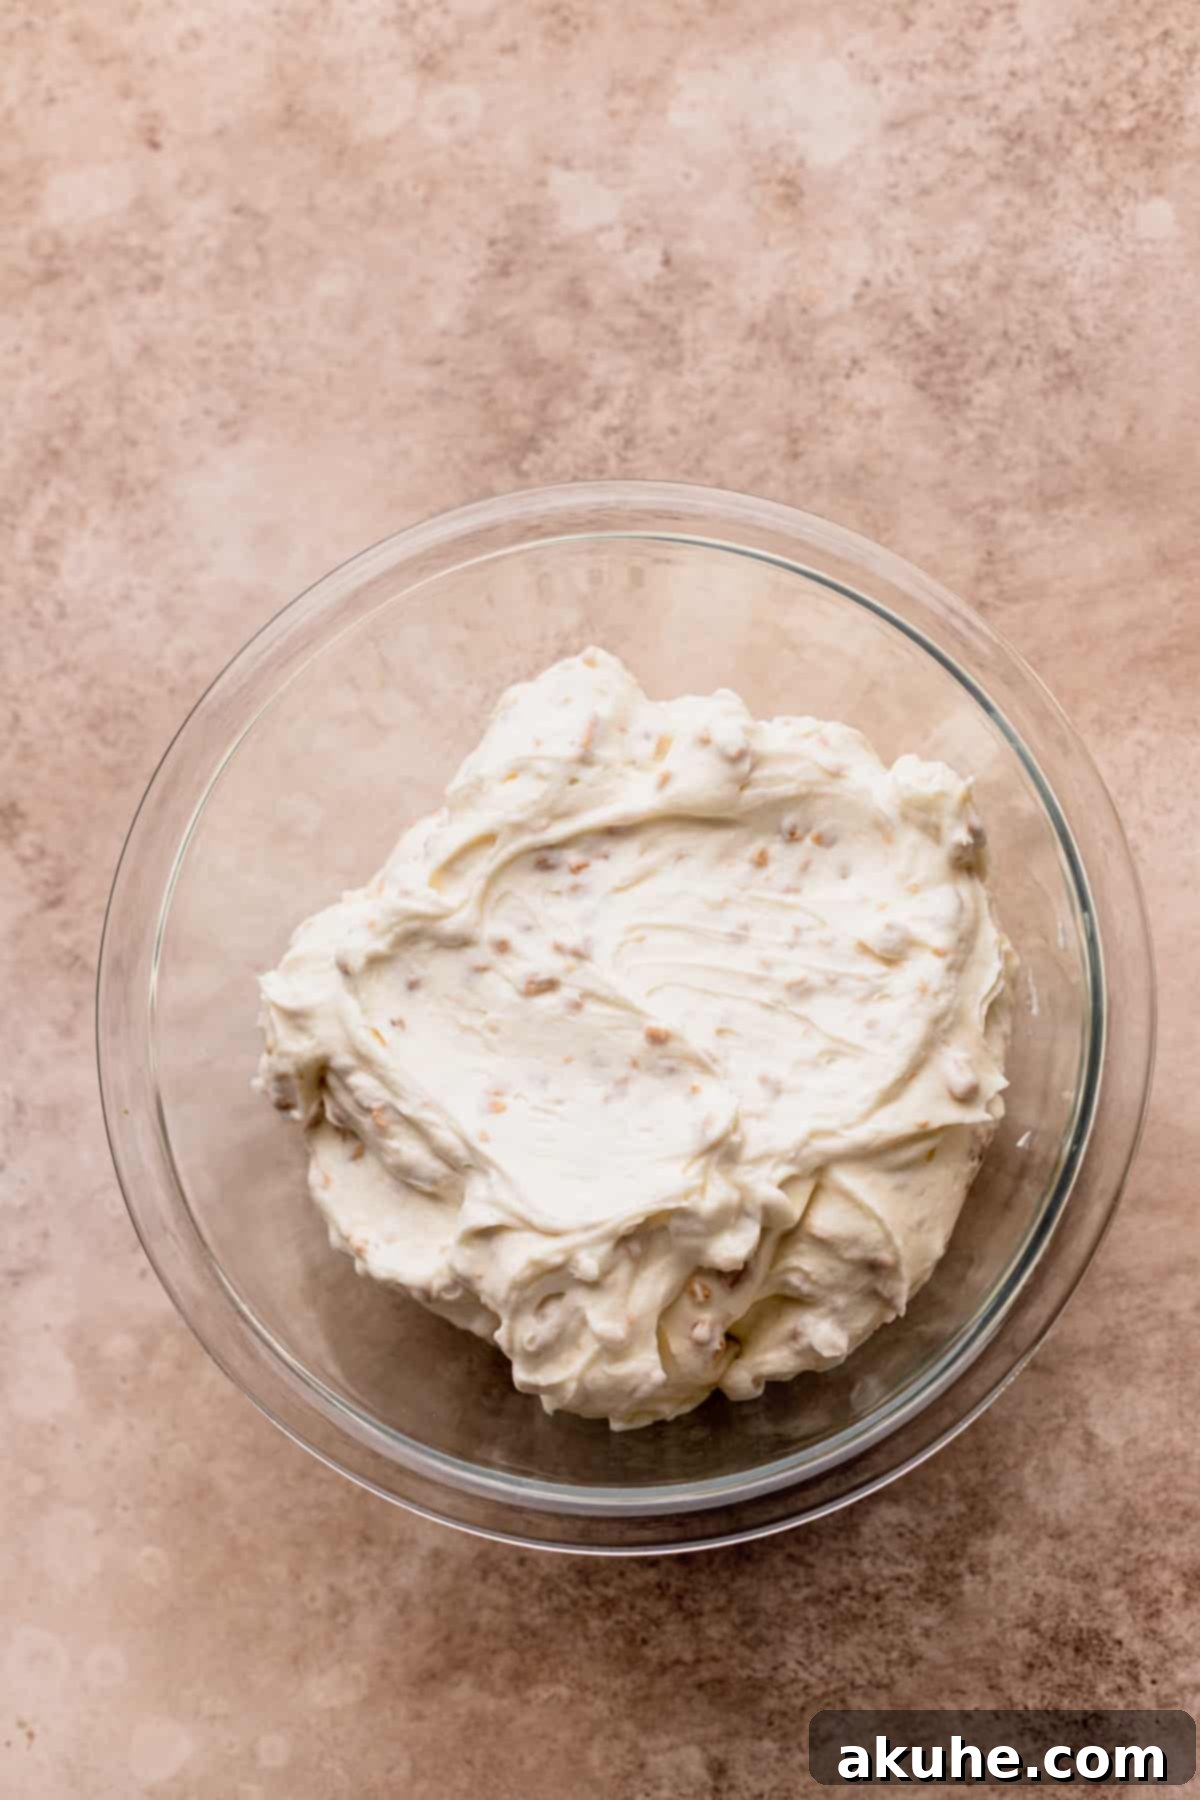
STEP 6: Prepare the Toffee Whipped Cream Cheese Filling. This luscious filling is a highlight of the cake. Begin by placing a metal mixing bowl and whisk attachment into the freezer for at least 10 minutes; this helps achieve perfectly stiff whipped cream. In a separate large bowl, beat the softened cream cheese on high speed for 1 minute until smooth. Gradually add the sifted powdered sugar, beating until fully incorporated and lump-free. Mix in the pure vanilla extract. Now, retrieve your chilled bowl and whisk. Pour in the cold heavy cream and beat on high speed until stiff peaks form – be careful not to overbeat, or it could turn grainy. Gently fold the freshly whipped cream into the cream cheese mixture using a rubber spatula. The key here is gentleness to maintain the airiness of the whipped cream. Finally, fold in the crunchy toffee pieces. Once mixed, cover the filling and chill it in the refrigerator for at least an hour. It needs to be thick and cold before you use it to fill your cake layers.
STEP 7: Craft the Silky Cream Cheese Frosting. For the iconic cream cheese frosting, ensure your cream cheese is at room temperature and your butter is slightly cool, not completely soft. In the bowl of your stand mixer, beat the room temperature cream cheese and slightly cool unsalted butter together on high speed for about 2 minutes until light and fluffy. Gradually add the sifted powdered sugar, mixing on low speed initially to avoid a powdered sugar cloud, then increasing to medium-high until smooth and thick. Scrape down the bowl frequently to ensure everything is well combined. Finally, add the pure vanilla extract, salt, and heavy cream. Beat on high speed for another 2 minutes, scraping the bowl halfway through. The frosting should be beautifully smooth, creamy, and ready for decorating.
Expert Tips for Assembling Your Layered Cake Like a Pro
Assembling a layered cake can seem daunting, but with a few expert tips, you’ll achieve a beautifully structured and professional-looking dessert. Patience and cold cake layers are your best friends here!
Before you begin the assembly process, ensure your cake layers are completely cooled – ideally, even slightly chilled or frozen for 20-30 minutes. Cold cake layers are much easier to handle, less prone to tearing, and significantly reduce crumbs migrating into your frosting, leading to a much cleaner finish. If your cake layers have domed tops after baking, use a serrated knife to carefully level them, creating a flat surface for stable stacking.
To prevent your cake from sliding around during decorating, pipe or spread a small dollop of cream cheese frosting onto the center of your cake board or serving plate. This acts as an anchor, securely holding the first cake layer in place.
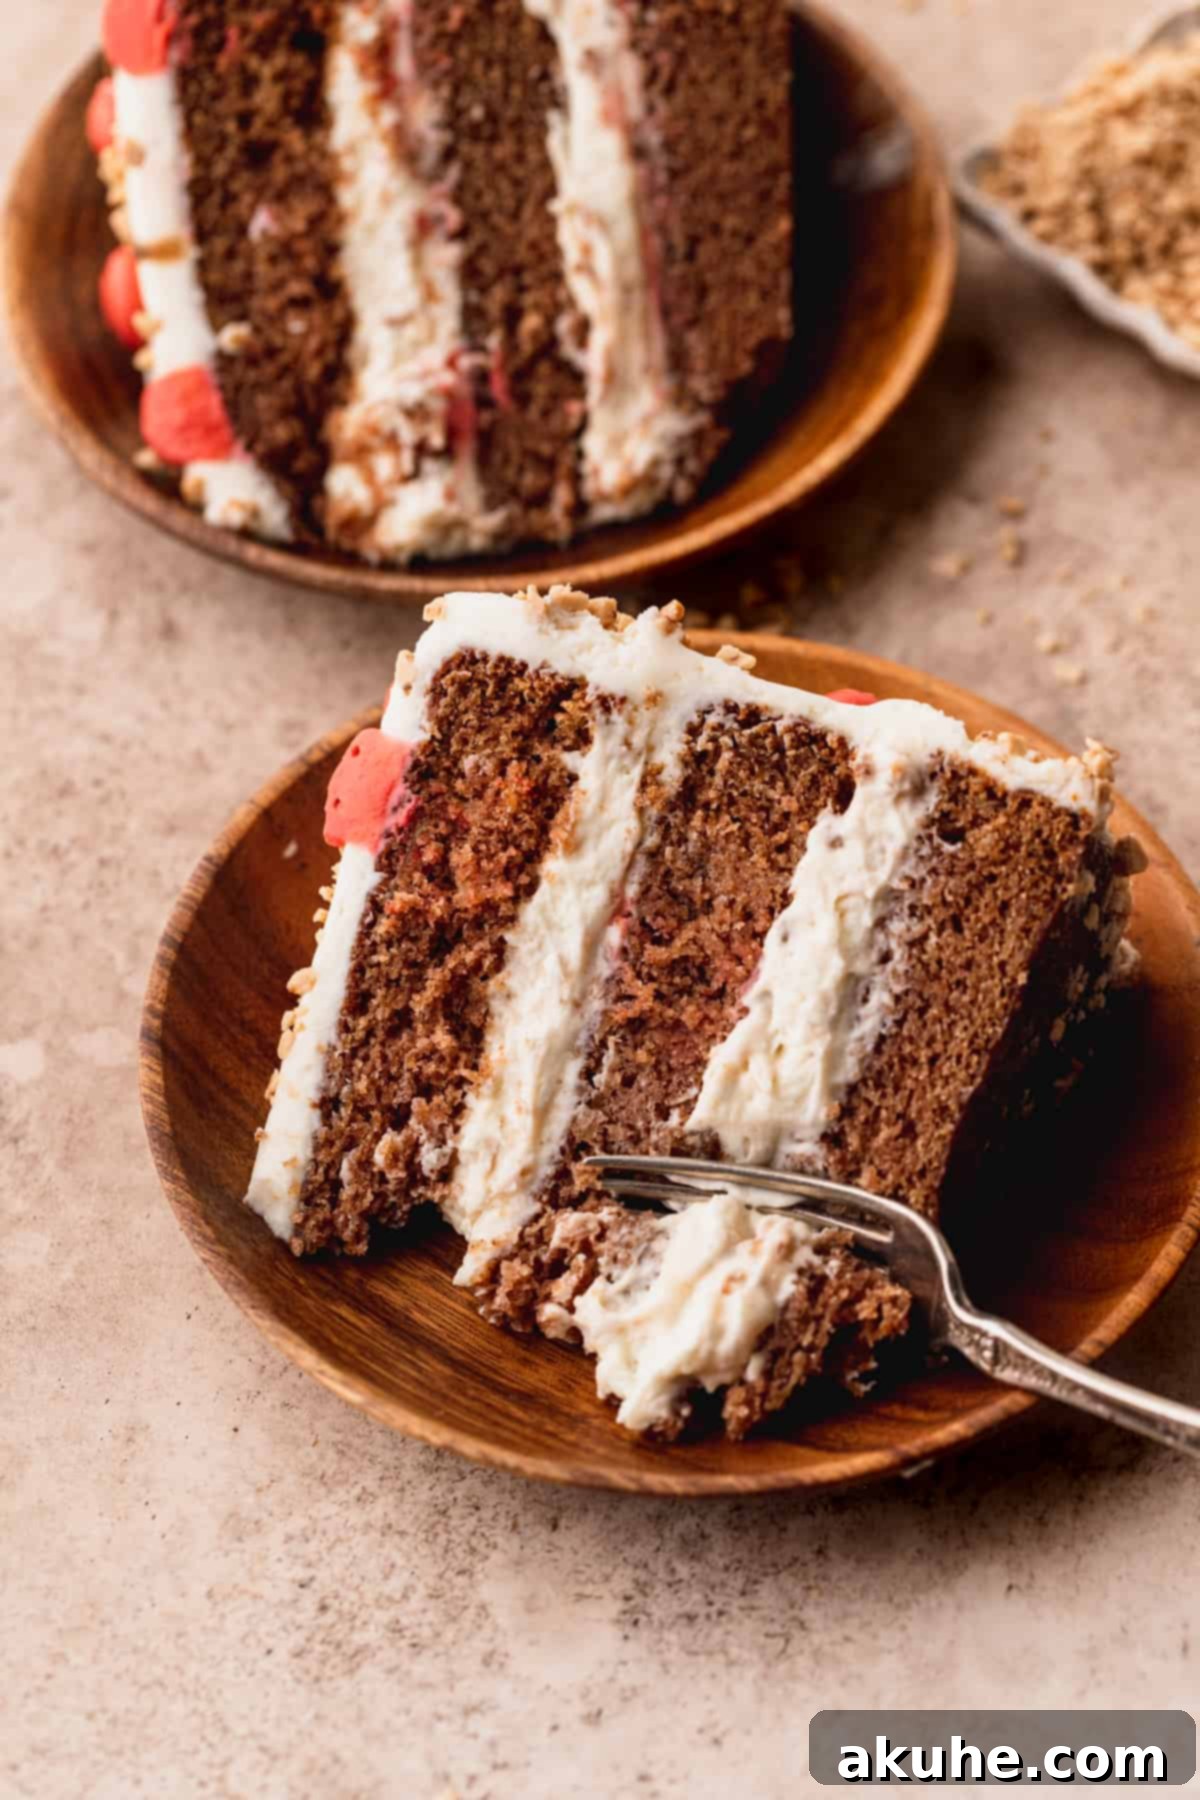
Now, place your first leveled cake layer onto the anchored board. Using an offset spatula or the back of a spoon, spread approximately 1/2 cup of the prepared cream cheese frosting evenly over the top of this layer. Next, pipe a double border of frosting around the very edge of the cake layer. This “frosting dam” is crucial; it creates a barrier that will hold the soft toffee whipped cream cheese filling securely in place, preventing it from oozing out the sides when you stack the next layer.
With the dam in place, carefully spread half of your chilled toffee whipped cream cheese filling over the frosted cake layer, staying within the piped border. Then, gently place the second cake layer on top, pressing down very lightly to ensure it’s level. Repeat the frosting and filling steps: spread another 1/2 cup of cream cheese frosting, pipe a double border, and then spread the remaining half of the toffee whipped cream cheese filling.
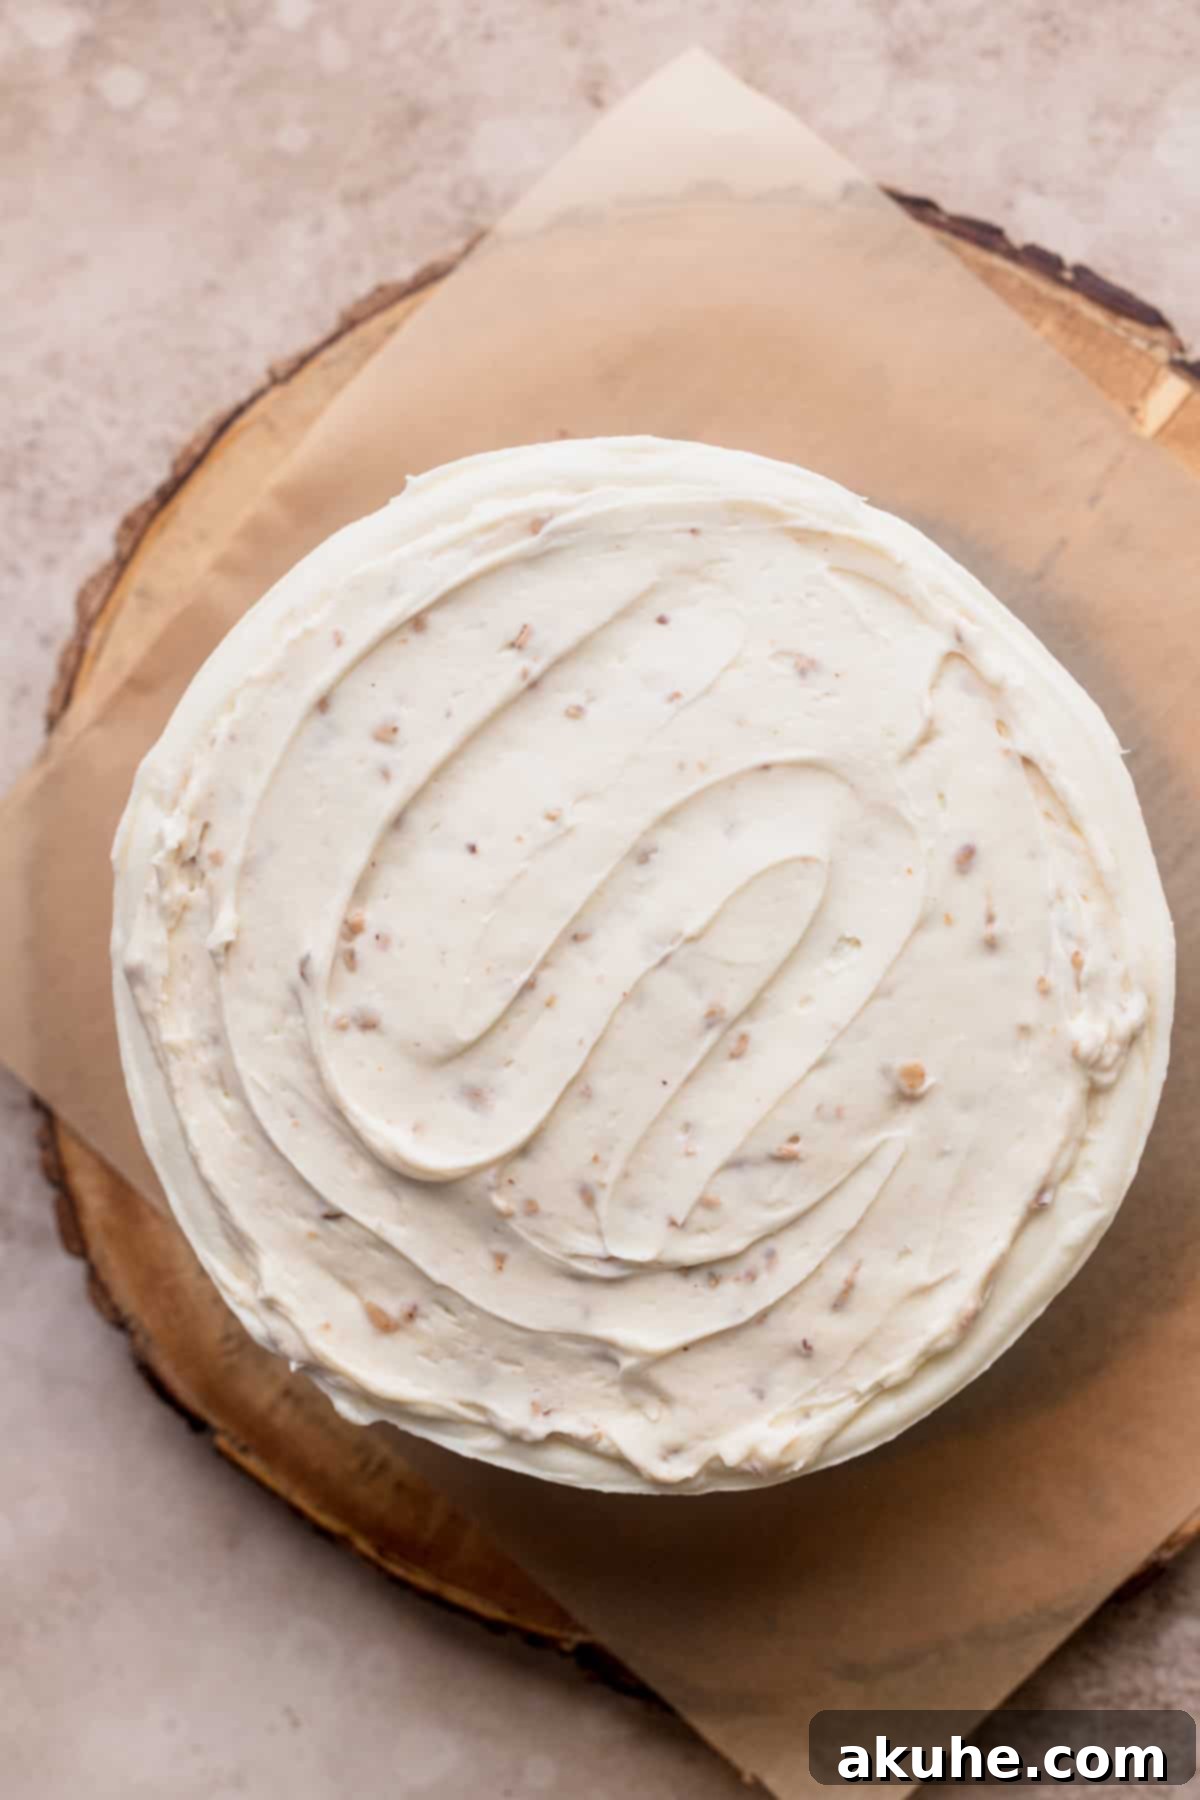
For the final layer, place the third cake layer onto the stack with its bottom side facing up. This trick ensures you have the flattest, most even surface for the very top of your cake, providing a perfect canvas for frosting and decoration. Once all layers are stacked and filled, apply a very thin “crumb coat” of cream cheese frosting all over the entire cake. This thin layer traps any loose crumbs. Immediately transfer the cake to the freezer for about 15-20 minutes to allow this crumb coat to set completely. This step is essential for achieving a clean, crumb-free final frosting layer.
Delightful Decoration Ideas for Your Apple Toffee Cake
Once your cake is beautifully assembled and frosted with its final layer, the fun truly begins with decoration! The beauty of this cake is that it’s incredibly versatile, allowing you to personalize it to your heart’s content. You can keep it simple with a rustic, smooth finish, or go all out with creative designs.
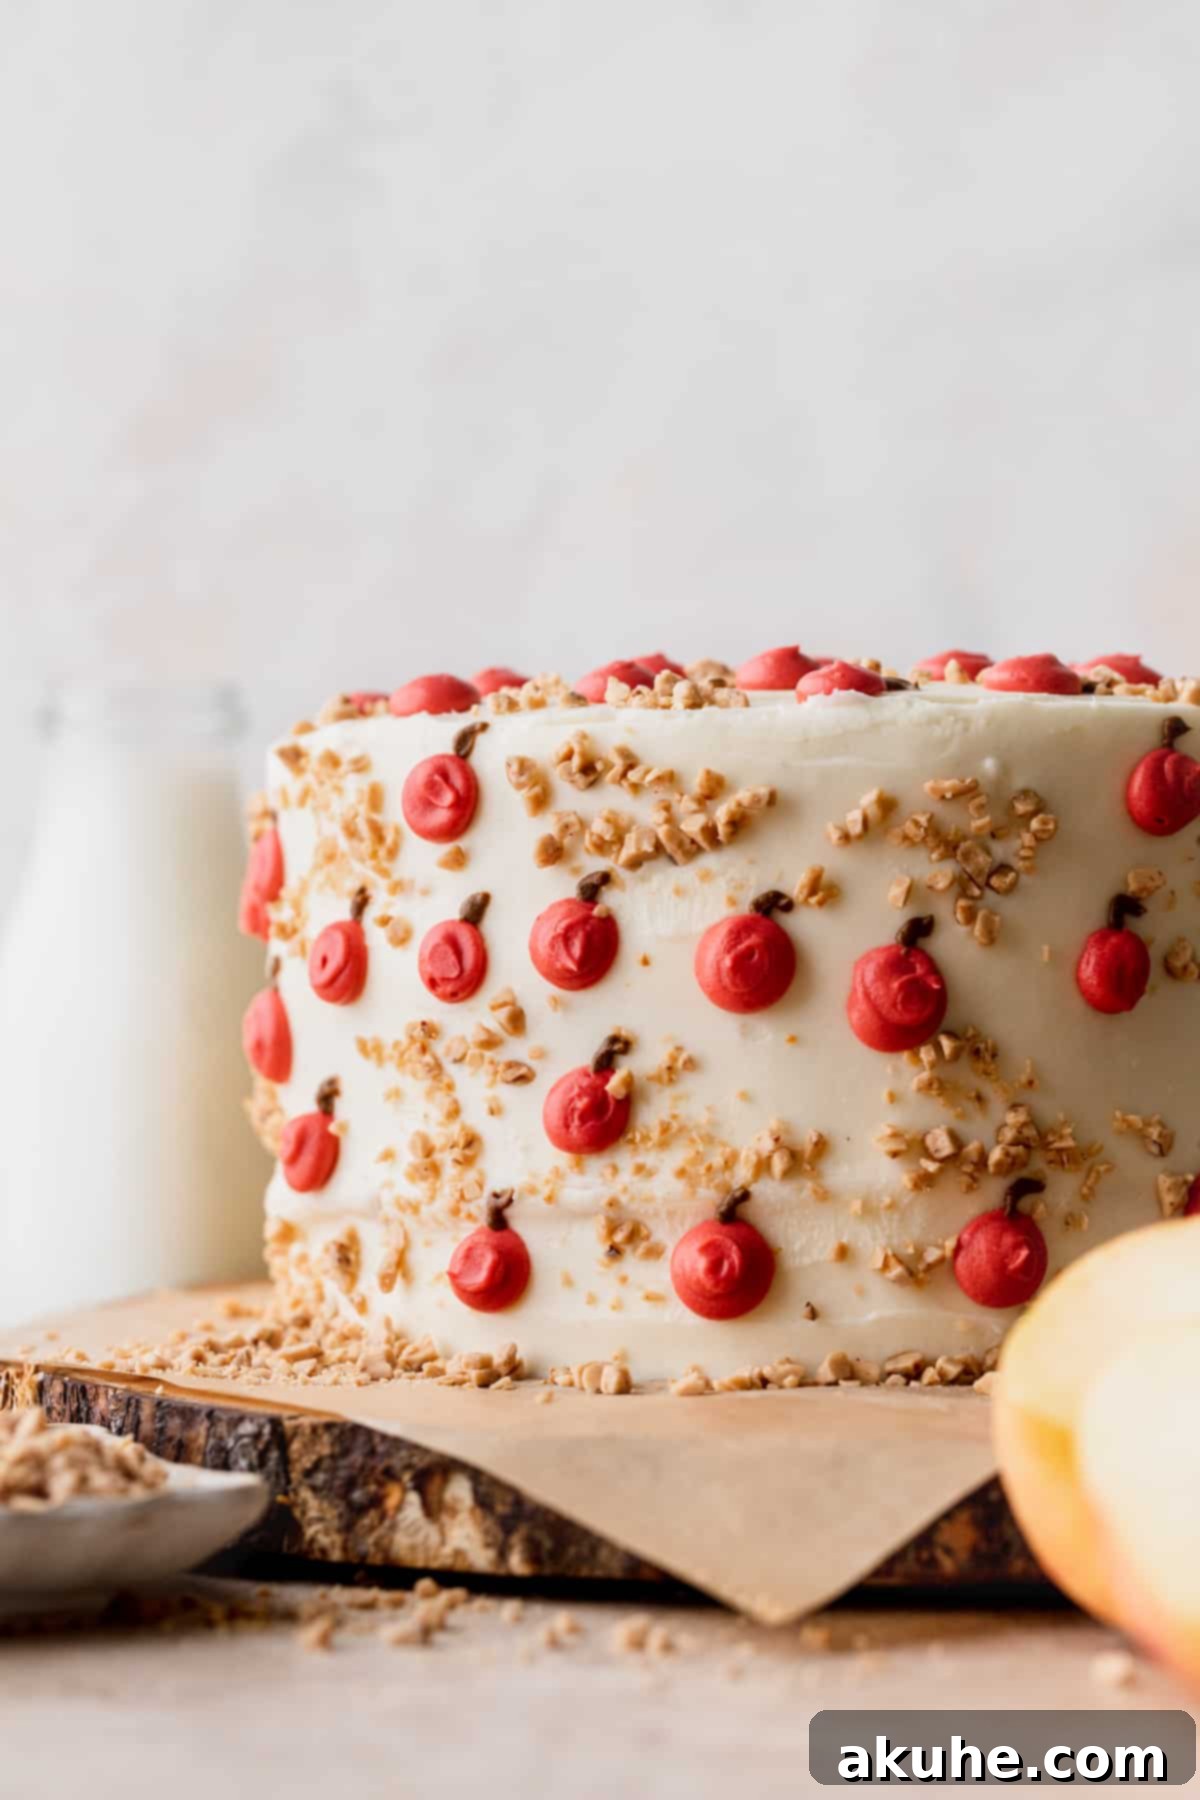
If you’re aiming for the charming piped apple design featured in our photos, here’s how to achieve it: First, separate two small bowls of your cream cheese frosting. You won’t need much, just a couple of tablespoons for each color. Tint one bowl of frosting red using gel food coloring and the other brown. Gel food colorings provide vibrant hues without thinning the frosting. Once colored, chill both bowls of frosting in the refrigerator for 5-10 minutes; this helps the frosting firm up slightly, making it easier to pipe precise shapes.
While the cake’s final layer of frosting is still “wet” or soft, gently press the remaining toffee pieces around the base or sides of the cake. This allows them to adhere beautifully. Before piping your apples, freeze the entire frosted cake for another 10-15 minutes. This crucial step sets the outer layer of frosting, preventing smudges and ensuring a clean canvas for your piped decorations.
To pipe the red apples, fill a piping bag fitted with a Wilton tip 12 (a medium round tip) with the red frosting. Pipe small, neat circles or apple-like shapes onto the top of the cake. For the brown stems, switch to a piping bag fitted with a Wilton tip 4 (a smaller round tip) filled with the brown frosting. Carefully pipe a tiny stem on top of each red apple. You can even add a tiny green leaf if you’re feeling extra artistic! The result will be an incredibly cute and festive cake that is sure to draw smiles.
Frequently Asked Questions About Apple Toffee Layered Cake
Here are answers to some common questions that arise when baking this delicious Apple Toffee Layered Cake:
Absolutely! This versatile recipe works wonderfully as cupcakes. To do so, you’ll need to divide the cake batter recipe in half for a manageable batch. Line a cupcake pan with paper liners and fill each liner about two-thirds full. Bake the cupcakes for a shorter duration, typically between 18-22 minutes, or until a toothpick inserted into the center comes out clean. The frosting and filling amounts would also need to be adjusted accordingly to match the smaller yield.
Yes, you can certainly adapt this recipe for a 9×13 inch sheet cake! The full cake batter recipe can be used as is, but you may want to divide the frosting recipe in half, as a single layer requires less frosting than a multi-layered cake. Bake the sheet cake for a longer period, usually between 30-40 minutes, or until a toothpick inserted into the center comes out clean. Keep an eye on it to prevent overbaking.
For this Apple Toffee Layered Cake, it’s best to use sweet, firm-fleshed medium apples that hold their shape well during baking. Excellent choices include Gala, Fuji, Honeycrisp, or Golden Delicious. These varieties offer a pleasant sweetness and retain some texture, contributing wonderfully to the cake’s moistness. Avoid overly tart apples like Granny Smith, as their acidity can change the overall flavor balance and potentially react differently with the baking soda.
Yes, absolutely! This Apple Toffee Layered Cake is an excellent make-ahead dessert. You can bake the cake layers up to 2-3 days in advance. Once cooled, wrap them tightly in plastic wrap and store at room temperature or in the refrigerator. The frosting and filling can also be prepared a day in advance and stored in airtight containers in the fridge. Assemble and decorate the cake the day you plan to serve it for the freshest look and best texture, or assemble it fully and refrigerate it overnight.
Several factors can cause cake layers to sink. Common culprits include opening the oven door too early during baking (especially in the first two-thirds of the baking time), which causes a sudden temperature drop. Overmixing the batter can develop too much gluten, leading to a tough cake that might collapse. Also, using ingredients that are too cold, or incorrect measurements of leavening agents (baking soda/powder) can be contributing factors. Ensure your oven temperature is accurate with an oven thermometer and avoid disturbing the cakes while they bake!
Creative Recipe Variations to Customize Your Cake
While our Apple Toffee Layered Cake is undeniably delicious as is, feel free to get creative with these variations to tailor it to your personal taste or available ingredients:
- Simplified Frosting Option: If you’re short on time or prefer a less rich cake, you can certainly skip the separate toffee whipped cream cheese filling. Instead, prepare a larger batch of the standard cream cheese frosting and use it for both the filling between the layers and the exterior of the cake. You can still fold some toffee pieces directly into this combined frosting for that delightful crunch. This streamlines the process without sacrificing too much flavor.
- Thicker Cake Layers: For a more substantial feel and fewer layers, you can adjust the recipe to bake into two thicker cake layers instead of three. You might need to increase the baking time slightly (by an additional 5-10 minutes, or until a toothpick comes out clean) to ensure the thicker layers are fully baked through. This also makes the assembly process a bit quicker.
- Nutty Addition: For an extra layer of flavor and texture, consider folding 1/2 to 1 cup of chopped toasted pecans or walnuts into the cake batter along with the shredded apples. The warmth of the nuts pairs beautifully with the apple and spice flavors.
- Caramel Drizzle: Elevate the toffee aspect even further by adding a luscious caramel drizzle. After frosting the cake, gently warm some store-bought or homemade caramel sauce and drizzle it generously over the top of the cake, allowing it to drip attractively down the sides.
- Spiced Cream Cheese Frosting: Enhance the warmth of the cake by adding a pinch of cinnamon or nutmeg (about 1/2 teaspoon) to your cream cheese frosting. This subtle spice addition will tie the frosting even more closely to the apple spice cake layers.
Specialty Tools for Effortless Layered Cake Baking
While many of these tools are common kitchen staples, having the right equipment can significantly enhance your layered cake baking experience, making it more efficient and enjoyable:
- High-Quality Cake Pans: Investing in good quality 8-inch round cake pans, like those from Wilton, is essential. Pans that conduct heat evenly ensure your cake layers bake consistently and rise beautifully without burnt edges or raw centers.
- Parchment Paper Circles: These pre-cut 8-inch parchment paper circles are a true time-saver! They eliminate the tedious task of tracing and cutting out circles from a roll of parchment paper, guaranteeing non-stick bottoms and easy cake release every time.
- Baking Spray with Flour: A nonstick baking spray that contains flour (like this nonstick spray) is invaluable. It provides a superior non-stick coating, ensuring your delicate cake layers release cleanly from the pans without any sticking or tearing.
- Offset Spatula: An offset spatula is a baker’s best friend for spreading frosting and fillings smoothly and evenly. Its angled blade keeps your knuckles clear of the cake surface, allowing for precise and effortless application. You’ll wonder how you ever frosted a cake without one!
- Cake Turntable: While not strictly essential, a good quality cake turntable, such as the nice Ateco cast iron turntable, makes frosting and decorating layered cakes significantly easier. Its smooth, seamless spin allows you to effortlessly rotate the cake, ensuring even frosting application around the sides and making intricate decorations much simpler. Cheaper turntables can be jerky, making smooth finishes difficult.
- Cake Scraper: For achieving perfectly smooth and straight sides on your frosted cake, a metal cake scraper is indispensable. It helps to level the frosting and remove excess, giving your cake a polished, professional look that’s hard to achieve with just a spatula.
- Piping Bags: Larger 18-inch piping bags are incredibly practical for frosting and decorating. They hold more frosting, reducing the need for frequent refills, which is especially helpful when dealing with larger cakes or extensive decoration.
- Sifter: A good sifter ensures your dry ingredients are lump-free and aerated, leading to a lighter, more consistent cake batter and smooth frostings.
Proper Storage and Freezing for Lasting Freshness
To ensure your exquisite Apple Toffee Layered Cake remains as delicious as the day it was baked, proper storage is key. This cake, with its cream cheese frosting and filling, needs to be refrigerated.
Storing the Cake: Store the assembled and frosted Apple Toffee Layered Cake in a dedicated cake carrier or an airtight container in the refrigerator. This will protect it from drying out and absorbing other odors from the fridge. When properly stored, the cake will remain fresh and delightful for up to 5 days. For the absolute best flavor and texture experience, we recommend allowing slices of the cake to come to room temperature for about 30 minutes to an hour before serving. This softens the frosting and cake, enhancing its moistness and the complexity of its flavors.
Freezing Your Apple Toffee Layered Cake
This cake is also freezer-friendly, allowing you to enjoy slices whenever a craving strikes or to prepare components ahead of time.
Freezing Individual Slices: For easy portion control, you can freeze individual slices of the cake. Simply cut the cake into your desired serving sizes. Wrap each slice tightly in plastic wrap, then place them in an airtight freezer-safe container or a heavy-duty freezer bag. Stored this way, individual slices will keep beautifully in the freezer for up to 30 days. To enjoy, simply thaw a slice on the countertop for about 1 hour before eating, or briefly warm it for a fresh-baked feel.
Freezing Cake Layers (Preparation Ahead): If you like to get a head start on your baking, the cooled cake layers can be prepared and frozen in advance. Once the baked cake layers have completely cooled to room temperature, wrap each layer individually and very tightly in several layers of plastic wrap, then an additional layer of aluminum foil. This double-layer protection prevents freezer burn. These well-wrapped cake layers can be stored in the freezer for up to 30 days. When you’re ready to assemble and decorate, simply pull the frozen cake layers out of the freezer about 1 hour before you plan to frost them. They will thaw quickly and be perfectly ready for assembly, often being easier to handle when slightly firm.
Explore More Layered Cake Recipes
If you’ve enjoyed the process and delicious outcome of this layered cake, you’ll love venturing into other multi-layered delights. The art of layered cakes offers endless possibilities for flavor combinations and stunning presentations.
Don’t Miss These Other Apple-Inspired Creations
Apples are a versatile and beloved fruit in baking, offering a range of textures and flavors. If you have an abundance of apples or simply can’t get enough of their sweet and tart charm, explore these other fantastic apple recipes:
- Warm & Spicy Apple Cider Cinnamon Rolls: Indulge in the perfect breakfast or brunch treat, where soft cinnamon rolls meet the tangy sweetness of apple cider.
- Decadent Apple Pie Cheesecake: A sublime fusion of two classic desserts – the creamy richness of cheesecake combined with the comforting flavors of apple pie.
- Fluffy Apple Cider Muffins: Perfect for a quick breakfast or a delightful snack, these muffins are packed with apple flavor and a hint of warming spices.
- Classic Apple Cinnamon Rolls: A timeless favorite, these rolls are generously filled with tender apples and aromatic cinnamon, perfect for a cozy morning.
- Elegant Puff Pastry Apple Tart: A deceptively simple yet impressive dessert, featuring thinly sliced apples baked on a flaky puff pastry base.
We hope you thoroughly enjoy baking and savoring this magnificent Apple Toffee Layered Cake! Your feedback is incredibly valuable to us. Please make sure to leave a star rating and review below to share your experience and tips with other bakers.
We absolutely love seeing your culinary creations! Don’t forget to tag us on Instagram @stephaniesweettreats when you share your cake. For more delicious baking ideas, make sure to follow us on Pinterest. Happy baking!
Apple Toffee Layered Cake
Stephanie Rutherford
1 hr
30 mins
1 hr 30 mins
3 hrs
16 slices
Ingredients
Apple Cake
- 3 1/3 cups All-purpose flour
- 2 1/4 tsp Baking soda
- 1 tsp Salt
- 3 tsp Ground cinnamon
- 1/2 tsp Ground nutmeg
- 1/2 tsp Ground ginger
- 1 cup Unsalted butter, room temperature
- 1/3 cup Oil, canola or vegetable
- 1 1/4 cup White granulated sugar
- 3/4 cup Brown sugar, packed light or dark
- 1/4 cup Sour cream, room temperature
- 2 tsp Pure vanilla extract
- 4 Large eggs, room temperature
- 2 cups Shredded apples, Peeled and shredded.
- 1/2 cup Buttermilk, room temperature
Toffee Whipped Cream Cheese
- 8 oz Cream cheese, room temperature
- 1 tsp Pure vanilla extract
- 1 1/2 cups Powdered sugar, sifted
- 1 cup Heavy cream, cold
- 3/4 cup Toffee pieces
Cream Cheese Frosting
- 8 oz Cream cheese, room temperature
- 1 1/2 cups Unsalted butter, slightly cold
- 7 1/2 cups Powdered sugar, sifted
- 1 tsp Pure vanilla extract
- 1/4 tsp Salt
- 1/4 cup Heavy cream
Instructions
Apple Cake
- Preheat oven to 350°F. Spray three 8 inch cake pans with baking non-stick spray. Line the bottoms with parchment circles. Spray again.
- Peel the apples. Shred the apples using the largest holes in the grater. The apples will brown, but this is normal. Set aside.2 cups Shredded apples
- Mix the flour, baking soda, salt, cinnamon, nutmeg, and ginger. Set aside. Using a mixer, beat the butter, oil, sugar, and brown sugar. Mix on high for 2 minutes. It will be light and fluffy.3 1/3 cups All-purpose flour, 2 1/4 tsp Baking soda, 1 tsp Salt, 3 tsp Ground cinnamon, 1/2 tsp Ground nutmeg, 1/2 tsp Ground ginger, 1 cup Unsalted butter, 1/3 cup Oil, 1 1/4 cup White granulated sugar, 3/4 cup Brown sugar
- Mix in sour cream and vanilla. Mix until combined. Add in eggs one at a time. Scrape the bowl and mix on medium for 1 minute. It will be very fluffy.1/4 cup Sour cream, 2 tsp Pure vanilla extract, 4 Large eggs
- Wring out the apples to get rid of the juice. Mix with the buttermilk. Mix 1/3rd of the dry ingredients and half of the buttermilk. Then, mix in another 1/3rd of the dry ingredients and the rest of the buttermilk. Mix in the rest of the dry ingredients.1/2 cup Buttermilk
- Pour batter evenly in the cake pans. Bake for 26-30 minutes. The cake is done baking when a toothpick inserted comes out clean. The cake will be very brown from the apples. That is normal.
- Let the cakes sit in the pan for 10 minutes. Then, transfer to a cooling rack and cool completely.
Toffee Whipped Cream Cheese
- Place a metal bowl and whisk attachment in the freezer for 10 minutes. Beat the cream cheese on high for 1 minute in a separate bowl. Add in sifted powdered sugar and beat until smooth. Mix in vanilla.8 oz Cream cheese, 1 1/2 cups Powdered sugar, 1 tsp Pure vanilla extract
- Beat the heavy cream in the cold bowl on high until stiff peaks form. Very gently stir the whipped cream into the cream cheese mixture. Be gentle to not to knock the air out of the whipped cream. Fold in toffee pieces.1 cup Heavy cream, 3/4 cup Toffee pieces
- Chill for at least an hour before using in the cake. It should be thick and cold.
Cream Cheese Frosting
- Set the butter on the counter for 30 minutes to get slightly cold. Sift the powdered sugar while you wait.1 1/2 cups Unsalted butter
- Using a mixer, beat the cream cheese and butter on high for 2 minutes. Slowly add in the powdered sugar. Mix until smooth. It will be thick.8 oz Cream cheese, 7 1/2 cups Powdered sugar
- Add in vanilla, salt, and heavy cream. Beat on high for 2 minutes. Scrape the bowl halfway though.1 tsp Pure vanilla extract, 1/4 tsp Salt, 1/4 cup Heavy cream
Assembly
- Freeze the cake layers for 20-30 minutes before decorating. The cold cake helps with the crumbs. If the cakes have a dome, use a serrated knife to level the cakes. Place a small amount of frosting on the board you are decorating on to lock the cake in place.
- Place the 1st layer of cake down. Spread a 1/2 cup of frosting over the cake. Pipe a double layer of frosting over the border of the cake to keep the filling in. Spread half of the filling on the cake. Repeat with the second layer.
- Place the last layer of cake bottom side up. Frost a very light layer of frosting over the cake. Freeze for 15 minutes to keep the crumbs in place.
- Frost the rest of the cake.
- Optional decoration, separate two small bowls of frosting. Color them red and brown. Chill for 10 minutes. Use Wilton tip 4 and 12 to decorate like apples. Sprinkle toffee pieces over the cake.
