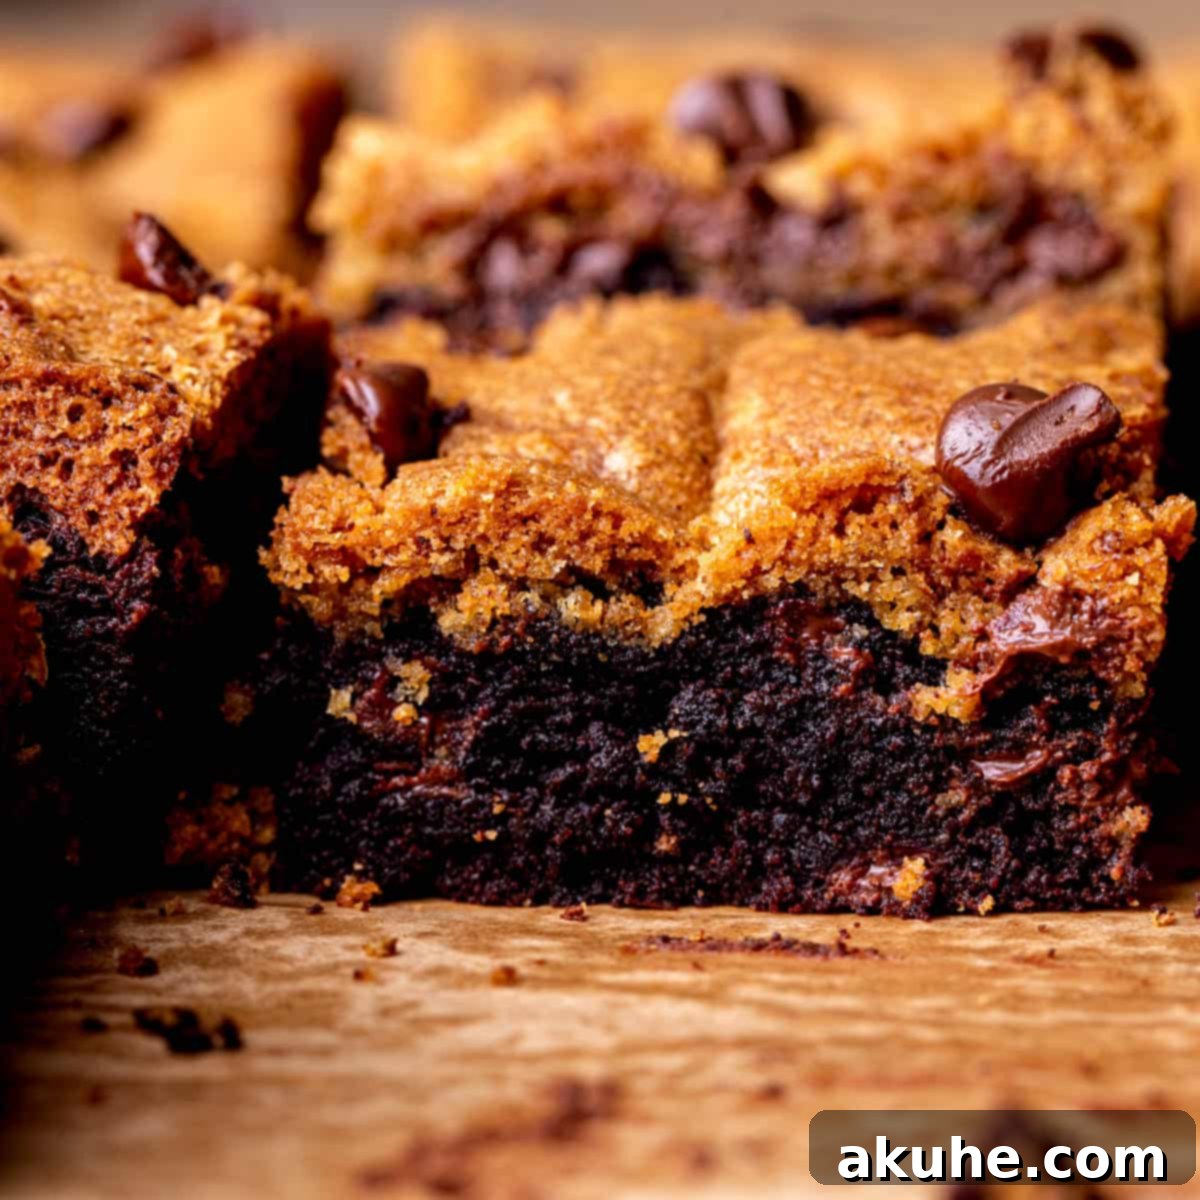
Indulge in the ultimate dessert fusion with these decadent Brookies – the perfect marriage of a rich, fudgy brownie and a chewy, brown butter chocolate chip cookie. If you’ve ever found yourself torn between the intense chocolate satisfaction of a brownie and the comforting sweetness of a classic chocolate chip cookie, then these homemade brookie bars are your dream come true. This recipe promises an effortless path to a truly extraordinary treat that will delight everyone who tries it. Imagine sinking your teeth into a layered bar where a dense, chocolatey brownie base meets a golden, buttery cookie top, studded with melty chocolate chips. It’s an experience that transcends a simple dessert, offering a harmonious blend of textures and flavors in every single bite. Forget making tough choices; with this easy-to-follow recipe, you can have the best of both worlds, elevated by the irresistible nutty notes of brown butter. These aren’t just any brownie cookie bars; they are an invitation to pure dessert bliss.
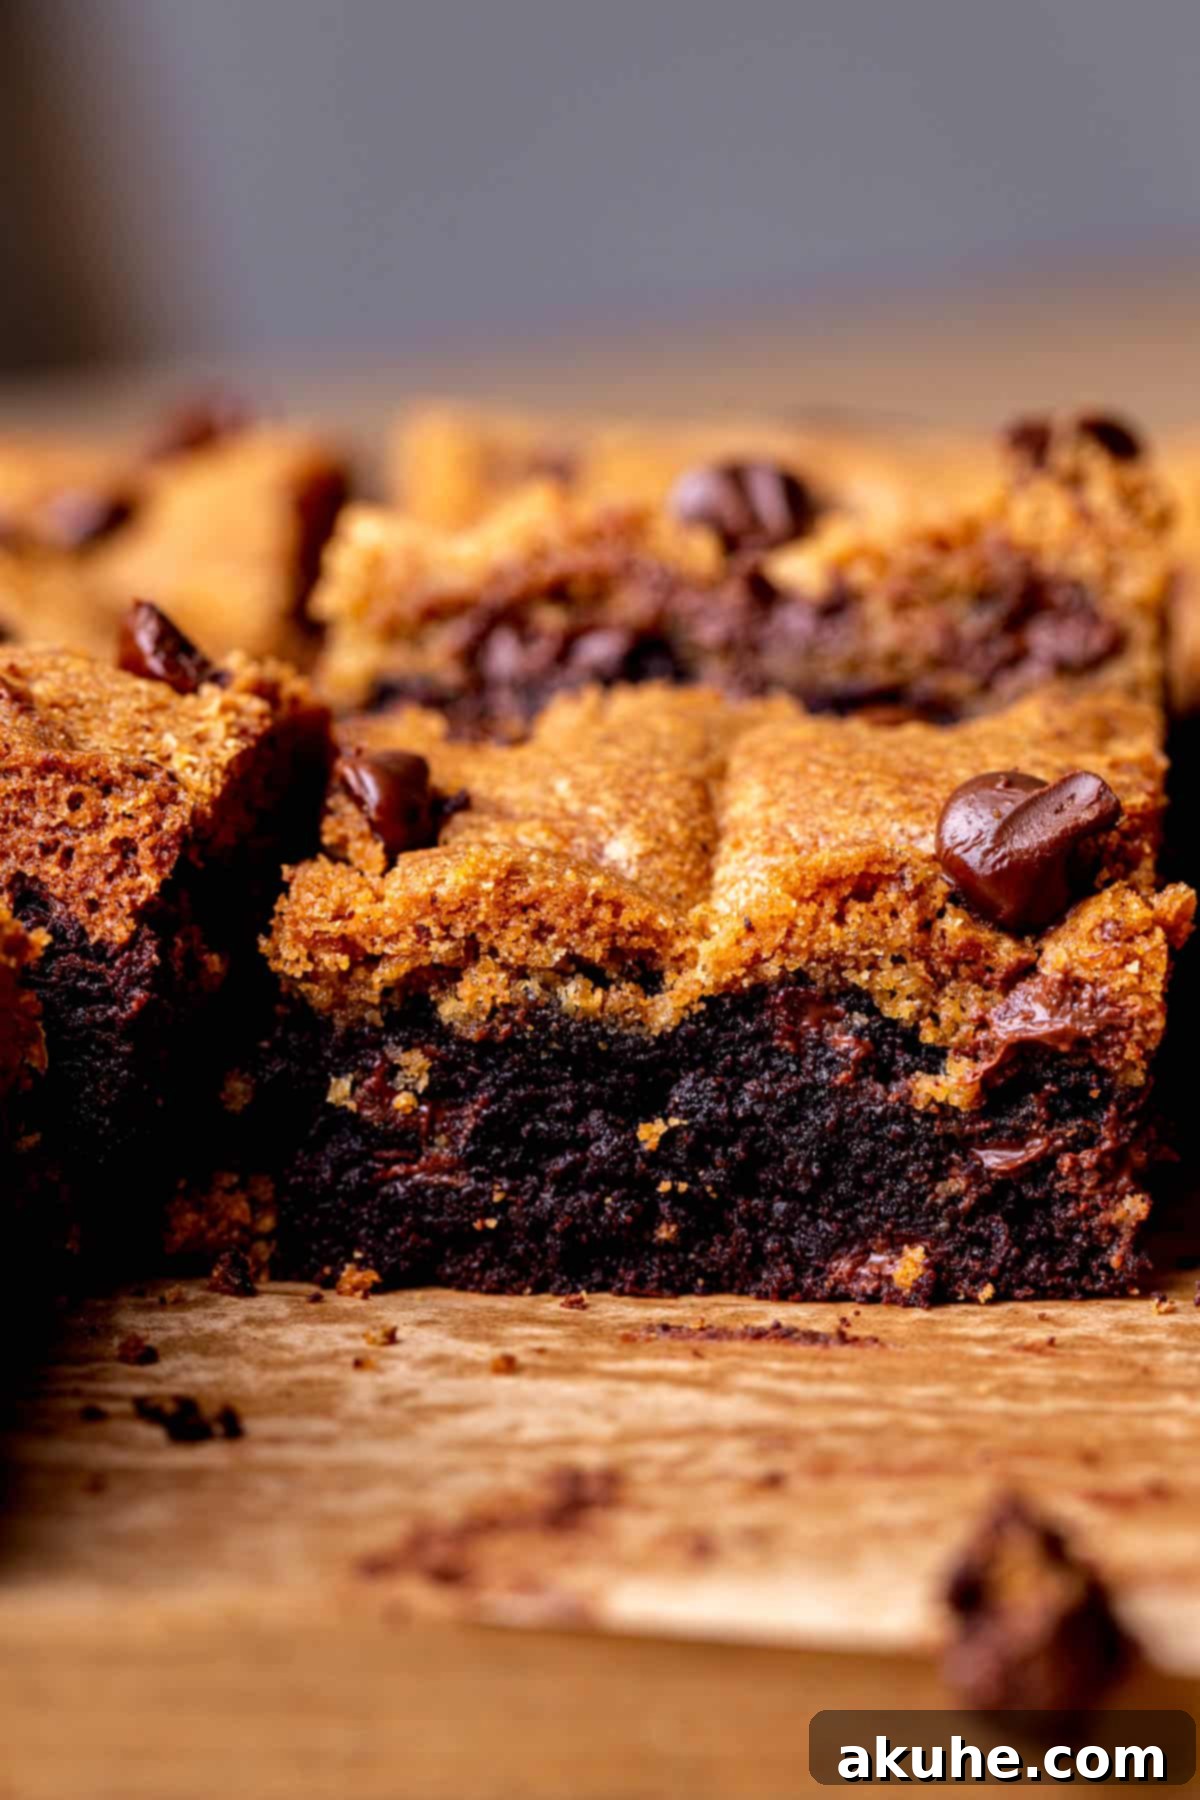
Brookies, short for brownie-cookies, have emerged as a beloved hybrid dessert, celebrated for their ability to deliver two distinct yet complementary flavors in one delightful package. This particular recipe takes that concept a step further by incorporating the nuanced depth of brown butter into the chocolate chip cookie layer, transforming a simple cookie into something truly special. The combination of the deep, dark chocolate brownie and the sweet, nutty cookie creates a complex flavor profile that is both familiar and exciting. Whether you’re baking for a special occasion, a casual gathering, or simply to satisfy a serious sweet craving, these homemade brookie bars are guaranteed to be a hit. Their visual appeal, with the distinct layers of dark brownie and golden cookie, makes them as pleasing to the eye as they are to the palate. Get ready to impress with this wonderfully decadent and surprisingly simple dessert that truly offers the ultimate indulgence.
For more delightful cookie recipes that are sure to satisfy your sweet tooth, explore our Oreo Cheesecake Cookies, our light and fruity Peach Cookies, and the vibrant Strawberry Cheesecake Cookies.
Why This Brookies Recipe Stands Out
Crafting the perfect brookie requires a delicate balance between its two iconic components. This recipe has been meticulously designed to ensure each layer shines, contributing to an overall experience that is nothing short of sensational.
- Truly Fudgy Homemade Brownies: The foundation of our brookies is a rich, intensely chocolatey brownie layer that is good enough to be a standalone dessert. We’ve optimized the ratios of fat, sugar, and flour to achieve that quintessential fudgy texture, rather than a cake-like crumb. Every bite of this brownie base is dense, moist, and bursting with deep cocoa flavor, providing the perfect counterpoint to the cookie layer above.
- Classic Chocolate Chip Cookies, Elevated: What could be more comforting than a classic chocolate chip cookie? In this recipe, the cookie layer offers that familiar, beloved taste and chewy texture, perfectly complementing the rich brownie beneath. It’s the ultimate comfort food married with decadence, creating a delightful contrast that keeps you coming back for more.
- The Magic of Brown Butter: This is where our cookie layer truly transcends the ordinary. Browning the butter introduces a magnificent nutty, toffee-like aroma and flavor that infuses every part of the cookie dough. This simple yet transformative step adds incredible depth and complexity, elevating the classic chocolate chip cookie to an entirely new level and making these brookies undeniably unique and irresistible.
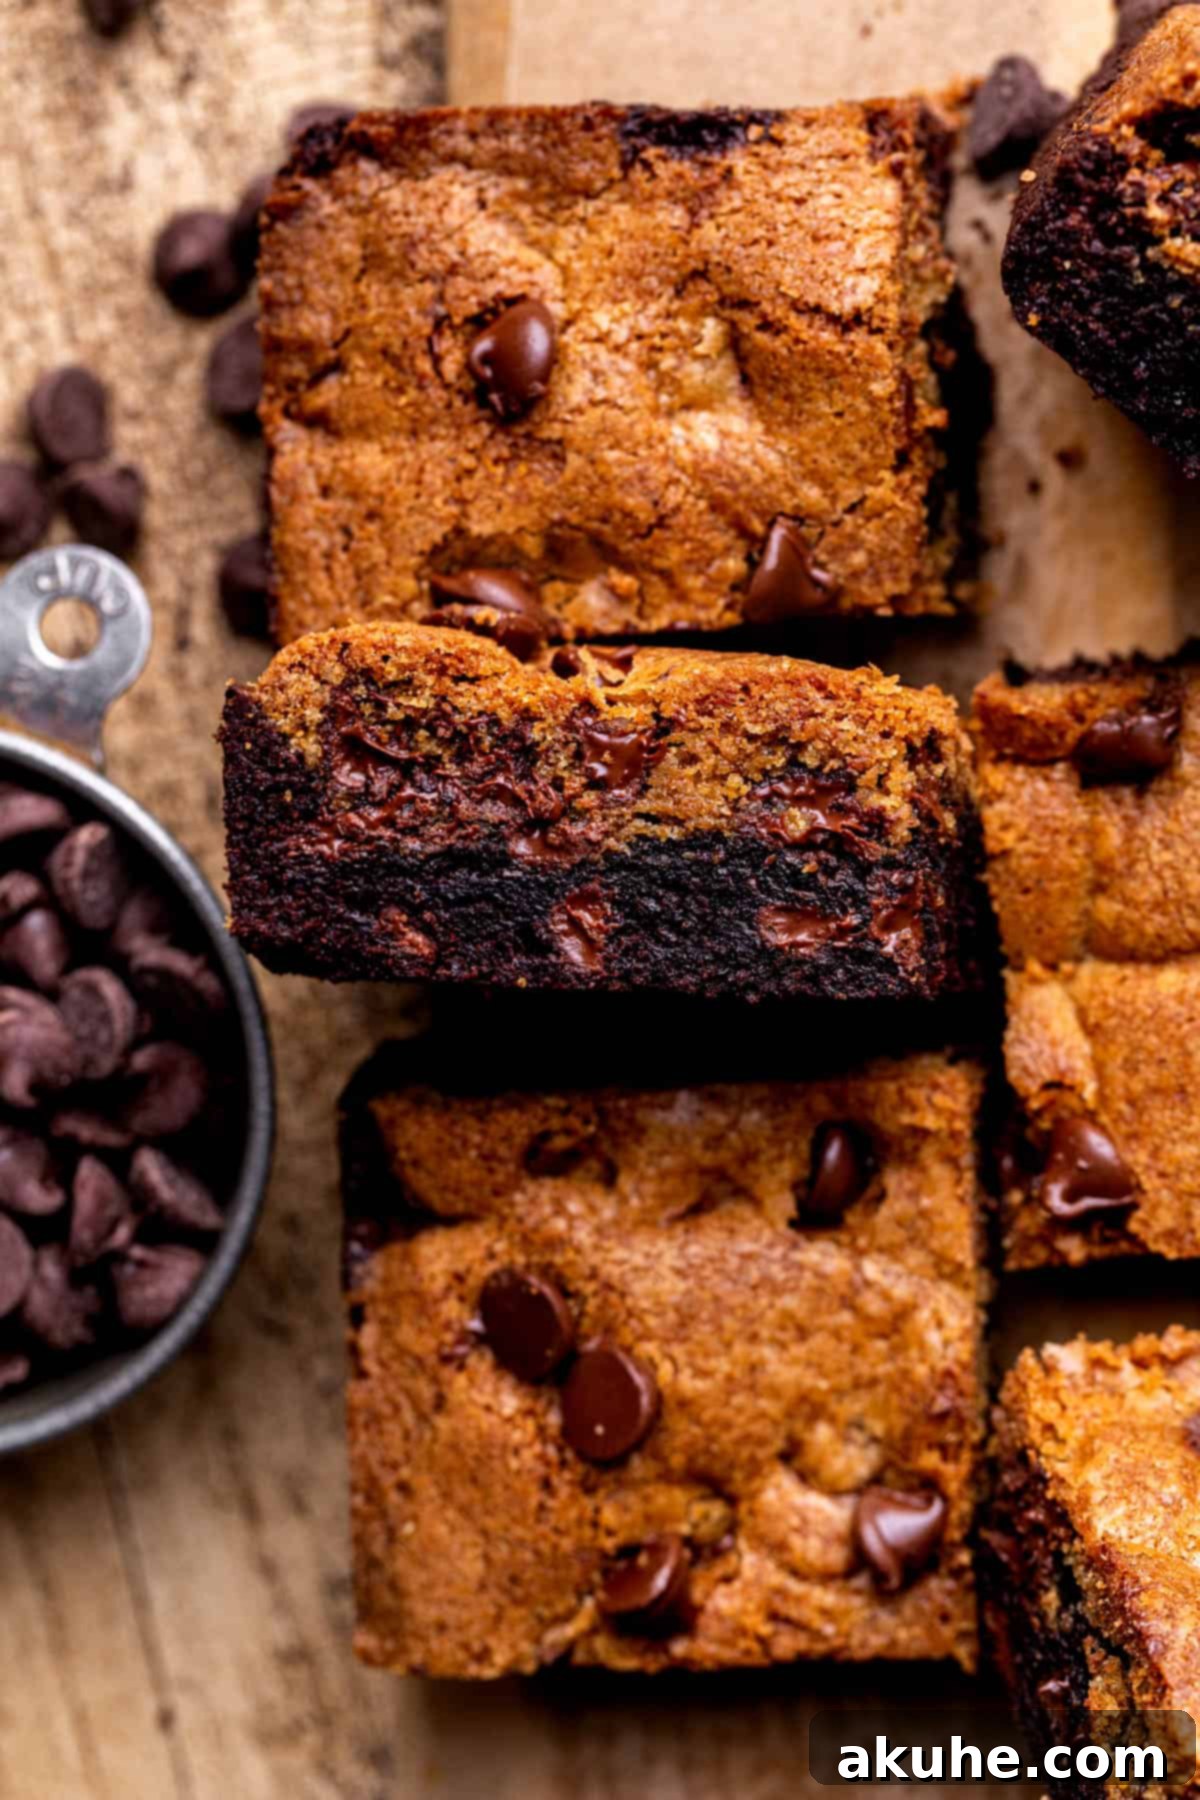
Essential Ingredient Notes for Perfect Brookie Bars
Understanding the role of each ingredient is key to achieving the perfect texture and flavor for your brookies. Here’s a closer look at some of the core components:
- Oil: For the brownie layer, we recommend using a neutral-flavored oil such as canola oil or vegetable oil. The oil contributes significantly to the fudgy texture of the brownies by adding moisture without solidifying at room temperature, ensuring a soft, tender crumb.
- Unsalted Butter: Both layers utilize butter, but for different purposes. When melting butter for the brownie layer, ensure it has enough time to cool down to room temperature before incorporating it into the batter. This prevents scrambling the eggs and ensures a smooth, emulsified mixture. For the cookie layer, unsalted butter is browned, intensifying its flavor. Using unsalted butter also gives you precise control over the overall saltiness of your dessert.
- Unsweetened Cocoa Powder: To achieve a truly rich, deep chocolate flavor in your brownie layer, we strongly recommend Dutch-process cocoa powder. Unlike natural cocoa powder, Dutch-process cocoa is alkalized, which gives it a darker color and a smoother, less acidic chocolate taste, enhancing the decadence of the brownie. This is a highly-rated option that delivers exceptional results.
- Chocolate Chips: We suggest using semi-sweet chocolate chips for both layers. Their balanced sweetness perfectly complements the rich brownie and the nutty cookie, preventing the brookies from becoming overly sweet. Milk chocolate chips are generally not recommended as they can make the final product too sugary, masking the nuanced flavors of the brown butter and rich cocoa.
- Brown Sugar: Light brown sugar is specified for the cookie layer, providing moisture and a subtle molasses flavor that enhances the overall chewiness and depth of the cookie. Dark brown sugar can also be used if preferred; it will impart a slightly stronger molasses flavor and a darker hue to the cookie.
Ingredient Substitutions and Dietary Considerations
Life happens, and sometimes you need to make adjustments to a recipe. Here are some common substitutions that can help you adapt this brookie recipe to various dietary needs or ingredient availability:
- Dairy-Free Options: This recipe can be made dairy-free by substituting your favorite plant-based butter (ensure it’s suitable for baking) and dairy-free chocolate chips. Opt for unsweetened almond milk or oat milk if the recipe calls for any liquid milk, although this particular recipe primarily uses butter.
- Gluten-Free Alternatives: While we haven’t personally tested a gluten-free version of this specific recipe, many bakers have successfully adapted similar recipes. You can try a 1:1 gluten-free all-purpose flour blend that contains xanthan gum. Be aware that the texture might vary slightly, and you might need minor adjustments to liquid content. For a dedicated gluten-free brownie recipe to use as a base, consider exploring options like this recipe for The Best Dark Chocolate Paleo Brownies by The Fit Peach. If you do experiment with gluten-free flour, we’d love to hear about your results!
- Oil Alternatives: If canola or vegetable oil is not available, a mild-flavored olive oil can be used as a substitute in the brownie layer. Ensure it’s a light olive oil so its flavor doesn’t overpower the chocolate. Other neutral oils like grapeseed or sunflower oil would also work well.
Step-by-Step Instructions: Crafting the Brown Butter Chocolate Chip Cookie Dough
The cookie layer is a crucial component of these brookies, and the brown butter adds an unparalleled depth of flavor. Follow these detailed steps to create the perfect brown butter chocolate chip cookie dough. For this recipe, an electric mixer is highly recommended, either a hand mixer or a stand mixer equipped with a paddle attachment. A whisk attachment will be essential for the brownie batter section.
STEP 1: Begin by Browning the Butter. Place the unsalted butter in a light-colored frying pan or saucepan over medium heat. It’s important to use a light-colored pan so you can easily monitor the color changes. Stir the butter constantly with a heat-proof spatula or whisk as it melts and cooks. Initially, it will melt, then foam. Continue stirring. Soon, small milk solids will separate and settle at the bottom, turning a beautiful amber color. You’ll also notice a distinct nutty aroma. As soon as these milk deposits turn amber and the butter takes on a golden-brown hue, remove it from the heat immediately to prevent burning.
STEP 2: Cool the Brown Butter. Promptly pour the warm brown butter into a heat-proof container, such as a glass bowl, to halt the cooking process. Allow it to cool completely to room temperature. This crucial step typically takes around 30 minutes, but it can be sped up slightly by placing the bowl in a cold water bath, stirring occasionally. Ensure it’s fully cooled before moving to the next step, as warm butter can negatively affect the cookie dough’s texture.
STEP 3: Prepare Your Baking Pan. Preheat your oven to 325°F (160°C). Lightly spray a 9×9 inch square baking pan with non-stick baking spray. Next, line the bottom of the pan with a sheet of parchment paper, making sure it extends up two opposite sides of the pan. These parchment overhangs will serve as convenient handles for lifting the brookies out later. Spray the parchment-lined pan again to ensure extra non-stick coverage.
STEP 4: Combine the Dry Ingredients. In a medium mixing bowl, whisk together the all-purpose flour, baking soda, and salt. Whisking ensures these ingredients are evenly distributed, which is vital for proper leavening and seasoning. Set this bowl aside for later use.
STEP 5: Cream the Butter and Sugars. In a separate large mixing bowl, using your electric mixer fitted with the paddle attachment, beat the cooled brown butter, light brown sugar, and white granulated sugar together on high speed for approximately 2 minutes. The mixture should become light, fluffy, and well-combined. Then, add the pure vanilla extract and the single egg yolk to the butter mixture. Continue to mix on medium speed until all ingredients are thoroughly combined and the mixture is smooth.
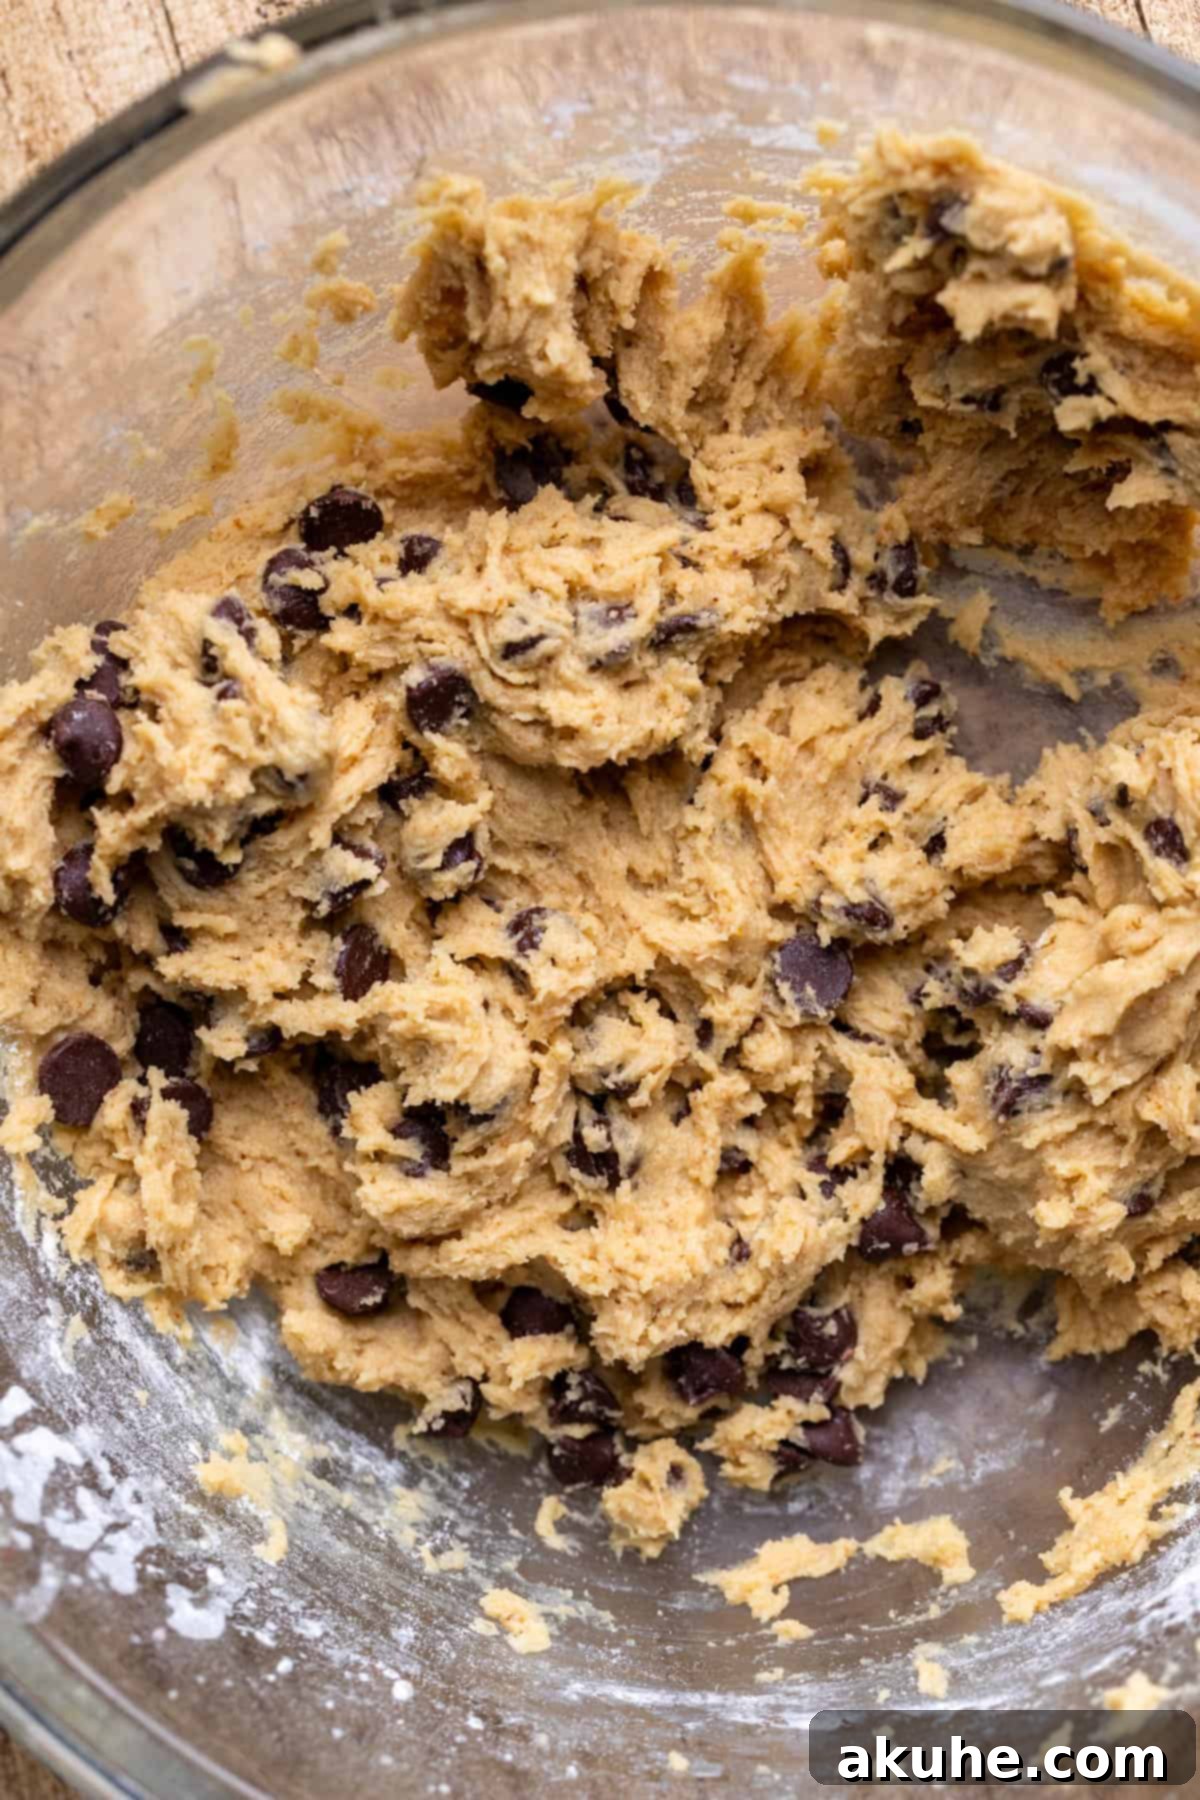
STEP 6: Integrate Wet and Dry Ingredients, then Add Chocolate Chips. Gradually add the reserved dry ingredients to the wet mixture. Mix on low speed until the flour is just combined. Be careful not to overmix, as this can develop the gluten too much, resulting in a tougher cookie. Finally, fold in the semi-sweet chocolate chips until they are evenly distributed throughout the dough. Set the cookie dough aside while you prepare the brownie batter.
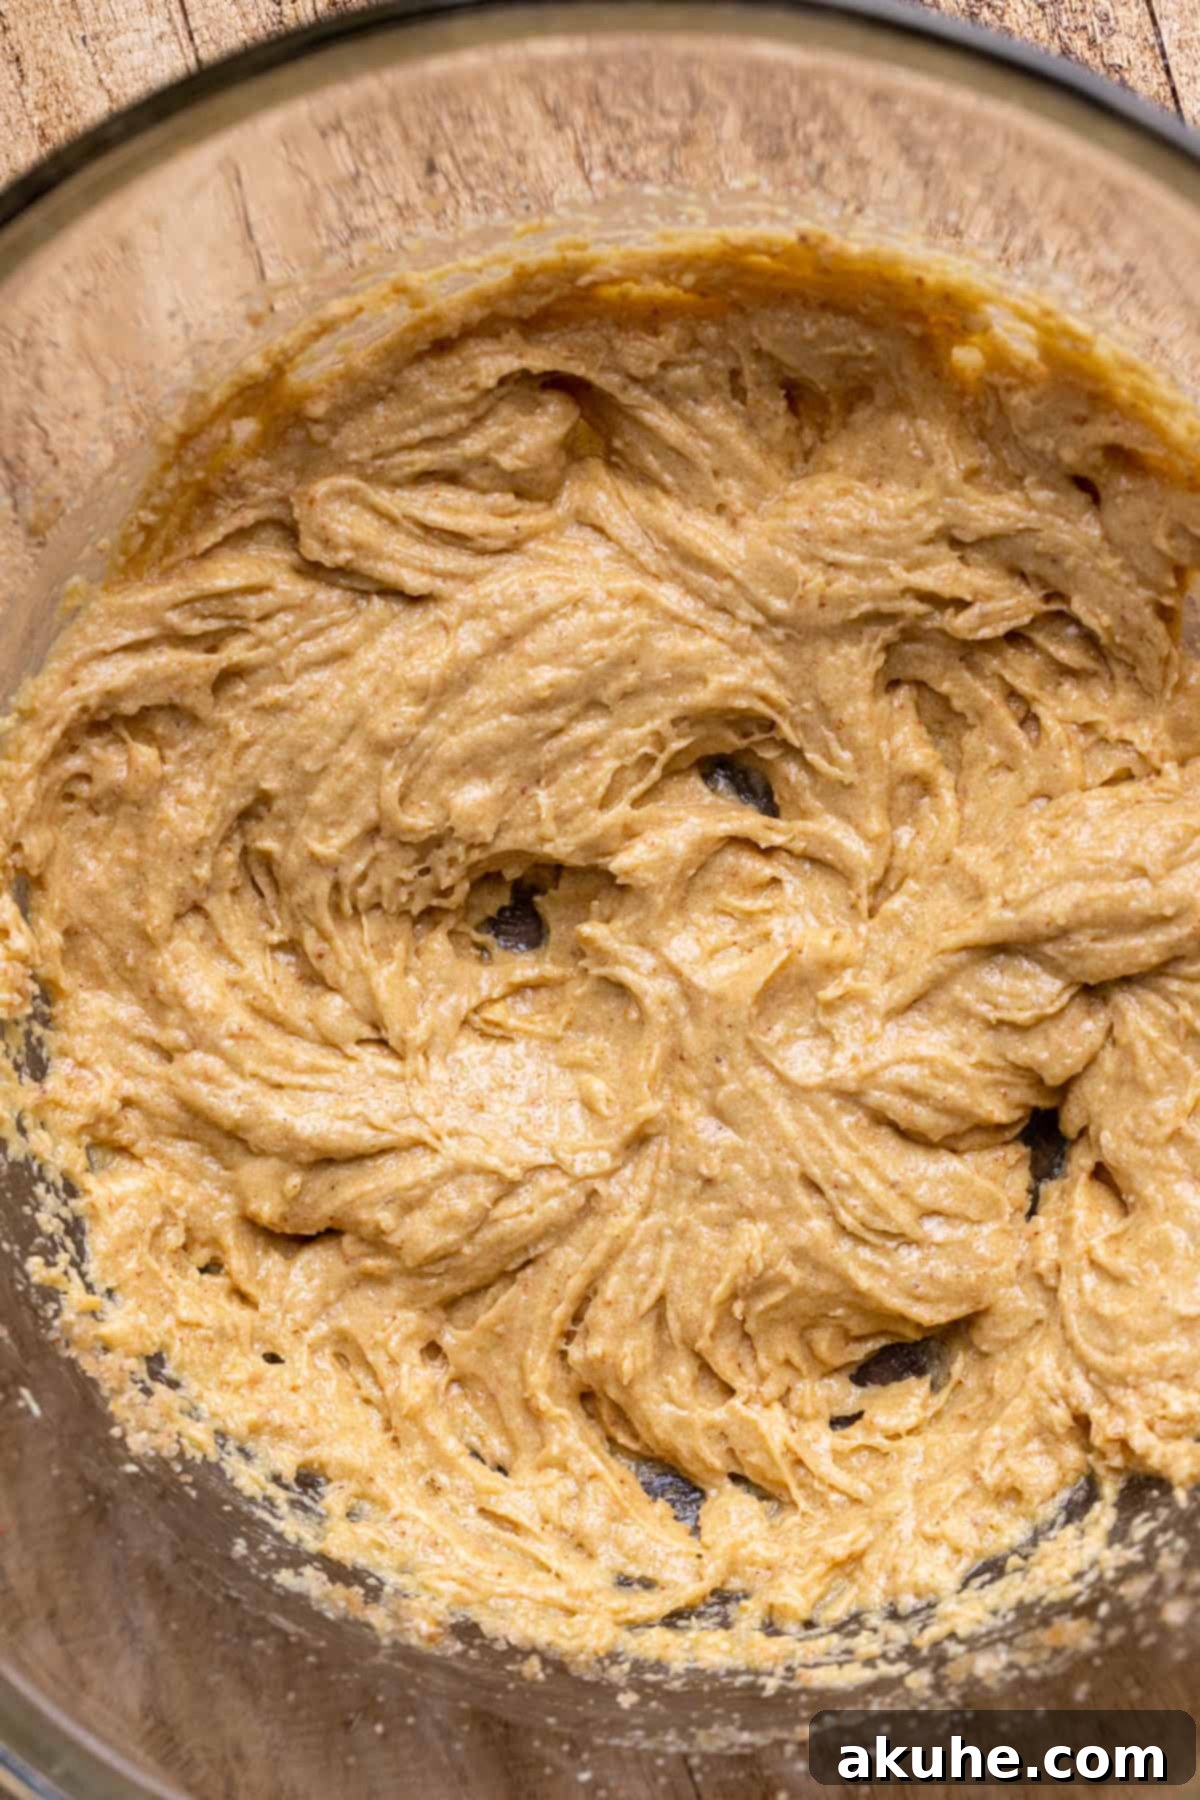
Step-by-Step Instructions: Preparing the Fudgy Brownie Batter and Baking the Brookies
Now that your brown butter chocolate chip cookie dough is ready, it’s time to prepare the rich brownie batter and assemble your delicious brookies. The key to a fudgy brownie is careful mixing and proper ingredient ratios.
STEP 1: Sift the Dry Ingredients for Brownie Batter. In a medium bowl, sift together the all-purpose flour, Dutch process cocoa powder, cornstarch, and salt. Sifting is important here as it breaks up any lumps in the cocoa powder and cornstarch, ensuring a smoother batter and an even distribution of ingredients. Set this mixture aside.
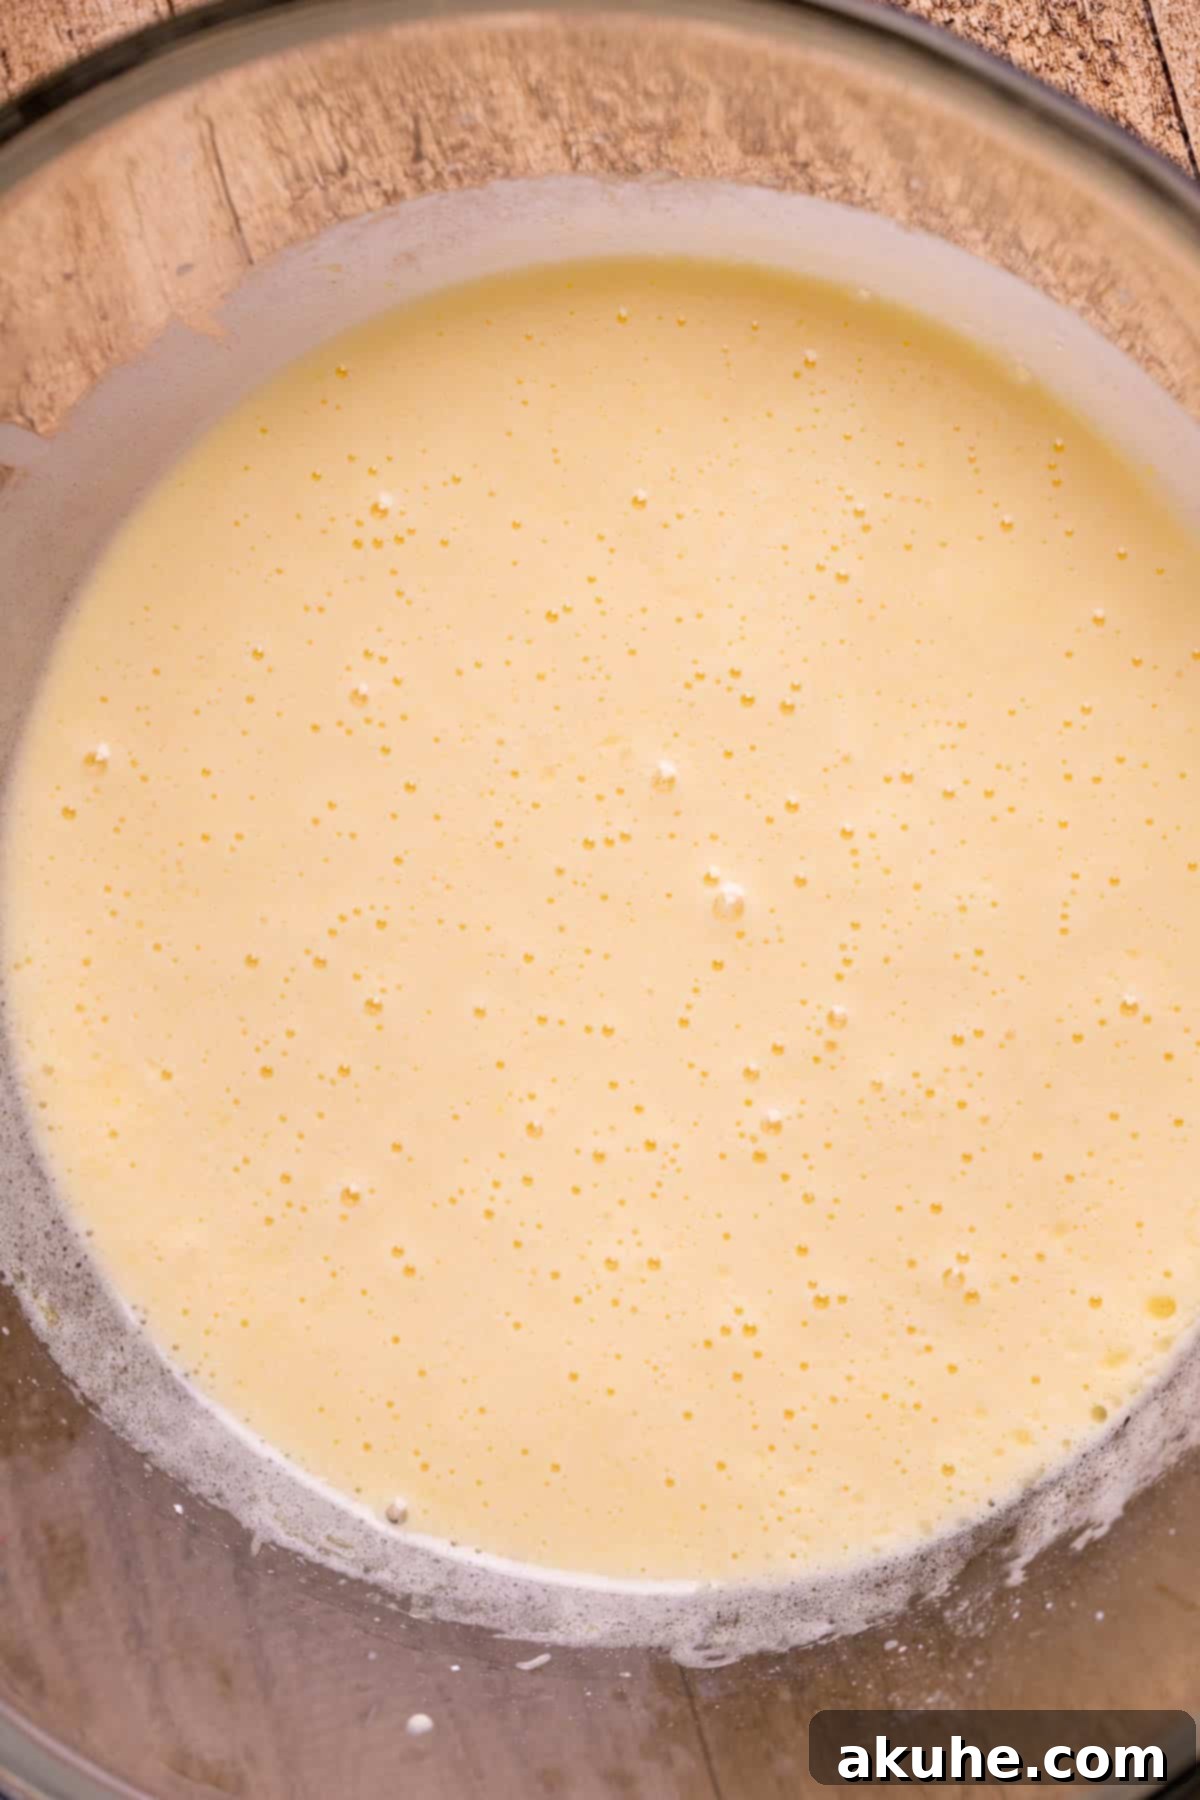
STEP 2: Aerate Sugar and Eggs. In a large mixing bowl, using your electric mixer fitted with the whisk attachment, combine the white granulated sugar, powdered sugar, and large eggs. Beat these ingredients on high speed for at least 1 minute. This step is crucial for incorporating air into the mixture, which contributes to the characteristic crinkly top of a good brownie and its ultimate texture.
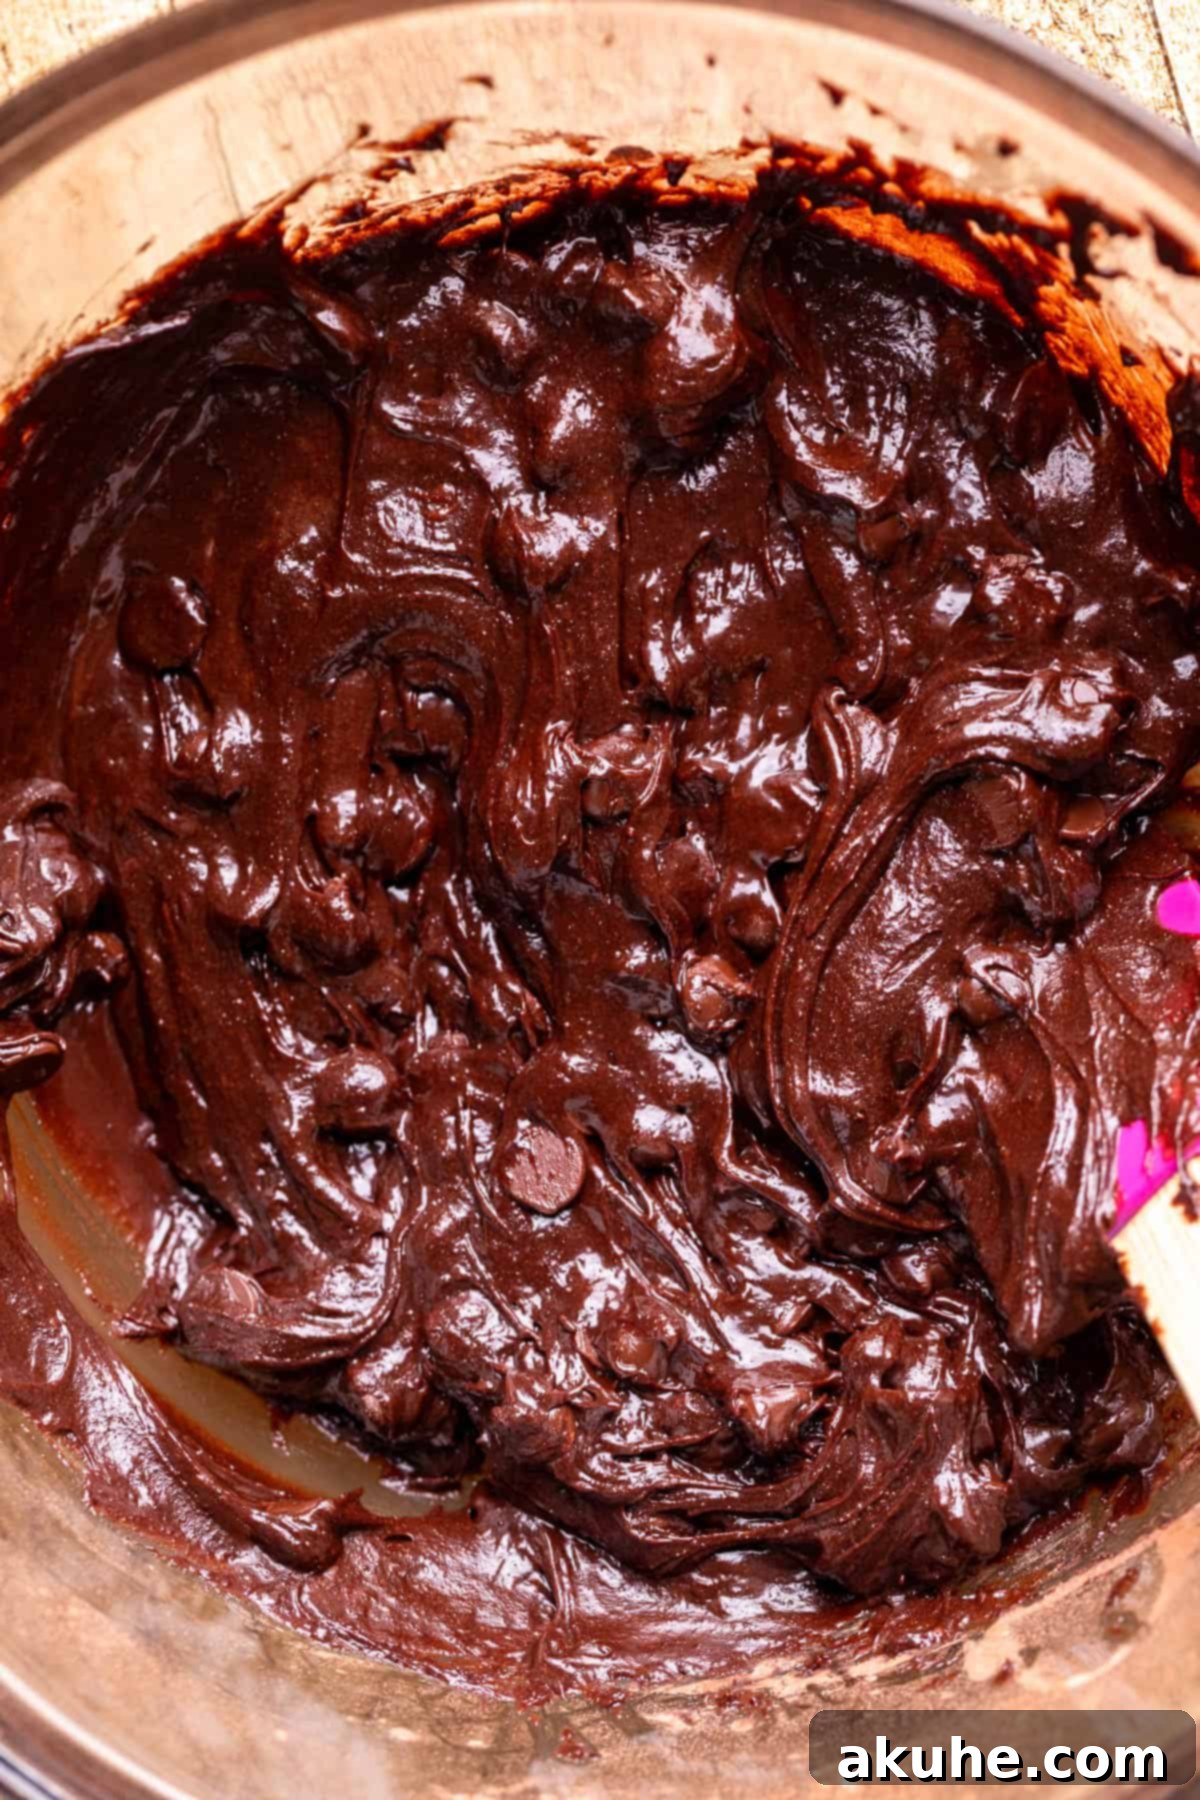
STEP 3: Combine Wet and Dry Brownie Ingredients. Reduce the mixer speed to low. Add the melted unsalted butter (ensure it’s cooled to room temperature), canola or vegetable oil, and pure vanilla extract to the egg mixture. Mix on low speed until just combined. Next, gradually add the sifted dry ingredients to the wet mixture. Mix on low speed until the flour and cocoa powder are just incorporated. Be careful not to overmix the batter. Use a rubber spatula to scrape down the sides and bottom of the bowl, ensuring everything is thoroughly mixed without overworking the gluten. Finally, fold in the semi-sweet chocolate chips with the spatula until evenly distributed.
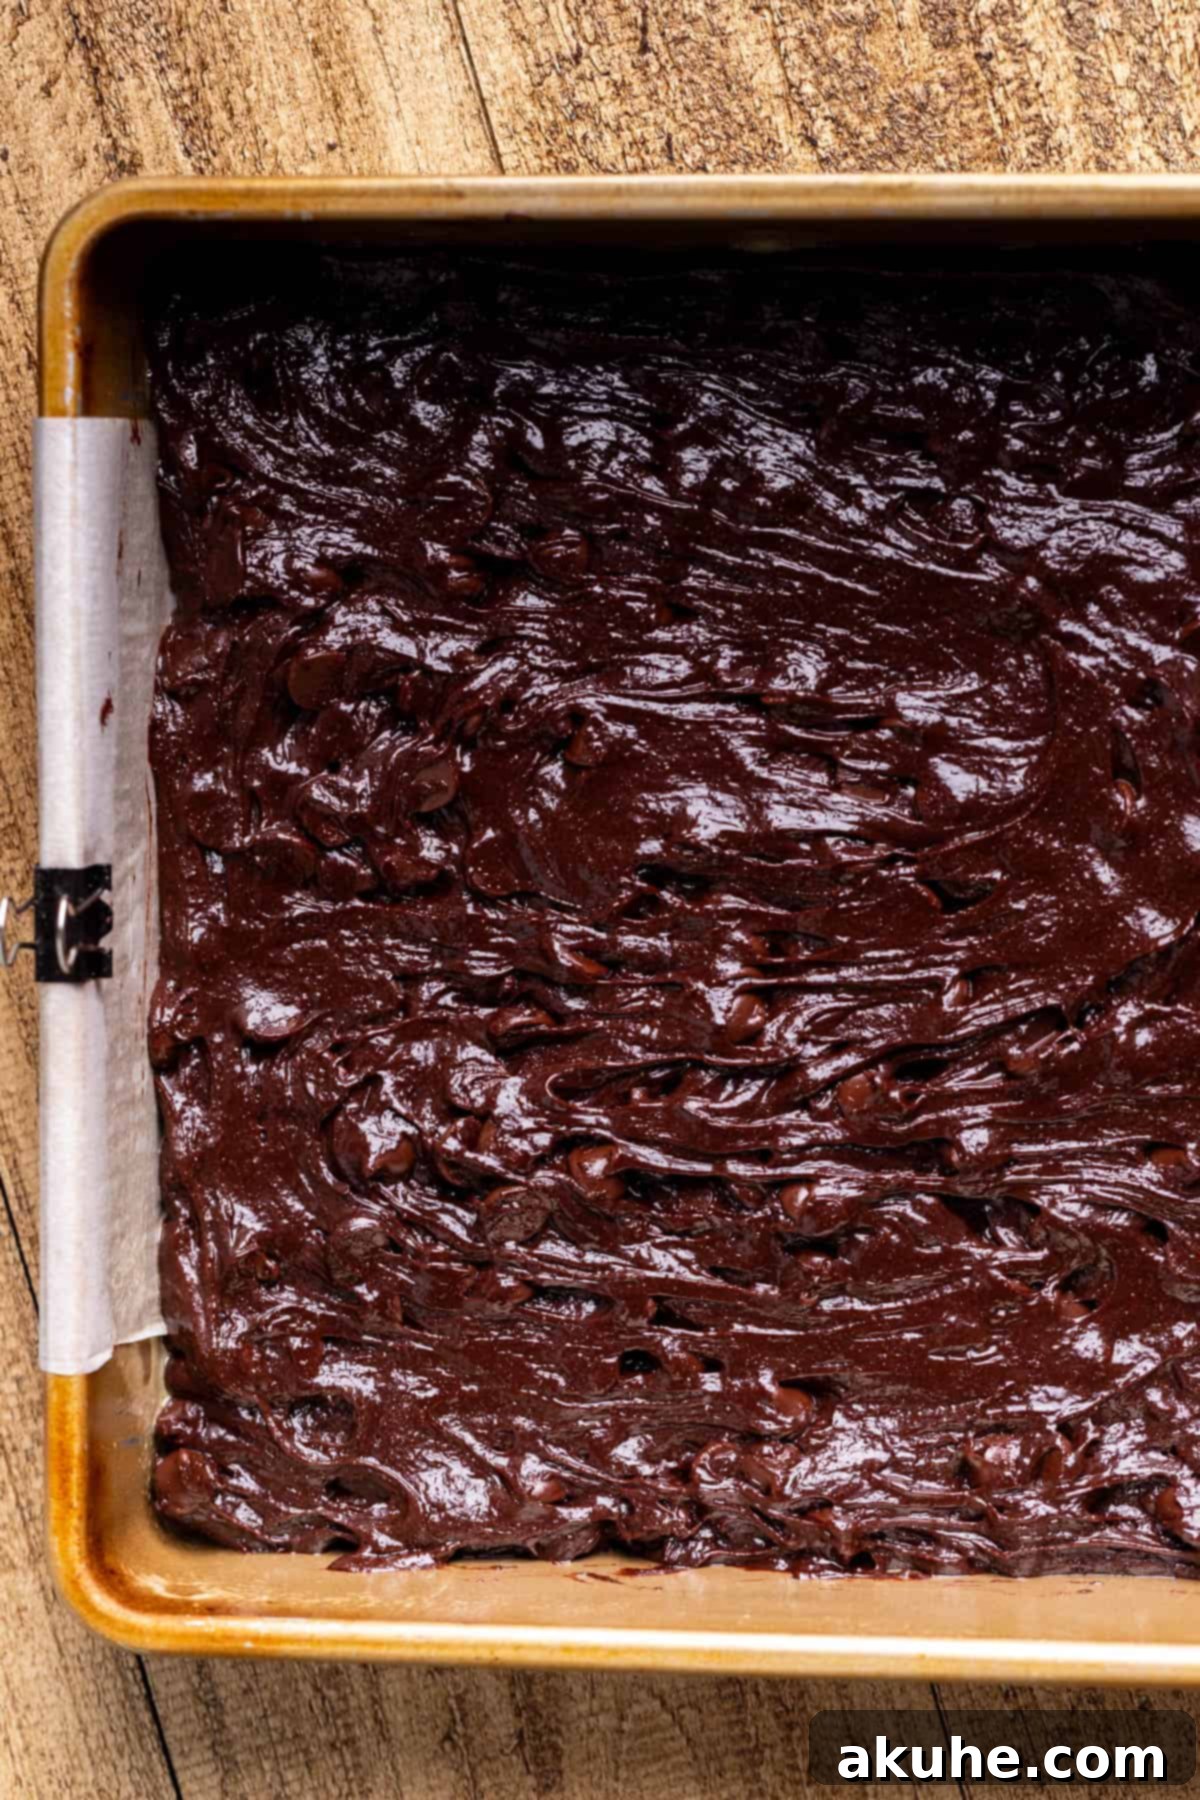
STEP 4: Pour the Brownie Batter. Carefully pour the freshly prepared brownie batter into your parchment-lined 9×9 inch baking pan. Use an offset spatula or the back of a spoon to gently spread the batter into an even layer, ensuring it reaches all corners of the pan. This creates a uniform base for your cookie layer.
STEP 5: Position the Cookie Dough Discs. Take small portions of your brown butter chocolate chip cookie dough and flatten them into small discs with your hands. Strategically place these cookie dough discs on top of the brownie batter, leaving a little space between each one. As the brookies bake, the cookie dough will spread and merge, forming a continuous, delicious top layer.
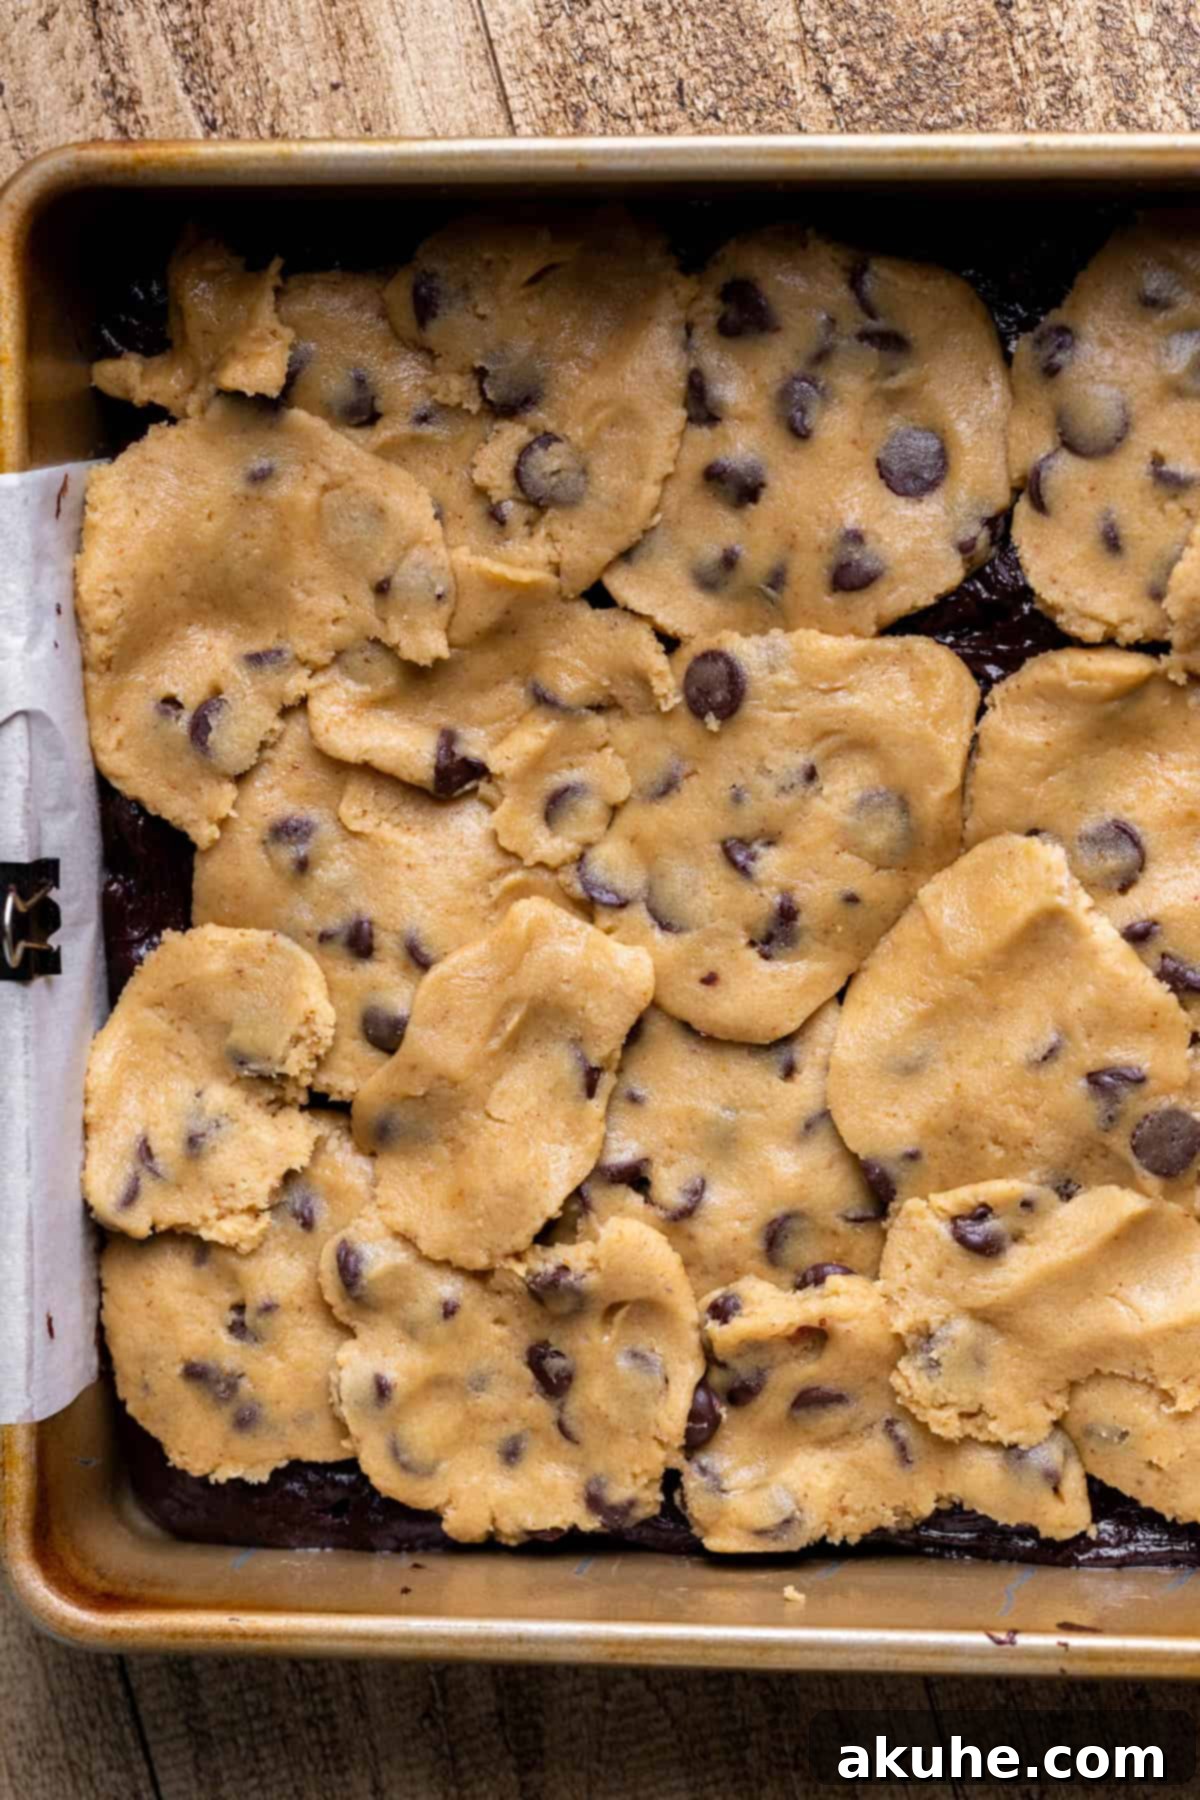
STEP 6: Bake to Perfection. Transfer the pan to your preheated oven and bake for 30-38 minutes. Baking times can vary depending on your oven, so it’s essential to monitor for doneness. The brookies are ready when a toothpick inserted into the middle of the brownie layer comes out with moist crumbs attached. It should not come out with wet batter, but some fudgy crumbs are perfectly acceptable and indicate a perfectly baked, moist brownie layer.
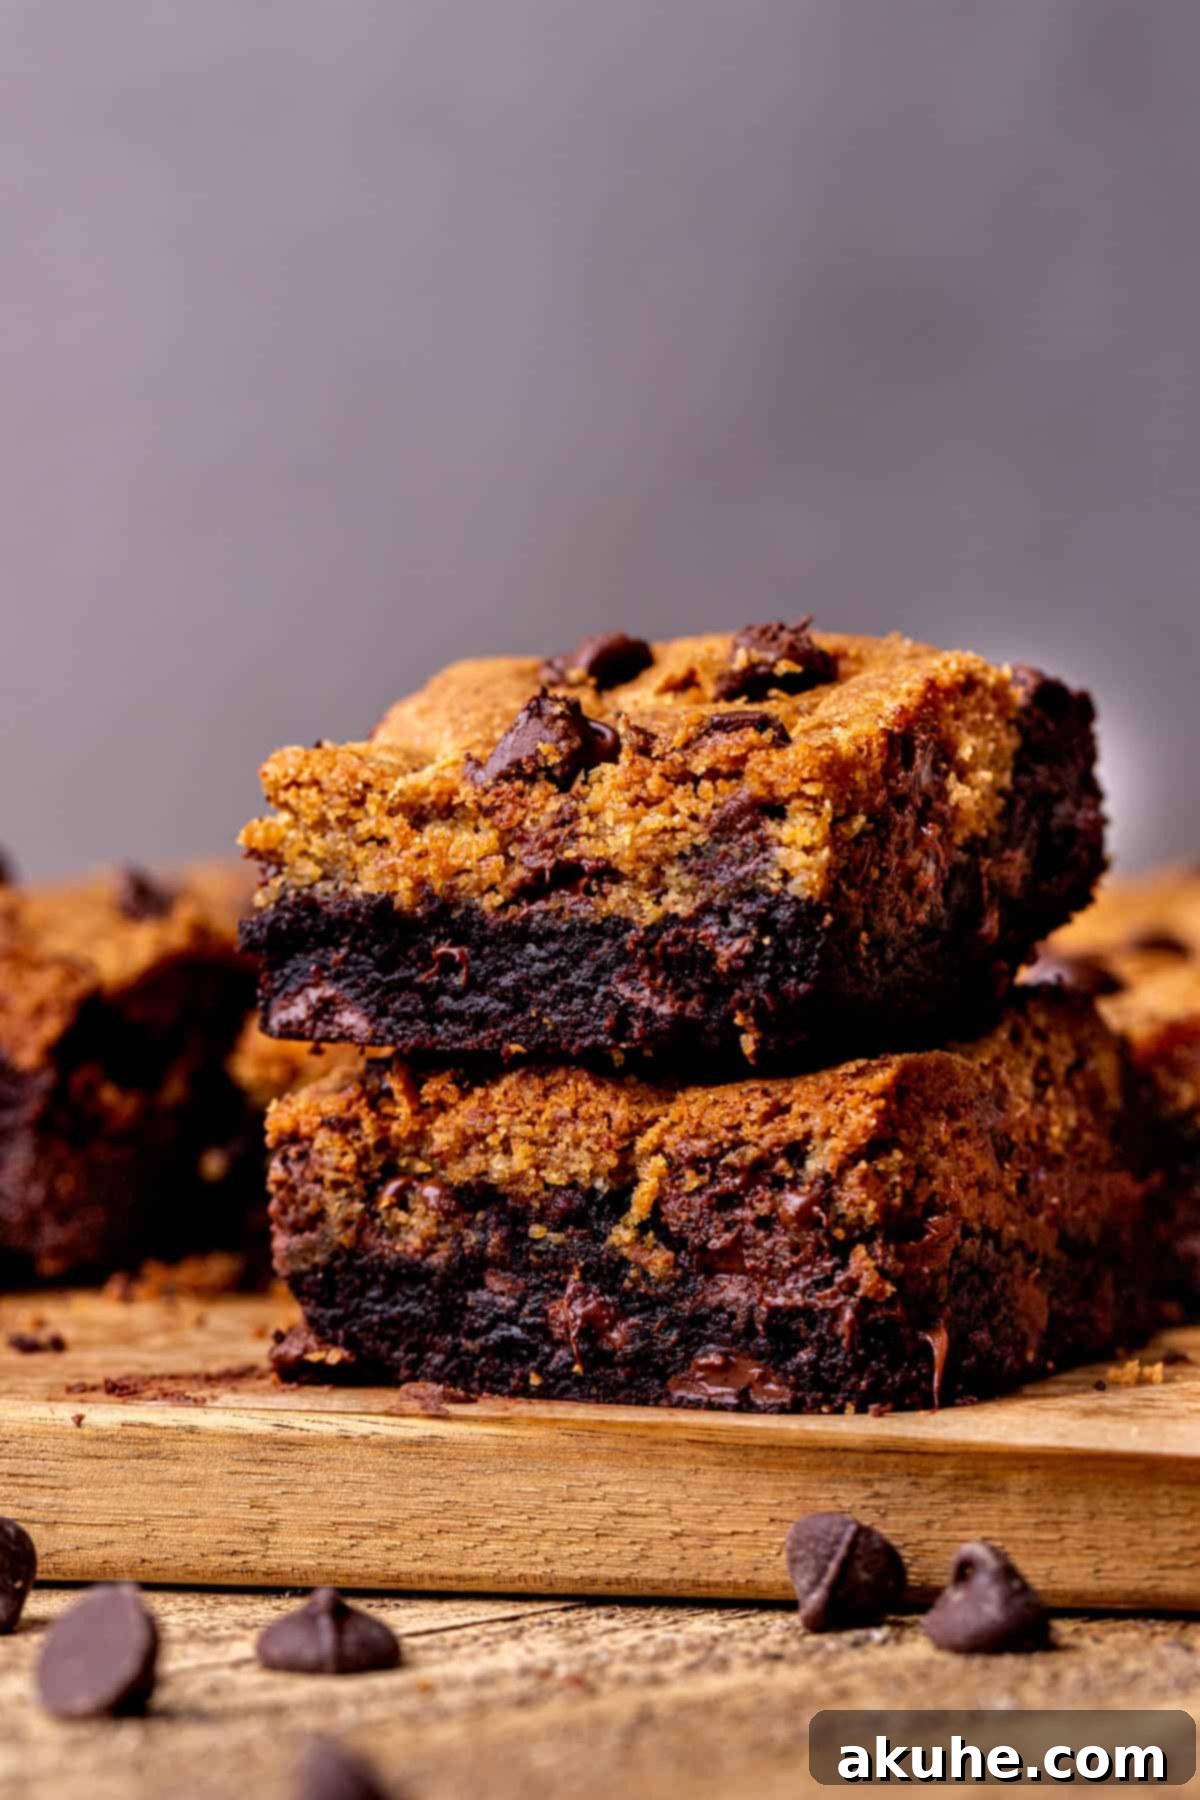
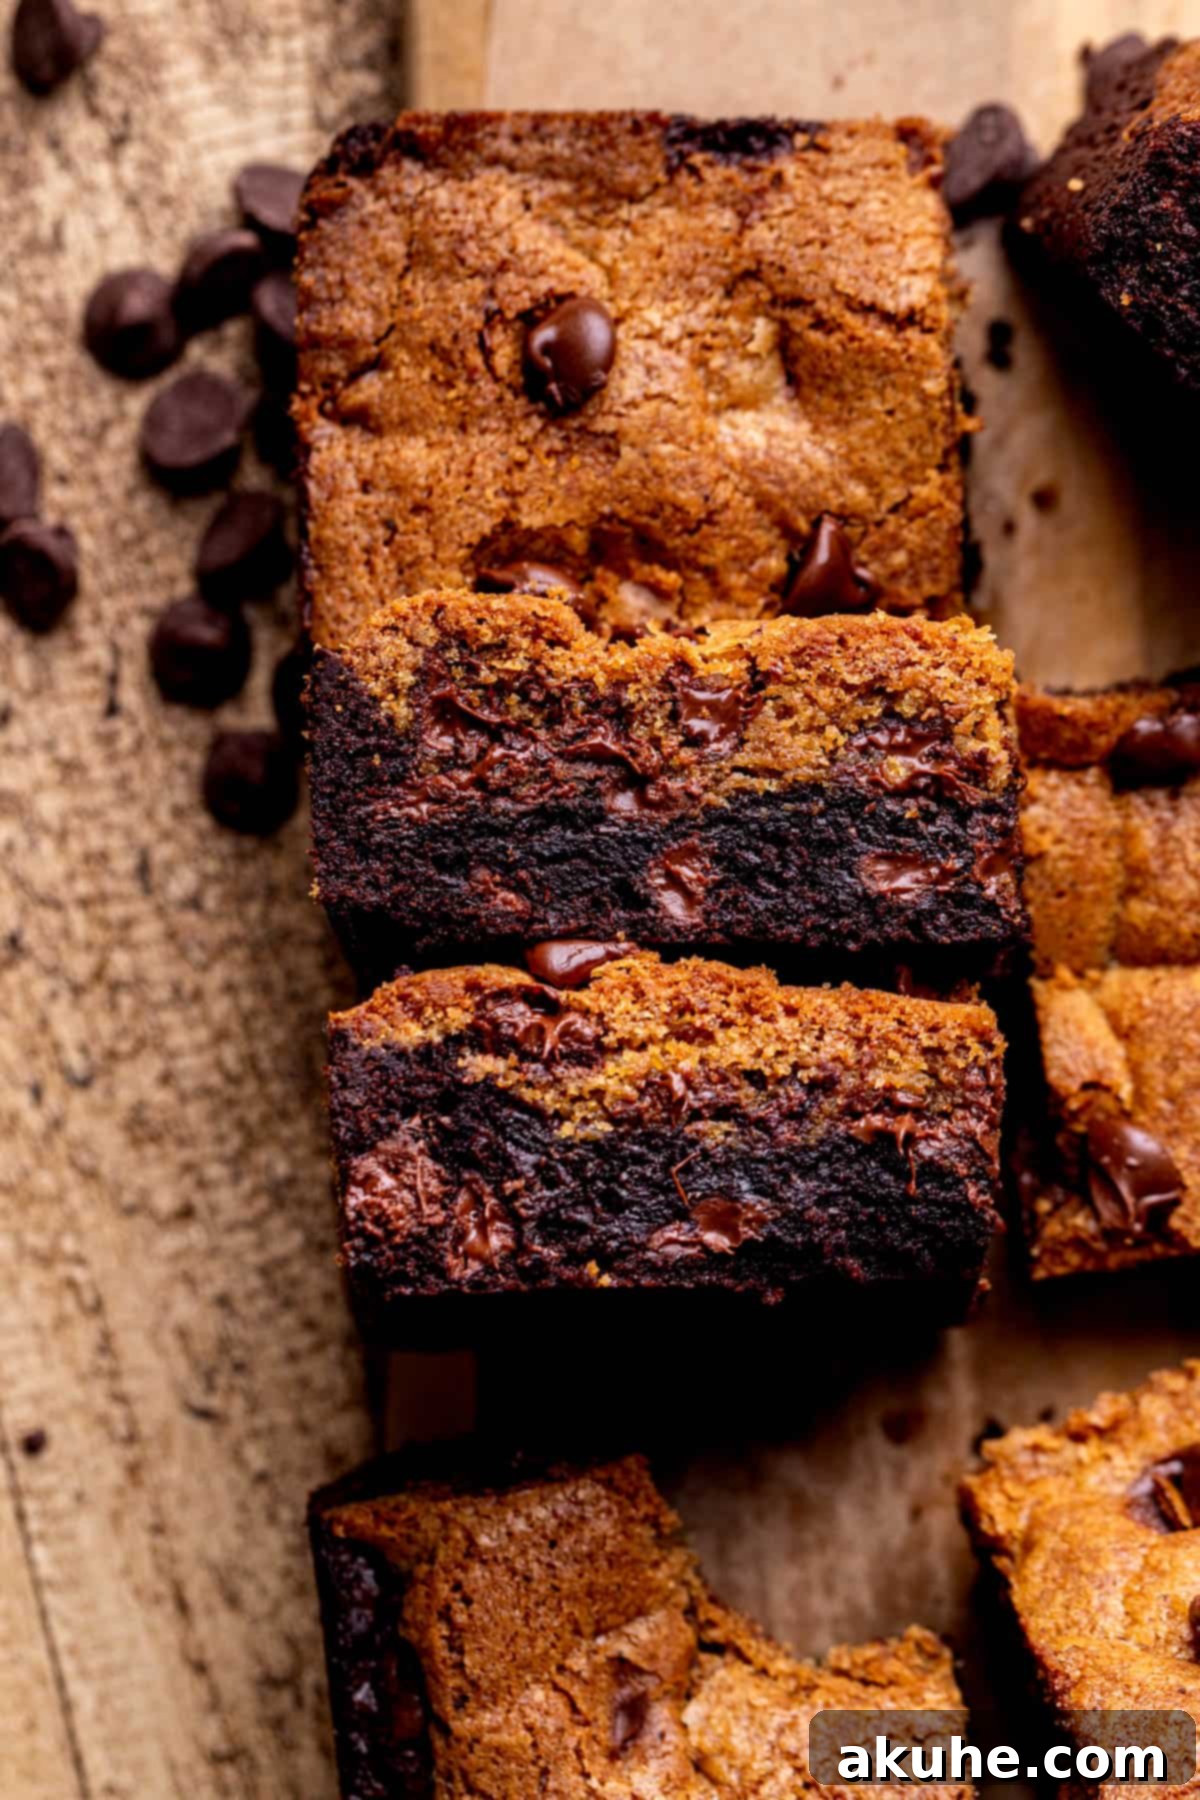
STEP 7: Cool Completely Before Serving. Once baked, remove the brookies from the oven. Resist the urge to cut into them immediately! Allow them to cool completely in the pan on a wire rack. This cooling period is critical for the layers to set properly, ensuring a clean cut and the ideal fudgy and chewy texture. Once fully cooled, use the parchment paper overhangs to lift the brookies out of the pan, then slice and serve.
Expert Baking Tips for Flawless Brookies
Achieving bakery-quality brookies is within your reach with these expert tips and tricks:
- Maximizing Fudginess in Brownies: To enhance the fudgy texture of your brownie layer, a higher ratio of fat to flour is ideal. The inclusion of oil alongside melted butter, combined with cornstarch, helps to achieve this. Cornstarch, in particular, plays a crucial role by interfering with gluten development from the flour, leading to a more tender and fudgy brownie rather than a cakey one. For larger brownie batches, adding an extra egg yolk can further boost fudginess, though for this recipe, the current proportions are perfectly balanced.
- The Toothpick Test Explained: When testing for doneness, insert a toothpick into the center of the brownie layer, avoiding any large chocolate chips if possible. If the toothpick comes out completely clean, your brookies are likely overbaked and will be dry. The ideal result is a toothpick that emerges with moist, fudgy crumbs clinging to it, but no wet batter. This indicates a perfectly baked, gloriously fudgy interior.
- Accurate Flour Measurement is Key: Improper flour measurement is a common baking pitfall. Always use the “spoon and level” method: gently spoon flour into your measuring cup until it overflows, then level off the excess with a straight edge (like the back of a knife). Never scoop flour directly from the bag with your measuring cup, as this compacts the flour, leading to too much in your recipe and potentially dry, dense baked goods.
- Don’t Overmix the Doughs: For both the cookie dough and brownie batter, overmixing after adding the dry ingredients can lead to tough results. Mix only until the ingredients are just combined. A few streaks of flour are better than an overmixed, gluten-developed batter.
- Quality Ingredients Matter: Using high-quality ingredients, especially chocolate and butter, can significantly impact the flavor of your brookies. Good quality cocoa powder and chocolate chips will yield a richer, more satisfying chocolate experience.
- Patience with Cooling: As tempting as it is, do not cut into your brookies until they have cooled completely. Warm brookies are fragile and can fall apart easily. Cooling allows the layers to set, firm up, and become easier to slice, ensuring neat, attractive bars.
Frequently Asked Questions About Brookies
Here are answers to some common questions that arise when baking brookies, helping you troubleshoot and achieve the best results:
My brookies are very hard and dry. What went wrong?
If your brookies turned out hard, it’s a clear sign they were overbaked. Overbaking causes too much moisture to evaporate from both the brownie and cookie layers, resulting in a dry, crumbly texture. Remember to follow the toothpick test described in the expert tips: the center should still have moist crumbs, not wet batter, but definitely not a clean toothpick. Aim for that slightly “underdone” fudgy center for optimal texture.
Can I bake this recipe in an 8×8 inch pan instead of a 9×9 inch pan?
Yes, you can certainly use an 8×8 inch pan. However, be aware that using a smaller pan will result in thicker brookies. Because they are thicker, they will require a longer baking time than specified in the recipe. Start checking for doneness a few minutes after the original bake time, using the toothpick test as your guide.
Why did my brookies sink in the middle after baking?
Brookies sinking in the middle usually indicates that the brownie layer was significantly underbaked. While a fudgy, slightly moist center is desired, an overly underbaked brownie lacks structural integrity and will collapse upon cooling. If you notice a sunken center, it means your brownie layer was probably extremely fudgy, almost liquid. Next time, try baking them for an additional 5-10 minutes to ensure adequate cooking of the brownie base.
Can I use different types of chocolate chips in this recipe?
Absolutely! While semi-sweet chocolate chips provide a balanced sweetness, you can experiment with other varieties. Dark chocolate chips will yield a more intense, less sweet flavor profile, which can be delightful for serious chocolate lovers. Milk chocolate chips might make the brookies overly sweet, so use them sparingly or combine them with a darker chocolate. White chocolate chips or even chopped chocolate bars can also be fun additions for varied texture and taste.
Do I need an electric mixer for this recipe?
While an electric mixer (either a hand mixer or a stand mixer with a paddle and whisk attachment) is highly recommended for ease and efficiency, especially for creaming butter and sugar, it is not strictly essential. You can make both the cookie dough and brownie batter by hand using a sturdy whisk and a rubber spatula. Just be prepared for a bit more arm work to achieve the proper consistency, particularly when beating the eggs and sugar for the brownie layer.
Recipe Variations to Customize Your Brookies
This classic brookie recipe is fantastic on its own, but it also serves as an excellent canvas for creative variations. Feel free to experiment and make these bars your own:
- Classic Chocolate Chip Cookie Layer: If you prefer the traditional taste of a chocolate chip cookie and want to skip the extra step, you can certainly make the cookie batter with regular unsalted butter (softened to room temperature) instead of brown butter. While it won’t have the unique nutty depth, it will still yield a delicious and classic cookie topping.
- Thicker Cookie Top: For those who adore the cookie layer and want more of it, simply double the brown butter chocolate chip cookie dough recipe. This will create a generously thick cookie topping that stands out even more against the fudgy brownie base, offering a more pronounced chewy texture.
- Add a Swirl: Before baking, try adding a swirl of peanut butter, Nutella, or caramel on top of the cookie dough for an extra layer of flavor and visual appeal. Gently dollop spoonfuls and swirl with a toothpick.
- Different Mix-ins: Get creative with your chocolate chip choices. Beyond semi-sweet, consider white chocolate, milk chocolate, dark chocolate, or a mix of all three. You can also add chopped nuts (walnuts, pecans), pretzels for a salty crunch, or even candy pieces (M&M’s, chopped Snickers) to either the cookie or brownie layer for extra texture and flavor.
- Espresso Kick: Enhance the chocolate flavor of the brownie layer by adding 1 teaspoon of instant espresso powder or coffee granules. It deepens the cocoa without making it taste like coffee.
Special Tools for Baking Success
Having the right tools can make your baking experience smoother and more enjoyable. Here are some special tools that are particularly helpful for this brookie recipe:
- 9×9 Inch Baking Pan: For optimal results, we highly recommend using metal square pans for baking these brookies. Metal pans conduct heat more evenly than glass pans, leading to a more consistent bake and preventing overly dry edges or an underbaked center.
- Parchment Paper: Using pre-cut sheets of parchment paper is a game-changer for baking. These pre-cut sheets make lining your pan quick and easy, eliminating the frustration of curling rolls and ensuring a perfect fit. More importantly, parchment paper prevents sticking and allows for effortless removal of the cooled brookies from the pan, simplifying cleanup significantly.
- Baking Spray with Flour: A good quality nonstick baking spray is essential, especially the kind that includes flour. We use nonstick spray with flour because it provides an extra layer of protection against sticking, ensuring your brookies release cleanly from the pan every time.
- Offset Spatula: An offset spatula is an invaluable tool for any baker. Its angled blade makes it incredibly easy to spread batters and frostings smoothly and evenly, which is particularly useful for getting a uniform layer of brownie batter in your pan.
- Electric Mixer: While not strictly mandatory, an electric mixer (either a stand mixer with a paddle and whisk attachment or a powerful hand mixer) greatly simplifies the process of creaming butter and sugar and aerating eggs, leading to better textured results.
- Heat-Proof Spatula or Whisk: Essential for browning butter, these tools allow you to stir constantly and safely without scratching your pan.
Storing and Freezing Your Brookies
Proper storage ensures your brookies stay fresh and delicious for as long as possible.
Store these brookies in an airtight container, such as a cake carrier or a large plastic container, at room temperature for up to 5 days. Keeping them sealed will prevent them from drying out and help maintain their fudgy and chewy textures.
Freezing Brookies for Later
Brookies freeze exceptionally well, making them perfect for meal prepping desserts or saving for a future treat. You can freeze individual slices by placing them in an airtight container or a freezer-safe bag. To prevent sticking, you might want to place a small piece of parchment paper between individual bars. They can be frozen for up to 30 days. To enjoy, simply thaw them at room temperature for a few hours or warm briefly in the microwave for a fresh-baked feel.
Other Decadent Brownie Recipes To Try
More Delicious Bar Recipes To Enjoy
- Discover the fruity delight of our Cherry Pie Bars.
- Indulge in the perfect sweet and salty combination with these Salted Caramel Fudge Brownies.
- Satisfy your cravings with the nutty and caramel-infused Turtle Brownies.
- For a candy bar twist, try our unbelievably good Snickers Brownies.
- Experience a unique, spiced flavor with our rich Fudgy Biscoff Brownies.
We hope you love this brookies recipe as much as we do! If you enjoyed making and tasting these delicious bars, please consider leaving a STAR REVIEW below to let us know. Your feedback is greatly appreciated. Don’t forget to tag us on Instagram @stephaniesweettreats with your beautiful creations. For more baking inspiration and sweet ideas, be sure to follow us on Pinterest. Happy baking!
Brookies (Brownie Cookie Bars)
Print Recipe
Pin Recipe
Ingredients
Brownie Batter
- 3/4 cup White granulated sugar
- 1/4 cup Powdered sugar
- 2 Large eggs
- 1/4 cup Oil, canola or vegetable
- 4 TBSP Unsalted butter, melted and cooled
- 1 tsp Pure vanilla extract
- 1/2 cup All-purpose flour
- 1/2 cup Dutch process cocoa powder
- 1 TBSP Cornstarch
- 1/2 tsp Salt
- 1 cup Semi-sweet chocolate chips
Brown Butter Chocolate Chip Cookie Dough
- 1/2 cup Unsalted butter, browned and cooled
- 1/2 cup Brown sugar , packed light or dark
- 1/4 cup White granulated sugar
- 1 tsp Pure vanilla extract
- 1 Large egg, room temperature
- 1 Egg yolk, room temperature
- 1 1/4 cup All-purpose flour
- 1/2 tsp Baking soda
- 1/2 tsp Salt
- 3/4 cup Semi-sweet chocolate chips
Instructions
Brown Butter Chocolate Chip Cookie Dough
- Place butter in a frying pan over medium heat. Stir constantly until the butter foams, milk deposits separate, and it turns amber in color with a nutty aroma. Remove from heat immediately.
- Pour the brown butter into a container to cool completely to room temperature, which takes at least 30 minutes.
- Preheat oven to 325°F (160°C). Spray a 9×9 inch pan with non-stick baking spray. Line the bottom and two sides of the pan with parchment paper, leaving an overhang for handles. Spray again.
- In a mixing bowl, combine the flour, baking soda, and salt. Set aside.
- In a separate mixing bowl, using an electric mixer, beat the cooled brown butter, brown sugar, and granulated sugar on high speed for 2 minutes. Add in vanilla extract and egg yolk. Mix on medium speed until combined and smooth.
- Add the dry ingredients to the wet ingredients. Mix on low speed until just combined. Fold in the chocolate chips. Set aside.
Brownie Batter & Assembly
- In a mixing bowl, sift the flour, cocoa powder, cornstarch, and salt. Set aside.
- Using an electric mixer with a whisk attachment, combine granulated sugar, powdered sugar, and eggs. Beat on high speed for 1 minute until light and aerated.
- Add in cooled melted butter, oil, and vanilla extract. Mix on low speed until just combined. Then, add the sifted dry ingredients and mix on low speed until just combined. Scrape the sides of the bowl with a rubber spatula and mix lightly. Fold in the chocolate chips.
- Pour the brownie batter into the prepared pan. Spread it into an even layer using an offset spatula.
- Flatten small portions of cookie dough into discs with your hands. Place these cookie dough discs on top of the brownie batter, spacing them out evenly.
- Bake for 30-38 minutes, or until a toothpick inserted into the center of the brownie layer comes out with moist crumbs (not wet batter).
- Let the brookies cool completely in the pan before removing and slicing for serving. This ensures they set properly.
Notes
High Altitude Baking: For baking at high altitudes, consider adding an extra 1/2 tablespoon of flour to both the brownie batter and the cookie dough to adjust for the lower atmospheric pressure.
Calories: 358kcal
Carbohydrates: 44g
Protein: 3g
Fat: 20g
Saturated Fat: 10g
Polyunsaturated Fat: 2g
Monounsaturated Fat: 7g
Trans Fat: 0.4g
Cholesterol: 36mg
Sodium: 186mg
Potassium: 181mg
Fiber: 3g
Sugar: 27g
Vitamin A: 291IU
Calcium: 28mg
Iron: 2mg
