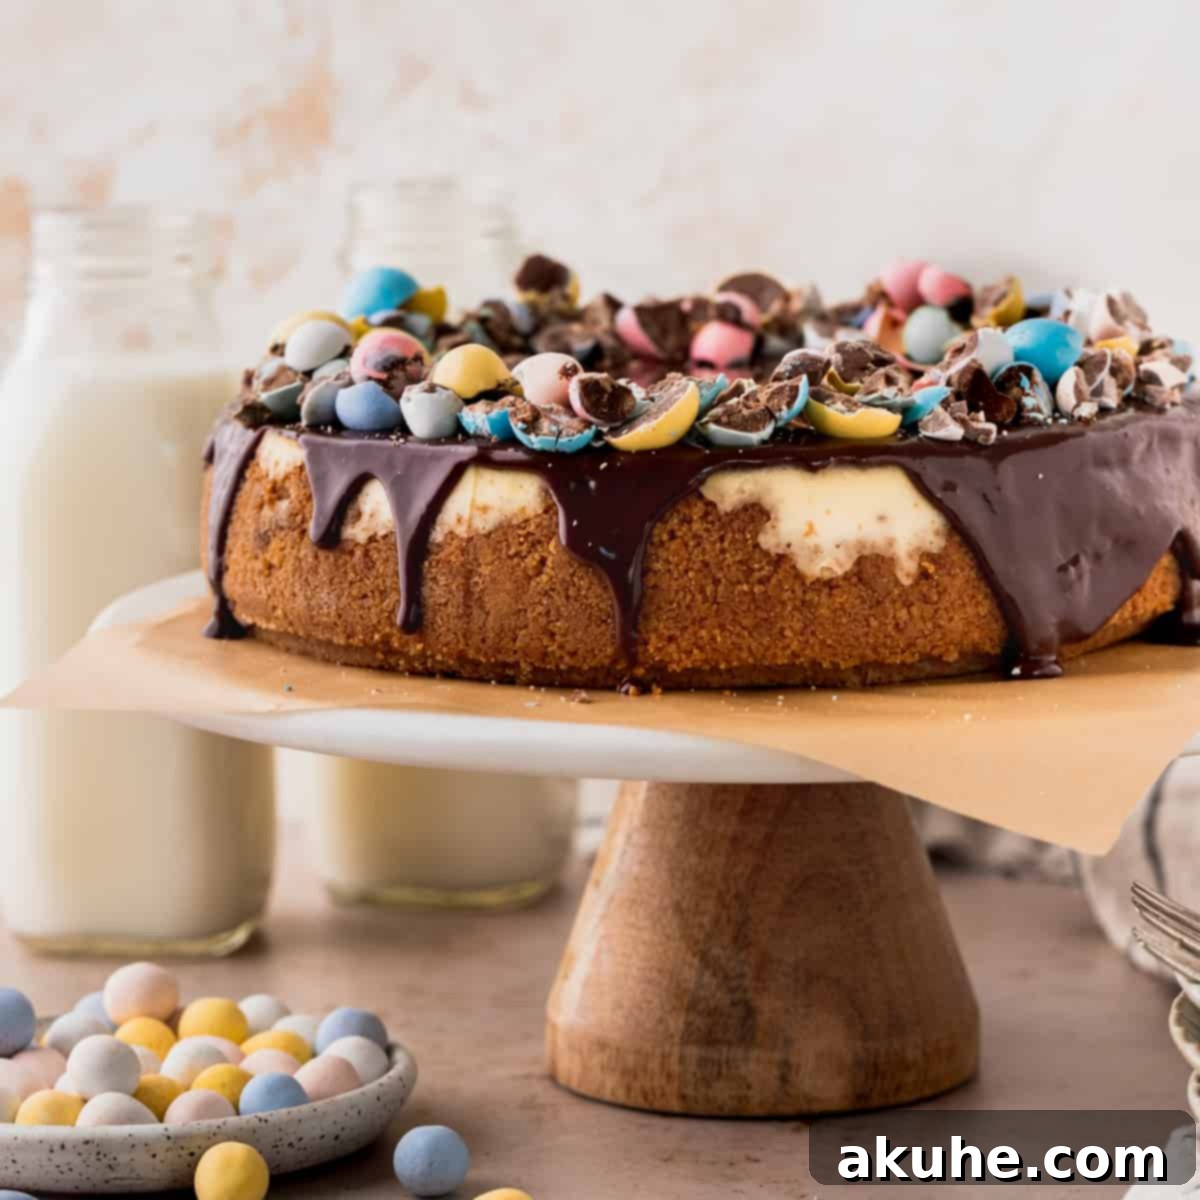
As Easter approaches, the culinary world awakens with delightful treats, and nothing quite captures the festive spirit like a show-stopping dessert. This **Easter Egg Cheesecake** is more than just a dessert; it’s a celebration on a plate, featuring a luxurious blend of classic cheesecake creaminess with the joyful crunch and vibrant colors of mini chocolate eggs. Designed to be the centerpiece of your holiday table, this recipe promises a dessert experience that is both visually stunning and irresistibly delicious.
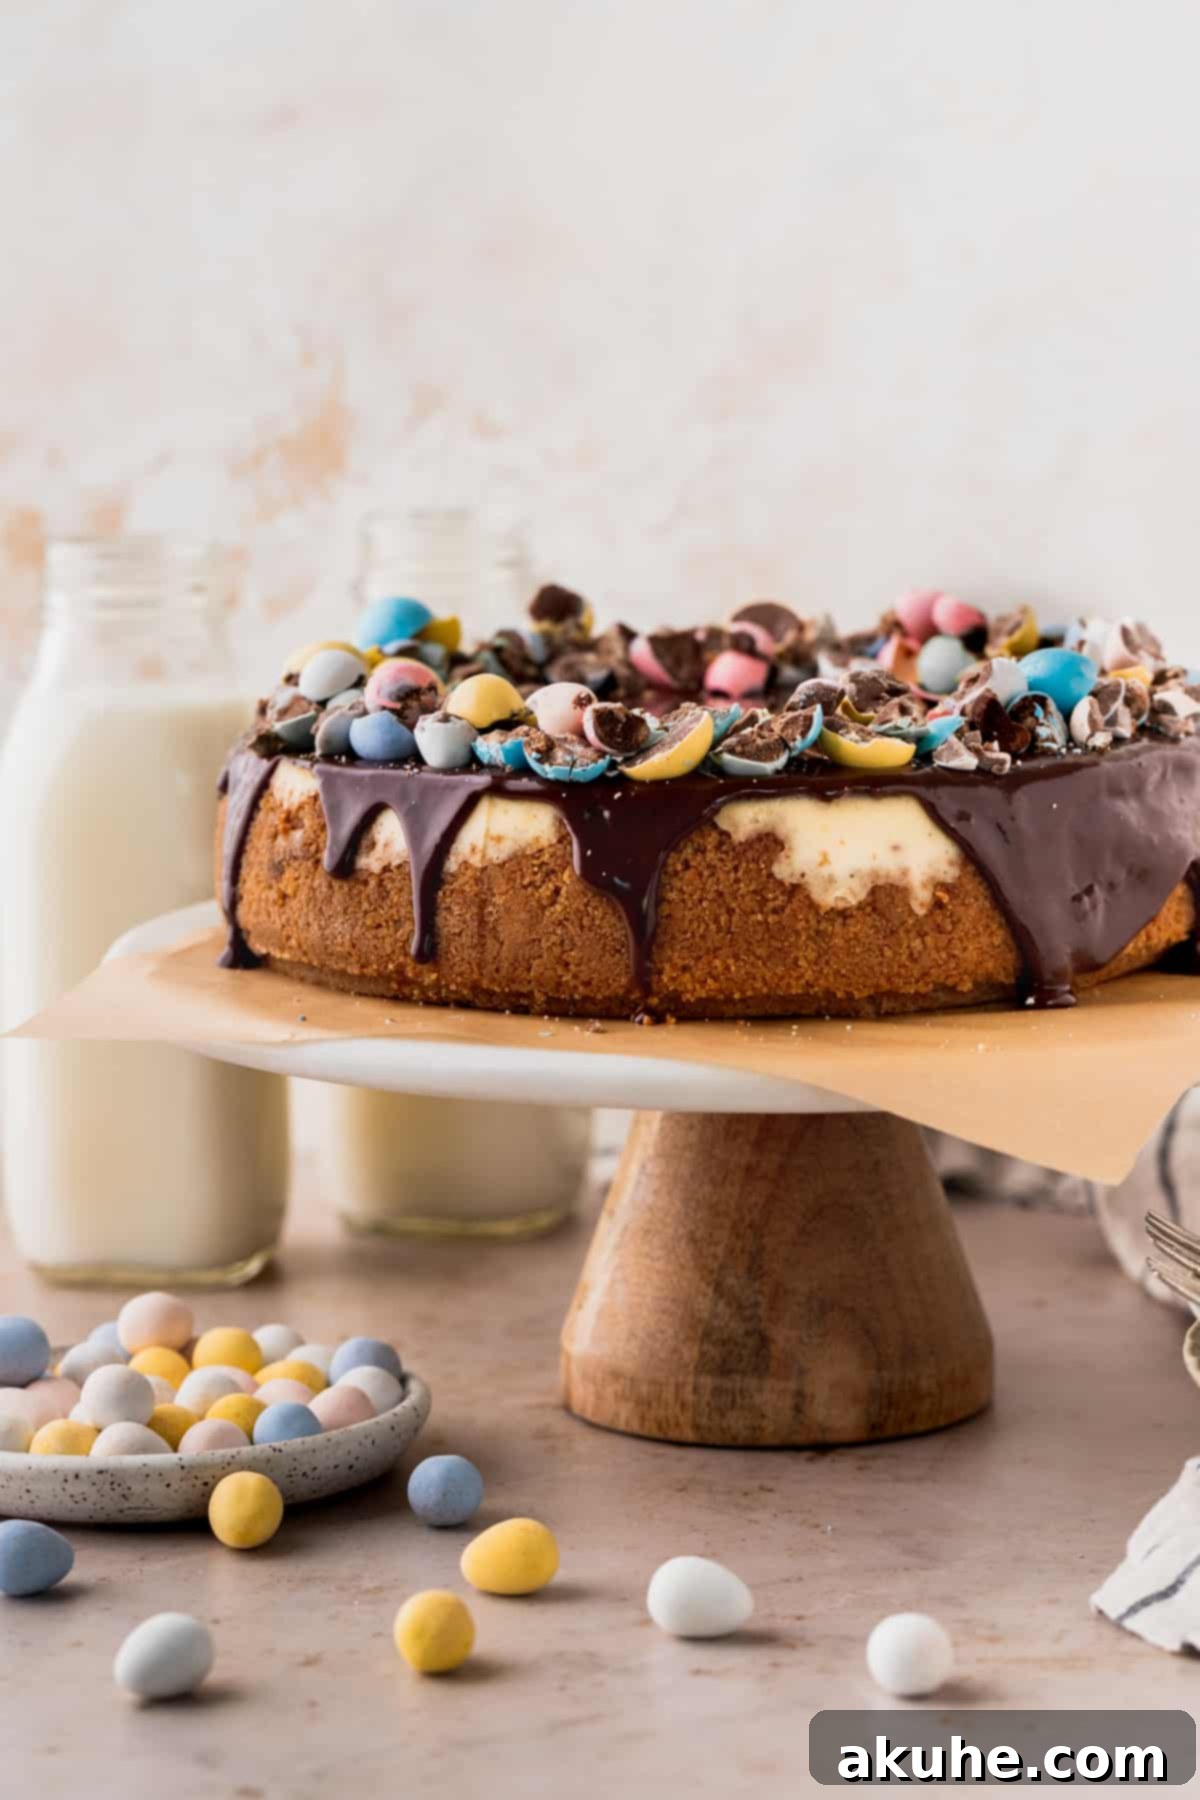
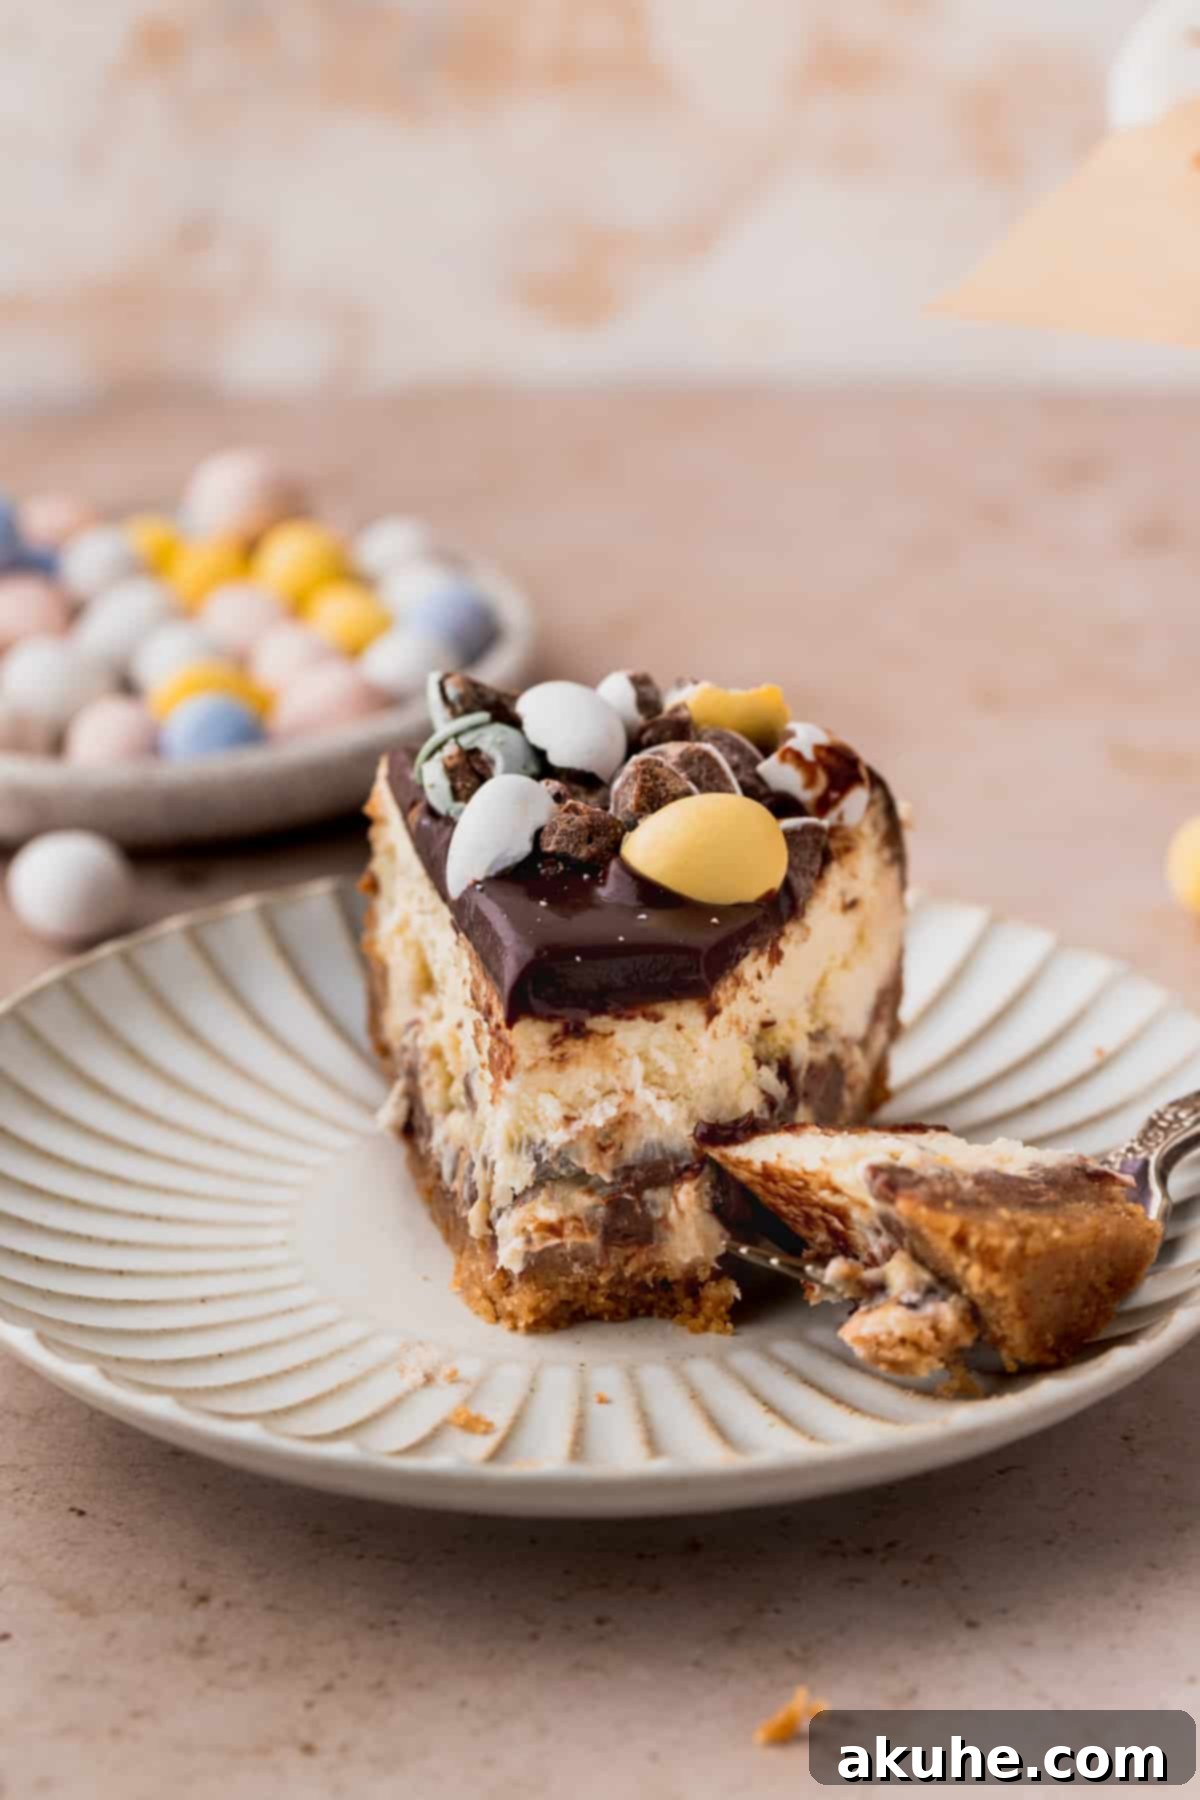
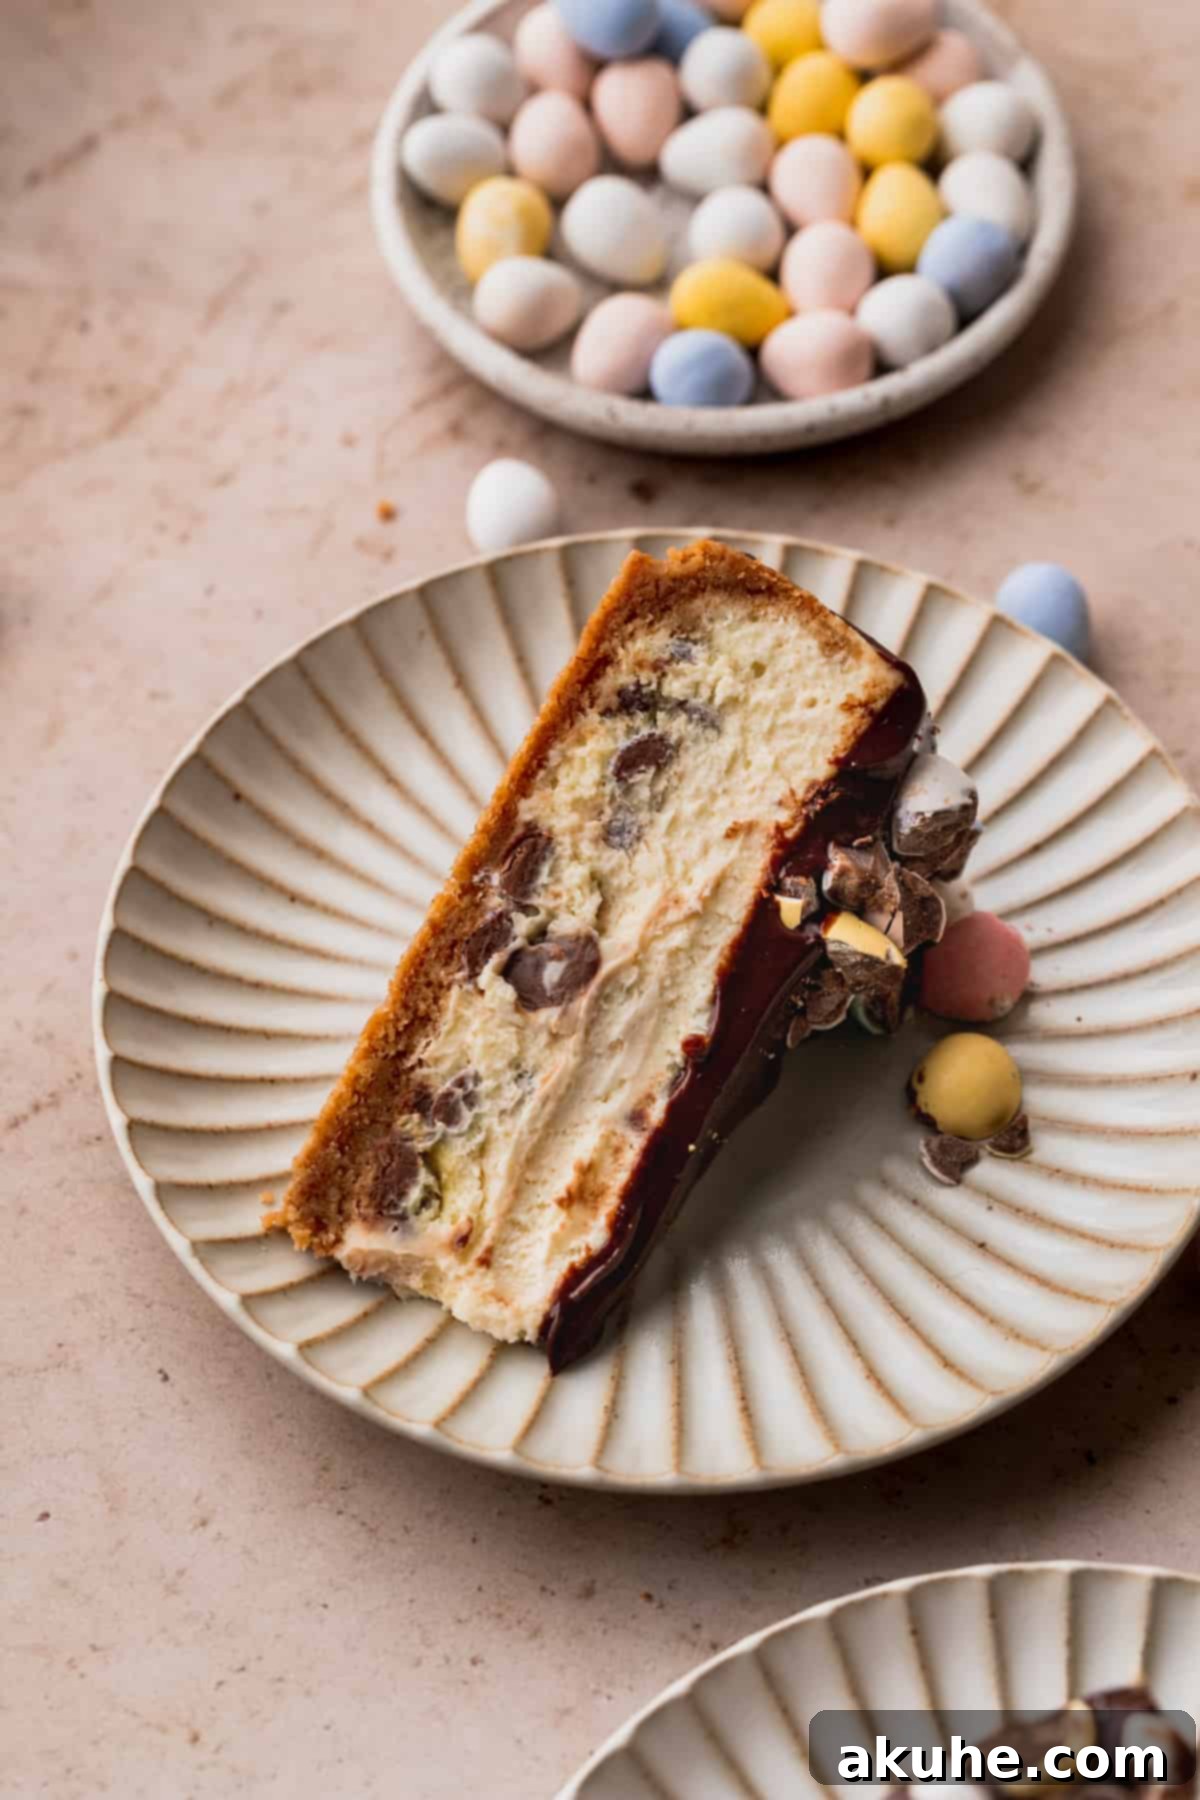
At its heart, this cheesecake boasts a perfectly baked, incredibly creamy filling studded with generous chunks of chopped mini eggs, all nestled atop a buttery, golden graham cracker crust. The vibrant hues of the chocolate eggs peeking through the rich cheesecake create an inviting mosaic that is instantly recognizable as an Easter delight. While the inherent sweetness of milk chocolate mini eggs makes this a truly indulgent treat, a clever addition of extra salt into the cheesecake batter ensures a beautifully balanced flavor profile, preventing it from being overwhelmingly sweet. The grand finale is a silky smooth chocolate ganache, draped elegantly over the top, and crowned with even more colorful mini eggs, making every slice a work of art.
Looking for more delightful dessert ideas? Explore our other beloved cheesecake creations like Oreo Cheesecake Brownies, the exquisitely rich Creamy Honey Cheesecake, and the refreshing Strawberry White Chocolate Cheesecake.
Why This Easter Egg Cheesecake Recipe is a Must-Try
This Easter Egg Cheesecake isn’t just another dessert; it’s a carefully crafted experience designed for maximum enjoyment and ease of preparation. Here’s what makes this recipe stand out:
- Irresistible Graham Cracker Crust: The foundation of any great cheesecake, our buttery graham cracker crust provides the perfect textural contrast and a delightful hint of sweetness that complements the rich cheesecake filling without overpowering it. It’s simple to make and always delivers a satisfying crunch.
- Luxuriously Baked Creamy Cheesecake: Achieving that signature smooth, dense, and melt-in-your-mouth cheesecake texture is key. Our baked cheesecake method ensures a consistently creamy result every time, with a delicate balance of tang and sweetness that makes it truly exceptional.
- Celebratory Mini Egg Infusion: What’s Easter without mini eggs? We incorporate generous amounts of chopped Cadbury mini eggs not only into the cheesecake batter for bursts of chocolatey goodness in every bite but also as a vibrant, festive decoration on top, making it a feast for both the eyes and the palate.
- Decadent Chocolate Ganache Topping: A luscious, velvety smooth chocolate ganache adds an extra layer of indulgence and a sophisticated finish. It cascades beautifully over the edges, creating an elegant presentation and enhancing the chocolate notes of the mini eggs within.
- Perfectly Balanced Sweetness: While packed with sweet mini eggs, the recipe is carefully calibrated with extra salt to cut through the richness and prevent it from being cloyingly sweet, ensuring a perfectly harmonious flavor.
- Visually Stunning Easter Showstopper: With its colorful mini eggs and glossy ganache, this cheesecake is guaranteed to impress your guests and become the star dessert of your Easter gathering.
Essential Ingredient Notes for the Best Easter Egg Cheesecake
The quality and preparation of your ingredients play a crucial role in the success of this Easter Egg Cheesecake. Paying attention to these details will ensure a perfectly creamy texture and rich flavor. For a complete list of quantities, please refer to the detailed recipe card below.
- Graham Crackers: This recipe calls for approximately two sleeves of graham crackers, which create about 2 ¼ cups of fine crumbs. If you’re outside the United States, digestive biscuits are an excellent, readily available alternative that will yield a similar buttery, slightly sweet crust. Ensure they are finely crushed for a cohesive base.
- Brown Sugar: We recommend using light brown sugar for the crust. Its subtle molasses notes add depth and a lovely chewiness that granulated sugar alone cannot provide. Make sure it’s packed firmly when measuring.
- Unsalted Butter: Melted unsalted butter binds the graham cracker crumbs together, creating a sturdy and flavorful crust. Using unsalted butter allows you to control the overall saltiness of the recipe.
- Full-Fat Cream Cheese: This is non-negotiable for a truly rich and creamy cheesecake. Low-fat varieties contain more water, which can lead to a less stable and less flavorful cheesecake. Crucially, bring your cream cheese to room temperature for at least two hours before baking. This ensures it blends smoothly without lumps, preventing cracks in the final product.
- Full-Fat Sour Cream: Just like cream cheese, full-fat sour cream contributes to the cheesecake’s characteristic tang and incredibly smooth texture. It also helps to prevent cracks. Allow it to come to room temperature alongside the cream cheese for optimal blending.
- Heavy Cream: This adds an extra layer of richness and helps achieve that luxurious, velvety consistency. Like other dairy ingredients, having it at room temperature will aid in emulsification and create a smoother batter.
- Large Eggs: Eggs provide structure and richness to the cheesecake. Ensure they are large and also brought to room temperature before mixing. Cold eggs can cause the batter to curdle or become lumpy.
- Cadbury Mini Eggs: For the best flavor and festive aesthetic, Cadbury mini eggs are highly recommended. Their distinctive crunchy shell and creamy milk chocolate interior are unparalleled. While other brands like Hershey’s offer mini eggs, Cadbury’s quality truly shines in this dessert.
- Semisweet Chocolate Chips: When making the chocolate ganache topping, choose semisweet or dark chocolate chips. Milk chocolate chips would make the ganache overly sweet, especially considering the sweetness of the mini eggs already present in the cheesecake. The slight bitterness of semisweet chocolate provides a perfect counterpoint.
Ingredient Substitutions & Dietary Considerations
- Gluten-Free Option: While this recipe has not been specifically tested with gluten-free ingredients, you can likely achieve a gluten-free version by substituting the graham cracker crumbs with your favorite gluten-free graham crackers or a gluten-free digestive biscuit equivalent. Ensure all other ingredients are certified gluten-free. We’d love to hear about your results if you try this!
- Yogurt for Sour Cream: If sour cream is not available or you prefer a slightly lighter tang, plain full-fat Greek yogurt can be used as a direct substitute for sour cream. It will provide a similar creamy texture and acidic balance.
- Different Chocolate Candies: While mini eggs are classic for Easter, you can certainly experiment with other small, colorful chocolate candies like M&M’s if you’re making this for another occasion or prefer a different flavor profile.
Step-by-Step Instructions: Crafting Your Easter Egg Cheesecake
Creating this stunning mini egg cheesecake is a rewarding process. Follow these detailed steps to ensure a flawless and delicious result. You’ll need a stand mixer with a paddle attachment or a reliable electric hand mixer for the cheesecake batter.
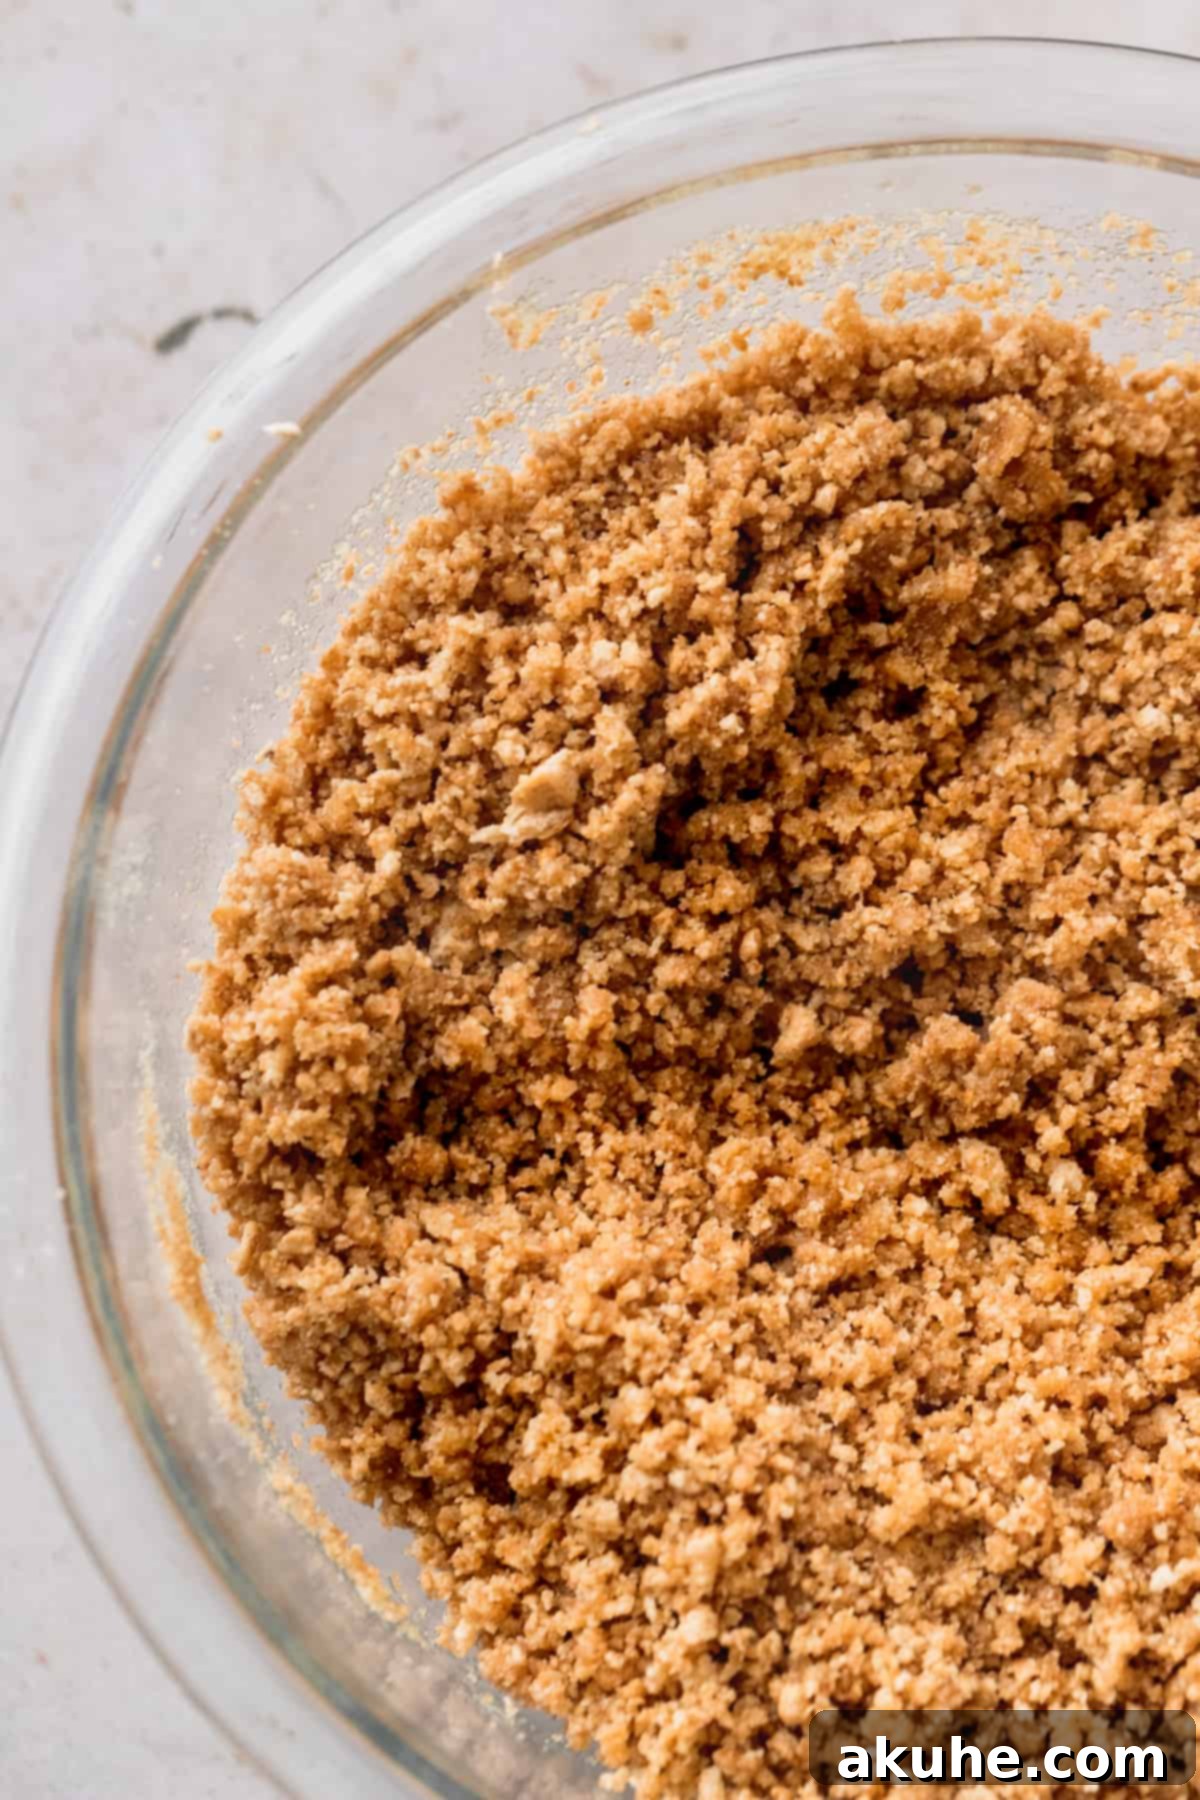
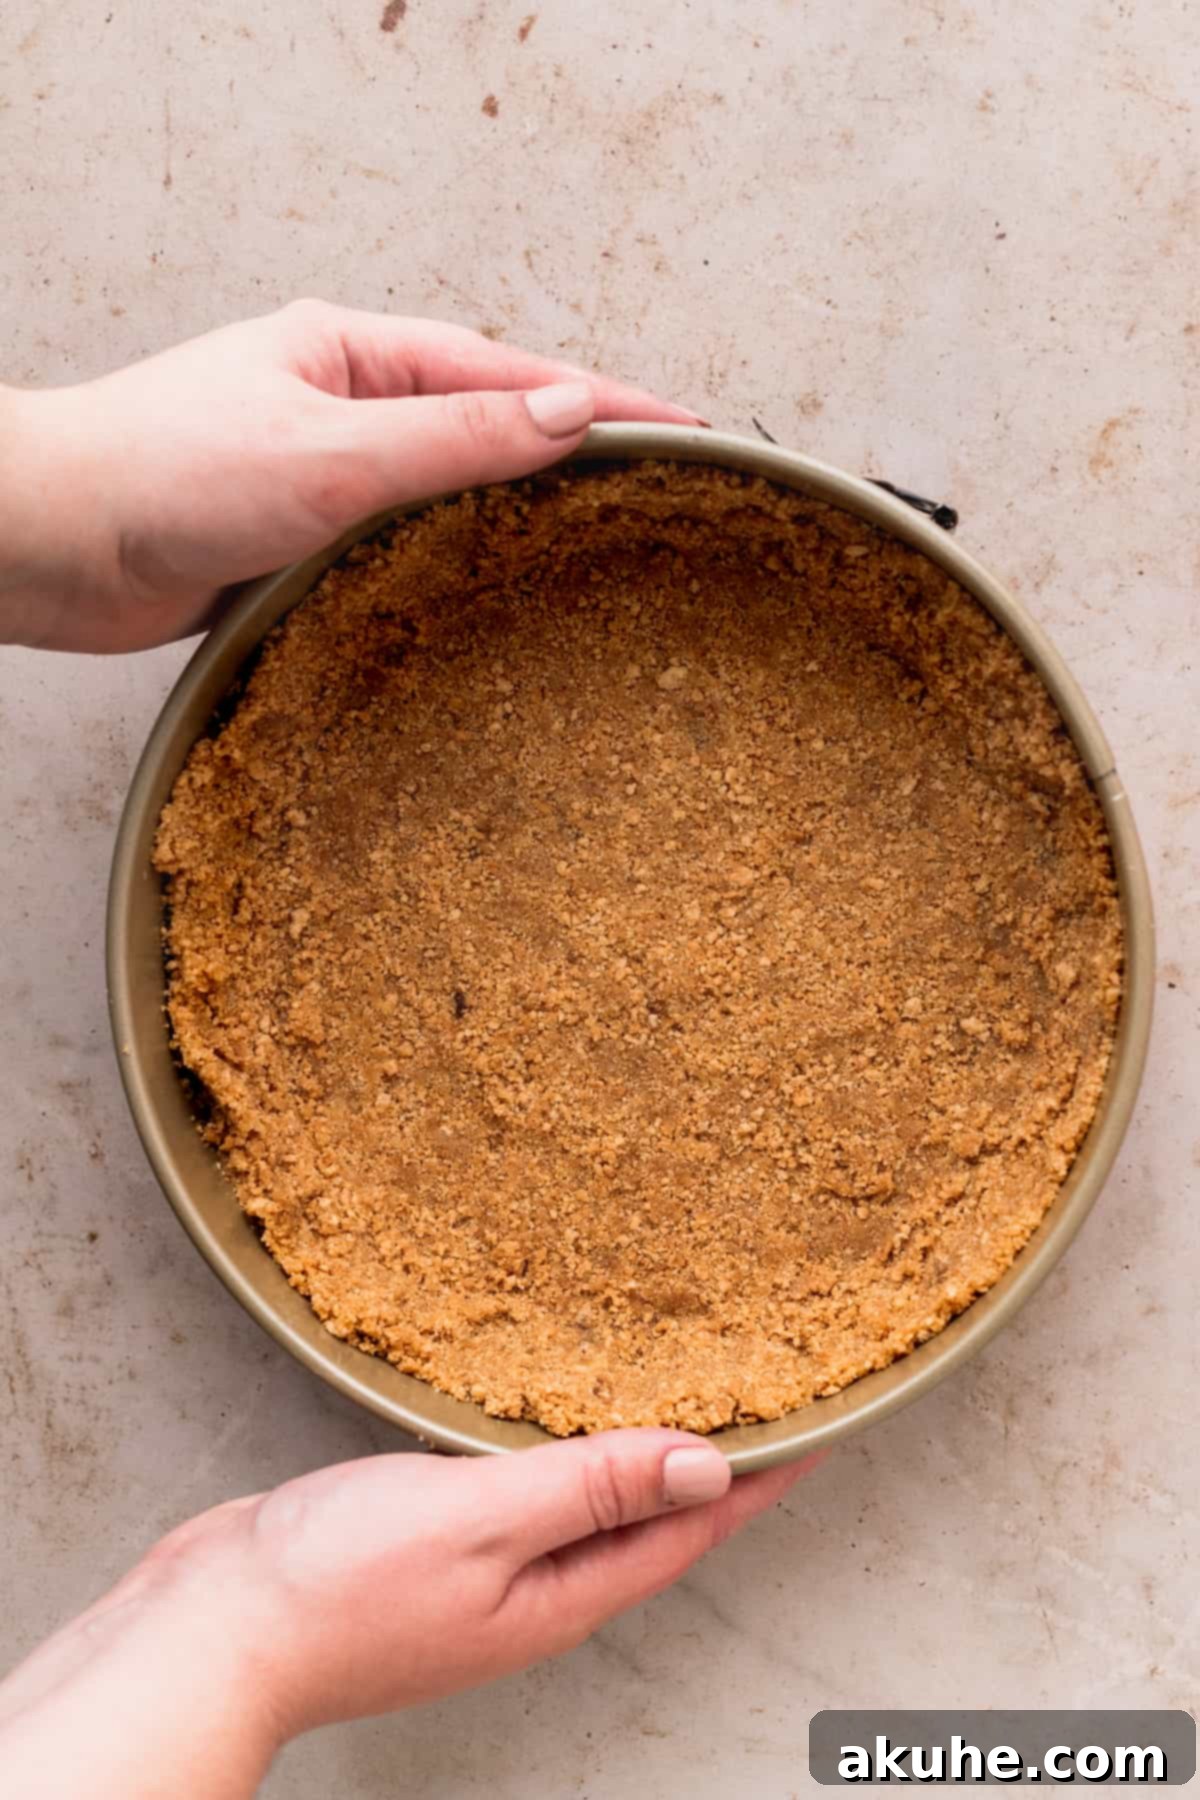
STEP 1: Prepare the Graham Cracker Crust. Begin by preheating your oven to 325°F (160°C). Lightly spray a 9-inch springform pan with nonstick baking spray, then line the bottom with a 9-inch parchment paper circle. Spray the parchment paper again. Use a food processor to finely blend your graham crackers until they resemble fine crumbs. In a medium bowl, combine these crumbs with brown sugar, a pinch of salt, and melted unsalted butter. Mix thoroughly with a fork until the mixture is uniformly moistened and resembles wet sand.
STEP 2: Bake the Crust. Pour the graham cracker mixture into the prepared springform pan. Using your fingers, carefully press the crumbs up the sides of the pan, about halfway. Then, use the flat bottom of a measuring cup or a glass to firmly compact the crust both on the bottom and up the sides. This creates a solid, non-crumbly base. Bake the crust in the preheated oven for 13 minutes. This par-baking step helps to set the crust and prevents it from becoming soggy once the cheesecake filling is added.
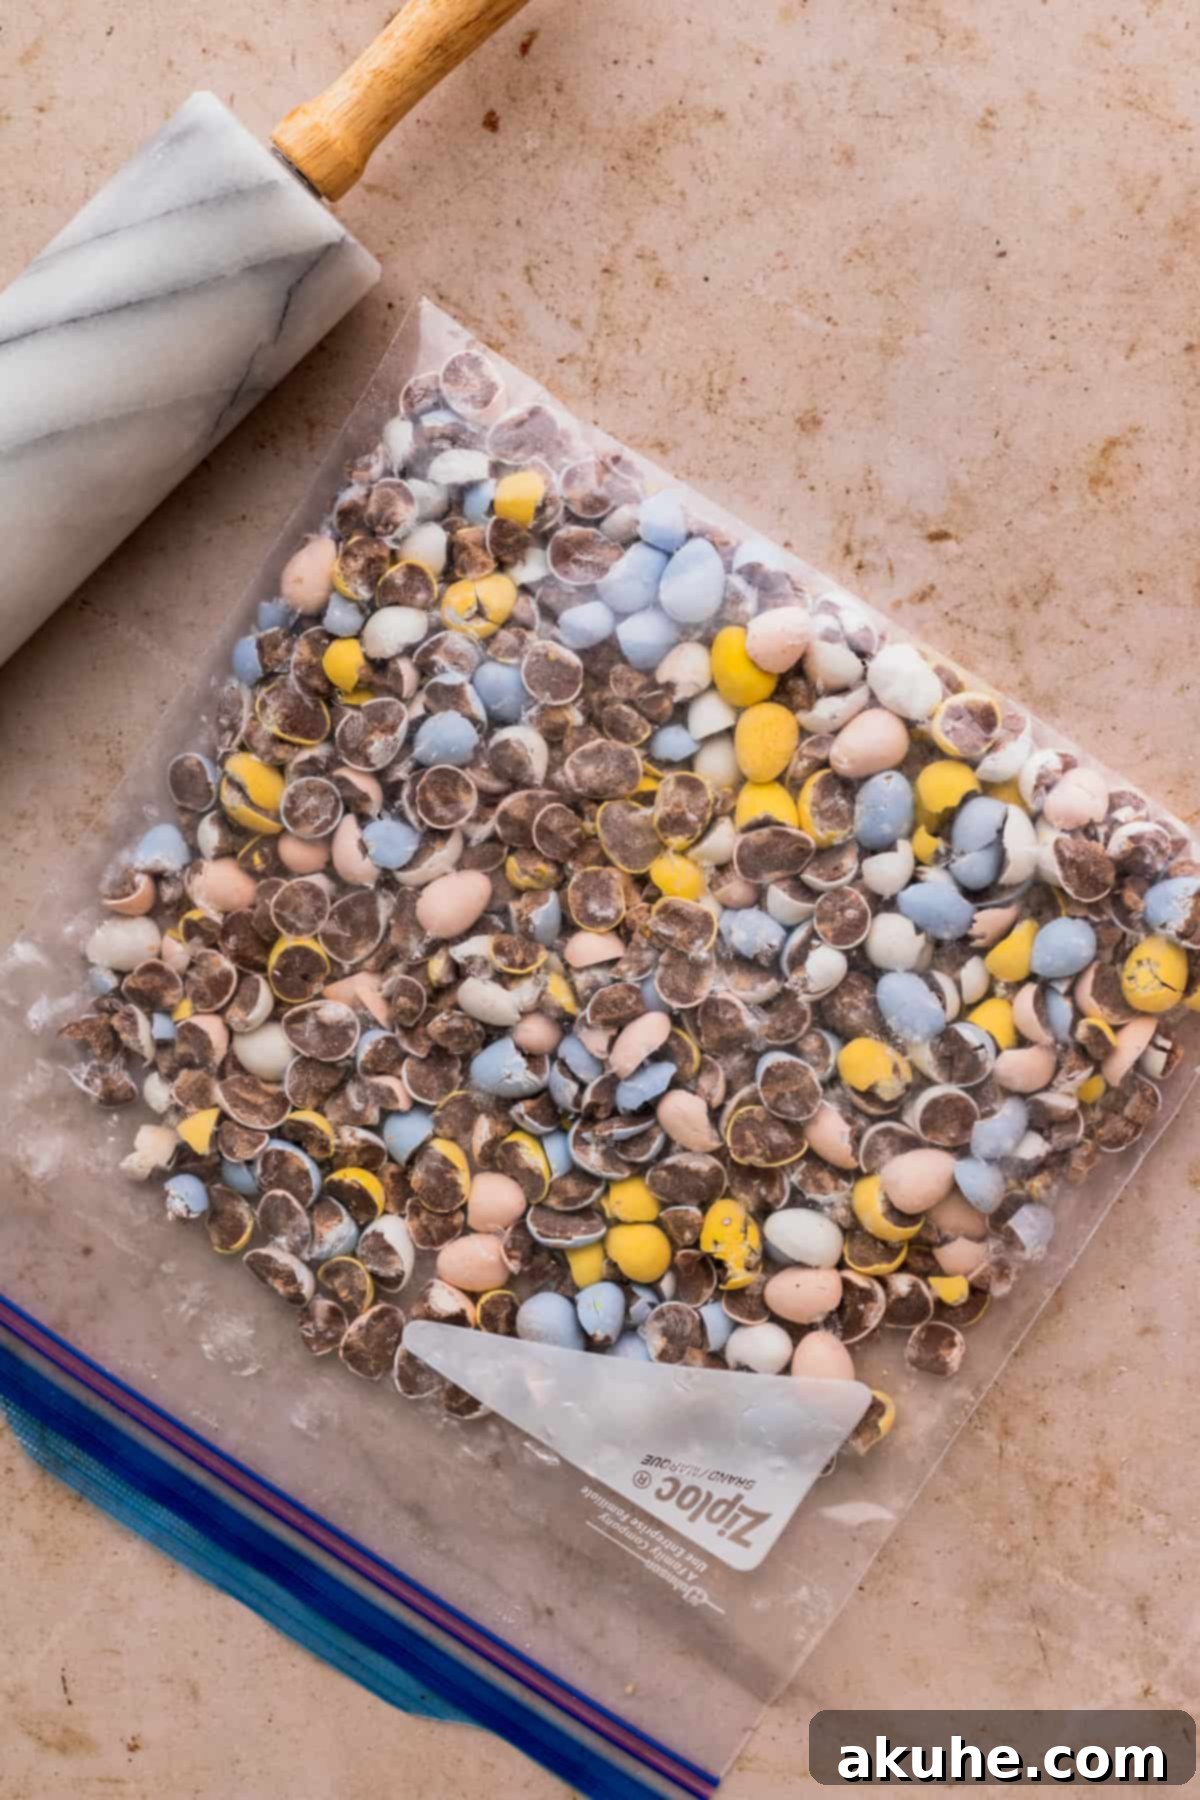
STEP 3: Prepare the Chopped Mini Eggs. While the crust is baking, prepare your mini eggs. For easy and efficient chopping, place the mini eggs into a large resealable plastic bag. Using a rolling pin, gently but firmly crush the eggs. Aim for a mix of larger chunks and smaller pieces; this variety in size adds wonderful texture and visual appeal to the cheesecake filling. Set these aside.
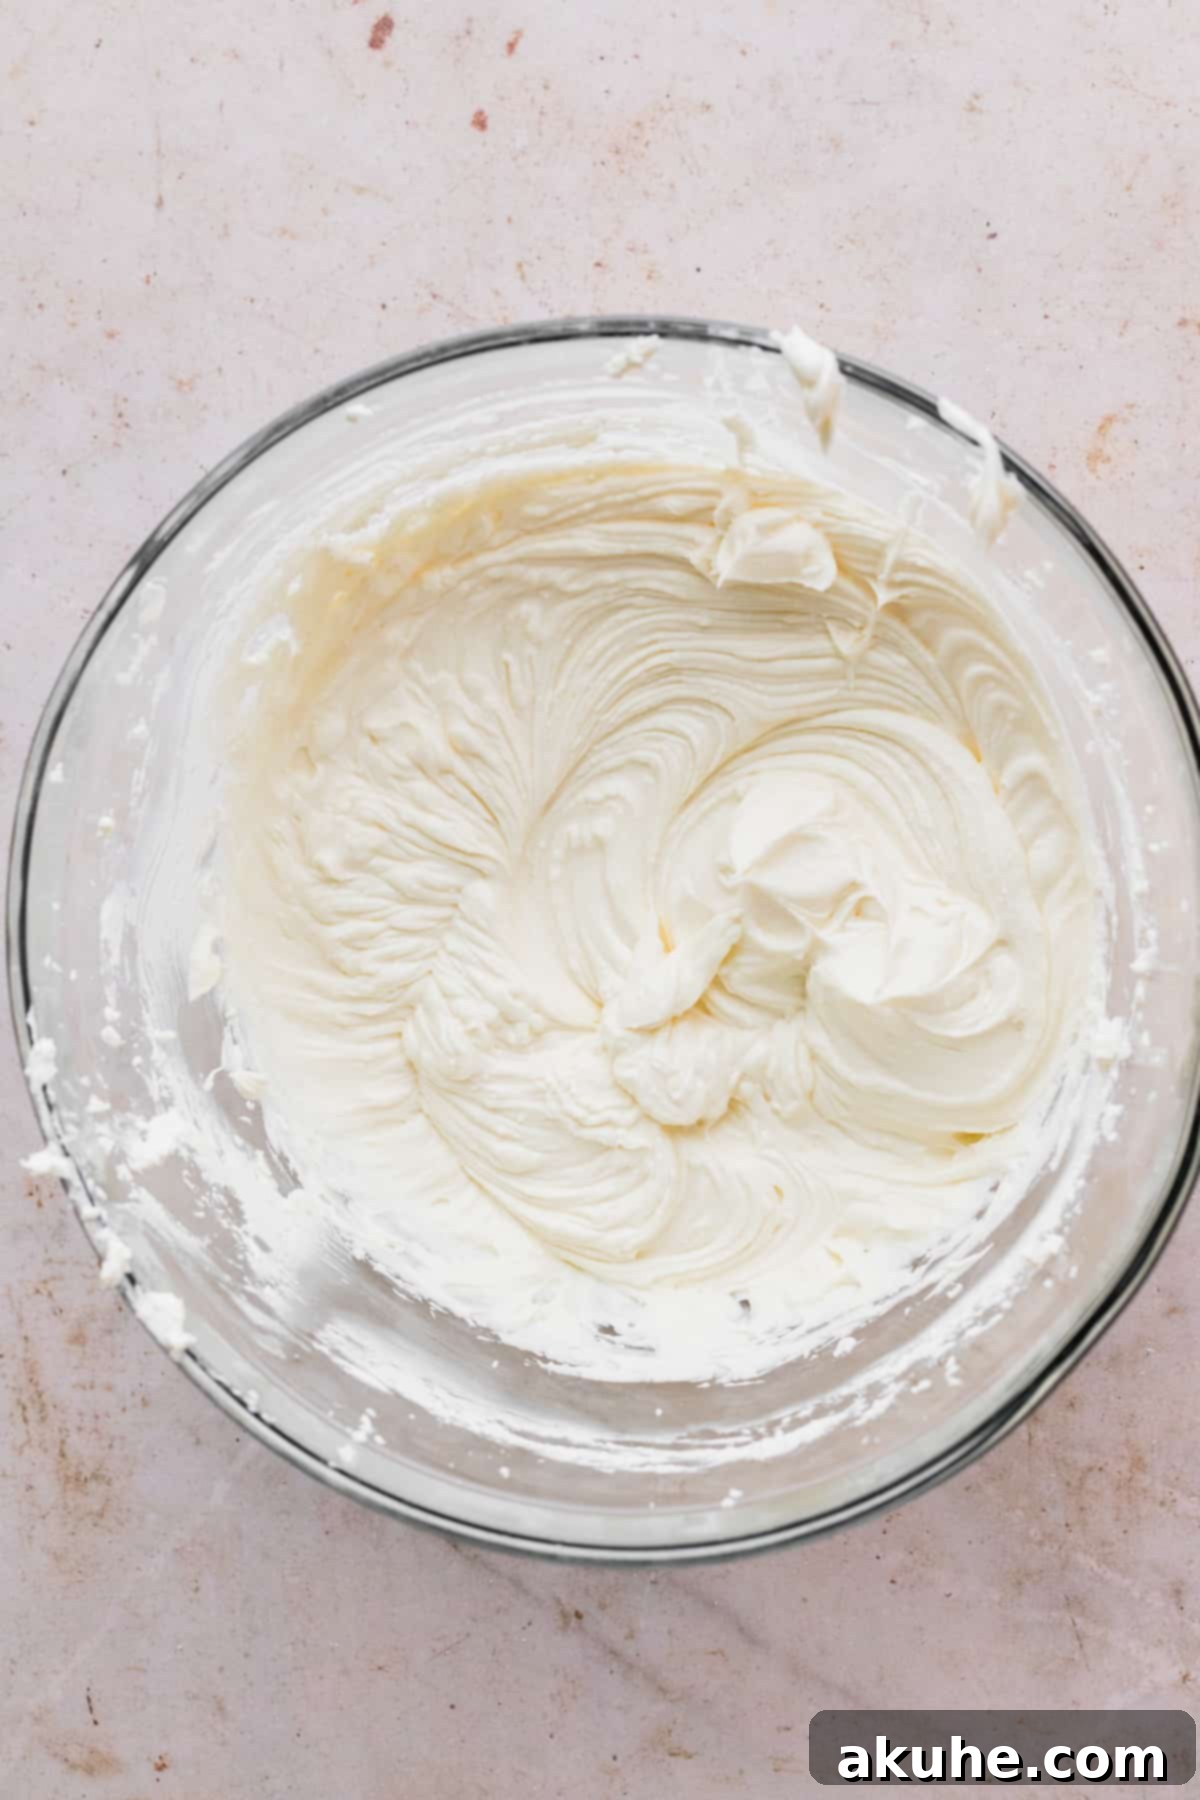
STEP 4: Beat Cream Cheese and Sugar. In a large mixing bowl (preferably of a stand mixer), beat the room-temperature cream cheese on high speed for approximately 1 minute until it is smooth and lump-free. Then, gradually add the granulated sugar and continue beating on high speed for another minute, scraping down the sides of the bowl with a rubber spatula halfway through. This ensures the mixture is fully incorporated and smooth.
STEP 5: Incorporate Wet Ingredients. Reduce the mixer speed to medium. Add the room-temperature sour cream, heavy cream, pure vanilla extract, and the specified amount of salt to the cream cheese mixture. Mix until just combined and smooth, again scraping down the bowl as needed. Finally, add the large eggs, one at a time, on low speed. Mix only until each egg is just incorporated before adding the next. Overmixing the eggs can introduce too much air, which can cause cracks during baking.
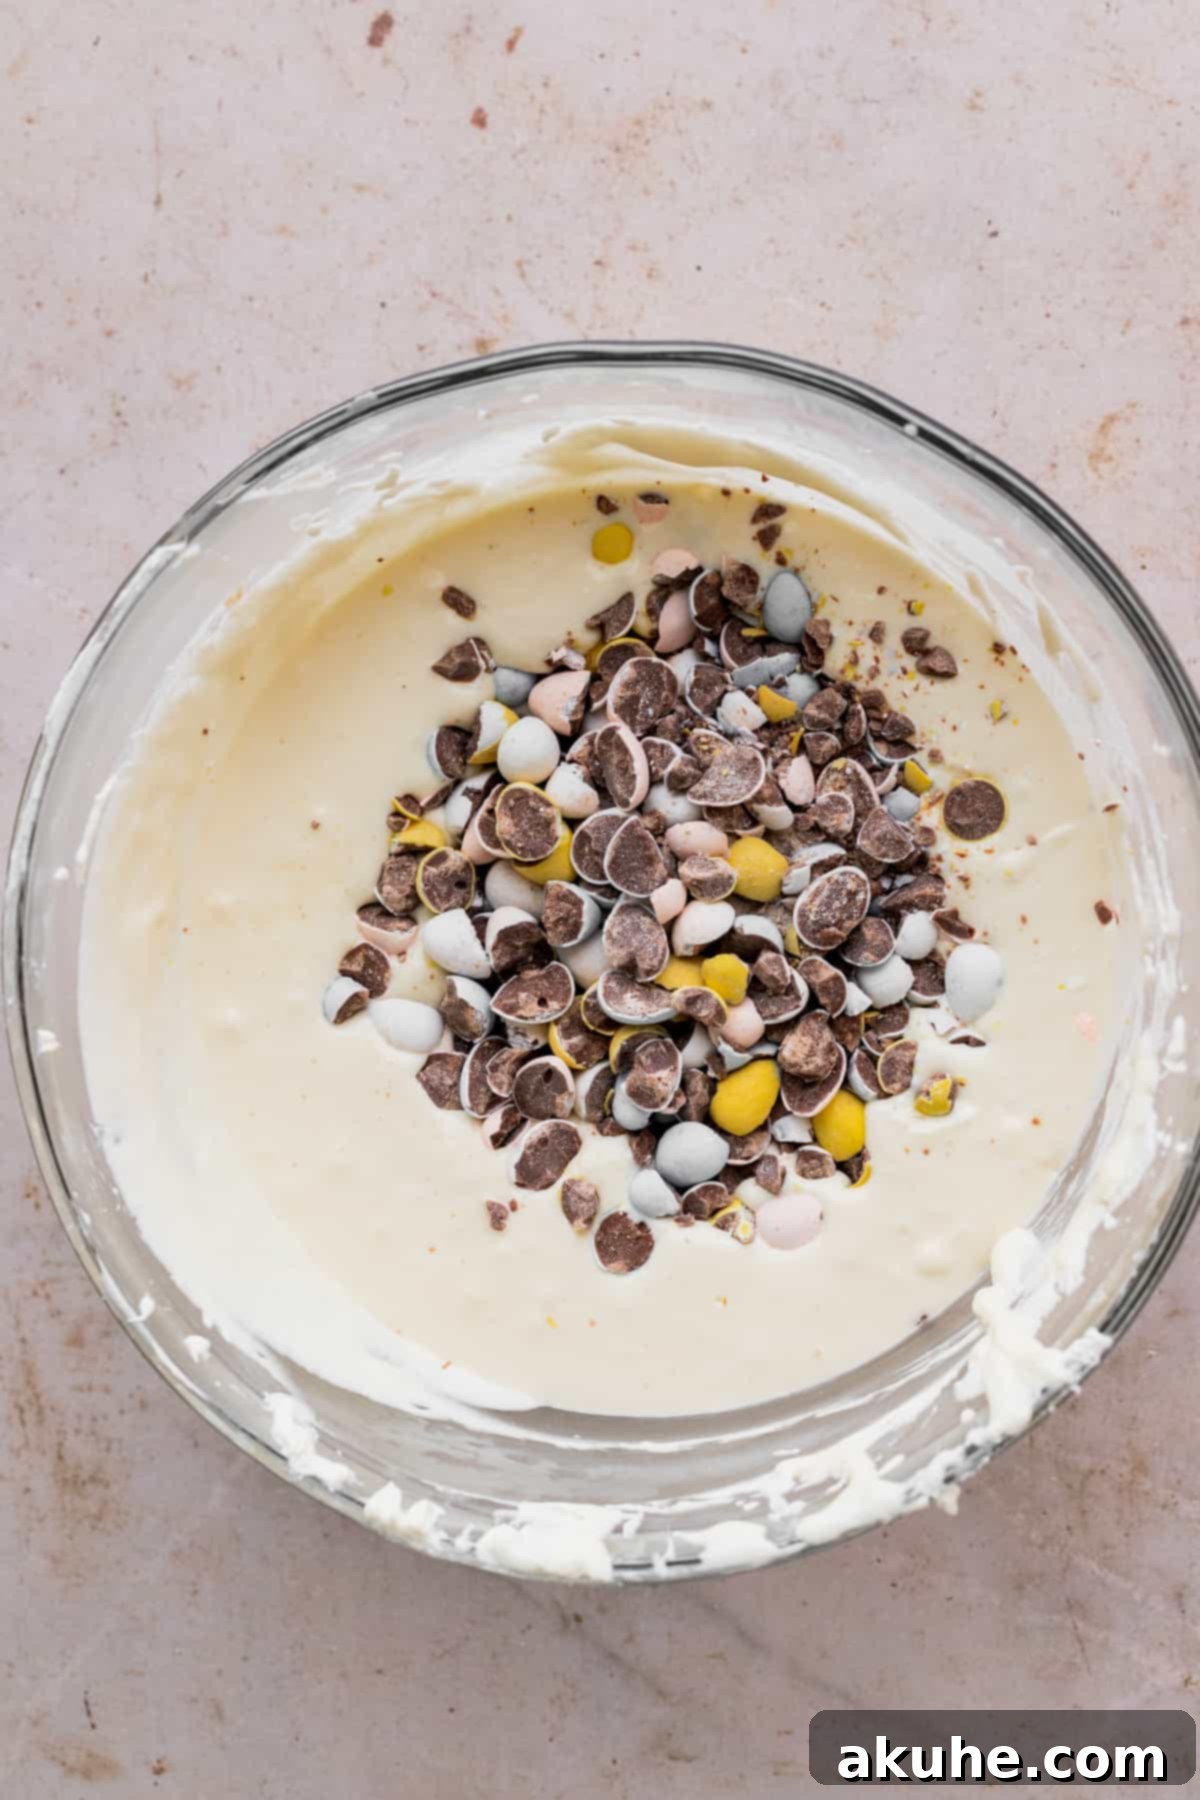
STEP 6: Gently Fold in Mini Eggs. Remove the bowl from the mixer. Using a rubber spatula, carefully fold the chopped Cadbury mini eggs into the cheesecake batter. Be gentle to avoid overmixing, which can deflate the batter and cause the eggs to sink. Ensure the mini eggs are evenly distributed throughout the creamy mixture.
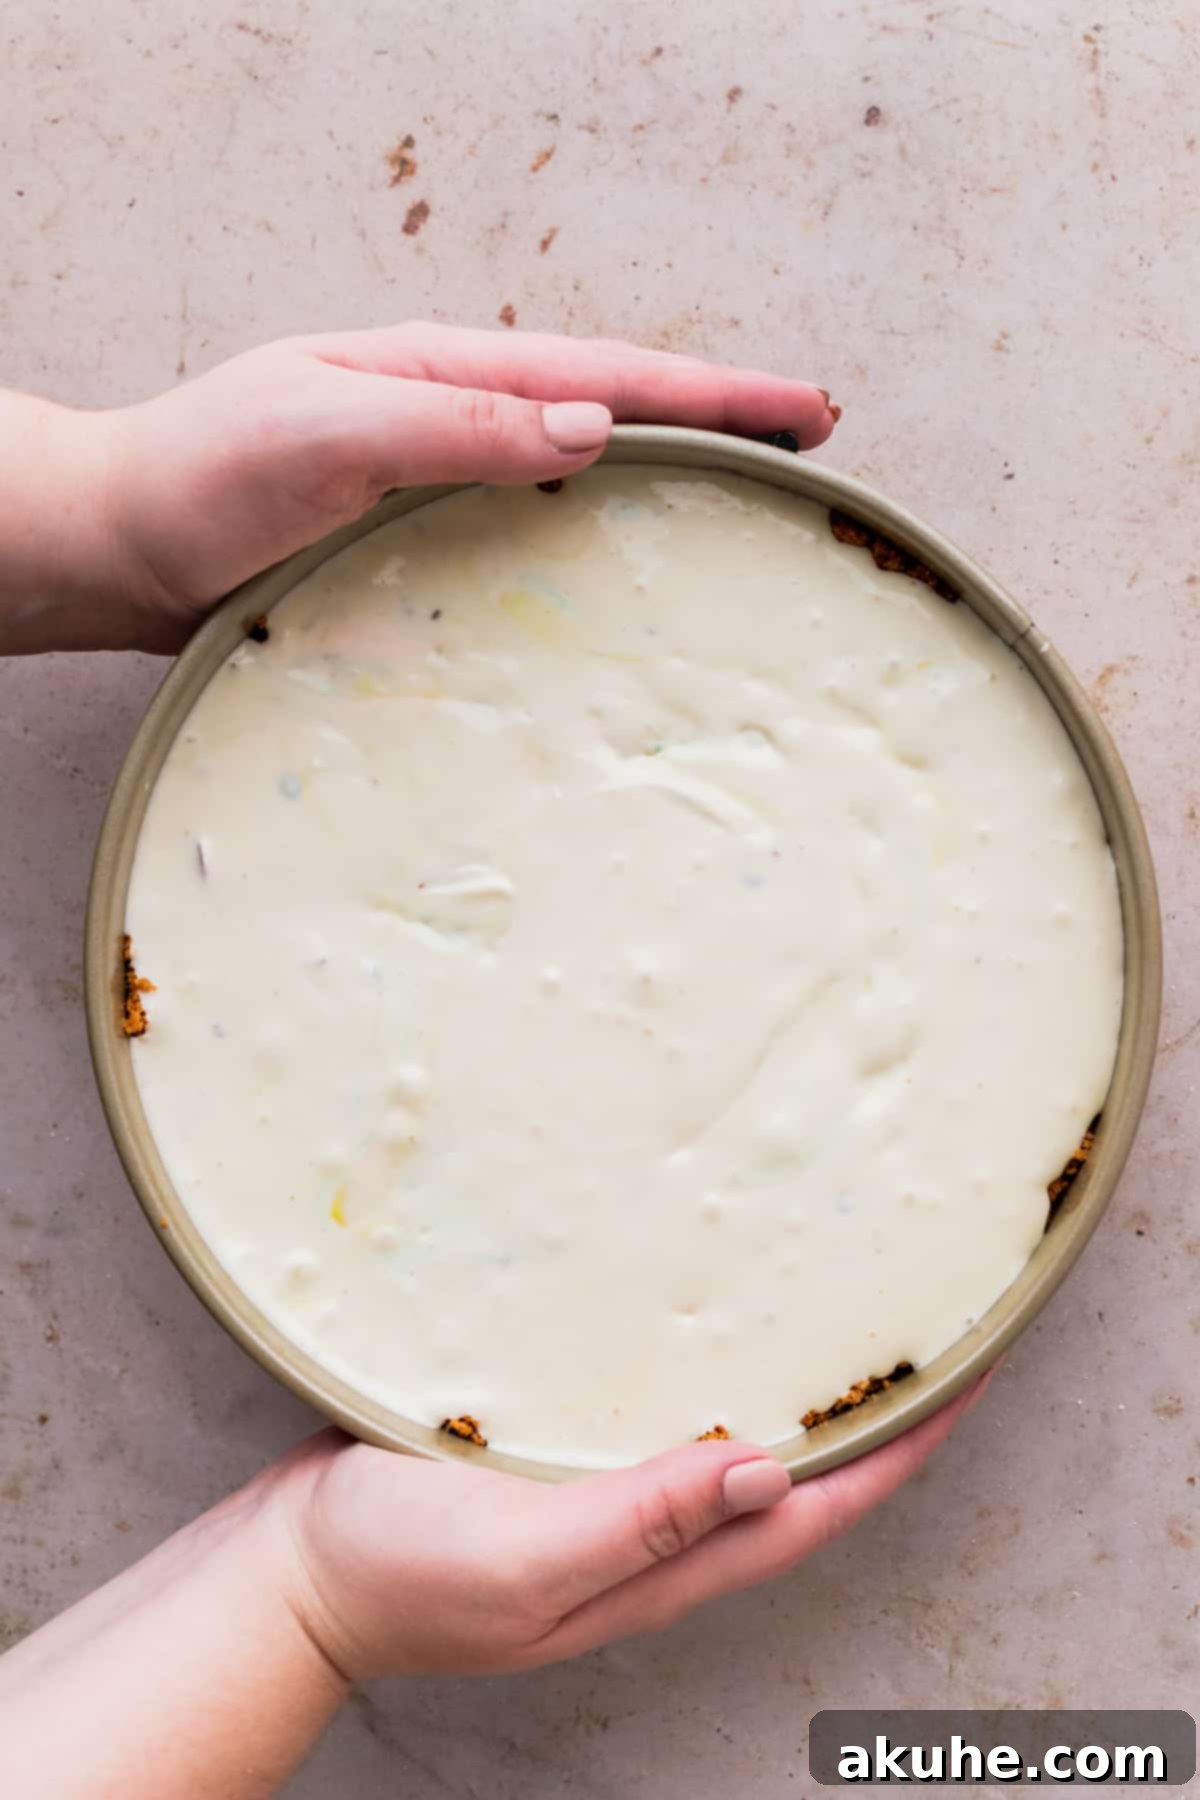
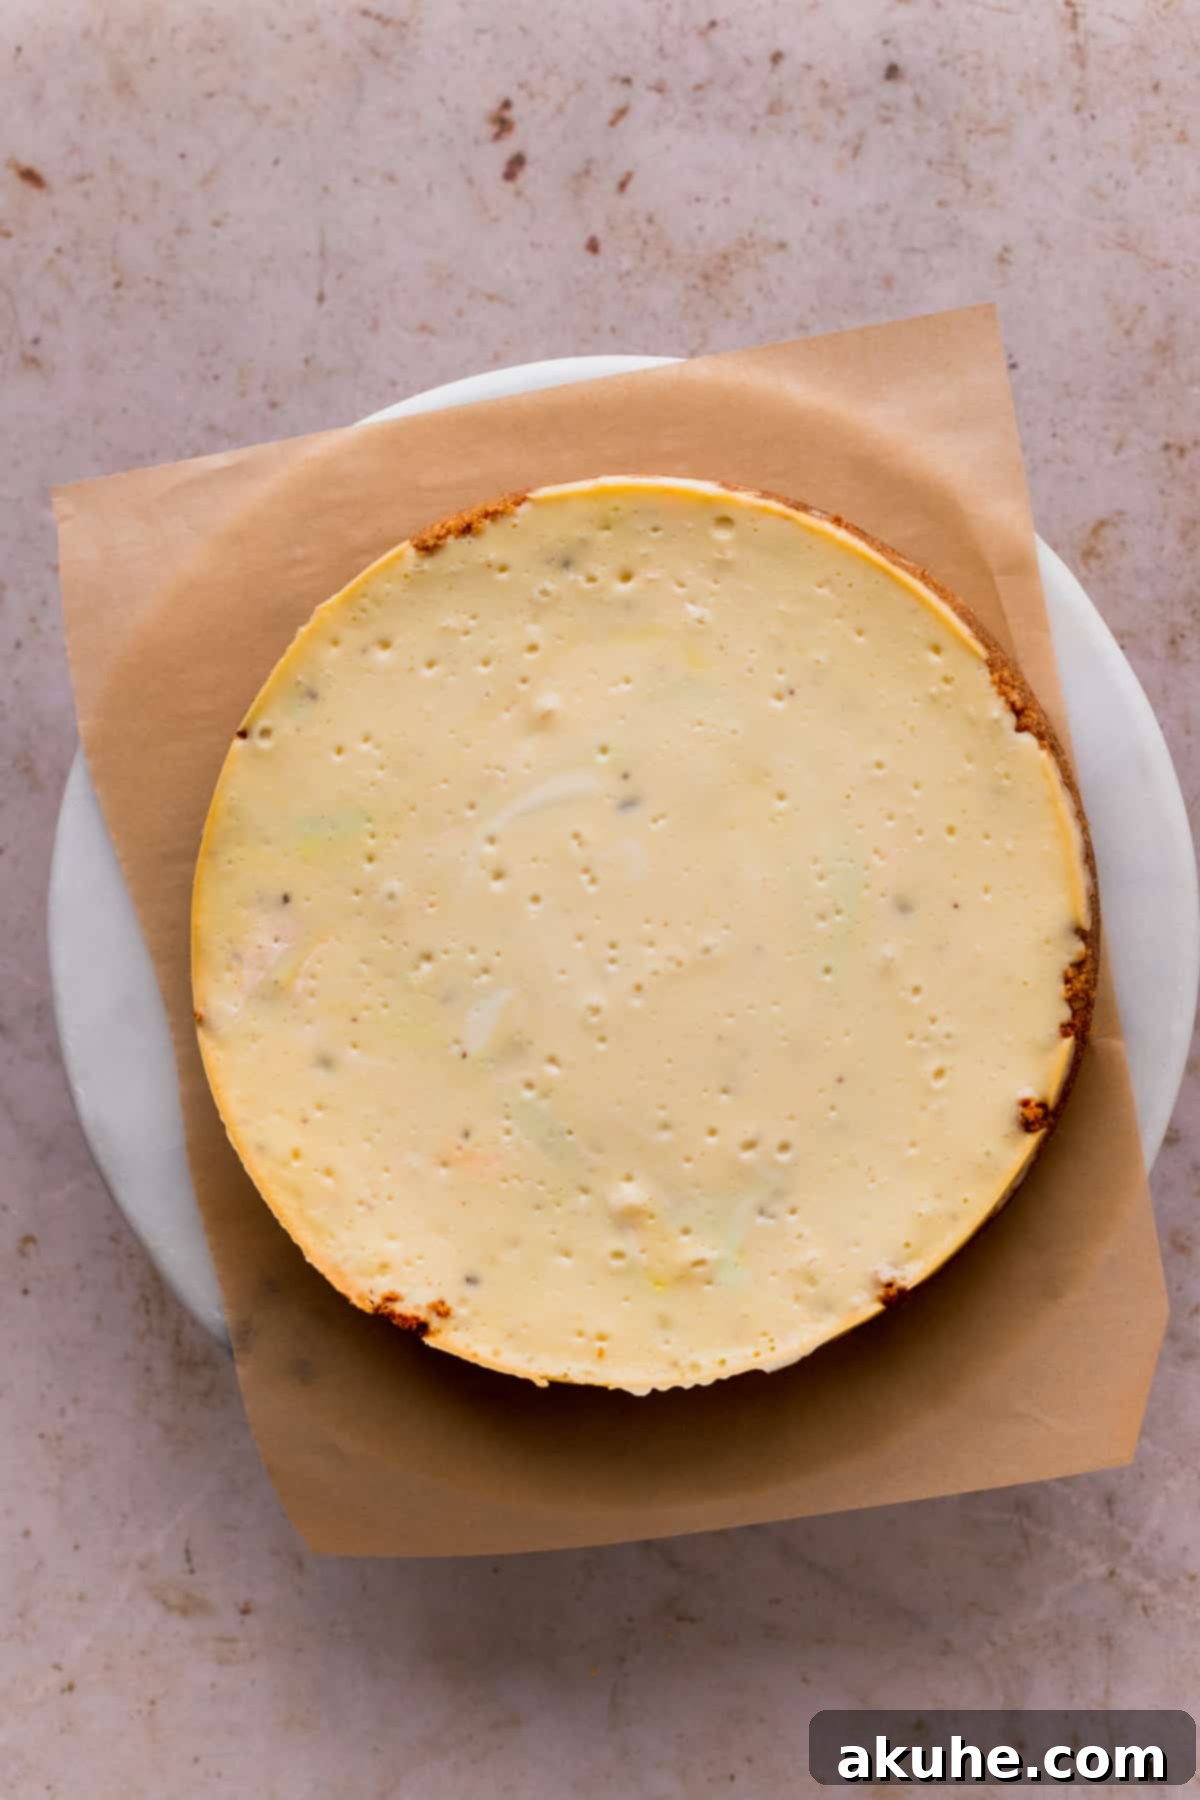
STEP 7: Bake the Cheesecake. Carefully pour the cheesecake mixture over the pre-baked graham cracker crust in the springform pan. Now, prepare your water bath (detailed tips below). Place the cheesecake-filled springform pan into the water bath. Bake for approximately 70-85 minutes. The cheesecake is done when the edges are set and appear slightly firm, but the center still has a slight, gentle wobble when you lightly jiggle the pan. This slight jiggle is normal and indicates perfect doneness; it will set fully as it cools.
STEP 8: Cool and Chill the Cheesecake. This is a critical step for preventing cracks. Once baked, turn off the oven and slightly crack open the oven door. Leave the cheesecake in the water bath inside the oven for an additional 30 minutes to cool down slowly. This gradual temperature change is essential. After 30 minutes, carefully remove the springform pan from the water bath and place it on a wire cooling rack to cool completely at room temperature. Once cooled, cover the cheesecake loosely with aluminum foil and transfer it to the refrigerator to chill for a minimum of 6 hours, or ideally, overnight. Chilling overnight allows the cheesecake to firm up completely, develop its full flavor, and become easier to slice.
Water Bath Tips for a Perfect Cheesecake
A water bath, also known as a bain-marie, is fundamental to baking a crack-free and silky-smooth cheesecake. It provides a moist, even heat environment, preventing the edges from baking faster than the center and ensuring a gentle set. The steam generated creates a humid atmosphere, which is crucial for preventing the surface from drying out and cracking.
Here are two effective methods for setting up a water bath, both utilizing a large roasting pan and hot, steaming water:
- The “Pan-in-Pan” Method (Highly Recommended): This is my preferred technique as it virtually eliminates any risk of water seeping into your crust. Place your 9-inch springform pan (with the cheesecake batter) inside a slightly larger, solid 10-inch cake pan. Then, place this cake pan (containing the springform) into your large roasting pan. Carefully fill the roasting pan with hot, steaming water, ensuring the water level comes about halfway up the sides of the outer cake pan. This method creates a protective barrier for your springform, guaranteeing a perfectly dry and crisp crust.
- The “Foil-Wrapped Springform” Method: Begin by tightly wrapping the exterior of your 9-inch springform pan with two layers of heavy-duty aluminum foil. Ensure there are no gaps or tears that could allow water to seep in. Place the foil-wrapped springform pan directly into the large roasting pan. Carefully fill the roasting pan with hot water, again ensuring the water level reaches about halfway up the sides of the foil-wrapped springform. While this method works well for many, there’s always a slight chance of water leakage if the foil isn’t perfectly sealed, which could result in a soggy crust.
The first method (pan-in-pan) is highly recommended for beginners and experienced bakers alike, as it offers superior protection against water intrusion and makes cheesecake baking incredibly straightforward and stress-free.
Decorating Your Festive Cheesecake
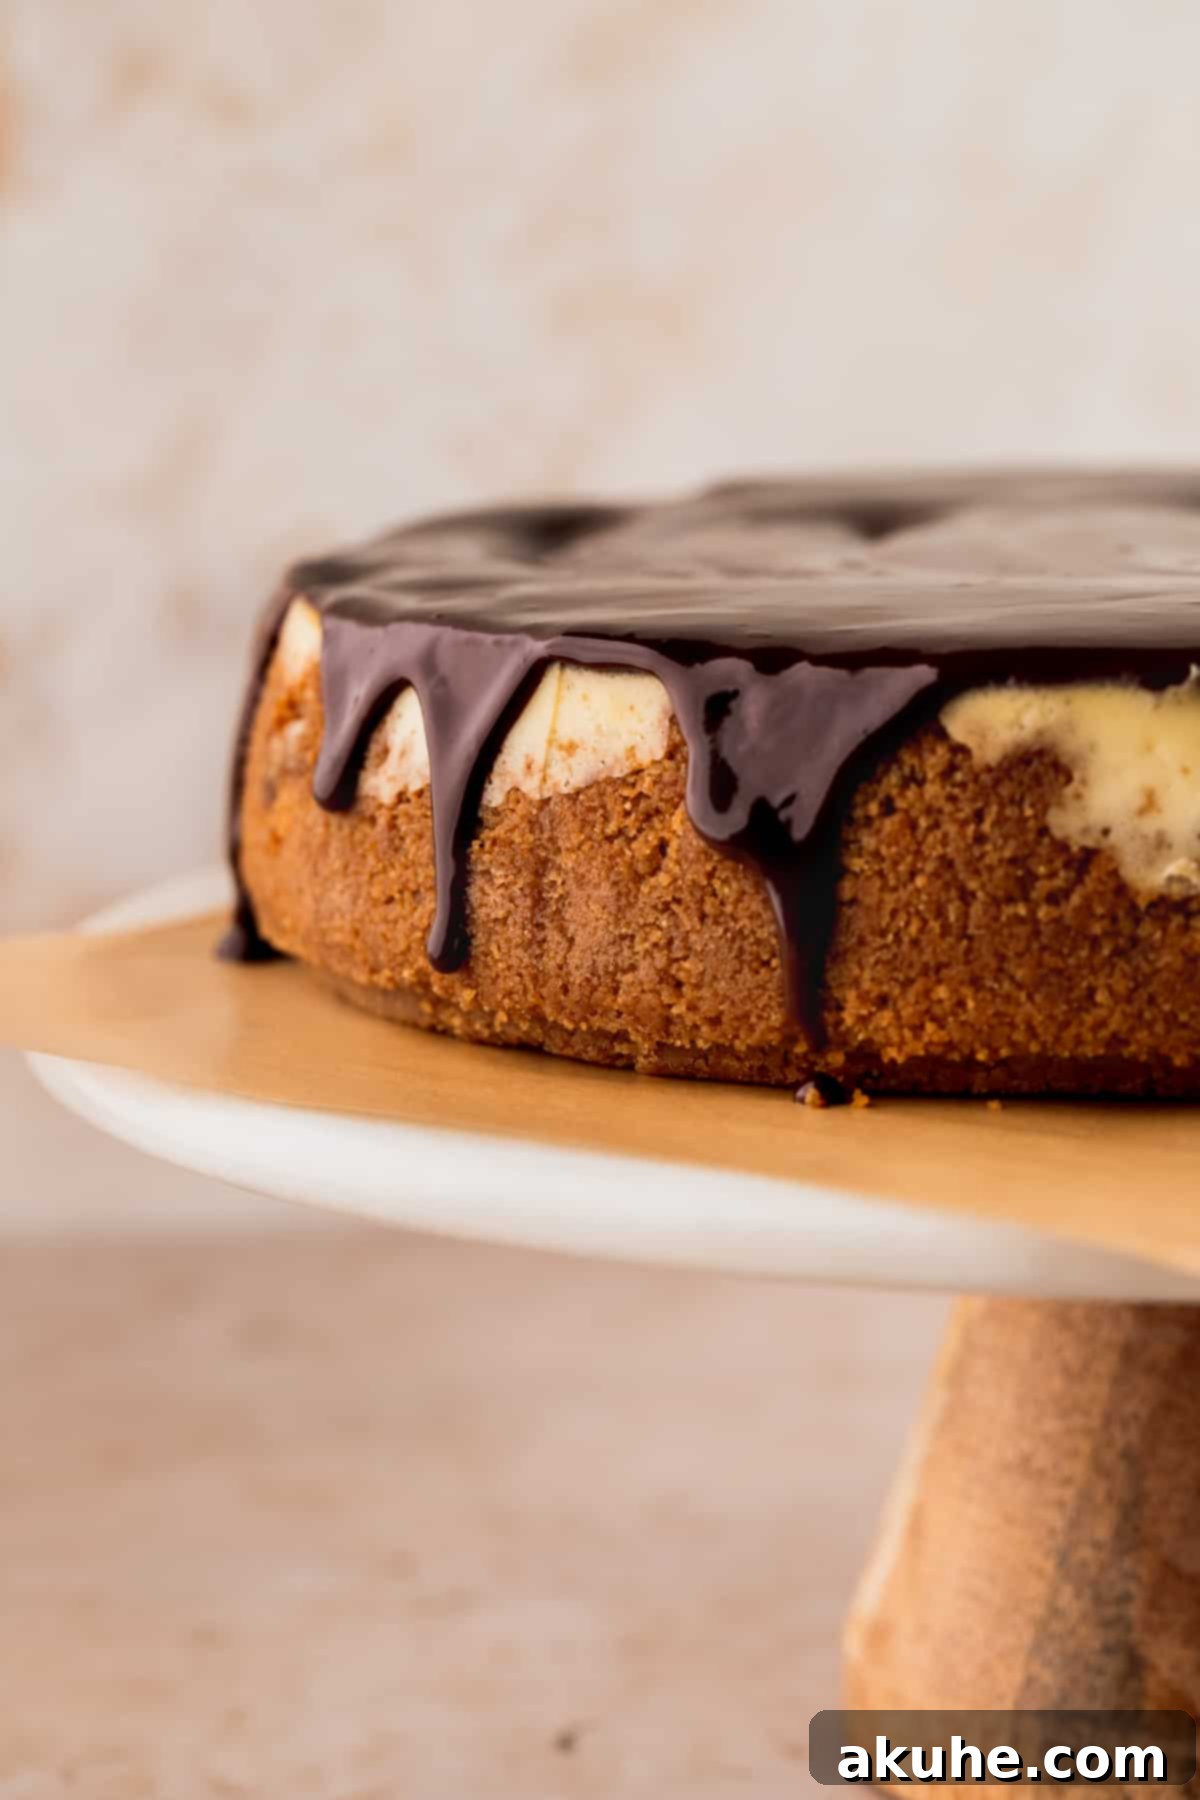
Once your Easter Egg Cheesecake has been thoroughly chilled and is firm, it’s time for the exciting final touches! Carefully remove the cheesecake from the springform pan and transfer it to your serving plate or cake stand.
- Prepare the Chocolate Ganache: In a small saucepan, gently heat the heavy cream over medium-low heat until it’s hot and just steaming, but not boiling. Place your semisweet chocolate chips in a heatproof bowl. Pour the hot cream over the chocolate chips, ensuring all chips are submerged. Let it sit undisturbed for 1 minute and 30 seconds to allow the chocolate to soften.
- Achieve Silky Smooth Ganache: After soaking, use a rubber spatula to gently stir the chocolate and cream together. Start from the center and work your way outwards until the mixture is completely smooth, glossy, and silky. If any small chocolate chunks remain, you can microwave the ganache in 10-second intervals, stirring after each, until perfectly melted and smooth.
- Pour and Set: Pour the warm, smooth chocolate ganache evenly over the top of the chilled cheesecake, allowing it to artfully drip down the sides. For a clean finish, you can use an offset spatula to gently spread the ganache to the edges.
- Final Touches: Once the ganache is applied, return the cheesecake to the refrigerator for about 10 minutes. This allows the ganache to set slightly. After it has set, arrange additional Cadbury mini eggs artfully on top of the ganache. You can place them whole, or roughly chop some for added texture and visual interest.
How to Prevent Cracks in Your Cheesecake
Achieving a smooth, pristine surface on your cheesecake is a hallmark of a perfectly baked dessert. Cracks are a common frustration for bakers, but with a few key techniques, you can minimize or eliminate them. Cracks primarily occur due to sudden temperature changes, uneven baking, or too much air in the batter. Here’s how to prevent them:
- Smooth Batter is Key: Ensure all dairy ingredients (cream cheese, sour cream, heavy cream) are at proper room temperature. Beat the cream cheese alone on high speed until it’s perfectly smooth and free of any lumps before adding sugar. Cream cheese chunks can create weak spots in the batter that are prone to cracking during baking.
- Mindful Egg Incorporation: When adding the eggs, reduce your mixer speed to low. Incorporate them one at a time, mixing only until just combined. The goal is to introduce as little air as possible into the batter once the eggs are added. Excessive air creates bubbles that expand rapidly in the oven and then collapse quickly as the cheesecake cools, leading to unsightly cracks.
- The Essential Water Bath: A water bath is non-negotiable for preventing cracks. As discussed above, it creates a moist, consistent heat environment, allowing the cheesecake to bake gently and evenly without drying out. Choose the “pan-in-pan” method for the most reliable results.
- Gradual Cooling is Paramount: The transition from a hot oven to a cool room temperature counter is a major cause of cracks. To prevent this thermal shock, once your cheesecake is done baking, turn off the oven and crack open the oven door. Let the cheesecake remain in the water bath inside the cooling oven for an additional 30 minutes. This allows it to slowly adjust to a lower temperature. After this period, remove it from the water bath and place it on a wire cooling rack to cool completely at room temperature before chilling in the fridge.
- Avoid Overbaking: An overbaked cheesecake will always crack. Bake until the edges are set and the very center has a slight jiggle. It will continue to set as it cools.
Frequently Asked Questions (FAQ)
Absolutely! This recipe can be easily adapted for mini cheesecakes. Simply divide the crust and filling ingredients into thirds, and bake them in a muffin tin lined with paper liners. For detailed instructions on baking times and techniques for mini cheesecakes, you can refer to our Mini Oreo Cheesecakes recipe.
Yes, you certainly can! While Cadbury mini eggs offer a unique Easter charm, M&M’s make a fantastic substitute, especially if you’re making this cheesecake for a different occasion or prefer their distinct chocolate flavor and candy shell. The colors will be just as vibrant!
Yes, you can substitute plain, full-fat Greek yogurt for the sour cream in this recipe. Greek yogurt will provide a similar tangy flavor and creamy texture, making it a suitable alternative if you don’t have sour cream on hand.
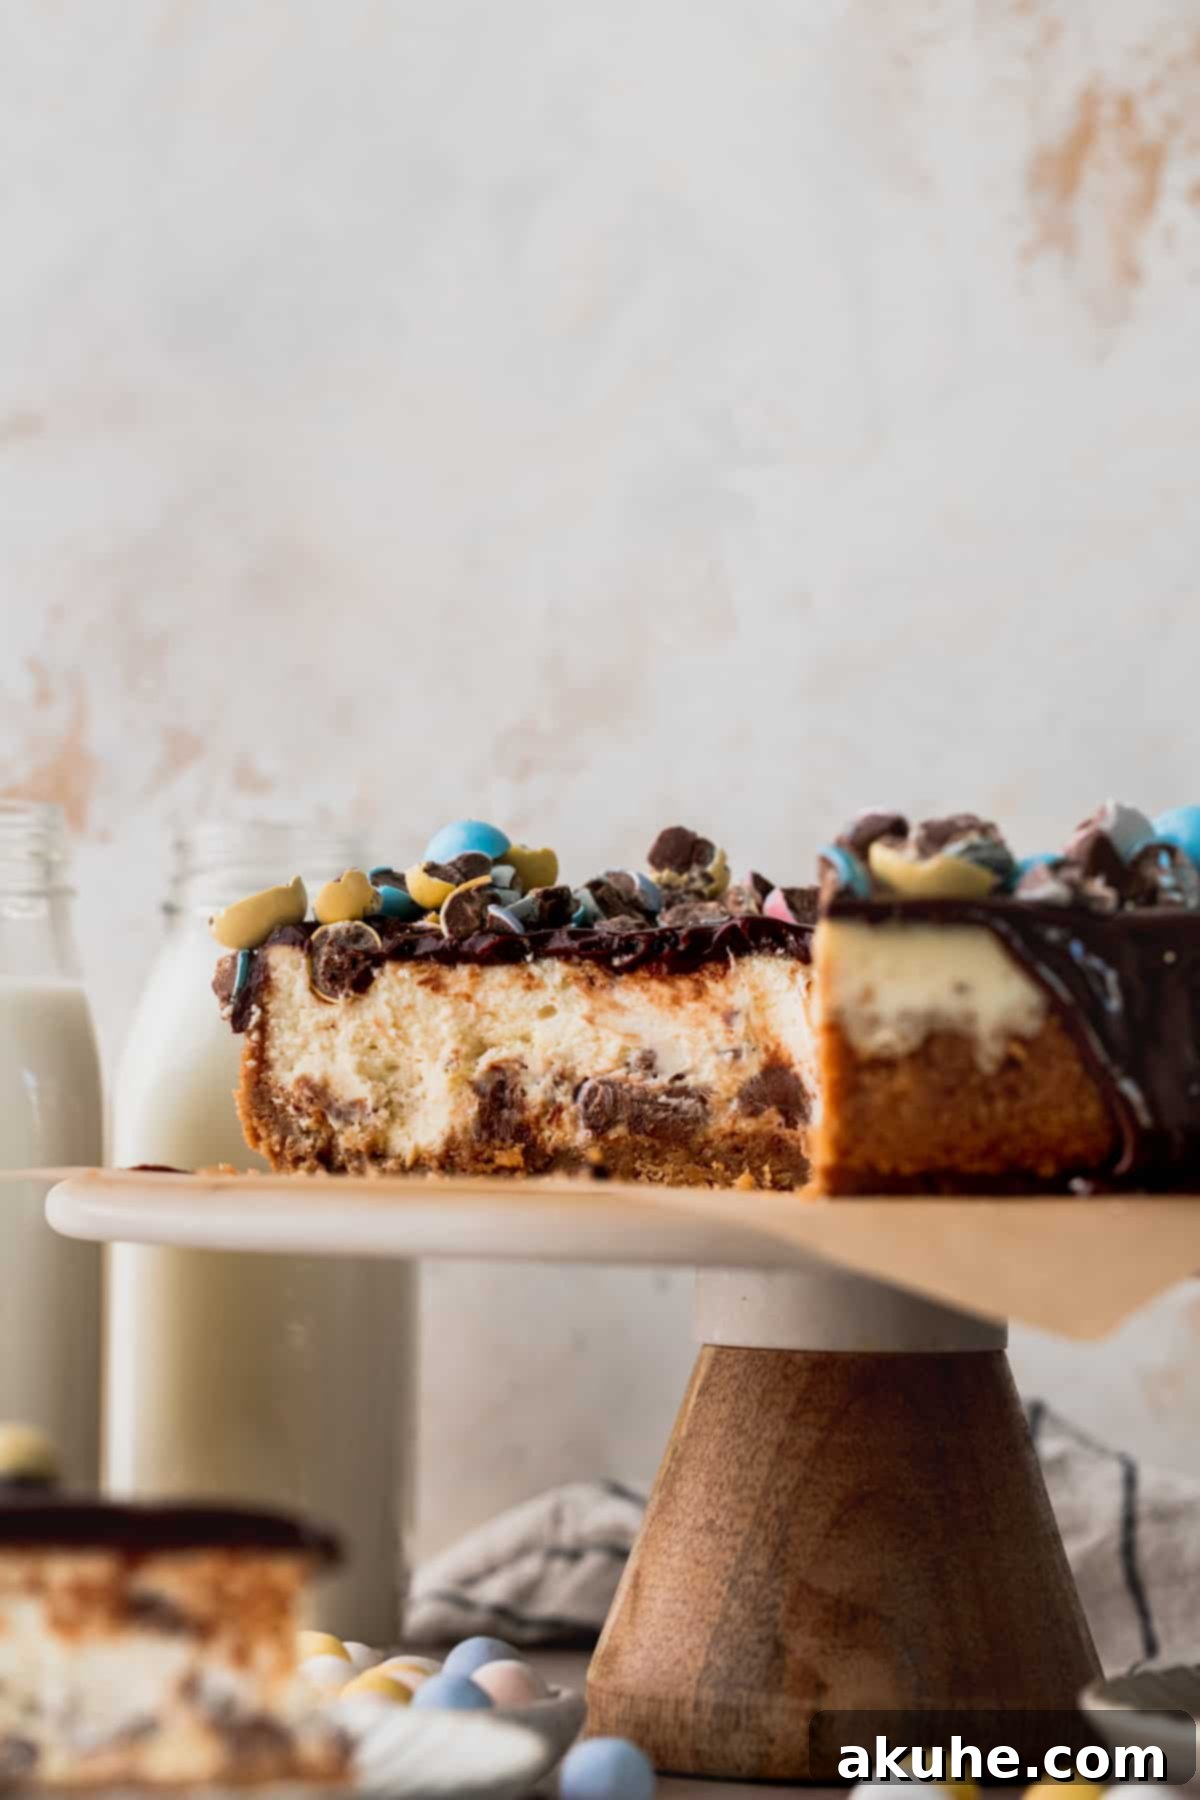
For restaurant-quality slices, ensure your cheesecake is very cold, ideally chilled overnight. Before cutting, dip a sharp, thin-bladed knife into hot water and wipe it clean and dry. Make each slice with a single, smooth motion, then clean and re-warm the knife before cutting the next slice. This prevents sticking and ensures clean edges.
Recipe Variations to Customize Your Cheesecake
- Adjusting Sweetness: This cheesecake is delightfully sweet with the milk chocolate mini eggs. If you prefer a less sweet dessert, you can omit the extra 1/4 teaspoon of salt added to the batter, which is designed to balance the sweetness. Alternatively, for a more intense flavor balance, consider using dark chocolate chips instead of semisweet for the ganache.
- Simplify the Topping: To save time, you can skip the chocolate ganache topping entirely. The cheesecake is still wonderfully delicious with just the baked-in mini eggs and a scattering of fresh mini eggs on top for decoration. A simple dusting of powdered sugar could also work!
- Add Citrus Zest: For a brighter flavor profile that complements the richness, consider adding 1-2 teaspoons of finely grated orange or lemon zest to the cheesecake batter along with the vanilla extract.
- Alternate Crusts: While graham crackers are classic, experiment with other cookie crusts like crushed chocolate cookies for a “double chocolate” effect, or shortbread biscuits for a buttery, less sweet base.
- Infused Ganache: For an extra layer of flavor, infuse the heavy cream for the ganache with a vanilla bean pod or a hint of mint extract (especially if pairing with mint mini eggs, if available).
Special Tools for Cheesecake Success
Having the right tools can make all the difference in achieving a perfect cheesecake. These are some of our recommended essentials:
- Springform Pan: A high-quality 9-inch springform pan is indispensable for cheesecakes, allowing for easy release without damaging the sides. If you prefer a taller, more dramatic cheesecake, an 8-inch springform pan can be used, though baking times may need slight adjustment.
- Parchment Paper Circles: These pre-cut 8-inch parchment paper circles are a game-changer. They perfectly fit the bottom of your pan, preventing sticking and ensuring a clean release without the hassle of cutting your own from a roll.
- Nonstick Baking Spray with Flour: A good quality nonstick spray that includes flour provides an extra layer of protection against sticking, especially for the sides of the pan and the parchment paper.
- Offset Spatula: An offset spatula is incredibly versatile. It’s ideal for smoothly spreading the graham cracker crust up the sides of the pan, distributing the cheesecake batter evenly, and creating a flawless finish for your ganache topping.
- Food Processor: For quickly and uniformly crushing graham crackers into fine crumbs, a food processor is highly efficient.
- Electric Mixer: Whether a stand mixer with a paddle attachment or a powerful hand mixer, an electric mixer is essential for achieving a lump-free, aerated cream cheese mixture.
Storing and Freezing Your Easter Egg Cheesecake
To enjoy your Easter Egg Cheesecake at its best, proper storage is crucial. This cheesecake holds up beautifully, making it an excellent make-ahead dessert.
Store any leftover cheesecake in an airtight container, such as a cake carrier, in the refrigerator. It will maintain its freshness and delicious texture for up to 5 days. Ensure it’s well-covered to prevent it from absorbing any refrigerator odors.
Freezing Instructions
This Easter Egg Cheesecake is also freezer-friendly, allowing you to enjoy slices whenever a craving strikes or to prepare ahead for future events. You can freeze individual slices or the entire cheesecake (undecorated, if possible, for best results).
For slices: Place individual slices on a baking sheet and freeze until firm (about 1-2 hours). Then, wrap each slice tightly in plastic wrap, followed by a layer of aluminum foil. Store in an airtight freezer-safe container.
For a whole cheesecake: If freezing the entire cheesecake, it’s best to do so before adding the final ganache and mini egg decorations. Wrap the chilled cheesecake (still on its base, if desired) tightly in several layers of plastic wrap, then cover with a final layer of heavy-duty aluminum foil. This prevents freezer burn.
Frozen cheesecake can be stored for up to 30 days. To serve, thaw the cheesecake or individual slices in the refrigerator for at least 4-6 hours, or on the counter for about 1 hour for slices. If you froze the whole cheesecake without decoration, apply the ganache and fresh mini eggs after thawing.
Other Cheesecake Recipes To Try
If you’ve enjoyed this festive Easter Egg Cheesecake, you might love exploring more of our creamy, dreamy cheesecake creations. From classic flavors to unique twists, there’s a cheesecake for every occasion and palate. Check back frequently for new additions to our collection!
Delightful Easter Recipes You’ll Love
Easter is a time for joyful gatherings and delicious food. Beyond this incredible cheesecake, we have a variety of other recipes perfect for your holiday spread, from light and fluffy treats to comforting baked goods:
- Mini Carrot Cake: Perfectly portioned and moist, these individual carrot cakes are ideal for a festive gathering.
- Mini Egg Cookies: A delightful way to incorporate those beloved mini eggs into a chewy cookie format.
- Carrot Cake Cookies: All the flavors of a classic carrot cake, but in a convenient and chewy cookie form.
- Carrot Cake Cinnamon Rolls: A sensational breakfast or brunch treat, combining the best of carrot cake with warm, gooey cinnamon rolls.
- Carrot Bread: A moist and flavorful quick bread, perfect for breakfast, a snack, or a lighter dessert.
We love seeing your creations! If you made and loved this recipe, please make sure to leave a STAR REVIEW. Share your photos on Instagram and tag us @stephaniesweettreats. For more baking inspiration and ideas, be sure to follow us on Pinterest!
Easter Egg Cheesecake
This Easter egg cheesecake is a baked creamy cheesecake full of mini eggs. It has a graham cracker crust, baked cheesecake with chopped mini eggs, and chocolate ganache.
Pin Recipe
Leave a Review
Cook Time: 1 hr 20 mins
Chilling Time: 6 hrs
Total Time: 8 hrs 20 mins
Servings: 14 slices
Ingredients
Graham Cracker Crust
- 2 1/4 cup Graham cracker crumbs (from 2 packets of graham crackers)
- 1/8 cup Brown sugar, packed light or dark
- 1/8 tsp Salt
- 10 TBSP Unsalted butter, melted
Mini Egg Cheesecake
- 24 oz Cream cheese, room temperature
- 3/4 cup White granulated sugar
- 1/2 cup Sour cream, room temperature
- 1/4 cup Heavy cream, room temperature
- 1 tsp Pure vanilla extract
- 1/2 tsp Salt
- 3 Large eggs, room temperature
- 2 cups Chopped Mini eggs (use Cadbury for best flavor, approximately 2 bags)
Chocolate Ganache
- 1 cup Semisweet chocolate chips
- 1/2 cup Heavy cream
- Mini eggs, for decoration
Instructions
Graham Cracker Crust
- Preheat the oven to 325°F (160°C). Spray a 9-inch springform pan with nonstick baking spray. Line the bottom with a 9-inch parchment paper circle and spray again.
- Use a food processor to blend the graham crackers into fine crumbs. In a medium bowl, mix graham cracker crumbs, brown sugar, salt, and melted butter using a fork until well combined.
- Pour crumbs into the prepared pan. Use your fingers to form the crust up the sides of the pan about halfway. Use the bottom of a measuring cup to compact the crust firmly.
- Bake for 13 minutes.
Mini Egg Cheesecake
- While the crust bakes, prepare the mini eggs. Place them in a large zip-top bag and use a rolling pin to crush them into a mix of medium and small pieces. Set aside.
- Using a mixer, beat the room temperature cream cheese on high speed for 1 minute until smooth. Then, add the granulated sugar and beat again on high for 1 minute. Scrape down the bowl with a rubber spatula.
- Add sour cream, heavy cream, vanilla extract, and salt. Mix on medium speed until just combined. Scrape the bowl again.
- Add eggs one at a time on low speed, mixing only until just combined after each addition. Take the bowl off the mixer and use a rubber spatula to gently fold in the chopped mini eggs.
- Pour the cheesecake batter on top of the baked crust and prepare a water bath (see tips above).
- Bake the cheesecake for 70-85 minutes, or until the edges are set and the middle has a slight jiggle.
- Turn off the oven, crack open the door slightly, and let the cheesecake sit in the water bath in the oven for 30 minutes to cool slowly. Remove from the water bath and place on a cooling rack. Cool completely at room temperature.
- Wrap with foil and chill in the refrigerator for at least 6 hours, or ideally overnight, for best results.
Chocolate Ganache
- Once chilled, remove the cheesecake from the fridge, carefully take it out of the springform pan, and remove the parchment paper.
- In a small saucepan, heat the heavy cream on medium-low heat until hot and steaming. Pour over a bowl of semisweet chocolate chips. Let sit for 1 minute and 30 seconds.
- Use a rubber spatula to stir the chocolate and cream together until smooth and silky. If any chocolate chunks remain, microwave in 10-second intervals, stirring after each, until melted.
- Pour the ganache over the cheesecake. Chill for 10 minutes to allow the ganache to set slightly before adding extra mini eggs on top for decoration.
Notes
Ensure all dairy ingredients (cream cheese, sour cream, heavy cream, eggs) are at room temperature for at least 2 hours before baking for the smoothest batter and to prevent cracks.
Nutrition Information (per slice)
- Calories: 483 kcal
- Carbohydrates: 33g
- Protein: 5g
- Fat: 37g
- Saturated Fat: 22g
- Polyunsaturated Fat: 2g
- Monounsaturated Fat: 10g
- Trans Fat: 1g
- Cholesterol: 91mg
- Sodium: 354mg
- Potassium: 189mg
- Fiber: 1g
- Sugar: 23g
- Vitamin A: 1148IU
- Vitamin C: 1mg
- Calcium: 87mg
- Iron: 1mg
