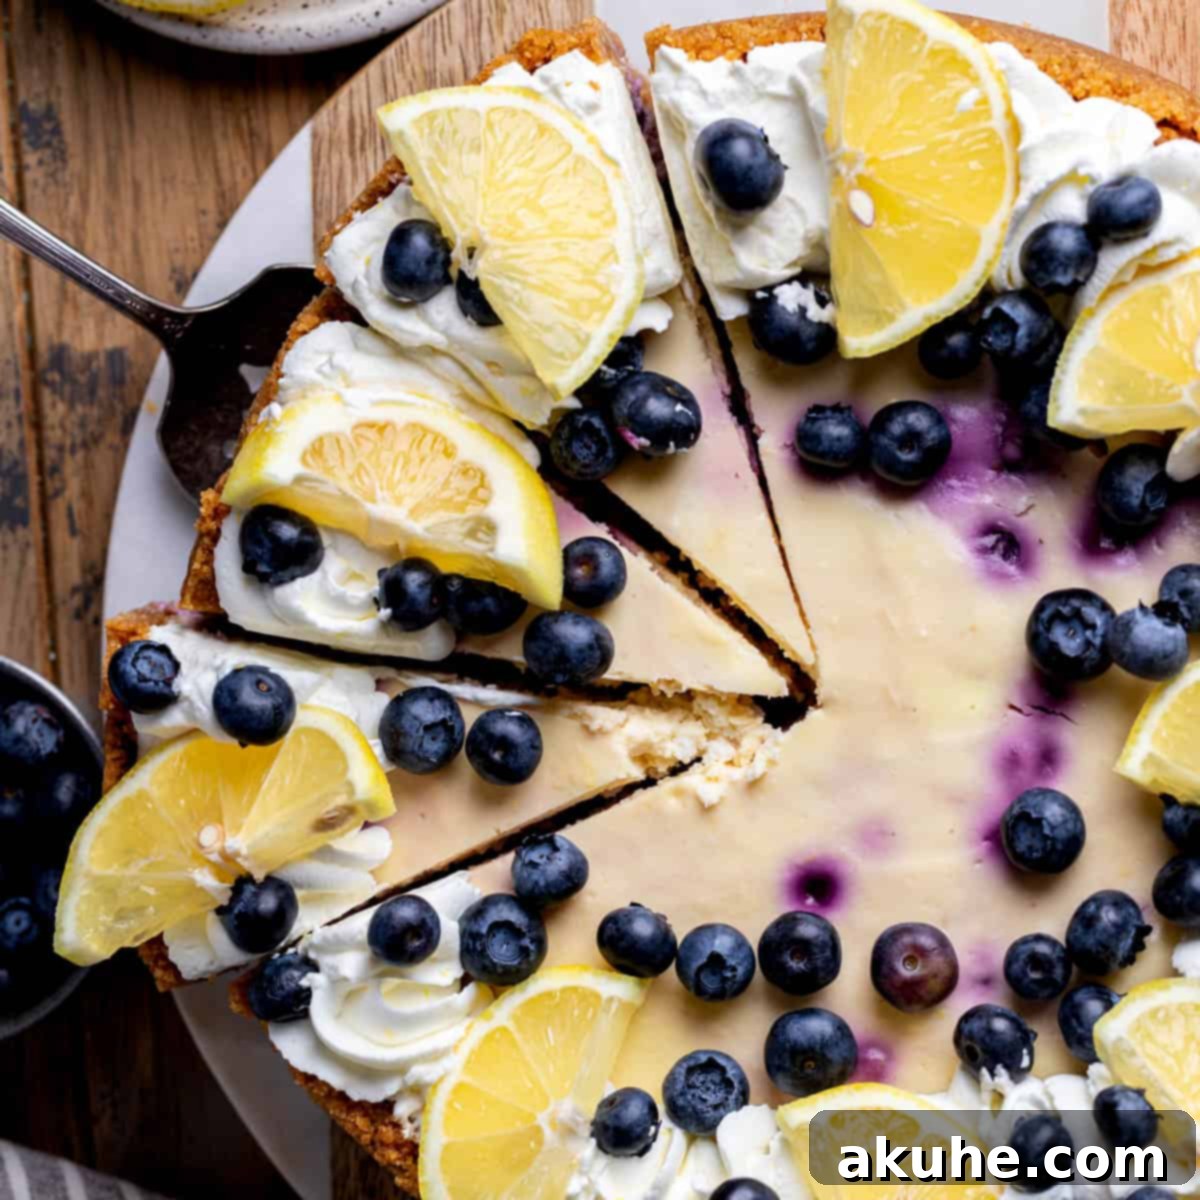
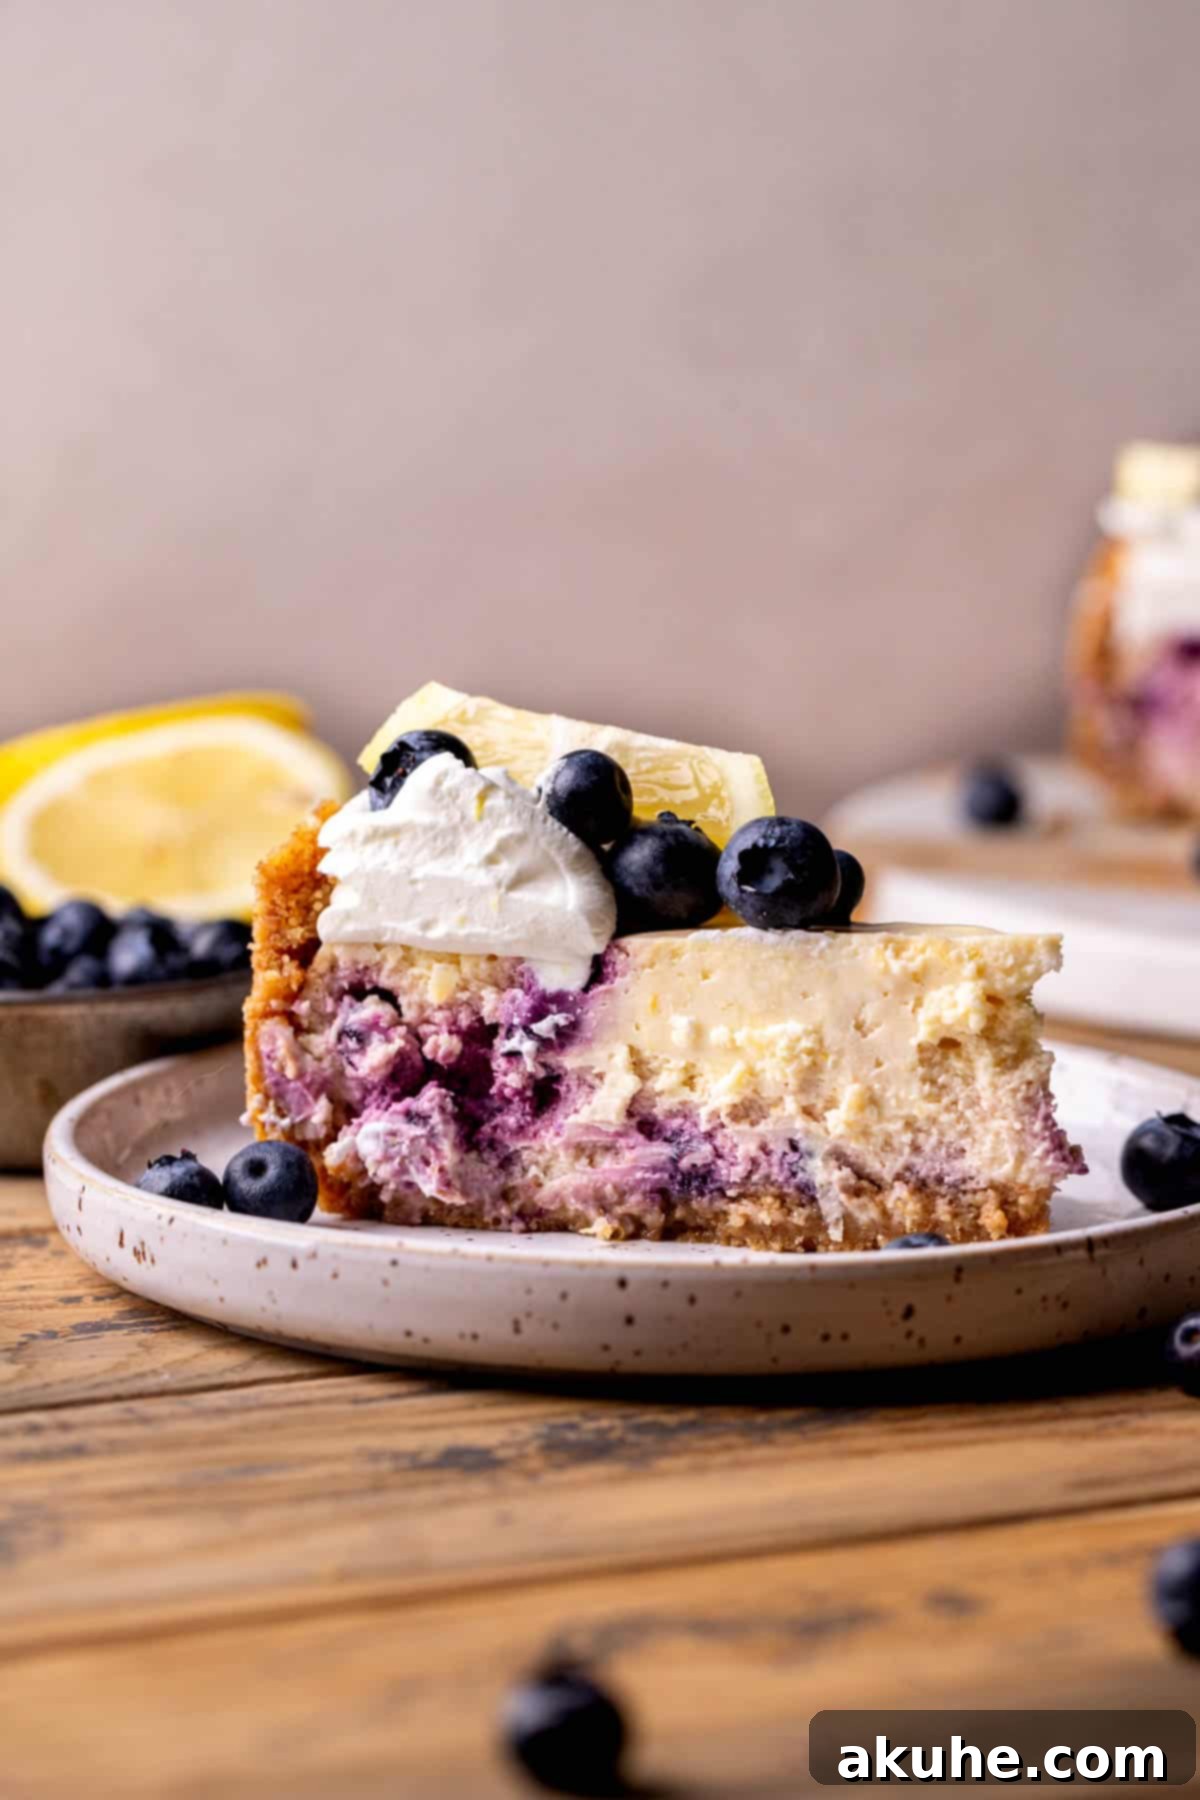
Welcome to the ultimate guide for creating a show-stopping Lemon Blueberry Cheesecake! This baked masterpiece features a delightfully buttery graham cracker crust, a luxuriously creamy lemon-infused cheesecake filling generously studded with frozen wild blueberries, all crowned with a light and zesty lemon whipped cream. The vibrant, tangy notes of lemon perfectly complement the sweet, juicy burst of blueberries, creating a harmonious flavor profile that makes this dessert an absolute dream come true for any fruit cheesecake lover. Every single bite offers an exquisite balance of textures and tastes, promising pure heaven with each spoonful. It’s not just a dessert; it’s an experience, guaranteed to be the highlight of any gathering or a perfect treat for your own indulgence.
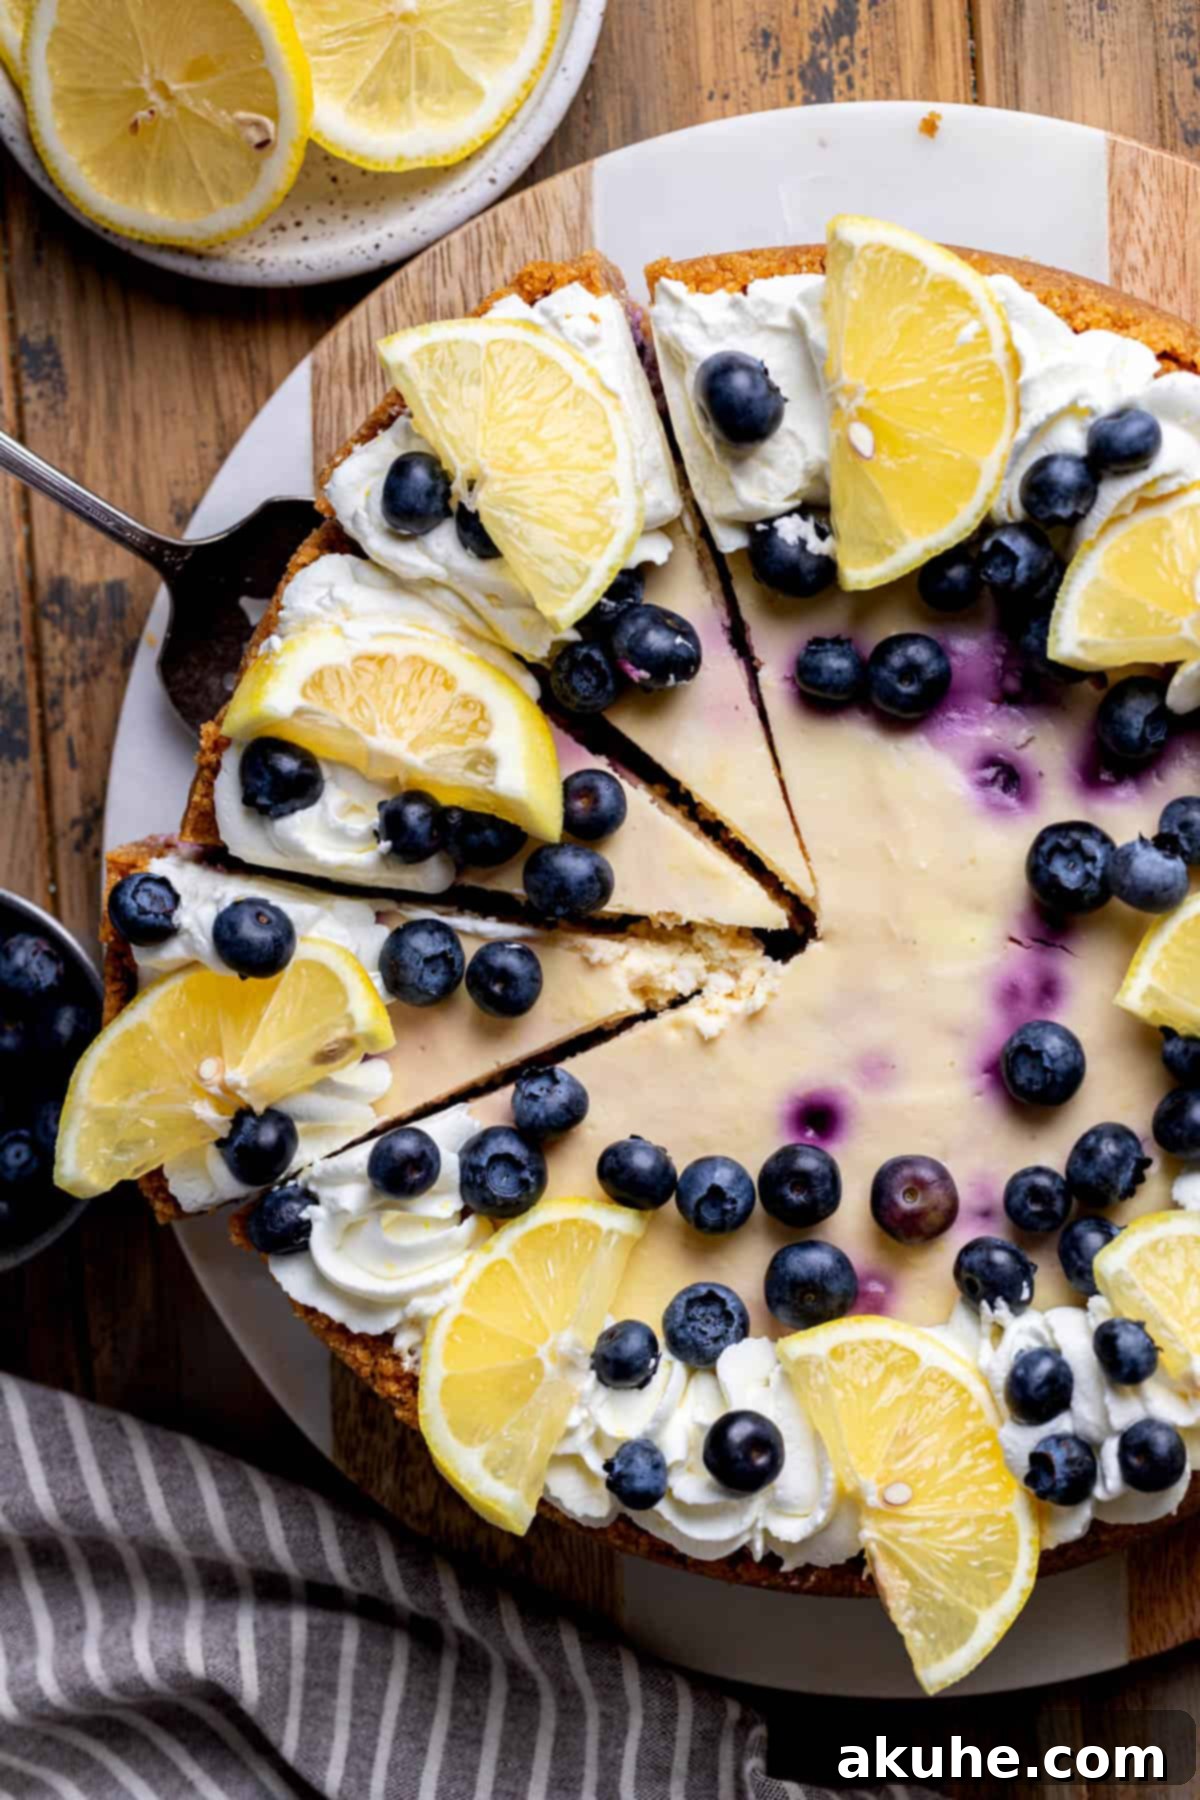
If you adore the refreshing zest of citrus combined with the sweet earthiness of berries, this Lemon Blueberry Cheesecake recipe is tailor-made for you. It’s an ideal choice for spring and summer celebrations, or simply when you crave a dessert that’s both comforting and invigorating. The careful selection of wild blueberries ensures they are distributed perfectly throughout the rich, tangy lemon cheesecake, while the homemade lemon whipped cream adds an airy, bright finish that truly elevates this classic dessert. Prepare to impress your guests and satisfy your sweet tooth with this effortlessly elegant and incredibly flavorful cheesecake.
Craving more delightful lemon treats? Explore these other fantastic recipes: Lemon Donuts, Lemon Blackberry Cookies, and Lemon Rolls.
Why This Lemon Blueberry Cheesecake Will Be Your New Favorite
Discover the compelling reasons why this Lemon Blueberry Cheesecake stands out as a truly exceptional dessert, winning hearts with every slice.
- Exquisite Lemon Flavor: This cheesecake is a celebration of fresh lemon. We infuse the rich, creamy batter with both lemon zest and freshly squeezed lemon juice, creating a bright, tangy profile that is incredibly refreshing and never overpowering. Even the homemade whipped cream gets a delightful lemon boost, ensuring a consistent and captivating citrus experience from the first taste to the last. It’s a flavor so good, the cheesecake would be remarkable even without the addition of blueberries!
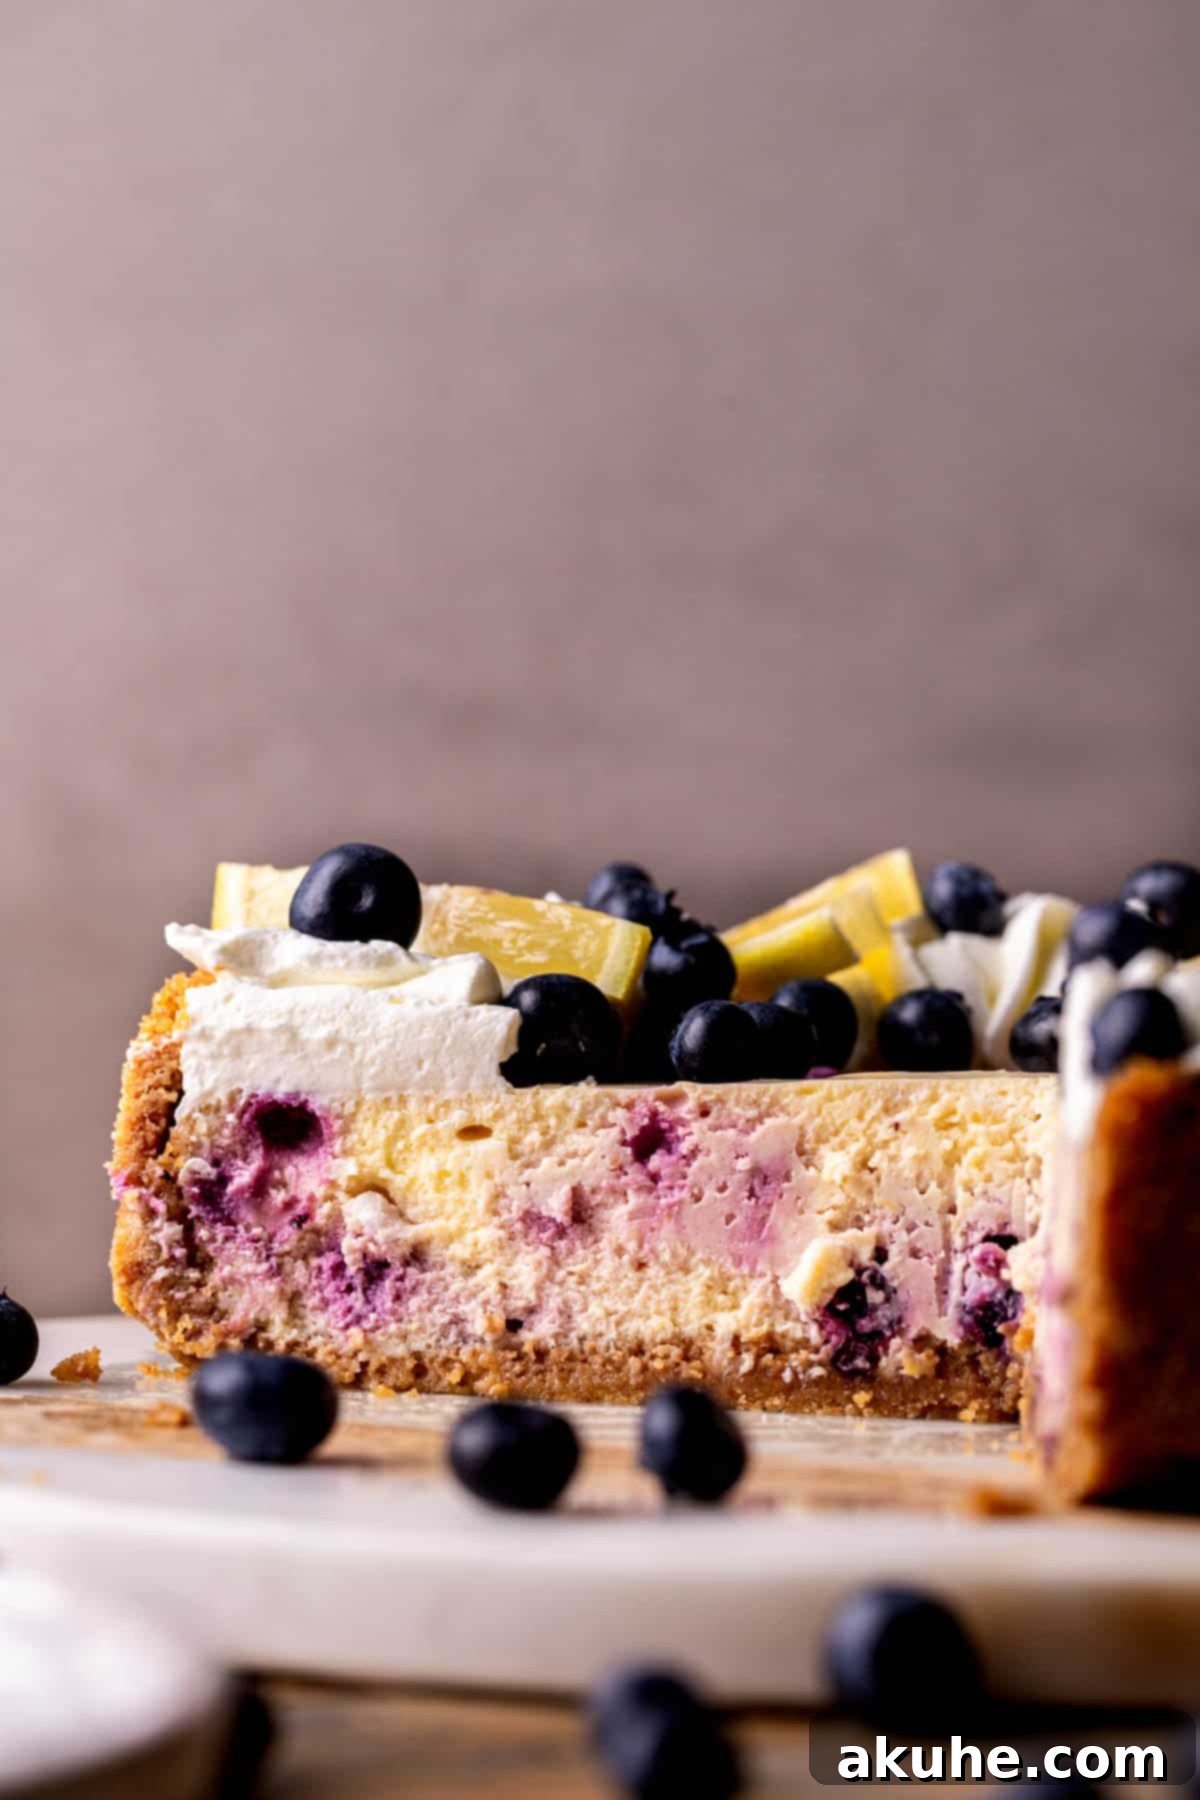
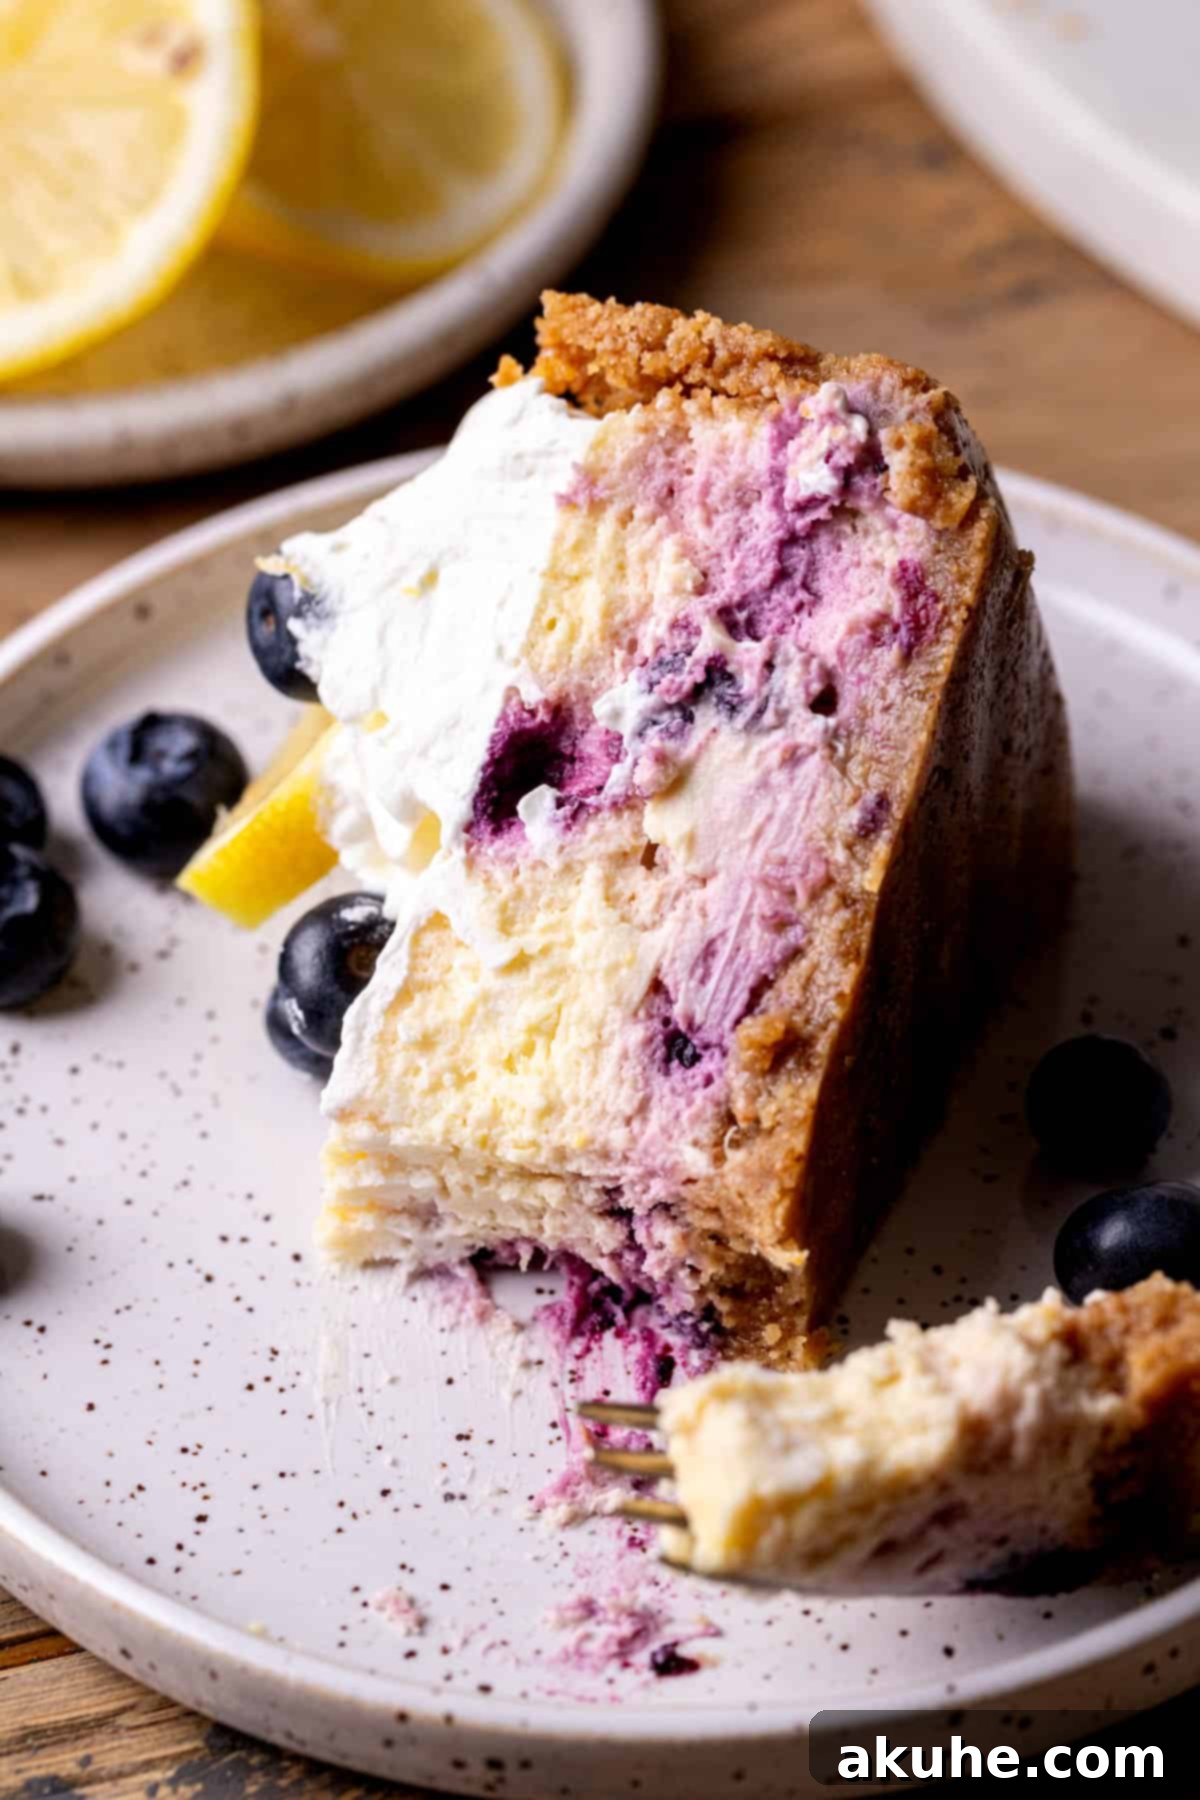
- Perfect Blueberry Harmony: The inclusion of wild blueberries takes an already fantastic cheesecake to an entirely new level. Their smaller size allows for better distribution throughout the cheesecake, ensuring a burst of sweet-tart fruit in every bite. They are the ideal complement to the lemon, adding a beautiful color and a delightful textural contrast without making the cheesecake soggy.
- Unmatched Creamy Texture: Achieving the perfect cheesecake texture has always been a passion. Through extensive testing, we’ve perfected a recipe that yields a cheesecake that is the epitome of rich and fluffy, with an incredibly smooth and creamy consistency that practically melts in your mouth. It strikes that coveted balance – not too dense, not too airy – creating a truly luxurious mouthfeel that cheesecake aficionados will adore.
Essential Ingredients for a Heavenly Cheesecake
Crafting a truly spectacular cheesecake begins with selecting the right ingredients. Here are some important notes to ensure your Lemon Blueberry Cheesecake turns out flawlessly. A complete list of all ingredients with precise measurements can be found in the recipe card below.
- Unsalted Butter: Melted unsalted butter is crucial for binding our graham cracker crust. Using unsalted butter allows you to control the overall saltiness of the dessert. You can easily melt it in a microwave-safe bowl.
- Sour Cream: For the cheesecake filling, opt for full-fat sour cream or a thick Greek yogurt. This ingredient contributes significantly to the cheesecake’s creamy texture and adds a subtle tang that balances the sweetness. Remember to pull it out of the refrigerator at least two hours before baking so it reaches room temperature, ensuring it blends smoothly into the batter without creating lumps.
- Cream Cheese: The foundation of any great cheesecake! Always use full-fat block cream cheese, not the spreadable kind, as it provides the necessary richness and structure. Like sour cream, make sure your cream cheese is at room temperature for at least two hours before you begin. This is paramount for achieving a perfectly smooth, lump-free batter.
- Eggs: Large, room-temperature eggs are essential for the cheesecake’s emulsification and overall texture. Using room temperature eggs helps them incorporate more evenly into the batter, preventing overmixing. We use whole eggs, specifically for their fatty yolks, which contribute to the cheesecake’s luxurious richness and smooth consistency.
- Frozen Wild Blueberries: While fresh blueberries can be used, frozen wild blueberries are highly recommended for this recipe. Their smaller size ensures they distribute beautifully throughout the cheesecake batter without sinking to the bottom. They also provide a vibrant pop of color and flavor in every slice, making each bite an exquisite blend of lemon and berry.
Mastering the Perfect Graham Cracker Crust
A sturdy, flavorful crust is the foundation of any exceptional cheesecake. Follow these simple steps to create a delicious graham cracker crust that holds up beautifully to our creamy lemon blueberry filling.
STEP 1: Prepare Your Pan and Preheat Oven. Begin by preheating your oven to 325°F (160°C). Generously spray a 9-inch springform pan with a non-stick baking spray. To prevent sticking and ensure easy removal, line the bottom of the pan with a parchment paper circle, then spray it again. This double-layer of protection is key to a flawless presentation.
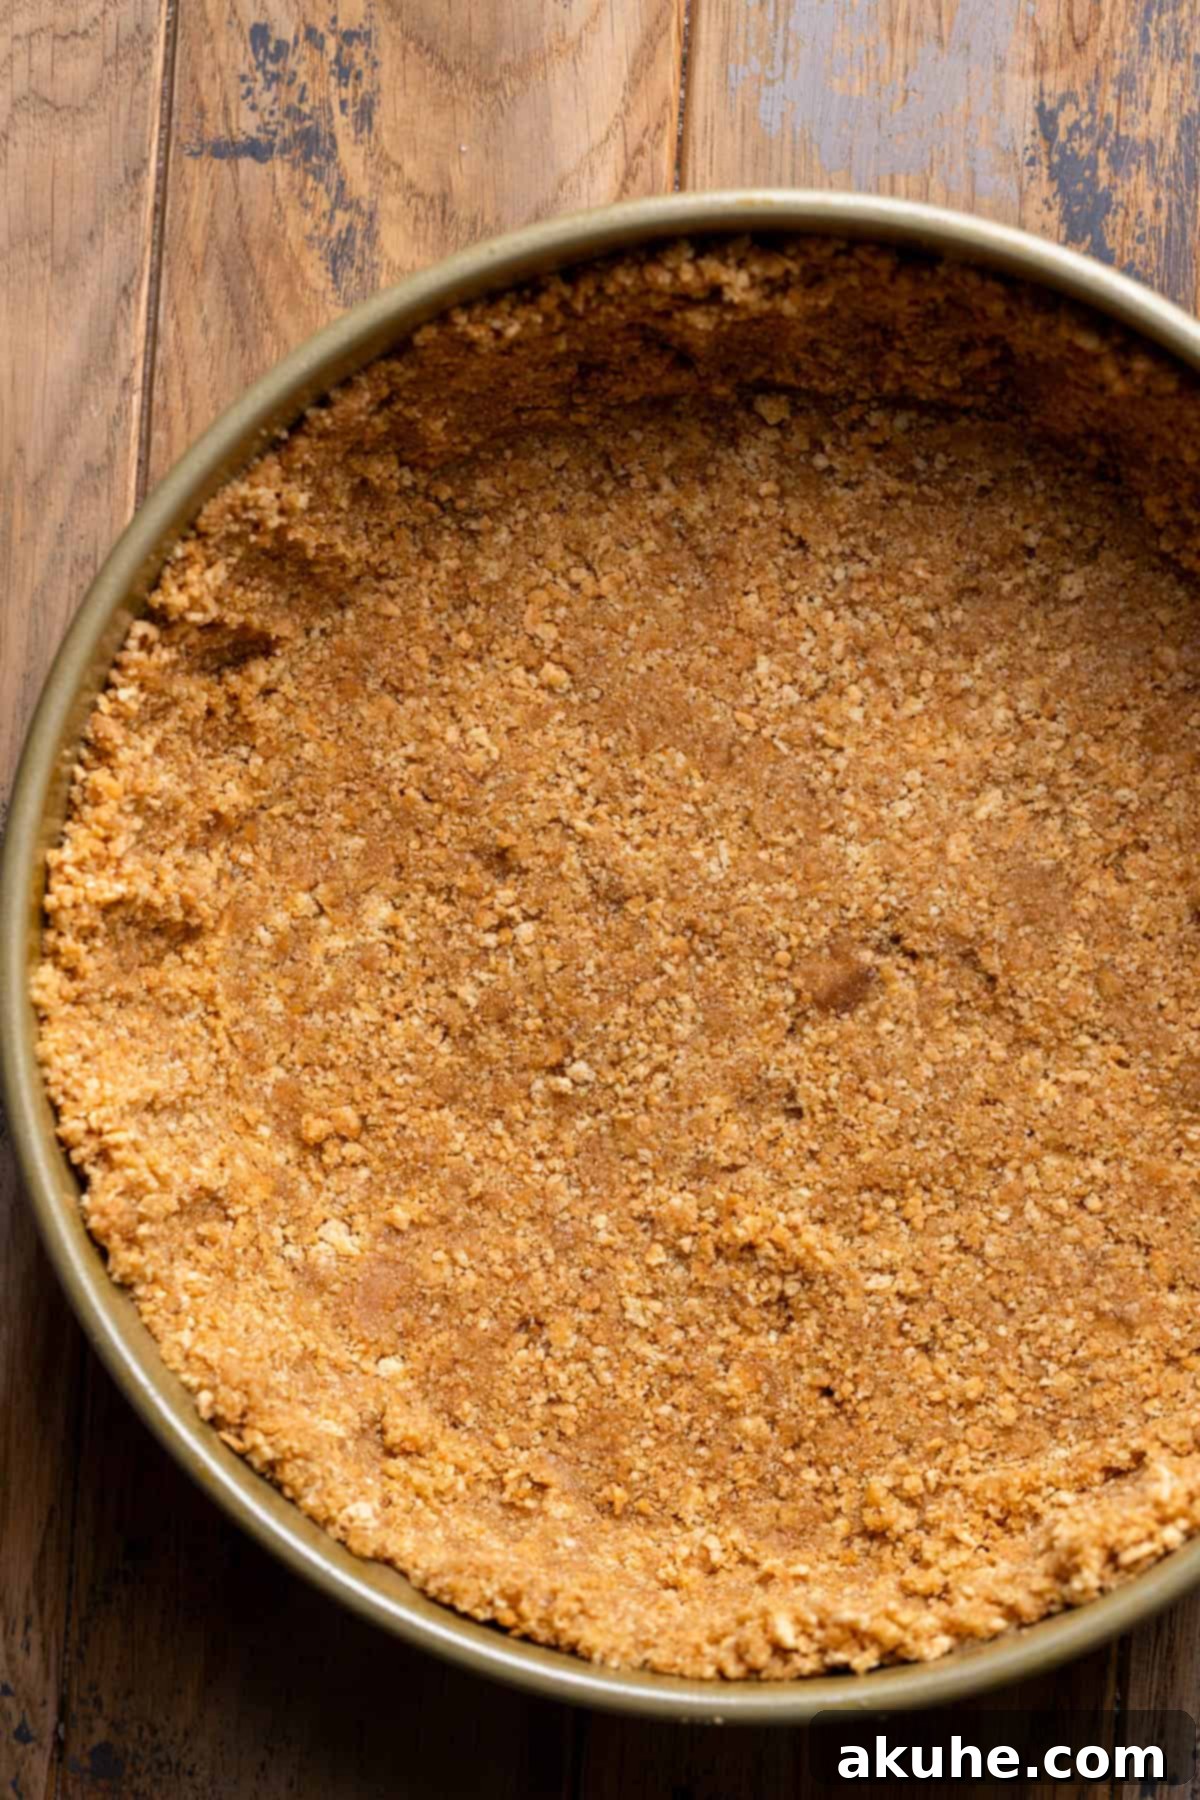
STEP 2: Blend and Combine Ingredients. Using a food processor, blend the graham crackers until they form very fine crumbs. In a medium bowl, combine these graham cracker crumbs with the brown sugar and the melted unsalted butter. Use a fork to mix everything together thoroughly until the crumbs are evenly moistened and resemble wet sand.
STEP 3: Form the Crust. Pour the crumb mixture into your prepared springform pan. Use your hands to press the mixture evenly across the bottom and about halfway up the sides of the pan. For a perfectly compact and flat base, use the back of a measuring cup or a flat-bottomed glass to firmly press the bottom of the crust. This creates a solid foundation that won’t crumble when sliced.
STEP 4: Bake the Crust. Place the pan in the preheated oven and bake the crust for 11 minutes. This short bake time helps to set the crust, making it crisp and preventing it from becoming soggy once the cheesecake filling is added.
Crafting the Irresistible Lemon Blueberry Cheesecake Filling
Now for the star of the show – the rich and tangy lemon blueberry cheesecake filling. This recipe utilizes an electric mixer; either a stand mixer fitted with a paddle attachment or a reliable hand mixer will work wonderfully to achieve that signature smooth consistency.
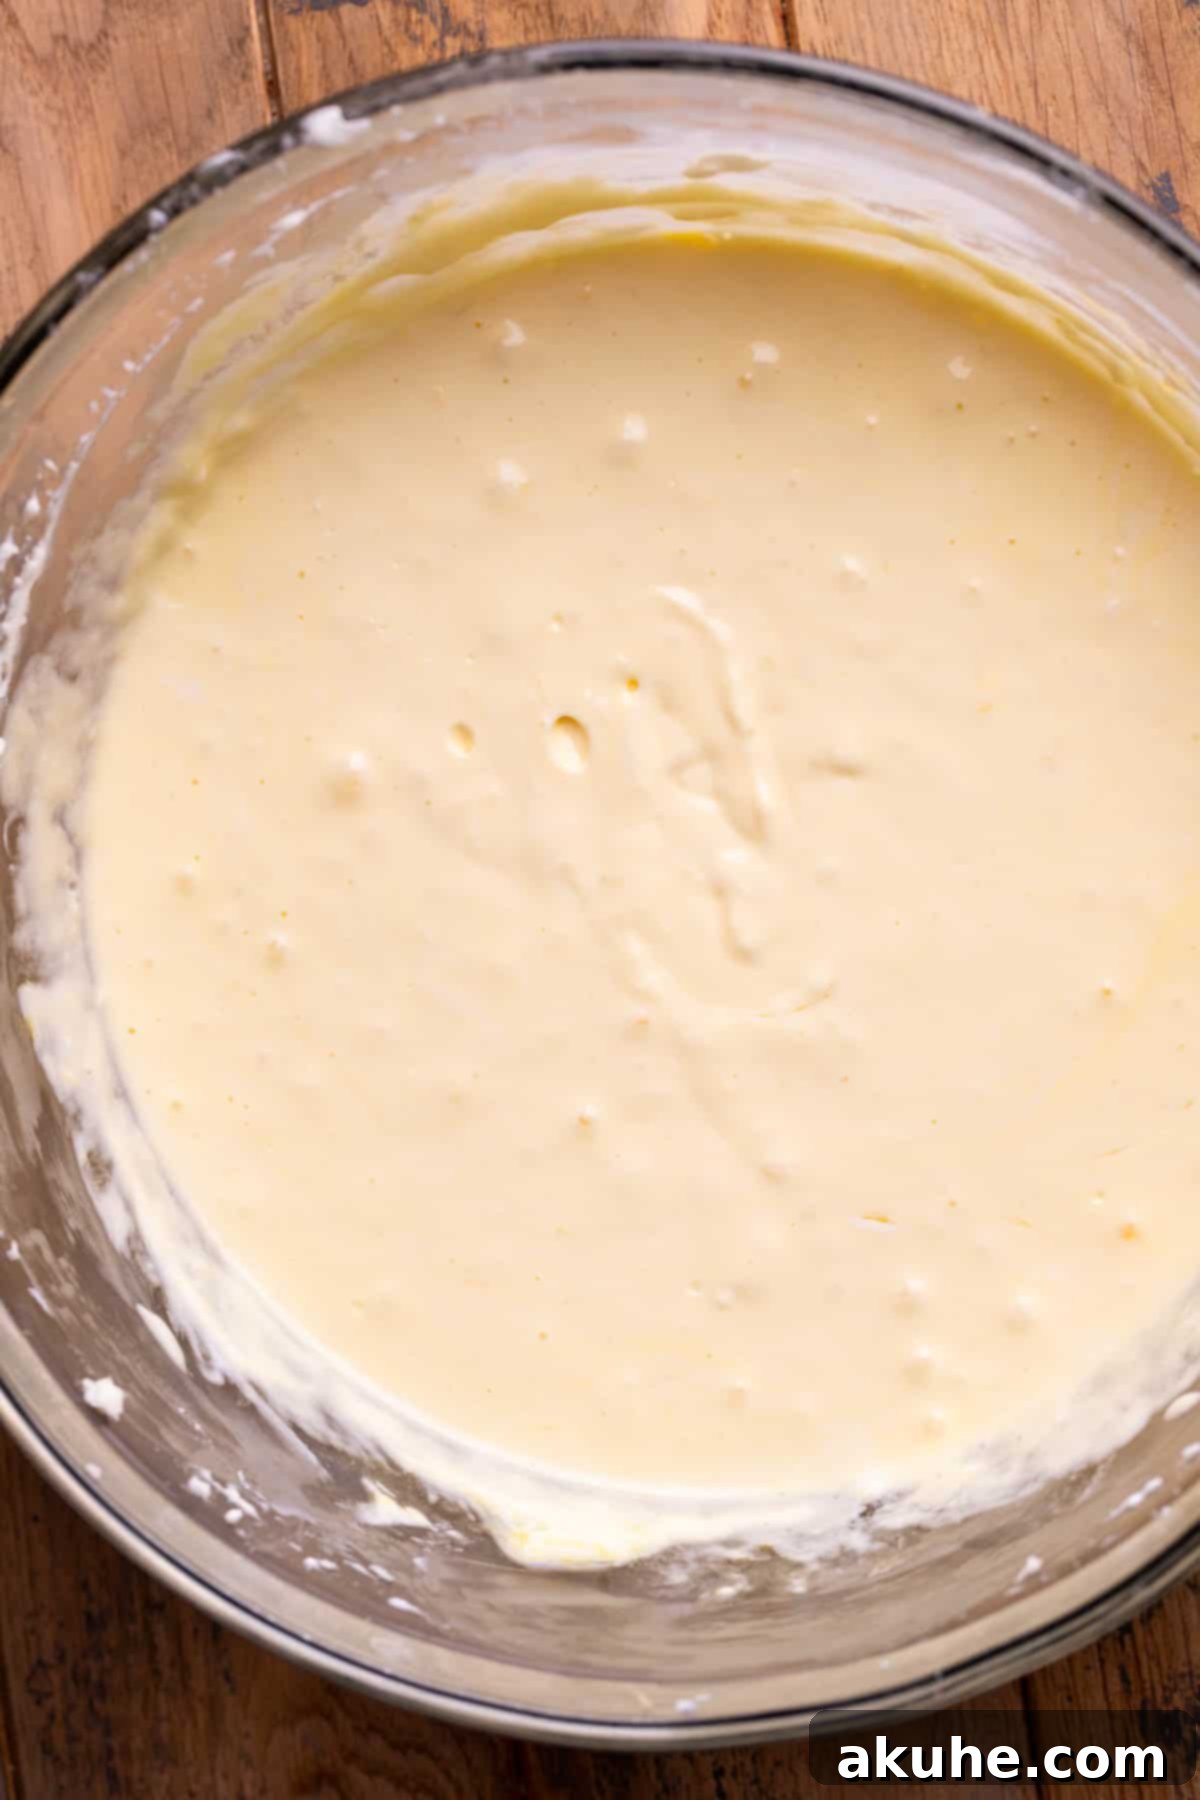
STEP 1: Beat Cream Cheese and Sugar. In a large mixing bowl, combine the room temperature cream cheese and granulated sugar. Beat them together on high speed for approximately 2 minutes. This vigorous beating ensures the mixture becomes incredibly smooth and creamy, with no lumps of cream cheese remaining. Don’t forget to stop and scrape down the sides of the bowl midway through and at the end to ensure all ingredients are fully incorporated.
STEP 2: Incorporate Liquid Flavorings and Dairy. Reduce the mixer speed to low. Add the pure vanilla extract, fresh lemon zest, fresh lemon juice, and room temperature sour cream to the cream cheese mixture. Mix until everything is just combined and the mixture is smooth. Finally, gently add the large room temperature eggs, mixing them in on the lowest speed possible until they are just incorporated. Overmixing the eggs can introduce too much air, which can lead to cracks in your baked cheesecake.
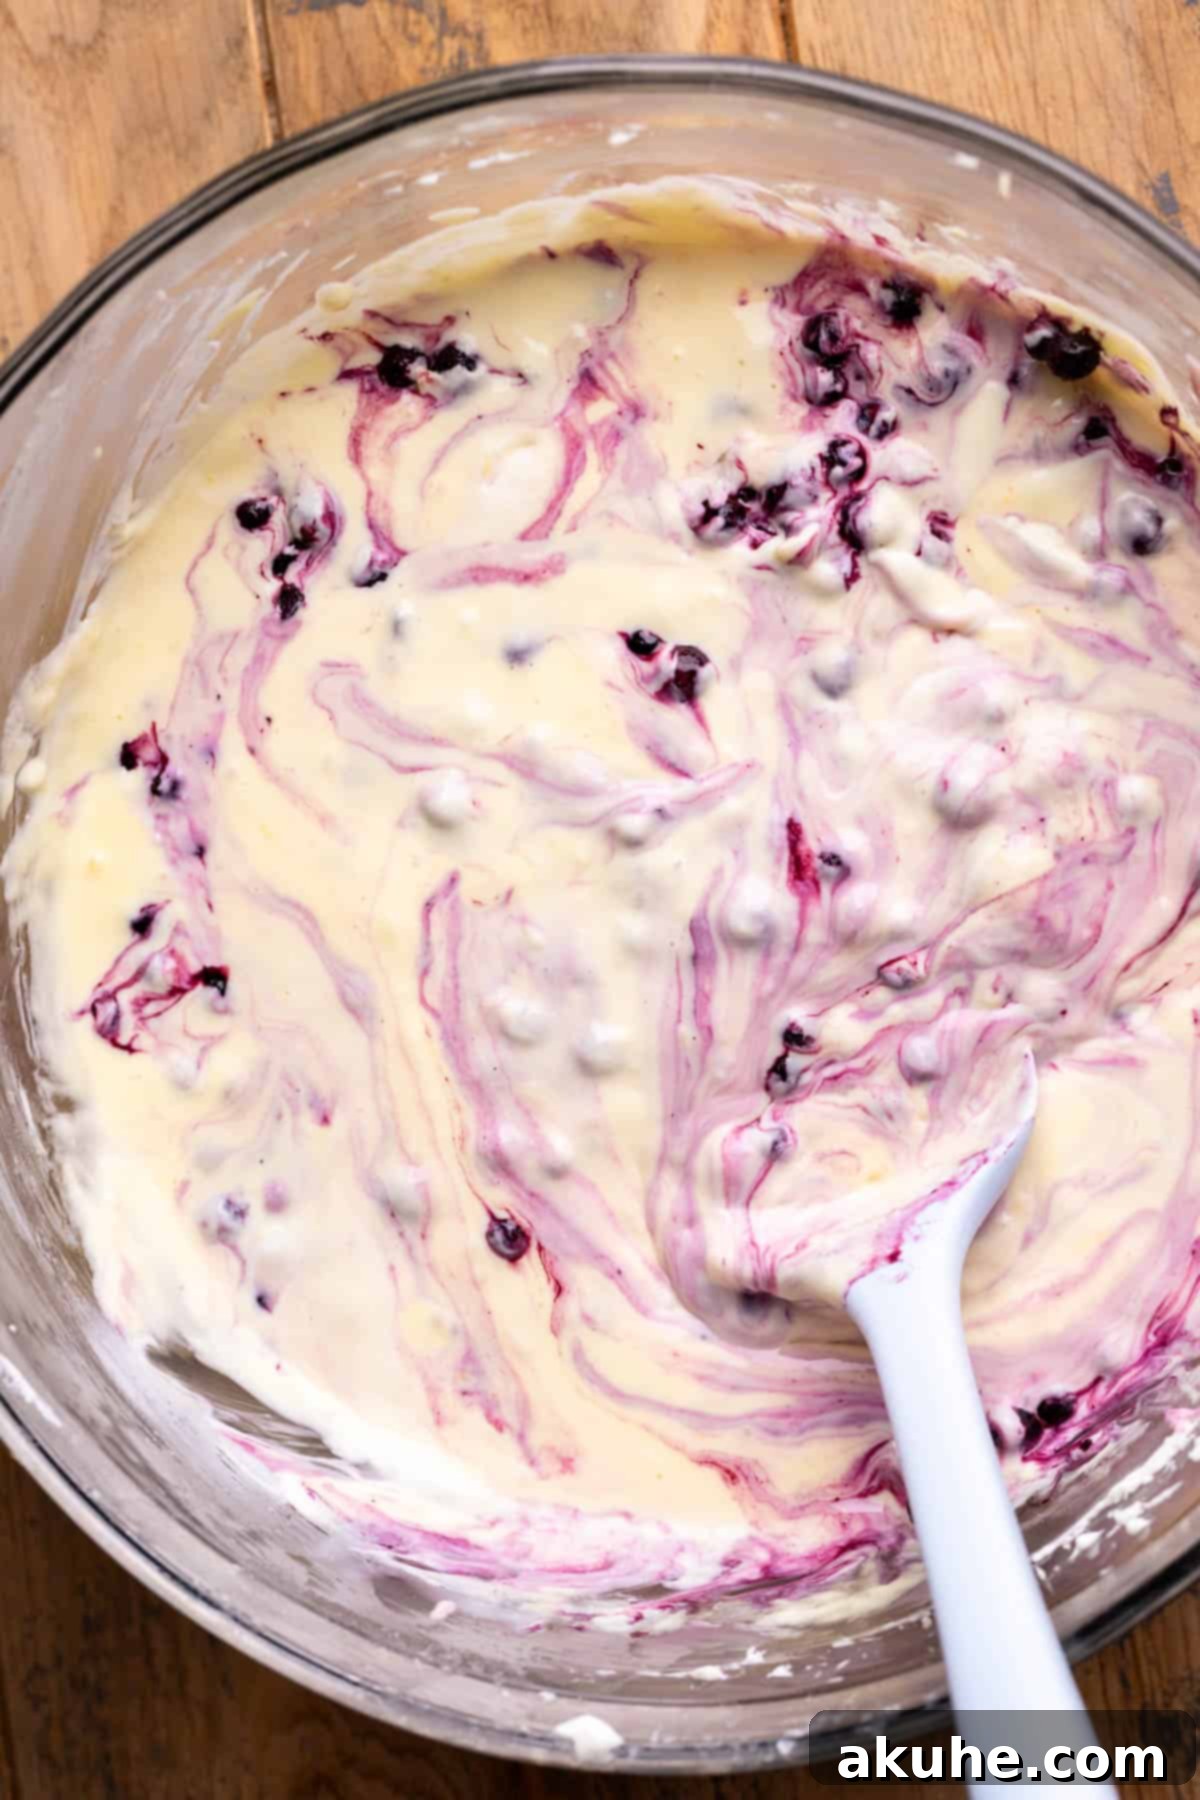
STEP 3: Gently Fold in Blueberries. With the mixer off, add the frozen wild blueberries to the cheesecake batter. Using a rubber spatula, carefully fold the blueberries into the batter. Be gentle and avoid overmixing! The goal is to achieve a beautiful swirl of blue throughout the cheesecake, rather than a uniformly blue batter. This delicate folding ensures the blueberries remain intact and create a lovely visual appeal.
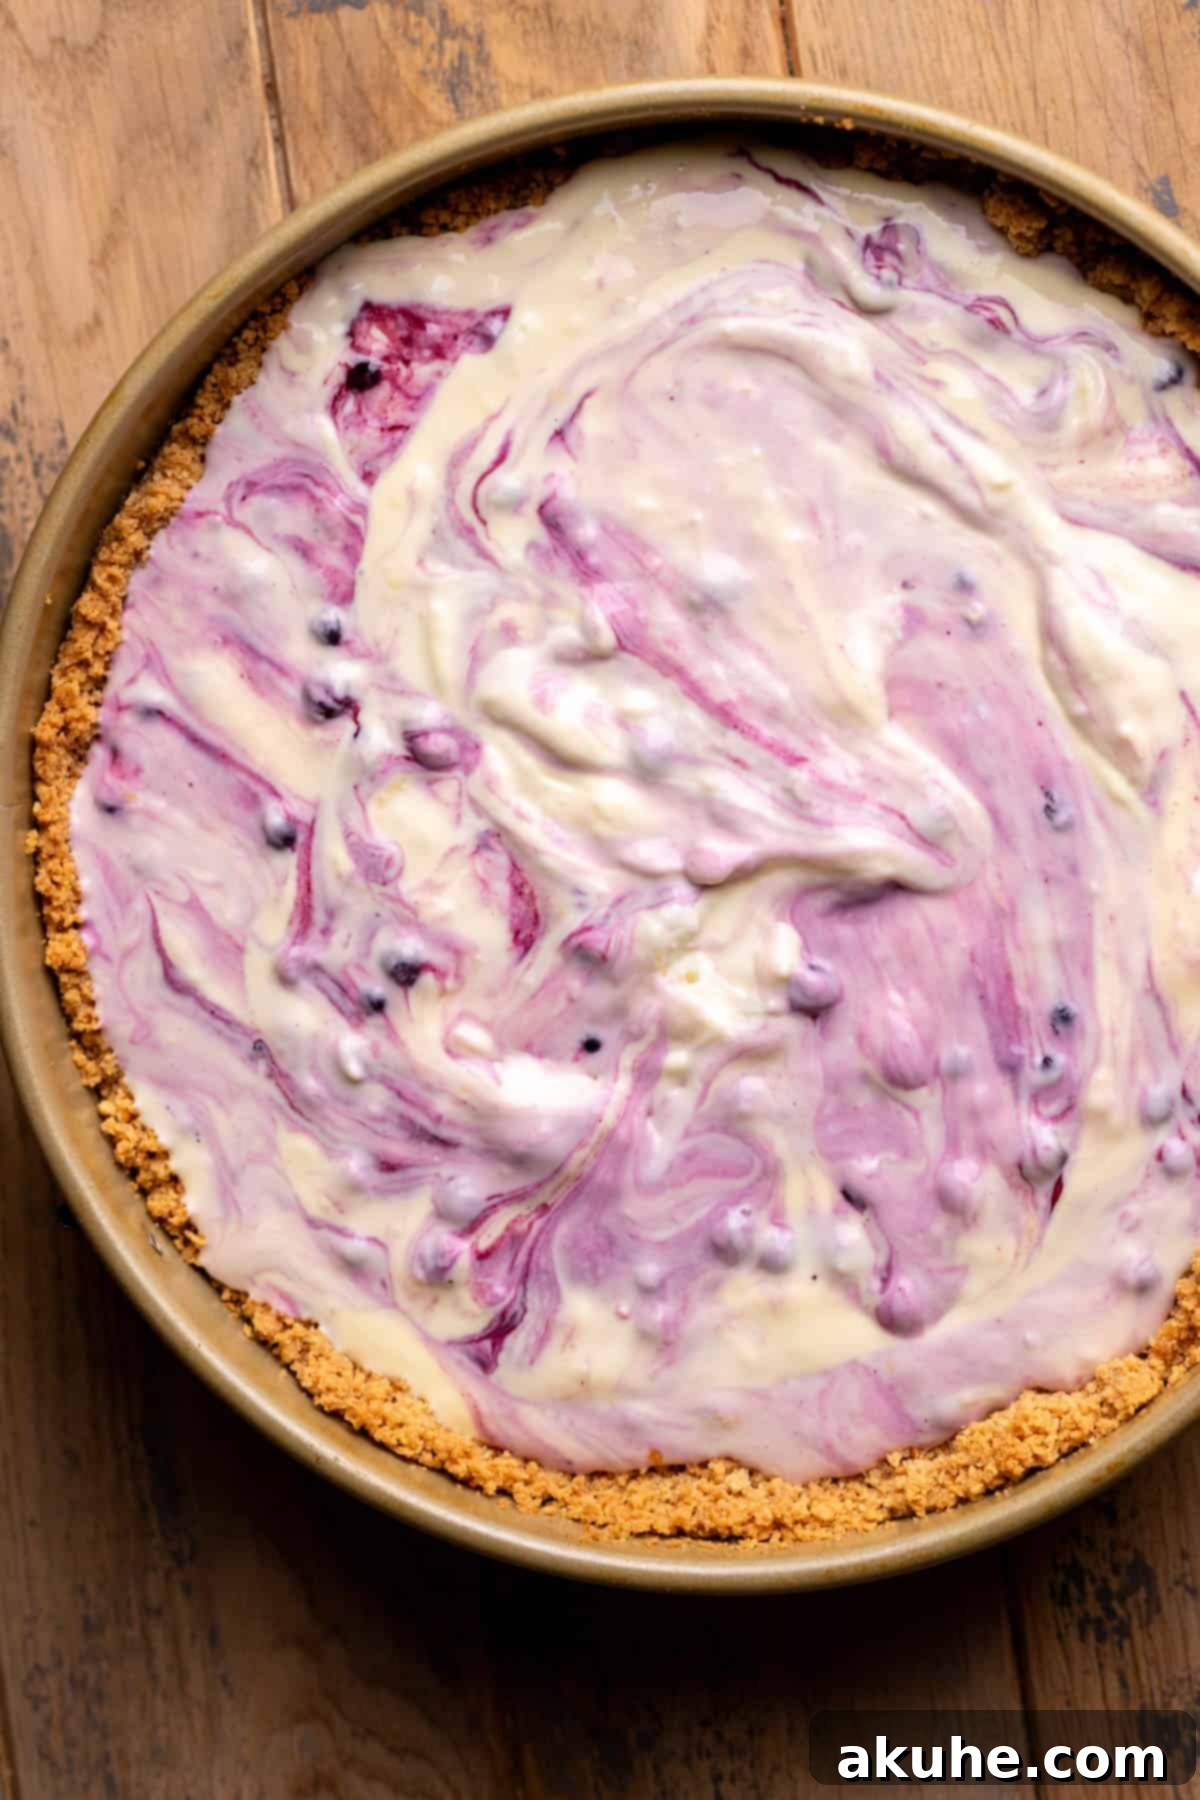
STEP 4: Prepare for Baking with a Water Bath. Pour the cheesecake batter evenly over the pre-baked graham cracker crust in the springform pan. Before placing it in the oven, you must prepare a water bath (also known as a bain-marie). Refer to the “Water Bath Tips” section below for detailed instructions on setting up your water bath. This step is crucial for achieving that signature creamy, crack-free cheesecake.
STEP 5: Bake the Cheesecake. Carefully place the springform pan (within its water bath setup) into the preheated oven. Bake for approximately 80-90 minutes. This bake time is slightly longer than many cheesecakes due to the added moisture and acidity from the lemon juice and blueberries. The cheesecake is done when the edges appear set and slightly puffed, but the very center still has a slight, gentle jiggle when the pan is carefully nudged. Avoid overbaking, as this can lead to a dry texture and cracks.
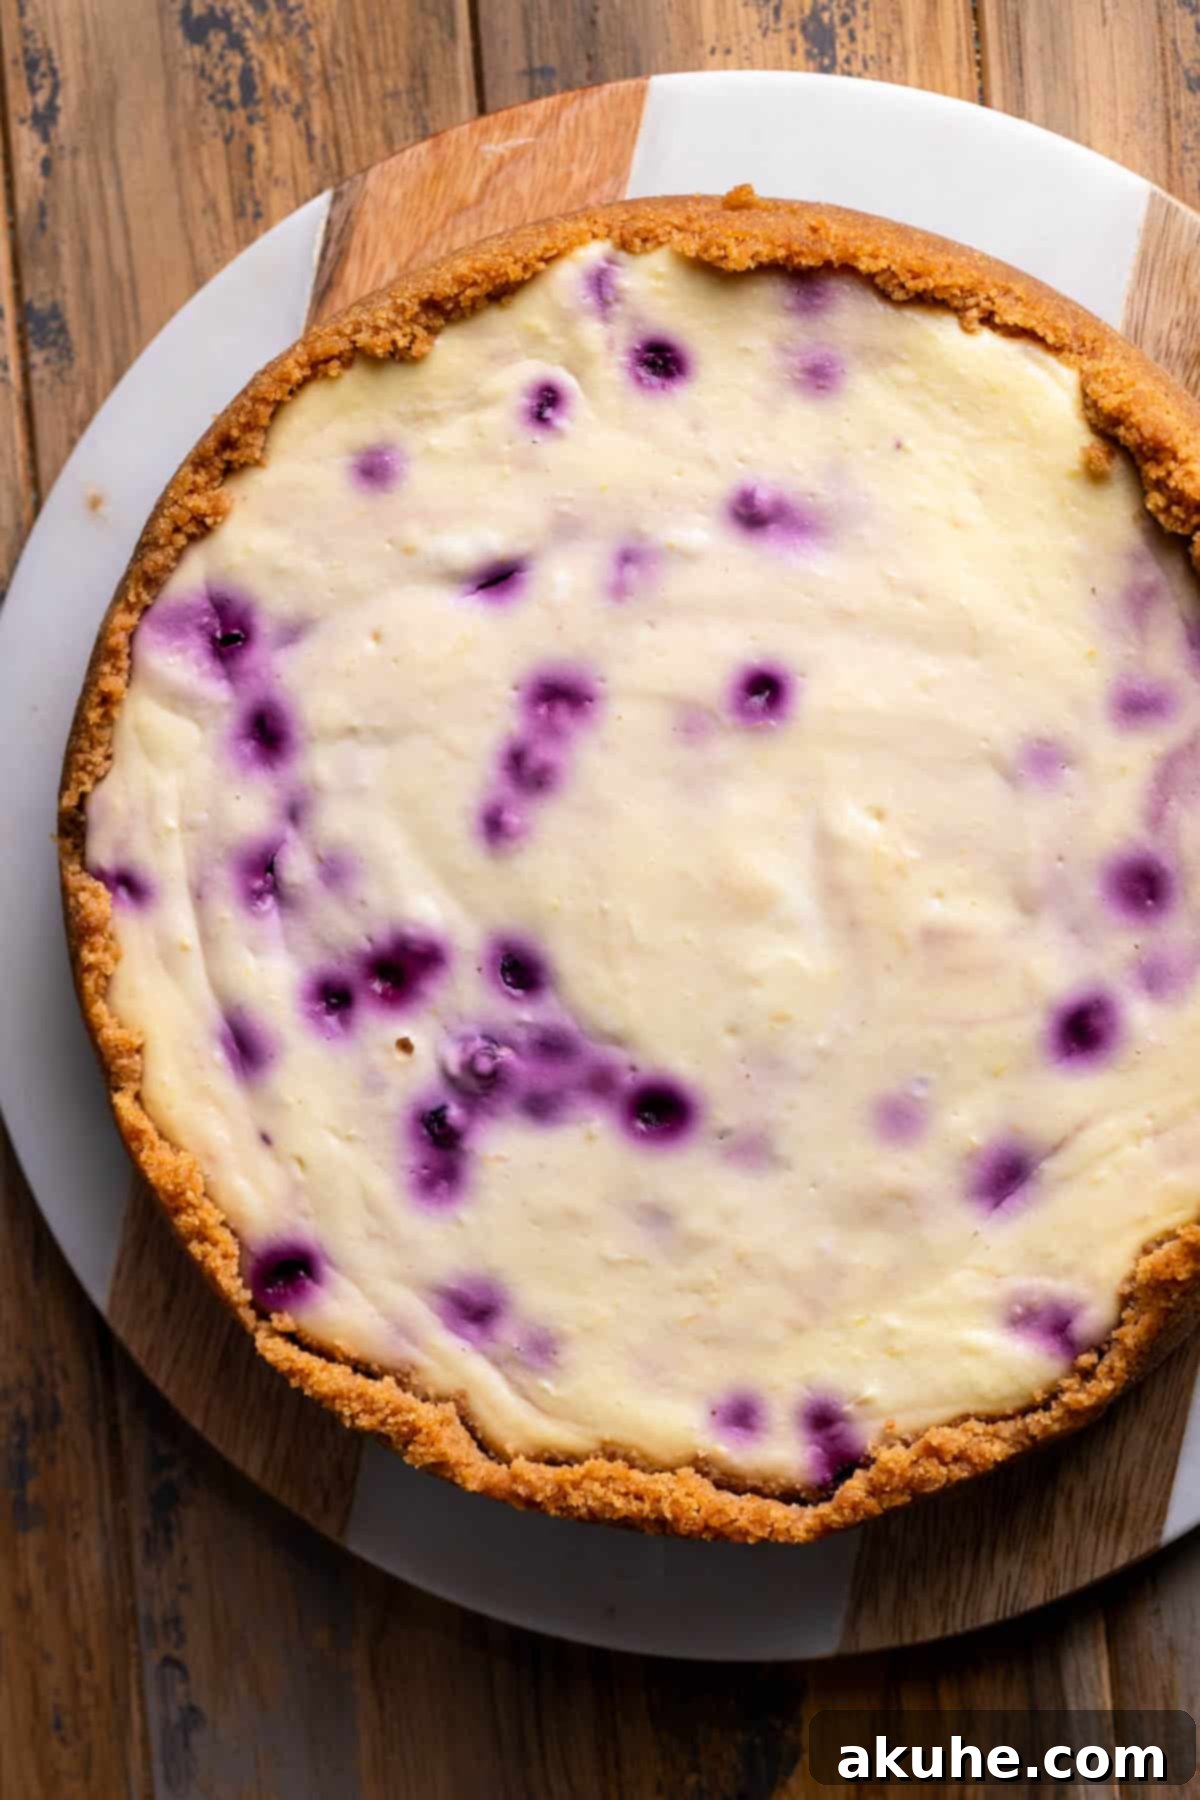
STEP 6: Gradual Cooling. Once the cheesecake is baked, turn off the oven but do not remove the cheesecake immediately. Crack the oven door open slightly and allow the cheesecake to cool slowly within the residual heat of the oven for 30 minutes. This gradual temperature change is vital in preventing cracks. After 30 minutes, carefully transfer the springform pan to a wire cooling rack to cool completely at room temperature.
STEP 7: Essential Chilling. Once the cheesecake has cooled completely to room temperature, wrap it securely in aluminum foil and transfer it to the refrigerator. It needs to chill for a minimum of 6 hours, or ideally, overnight. This chilling period allows the cheesecake to fully set, firm up, and develop its full flavor and texture, making it easier to slice cleanly.
Finishing Touch: Zesty Lemon Whipped Cream
The perfect complement to this creamy cheesecake is a light, airy, and zesty lemon whipped cream. Here’s how to prepare it and beautifully decorate your dessert.
STEP 1: Chill Your Equipment. For the best results with whipped cream, cold equipment is key. Place a metal mixing bowl and the whisk attachment for your mixer into the freezer for at least 10 minutes. This helps the cream whip up faster and hold its shape better.
STEP 2: Whip the Cream to Stiff Peaks. Remove the chilled bowl and whisk from the freezer. Pour the heavy cream into the cold bowl, add the lemon zest, and powdered sugar. Beat on high speed until stiff peaks form. Be careful not to overbeat, as this can turn the cream grainy or into butter.
STEP 3: Decorate and Serve. Once your cheesecake is thoroughly chilled, carefully remove it from the springform pan and gently peel away the parchment paper from the bottom. Transfer the cheesecake to your serving platter. Use a piping bag fitted with your favorite tip (or simply a spatula) to pipe or spread the lemon whipped cream over the top of the cheesecake. For an extra touch of elegance and fresh flavor, garnish with a few thin lemon slices and a scattering of fresh or frozen blueberries.
Demystifying the Water Bath for Perfect Cheesecakes
The water bath (bain-marie) is not an optional step for a truly perfect cheesecake; it’s essential! It creates a moist, humid environment in the oven by producing steam, which prevents the cheesecake from drying out, baking too quickly, and most importantly, cracking. Without adequate moisture, the cheesecake’s delicate custard structure can tear as it cools and contracts.
Here are two highly effective techniques for setting up a water bath, both utilizing a large roasting pan filled with hot, steaming water:
- The Double-Pan Method (My Preferred Choice): Place your springform pan (with the crust and batter) inside a slightly larger 10-inch round cake pan. Then, place this cake pan into your large roasting pan. Carefully fill the roasting pan with hot, steaming water until it comes about halfway up the sides of the 10-inch cake pan. This method provides an extra layer of protection, completely preventing any water from seeping into your crust and ensuring it remains perfectly crisp. It makes baking cheesecake incredibly straightforward and stress-free!
- The Foil-Wrapped Method: Tightly wrap the bottom and sides of your springform pan twice with heavy-duty aluminum foil. Ensure there are no gaps or tears. Then, place the foil-wrapped springform pan directly into the roasting pan. Fill the roasting pan halfway up the sides of the springform pan with hot water. While effective, there’s a slight chance that water could still find its way past the foil and create a soggy crust. This is why the double-pan method is generally safer and my personal recommendation.
By employing a water bath, you’re setting your cheesecake up for success, ensuring a beautifully smooth top and a sumptuously creamy texture.
Expert Tips to Prevent Cheesecake Cracks
Achieving a perfectly smooth, crack-free cheesecake is the hallmark of a skilled baker. Here are the key techniques to ensure your Lemon Blueberry Cheesecake emerges from the oven looking flawless:
- Beat Wet Ingredients Thoroughly (Except Eggs): When combining the cream cheese, sugar, vanilla, lemon zest, lemon juice, and sour cream, beat them on high speed until the mixture is exceptionally creamy and smooth. Any lingering lumps of cream cheese can create weak points in the batter, which may lead to cracks during baking or cooling.
- Incorporate Eggs on Low Speed, Just Until Combined: Eggs are crucial for structure, but they also introduce air. Beat the eggs into the batter on the lowest possible speed, only until they are just incorporated. Overmixing eggs creates excess air bubbles, which can cause the cheesecake to rise too quickly in the oven and then collapse dramatically during cooling, resulting in unsightly cracks. Minimize air, maximize creaminess.
- Always Use a Water Bath: As detailed in the section above, a water bath is non-negotiable for preventing cracks. The moist, steamy environment it creates ensures the cheesecake bakes gently and evenly, preventing the edges from setting too quickly and pulling away from the center, which causes cracks.
- Implement Gradual Cooling: Sudden temperature changes are a cheesecake’s worst enemy. Once your cheesecake is done baking, resist the urge to pull it out of the oven immediately. Turn off the oven, prop the door open slightly, and let the cheesecake sit in the warm oven for an additional 30 minutes. This slow, controlled cooling period allows the cheesecake to adjust to the temperature change gradually, preventing thermal shock that can lead to cracks. Transferring it directly from a hot oven to a cool countertop is a recipe for disaster.
Effortless Removal: Unmolding Your Cheesecake
After all your hard work, ensuring a clean and easy removal of your cheesecake from the pan is the final step to a picture-perfect dessert. Here’s how to do it without a hitch:
First, before adding any ingredients, thoroughly spray your springform pan with a good quality non-stick baking spray. Next, line the bottom of the pan with a 9-inch parchment paper circle. It’s a small step that makes a huge difference! Don’t forget to spray the parchment paper circle again once it’s in place. This double layer of protection ensures absolutely no sticking.
Once your cheesecake has chilled in the refrigerator, ideally overnight, the springform pan should release with ease. Simply unclip the latch and the sides of the pan should pop right off. If you encounter any resistance, very gently run a thin, sharp knife (dipped in hot water and wiped clean) around the edge of the cheesecake before unlatching the pan to help it release cleanly. Then, you should be able to carefully slide a thin spatula or knife under the cheesecake to separate it from the bottom of the pan, or lay the cheesecake on its side to easily peel off the parchment paper circle from the base.
Frequently Asked Questions About Lemon Blueberry Cheesecake
Can I make this into mini cheesecakes?
Absolutely! This recipe adapts beautifully to mini cheesecakes. Simply divide the batter into thirds, which should yield approximately 12 mini cheesecakes when baked in a standard muffin pan lined with paper liners. Reduce the baking time to about 18-20 minutes, or until the edges are set and the centers have a slight jiggle. For more detailed instructions on creating delightful mini cheesecakes, you can refer to our Mini Oreo Cheesecakes recipe, which provides comprehensive guidance.
What other pans can I use?
While a 9-inch springform pan is ideal, you have other options. To create lemon blueberry cheesecake bars, you can halve the recipe and bake it in an 8×8 inch or 9×9 inch baking pan (using 16 oz of cream cheese for the halved recipe). You can also use an 8-inch springform pan for a slightly taller cheesecake; no recipe adjustment is needed. If you wish to use a 6-inch springform pan, you will need to halve the recipe but maintain 16 oz of cream cheese for a good height. Be aware that when using different pan sizes, especially larger pans with a thinner layer of batter, you will need to adjust the baking time as the cheesecake will bake faster.
How to get the perfect slice?
Achieving clean, elegant slices is easy with a few simple tricks. First and foremost, ensure your cheesecake is very cold – chilling it overnight is truly best. Once ready to slice, use a sharp, thin-bladed knife. For the cleanest cuts, wipe the knife clean with a damp cloth or paper towel and re-dip it in hot water before each new slice. This warms the blade slightly, allowing it to glide through the creamy cheesecake without dragging.
Storage & Freezing Guide
Proper storage is key to maintaining the freshness and delicious flavor of your Lemon Blueberry Cheesecake. Keep this delightful dessert in the refrigerator in an airtight container, such as a specialized cake carrier, for up to 5 days. Ensure it’s well-covered to prevent it from absorbing any odors from other foods in your fridge.
Freezing Your Cheesecake for Later Enjoyment
Cheesecake freezes beautifully, allowing you to enjoy this treat even longer. You have a couple of excellent options for freezing:
- Freezing Individual Slices: For convenient single servings, cut the chilled cheesecake into individual slices. Place each slice in an airtight container or wrap them tightly in plastic wrap, then a layer of aluminum foil. They can be stored in the freezer for up to 30 days. To enjoy, simply thaw a slice for 1-2 hours at room temperature before serving.
- Freezing the Whole Cheesecake (before decorating): If you plan to serve the cheesecake later and prefer to decorate it fresh, you can freeze the entire cheesecake before adding the whipped cream topping. First, ensure the cheesecake has cooled completely at room temperature, then chilled overnight in the refrigerator. Once thoroughly chilled, wrap the entire cheesecake securely in several layers of plastic wrap, followed by a layer of aluminum foil. Freeze for up to 30 days. When ready to serve, thaw the cheesecake in the refrigerator for 1-2 hours (or until soft enough to cut) before adding your fresh lemon whipped cream and garnishes.
Explore More Delicious Cheesecake Recipes
We hope you loved this recipe! We always appreciate hearing your thoughts and seeing your creations. Please consider leaving a star rating and a review if you enjoyed making and tasting this delightful cheesecake.
Lemon Blueberry Cheesecake Recipe
Rating: 5 out of 5 stars based on 4 reviews
By Stephanie Rutherford
This lemon blueberry cheesecake is a baked cheesecake. It has a graham cracker crust, lemon cheesecake with frozen wild blueberries, and a lemon whipped cream on top.
Prep Time: 1 hour | Cook Time: 1 hour 30 mins | Chilling Time: 6 hours | Total Time: 8 hours 30 mins
Servings: 16 slices
Ingredients
Graham Cracker Crust
- 2 1/2 cups Graham cracker crumbs, fine crumb (approximately two sleeves of crackers)
- 1/4 cup Brown sugar, packed (light or dark)
- 10 TBSP Unsalted butter, melted
Lemon Blueberry Cheesecake
- 24 oz Cream cheese, room temperature
- 3/4 cup White granulated sugar
- 1 tsp Pure vanilla extract
- Zest of 2 Large lemons
- 1/4 cup Lemon juice (freshly squeezed)
- 1/2 cup Sour cream, room temperature
- 4 Large eggs, room temperature
- 1 1/2 cups Frozen wild blueberries
Lemon Whipped Cream
- 1 cup Heavy cream, cold
- Zest of 1 Small lemon
- 2 TBSP Powdered sugar
Instructions
Graham Cracker Crust
- Preheat the oven to 325℉ (160°C). Spray a 9-inch springform pan with baking spray. Line the bottom with a parchment paper circle, then spray again.
- Using a food processor, blend the graham crackers into fine crumbs. In a small bowl, combine graham cracker crumbs, brown sugar, and melted butter with a fork until well combined.
- Pour the crumb mixture into the prepared pan. Use your hands to press the crust halfway up the sides of the pan. Use the bottom of a measuring cup to compact the bottom of the crust firmly.
- Bake for 11 minutes. Remove from oven and let cool slightly while preparing the filling.
Lemon Blueberry Cheesecake
- Using an electric mixer in a large mixing bowl, beat the room temperature cream cheese and granulated sugar on high speed for 2 minutes until smooth and creamy. Scrape down the sides of the bowl.
- Add in the vanilla extract, lemon zest, lemon juice, and room temperature sour cream. Mix until smooth. Add in the room temperature eggs one at a time, mixing on low speed until just combined. Do not overmix the eggs.
- Gently add the frozen wild blueberries. Use a rubber spatula to fold the blueberries in carefully. Be gentle to create a swirl of blue rather than a solid blue cheesecake.
- Pour the cheesecake batter over the baked graham cracker crust in an even layer. Prepare a water bath using one of the methods described in the “Demystifying the Water Bath” section above.
- Bake the cheesecake for 80-90 minutes. The cheesecake is done when the edges are set, and the middle still has a very slight jiggle. The longer bake time is due to the lemon juice and blueberries.
- Once baked, turn off the oven, crack open the door, and let the cheesecake cool in the oven for 30 minutes. Then, transfer the springform pan to a wire cooling rack to cool completely to room temperature.
- Once fully cooled, wrap the cheesecake in foil and place it in the fridge. Chill for at least 6 hours, or preferably overnight, for the best texture and clean slicing.
Lemon Whipped Cream
- Place a metal mixing bowl and a whisk attachment for your mixer into the freezer for 10 minutes to chill.
- Using the chilled bowl and whisk attachment, beat the cold heavy cream, lemon zest, and powdered sugar on high speed until stiff peaks form.
- Once the cheesecake is chilled, remove it from the springform pan and discard the parchment paper. Pipe or spread the lemon whipped cream on top of the cheesecake. Garnish with extra lemon slices and fresh blueberries, if desired.
Notes
For best results, remember to pull out all dairy ingredients (cream cheese, sour cream, eggs) at least 2 hours before baking to allow them to reach room temperature. This is crucial for a smooth batter and an even bake.
Nutrition Information (per slice, approximate)
Calories: 383kcal, Carbohydrates: 27g, Protein: 4g, Fat: 30g, Saturated Fat: 17g, Polyunsaturated Fat: 1g, Monounsaturated Fat: 8g, Trans Fat: 0.3g, Cholesterol: 83mg, Sodium: 228mg, Potassium: 114mg, Fiber: 0.5g, Sugar: 18g, Vitamin A: 1053IU, Vitamin C: 2mg, Calcium: 74mg, Iron: 1mg
