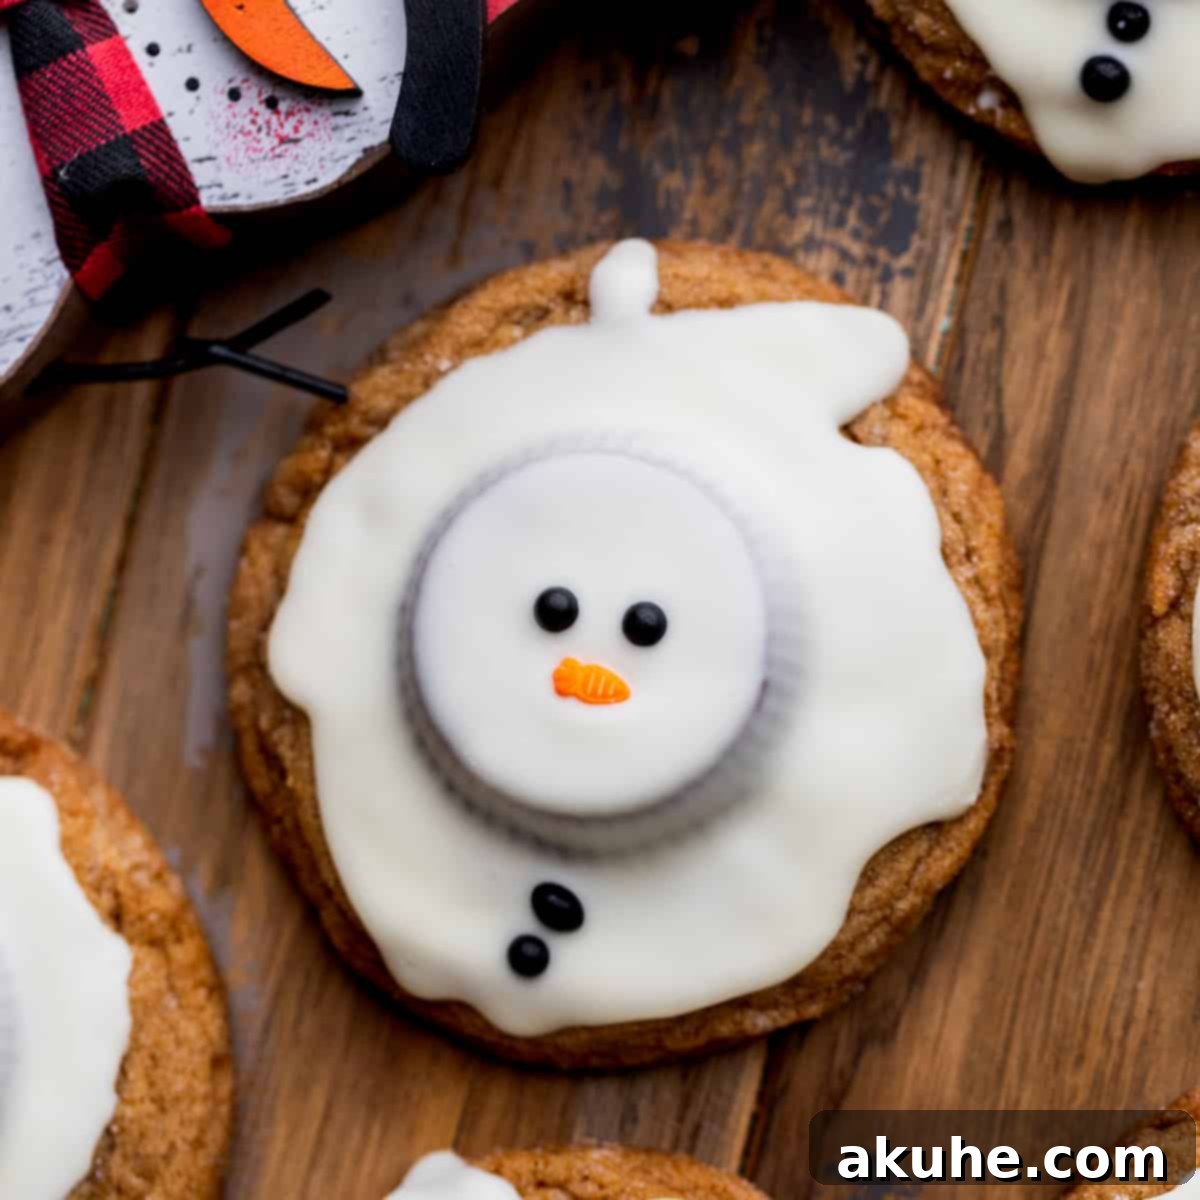
Melted Snowman Cookies: Your Ultimate Gingerbread Holiday Treat
Unwrap the magic of the holiday season with these irresistibly charming Melted Snowman Cookies! Crafted from soft, spiced gingerbread, each cookie becomes a delightful winter wonderland scene, topped with a creamy peanut butter cup, a cascade of smooth white chocolate, and festive snowman sprinkles. They’re not just a treat; they’re a whimsical masterpiece designed to bring smiles and holiday cheer to everyone who sees – and tastes – them. Perfect for festive gatherings or a cozy night in, these adorable gingerbread creations capture the playful spirit of a melting snowman, making them an instant holiday classic.
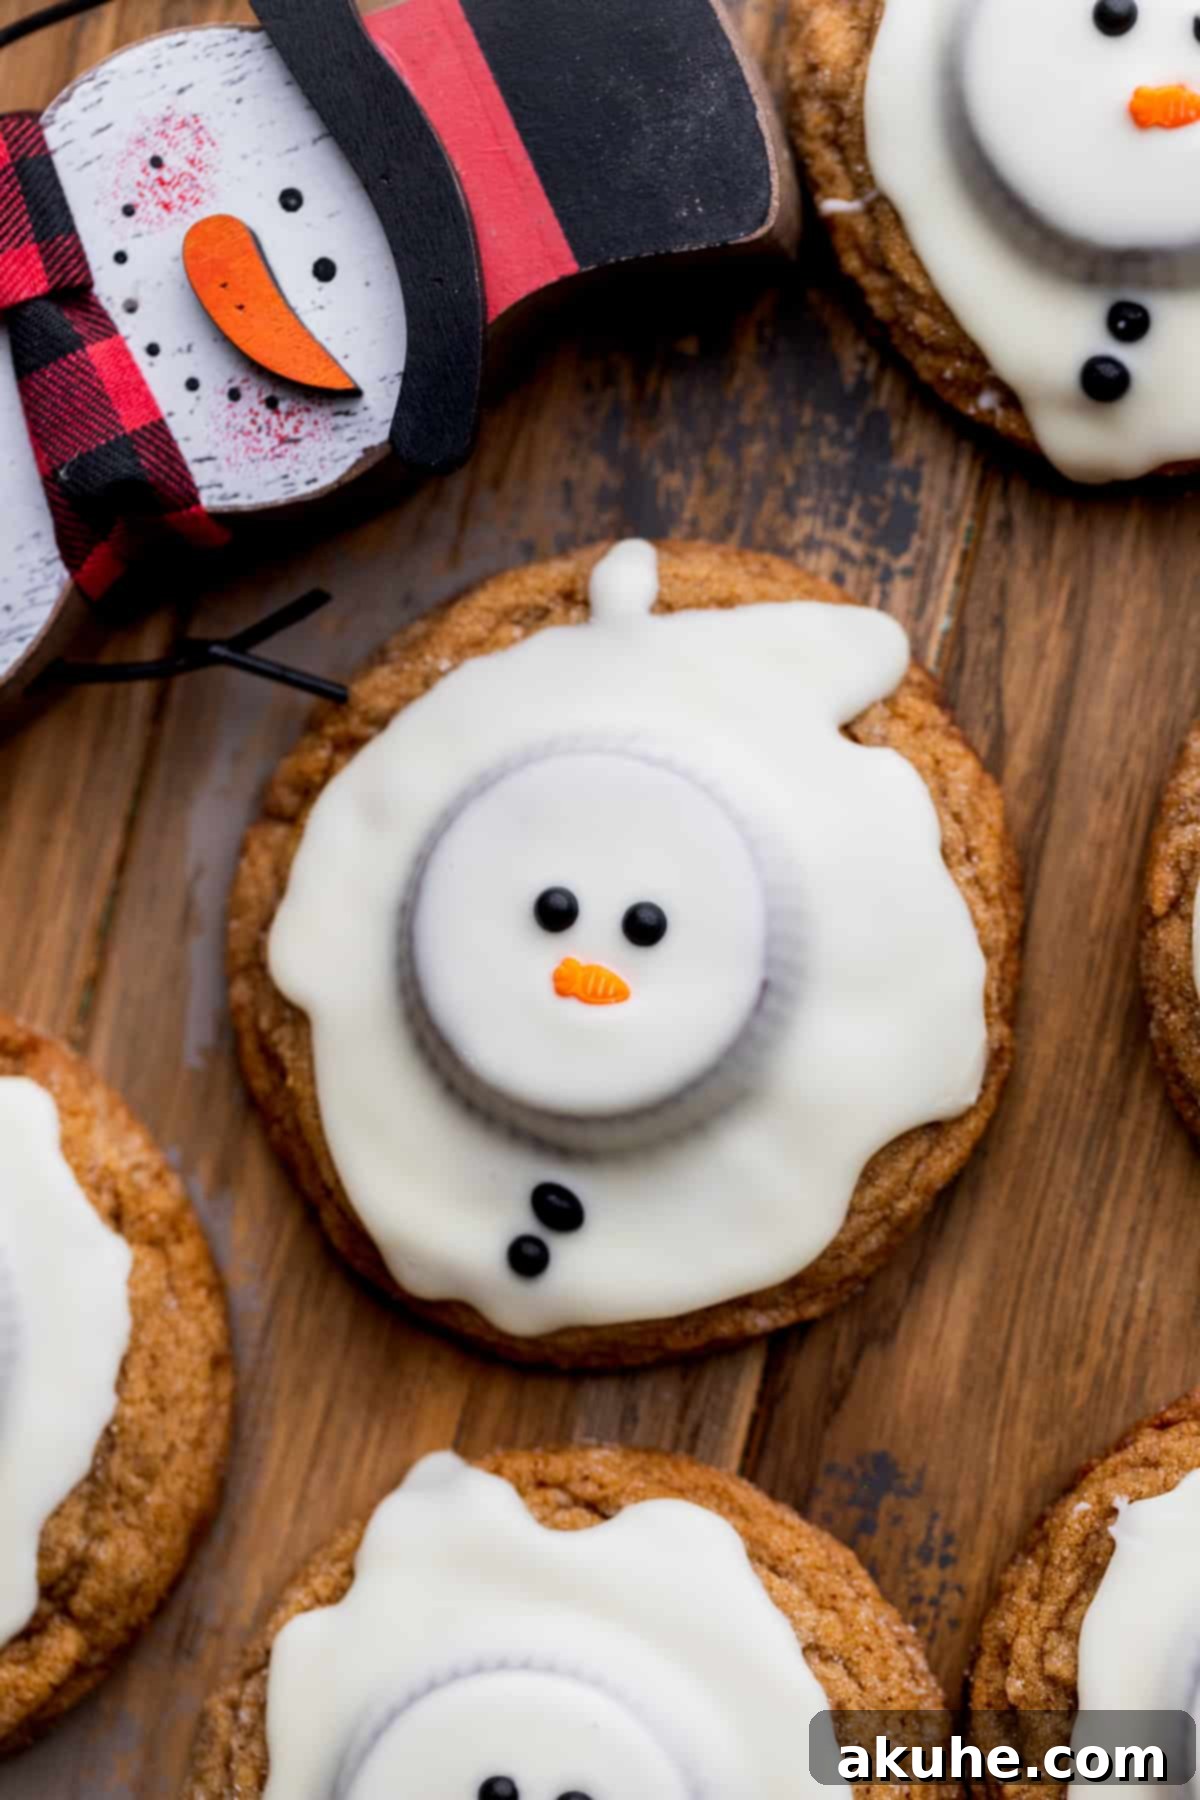
These Melted Snowman Cookies are truly the quintessential holiday delight! They offer a perfect blend of fun, simplicity, and festive flavor, making them a recipe your entire family will cherish. The best part? You won’t need to hunt for exotic ingredients; everything you need can be found in the baking aisle of your local grocery store. Get ready to fall in love with these adorable, delicious melted snowmen!
Looking for more enchanting holiday desserts? Be sure to explore our Gingerbread Cheesecake, a rich and creamy delight; our vibrant Cherry Cheesecake; and the festive Christmas Cranberry Cake for more inspiration.
Why These Melted Snowman Cookies Are a Must-Bake This Season
There are countless reasons why these delightful gingerbread cookies should be at the top of your holiday baking list. Their unique charm and straightforward preparation make them a standout festive treat.
- Effortlessly Easy Cookie Recipe: Forget complicated techniques or specialized equipment. These adorable melted snowman cookies are incredibly simple to prepare, requiring minimal time and effort. If you dream of impressing your guests with homemade holiday cookies without spending hours in the kitchen, this recipe is your secret weapon. The simple assembly means even beginner bakers can achieve stunning results.
- Unbelievably Cute & Charming: Prepare for an avalanche of compliments! The whimsical melted snowman design, complete with a tiny carrot nose and expressive sprinkle eyes, captures hearts and sparks joy. Their playful appearance makes them a fantastic centerpiece for any holiday dessert spread and a memorable gift for friends and family. It’s hard not to smile when looking at these little characters.
- The Ultimate Christmas Cookie Experience: More than just a dessert, this Christmas cookie recipe is an invitation to spread holiday cheer. The warm spices of gingerbread combined with the sweetness of white chocolate and peanut butter evoke the festive spirit, making them perfect for cookie exchanges, holiday parties, or simply enjoying by a crackling fire with loved ones. They embody the warmth and wonder of the season in every bite.
Essential Ingredient Notes for Perfect Snowman Cookies
Understanding your ingredients is key to achieving bakery-quality results. Here’s a closer look at the specific details for each component. For a complete list of quantities, refer to the detailed recipe card below.
- Butter: For the best texture and consistency in your gingerbread dough, ensure your butter is melted and then thoroughly cooled before incorporating it into the wet ingredients. Using butter that is too warm can negatively impact the dough’s structure and lead to excessive spreading during baking.
- Brown Sugar: We recommend using light brown sugar for its balanced caramel notes, which perfectly complement the gingerbread spices. However, if dark brown sugar is all you have, it will work just as well, lending a slightly deeper, more robust flavor to your cookies.
- Egg: Room temperature eggs are crucial for a smooth, well-emulsified dough. They combine more effectively with other ingredients, leading to a more uniform and tender cookie. Remember to pull your egg out of the refrigerator at least 2 hours before you plan to start baking.
- Molasses: This ingredient is the heart of true gingerbread flavor. Always opt for regular molasses (like Grandma’s molasses), not blackstrap molasses. Blackstrap is significantly more bitter and denser, and it is not an interchangeable substitute for this recipe; using it will alter the intended flavor profile drastically.
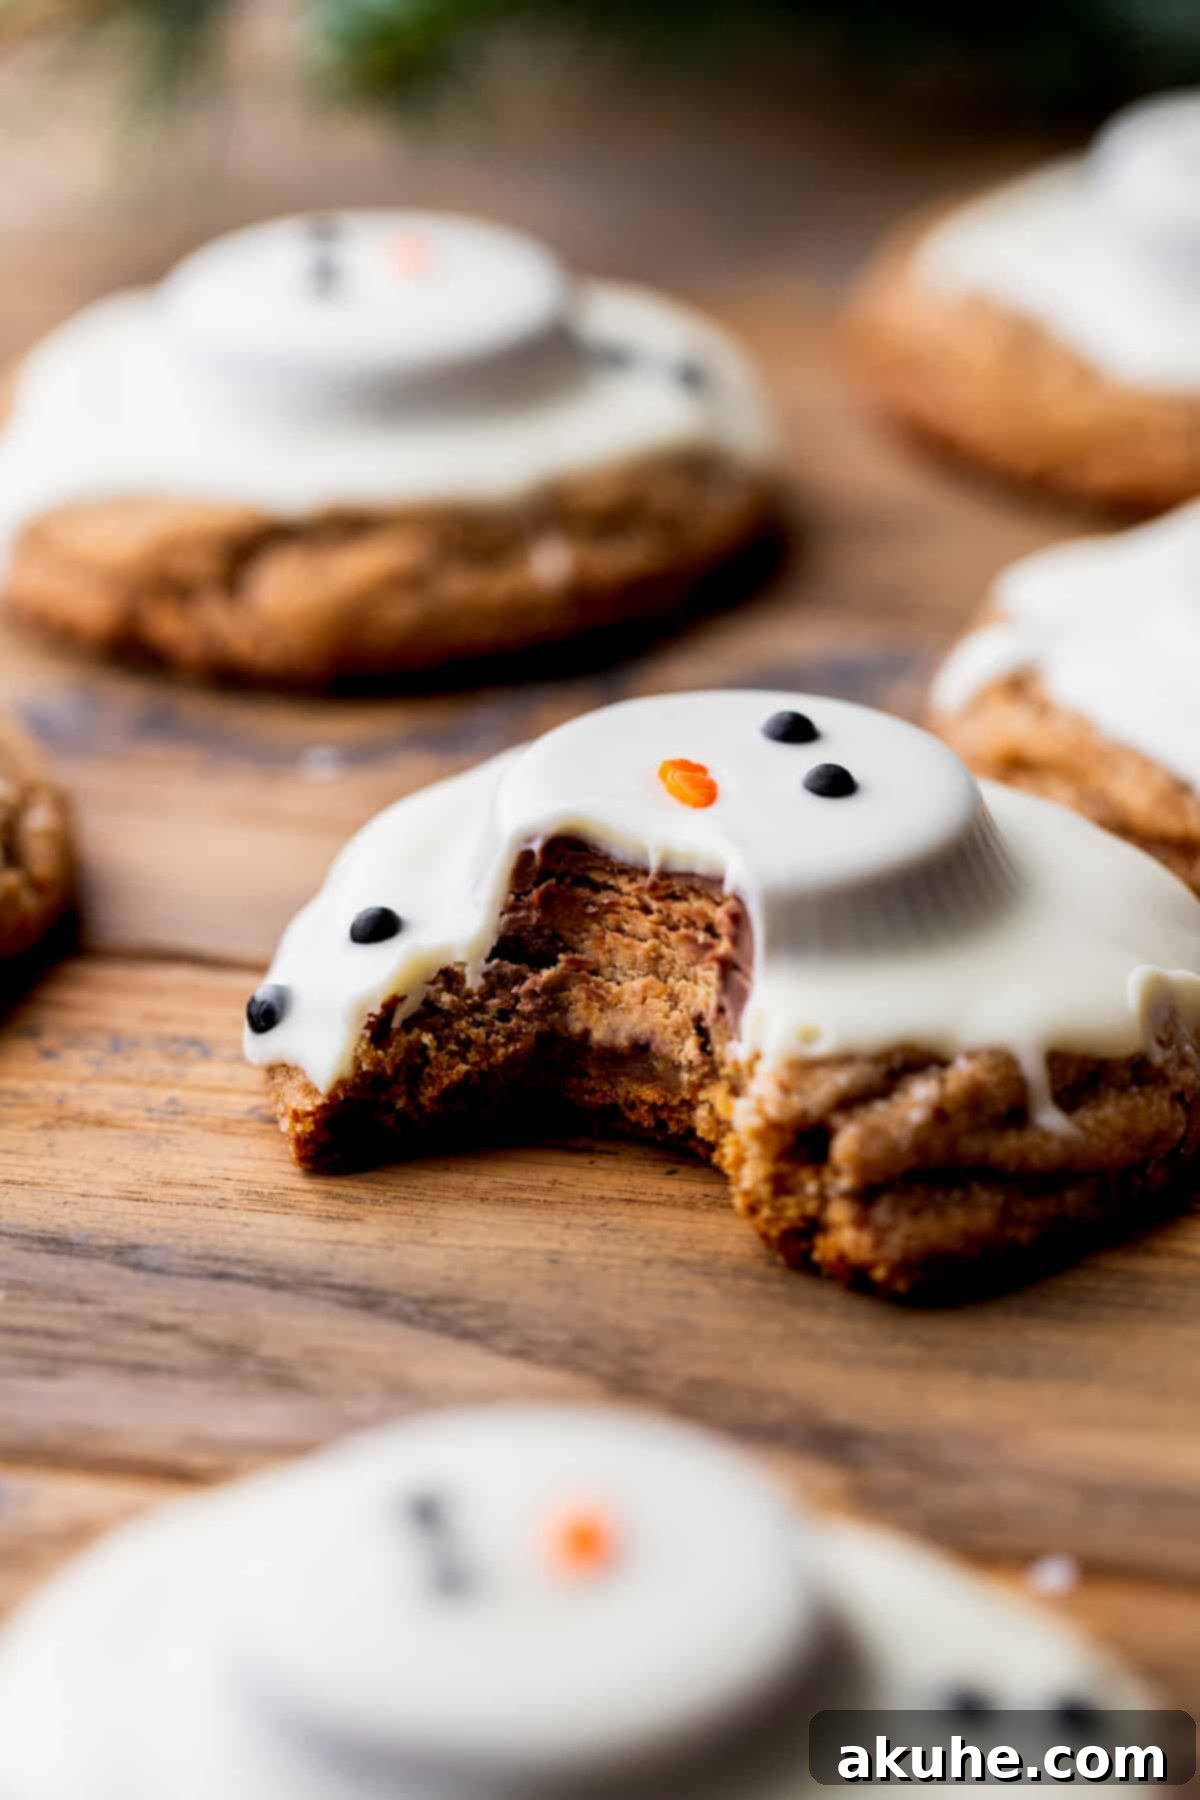
- Reese’s Peanut Butter Cups: The classic regular-sized Reese’s Peanut Butter Cups are ideal for this recipe, forming the perfect “head” for your melting snowman. If you choose another brand, ensure their size is comparable to maintain the correct proportions on your cookies.
- White Chocolate: For the smoothest, most luxurious “melted snow” topping, always use high-quality white chocolate bars, not chips. Chocolate chips contain stabilizers that prevent them from melting as fluidly as bars, often resulting in a thicker, grainy texture. We highly recommend Lindt white chocolate bars for their superior melting properties and creamy finish.
- Sprinkles: To create the snowman’s adorable face, a dedicated snowman sprinkle pack is fantastic for convenience. Alternatively, you can easily use small black round sprinkles for the eyes and orange jimmies or small candy pearls for the charming carrot nose, providing flexibility if a specific pack isn’t available.
Ingredient Substitutions and Dietary Considerations
We believe everyone should enjoy these festive treats! Here are a few common substitutions:
- Dairy-Free Option: This recipe is wonderfully adaptable for those with dairy sensitivities. Feel free to substitute your favorite plant-based butter and dairy-free white chocolate bars. The overall flavor and texture should remain delightful.
- Gluten-Free Exploration: While this recipe has not been formally tested with gluten-free flours, many readers have success using a 1:1 gluten-free baking blend (one that contains xanthan gum). Please note that results may vary in terms of texture and spread. If you experiment with a gluten-free alternative, we’d love to hear about your experience!
Step-by-Step Instructions: Crafting Your Melted Snowman Cookies
Creating these charming cookies is a straightforward process that doesn’t require any fancy equipment like an electric mixer. Follow these simple steps for perfectly spiced gingerbread snowmen.
STEP 1: Prepare Your Dry Ingredients. In a medium-sized mixing bowl, thoroughly sift together the all-purpose flour, baking soda, baking powder, salt, ground cinnamon, ground ginger, and ground nutmeg. Sifting ensures all ingredients are evenly distributed and helps to create a light, airy cookie texture. Set this mixture aside.
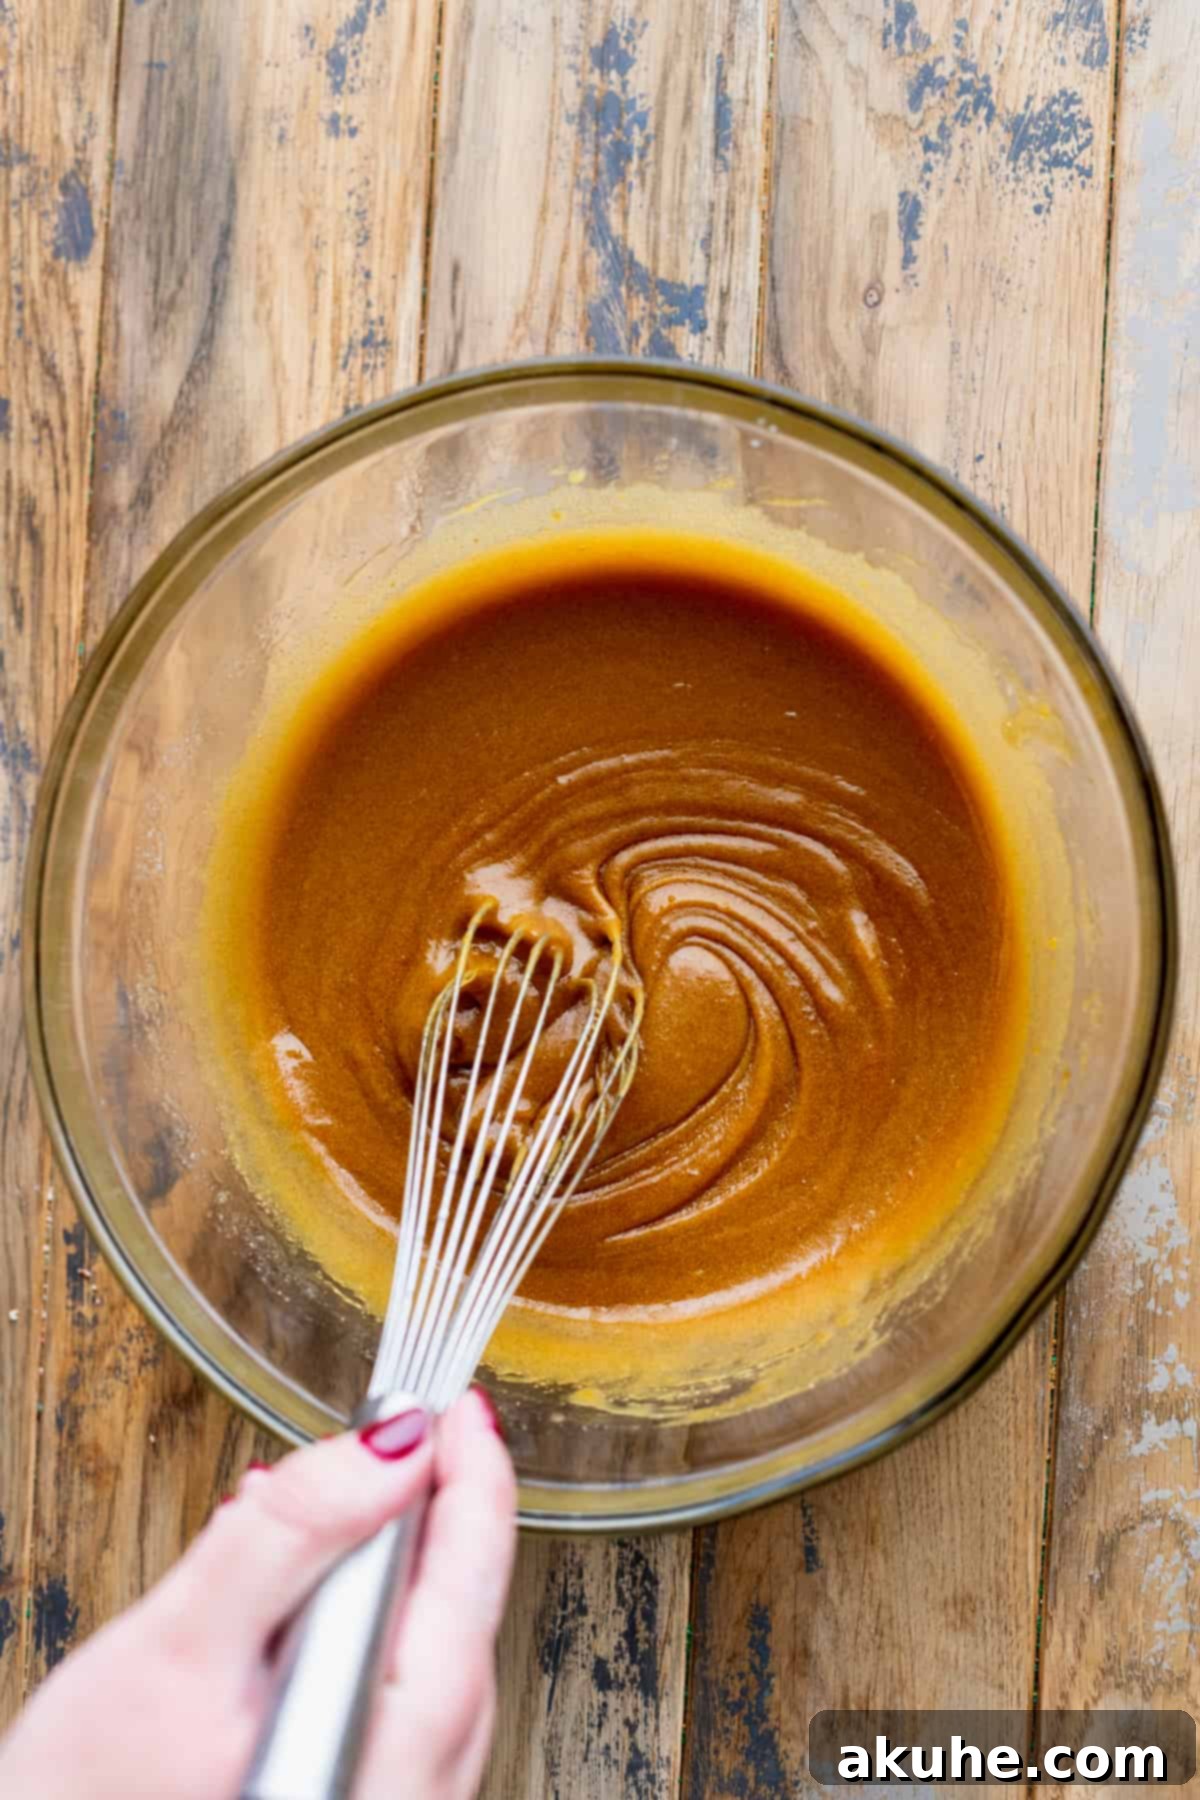
STEP 2: Combine Wet Ingredients. In a separate, larger bowl, whisk together the cooled melted butter, both brown sugar and granulated sugar, vanilla extract, the room temperature egg, egg yolk, and molasses. Continue to whisk until the mixture is completely smooth and all ingredients are well combined. The mixture should have a uniform color and consistency.
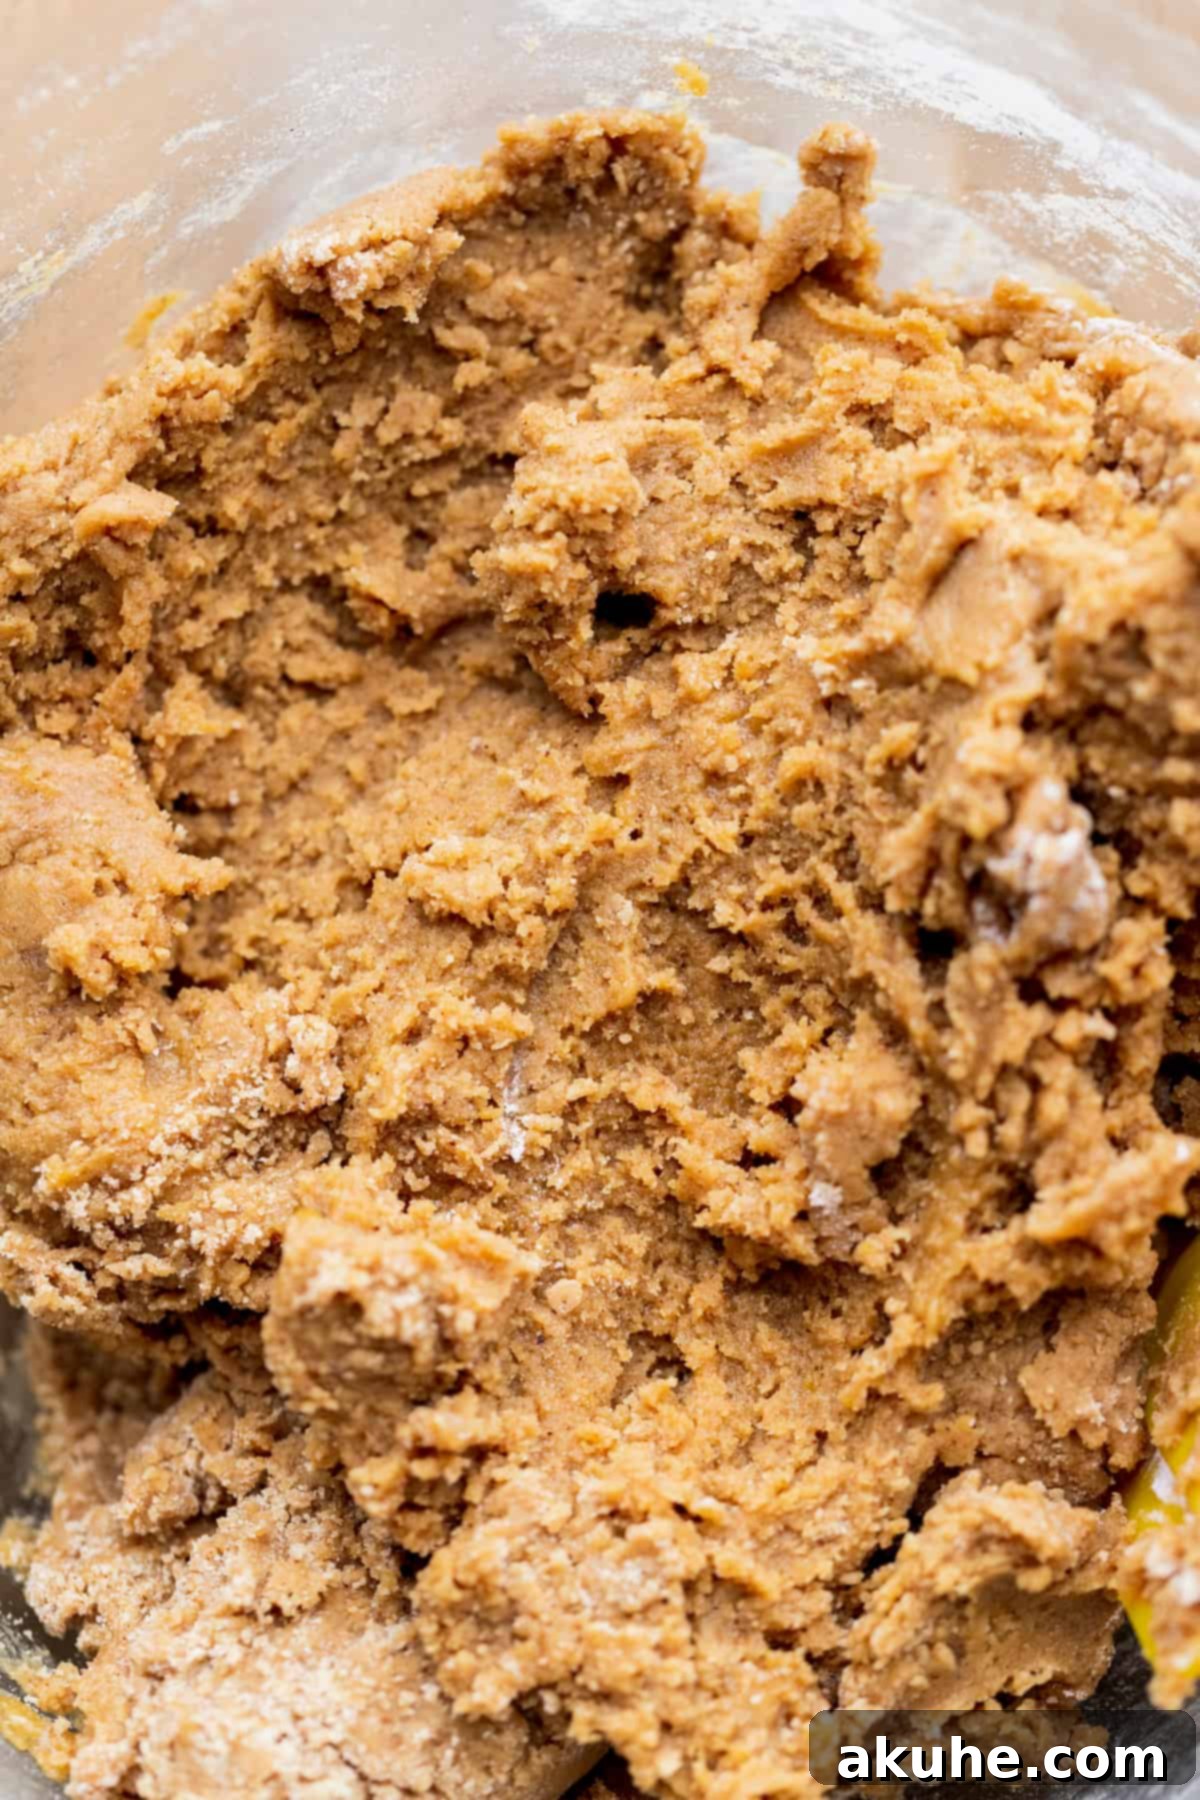
STEP 3: Bring It All Together. Gradually add the dry ingredient mixture to the wet ingredients. Using a rubber spatula, gently fold the ingredients together until they are *just* combined. Avoid overmixing, as this can develop the gluten in the flour and lead to tough cookies. The dough should be soft and pliable.
While the dough rests briefly, preheat your oven to 350°F (175°C). Line two large baking sheets with parchment paper; this prevents sticking and ensures even baking. A short rest for the dough can help the flavors meld and the gluten relax slightly.
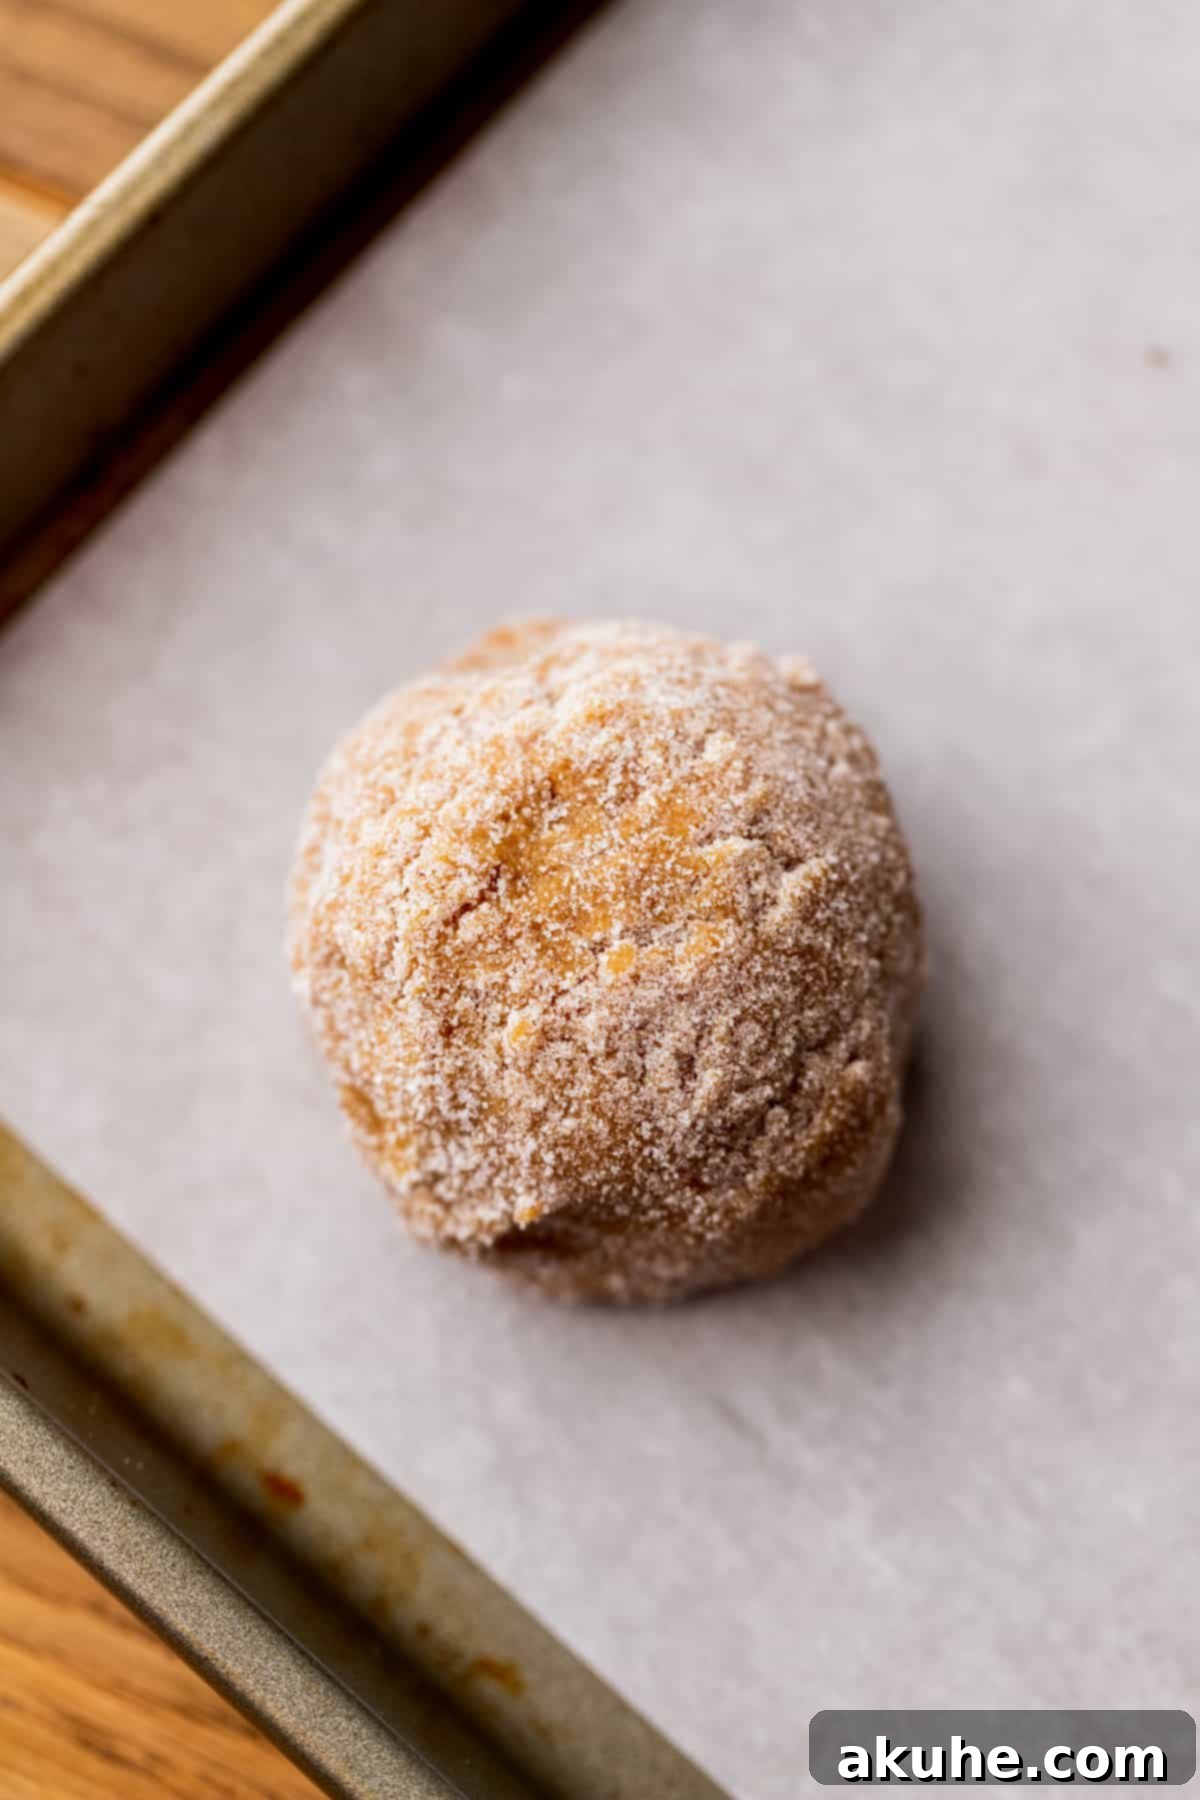
STEP 4: Bake Your Gingerbread Bases. Using a 3-tablespoon large cookie scoop, portion out the dough. For perfectly round cookies, gently roll each scoop into a smooth ball. Place six cookie dough balls onto each prepared baking sheet, ensuring adequate space between them for spreading. Bake for 13-15 minutes, or until the edges appear lightly golden brown and the centers are set but still soft.
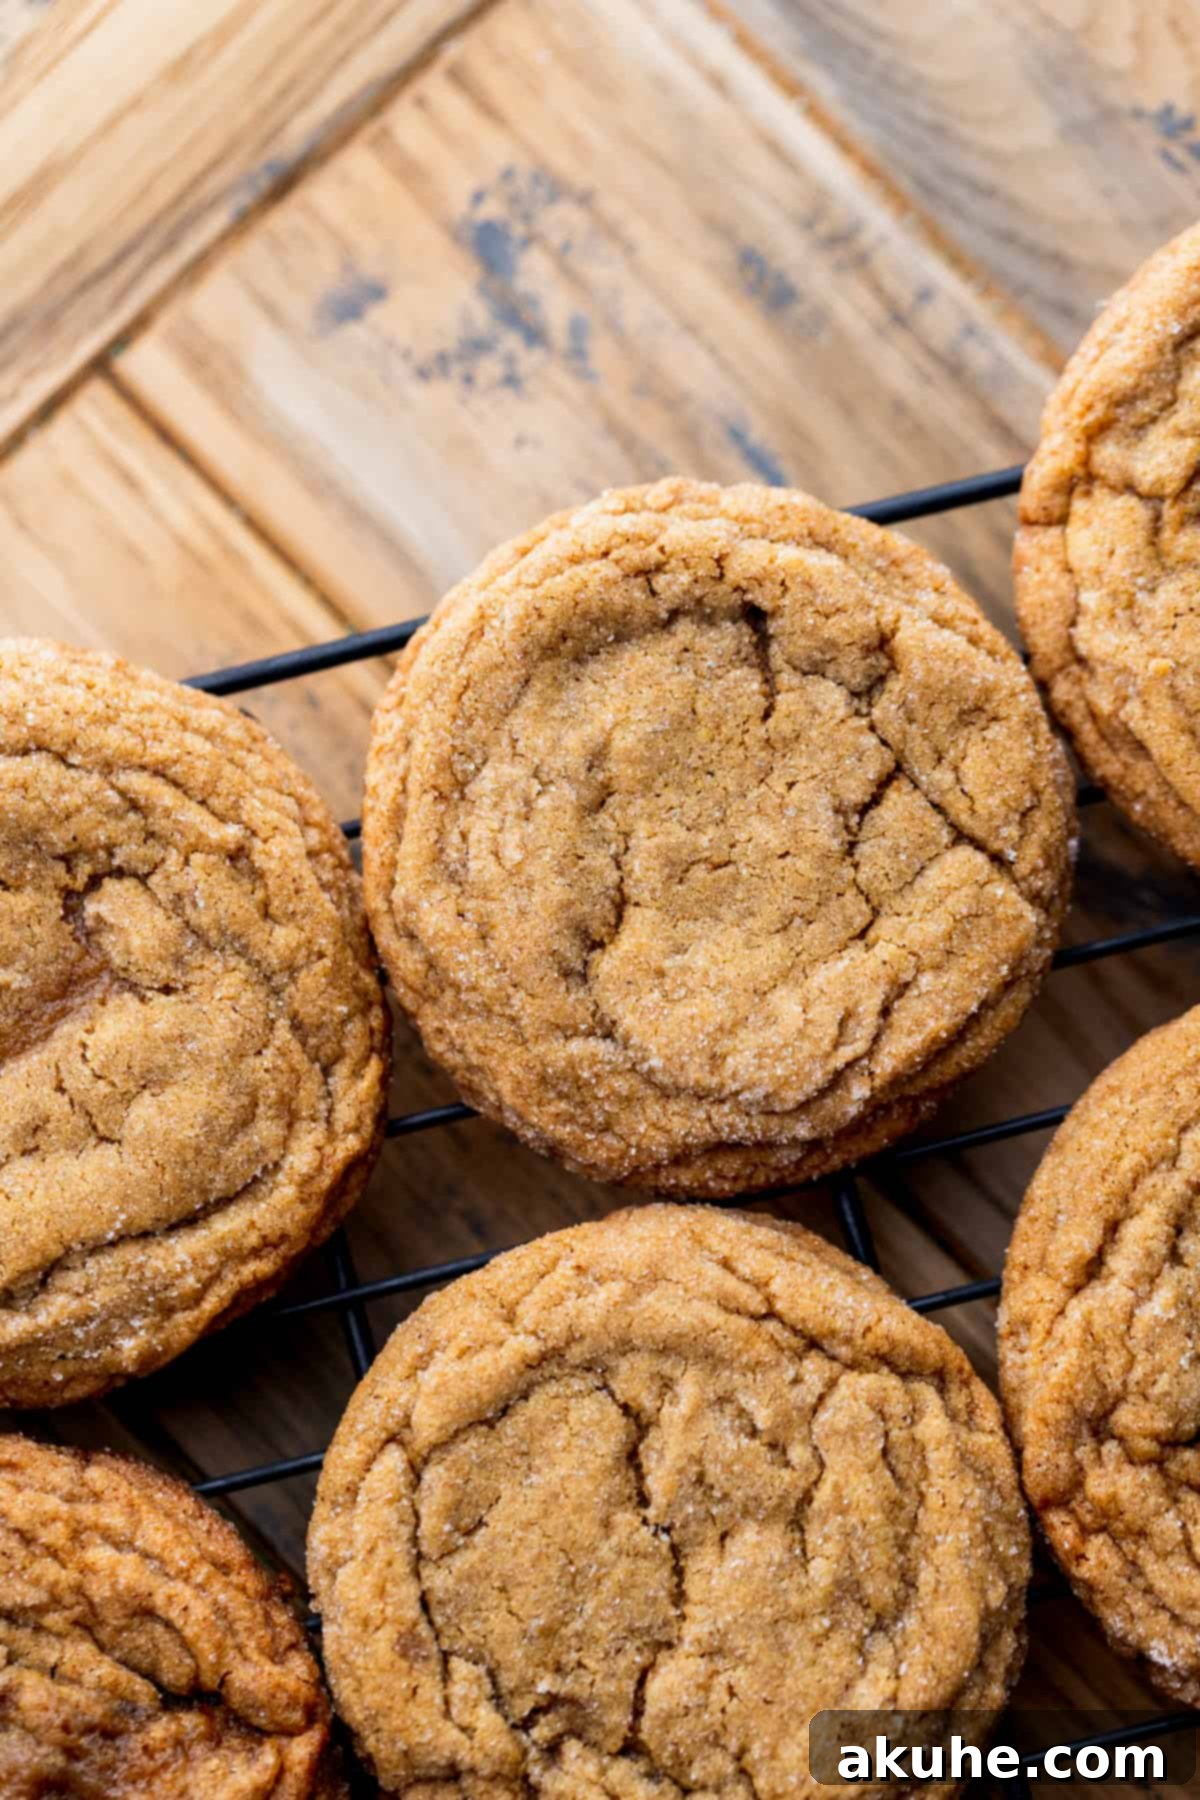
STEP 5: Cool Cookies Completely. Once baked, remove the cookie sheets from the oven and allow the cookies to rest on the trays for 5 minutes. This crucial step allows them to firm up slightly before being moved. After 5 minutes, carefully transfer the warm cookies to a wire rack to cool down completely. Decorating warm cookies will cause the white chocolate to melt prematurely and spread too thin.
STEP 6: Melt the White Chocolate. Break your white chocolate bars into smaller pieces and place them in a microwave-safe bowl. Heat for 30 seconds, then remove and stir thoroughly. Continue heating in 15-second intervals, stirring after each, until the chocolate is completely smooth and melted with no lumps. Be careful not to overheat, which can cause it to seize.
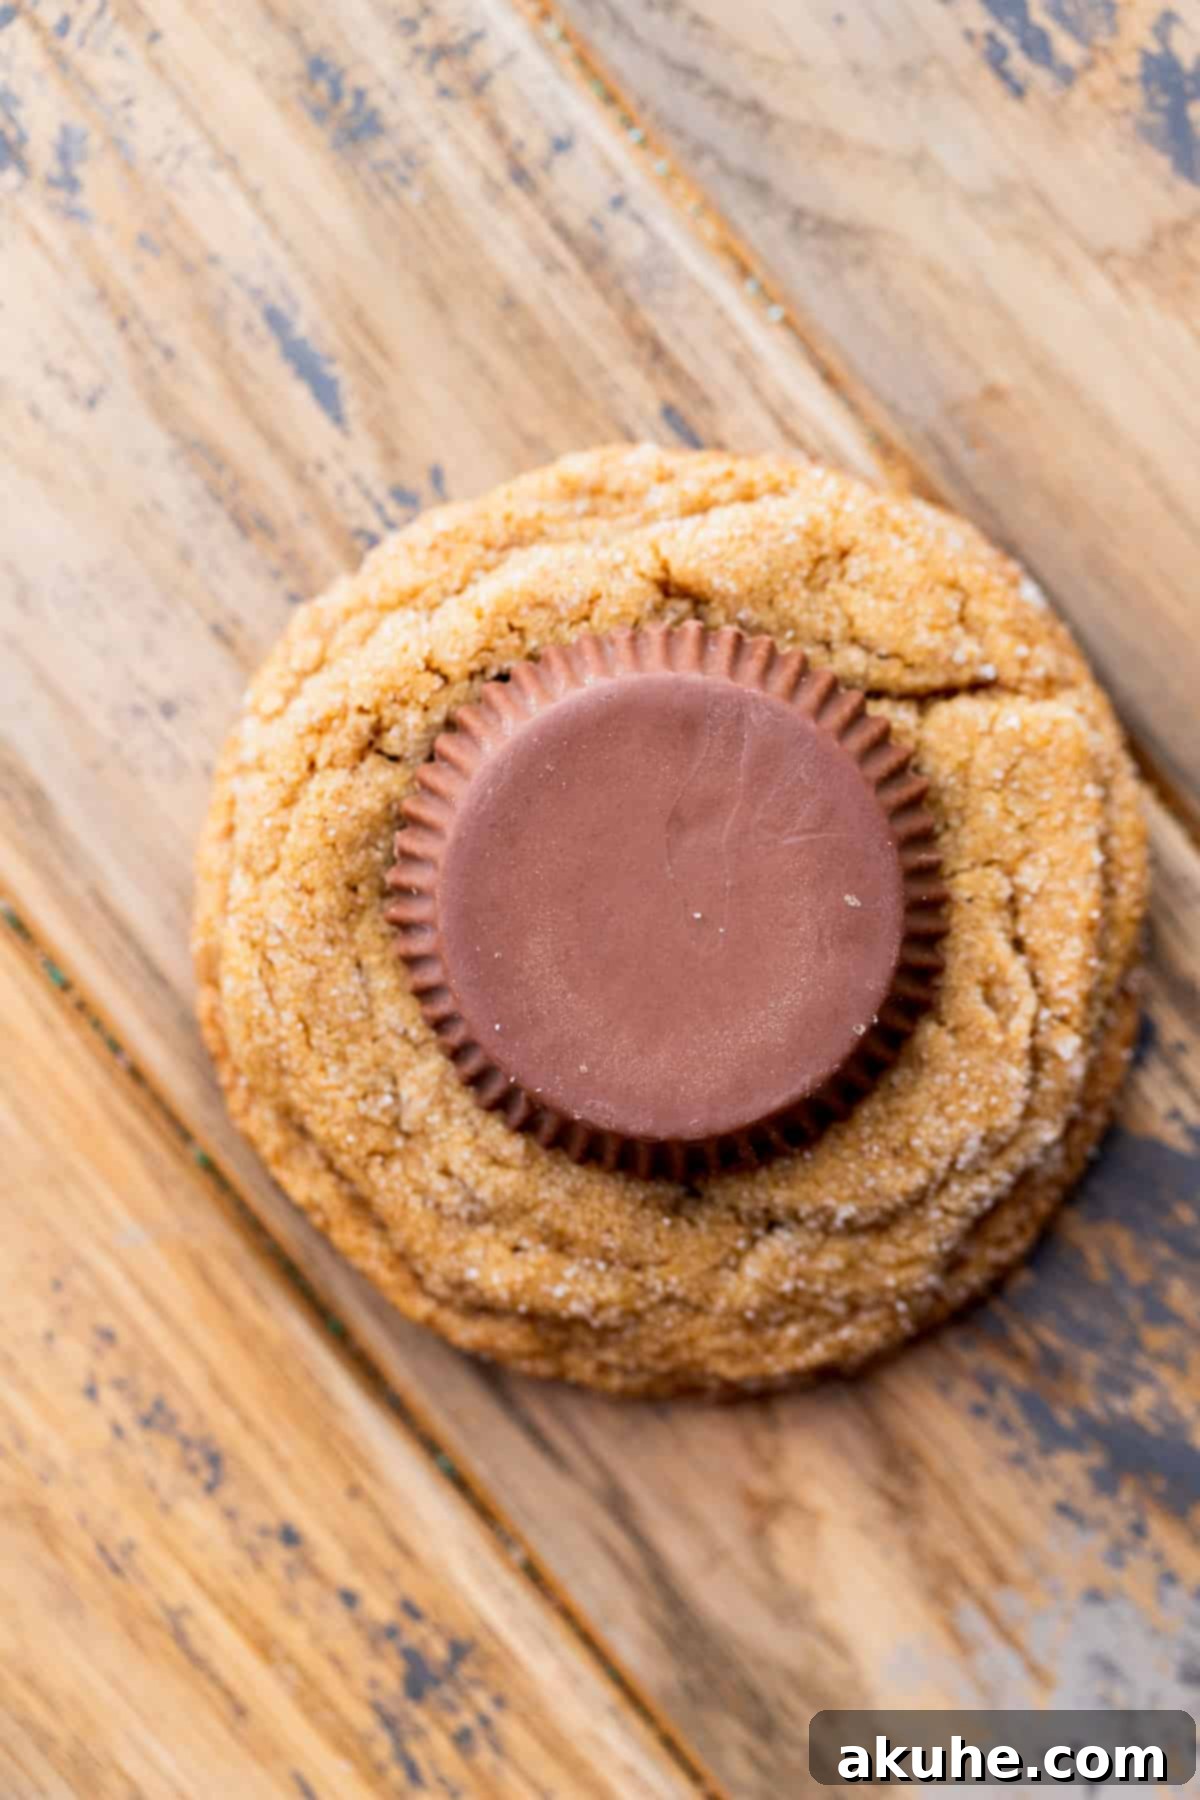
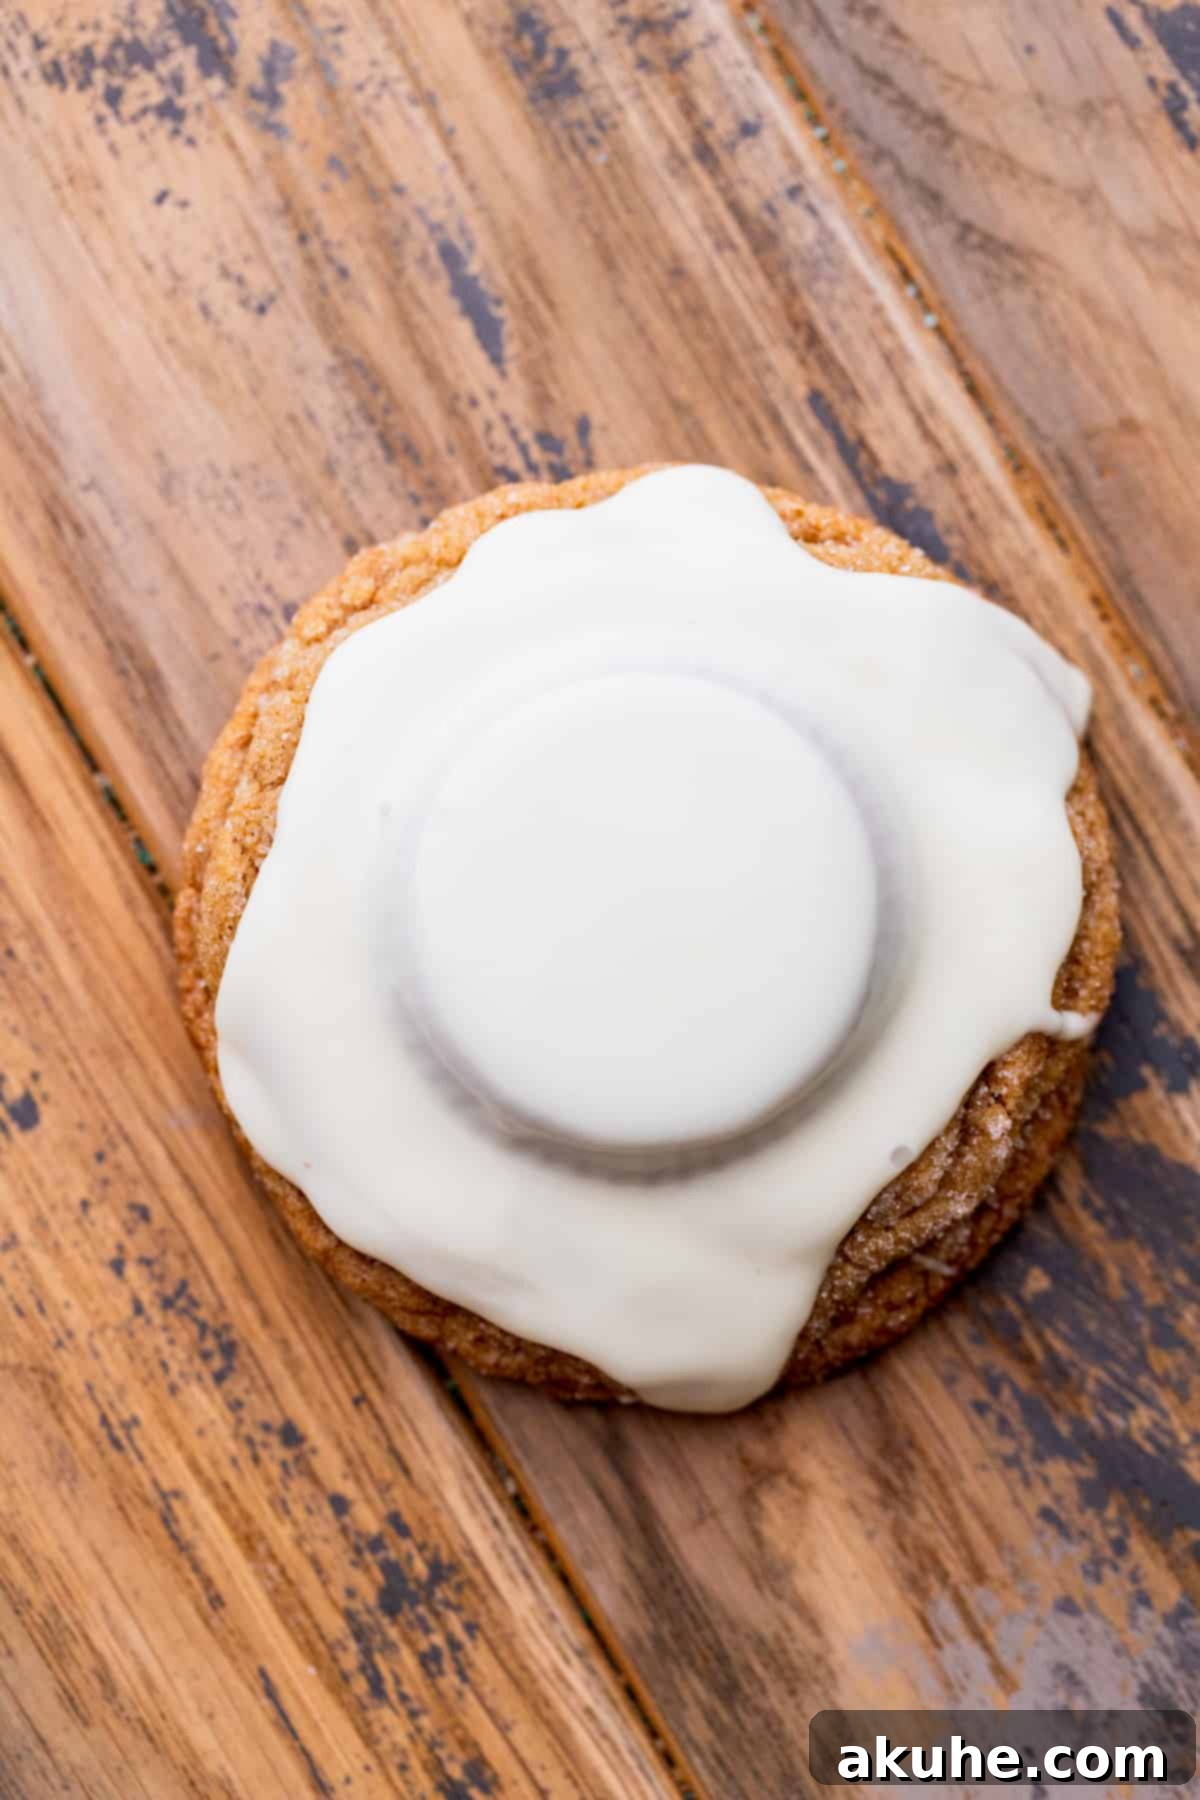
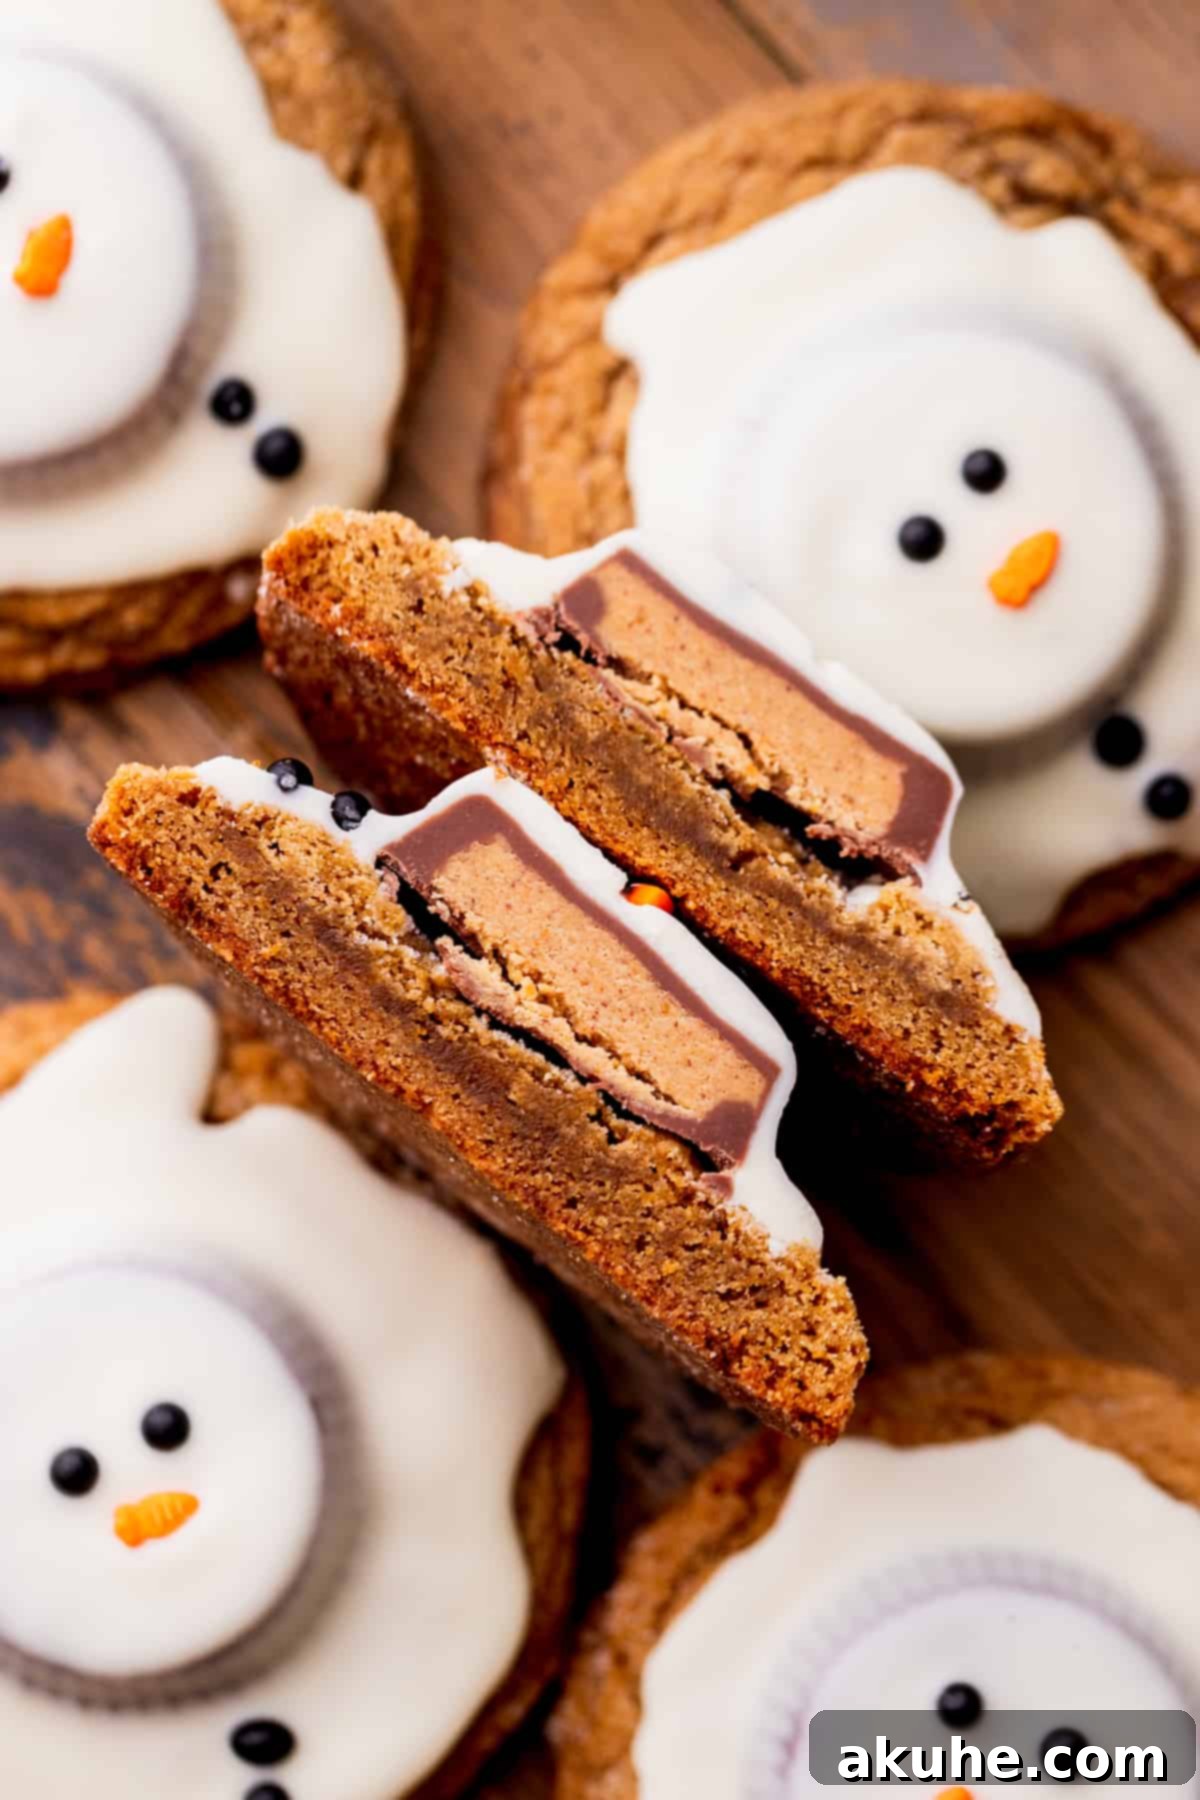
STEP 7: Assemble the Melting Snowmen. Once the cookies are fully cooled, gently place one peanut butter cup face down on the center of each gingerbread cookie. Now, carefully pour approximately 1 tablespoon of the melted white chocolate over the top of each peanut butter cup. For that perfect “melted snow” effect, gently shake the cookie from side to side. This will encourage the white chocolate to flow down the sides of the peanut butter cup and spread slightly onto the cookie, creating the illusion of a melted snowman.
STEP 8: Decorate Your Snowmen. While the white chocolate is still wet, carefully place two small black sprinkles for the snowman’s eyes and one orange sprinkle (or a small piece of orange candy) for the carrot nose onto the white chocolate-covered peanut butter cup. Allow the white chocolate to set slightly before serving or handling to prevent the decorations from shifting. For faster setting, you can place the decorated cookies in the refrigerator for about 10-15 minutes.
Expert Baking Tips for Flawless Snowman Cookies
Achieve professional-level results with these tried-and-true baking tips, ensuring your Melted Snowman Cookies turn out perfectly every time.
- Mastering Flour Measurement: Accurate flour measurement is paramount for cookie success. Always spoon your flour into the measuring cup and then level it off with the back of a knife. Never scoop directly from the bag with your measuring cup, as this compacts the flour, adding too much to the recipe. Excess flour can result in dry, dense cookies that don’t spread properly during baking. For ultimate precision, a kitchen scale is always recommended.
- Controlling Cookie Spread: If you notice your cookies spreading more than desired, first ensure you are always using parchment paper on your baking sheets; this helps with even heat distribution and prevents sticking. Over-spreading can often be attributed to butter that was too warm when mixed with the other ingredients, or an oven that isn’t at the correct temperature. If spreading remains an issue, try chilling your portioned cookie dough balls on the baking sheet for 10-15 minutes before baking. This solidifies the butter, allowing them to hold their shape better.
- High-Altitude Adjustments: Baking at high altitudes can significantly affect recipes due to lower atmospheric pressure. If you live in a high-altitude area, we recommend adding an extra 2 tablespoons of all-purpose flour to your dough. This small adjustment helps to stabilize the cookie structure and prevent excessive spreading, ensuring your snowmen maintain their charming form.
- Room Temperature Ingredients: Always ensure dairy ingredients like butter and eggs are at room temperature unless otherwise specified. Room temperature ingredients emulsify better, creating a smoother batter and a more uniform cookie texture. Plan ahead and take them out of the fridge at least 1-2 hours before baking.

Frequently Asked Questions (FAQ) About Snowman Cookies
Have questions? We’ve got answers to help you perfect your melted snowman cookies.
While you certainly can adjust the size, be aware that smaller cookies may not accommodate the standard peanut butter cup in the same way, potentially altering the “melted” look. If you opt for smaller cookies, use a small cookie scoop (about 1.5-2 tablespoons) to portion out approximately 12 cookie dough balls per baking sheet. Adjust baking time to 8-11 minutes, watching closely for lightly golden edges.
Absolutely! Freezing the cookie dough is an excellent way to prepare ahead for last-minute baking. Simply scoop and roll the cookie dough balls as instructed, then place them on a parchment-lined tray and freeze until solid. Once frozen, transfer them to an airtight container or a freezer-safe bag. They can be stored in the freezer for up to 30 days. Remember to let the frozen cookie dough balls thaw at room temperature for about 30-60 minutes before baking according to the recipe instructions.
Yes, chilling the dough overnight can actually enhance the gingerbread flavors! For best results, we recommend portioning the dough into balls before chilling. Wrap the cookie dough balls tightly in plastic wrap or place them in an airtight container to prevent them from drying out. Ensure they come back to room temperature (this might take 1-2 hours) before baking to ensure proper spreading and texture.
No problem! You can use a standard tablespoon to measure out the dough. For this recipe, aim for about three packed tablespoons per cookie. Roll the measured dough into a ball with your hands. While a scoop ensures uniformity, consistent hand-rolling will yield similar results.
Yes, for a variation, you can definitely use melted milk chocolate or dark chocolate instead of white chocolate. This will give your “melted snowmen” a different aesthetic and flavor profile, perhaps more resembling a “mud puddle” snowman or simply a chocolate-covered gingerbread cookie. The decorating steps remain the same.
Creative Recipe Variations to Explore
Unleash your inner chef and customize these charming snowman cookies with these exciting variations:
- Simpler Flat Cookies: If you prefer a flatter, less dimensional cookie or want to skip the peanut butter cup, simply omit it. Pour the melted white chocolate directly over the baked gingerbread cookie and decorate as desired. This creates a beautifully classic gingerbread cookie with a white chocolate topping.
- Colored Chocolate Decorations: Instead of using sprinkles for the eyes and nose, get creative with colored melted chocolate! You can melt small amounts of dark chocolate for eyes and orange candy melts for the carrot nose. Use a toothpick or a fine piping bag to draw on the features for a more artistic touch.
- Different Cookie Bases: While gingerbread is traditional, consider experimenting with other cookie bases. A sugar cookie or even a spiced shortbread cookie could provide a delicious alternative foundation for your melted snowmen.
- Mini Snowmen: For bite-sized treats, use mini peanut butter cups and a smaller cookie scoop. Adjust baking times accordingly (likely 8-10 minutes). These are perfect for platters or party favors.
Special Tools for Effortless Holiday Baking
While not strictly essential, these tools can significantly enhance your baking experience and help achieve perfect results with minimal fuss.
- Parchment Paper: A baker’s best friend! We highly recommend using premade sheets of parchment paper rather than struggling with rolls. They lay flat, fit standard baking sheets perfectly, and make cleanup a breeze while preventing cookies from sticking and promoting even browning.
- Large Cookie Scoop: For consistent cookie size and shape, a reliable cookie scoop is indispensable. This OXO cookie scoop is a favorite for its comfortable grip and smooth release mechanism, ensuring every cookie is uniformly portioned and bakes evenly.
- Wire Cooling Rack: Essential for preventing soggy bottoms, a wire cooling rack allows air to circulate around your cookies, ensuring they cool completely and crisp up properly.
- Microwave-Safe Bowl: For melting chocolate efficiently and without scorching, a good quality microwave-safe bowl is a must-have.
Storing and Freezing Your Snowman Cookies
Ensure your delightful Melted Snowman Cookies stay fresh and delicious for as long as possible with these storage tips.
Store the decorated snowman cookies at room temperature in an airtight container for up to 5 days. Layer them with parchment paper between each layer to prevent sticking and preserve their delicate decorations.
Freezing Baked Snowman Cookies
For longer storage, these cookies freeze beautifully! Once completely cooled and the white chocolate has fully set, place the cookies in a single layer on a baking sheet and freeze until solid (about 1-2 hours). Then, transfer the frozen cookies to an airtight container or a freezer-safe bag, separating layers with parchment paper. They can be frozen for up to 30 days. To enjoy, simply thaw them at room temperature for 1-2 hours before serving. The texture and flavor will remain wonderful, making them perfect for future holiday treats.
More Festive Christmas Cookie Recipes To Try
Looking for more holiday baking inspiration? Explore these other fantastic Christmas cookie recipes to add to your festive repertoire.
Indulge in These Peanut Butter Cup Recipes
If you’re a fan of peanut butter cups, you’ll adore these other recipes that feature the beloved candy:
- Reese’s Cup Peanut Butter Cookies
- Reese’s Peanut Butter Cup Pie
- Reese’s Peanut Butter Chip Cookies
- Peanut Butter Chocolate Cupcakes
We love seeing your creations! If you enjoyed this recipe, please consider leaving a STAR REVIEW below. Don’t forget to tag us on Instagram @stephaniesweettreats so we can see your beautiful bakes! For more inspiring ideas and delicious recipes, be sure to follow us on Pinterest.
Overall Rating: 5 out of 5 stars (Based on 5 reviews)
Snowman Cookies
By Stephanie Rutherford
These snowman cookies are a gingerbread Christmas cookie, topped with a peanut butter cup, melted white chocolate and snowman sprinkles. They look like melted snowmen!
Print Recipe |
Pin Recipe |
Leave a Review
Prep Time: 1 hr | Cook Time: 13 mins | Total Time: 1 hr 13 mins
Servings: 16 Large cookies
Ingredients
- 2 3/4 cups All-purpose flour
- 1/2 tsp Baking soda
- 1/2 tsp Baking powder
- 1 tsp Salt
- 2 tsp Ground cinnamon
- 1 tsp Ground ginger
- 1/4 tsp Ground nutmeg
- 1 cup Unsalted butter, melted and cooled
- 1 cup Brown sugar, packed light or dark
- 1/2 cup White granulated sugar
- 1 tsp Pure vanilla extract
- 1 Large egg, room temperature
- 1 Egg yolk, room temperature
- 1/4 cup Molasses (use Grandma’s molasses, not blackstrap)
- White granulated sugar, for rolling the cookie dough
- 16 Reese’s peanut butter cups, regular size
- 8 oz White chocolate bars, melted (Lindt white chocolate bars recommended)
- Snowman sprinkle pack (or small black round sprinkles for eyes, orange jimmies for noses)
Instructions
- In a medium bowl, sift together the all-purpose flour, baking soda, baking powder, salt, cinnamon, ginger, and nutmeg. Set aside.
- In a large bowl, mix the melted butter (ensuring it’s cooled to room temperature), brown sugar, granulated sugar, vanilla, egg, egg yolk, and molasses. Whisk until smooth and thoroughly combined.
- Add the dry ingredients to the wet ingredients and use a rubber spatula to mix until just combined. Avoid overmixing.
- Preheat the oven to 350°F (175°C). Line 2 cookie sheets with parchment paper. Let the cookie dough rest while the oven preheats; this helps prevent excessive spreading.
- Using a large cookie scoop (3 TBSP), scoop out cookie dough. Roll the dough balls in white granulated sugar. Place 6 cookie dough balls per cookie sheet, ensuring adequate space between them.
- Bake for 13-15 minutes, or until the edges are lightly golden brown.
- Allow the cookies to sit on the baking tray for 5 minutes after removing them from the oven. Then, transfer them to a wire rack to cool completely before decorating.
- Place the white chocolate bars, broken into pieces, into a microwave-safe bowl. Heat in the microwave for 30 seconds, then stir. Continue heating in 15-second intervals, stirring after each, until the white chocolate is fully melted and smooth.
- Place a Reese’s peanut butter cup upside down in the center of each cooled cookie. Pour 1 tablespoon of melted white chocolate over each peanut butter cup. Gently shake the cookie to help the melted chocolate spread down the peanut butter cup and onto the cookie, creating a melted snowman effect.
- While the white chocolate is still wet, top with sprinkle eyes and an orange carrot nose. Allow the white chocolate to set slightly before serving or storing.
Notes
Flour Measurement: Always spoon and level your flour, or use a kitchen scale for accuracy. Compacted flour can lead to dry cookies that don’t spread properly.
High Altitude Baking: For those baking at higher altitudes, add an extra 2 tablespoons of flour to the recipe to help with cookie spread and structure.
Room Temperature Ingredients: For optimal results, ensure all dairy ingredients, such as butter and eggs, are at room temperature before you begin baking. This usually requires taking them out of the refrigerator 2 hours prior.
Nutrition Facts (per cookie)
Calories: 277 kcal,
Carbohydrates: 40g,
Protein: 3g,
Fat: 12g,
Saturated Fat: 7g,
Polyunsaturated Fat: 1g,
Monounsaturated Fat: 3g,
Trans Fat: 0.5g,
Cholesterol: 43mg,
Sodium: 201mg,
Potassium: 126mg,
Fiber: 1g,
Sugar: 24g,
Vitamin A: 372 IU,
Vitamin C: 0.01mg,
Calcium: 41mg,
Iron: 1mg
Did you make this recipe? Please leave a star rating and review below!
