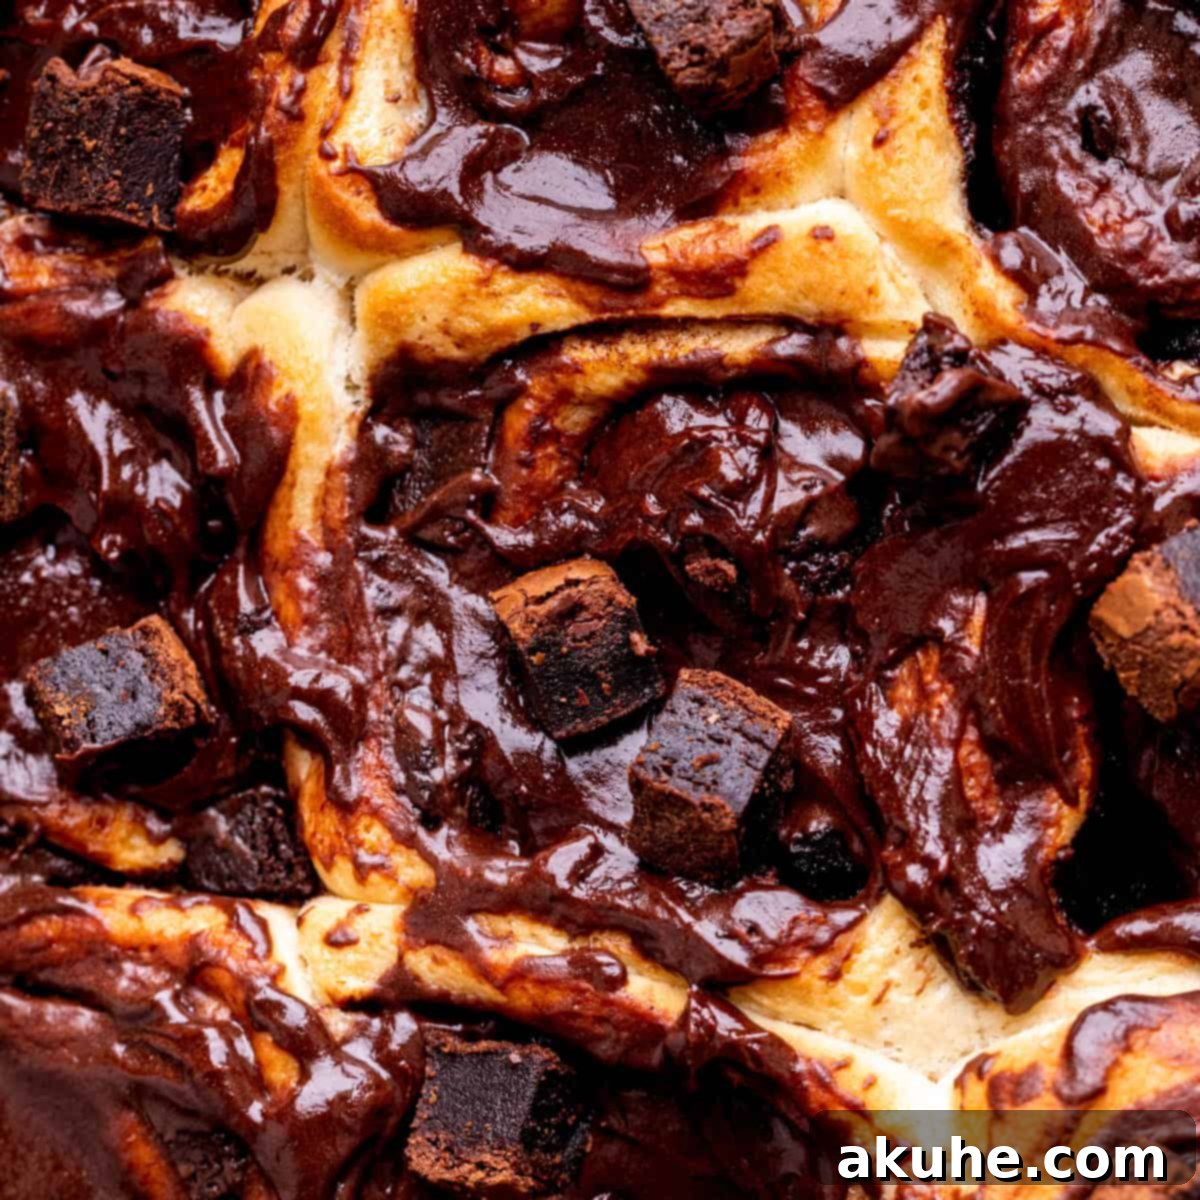
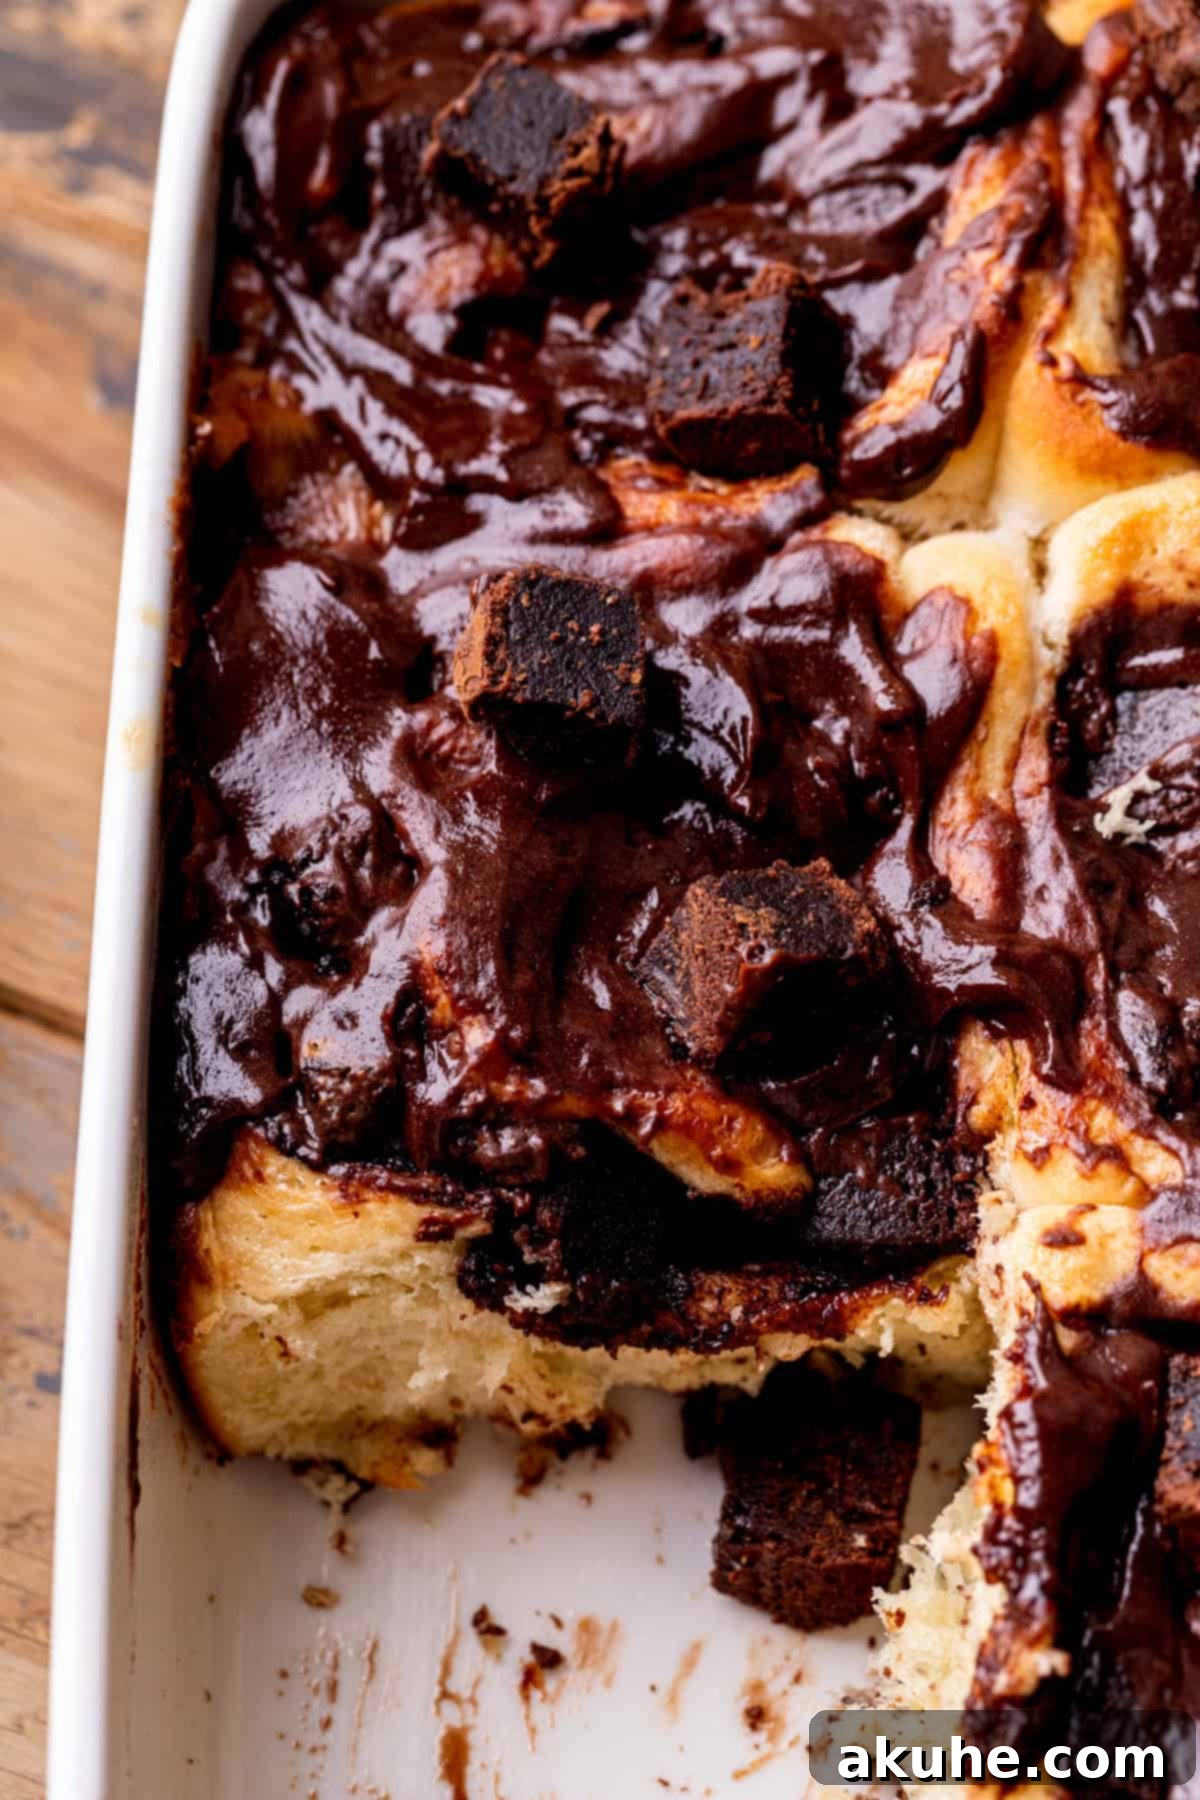
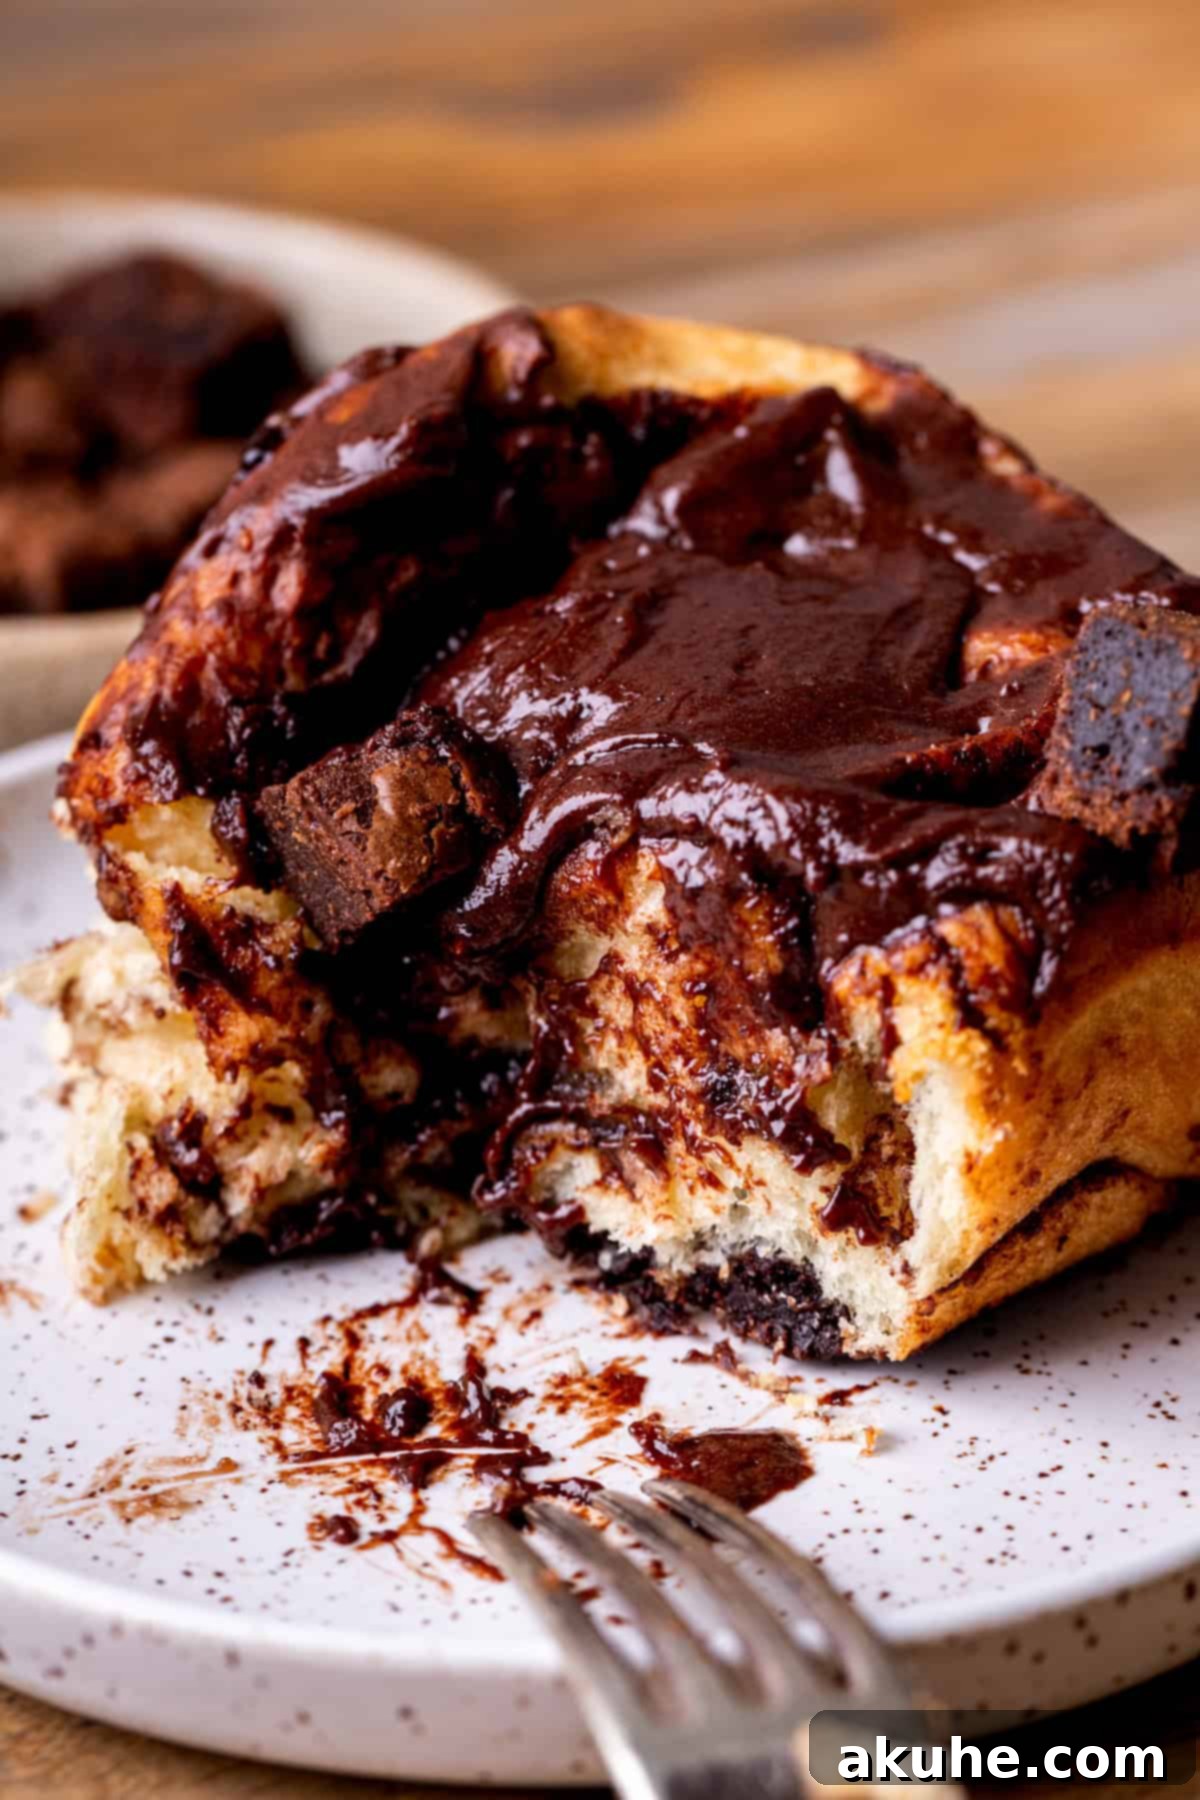
Indulge in the ultimate fusion of two beloved treats: classic cinnamon rolls and rich, fudgy brownies. These delightful Brownie Rolls are more than just a dessert; they’re an experience. Imagine soft, gooey cinnamon roll dough, generously swirled with a decadent chocolate butter filling, studded with delightful chunks of chopped brownies, and crowned with a luscious chocolate cream cheese icing. To top it all off, we scatter even more brownie pieces, ensuring every bite is a chocolate lover’s dream.
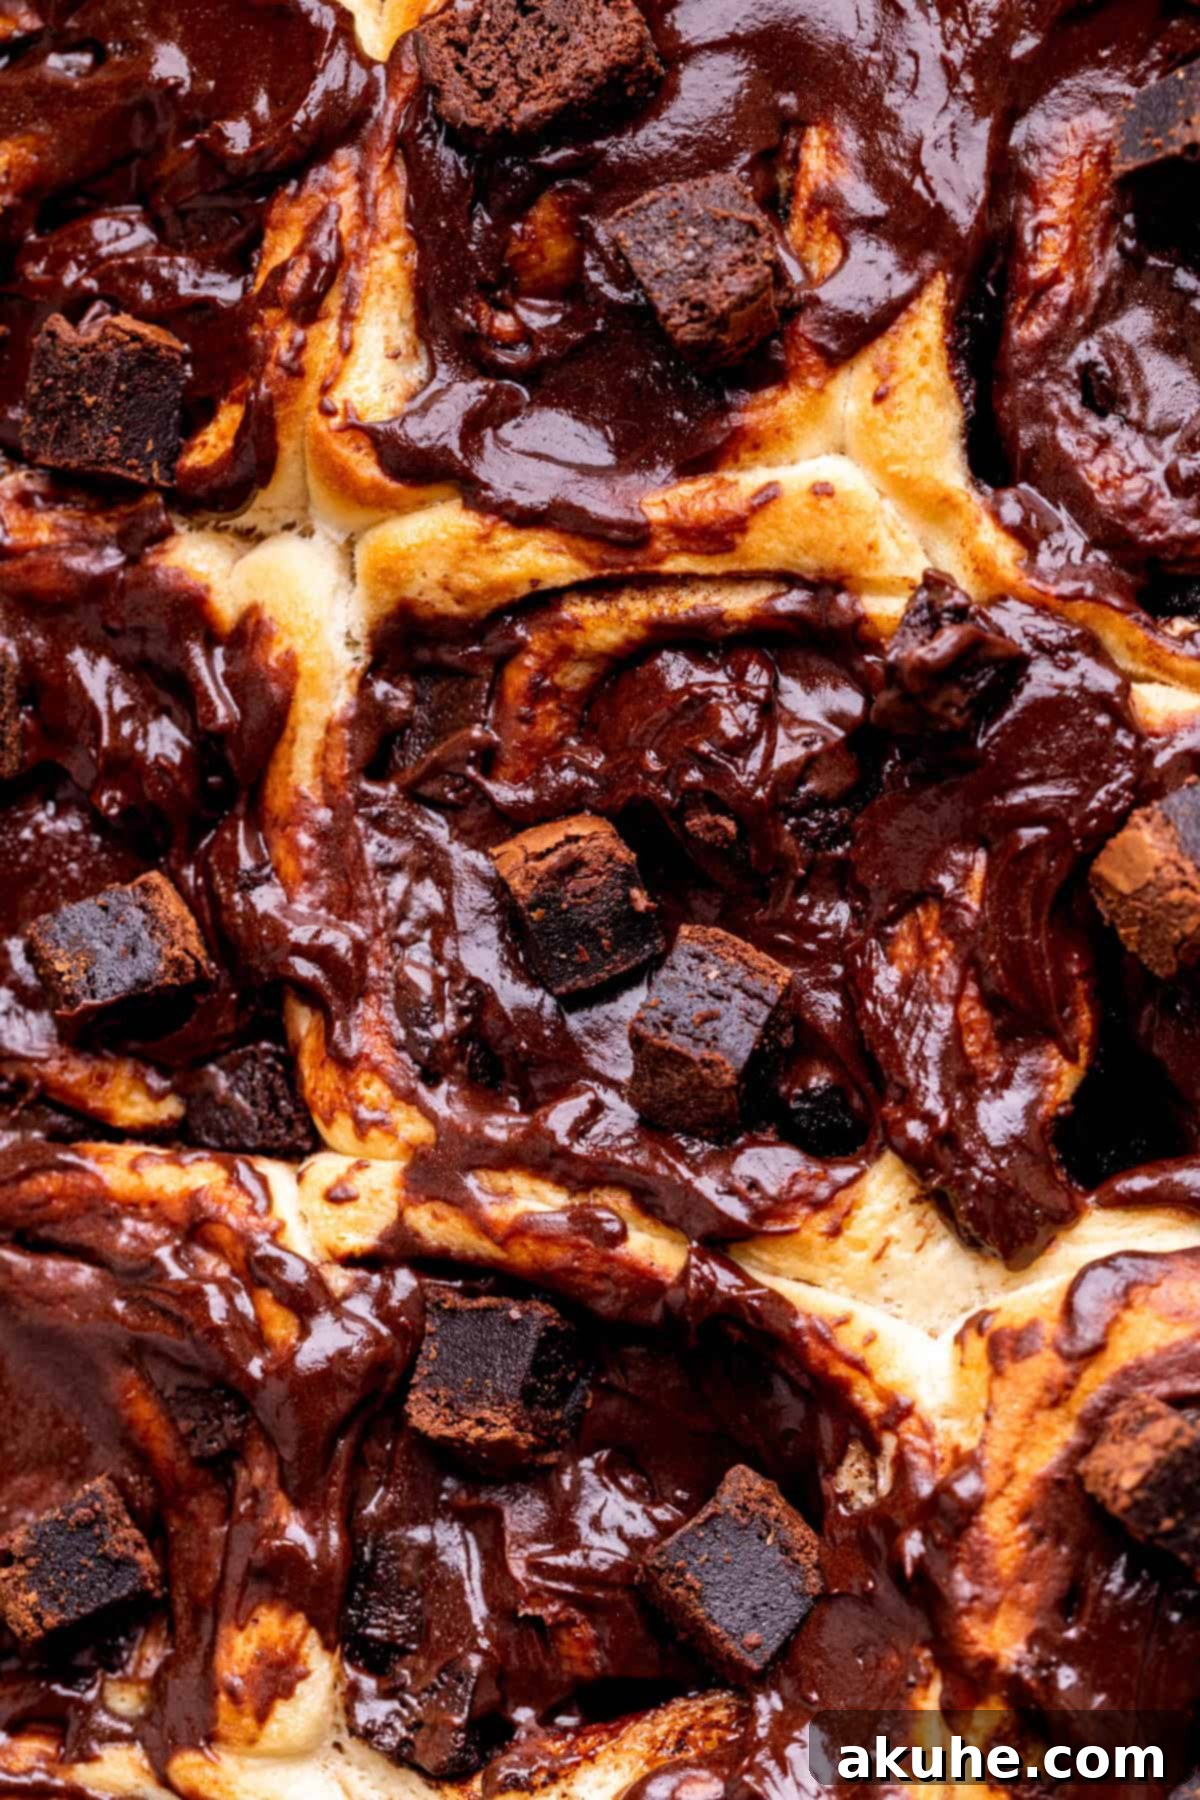
Perfect for a special breakfast, a lavish brunch dessert, or an evening treat, these homemade brownie rolls marry the comforting warmth of a cinnamon roll with the intense chocolatey goodness of a brownie. They’re a fantastic way to elevate your baking skills and impress guests, offering a unique twist on a familiar favorite. Serve them warm with a tall glass of cold milk or a scoop of vanilla ice cream for an unforgettable dessert experience.
If you adore brownies as much as we do, be sure to explore more delightful brownie-inspired recipes such as Brownie Cake, Brownie Crinkle Cookies, and our decadent Brownie Cheesecake.
Why This Fudgy Brownie Rolls Recipe Works Wonders
Creating these chocolate cinnamon brownie rolls is a journey of pure delight, resulting in a treat that consistently wows. Here’s why this recipe stands out:
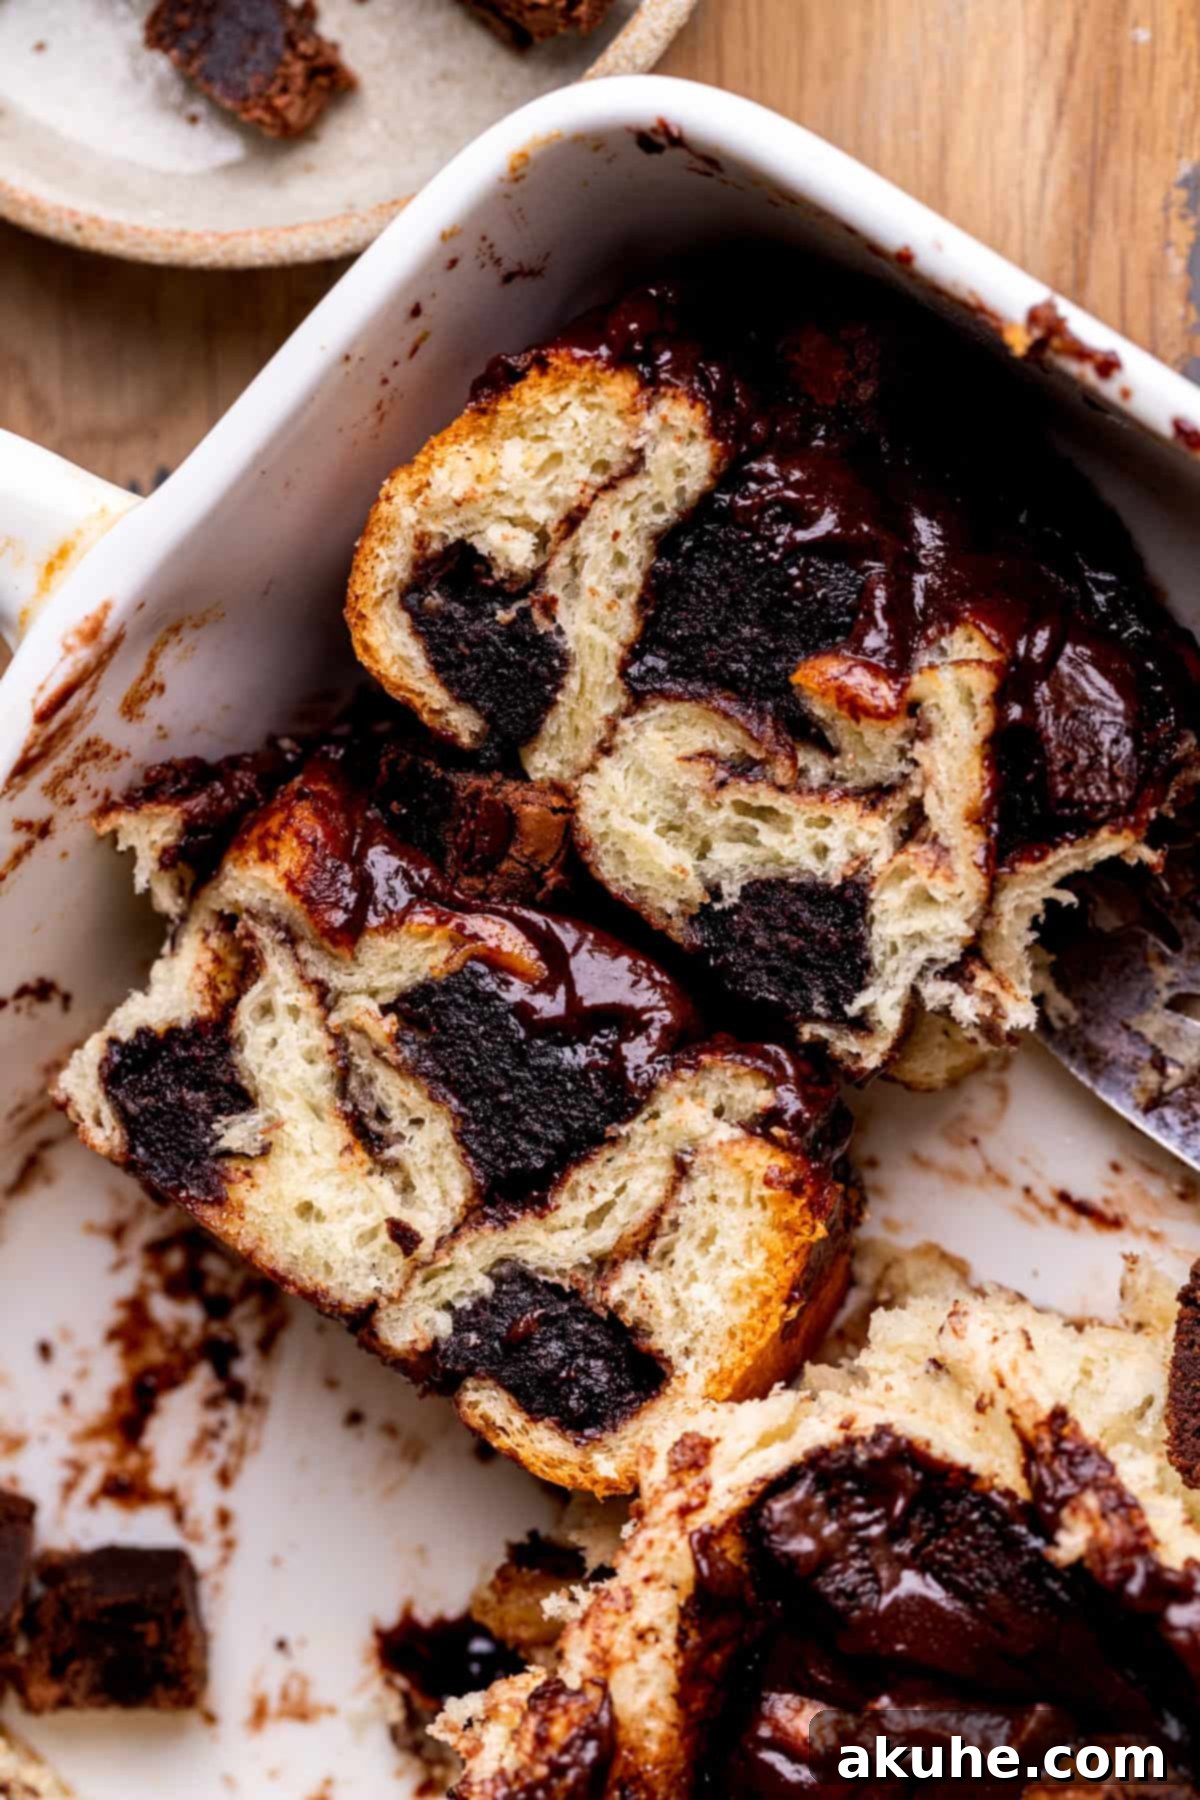
- Unrivaled Gooey Texture: Achieve the quintessential gooey texture synonymous with the best homemade cinnamon rolls. Our dough recipe is specifically crafted to yield an incredibly soft, tender crumb that melts in your mouth, providing the perfect contrast to the rich filling. This delicate balance ensures that each roll is moist and deeply satisfying, never dry or dense.
- Explosion of Brownie Flavor: These rolls aren’t just chocolate-flavored; they capture the deep, rich, fudgy essence that makes brownies so irresistible. The chocolate butter filling, combined with actual pieces of brownie swirled inside, delivers an authentic and intense brownie experience that chocolate lovers will crave. Every bite offers that familiar, comforting cocoa depth.
- Convenient Make-Ahead Option: Life is busy, but delicious homemade treats don’t have to be a last-minute scramble. This recipe is designed with flexibility in mind. You can prepare the dough a day in advance, allowing for a relaxed morning. Alternatively, partially bake the rolls the night before and finish them off fresh the next morning, making them ideal for holiday breakfasts or special weekend brunches without the stress.
- Irresistible Chocolate Cream Cheese Icing: What’s a roll without a glorious topping? Our chocolate cream cheese icing is the perfect complement, offering a tangy sweetness that cuts through the richness of the chocolate and adds another layer of creamy indulgence. It’s easy to whip up and creates that iconic, beautifully glazed finish.
Essential Ingredient Notes for Delicious Brownie Rolls
Understanding your ingredients is key to successful baking. Here are some detailed notes to guide you. A complete list of quantities can be found in the recipe card below.
- Unsalted Butter: Always opt for unsalted butter to control the total sodium in your recipe. It’s crucial for the butter to be softened to room temperature for both the dough and the filling. For best results, take it out of the refrigerator at least 2 hours before you plan to start baking. Properly softened butter incorporates smoothly, leading to a more consistent dough and a creamy filling.
- Milk: Any type of milk (whole, low-fat, or non-dairy) will work, but the temperature is paramount. Warm the milk to precisely 110°F (43°C). Use a kitchen thermometer for accuracy. If the milk is too hot, it will kill the active dry yeast, preventing your dough from rising. If it’s too cool, the yeast will activate too slowly or not at all, leading to a dense roll.
- Active Dry Yeast: This recipe calls for one packet of active dry yeast, typically 2 1/4 teaspoons or 11 grams. Active dry yeast needs to be “proofed” in warm liquid (our milk) to ensure it’s alive and active. Do not substitute with “fast rise” or “instant” yeast without adjusting the rising times, as these activate more quickly and don’t require proofing.
- Large Eggs: Like butter, eggs should be at room temperature. This helps them incorporate more easily and evenly into the dough, contributing to a lighter, softer texture. Remove them from the fridge about 2 hours before baking. Lightly beat them before adding them to the dry ingredients for better integration.
- Cream Cheese: For the ultimate smooth and spreadable chocolate cream cheese icing, your cream cheese must be at room temperature. Cold cream cheese will result in a lumpy icing that’s difficult to spread. Allow it to soften on the counter for at least 2 hours prior to mixing. Full-fat cream cheese is recommended for the richest flavor and texture.
- Brownies: The star of these rolls! While you can certainly bake your own brownies, using high-quality store-bought fudgy brownies is a fantastic shortcut, especially since you’re already making a homemade dough. Look for the fudgiest variety you can find to ensure maximum flavor and moisture. If you are inclined to bake from scratch, our recommended fudge brownie recipe is an excellent choice and not much more effort than a box mix, yielding superior results – plus, you’ll have extra brownies for snacking!
Ingredient Substitutions for Dietary Needs
We believe everyone should enjoy these delicious treats. Here are some substitution ideas:
- Dairy-Free Option: Most dairy ingredients in this recipe can be swapped with your favorite dairy-free alternatives. Use plant-based milk (almond, soy, oat), dairy-free butter sticks (ensure they’re suitable for baking), and dairy-free cream cheese. Always check product labels for best results.
- Gluten-Free Option: While this recipe has not been specifically tested with gluten-free flour, many readers have success using a 1:1 gluten-free all-purpose flour blend. If you attempt a gluten-free version, please let us know your results! Adjustments to liquid and rise times might be necessary depending on the flour blend used.
Step-By-Step Instructions: Crafting the Perfect Dough
The foundation of these incredible brownie rolls is a soft, pliable dough. Follow these instructions carefully for the best results. These steps are optimized for a stand mixer with a dough hook attachment. For instructions on making the dough by hand, please refer to the recipe notes section.
- Activate the Yeast: Begin by gently warming 1 cup of milk in a microwave-safe bowl until it reaches precisely 110°F (43°C). Sprinkle the active dry yeast evenly over the surface of the warm milk. Allow this mixture to sit undisturbed for about 10 minutes. During this time, the yeast should dissolve and become frothy, indicating it’s active and ready to work its magic.
- Combine Dry Ingredients: In a large mixing bowl, combine the all-purpose flour, granulated sugar, and salt. Whisk them together briefly to ensure they are well mixed and evenly distributed.
- Incorporate Butter into Dry Mix: Add the cubed, room-temperature unsalted butter to your dry ingredient mixture. Using a pastry blender or a fork, cut the butter into the flour until the butter pieces are roughly the size of small peas. This step helps create pockets of butter that contribute to the rolls’ flaky and tender texture.
- Knead the Dough: Pour the activated yeast mixture and the lightly beaten large eggs into the flour and butter mixture. Attach the dough hook to your stand mixer and start mixing on low speed. Continue to mix until the ingredients come together and a shaggy dough begins to form. Increase the speed to medium and knead the dough for a full 5 minutes. The dough should become smooth, elastic, and pull away from the sides of the bowl.
- First Rise: Lightly spray a clean, large mixing bowl with nonstick cooking spray. Transfer the kneaded dough into this bowl, turning it once to coat all sides with a thin layer of spray. Cover the bowl snugly with a clean kitchen towel or plastic wrap. Place the bowl in a warm, draft-free spot (see FAQ for tips if your house is cold) and allow the dough to rise for approximately 1 hour, or until it has doubled in size.
Step-By-Step Instructions: Crafting the Chocolate Filling and Baking
Now for the decadent part! Here’s how to prepare the rich chocolate filling and bake your delicious brownie rolls to perfection.
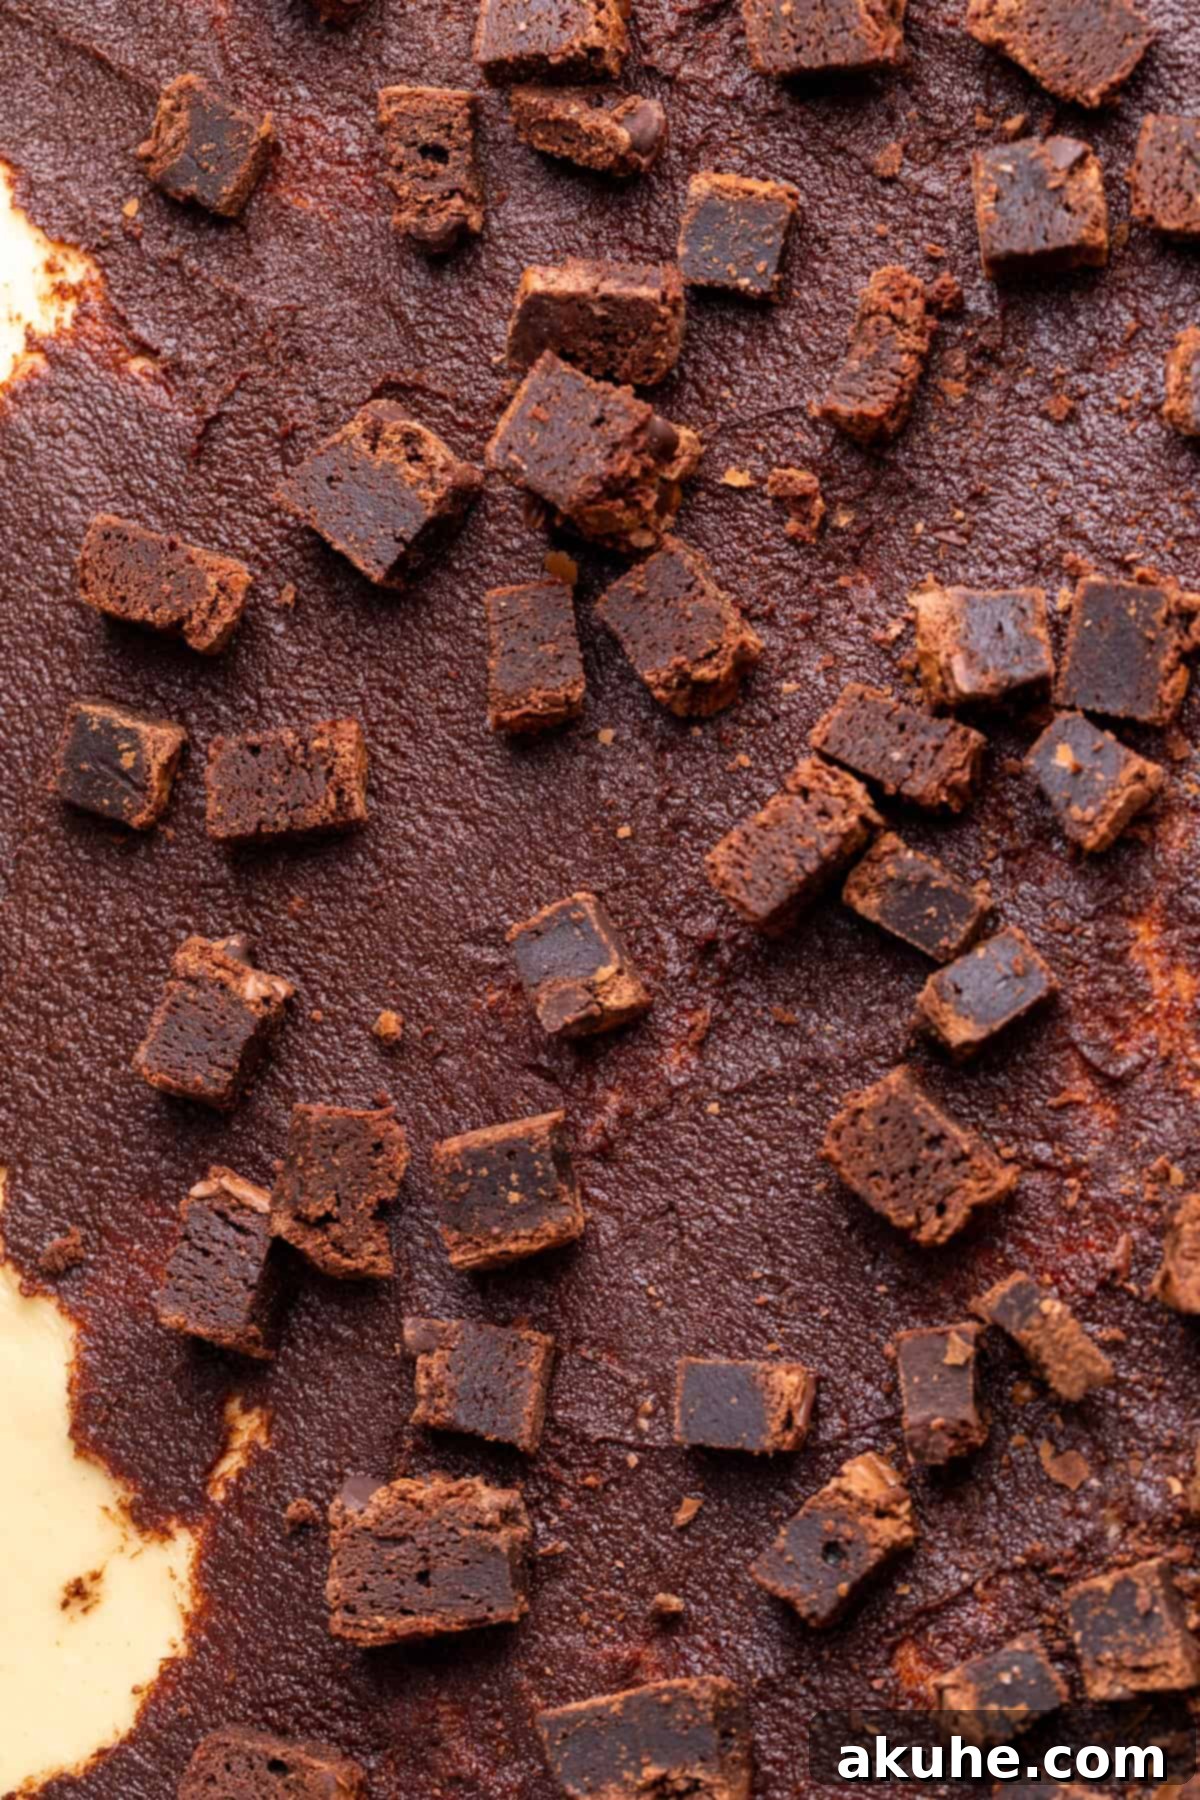
- Prepare Brownie Pieces: Take your fudgy brownies and chop them into small, bite-sized pieces. Aim for pieces roughly the size of a penny or nickel. Set these chopped brownies aside for later.
- Mix the Chocolate Filling: In a medium bowl, beat the room-temperature unsalted butter with an electric mixer on high speed until it becomes light and fluffy, about 1-2 minutes. Gradually add the brown sugar and unsweetened cocoa powder, mixing on medium speed until well combined and smooth. Increase the speed to high and beat for another minute. This ensures the filling is incredibly creamy and easily spreadable.
- Roll Out the Dough: Once your dough has completed its first rise, gently punch it down to release the air. Transfer the dough to a lightly floured clean surface. Using a rolling pin, roll the dough into a large rectangle. The ideal thickness for your dough should be approximately 1/4 inch.
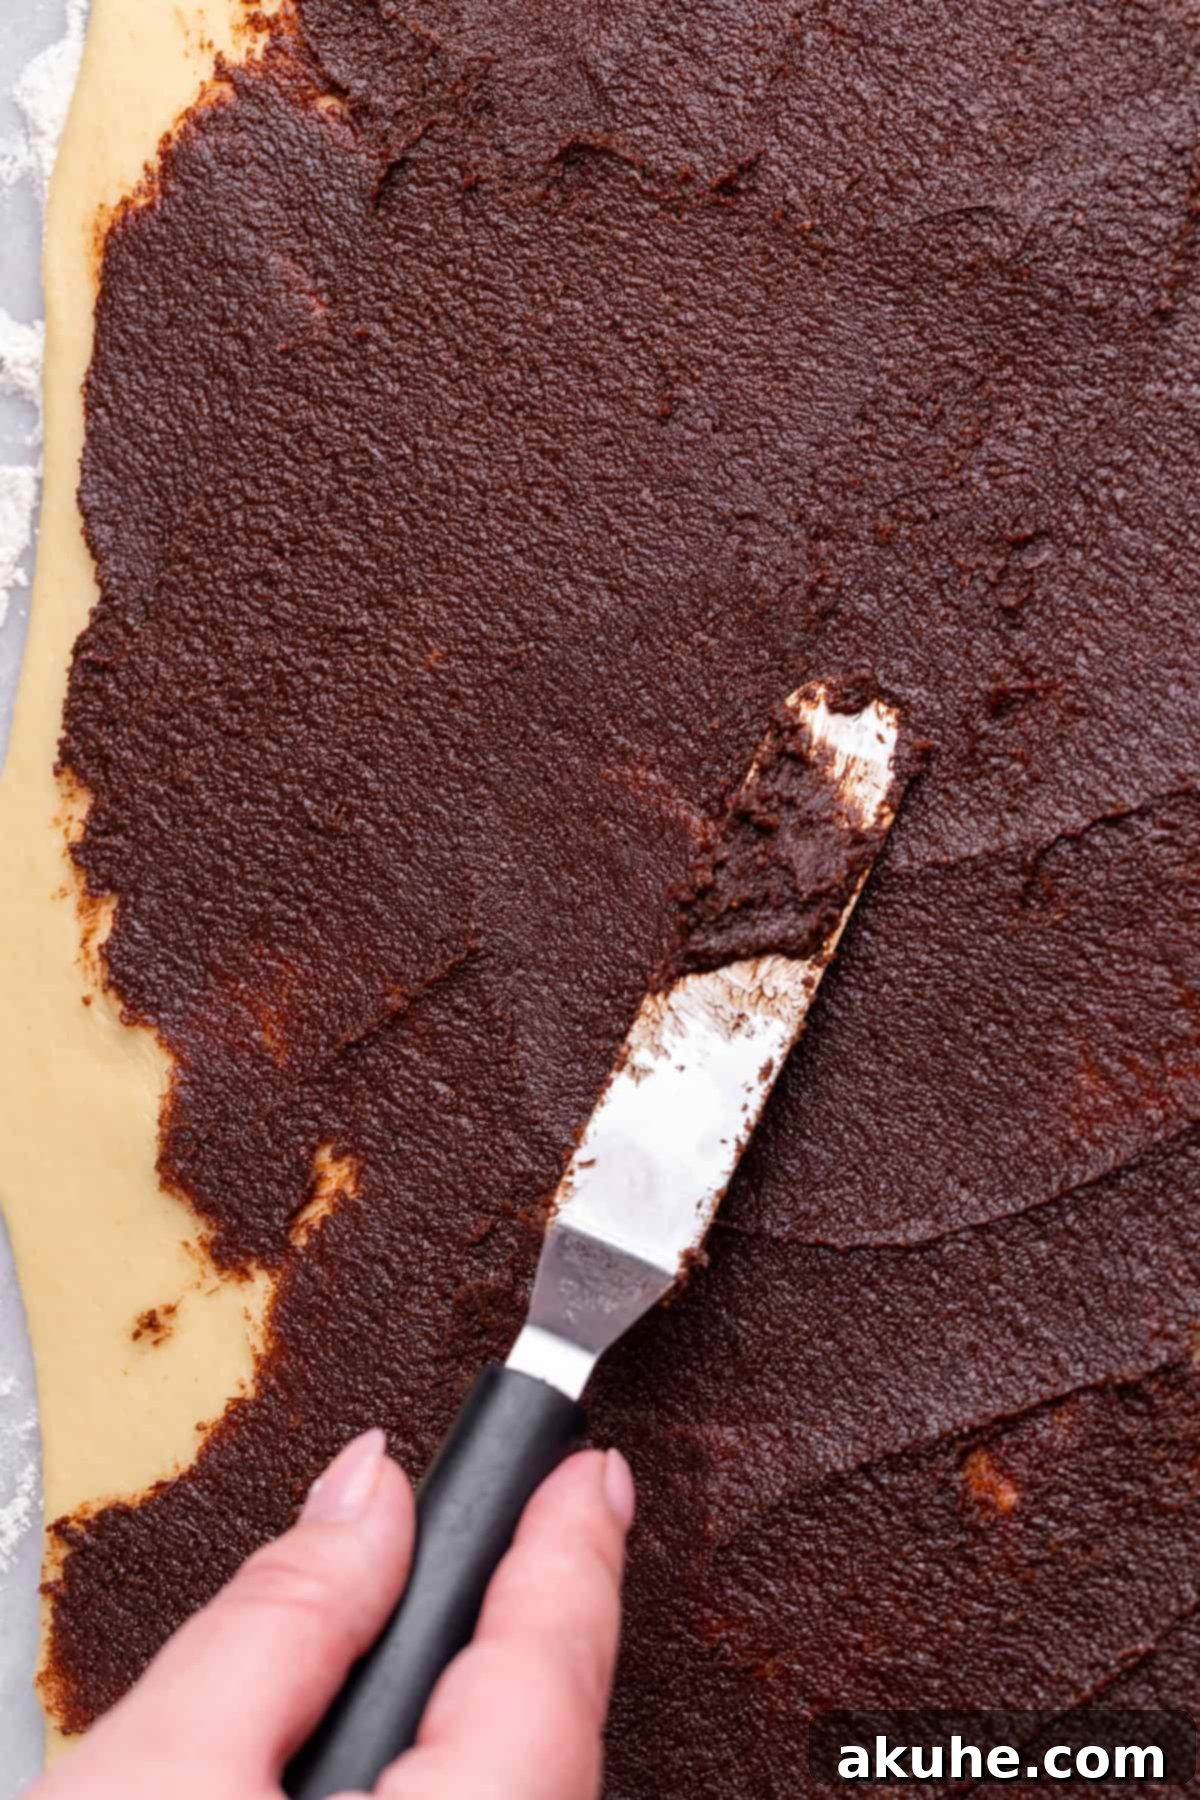
- Spread Filling and Brownies: Using an offset spatula or the back of a spoon, evenly spread the prepared chocolate butter filling over the entire surface of the rolled-out dough, making sure to extend it right to the edges. Generously sprinkle the chopped brownie pieces over the chocolate filling.
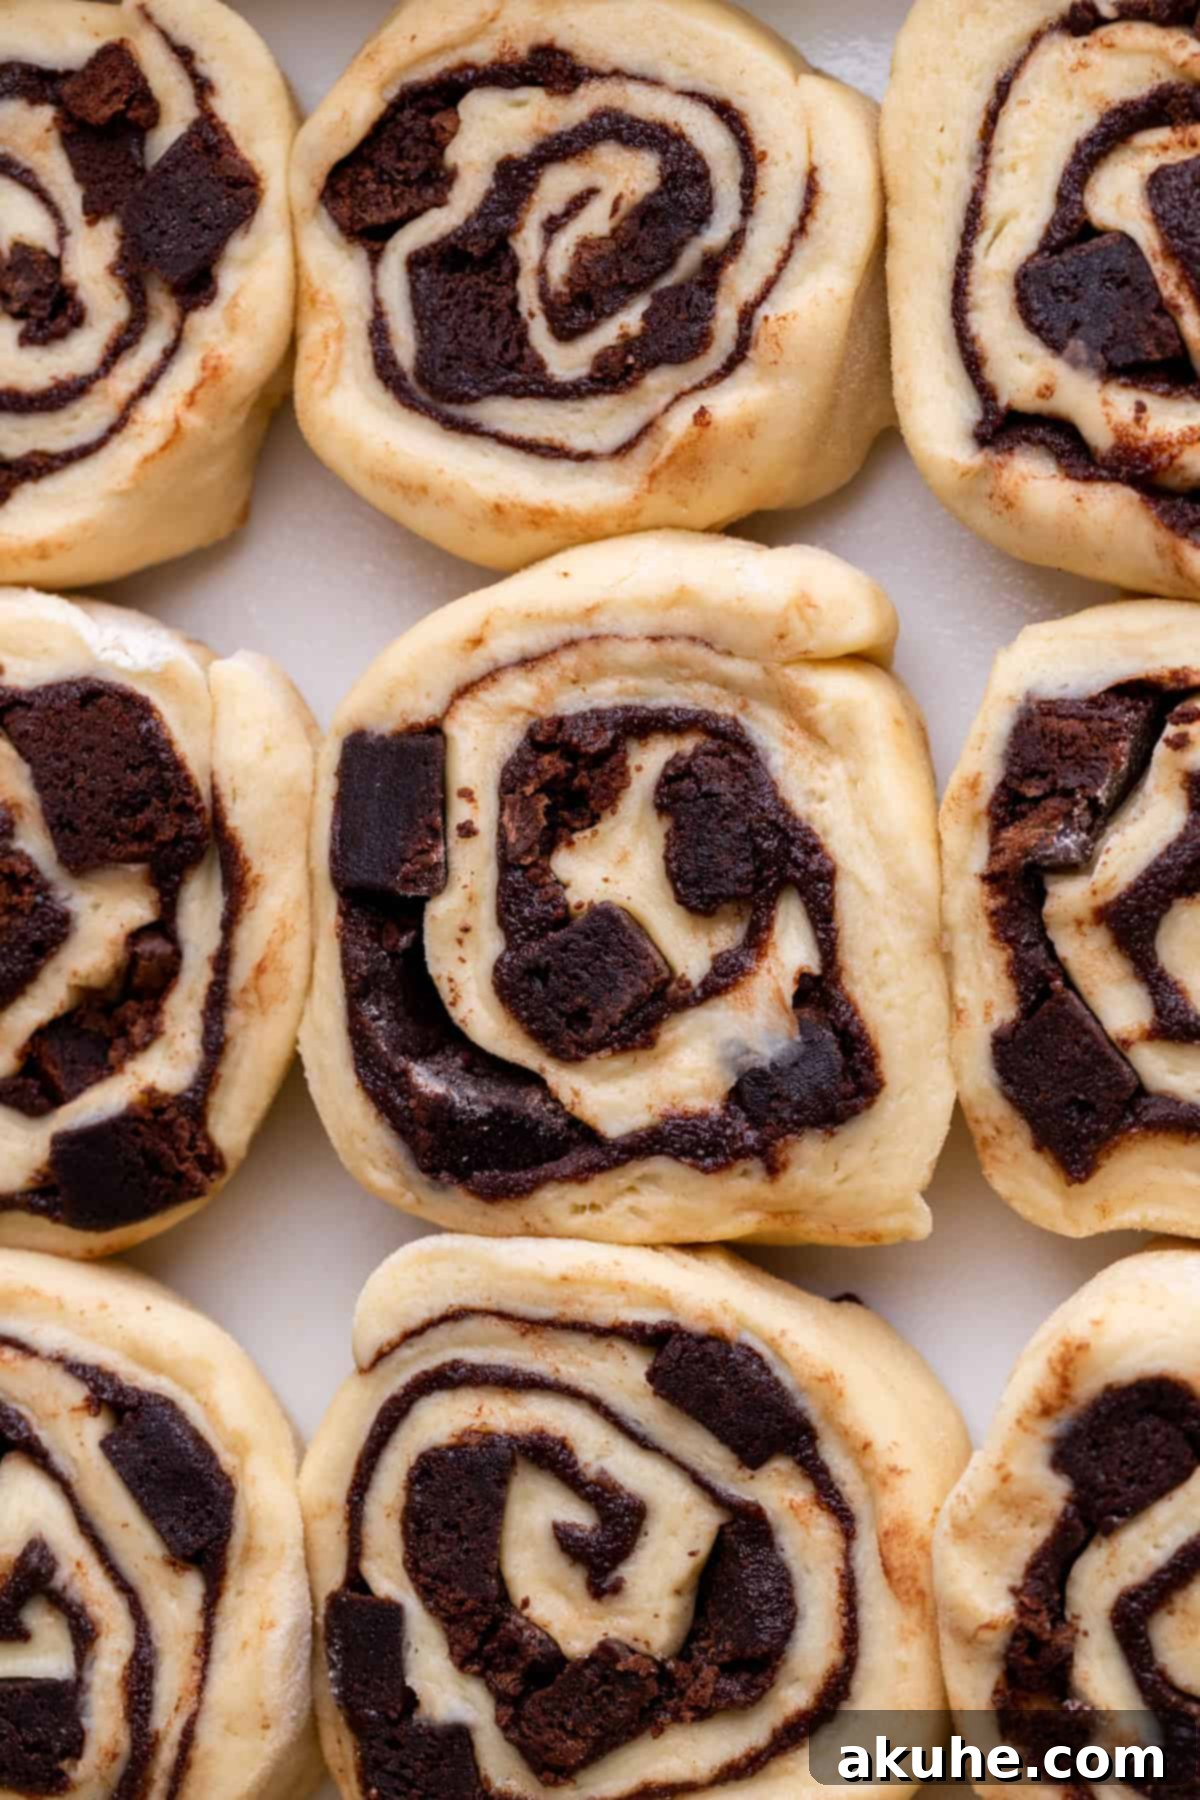
- Roll and Slice the Log: Starting from one of the shorter sides of the rectangle, carefully and tightly roll the dough into a log. Once rolled, use a sharp, serrated knife to gently trim off any uneven ends. Then, cut the log into 12 equal-sized rolls. A serrated knife helps achieve clean cuts without squishing the dough.
- Second Rise: Lightly spray a 9×13 inch baking pan with nonstick baking spray. Arrange the cut brownie rolls in a single, even layer in the prepared pan. Cover the pan loosely with a clean kitchen towel and allow the rolls to undergo a second rise for about 20 minutes in a warm spot.
- Prepare for Baking: While the rolls are completing their second rise, preheat your oven to 375°F (190°C). Once the oven is preheated and just before baking, pour the heavy cream over the rolls. Focus on pouring the cream into the spaces and holes between the rolls. The goal is to create a pool of cream at the bottom of the pan, which will steam and create incredibly moist and gooey rolls.
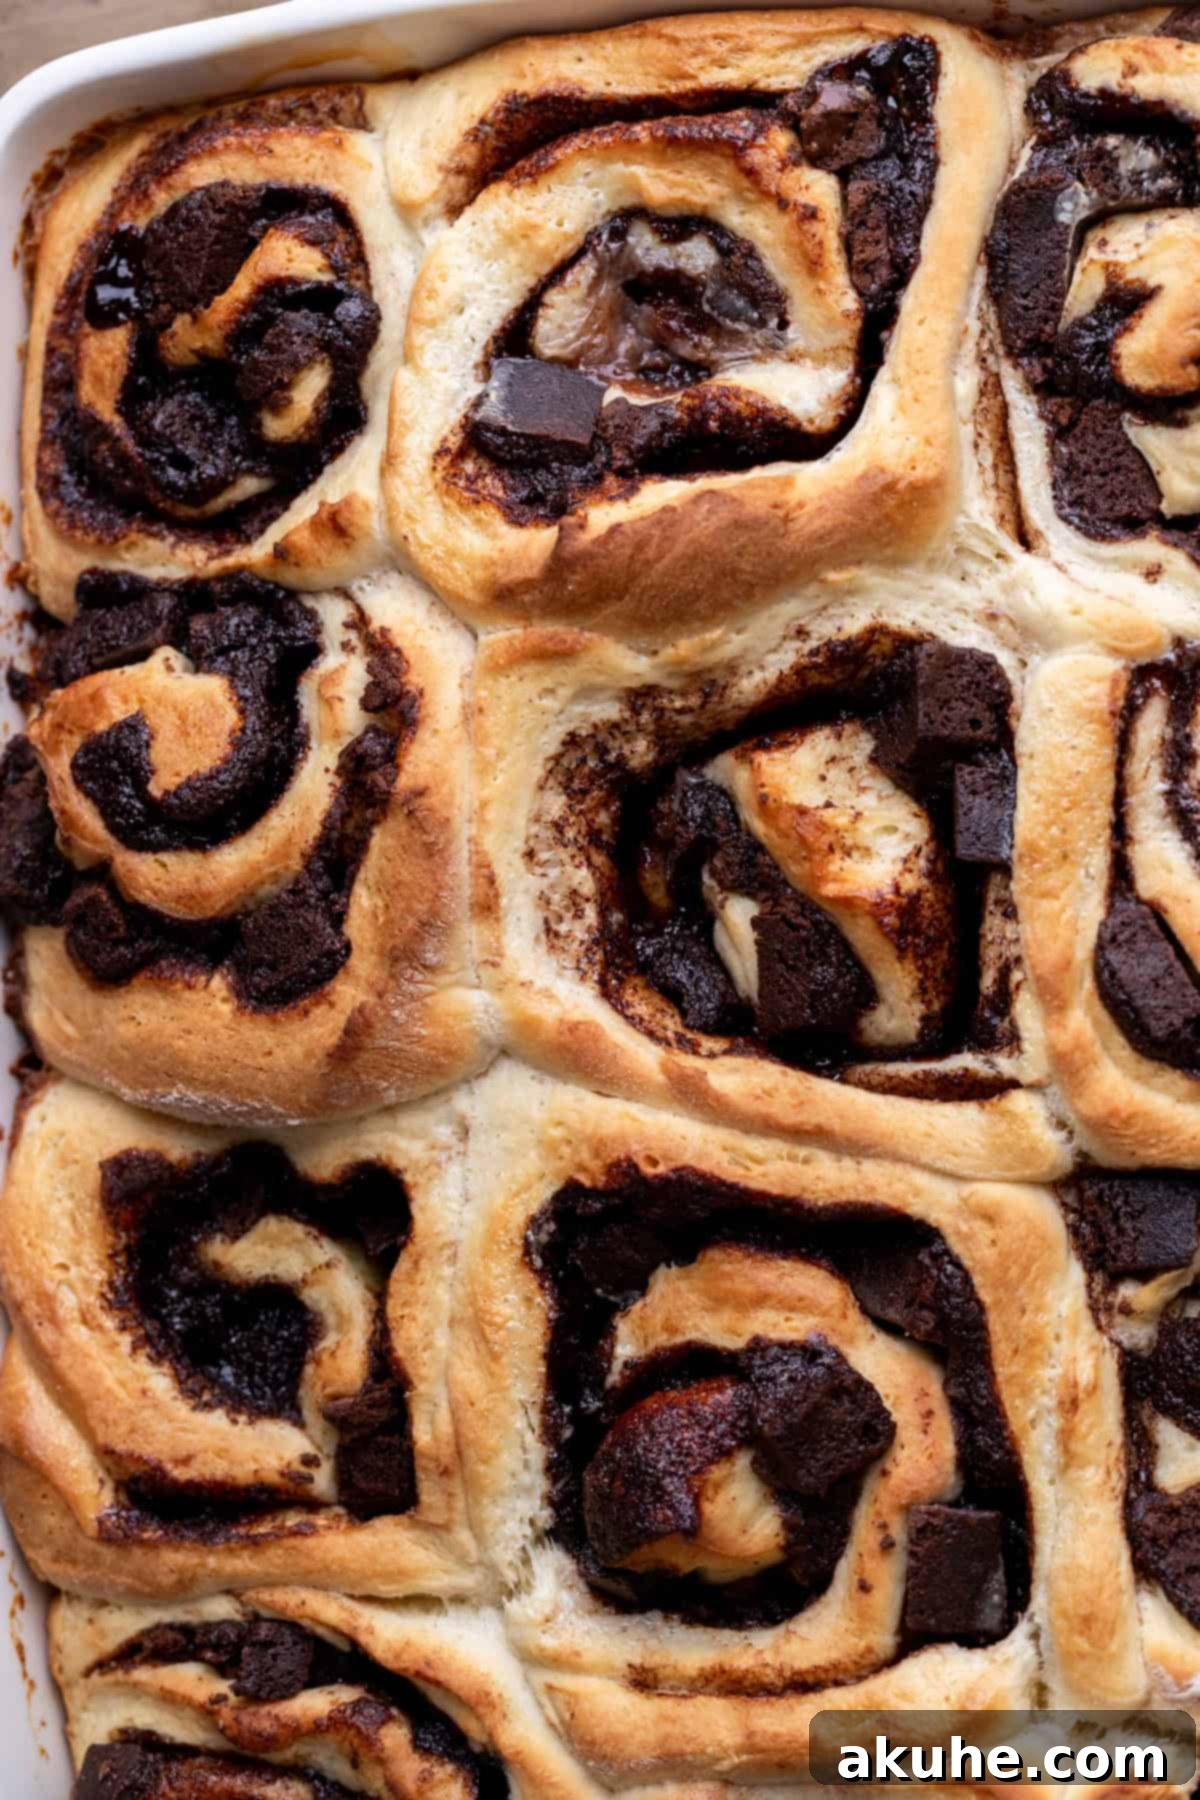
- Bake the Rolls: Place the baking pan in the preheated oven and bake for 25-29 minutes. The rolls are ready when their tops are lightly golden brown and they are puffed up. As soon as they come out of the oven, place the pan on a wire rack to cool slightly while you prepare the irresistible chocolate cream cheese icing.
Step-By-Step Instructions: Decadent Chocolate Cream Cheese Icing
No brownie roll is complete without a generous slathering of creamy, tangy-sweet chocolate cream cheese icing. Here’s how to whip it up:
- Beat Cream Cheese and Butter: In a small mixing bowl, combine the room-temperature cream cheese and softened unsalted butter. Using a hand mixer (or stand mixer with paddle attachment), beat on high speed for approximately 2 minutes until the mixture is incredibly smooth, light, and fluffy, with no lumps remaining.
- Mix the Icing: Gradually add the sifted powdered sugar and sifted unsweetened cocoa powder to the cream cheese mixture. Begin mixing on low speed to avoid a cloud of sugar, until the dry ingredients are just incorporated. Then, increase the speed to high and beat for 1-2 minutes until the icing is completely creamy, smooth, and spreadable. Stir in the pure vanilla extract until just combined.
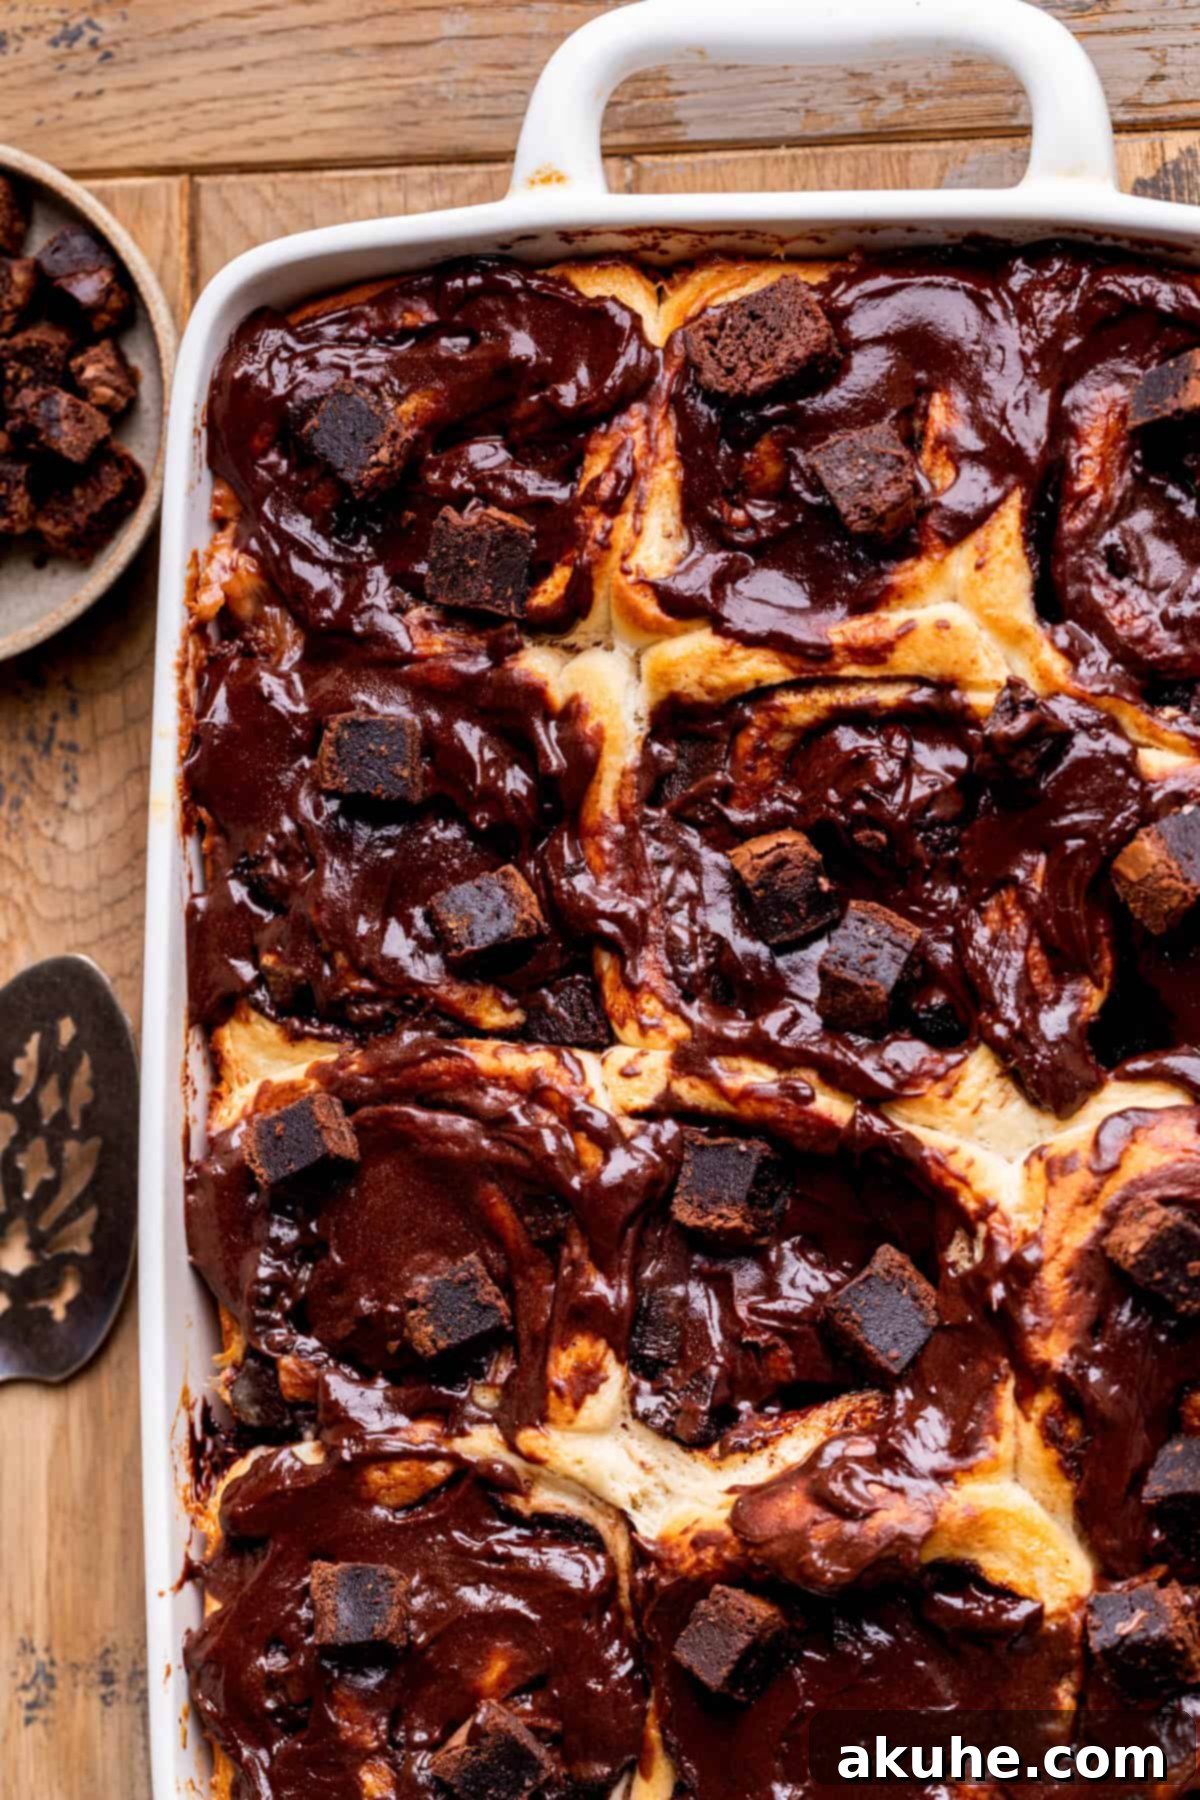
- Spread and Decorate: Once your brownie rolls are fresh out of the oven and have cooled for a few minutes (just until the bubbling subsides, you want them warm for the icing to melt slightly), generously spread the chocolate cream cheese icing over the tops of the rolls using a spoon or an offset spatula. For an extra touch of indulgence and visual appeal, scatter additional chopped brownie pieces over the freshly iced rolls. Serve immediately and enjoy!
Expert Baking Tips for Flawless Brownie Rolls
Achieving bakery-quality brownie rolls at home is simple with these expert tips:
- Measure Flour Accurately: This is one of the most common baking mistakes. To measure flour correctly, spoon it lightly into your measuring cup until it overflows, then level it off with the straight edge of a knife. Do NOT scoop the measuring cup directly into the flour container, as this compacts the flour and can add up to 25% more flour than needed, resulting in dry, dense rolls. For ultimate precision, use a kitchen scale to measure flour by weight (grams).
- Ensure Yeast Freshness and Proper Activation: Yeast is a living organism, and its vitality is key to a good rise. Always check the expiration date on your yeast packet. When activating, ensure the milk is exactly 110°F (43°C). Too hot will kill the yeast, too cold will prevent it from activating efficiently. A properly activated yeast mixture will look frothy and bubbly after 5-10 minutes. If it doesn’t, your yeast might be expired or the milk temperature was off, and you should start again.
- Room Temperature Ingredients are Non-Negotiable: For both the dough and the icing, butter, eggs, and cream cheese should be at room temperature. This ensures they emulsify properly, creating a smoother dough, a more consistent rise, and a lump-free, creamy icing. Plan ahead and take them out of the fridge at least 1-2 hours before you begin.
- Don’t Over-Flour Your Surface: When rolling out the dough, use a very light dusting of flour on your work surface. Too much flour can be absorbed into the dough, making it stiff and difficult to roll, and can lead to dry rolls.
- Gentle Handling of Dough: Yeast doughs thrive on gentle handling. Once the dough has risen, punch it down just enough to release the air, but don’t overwork it. Over-handling can develop too much gluten, resulting in tough rolls.
- Patience is a Virtue for Rising: Don’t rush the rising process. If your kitchen is cool, your dough might take longer than the specified time to double in size. A slow, steady rise often yields the best flavor and texture. Refer to our FAQ for tips on creating a warm environment for rising.
Frequently Asked Questions (FAQ)
Yeast dough thrives in a warm environment. If your house is chilly, there are a few tricks. You can preheat your oven to its lowest setting (usually around 200°F or 90°C) for just a few minutes, then turn it off completely. Place your covered bowl of dough inside the slightly warmed oven, leaving the door cracked open a bit. This creates a cozy, draft-free spot for the dough to rise effectively. Another option is to use a proofing drawer if your oven has one, or simply place the bowl in a sunny spot in your kitchen.
For a single roll, microwave it on a plate for 15-25 seconds, or until it’s warmed through and soft. Microwave times can vary, so adjust as needed. If you’re reheating a whole tray, preheat your oven to 350°F (175°C). Cover the baking dish of rolls loosely with foil to prevent drying, and warm them in the oven for about 5-10 minutes, or until they are hot and gooey. This method helps maintain their soft texture.
Absolutely! This is a fantastic make-ahead option. Follow all the instructions up to the baking step. Instead of baking for the full 25-29 minutes, bake the rolls for only 10 minutes. They should be set but still pale. Remove them from the oven, let them cool completely, then cover the pan tightly with foil and refrigerate overnight. The next morning, pull the pan out while your oven preheats to 375°F (190°C). Bake for the remaining 15-19 minutes, or until golden brown and cooked through. Then, proceed with the icing as usual for fresh, warm rolls.
Recipe Variations to Explore
These brownie rolls are fantastic as is, but here are a few ideas to customize them:
- Homemade Brownies for Extra Flair: For an even more spectacular result, consider making your own brownies from scratch. If you’re willing to bake an extra recipe first, our absolute favorite fudge brownie recipe yields incredibly rich and moist brownies that will take these rolls to the next level. The effort is minimal compared to the enhanced flavor!
- No Brownies? No Problem!: If you’re short on time or don’t have brownies on hand, you can easily adapt this recipe to make delicious chocolate rolls. Simply omit the chopped brownie pieces from the filling. To maintain a rich chocolate flavor and interesting texture, you can substitute the brownie pieces with a generous sprinkle of chocolate chips (milk chocolate, semi-sweet, or dark), or finely chopped chocolate bar pieces.
- Add Nuts or Other Mix-ins: For added crunch and flavor, consider sprinkling chopped walnuts or pecans along with the brownie pieces in the filling. Mini marshmallows or a swirl of caramel sauce could also be delightful additions.
Special Tools for Baking Success
While not strictly necessary for every step, these tools can make your brownie roll baking experience much smoother and more enjoyable:
- Baking Spray with Flour: A nonstick baking spray that contains flour (like this one) is a secret weapon for ensuring your rolls never stick to the pan, guaranteeing easy removal and beautiful presentation every time.
- Offset Spatula: This versatile tool (an offset spatula) is incredibly useful for evenly spreading the chocolate filling over the dough and for elegantly applying the cream cheese icing. Its angled blade makes spreading smooth and effortless.
- 9×13 Inch Casserole Pan: While any 9×13 inch baking pan will work, a sturdy casserole pan often provides better heat distribution and retention, leading to more evenly baked and consistently gooey rolls.
- Rolling Pin: A good rolling pin is essential for rolling out the dough evenly and to the correct thickness. Any standard rolling pin you have on hand will do the trick!
- Kitchen Thermometer: For precise yeast activation, a reliable kitchen thermometer is highly recommended to ensure your milk is at the perfect 110°F.
Storing and Freezing Your Brownie Rolls
These brownie rolls are best enjoyed fresh, but they store beautifully for later indulgence:
Store any leftover baked and iced brownie rolls in an airtight container in the refrigerator for up to 5 days. For the best experience, reheat individual rolls in the microwave for 15-25 seconds until warm and soft before serving.
For longer storage, these brownie rolls can be frozen in two convenient ways:
- Freeze Unbaked Rolls: After cutting the rolls and placing them in your 9×13 inch baking pan, cover the pan tightly with plastic wrap and then aluminum foil. Freeze for up to 30 days. When ready to bake, thaw the rolls overnight in the refrigerator or for a few hours at room temperature until softened. They may not rise quite as much after freezing, but they will still bake up wonderfully. Proceed with the heavy cream and baking instructions as usual.
- Freeze Already Baked Rolls: Allow the baked and iced rolls to cool completely. Wrap individual rolls tightly in plastic wrap, then place them in an airtight freezer-safe bag or container. Freeze for up to 30 days. To enjoy, thaw the rolls at room temperature for about 1 hour before eating. You can also gently warm them in the microwave or oven after thawing for a fresh-baked feel.
More Cinnamon Roll Recipes To Try
If you’re a fan of the classic, gooey cinnamon roll, explore these other delicious twists!
- [Link to another cinnamon roll recipe 1]
- [Link to another cinnamon roll recipe 2]
- [Link to another cinnamon roll recipe 3]
Explore More Irresistible Brownie Recipes!
Can’t get enough of that fudgy brownie goodness? Dive into these other amazing brownie creations:
- Brownie Bites
- Salted Caramel Brownies
- Cheesecake Brownies
- Cookie Dough Brownies
- Nutella Brownies
We love seeing your creations! If you made and loved this recipe, please make sure to leave a STAR REVIEW below. Don’t forget to tag us on Instagram @stephaniesweettreats. For more delicious baking ideas and inspiration, follow us on Pinterest.
Brownie Rolls Recipe
By Stephanie Rutherford
These delightful brownie rolls feature a soft cinnamon roll dough, a rich chocolate butter filling, chopped brownies swirled inside, and a creamy chocolate cream cheese icing on top. Finished with extra brownie pieces for ultimate indulgence!
Preparation Details
- Prep Time: 1 hr
- Cook Time: 27 mins
- Resting Time: 1 hr 20 mins
- Total Time: 2 hrs 47 mins
- Servings: 12 rolls
Ingredients
For the Dough:
- 1 cup Milk, warmed to 110℉
- 2 1/4 tsp Active dry yeast (11 grams or 1 packet)
- 2 Large eggs, lightly beaten
- 4 1/2 cups All-purpose flour
- 1/4 cup White granulated sugar
- 1 tsp Salt
- 10 TBSP Unsalted butter, room temperature and cubed
For the Chocolate Filling:
- 1/2 cup Unsalted butter, room temperature
- 3/4 cup Brown sugar, packed light or dark
- 2 TBSP Unsweetened cocoa powder
- 2 1/2 cups Store-bought fudgy brownies, chopped (use the fudgiest you can find!)
- 1/2 cup Heavy cream
For the Chocolate Cream Cheese Icing:
- 4 oz Cream cheese, room temperature
- 4 TBSP Unsalted butter, room temperature
- 3/4 cup Powdered sugar, sifted
- 2 TBSP Unsweetened cocoa powder, sifted
- 1 tsp Pure vanilla extract
- More brownie pieces, for decoration (optional)
Instructions
Dough Preparation:
- These instructions are for a stand mixer with a dough hook. For making the dough by hand, please see the recipe notes below.
- Heat 1 cup of milk in the microwave until it reaches 110℉. Sprinkle the 2 1/4 tsp of active dry yeast on top of the milk. Let it sit for 10 minutes until frothy.
- In a large bowl, mix 4 1/2 cups of all-purpose flour, 1/4 cup of white granulated sugar, and 1 tsp of salt. Add the 10 TBSP of cubed unsalted butter to the flour mixture and knead it in with a pastry kneader or a fork until the butter clumps are about the size of a pea.
- Add the yeast mixture and the 2 large beaten eggs to the bowl. Use a stand mixer with a dough hook on low speed to knead until a dough begins to form. Then, switch to medium speed and knead for 5 minutes until the dough is smooth and elastic.
- Lightly spray a large mixing bowl with nonstick spray. Place the dough into the bowl, cover it with a kitchen towel, and let it rise in a warm place for 1 hour, or until doubled in size. (Refer to recipe notes for overnight instructions.)
Chocolate Filling & Baking:
- Chop the 2 1/2 cups of fudgy brownies into small pieces, approximately the size of a penny or nickel. Set them aside.
- In a small bowl, beat 1/2 cup of room-temperature unsalted butter with a hand mixer on high speed until it’s soft and fluffy. Add 3/4 cup of brown sugar and 2 TBSP of unsweetened cocoa powder. Mix on medium speed until combined, then switch to high speed and beat for 1 minute to make it more spreadable.
- On a lightly floured surface, roll the risen dough out into a large rectangle, aiming for a thickness of 1/4 inch.
- Using an offset spatula, evenly spread the chocolate filling over the entire surface of the dough, making sure to reach the edges. Sprinkle the chopped brownies on top of the filling.
- Starting from one of the shorter sides, carefully roll the dough into a tight log. Use a sharp serrated knife to cut off any uneven ends. Then, cut the log into 12 equal rolls.
- Spray a 9×13 inch baking pan with nonstick baking spray. Arrange the rolls evenly in the pan. Cover with a kitchen towel and let them rise for a second time for 20 minutes.
- Preheat your oven to 375℉ (190°C). Pour 1/2 cup of heavy cream over the rolls, focusing on pouring it into the spaces between the rolls.
- Bake the rolls for 25-29 minutes, or until the tops are lightly golden brown. Once baked, remove the pan from the oven and place it on a wire rack to cool slightly while you prepare the icing.
Chocolate Cream Cheese Icing:
- In a small bowl, using a hand mixer, beat 4 oz of room-temperature cream cheese and 4 TBSP of room-temperature unsalted butter on high speed for 2 minutes until smooth and fluffy.
- Add 3/4 cup of sifted powdered sugar and 2 TBSP of sifted unsweetened cocoa powder. Mix on low speed until just combined, then switch to high speed and beat until the icing is creamy and smooth. Add 1 tsp of pure vanilla extract and mix until fully incorporated.
- Once the rolls are done baking and have stopped bubbling (they should still be warm), spread the prepared chocolate cream cheese icing generously over the tops of the rolls using a spoon or offset spatula. Decorate with extra brownie pieces if desired. Serve warm!
Recipe Notes
- Flour Measurement: Always spoon and level your flour, or ideally, use a kitchen scale for precise measurement. Compacted flour can lead to dry and dense rolls.
- Temperature Matters: Ensure all dairy ingredients (butter, eggs, cream cheese) are at room temperature by pulling them out of the fridge at least 2 hours before you plan to bake.
- Making Dough By Hand: If you don’t have a stand mixer, you can mix the wet ingredients into the dry using a rubber spatula initially. Once the dough starts to come together, switch to using your hands to mix until a cohesive dough forms. Transfer the dough to a lightly floured surface and knead by hand for 5-8 minutes until it’s smooth and elastic. To test for readiness, stretch a small piece of dough thinly between your fingers; if you can see light through it without it tearing, it’s done.
- Overnight Instructions for Dough: To make these rolls ahead for a morning treat, follow all dough instructions until you have cut the rolls and placed them in the baking pan. Cover the pan tightly with plastic wrap or aluminum foil and refrigerate overnight (up to 12-18 hours). The next morning, remove the rolls from the fridge while your oven preheats, then proceed with pouring the heavy cream and baking as directed.
Nutrition Information (per roll)
Calories: 509kcal,
Carbohydrates: 64g,
Protein: 7g,
Fat: 29g,
Saturated Fat: 18g,
Polyunsaturated Fat: 1g,
Monounsaturated Fat: 7g,
Trans Fat: 1g,
Cholesterol: 79mg,
Sodium: 242mg,
Potassium: 159mg,
Fiber: 2g,
Sugar: 19g,
Vitamin A: 950IU,
Vitamin C: 0.1mg,
Calcium: 68mg,
Iron: 3mg
