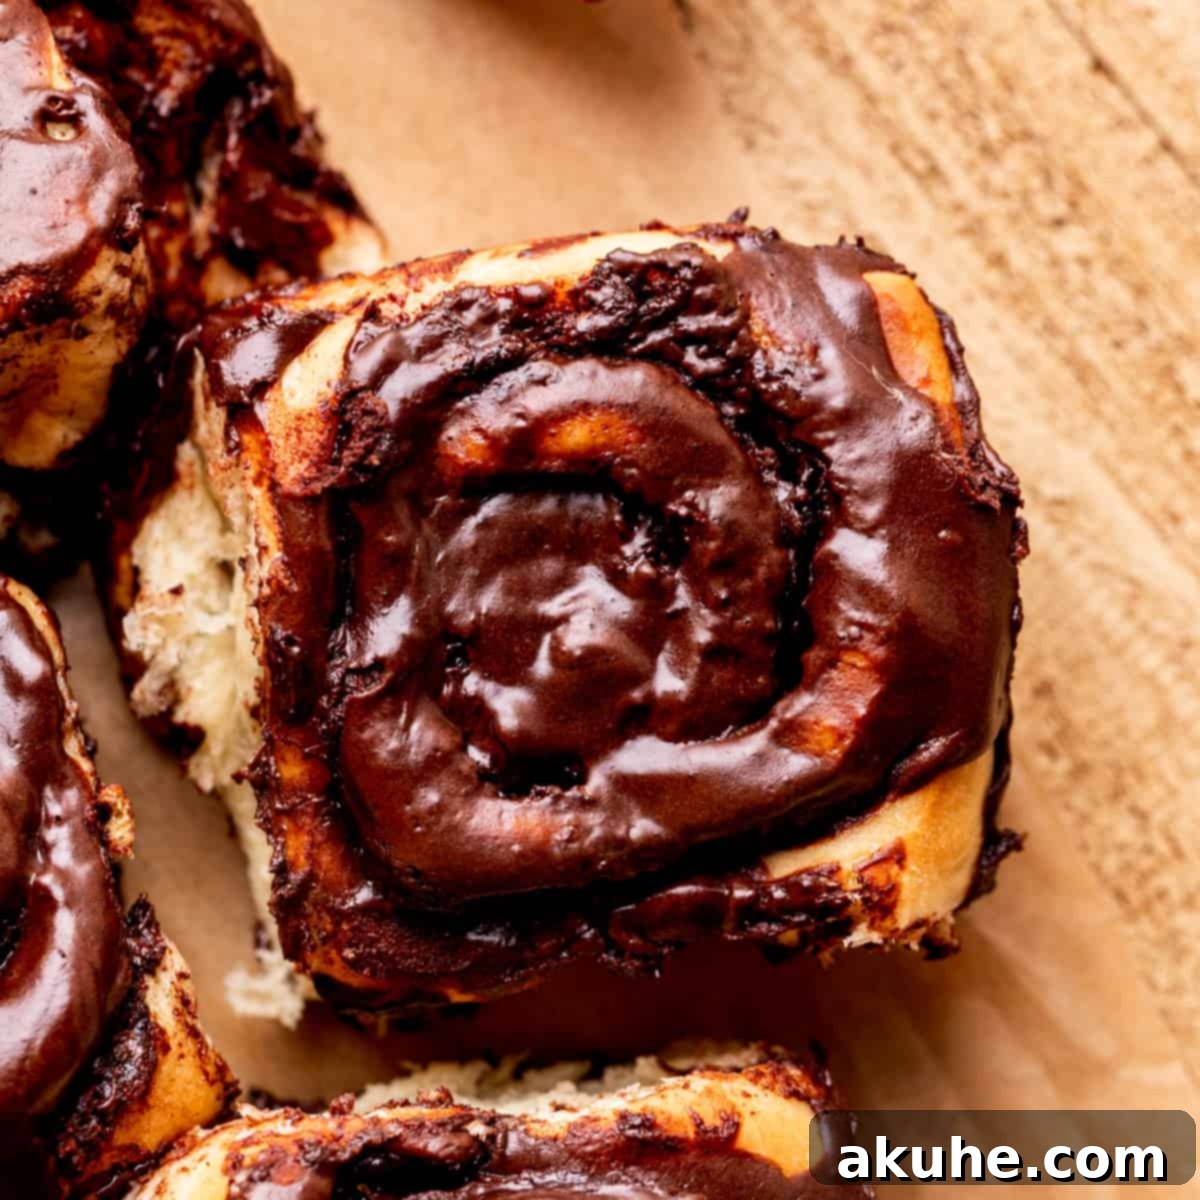
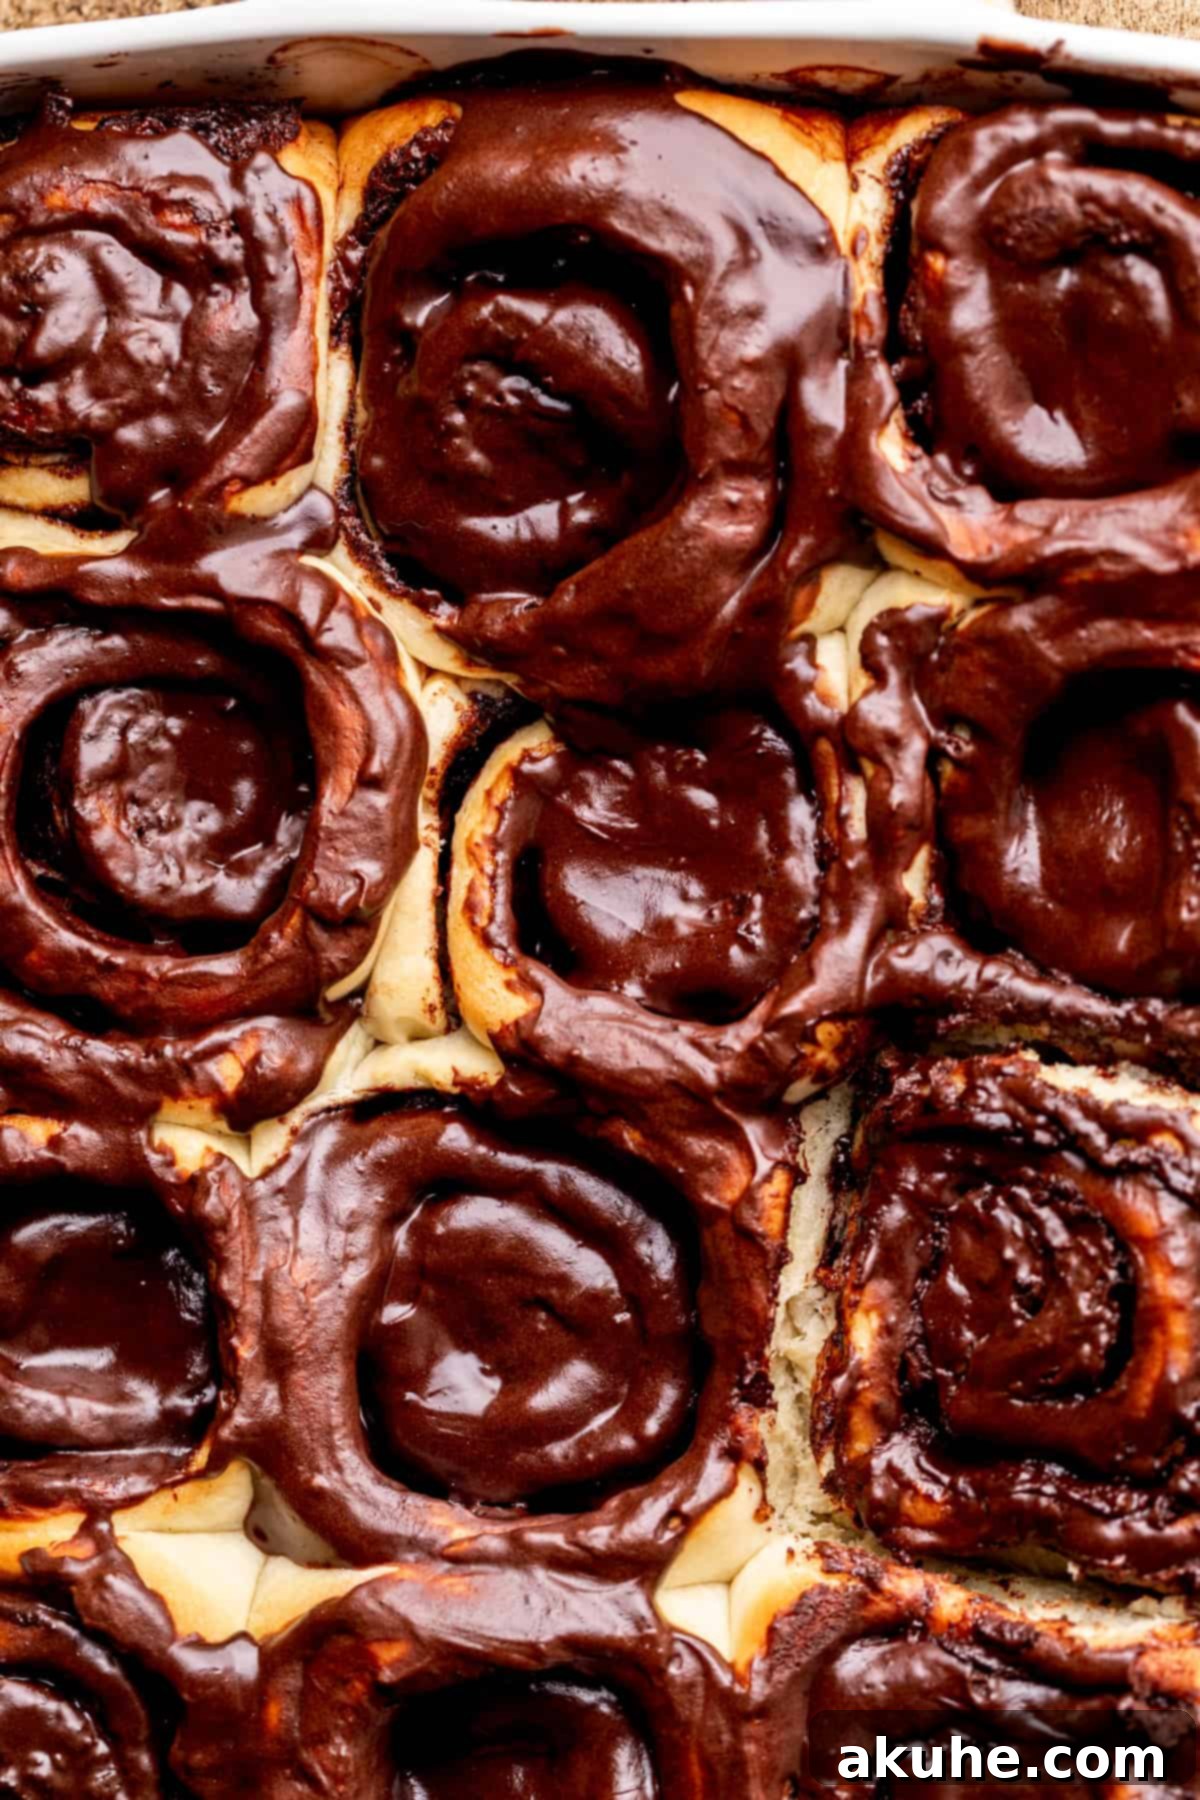
Prepare to be enchanted by the ultimate indulgence for chocolate lovers: **Gooey Chocolate Cinnamon Rolls**. This exceptional recipe masterfully combines the classic comfort of soft, sweet cinnamon rolls with a rich, decadent chocolate twist. Imagine sinking your teeth into a warm, fluffy roll, brimming with a luxurious chocolate cinnamon filling and generous chunks of melted chocolate, all crowned with a velvety, tangy chocolate cream cheese icing. Perfect for a special breakfast, a delightful brunch, or a comforting dessert, these homemade chocolate cinnamon rolls promise an unforgettable culinary experience.
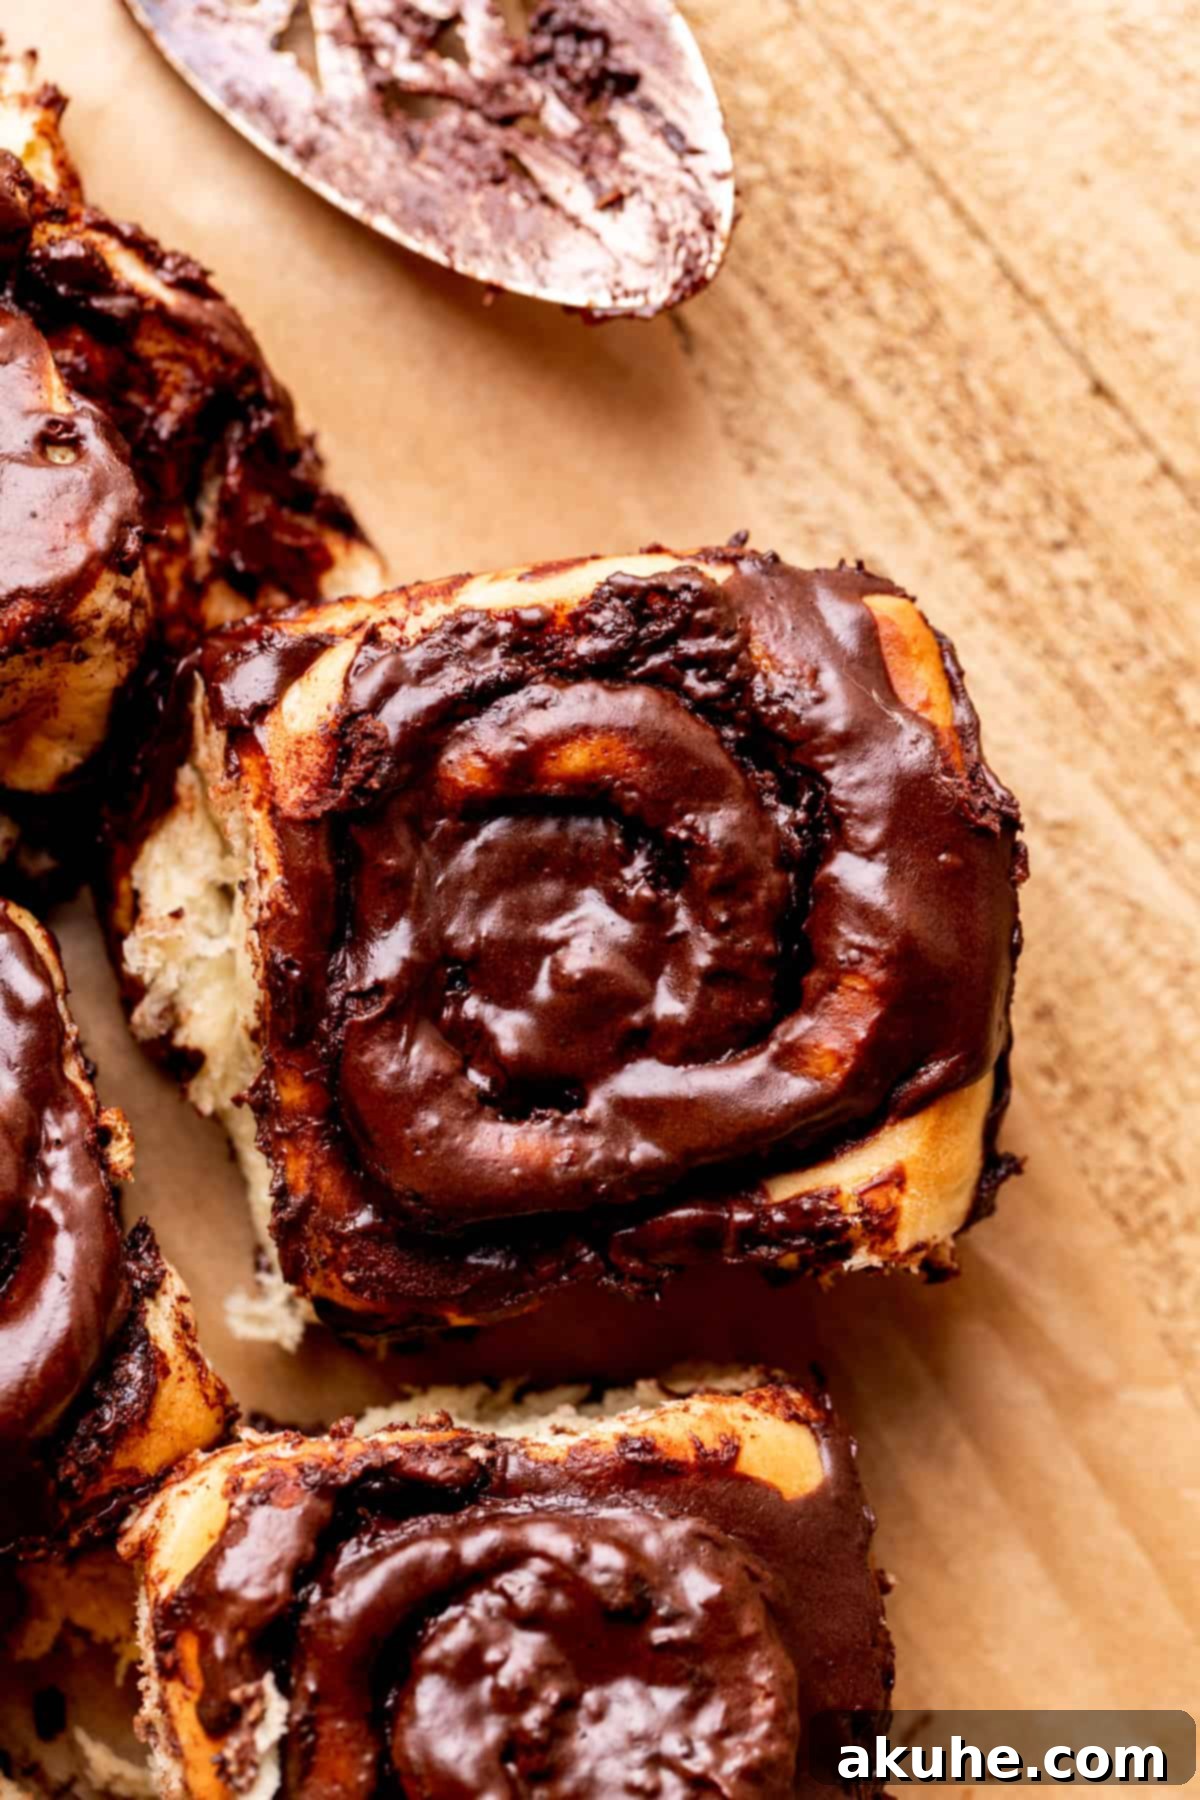
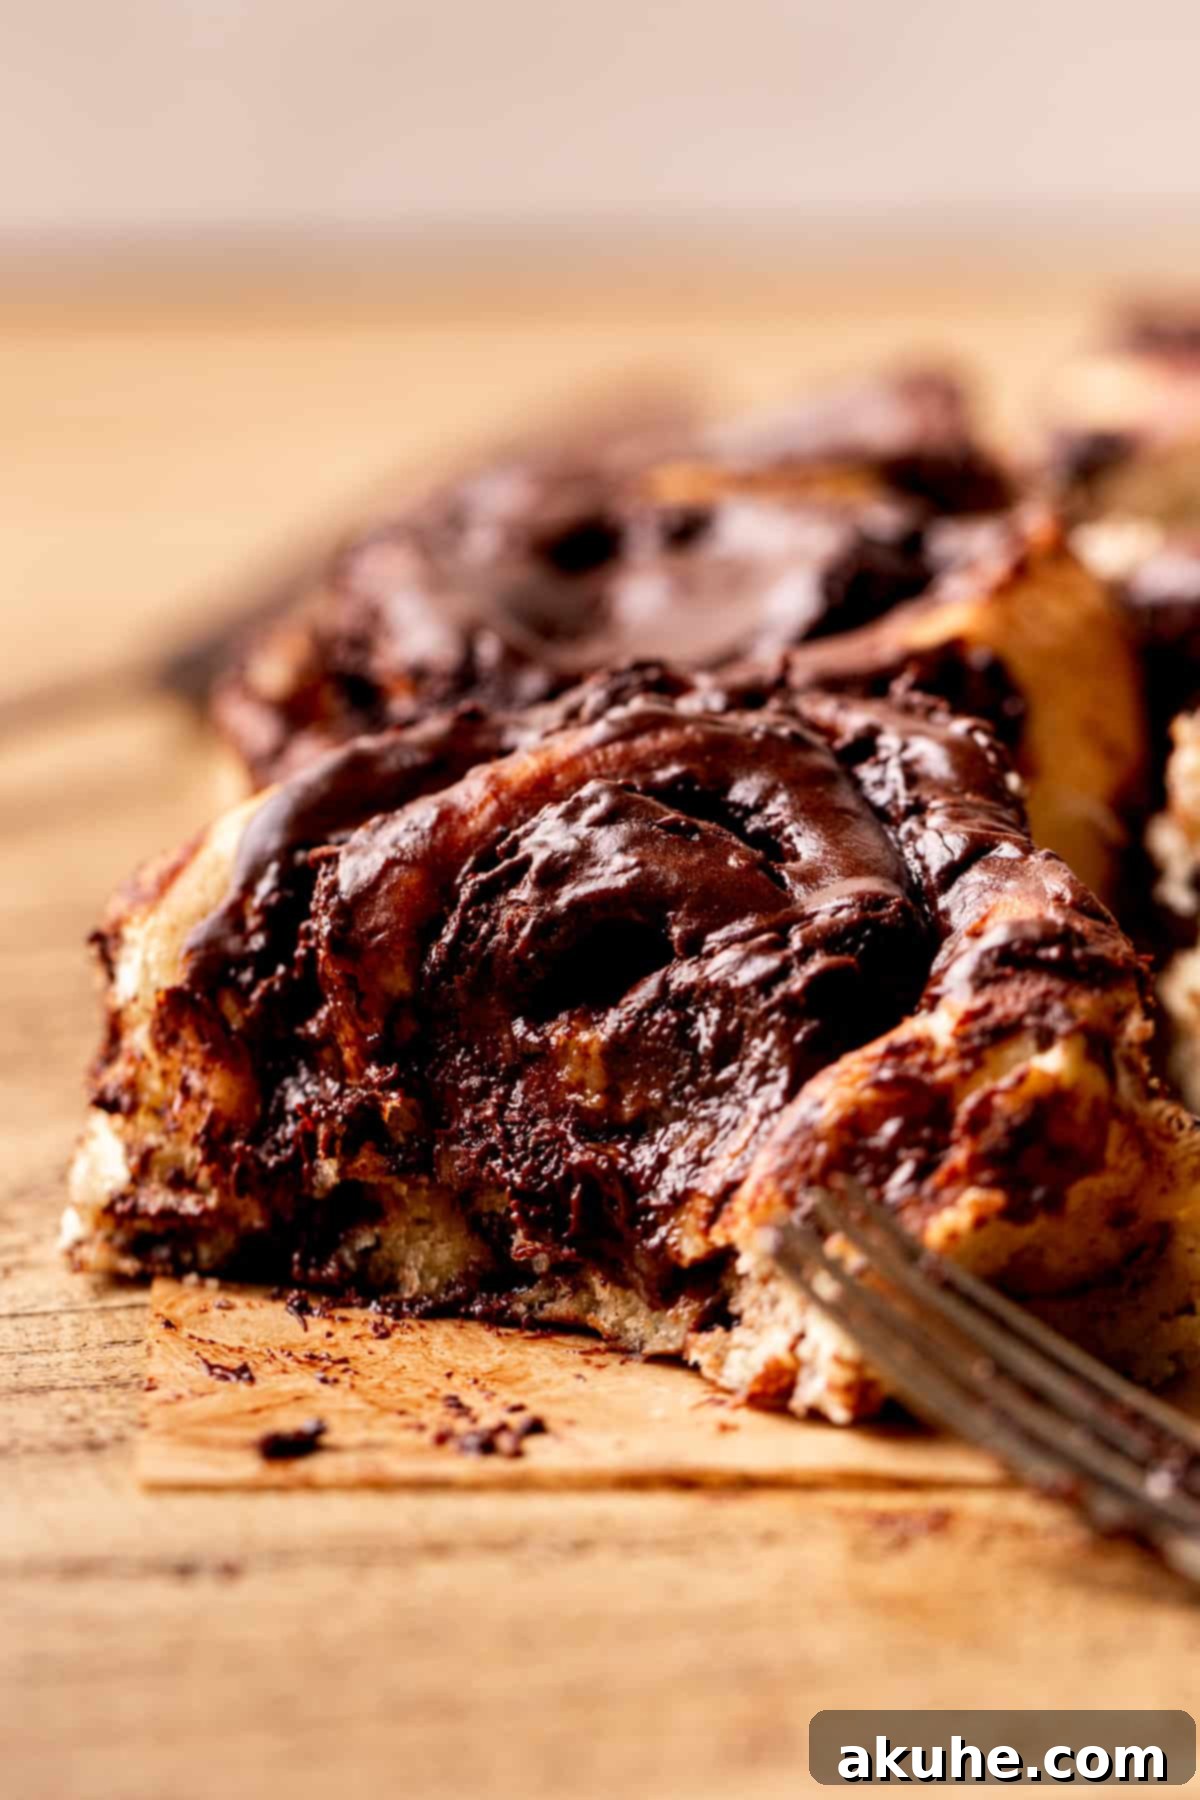
Forget your average breakfast pastry; these chocolate cinnamon rolls elevate the experience to an art form. Each roll features a wonderfully soft and tender brioche-style dough, which encases a generous layer of spiced chocolate filling, studded with real chocolate pieces that melt into gooey pockets during baking. The pièce de résistance is a luscious chocolate cream cheese icing that perfectly balances the sweetness and richness, adding a tangy finish that will have everyone reaching for another. This recipe is more than just a sweet treat; it’s an invitation to create magic in your kitchen, filling your home with the irresistible aroma of fresh-baked goodness.
If you’re a true chocolate enthusiast eager to explore more delightful creations, be sure to also try our Chocolate Caramel Cookies, the surprisingly moist and flavorful Chocolate Zucchini Bread, and the show-stopping Chocolate Ganache Cake for your next sweet adventure.
Why You’ll Adore This Chocolate Cinnamon Roll Recipe
- Unforgettable Chocolate Flavor: While classic cinnamon rolls are delightful, the addition of rich, unsweetened cocoa powder to both the filling and the cream cheese icing, along with chopped chocolate pieces, transforms them into an extraordinary chocolate experience. This recipe layers various chocolate elements to create a profound and satisfying taste that will captivate any chocolate lover. It’s breakfast, but undeniably better with chocolate!
- The Magic of Homemade Baking: There’s truly nothing comparable to the aroma and taste of freshly baked cinnamon rolls pulled straight from your oven. These homemade chocolate cinnamon rolls are incredibly warm, exquisitely gooey, and boast a tender, fluffy texture that store-bought versions can only dream of. The satisfaction of creating such a delicious treat from scratch is unparalleled.
- Convenient Prep-Ahead Option: Our recipe is designed with flexibility in mind. You can easily prepare the dough and assemble these delectable chocolate cinnamon rolls the night before, allowing for a stress-free morning bake. Simply follow the specific overnight instructions for the dough’s first rise, and you’ll wake up to a nearly ready-to-bake breakfast that feels incredibly special without the morning rush.
- Perfect for Any Occasion: Whether it’s a festive holiday breakfast, a special weekend brunch, or just a desire to treat yourself and your loved ones, these chocolate cinnamon rolls fit every occasion. They are impressive enough to serve guests yet comforting enough for a quiet morning at home.
- Ultimate Comfort Food: Warm, sweet, and incredibly rich, these rolls offer the ultimate comfort. The combination of soft dough, gooey filling, and smooth icing creates a textural and flavor profile that soothes the soul and satisfies even the deepest sweet cravings.
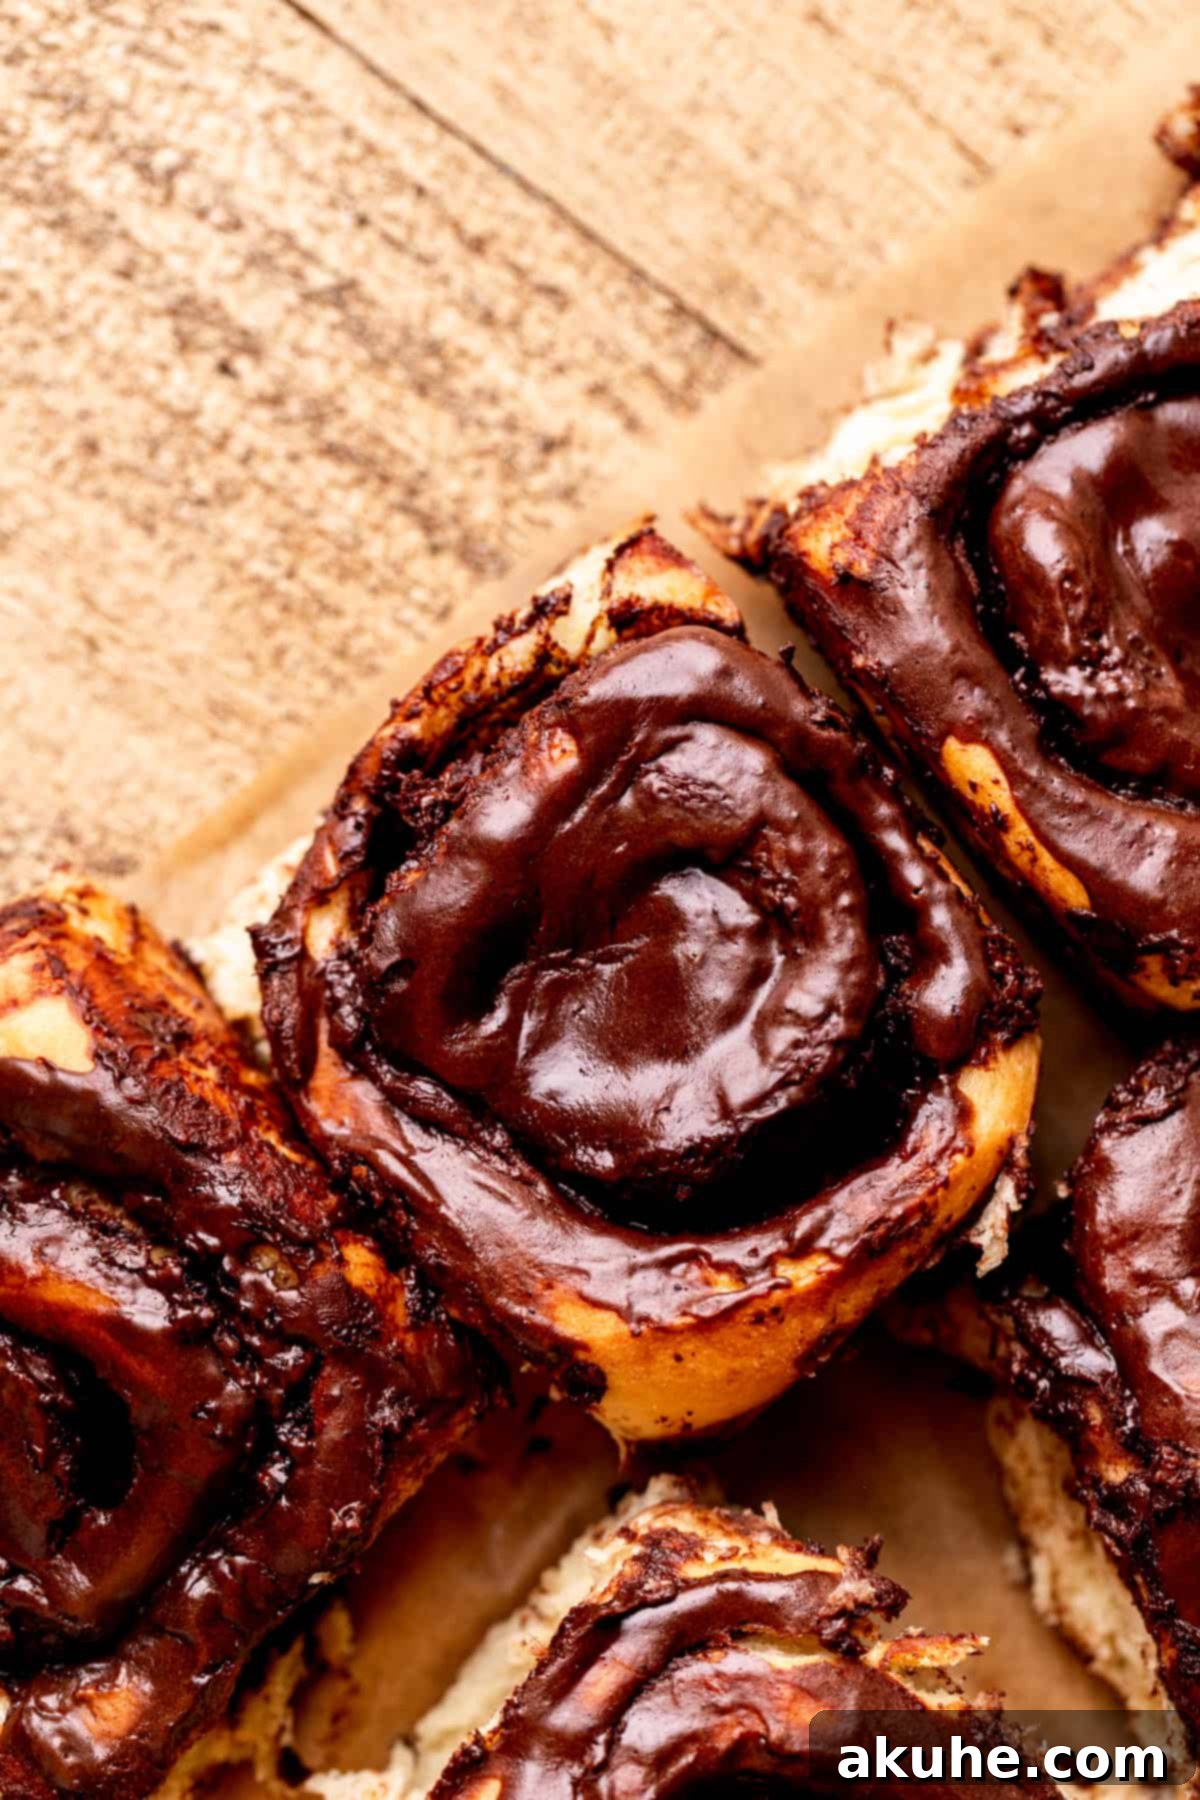
Essential Ingredient Notes for Perfect Rolls
Understanding the role of each ingredient is key to achieving bakery-quality chocolate cinnamon rolls. Below are important notes for the main components. For a complete list with precise measurements, please refer to the recipe card further down the page.
- Unsalted Butter: Always use unsalted butter to control the overall salt content in your baking. For optimal results in both the dough and the filling, ensure your butter is softened to room temperature. This means pulling it out of the refrigerator at least two hours before you plan to use it. Softened butter creams more easily, incorporates smoothly into the flour, and creates a more tender dough structure.
- Milk: Any type of milk (whole, 2%, or even a non-dairy alternative) will work beautifully. The crucial factor is its temperature. Warm the milk to precisely 110°F (43°C). A temperature too hot will unfortunately kill the active dry yeast, preventing your dough from rising. Conversely, milk that is too cool will drastically slow down the yeast’s activity, leading to a much longer and potentially insufficient rise. A kitchen thermometer is your best friend here.
- Active Dry Yeast: This recipe calls for one packet of active dry yeast, which is typically 2 1/4 teaspoons. It’s important to note that active dry yeast often requires proofing (activating in warm liquid) before being combined with other ingredients, which this recipe incorporates. While instant yeast can sometimes be used interchangeably, stick to active dry for the best results as specified. Avoid “fast-rise” or “rapid-rise” yeast, as it behaves differently and might impact the dough’s texture and flavor development. Always check the expiry date on your yeast; old yeast will not activate.
- Large Eggs: Similar to butter, eggs should be at room temperature when added to the dough. Room temperature eggs emulsify better with other ingredients, leading to a more homogenous, smoother, and lighter dough. Pull them out with your butter a couple of hours beforehand. Before adding them, lightly beat them in a separate bowl to ensure even distribution throughout the mixture.
- Brown Sugar: We recommend light brown sugar for its delicate molasses flavor and moisture content, which contributes to the rolls’ gooeyness. However, dark brown sugar can also be used if you prefer a richer, more pronounced molasses taste. Ensure it’s packed tightly when measuring for accuracy.
- Cream Cheese: For the chocolate cream cheese icing, it is absolutely essential that your cream cheese is at room temperature. Cold cream cheese will result in a lumpy, inconsistent icing that is difficult to spread. Allow it to soften for at least two hours outside the fridge before you begin preparing the icing.
- Unsweetened Cocoa Powder: For a truly deep, rich chocolate flavor and a beautiful dark color in both the filling and the icing, we highly recommend using Dutch-processed unsweetened cocoa powder. Dutch-processed cocoa has been treated with an alkali to reduce its acidity, resulting in a smoother, less bitter chocolate flavor compared to natural cocoa powder. This small detail makes a significant difference in the final taste profile of your chocolate cinnamon rolls.
Step-by-Step Instructions: Crafting the Dough
The foundation of these incredible chocolate cinnamon rolls is a tender, flavorful yeast dough. Follow these steps carefully to ensure a perfect rise and soft texture.
STEP 1: Activate the Yeast. Begin by heating your milk in a microwave-safe bowl for approximately 1 minute, or until it reaches a precise temperature of 110°F (43°C). Use a thermometer to confirm. Once warmed, gently sprinkle the active dry yeast over the surface of the milk. Let this mixture rest undisturbed for 10 minutes. During this time, the yeast should become foamy and bubbly, indicating that it’s active and ready to work. If it doesn’t foam, your yeast may be expired or the milk temperature was off, and you should start over. While the yeast is activating, pour the large eggs into a separate small bowl and lightly beat them with a fork or whisk until the yolks and whites are just combined.
STEP 2: Combine Dry Ingredients. In the large bowl of your stand mixer (or a spacious mixing bowl if kneading by hand), combine the all-purpose flour, granulated white sugar, and salt. Whisk these dry ingredients together thoroughly. Next, add the cubed unsalted butter, ensuring it’s at room temperature. Using a pastry blender or your fingertips, work the butter into the flour mixture until it resembles coarse crumbs, with butter pieces approximately the size of small peas. This step helps create pockets of steam during baking, contributing to the rolls’ flaky and tender texture.
STEP 3: Incorporate Wet Ingredients. Once the yeast mixture is foamy, pour it into the bowl with the dry ingredients and butter. Follow with the lightly beaten eggs. These wet components will bring the dough together.
STEP 4: Knead the Dough. Attach the dough hook to your stand mixer and mix the ingredients on low speed until a shaggy dough begins to form and all the flour is incorporated. Increase the speed to medium and continue kneading for 5 minutes. The dough should become smooth, elastic, and pull away from the sides of the bowl. For those kneading by hand, refer to the “Expert Baking Tips” section for detailed instructions on achieving the perfect dough consistency.
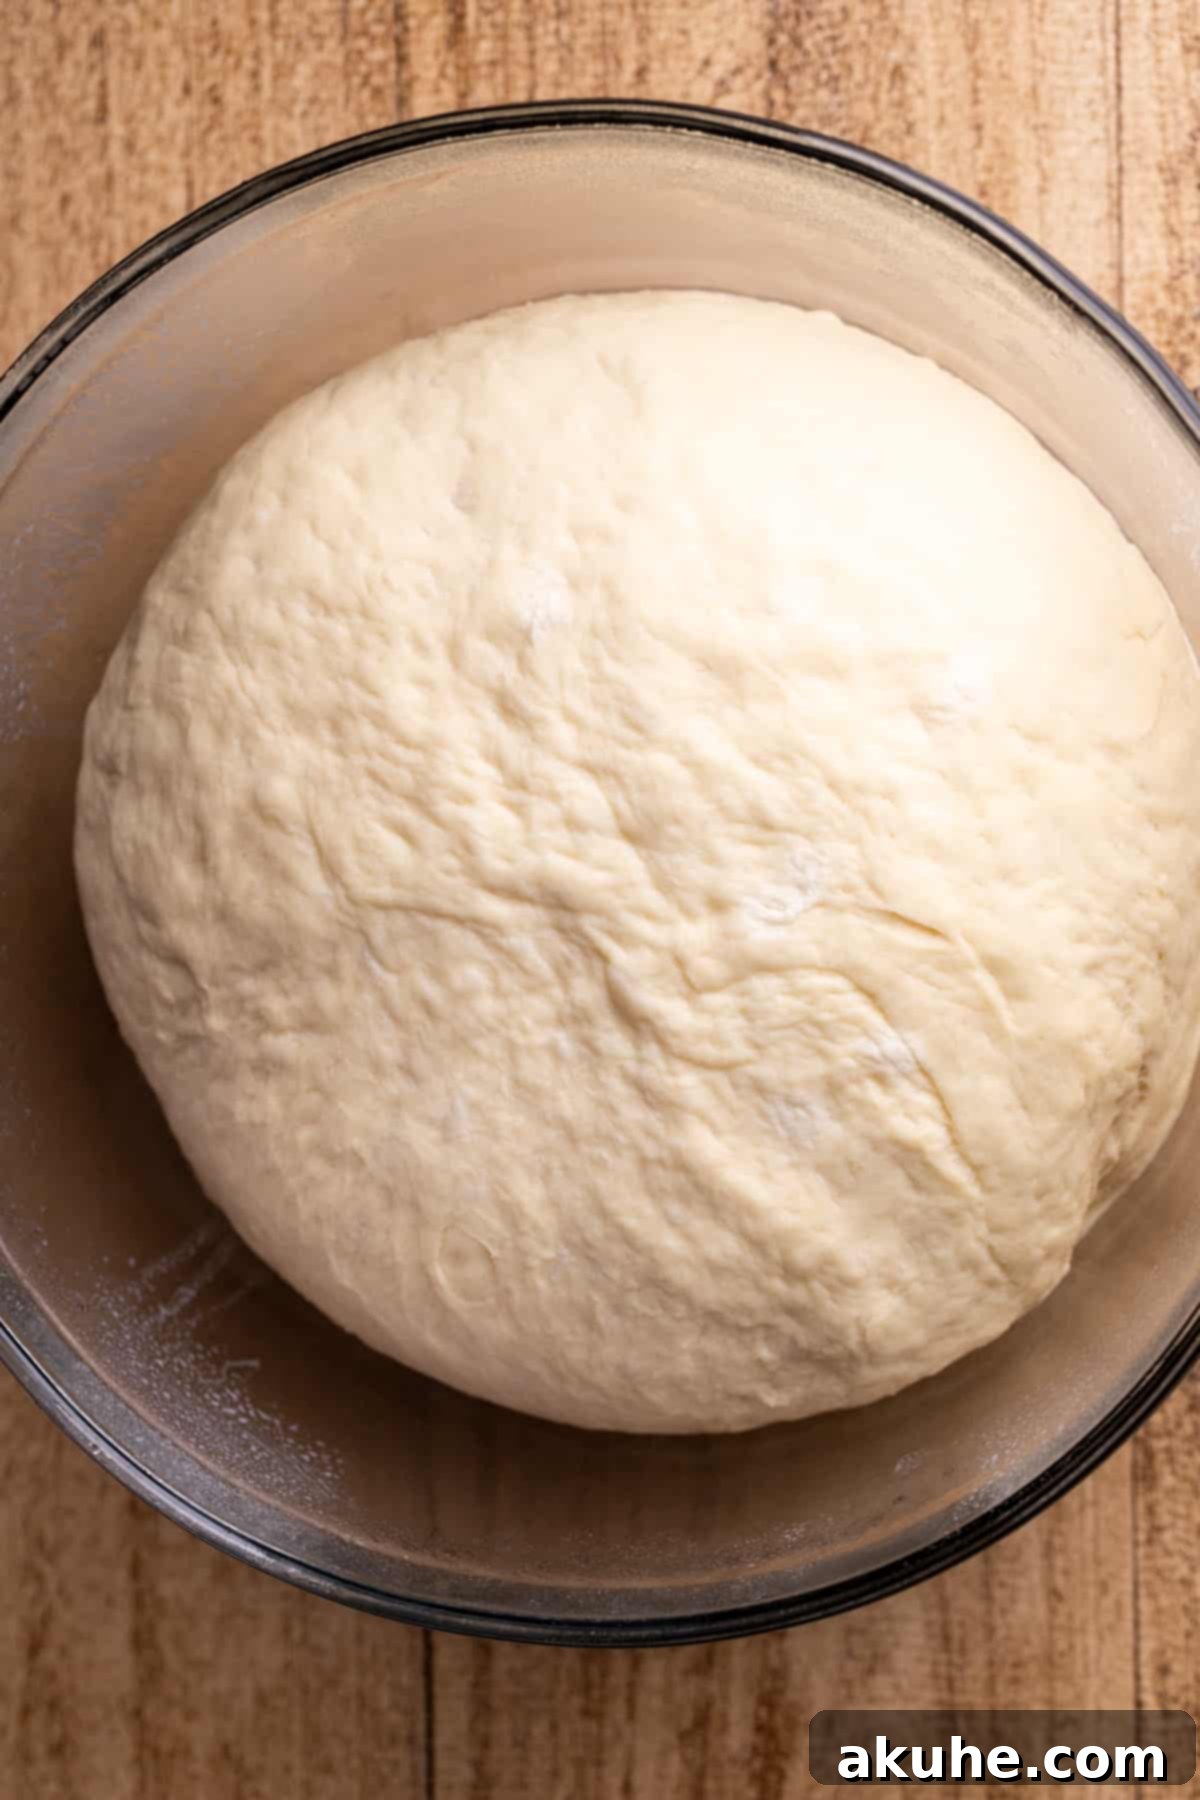
STEP 5: First Rise (Proofing). Lightly spray the inside of a clean, large bowl with a nonstick cooking spray. Gently remove the kneaded dough from the mixer bowl, shape it into a ball, and place it into the prepared bowl, turning it once to coat lightly with spray. This prevents the dough from sticking. Now, choose your preferred rising method:
- Faster Rise Method: For a quicker rise, preheat your oven to its lowest setting (typically 200°F or 90°C), then immediately turn it off. Place a clean kitchen towel over the bowl containing the dough. Position the bowl inside the turned-off oven, leaving the oven door slightly cracked open. Allow the dough to rise in this warm, draft-free environment for 1 hour, or until it has visibly doubled in size.
- Overnight Rise Method (for enhanced flavor): For convenience and a deeper, more developed flavor, you can opt for an overnight rise. Tightly cover the bowl with plastic wrap and place it in the refrigerator. The dough can slowly rise in the fridge for up to 18 hours. This method is excellent for preparing ahead, allowing you to bake fresh rolls in the morning without much fuss.
Step-by-Step Instructions: Crafting the Chocolate Cinnamon Filling and Baking
Once your dough has completed its first rise, it’s time to create the irresistible chocolate cinnamon filling and bake your rolls to golden perfection.
STEP 1: Prepare the Chocolate Cinnamon Filling. In a small mixing bowl, use a hand mixer to beat the room temperature unsalted butter until it is smooth and creamy. Next, add the packed brown sugar, ground cinnamon, and Dutch-processed unsweetened cocoa powder. Beat on high speed until all ingredients are thoroughly combined, forming a smooth, thick, and spreadable paste. The consistency should be easy to spread without being too runny.
STEP 2: Roll Out the Dough. Lightly flour a clean work surface. Gently transfer the risen dough onto the floured surface. Using a rolling pin, roll the dough out into a large rectangle. Aim for a thickness of approximately 1/4 inch (about 0.6 cm). Ensure the rectangle is as even as possible to create uniform rolls.
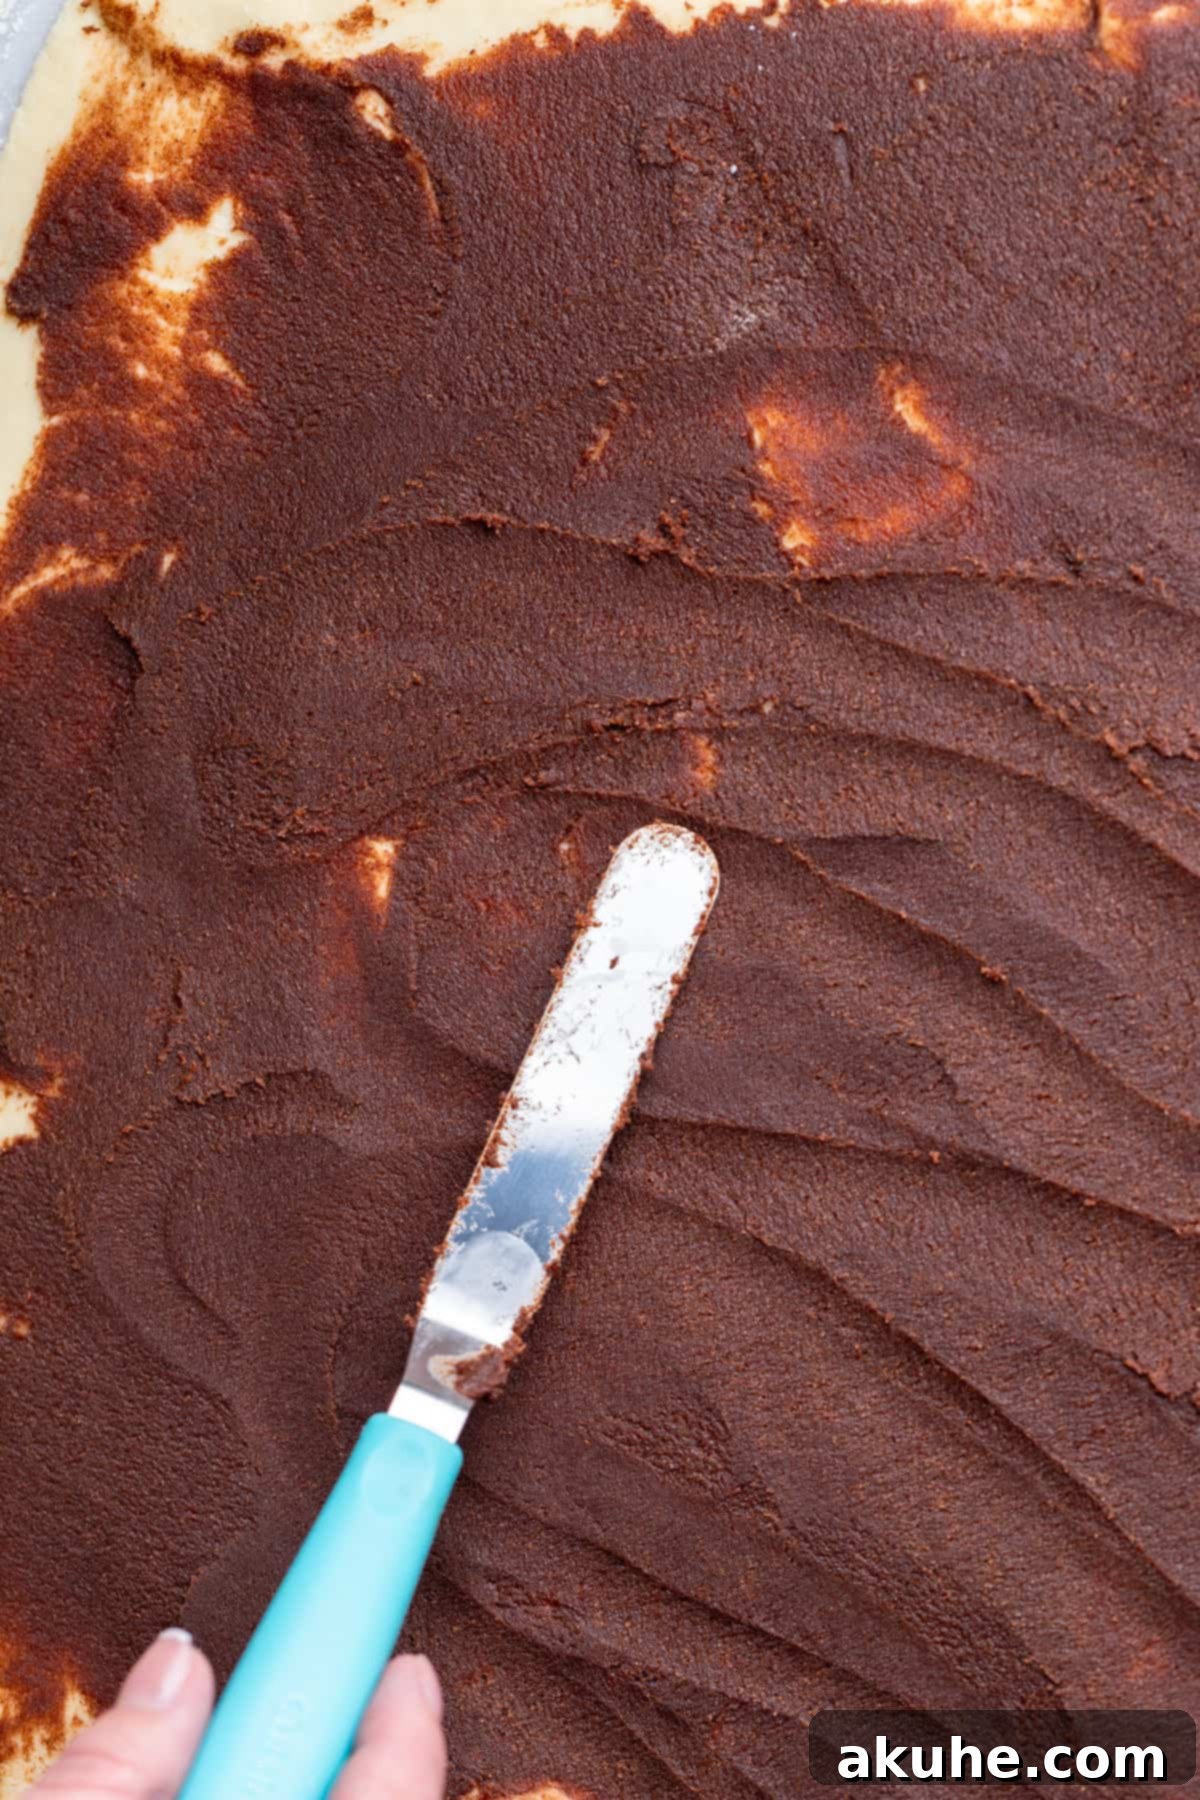
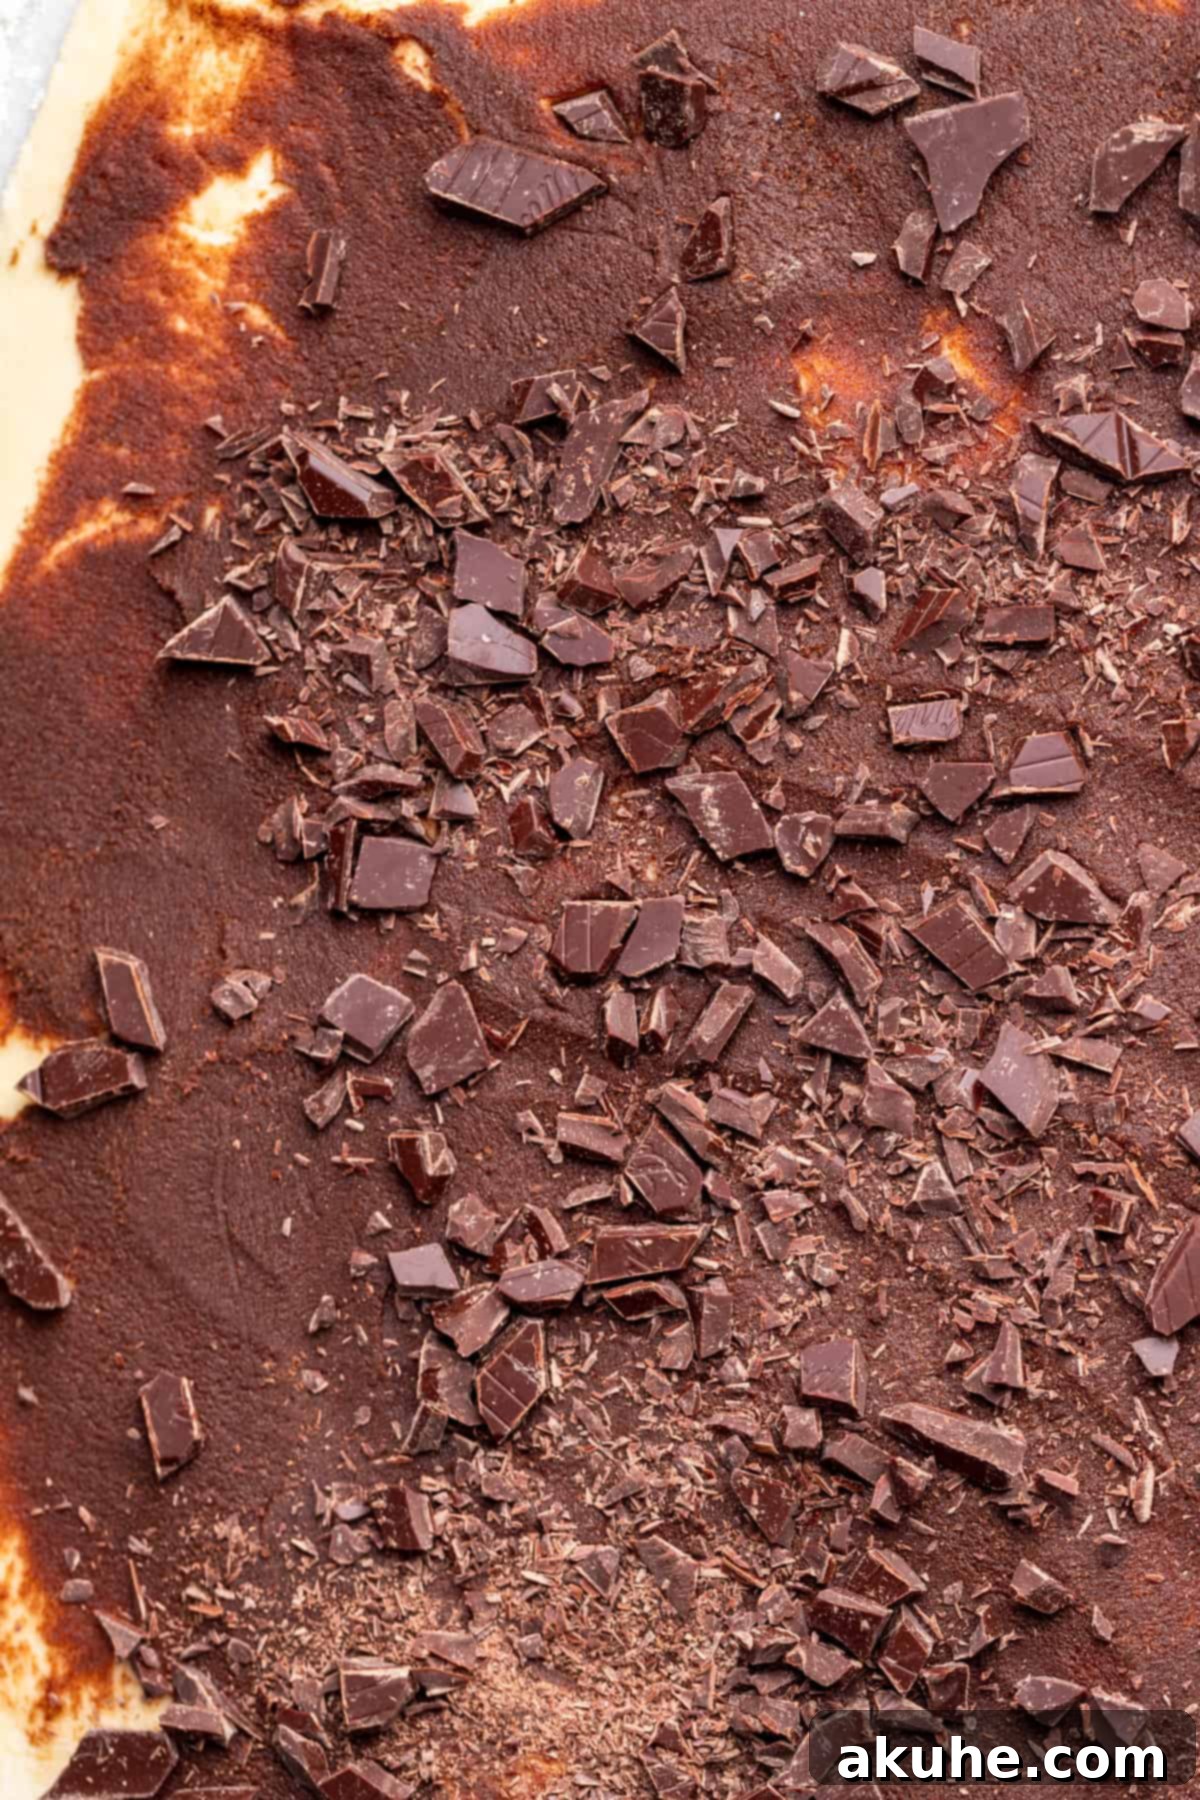
STEP 3: Spread the Filling and Add Chocolate Chunks. Using an offset spatula or the back of a spoon, evenly spread the rich chocolate cinnamon filling over the entire surface of the rolled-out dough, extending all the way to the edges. This ensures every bite is packed with flavor. Then, generously sprinkle the chopped chocolate bar over the filling. Gently press the chocolate pieces into the filling and dough with your hands to help them adhere, preventing them from falling out when rolling.
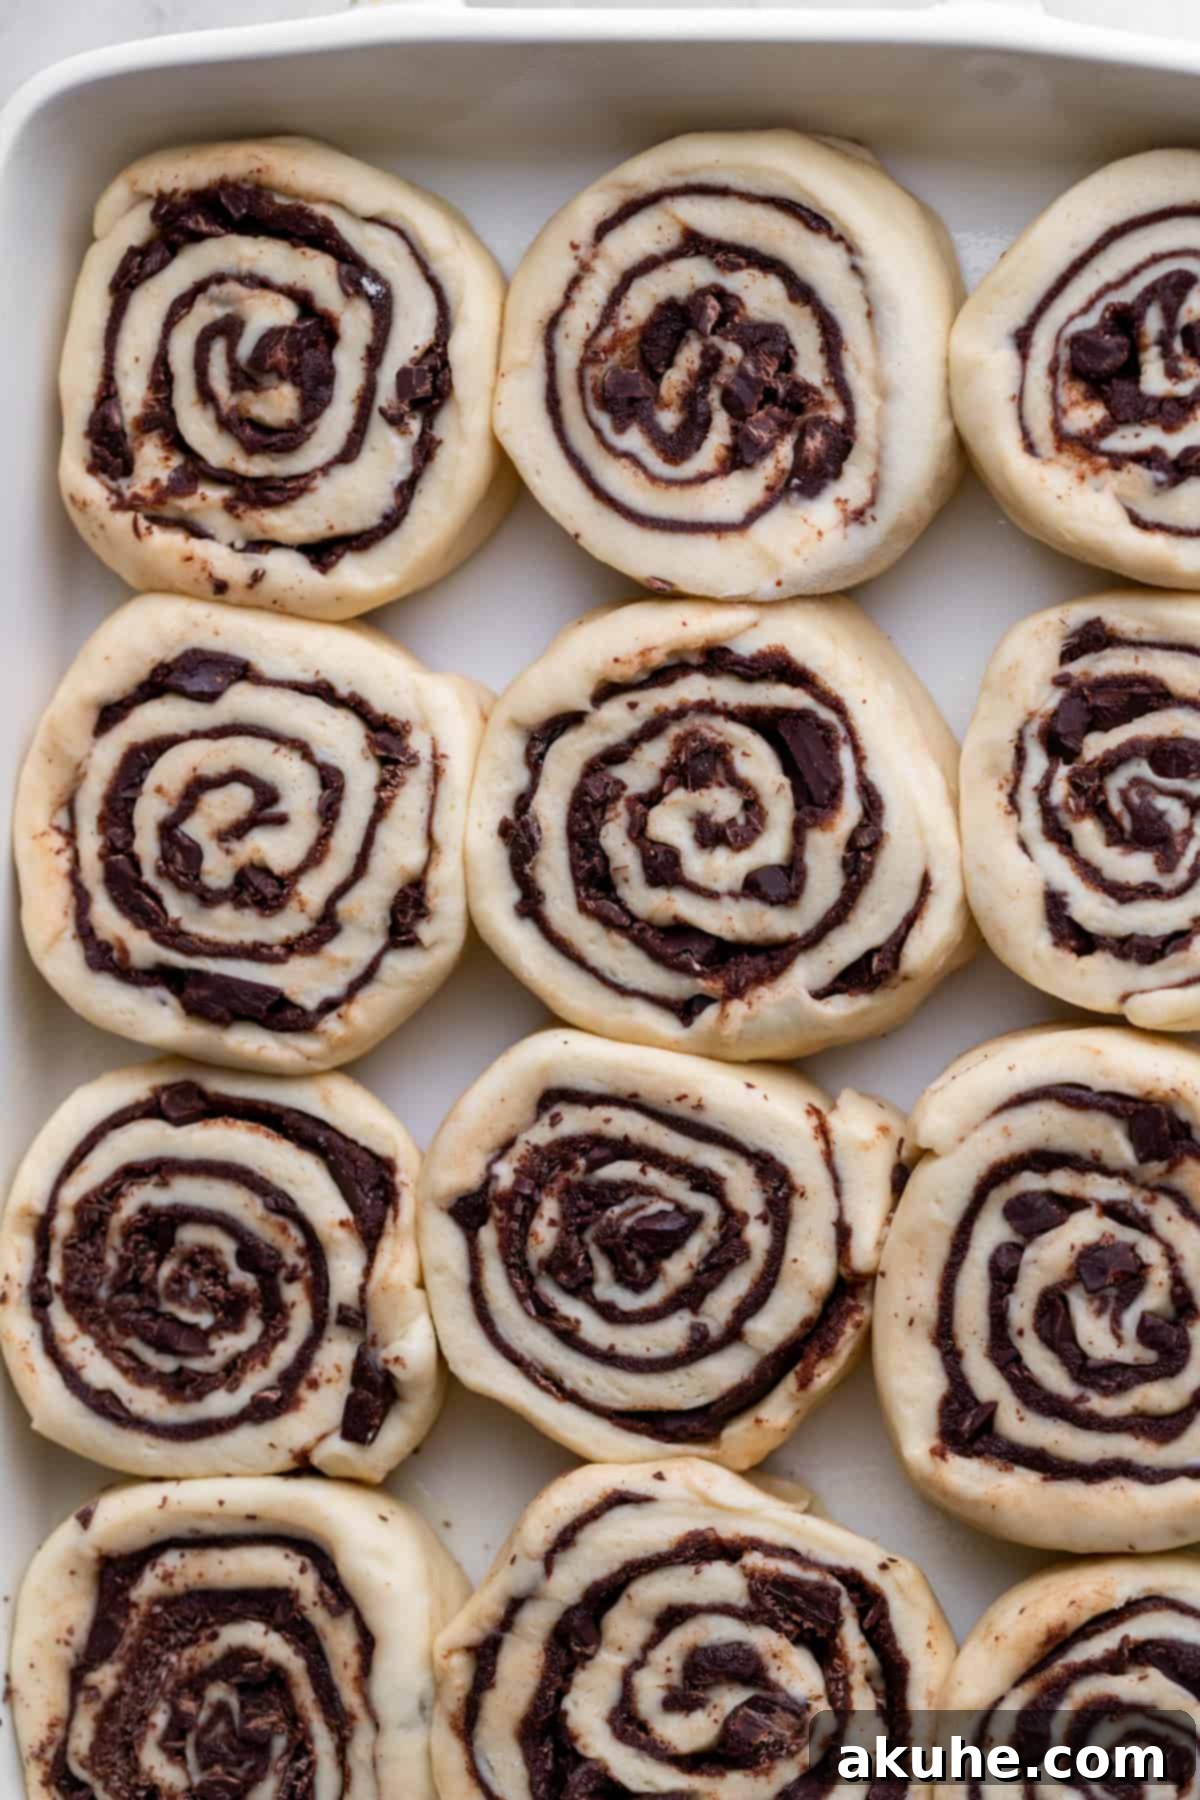
STEP 4: Roll and Slice the Log. Starting from one of the shorter sides of the rectangle, carefully and tightly roll the dough into a log. A tight roll is crucial for maintaining the swirl shape of the cinnamon rolls. Once rolled, use a sharp serrated knife to gently trim off any uneven edges from both ends of the log, creating neat, clean sides. Then, using a gentle sawing motion rather than pressing straight down (which can squish the rolls), cut the log into 12 equally sized pieces, each about 1 to 1.5 inches thick.
STEP 5: Second Rise. Lightly spray a 9×13-inch baking pan with nonstick cooking spray. Arrange the cut chocolate cinnamon rolls evenly inside the prepared pan, leaving a little space between each one to allow for expansion during the second rise. Cover the pan loosely with a clean kitchen towel and let the rolls rise in a warm place for an additional 20 minutes. This second rise will make the rolls extra fluffy and tender.
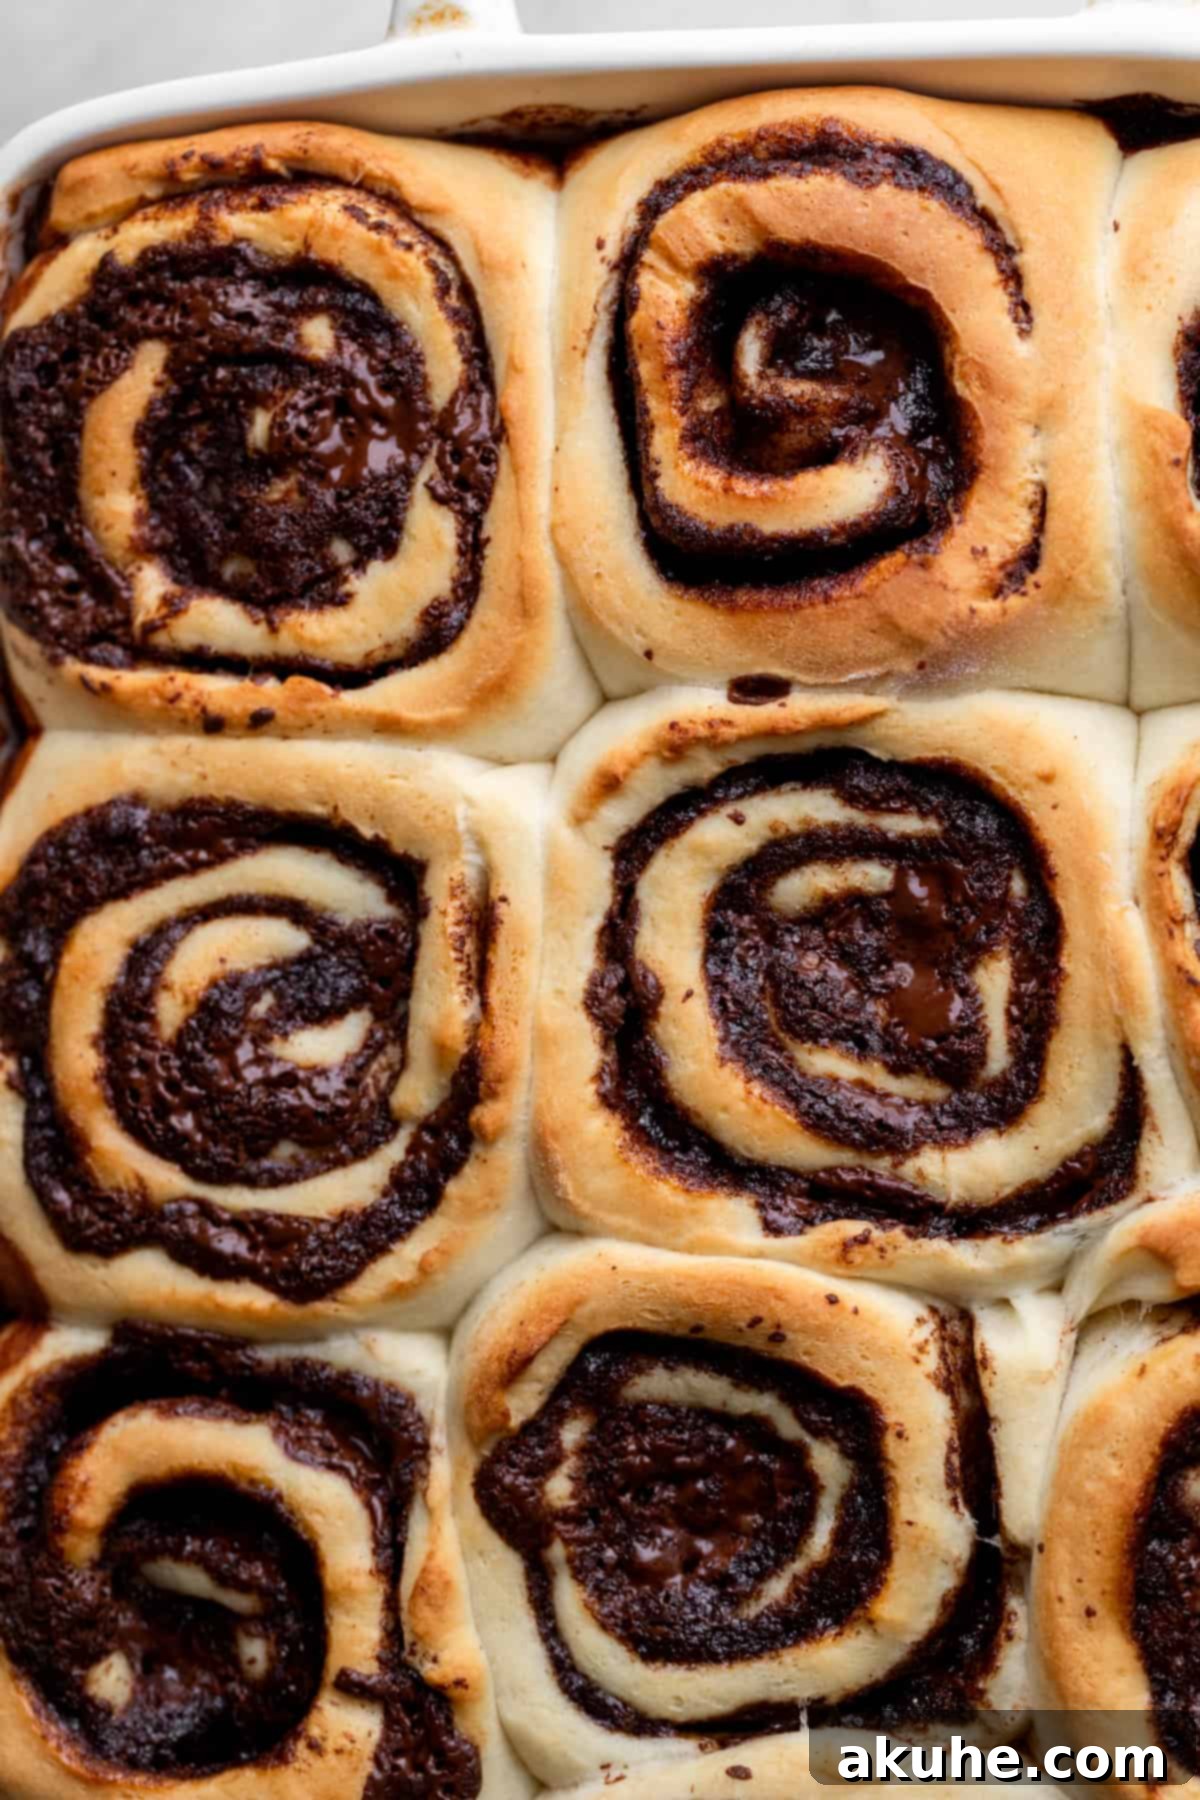
STEP 6: Bake the Rolls. While the rolls are completing their second rise, preheat your oven to 350°F (175°C). Once preheated and the rolls have risen for 20 minutes, remove the kitchen towel. Place the baking pan in the preheated oven and bake for 23-25 minutes. The rolls are done when their tops are beautifully golden brown and an internal thermometer inserted into the center of a roll (avoiding the filling) registers 160°F (71°C). While the rolls are baking, take the opportunity to prepare your indulgent chocolate cream cheese icing so it’s ready to slather on warm from the oven.
Step-by-Step Instructions: Decadent Chocolate Cream Cheese Icing
No chocolate cinnamon roll is complete without a generous dollop of rich, tangy, and sweet icing. Here’s how to create the perfect chocolate cream cheese glaze.
STEP 1: Beat Butter and Cream Cheese. In a small mixing bowl, combine the room temperature cream cheese and softened unsalted butter. Using a hand mixer, beat these two ingredients together on high speed until the mixture is completely smooth, light, and fluffy. Ensure there are no lumps of cream cheese remaining.
STEP 2: Add Dry Icing Ingredients. Gradually add the powdered sugar and unsweetened cocoa powder to the butter and cream cheese mixture. Start mixing on low speed to avoid a cloud of powdered sugar, then increase to high speed. Continue beating until the icing is once again smooth and fully combined. Scrape down the sides of the bowl as needed to ensure everything is incorporated.
STEP 3: Incorporate Vanilla and Milk. Pour in the pure vanilla extract and the milk. Mix on low speed until the icing reaches a smooth, pourable, yet thick consistency. If the icing is too thick, add a tiny bit more milk (half a teaspoon at a time) until you reach your desired texture. If it’s too thin, you can add a tablespoon or two more powdered sugar.
STEP 4: Ice the Warm Rolls. The best time to ice your chocolate cinnamon rolls is immediately after you take them out of the oven. The warmth of the rolls will slightly melt the icing, allowing it to seep into every crevice, creating an even gooier and more irresistible treat. Spoon or spread the freshly made icing generously over the warm rolls.
Expert Baking Tips for Flawless Chocolate Cinnamon Rolls
Achieving bakery-perfect cinnamon rolls is easier with a few expert tips. These insights will help you avoid common pitfalls and ensure your chocolate cinnamon rolls are always a success.
- Accurately Measure Your Flour: Flour is often the most significant variable in baking. To prevent dry, dense rolls, avoid scooping your measuring cup directly into the flour bag, as this compacts the flour and can result in using too much. Instead, gently spoon the flour into your measuring cup until it overflows, then level it off with a straight edge (like the back of a knife). For ultimate accuracy, especially for yeast doughs, consider using a kitchen scale to measure flour by weight (typically 1 cup of all-purpose flour weighs around 120-125 grams).
- Ensure Your Yeast is Active and Fresh: Yeast is a living organism, and its freshness is paramount for a proper rise. Always check the expiration date on your yeast packet or jar. Beyond freshness, the temperature of the milk used to activate it is critical (110°F or 43°C). If the milk is too hot, it will kill the yeast; if it’s too cold, the yeast will activate too slowly or not at all. After sprinkling the yeast over warm milk, let it sit for 5-10 minutes. It should become visibly foamy and bubbly. If it doesn’t, your yeast is likely dead, and you’ll need to discard it and start with new yeast.
- Don’t Overbake: Overbaking is a common culprit for dry cinnamon rolls. Keep a close eye on your rolls during the last few minutes of baking. They should be lightly golden brown on top, and an instant-read thermometer inserted into the center of a roll (avoiding the filling) should register around 160°F (71°C). The rolls will continue to cook slightly from residual heat once removed from the oven.
- Use Quality Chocolate: Since chocolate is a star ingredient in these rolls, using a good quality chocolate bar for chopping will make a noticeable difference in flavor. A bar with 60-70% cocoa content, like Lindt 70% as suggested in the original recipe, provides a rich, complex flavor that complements the sweetness of the dough and icing beautifully. Chocolate chips can be used in a pinch, but a chopped bar offers superior melt and flavor distribution.
- The Windowpane Test for Dough: To truly know if your dough is perfectly kneaded, try the “windowpane test.” Pinch off a small piece of dough and gently stretch it between your fingers. If you can stretch it thin enough to see light through it without it tearing, your dough is adequately kneaded and the gluten has developed correctly. If it tears easily, continue kneading for another minute or two and test again.
- Adjust Dough Hydration for Humidity: The amount of flour needed can vary slightly depending on the humidity in your kitchen. If your dough feels too sticky after the initial kneading time, add flour one tablespoon at a time until it reaches a smooth, elastic consistency that pulls away from the sides of the bowl. If it feels too dry, add a tiny bit of milk or water.
- Chilling for Convenience and Flavor: As noted in the instructions, you can chill the prepared, unbaked rolls overnight. This isn’t just for convenience; the slow, cold fermentation actually allows the flavors in the dough to develop more deeply, resulting in a more complex and delicious final product. It also makes the dough easier to handle when rolling and cutting.
Frequently Asked Questions About Chocolate Cinnamon Rolls
Here are answers to some common questions about making and enjoying these decadent chocolate cinnamon rolls.
- Do the rolls have to rise in the oven?
While the preheated-then-turned-off oven method creates a consistently warm and draft-free environment ideal for yeast doughs, it’s not the only way. Yeast thrives in warmth, so if your oven is occupied, you can let the dough rise at room temperature. Just ensure your kitchen isn’t too cold, as this will significantly slow down the rising process. Look for a naturally warmer spot in your home, perhaps near a sunny window (but not in direct blazing sun) or near a warm appliance. The key is consistency. For the best flavor development and scheduling flexibility, the overnight rise in the refrigerator is also an excellent and highly recommended option, as it allows for a slow, cold fermentation.
- What is the best way to reheat cinnamon rolls?
For a single roll, the microwave is your best friend. Place one chocolate cinnamon roll on a microwave-safe plate and heat for 15-25 seconds, or until it’s warm and gooey. Microwave timings can vary, so start with less time and add more if needed to prevent drying it out. If you’re reheating a whole tray of rolls, preheat your oven to 350°F (175°C). Place the baking dish of rolls (covered loosely with foil to prevent drying) into the warm oven for about 5-10 minutes, or until they are heated through and soft again. This method helps retain their original texture.
- Can I par-bake these rolls in advance?
Yes, you can absolutely par-bake these chocolate cinnamon rolls for even greater convenience! Follow all the dough preparation, filling, and rolling instructions. Instead of baking for the full 23-25 minutes, bake the rolls for only 10-12 minutes. They should be set but still pale, not golden brown. Remove them from the oven and let them cool completely in the pan, then cover and chill them in the refrigerator. In the morning, or when you’re ready to serve, simply continue baking the par-baked rolls in a preheated 350°F (175°C) oven for another 8-10 minutes, or until they are golden brown and heated through. This method is fantastic for fresh-baked rolls with minimal morning effort.
Storing and Freezing Your Delicious Chocolate Cinnamon Rolls
Proper storage ensures your homemade chocolate cinnamon rolls remain fresh and delightful for as long as possible.
Once baked and cooled (or even with the icing still warm), store any leftover chocolate cinnamon rolls in an airtight container. Keep them in the refrigerator for up to 5 days. While delicious cold, they are truly best when gently reheated in the microwave until warm and soft again, bringing back their delightful gooey texture.
Freezing Instructions
These versatile chocolate cinnamon rolls can be frozen in two convenient ways, allowing you to enjoy them fresh whenever the craving strikes.
- Freeze Unbaked Rolls: After the second rise and cutting, place the unbaked rolls onto a baking sheet and freeze them individually until solid (about 1-2 hours). Once frozen, transfer them to a freezer-safe airtight bag or container. They can be stored for up to 30 days. When ready to bake, transfer the frozen rolls to your baking pan, cover them, and let them thaw and rise in a warm place for several hours (4-6 hours or overnight in the fridge) until they are puffy again. Note that the rise might not be as pronounced as with fresh dough, but they will still be incredibly delicious. Then, bake as directed.
- Freeze Already Baked Rolls: Once your chocolate cinnamon rolls are fully baked and cooled (with or without icing), you can freeze them. Wrap individual rolls tightly in plastic wrap, then place them in a freezer-safe airtight container or bag. They will keep well for up to 30 days. To enjoy, thaw the rolls at room temperature for about 1 hour, then reheat briefly in the microwave or oven for that fresh-baked warmth and gooeyness.
Other Sweet Roll Recipes To Explore
If you enjoyed crafting these delicious chocolate cinnamon rolls, be sure to explore more sweet roll creations! And if you loved this recipe, consider sharing your experience. We love seeing your culinary creations; don’t forget to tag us on Instagram @stephaniesweettreats. For more inspiring baking ideas, make sure to follow us on Pinterest.
Chocolate Cinnamon Rolls
Print Recipe
Pin Recipe
Ingredients
Dough
- 1 cup Milk, warmed to 110℉
- 2 1/4 tsp Active dry yeast, 1 packet
- 2 Large eggs, room temperature
- 4 1/2 cups All-purpose flour
- 1/4 cup White granulated sugar
- 1 tsp Salt
- 10 TBSP Unsalted butter, room temperature cubed
Chocolate Cinnamon Filling
- 1/2 cup Unsalted butter, room temperature
- 3/4 cup Brown sugar, packed light or dark
- 1 TBSP Ground cinnamon
- 2 TBSP Unsweetened cocoa powder, I use dutch process
- 8 oz Chocolate bar, chopped. I use Lindt 70%
Chocolate Cream Cheese Icing
- 2 oz Cream cheese, room temperature
- 2 TBSP Unsalted butter, room temperature
- 1/2 cup Powdered sugar
- 2 TBSP Unsweetened cocoa powder
- 1 tsp Pure vanilla extract
- 2 TBSP Milk
Instructions
Dough
- Heat the milk in a microwave-safe bowl for 1 minute until it reaches 110℉. Sprinkle the yeast over the milk and let it sit for 10 minutes to activate. Meanwhile, pour the eggs into a bowl and lightly beat them.
- In a large bowl, mix the flour, sugar, and salt. Add the cubed room temperature butter and use a pastry kneader or your hands to work the butter into the flour until it resembles pea-sized crumbs.
- Add the activated milk/yeast mixture and the beaten eggs to the dry ingredients.
- Using a stand mixer with a dough hook, mix on low speed until a dough starts to form. Then, increase to medium speed and knead for 5 minutes until smooth and elastic. (Refer to notes for hand-kneading instructions).
- Rising Options:
1. For a quicker rise: Preheat oven to 200℉, turn off. Place dough in a greased bowl, cover with a kitchen towel, and place in the warm oven with the door cracked for 1 hour, or until doubled.
2. For an overnight rise: Place dough in a greased bowl, cover with plastic wrap, and refrigerate overnight (up to 18 hours).
Chocolate Cinnamon Filling & Baking
- In a small bowl, beat room temperature butter until smooth. Add brown sugar, cinnamon, and cocoa powder. Mix on high speed until it forms a smooth, thick paste.
- Place the risen dough on a lightly floured surface. Use a rolling pin to roll it into a large rectangle, about 1/4 inch thick.
- Spread the chocolate filling evenly over the dough using an offset spatula, extending to the edges. Sprinkle the chopped chocolate over the filling and gently press it into the dough.
- Starting from the short side, tightly roll the dough into a log. Use a serrated knife with gentle sawing motions to trim uneven ends and cut the log into 12 equal rolls.
- Spray a 9×13-inch pan with nonstick spray. Place the rolls inside, cover with a kitchen towel, and let rise for 20 minutes.
- While rolls rise, preheat oven to 350℉. Bake for 23-25 minutes, or until tops are lightly golden brown and insides reach 160℉. Start preparing the icing while rolls bake.
Chocolate Cream Cheese Icing
- In a small bowl, use a hand mixer to beat room temperature cream cheese and butter on high speed until smooth and fluffy.
- Add powdered sugar and cocoa powder. Mix on low speed until combined, then switch to high speed and beat until smooth.
- Add vanilla extract and milk. Mix on low speed until well incorporated and smooth.
- Immediately after taking the rolls out of the oven, generously spoon or spread the warm icing over them.
Notes
High Altitude Baking: If you’re baking at high altitudes, consider adding an extra 3 tablespoons of flour to the dough.
Room Temperature Ingredients: For best results with both dough and icing, pull out all dairy ingredients (butter, milk, eggs, cream cheese) at least 2 hours before you begin baking to allow them to reach room temperature.
Making Dough by Hand:
– After combining dry ingredients and butter, add wet ingredients and mix with a rubber spatula until mostly combined. Switch to using your hands to fully incorporate until a shaggy dough forms.
– Transfer the dough to a lightly floured surface. Knead continuously with your hands for 5-8 minutes until the dough is smooth and elastic.
– Test for doneness: Gently stretch a small piece of dough between your fingers. If you can stretch it thin enough to see light through it without tearing (the “windowpane test”), it is properly kneaded.
