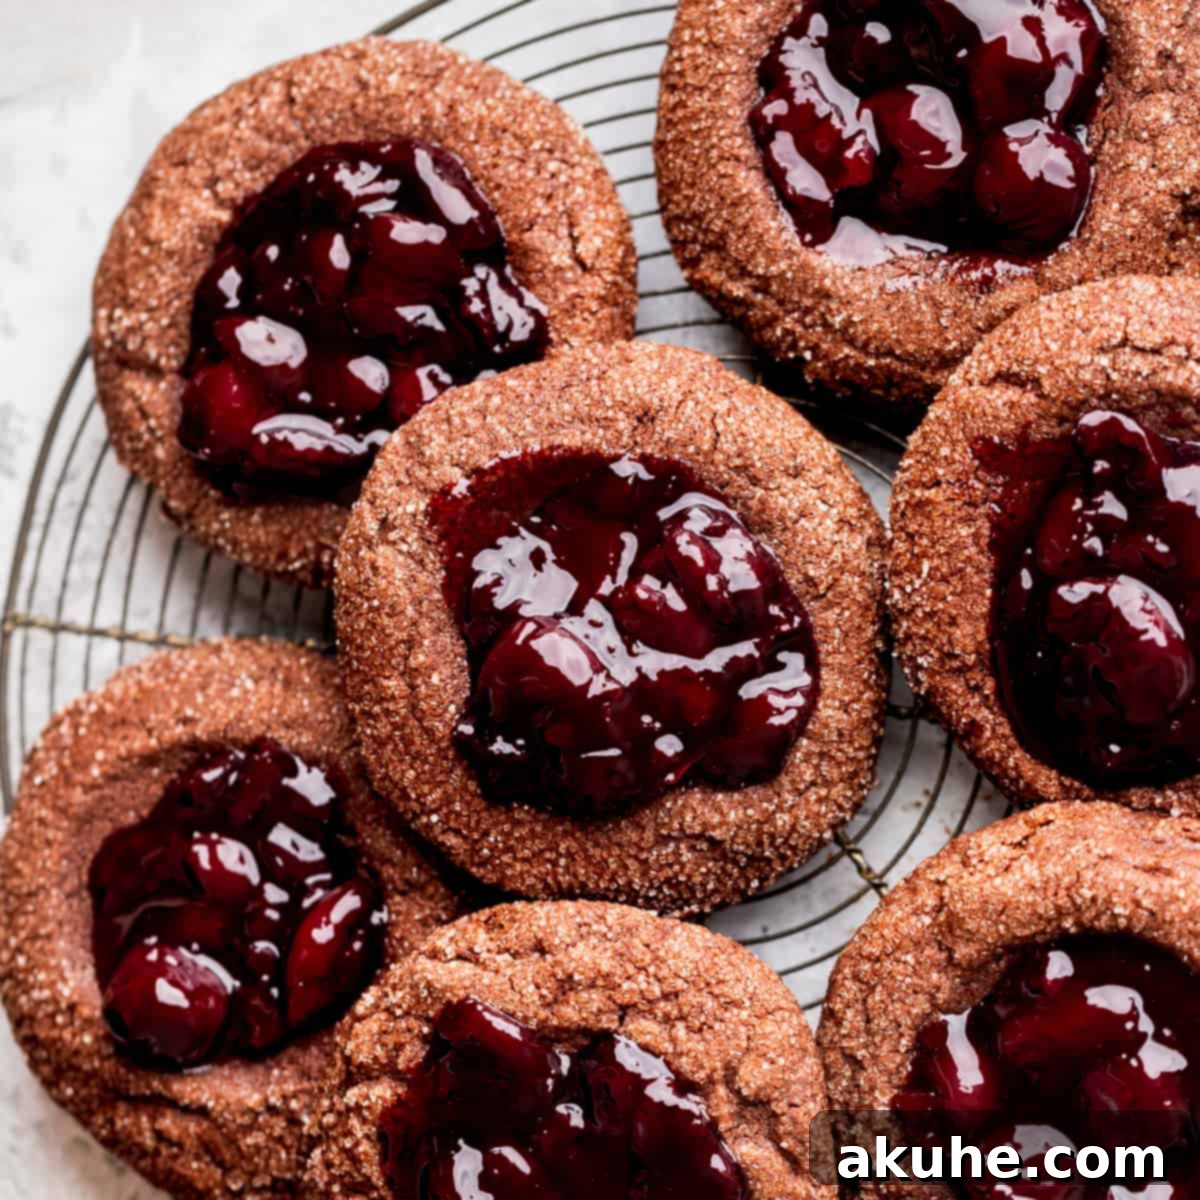
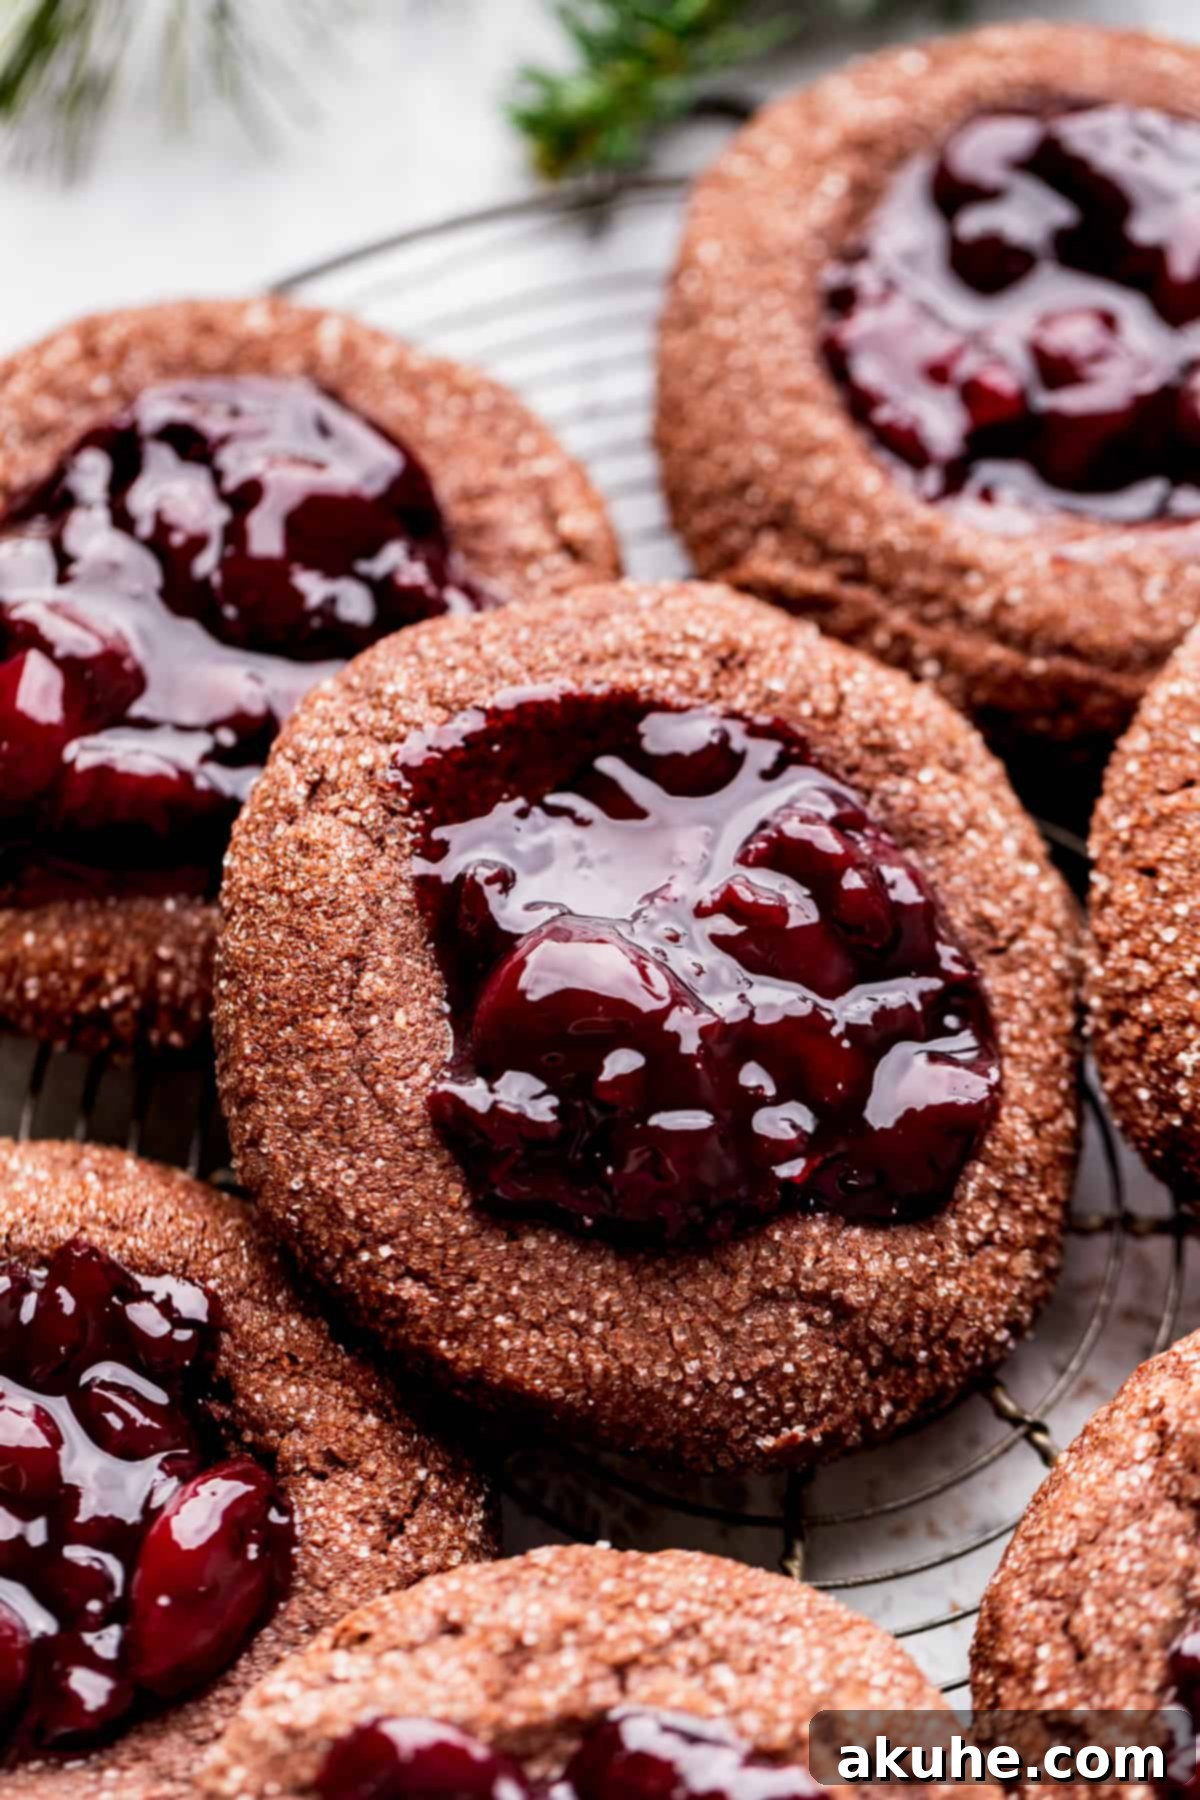
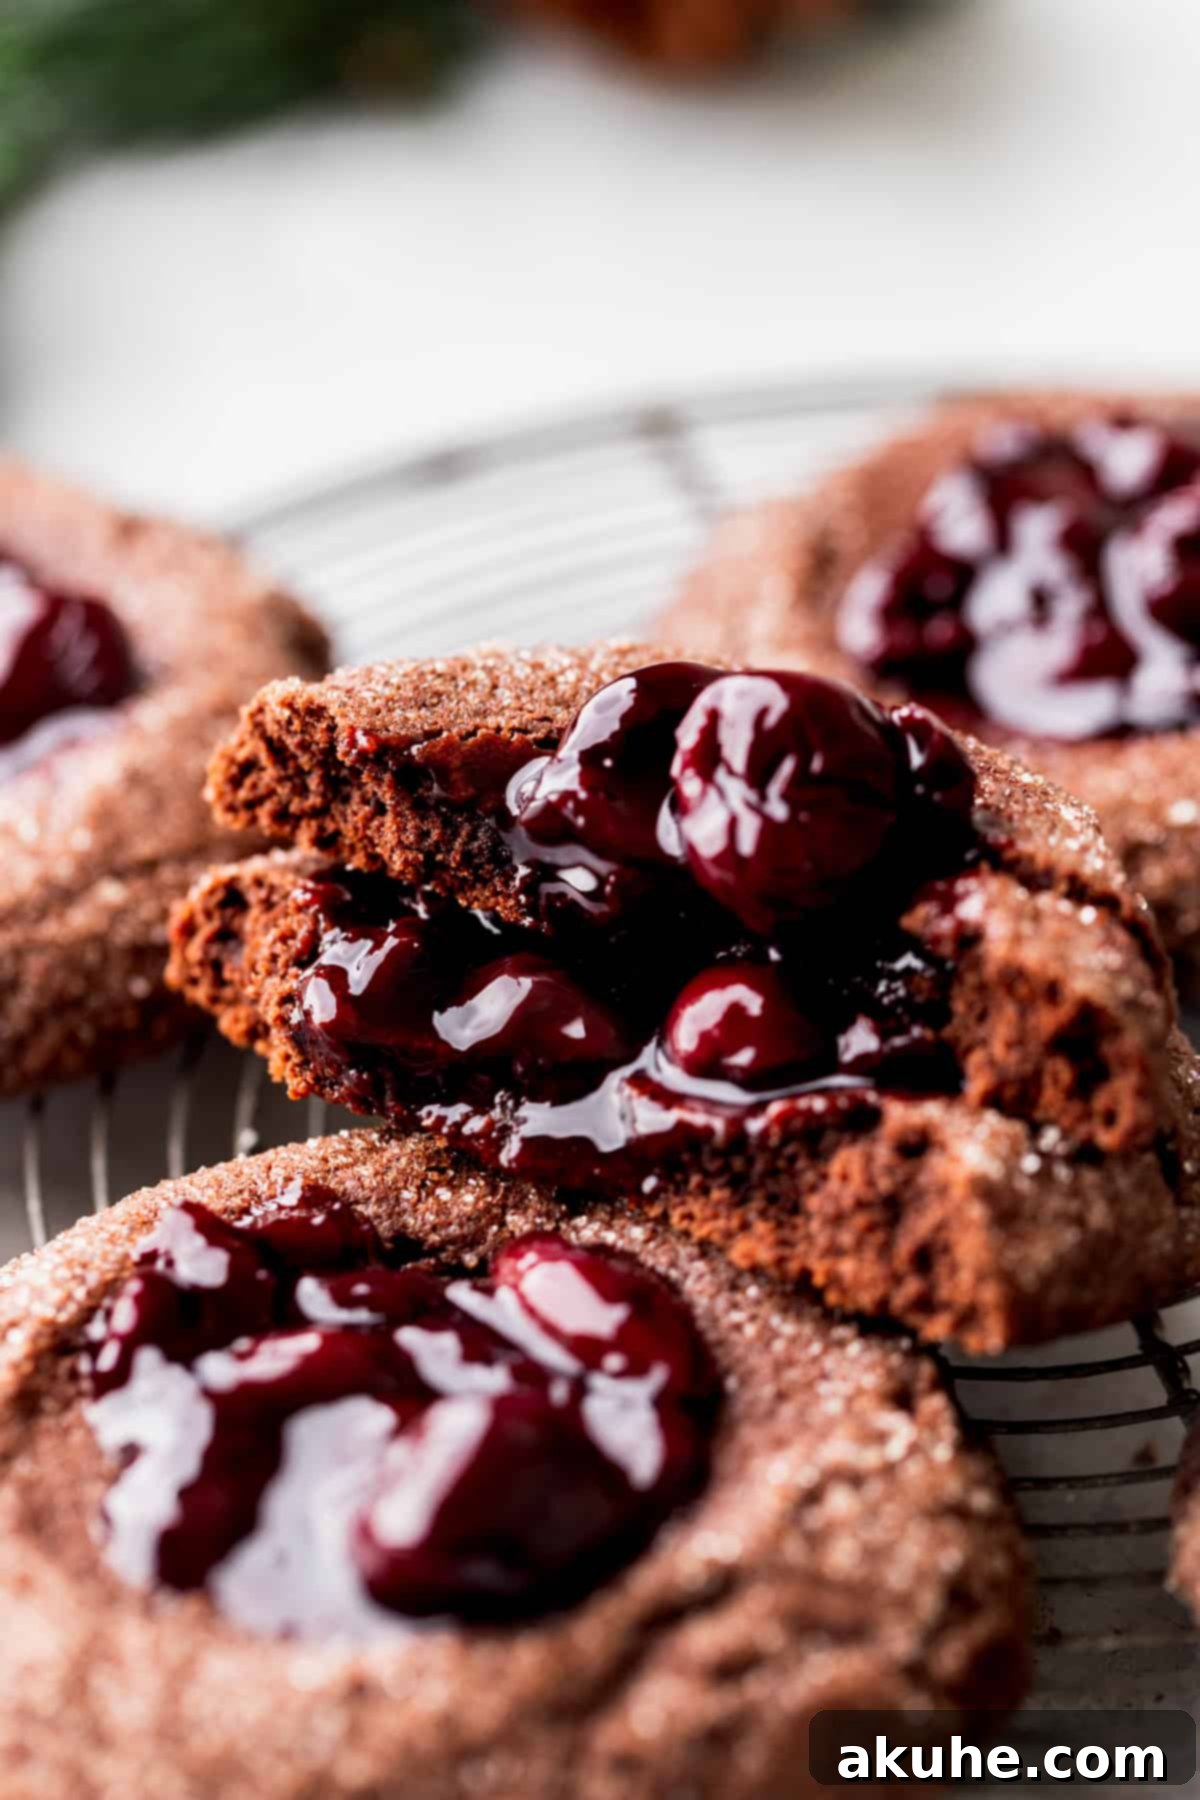
Indulge in the perfect harmony of rich chocolate and vibrant cherry with these irresistible **Chocolate Cherry Cookies**. Imagine a melt-in-your-mouth, fudgy chocolate cookie base, lovingly rolled in sparkling sugar, and crowned with a luscious, homemade cherry filling. These cookies aren’t just a treat; they’re an experience, ideal for celebrating the peak of cherry season, adding a festive touch to your Christmas baking, making Valentine’s Day extra sweet, or simply satisfying any chocolate and cherry craving that strikes. Get ready to bake a batch of pure bliss that will captivate hearts and taste buds alike.
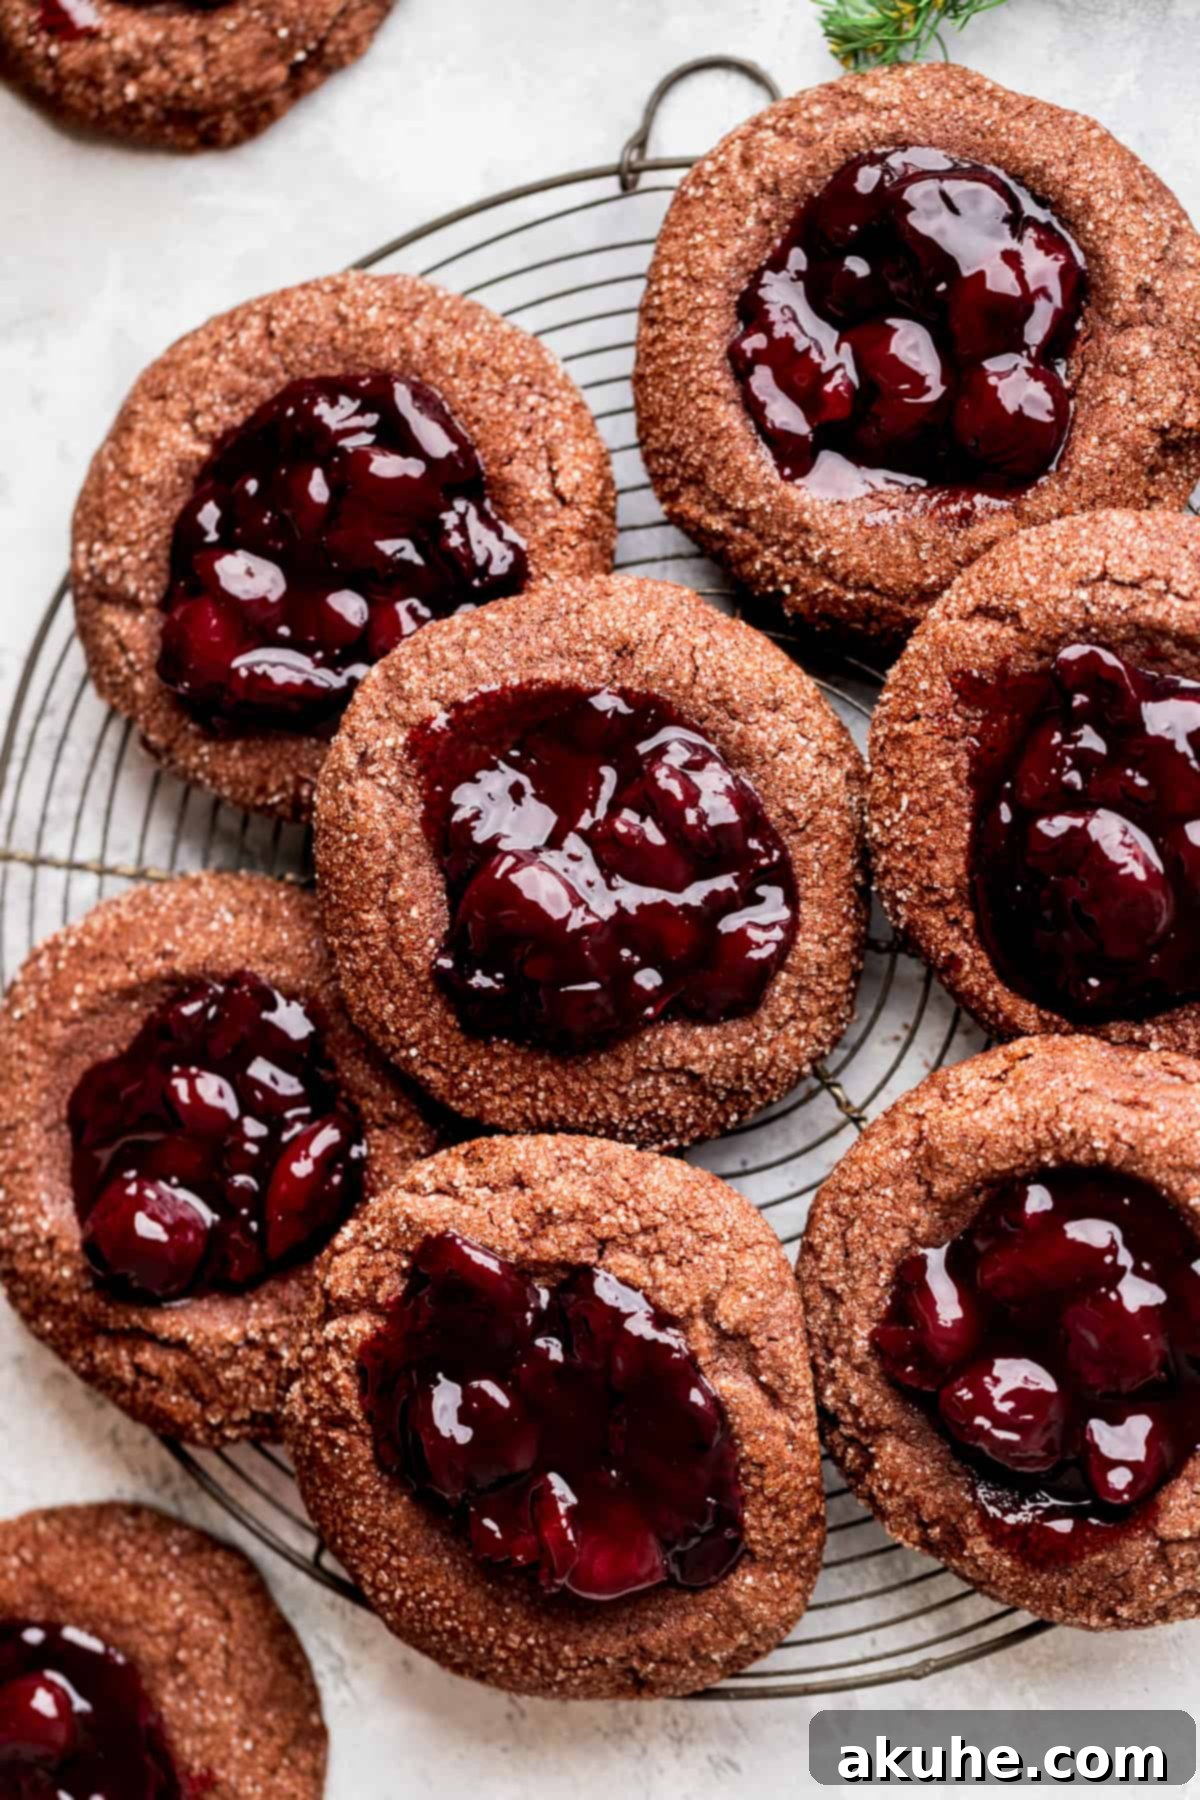
For anyone who adores the classic combination of chocolate and cherry, especially fans of a good cherry pie, these cookies are a dream come true. The deep, intense flavor of the chocolate cookie provides the perfect canvas for the bright, fruity notes of the cherry filling. These delightful treats are destined to become your new favorite for any festive occasion, from the joyous holiday season to romantic Valentine’s Day gatherings, or even just a cozy weekend at home. They offer all the beloved flavors of a homemade cherry pie, elegantly transformed into a convenient and utterly delicious cookie form.
If you’re looking for more enchanting holiday dessert recipes, be sure to try our Gingerbread Cheesecake, a comforting classic that perfectly embodies festive warmth. For another cherry-inspired delight, our Cherry Cheesecake is always a crowd-pleaser. And don’t miss the vibrant flavors of our Christmas Cranberry Cake, another fantastic addition to your holiday baking repertoire.
Craving even more cherry goodness? Explore these fantastic cherry pie bars for a delightful twist on a classic dessert!
Why This Chocolate Cherry Cookie Recipe Stands Out
Our Chocolate Cherry Cookies aren’t just another cookie recipe; they’re crafted to deliver an exceptional baking and tasting experience. Here’s what makes this recipe truly special and a must-try for any dessert enthusiast:
- Irresistible Fudgy Chocolate Cookie Base: The foundation of this recipe is a remarkably rich and fudgy chocolate cookie. It’s not just a vehicle for the cherry filling; it’s a star in its own right, boasting a deep chocolate flavor and a delightfully chewy texture that chocolate lovers will instantly adore. We use Dutch process cocoa powder to achieve an intense, dark chocolate profile that truly elevates the entire cookie.
- Luscious Homemade Cherry Filling: Forget bland, store-bought fillings! The vibrant cherry topping in these cookies mimics the deliciousness of a gourmet cherry pie filling, but in a perfectly portable cookie format. Made from scratch with fresh or frozen cherries, it offers a burst of sweet-tart flavor that beautifully complements the rich chocolate. This homemade touch truly sets these cookies apart.
- Effortless Baking Process, Impressive Results: Don’t be intimidated by their sophisticated appearance. These cookies are surprisingly easy to make, even for novice bakers. You won’t even need an electric mixer – a simple whisk and spatula are all it takes! This accessibility means you can whip up a batch of these stunning treats without any fuss, making them perfect for last-minute entertaining or a spontaneous baking session.
- Festive and Versatile for Any Occasion: While perfect for cherry season and Christmas, these cookies transcend specific holidays. Their striking appearance and delightful flavor combination make them a fantastic choice for Valentine’s Day, potlucks, birthday parties, or simply as an elegant everyday dessert. They’re guaranteed to be a conversation starter and a favorite at any gathering.
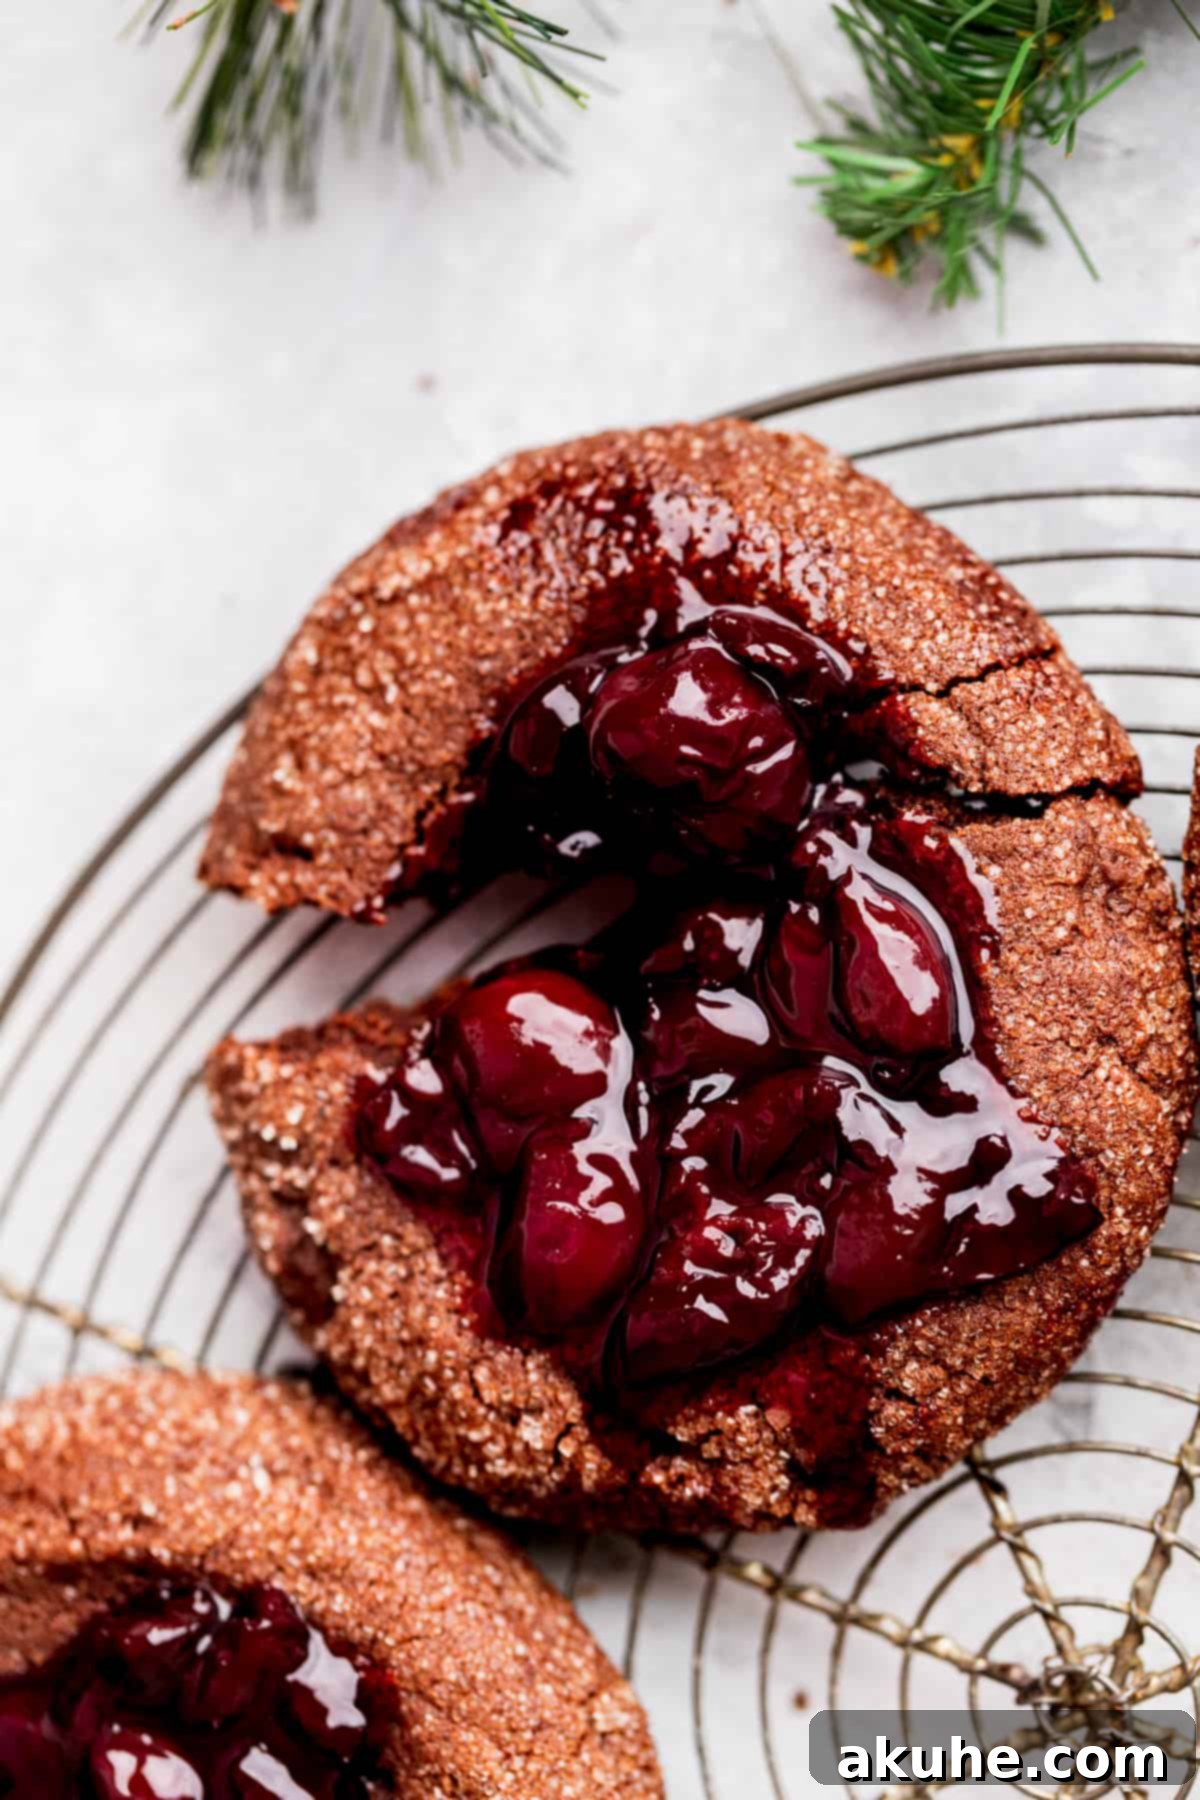
- Stunning Visual Appeal: The sparkling sugar coating provides a beautiful shimmer, and the vibrant red cherry filling nestled in the center creates an eye-catching contrast against the dark chocolate cookie. These cookies don’t just taste good; they look absolutely gorgeous on any dessert platter, making them ideal for gifting or showcasing your baking prowess.
Essential Ingredient Notes for Perfect Chocolate Cherry Cookies
Understanding the role of each ingredient is key to achieving the best possible results. Below are some important notes and considerations for the components of these delightful cookies. For a comprehensive list of quantities, please refer to the recipe section at the bottom of this page.
- Cherries: Both fresh or frozen cherries are suitable for this recipe, offering flexibility depending on availability. If using fresh, make sure they are thoroughly pitted to avoid any unpleasant surprises. Dark sweet cherries are highly recommended for their rich flavor and beautiful color, but tart cherries can also be used for a more intense, tangy filling. Note that frozen cherries may require a slightly longer cooking time to soften and release their juices.
- Unsweetened Cocoa Powder: The quality of your cocoa powder significantly impacts the flavor and color of your chocolate cookies. We highly recommend using a Dutch process cocoa powder. This type of cocoa is treated with an alkali, which neutralizes its acidity, resulting in a darker, richer, and smoother chocolate flavor compared to natural cocoa. It contributes to the fudgy texture and deep color that makes these cookies so appealing.
- Unsalted Butter: Using unsalted butter gives you complete control over the salt content in your recipe. It’s crucial that the butter is melted and then cooled to room temperature before being incorporated into the wet ingredients. Adding hot butter can cause the cookies to spread excessively during baking, leading to a thinner, crispier cookie rather than the desired fudgy texture. Planning ahead to let your butter cool is a small step that makes a big difference.
- Brown Sugar: Light brown sugar is specified in this recipe, contributing to the cookies’ chewiness and moisture content, as well as a subtle caramel note. The molasses in brown sugar also interacts with the leavening agents to create a softer texture. Packed brown sugar ensures accurate measurement.
- White Granulated Sugar: This sugar adds sweetness and helps with the cookie’s structure and spread. A portion of it is also used for rolling the cookie dough balls, creating a sparkling, slightly crisp exterior.
- Eggs: For optimal emulsification and a smoother dough, ensure your eggs are at room temperature. This allows them to blend more seamlessly with the other ingredients, creating a uniform batter and a better overall cookie texture. Take them out of the refrigerator at least 30 minutes to 2 hours before you begin baking.
- All-Purpose Flour, Baking Soda, Baking Powder, and Salt: These essential dry ingredients form the structure of the cookie and aid in leavening and flavor balance. Proper measurement of flour is critical; spooning it into the measuring cup and leveling it off prevents over-measuring, which can lead to dry, dense cookies.
- Vanilla Extract: Pure vanilla extract enhances the chocolate flavor and adds a warm, aromatic depth to the cookies.
Ingredient Substitutions for Dietary Needs and Preferences
Baking should be enjoyable for everyone! While this recipe is fantastic as written, here are a couple of common substitutions you might consider to accommodate various dietary requirements:
- Dairy-Free: To make these chocolate cherry cookies dairy-free, you can easily substitute the unsalted butter with your favorite plant-based, dairy-free butter alternative. Ensure the dairy-free butter is also melted and cooled to room temperature, just like traditional butter, to maintain the correct cookie consistency.
- Gluten-Free: This recipe has not been specifically tested with gluten-free flour. However, many successful gluten-free bakers have had success substituting standard all-purpose flour with a high-quality 1:1 gluten-free all-purpose baking blend that contains xanthan gum. If you choose to try a gluten-free blend, results may vary, and a slight adjustment in liquid or baking time might be necessary. We encourage you to experiment and would love to hear about your experience if you do!
- Cherry Filling Alternatives: While homemade cherry filling is superb, if you’re short on time, a high-quality canned cherry pie filling can be used as a convenient substitute. Alternatively, you could experiment with other fruit fillings like raspberry, strawberry, or even a mixed berry compote for a different flavor profile.
Step-By-Step Instructions for Crafting Your Chocolate Cherry Cookies
Follow these detailed steps to create your delicious chocolate cherry cookies. This recipe is designed to be straightforward and does not require an electric hand mixer or a stand mixer, making it accessible for all skill levels.
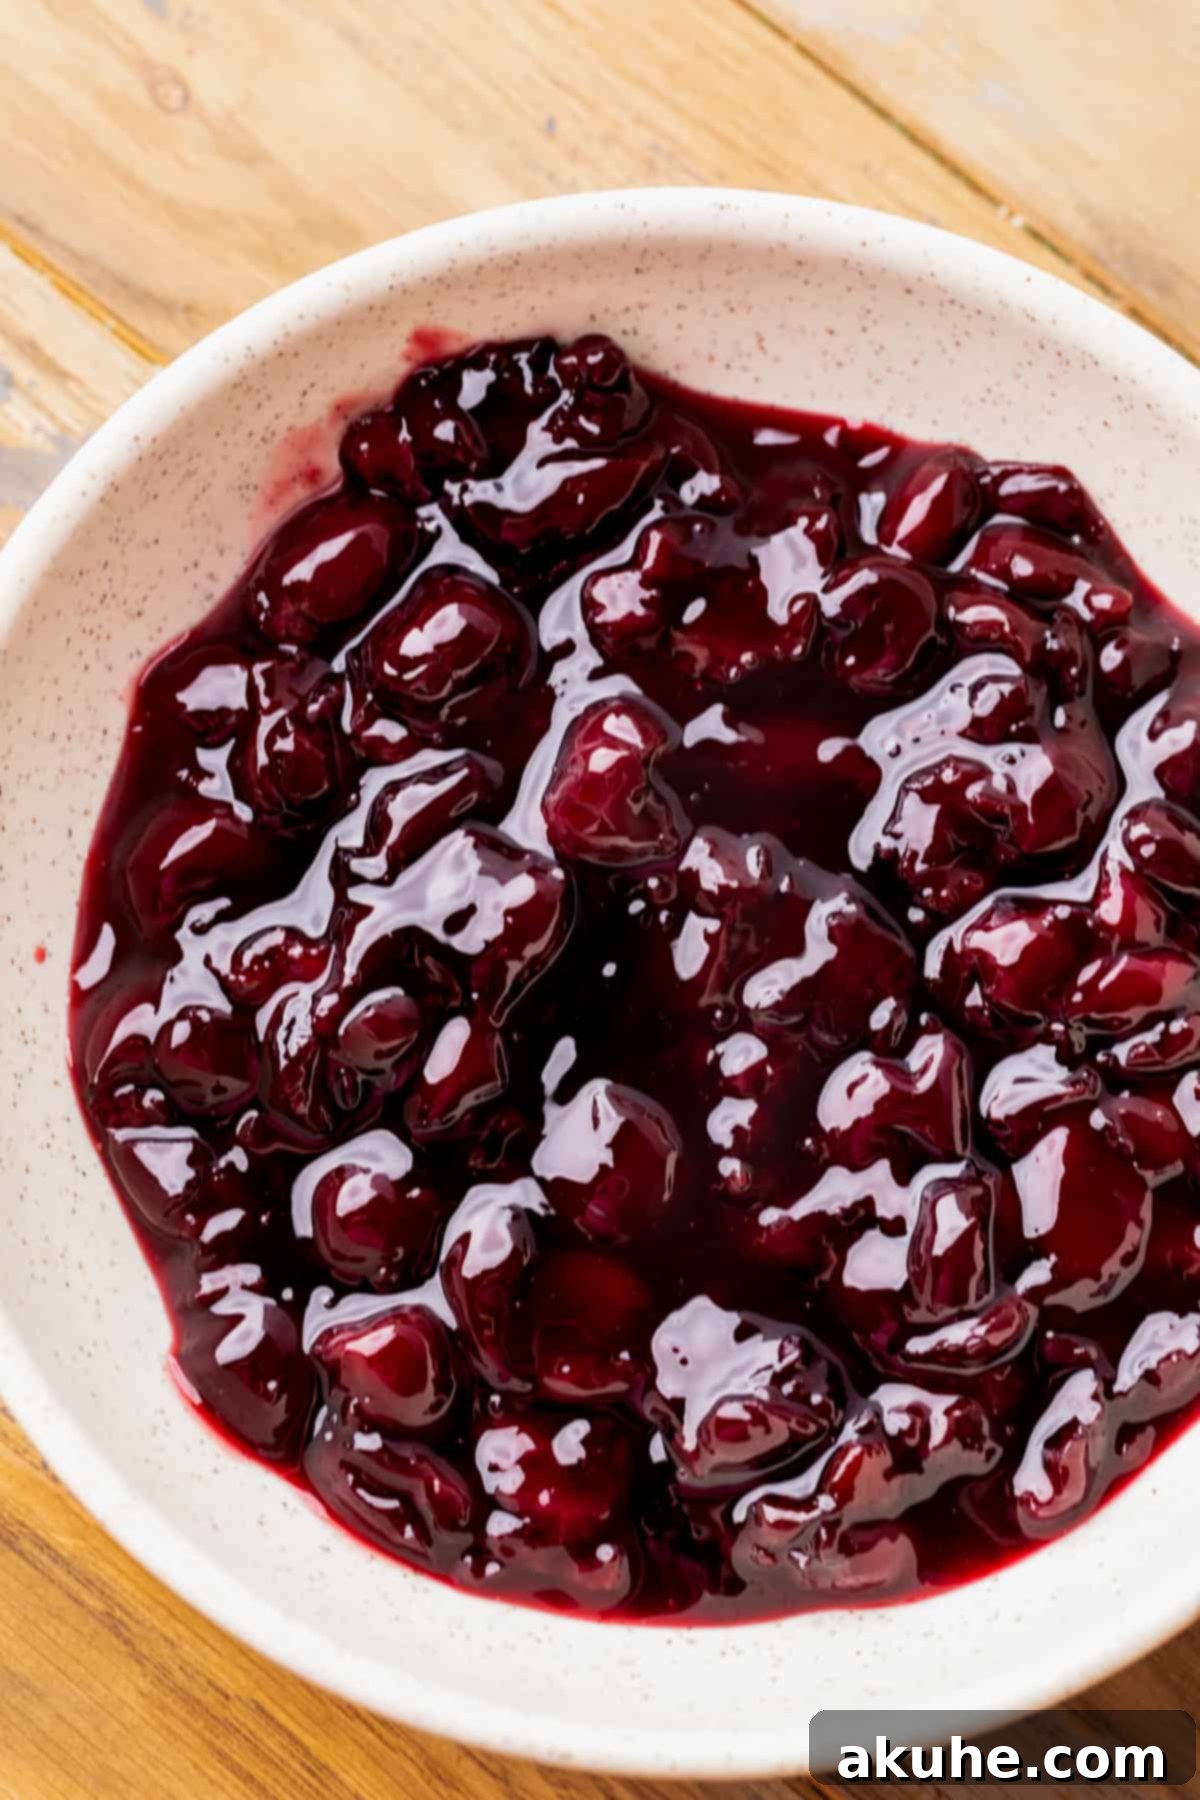
STEP 1: Prepare the Luscious Cherry Filling. Begin by combining the pitted cherries (ensure all pits are removed!), granulated sugar, cornstarch, and water in a medium saucepan. Place the saucepan over medium heat.
Stir the mixture continuously. As it heats, the cherries will soften and burst open. Continue to cook and stir until the mixture thickens slightly, achieving a consistency similar to pie filling. If using frozen cherries, this step might take a bit longer. Use a wooden spoon or potato masher to gently mash a few of the cherries, creating a slightly chunkier texture. Once thickened, remove the saucepan from the heat and set the filling aside to cool completely. Cooling is crucial before adding it to the baked cookies.
STEP 2: Combine the Dry Ingredients. In a medium-sized bowl, sift together the all-purpose flour, unsweetened cocoa powder, baking soda, and salt. Sifting helps to remove any lumps and ensures these ingredients are evenly distributed throughout the dough, contributing to a smooth, uniform cookie texture. Gently mix them with a whisk or fork and set this bowl aside.
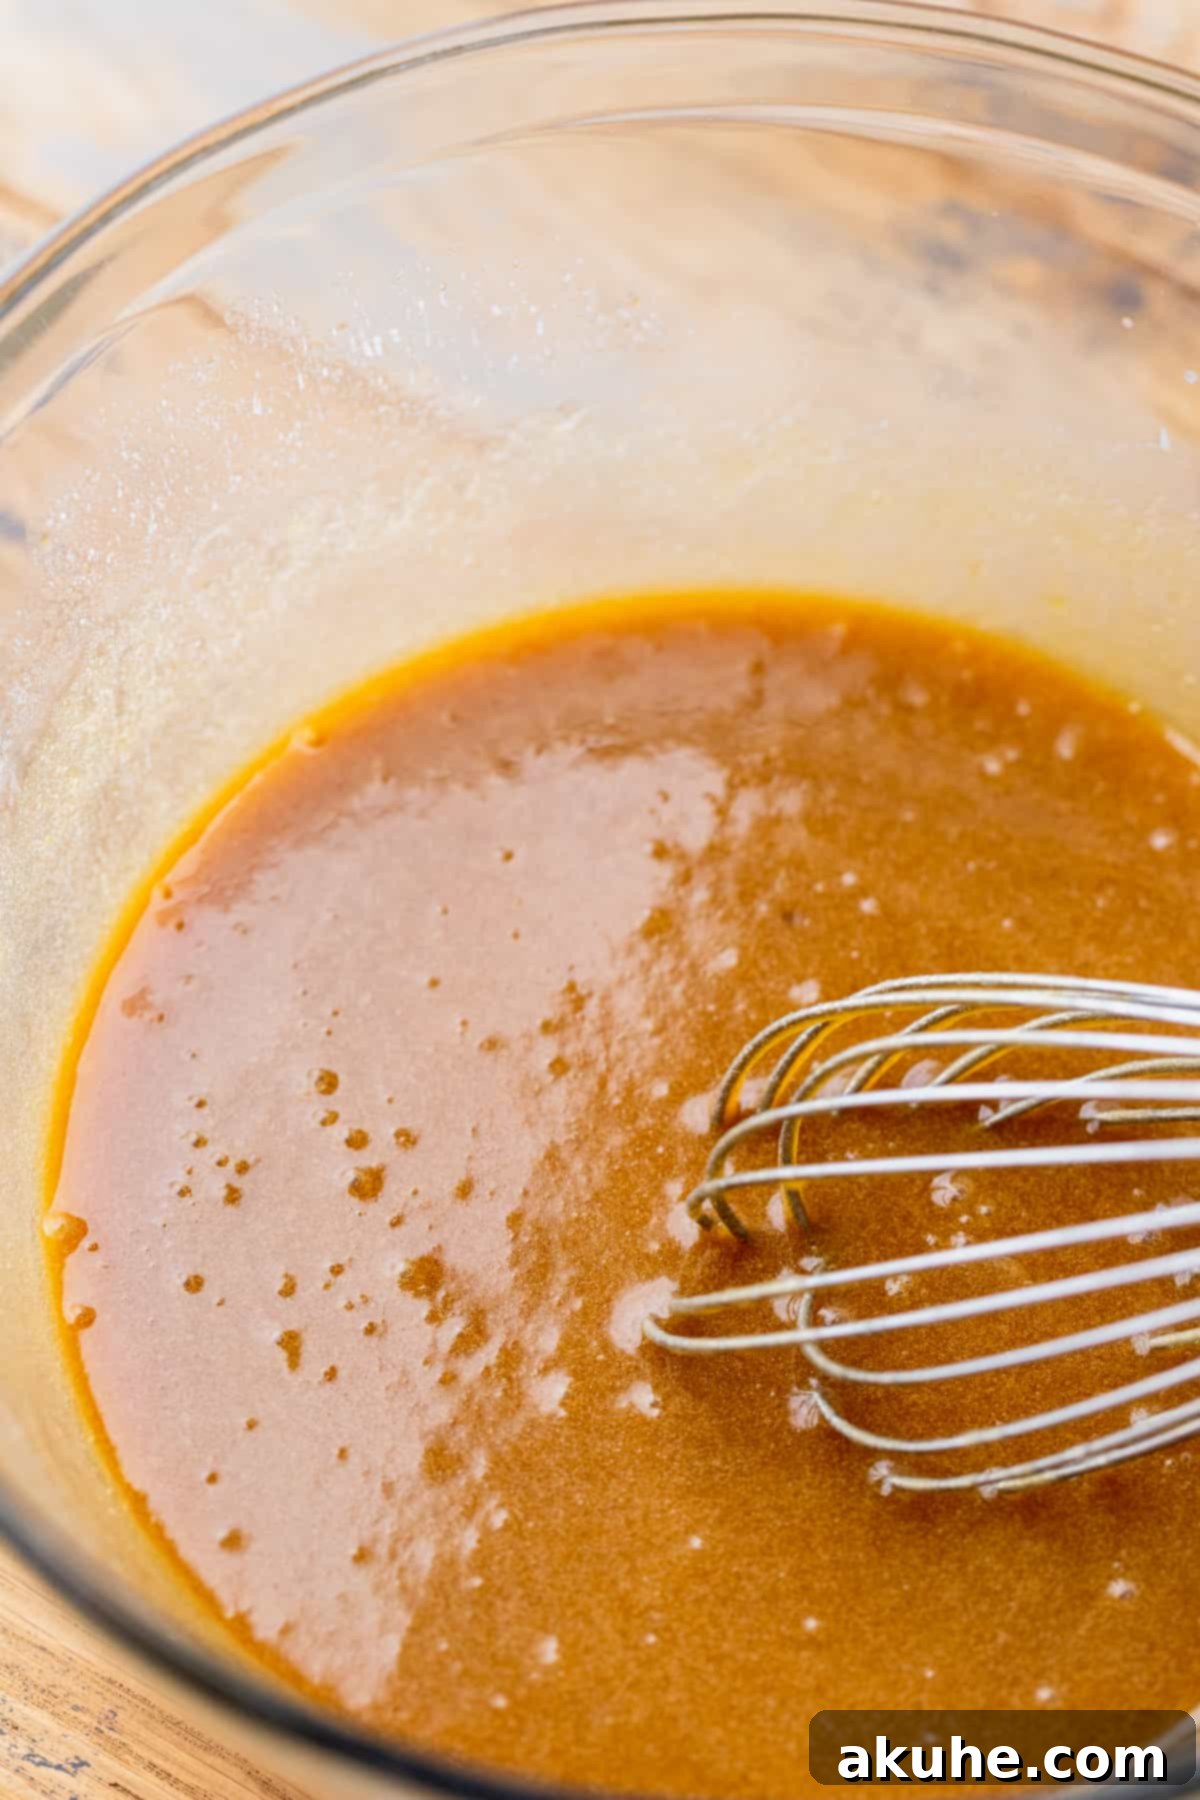
STEP 3: Mix the Wet Ingredients. In a large mixing bowl, combine the cooled melted unsalted butter (remember, it should be at room temperature!), light brown sugar, white granulated sugar, pure vanilla extract, and room temperature eggs. Whisk these ingredients together until they are just combined and appear smooth. Avoid over-whisking at this stage.
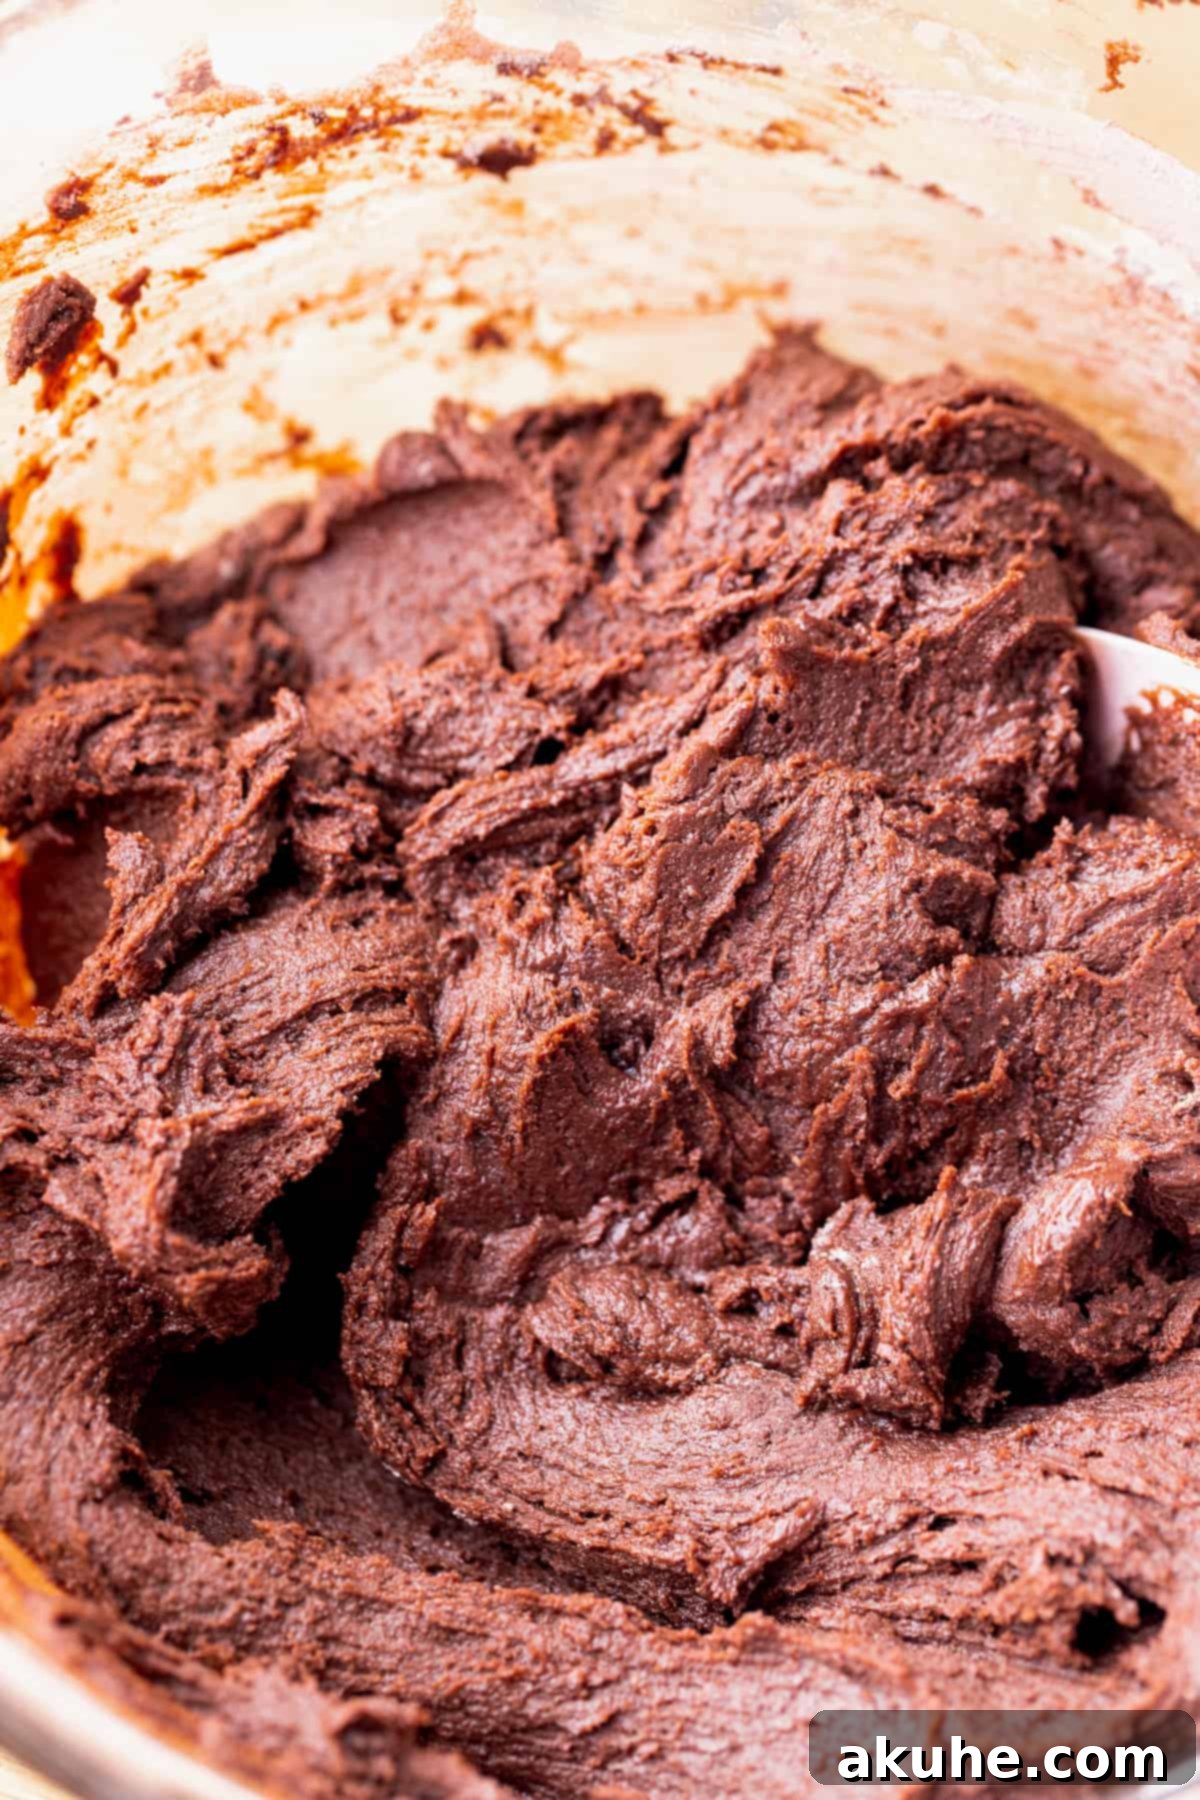
STEP 4: Integrate Wet and Dry Ingredients. Gradually add the sifted flour mixture to the wet ingredients in the large bowl. Using a rubber spatula, gently fold and mix until the dry ingredients are just incorporated into the wet. Be careful not to overmix the dough, as this can lead to tough cookies. Stop mixing as soon as no streaks of flour remain.
While the dough rests for a moment, preheat your oven to 350°F (175°C). Line two baking sheets with parchment paper. This will prevent sticking and ensure even baking.
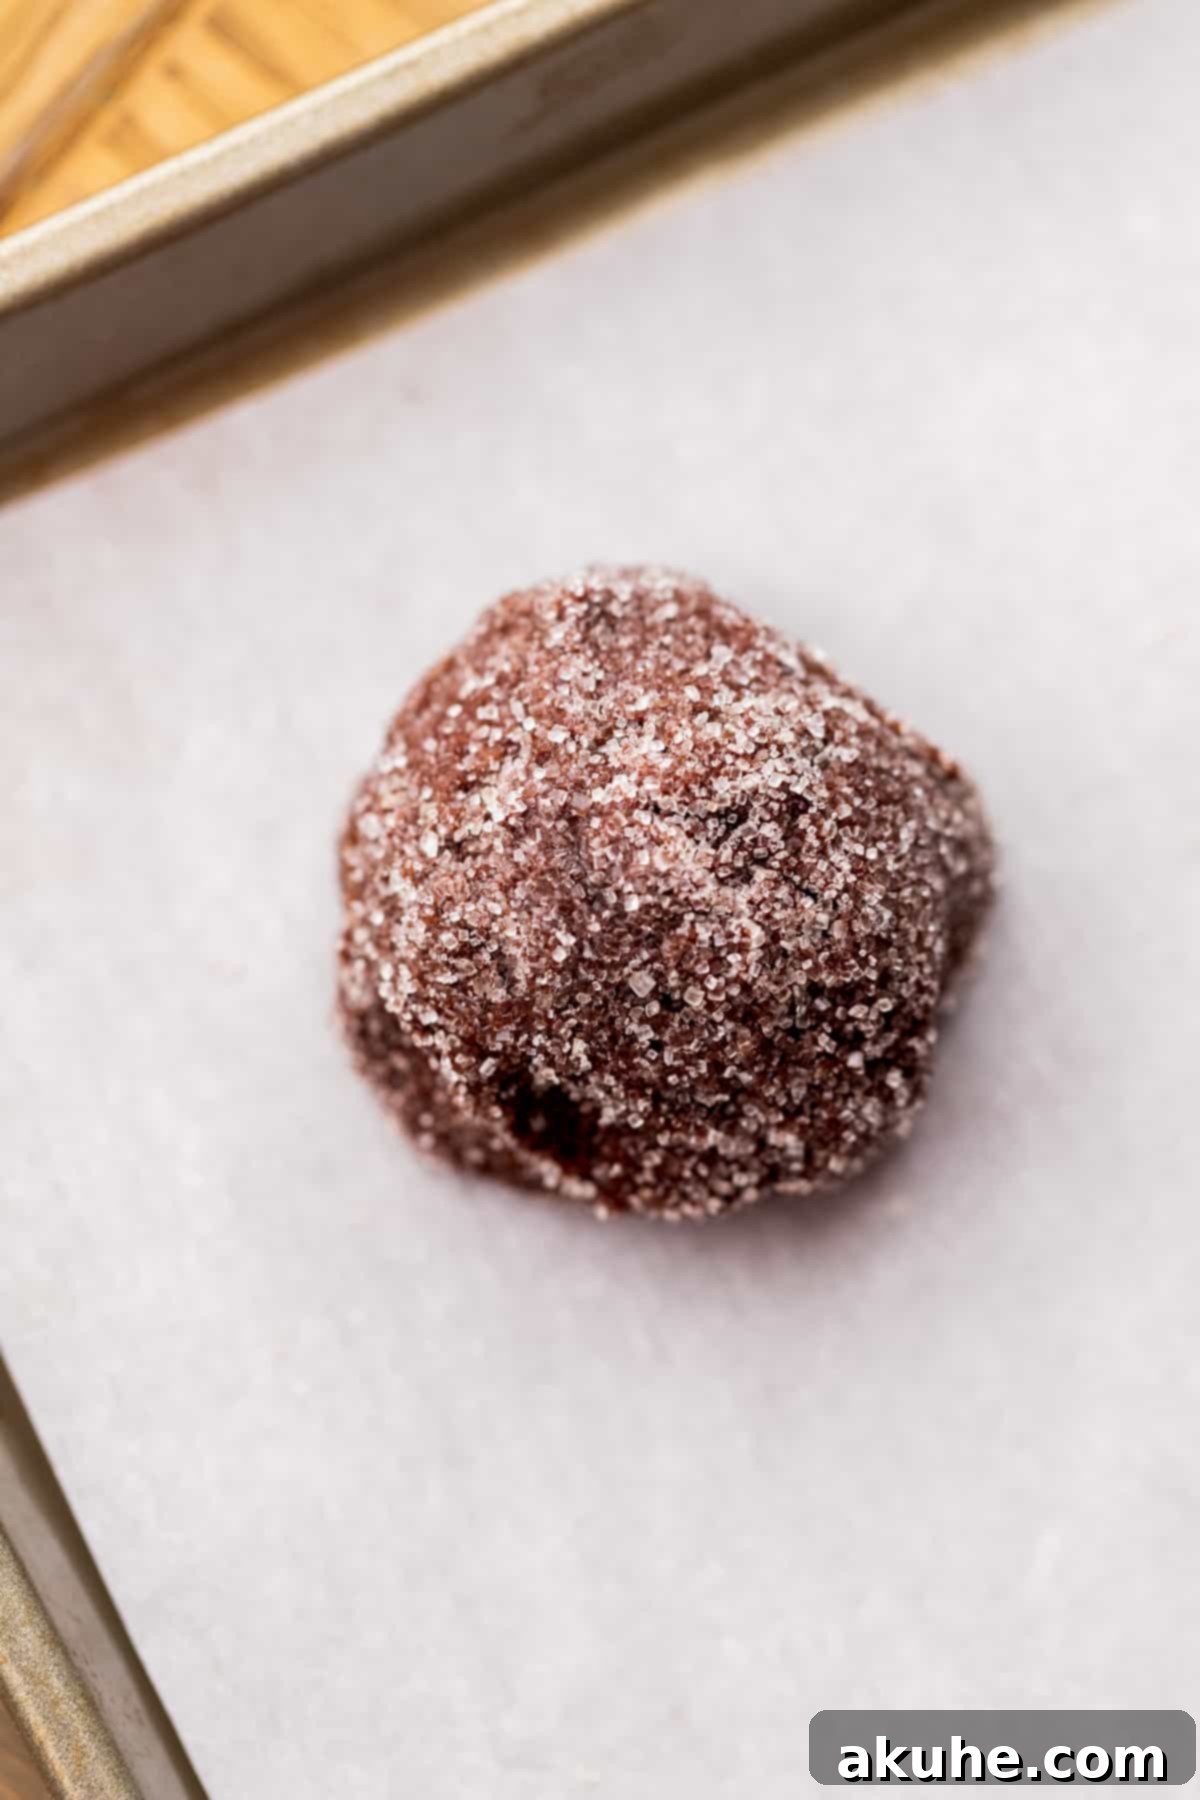
STEP 5: Scoop and Roll the Dough. Pour cane sugar or regular white granulated sugar into a separate small, shallow bowl for rolling. Use a large cookie scoop (approximately 3 tablespoons) to portion out the cookie dough, forming uniform cookie dough balls. Roll each dough ball thoroughly in the sugar until it is completely coated. This sugar coating will give the cookies a beautiful sparkle and a delightful crisp edge.
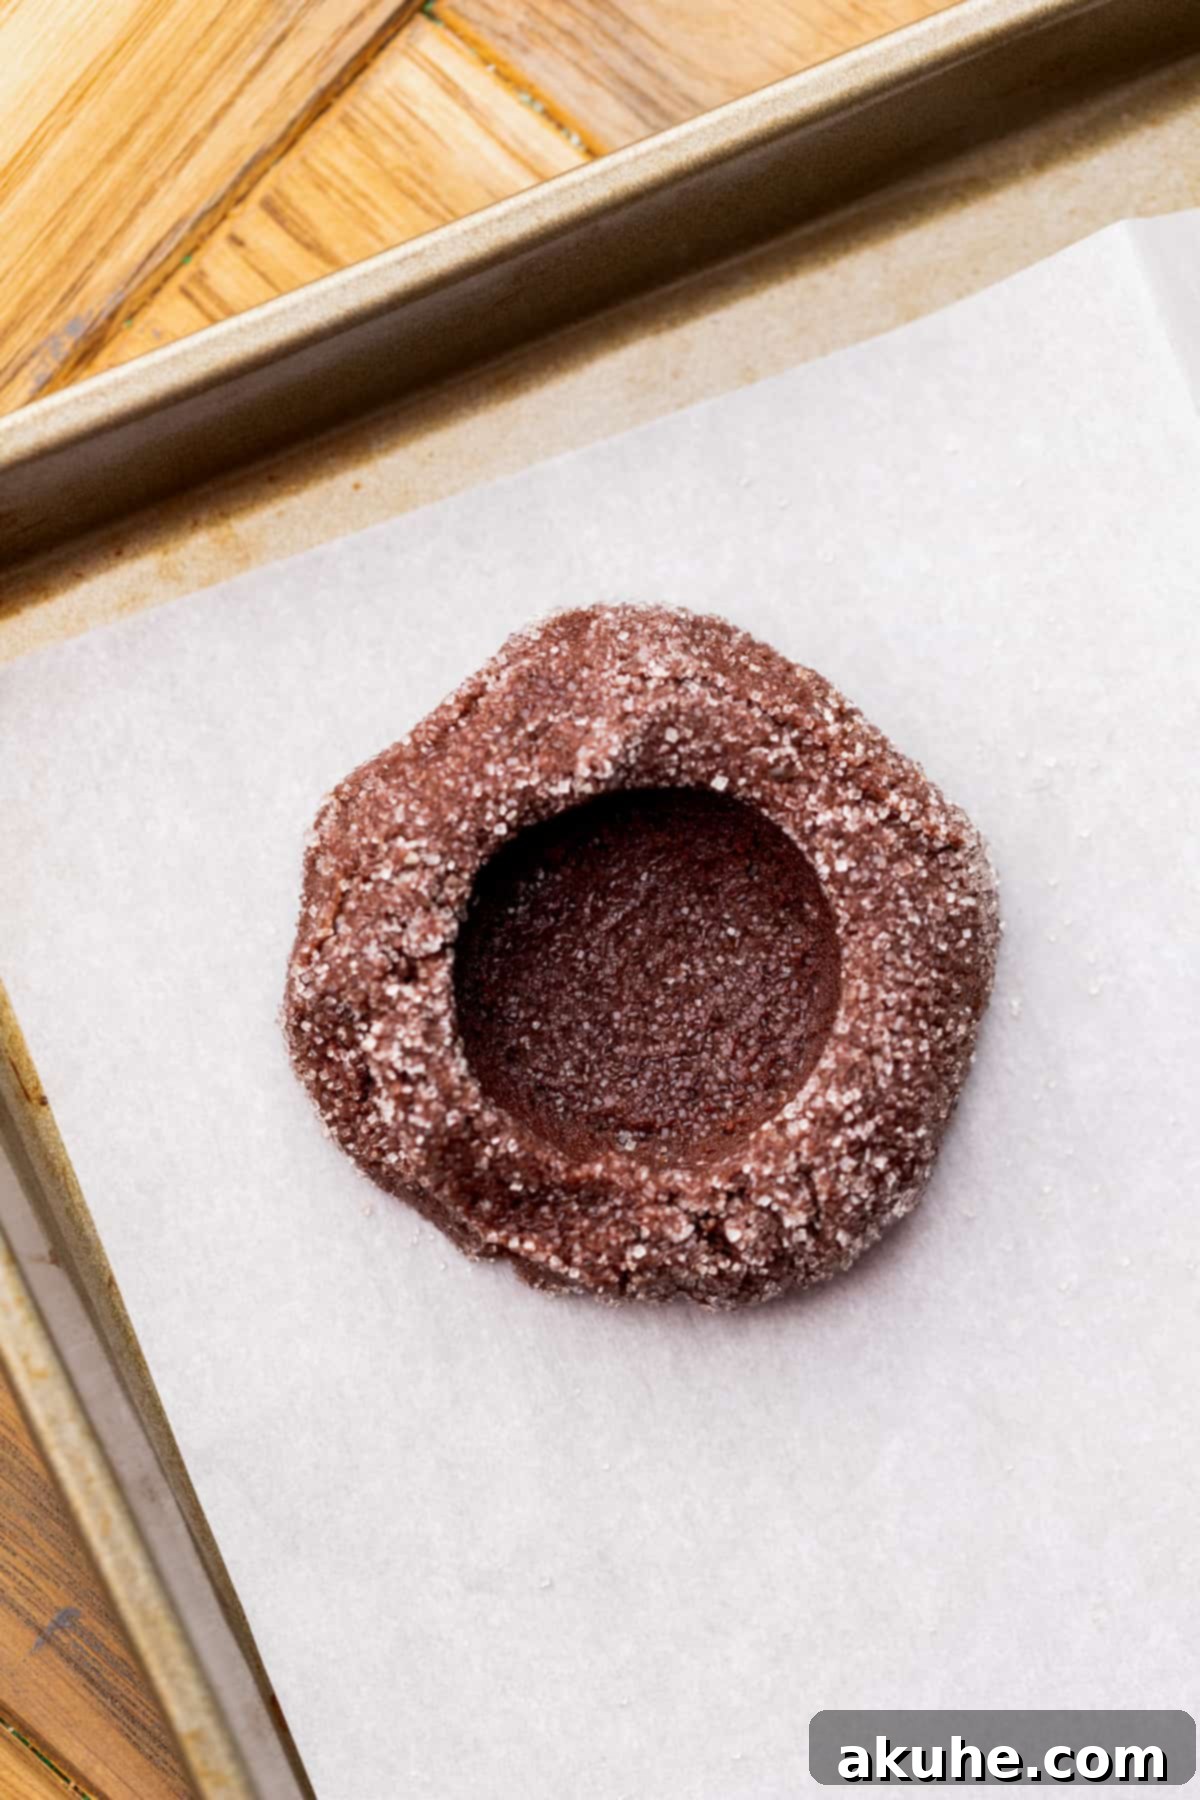
STEP 6: Bake the Cookies to Perfection. Arrange no more than six rolled cookie dough balls on each prepared baking sheet, ensuring adequate space between them for spreading. Using the back of a 1/8 cup measuring spoon or a small spice jar, gently press a deep indentation into the center of each cookie dough ball. This creates a well for the cherry filling.
Bake one sheet at a time in your preheated oven for 13-15 minutes. The edges should be set, and the centers should still appear soft and slightly puffed. If the indentations become less defined during baking, gently re-press them with the back of the measuring spoon immediately after removing the cookies from the oven. This helps maintain the perfect cavity for your filling. After baking, allow the cookies to rest on the hot baking sheets for 5 minutes.
STEP 7: Cool Completely. After the initial 5-minute rest on the baking sheets, carefully transfer the cookies to a wire rack. Allow them to cool completely before proceeding to the filling step. Cooling ensures the cookies are firm enough to hold the filling without collapsing and allows their flavors to fully develop.
STEP 8: Fill with Cherry Goodness. Once the cookies are entirely cool, spoon approximately 1/8 cup of your prepared (and fully cooled) cherry filling into the center indentation of each cookie. The vibrant red filling against the dark chocolate cookie creates a stunning visual appeal and delivers that perfect sweet-tart contrast.
Expert Baking Tips for Flawless Chocolate Cherry Cookies
Achieving bakery-quality cookies is all about paying attention to a few key details. Here are some expert tips to ensure your chocolate cherry cookies turn out perfectly every time:
- Master Flour Measurement: This is one of the most common pitfalls in baking. To accurately measure flour, use the “spoon and level” method: gently spoon flour into your measuring cup until it overflows, then level off the excess with a straight edge (like the back of a knife). Never scoop flour directly from the bag with the measuring cup, as this compacts it, leading to significantly more flour than needed. Over-measured flour can result in dry, dense cookies that don’t spread properly.
- Temperature Matters: Room Temperature Ingredients are Key: Just like the cooled melted butter and room temperature eggs mentioned in the ingredient notes, ensuring all dairy products (if applicable in other recipes, though not explicit here) and eggs are at room temperature is vital. Room temperature ingredients emulsify better, creating a smoother, more uniform dough and contributing to a superior cookie texture. Pull them out of the refrigerator at least 30 minutes to 2 hours before you plan to start baking.
- Controlling Cookie Spread: If you find your cookies are spreading too much, double-check that you are using parchment paper on your baking sheets. Parchment paper provides a non-stick surface and helps regulate heat distribution. The primary culprit for excessive spreading is often butter that was too warm when added to the ingredients. If the issue persists, try chilling your scooped cookie dough balls in the refrigerator for 10-15 minutes before baking. This helps solidify the butter, preventing rapid spread in the oven.
- Adjusting for High Altitude Baking: For bakers residing at high altitudes, cookie recipes often require minor adjustments to prevent excessive spreading and maintain structure. A common adjustment is to add an extra 1-2 tablespoons of all-purpose flour per cup of flour in the recipe. For this specific recipe, adding an extra 2 tablespoons of flour to the dry mixture can help with preventing excessive spread at higher elevations.
- Don’t Overbake: For fudgy cookies, it’s crucial to remove them from the oven when the edges are set but the centers still look slightly soft or underbaked. They will continue to cook and set as they cool on the hot baking sheet. Overbaking will lead to dry, crumbly cookies rather than the desired fudgy texture.
- Uniform Cookie Size: Using a cookie scoop is not just for convenience; it ensures that all your cookies are the same size. This leads to even baking, meaning all cookies will be perfectly done at the same time, preventing some from being overbaked while others are underbaked.
Frequently Asked Questions About Chocolate Cherry Cookies
Can these cookie dough balls be frozen?
Absolutely! Freezing cookie dough is a fantastic way to prepare ahead. Once you’ve scooped and rolled the dough balls in sugar, place them on a parchment-lined baking sheet and freeze until solid. Then, transfer the frozen dough balls to an airtight container or a freezer-safe bag. They can be stored in the freezer for up to 30 days. When ready to bake, let the cookie dough balls thaw on a baking sheet at room temperature for about 30-60 minutes before baking as directed.
Can I chill the cookie dough overnight?
Yes, you can chill the cookie dough overnight. For best results, we recommend portioning the dough into cookie dough balls first before chilling. Roll them in sugar, then arrange them on a baking sheet and cover tightly with plastic wrap. Store in the refrigerator overnight. Before baking, allow the chilled dough balls to come to room temperature (about 30-60 minutes) to ensure even baking and proper spread.
Can I use canned cherry pie filling instead of making it from scratch?
Yes, for convenience, you can definitely use a high-quality canned cherry pie filling. Simply spoon it into the baked cookie indentations once they’ve cooled. Be aware that canned fillings might be sweeter or have a different consistency than homemade, so adjust to your preference. Ensure the canned filling is also at room temperature or slightly chilled before adding to the cookies.
How do I pit fresh cherries easily?
Pitting fresh cherries can be done with a dedicated cherry pitter, which makes the process quick and efficient. If you don’t have one, you can use a clean paperclip, a chopstick, or even a sturdy straw to push the pit through the cherry, typically from the stem end. Be gentle to keep the cherries as intact as possible.
What kind of sugar should I use for rolling the cookies?
The recipe suggests cane sugar or regular white granulated sugar for rolling. Cane sugar typically refers to granulated sugar derived from sugar cane and can sometimes have slightly larger crystals than standard granulated sugar, giving a beautiful sparkling effect. Regular white granulated sugar works perfectly well and will also create a lovely sweet and crisp exterior. The choice mostly comes down to what you have on hand and your desired level of sparkle.
Creative Recipe Variations to Explore
Once you’ve mastered the basic chocolate cherry cookie, feel free to get creative with these delicious variations:
- Extra Cherry Punch: For an even more intense cherry flavor, you can gently fold about half a cup of finely chopped dried cherries or mini chocolate-covered dried cherries into the cookie dough before scooping.
- Almond Essence: Add 1/4 to 1/2 teaspoon of almond extract to the cherry filling for a subtle, complementary nutty flavor that pairs wonderfully with cherries and chocolate.
- White Chocolate Drizzle: Once the cookies are cooled and filled, melt some white chocolate chips and drizzle it over the top of the cookies for an elegant finish and an extra layer of sweetness.
- Different Fruit Fillings: Don’t limit yourself to cherries! This fudgy chocolate cookie base would be equally delicious with raspberry, strawberry, or even apricot preserves or homemade fillings.
- A Hint of Liqueur: For an adult twist, add a teaspoon of cherry liqueur (like kirsch) or almond liqueur (like amaretto) to your homemade cherry filling after it has cooled.
Recommended Special Tools for Easy Baking
While this recipe is designed to be simple, having a few key tools can make the process even smoother and more enjoyable:
- Parchment Paper: A true baking essential! Using parchment paper eliminates the need for greasing pans, prevents cookies from sticking, and ensures even baking. We highly recommend using premade sheets of parchment paper, as they lay flat and are incredibly convenient compared to wrestling with a roll.
- Large Cookie Scoop: A good quality cookie scoop, like this OXO cookie scoop, is invaluable for creating uniformly sized cookies. This ensures all your cookies bake evenly and have a consistent appearance, making your final product look professional. A 3-tablespoon scoop is ideal for these substantial cookies.
- Cherry Pitter: If you plan on using fresh cherries frequently, a cherry pitter is a worthwhile investment that saves a lot of time and mess.
- Medium Saucepan: For preparing the cherry filling.
- Mixing Bowls and Spatula: Essential for combining your wet and dry ingredients.
Storing and Freezing Your Delicious Cookies
Storing Baked Cookies
To keep your chocolate cherry cookies fresh and delicious, store them at room temperature in an airtight container. Make sure the container is sealed tightly to prevent them from drying out. They will maintain their quality and flavor for up to 5 days. For best taste and texture, consume them within 2-3 days.
Freezing Baked Cookies
These cookies freeze beautifully! To freeze baked cookies, allow them to cool completely first. Then, place them in a single layer on a baking sheet and freeze until solid. Once frozen, transfer them to an airtight freezer-safe container or a heavy-duty freezer bag, separating layers with parchment paper if stacking. They can be stored in the freezer for up to 30 days. To enjoy, simply thaw the cookies at room temperature for 1-2 hours before serving. This is a great way to have a supply of homemade treats ready for any occasion.
More Christmas Cookie Recipes To Try
Looking for more festive inspiration? Explore a variety of holiday cookie recipes to fill your cookie platters and delight your loved ones during the most wonderful time of the year!
Discover More Delicious Cherry Recipes
If you’re a cherry enthusiast, you’ll love these other cherry-inspired creations:
- Chocolate Cherry Brownies: A decadent fusion of rich chocolate and roasted cherries.
- Cherry Cheesecake: A creamy, classic dessert with a delightful cherry topping.
- Cherry Pie Bars: All the goodness of cherry pie in an easy-to-eat bar form.
- Black Forest Cupcakes: The iconic German cake flavors, transformed into delightful cupcakes.
We hope you loved this recipe! If you tried it, please consider leaving a review. Share your creations on Instagram by tagging @stephaniesweettreats. For more delicious inspiration, make sure to follow us on Pinterest.
Chocolate Cherry Cookies
Author: Stephanie Rutherford
These cherry cookies are chocolate fudgy cookies rolled in sparkling sugar and topped with a cherry filling. They are perfect for cherry season or for Christmas!
Print Recipe |
Pin Recipe
Prep Time: 30 minutes | Cook Time: 13 minutes | Total Time: 43 minutes
Servings: 12 Large cookies
Ingredients
Chocolate Cookies
- 2 2/3 cups All-purpose flour
- 1/2 cup Unsweetened cocoa powder
- 1/2 tsp Baking powder
- 1/2 tsp Baking soda
- 1 tsp Salt
- 1 cup Unsalted butter, melted and cooled
- 1 cup Brown sugar, packed light or dark
- 1/2 cup White granulated sugar
- 1 tsp Pure vanilla extract
- 2 Large eggs, room temperature
- Cane sugar, or regular white granulated sugar for rolling the cookies.
Cherry Filling
- 1 lb Cherries, fresh or frozen
- 1/2 cup White granulated sugar
- 1 TBSP Cornstarch
- 1 TBSP Water
Instructions
Cherry Filling
- Start this first before the cookies. In a medium saucepan over medium heat, add the cherries (pitted first!), sugar, cornstarch, and water.
- Mix until the heat breaks open the cherries and they softened. This will take slightly longer if they are frozen. Mix until the sauce thickens slightly. Mash a few of the cherries with a wooden spoon.
- Take off the heat and cool completely.
Chocolate Cookies
- In a medium bowl, sift the flour, cocoa powder, baking powder, baking soda, and salt. Set aside.
- In a large bowl, mix the melted butter (Make sure it is cooled back to room temperature before using), brown sugar, sugar, vanilla, and eggs. Whisk until combined.
- Add in the dry ingredients and use a rubber spatula to mix until just combined.
- Preheat the oven to 350°F. Line 2 cookie sheets with parchment paper. Let the cookie dough sit in the bowl while the oven preheats before scooping.
- Scoop using a large cookie scoop, 3 TBSP cookie scoop. Pour the cane sugar, or white sugar, into a bowl. Roll the cookie dough balls in the sugar.
- Place 6 cookie dough balls per cookie sheet. Use a 1/8 cup or the back of a spice jar to press a hole into the cookies. Bake 1 sheet at a time for 13-15 minutes.
- Press the 1/8 cup into the cookies again. Then, let it sit on the hot pans for 5 minutes. Transfer to a cooling rack and cool completely.
- Scoop a 1/8 cup of cherry filling on top of the cookies.
Notes
Flour – Make sure flour is spooned and leveled or use a kitchen scale. Compacted flour can dry out the cookies and cause them not to spread.
High altitude baking – Add an extra 2 TBSP of flour to help with spread.
Pull out dairy ingredients 2 hours before baking to ensure they are at room temperature.
Nutrition Information (Approximate per serving)
- Calories: 406 kcal
- Carbohydrates: 65g
- Protein: 4g
- Fat: 16g
- Saturated Fat: 10g
- Polyunsaturated Fat: 1g
- Monounsaturated Fat: 4g
- Trans Fat: 1g
- Cholesterol: 41mg
- Sodium: 266mg
- Potassium: 198mg
- Fiber: 3g
- Sugar: 39g
- Vitamin A: 497IU
- Vitamin C: 3mg
- Calcium: 44mg
- Iron: 2mg
