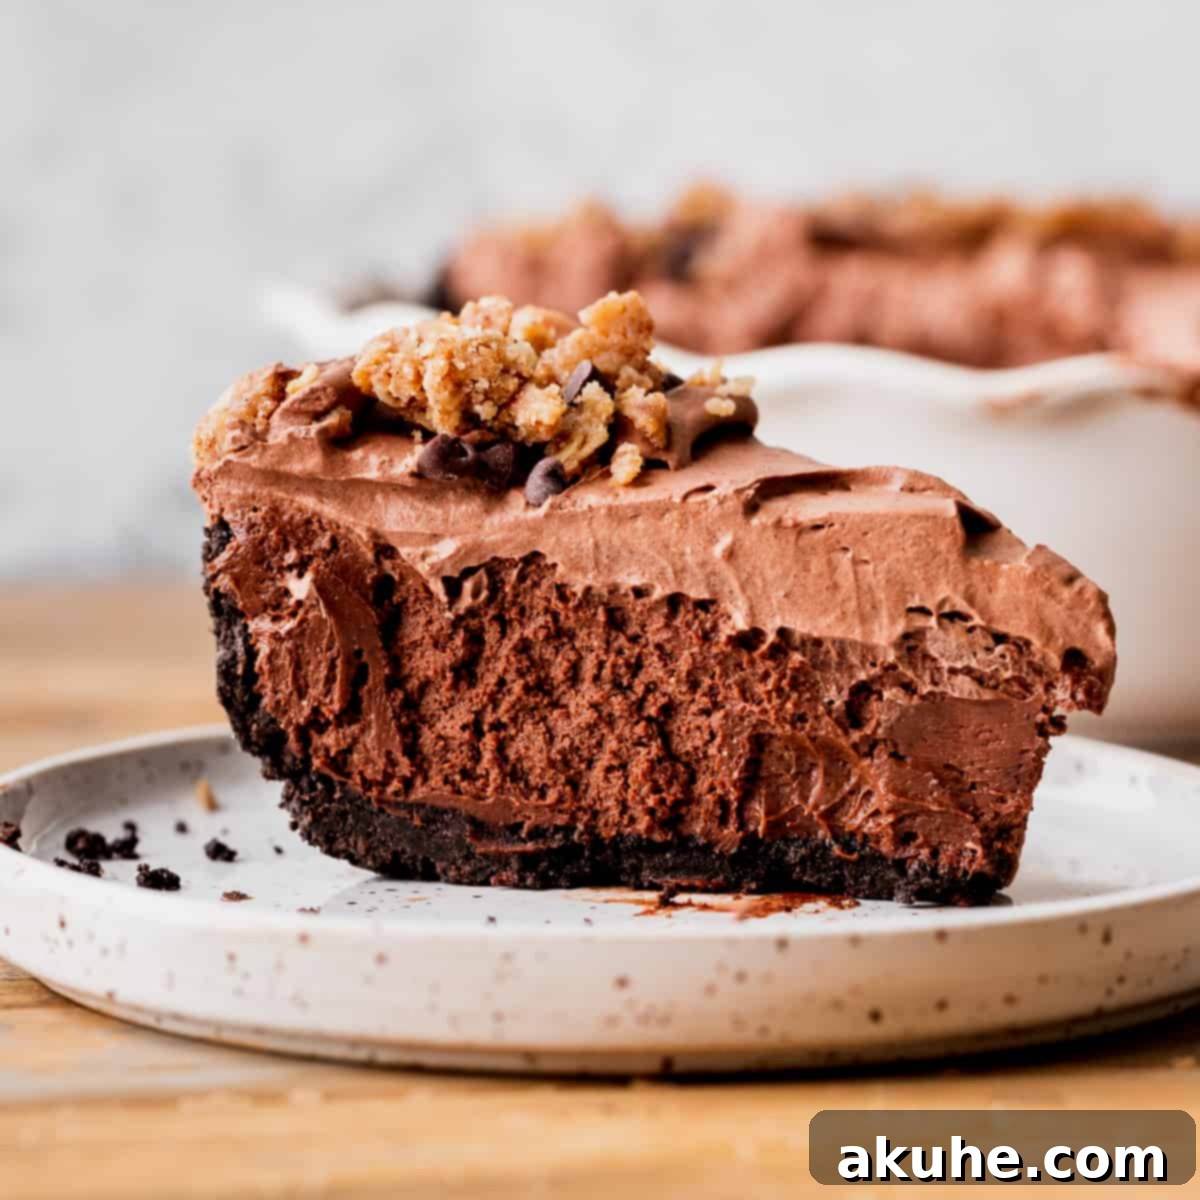
Welcome to the ultimate indulgence for every chocolate lover: a decadent, no-bake chocolate pie that promises to become your new favorite dessert! Forget traditional cream pies; this recipe elevates the experience with a rich Oreo crust, a creamy Nutella chocolate filling, a luscious chocolate whipped cream topping, and a delightful cinnamon oat crumble for an irresistible texture contrast. Perfect for holiday gatherings, special occasions, or simply a luxurious treat, this easy-to-make pie is guaranteed to impress.
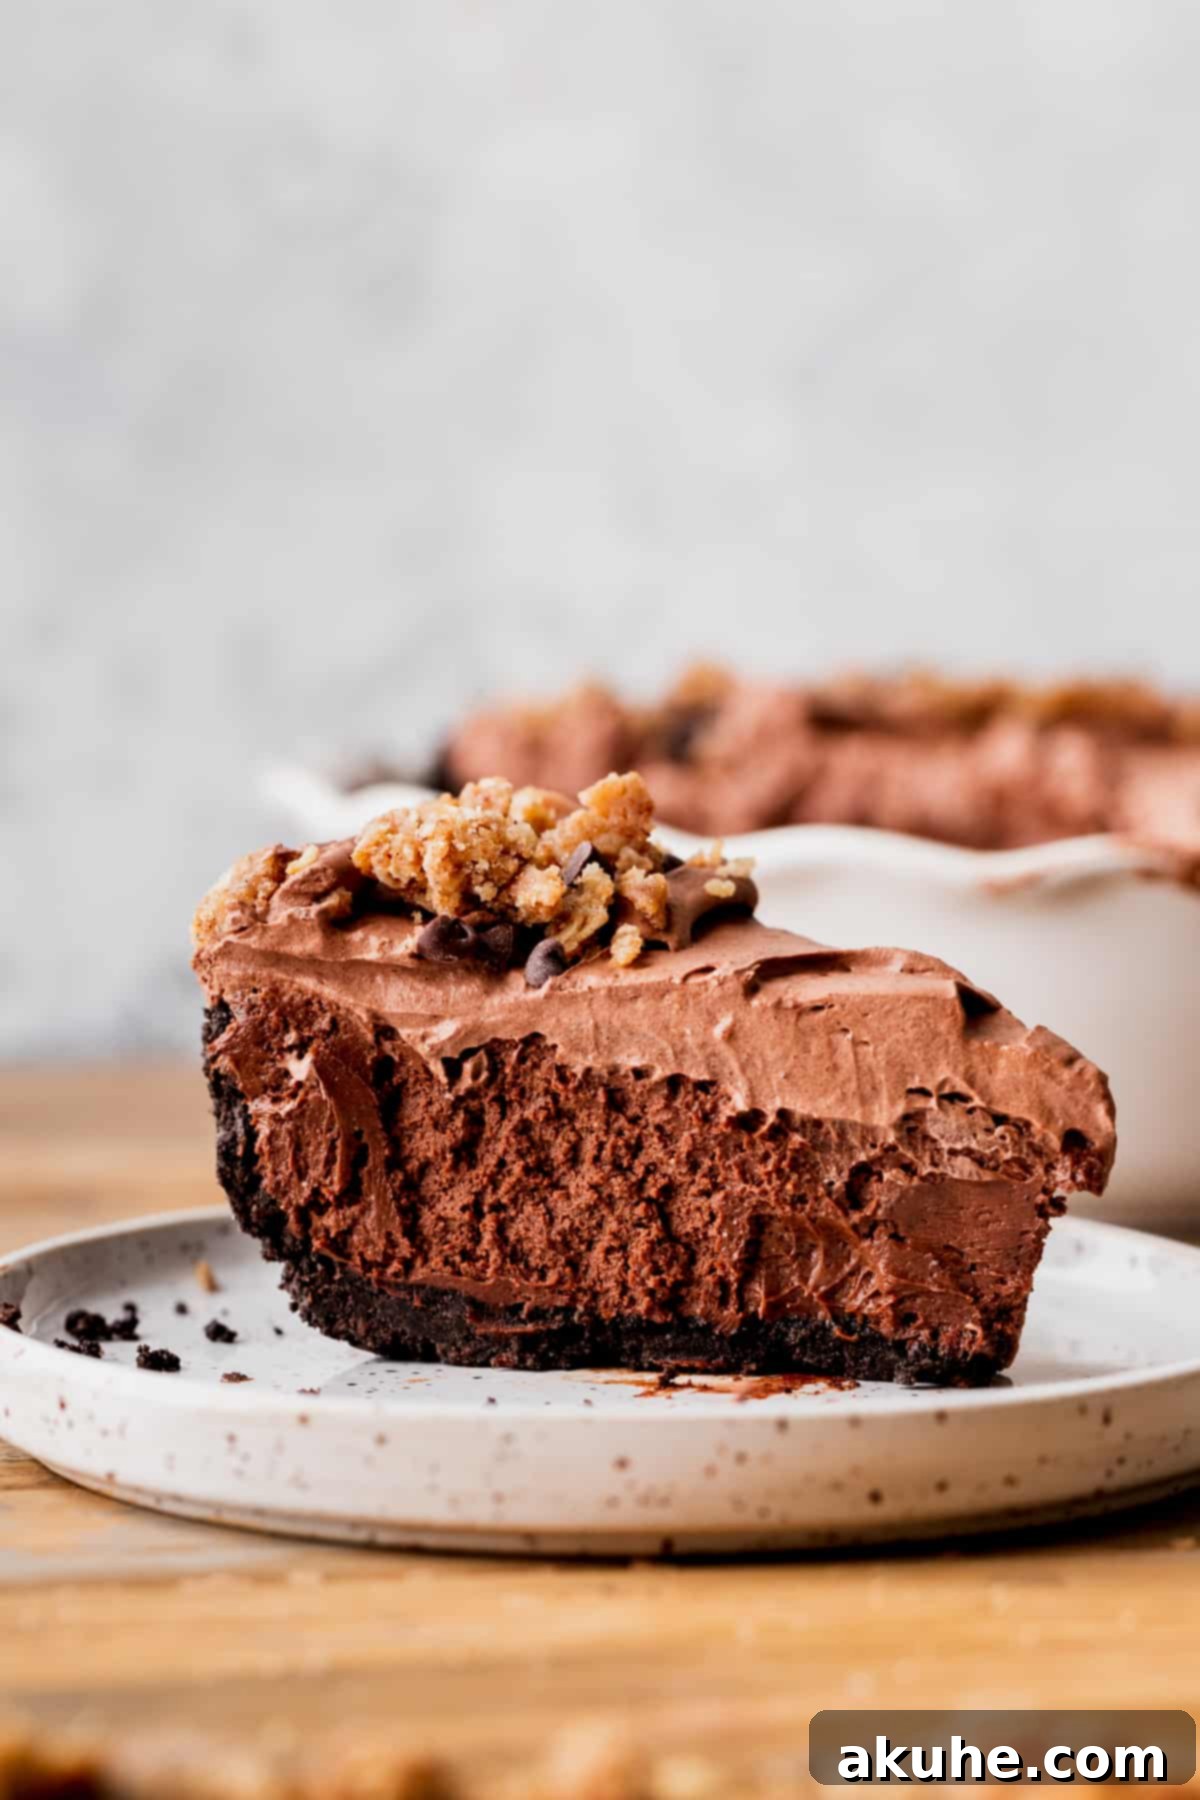
Imagine a dessert where every bite delivers a symphony of chocolate. This exquisite pie features not one, but three distinct layers of chocolate goodness, perfectly complemented by the spicy-sweet crunch of a cinnamon oat crumble. From the deeply flavorful Oreo base to the silky smooth Nutella heart and the airy chocolate cloud on top, it’s a dream come true for anyone who craves rich, cocoa-infused delights. Best of all, this impressive dessert requires minimal baking, making it a stress-free option for any occasion.
If you’re looking for more delightful pie recipes to add to your repertoire, consider exploring Reese’s Peanut Butter Cup Pie for a classic flavor combination, Blueberry Strawberry Pies for a burst of fruity freshness, or adorable Mini Blueberry Pies for individual servings.
Why This No-Bake Chocolate Nutella Pie Recipe Works Wonders
This isn’t just another chocolate pie; it’s a culinary triumph designed for ease, indulgence, and unforgettable flavor. Here’s why this no-bake chocolate Nutella pie will quickly become a cherished recipe in your collection:
- Effortless Preparation for Stunning Results: This is truly one of the simplest homemade pie recipes you’ll ever encounter. The main pie components are entirely no-bake, saving you valuable oven space and time. The oven is only utilized for the optional, yet highly recommended, cinnamon oat crumble. This makes it a perfect dessert for beginner bakers or busy hosts who want a show-stopping dessert without the fuss of complex techniques or extensive baking. Spend less time in the kitchen and more time enjoying your delicious creation!
- The Irresistible Oreo Crust: Elevating beyond a traditional pie crust or a simple graham cracker crust, our homemade Oreo crust provides an unparalleled depth of chocolate flavor and a delightful crunch. Made with finely crushed Oreo cookies and melted butter, it forms a sturdy, flavorful base that perfectly complements the creamy filling. This crust requires no baking, just a quick freeze, ensuring a consistently delicious foundation every time.
- A Triple Threat of Chocolate Bliss: Prepare your taste buds for an extraordinary experience with three distinct layers of chocolate, each contributing its unique character to this masterpiece.
- First, the dark, rich, and slightly crunchy Oreo crust sets the stage.
- Next, the incredibly smooth and luscious Nutella chocolate pie filling, a harmonious blend of creamy cheese and hazelnut chocolate spread, delivers a melt-in-your-mouth experience.
- Finally, a cloud of light and airy chocolate whipped cream crowns the pie, adding another dimension of cocoa flavor and a beautiful, soft texture.
Together, these layers create a symphony of flavors and textures, making it one of the most decadent and satisfying chocolate desserts imaginable. It’s the perfect sweet ending for Valentine’s Day, a festive holiday gathering, or any moment that calls for a truly special treat.
- Make-Ahead Convenience: This pie is an excellent make-ahead dessert. The filling requires a minimum of 6 hours to chill and set, making it ideal for preparing the day before your event. This flexibility significantly reduces last-minute stress, allowing you to focus on other preparations.
Essential Ingredient Notes for Your Perfect Pie
Understanding the role of each ingredient can make all the difference in achieving the perfect consistency and flavor for your chocolate pie. Here are some detailed notes to guide you. For the complete list of ingredients with precise measurements, please refer to the recipe card below.
- Oreos: For the best Oreo crust, opt for regular Oreos, not the double-stuffed variety. The extra cream in double-stuffed Oreos introduces too much moisture, which can alter the texture of your crust, making it less firm and potentially soggy. Using regular Oreos ensures a perfectly crumbly yet compact crust that holds its shape beautifully.
- Cream Cheese: It is crucial to bring your cream cheese to room temperature before you begin mixing. This usually takes about 1 to 2 hours on the counter. Room temperature cream cheese blends smoothly with other ingredients, preventing lumps and ensuring a consistently creamy, velvety filling. Cold cream cheese will be difficult to mix and can result in a lumpy texture.
- Brown Sugar: This recipe uses light brown sugar, which provides a subtle molasses flavor and a moist texture to the cinnamon oat crumble. Dark brown sugar can also be used for a slightly deeper, more intense caramel note, offering a wonderful alternative if you prefer a richer flavor profile. Both work well, so choose based on your preference.
- Nutella: For consistent results in your no-bake chocolate Nutella pie filling, we highly recommend using store-bought hazelnut spread. While homemade versions can be delicious, their texture can vary significantly, which might affect how well the filling sets and blends. Store-bought Nutella offers a reliably smooth consistency, ensuring your pie filling is perfectly creamy every time.
- Chocolate Whipped Cream: This topping adds another layer of chocolate luxury. However, feel free to customize! You can opt for a classic plain whipped cream if you prefer a lighter contrast, or even use a store-bought whipped topping like Cool Whip for ultimate convenience. Just ensure it’s well-chilled before using for best results.
- Heavy Whipping Cream: Ensure your heavy whipping cream is very cold when you’re ready to whip it. Cold cream whips up much faster and achieves stiffer, more stable peaks than warm cream. For best results, chill your mixing bowl and whisk attachment in the freezer for 10-15 minutes before whipping.
Step-By-Step Instructions: Crafting the Luscious Crust and Filling
Embark on your journey to create this magnificent chocolate pie. For these steps, you will need an electric mixer with a whisk attachment. Both an electric hand mixer and a stand mixer will work perfectly.
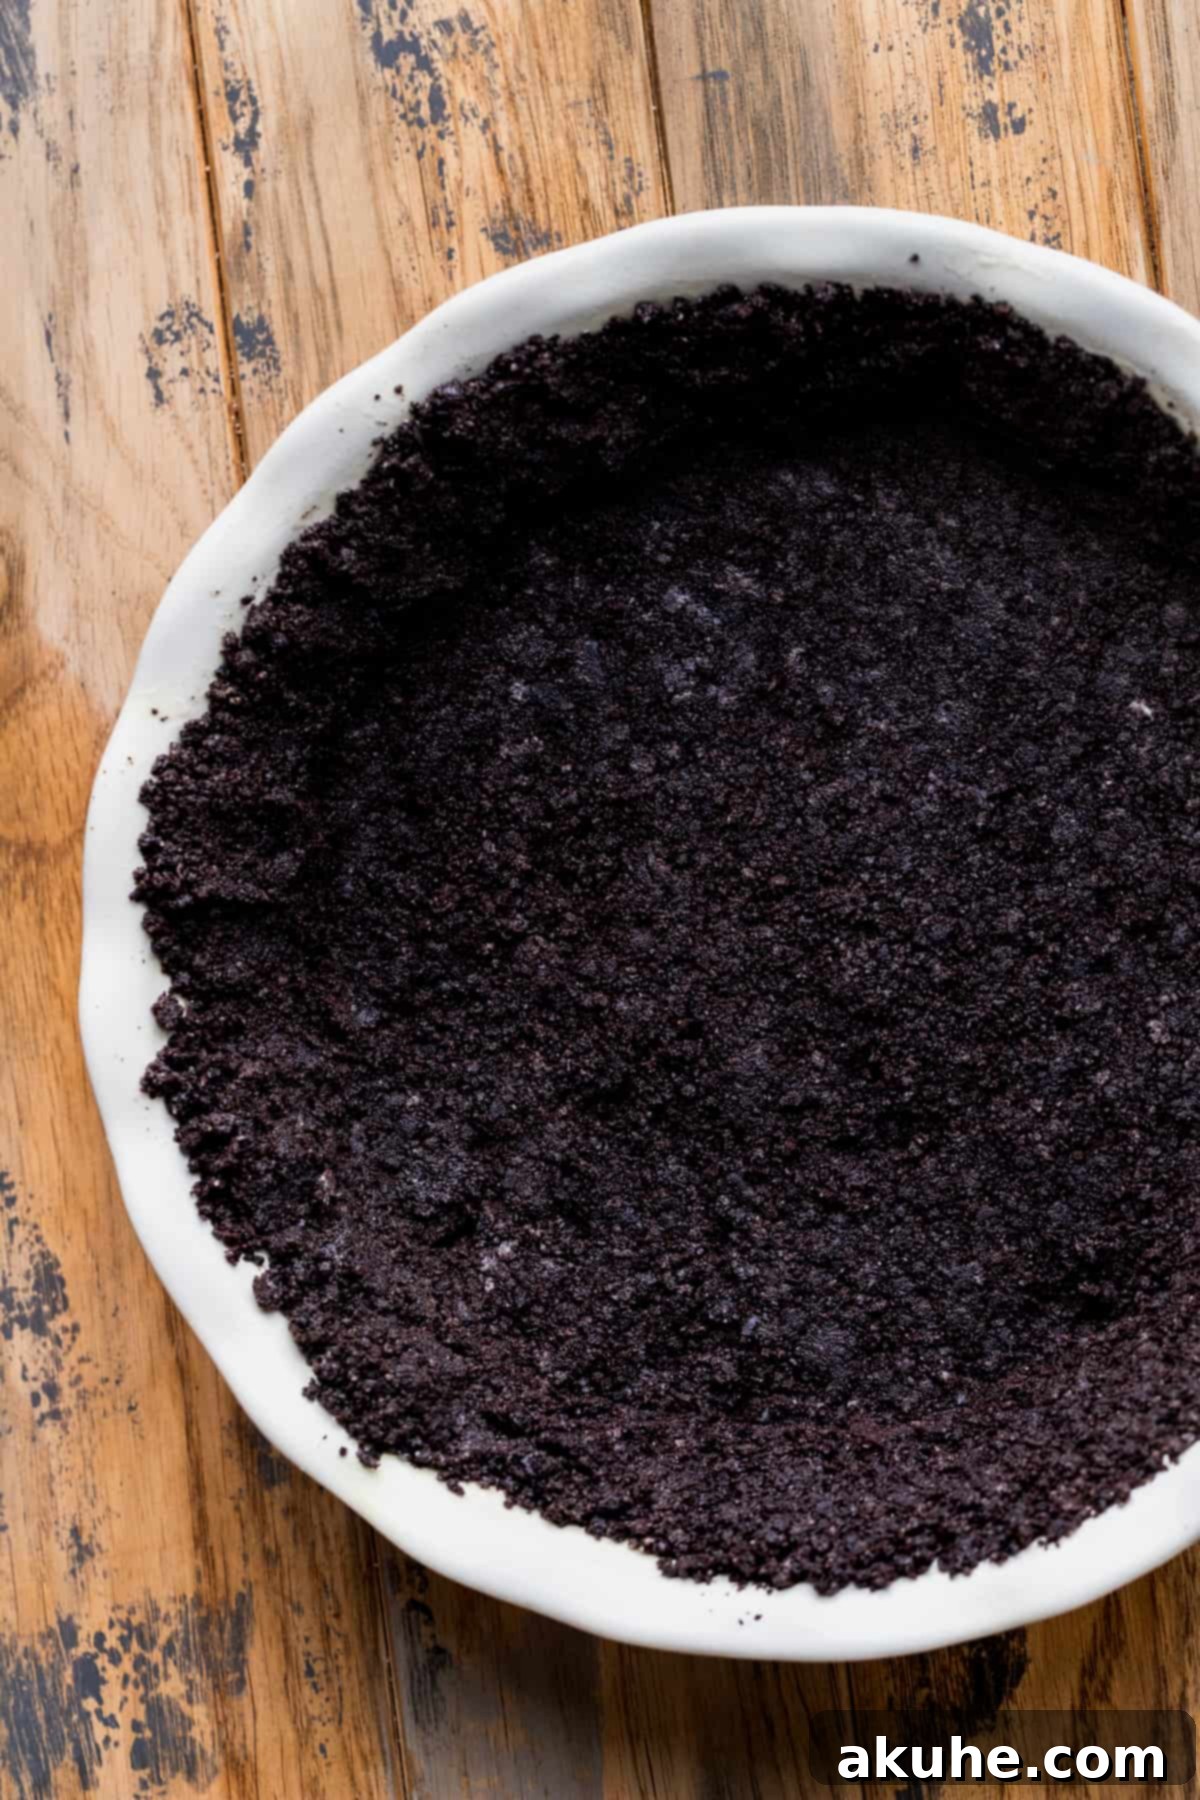
STEP 1: Prepare the Oreo Crust. Begin by crushing the Oreos into very fine crumbs. A blender or food processor is ideal for achieving this consistent, fine texture. Once crumbed, transfer the Oreo crumbs to a mixing bowl and thoroughly combine them with the melted unsalted butter until the mixture resembles wet sand. This ensures every crumb is coated, leading to a perfectly formed crust. Press this mixture firmly into the bottom and halfway up the sides of your chosen springform pan or pie tin. Use the flat bottom of a measuring cup or a glass to compact the crust evenly and densely. This firm compaction is key to preventing the crust from crumbling when sliced.
STEP 2: Chill and Prepare for Whipping. Place the prepared pie crust in the freezer to chill and set while you prepare the filling. This step helps the crust firm up, preventing it from getting soggy once the filling is added. Additionally, place a metal mixing bowl and your whisk attachment (or the bowl of your stand mixer if using) into the freezer for at least 10 minutes. A chilled bowl and whisk are essential for achieving perfectly stiff whipped cream.
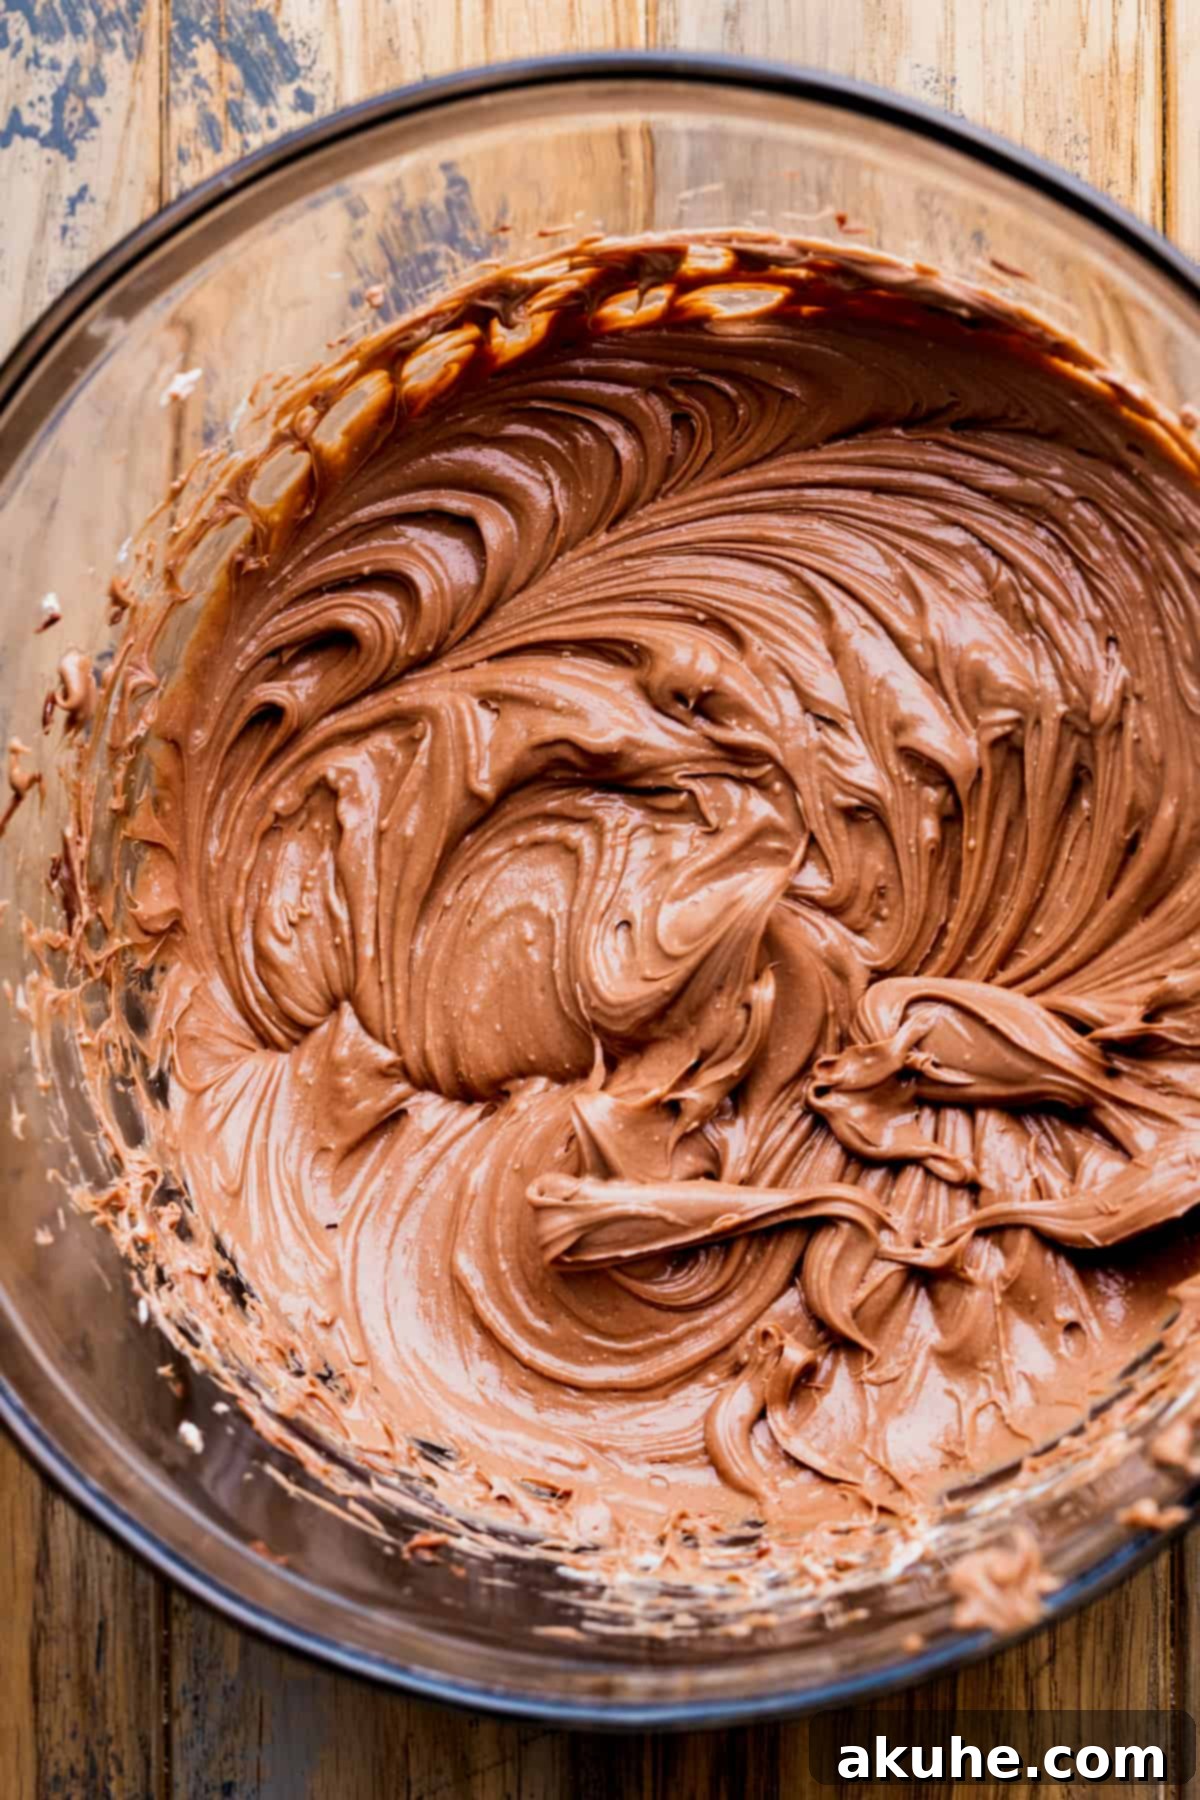
STEP 3: Create the Nutella Cream Cheese Filling. In a medium-sized mixing bowl, combine the room-temperature cream cheese and Nutella. Using your electric mixer, beat these two ingredients together on high speed for approximately 1 minute, until the mixture is light, fluffy, and well combined. Next, add the powdered sugar, unsweetened cocoa powder, and pure vanilla extract. Continue to mix until all ingredients are thoroughly incorporated and the filling is completely smooth and free of any lumps. Scrape down the sides of the bowl as needed to ensure everything is blended evenly.
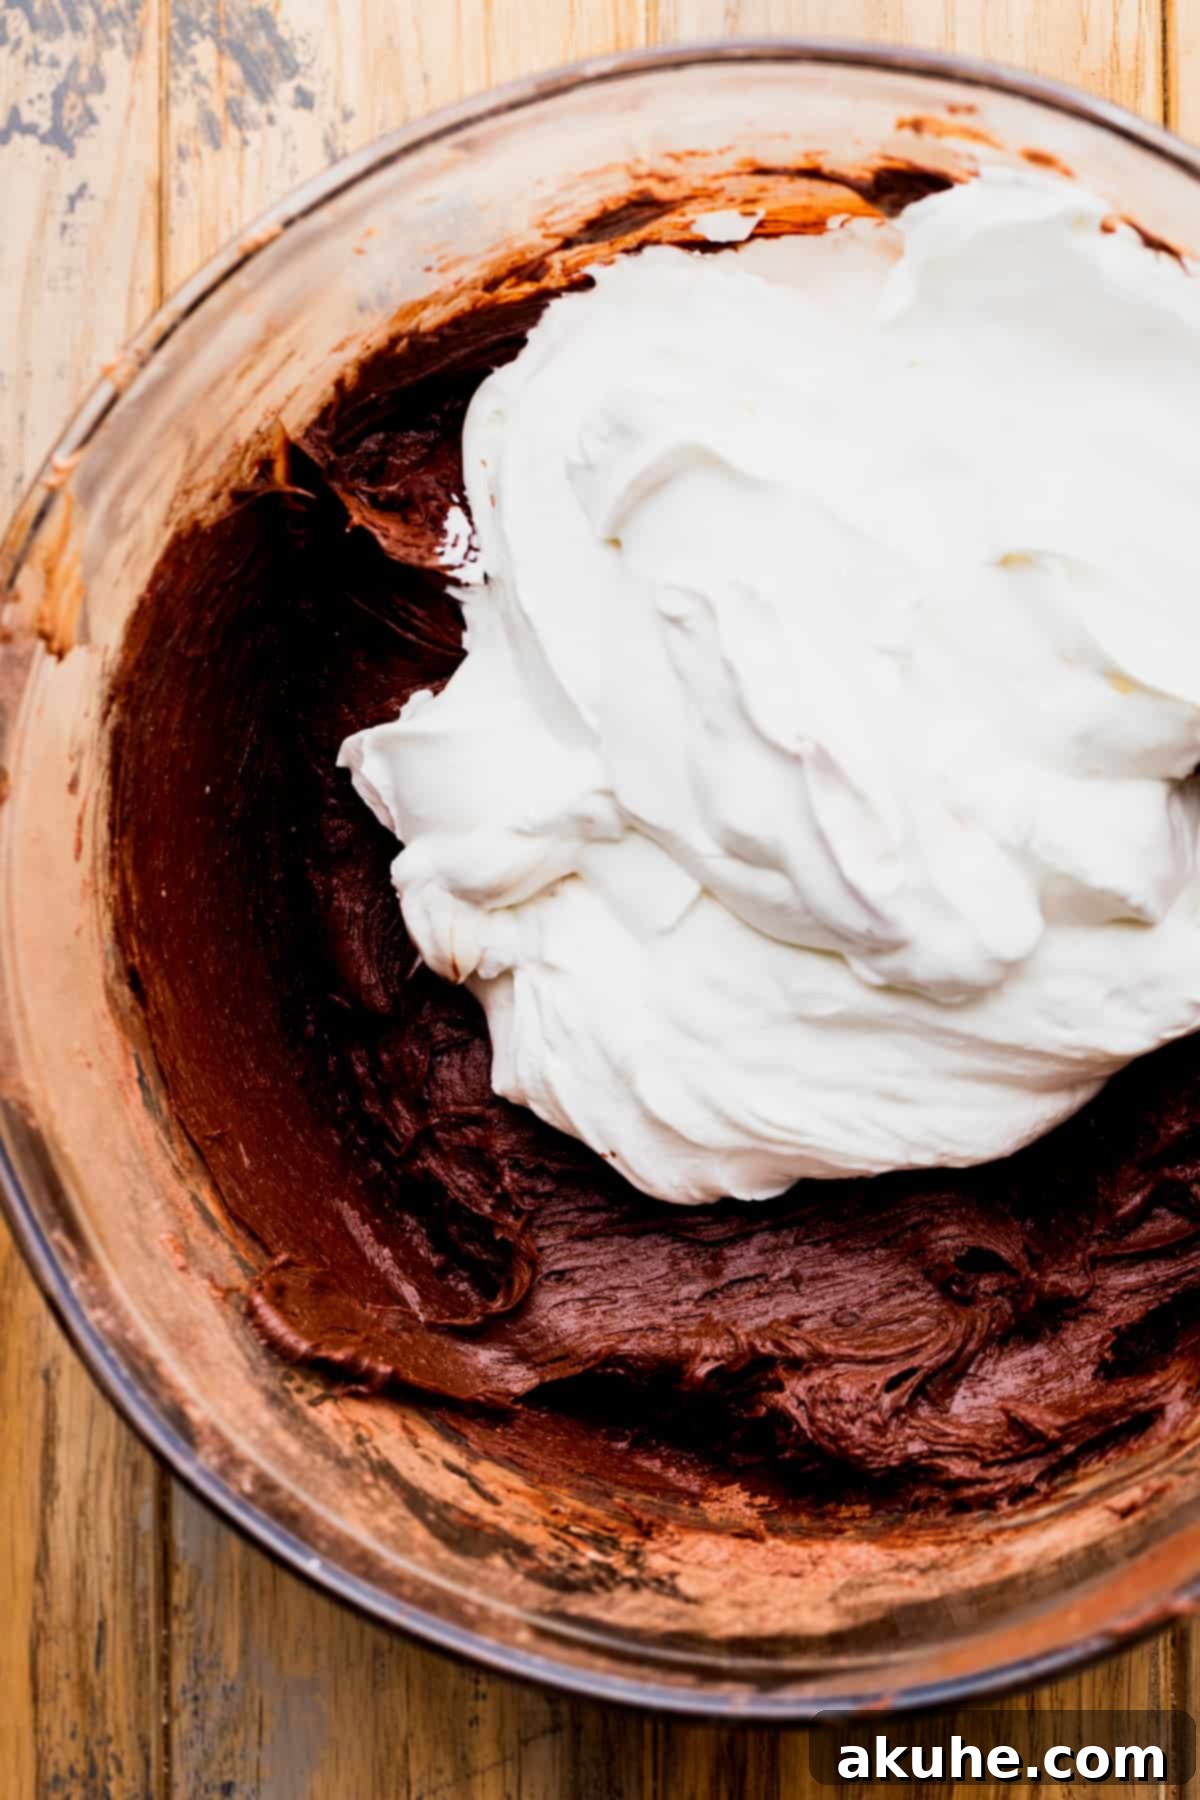
STEP 4: Prepare the Whipped Cream. Once your metal bowl and whisk attachment are thoroughly chilled from the freezer, pour in the very cold heavy whipping cream along with ½ cup of powdered sugar. Beat these ingredients on high speed with your electric mixer until stiff peaks form. The whipped cream should be firm enough to hold its shape when the whisk is lifted.
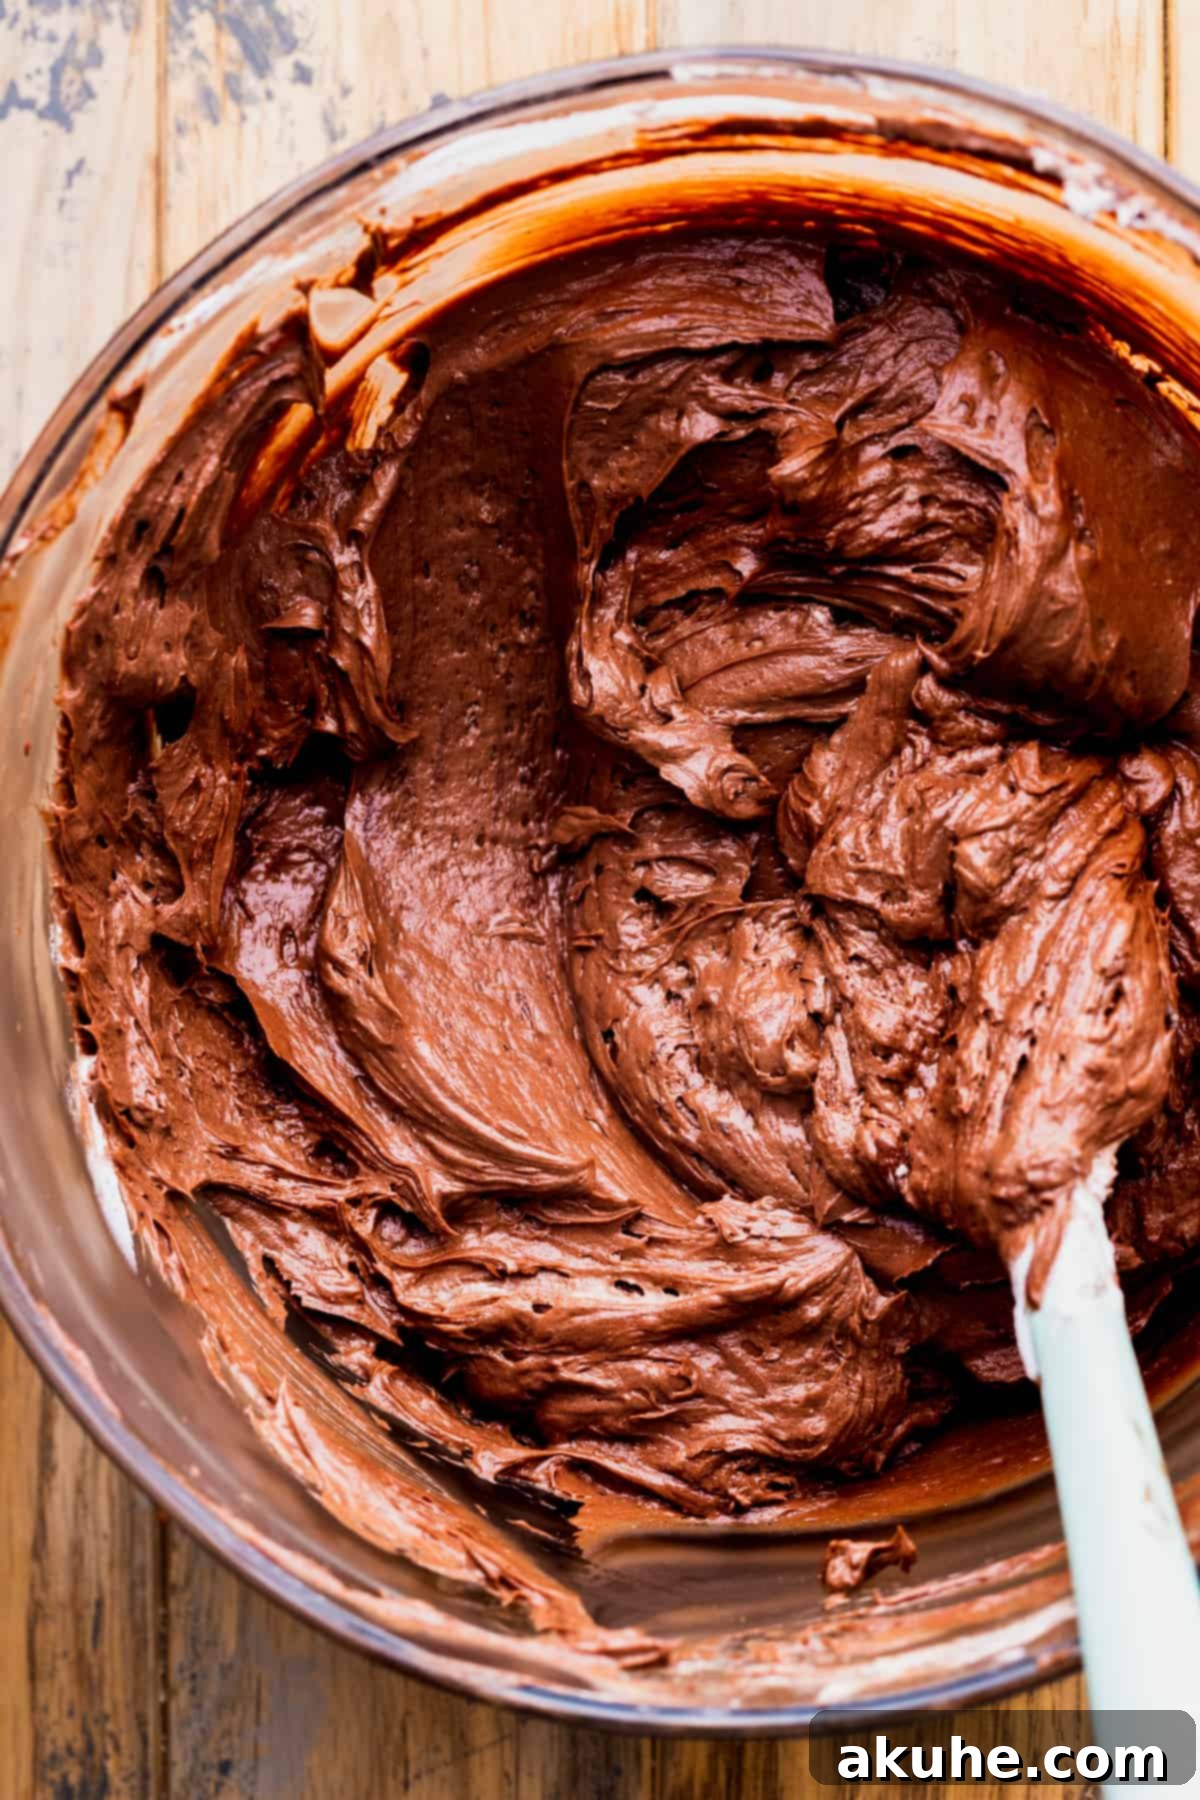
STEP 5: Gently Fold the Filling Together. Transfer the stiff whipped cream into the bowl with the cream cheese chocolate mixture. Using a rubber spatula, gently fold the whipped cream into the Nutella mixture. This step requires patience and a light hand to incorporate the air from the whipped cream without deflating it. The Nutella mixture is quite thick, so it may take a few minutes to fully integrate the whipped cream. Continue folding until no streaks of white whipped cream are visible, but be careful not to overmix, as this can cause the pie to not set properly.
STEP 6: Pour and Chill. Carefully pour the finished chocolate filling into the chilled Oreo crust. Gently spread the filling evenly across the crust using your spatula, creating a smooth, flat top. Cover the pie loosely with aluminum foil or plastic wrap, making sure the wrap doesn’t touch the surface of the pie. Place the covered pie in the refrigerator to chill for a minimum of 6 hours, or ideally overnight. This extended chilling time is crucial for the pie to fully set and firm up, ensuring clean slices.

Step-By-Step Instructions: Crafting the Cinnamon Oat Crumble and Chocolate Whipped Cream Topping
While the main pie is a no-bake wonder, this optional cinnamon oat crumble truly elevates the dessert to another level, adding a delightful crunch and warm spice. If you prefer to keep your oven off completely, you can certainly skip this part, but we highly recommend it!
STEP 1: Mix the Crumble Ingredients. In a medium bowl, combine the all-purpose flour, old-fashioned oats, brown sugar (light or dark), ground cinnamon, and melted unsalted butter. Mix these ingredients thoroughly with a fork or your fingertips until well combined and the mixture resembles coarse crumbs. Place the bowl in the refrigerator to chill while your oven preheats. Chilling helps the crumble retain its shape and prevents it from spreading too much during baking.
STEP 2: Prepare for Baking. Preheat your oven to 300°F (150°C). Lightly spray a baking sheet with nonstick baking spray. Evenly press the chilled crumble mixture over the prepared cookie sheet. You can create a uniform layer or small clusters, depending on your preferred crumble texture.
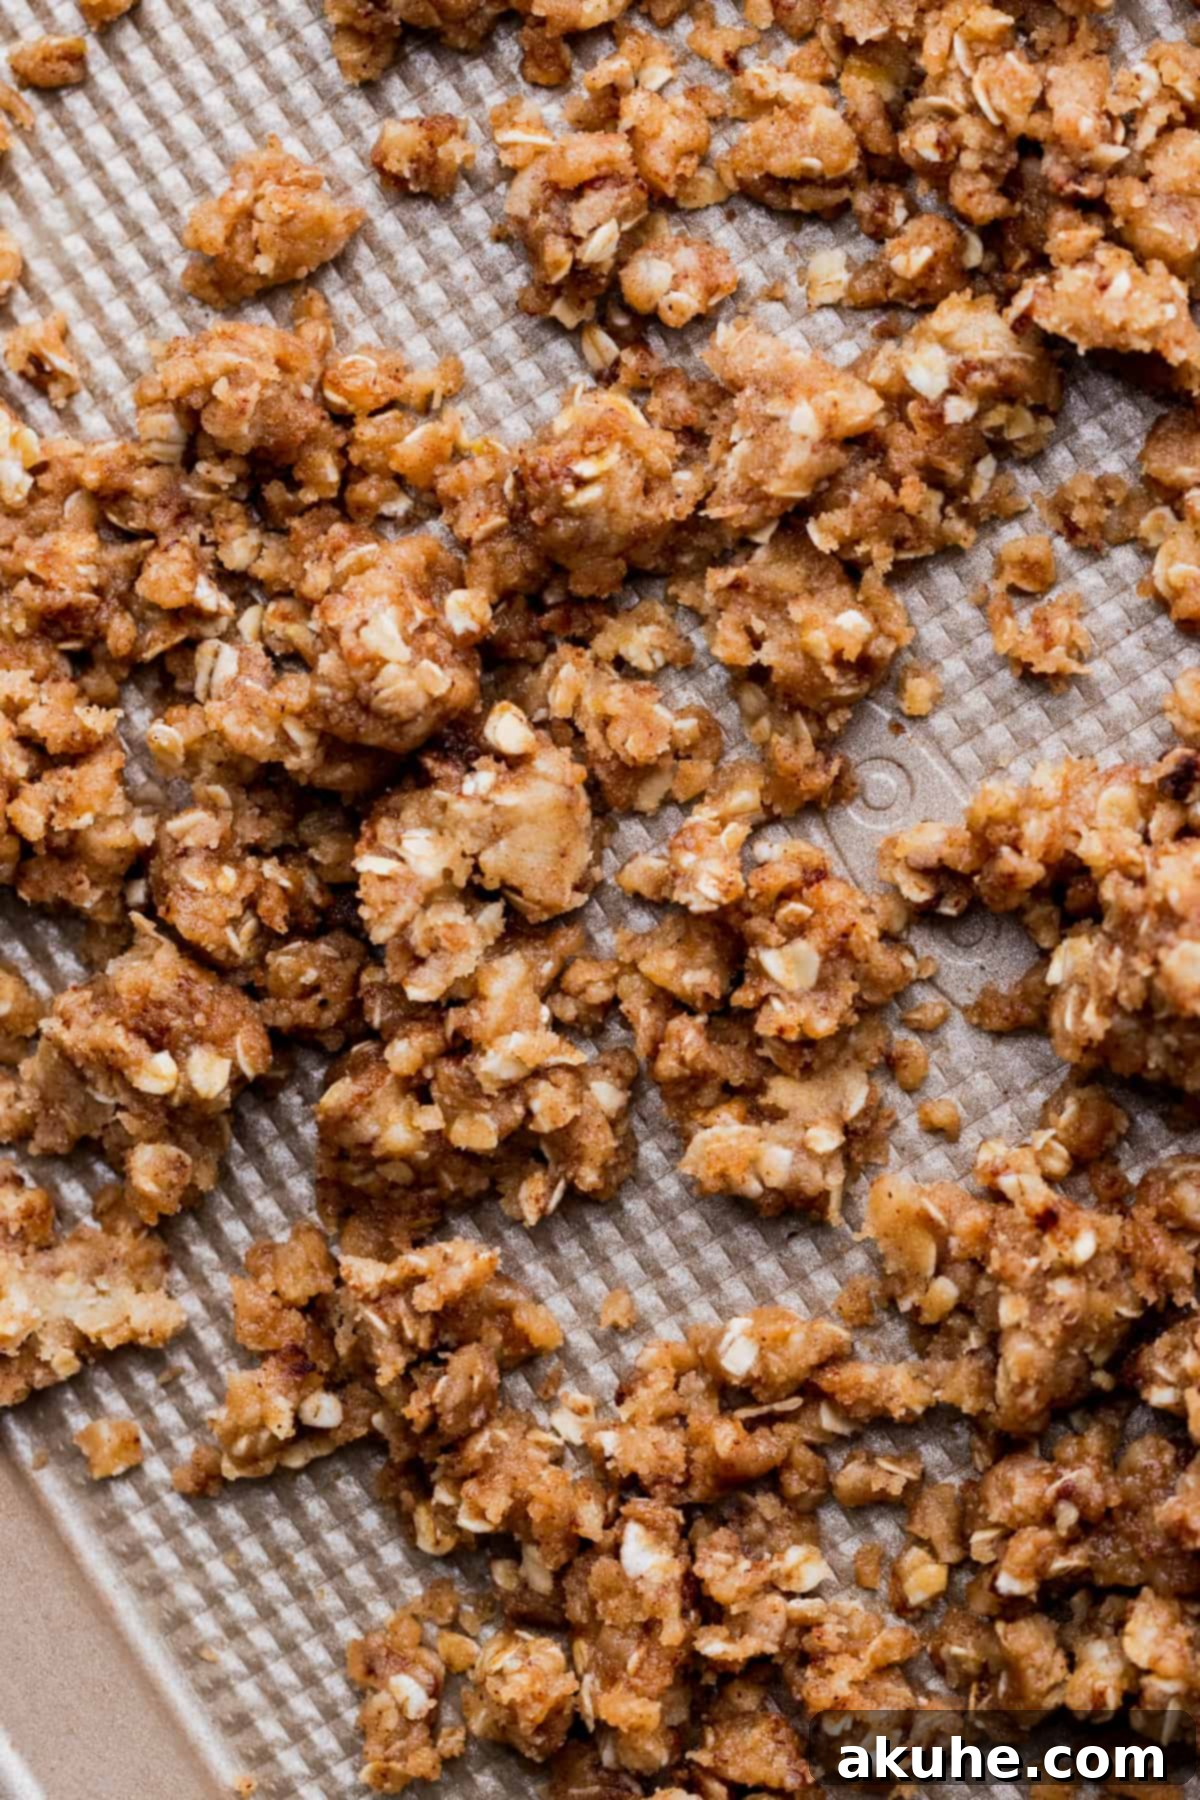
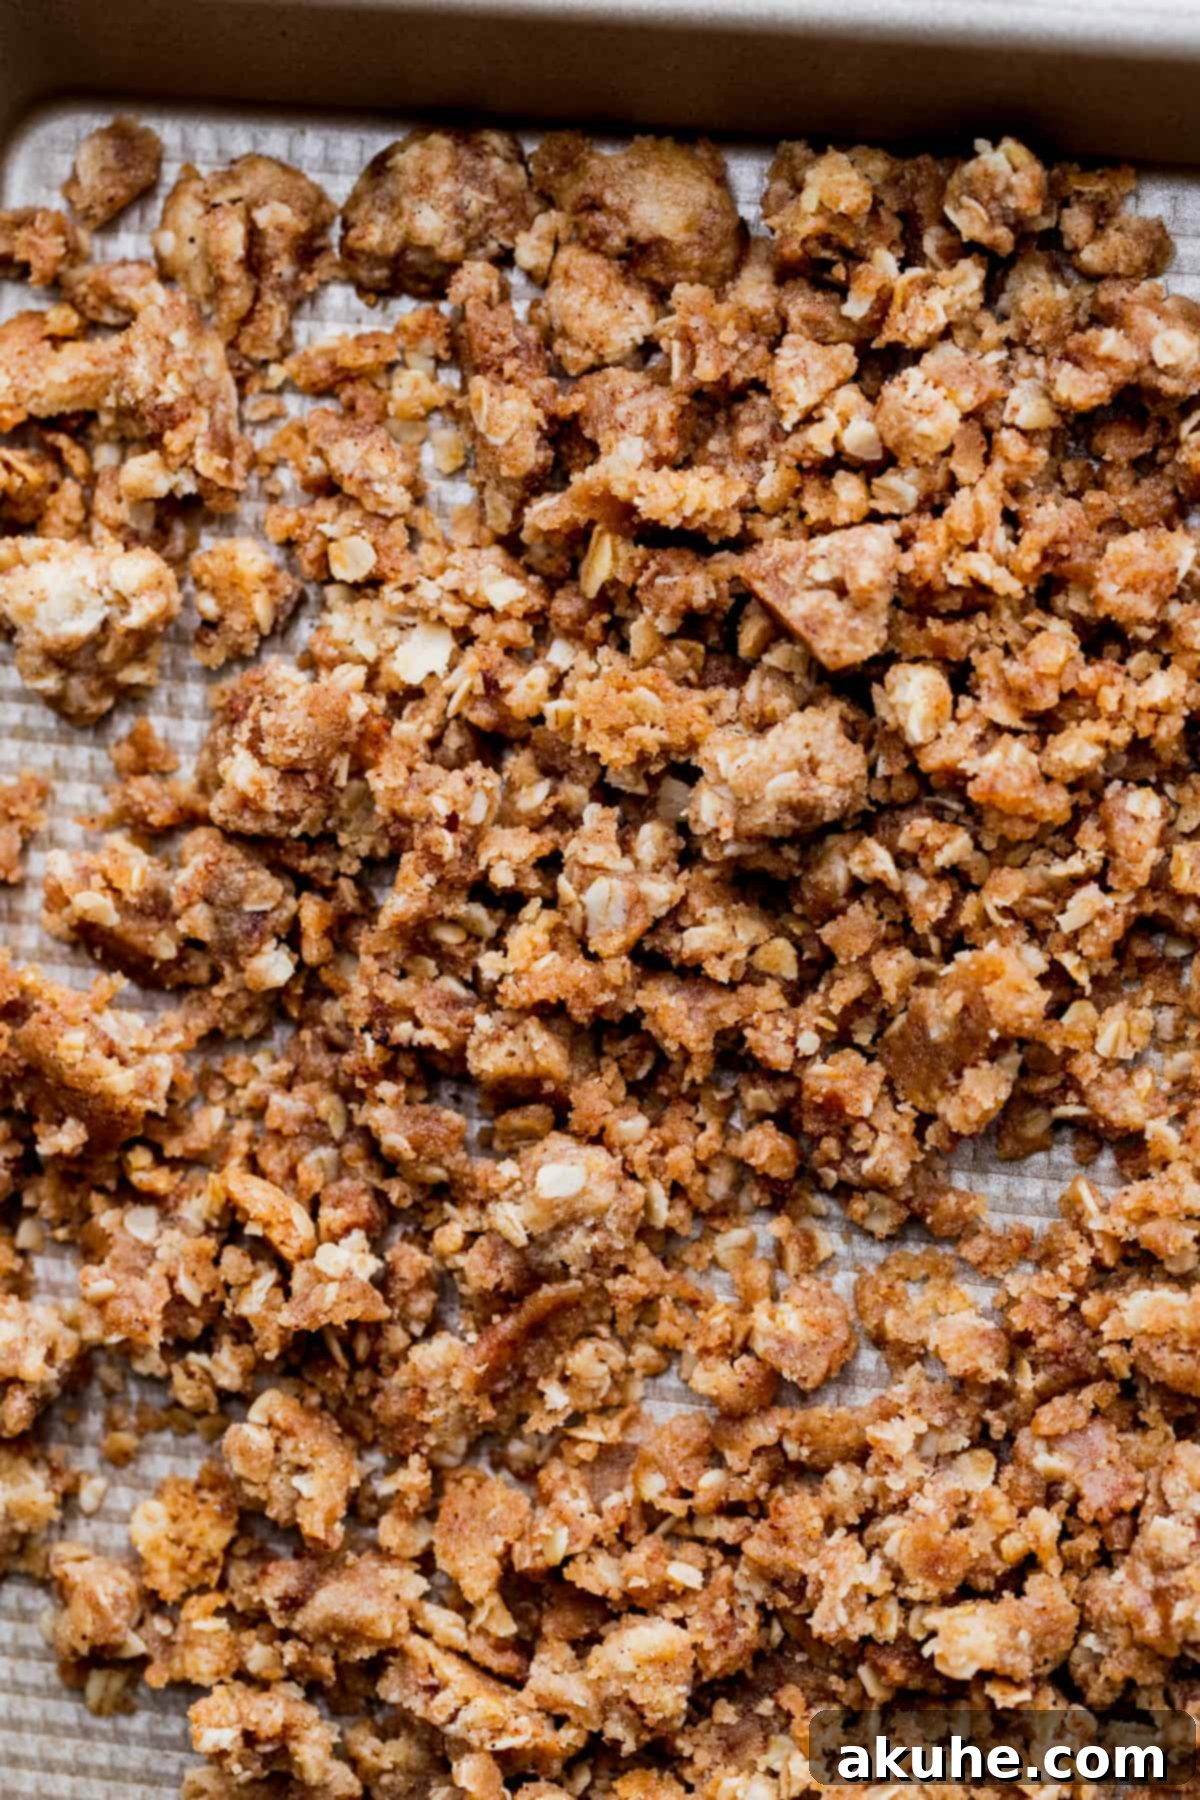
STEP 3: Bake the Crumble. Bake the crumble in the preheated oven for approximately 10 minutes, or until it turns a beautiful golden brown and becomes fragrant. Once baked, remove the baking sheet from the oven. As the crumble cools, it will harden further. Use a spatula to gently break up and mix the crumble, ensuring you have individual, crunchy pieces. Allow it to cool completely on the baking sheet before using or storing.
STEP 4: Prepare for Chocolate Whipped Cream. As before, place a clean metal bowl and a whisk attachment in the freezer for 10 minutes. This chilling step is vital for achieving the perfect texture for your chocolate whipped cream.
STEP 5: Whip the Chocolate Cream. Once the bowl and whisk are thoroughly chilled, combine the very cold heavy whipping cream, 2 tablespoons of powdered sugar, unsweetened cocoa powder, and ½ teaspoon of pure vanilla extract in the cold bowl. Beat on high speed with your electric mixer until medium peaks form. The whipped cream should be fluffy and hold soft peaks, but not be overly stiff – a slightly softer consistency is perfect for spreading. Be careful not to over-whip, which can turn it grainy.
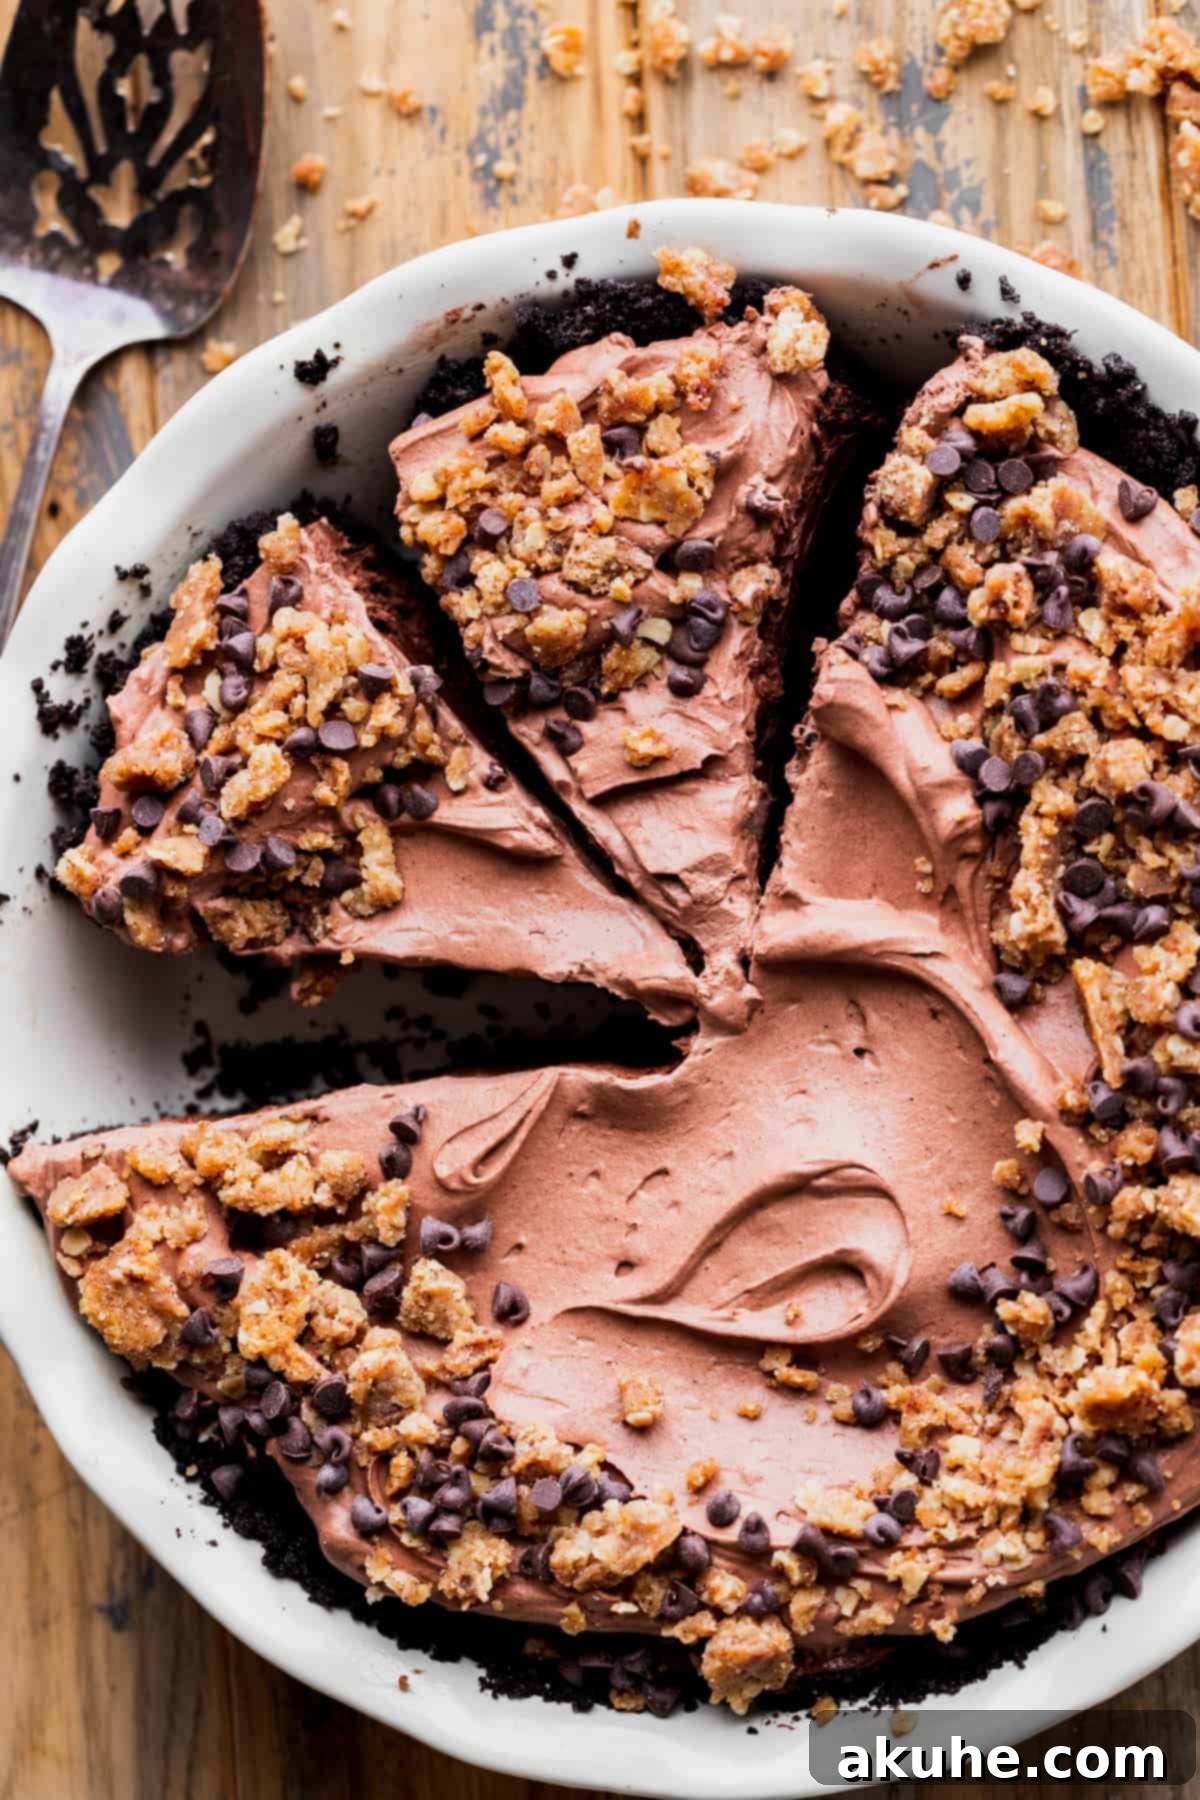
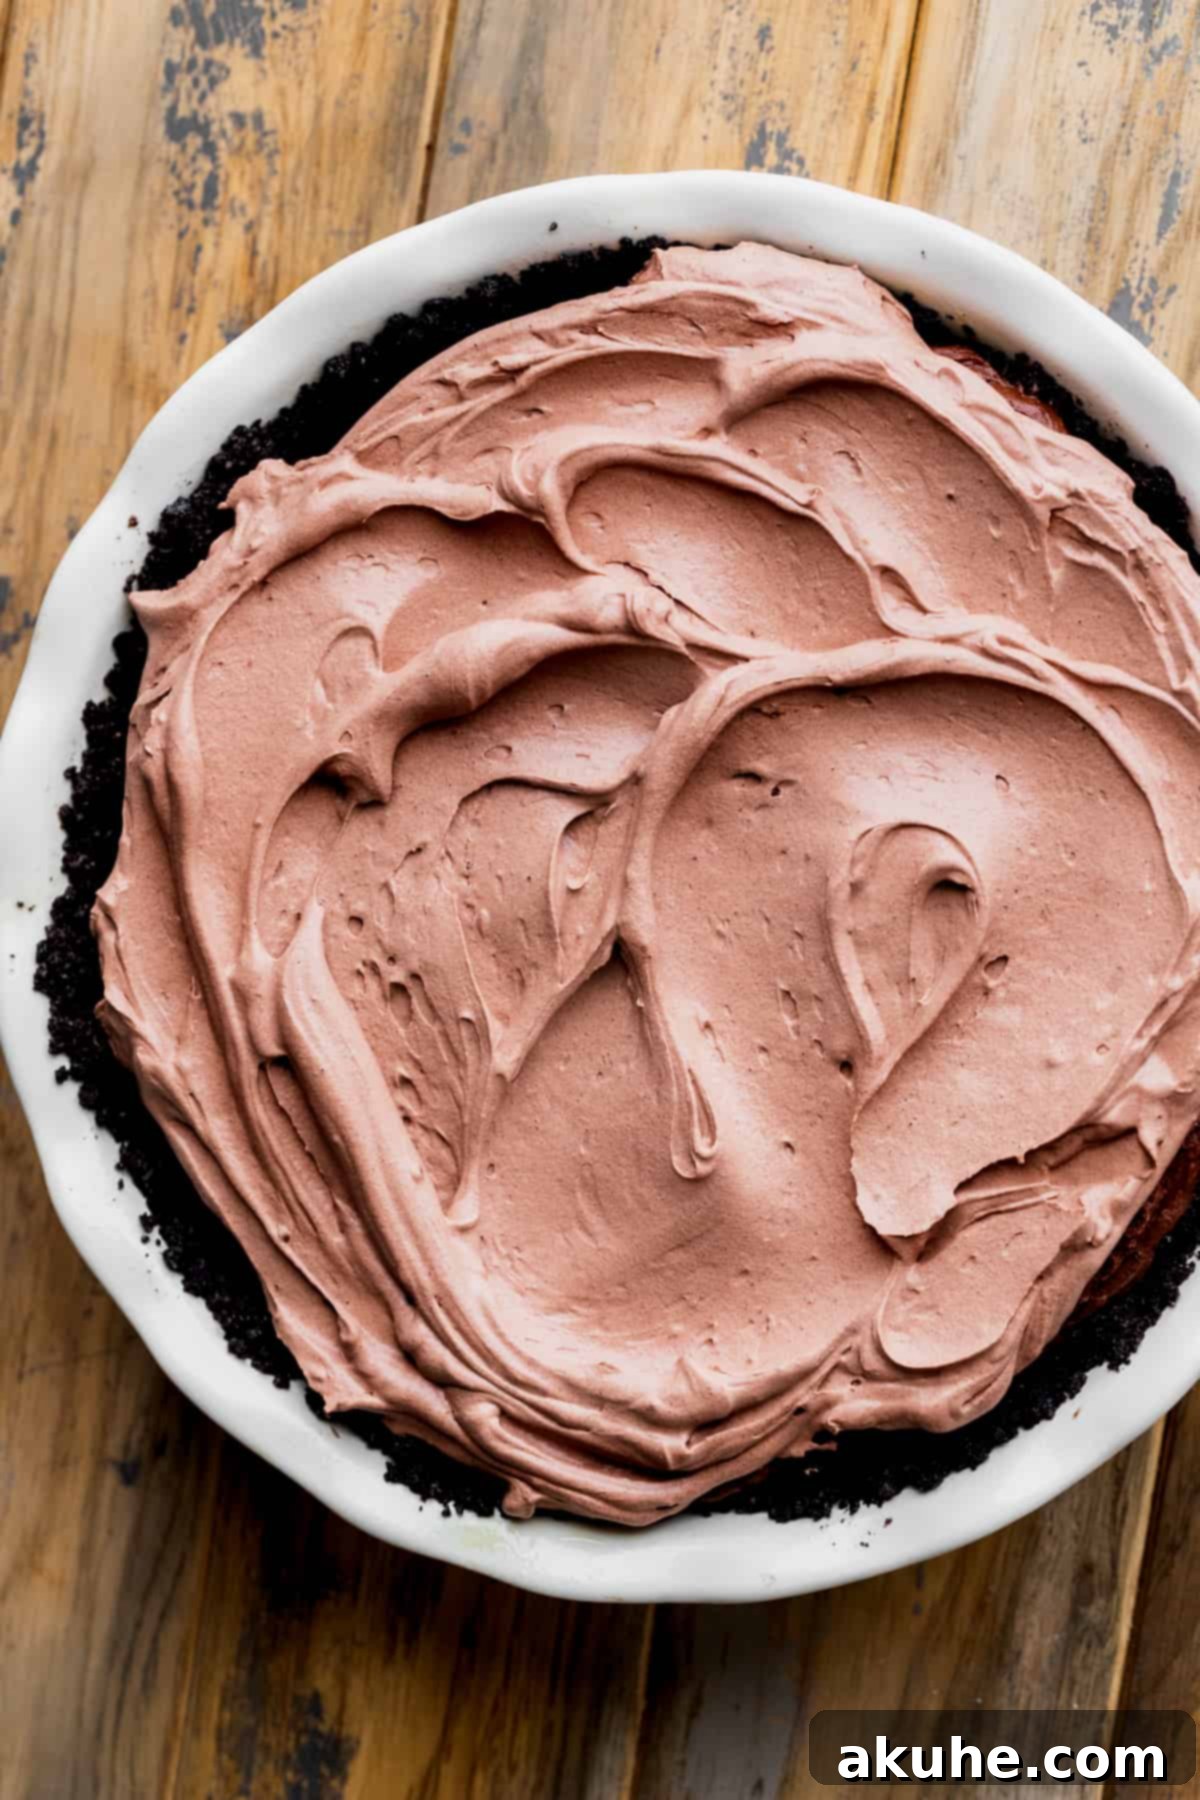
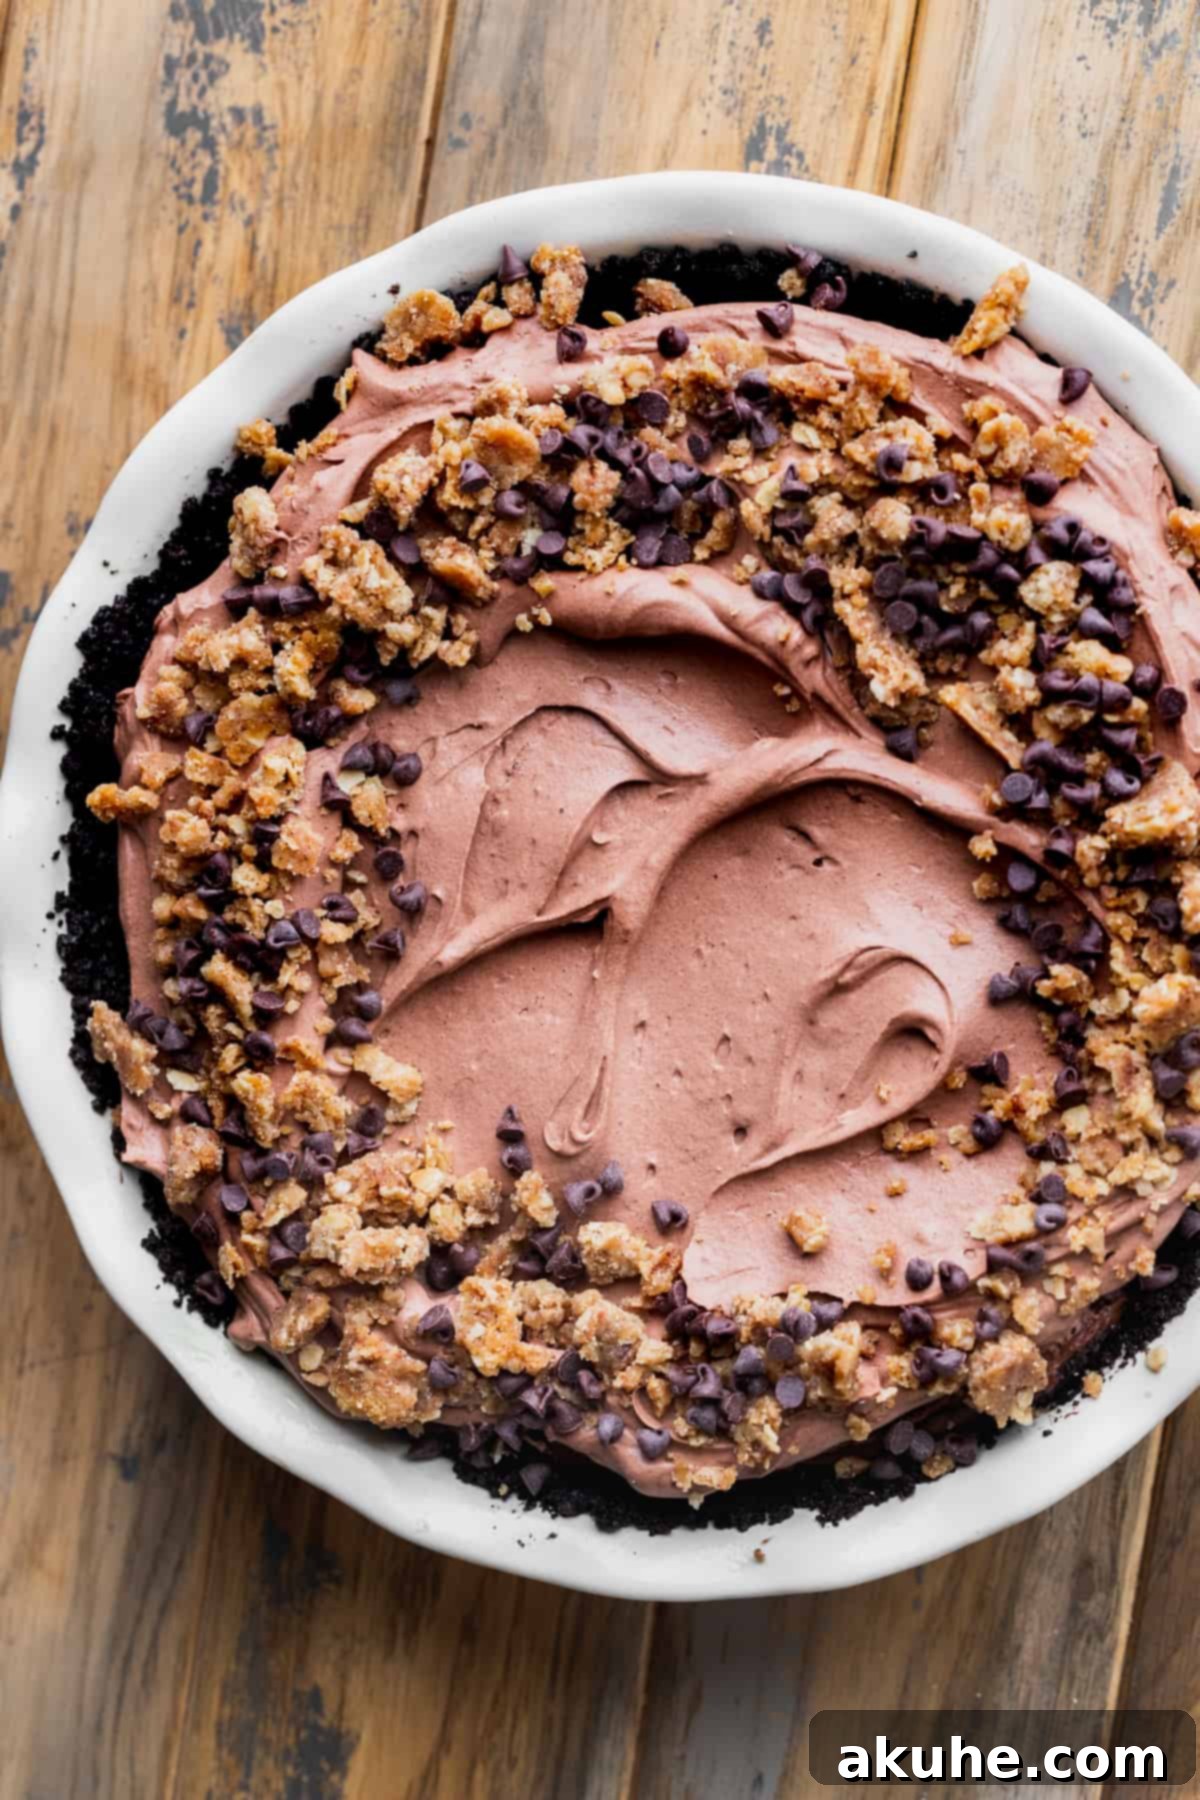
STEP 6: Assemble and Top the Pie. Take your well-chilled chocolate pie out of the refrigerator. If you used a springform pan, carefully release and remove the sides of the pan. Gently spread the freshly made chocolate whipped cream evenly over the top of the pie. Finally, sprinkle the cooled cinnamon oat crumble generously over the whipped cream. If you opted to skip the crumble, some excellent substitutes include elegant chocolate curls for a sophisticated look, or a handful of mini chocolate chips for a simpler, yet equally delicious, touch. Serve immediately or chill briefly until ready to enjoy!
Expert Baking Tips for a Flawless Chocolate Pie
Achieving a perfectly set, deliciously creamy chocolate pie is easier than you think with these expert tips:
- Gentle Folding is Key: When incorporating the whipped cream into the cream cheese and Nutella mixture, proceed with extreme caution and a light touch. The goal is to gently fold the whipped cream in, preserving as much of the air as possible. If you are too rough or overmix the batter, you risk deflating the whipped cream. This loss of air will prevent the pie from setting correctly, resulting in a runny, unstable filling rather than a firm, sliceable dessert. Think of it as delicately blending, not aggressively stirring.
- Patience with Chilling Time: This no-bake pie relies heavily on a sufficient chill time to firm up and set. A minimum of 6 hours in the refrigerator is essential, but for the best possible results and clean, neat slices, chilling the pie overnight (for 8-12 hours) is highly recommended. Rushing this step will lead to a soft, gooey pie that is difficult to serve. Plan ahead to give your pie ample time to chill.
- The Importance of Cold for Whipped Cream: To achieve light, fluffy, and stable whipped cream, every element must be as cold as possible. Ensure both your heavy cream and your mixing bowl and whisk attachment are thoroughly chilled (ideally, the bowl and whisk should be frozen for 10-15 minutes). If the heavy cream warms up too much, or if your equipment isn’t cold enough, the fat molecules won’t stabilize properly, and the cream will struggle to whip up into stiff peaks. Cold temperatures promote better aeration and stability, guaranteeing perfect whipped cream every time.
- Quality Ingredients Matter: While simple, the quality of your ingredients directly impacts the final taste. Use good quality cream cheese, a hazelnut spread you enjoy, and fresh heavy cream for the best flavor and texture.
- Accurate Measurements: Baking, even no-bake recipes, is a science. Use proper measuring cups and spoons to ensure accuracy, especially for the powdered sugar and cocoa powder. This consistency will ensure your pie is perfectly balanced in sweetness and richness.

Frequently Asked Questions (FAQ)
There are typically two main reasons why a no-bake chocolate pie might fail to set: either the whipped cream was overmixed into the cream cheese mixture, causing it to deflate and lose its setting ability, or the pie simply did not have enough time to chill in the refrigerator. Ensure you fold the whipped cream gently and allow for at least 6 hours, preferably overnight, for adequate chilling.
Yes, you absolutely can use a pre-made pie crust as your pie shell for convenience. While our homemade Oreo crust is incredibly easy to make and adds a superior chocolate flavor, a store-bought chocolate or graham cracker crust will also work well as a base for this delicious filling. Ensure it’s a 9-inch crust to accommodate the filling quantity.
Absolutely! This recipe is wonderfully adaptable for creating individual mini pies. To do so, divide the recipe into thirds to yield approximately 12 mini pies. You will need a standard muffin pan for this. Simply press the Oreo crust mixture into the bottom of each muffin cup, fill with the chocolate Nutella mixture, and chill. Top with whipped cream and crumble as directed.
This chocolate pie is an excellent make-ahead dessert! The filling requires a significant amount of chilling time to set, making it perfect to prepare the day before your event. You can assemble the entire pie (crust and filling) and chill it overnight. Add the chocolate whipped cream and cinnamon oat crumble just before serving for the freshest look and texture. This allows for stress-free entertaining.
Storing and Freezing Your Decadent Chocolate Pie
To keep your chocolate pie fresh and delicious for as long as possible, proper storage is essential.
Storing
Store any leftover chocolate pie slices or the entire undecorated pie in an airtight container, such as a cake carrier or a pie saver, in the refrigerator. This helps prevent the pie from absorbing any odors from other foods and maintains its freshness. When properly stored, the pie will remain delicious for up to 5 days in the fridge.
Freezing
This chocolate pie freezes beautifully, allowing you to enjoy it weeks later!
- For Individual Slices: If you have leftover slices, wrap each one tightly in plastic wrap, then place them in an airtight freezer-safe bag or container. They can be frozen for up to 30 days. To thaw, simply remove a slice from the freezer and let it sit at room temperature for 1-2 hours until softened to your desired consistency.
- For a Whole Pie (Undecorated): To freeze an entire pie, first ensure it has been thoroughly chilled overnight in the refrigerator and is fully set. Once firm, wrap the pie tightly in several layers of plastic wrap, followed by a layer of aluminum foil. This double-layer protection helps prevent freezer burn. The whole pie can be frozen for up to 30 days. When you’re ready to serve, transfer the frozen pie to the refrigerator and let it thaw for approximately 24 hours. Once thawed, you can decorate it with fresh chocolate whipped cream and cinnamon oat crumble just before serving.

Other Chocolate Recipes To Try
If you adored this recipe, we’d love for you to leave a STAR REVIEW! Don’t forget to tag us on Instagram @stephaniesweettreats with your delicious creations. For more inspiring dessert ideas, be sure to follow us on Pinterest.
Chocolate Pie

This chocolate pie features an Oreo crust, a smooth no-bake Nutella chocolate filling, a generous layer of chocolate whipped cream, and a crunchy cinnamon oat crumble. It’s an incredibly indulgent pie, perfectly suited for the holidays or any special occasion!
Author: Stephanie Rutherford
Prep Time: 1 hour | Chilling Time: 6 hours | Total Time: 7 hours
Servings: 16 slices
Ingredients
Oreo Crust
- 2 1/2 cups Oreo crumbs (approximately 20-25 regular Oreos)
- 3 TBSP Unsalted butter, melted
Chocolate Nutella Pie Filling
- 16 oz Cream cheese, room temperature
- 1 cup Nutella
- 1/2 cup Powdered sugar
- 1/2 cup Unsweetened cocoa powder
- 1 tsp Pure vanilla extract
- 1 cup Heavy cream, very cold
- 1/4 cup Powdered sugar
Chocolate Whipped Cream Topping
- 1 cup Heavy cream, very cold
- 1/4 cup Unsweetened cocoa powder
- 2 TBSP Powdered sugar
- 1/2 tsp Pure vanilla extract
Cinnamon Oat Crumble (Optional)
- 1/2 cup All-purpose flour
- 1/4 cup Old-fashioned oats
- 1/4 cup Brown sugar, packed (light or dark)
- 1 tsp Ground cinnamon
- 5 TBSP Unsalted butter, melted
Instructions
Oreo Crust
- Lightly spray a 9-inch pie pan or a 9-inch springform pan with nonstick baking spray. Set aside.
- Blend the Oreos in a food processor or blender until fine crumbs are formed. In a medium bowl, mix the Oreo crumbs and melted butter with a fork until well combined.
- Pour the crumb mixture into the prepared pan and press it firmly into the bottom and halfway up the sides. Use the bottom of a measuring cup or glass to compact the crust. Freeze the pan while you prepare the filling.
Chocolate Nutella Pie Filling
- Place a metal mixing bowl and a whisk attachment in the freezer for 10 minutes to chill.
- In a separate medium bowl, use an electric mixer to beat the room-temperature cream cheese and Nutella on high speed for 1 minute until smooth. Add the powdered sugar, cocoa powder, and vanilla extract; mix until completely smooth and lump-free.
- Using the cold bowl and whisk, beat the 1 cup of very cold heavy cream and 1/4 cup of powdered sugar on high speed until stiff peaks form.
- Gently pour the whipped cream into the bowl with the chocolate cream cheese mixture. Use a rubber spatula to carefully fold the whipped cream into the chocolate mixture until just combined, being careful not to overmix and deflate the cream. The mixture will be thick, so be patient.
- Pour the finished filling on top of the chilled Oreo crust. Gently spread it evenly. Cover the pie loosely with foil or plastic wrap and chill in the refrigerator overnight, or for at least 6 hours, until fully set.
Cinnamon Oat Crumble (Optional)
- (If you prefer not to use your oven, you can skip this section. However, the crumble adds a fantastic texture and flavor!)
- In a medium bowl, combine the flour, oats, brown sugar, cinnamon, and melted butter. Mix until well combined and crumbly. Place the bowl in the fridge to chill while the oven preheats.
- Preheat your oven to 300°F (150°C). Spray a cookie sheet with nonstick baking spray. Press the chilled crumble mixture evenly over the cookie sheet.
- Bake for 10 minutes, or until golden brown. Remove from oven and use a rubber spatula to gently mix the crumble as it cools; it will harden as it sets. Cool completely before using.
Chocolate Whipped Cream Topping
- Place a clean metal bowl and a whisk attachment in the freezer for 10 minutes to chill.
- In the cold bowl, beat the 1 cup of very cold heavy cream, 1/4 cup cocoa powder, 2 tablespoons powdered sugar, and 1/2 tsp vanilla extract on high speed until medium peaks form.
- Take the chilled pie out of the refrigerator. If using a springform pan, carefully remove the sides.
- Spread the chocolate whipped cream evenly over the top of the pie. Sprinkle the cooled cinnamon oat crumble (or your chosen topping) generously over the whipped cream. Serve immediately or chill until ready to enjoy.
Notes
For best results and to ensure smooth mixing and proper whipping, pull out dairy ingredients (cream cheese and heavy cream) from the refrigerator approximately 2 hours before you plan to start preparing the pie, allowing them to come to room temperature (except for the heavy cream used for whipping, which must stay very cold).
Nutrition Information
Calories: 394kcal, Carbohydrates: 30g, Protein: 5g, Fat: 32g, Saturated Fat: 22g, Polyunsaturated Fat: 1g, Monounsaturated Fat: 7g, Trans Fat: 0.2g, Cholesterol: 77mg, Sodium: 108mg, Potassium: 219mg, Fiber: 3g, Sugar: 16g, Vitamin A: 994IU, Vitamin C: 0.2mg, Calcium: 80mg, Iron: 2mg
