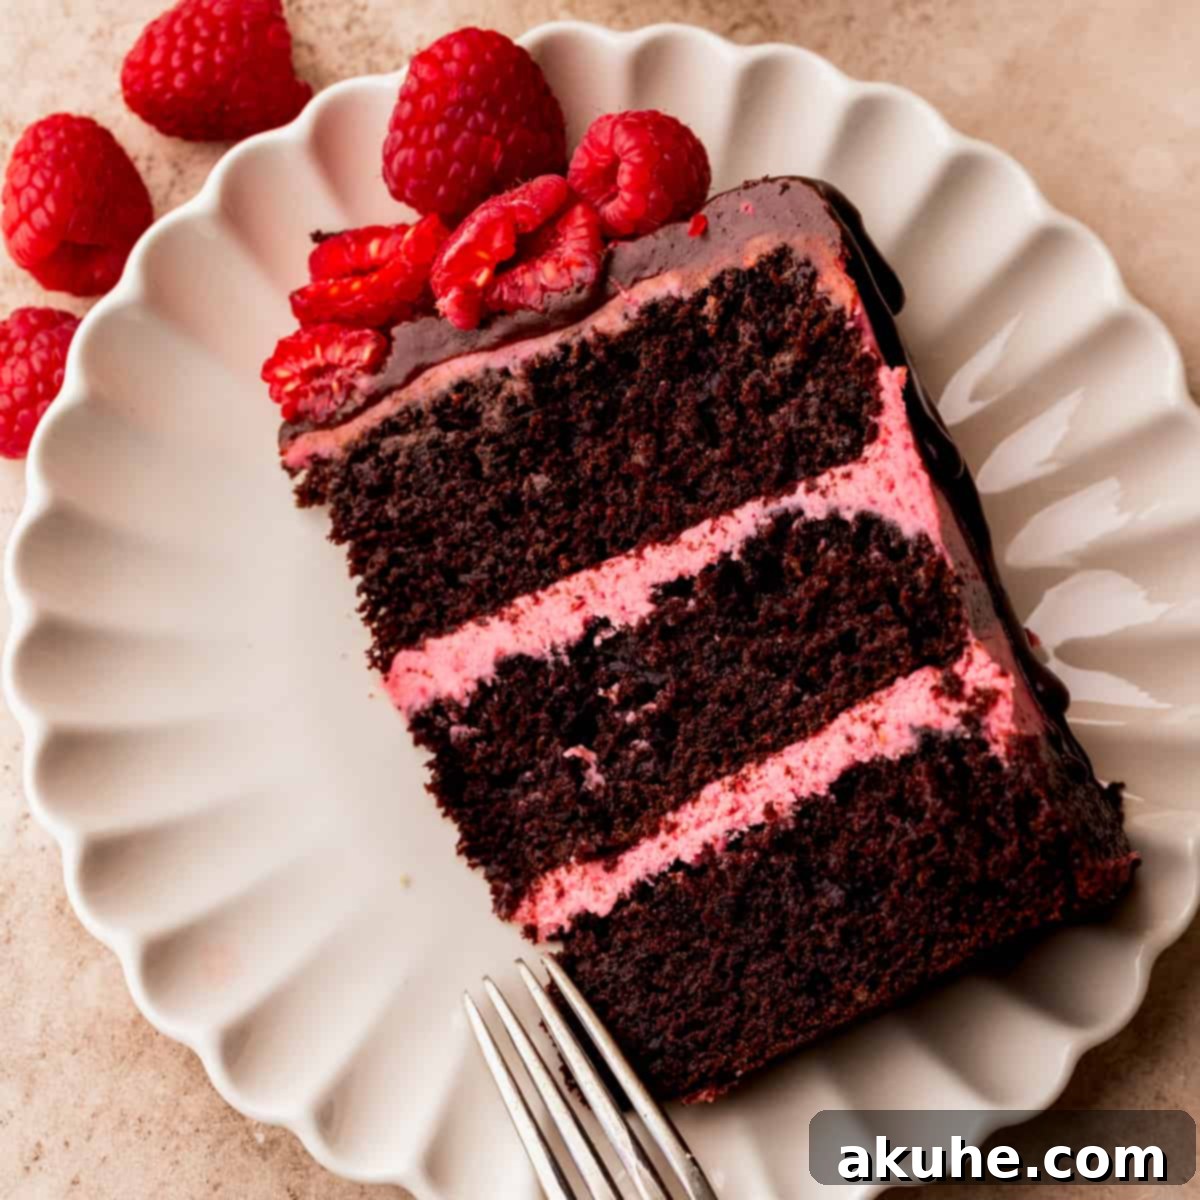
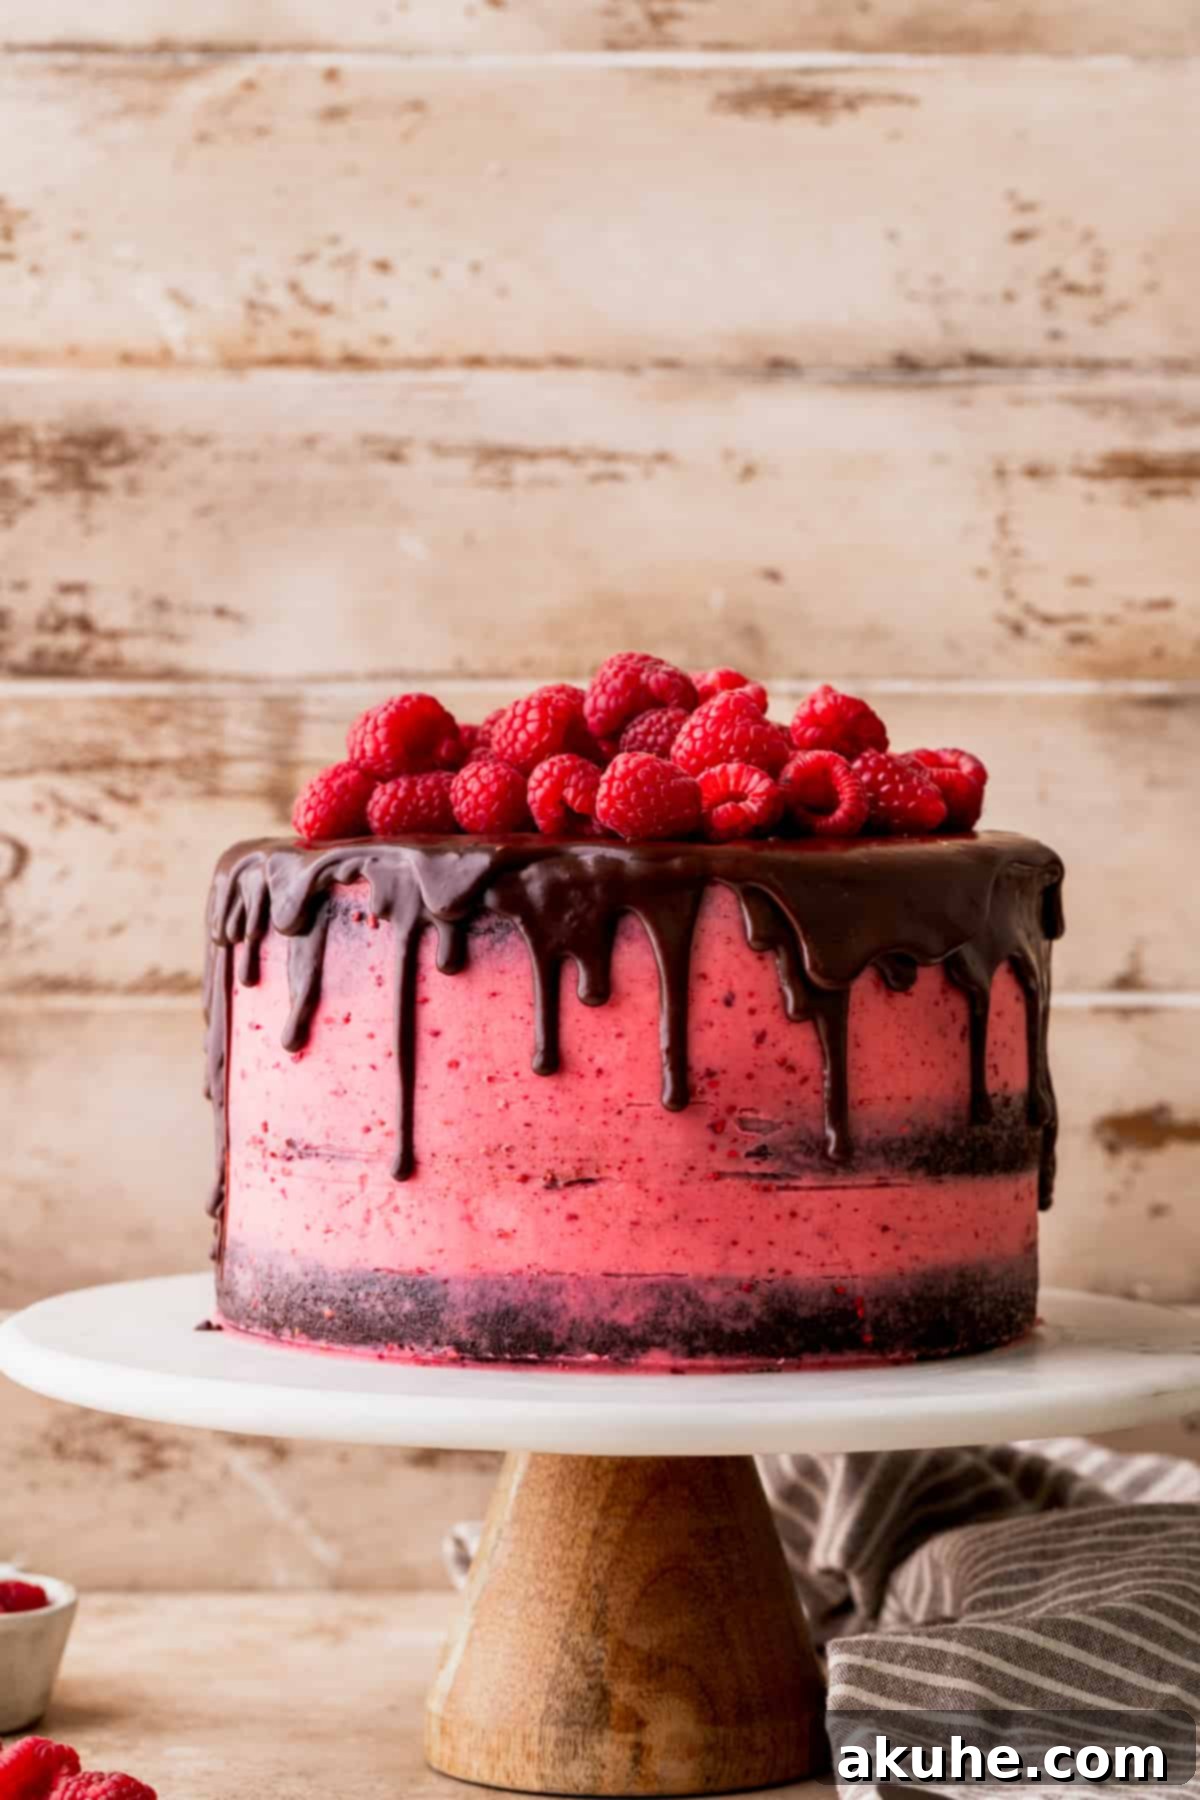
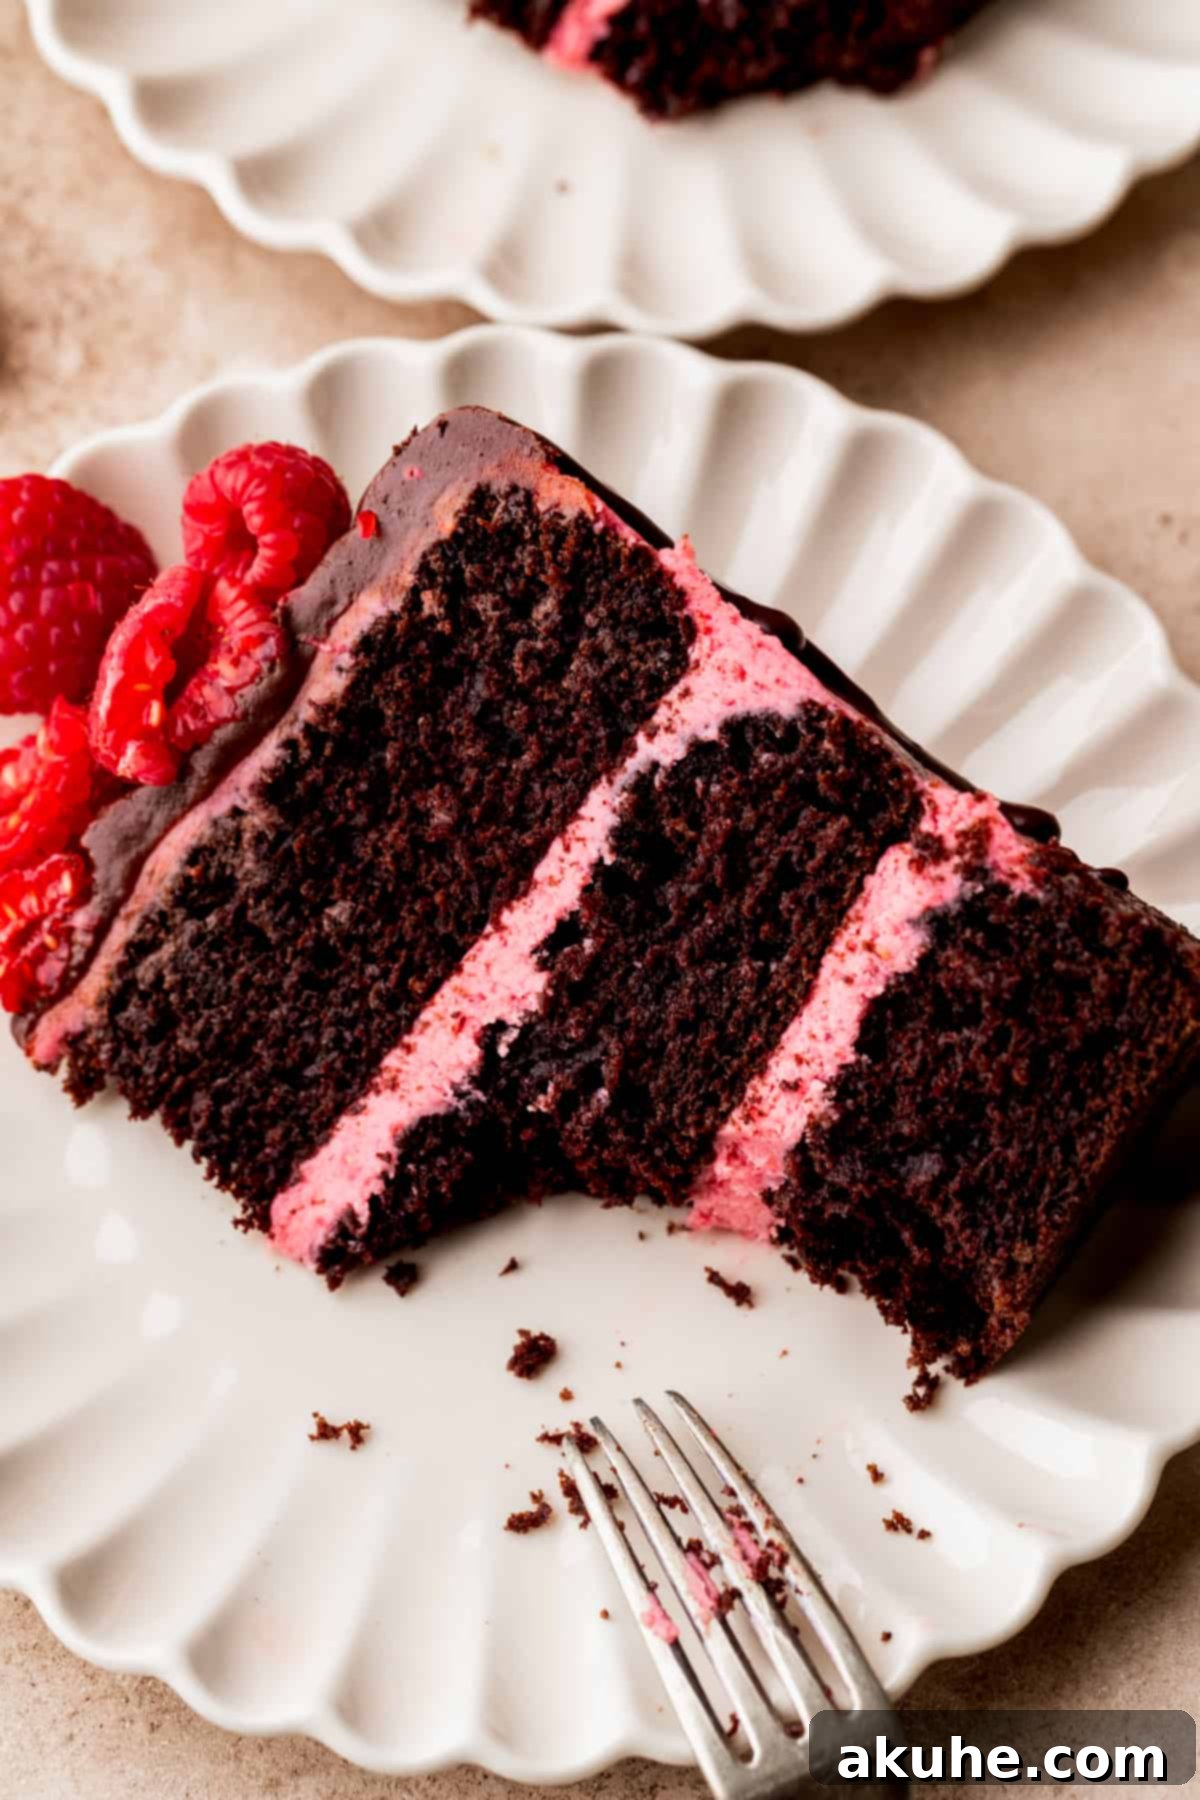
Indulge in the ultimate symphony of flavors with our truly decadent Chocolate Raspberry Cake. This exquisite three-layer cake boasts an unbelievably moist chocolate base, generously layered with a luscious raspberry frosting. What makes this frosting extraordinary is its dual raspberry punch: a vibrant reduction of fresh raspberry puree combined with the intense flavor of ground freeze-dried raspberries. If you’re a connoisseur of rich chocolate and bright, tangy raspberries, prepare to fall in love with this unforgettable dessert.
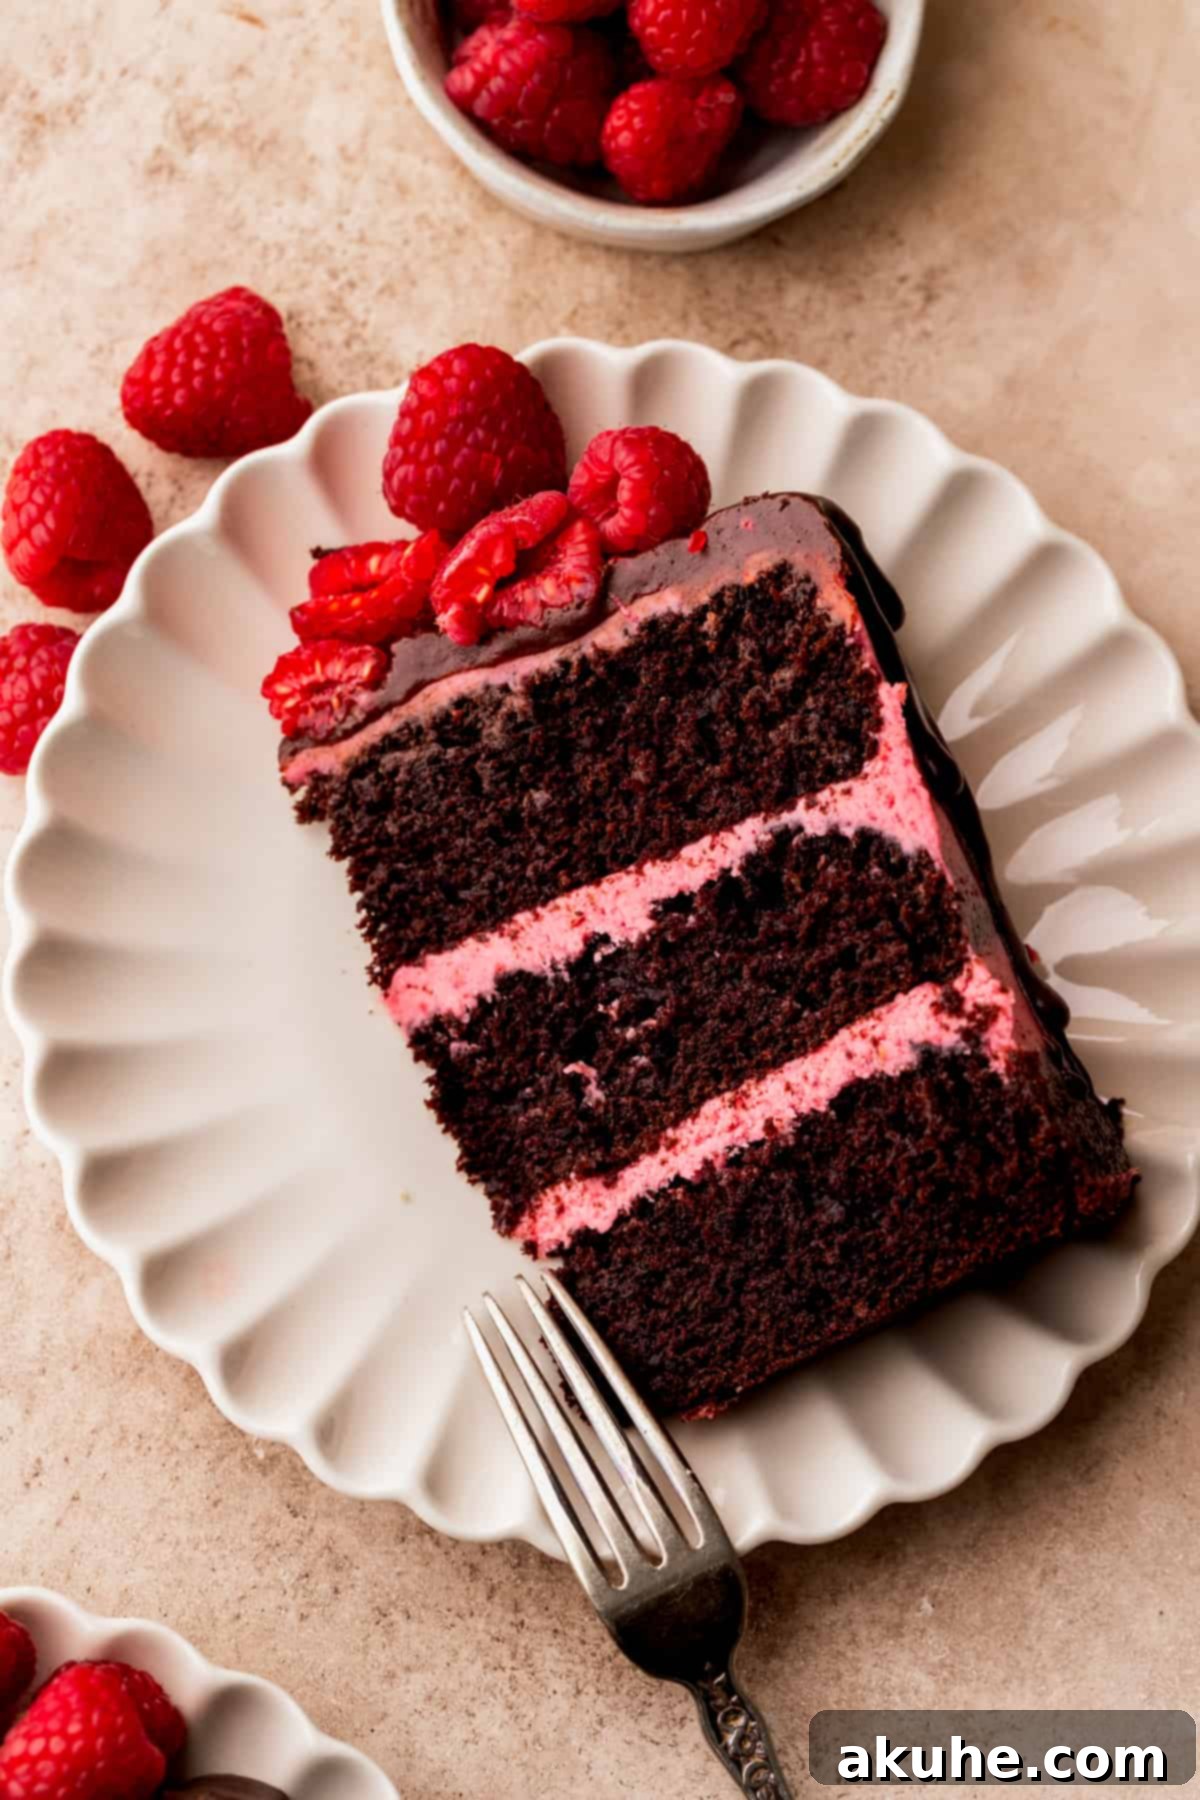
Our chocolate raspberry cake isn’t just a dessert; it’s a celebration of classic flavor pairing. Each bite delivers a harmonious blend of deep cocoa notes and the sweet-tart essence of raspberries, all wrapped in a tender, moist crumb. The homemade raspberry frosting is the star, offering a burst of fresh fruit flavor that perfectly complements the rich chocolate cake layers. This recipe is designed to be accessible even for those new to baking, breaking down the process into clear, manageable steps. It’s an ideal choice for special occasions like Valentine’s Day, anniversaries, birthdays, or simply when you crave a truly remarkable homemade treat.
For those who adore the delightful tang of raspberries in their baking, explore some of our other cherished recipes. You might enjoy our Raspberry Muffins, a perfect breakfast or snack option, the elegant Vanilla Raspberry Cake for a lighter touch, or our irresistible Raspberry White Chocolate Cookies for a delightful chewy treat.
Why This Chocolate Raspberry Cake Recipe Stands Out
Crafting the perfect dessert can be a joy, and this chocolate raspberry cake recipe is engineered for success and pure indulgence. Here’s why it’s destined to become a favorite in your baking repertoire:
- The Irresistible Duo: Raspberry and Chocolate The pairing of sweet, slightly bitter chocolate with the bright, tart freshness of raspberries is a match made in culinary heaven. This cake perfectly balances these contrasting flavors, creating a sophisticated and utterly delicious dessert that appeals to a wide range of palates. Each component—from the rich cocoa cake to the vibrant raspberry frosting—enhances the other, making every forkful a delightful experience.
- Remarkably Moist Chocolate Cake Layers No one wants a dry cake! Our recipe prioritizes moisture, resulting in chocolate cake layers that are incredibly tender, soft, and moist throughout. This is achieved through a careful balance of wet and dry ingredients, including buttermilk and hot water, which contribute to the cake’s luxurious texture and ensure it stays fresh longer. You’ll be amazed at how consistently moist these chocolate layers are.
- Achievable Layer Cake for All Skill Levels Layer cakes often intimidate home bakers, but this recipe simplifies the process without compromising on visual appeal or taste. We’ve broken down the preparation into straightforward, easy-to-follow steps, ensuring that even novice bakers can confidently create a stunning, multi-layered masterpiece. There are no complicated techniques or daunting challenges, just clear instructions for a beautiful result.
- Dual Raspberry Flavor in the Frosting Our unique raspberry frosting features not one, but two forms of raspberry to maximize flavor intensity. A reduced raspberry puree provides a concentrated, fresh fruit base, while ground freeze-dried raspberries amplify the natural tartness and color without adding excess moisture. This innovative approach delivers an unparalleled, authentic raspberry taste that truly shines.
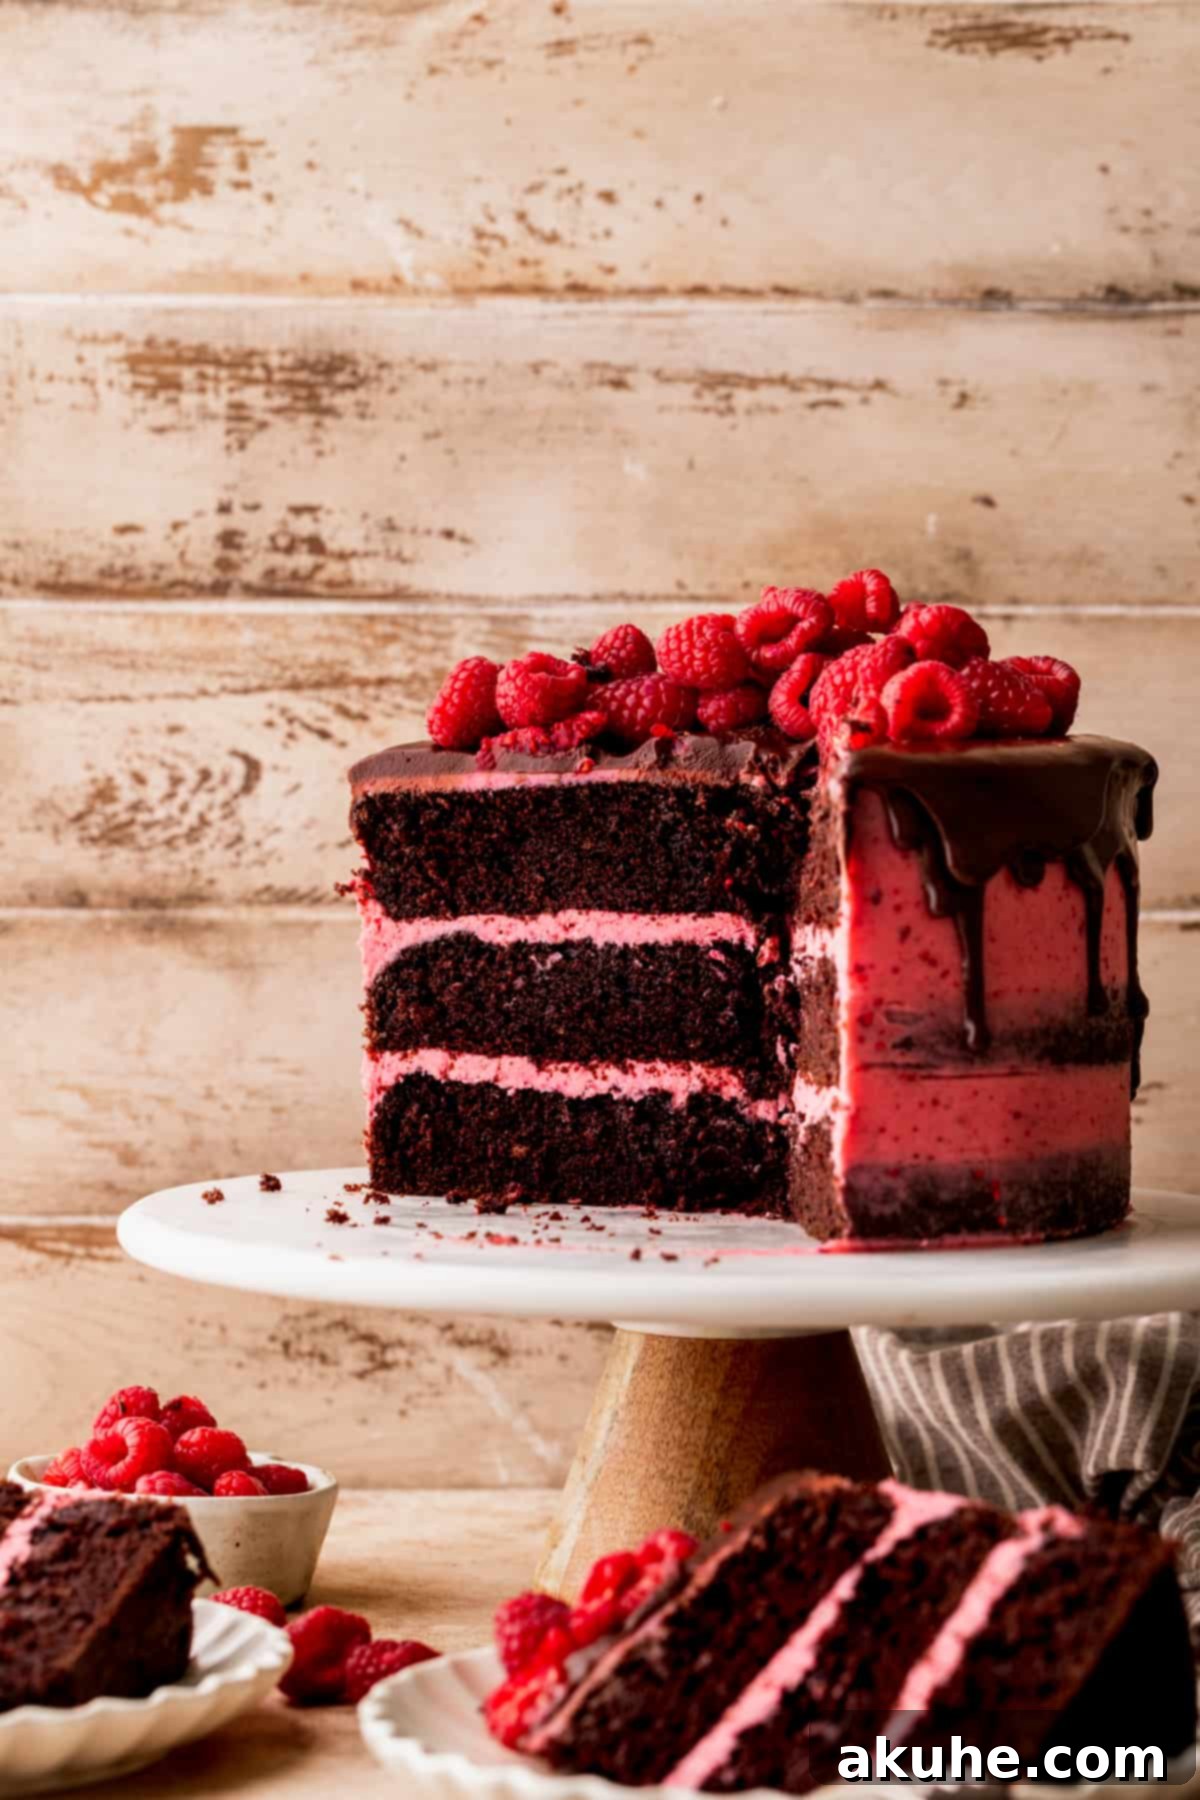
Key Ingredients for Success
Understanding the role of each ingredient is crucial for baking success. Here’s a closer look at what makes our Chocolate Raspberry Cake so exceptional:
For the Moist Chocolate Cake
- All-Purpose Flour: The structural backbone of our cake. Ensure it’s measured correctly by spooning it into the measuring cup and leveling it off, rather than scooping directly from the bag, which can lead to a dense, dry cake.
- Unsweetened Cocoa Powder: Provides the rich, deep chocolate flavor. Opt for high-quality cocoa for the best taste. Natural unsweetened cocoa is typically used for recipes with baking soda.
- Baking Soda & Baking Powder: These leavening agents work together to create a light and airy texture. Baking soda reacts with the acidic buttermilk, while baking powder provides additional lift.
- Salt: Essential for balancing the sweetness and enhancing all the flavors, especially the chocolate.
- White Granulated Sugar: Sweetens the cake and helps retain moisture.
- Buttermilk (room temperature): Its acidity reacts with baking soda for leavening and contributes to the cake’s tender crumb and moistness. Room temperature ingredients emulsify better, leading to a smoother batter.
- Vegetable Oil: Adds significant moisture to the cake, contributing to its incredibly tender texture and keeping it moist for days. Unlike butter, oil is 100% fat, making it a superior moisturizer in cakes.
- Large Eggs (room temperature): Bind the ingredients, add richness, and provide structure. Room temperature eggs blend more evenly into the batter.
- Pure Vanilla Extract: A crucial flavor enhancer that complements the chocolate beautifully.
- Hot Water (steaming): Dissolves the cocoa powder, blooming its flavor and ensuring a smoother, more liquid batter that results in a wonderfully moist cake.
For the Vibrant Raspberry Frosting
- Unsalted Butter (room temperature): The base of our buttercream. Room temperature butter whips up light and fluffy, essential for a smooth, spreadable frosting.
- Powdered Sugar (sifted): Provides sweetness and body to the frosting. Sifting prevents lumps and ensures a silky-smooth texture.
- Ground Freeze-Dried Raspberries: Offers an intense, concentrated raspberry flavor and a beautiful natural pink color without adding extra liquid, ensuring the frosting remains stable.
- Reduced Raspberry Puree: Made from fresh or frozen raspberries, this concentrated puree delivers a burst of fresh fruit flavor and natural acidity that brightens the frosting. Reducing it on the stove intensifies the flavor and removes excess water.
- Pure Vanilla Extract: A touch of vanilla enhances the overall flavor profile of the frosting.
- Salt: A pinch of salt balances the sweetness and brings out the fruity notes.
For the Glossy Chocolate Ganache
- Semi-Sweet Chocolate Chips: The foundation of the ganache. Quality chocolate will yield a smoother, richer drip.
- Heavy Cream: Provides the liquid component and richness for the ganache. The fat in heavy cream creates a luscious, stable emulsion with the chocolate.
Step-By-Step Instructions – Crafting the Chocolate Cake Layers
Creating the perfect foundation for your chocolate raspberry cake begins with these moist, rich chocolate layers. Follow these steps for success:
STEP 1: Prepare Your Baking Environment. Begin by preheating your oven to 350°F (175°C). This ensures your oven is at the correct temperature when the batter is ready, promoting even baking. Next, prepare three 8-inch cake pans. Lightly spray them thoroughly with a baking spray that contains flour, or use a non-stick cooking spray and dust lightly with flour. For easy release and perfect bottoms, line the base of each pan with an 8-inch parchment paper circle, then spray the parchment paper again.
STEP 2: Combine Dry Ingredients. In a large mixing bowl, sift together the all-purpose flour, unsweetened cocoa powder, baking soda, baking powder, salt, and granulated sugar. Sifting is crucial here to prevent lumps and ensure a light, even texture in your finished cake. Whisk these dry ingredients thoroughly to combine them evenly. Set this bowl aside.
STEP 3: Prepare Wet Ingredients. In a small saucepan, heat one cup of water over high heat until it just begins to steam, but not boil rapidly. Meanwhile, in a separate medium bowl, whisk together the room temperature large eggs, vegetable oil, pure vanilla extract, and room temperature buttermilk until well combined. Gradually and slowly pour the hot, steaming water into the wet ingredient mixture, whisking continuously. It’s important to add the hot water slowly to temper the eggs, preventing them from cooking prematurely.
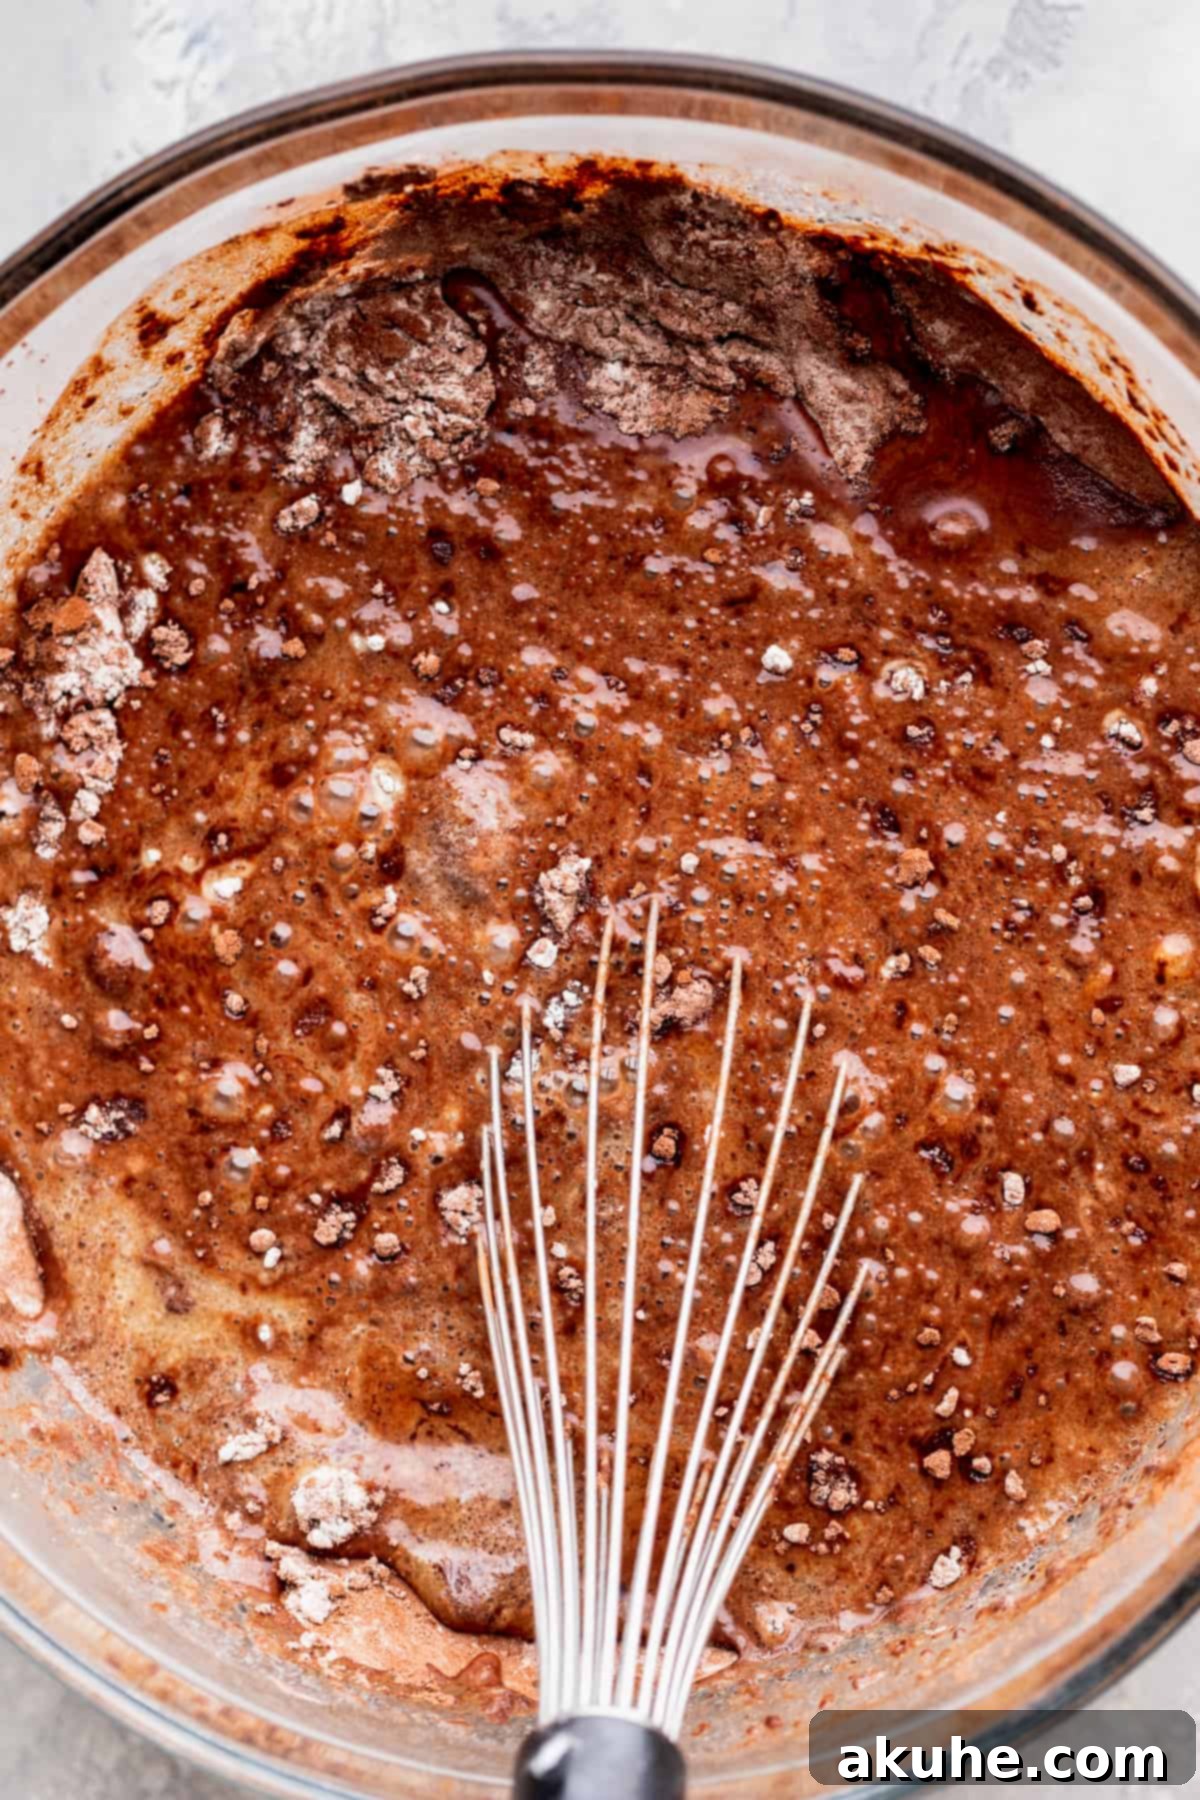
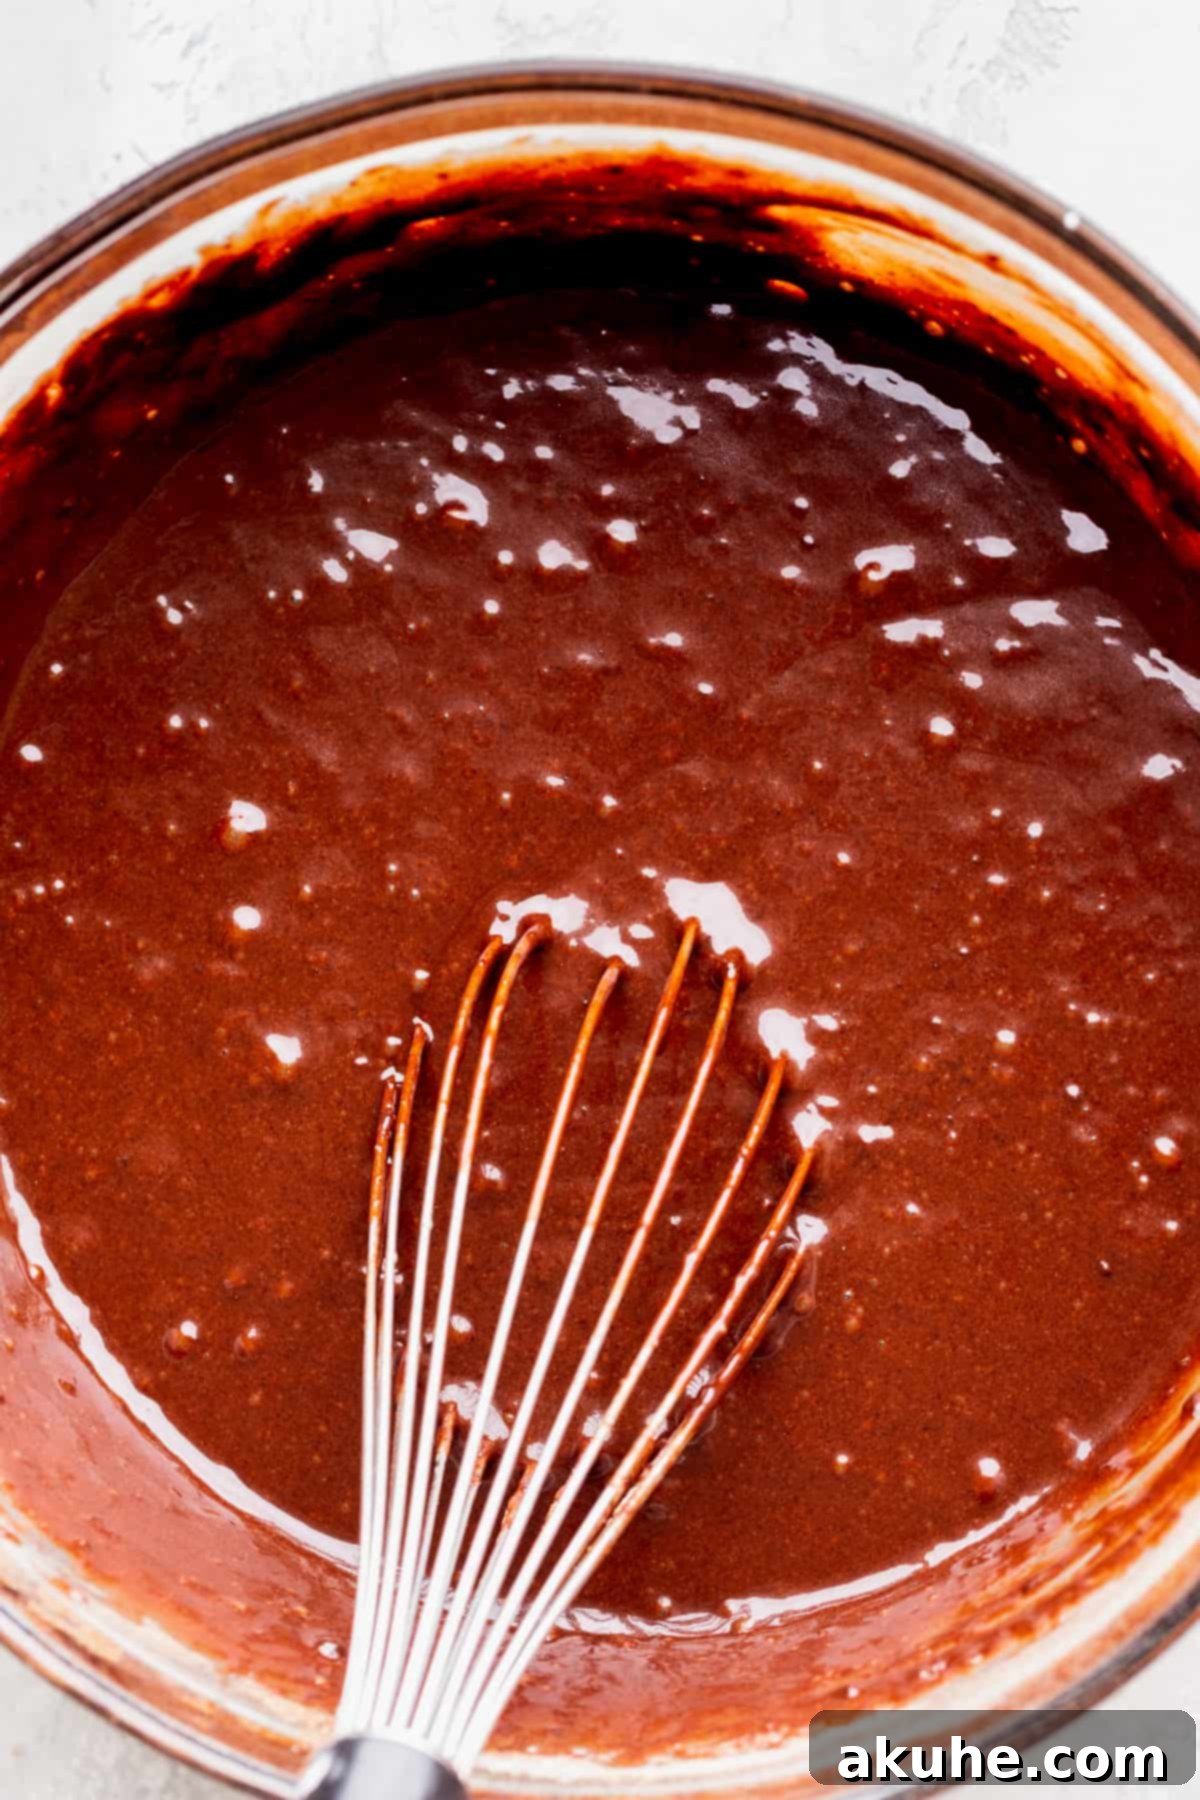
STEP 4: Combine Batter and Pour. Pour the wet ingredients mixture into the bowl with your sifted dry ingredients. Using a spatula or whisk, mix until they are just combined. Be careful not to overmix the batter; overmixing can develop the gluten in the flour, leading to a tough cake. A few lumps are perfectly fine. Once combined, divide the chocolate cake batter evenly among the three prepared 8-inch cake pans. You can use a kitchen scale for precise division, ensuring even cake layers.
STEP 5: Bake to Perfection. Transfer the cake pans to the preheated oven and bake for 25-28 minutes. The cakes are done when a wooden toothpick or cake tester inserted into the center of a cake layer comes out clean, with no wet batter clinging to it. Avoid opening the oven door too frequently during baking, as this can cause the cakes to sink.
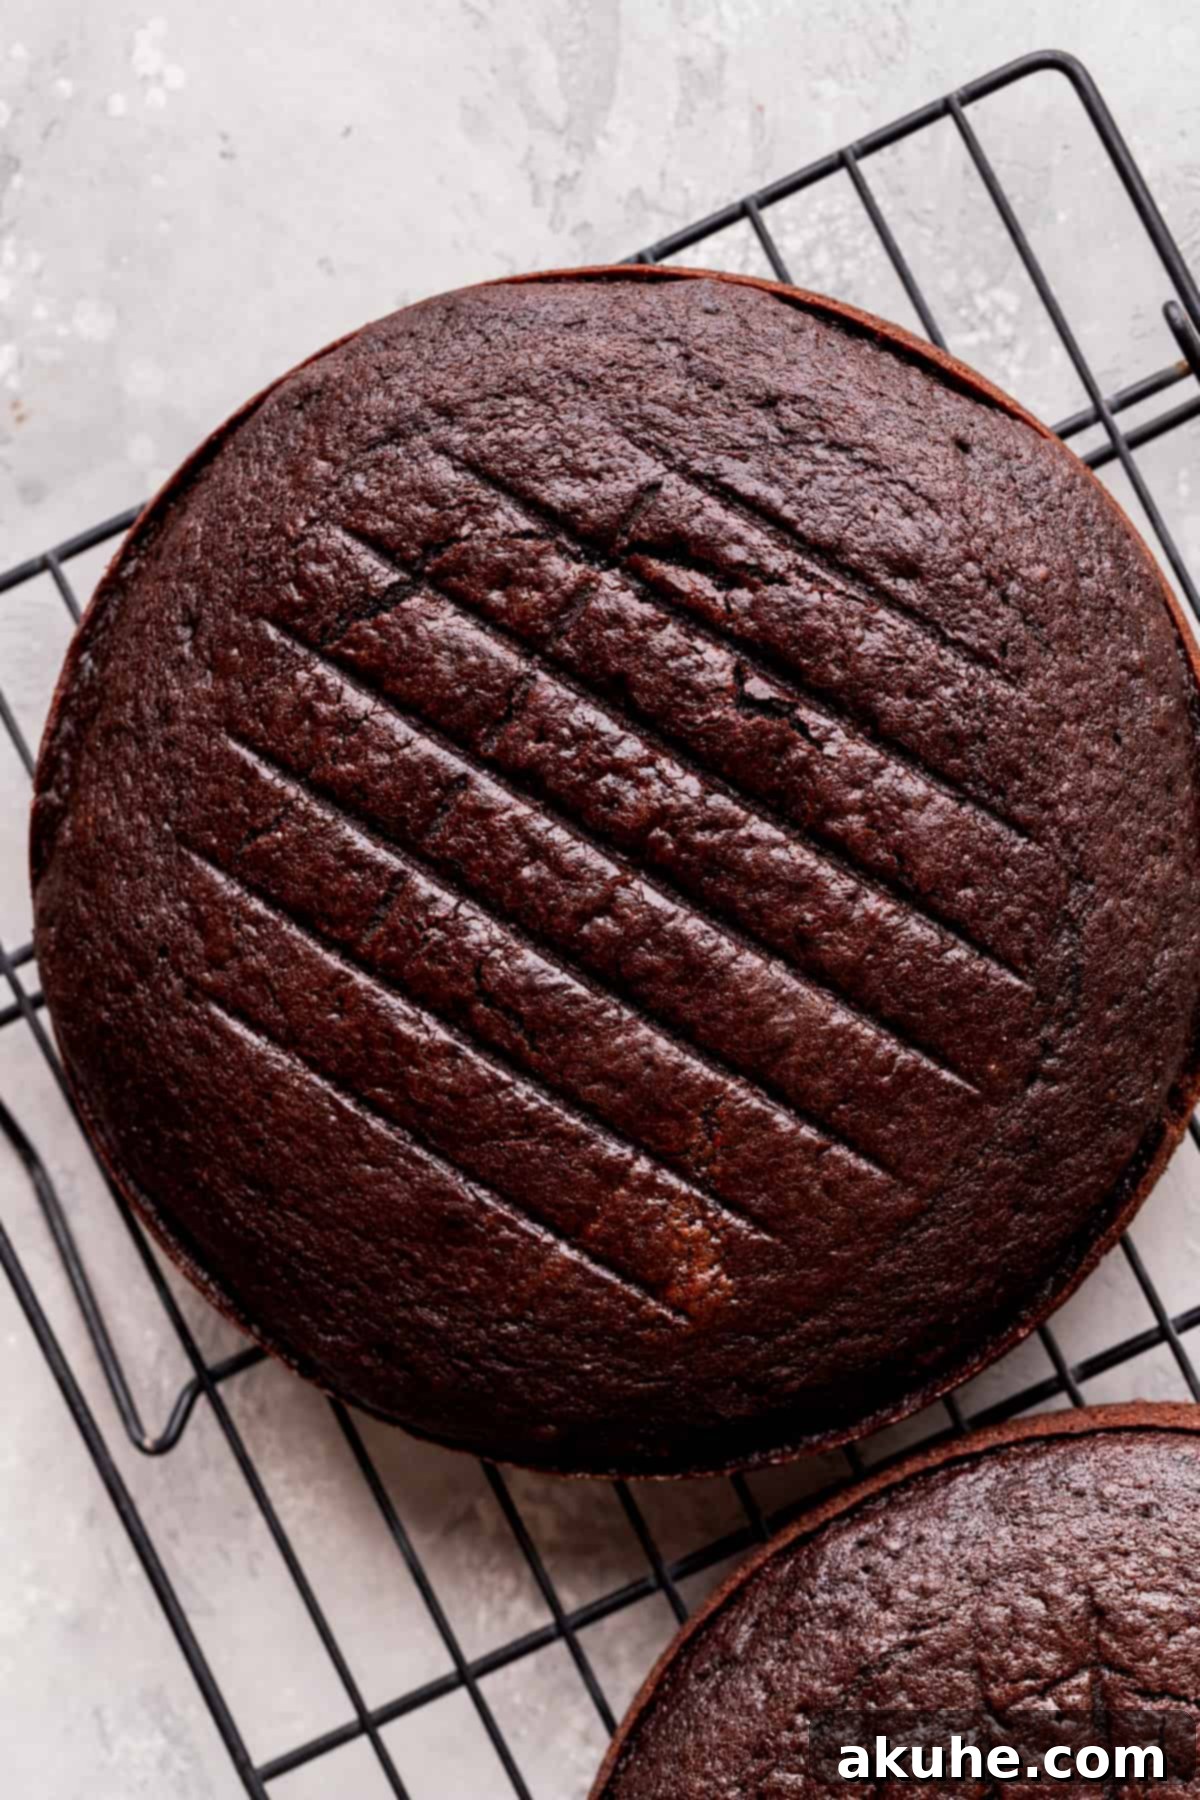
STEP 6: Cool Properly. Once baked, remove the cake pans from the oven and let them sit in their pans on a wire cooling rack for exactly 10 minutes. This crucial resting period allows the cakes to firm up slightly and prevent them from breaking when unmolded. After 10 minutes, carefully invert the cakes onto the wire rack, remove the pans and parchment paper, and allow the cake layers to cool completely to room temperature before attempting to frost them. Cooling completely prevents the frosting from melting and sliding off.
Step-By-Step Instructions – Luscious Raspberry Frosting
This vibrant raspberry frosting is the perfect counterpoint to the rich chocolate cake. Its dual raspberry infusion ensures a burst of fresh, fruity flavor. For additional expert tips and troubleshooting, refer to my detailed raspberry frosting guide.
STEP 1: Create Raspberry Puree. Begin by blending fresh or thawed frozen raspberries with a quarter cup of water in a blender until smooth. If using frozen raspberries, ensure they are fully thawed before blending. Once pureed, pour the mixture through a fine-mesh sieve set over a bowl. Use a spatula or the back of a spoon to press the puree through the sieve, separating out all the seeds. Discard the seeds, leaving you with a smooth, seedless raspberry puree.
STEP 2: Reduce the Puree. Transfer the seedless raspberry puree into a small frying pan. Cook the puree over medium heat, stirring occasionally, until it significantly thickens and its color deepens. This process usually takes about 3-5 minutes, reducing the volume to approximately 1/4 cup of intensely flavored, concentrated raspberry reduction. Remove from heat and allow the reduced puree to cool completely to room temperature before incorporating it into the frosting. A warm puree will melt your butter.
STEP 3: Prepare Frosting Dry Ingredients. In a large mixing bowl, sift the powdered sugar. Sifting is essential here to remove any lumps, ensuring your frosting is perfectly smooth. Then, add the finely ground freeze-dried raspberries to the sifted powdered sugar. Whisk them together briefly to distribute the raspberry powder evenly. This step infuses the frosting with deep raspberry flavor and natural color.
STEP 4: Cream the Butter. In the bowl of a stand mixer fitted with the paddle attachment (or using a hand mixer), beat the room temperature unsalted butter on high speed for 3 minutes. This aerates the butter, making it incredibly light and fluffy, which is key to a light and airy buttercream. Next, add half of the sifted powdered sugar and ground freeze-dried raspberry mixture. Mix on low speed until just combined. Scrape down the sides of the bowl, then add the remaining powdered sugar mixture and continue mixing on low speed until fully incorporated. Scrape the bowl again to ensure no dry spots remain.
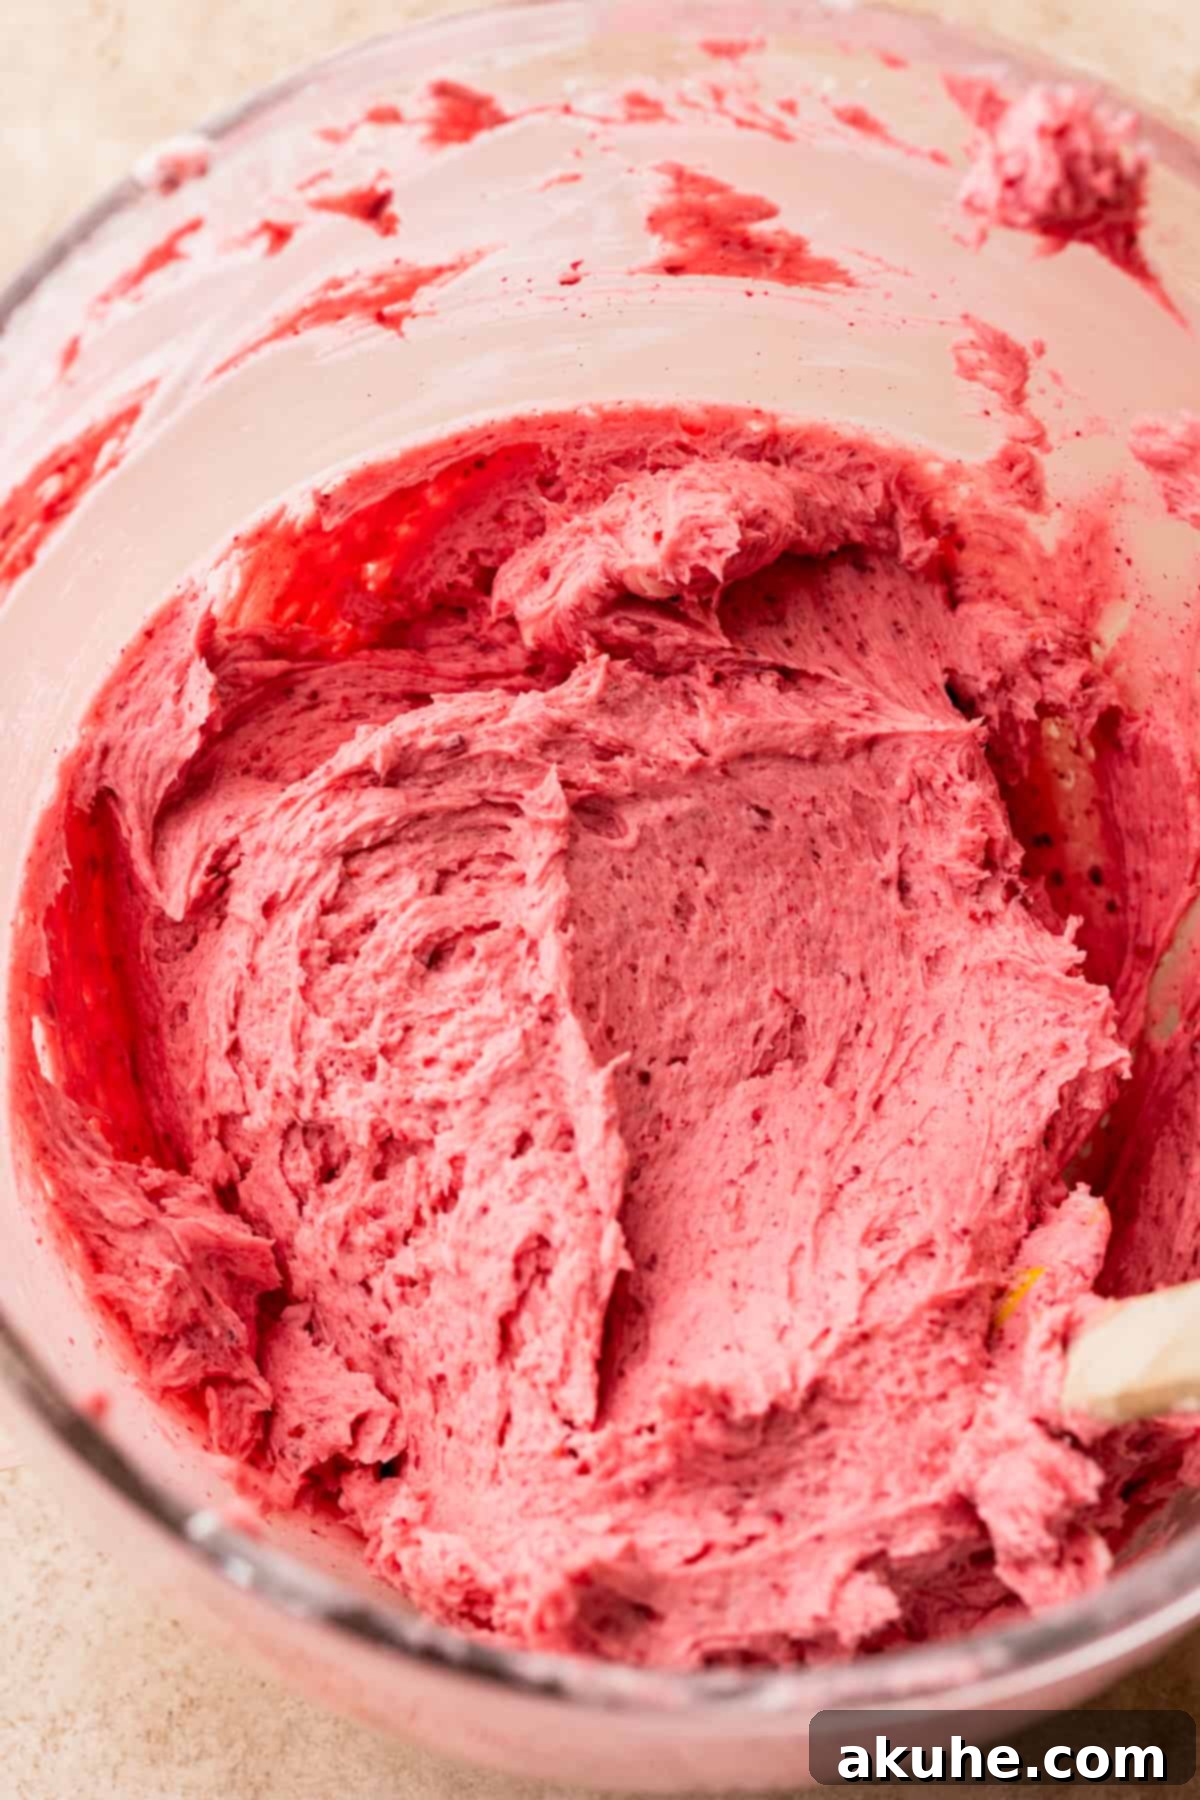
STEP 5: Combine All Frosting Elements. Add the completely cooled reduced raspberry puree, pure vanilla extract, and salt to the butter-sugar mixture. Mix on low speed until all ingredients are combined. Once combined, increase the mixer speed to high and beat for 2 minutes. Halfway through this beating process, pause to scrape down the sides and bottom of the bowl thoroughly. This final high-speed beating incorporates air, making the raspberry frosting incredibly light, fluffy, and vibrant.
Step-By-Step Instructions – Silky Chocolate Ganache
The glossy chocolate ganache provides a stunning finish and an extra layer of chocolatey indulgence to your cake. Crucially, do not prepare the ganache until your cake has been frosted and is ready for the pour. Refer to the “Assembling the Cake Tips” section for optimal timing.
STEP 1: Prepare Chocolate. Place the semi-sweet chocolate chips into a small, microwave-safe bowl. Choose good quality chocolate chips for the best flavor and melting consistency.
STEP 2: Heat Heavy Cream. In a small saucepan, heat the heavy cream over medium-low heat. Stir gently until the cream is steaming around the edges, but do not allow it to come to a rolling boil. Heating the cream thoroughly ensures it will melt the chocolate effectively.
STEP 3: Pour and Rest. Carefully pour the hot, steaming heavy cream directly over the chocolate chips in the bowl. Do not stir immediately. Let the mixture sit undisturbed for 2 minutes. This allows the heat from the cream to begin melting the chocolate, preparing it for a smooth emulsion.
STEP 4: Stir Until Smooth. After the 2-minute resting period, use a rubber spatula or a whisk to gently stir the chocolate and cream mixture. Start stirring from the center and gradually work outwards, until the ganache is completely smooth, glossy, and all the chocolate chips have melted. If, after stirring, a few small chocolate chunks remain, you can heat the ganache in the microwave for very short intervals (10-15 seconds), stirring well after each interval, until perfectly smooth. Be careful not to overheat it.
Expert Tips for Assembling Your Masterpiece
Assembling a beautiful layer cake requires a few tricks of the trade. Follow these tips to ensure a professional-looking finish:
- Essential Decorating Tools: For a smoother, easier decorating experience, consider having these tools on hand: a cake turntable for even frosting application, an offset icing spatula for spreading and smoothing, a straight icing spatula for larger surfaces, a cake scraper for perfectly smooth sides, and a cake leveler (or a long serrated bread knife) for evening out cake layers. A cake carrier is invaluable for storage and transport.
- Level Your Cake Layers: Use a serrated knife or a dedicated cake leveler to carefully slice off any domed tops from your cooled cake layers. This creates flat surfaces, ensuring your cake stacks evenly and doesn’t lean.
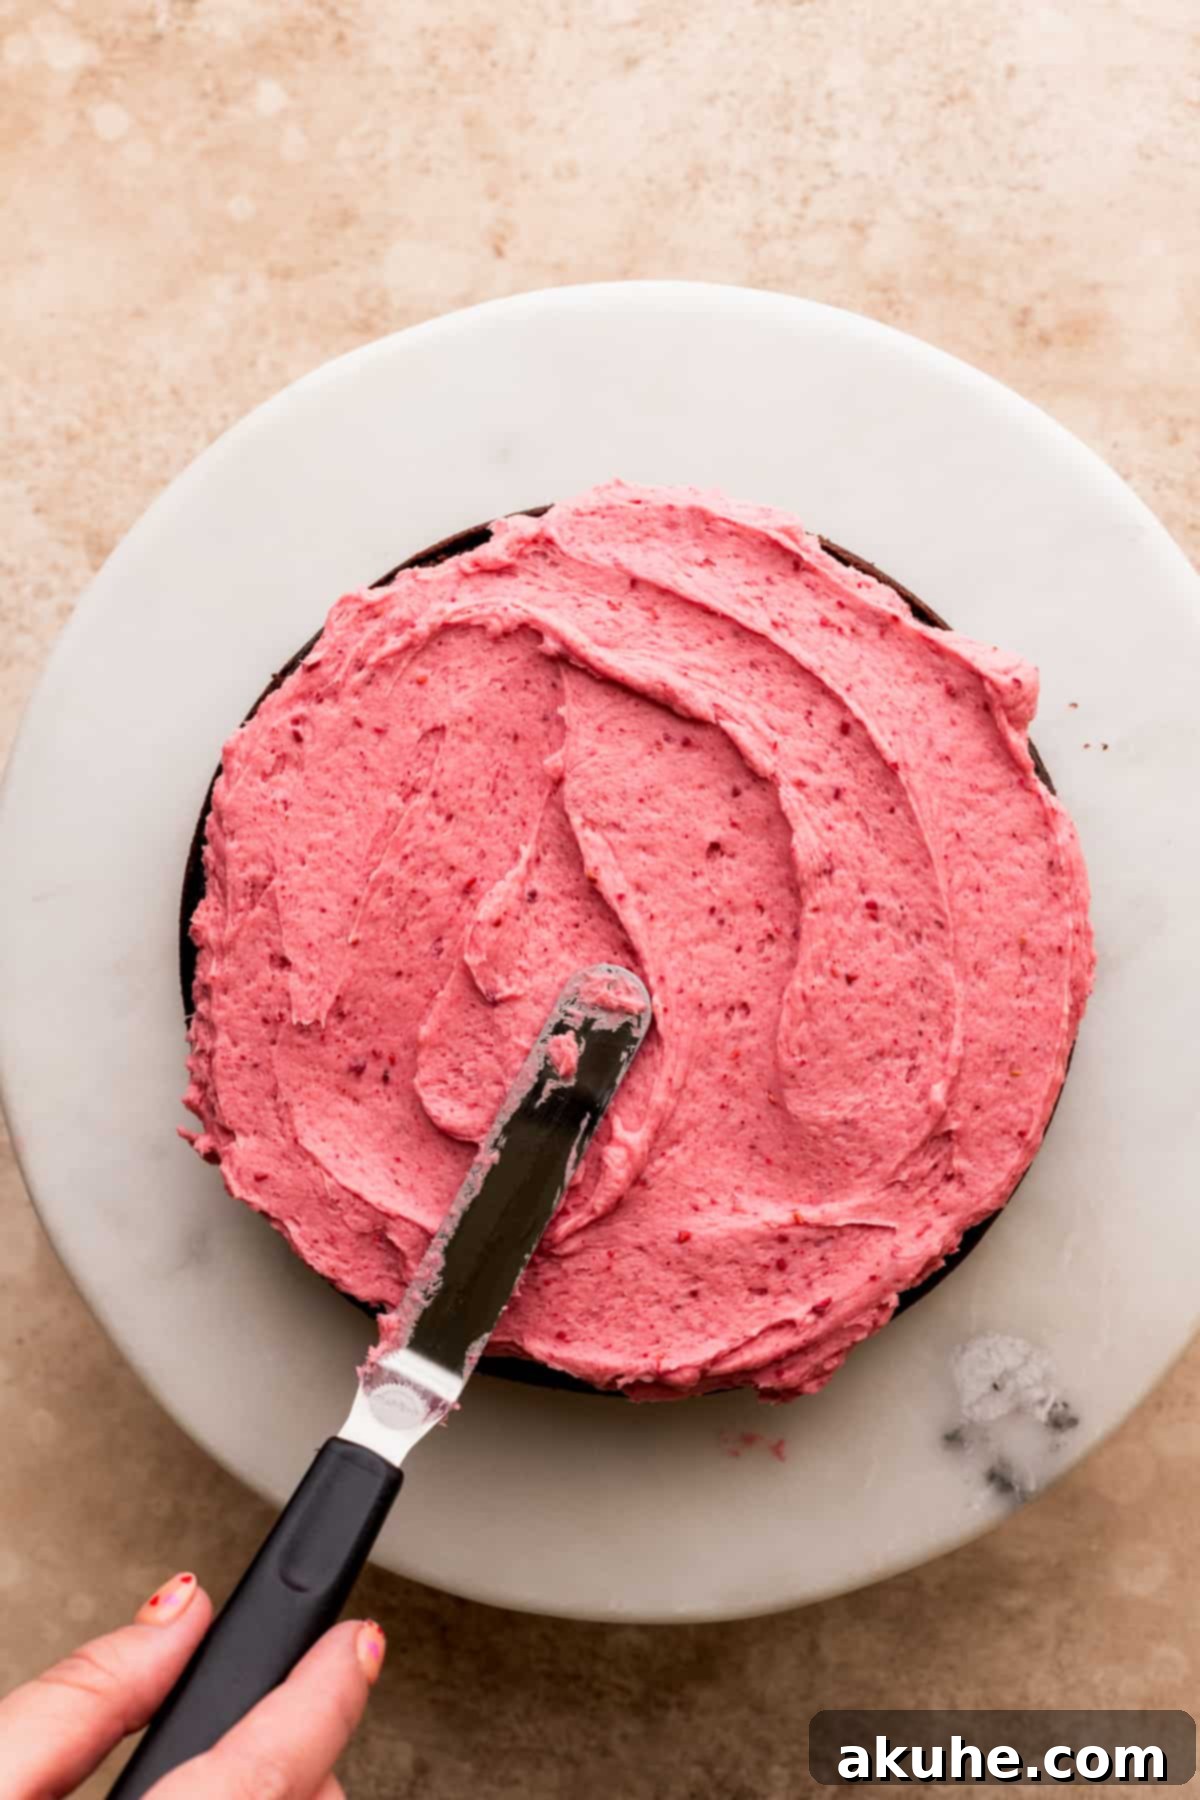
- First Layer and Frosting: Place your first leveled cake layer on your cake stand or serving plate. Spread about one cup of raspberry frosting evenly across the top surface. Use an offset spatula to gently push the frosting to the edges.
- Second Layer and Frosting: Carefully place the second leveled cake layer directly on top of the first, aligning it. Apply another generous cup of raspberry frosting, spreading it evenly to the edges, just like the first layer.
- The Top Layer Trick: For the final cake layer, place it on top with its bottom facing upwards. The bottom of the cake is typically the flattest and most even surface, providing a perfectly level top for your cake and a smooth canvas for further decorating.
- The Crumb Coat: Apply a very thin, light layer of raspberry frosting over the entire cake, covering both the top and sides. This is known as a “crumb coat.” Its purpose is to trap any loose cake crumbs, preventing them from mixing into your final decorative frosting layer. Once applied, place the cake in the freezer for about 15 minutes to allow the crumb coat to firm up. This quick chill sets the frosting and creates a stable base for your final layer.
- Final Frosting Layer: After the crumb coat has chilled, remove the cake from the freezer. Apply the remaining raspberry frosting in a thicker, more even layer across the top and sides of the cake. Use your offset spatula and cake scraper to achieve smooth, clean sides and a flat top.
- Timing the Ganache: Once your cake is fully frosted and looks beautiful, *then* prepare your chocolate ganache using the instructions provided above. It’s crucial that the ganache is still warm and pourable but not piping hot when applied, and the cake itself should be chilled from the crumb coat.
- Applying the Ganache Drip: For those signature drips, carefully pour the slightly cooled ganache over the very top center of your frosted cake. Then, using an offset spatula or the back of a spoon, gently push some of the ganache towards the edges, allowing it to naturally drip down the sides of the cake. Continue to smooth the top layer of ganache for an even finish.
- Garnish with Fresh Raspberries: If you have any extra fresh raspberries, artfully arrange them on top of the ganache for a beautiful and flavorful decoration. Their vibrant color contrasts wonderfully with the dark chocolate.
Baking Success: Expert Tips & Tricks
Achieving a bakery-worthy cake at home is easier with these insightful tips:
- Room Temperature Ingredients are Key: For the cake, ensure your buttermilk and eggs are at room temperature. For the frosting, your butter should be perfectly room temperature—soft enough to indent with a finger, but not melted. This allows ingredients to emulsify properly, creating a smooth batter and light, fluffy frosting. Plan ahead by taking them out of the fridge at least 1-2 hours before baking.
- Accurate Flour Measurement: Compacted flour can lead to a dry cake. Always use the “spoon and level” method: gently spoon flour into your measuring cup until overflowing, then level off the top with a straight edge. For ultimate precision, use a kitchen scale to weigh your ingredients.
- Don’t Overmix: After combining wet and dry ingredients for the cake batter, mix only until just combined. Overmixing develops gluten, which can result in a tough, chewy cake rather than a tender, moist one. A few small lumps are perfectly acceptable.
- Oven Temperature Matters: Ovens can vary. Consider using an oven thermometer to ensure your oven is truly preheated to 350°F (175°C). An inaccurate oven temperature can significantly impact baking time and cake texture.
- Cool Cakes Completely: Resist the urge to frost warm cakes! Warm cake layers will melt your frosting, leading to a messy and unstable cake. Allow them to cool completely on a wire rack before handling and frosting.
- High Altitude Adjustments: If you’re baking at high altitude, you may need to make slight adjustments. A common tip is to add an extra 1-2 tablespoons of all-purpose flour to the cake batter to help stabilize it, and sometimes a slight reduction in sugar and leavening agents is beneficial.
Frequently Asked Questions (FAQ)
Absolutely! This versatile recipe can easily be adapted for cupcakes. Simply halve the recipe to yield approximately 12 cupcakes. Fill standard muffin tins lined with paper liners about two-thirds full with batter. Bake for 18-20 minutes, or until a toothpick inserted into the center comes out clean. The baking time is shorter for cupcakes, so keep a close eye on them!
This recipe is quite adaptable! For a two-layer cake, you can use two 9-inch cake pans (baking time may vary slightly). For a smaller, taller cake, you could use four 6-inch cake pans. If you prefer a sheet cake, a single 9×13-inch cake pan works well, but you’ll want to halve the frosting recipe for this size. To make three 6-inch cake pans, an 8×8-inch square pan, or a 9×9-inch square pan, simply halve the entire cake recipe (and adjust frosting accordingly).
Yes, absolutely! Making the cake layers in advance is a great way to break up the baking process. Once the cake layers have cooled completely to room temperature, wrap each layer tightly in several layers of plastic wrap. You can then freeze them for up to 30 days. When you’re ready to decorate, simply remove them from the freezer about 1 hour before you plan to frost, allowing them to thaw at room temperature while still wrapped.
Yes, you can certainly skip the chocolate ganache. While it adds an extra layer of decadence and a beautiful visual appeal, the cake is equally delicious with just the chocolate cake layers and raspberry frosting. If you prefer a simpler cake or want to save time, simply finish with a final coat of raspberry frosting and decorate with fresh raspberries.
Recipe Variations & Customizations
Feel free to get creative and tailor this chocolate raspberry cake to your preferences:
- No Drip Ganache: To save time and simplify the decoration process, you can easily omit the chocolate ganache drizzle. The cake will still be incredibly delicious with just the raspberry frosting.
- Thicker Two-Layer Cake: Instead of three thinner layers, you can bake this recipe into two thicker 8-inch cake layers. Be aware that this will likely increase the baking time slightly. Adjust accordingly by checking for doneness with a toothpick.
- Add Fresh Raspberries Between Layers: For an extra burst of fresh fruit, sprinkle a handful of fresh raspberries over each frosted cake layer before adding the next cake layer. This adds texture and even more vibrant raspberry flavor.
- White Chocolate Raspberry Cake: For a different flavor profile, consider using a white chocolate cake recipe as the base and pairing it with this raspberry frosting. Alternatively, you could drizzle white chocolate ganache over the top instead of dark chocolate.
- Mini Cakes: This recipe can be scaled down or adapted for smaller cake pans to create adorable mini layer cakes, perfect for individual servings or smaller gatherings.
Special Tools for Baking and Decorating
Having the right tools can make your baking and decorating experience significantly smoother and more enjoyable:
- Cake Pans: We recommend using high-quality 8-inch cake pans for even baking and easy release. Consistent pan size is key for uniform layers.
- Parchment Paper Circles: These pre-cut 8-inch parchment paper circles are a game-changer! They perfectly fit the bottom of your pans, ensuring your cakes never stick and make removal effortless, saving you time from cutting out circles yourself.
- Baking Spray with Flour: A good quality nonstick spray containing flour ensures your cake layers release cleanly from the pan every time, preventing frustration and broken cakes.
- Offset Spatula: An offset spatula is indispensable for spreading frosting and fillings smoothly and evenly across cake layers and sides. Its angled blade keeps your knuckles out of the frosting.
- Cake Turntable: A high-quality cake turntable, like an Ateco cast iron one, spins seamlessly, allowing you to frost and decorate your cake with incredible ease and precision, achieving perfectly smooth surfaces.
- Cake Scraper: A metal cake scraper is your best friend for achieving perfectly smooth, professional-looking sides on your frosted cakes. It helps distribute frosting evenly and removes excess.
- Piping Bags: For applying ganache drips or more intricate frosting decorations, sturdy 18-inch piping bags are excellent as they hold a good amount of product and are durable.
Storing and Freezing Your Cake
To keep your delicious chocolate raspberry cake fresh, proper storage is essential.
Store this cake in an airtight container, such as a specialized cake carrier, in the refrigerator for up to 5 days. Keeping it chilled helps maintain the freshness of both the cake and the raspberry frosting, and prevents the chocolate ganache from becoming too soft.
Freezing Instructions
You can also freeze slices of this chocolate raspberry cake for future enjoyment. Place individual cake slices in an airtight container, or wrap them tightly in plastic wrap and then foil, and freeze for up to 30 days. If your cake was decorated with fresh raspberries on top, it’s best to remove them before freezing, as fresh fruit tends to lose its texture and become mushy after being frozen and thawed.
Other Decadent Cake Recipes To Try
If you loved this cake, you might enjoy exploring more of our delightful cake creations to expand your baking repertoire!
More Raspberry Recipes You’ll Adore
- Raspberry white chocolate cookies
- Vanilla raspberry cake
- Raspberry muffins
- Raspberry cupcakes
We hope you adore this recipe! If you loved baking and tasting this Chocolate Raspberry Cake, please consider leaving a STAR REVIEW below. We love seeing your creations! Make sure to tag us on Instagram @stephaniesweettreats. For more delicious baking ideas and inspiration, be sure to follow us on Pinterest. Happy Baking!
Chocolate Raspberry Cake
By Stephanie Rutherford
This chocolate raspberry cake is a three layer chocolate cake that is super moist. Full of raspberry frosting that has both reduced raspberry puree and grounded freeze dried raspberries.
Prep Time: 1 hr
Cook Time: 25 mins
Decorating Time: 1 hr
Total Time: 2 hrs 25 mins
Servings: 16 slices
Ingredients
Chocolate Cake
- 2 1/2 cups All-purpose flour
- 1 cup Unsweetened cocoa powder
- 1 1/2 tsp Baking soda
- 2 1/2 tsp Baking powder
- 1 tsp Salt
- 1 3/4 cup White granulated sugar
- 1 cup Buttermilk, room temperature
- 1 cup Oil
- 4 Large eggs, room temperature
- 1 tsp Pure vanilla extract
- 1 cup Hot water, steaming
Raspberry Puree
- 1 cup Raspberries, fresh or frozen
- 1/4 cup Water
Raspberry Frosting
- 2 cups Unsalted butter, room temperature
- 2 cups Powdered sugar, sifted
- 1/4 cup Ground freeze-dried raspberries (ground 1 oz.)
- 1/4 cup Reduced raspberry puree
- 1 tsp Pure vanilla extract
- 1/2 tsp Salt
- Fresh raspberries, for decoration
Chocolate Ganache
- 1 cup Semi-sweet chocolate chips
- 3/4 cup Heavy cream
Instructions
Chocolate Cake
- Preheat the oven to 350°F (175°C). Spray three 8-inch cake pans with baking nonstick spray. Line the bottoms with 8-inch parchment paper circles and spray again.
- In a large bowl, sift and mix the flour, cocoa powder, baking soda, baking powder, salt, and sugar. Set aside.
- In a small pan on the stove over high heat, heat the water until steaming. In a separate bowl, mix the eggs, oil, vanilla, and buttermilk. Then, slowly mix in the hot water. Tip: Go slow to avoid overheating the eggs.
- Pour the wet ingredients into the dry and mix until just combined. Pour evenly between the 3 cake pans.
- Bake for 25-28 minutes until a toothpick inserted comes out clean.
- Let the cakes sit for 10 minutes in the hot pans before transferring to a cooling rack. Cool completely before decorating.
Raspberry Puree
- Using a blender, blend the raspberries and water into a puree. (If using frozen berries, thaw them first.) Pour the raspberries through a mesh sieve to separate the seeds out. Discard the seeds.
- Pour the raspberry puree into a small frying pan. Over medium heat, heat the raspberries until it thickens and deepens in color. This takes 3-5 minutes and will yield about 1/4 cup total. Let it cool completely before using.
Raspberry Frosting
- In a large bowl, sift the powdered sugar. Add in the ground freeze-dried raspberries and mix.
- Using a mixer, beat the butter on high speed for 3 minutes until super fluffy. Add in half of the powdered sugar mixture and mix on low until combined. Finish with the rest of the powdered sugar mixture and mix on low. Scrape the bowl and mix again to ensure it is all combined.
- Add in the reduced raspberry puree, vanilla, and salt. Mix on low until combined, then switch to high speed and beat for 2 minutes. Halfway through, make sure to scrape the bowl.
Chocolate Ganache
- Start this after you frost the cake. In a small bowl, add the chocolate chips. Heat the heavy cream in a small pan on medium-low heat until steaming. Pour the hot cream over the chocolate chips. Let it sit for 2 minutes.
- Use a rubber spatula to mix until smooth and melted. If any chocolate chunks remain, heat in the microwave for 15-second intervals, stirring until melted.
Assembling the Cake
- Use a serrated knife to cut the domes off the cooled cake layers to create flat tops.
- Place the 1st cake layer down and spread 1 cup of frosting over the cake evenly. Repeat with the second cake layer. Place the last layer of cake with its bottom facing up for the flattest top.
- Frost the entire cake in a very light layer of frosting (crumb coat). Freeze for 15 minutes to set the frosting and trap crumbs.
- Frost the rest of the cake with the remaining raspberry frosting. You can do another light layer for a semi-naked cake look, or a thicker, smoother layer.
- Freeze for 10 minutes while you prepare the chocolate ganache.
- Pour half of the prepared chocolate ganache into a piping bag. Pipe small drips on the cake by starting at the very edge at the top so it drips down naturally.
- Top the cake with the remaining ganache, spreading it evenly. Freeze for 10 minutes before decorating with fresh raspberries.
Notes
Flour: Make sure flour is spooned and leveled or use a kitchen scale for accuracy. Compacted flour can dry out the cake.
High Altitude Baking: Add an extra 2 tablespoons of flour to the cake batter for stability.
Room Temperature Ingredients: For best results, pull out dairy ingredients like buttermilk and butter at least 2 hours before baking to allow them to come to room temperature.
Nutrition Information (per slice)
| Nutrient | Amount |
|---|---|
| Calories | 613 kcal |
| Carbohydrates | 75 g |
| Protein | 5 g |
| Fat | 47 g |
| Saturated Fat | 21 g |
| Polyunsaturated Fat | 5 g |
| Monounsaturated Fat | 18 g |
| Trans Fat | 1 g |
| Cholesterol | 76 mg |
| Sodium | 412 mg |
| Potassium | 217 mg |
| Fiber | 4 g |
| Sugar | 28 g |
| Vitamin A | 906 IU |
| Vitamin C | 2 mg |
| Calcium | 87 mg |
| Iron | 3 mg |
