Ultimate Cookie Dough Dream Cake: A Layered Masterpiece
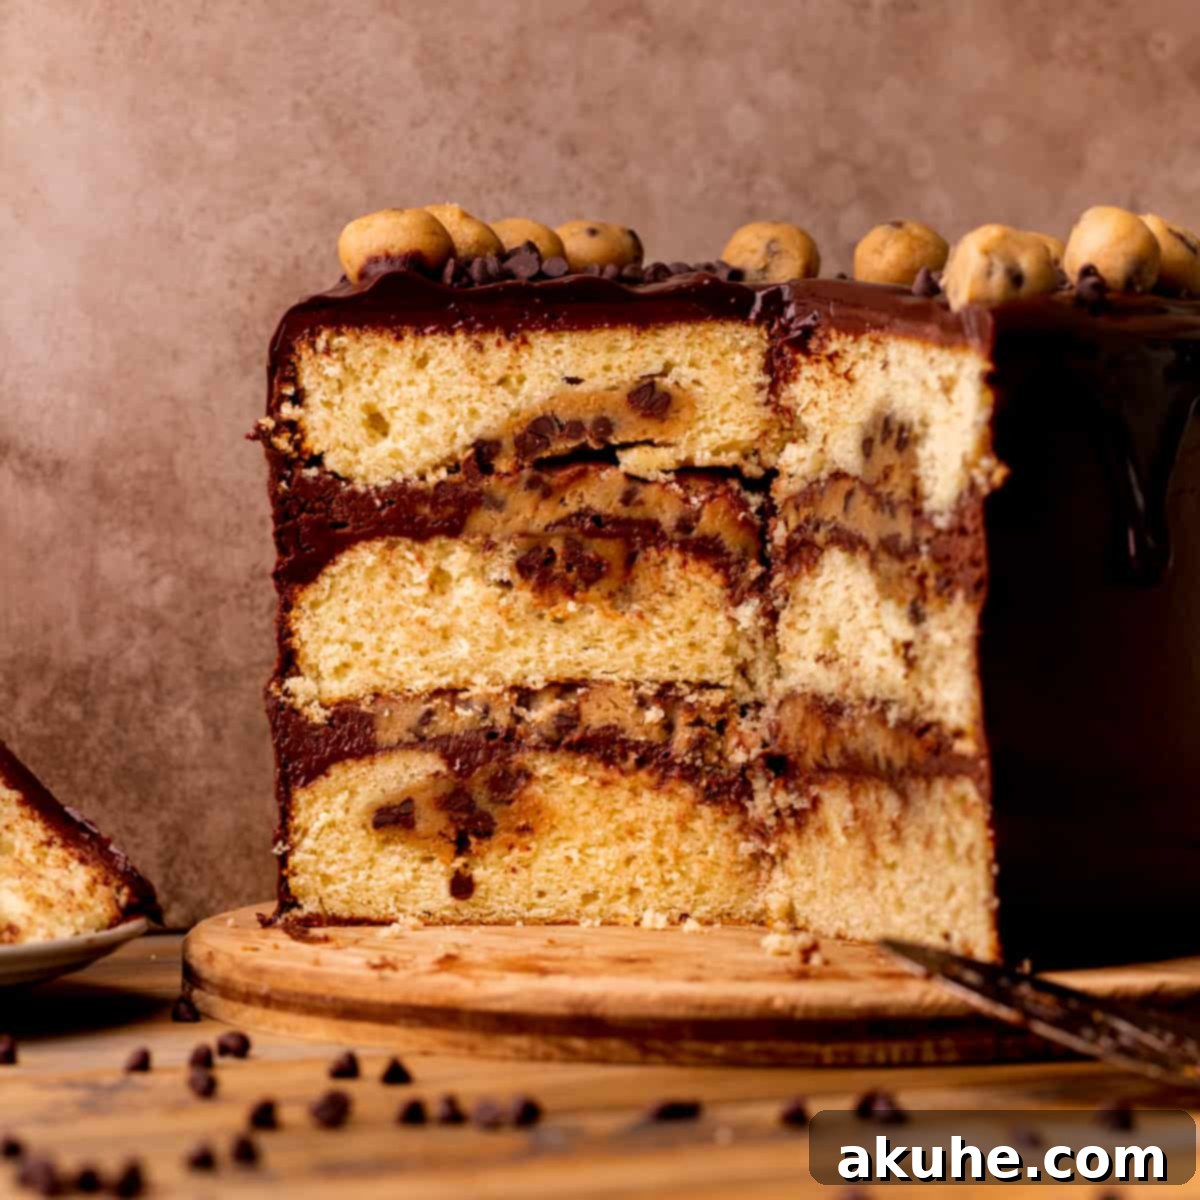
Prepare to embark on an unforgettable culinary journey with our sensational Cookie Dough Dream Cake. This isn’t just a cake; it’s a celebration of pure, unadulterated cookie dough joy, meticulously crafted into a stunning, multi-layered vanilla masterpiece. Every forkful promises an explosion of classic cookie dough flavor, perfectly complemented by rich chocolate cream cheese frosting and a decadent ganache drizzle. If you’re a true cookie dough enthusiast, get ready to fall head over heels for this extraordinary dessert.
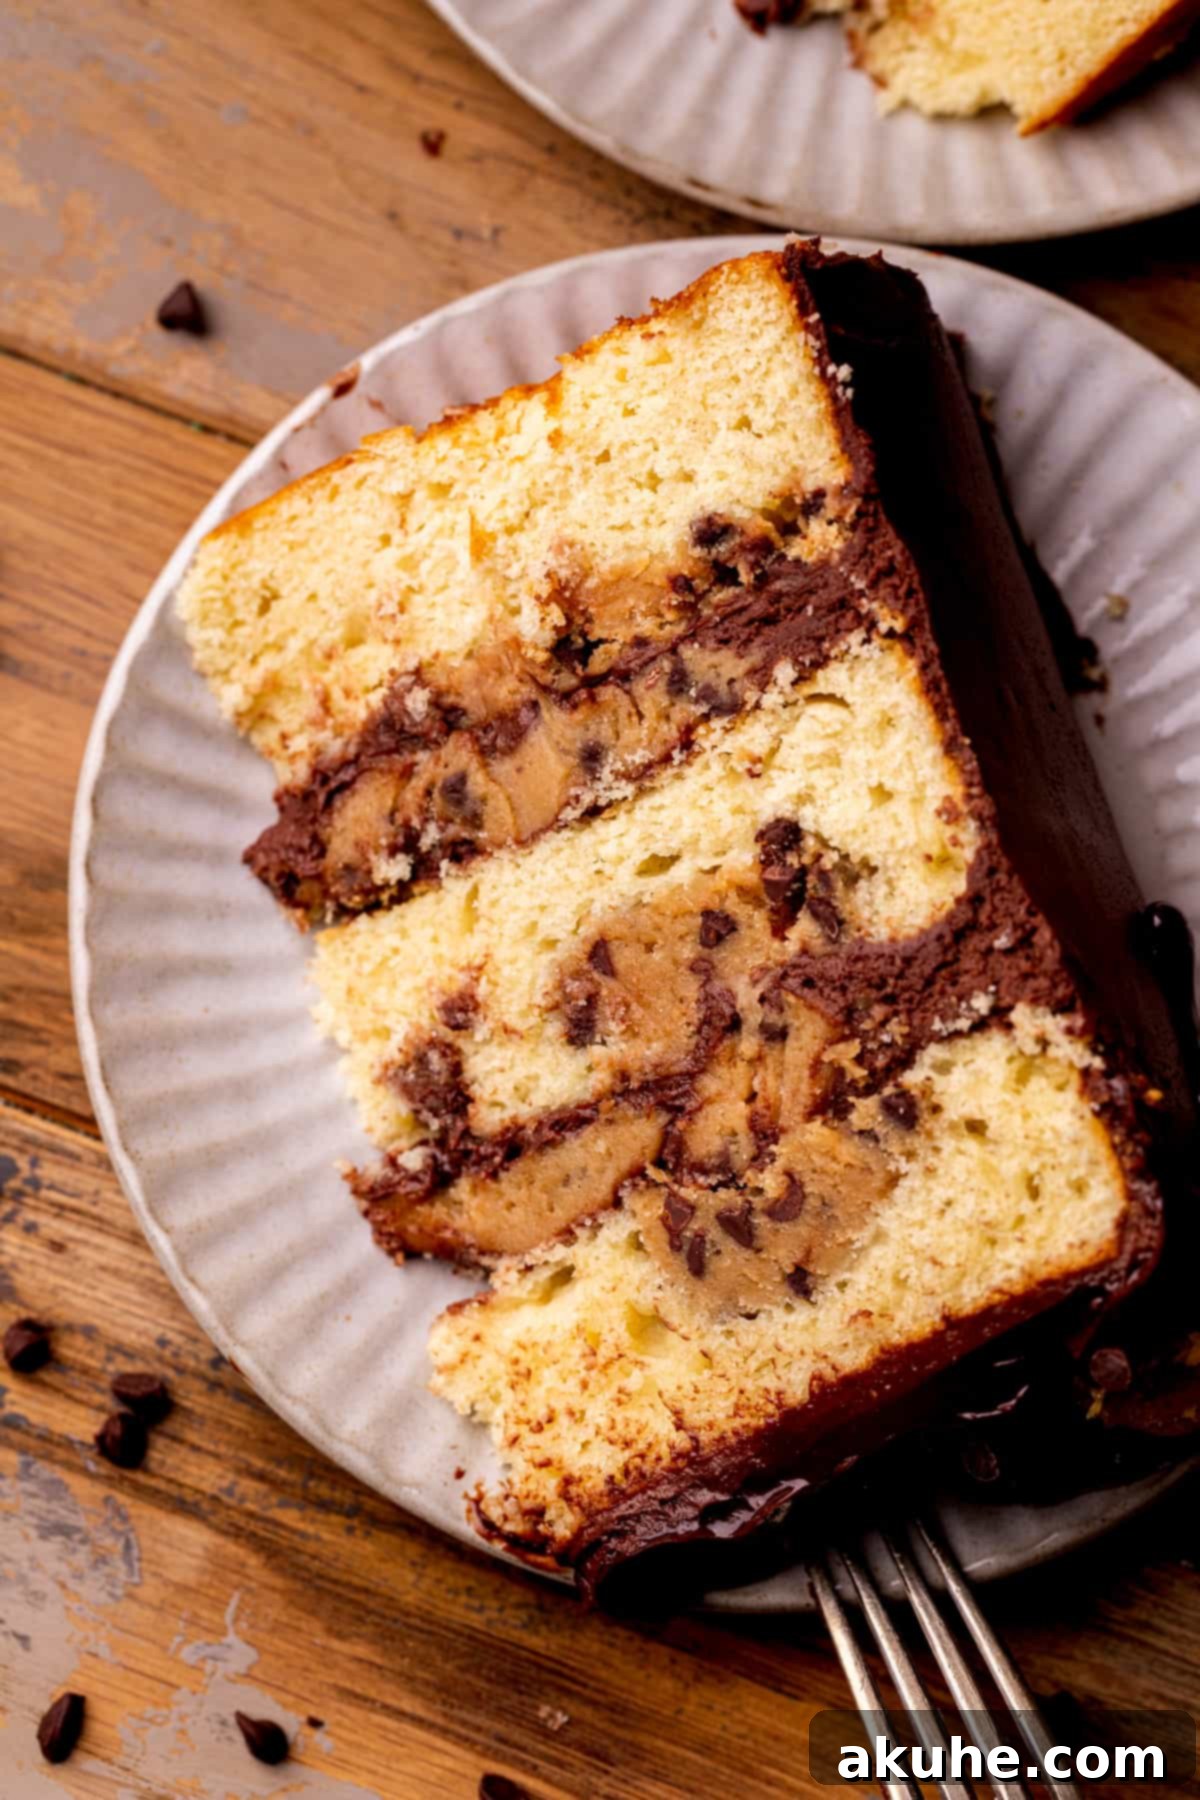
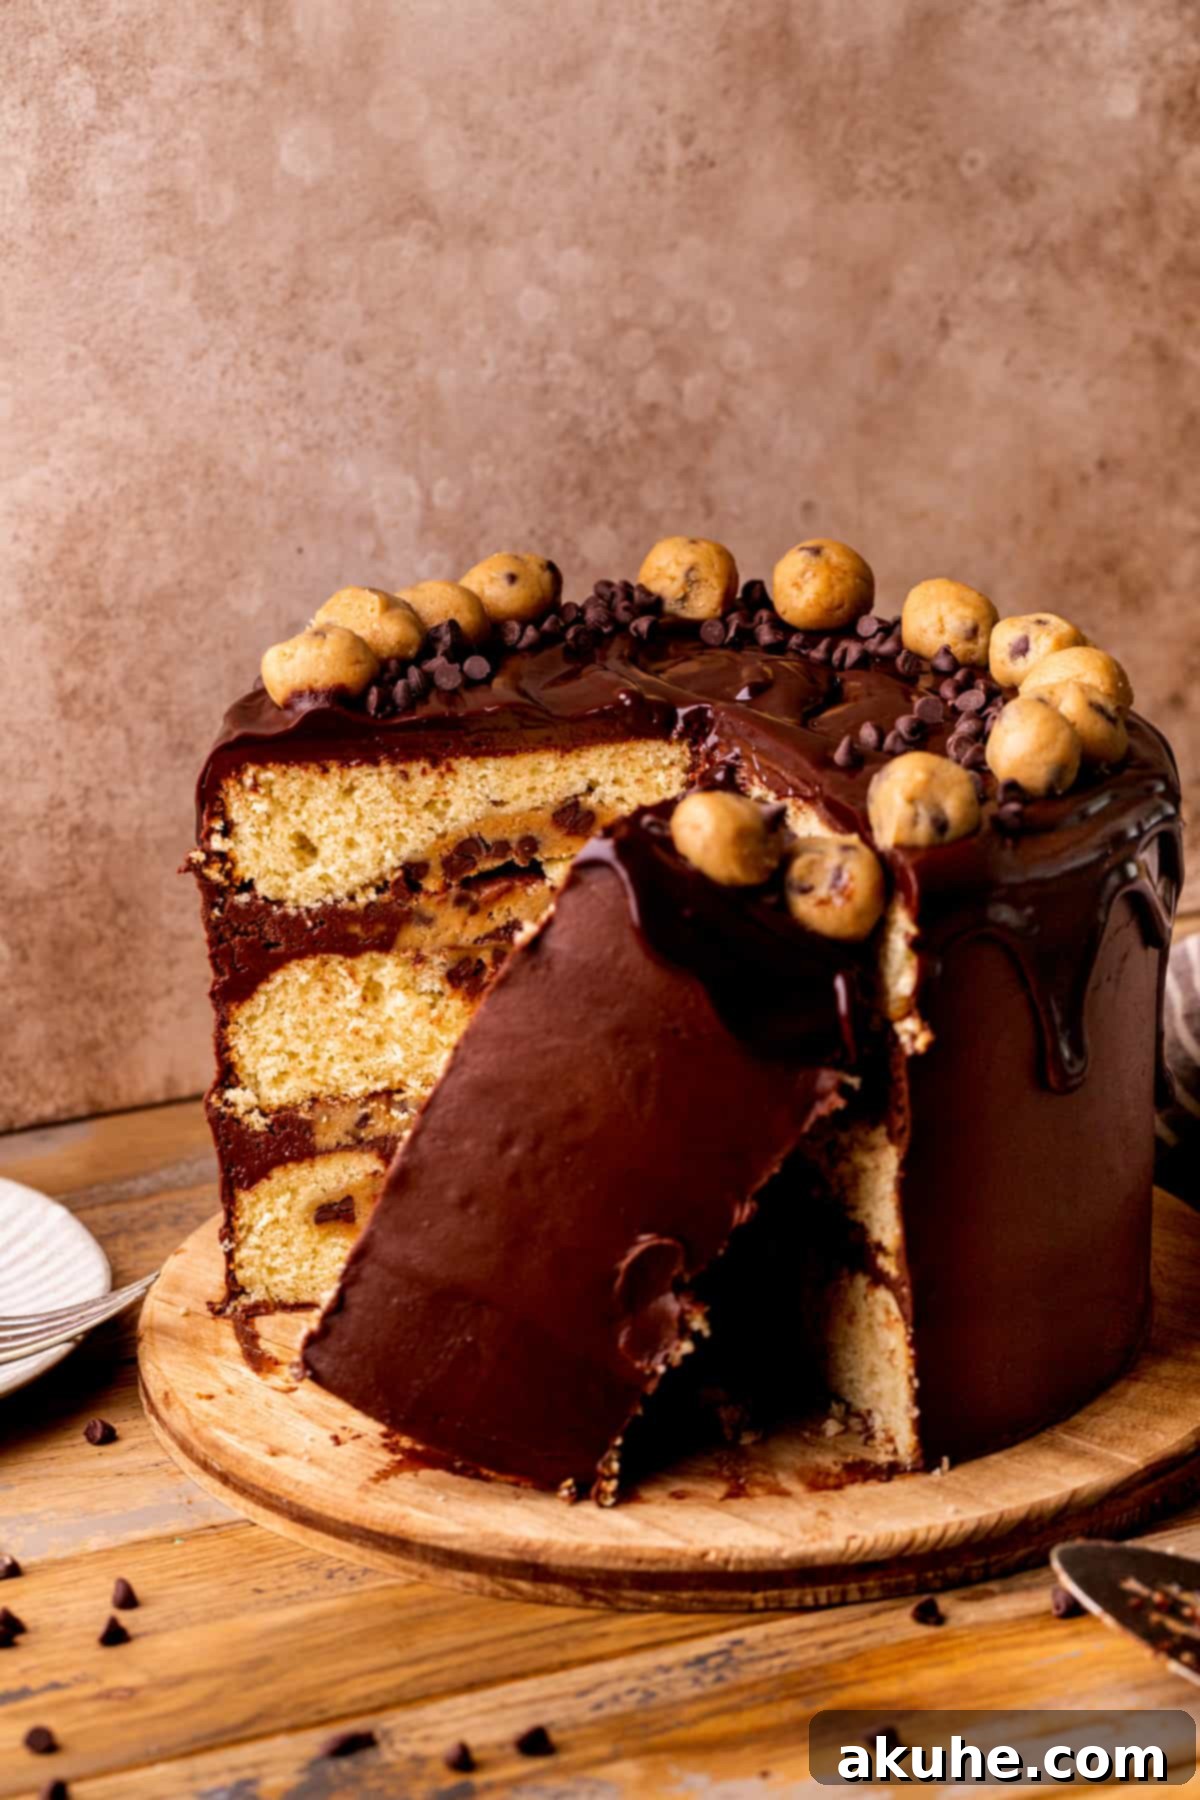
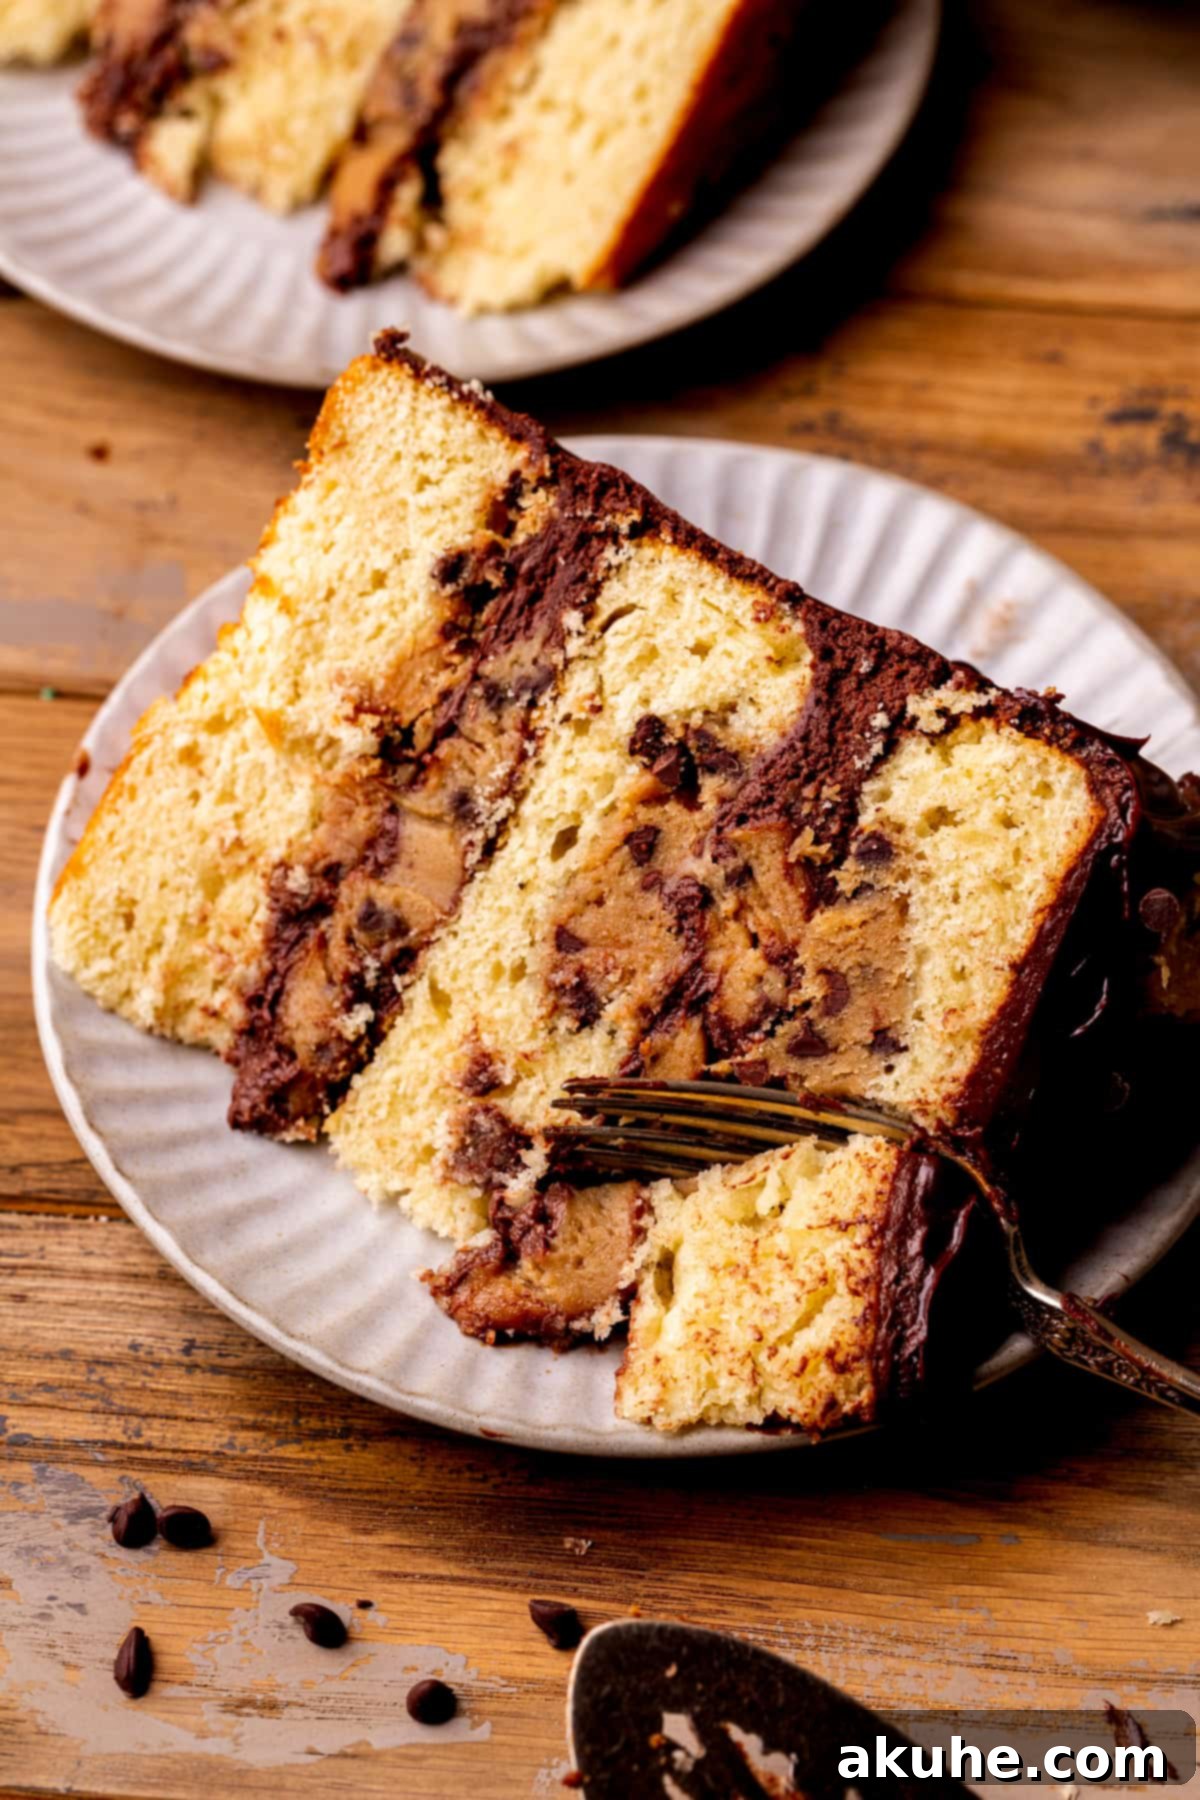
Imagine soft, moist vanilla cake layers, generously studded with baked-in morsels of luscious edible cookie dough. Between these dreamy layers, you’ll discover a lavish filling of silky chocolate cream cheese frosting, interspersed with even more irresistible cookie dough. Crowned with a glossy chocolate ganache drip and charming dollops of cookie dough, this cake is not only a feast for the taste buds but also a showstopper on any dessert table. It’s the ultimate dessert for birthdays, special occasions, or simply to treat yourself to an indulgent delight.
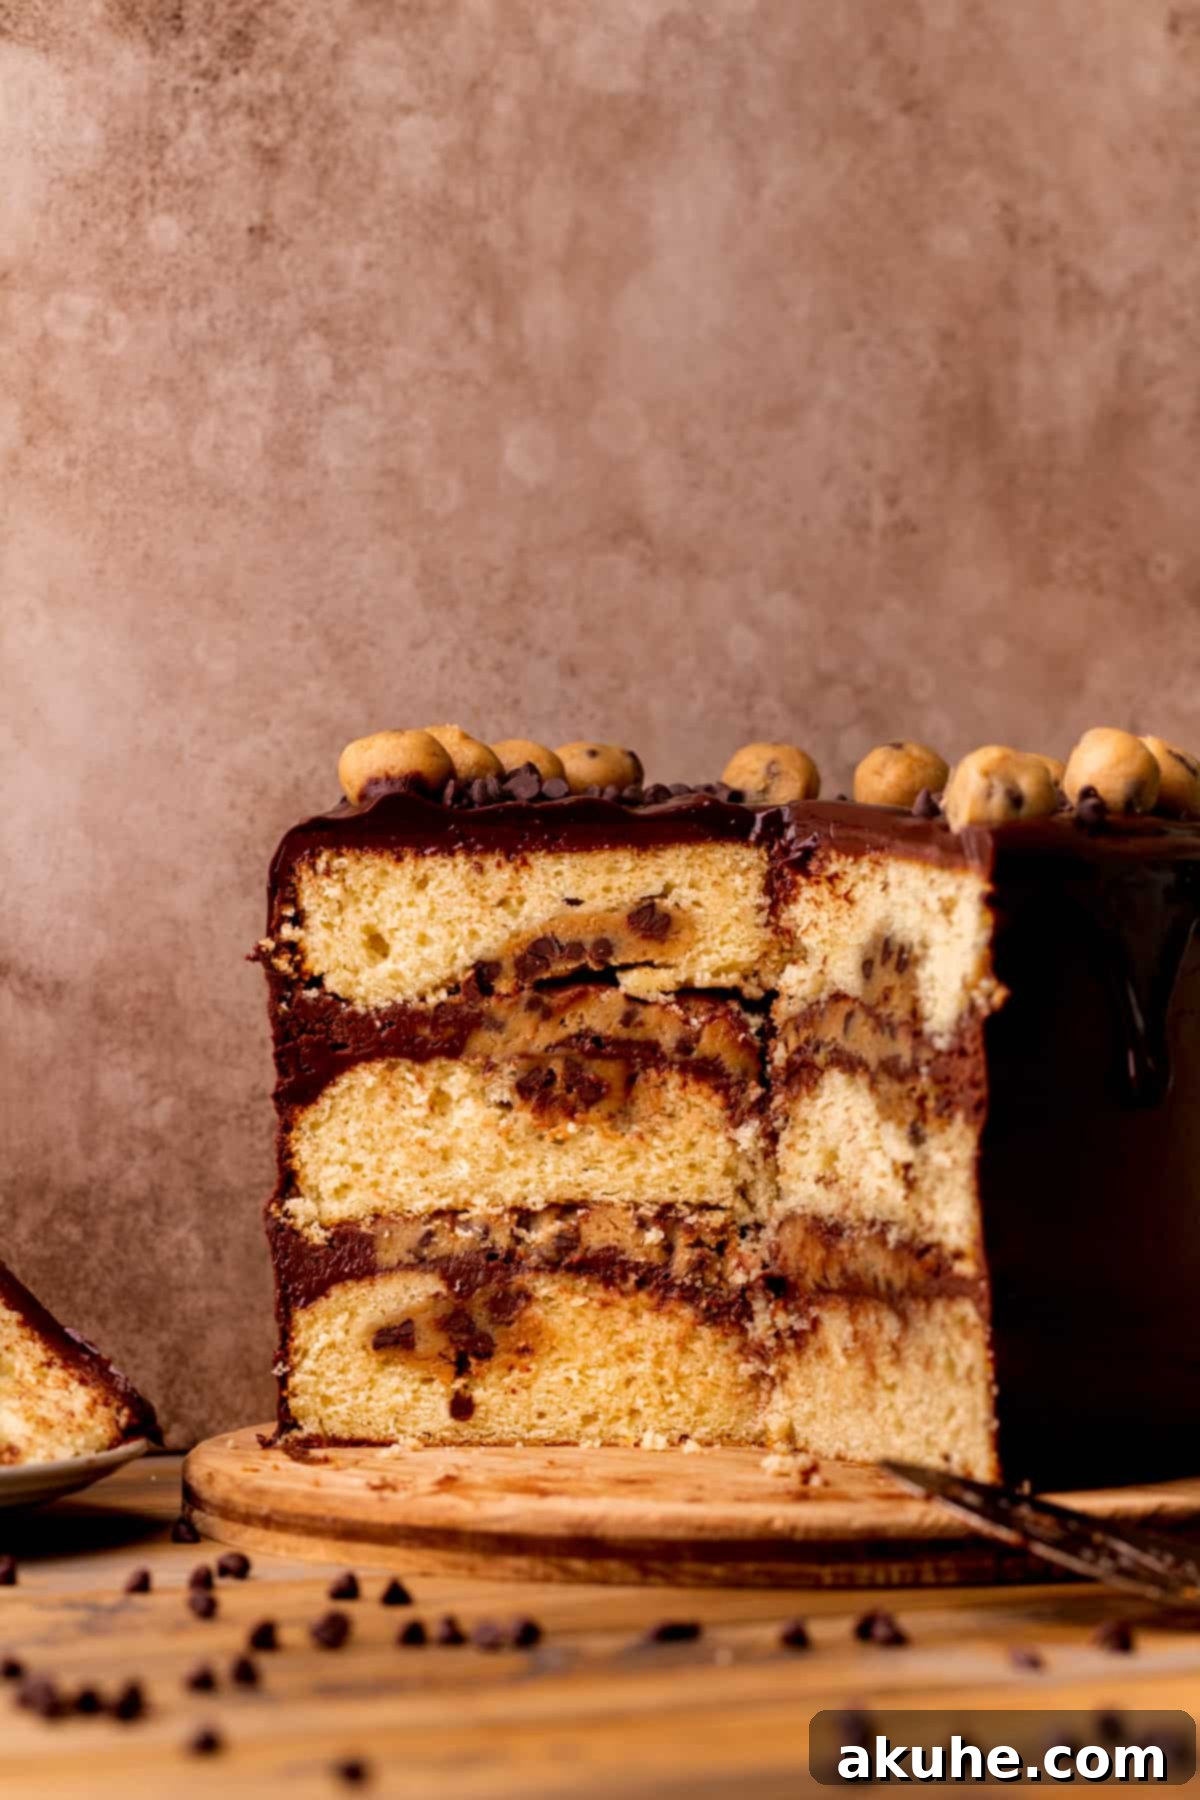
This recipe is designed to guide you through creating an impressive dessert that tastes as incredible as it looks. We’ve broken down each component – the light vanilla cake, the safe and delicious edible cookie dough, the smooth chocolate cream cheese frosting, and the glossy chocolate ganache – into easy-to-follow steps. With our expert tips, even novice bakers can achieve bakery-quality results. Get ready to impress your family and friends with a cake that truly celebrates the beloved taste of cookie dough in every single bite!
Looking for more show-stopping cake recipes? Don’t miss our Rich Chocolate Ganache Cake, the light and airy Delicate Strawberry Mousse Cake, or the refreshing Zesty Lemonade Bundt Cake.
Why This Cookie Dough Cake Recipe Will Be Your New Favorite
Our Cookie Dough Dream Cake isn’t just another dessert; it’s a meticulously crafted experience designed to delight every cookie dough lover. Here’s what makes this recipe truly stand out:
- Unbeatable Cookie Dough Flavor Explosion: Unlike cakes with just a hint of cookie dough, this recipe boldly integrates that irresistible taste throughout every single layer. From the baked-in cookie dough discs to the generous filling and decorative toppings, you’ll experience the rich, buttery, brown sugar essence that defines perfect cookie dough in every mouthful. We don’t just put cookie dough on it; we build the cake around it, making it the star of the show.
- The Perfect Chocolate Complement: There’s an undeniable magic that happens when cookie dough meets chocolate, and this cake harnesses it beautifully. The rich, velvety chocolate cream cheese frosting provides a luscious, tangy counterpoint to the sweet cookie dough, while the glossy chocolate ganache drip adds an intense, sophisticated cocoa kick. This dynamic duo of chocolate elements ensures a perfectly balanced flavor profile, preventing the cake from being overly sweet and enhancing the overall indulgence.
- Effortlessly Elegant Decoration: Creating a visually stunning cake doesn’t have to be complicated. Our design incorporates a gorgeous chocolate ganache drip that naturally creates an appealing, rustic-yet-refined aesthetic with minimal effort. Simply pour and gently guide the ganache for beautiful cascades down the sides. Finishing touches of edible cookie dough on top not only reinforce the cake’s theme but also add a playful, professional look that’s surprisingly simple to achieve, making you look like a pastry pro!
Step-By-Step Guide: Crafting the Edible Cookie Dough
Safety and flavor are paramount when making edible cookie dough. Follow these detailed steps to prepare the perfectly safe and delicious cookie dough that will be baked into your cake and used for filling and decoration. For more in-depth tips on making edible cookie dough, refer to our comprehensive edible cookie dough post.
- STEP 1: Treat the Flour for Safety. Begin by preheating your oven to 300°F (150°C). This crucial step ensures the flour is heat-treated, neutralizing any potential bacteria that might be present in raw flour, making it completely safe for consumption. Spread the all-purpose flour evenly across a baking sheet. Bake for 8 minutes, allowing it to heat thoroughly. Once baked, remove the flour from the oven and spread it out on a clean surface or another baking sheet to cool completely to room temperature. This cooling step is vital to prevent it from melting your butter in subsequent steps.
- STEP 2: Prepare Dry Ingredients. In a medium-sized mixing bowl, combine the heat-treated flour and salt. Use a fine-mesh sieve to sift these dry ingredients together. Sifting is important to remove any lumps and ensure the flour and salt are evenly distributed, leading to a smooth and consistent cookie dough texture. Set this mixture aside.
- STEP 3: Cream Butter and Sugars. In a large mixing bowl, using an electric mixer (either a stand mixer with a paddle attachment or a handheld mixer), beat the softened unsalted butter, granulated sugar, and packed light or dark brown sugar together. Beat on medium-high speed for approximately 2 minutes, or until the mixture becomes light, fluffy, and noticeably paler in color. This creaming process incorporates air, which contributes to a delightful texture.
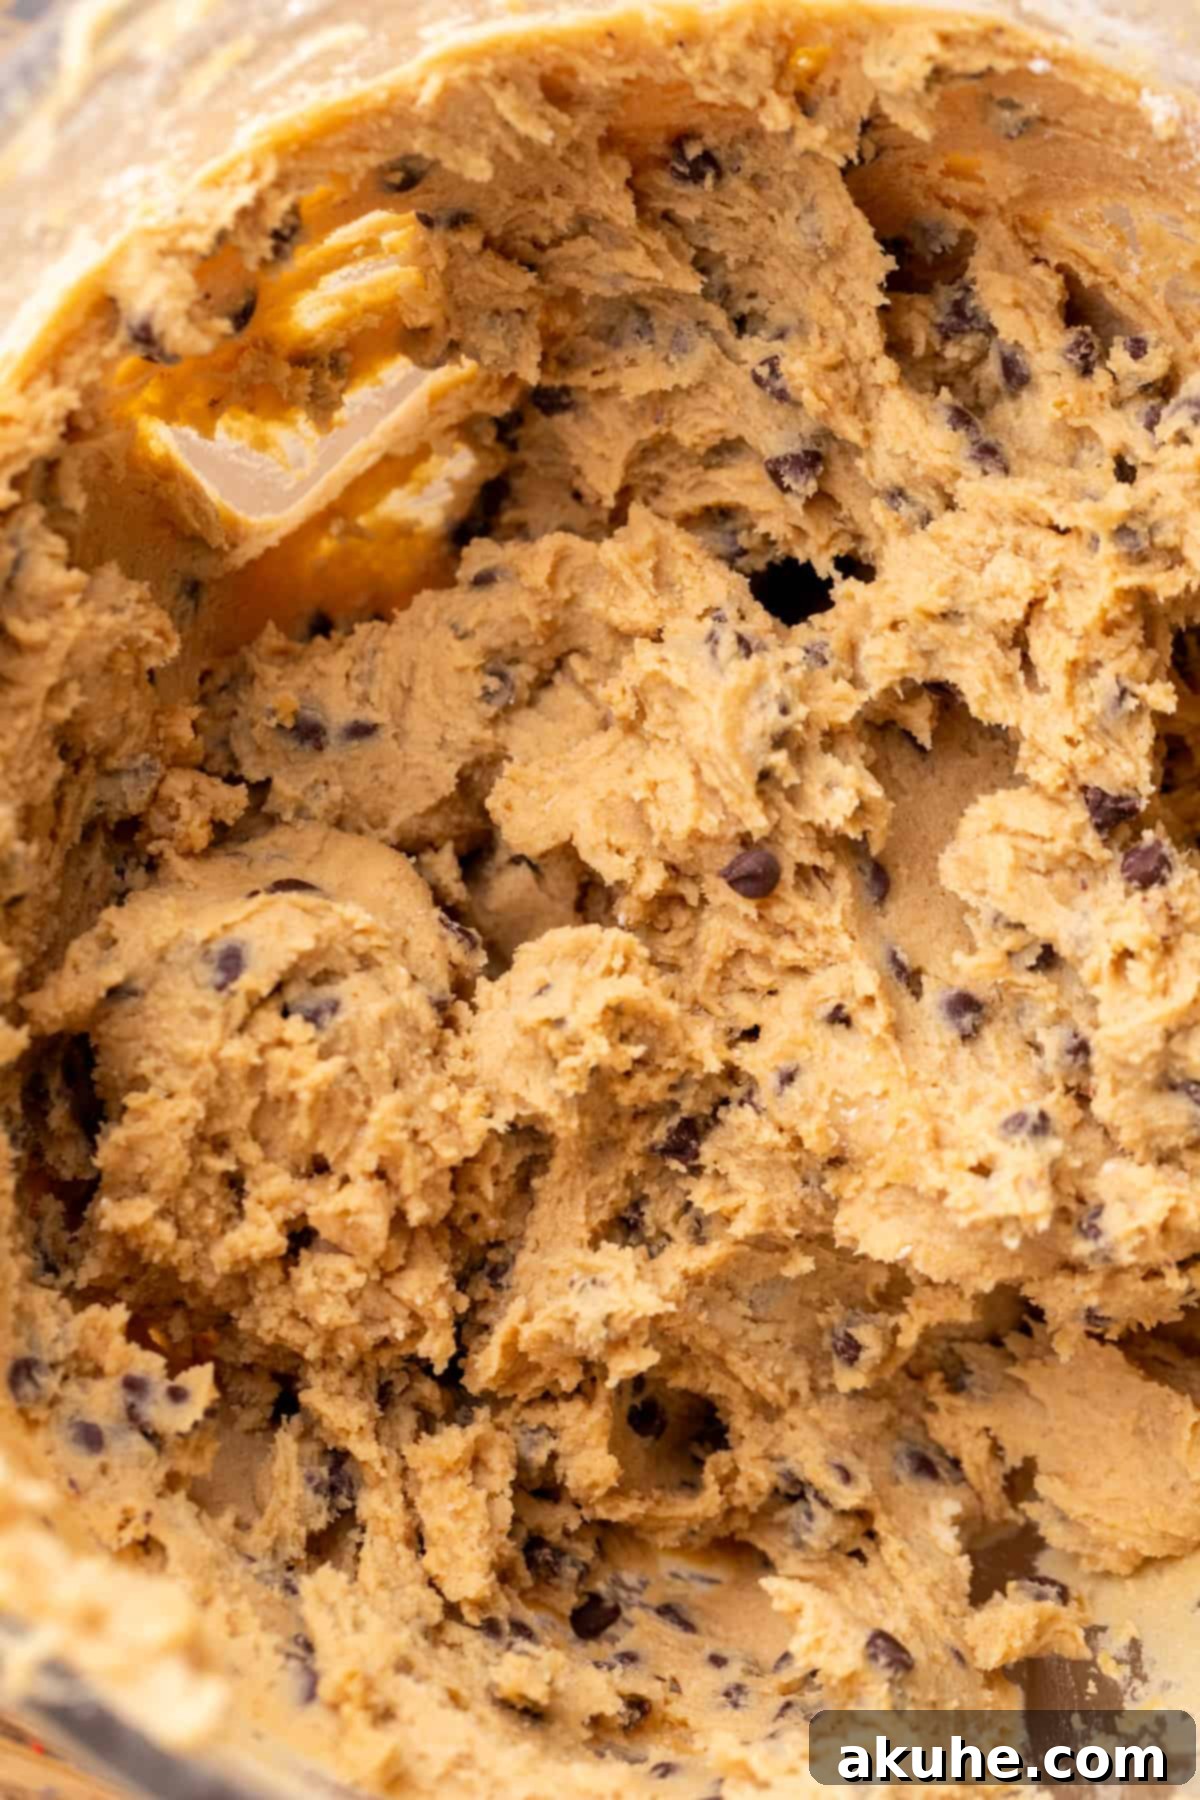
- STEP 4: Incorporate Wet and Dry. To the creamed butter and sugar mixture, add the pure vanilla extract and milk. Mix on medium speed for about 30 seconds until just combined. Next, with the mixer on low speed, gradually add the sifted dry ingredients (flour and salt) to the wet mixture, mixing until just combined and no streaks of dry flour remain. Be careful not to overmix, as this can lead to a tougher dough. Finally, gently fold in the mini chocolate chips using a spatula.
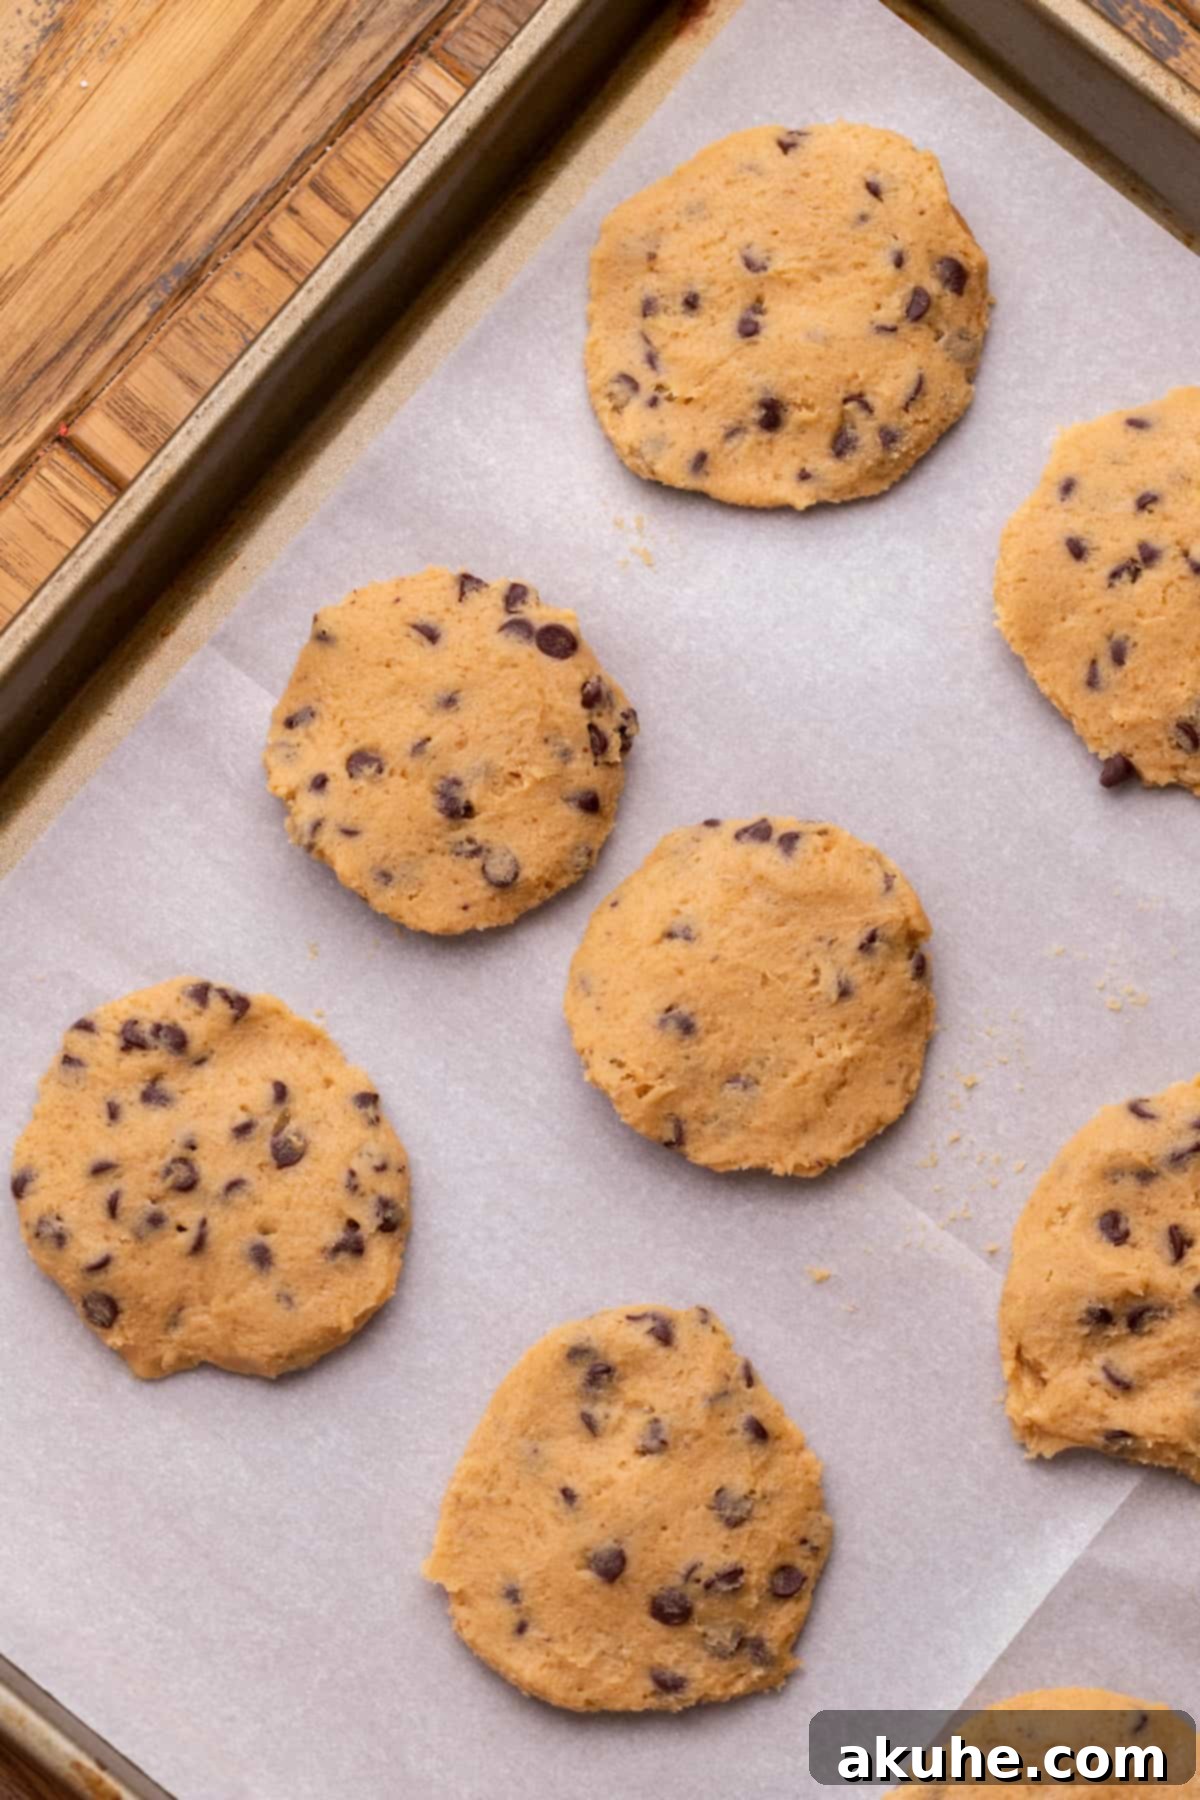
- STEP 5: Shape and Chill Cookie Dough Discs. Line a standard cookie sheet with parchment paper. Using a 1 oz cookie scoop, portion out 15 balls of the prepared cookie dough. These will be baked into your cake layers. Gently flatten each ball into a disc shape, approximately 1/2 inch thick. Arrange these discs on the parchment-lined cookie sheet and place them in the freezer to chill for at least 15-20 minutes. Chilling helps them retain their shape when baked into the cake. The remaining cookie dough should be covered and refrigerated; this will be used for the cake’s filling and for decorating the top.
Step-By-Step Guide: Baking the Fluffy Vanilla Cake Layers
These vanilla cake layers provide the perfect soft, tender base for our cookie dough dream. Follow these instructions carefully to ensure light and moist results every time.
- STEP 1: Prepare Your Pans. Begin by preheating your oven to 350°F (175°C). Proper pan preparation is key to ensuring your cakes release cleanly. Thoroughly spray three 8-inch round cake pans with a high-quality non-stick baking spray (preferably one that contains flour). Next, cut or use pre-made 8-inch parchment paper circles to line the bottoms of each pan. This creates an extra barrier against sticking. Spray the parchment paper circles again to ensure a completely non-stick surface. This double layer of protection is essential for easy cake removal and perfectly intact layers.
- STEP 2: Combine Dry Ingredients. In a large mixing bowl, sift together the all-purpose flour, baking powder, baking soda, and salt. Sifting helps to aerate the flour, remove any lumps, and ensure that the leavening agents are evenly distributed throughout the dry mixture. This leads to a finer crumb and a more even rise in your cake. Set this bowl aside for later use.
- STEP 3: Cream Butter, Oil, and Sugar. In the bowl of a stand mixer fitted with the paddle attachment (or using a handheld mixer), combine the softened unsalted butter, vegetable oil, and white granulated sugar. Beat these ingredients together on high speed for precisely 3 minutes. The mixture should become very light in color, fluffy, and visibly aerated. The butter and sugar should be fully creamed, creating a light and airy base for your cake batter.
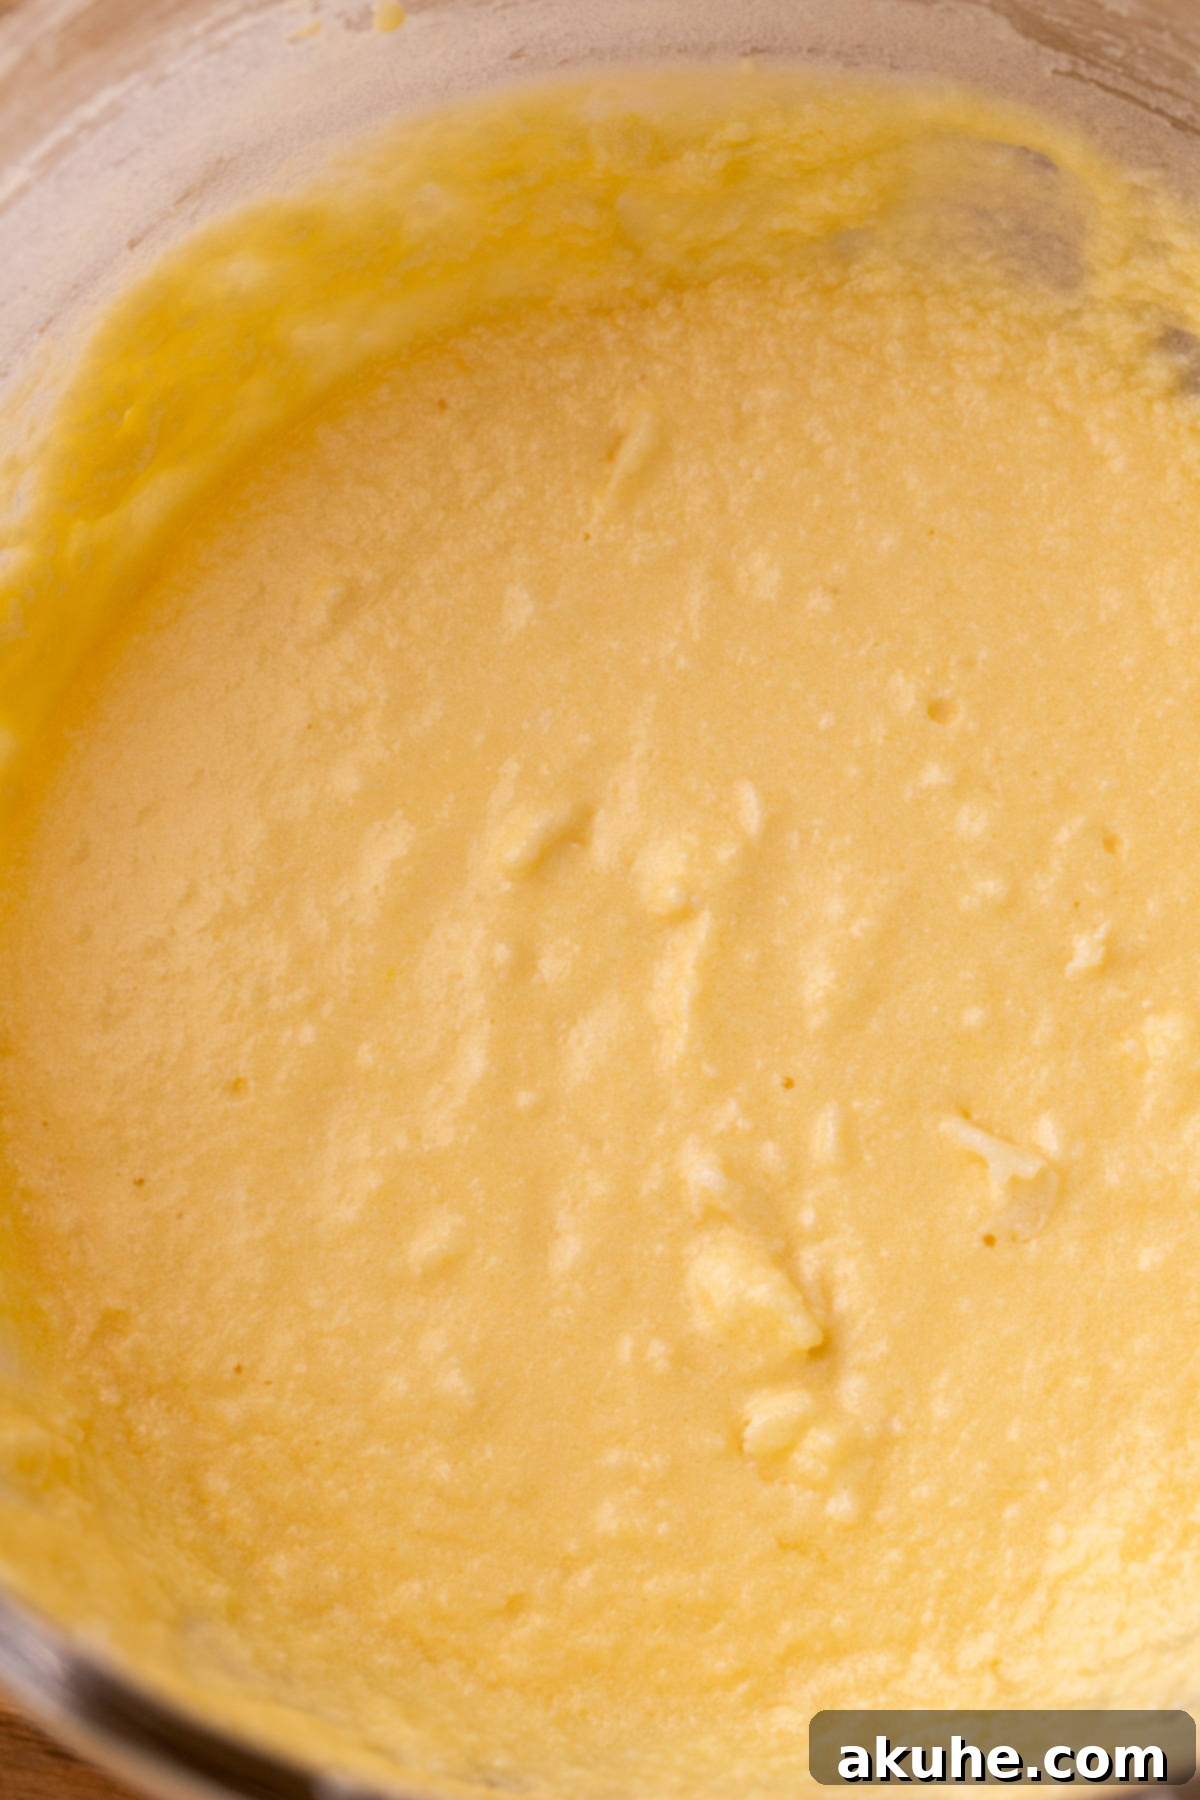
- STEP 4: Incorporate Wet Ingredients. Reduce the mixer speed to medium. Add the sour cream and pure vanilla extract to the creamed butter mixture. Mix until just fluffy and well combined, ensuring no lumps of sour cream remain. Next, add the large eggs, one at a time, mixing on medium speed after each addition until fully incorporated. It’s crucial to scrape down the sides and bottom of the bowl frequently with a rubber spatula during this stage to ensure all the butter and other ingredients are thoroughly mixed in, preventing any unmixed pockets.
- STEP 5: Alternate Dry and Wet Additions. This step ensures a tender cake crumb. With the mixer set to the lowest speed, add approximately one-third of the sifted dry ingredients to the wet mixture, mixing until just barely combined. Immediately follow with half of the buttermilk, mixing until smooth. Repeat this process: add another one-third of the dry ingredients, mix, then add the remaining buttermilk, mix. Finally, add the last one-third of the dry ingredients and mix only until just combined. Stop mixing as soon as no dry streaks of flour are visible. Overmixing at this stage can develop the gluten in the flour, resulting in a tough cake.
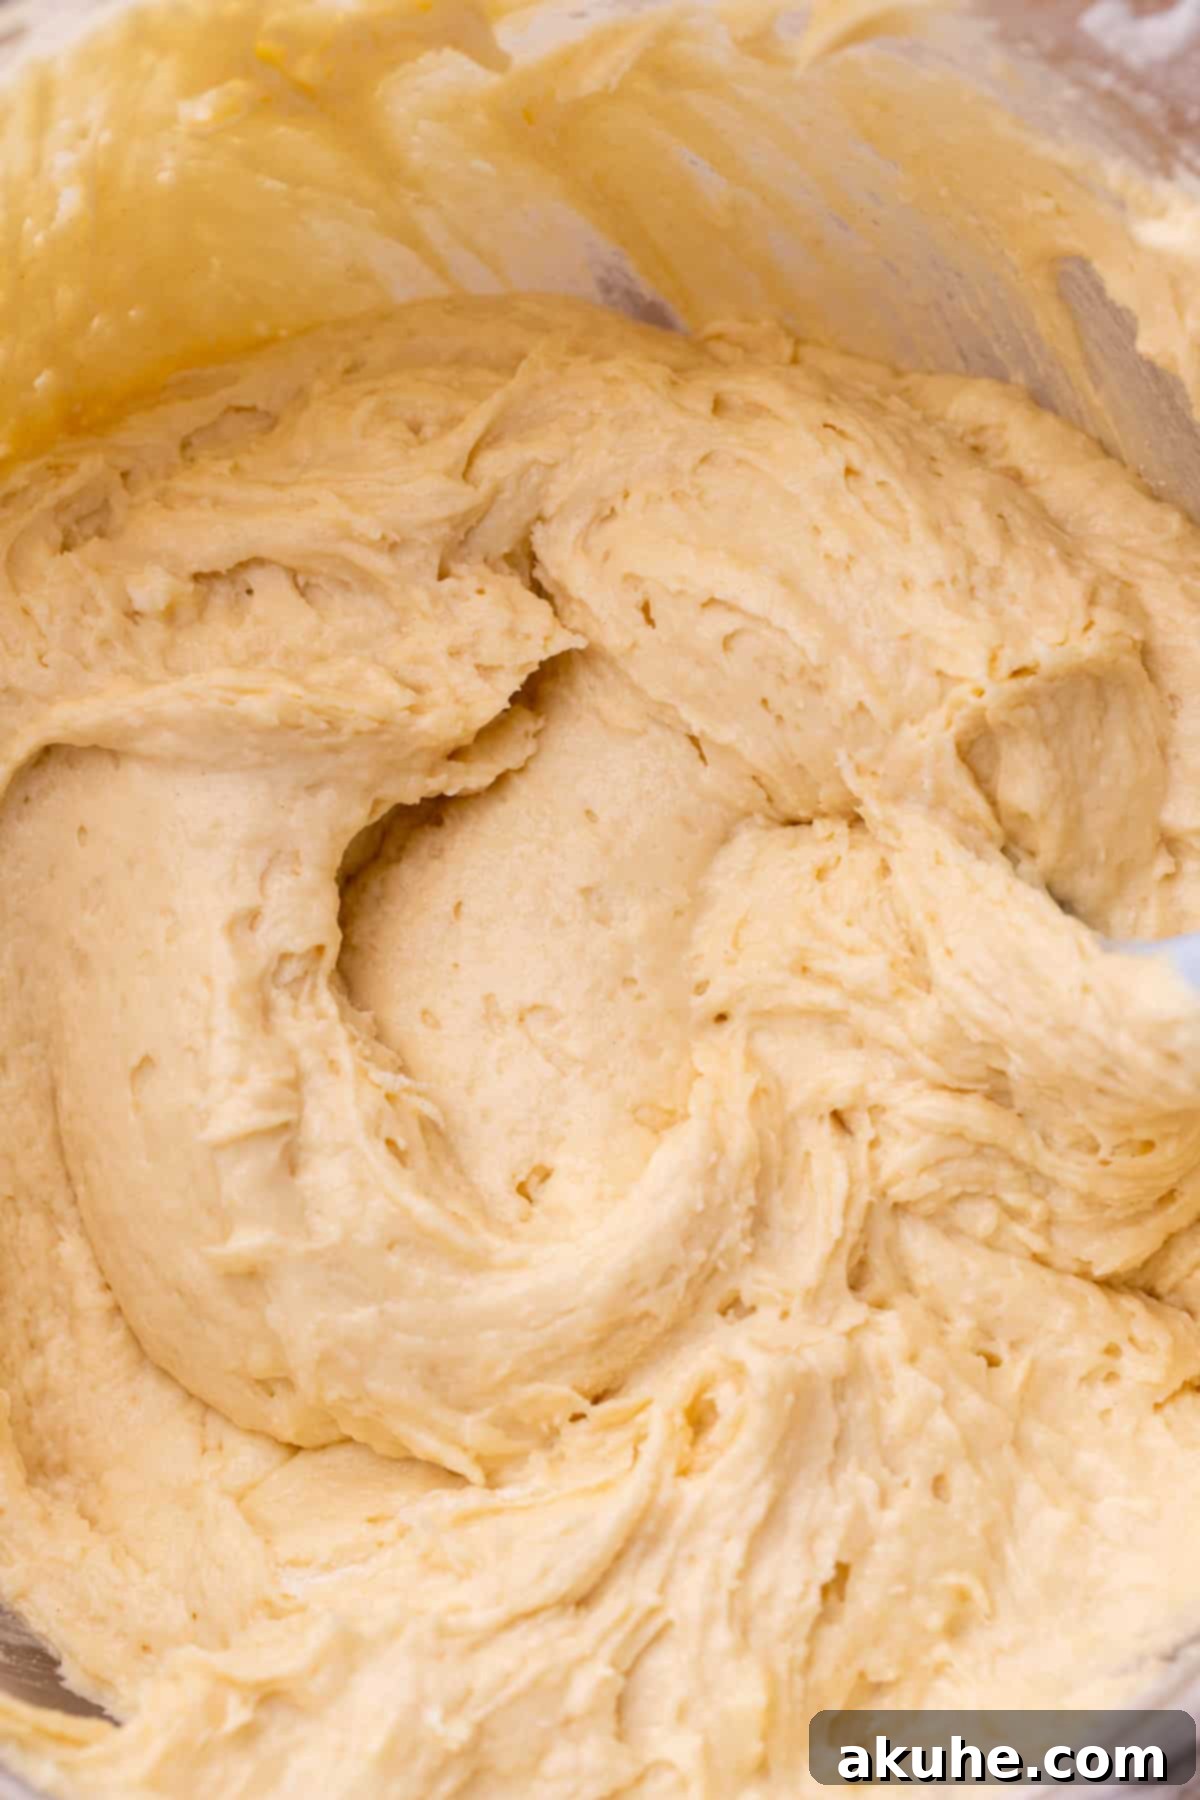
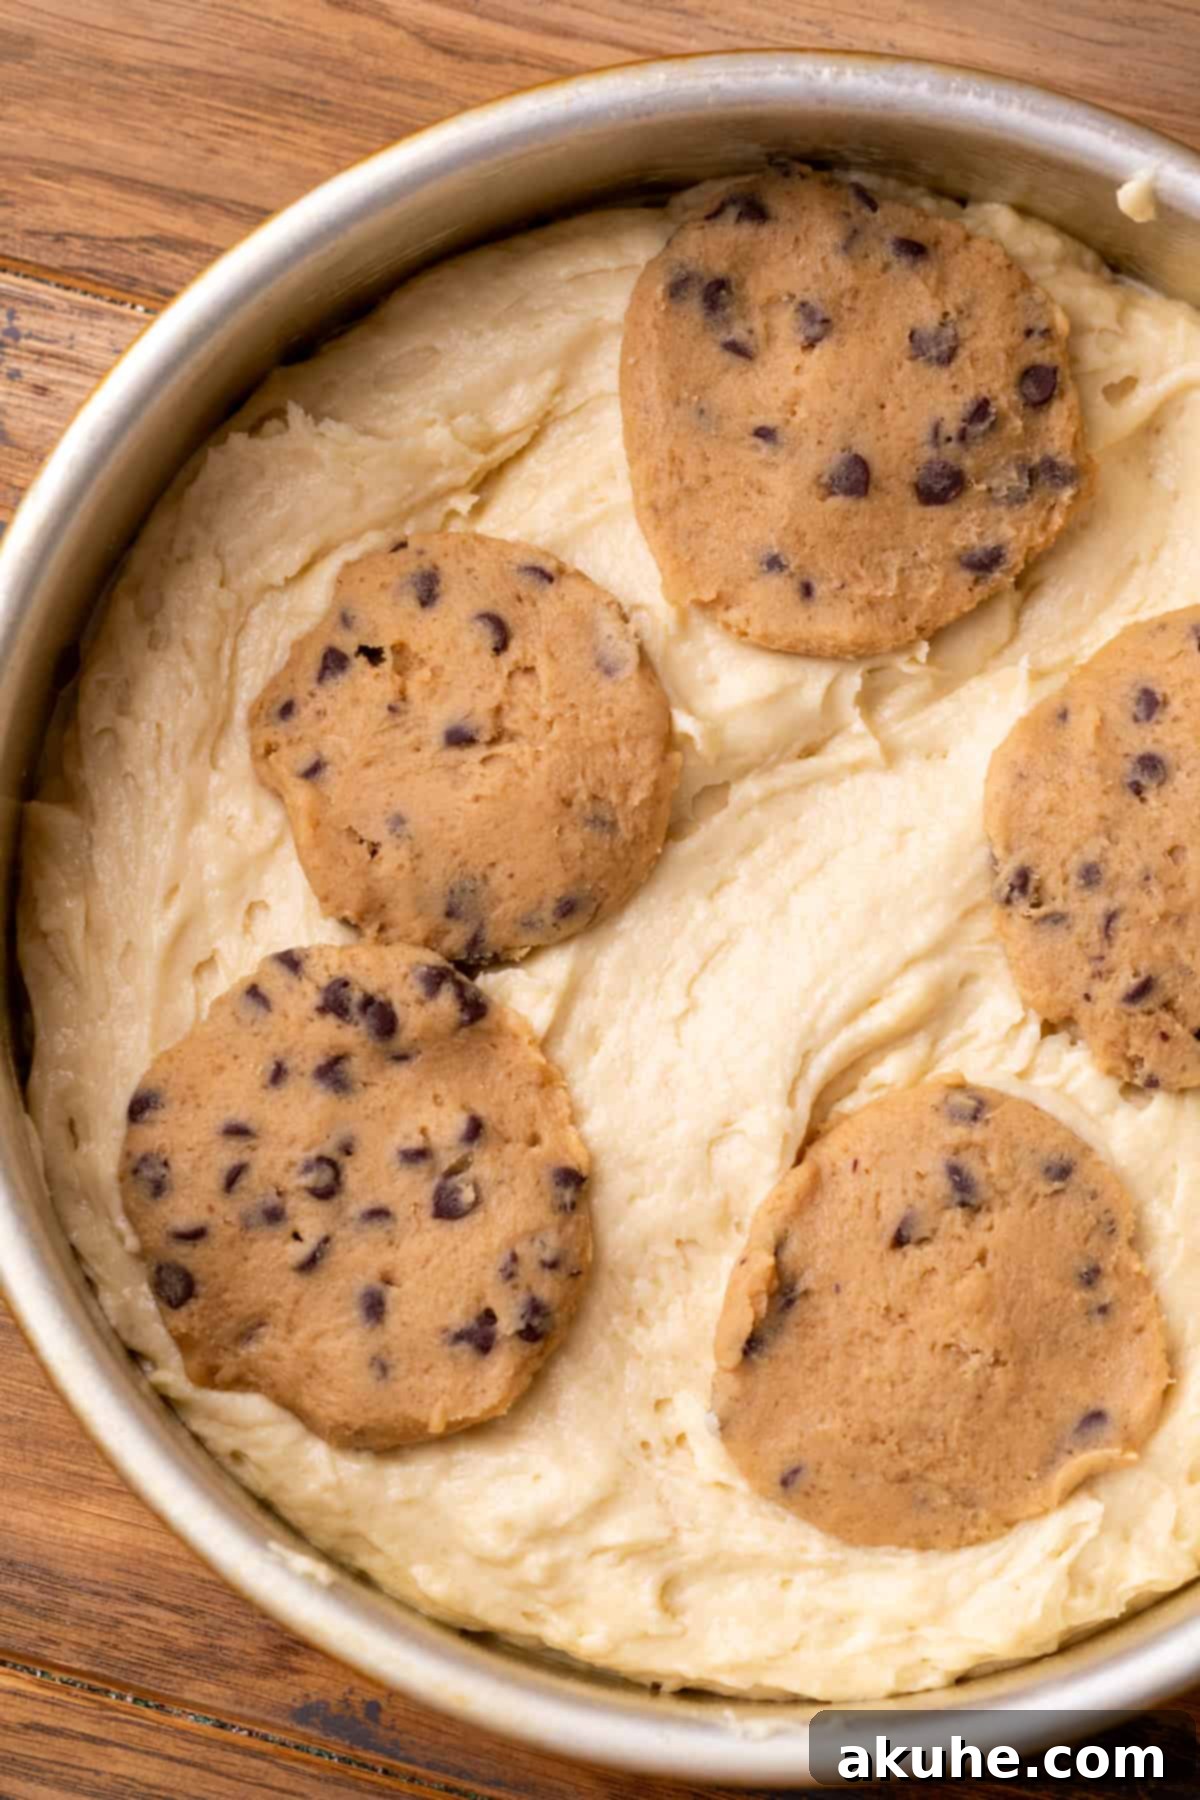
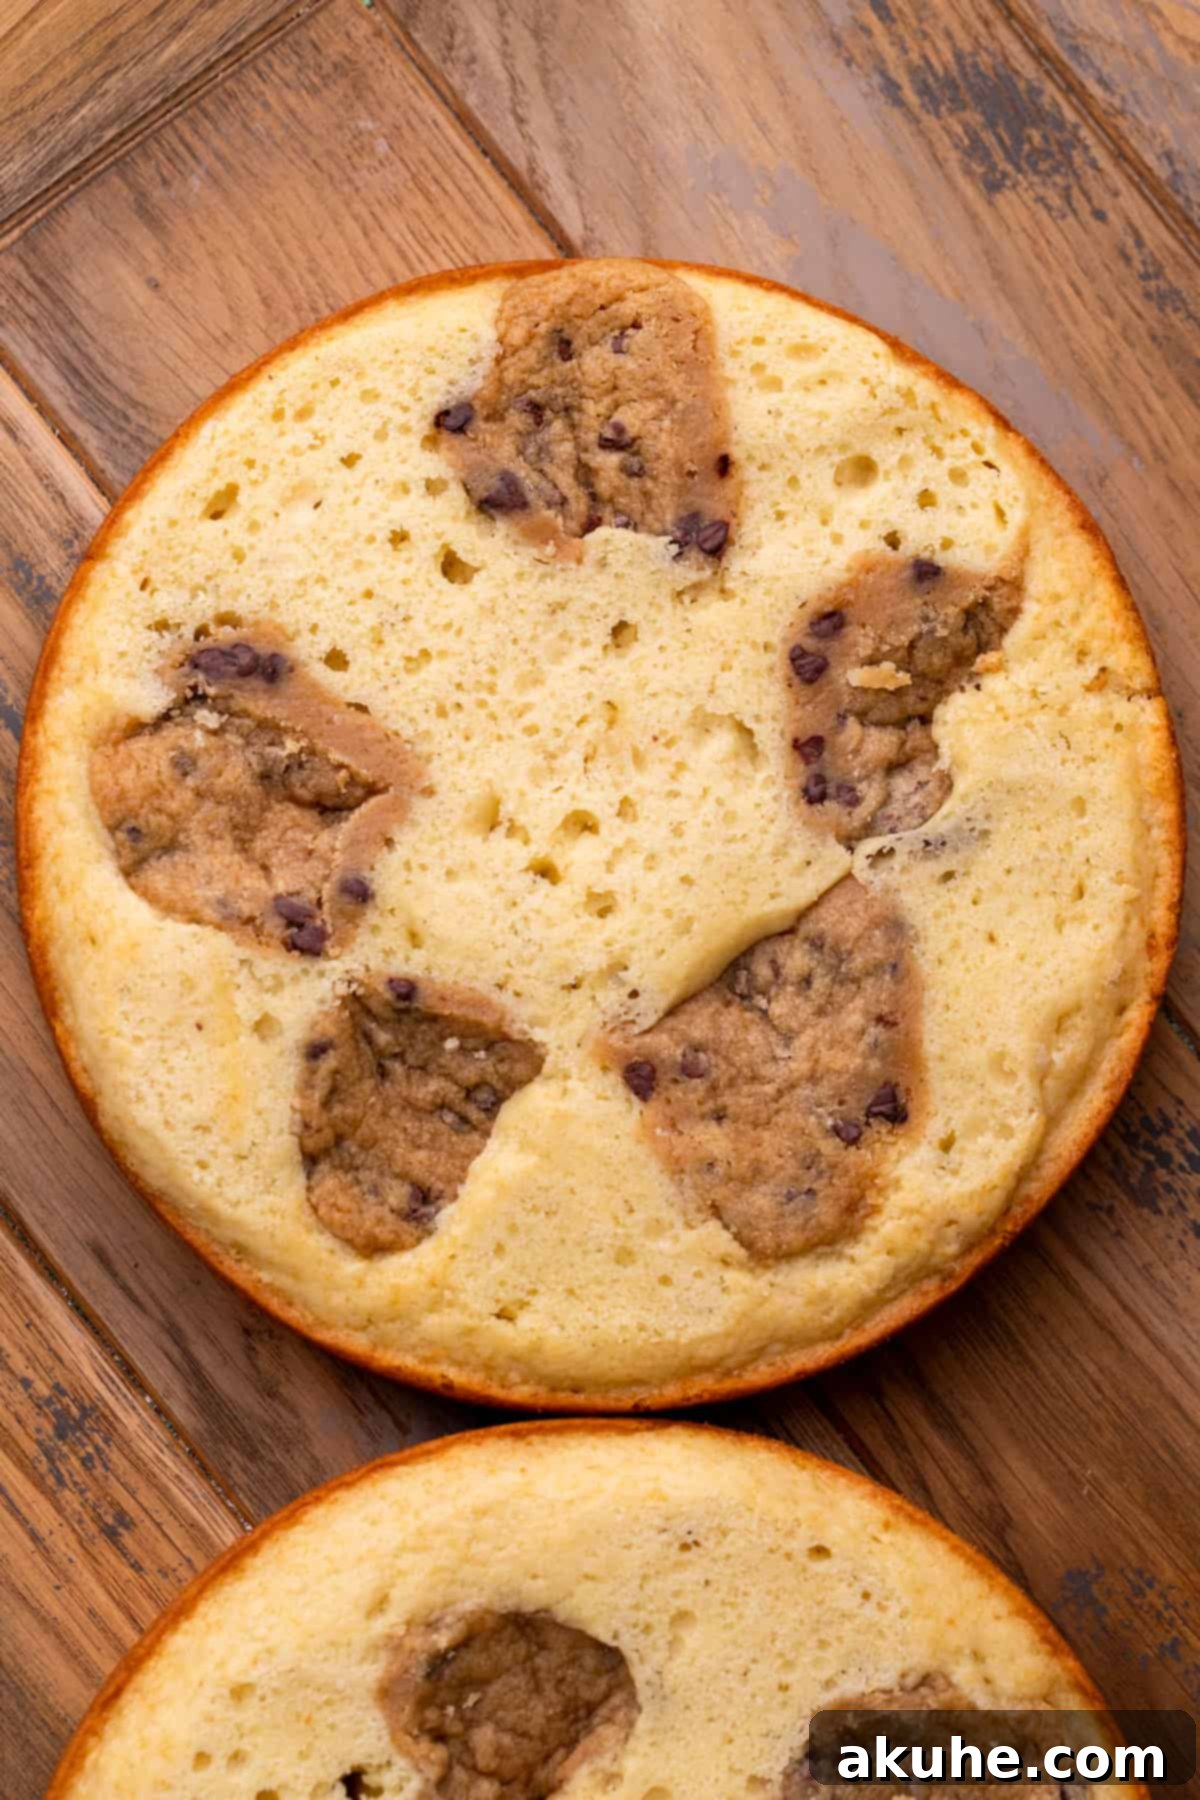
- STEP 6: Pour Batter and Add Cookie Dough Discs. Divide the prepared vanilla cake batter equally among the three 8-inch cake pans. Use a kitchen scale for precision if you want perfectly even layers. Gently smooth the top of the batter in each pan. Now, carefully arrange 5 of the chilled cookie dough discs on top of the batter in each cake pan. Press them down slightly so they are partially submerged in the batter. As the cake bakes, these discs will melt slightly and infuse the cake layers with delightful pockets of cookie dough flavor and texture.
- STEP 7: Bake the Cake Layers. Transfer the cake pans to your preheated 350°F (175°C) oven. Bake for approximately 25-30 minutes. Baking times can vary depending on your oven, so begin checking for doneness around the 25-minute mark. The cakes are perfectly baked when a wooden toothpick or cake tester inserted into the center of a cake layer comes out clean, with no wet batter clinging to it. The tops should be golden brown and spring back lightly when gently pressed.
- STEP 8: Cool Completely. Once baked, remove the cake pans from the oven and place them on a wire cooling rack. Allow the cakes to cool in their pans for a full 10 minutes. This initial cooling period allows the cakes to firm up slightly, making them less fragile. After 10 minutes, carefully invert each cake onto the wire rack, peel off the parchment paper from the bottom, and allow them to cool completely to room temperature. This can take 1-2 hours. Do not attempt to frost or assemble a warm cake, as the frosting will melt and slide off.
Step-By-Step Guide: Creating the Luscious Chocolate Frosting and Drip
This rich chocolate cream cheese frosting and glossy ganache drip are the perfect decadent companions to our cookie dough cake. They add depth, moisture, and an irresistible chocolatey finish. For more detailed tips on crafting the perfect chocolate cream cheese frosting, consult our dedicated chocolate cream cheese frosting guide.
- STEP 1: Sift Dry Frosting Ingredients. In a medium mixing bowl, use a fine-mesh sieve to sift together the powdered sugar and unsweetened cocoa powder. This step is crucial for achieving a super smooth, lump-free frosting. Cocoa powder and powdered sugar tend to clump, and sifting ensures a silky texture without any gritty bits. Set the sifted mixture aside.
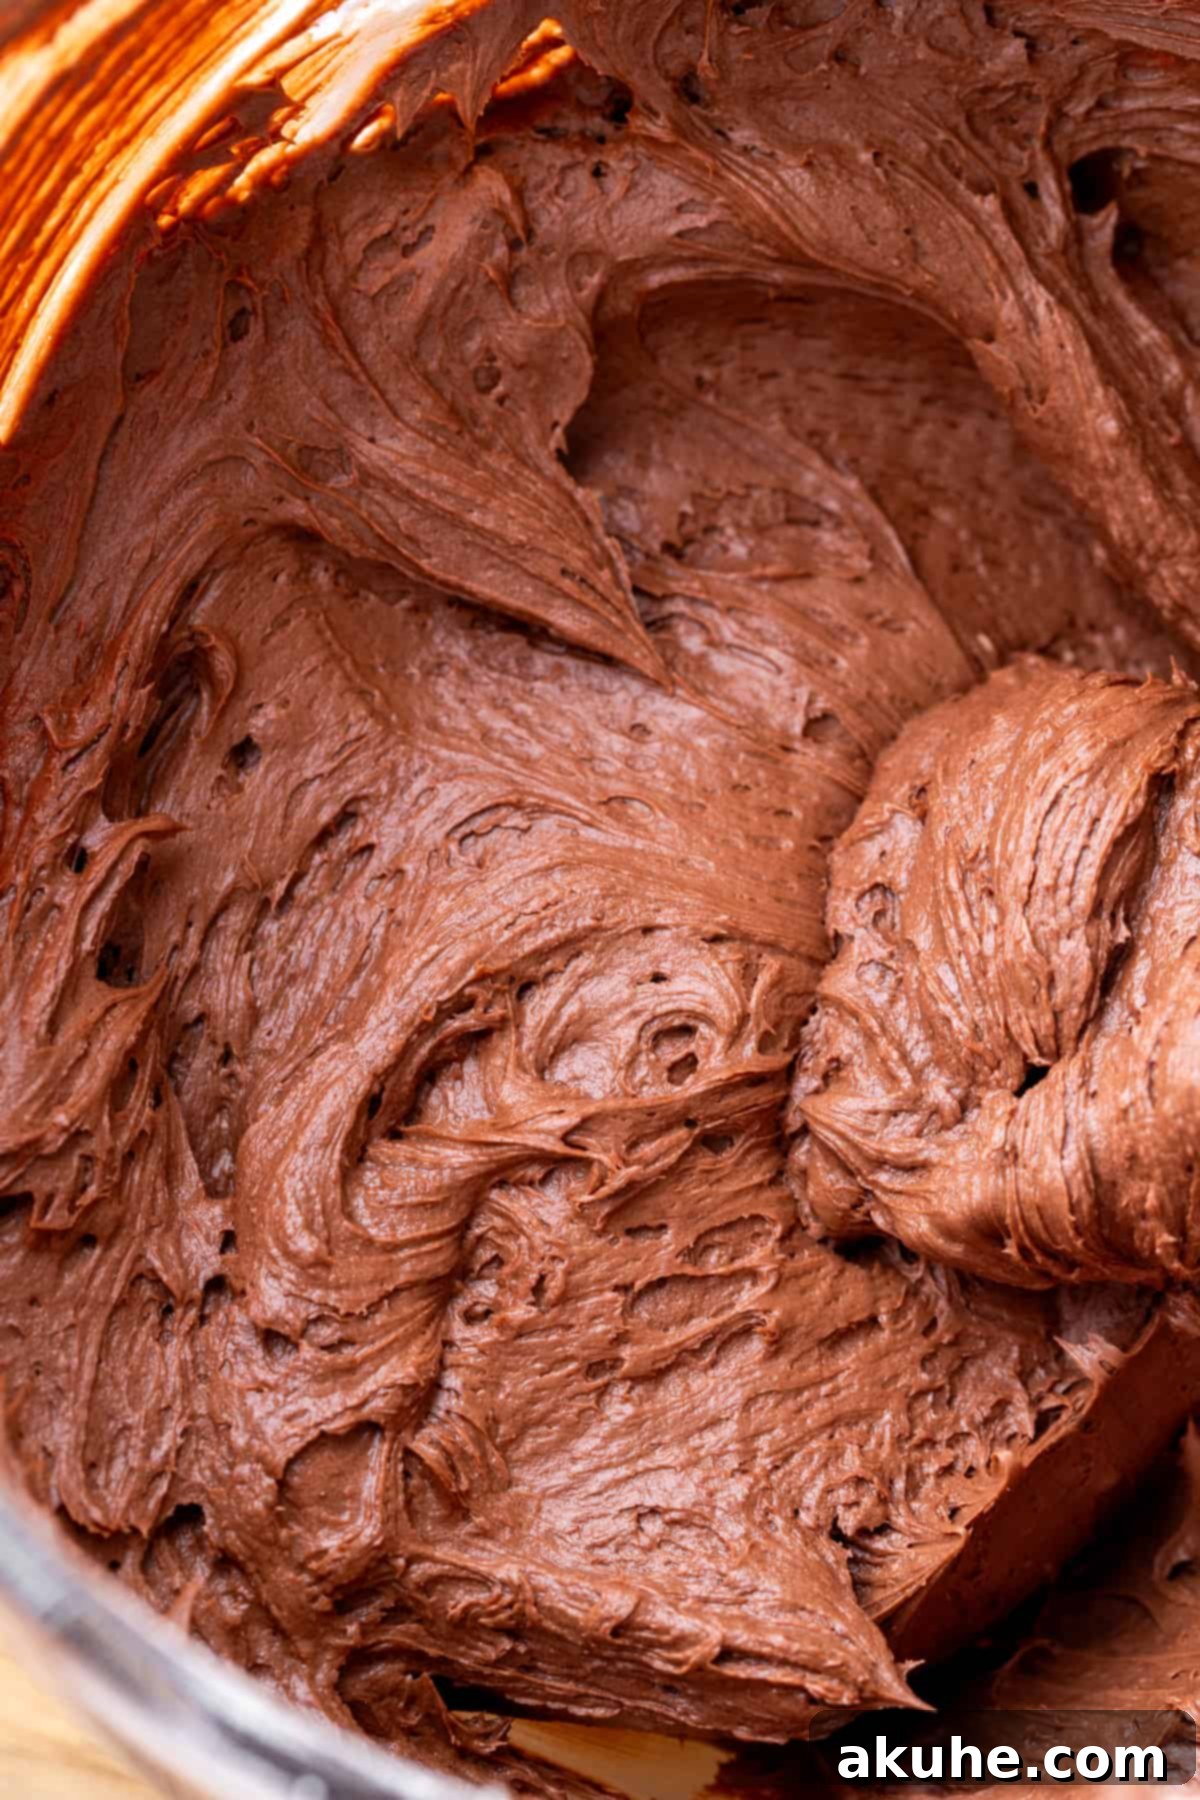
- STEP 2: Cream Butter and Cream Cheese. In the bowl of a stand mixer fitted with a paddle attachment (or using a handheld mixer), beat the softened unsalted butter and room temperature cream cheese together on high speed for exactly 2 minutes. During this time, the mixture will become light, airy, and fluffy. Pause to scrape down the sides and bottom of the bowl with a rubber spatula to ensure everything is thoroughly combined. The cream cheese should be fully incorporated and smooth, with no cold lumps.
- STEP 3: Mix the Chocolate Cream Cheese Frosting. Reduce the mixer speed to low. Add half of the sifted powdered sugar and cocoa powder mixture to the butter and cream cheese. Mix on low speed until just combined, being careful not to over-aerate the frosting. Add the remaining powdered sugar and cocoa powder and continue mixing on low speed until fully incorporated. Finally, add the salt and pure vanilla extract. Increase the mixer speed to high and beat for 1-2 minutes until the frosting is incredibly creamy, light, and airy. Scrape the bowl once more to ensure uniform consistency.
Important Note on Chocolate Drip: Do not begin preparing the chocolate ganache drip until your cake is fully assembled and frosted with the crumb coat, and preferably the final layer of frosting as well. This ensures the ganache is at the perfect temperature and consistency when you are ready to apply it.
- STEP 4: Heat the Cream for Ganache. Place the semi-sweet chocolate chips in a heat-safe, medium-sized bowl and set it aside. In a small saucepan, pour the heavy cream and heat it on medium-low heat. Bring the cream just to a simmer, watching carefully until it begins to steam and small bubbles form around the edges. Do not let it boil vigorously.
- STEP 5: Melt and Create the Ganache. Immediately remove the hot cream from the heat and pour it directly over the chocolate chips in the heat-safe bowl. Do not stir yet! Allow the hot cream to sit undisturbed over the chocolate chips for 1 minute and 30 seconds. This allows the heat from the cream to gently melt the chocolate. After the waiting period, begin stirring the mixture continuously with a whisk or spoon, starting from the center and slowly working outwards, until it transforms into a completely smooth, glossy, and uniform chocolate ganache. If there are any stubborn lumps, you can gently heat the bowl over a double boiler or microwave for 10-15 seconds at a time, stirring thoroughly after each interval, until perfectly smooth. Let the ganache cool slightly to a warm but not hot temperature before using it for the drip – it should be thick enough to drip slowly, not run off rapidly.
Assembling Your Cookie Dough Dream Cake: Layer by Layer
Now for the exciting part – bringing all the components together to create your spectacular Cookie Dough Dream Cake! Patience and precision at this stage will ensure a beautiful and stable finished product.
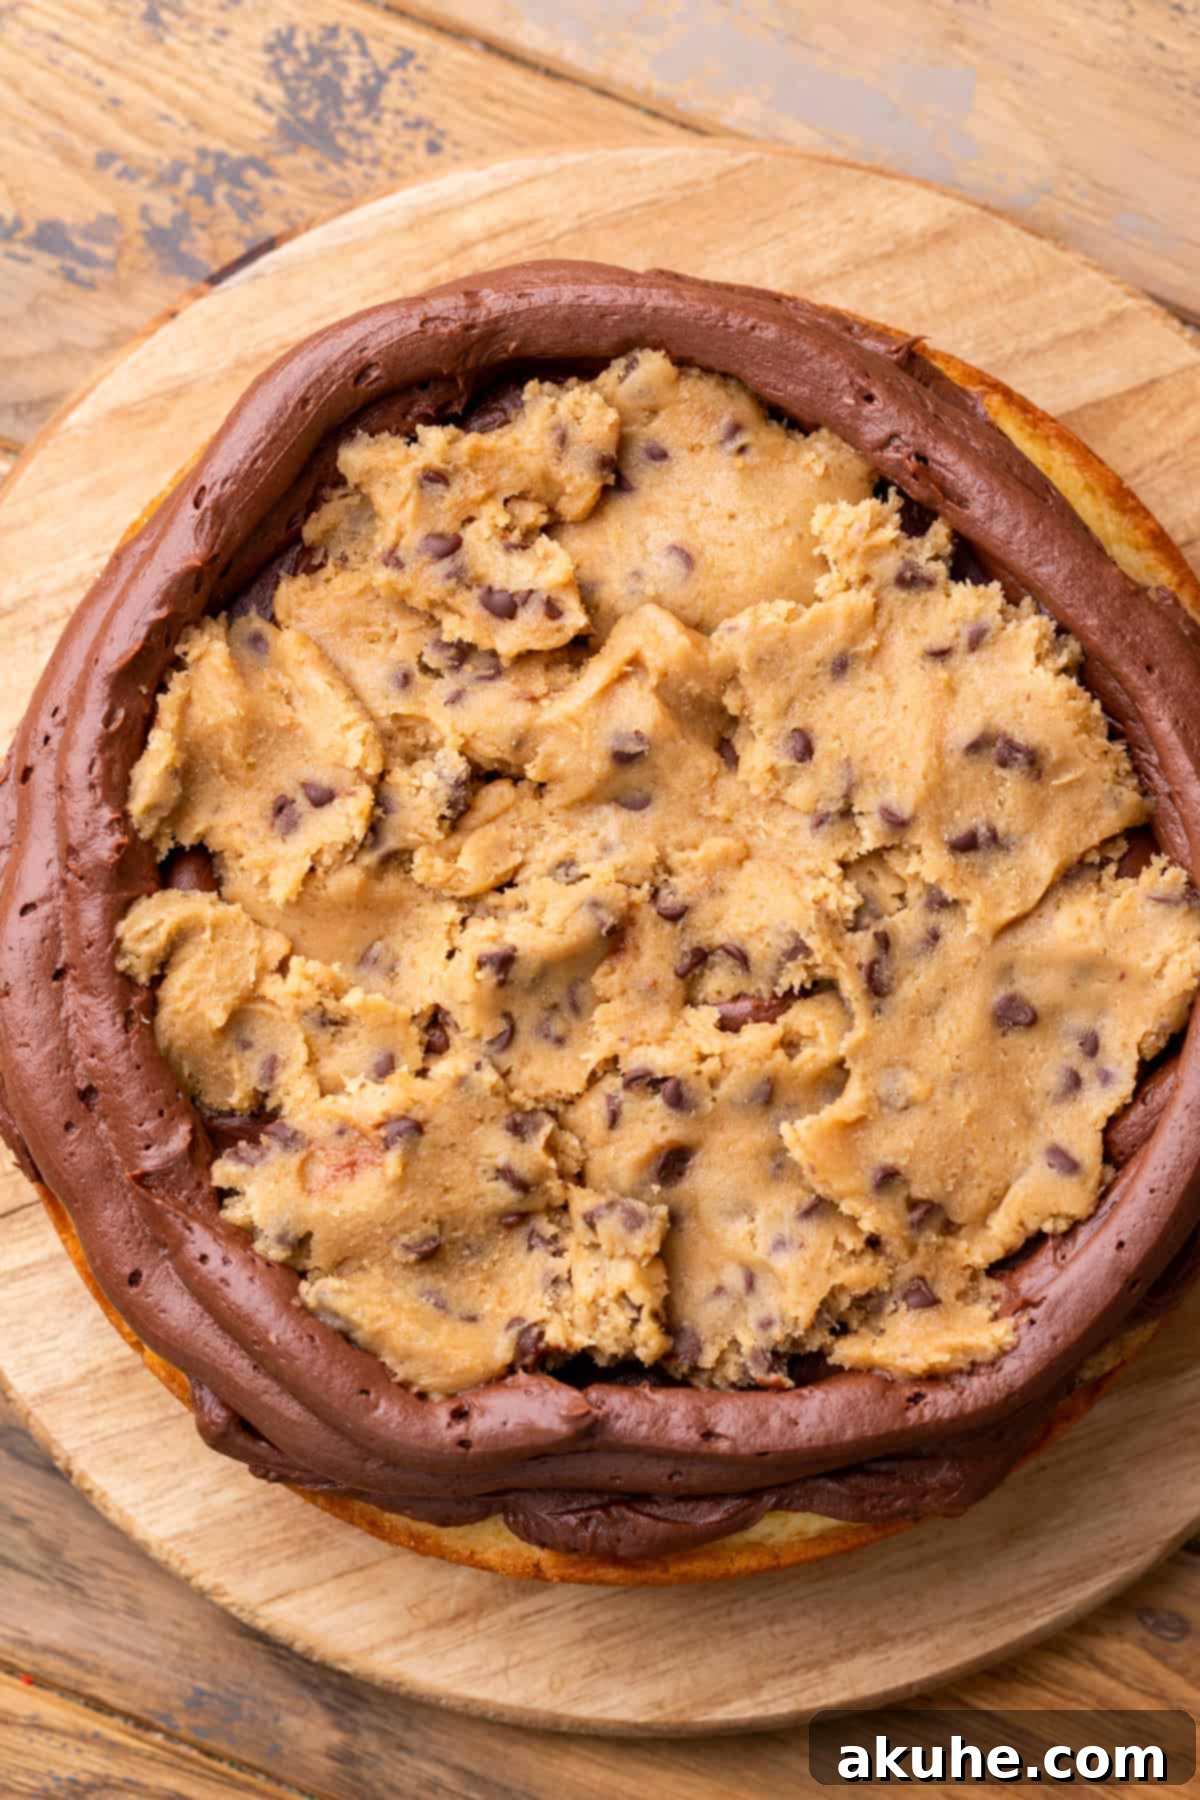
- STEP 1: The First Layer. Place your first completely cooled vanilla cake layer onto your serving platter or cake stand, ensuring the flat side is facing down. This creates a stable base. Using an offset spatula, spread approximately 3/4 cup of the chocolate cream cheese frosting evenly over the top of this cake layer, extending almost to the edges. Then, using a piping bag fitted with a round or star tip (like Wilton 1M), pipe two concentric layers of frosting border around the perimeter of the cake. This “frosting dam” will hold in your cookie dough filling.
- STEP 2: The Cookie Dough Filling. Take the reserved edible cookie dough from the refrigerator. Place small, irregular globs or spoonfuls of cookie dough into the center of the cake, within the frosting border. Continue adding cookie dough until the entire center of the frosting dam is completely filled. Use your hands, a small spatula, or the back of a spoon to gently flatten the cookie dough, creating an even layer across the cake. This ensures a uniform distribution of cookie dough in every slice.
- STEP 3: The Second Layer. Carefully place the second cooled vanilla cake layer directly on top of the cookie dough filling and the first layer of frosting, again with its flat side facing down. Gently press down to ensure it is level and stable. Repeat Steps 1 and 2 for this layer: spread 3/4 cup of chocolate cream cheese frosting, pipe a double border, and fill generously with more edible cookie dough, flattening it out.
- STEP 4: The Final Layer. Position the third and final cooled vanilla cake layer on top of the second cookie dough-filled layer. For the neatest finish, place this layer flat side up. This creates a smooth and even surface for the final frosting application.
- STEP 5: The Essential Crumb Coat. A crumb coat is a thin layer of frosting that traps any loose crumbs, ensuring a pristine finish for your final frosting layer. Using an offset spatula, apply a very thin, even layer of chocolate cream cheese frosting over the entire cake – top and sides. Don’t worry about perfection at this stage, just aim for full coverage. Once coated, place the cake in the freezer for 15 minutes. This quick chill sets the crumb coat, effectively sealing in all those tiny crumbs and firming up the cake for easier handling.
- STEP 6: The Final Frosting Layer. Remove the cake from the freezer. Apply a thicker, more generous layer of the remaining chocolate cream cheese frosting over the entire cake, top and sides. Use an offset spatula and a cake scraper to smooth the frosting, achieving clean, sharp edges and a polished finish. Take your time to get it as smooth as possible.
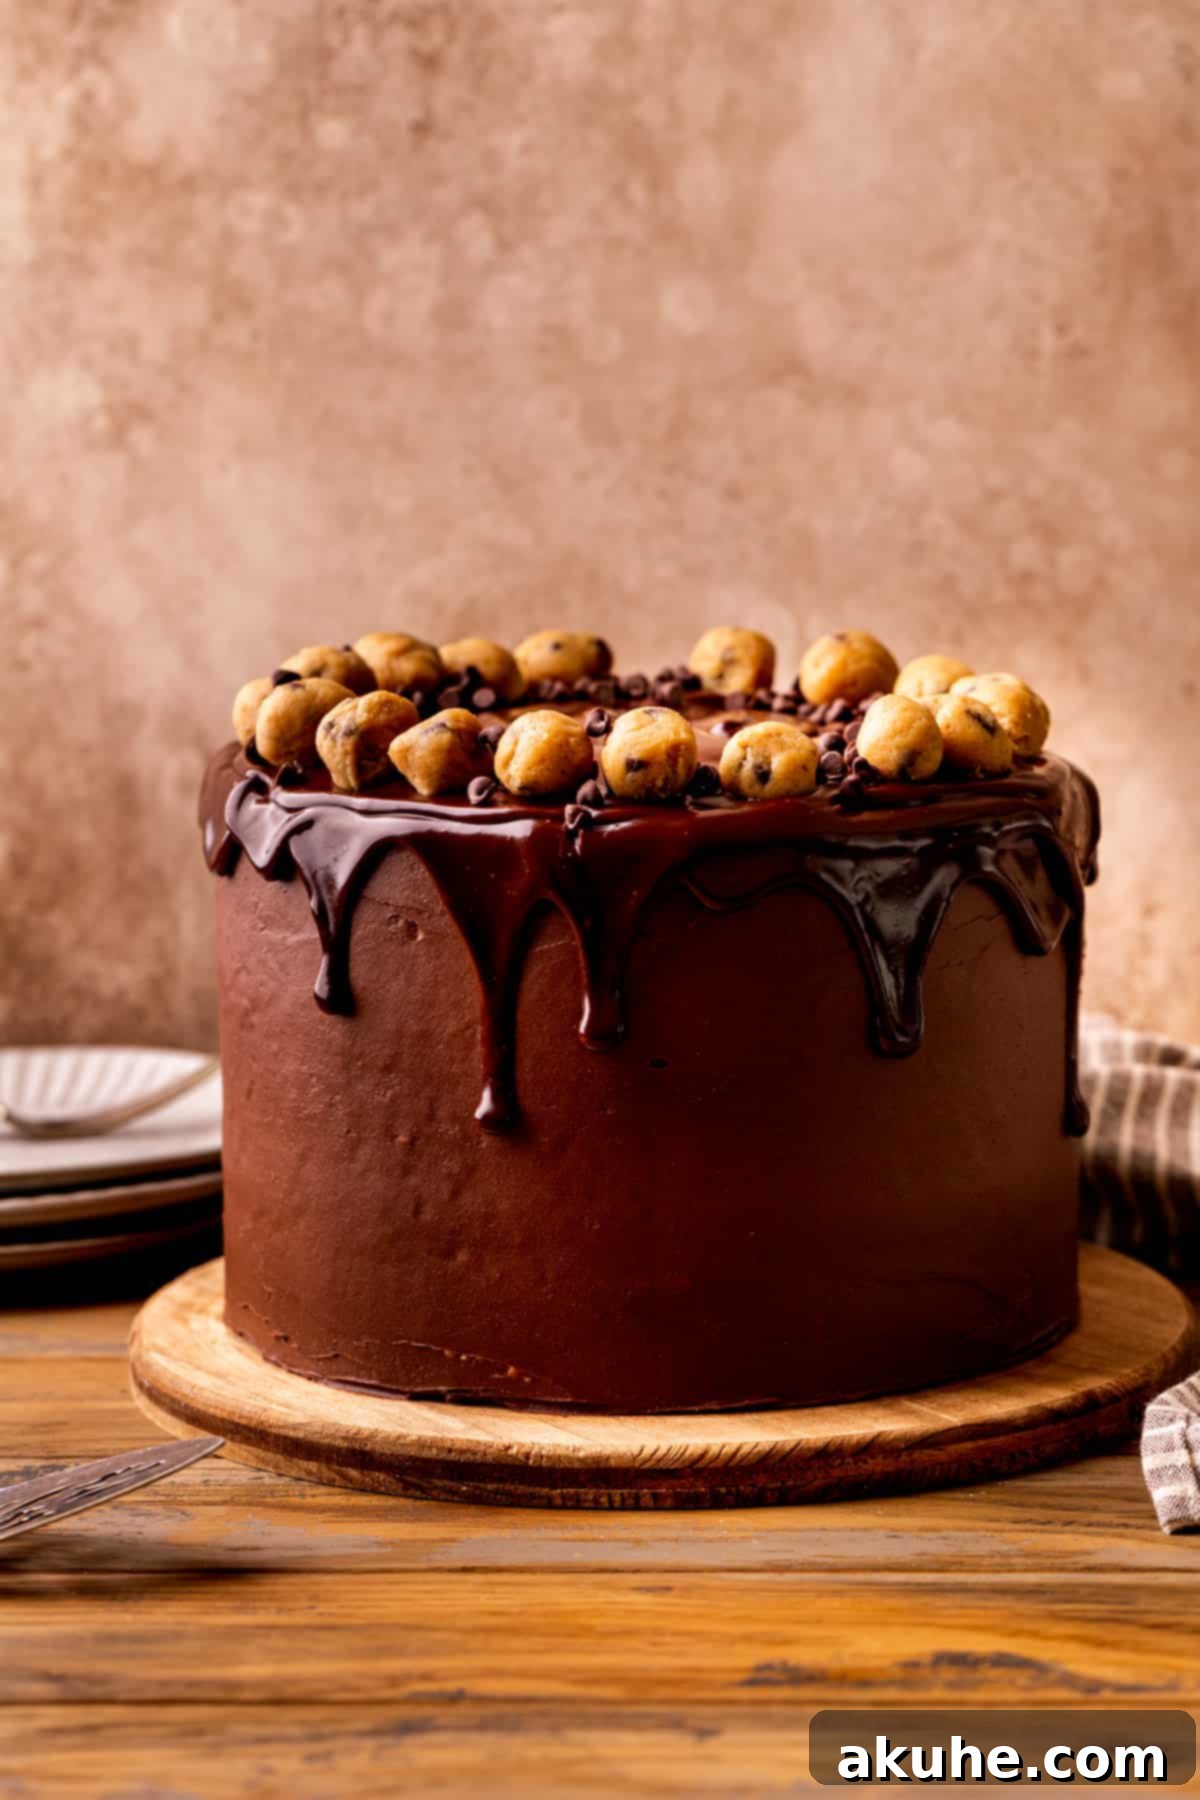
- STEP 7: The Dazzling Chocolate Ganache Drip. Ensure your chocolate ganache has cooled sufficiently to be warm but not hot, and of a pourable yet thick consistency. Slowly pour the ganache over the top center of the frosted cake. Using an offset spatula or the back of a spoon, gently guide the ganache towards the edges of the cake, allowing it to naturally drip down the sides in beautiful rivulets. For a more controlled drip, you can use a squeeze bottle. Once the drip is complete, use the offset spatula to gently smooth the ganache on top of the cake for an even, glossy surface.
- STEP 8: Final Cookie Dough Decorations. As the grand finale, take the last of your reserved edible cookie dough and arrange it artistically on top of the ganache-covered cake. You can form small balls, crumble it, or even shape miniature cookies. This adds a whimsical touch and clearly announces the star flavor of your magnificent Cookie Dough Dream Cake.
Expert Baking Tips for a Perfect Cookie Dough Cake
Achieving bakery-quality results at home is easier than you think with these professional insights:
- Master the Art of Measuring Flour: This is perhaps one of the most common baking mistakes that can lead to dry cakes. Always use the “spoon and level” method: gently spoon flour into your dry measuring cup until it overflows, then use a straight edge (like the back of a knife or a bench scraper) to level off the excess without compacting the flour. Never scoop directly from the bag, as this can add up to 25% more flour than needed. Excessively compacted flour results in a dense, dry cake. For ultimate accuracy, use a kitchen scale to measure flour by weight (grams).
- Ensure Room Temperature Ingredients: For all recipes requiring “room temperature” ingredients (butter, cream cheese, sour cream, eggs, buttermilk), it’s crucial to pull them out of the refrigerator at least 1-2 hours before you plan to start baking. Room temperature ingredients emulsify much better, creating a smooth, homogenous batter that traps air more efficiently. This leads to a lighter, more evenly textured cake and a creamier, lump-free frosting. Cold ingredients will result in a curdled batter and a stiff, unmanageable frosting.
- Flawless Cake Release Every Time: To effortlessly remove your cake layers from the pans without tearing, meticulous pan preparation is key. First, generously spray the interior of your cake pans with a high-quality non-stick baking spray (one that contains flour is ideal). Then, line the bottoms of the pans with pre-cut parchment paper circles. This extra barrier is invaluable. Finally, spray the parchment paper again. Be exceptionally thorough with your spraying, ensuring every nook and cranny is coated. Any missed spot can act as an anchor, causing your delicate cake to stick and tear upon removal.
- Don’t Overmix Your Batter: Once you add the dry ingredients to the wet, mix only until just combined. Overmixing develops the gluten in the flour, leading to a tough, chewy cake rather than a tender, fluffy one. A few small lumps of flour are far better than an overmixed, tough batter.
- Oven Temperature Accuracy: Home ovens can vary significantly in temperature. Consider investing in an inexpensive oven thermometer to ensure your oven is truly heating to the temperature you set. An inaccurate oven can lead to underbaked or overbaked cakes, affecting both texture and rise.
- Cool Cakes Completely: Resist the urge to frost or stack your cake layers while they are still warm. Warm cake layers will melt your frosting, causing it to slide off and creating a messy, unstable cake. Always allow the layers to cool completely to room temperature on a wire rack before proceeding with assembly and frosting.
- High Altitude Adjustments: For bakers living at high altitudes (typically 3,500 feet or more above sea level), atmospheric pressure changes can impact baking. To counteract this, add an extra 2-3 tablespoons of all-purpose flour to the cake batter. This helps to strengthen the cake’s structure, preventing it from collapsing due to the lower pressure.
Frequently Asked Questions About Our Cookie Dough Cake
Absolutely! Making the cake layers in advance is a fantastic time-saver. Once your cake layers have cooled completely to room temperature on a wire rack, wrap each layer tightly in several layers of plastic wrap to prevent freezer burn and moisture loss. You can then freeze them for up to 30 days. When you’re ready to decorate, simply remove them from the freezer about 1 hour before you plan to assemble the cake, allowing them to thaw at room temperature. They will taste just as fresh as if they were baked that day!
Yes, you can certainly adjust the pan size! If you opt for 9-inch cake pans, your cake layers will be a bit thinner, and the baking time may be slightly reduced, so keep a close eye on them. If you prefer thicker, more dramatic layers, you can use 6-inch cake pans. This will result in taller individual layers, and you might need to increase the baking time. Remember to always adjust baking times based on your oven and the toothpick test.
Our edible cookie dough recipe is specifically designed for safe raw consumption! We achieve this in two key ways: first, the recipe contains no raw eggs, which are often a concern in traditional cookie dough. Second, and crucially, the all-purpose flour is heat-treated by baking it in the oven at a low temperature for a short period. This process eliminates any potential bacteria (like E. coli) that can sometimes be found in raw flour. So you can enjoy every spoonful of this delicious dough without any worries!
Recipe Variations: Customize Your Cookie Dough Cake
Feel free to get creative and tailor this cookie dough cake to your personal preferences or dietary needs:
- Simplify Without Ganache: While the chocolate ganache drip adds a beautiful, professional touch, you can absolutely skip it if you’re short on time or prefer a simpler look. The chocolate cream cheese frosting alone provides plenty of deliciousness. You can decorate the top with extra cookie dough crumbles, chocolate shavings, or even a simple sprinkle of mini chocolate chips for an equally delightful finish.
- Go for a Rich Chocolate Cake Base: If your heart truly belongs to chocolate, transform this into an ultimate chocolate-lover’s dream cake! Instead of the vanilla cake layers, substitute them with a decadent chocolate cake batter. We highly recommend using the reliable and moist cake batter from this rich chocolate cake recipe for a truly indulgent experience that pairs perfectly with the cookie dough and chocolate frosting.
- Nut-Free Option: If you or your guests have nut allergies, ensure all ingredients (especially chocolate chips and extracts) are certified nut-free. This recipe is naturally nut-free if you select appropriate brands.
- Add Sprinkles: For a fun, festive touch, fold some colorful sprinkles into your edible cookie dough or sprinkle them over the top of the cake for decoration.
Special Tools for Baking Success
Having the right tools can make all the difference in your baking experience and the final presentation of your cake:
- Cake Pans: We recommend using high-quality Wilton 8-inch round cake pans. Their even heating ensures your cakes bake uniformly, preventing burnt edges or raw centers.
- Parchment Paper Circles: Save time and frustration by using pre-cut 8-inch parchment paper circles. These fit perfectly in your pans, eliminating the need for tedious cutting from a roll and ensuring a clean release every time.
- Baking Spray: For the ultimate non-stick insurance, use a reliable nonstick baking spray that contains flour. It provides a superior barrier against sticking compared to plain cooking spray.
- Offset Spatula: An offset spatula is an indispensable tool for bakers. Its angled blade makes spreading frosting, ganache, and fillings effortlessly smooth and even across your cake layers.
- Cake Turntable: For decorating cakes like a pro, a good quality cake turntable is essential. We highly recommend a sturdy Ateco cast iron turntable because it offers unparalleled stability and a seamlessly smooth spin, unlike some flimsier plastic options that can be jerky.
- Cake Scraper: To achieve those perfectly smooth, sharp edges on your frosted cake, a metal cake scraper is a must-have. It helps you get a professional finish with ease.
- Piping Bags: For piping frosting borders or decorations, 18-inch piping bags are excellent as they hold a generous amount of frosting, reducing the need for constant refills during decoration.
- Piping Tip: The Wilton 1M star piping tip is incredibly versatile and perfect for piping elegant borders, rosettes, or decorative swirls on your cake.
- Small Cookie Scoop: A Wilton 1 oz cookie scoop ensures uniform sizing for your edible cookie dough balls, making for consistent baking and an appealing presentation.
Storing and Freezing Your Cookie Dough Cake
To ensure your magnificent Cookie Dough Dream Cake remains as fresh and delicious as possible, proper storage is key:
Storing: Once assembled and frosted, store the entire cookie dough cake in an airtight container, such as a specialized cake carrier, to protect it from drying out and absorbing refrigerator odors. Due to the cream cheese frosting, the cake must be kept refrigerated. It will stay fresh and moist in the fridge for up to 5 days. For the best flavor and texture, allow the cake to come to room temperature for about 30-60 minutes before serving.
Freezing: If you’re planning to enjoy your cake over a longer period, or if you simply have leftovers (a rare occurrence with this cake!), you can easily freeze individual slices. Cut the cake into desired portions. Wrap each slice tightly in plastic wrap, then place the wrapped slices in an airtight freezer-safe container or a heavy-duty freezer bag. This double protection helps prevent freezer burn. The frozen cake slices can be stored for up to 30 days. To enjoy, simply remove a slice from the freezer and let it thaw in the refrigerator overnight, or at room temperature for a few hours. The cookie dough and cake layers will retain their delightful texture.
Discover More Irresistible Cake Recipes
If you’ve loved creating this cookie dough masterpiece, you’ll surely enjoy exploring our other decadent cake creations. Expand your baking repertoire with these delightful options!
Indulge Further with These Cookie Dough Creations!
Can’t get enough of cookie dough? Dive into these other amazing recipes that highlight everyone’s favorite treat:
- Chewy Cookie Dough Brownies
- Sweet Cookie Dough Cinnamon Rolls
- Refreshing Cookie Dough Ice Cream Cake
- Homemade Chocolate Cookie Dough Pop Tarts
- Creamy Cookie Dough Cheesecake
Did you bake this incredible Cookie Dough Dream Cake? We would absolutely love to hear about your experience! Please make sure to leave a STAR REVIEW below to share your thoughts. Don’t forget to tag us on Instagram @stephaniesweettreats with your stunning creations. For more baking inspiration and delicious recipe ideas, be sure to follow us on Pinterest. Happy Baking!
Cookie Dough Cake
This cookie dough cake is a layered vanilla cake with cookie dough baked in. It is filled with chocolate cream cheese frosting and cookie dough.
Print Recipe
Pin Recipe
Leave a Review
1 hr 30 mins
16 mins
1 hr 46 mins
16 slices
Ingredients
Chocolate Chip Cake
- 3 1/2 cups All-purpose flour
- 2 1/2 tsp Baking powder
- 1/4 tsp Baking soda
- 1 tsp Salt
- 1 cup Unsalted butter, room temperature
- 1 1/2 cups White granulated sugar
- 3 TBSP Oil
- 1/2 cup Sour cream, room temperature
- 1 TBSP Pure vanilla extract
- 4 Large eggs, room temperature
- 1 cup Buttermilk, room temperature
Edible Cookie Dough
- 1 cup Unsalted butter, room temperature
- 1/2 cup White granulated sugar
- 1 cup Brown sugar, packed light or dark
- 1/2 cup Milk
- 1 tsp Pure vanilla extract
- 2 3/4 cups All-purpose flour (heat treated)
- 1 tsp Salt
- 1 cup Mini chocolate chips
Chocolate Cream Cheese Frosting
- 2 1/2 cups Unsalted butter, room temperature
- 8 oz Cream cheese, room temperature
- 4 1/2 cups Powdered sugar, sifted
- 1/2 cup Unsweetened cocoa powder
- 1/4 tsp Salt
- 1 tsp Pure vanilla extract
Chocolate Drip
- 1 cup Semi-sweet chocolate chips
- 3/4 cup Heavy cream
Instructions
Edible Cookie Dough
- Preheat the oven at 300°F (150°C). Place 2 3/4 cups all-purpose flour on a cookie sheet and bake for 8 minutes to heat treat. Allow flour to cool completely before proceeding.
- In a medium bowl, sift together the cooled, heat-treated flour and 1 tsp salt. Set aside.
- Using a mixer, cream together the 1 cup unsalted butter, 1/2 cup white granulated sugar, and 1 cup brown sugar for 2 minutes until light and fluffy. Add in 1 tsp pure vanilla extract and 1/2 cup milk. Mix for 30 seconds.
- Slowly add in the sifted dry ingredients to the wet mixture, mixing until just combined. Stir in all 1 cup mini chocolate chips.
- Line a cookie sheet with parchment paper. Use a 1 oz cookie scoop to portion out 15 balls of dough. Flatten each ball into a disc shape. Place these discs in the freezer to chill for at least 15-20 minutes. Reserve the remaining cookie dough for filling and topping the cake.
Vanilla Cake
- Preheat oven to 350°F (175°C). Spray three 8-inch cake pans with a non-stick baking spray. Place an 8-inch parchment circle on the bottom of each pan and spray again.
- In a mixing bowl, sift together 3 1/2 cups all-purpose flour, 2 1/2 tsp baking powder, 1/4 tsp baking soda, and 1 tsp salt. Set aside. In a separate large bowl, using a mixer, beat 1 cup unsalted butter, 3 TBSP oil, and 1 1/2 cups white granulated sugar together for 3 minutes on high speed until light and fluffy.
- Add in 1/2 cup sour cream and 1 TBSP pure vanilla extract to the butter mixture. Mix on medium speed until fluffy. Add in 4 large eggs, one at a time, mixing on medium until combined. Scrape the sides of the bowl to ensure all ingredients are well mixed.
- Add 1/3 of the dry ingredients and half of the 1 cup buttermilk on low speed. Then, add another 1/3 of the dry ingredients and the rest of the buttermilk. Next, add the remaining dry ingredients. Mix until just combined, being careful not to overmix.
- Pour the batter evenly into the three prepared cake pans. Place 5 chilled cookie dough discs on top of the batter in each cake pan, pressing them down slightly.
- Bake for 25-30 minutes, or until a toothpick inserted into the center of the cake comes out clean.
- Let the cakes sit in the hot pans for 10 minutes on a wire rack. Then, carefully invert the cakes onto the wire rack to cool completely to room temperature.
Chocolate Cream Cheese Frosting
- Sift 4 1/2 cups powdered sugar and 1/2 cup unsweetened cocoa powder together in a mixing bowl. Set aside.
- Using a mixer, beat 2 1/2 cups unsalted butter and 8 oz cream cheese on high speed for 2 minutes until light and fluffy. Scrape down the sides of the bowl.
- Add half of the sifted powdered sugar mixture and mix on low speed until just combined. Add in the remaining powdered sugar mixture and mix until combined. Finally, add 1/4 tsp salt and 1 tsp pure vanilla extract and mix on high speed until the frosting is creamy and smooth.
Chocolate Drip
- Begin this step just before you are ready to apply the drip. Pour 1 cup semi-sweet chocolate chips into a small, heat-safe bowl and set aside. Using a saucepan on medium-low heat, warm 3/4 cup heavy cream until it is steaming and hot, with small bubbles forming around the edges. Do not let it boil vigorously.
- Pour the hot cream over the chocolate chips. Let it sit undisturbed for 1 minute and 30 seconds to allow the chocolate to melt. Then, stir continuously with a whisk or spoon until the ganache is smooth and glossy. Let cool slightly to a warm, pourable consistency before using.
Assembly
- Place the first cake layer flat side down on your serving platter. Spread about 3/4 cup of the chocolate cream cheese frosting evenly over the cake. Pipe two concentric layers of frosting border around the edge of the cake to create a dam.
- Place small globs of the reserved edible cookie dough into the center of the cake, within the frosting border. Fill the center completely and gently flatten the cookie dough with your hands or a small spatula.
- Carefully place the second cake layer flat side down on top of the cookie dough filling. Repeat steps 1 and 2 for this layer.
- Place the third and final cake layer flat side up on top of the cake stack.
- Apply a thin, even layer of frosting over the entire cake (top and sides) for a crumb coat. This traps any loose crumbs. Place the cake in the freezer for 15 minutes to allow the crumb coat to set and firm up.
- Remove the cake from the freezer and apply a thicker, final layer of chocolate cream cheese frosting over the entire cake, smoothing it with an offset spatula and cake scraper for a polished finish.
- Pour the slightly cooled chocolate ganache over the top of the cake. Gently push the ganache off the sides of the cake with an offset spatula, guiding it to create beautiful drips. Smooth the ganache on top of the cake for an even, glossy surface.
- Decorate the top of the cake with the remaining edible cookie dough. You can form small balls, crumbles, or other creative shapes.
Notes
High Altitude Baking: If baking at high altitudes, add an extra 3 tablespoons of all-purpose flour to the cake batter to help maintain structure.
Flour Measurement: Always use the “spoon and level” method for measuring flour, or use a kitchen scale for precise weight measurements. Compacted flour can lead to a dry cake.
Room Temperature Ingredients: Ensure all “room temperature” ingredients (butter, cream cheese, sour cream, eggs, buttermilk) are pulled out of the refrigerator at least 2 hours before you begin baking for optimal mixing and cake texture.
Calories:
1055
kcal
Carbohydrates:
129
g
Protein:
9
g
Fat:
73
g
Saturated Fat:
44
g
Polyunsaturated Fat:
4
g
Monounsaturated Fat:
19
g
Trans Fat:
2
g
Cholesterol:
173
mg
Sodium:
500
mg
Potassium:
263
mg
Fiber:
4
g
Sugar:
52
g
Vitamin A:
2063
IU
Vitamin C:
0.2
mg
Calcium:
150
mg
Iron:
4
mg
Did you make this recipe?
Please leave a star rating and review below!
