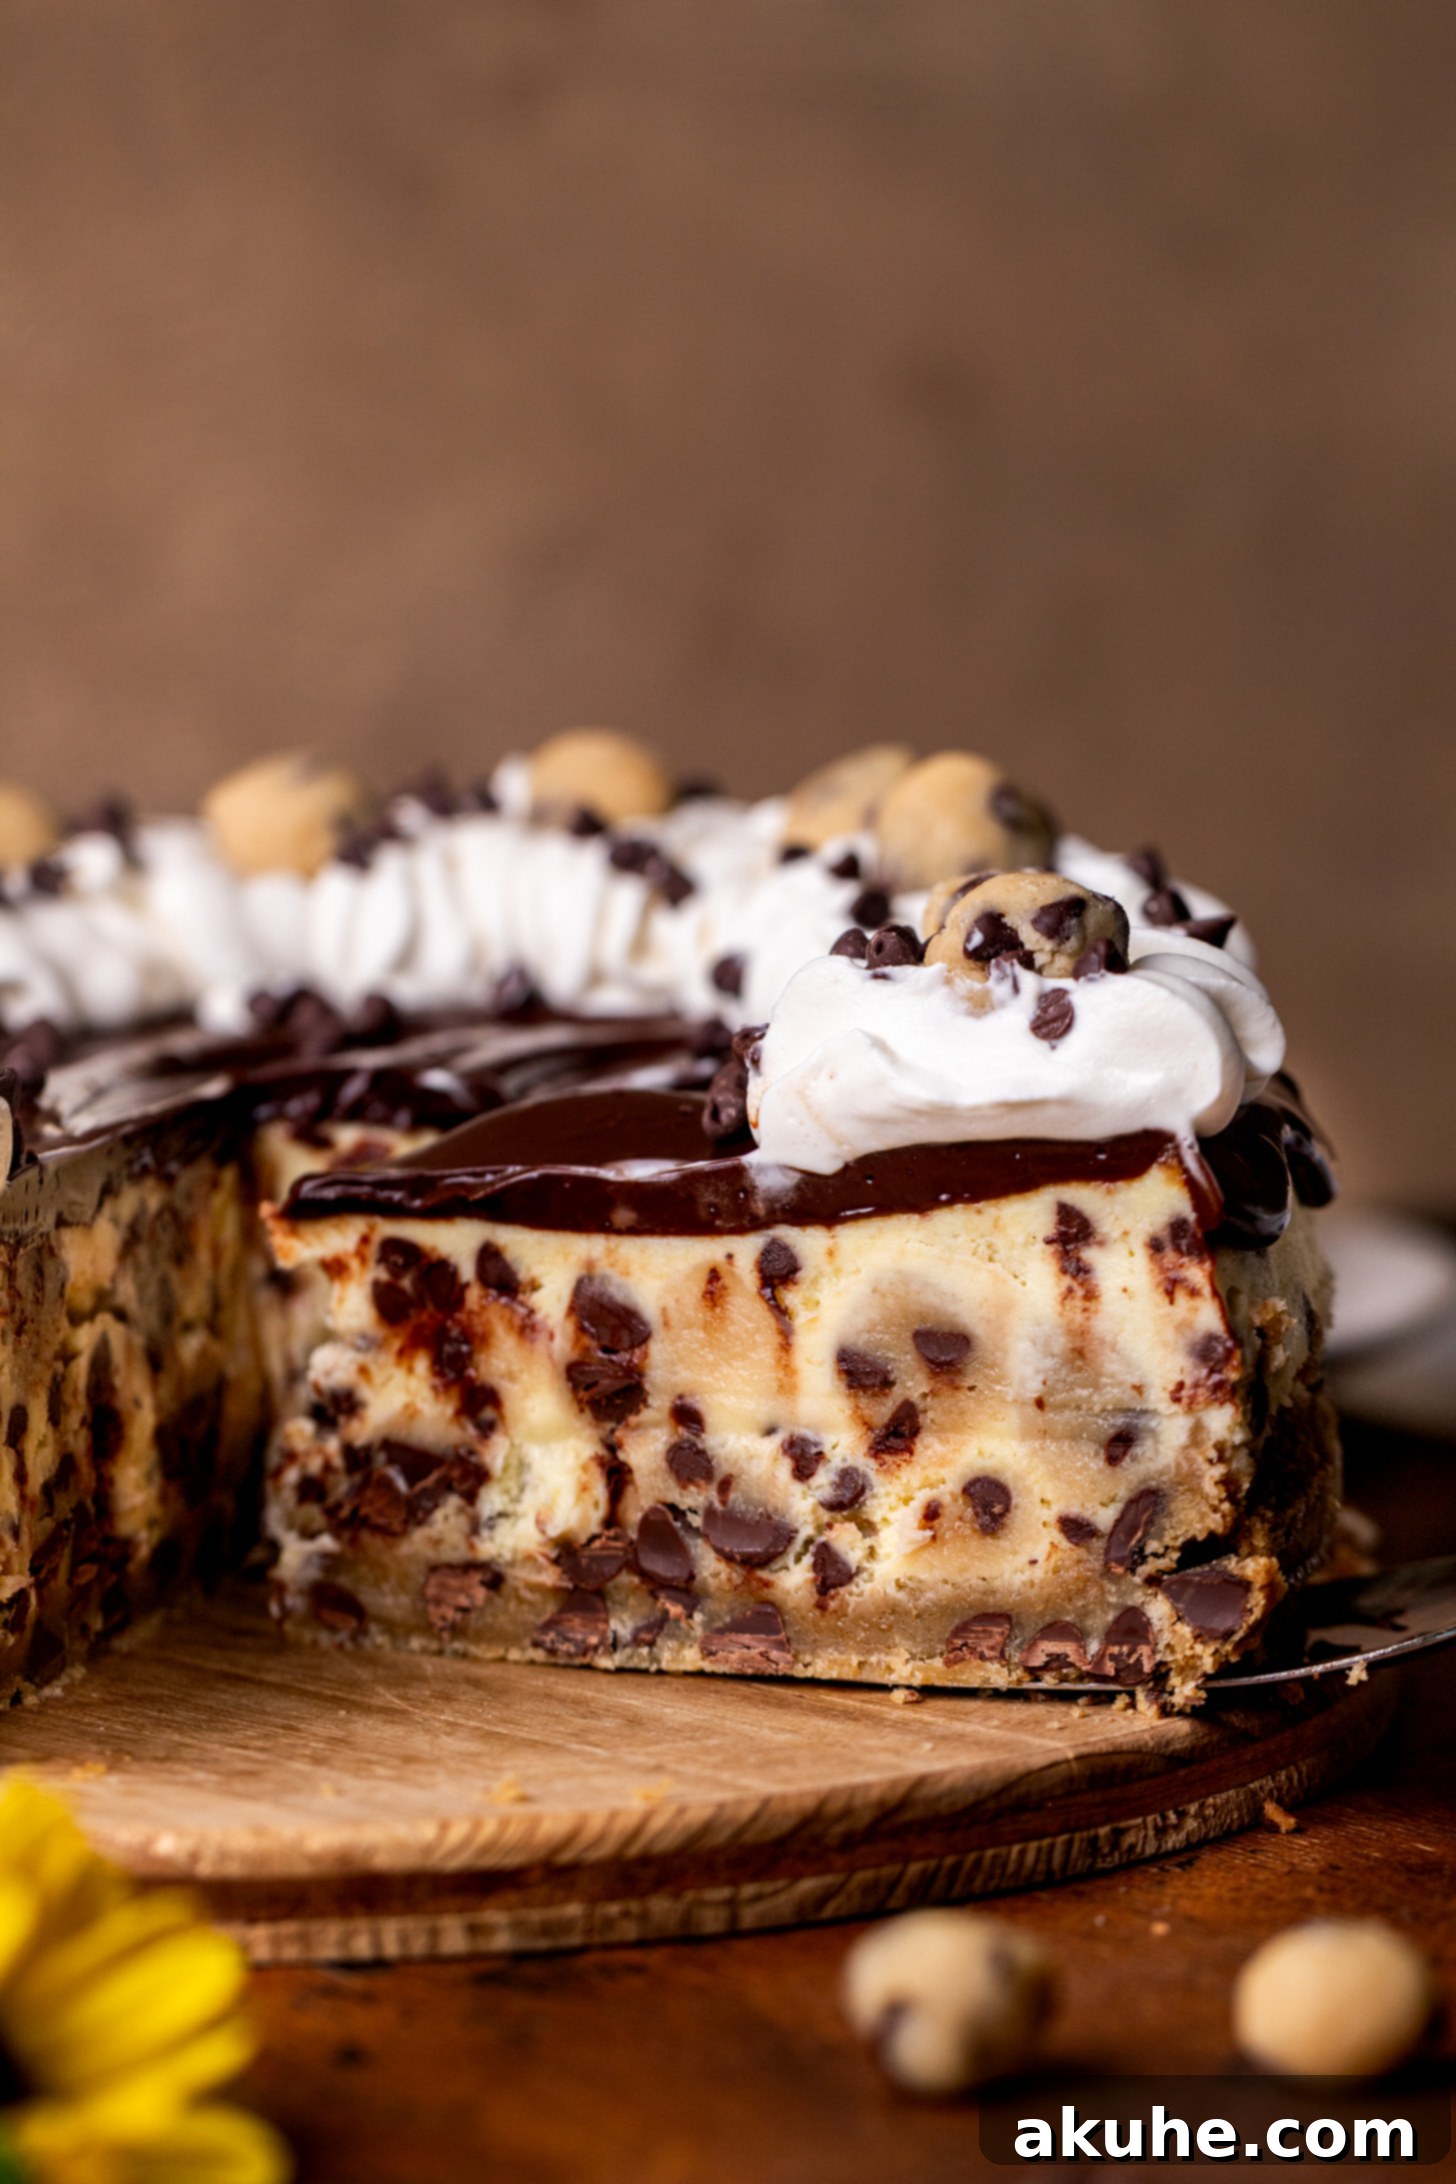
Welcome to the ultimate indulgence for every dessert aficionado: the Chocolate Chip Cookie Dough Cheesecake. This isn’t just a cheesecake; it’s a meticulously crafted masterpiece designed to thrill the palates of both cheesecake connoisseurs and devoted cookie dough lovers. Imagine a buttery, crunchy chocolate chip cookie crust forming the perfect foundation for a rich, creamy chocolate chip cheesecake filling. But the magic doesn’t stop there – nestled within the silky smooth cheesecake are delightful pockets of frozen, edible chocolate chip cookie dough, ensuring a soft, chewy surprise with every bite. The grand finale? A luscious layer of decadent chocolate ganache, crowned with swirls of fluffy whipped cream and a sprinkle of extra edible cookie dough for good measure. If you’ve been searching for a show-stopping dessert that combines two all-time favorites into one irresistible creation, your quest ends here. This recipe promises a truly unforgettable experience, delivering layer upon layer of sweet, chocolatey, and utterly satisfying bliss.
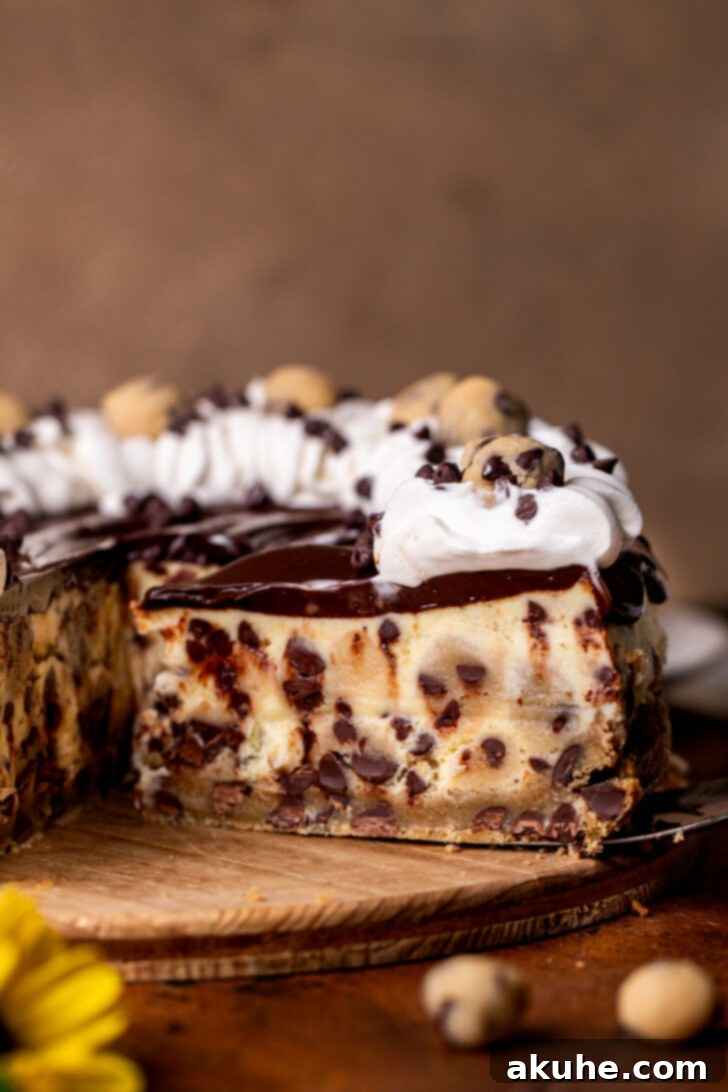
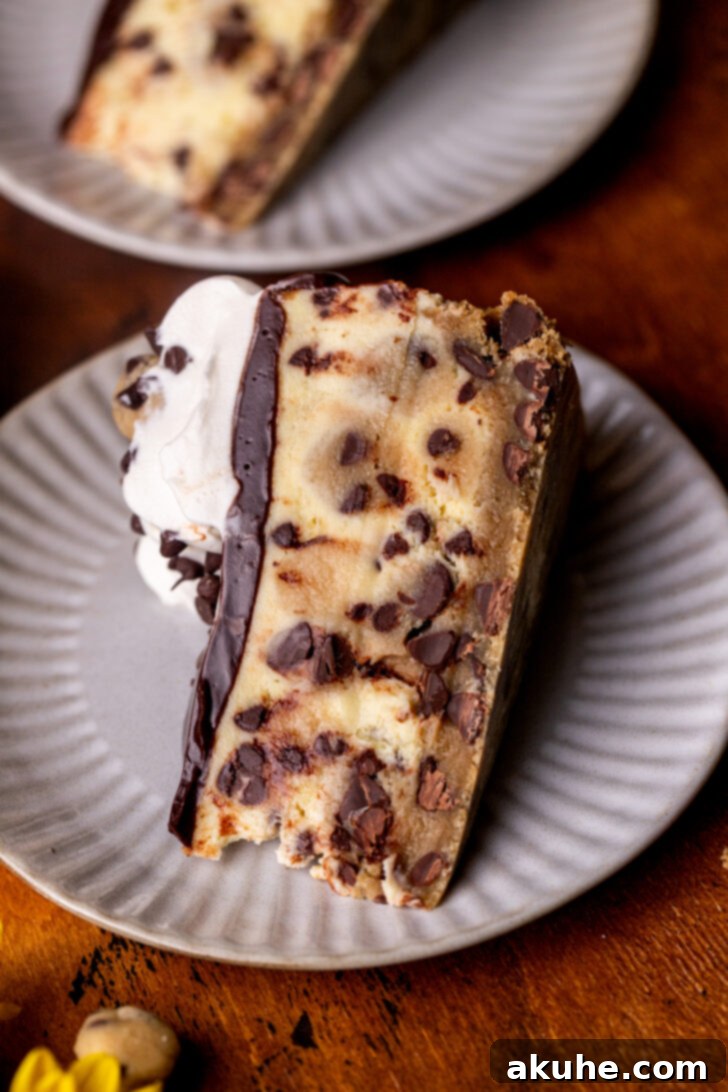
This chocolate chip cookie dough cheesecake stands out as the absolute best in its class. While the homemade chocolate chip cookie crust provides an undeniably delicious base, the true star of this dessert lies within: perfectly formed, edible cookie dough balls baked directly into the creamy cheesecake filling. The secret to their incredible texture is a crucial freezing step. By freezing the cookie dough balls before baking, they retain their delightful chewiness and distinct cookie dough form, preventing them from melting completely into the cheesecake batter. The result is an extraordinary textural contrast that will have you coming back for more. This ingenious technique ensures that each slice offers a delightful journey through velvety cheesecake and tender, unbaked cookie dough. For those eager to master the art of safe and delicious edible cookie dough, delve into our comprehensive edible cookie dough recipe, complete with invaluable tips, tricks, and step-by-step process photos to guide you. If your heart belongs to cookie dough desserts, you simply must explore our equally delightful cookie dough cheesecake bars, another fan favorite that delivers big on flavor and ease.
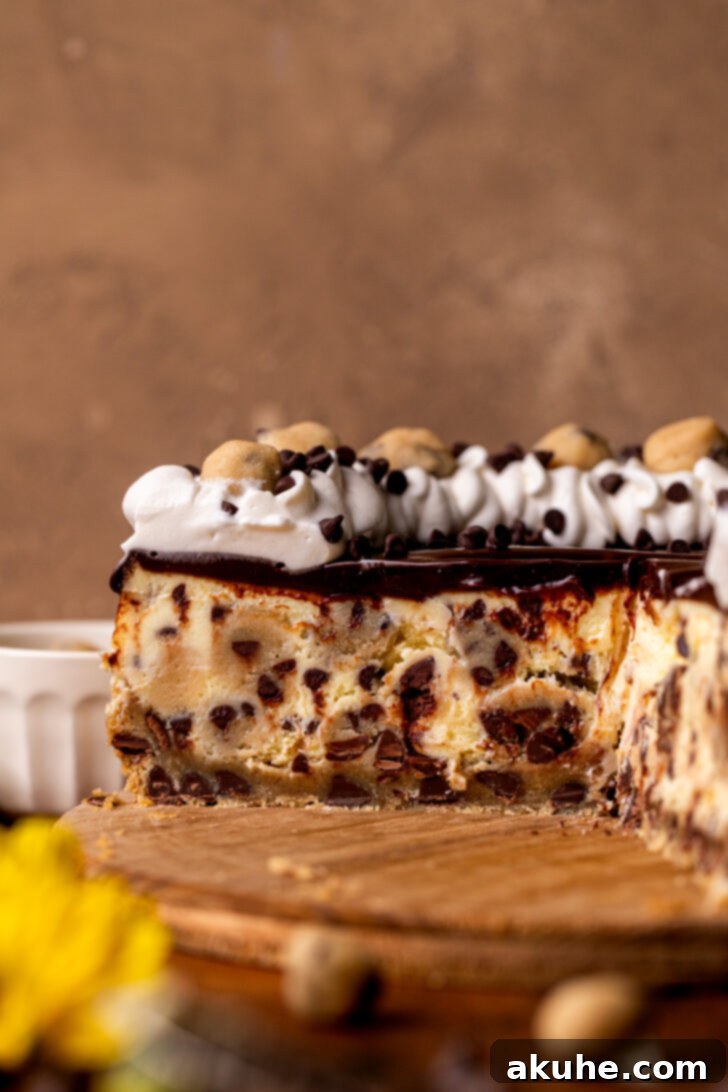
Expert Tips for Crafting the Perfect Cookie Dough Cheesecake
Achieving a bakery-quality chocolate chip cookie dough cheesecake at home is entirely within reach with these essential tips. Follow these guidelines closely to ensure your cheesecake turns out beautifully smooth, crack-free, and utterly delicious, just like the one pictured in this recipe.
- Tip 1: Precision in Flour Measurement for Crust and Cookie Dough. Accurate flour measurement is paramount for both the cookie crust and the edible cookie dough balls. The common mistake of scooping your measuring cup directly into the flour can compact it, leading to an excess of flour. This results in a dry, crumbly crust and dense, unappealing cookie dough. To avoid this, always use the “spoon and level” method: spoon flour into your measuring cup until it overflows, then use the straight edge of a knife or a flat object to level off the excess. This technique ensures you get the precise amount of flour needed for optimal texture.
- Tip 2: Prioritize the Crust Preparation. Begin your cheesecake journey by preparing the cookie crust first. The crust requires approximately 18-23 minutes of baking time, which presents a perfect window of opportunity to prepare your edible cookie dough balls. This efficient sequencing allows you to multitask and streamline your baking process, ensuring everything is ready at the right moment without feeling rushed.
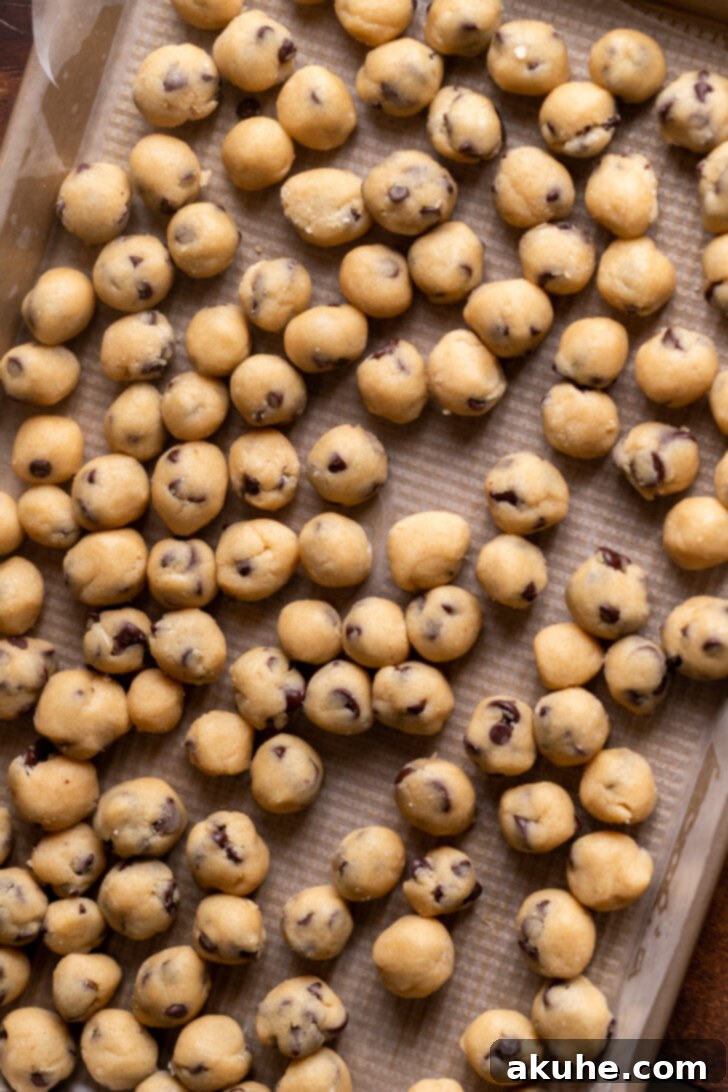
- Tip 3: Consistency in Cookie Dough Ball Size. While the recipe suggests forming cookie dough balls around 1 to 1 1/2 teaspoons in size, don’t fret over absolute uniformity. Eyeballing the size is perfectly acceptable and even adds a charming rustic quality to the finished cheesecake. The key is to aim for a relatively consistent size to ensure they bake evenly within the cheesecake and provide a balanced cookie dough experience in every forkful.
- Tip 4: Gentle Egg Incorporation for a Smooth Cheesecake. When adding eggs to your cheesecake batter, it’s crucial to mix them in at a low speed, just until they are combined. Overmixing the eggs or incorporating them at a high speed can introduce too much air into the batter. These air bubbles, while seemingly innocuous, will expand during baking, rise to the surface, and then pop as the cheesecake cools. This rapid contraction is a primary culprit behind unsightly cracks on the surface of your beautiful cheesecake. A gentle, low-speed mix ensures a dense, creamy, and crack-free texture.
- Tip 5: Ensure Room Temperature Dairy Ingredients. For both the edible cookie dough and the cheesecake filling, using room temperature cream cheese, butter, sour cream, and heavy cream is non-negotiable. Cold ingredients do not emulsify properly, leading to a lumpy batter and a less-than-silky cheesecake texture. Allow all dairy products to sit out on the counter for at least two hours before you begin baking. This will ensure they blend smoothly, creating a homogeneous and luxurious batter.
- Tip 6: Embrace the Water Bath Technique. A water bath is your best friend for achieving a perfectly smooth, evenly baked, and crack-free cheesecake. The steam from the water bath creates a moist environment in the oven, preventing the cheesecake from drying out and baking too quickly around the edges, which is a common cause of cracks. It also promotes gentle, even cooking, resulting in a wonderfully creamy texture from edge to center. We’ll detail two methods for setting up your water bath in the instructions.


Elevating Your Cheesecake: The Art of Decoration
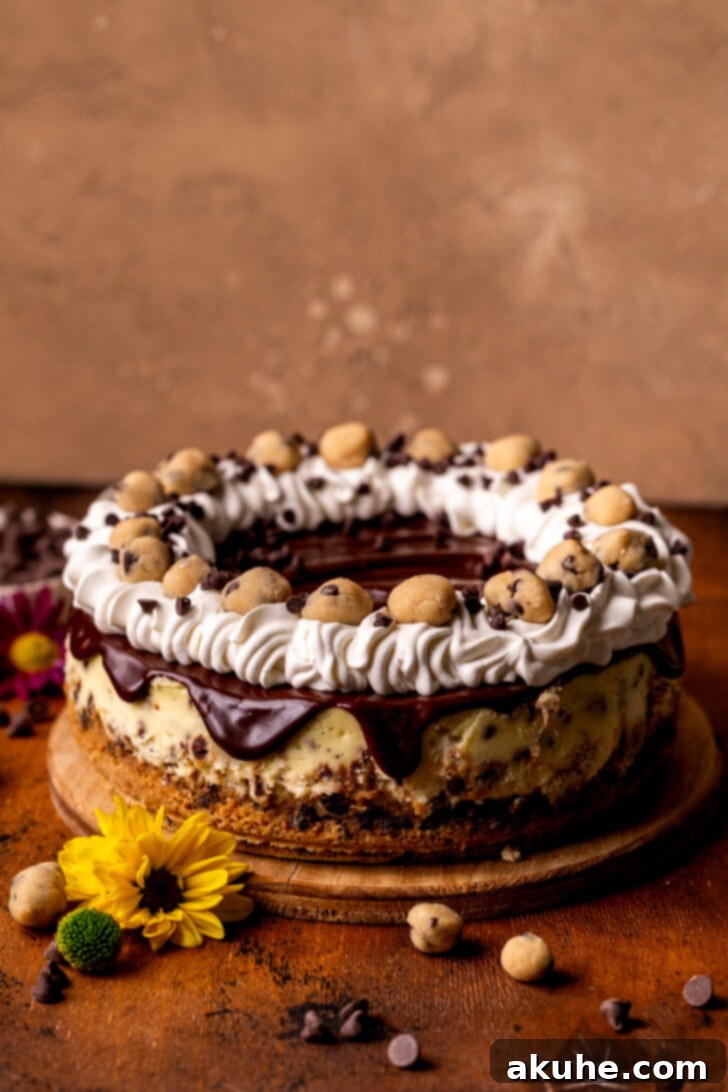
Once your chocolate chip cookie dough cheesecake has chilled to perfection, it’s time to transform it into a stunning dessert with the perfect finishing touches. The decoration not only enhances its visual appeal but also adds complementary textures and flavors, making each slice an even more delightful experience.
If you adore the comforting taste of cookie dough, don’t miss our other fantastic recipes: these chewy cookie dough cookies and the impressive cookie dough cake. Each offers a unique way to enjoy your favorite sweet treat!

If you were captivated by this recipe, please consider leaving a star review below! We love hearing from you. Don’t forget to tag us on Instagram @stephaniesweettreats with your stunning creations. For more baking inspiration and delightful dessert ideas, be sure to follow us on Pinterest.
Recipe Video Guide
Chocolate Chip Cookie Dough Cheesecake
Print Recipe
Pin Recipe
Leave a Review
Ingredients
Chocolate Chip Cookie Crust
- 1 1/4 cup All-purpose flour
- 1/2 tsp Baking soda
- 1/2 tsp Salt
- 1/2 cup Unsalted butter, room temperature
- 1/2 cup Brown sugar, packed light or dark
- 1/4 cup White granulated sugar
- 1/2 tsp Pure vanilla extract
- 1 Large egg, room temperature
- 1 cup Semi-sweet chocolate chips
Edible Cookie Dough
- 1 1/2 cup All-purpose flour, heat treated see notes
- 1/4 tsp Salt
- 1/2 cup Unsalted butter, room temperature
- 1/2 cup Brown sugar , packed light or dark
- 1/2 cup White granulated sugar
- 1 tsp Pure vanilla extract
- 3 TBSP Milk
- 1/2 cup Semi-sweet chocolate chips
- 1/2 cup Mini chocolate chips
Chocolate Chip Cheesecake
- 24 oz Cream cheese, room temperature
- 3/4 cup White granulated sugar
- 1/2 cup Sour cream, room temperature
- 1/4 cup Heavy whipping cream, room temperature
- 1 tsp Pure vanilla extract
- 3 Large eggs, room temperature
- 3/4 cup Mini chocolate chips
- 2/3 Cookie dough balls
Chocolate Ganache
- 1 cup Semi-sweet chocolate chips
- 1/2 cup Heavy whipping cream
Whipped Cream
- 1 cup Heavy whipping cream
- 2 TBSP Powdered sugar
- 1/2 tsp Pure vanilla extract
Instructions
Chocolate Chip Cookie Crust
- Preheat your oven to 350°F (175°C). Prepare a 9-inch springform pan by lightly spraying it with non-stick baking spray. Place a 9-inch parchment paper circle on the bottom of the pan and spray it again. This double-layer of spray and parchment ensures your cheesecake will release cleanly from the pan.
- In a medium bowl, sift together the all-purpose flour, baking soda, and salt. Sifting helps to eliminate lumps and ensures these dry ingredients are evenly distributed for a consistent crust texture. Set this dry mixture aside for later use.1 1/4 cup All-purpose flour, 1/2 tsp Baking soda, 1/2 tsp Salt
- Using an electric mixer (either stand or hand-held), beat the softened unsalted butter, brown sugar, and white granulated sugar together for a full 2 minutes. This creaming process is essential; the mixture should become noticeably light in color and fluffy in texture, incorporating air that will contribute to a tender crust. Next, add the pure vanilla extract and the room temperature large egg. Continue mixing just until these ingredients are fully combined, being careful not to overmix.1/2 cup Unsalted butter, 1/2 cup Brown sugar, 1/4 cup White granulated sugar, 1/2 tsp Pure vanilla extract, 1 Large egg
- Gradually add the sifted dry ingredients to the wet mixture, mixing on low speed until just combined. Once the flour mixture is incorporated, fold in the semi-sweet chocolate chips using a rubber spatula or mix briefly on very low speed until they are evenly distributed throughout the cookie dough. Be cautious not to overmix, as this can develop the gluten in the flour and result in a tough crust.1 cup Semi-sweet chocolate chips
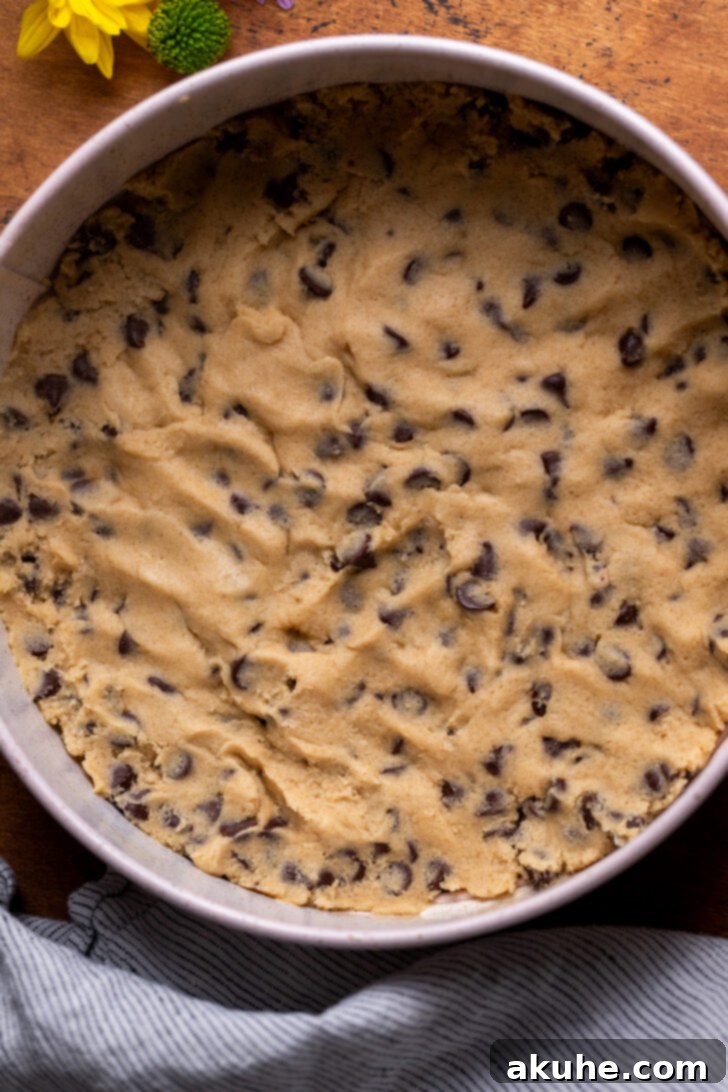
- Carefully transfer all of the prepared cookie dough into the bottom of your springform pan. Using the back of a spoon or your fingertips, firmly and evenly compact the cookie dough across the entire base of the pan. Ensure it forms a solid, flat layer without extending up the sides of the pan. This creates a sturdy and delicious crust.
- Bake the cookie crust in the preheated oven for 18-23 minutes. You’ll know it’s ready when the edges are beautifully golden brown and the center appears set. Remove the pan from the oven and place it on a wire cooling rack while you prepare the edible cookie dough.
Edible Cookie Dough
- While your cookie crust is baking and cooling, you can efficiently begin preparing the edible cookie dough. First, it’s crucial to heat treat your flour to ensure it’s safe for consumption without baking. You can do this by spreading the flour thinly on a baking sheet and baking it at 300°F (150°C) for about 5-7 minutes, or until it reaches 160°F (71°C) as measured by an instant-read thermometer. Alternatively, microwave the flour in a microwave-safe bowl on high for 1 minute and 15 seconds, stirring after 45 seconds. Let it cool completely. Once cooled, in a medium bowl, sift the heat-treated flour and salt together. Set this mixture aside.1 1/2 cup All-purpose flour, 1/4 tsp Salt
- Using an electric mixer, beat the room temperature unsalted butter, brown sugar, and white granulated sugar together on medium speed for 2 minutes. Just like with the crust, this step creates a light and fluffy base. Incorporate the pure vanilla extract and milk, mixing until they are fully combined and the mixture is smooth.1/2 cup Unsalted butter, 1/2 cup Brown sugar, 1/2 cup White granulated sugar, 1 tsp Pure vanilla extract, 3 TBSP Milk
- Slowly add the cooled, heat-treated dry ingredients into the wet mixture, mixing on low speed until just combined. Once incorporated, use a rubber spatula to scrape down the sides of the bowl, ensuring all ingredients are well mixed. Then, gently fold in both the semi-sweet chocolate chips and the mini chocolate chips until they are evenly distributed throughout the edible cookie dough.1/2 cup Semi-sweet chocolate chips, 1/2 cup Mini chocolate chips
- Line a baking sheet with parchment paper. Take small portions of the edible cookie dough, roughly 1 to 1 1/2 teaspoons each, and roll them into neat balls between your palms. The size can range from that of a chickpea to a large blueberry – aim for consistency but don’t obsess over perfection. This recipe will yield a generous amount of cookie dough balls, ensuring plenty for both baking into the cheesecake and for decoration.
- Place the baking sheet with the formed cookie dough balls into the freezer. Freeze them for at least 15 minutes, or until they are very firm. This crucial freezing step prevents the cookie dough from melting and losing its shape within the warm cheesecake batter during baking, preserving those delightful pockets of chewy cookie dough.
Chocolate Chip Cheesecake
- Once your cookie crust has finished baking and has slightly cooled on a wire rack, it’s time to prepare the luscious cheesecake batter. Lower your oven temperature to 325°F (160°C). This lower temperature is key for a slow, even bake, minimizing the risk of cracks.
- Using an electric mixer, beat the room temperature cream cheese on high speed for 1 minute until it is completely smooth and fluffy. Stop the mixer and scrape down the sides and bottom of the bowl thoroughly to ensure no lumps remain. Next, add the white granulated sugar and beat again on high speed for another minute. Scrape the bowl once more. It’s essential at this stage to have a perfectly smooth cream cheese base, free of any chunks, to achieve the signature velvety cheesecake texture.24 oz Cream cheese, 3/4 cup White granulated sugar
- Now, add the pure vanilla extract, room temperature sour cream, and room temperature heavy whipping cream to the cream cheese mixture. Begin mixing on low speed until these ingredients are just combined. Then, increase the speed to medium-high and beat for an additional 30 seconds. The batter should now be wonderfully creamy and perfectly smooth. Again, stop and scrape down the bowl to catch any missed spots. If you notice any small cream cheese chunks, beat for another 30 seconds until completely smooth.1/2 cup Sour cream, 1/4 cup Heavy whipping cream, 1 tsp Pure vanilla extract
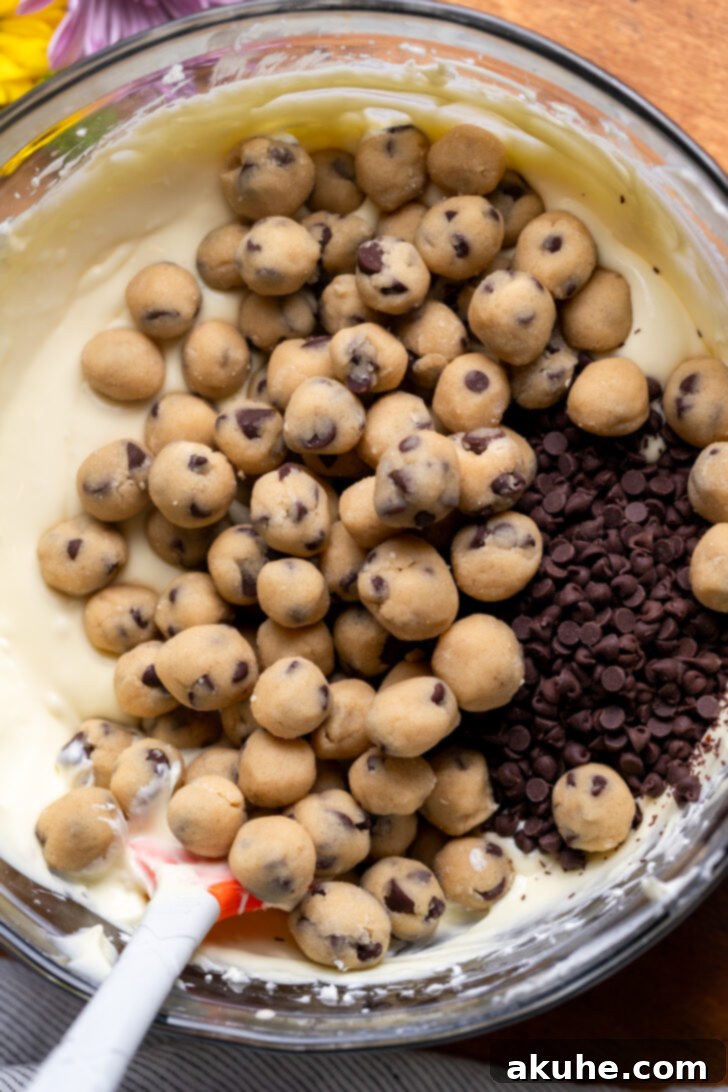
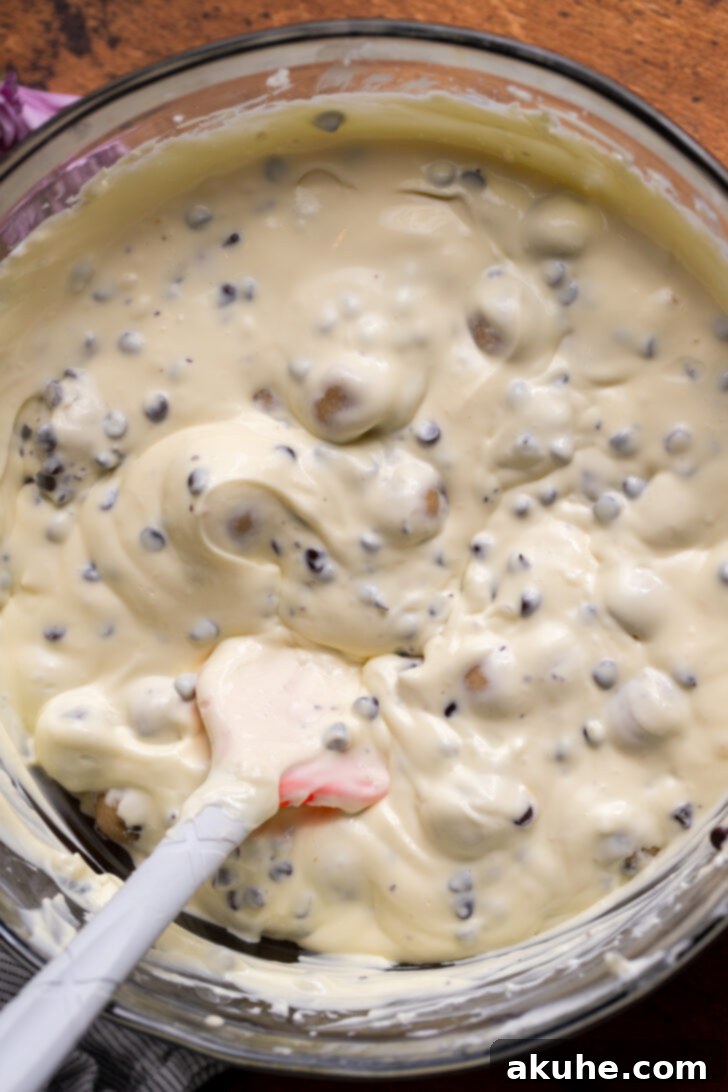
- Crucially, add the large eggs one at a time, mixing on the lowest speed of your mixer just until each egg is barely incorporated. Overmixing eggs at this stage introduces excess air, which can lead to cracks in your cheesecake. After all eggs are added, scrape the bowl one final time and mix for a mere 10 seconds to ensure everything is just combined. Finally, gently fold in the mini chocolate chips and approximately two-thirds of your frozen cookie dough balls using a rubber spatula. The frozen state of the cookie dough is key here, as it will help them retain their delightful shape and chewiness during baking, rather than melting completely into the cheesecake.3/4 cup Mini chocolate chips, 2/3 Cookie dough balls, 3 Large eggs
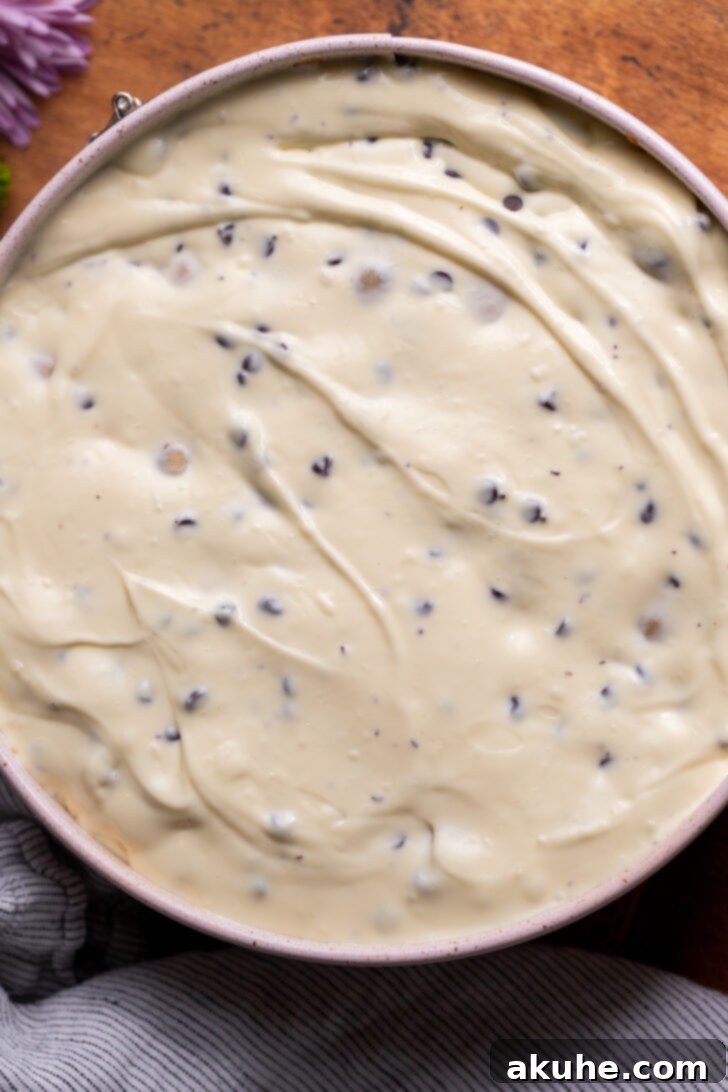
- Now, prepare your water bath, which is essential for a perfectly baked, crack-free cheesecake. You will need hot steaming water and a large roasting pan. Choose one of these two methods:
Method 1 (My Favorite): Place your 9-inch springform pan (containing the crust and batter) inside a larger 10-inch cake pan. Then, carefully place the 10-inch cake pan into the roasting pan. Fill the roasting pan with hot water, allowing it to come about halfway up the sides of the 10-inch cake pan. This method provides an extra layer of protection against water seeping into your springform pan.
Method 2: Double-wrap the bottom and sides of your springform pan tightly with heavy-duty aluminum foil to prevent any water from seeping in. Then, place the foil-wrapped springform pan directly into the roasting pan. Fill the roasting pan with hot water, ensuring it comes about halfway up the sides of the springform pan. - Carefully transfer the roasting pan with the cheesecake and water bath into the preheated 325°F (160°C) oven. Bake for 75-90 minutes. The cheesecake is done when the edges appear lightly golden brown and are set, but the very center still has a slight, gentle jiggle when the pan is lightly tapped. This jiggle indicates a perfectly creamy texture. Once baked, turn off the oven, prop the oven door open slightly, and allow the cheesecake to cool slowly inside the oven for 30 minutes. This gradual cooling prevents sudden temperature changes that can cause cracks.
- After the 30-minute cooling period in the oven, carefully remove the cheesecake from the water bath and transfer it to a wire cooling rack. Allow the cheesecake to cool completely at room temperature. Once entirely cool, wrap the springform pan tightly in aluminum foil and refrigerate for at least 6 hours, or ideally, overnight. Chilling is crucial for the cheesecake to fully set, develop its rich flavor, and achieve that perfect, firm slicing consistency.
Chocolate Ganache
- Once your cheesecake is thoroughly chilled, gently unlatch and remove the sides of the springform pan. Carefully peel off the parchment circle from the bottom of the cheesecake. Place the cheesecake on your desired serving platter. Pour the semi-sweet chocolate chips into a small, heatproof bowl. Take the remaining edible cookie dough balls out of the freezer and let them sit on the counter for a few minutes to soften slightly.1 cup Semi-sweet chocolate chips
- In a small saucepan, gently heat the heavy whipping cream over medium-low heat until it is hot and steaming, just before it boils. Immediately remove the saucepan from the heat and pour the hot cream directly over the chocolate chips in the bowl. Let it sit undisturbed for 1 minute and 30 seconds. This allows the heat from the cream to melt the chocolate chips. After this resting period, use a rubber spatula to slowly stir the mixture from the center outwards until the ganache is completely smooth, glossy, and silky.1/2 cup Heavy whipping cream
- If, after stirring, there are still a few stubborn chocolate chunks remaining, you can gently heat the ganache in the microwave in 10-second intervals, stirring well after each interval, until it is fully melted and smooth. Be extremely careful not to overheat the chocolate, as it can seize. If the ganache becomes too hot or thick, allow it to cool and thin slightly at room temperature for about 5 minutes before applying it to the cheesecake.
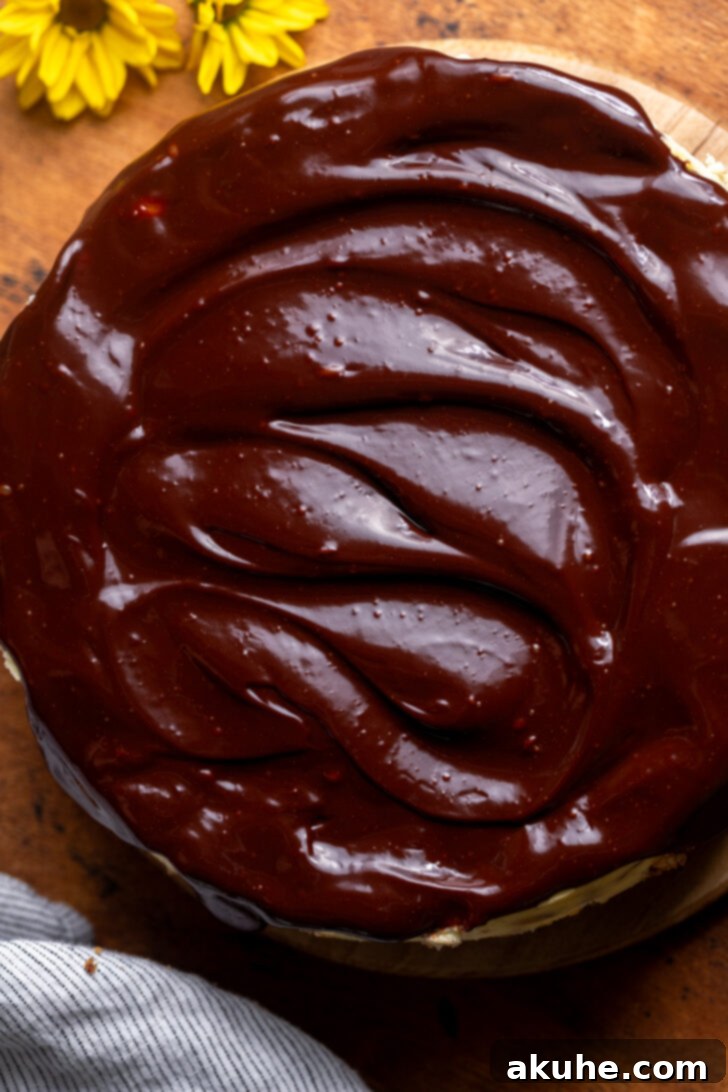
- Pour the prepared chocolate ganache directly onto the center of your chilled cheesecake. Using an icing spatula or the back of a spoon, gently and evenly spread the ganache across the top surface, creating a beautiful, smooth layer right to the edges.
- Once the ganache is spread, carefully place the cheesecake back into the refrigerator or freezer for about 10 minutes. This quick chill will help the ganache set slightly, making it firm enough for the next decorative layer.
Whipped Cream
- While the ganache is setting, prepare for your whipped cream. Place a metal mixing bowl and your whisk attachment (if using a stand mixer) into the freezer for 10 minutes. A chilled bowl and whisk are essential for achieving perfectly stable, fluffy whipped cream.
- Remove the chilled bowl and whisk from the freezer. Pour the cold heavy whipping cream into the bowl, then add the powdered sugar and pure vanilla extract. Using an electric mixer, beat the mixture on high speed until stiff peaks form. The whipped cream should hold its shape firmly when the whisk is lifted. Be careful not to overbeat, as it can quickly turn into butter.1 cup Heavy whipping cream, 2 TBSP Powdered sugar, 1/2 tsp Pure vanilla extract
- Transfer the whipped cream to a piping bag fitted with your desired tip (a Wilton 1M star tip creates beautiful swirls). Pipe decorative swirls or dollops of whipped cream around the edge of the cheesecake, or as desired. Artfully arrange the remaining edible cookie dough balls on top of the whipped cream and sprinkle with a few extra mini chocolate chips for a truly irresistible finish. Slice and serve!
Notes
Flour Measurement: Always use the “spoon and level” method when measuring flour. Do not scoop flour directly with your measuring cup, as this can compact the flour and lead to an inaccurate measurement, resulting in a dry crust or dense cookie dough.
Room Temperature Ingredients: For both the edible cookie dough and the chocolate chip cheesecake batter, ensure all dairy ingredients (butter, cream cheese, sour cream, heavy cream, and eggs) are at room temperature. Take them out of the refrigerator at least 2 hours before you plan to start baking. Room temperature ingredients blend much more smoothly, creating a homogeneous batter and a superior texture in the finished product.
Make Ahead: This cheesecake is an excellent dessert to prepare in advance. For the best flavor and texture, make this cheesecake at least 1 day before you plan to serve it. This extended chilling time allows all the flavors to meld beautifully and the cheesecake to set perfectly firm, making for cleaner slices and an enhanced eating experience.
Storage: Store any leftover cheesecake slices or the entire cheesecake covered tightly with plastic wrap in the refrigerator for up to 3-4 days. For longer storage, slices can be individually wrapped and frozen for up to 1 month. Thaw in the refrigerator before serving.
Heat Treating Flour for Edible Dough: As mentioned in the recipe, heat treating the flour for the edible cookie dough is essential for food safety. Raw flour can contain bacteria, so don’t skip this step!
