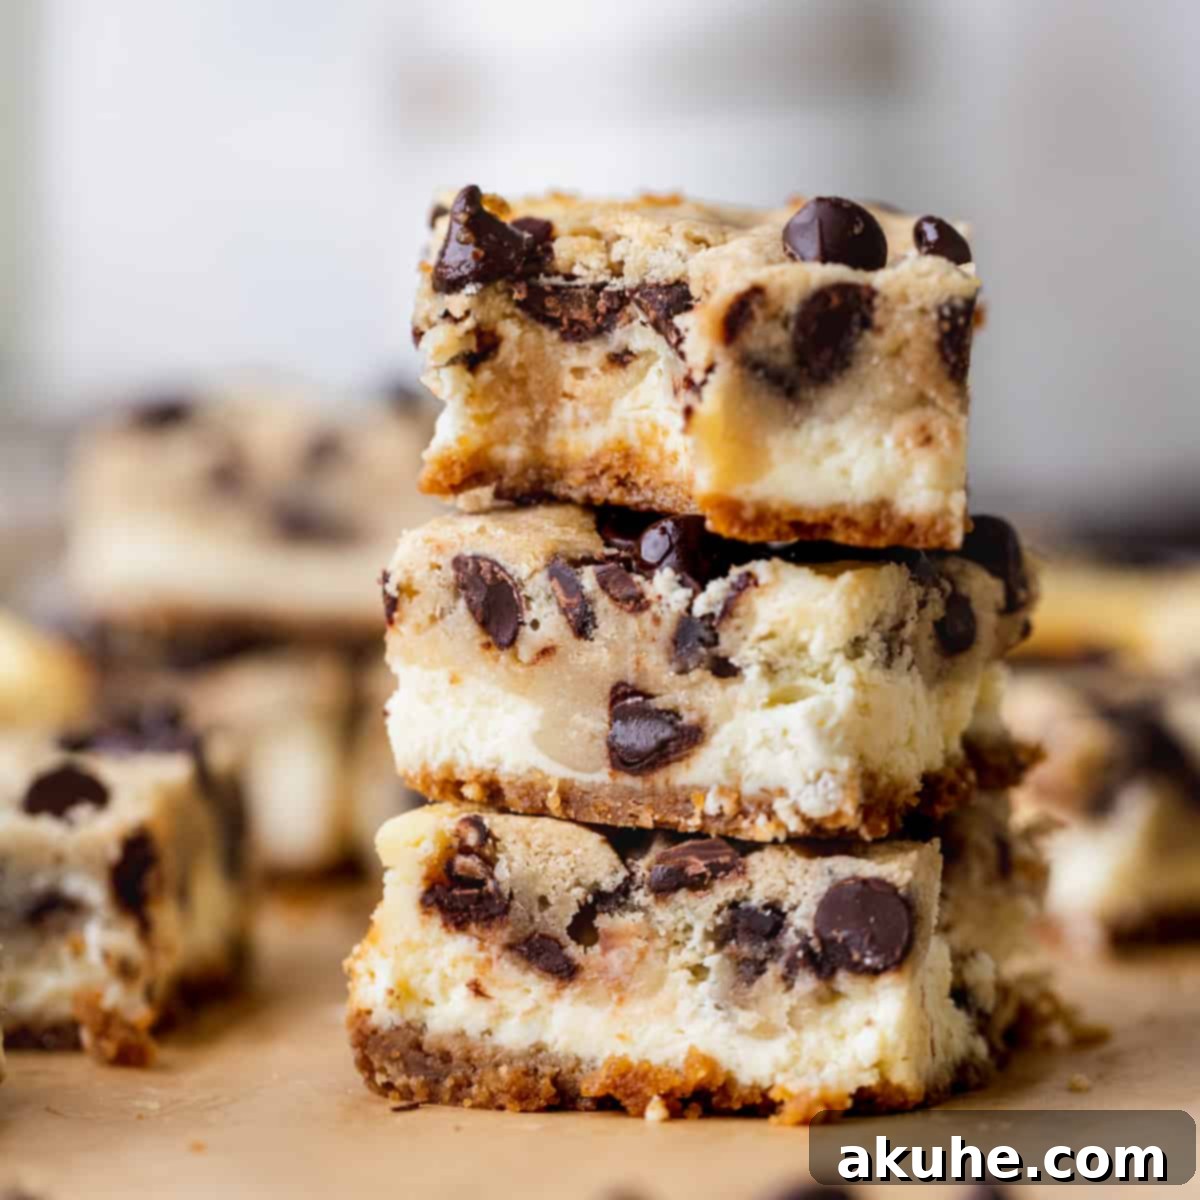
Irresistible Cookie Dough Cheesecake Bars: The Ultimate Dessert Fusion
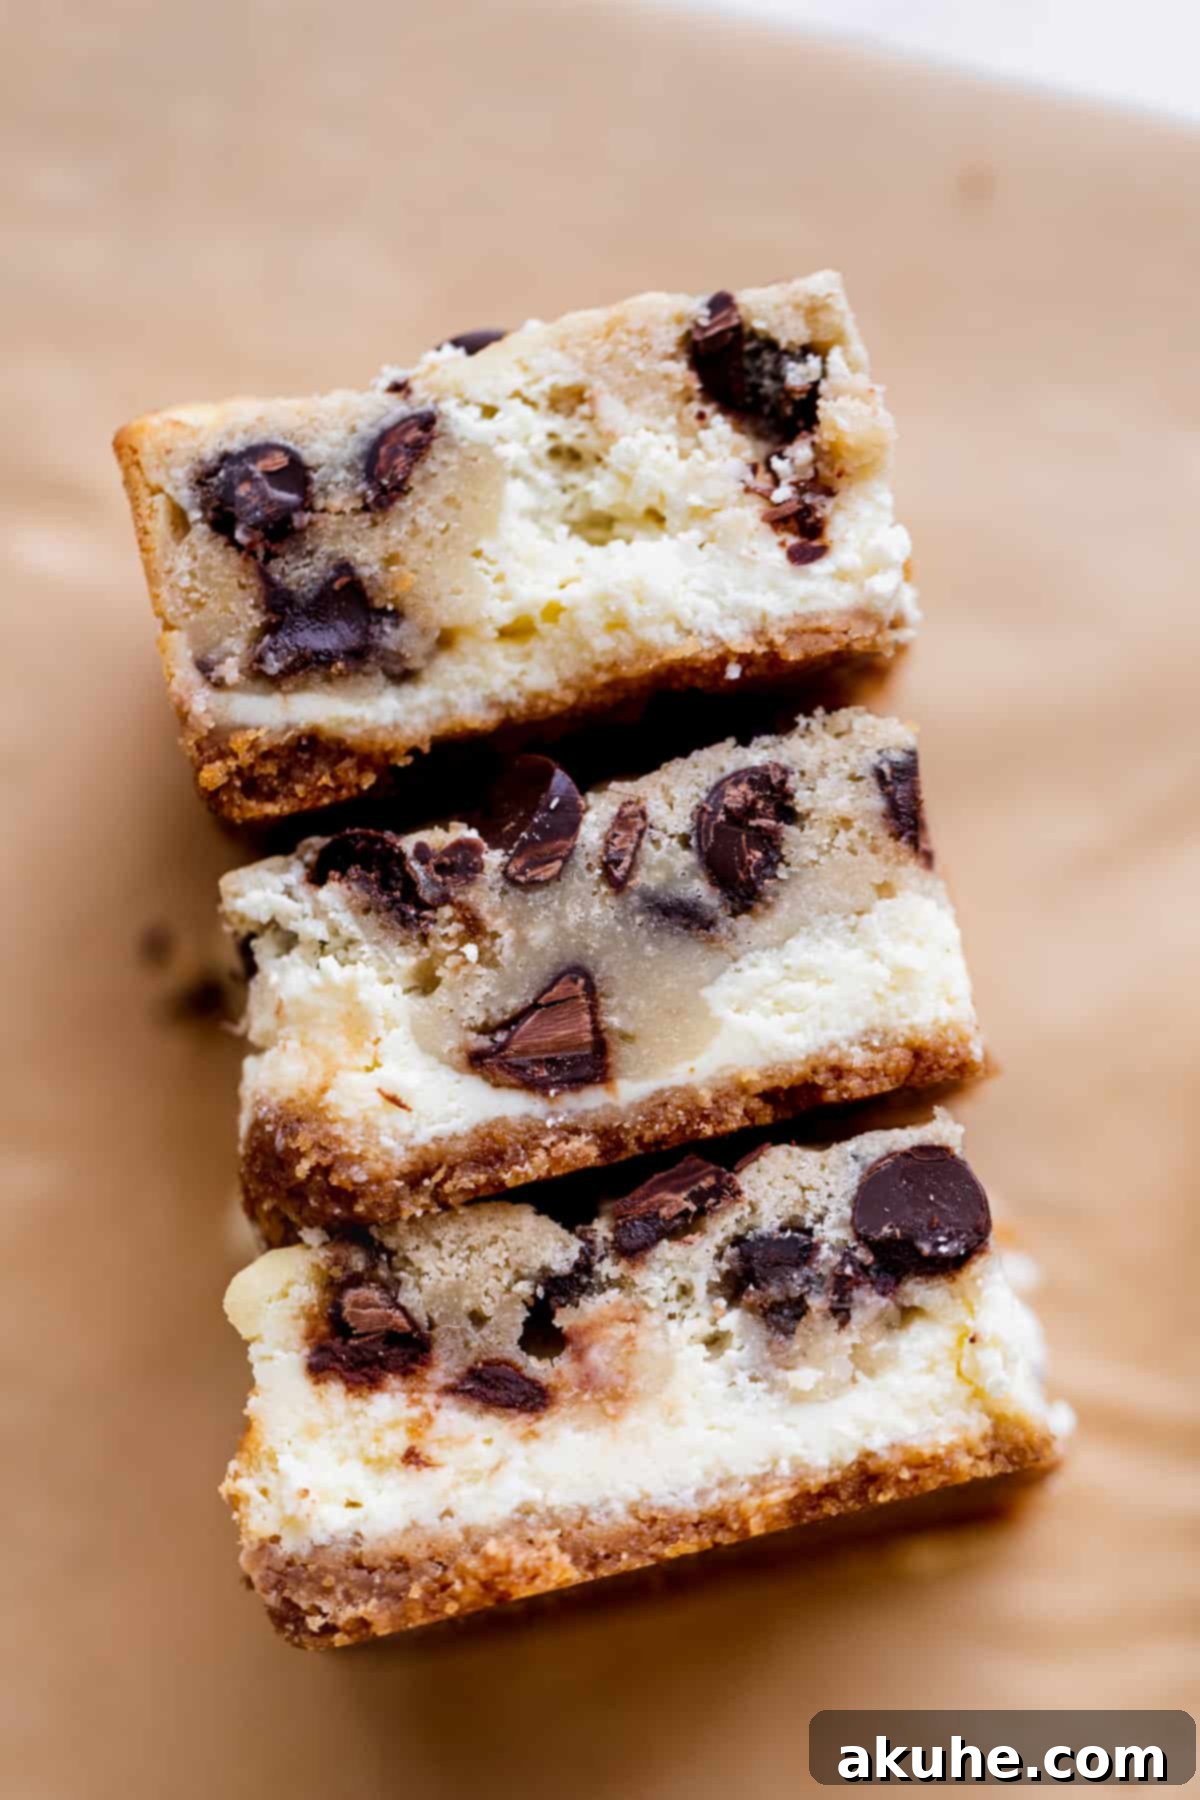
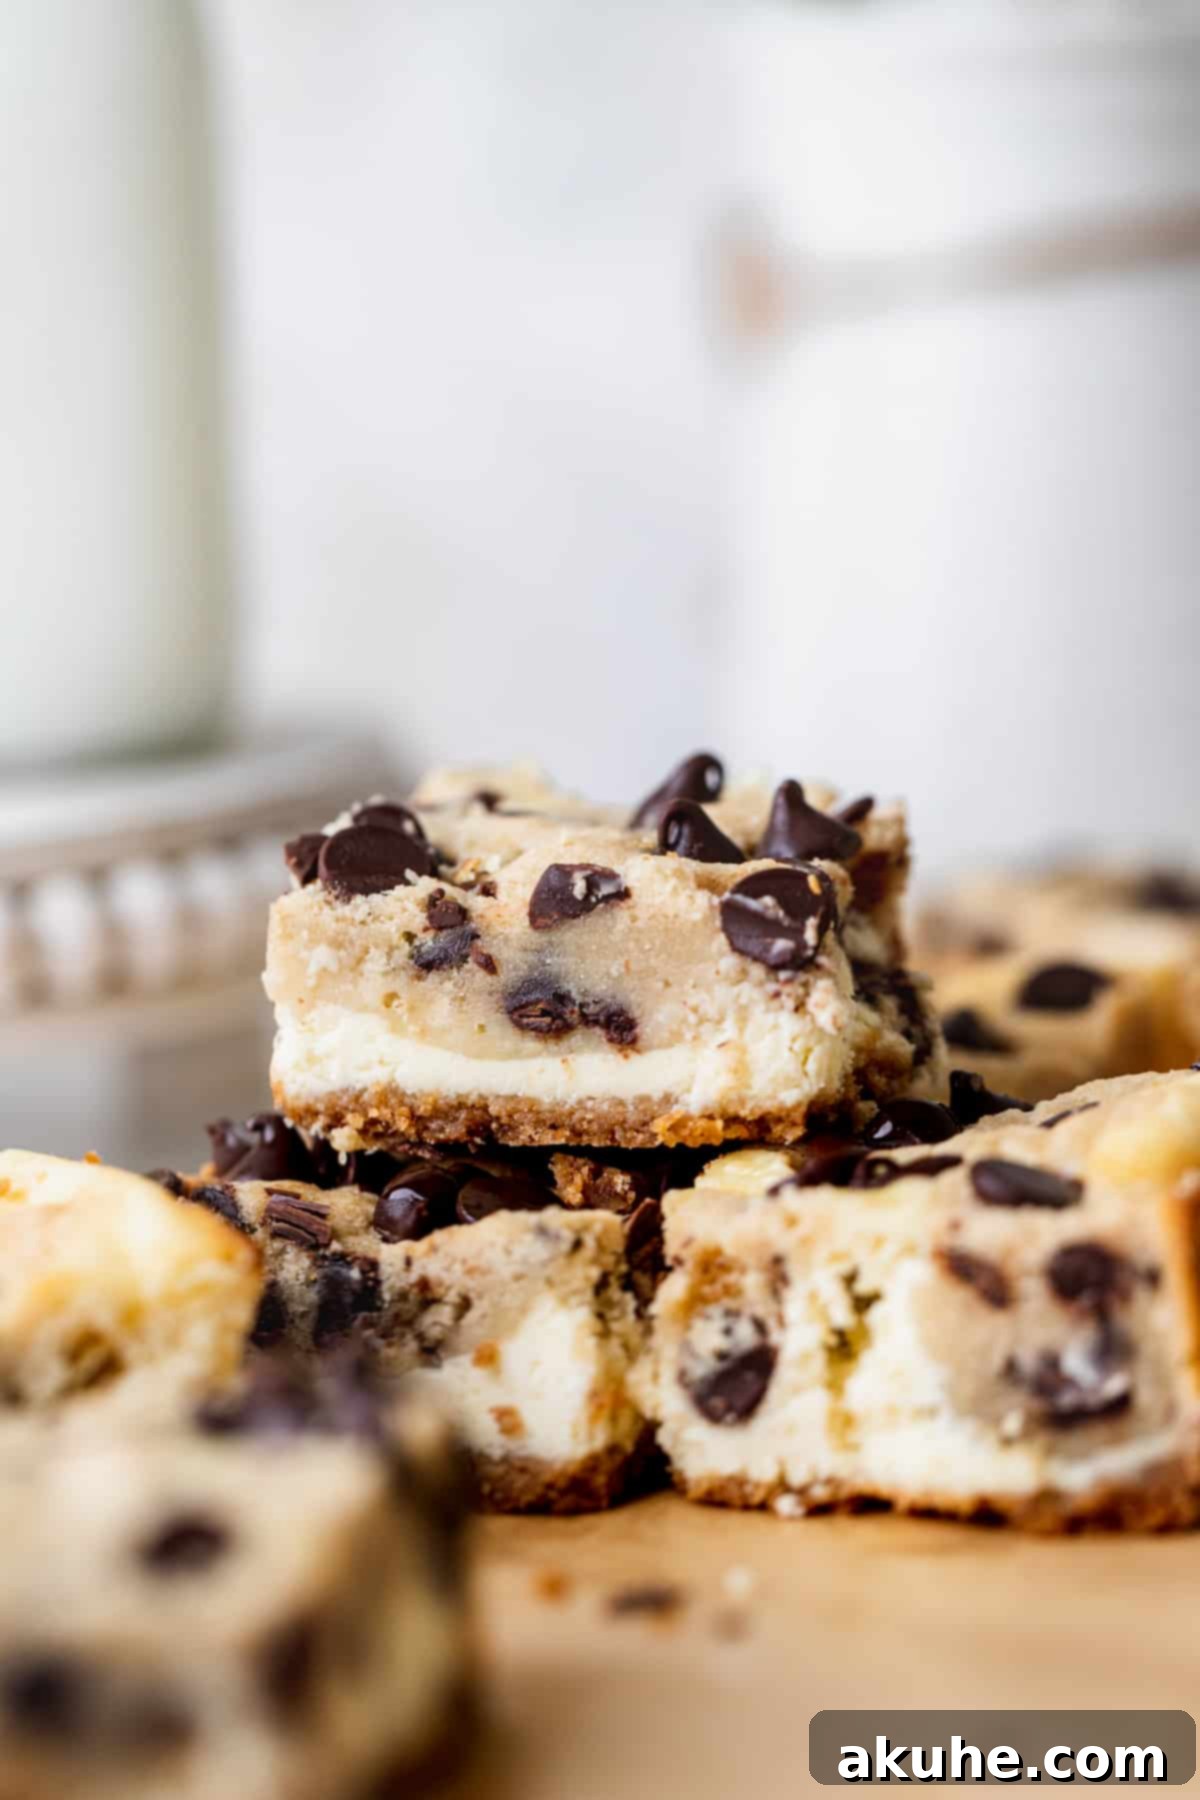
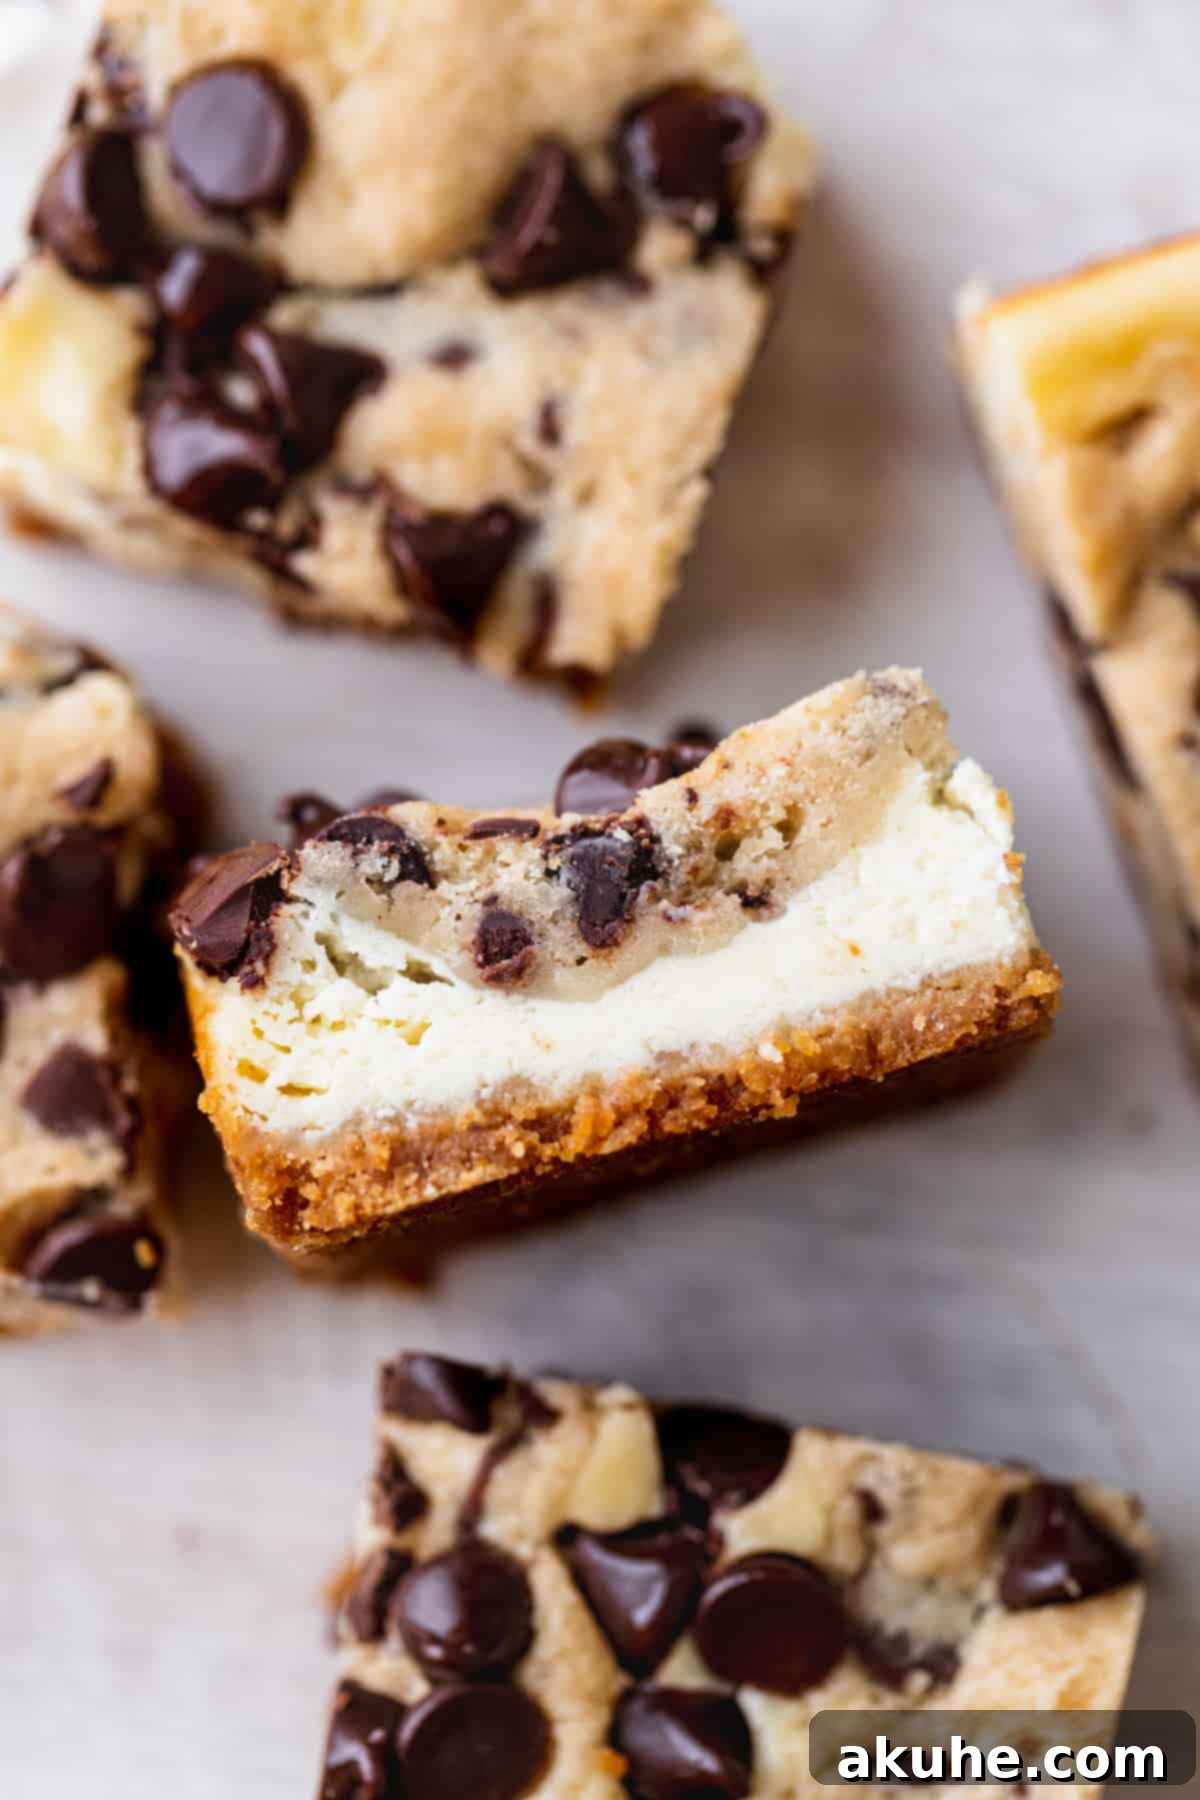
Prepare to tantalize your taste buds with these extraordinary Cookie Dough Cheesecake Bars. This dessert masterpiece seamlessly merges the chewy, comforting goodness of chocolate chip cookie dough with the rich, creamy decadence of baked cheesecake, all resting on a perfectly crisp graham cracker crust. What makes these bars truly magical is how the chocolate chip cookie layer bakes to a golden perfection on top, yet retains that gloriously soft, dough-like texture in the middle. It’s an innovative twist that delivers the best of both worlds in every single bite, creating an unforgettable experience for any dessert lover.
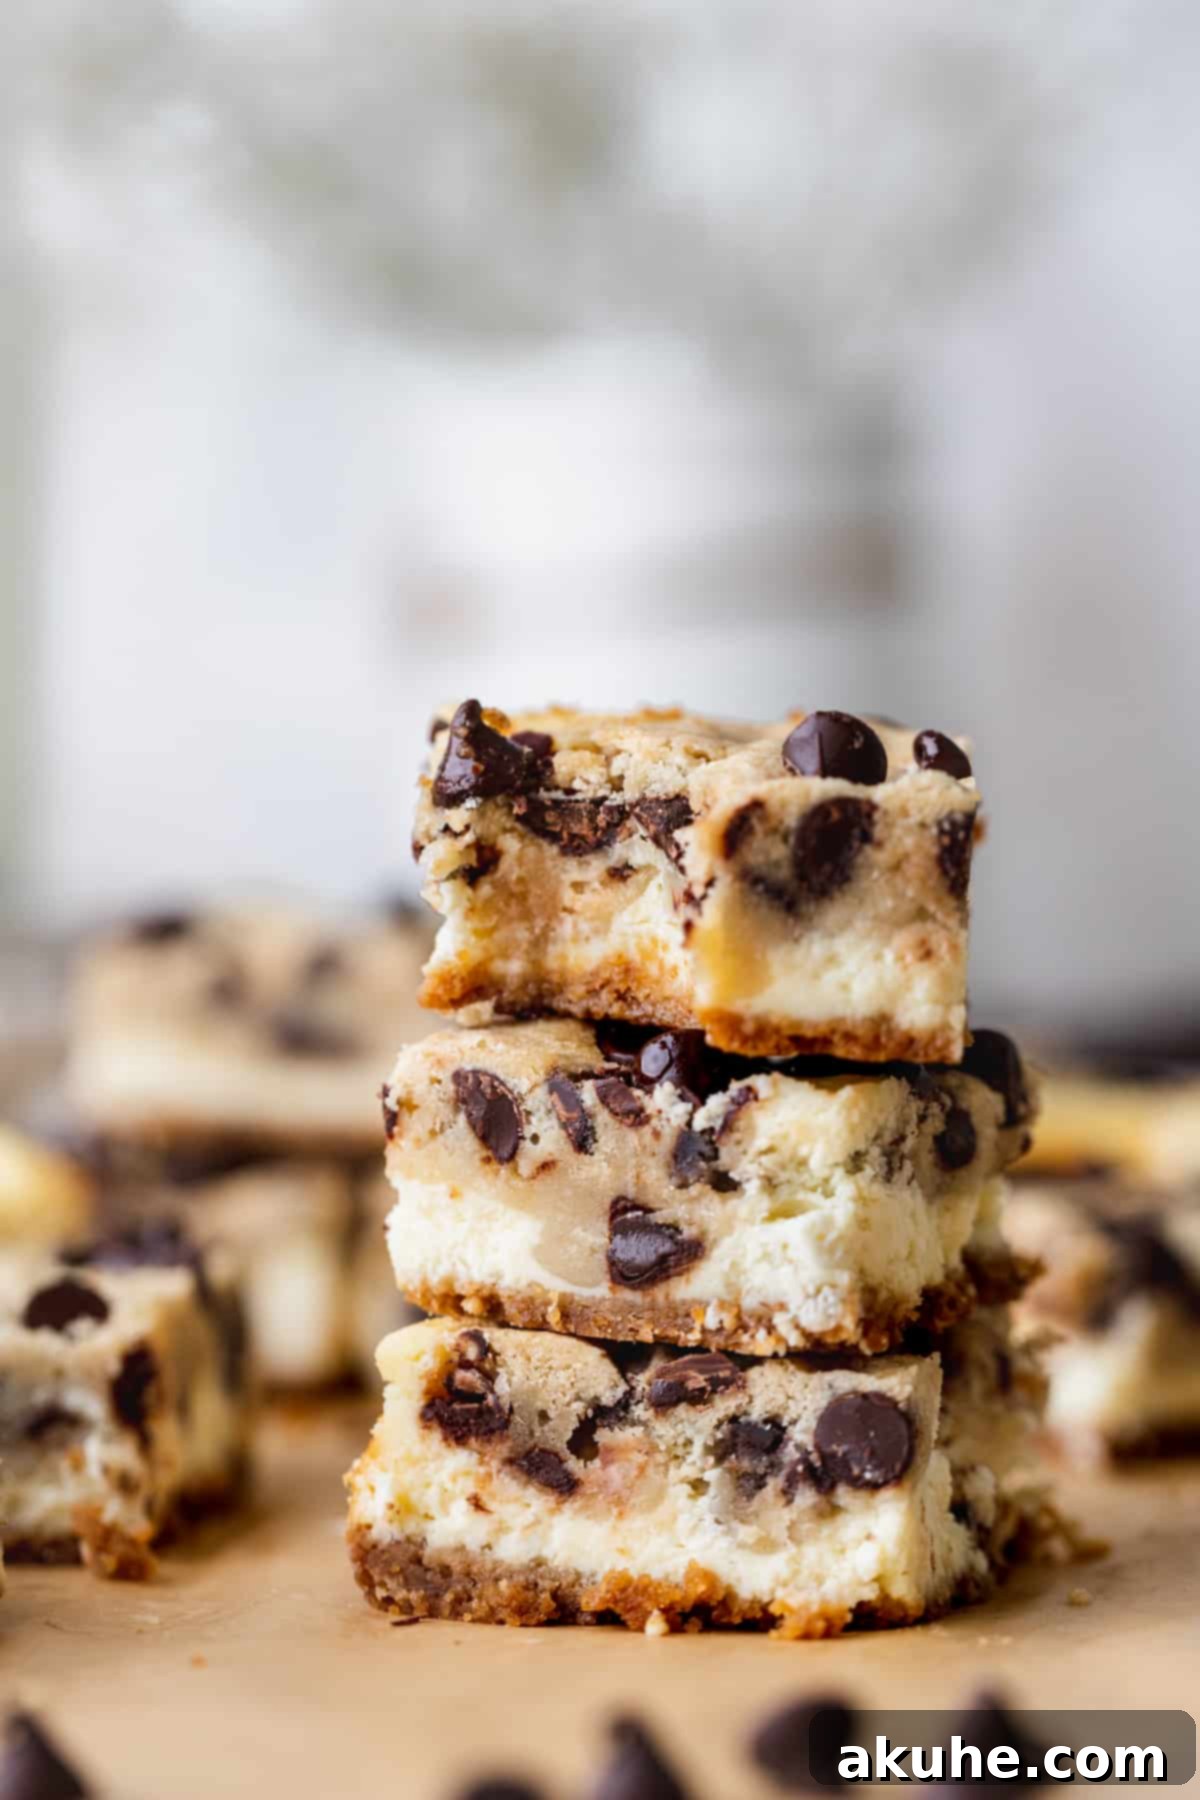
It’s no exaggeration to say these chocolate chip cookie dough cheesecake bars have become a legend in my kitchen. My husband, a self-proclaimed dessert connoisseur, declares them his absolute favorite among all the sweet treats I’ve ever created – and that’s saying something, as I’m constantly experimenting with new recipes! He particularly adores the harmonious blend of the tangy, velvety cheesecake and the sweet, buttery cookie dough that comes together in each decadent mouthful. There truly is no better duo than the classic comfort of cookie dough and the sophisticated richness of cheesecake. This recipe takes convenience to the next level by transforming two beloved desserts into a portable, easy-to-serve bar format.
If you find yourself utterly captivated by the allure of cookie dough, we have even more delightful recipes to satisfy your cravings. Dive into the world of irresistible cookie dough cupcakes, indulge in a grand slice of decadent cookie dough cake, or explore another variation of pure bliss with our classic chocolate chip cookie dough cheesecake. Each offers a unique way to enjoy that beloved unbaked flavor in a baked creation.
Why You Will Absolutely Love These Cookie Dough Cheesecake Bars
These cookie dough cheesecake bars aren’t just another dessert; they’re a revelation. Here’s why this recipe is destined to become a staple in your baking repertoire:
- Effortlessly Simple Bar Format: Forget the complexities often associated with traditional cheesecakes that demand water baths and meticulous care. These bars are designed for ease, eliminating the need for a fussy water bath while still achieving a creamy, dreamy texture. This means less stress, less cleanup, and more time enjoying your delicious creation. Their convenient bar shape also makes them perfect for serving at parties and gatherings.
- Perfectly Buttery Graham Cracker Crust: The foundation of these bars is a homemade graham cracker crust, buttery, gently sweet, and perfectly crumbly. It provides a delightful texture contrast to the creamy cheesecake and chewy cookie dough, elevating every bite. Its gentle sweetness complements the other layers without overpowering them, offering a classic base that everyone loves.
- Velvety Smooth Cheesecake Filling: Prepare for an incredibly light and fluffy cheesecake layer that practically melts in your mouth. Made with full-fat dairy ingredients, it delivers a rich, tangy flavor that beautifully cuts through the sweetness of the cookie dough, creating a balanced and harmonious dessert experience. The no-water-bath method ensures a fuss-free, yet perfectly creamy, result every time.
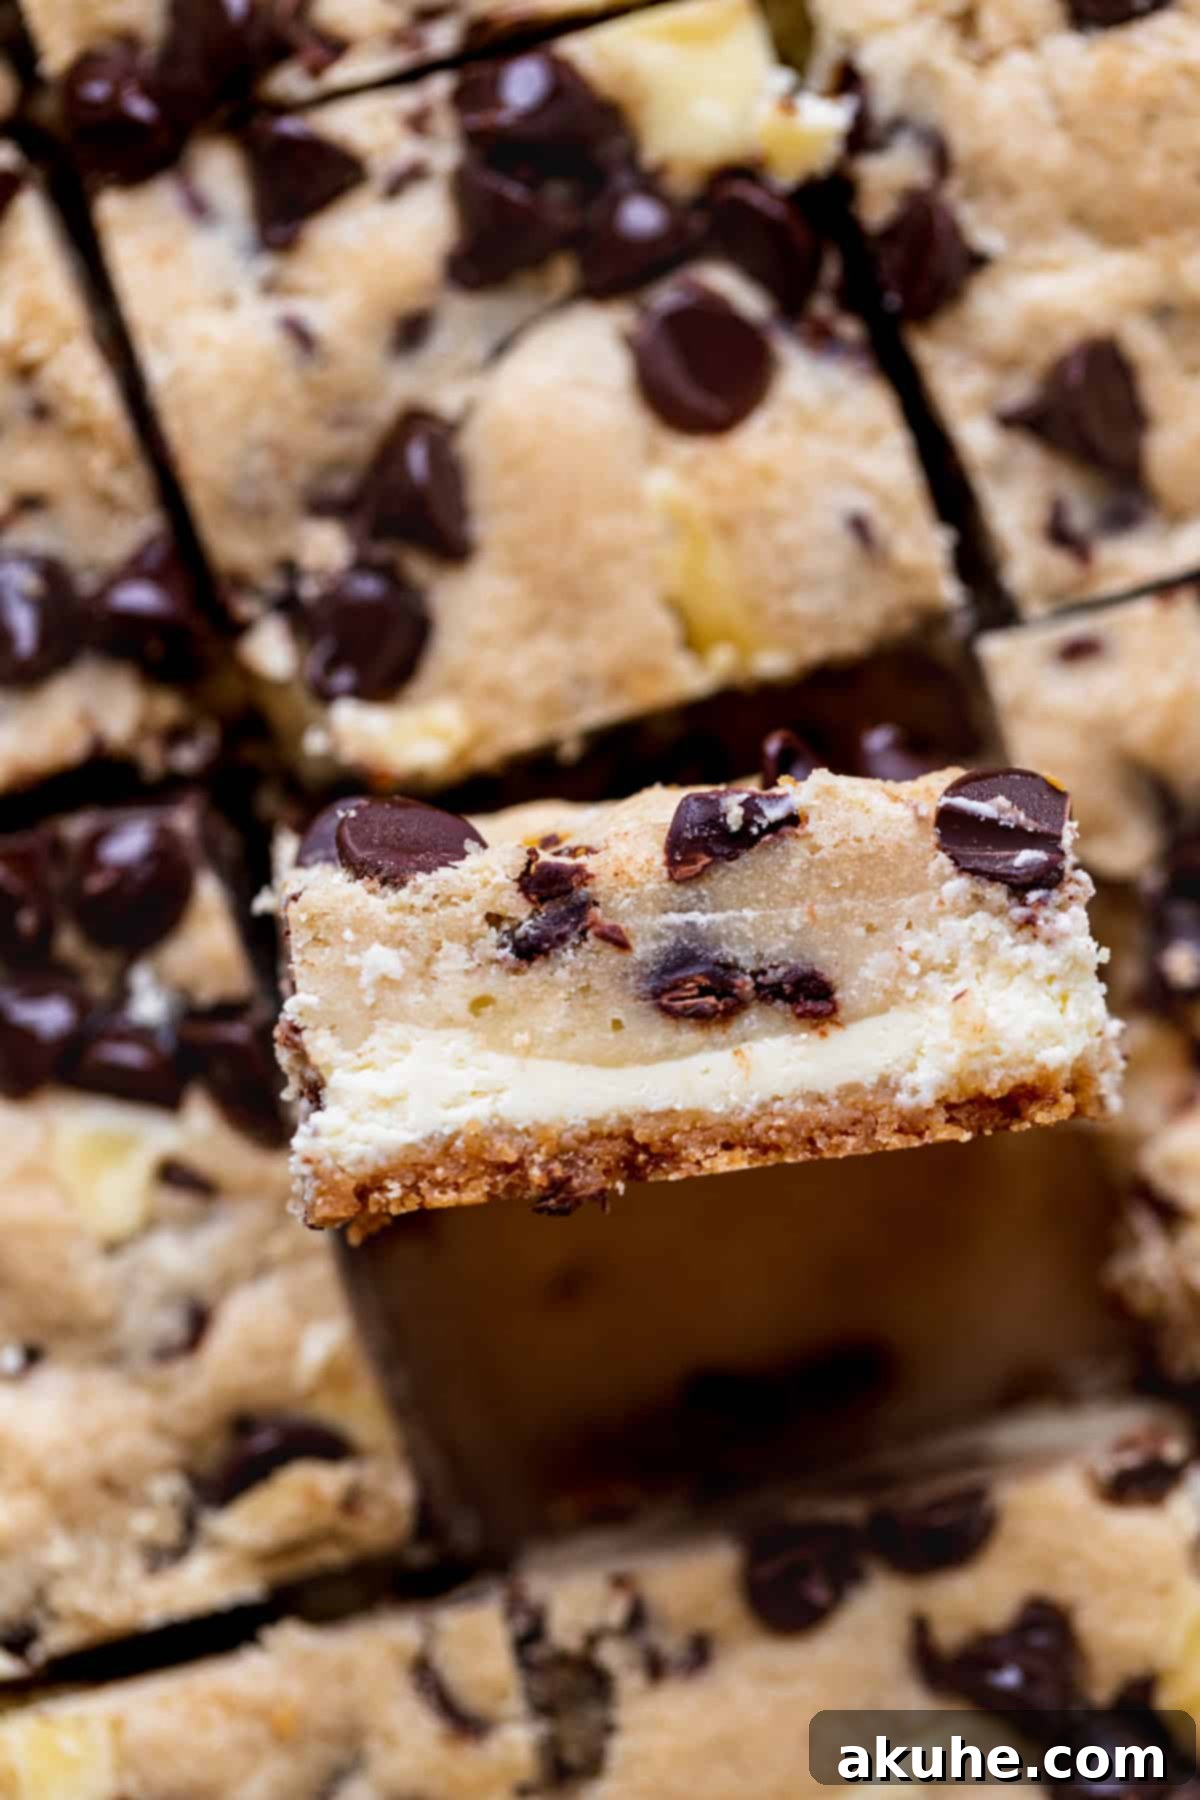
- Irresistible Doughy Cookie Layer: The undeniable star of the show! A generous layer of chocolate chip cookie dough bakes on top, achieving a lightly crisped edge while maintaining a gloriously soft, gooey, and truly “dough-like” center. This unique texture is what sets these bars apart, offering that beloved cookie dough sensation even after baking, making them utterly addictive.
- A Guaranteed Crowd-Pleaser: Who can resist the universal appeal of both creamy cheesecake and classic chocolate chip cookies? This dessert is a guaranteed hit at any gathering, party, holiday celebration, or casual family dinner. It brings together two universally loved treats in a single, convenient bar form that’s easy to serve and even easier to devour.
- Ideal for Make-Ahead Preparation: These bars taste even better after a night in the fridge, allowing the flavors to fully meld and the textures to set perfectly. This makes them an ideal dessert to prepare in advance for special occasions, freeing up your time on the day of your event, allowing you to relax and enjoy the occasion without last-minute baking stress.
Essential Ingredients for Perfect Cookie Dough Cheesecake Bars
Crafting these delectable bars requires a careful selection of high-quality ingredients, each playing a crucial role in achieving the perfect flavor and texture. Here’s a detailed look at what you’ll need and why proper ingredient preparation is key:
- Graham Crackers: For the crust, opt for classic plain graham crackers. While cinnamon or chocolate varieties can be used for a flavor twist, be aware they will subtly alter the overall taste profile of the dessert. Crushing them into fine, uniform crumbs is paramount for a cohesive, compact crust that holds its shape.
- Brown Sugar (Light or Dark): This essential sweetener adds a rich, molasses-like depth and contributes significant moisture to both the crust and the cookie dough. It’s key for achieving that irresistible chewiness and complex flavor in the cookie layer. Light brown sugar provides a softer, more subtle sweetness, while dark brown sugar offers a bolder, caramel-like note; choose based on your preference.
- Unsalted Butter: Absolutely vital for both the crust and the cookie dough. For the crust, it’s melted to bind the graham cracker crumbs together seamlessly. For the cookie dough, ensure it’s softened to true room temperature (taken out about 2 hours before baking) to cream properly with the sugars, creating a light and airy base. Using unsalted butter gives you precise control over the overall saltiness of the finished dessert.
- Full-Fat Cream Cheese: This is the cornerstone of a truly creamy, rich, and decadent cheesecake. Always use full-fat, brick-style cream cheese, and ensure it’s brought to room temperature before mixing. This is vital for achieving a smooth, lump-free batter that bakes into a perfectly silky cheesecake texture. Low-fat alternatives will result in a less rich taste and a potentially more watery or grainy consistency.
- Full-Fat Sour Cream: Another key player for a luxurious cheesecake texture and balanced flavor. Room temperature sour cream adds a delightful tanginess that beautifully cuts through the sweetness of the other layers and contributes significantly to the cheesecake’s characteristic smooth, creamy consistency. Do not skip this for the best, most authentic cheesecake experience.
- Heavy Cream: Also brought to room temperature, heavy cream further enhances the richness and silkiness of the cheesecake batter. It contributes to the light and fluffy texture, ensuring the cheesecake is decadent without being overly dense, creating a melt-in-your-mouth experience.
- Large Eggs: It’s crucial that both the eggs for the cheesecake and the single egg for the cookie dough are at room temperature. Eggs act as a binder and add essential structure to the cheesecake, giving it that characteristic custardy texture. For the cookie dough, the egg provides moisture and binding for that perfect chewy texture. Ensure they are incorporated gently to avoid introducing too much air, which can lead to cracks in the cheesecake.
- Semi-Sweet or Dark Chocolate Chips: The classic choice for our chocolate chip cookie dough layer. Semi-sweet chips offer a balanced sweetness that appeals to most palates, while dark chocolate chips provide a richer, more intense cocoa flavor that beautifully complements the creamy cheesecake and the sweetness of the dough. Milk chocolate chips are often too sweet for this recipe and can overwhelm the other delicate flavors.
- All-Purpose Flour: This provides the primary structure for our chocolate chip cookie dough. Ensure it’s measured accurately by spooning it into the measuring cup and leveling it off with the back of a knife, rather than scooping directly. Compacted flour can result in too much flour, leading to a dry and dense cookie dough.
- Salt: A pinch of fine sea salt in both the graham cracker crust and the cookie dough is absolutely essential. Salt enhances all the other flavors, perfectly balancing the sweetness and making the chocolate taste even more prominent and delicious.
- Pure Vanilla Extract: A non-negotiable for both the cheesecake and cookie dough layers. Use high-quality pure vanilla extract for the best flavor, adding warmth, complexity, and an aromatic depth that ties all the individual components together beautifully.
Step-by-Step Guide to Crafting Your Cookie Dough Cheesecake Bars
Creating these delightful bars is a rewarding experience. Follow these detailed instructions carefully to ensure a perfect outcome. You’ll achieve the best results with either a stand mixer fitted with a paddle attachment or a reliable hand mixer for both the cheesecake and cookie dough.
Phase 1: Preparing the Graham Cracker Crust
STEP 1: Prepare Your Baking Pan with Precision. Begin by preheating your oven to 325°F (160°C). Select a 9×9-inch square baking pan. While an 8×8-inch pan can be used, be aware that your finished bars will be considerably thicker and may require a slightly longer baking time. Generously spray the pan with non-stick baking spray, ensuring all corners and sides are coated. Now, carefully line the bottom and two opposing sides of the pan with parchment paper, allowing a generous overhang of parchment on these two sides. This overhang acts as convenient “handles” later, making it incredibly easy to lift the entire baked and chilled cheesecake out of the pan for clean, effortless slicing. Once the parchment is in place, spray it again for good measure to prevent sticking.
STEP 2: Create the Perfect Graham Cracker Crumbs. To achieve a perfectly uniform and cohesive crust, finely crush your graham crackers. The most efficient way to do this is using a food processor, pulsing until ultra-fine, sand-like crumbs form. Alternatively, if you don’t have a food processor, place the graham crackers in a sturdy Ziploc bag, seal it, and crush them thoroughly with a rolling pin until they resemble fine sand. Aim for approximately 1 1/4 cups of these finely ground crumbs.
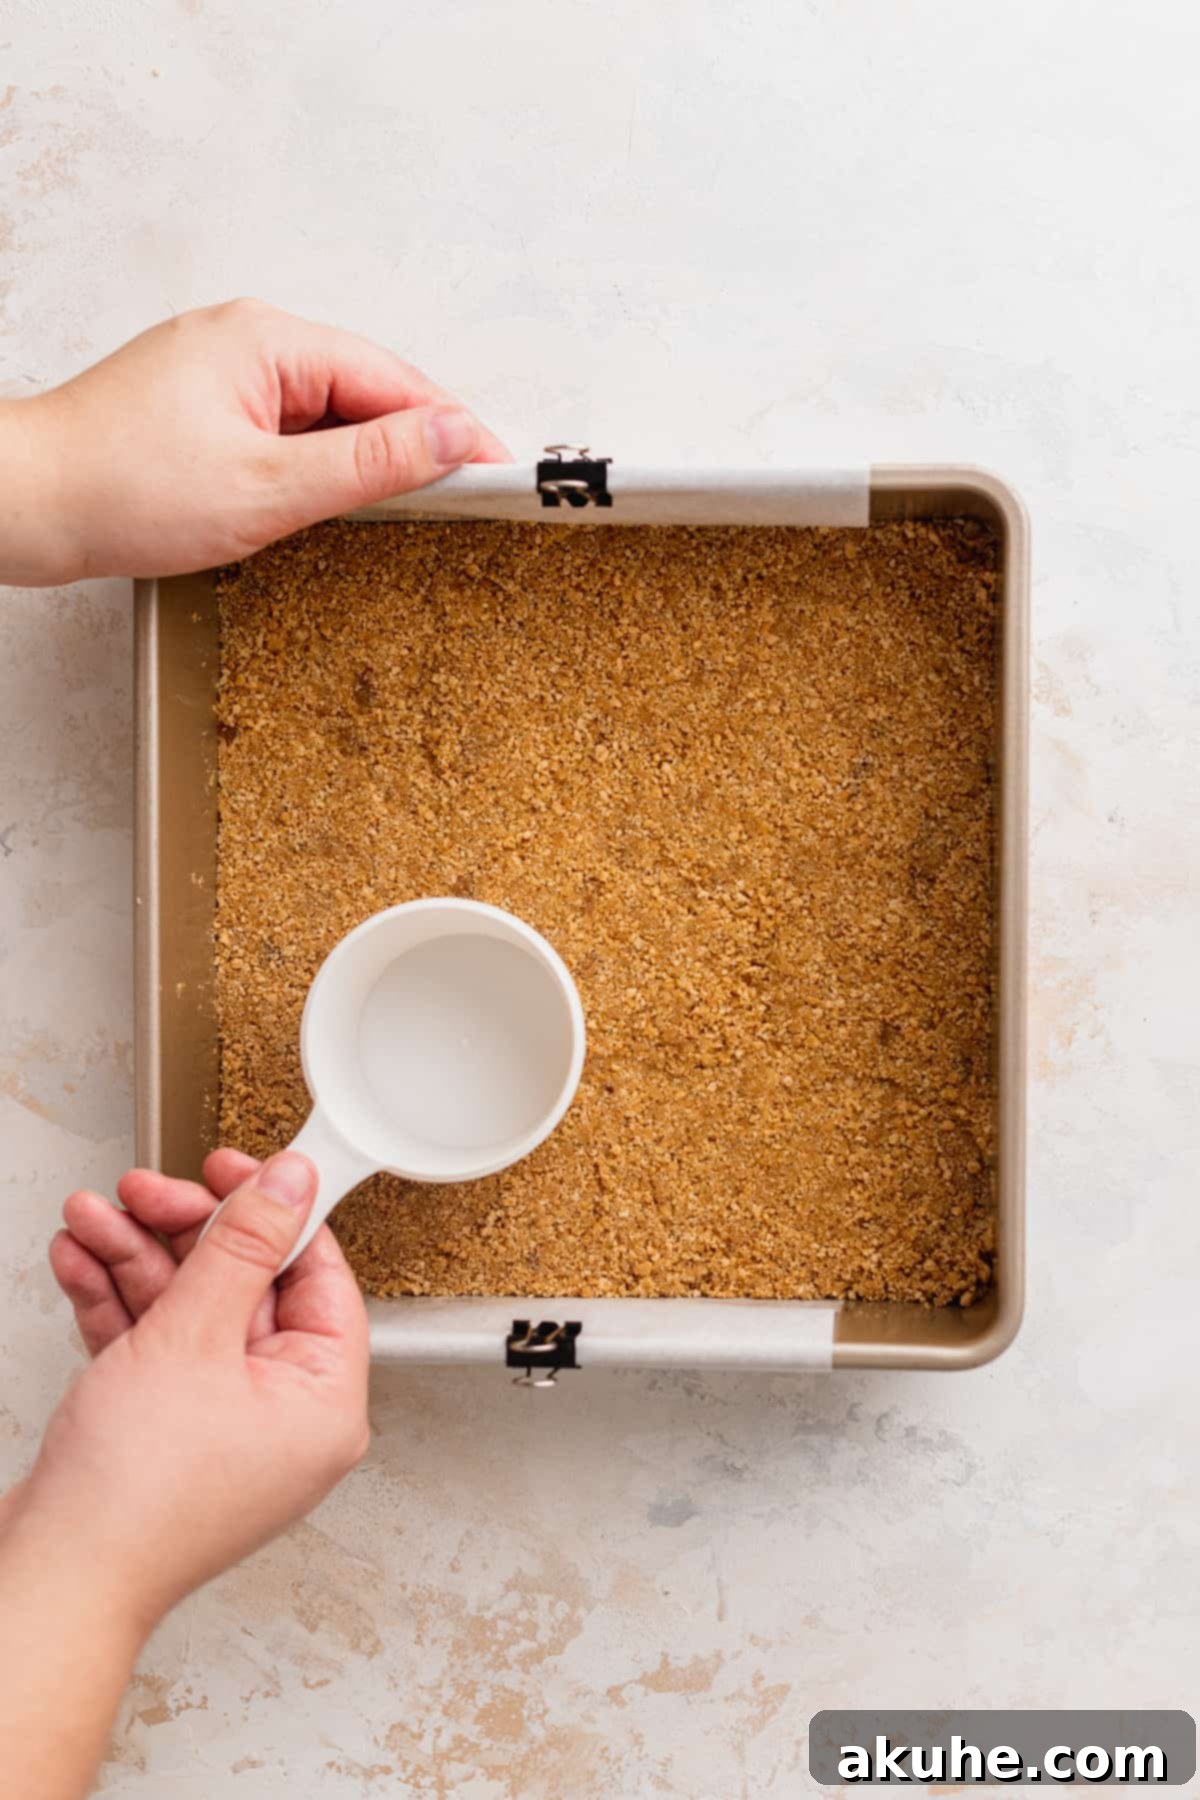
STEP 3: Mix and Press the Crust Foundation. In a medium-sized mixing bowl, combine the finely crushed graham cracker crumbs, the packed brown sugar, and the melted unsalted butter. Mix these ingredients thoroughly, either with a spoon or your hands, until all the crumbs are evenly moistened and the mixture resembles wet sand. This even coating of butter is crucial for binding the crust. Pour this fragrant mixture into your prepared 9×9-inch baking pan. Using the bottom of a flat measuring cup, a clean, flat glass, or even your knuckles, firmly and evenly press the crust mixture into a compact layer across the entire bottom of the pan. This compaction is crucial for a sturdy crust that won’t crumble or fall apart when the bars are cut and served.
STEP 4: Pre-Bake the Crust for Stability. Place the pan with the compacted graham cracker crust into your preheated oven and bake for precisely 10 minutes. This essential pre-baking step helps to “set” the crust, making it sturdier and preventing it from becoming soggy once the creamy cheesecake batter is added on top. After 10 minutes, carefully remove the pan from the oven and set it aside to cool slightly while you prepare the luscious cheesecake filling. This slight cooling period is important before adding the next layer.
Phase 2: Crafting the Creamy Cheesecake Layer
STEP 5: Prepare the Silky Cream Cheese Base. While your crust is pre-baking and cooling, begin preparing the cheesecake batter. In the bowl of your stand mixer (or a large bowl if you’re using a hand mixer), fitted with the paddle attachment, beat the room-temperature cream cheese on high speed for about 1 minute until it is incredibly smooth, creamy, and completely lump-free. Gradually add in the white granulated sugar, scraping down the sides as you go, and continue beating on high for another minute. The mixture should become wonderfully light, fluffy, and perfectly smooth. Stop the mixer and use a rubber spatula to thoroughly scrape down the sides and bottom of the bowl, ensuring all ingredients are well-incorporated and no unmixed cream cheese remains.
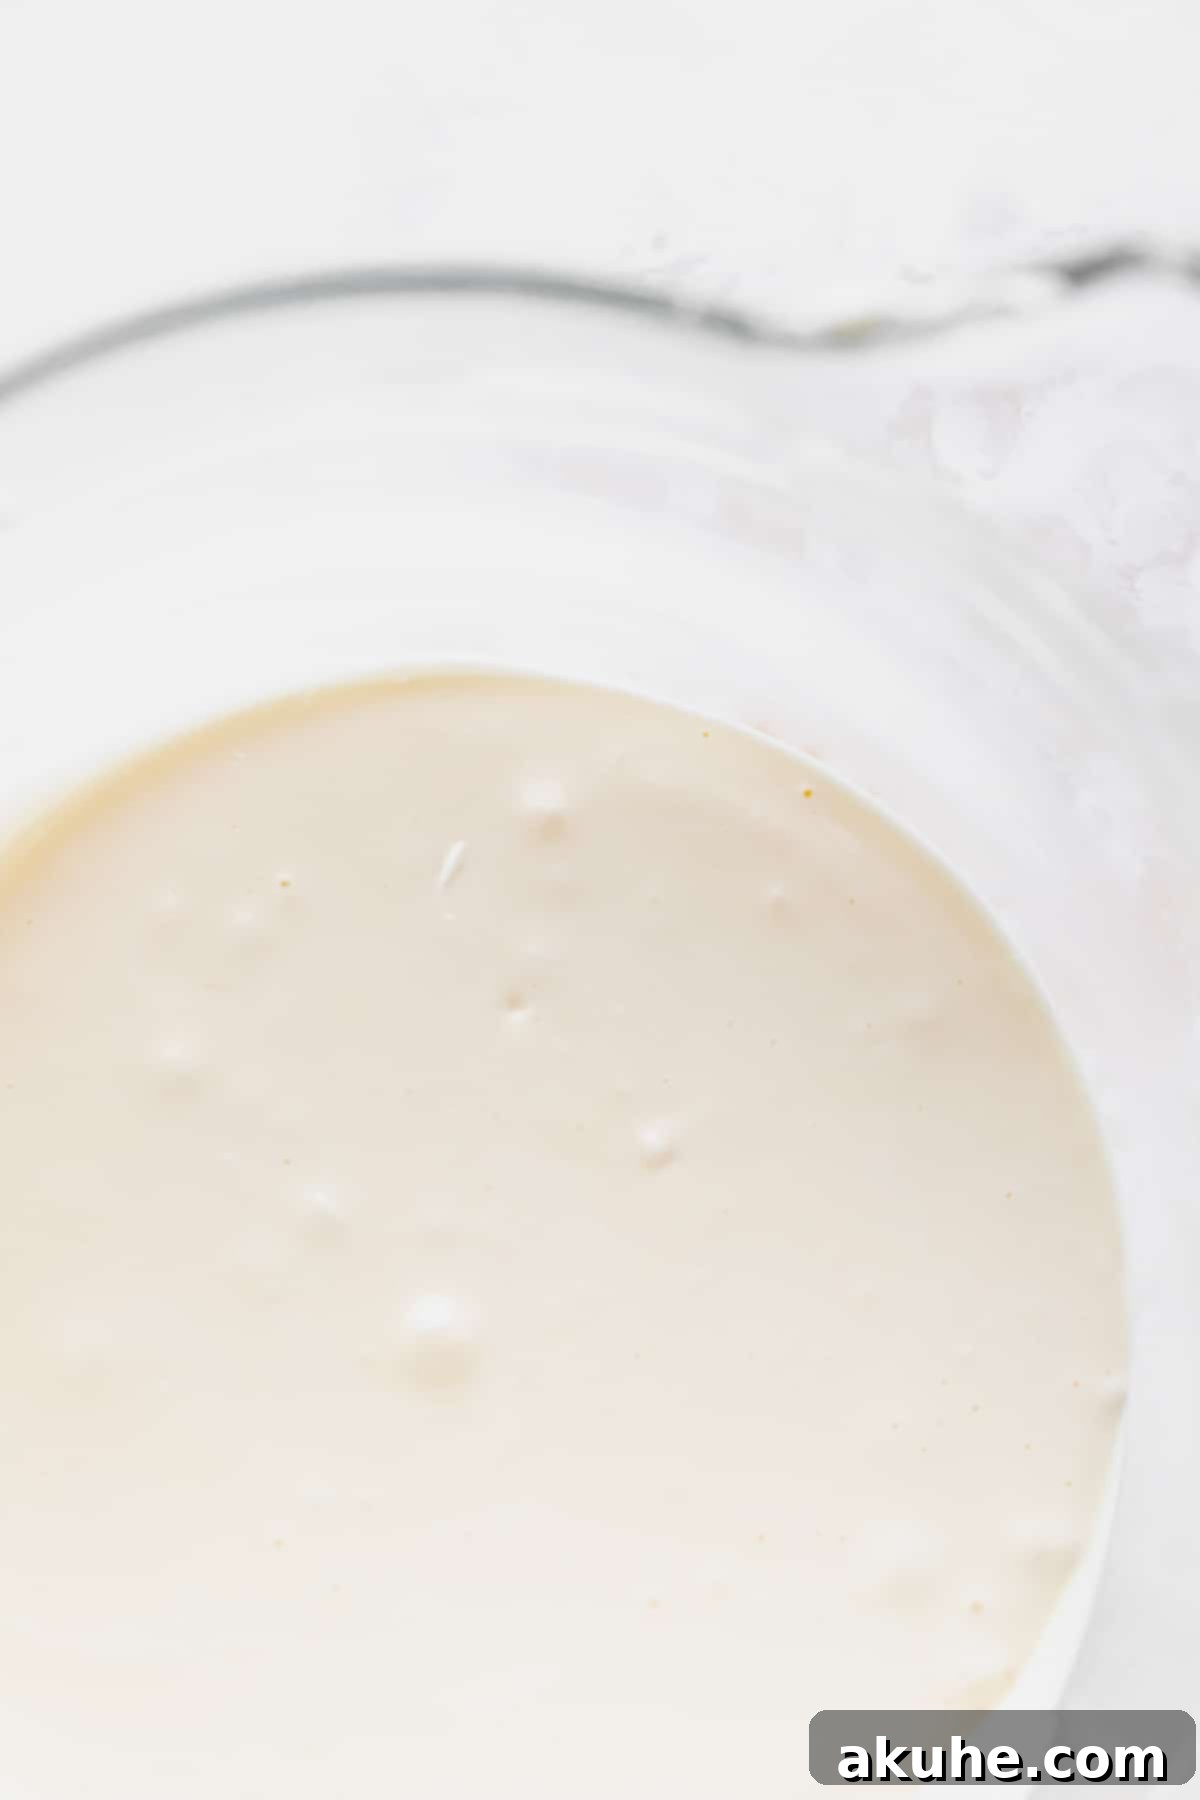
STEP 6: Gently Incorporate Remaining Wet Ingredients. Reduce the mixer speed to low. Add the room-temperature sour cream, room-temperature heavy cream, and the pure vanilla extract to the cream cheese mixture. Mix on low speed for just 1-2 minutes until everything is smoothly incorporated and the batter is homogeneous. Scrape down the bowl again to catch any stray ingredients. Now, add the large eggs one at a time, mixing only until *just* combined after each addition. This step is critical: introduce as little air as possible. Overmixing the eggs on high speed can cause your cheesecake to puff up excessively during baking due to trapped air bubbles, which then deflate rapidly upon cooling, leading to unsightly cracks on the surface. Gently combine and scrape the bowl thoroughly between each egg addition.
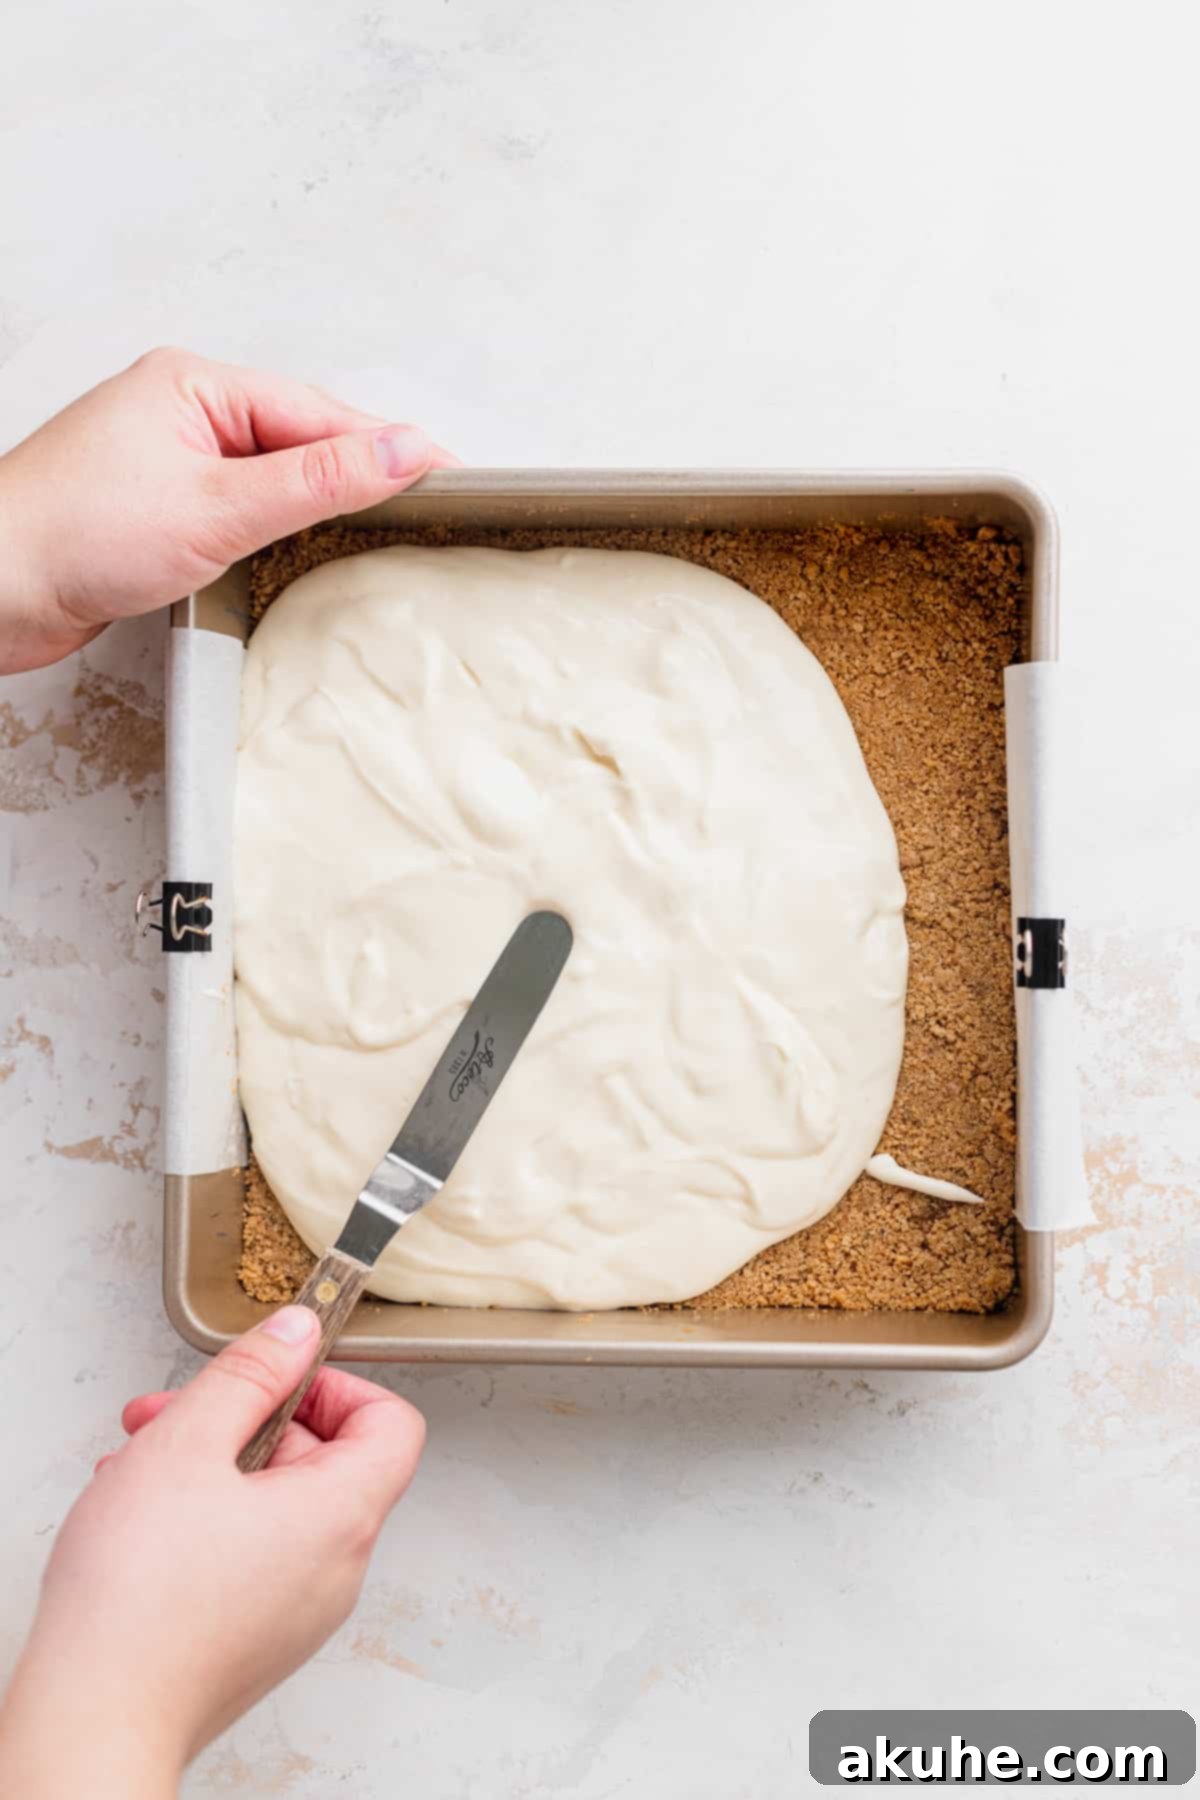
STEP 7: Assemble the First Layers. Once your graham cracker crust has cooled slightly (it doesn’t need to be completely cold), carefully and evenly pour the smooth, creamy cheesecake batter over the pre-baked crust. Gently spread it with a rubber spatula or the back of a spoon to ensure an even layer that extends from edge to edge of the pan. The goal is to create a level surface for the cookie dough topping.
Phase 3: Creating the Chocolate Chip Cookie Dough Layer
STEP 8: Prepare Dry Ingredients for Cookie Dough. In a separate medium-sized mixing bowl, sift together the all-purpose flour and salt. Sifting helps to aerate the flour, remove any lumps, and ensures that these dry ingredients are evenly distributed throughout the mixture, which is crucial for achieving a tender and perfectly textured cookie dough. Set this bowl aside for later use.
STEP 9: Cream Butter and Sugars for Cookie Dough. In the clean bowl of your stand mixer (or using a hand mixer), beat the room-temperature unsalted butter with both the white granulated sugar and the packed brown sugar on high speed for 2-3 minutes. Continue mixing until the butter and sugars are light in color, fluffy in texture, and thoroughly blended. This creaming process is vital as it incorporates air into the mixture, which contributes to the cookie dough’s overall tenderness and slight rise during baking.
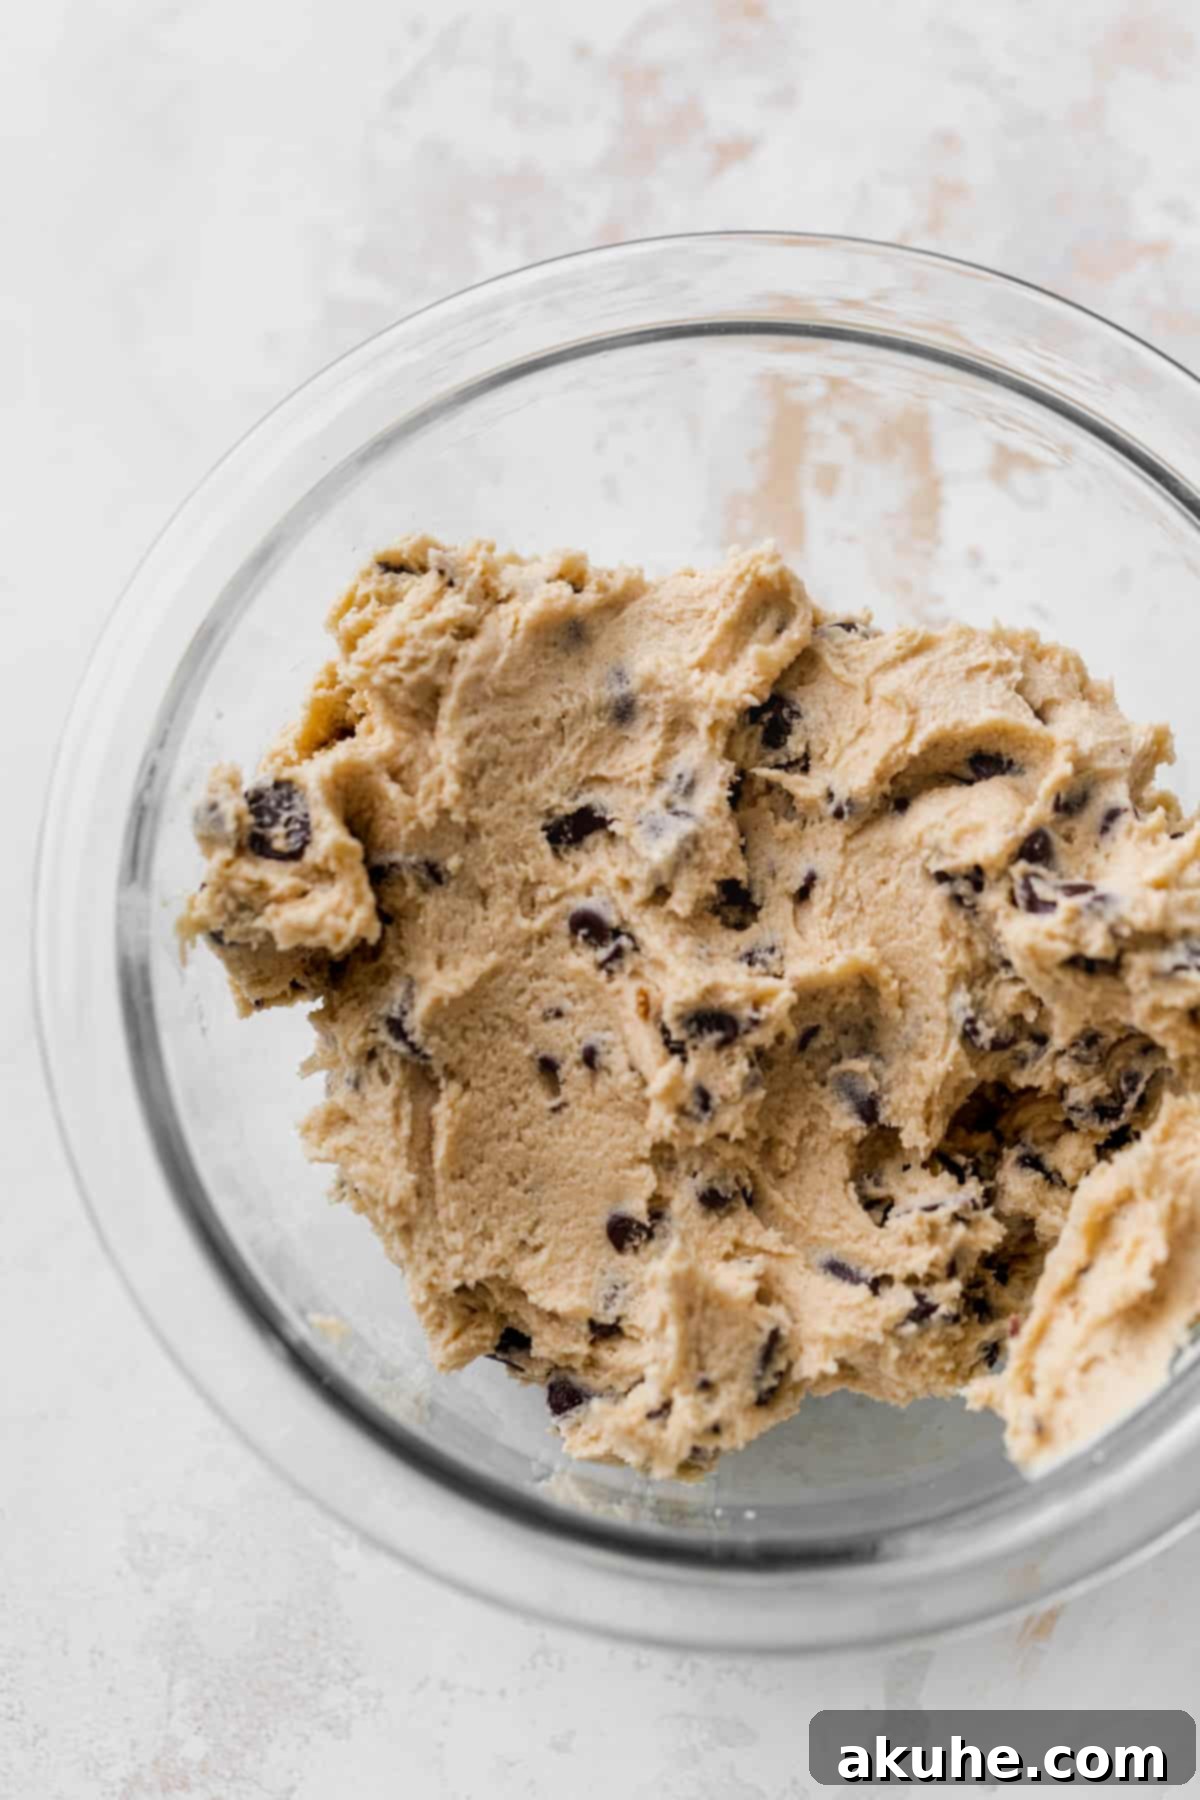
STEP 10: Add Wet Ingredients to Cookie Dough. Reduce the mixer speed to low. Add the pure vanilla extract and the single large egg (also at room temperature) to the creamed butter and sugar mixture. Mix well until everything is just combined and no streaks of egg remain. Be careful not to overmix at this stage. Stop the mixer and scrape down the sides of the bowl to ensure all ingredients are thoroughly incorporated.
STEP 11: Combine Dry and Wet for Cookie Dough. Gradually add the sifted flour and salt mixture to the wet cookie dough ingredients, mixing on low speed only until the flour streaks have almost disappeared. At this point, add the semi-sweet chocolate chips. Continue mixing on low speed just until the chocolate chips are evenly distributed throughout the dough and no dry streaks of flour remain. Remember, overmixing the flour can develop the gluten too much, leading to a tough and less tender cookie dough, so stop as soon as it’s combined.
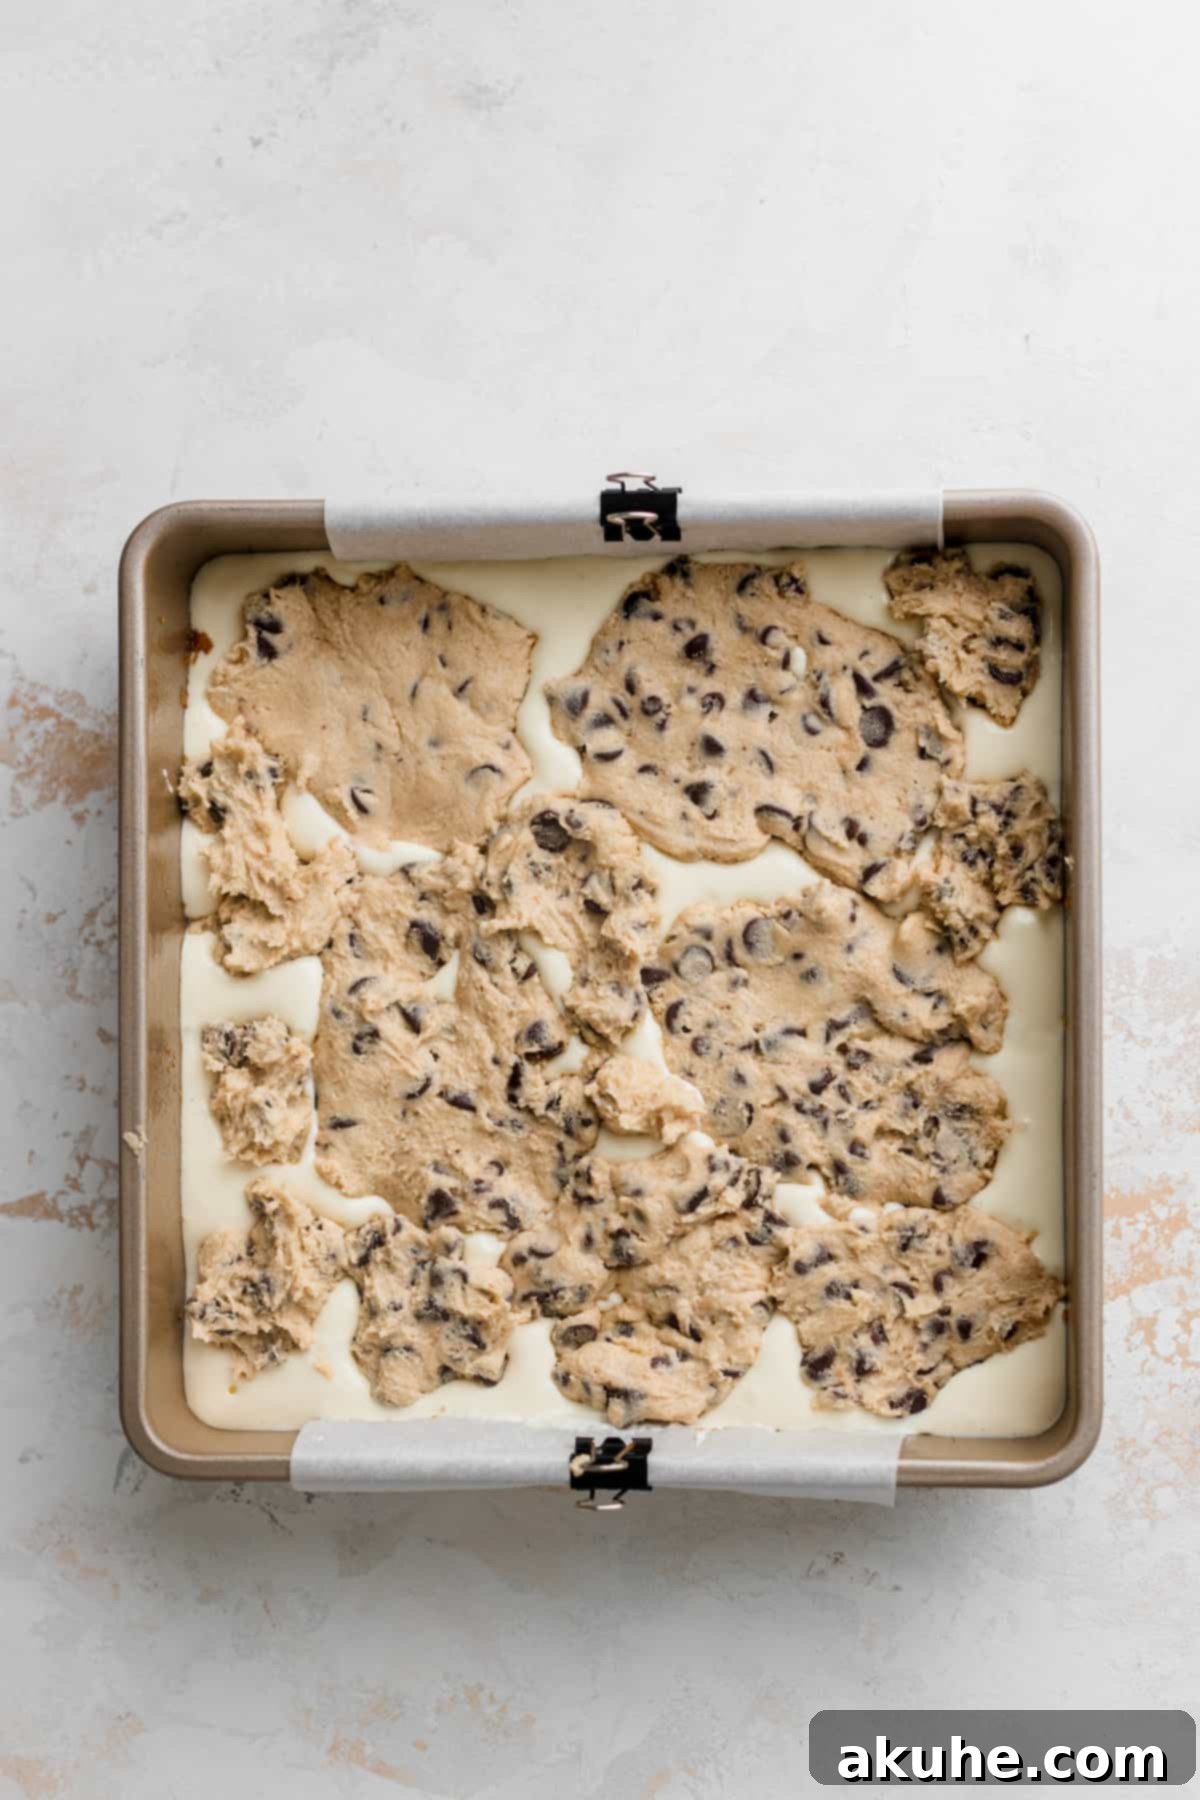
STEP 12: Add Cookie Dough to Cheesecake Layer. Take small, manageable portions of the prepared chocolate chip cookie dough and, using your hands, gently flatten each piece into a disc or irregular shape. Carefully arrange these cookie dough pieces evenly on top of the cheesecake batter, covering as much surface area as possible. Don’t worry if some cheesecake batter peeks through in places; the cookie dough will spread slightly during baking to cover most of it. The goal is to create a delightful, undulating top layer that bakes to a beautiful golden perfection while keeping its delicious, chewy, and slightly doughy center. Refer to the image above for guidance on placement and visual appeal.
Phase 4: Baking and Chilling to Perfection
STEP 13: Bake the Bars to Golden Perfection. Carefully transfer the pan with its layered contents to your preheated 325°F (160°C) oven. Bake for approximately 50-60 minutes. The bars are ready when the cookie dough topping is beautifully golden brown around the edges, the cheesecake edges appear set and slightly puffed, and the very center of the cheesecake has a slight, gentle jiggle when the pan is lightly tapped. This slight jiggle indicates that the cheesecake is cooked through but still moist. Avoid overbaking, as this can lead to a dry cheesecake. The cookie dough in the center will remain wonderfully soft, chewy, and delightfully dough-like, exactly as desired.
STEP 14: The Essential Cool-Down and Chill. Once baked, immediately remove the pan from the oven and place it on a wire rack to cool completely at room temperature. This gradual cooling is essential for preventing cracks and allowing the cheesecake to settle. Once the bars have cooled completely to room temperature (this can take 1-2 hours), cover the pan loosely with plastic wrap and transfer it to the refrigerator. Chill the cookie dough cheesecake bars for at least 6 hours, though chilling them overnight is highly recommended for the absolute best texture, cleanest cuts, and most intensely melded flavors. As they chill, the cheesecake will fully firm up, and all the delicious flavors will deepen and mature, resulting in a truly irresistible dessert. Attempting to cut warm or insufficiently chilled bars will result in a messy, crumbly disaster, so patience truly pays off here!
Expert Baking Tips for Flawless Cheesecake Bars
Achieving a perfect cheesecake can sometimes feel daunting, but with these expert tips and tricks, you’ll master these cookie dough cheesecake bars every single time, ensuring a delicious and visually appealing dessert:
- Mastering Cheesecake Crack Prevention: The ultimate secret to a smooth, unblemished cheesecake surface lies in minimizing air incorporation into the batter, especially when adding eggs. When you introduce the eggs to the cheesecake mixture, mix them in on the lowest speed possible, just until they are barely combined. Excess air whipped into the eggs will cause the cheesecake to puff up rapidly and unevenly during baking due to expanding air bubbles. As the cheesecake cools, these bubbles deflate, leading to a sudden fall and unsightly cracks on the surface. Gentle, minimal mixing is absolutely key here.
- The Gentle Slow Cool-Down Method: Another excellent and highly effective technique to prevent cheesecake cracks is to allow the cheesecake to cool very slowly. Once the baking time is complete and you’ve removed it from the oven, turn off your oven entirely. Immediately crack the oven door slightly open (about 1-2 inches) and let the cheesecake sit inside the cooling oven for an additional 15-30 minutes. This gradual reduction in temperature prevents a sudden shock to the cheesecake, which is a common culprit for cracking. After this, transfer to a wire rack to finish cooling completely at room temperature.
- Room Temperature Ingredients are Non-Negotiable: For both the creamy cheesecake batter and the chewy cookie dough, it is absolutely crucial that all dairy products (cream cheese, sour cream, heavy cream, butter) and eggs are at true room temperature. Cold ingredients do not emulsify properly, leading to a lumpy batter and an inconsistent, often inferior, final texture. Plan ahead and take these ingredients out of the refrigerator at least 2 hours before you plan to start your baking process. This single step makes a huge difference.
- Accurate Flour Measurement is Key: When measuring flour for your cookie dough, always employ the “spoon and level” method. Gently spoon the flour into your measuring cup until it overflows, then use the back of a straight edge (like a knife) to level off the excess. Never scoop directly from the bag, as this can compact the flour, resulting in an excessive amount, which will make your cookie dough dry, dense, and potentially tough. For ultimate precision, especially in baking, a kitchen scale is always your best friend.
- Do Not Overmix the Cookie Dough: Once you add the flour to the wet ingredients of the cookie dough mixture, mix only until just combined. The moment the flour streaks disappear, stop mixing. Overmixing develops the gluten in the flour, leading to a tough, less tender, and less pleasant chewy cookie dough layer. A few lumps of flour are better than an overmixed dough.
- The Paramount Importance of Chilling: Seriously, do not skip or shorten the chilling step! Six hours is the absolute minimum, but chilling the bars overnight in the refrigerator yields vastly superior results. The cheesecake needs this extended time to fully set, become dense, and allow its complex flavors to deepen and mature. Attempting to cut warm or insufficiently chilled bars will result in a messy, crumbly disaster where the layers don’t hold their shape. Patience truly pays off here in both texture and taste.
- Achieving Clean Cuts Every Time: After your bars have thoroughly chilled (preferably overnight), use a very sharp, thin knife to cut them cleanly into perfect squares. For extra neat and professional-looking slices, run the knife under hot water, wipe it clean with a damp cloth, and then make each cut. Repeat this process between each slice for the most pristine bars.
Delicious Substitutions & Creative Variations
While the classic recipe for these cookie dough cheesecake bars is undeniably divine, don’t hesitate to get creative and customize them to your liking. Here are some ideas to add your personal touch:
- Graham Cracker Alternatives for the Crust: If traditional graham crackers are hard to find in your region or you prefer a different flavor, digestive biscuits make an excellent, equally delicious, and often more accessible substitute for the crust.
- Innovative Crust Options: Beyond graham crackers, feel free to experiment with a variety of other crushed cookies for your base. Consider using crushed Oreos (for a deep chocolatey twist), Nutter Butters (for a delightful peanut butter kick), or even crisp shortbread cookies to create unique and delightful flavor profiles. Just remember to slightly adjust the sugar content in the crust if you’re using very sweet cookies.
- Exploring Chocolate Chip Choices: While semi-sweet chocolate chips are the timeless classic, feel free to switch to dark chocolate chips for a more intense and sophisticated cocoa flavor that perfectly complements the rich cheesecake. You could also try milk chocolate chips if you prefer a sweeter, creamier chocolate, or even white chocolate chips for a different aesthetic and a wonderfully buttery, sweet taste.
- Using Pre-Made Cookie Dough: Short on time or simply prefer a simpler approach? High-quality pre-made chocolate chip cookie dough can absolutely be used for the top layer. Just ensure it’s a type that bakes well and, if you prefer the gooey center, is labeled as safe to consume partially baked (some brands explicitly state this). This can be a great shortcut without sacrificing flavor.
- Exciting Add-ins for Cookie Dough: Elevate your cookie dough layer by folding in a variety of delicious additions. Consider adding colorful sprinkles for a festive touch, chopped nuts (such as walnuts, pecans, or almonds) for an enjoyable crunch, or even a swirl of caramel sauce or peanut butter into the dough before baking for an extra layer of flavor and texture.
- Varying Cheesecake Flavors: While the vanilla cheesecake is perfect as is, you can subtly change its profile with a hint of lemon zest, a touch of almond extract, or a swirl of berry compote before baking. For a bolder flavor, consider adding a tablespoon of espresso powder for a mocha cheesecake layer.
Frequently Asked Questions (FAQ) About Cookie Dough Cheesecake Bars
Absolutely! To adapt this recipe for a 9×13-inch pan, you will need to scale up the ingredients. Specifically, you should double the graham cracker crust ingredients and double the chocolate chip cookie dough ingredients. For the creamy cheesecake batter, you will need to increase the recipe by 1.5 times. Keep in mind that due to the thinner layers in a larger pan, the baking time may be slightly shorter than for the 9×9 pan. Always keep an eye on it and check for that characteristic slight jiggle in the center to determine doneness.
I have not specifically tested this recipe with egg substitutes for either the cheesecake layer or the cookie dough. Eggs play a crucial role in the structure, binding, and texture of both components, contributing to the creamy set of the cheesecake and the chewiness of the cookie dough. If you do attempt this with an egg substitute, please let me know your results and what specific substitute you used! It would be an interesting experiment for those with dietary restrictions, but I cannot guarantee the outcome without testing.
Yes, absolutely! These bars are an excellent make-ahead dessert, making them perfect for parties, potlucks, or busy weeknights. In fact, their flavor and texture often significantly improve after a day or two in the refrigerator as the different layers have more time to meld and mature. You can confidently prepare them 2-3 days in advance of when you plan to serve them without any loss in quality.
Yes, chilling is arguably one of the most critical steps for any cheesecake, and these bars are no exception. While 6 hours is the absolute minimum chilling time, I strongly recommend chilling them overnight for optimal results. During this extended chilling period, the cheesecake fully sets and firms up, becoming dense and perfectly sliceable. Additionally, the flavors of all three layers have ample time to develop, meld, and intensify, resulting in a much more delicious and cohesive dessert. If you attempt to cut the bars too early, before they are properly chilled, they will likely be too soft, sticky, and fall apart, making for a very messy presentation and a less enjoyable texture. Patience truly pays off here!
Yes, these delicious bars freeze beautifully, making them ideal for meal prep or enjoying later! Once they are completely chilled and have been cut into individual portions, wrap each bar tightly in plastic wrap, then place them in an airtight freezer-safe container or a heavy-duty freezer bag. They can be safely stored in the freezer for up to 1-2 months without a significant loss in quality. To serve, simply thaw them overnight in the refrigerator or at room temperature for a few hours until soft enough to enjoy.
Storage and Serving Suggestions
To keep your cookie dough cheesecake bars fresh and delicious, it’s essential to store them properly. Place them in an airtight container and keep them in the refrigerator. They will maintain their incredible quality and flavor for up to 5 days. For the best taste and texture, always serve them chilled, directly from the fridge. These bars make a fantastic make-ahead dessert for any occasion, from casual family dinners to festive parties, or simply to enjoy as a special treat throughout your week!
Discover More Irresistible Bar Recipes!
We truly hope you absolutely adore these Cookie Dough Cheesecake Bars as much as we do! Your feedback means the world to us and helps our community of bakers. Please take a moment to leave a star rating and review below – it helps others discover and enjoy this incredible recipe!
Don’t forget to share your amazing creations with us on Instagram by tagging @stephaniesweettreats. We love seeing what you bake! For endless dessert inspiration, new recipe ideas, and beautiful food photography, make sure to follow us on Pinterest. Happy baking!
Cookie Dough Cheesecake Bars Recipe
This detailed recipe guides you through creating layers of a rich graham cracker crust, a creamy baked cheesecake, and a decadent chocolate chip cookie dough topping that bakes to a golden perfection while retaining a wonderfully soft, gooey, and doughy center. It’s the ultimate dessert fusion that promises to impress!
Recipe Details
- Author: Stephanie Rutherford
- Prep Time: 40 minutes
- Cook Time: 1 hour
- Chilling Time: 6 hours (or preferably overnight)
- Total Time: Approximately 7 hours 40 minutes
- Yields: 16 delightful cheesecake bars
- Rating: 5 out of 5 stars (based on 24 reviews)
Ingredients
For the Buttery Graham Cracker Crust
- 1 1/4 cup Graham cracker crumbs (from about 1 full packet of graham crackers)
- 1/8 cup Packed light or dark brown sugar
- 1/4 cup Unsalted butter, melted
For the Creamy Cheesecake Filling
- 16 oz Full-fat cream cheese, softened to room temperature
- 1/2 cup White granulated sugar
- 1/4 cup Full-fat sour cream, softened to room temperature
- 1/8 cup Heavy cream, softened to room temperature
- 1 tsp Pure vanilla extract
- 2 Large eggs, brought to room temperature
For the Chocolate Chip Cookie Dough
- 1/3 cup Unsalted butter, softened to room temperature
- 1/8 cup White granulated sugar
- 1/3 cup Packed light or dark brown sugar
- 1 tsp Pure vanilla extract
- 1 Large egg, brought to room temperature
- 3/4 cup All-purpose flour
- 1/4 tsp Salt
- 3/4 cup Semi-sweet chocolate chips
Instructions
Preparing the Graham Cracker Crust
- Preheat your oven to 325°F (160°C). Generously spray a 9×9-inch baking pan with non-stick baking spray. Line the bottom and two opposing sides of the pan with parchment paper, leaving an overhang to assist in lifting the bars later. Spray the parchment paper again.
- Using a food processor or a Ziploc bag and rolling pin, finely crush the graham crackers until you have 1 1/4 cups of fine crumbs.
- In a medium bowl, combine the graham cracker crumbs, 1/8 cup packed brown sugar, and 1/4 cup melted unsalted butter. Mix thoroughly until all crumbs are evenly moistened and resemble wet sand.
- Pour the mixture into the prepared pan. Use the bottom of a flat measuring cup or glass to firmly compact the crust evenly across the bottom of the pan.
- Bake the crust for 10 minutes. Remove from the oven and set aside to cool slightly while you prepare the cheesecake filling.
Crafting the Creamy Cheesecake Filling
- In the bowl of a stand mixer (or using a hand mixer), beat 16 oz room-temperature cream cheese on high speed for 1 minute until smooth. Add 1/2 cup white granulated sugar and beat for another minute until light and fluffy. Scrape down the sides and bottom of the bowl.
- Reduce mixer speed to low. Add 1/4 cup room-temperature sour cream, 1/8 cup room-temperature heavy cream, and 1 tsp pure vanilla extract. Mix for 1-2 minutes until smoothly combined. Scrape the bowl. Add 2 large room-temperature eggs, one at a time, mixing on low speed only until just combined after each addition. Avoid overmixing the eggs to prevent cracks in the cheesecake.
- Once the graham cracker crust has cooled slightly, carefully pour the prepared cheesecake batter evenly over the crust. Gently spread it with a spatula to ensure a level layer.
Creating the Chocolate Chip Cookie Dough Layer
- In a separate medium bowl, sift together 3/4 cup all-purpose flour and 1/4 tsp salt. Set aside.
- In the mixer bowl, beat 1/3 cup room-temperature unsalted butter, 1/8 cup white granulated sugar, and 1/3 cup packed brown sugar on high speed for 2 minutes until the mixture is light, fluffy, and well blended.
- Add 1 tsp pure vanilla extract and 1 large room-temperature egg. Mix well until just combined. Scrape down the sides of the bowl.
- Gradually add the sifted dry ingredients to the wet mixture, mixing on low speed until almost combined. Then, fold in 3/4 cup semi-sweet chocolate chips, mixing just until evenly distributed and no dry streaks of flour remain. Do not overmix.
- Take small amounts of cookie dough and flatten each into a disc shape using your hands. Arrange these cookie dough discs evenly on top of the cheesecake batter, covering most of the surface.
- Carefully transfer the pan to your preheated 325°F (160°C) oven. Bake for approximately 50-60 minutes. The bars are done when the cookie topping is golden brown, the cheesecake edges are set, and the center has a slight, gentle jiggle.
- Remove the pan from the oven and let the cheesecake bars cool completely on a wire rack at room temperature. Once cooled, cover the pan loosely with plastic wrap and transfer to the refrigerator. Chill for at least 6 hours, or preferably overnight, for the best texture and clean slicing. Once thoroughly chilled, use the parchment paper overhang to lift the entire cheesecake out of the pan. Cut into 16 squares with a sharp, warm knife, wiping the knife clean between each cut. Store leftover bars in an airtight container in the refrigerator until ready to enjoy.
Helpful Notes and Pro Tips
- High Altitude Baking: If baking at high altitudes, consider adding an extra 1 tablespoon of all-purpose flour to the cookie dough mixture. This small adjustment helps to compensate for the lower air pressure and can prevent spreading.
- Room Temperature Ingredients are Key: For both the cheesecake batter and the cookie dough, ensure all dairy ingredients (cream cheese, sour cream, heavy cream, butter) and eggs are at true room temperature. This is absolutely crucial for achieving a smooth, lump-free batter and proper emulsification, which leads to the best texture in your final bars. Plan ahead and take them out of the refrigerator at least two hours before you begin mixing.
- Accurate Flour Measurement: When measuring all-purpose flour for the cookie dough, always use the “spoon and level” method. Gently spoon the flour into your measuring cup until it overflows, then level off the excess with the back of a knife. Scooping directly from the bag can compact the flour, leading to an excess amount that can result in a dry, dense, and crumbly cookie dough. For ultimate precision, a kitchen scale is recommended.
Nutrition Information (Approximate values per serving, based on 16 servings)
- Calories: 299 kcal
- Carbohydrates: 23g
- Protein: 3g
- Fat: 22g
- Saturated Fat: 13g
- Polyunsaturated Fat: 1g
- Monounsaturated Fat: 6g
- Trans Fat: 1g
- Cholesterol: 54mg
- Sodium: 176mg
- Potassium: 114mg
- Fiber: 1g
- Sugar: 14g
- Vitamin A: 641 IU
- Vitamin C: 1mg
- Calcium: 46mg
- Iron: 1mg
