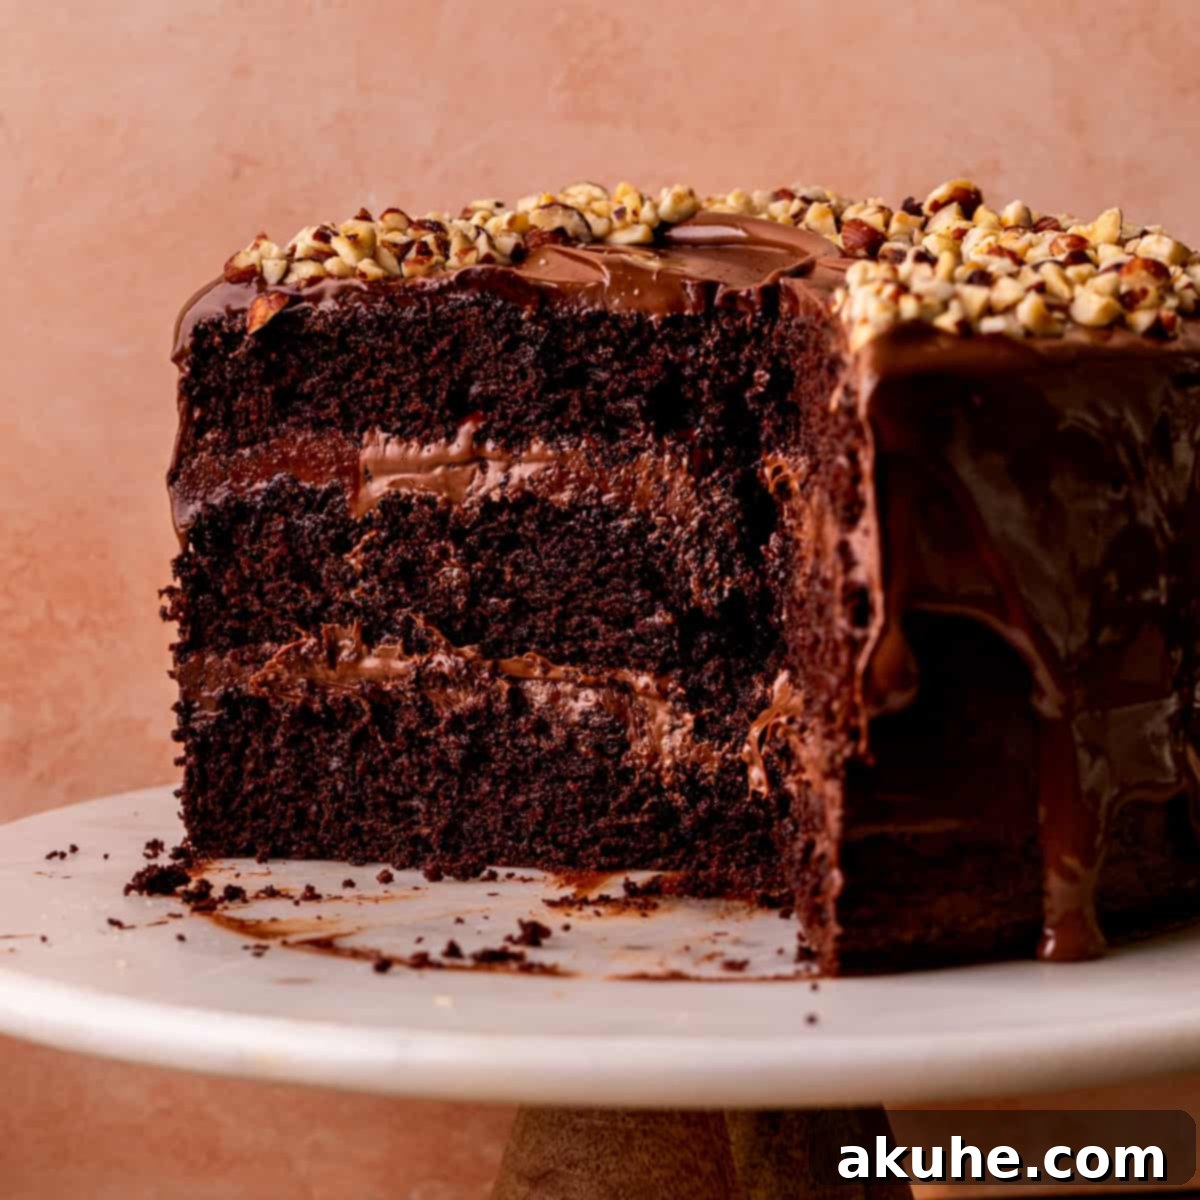
Prepare to be enchanted by the ultimate chocolate hazelnut dream: a truly decadent Nutella cake that promises a sublime experience with every single bite. This isn’t just any cake; it’s a masterpiece featuring three moist, rich chocolate cake layers generously filled with a luscious, gooey Nutella core, all enveloped in a dreamy Nutella frosting. It stands as the quintessential fusion of deep chocolate and irresistible hazelnut, delivering a fluffy cake texture perfectly complemented by that signature melted Nutella delight. Forget ordinary desserts; this easy Nutella cake recipe is destined to become your new favorite celebration showstopper or a simply magnificent treat for any occasion.
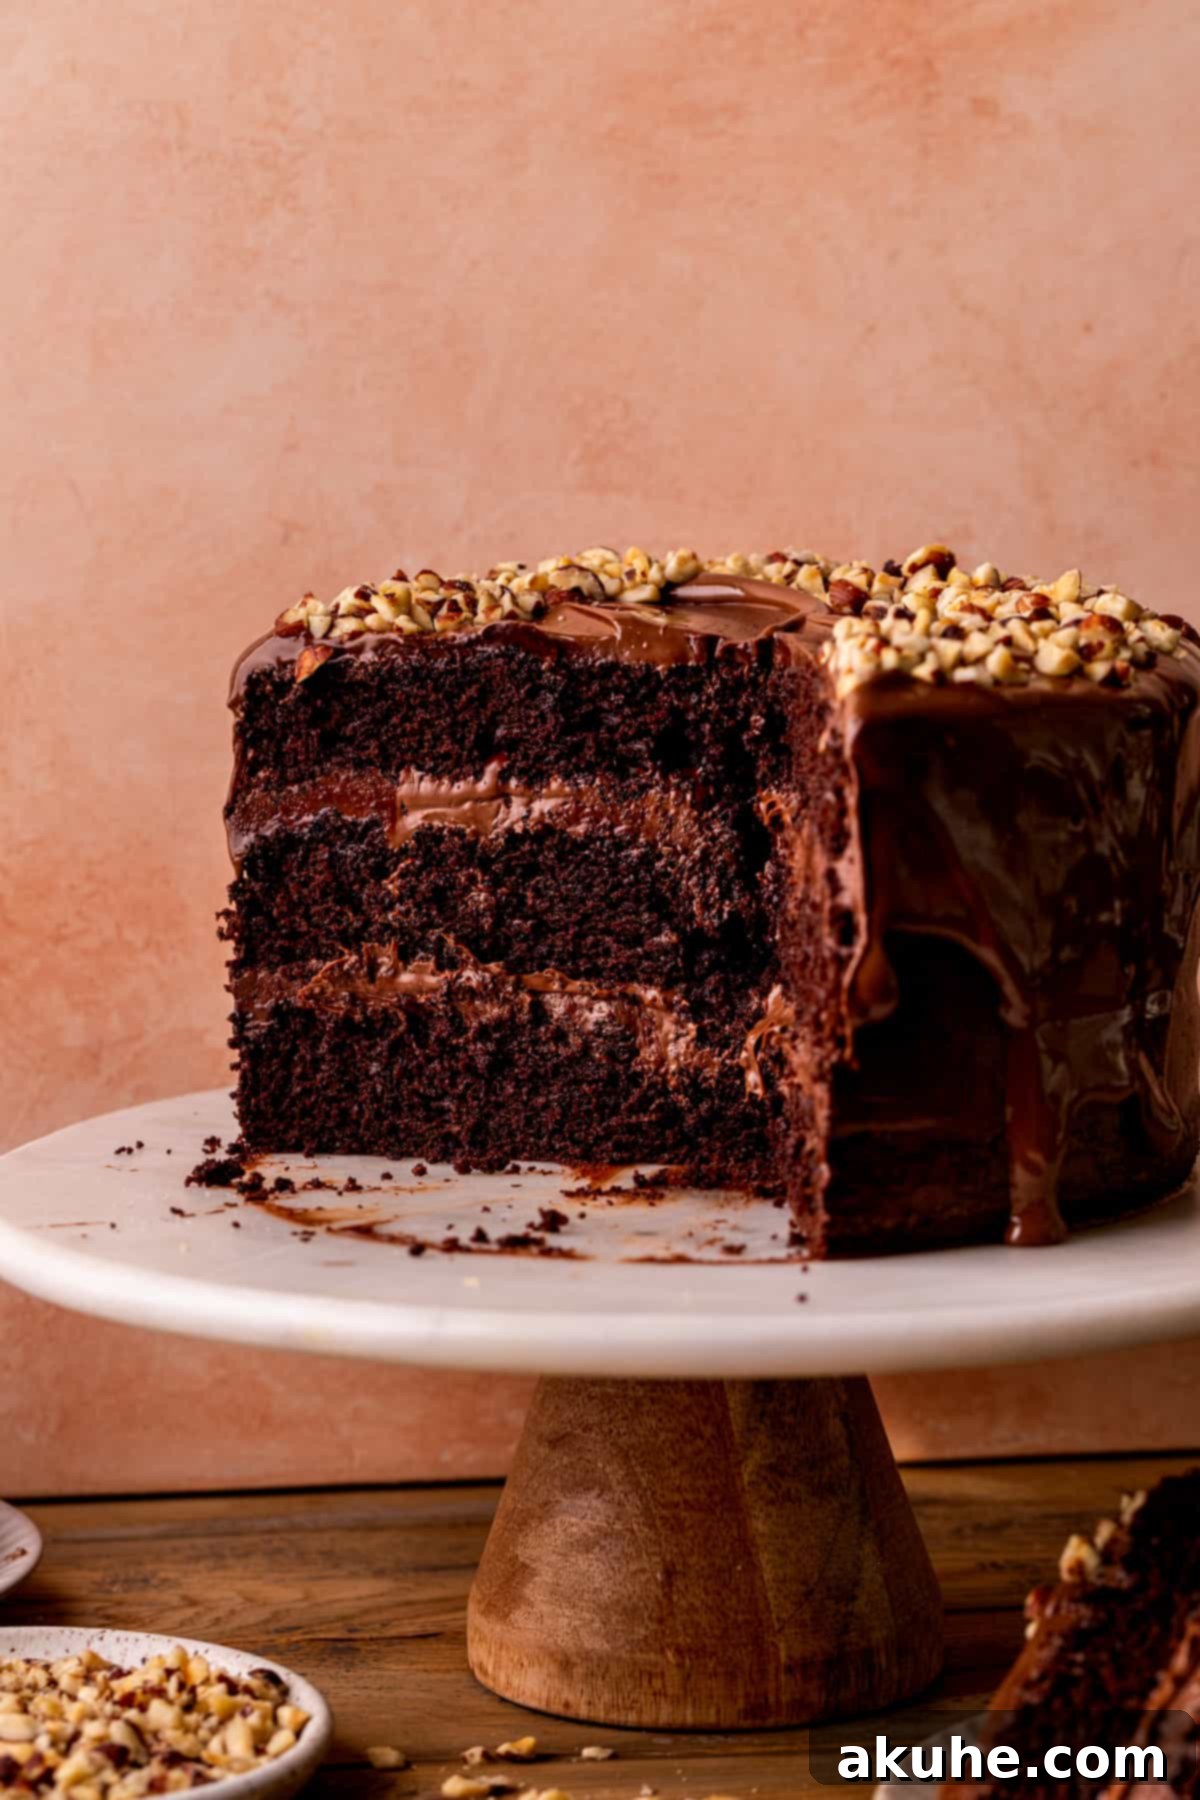
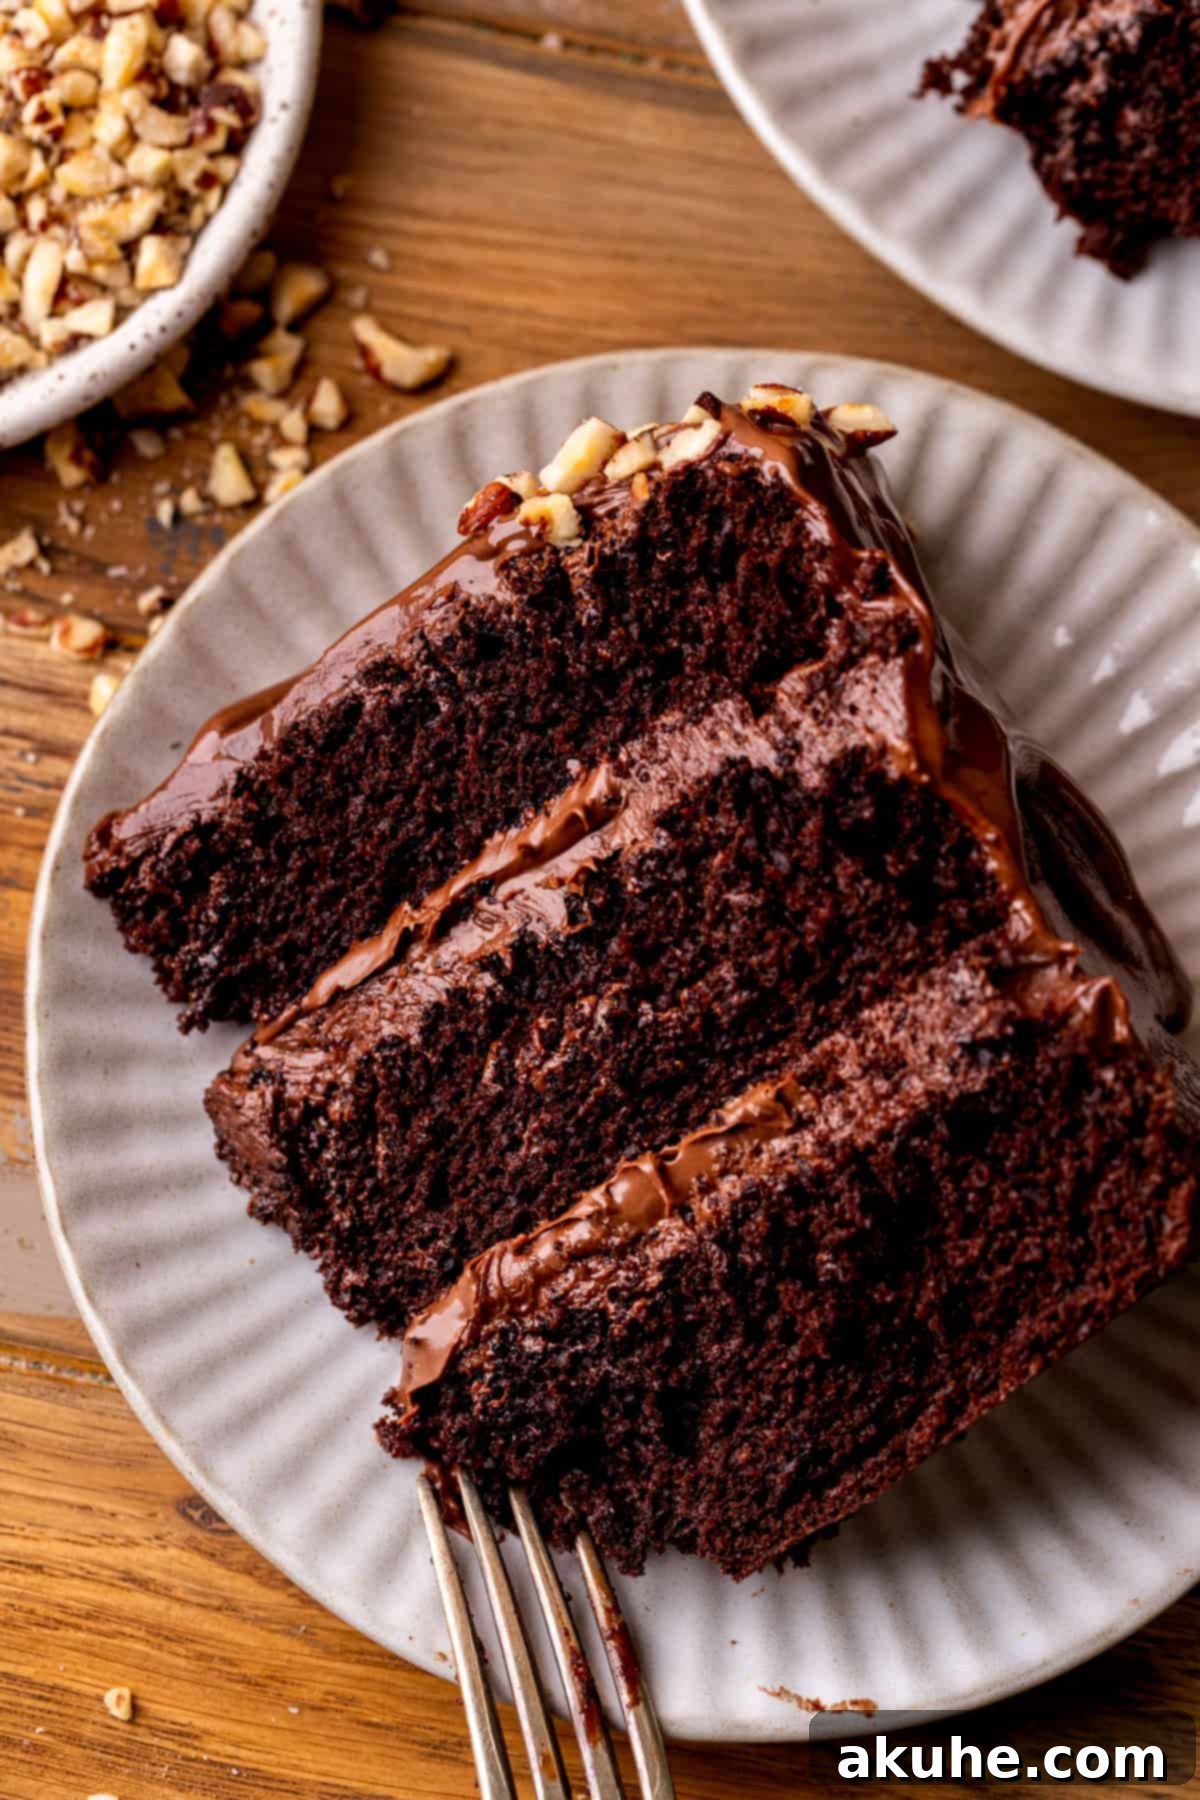
This homemade Nutella cake is an absolute must-try for every Nutella enthusiast. Its design ensures a burst of hazelnut-chocolate flavor in every forkful, with Nutella both generously spread between the layers and elegantly crowning the top. The tender, deeply chocolatey cake layers provide the ideal foundation, a robust yet delicate canvas for the rich Nutella filling and smooth frosting. If your heart beats for Nutella, we guarantee this cake will capture your culinary affection and become a cherished recipe in your baking repertoire.
For those who crave more Nutella-infused delights, explore our other beloved recipes, including the creamy Nutella Cheesecake, the delightfully chewy Nutella Cookies, and the intensely rich Nutella Brownies. Each offers a unique way to enjoy that irresistible hazelnut spread!
Why This Decadent Chocolate Nutella Cake Recipe Stands Out
Our chocolate Nutella cake isn’t just another dessert; it’s an experience crafted for maximum flavor and delight. Here’s why this recipe deserves a prime spot in your kitchen:
- Unmatched Nutella Flavor: Nutella is the star of this show, infusing every component – from the luscious filling to the silken frosting – with its iconic blend of roasted hazelnuts and rich cocoa. This ensures a consistent, delightful hazelnut-chocolate profile throughout the cake, making it truly irresistible for any Nutella lover.
- Perfectly Balanced Chocolate Cake Layers: The foundation of this magnificent dessert is a fudgy, incredibly moist chocolate cake. These layers are not merely a backdrop; they are crafted to be delicious on their own, providing the perfect textural and flavor contrast to the sweet, creamy Nutella filling and vibrant Nutella drip. The deep chocolate notes enhance the hazelnut, creating a harmonious symphony of flavors.
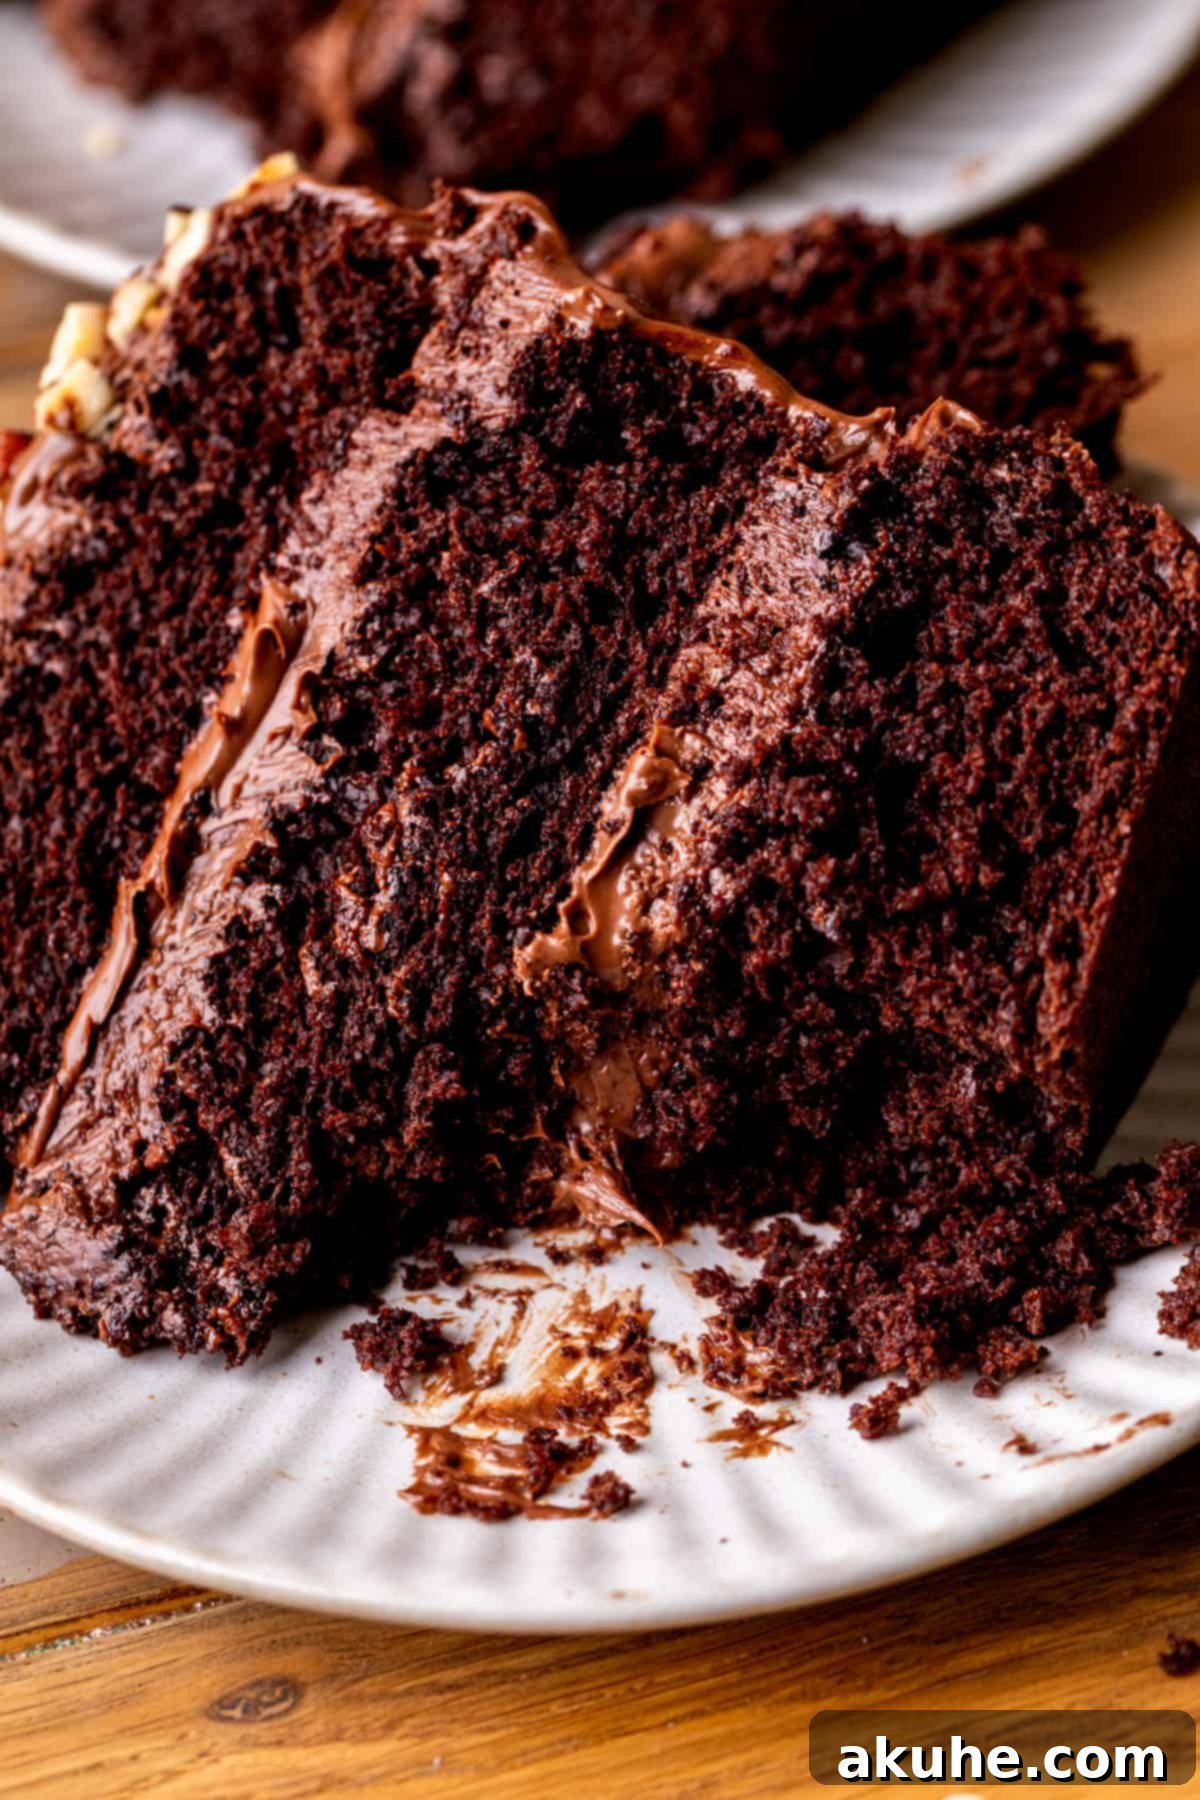
- Incredibly Soft and Fluffy Texture: Despite its richness, this cake boasts an astonishingly soft and fluffy crumb. Achieving this delicate texture is key to a truly pleasurable eating experience, allowing the cake to melt in your mouth while still holding its structure beautifully with the generous fillings and frosting.
- Easy-to-Follow Instructions: We’ve broken down each step into clear, concise instructions, making this show-stopping cake accessible for bakers of all skill levels. Even if you’re new to layer cakes, our detailed guide will help you achieve professional-looking results.
- Visually Stunning: With its elegant layers, rich chocolate tones, and glossy Nutella drip, this cake is as beautiful to behold as it is delicious to eat. It’s guaranteed to impress your guests and be the centerpiece of any dessert table.
Essential Ingredient Notes for Your Nutella Chocolate Cake
Understanding your ingredients is the first step to baking success. Here are detailed notes on the key components for this incredible chocolate Nutella cake. For the precise measurements and a comprehensive list, please refer to the complete recipe card below.
- Unsalted Butter: Always opt for unsalted butter to control the overall saltiness of your bake. It’s crucial that the butter is at room temperature – this means soft enough to indent with a finger but not melted. Pull it out of the refrigerator at least 2 hours before you plan to start baking for optimal creaming with sugar, which helps create a light and airy frosting.
- Oil: Using a neutral-flavored oil like canola oil, vegetable oil, or a light olive oil contributes to an incredibly moist and tender cake crumb. Unlike butter, oil remains liquid at room temperature, which helps keep the cake soft for longer.
- Eggs: Large eggs are specified for this recipe. Like butter, eggs should be at room temperature. Room temperature eggs emulsify better with other ingredients, resulting in a smoother, more uniform batter and a finer cake texture. Take them out of the fridge at least 30 minutes to an hour before use.
- Buttermilk: Full-fat or reduced-fat buttermilk both work beautifully in this recipe. Buttermilk adds a subtle tang that complements the chocolate and helps tenderize the cake due to its acidity reacting with the baking soda. Ensure your buttermilk is also at room temperature for the best results, as cold ingredients can seize up the batter.
- Powdered Sugar (Confectioners’ Sugar): This is essential for a silky-smooth Nutella frosting. Always sift your powdered sugar, especially for frosting, to remove any lumps. This step prevents a gritty texture and ensures a wonderfully smooth finish.
- Nutella: The star ingredient! Use genuine Nutella for its distinct hazelnut-chocolate flavor and creamy consistency. While other hazelnut spreads can be used as a substitute, be aware that their flavor profile and texture might differ slightly, potentially affecting the final taste and consistency of your cake.
- Unsweetened Cocoa Powder: Choose a high-quality unsweetened cocoa powder for the best chocolate flavor in your cake layers and frosting. Dutch-processed cocoa powder will give a darker color and mellower chocolate taste, while natural cocoa powder offers a lighter color and slightly more acidic flavor.
- Hot Water: Incorporating hot water into the chocolate cake batter helps to bloom the cocoa powder, intensifying its flavor and creating a more vibrant chocolate taste. It also contributes to the cake’s moistness and tender crumb.
Clever Ingredient Substitutions for Your Nutella Cake
While this recipe is perfected with the specified ingredients, we understand the need for flexibility. Here are some smart substitutions to adapt this delicious Nutella cake to your dietary needs or pantry availability:
- Dairy-Free Option: This recipe can easily be made dairy-free! Simply swap out the unsalted butter for your favorite plant-based butter alternative and use a dairy-free buttermilk substitute (such as almond milk or soy milk curdled with lemon juice or vinegar). Ensure any chocolate or Nutella alternative used is also dairy-free.
- Gluten-Free Adaptation: While we haven’t personally tested a gluten-free version, many readers have successfully substituted all-purpose flour with a high-quality 1:1 gluten-free baking flour blend (ensure it contains xanthan gum for structure). If you try this, please share your results in the comments; it helps the entire baking community!
- Homemade Buttermilk Substitute: No buttermilk on hand? No problem! You can easily make your own. For every 1 cup of buttermilk required, simply combine 1 cup of regular milk (dairy or non-dairy) with 1 tablespoon of white vinegar or lemon juice. Stir it gently and let it sit for about 5-10 minutes until it slightly curdles. This homemade version works wonderfully to achieve the same tenderizing and flavor-enhancing effects.
- Hazelnut Spread Alternatives: If Nutella is unavailable or you prefer a different brand, you can use another chocolate hazelnut spread. However, be mindful that the consistency and intensity of hazelnut flavor might vary, potentially altering the final cake’s texture and taste slightly. Always opt for a creamy, spreadable variety.
Step-By-Step Instructions: Crafting the Perfect Chocolate Cake Layers
Creating the foundational chocolate cake layers for this Nutella masterpiece is a straightforward process. Follow these detailed steps to achieve perfectly moist and tender cake layers:
STEP 1: Prepare Your Baking Environment. Begin by preheating your oven to 350°F (175°C). This ensures the oven is at the correct temperature for even baking. Next, meticulously prepare three 8-inch round cake pans. Generously spray each pan with a high-quality baking spray that includes flour, or grease and flour them. To prevent sticking and ensure easy release, line the bottoms of each pan with parchment paper circles. Spray the parchment paper again to create a truly non-stick surface. This crucial step guarantees your beautiful cake layers won’t tear upon removal.
STEP 2: Combine Dry Ingredients. In a large mixing bowl, sift together the all-purpose flour, unsweetened cocoa powder, cornstarch, baking powder, baking soda, and salt. Sifting is essential here as it aerates the dry ingredients and removes any lumps, which contributes to a smoother batter and a lighter cake texture. Whisk these dry ingredients thoroughly to ensure they are well combined and set the bowl aside.
STEP 3: Mix Wet Ingredients. In a separate, medium-sized bowl, combine the oil, granulated sugar, pure vanilla extract, room temperature eggs, and room temperature buttermilk. Whisk these ingredients together until the mixture is smooth and well emulsified. Gradually and slowly, pour in the hot water while continuously mixing. The hot water helps to “bloom” the cocoa, intensifying the chocolate flavor and contributing to the cake’s moistness.
STEP 4: Marry Wet and Dry Ingredients. Pour the wet ingredient mixture directly into the bowl with your sifted dry ingredients. Using a whisk, gently mix everything together. Be careful not to overmix; whisk just until there are no visible lumps of flour remaining. The batter will be notably thin and liquidy, which is perfectly normal for this recipe and contributes to the cake’s tenderness.
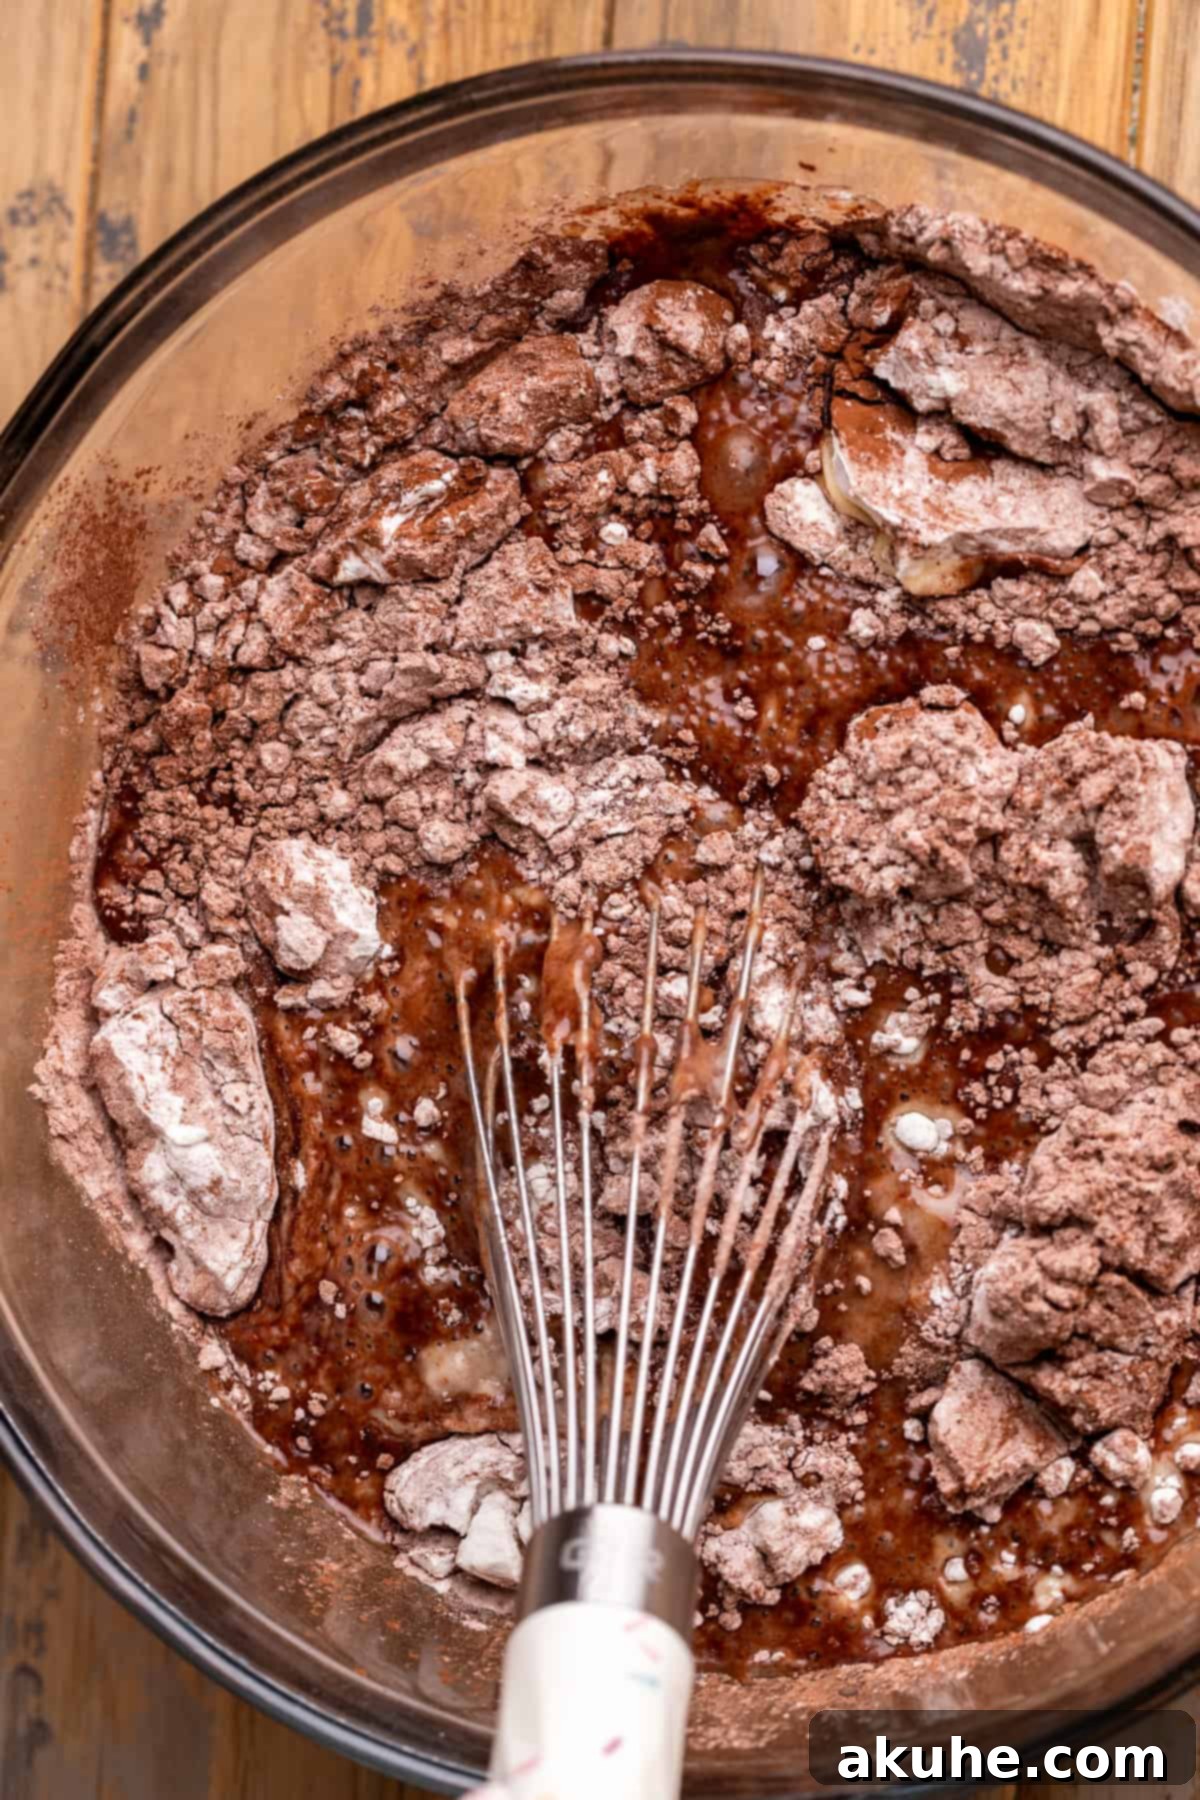
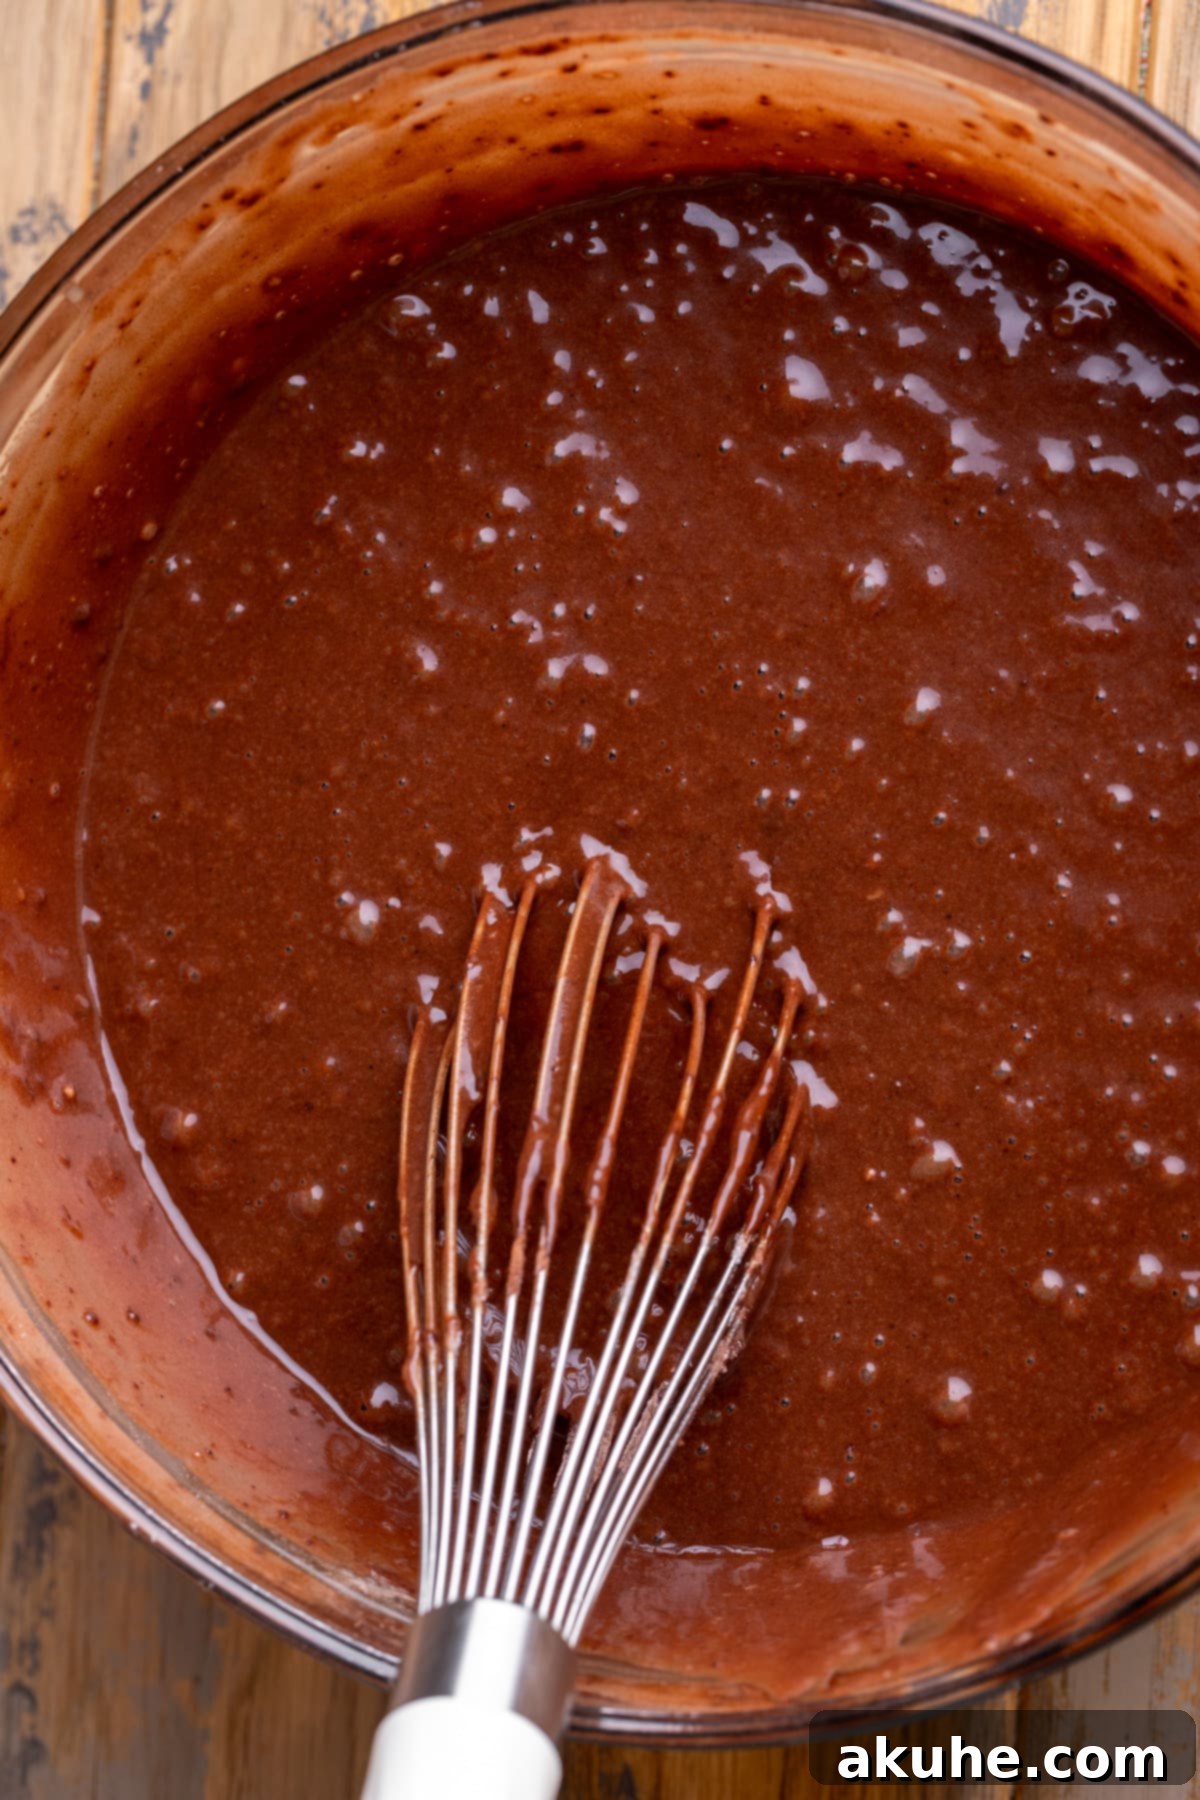
STEP 5: Distribute the Batter. Carefully divide the liquid chocolate cake batter as equally as possible among the three prepared 8-inch cake pans. You can use a kitchen scale for precision, but simply eyeballing it usually works fine.
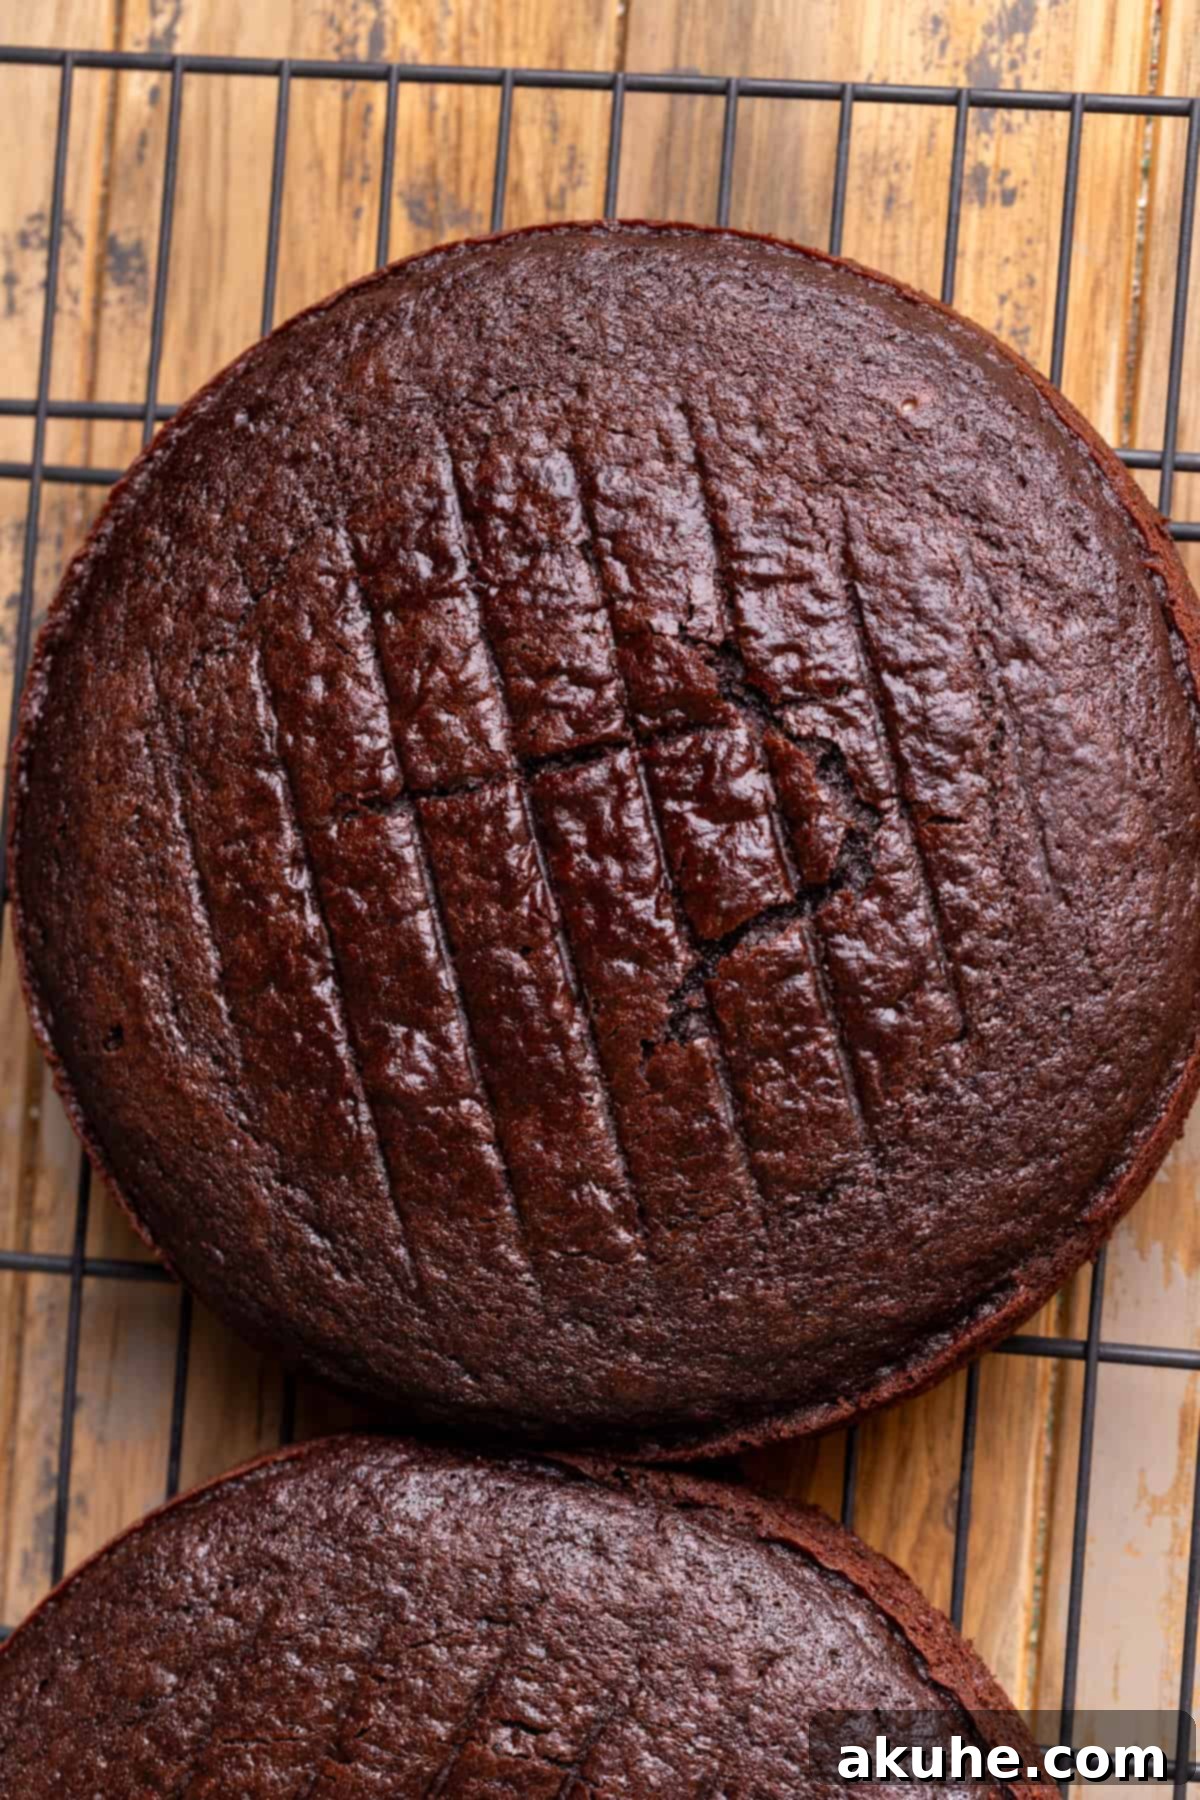
STEP 6: Bake to Perfection. Transfer the filled cake pans to your preheated oven. Bake for approximately 23-26 minutes. The exact baking time can vary depending on your oven, so keep an eye on them. To test for doneness, insert a wooden toothpick into the center of one of the cakes; it should come out clean or with only a few moist crumbs attached. Avoid overbaking, as this can lead to dry cake layers.
STEP 7: Cool Down. Once baked, remove the cakes from the oven. Allow them to cool in their pans for a critical 10 minutes. This resting period allows the cakes to firm up slightly, making them less prone to breaking. After 10 minutes, carefully invert the cakes onto a wire cooling rack. Remove the parchment paper and let them cool completely to room temperature before attempting to frost or assemble. Rushing this step can result in melted frosting and a messy cake.
Step-By-Step Instructions: Crafting Luxurious Nutella Frosting and a Glossy Nutella Drip
The frosting and drip are what truly elevate this cake to a Nutella lover’s paradise. Here’s how to create the rich, smooth Nutella frosting and that irresistible, glossy Nutella drip:
STEP 1: Sift Dry Frosting Ingredients. In a large mixing bowl, sift together the powdered sugar and unsweetened cocoa powder designated for the frosting. This step is crucial for achieving a smooth, lump-free frosting. Set this mixture aside.
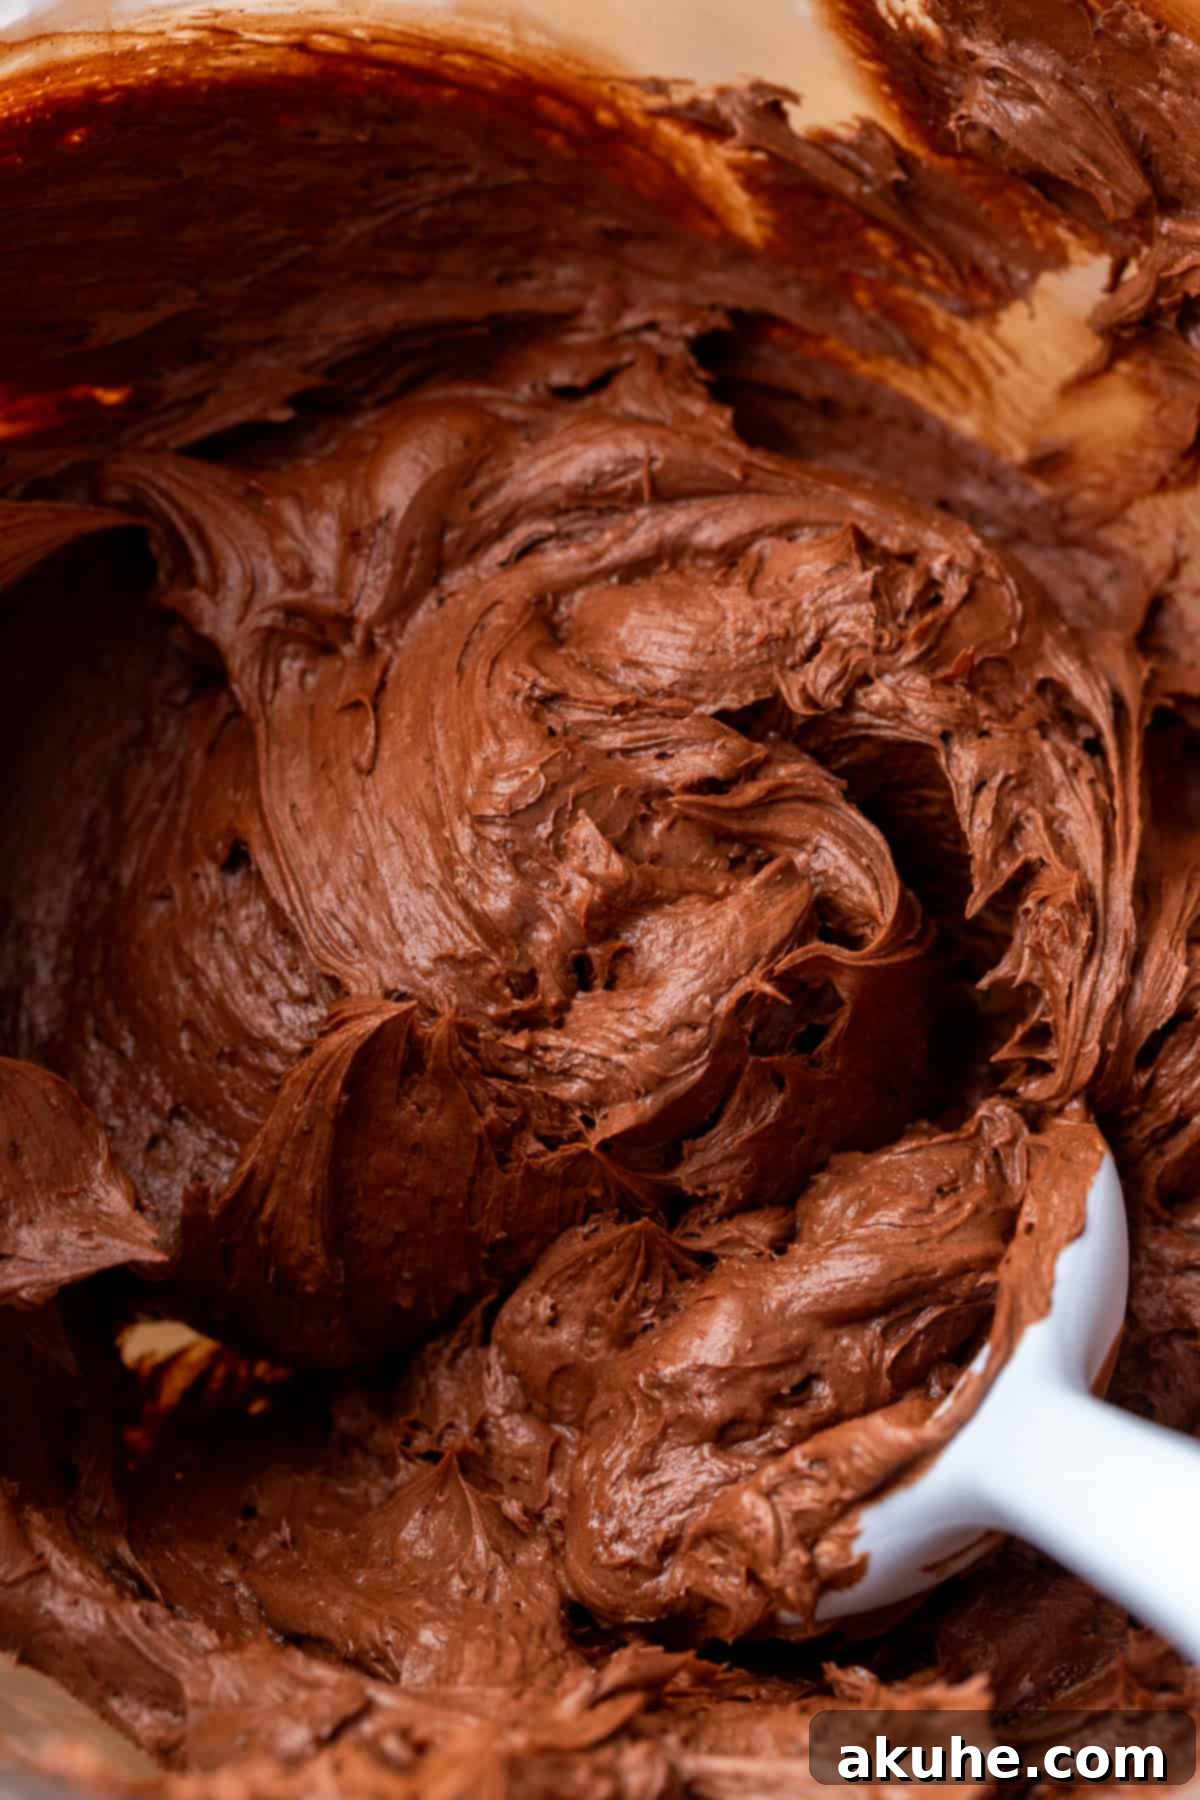
STEP 2: Cream the Butter and Add Nutella. Using an electric mixer (either a stand mixer with a paddle attachment or a handheld mixer), beat the room temperature unsalted butter on high speed for a full 3 minutes. This process incorporates air, making the butter light and fluffy. Stop the mixer, scrape down the sides of the bowl with a rubber spatula to ensure everything is evenly mixed. Now, add the 3/4 cup of Nutella to the beaten butter and mix on medium speed until it is fully combined and smooth. Scrape the bowl again as needed.
STEP 3: Mix in Powdered Sugar and Finish Frosting. Add approximately half of the sifted powdered sugar and cocoa powder mixture to the butter-Nutella mixture. Begin mixing on the lowest speed to avoid a cloud of powdered sugar. Once combined, increase the speed to medium until smooth. Then, add the remaining powdered sugar mixture and continue mixing on low speed until fully incorporated. Finally, add the vanilla extract and salt. Increase the mixer speed to high and beat the frosting for another 2-3 minutes until it becomes wonderfully light, fluffy, and smooth. The salt balances the sweetness, and vanilla enhances the overall flavor.
STEP 4: Prepare the Nutella Drip. This step should be done just before you are ready to apply the drip to the cake. Place the 3/4 cup of Nutella for the drip into a microwave-safe bowl. Heat it in the microwave for approximately 30 seconds on high power. Stir the Nutella until it is smooth and has a pourable, slightly runny consistency. If it’s too thick, heat it for another 10-15 seconds, stirring after each interval, until it reaches the desired consistency. Be careful not to overheat it.
Assembling Your Magnificent Nutella Cake
Now for the exciting part – bringing all the delicious components together to create this show-stopping Nutella cake. Take your time and enjoy the process!
STEP 1: Prepare Your Workstation. Place your first completely cooled chocolate cake layer onto a cake stand or serving plate. If using a cake turntable, place a small dollop of frosting on the stand before placing the cake layer down; this helps secure the cake and prevent it from sliding.
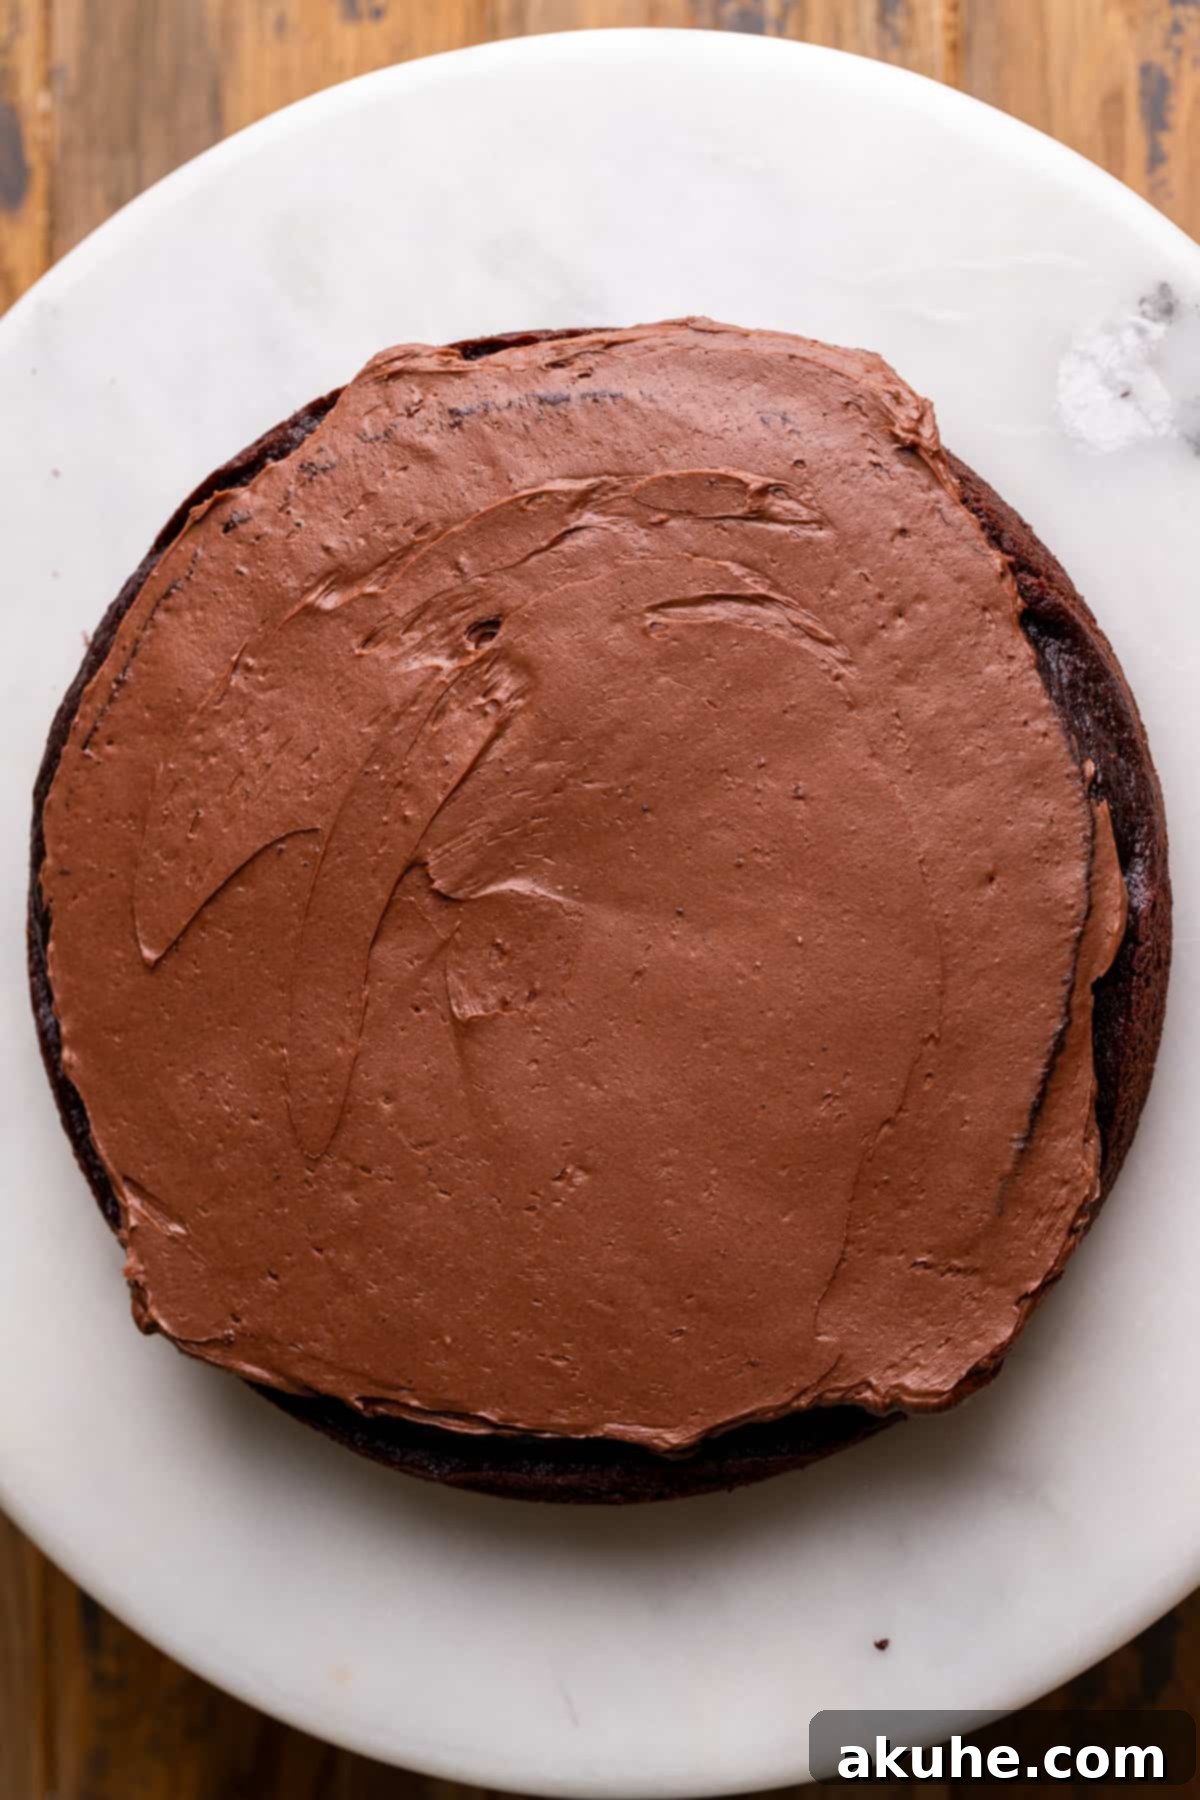
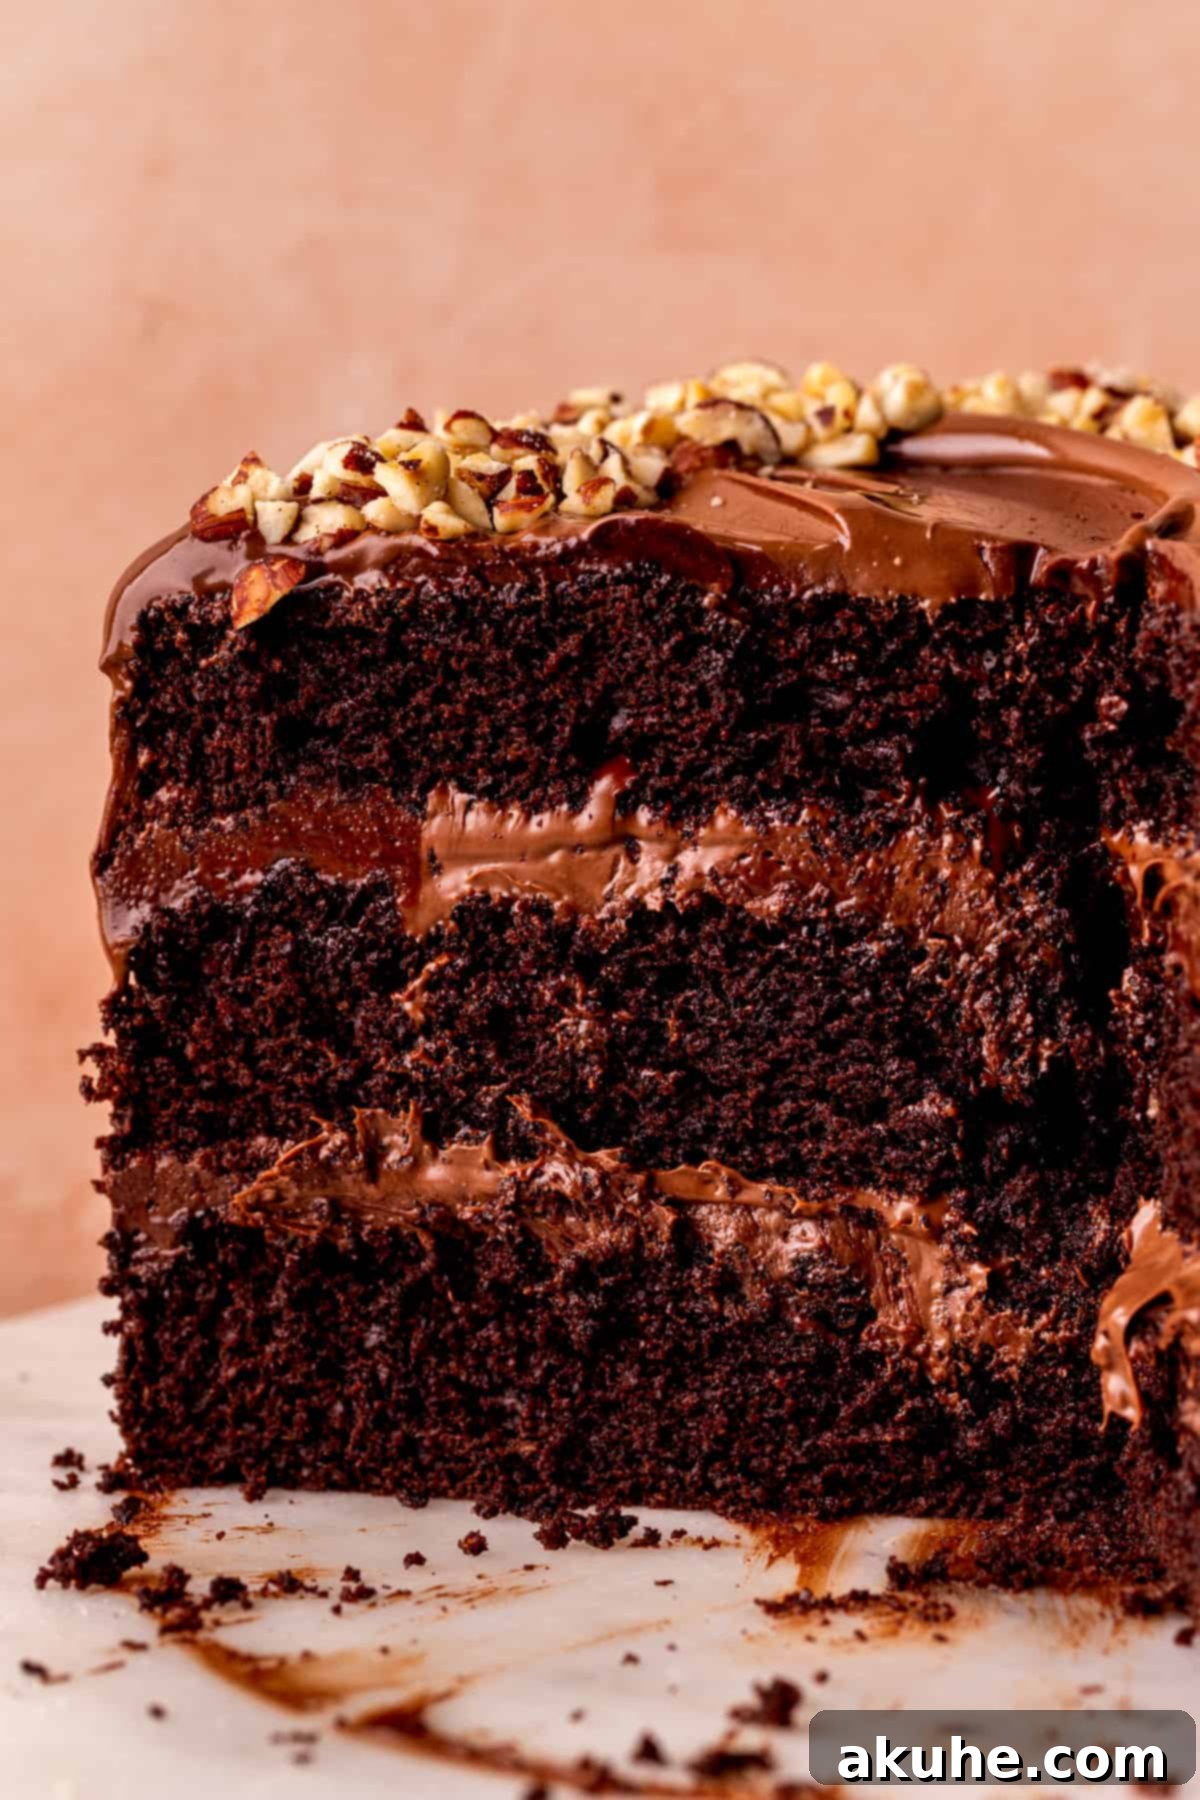
STEP 2: First Layer of Frosting and Nutella Filling. Using an offset spatula, spread a generous 3/4 cup of the prepared Nutella frosting evenly over the first cake layer. Next, warm the 2/3 cup of Nutella (designated for the filling) in the microwave until it is melted and pourable, similar to the drip consistency. Using a piping bag fitted with a round tip (or simply snip off the corner of a Ziploc bag), pipe a sturdy border of the Nutella frosting around the very edge of the frosted cake layer. This creates a dam to contain the melted Nutella. Carefully pour half of the melted Nutella filling within this piped border.
STEP 3: Second Layer Construction. Gently place the second chocolate cake layer on top of the first, aligning it carefully. Lightly press down to ensure it’s level. Repeat Step 2: spread another 3/4 cup of Nutella frosting, pipe a border, and pour the remaining half of the melted Nutella filling within the border.
STEP 4: Final Layer Placement. Position the third and final cake layer on top. For the neatest finish, place this layer upside down so that the perfectly flat bottom of the cake faces upwards. This creates a level top surface, making it easier to frost smoothly.
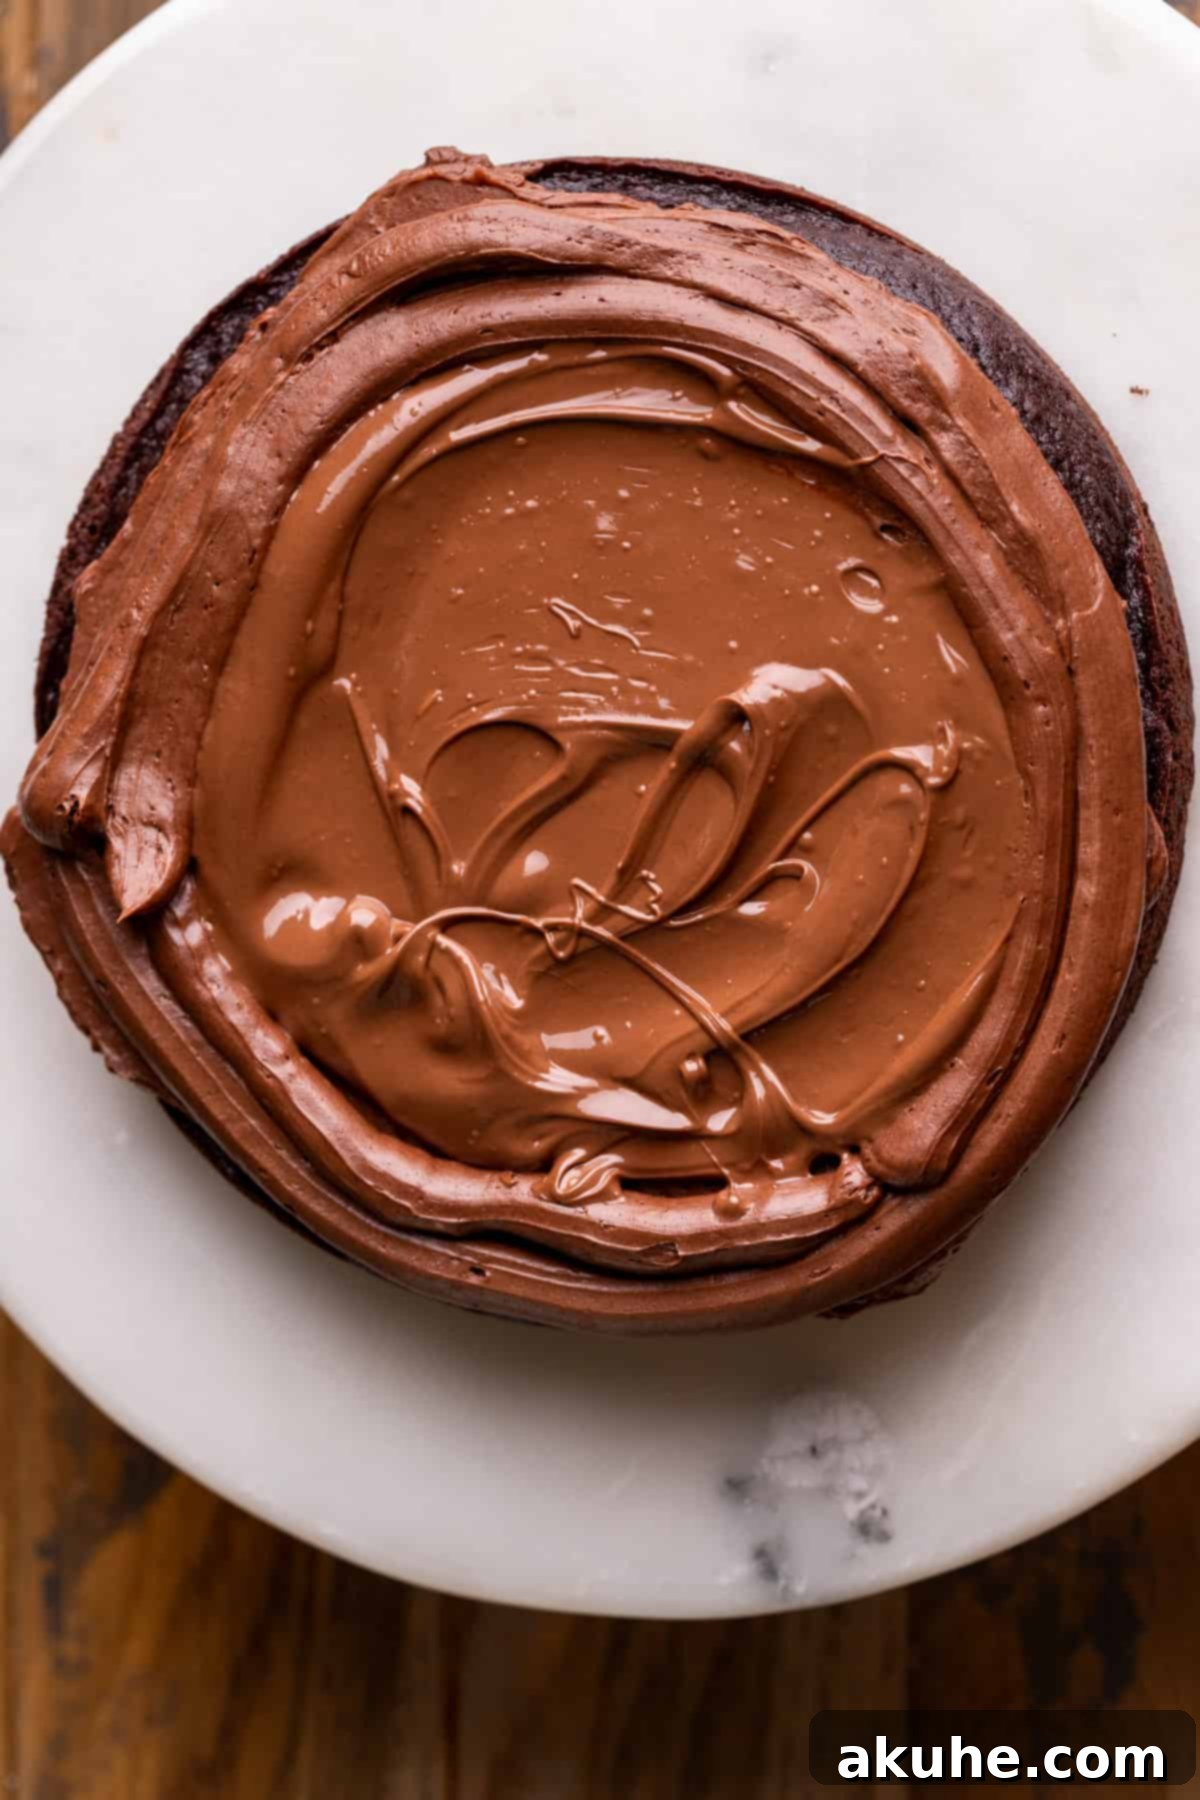
STEP 5: Crumb Coat and Chill. Using an offset spatula, apply a thin, even layer of the Nutella frosting over the entire cake – both the top and the sides. This is known as a “crumb coat” and its purpose is to trap any loose cake crumbs, preventing them from mixing into your final decorative frosting layer. Once coated, transfer the cake to the freezer for about 15-20 minutes, or to the refrigerator for 30 minutes, until the crumb coat is firm to the touch. This recipe often features a “semi-naked” look, meaning a minimal yet elegant frosting application that allows some of the cake layers to peek through. If you desire a fully frosted cake, you will apply a thicker second layer of frosting after this chill period.
STEP 6: Apply the Nutella Drip. Once the crumb coat is set, retrieve your prepared, slightly warmed Nutella drip. Carefully pour about half of the Nutella drip onto the very top center of the cake. Using an offset spatula or the back of a spoon, gently push the Nutella towards the edges, allowing it to slowly cascade and drip down the sides of the cake in an organic, artistic fashion. For thicker drips, apply more. Once satisfied, pour the remaining Nutella drip onto the top center of the cake, spreading it evenly across the surface. Place the cake back into the freezer for another 10-15 minutes to allow the drip to set and firm up.
STEP 7: Decorate to Perfection. Now for the final flourish! Once the Nutella drip is set, add any desired decorations to the top of your cake. Chopped toasted hazelnuts are a fantastic choice, complementing the Nutella flavor beautifully. You could also add chocolate curls, a scattering of chocolate chips, or even a few Ferrero Rocher candies for an extra touch of indulgence. Slice, serve, and enjoy your magnificent homemade Nutella cake!
Expert Baking Tips for a Flawless Nutella Chocolate Cake
- Achieve Accurate Flour Measurement: The single most common mistake in baking is improper flour measurement. Do not scoop your measuring cup directly into the flour bag, as this compacts the flour, leading to an excess amount and a dry, dense cake. Instead, use the “spoon and level” method: spoon flour into your measuring cup until it overflows, then level off the top with the straight edge of a knife. For truly professional results, use a kitchen scale to measure flour by weight.
- Ensure Easy Cake Removal: To effortlessly remove your perfectly baked cake layers without sticking or tearing, thorough pan preparation is key. Always start by generously spraying your cake pans with a high-quality nonstick baking spray that contains flour. Then, line the bottom of each pan with a parchment paper circle. Spray the parchment paper again to ensure every surface is coated. Be incredibly thorough with your spraying; any missed spots can cause the cake to stick and potentially ruin a layer.
- Mind Your Ingredient Temperatures: For the best emulsification and a smooth batter/frosting, ensure all dairy ingredients (butter, eggs, buttermilk) are at room temperature unless otherwise specified. This allows them to blend together seamlessly, preventing a curdled appearance and ensuring a consistent texture.
- Don’t Overmix the Batter: Once you combine the wet and dry ingredients for the cake, mix only until just combined and no streaks of flour remain. Overmixing develops the gluten in the flour too much, leading to a tough and chewy cake rather than a tender and fluffy one. A few small lumps are better than an overmixed batter.
- Baking at High Altitudes: If you’re baking at a high altitude (above 3,000 feet), cake recipes often require minor adjustments. To prevent the cake from rising too quickly and then collapsing, try adding an extra 2 tablespoons of all-purpose flour to the cake batter. This provides a bit more structure. You might also slightly reduce baking powder and sugar, but the flour adjustment is usually the most impactful for layer cakes.
- The Power of a Crumb Coat: Never skip the crumb coat! This initial, thin layer of frosting seals in any loose crumbs, creating a clean canvas for your final decorative layer of frosting. Chilling the cake after the crumb coat is also essential for a stable and smooth finish.
Frequently Asked Questions (FAQ) About Our Nutella Cake
Absolutely! This is a fantastic time-saving tip for complex layer cakes. Once your cake layers have completely cooled to room temperature, wrap each layer tightly in several layers of plastic wrap to prevent freezer burn and drying out. You can then freeze them for up to 30 days. When you’re ready to decorate, simply pull them out about 1 hour before you plan to frost, allowing them to thaw at room temperature. They’ll be just as fresh and moist as if they were baked that day!
Yes, you can certainly adapt the recipe to different pan sizes, though it will affect the baking time and cake thickness. If you opt for two 9-inch cake pans, your layers will be slightly thinner, and the baking time might be reduced by a few minutes. Conversely, if you use two or three 6-inch cake pans, your layers will be significantly thicker, requiring a longer baking time. Always keep a close eye on the cakes and use the toothpick test for doneness.
Yes, this versatile chocolate Nutella cake recipe can be easily transformed into delicious cupcakes! This recipe yields approximately 24 standard-sized Nutella cupcakes. Fill cupcake liners about two-thirds full and bake for roughly 18-22 minutes, or until a toothpick inserted into the center comes out clean. If you only need a smaller batch, simply halve the recipe to make about 12 cupcakes.
Doming (a raised center) can be frustrating. To prevent this, ensure your oven is accurately calibrated. You can also try using cake strips, which are wet fabric strips wrapped around the outside of the cake pans. These help the edges bake slower, allowing the cake to rise more evenly. Alternatively, after baking, you can use a serrated knife to gently level any domes once the cakes are completely cool.
Delicious Recipe Variations for Your Nutella Cake
While this Nutella cake is perfect as is, here are some exciting variations to customize it and add your personal touch:
- Ferrero Rocher Elegance: Elevate your Nutella cake into a luxurious Ferrero Rocher cake! Simply arrange whole Ferrero Rocher candies around the top edge of the cake, or chop them roughly and sprinkle them over the Nutella drip for an added crunch and flavor dimension. This makes for a stunning presentation.
- Fully Frosted Finish: If you prefer a classic, fully frosted cake over the semi-naked look, it’s easy to achieve. After applying and chilling the crumb coat (Step 5 of assembly), apply a second, thicker layer of Nutella frosting over the entire cake using an offset spatula or bench scraper to achieve perfectly smooth sides and top. You can then proceed with the Nutella drip or omit it for a truly traditional look.
- Add a Raspberry Compote: For a delightful contrast of flavors, consider adding a thin layer of homemade raspberry compote between one of the cake layers and the Nutella filling. The tartness of the raspberries beautifully cuts through the richness of the chocolate and Nutella.
- Nutella Ganache Drip: Instead of melted Nutella for the drip, you can make a richer Nutella ganache by warming Nutella with a small amount of heavy cream. This creates an even more luxurious and stable drip.
- Espresso Kick: Enhance the chocolate flavor by adding 1-2 teaspoons of instant espresso powder (or strong brewed coffee) to your chocolate cake batter. It won’t make the cake taste like coffee, but it will deepen the chocolate notes significantly.
Special Tools for Baking Success
Having the right tools can make your baking experience much smoother and more enjoyable. Here are some of our recommended special tools for this Nutella cake:
- Cake Pans: For consistently beautiful layers, we highly recommend using high-quality 8-inch cake pans. Durable pans ensure even heat distribution and professional-looking results.
- Parchment Paper Circles: Save yourself time and effort with pre-cut 8-inch parchment paper circles. These eliminate the need to trace and cut from a roll, making pan preparation a breeze and guaranteeing a non-stick bottom.
- Baking Spray: A reliable nonstick baking spray with flour is a game-changer for easy cake release, ensuring your precious layers come out of the pan perfectly intact every time.
- Offset Spatula: An offset spatula is indispensable for smoothly spreading frosting and fillings between layers and over the cake’s surface. Its angled design prevents your knuckles from dragging in the frosting.
- Cake Turntable: A good quality cake turntable, especially a sturdy cast iron one like Ateco, makes frosting and decorating a layered cake significantly easier and more professional. It allows you to rotate the cake smoothly for even application.
- Cake Scraper: For achieving wonderfully smooth and sharp edges on your frosted cake, a metal cake scraper is a professional’s secret weapon. It helps create a polished finish.
- Piping Bags: We prefer using 18-inch piping bags because their larger capacity means you don’t have to refill them as frequently, which is especially helpful when frosting a large cake.
- Piping Tip: For elegant borders, swirls, or decorative touches, the Wilton 1M star piping tip is a versatile and popular choice, perfect for creating beautiful designs with your Nutella frosting.
Storing and Freezing Your Delicious Nutella Cake
To keep your Nutella cake fresh and delicious for as long as possible, proper storage is essential:
Store this Nutella cake in an airtight container, such as a cake carrier, at room temperature for up to 2 days, or in the refrigerator for up to 5 days. The airtight environment prevents the cake from drying out and absorbing other refrigerator odors. Allow refrigerated cake to come closer to room temperature for about 30 minutes before serving to enjoy the best texture and flavor.
For longer storage, you can easily freeze individual slices of the Nutella cake. Place the cake slices in an airtight container, separating layers with parchment paper if stacking, or wrap each slice individually in plastic wrap and then foil. Freeze for up to 30 days. When you’re ready for a treat, simply thaw a slice in the refrigerator overnight or at room temperature for a few hours. This makes it perfect for having a decadent dessert on hand whenever a craving strikes!
Explore More Layered Cake Recipes to Try
Ready for more baking adventures? Discover these other fantastic cake recipes:
- Moist Banana Snack Cake
- Zesty Key Lime Pie Cake
- Classic Strawberry Shortcake
- Bright Lemon Poppy Seed Cake
- Nostalgic Ding Dong Cake
If you fall in love with this recipe, please make sure to leave a STAR REVIEW below! Don’t forget to tag me on Instagram @stephaniesweettreats with your stunning creations. For more inspiring baking ideas, make sure to follow me on Pinterest. Happy baking!
Nutella Cake
This Nutella cake boasts a gooey Nutella filling, three rich chocolate cake layers, and decadent Nutella frosting. It’s the ultimate chocolate and hazelnut dream!
Print Recipe
Pin Recipe
Leave a Review
Ingredients
Chocolate Cake
- 2 1/4 cups All-purpose flour
- 1/4 cup Cornstarch
- 1 cup Unsweetened cocoa powder
- 2 tsp Baking powder
- 1 tsp Baking soda
- 1 tsp Salt
- 1 cup Oil, canola or vegetable oil
- 1 3/4 cup White granulated sugar
- 1 tsp Pure vanilla extract
- 4 Large eggs, room temperature
- 1 cup Buttermilk, room temperature
- 1 cup Hot water
- 2/3 cup Nutella, for the filling
Nutella Frosting
- 2 1/2 cups Unsalted butter, room temperature
- 3/4 cup Nutella
- 2 cups Powdered sugar, sifted
- 3/4 cup Unsweetened cocoa powder, sifted
- 1/4 tsp Salt
- 1 tsp Pure vanilla extract
Nutella Drip
- 3/4 cup Nutella
Instructions
Chocolate Cake
- Preheat the oven to 350℉ (175°C). Spray three 8-inch cake pans with baking nonstick spray. Line the bottoms with parchment paper circles and spray again.
- In a large bowl, sift the flour, cocoa powder, cornstarch, baking powder, baking soda, and salt. Set aside.
- In a medium bowl, mix the oil, sugar, vanilla, eggs, and buttermilk. Mix until smooth. Slowly add in the hot water and mix into the batter.
- Pour the wet ingredients into the dry ingredients and mix using a whisk until there aren’t any flour lumps. It will be a liquidy batter.
- Pour the batter into the three cake pans. Bake for 23-26 minutes, or until a toothpick inserted comes out clean.
- Let the hot cake sit in the pans for 10 minutes. Then, transfer to a cooling rack. Cool completely before decorating.
Nutella Frosting
- In a large bowl, sift the powdered sugar and cocoa powder. Set aside.
- Using a mixer, beat the butter on high speed for 3 minutes. Scrape the bowl. Add in the Nutella and mix until combined.
- Add in half of the powdered sugar mixture and mix on low until combined. Add the rest of the powdered sugar and mix until smooth. Add in the vanilla and salt and mix on high speed until smooth.
Nutella Drip
- Right before you need it, place the Nutella in a bowl. Heat for 30 seconds in the microwave and stir until pourable.
Assembly
- Heat the 2/3 cup of Nutella for the filling in the microwave until melted.
- Place the first cake layer down. Spread 3/4 cup of frosting over the cake layer. Pipe a border of frosting around the edge of the cake. Pour half of the melted Nutella filling over the cake within the border.
- Repeat the previous step with the second cake layer. Place the last cake layer with the bottom of the cake facing up for a flat top.
- Spread the frosting in a light layer (crumb coat) over the entire cake and freeze for 15 minutes to set.
- Pour half of the Nutella drip over the cake and use an offset spatula to gently push the drip down the sides of the cake. Pour the rest of the Nutella drip on top of the cake. Freeze for 10 minutes to set it.
- Decorate the top of the cake as desired (e.g., with chopped hazelnuts).
Notes
Flour: Make sure flour is spooned and leveled or use a kitchen scale. Compacted flour can dry out the cake.
High Altitude Baking: Add an extra 2 tablespoons of flour to the cake batter.
Room Temperature Ingredients: Pull out all dairy ingredients (butter, eggs, buttermilk) 2 hours before baking for optimal results.
Nutrition Information (per serving):
Calories: 785kcal, Carbohydrates: 84g, Protein: 7g, Fat: 57g, Saturated Fat: 32g, Polyunsaturated Fat: 5g, Monounsaturated Fat: 17g, Trans Fat: 1g, Cholesterol: 78mg, Sodium: 342mg, Potassium: 357mg, Fiber: 6g, Sugar: 45g, Vitamin A: 912IU, Calcium: 114mg, Iron: 4mg
