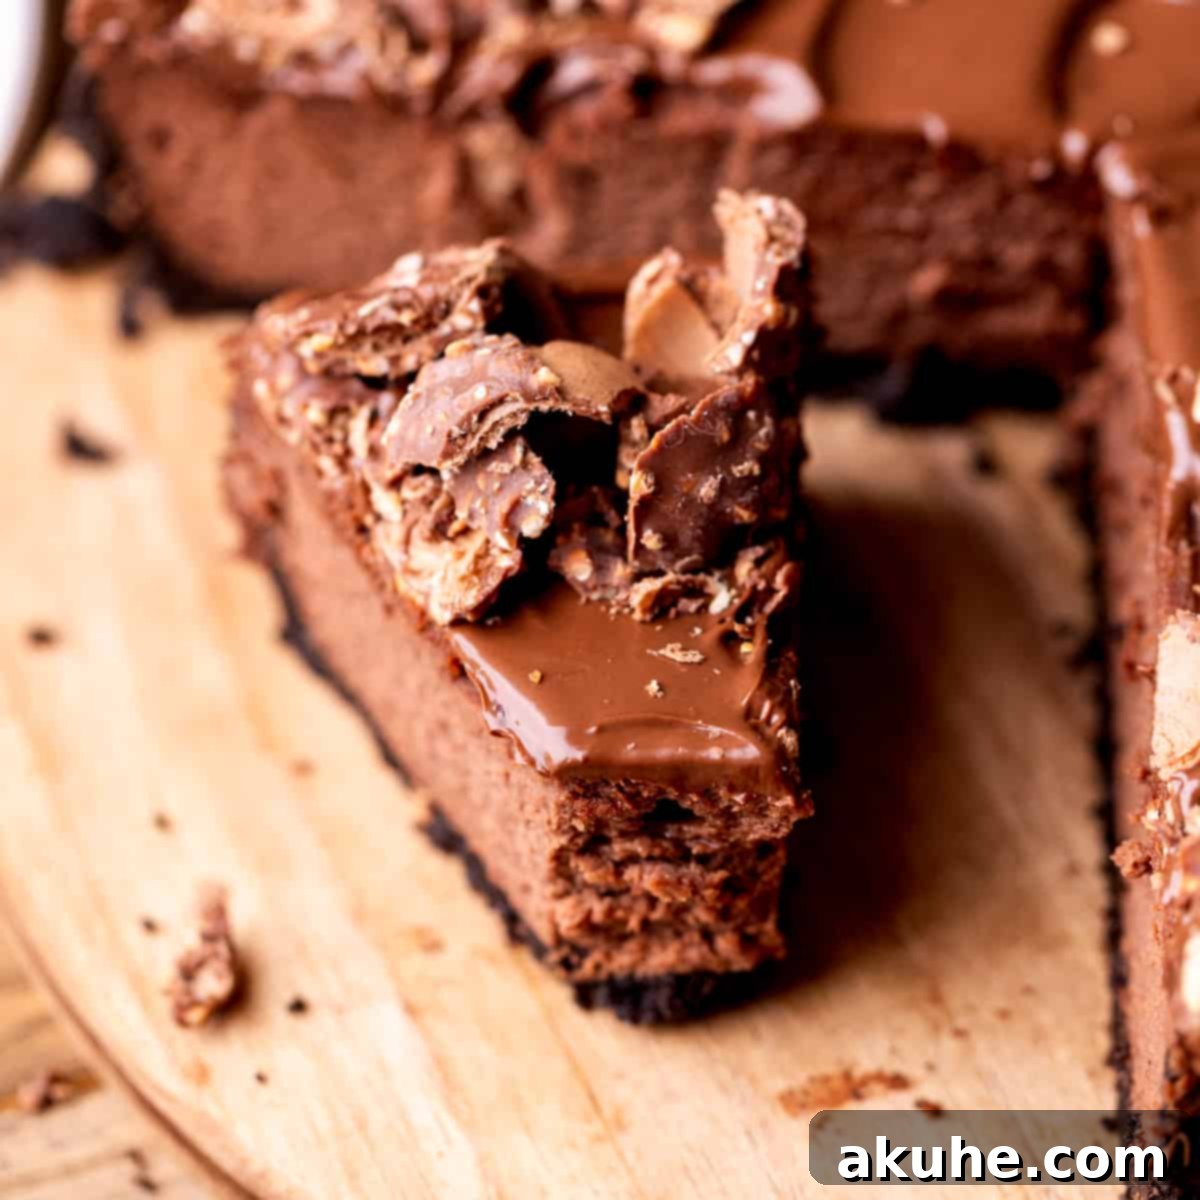
Indulge in the ultimate dessert experience with this unbelievably rich and creamy Nutella Cheesecake, a true showstopper for any occasion. Featuring a delightful, buttery Oreo cookie crust, a velvety smooth baked chocolate Nutella cheesecake filling, and crowned with a luscious layer of melted Nutella and crunchy chopped Ferrero Rocher, this recipe is a dream come true for any hazelnut chocolate lover. Every bite promises an exquisite blend of textures and an explosion of irresistible flavor. Prepare to amaze your guests and satisfy the deepest dessert cravings with this guaranteed crowd-pleaser.
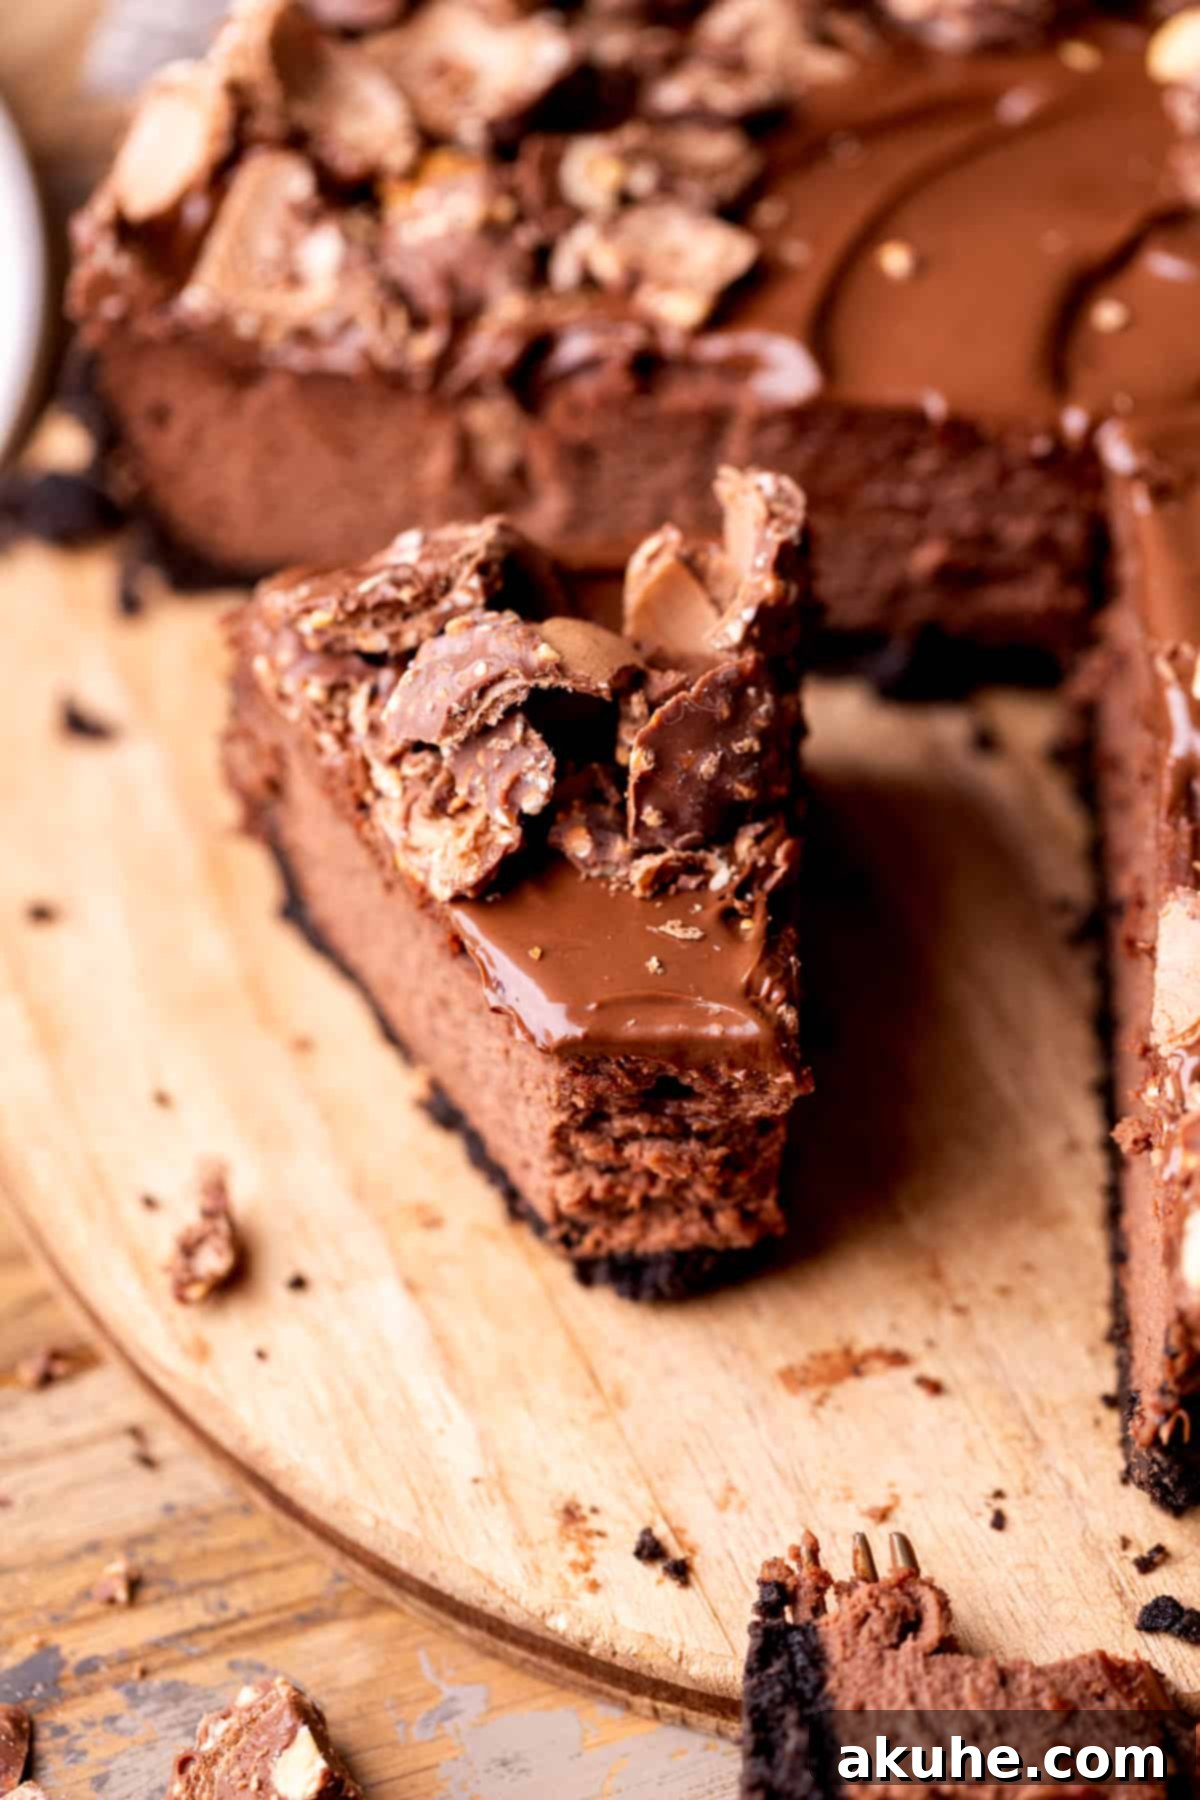
This dessert isn’t just a cheesecake; it’s an experience. Imagine the classic richness of a New York-style cheesecake infused with the beloved flavor of Nutella, all sitting atop a perfectly crumbly Oreo base. It’s designed to be a grand finale at dinner parties, family gatherings, or simply a luxurious treat for yourself. If you’re a devoted fan of Nutella, prepare for this to become your new favorite dessert recipe. For those eager to explore more Nutella-infused delights, be sure to try our Nutella Cookies, Nutella Brownies, and Nutella Muffins.
Why This Nutella Cheesecake Recipe Stands Out
Crafting the perfect cheesecake can seem daunting, but this Nutella cheesecake recipe simplifies the process while delivering exceptional results. Here’s why this particular recipe will become a cherished addition to your baking repertoire:
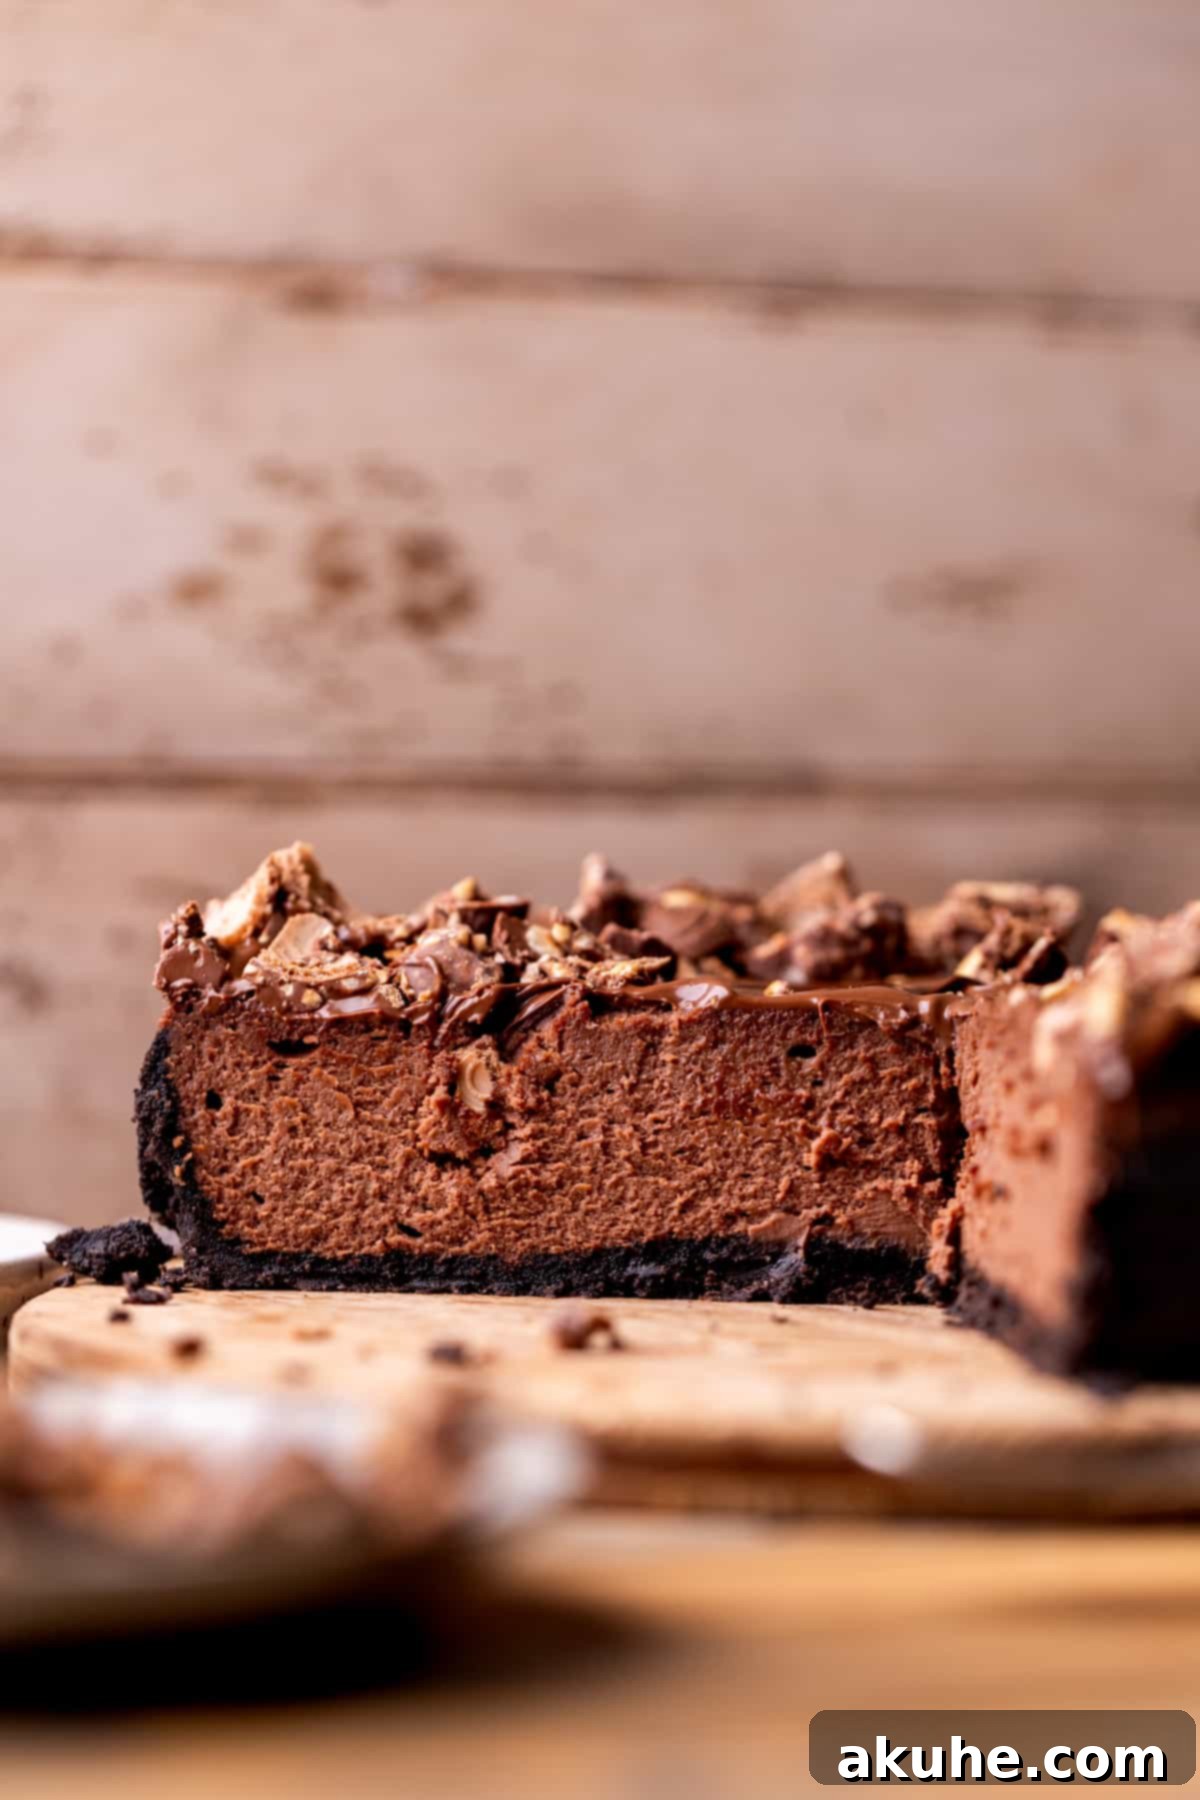
- Unrivaled Creamy Texture: This Nutella cheesecake boasts a luxurious, melt-in-your-mouth texture that is the hallmark of a truly great cheesecake. We achieve this through precise ingredient ratios and a gentle baking method that ensures a smooth, uniform crumb without any grittiness. The result is a cheesecake that’s wonderfully dense yet incredibly delicate, making each forkful a heavenly experience.
- Deep, Authentic Nutella Flavor: Beyond just a hint, this cheesecake is packed with the rich, unmistakable taste of Nutella. We incorporate generous amounts of the chocolate hazelnut spread directly into the filling, ensuring that its distinctive nutty and chocolatey notes shine through in every single slice. It’s a dream come true for anyone who adores Nutella.
- Irresistible Oreo Cookie Crust: The foundation of this spectacular dessert is a crunchy, flavorful crust made from crushed Oreo cookies blended with melted butter. This creates a sweet, slightly salty, and incredibly sturdy base that perfectly complements the creamy filling. The chocolatey crunch of the Oreos adds a delightful contrast to the smooth cheesecake, elevating the entire dessert.
- Surprisingly Easy to Make: Despite its gourmet appearance and decadent taste, this Nutella cheesecake recipe is designed for home bakers of all skill levels. We break down the process into clear, manageable steps, using readily available ingredients. Our detailed instructions, complete with helpful tips, ensure that you can achieve a professional-quality cheesecake with confidence and ease.
- Elegant and Impressive Presentation: Topped with a glossy layer of melted Nutella and adorned with chopped Ferrero Rocher candies, this cheesecake is not only delicious but also visually stunning. It makes an incredible centerpiece for any celebration, from birthdays and holidays to special anniversaries, and is sure to earn rave reviews from everyone who tries it.
- Crowd-Pleasing Indulgence: Whether you’re hosting a dinner party or simply looking for a decadent dessert, this Nutella cheesecake is guaranteed to be a hit. Its universally loved flavors of chocolate, hazelnut, and creamy cheesecake make it an instant favorite among guests of all ages.
Essential Ingredient Notes for the Perfect Nutella Cheesecake
The success of your Nutella cheesecake hinges on the quality and preparation of its ingredients. Below are some important notes to guide you. For the complete list of quantities, refer to the detailed recipe card at the end of this article.
- Unsalted Butter: You’ll need unsalted butter, which will be melted for the Oreo crust. Using unsalted butter allows you to control the overall saltiness of the dish. It can be easily melted in a microwave-safe bowl in short bursts until fully liquid.
- Full-Fat Cream Cheese: This is a non-negotiable ingredient for achieving that classic, rich, and creamy cheesecake texture. Avoid low-fat or whipped varieties, as they contain more water and stabilizers, which can lead to a less stable and potentially grainy cheesecake. For best results, pull your cream cheese out of the refrigerator at least two hours before you plan to start baking. Room temperature cream cheese blends smoothly, preventing lumps and ensuring a perfectly uniform batter.
- Large Eggs: Like cream cheese, large eggs should be at room temperature. This helps them incorporate more evenly into the batter, preventing overmixing and contributing to a smoother, crack-free cheesecake. We use whole eggs, as the fatty yolks are crucial for the cheesecake’s luxurious texture and richness.
- Nutella: The star of the show! We highly recommend sticking with genuine Nutella hazelnut spread for its consistent flavor profile and texture. While other chocolate hazelnut spreads exist, their differing consistencies could alter the final texture of your cheesecake. Using the specified brand helps ensure the recipe’s intended creaminess and taste. You’ll use Nutella in the filling and again for a decadent topping.
- White Granulated Sugar: Provides the perfect balance of sweetness to the rich chocolate and hazelnut flavors. Ensure it’s fully dissolved into the cream cheese mixture for a smooth batter.
- Unsweetened Cocoa Powder: A touch of unsweetened cocoa powder, preferably Dutch-process, enhances the chocolate notes in the cheesecake, creating a deeper, more complex flavor that pairs beautifully with the Nutella.
- Heavy Cream: Added to the filling, heavy cream contributes to the cheesecake’s unparalleled creaminess and smooth consistency. Ensure it’s at room temperature for optimal incorporation.
- Pure Vanilla Extract: A splash of pure vanilla extract elevates all the other flavors, adding a warm, aromatic depth that complements the chocolate and hazelnut beautifully.
- Ferrero Rocher (for topping): These delightful hazelnut chocolates are an optional but highly recommended topping, adding a gourmet touch, extra crunch, and a burst of complementary flavor. Freezing them briefly before chopping makes them easier to handle.
Essential Equipment for Cheesecake Baking
Having the right tools can make all the difference in ensuring a smooth and successful baking process for your Nutella cheesecake:
- 9-inch Springform Pan: Absolutely crucial for cheesecakes, this pan allows for easy removal of the sides once the cheesecake has cooled and set, preserving its beautiful presentation.
- Food Processor: Ideal for quickly transforming Oreo cookies into fine crumbs for the crust, ensuring an even base.
- Electric Mixer (Stand or Handheld): Essential for thoroughly blending the cream cheese and other ingredients until smooth and lump-free, which is key to preventing cracks.
- Large Roasting Pan: Used for the water bath, which provides a moist baking environment for the cheesecake, preventing cracks and ensuring even cooking.
- Parchment Paper: A 9-inch circle for the bottom of the springform pan helps prevent sticking and makes removal much easier.
- Rubber Spatula: Indispensable for scraping down the sides of the mixing bowl and gently folding in ingredients, ensuring everything is well combined without overmixing.
- Measuring Cups and Spoons: For accurate ingredient measurements.
- Microwave-Safe Bowl: For melting butter and the Nutella topping.
- Wire Rack: For cooling the cheesecake completely after baking, allowing air circulation around all sides.
Step-by-Step Instructions: Crafting the Perfect Oreo Crust
The foundation of this incredible Nutella cheesecake is its rich, chocolatey Oreo crust. Follow these simple steps to ensure a perfect base:
STEP 1: Prepare Your Pan and Preheat Oven. Begin by preheating your oven to 325°F (160°C). This ensures the oven is at the correct temperature when your crust is ready to bake. Next, take a 9-inch springform pan and generously spray the inside with baking nonstick spray. This initial spray helps prevent the crust from sticking. Then, line the bottom of the pan with a 9-inch parchment paper circle. This step is critical for easy removal of the cheesecake later. After placing the parchment, spray it again with baking spray to ensure maximum non-stick protection.
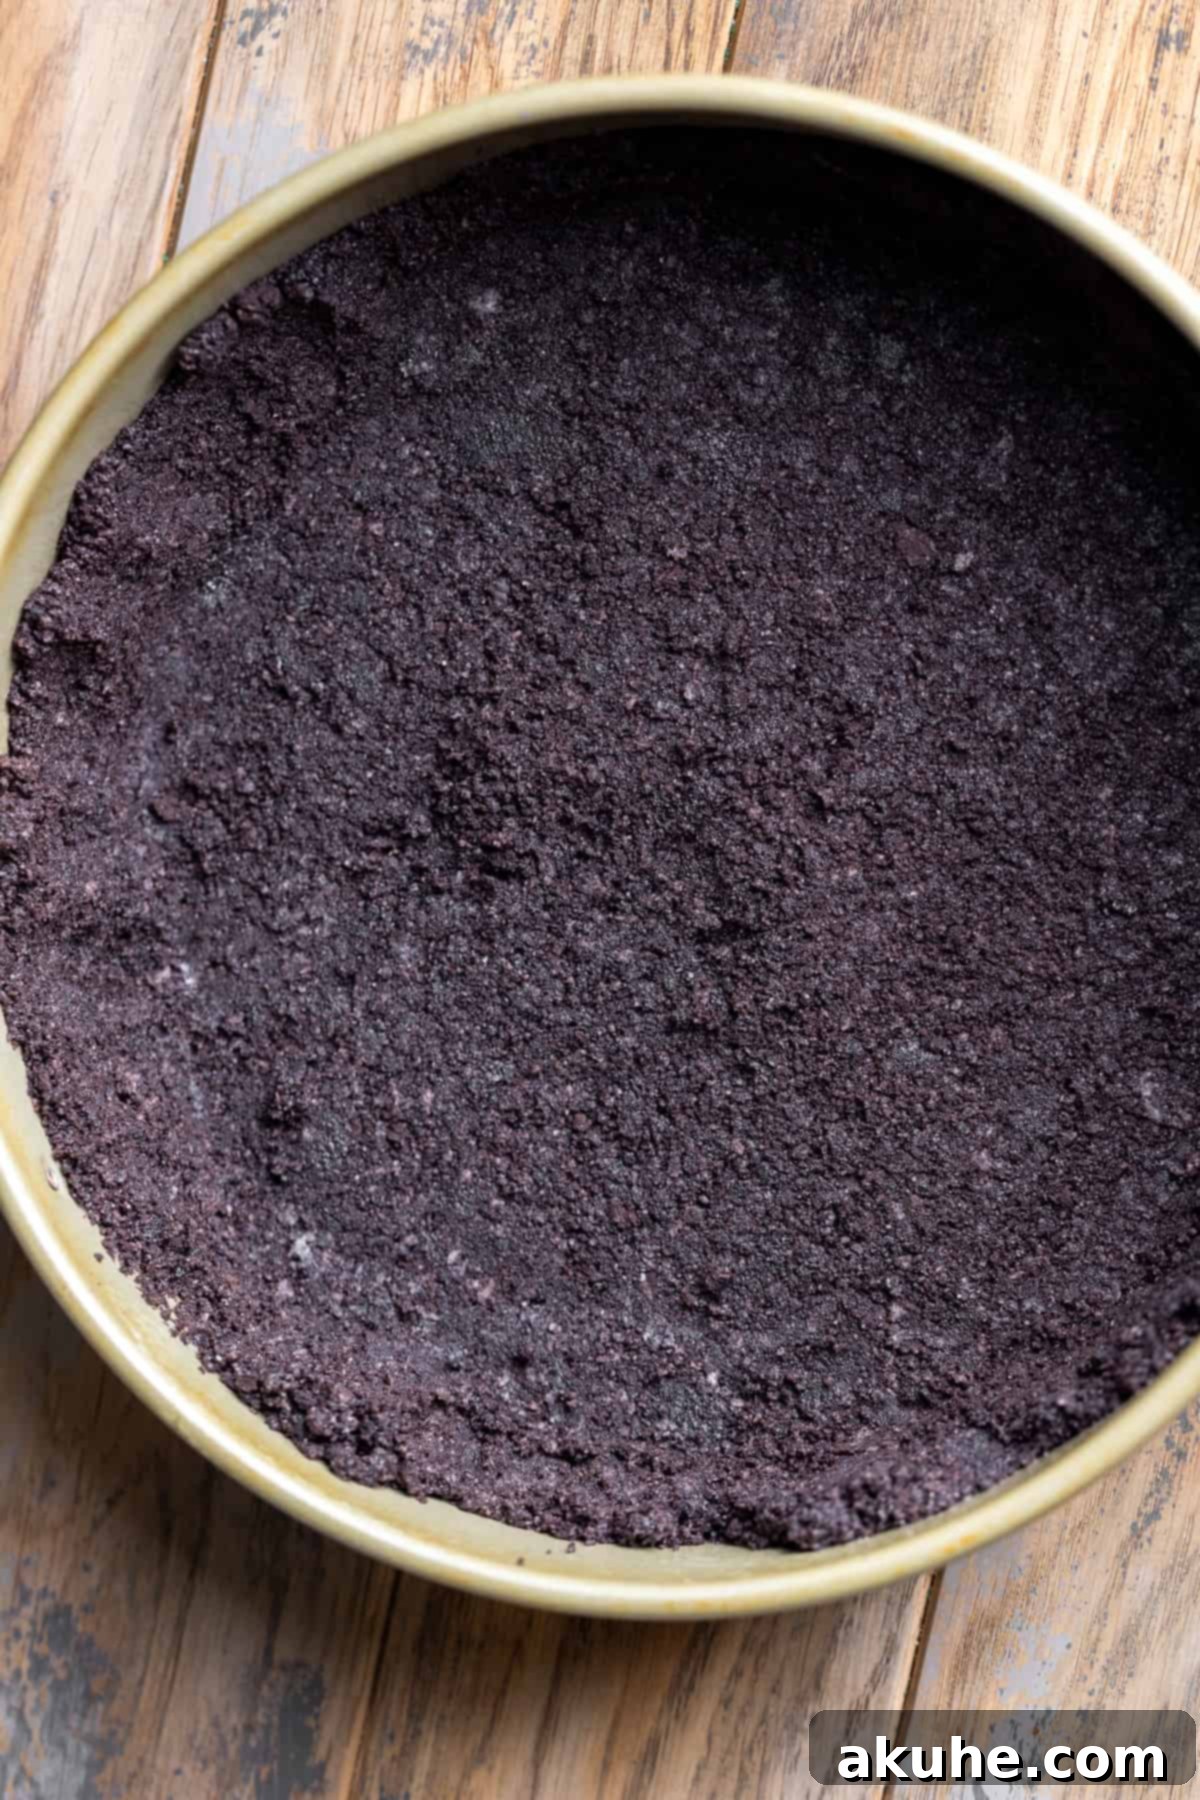
STEP 2: Create the Oreo Crumbs. In a food processor, add your Oreo cookies (about 2 rolls of regular Oreos, which yields approximately 2 1/2 cups of crumbs). Pulse until the Oreos are transformed into fine, uniform crumbs. This fine texture is essential for a cohesive and sturdy crust. Transfer the Oreo crumbs to a small mixing bowl. Pour in the 4 tablespoons of melted unsalted butter and use a fork to thoroughly mix the crumbs and butter until they are well combined and resemble wet sand. Every crumb should be moistened by the butter.
STEP 3: Form the Crust. Pour the buttered Oreo crumb mixture into the prepared springform pan. Using your hands, gently but firmly press the mixture halfway up the sides of the pan. This creates a beautiful, even border for your cheesecake. Then, to create a compact and firm bottom crust, use the back of a flat-bottomed measuring cup or a sturdy glass to press down firmly on the crumbs across the entire base of the pan. This ensures the crust won’t crumble apart when sliced.
STEP 4: Bake the Crust. Place the springform pan with the formed crust into your preheated oven. Bake for precisely 12 minutes. This brief baking time helps to set the crust, making it firm and slightly crisp, which prevents it from becoming soggy once the cheesecake filling is added.
Step-by-Step Instructions: Baking the Decadent Nutella Cheesecake
Now that your perfect Oreo crust is ready, it’s time to create the star of the show – the creamy Nutella cheesecake filling. Follow these steps carefully for a flawless result:
STEP 1: Beat Cream Cheese, Sugar, Cocoa, and Nutella. In a large mixing bowl, combine the room-temperature cream cheese, white granulated sugar, unsweetened cocoa powder, and 1 cup of Nutella. Using an electric mixer (either a stand mixer with a paddle attachment or a handheld mixer), beat these ingredients together on high speed for approximately 2 minutes. The goal is to achieve a completely smooth, lump-free, and creamy mixture. Stop the mixer occasionally to scrape down the sides of the bowl with a rubber spatula, ensuring all ingredients are fully incorporated.
STEP 2: Incorporate Wet Ingredients. Reduce the mixer speed to medium. Add the room-temperature heavy cream and pure vanilla extract to the cream cheese mixture. Mix until these ingredients are just combined and the batter appears smooth. Next, crack in the large, room-temperature eggs. Reduce the mixer speed to low and mix until the eggs are *just* combined. It is crucial not to overmix the eggs, as incorporating too much air can cause the cheesecake to puff up too much during baking and then crack as it cools. Once mixed, remove the bowl from the mixer and use a rubber spatula to gently give the batter a final stir by hand, ensuring everything is fully blended without adding excess air.
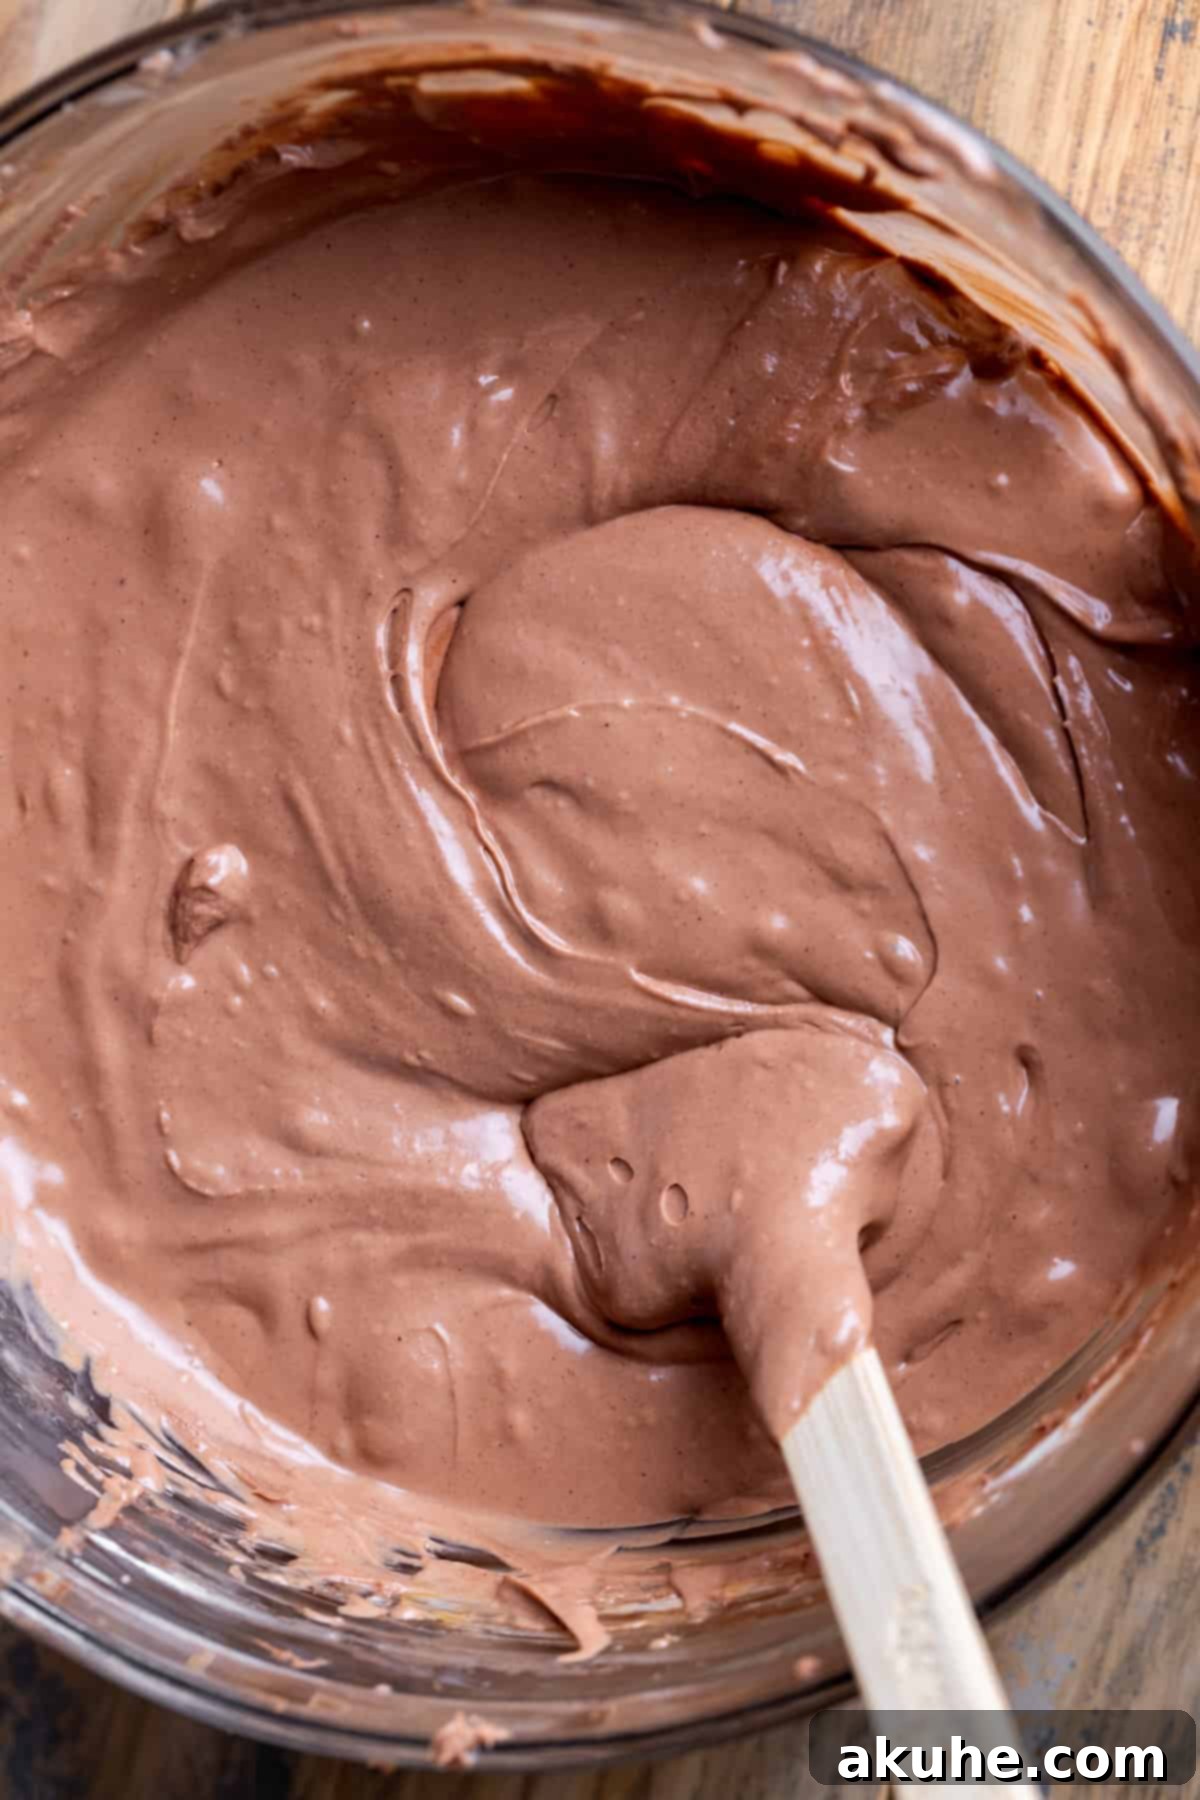
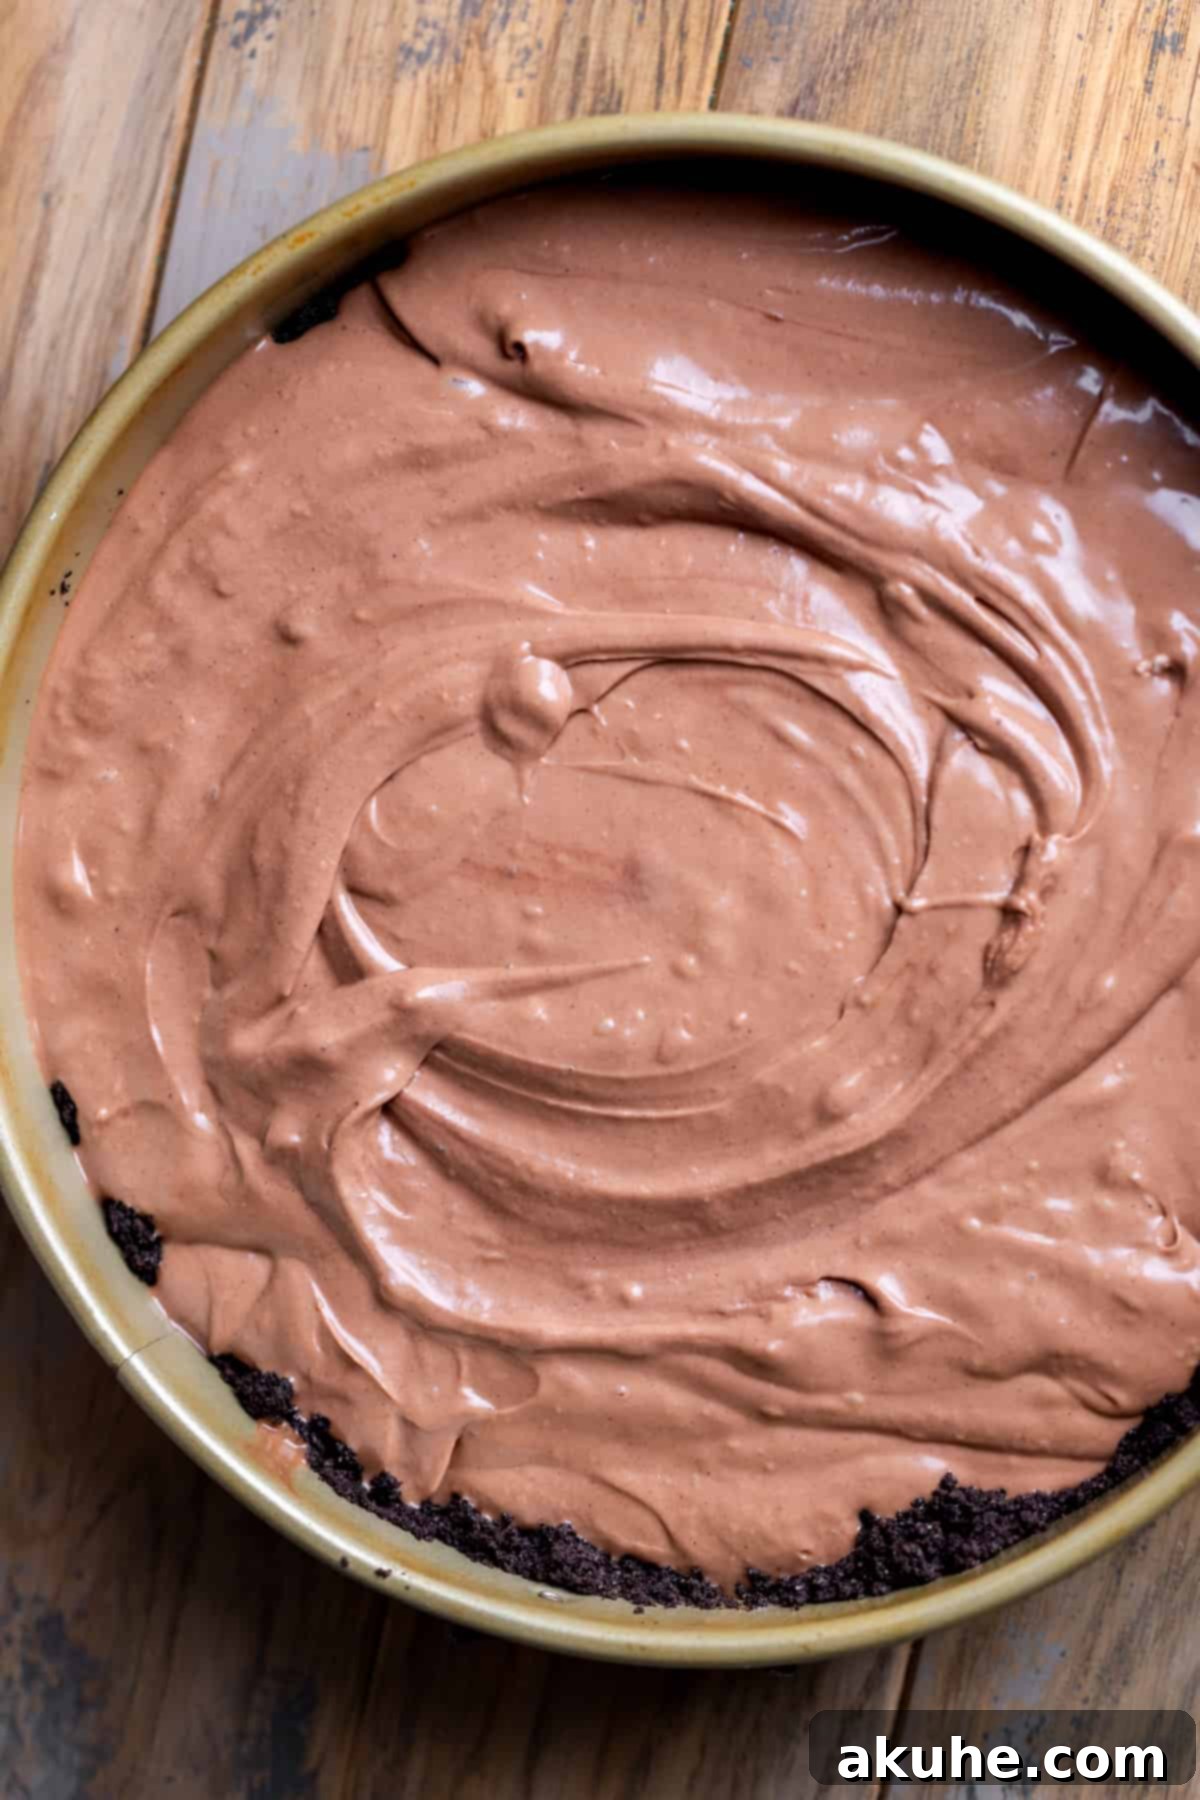
STEP 3: Prepare Water Bath and Bake Cheesecake. While the batter is ready, prepare your water bath using one of the methods detailed in the “Water Bath Tips” section below. A water bath is vital for creating a moist baking environment that prevents the cheesecake from cracking. Once your water bath is ready, carefully pour the smooth Nutella cheesecake batter over the pre-baked Oreo crust in the springform pan. Gently place the pan into the water bath, ensuring no water splashes into the cheesecake. Transfer the entire roasting pan setup to your preheated oven and bake for 70-80 minutes. The cheesecake is done when the edges are set and appear slightly firm, but the very center still has a slight, delicate jiggle when gently nudged. Do not overbake, as this can also lead to cracks.
STEP 4: Gradual Cooling. Once the baking time is complete, turn off your oven. Crucially, do not immediately remove the cheesecake. Instead, crack the oven door open slightly (about an inch) and let the cheesecake slowly cool inside the oven for an additional 30 minutes. This gradual temperature change is essential for preventing cracks. After 30 minutes, carefully remove the cheesecake from the water bath (and the roasting pan) and place it on a wire rack to cool completely to room temperature. This can take several hours.
STEP 5: Chill Overnight. Once the cheesecake has cooled completely to room temperature, wrap the springform pan tightly in plastic wrap or aluminum foil. Transfer it to the refrigerator and allow it to chill overnight, or for a minimum of 6 hours. Chilling is paramount for the cheesecake to fully set, develop its creamy texture, and become easy to slice. If you plan to decorate with Ferrero Rocher, place the unwrapped candies in a bowl and freeze them for 15 minutes before you start the decorating process – this makes them much easier to chop cleanly.

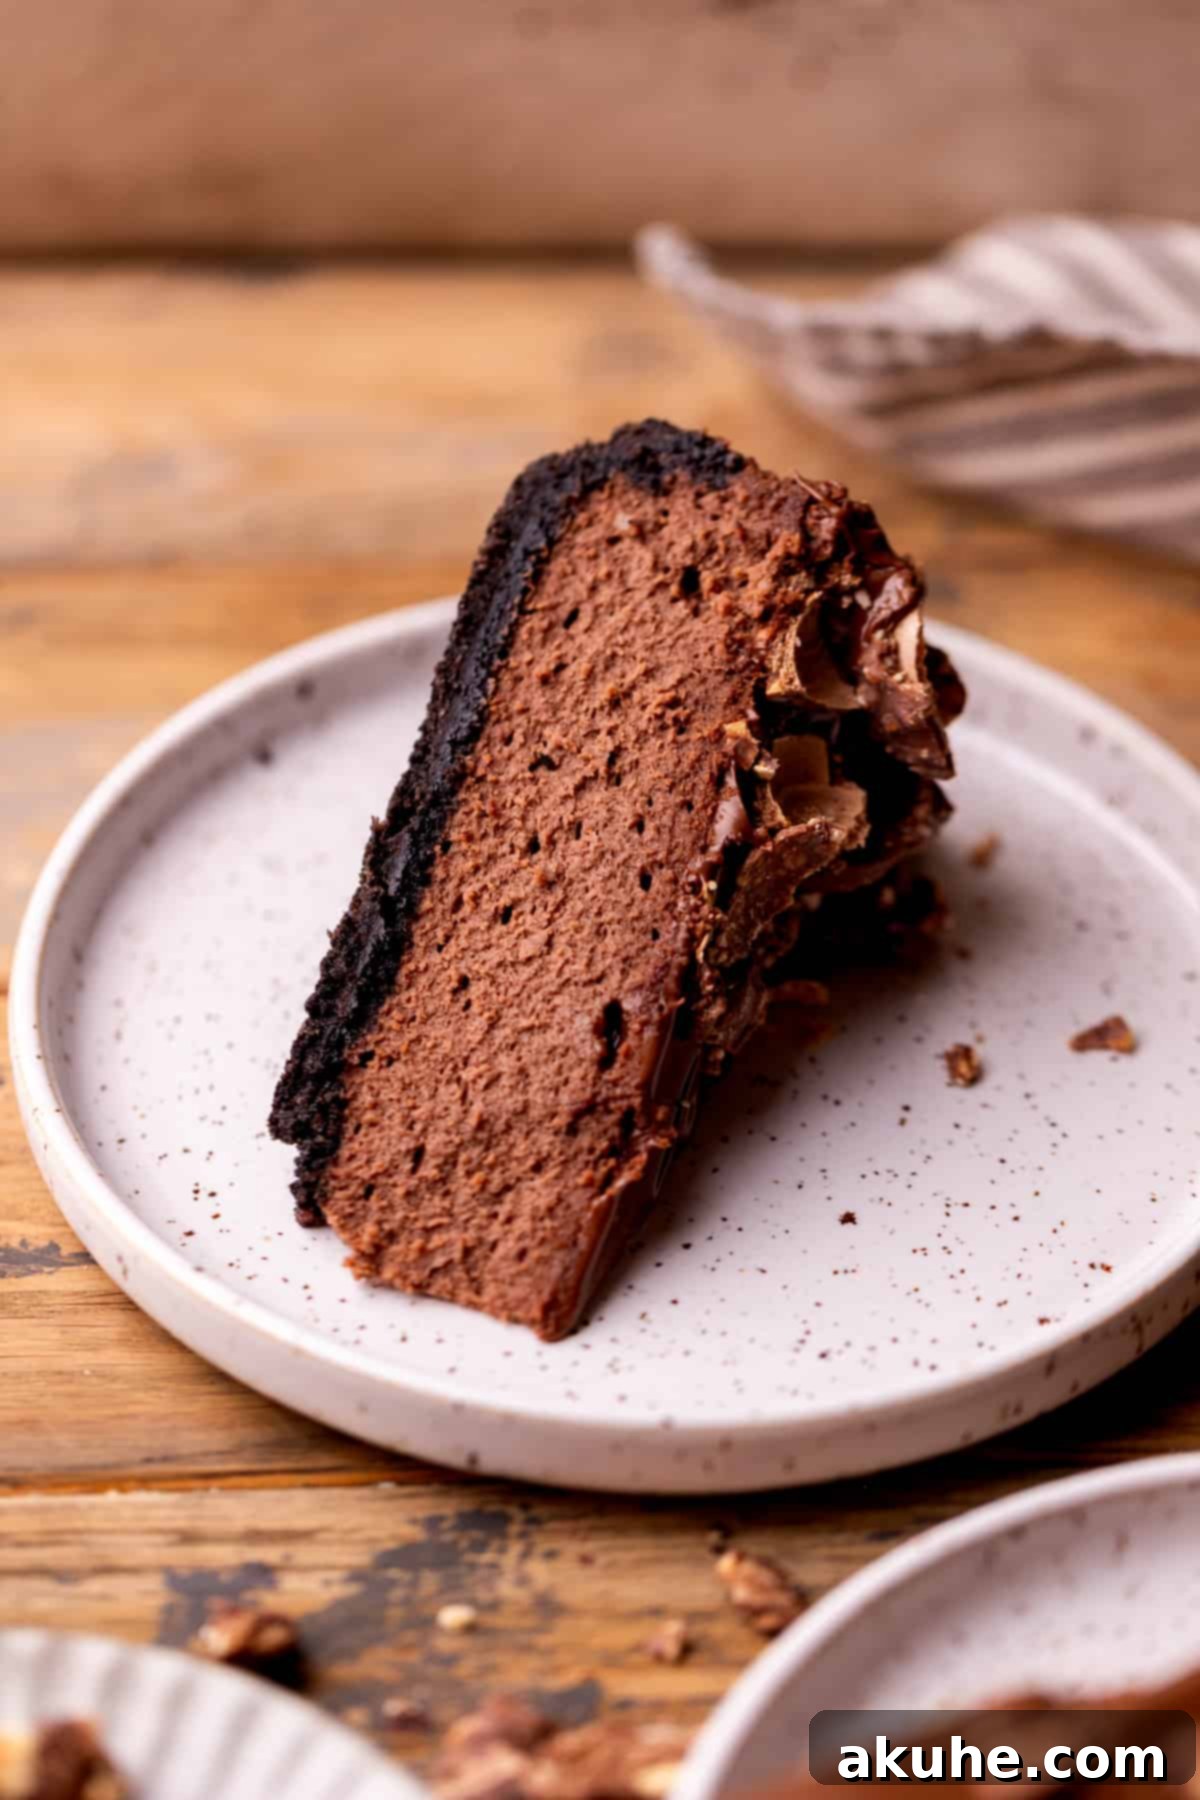
STEP 6: Prepare for Decorating. After your cheesecake has thoroughly chilled, carefully remove the springform pan sides. You may need to gently run a thin, warm knife around the edge if it’s sticking slightly. Then, carefully slide the cheesecake off the pan bottom and remove the parchment paper circle. In a microwave-safe bowl, melt the remaining 1/2 cup of Nutella for about 30 seconds, stirring until smooth and pourable. Be careful not to overheat it.
STEP 7: Top the Cheesecake. Pour the melted Nutella evenly over the top of the chilled cheesecake. Use an offset spatula to gently spread the Nutella to the edges, creating a smooth, glossy layer. Finally, take your frozen Ferrero Rocher, chop them into desired pieces, and artfully arrange them on top of the melted Nutella. Serve immediately or return to the fridge until ready to impress.
Water Bath Techniques for a Flawless Cheesecake
A water bath (also known as a bain-marie) is a crucial technique when baking cheesecake. The moist, steamy environment it creates prevents the cheesecake from drying out, rising too quickly, and ultimately cracking. It also ensures even baking and a perfectly creamy texture. Here are two effective methods:
- The “Pan-in-Pan” Method (Highly Recommended): This is my preferred technique as it offers the best protection against water seeping into your crust. Place your prepared 9-inch springform pan (with crust and batter) inside a slightly larger 10-inch round cake pan. Then, place the entire cake pan into a large roasting pan. Carefully pour hot, steaming water into the roasting pan, ensuring it comes about halfway up the sides of the 10-inch cake pan. This double-layer protection ensures absolutely no water touches your springform pan, guaranteeing a dry and crisp crust.
- The Foil Wrap Method: This method is also effective but requires meticulous wrapping. Take your prepared 9-inch springform pan and wrap the outside of the pan twice, very tightly, with heavy-duty aluminum foil. Ensure there are no seams or gaps where water could penetrate. Place this foil-wrapped springform pan directly into a large roasting pan. Carefully fill the roasting pan with hot water, coming about halfway up the sides of the foil-wrapped springform pan. While generally reliable, there’s a slightly higher chance of water leakage with this method if the foil isn’t perfectly sealed, which could lead to a soggy crust.
Regardless of the method you choose, always use hot, steaming water for the water bath as it helps maintain a consistent oven temperature and generates steam quickly.
Mastering the Art of Preventing Cheesecake Cracks
A perfectly smooth, crack-free cheesecake is the hallmark of a skilled baker. While the water bath is a major factor, several other techniques contribute to this desirable outcome:
- Achieve a Super Creamy Batter: Before adding the eggs, ensure your cream cheese, sugar, cocoa powder, and Nutella are beaten together on high speed until exceptionally smooth and creamy. Any small lumps of cream cheese can create weak spots in the batter that are prone to cracking during baking. Scrape down the bowl frequently to ensure even mixing.
- Incorporate Eggs Gently and Minimally: Add the eggs one at a time, mixing on the lowest speed possible, just until they are combined. The goal is to incorporate the eggs without whipping in excess air. Too much air in the batter causes the cheesecake to rise rapidly and dramatically during baking, and then contract too quickly as it cools, leading to unsightly cracks. Use a rubber spatula for a final gentle fold to ensure everything is mixed without adding extra air.
- Utilize a Water Bath: As emphasized above, a water bath is absolutely essential. The moist, even heat from the steam prevents the cheesecake from baking too quickly and drying out, allowing it to cook gently and uniformly. This gradual cooking process is key to preventing surface cracks.
- Implement Gradual Cooling: Sudden temperature changes are a primary culprit for cheesecake cracks. Once your cheesecake is baked, do not pull it out of the oven immediately. Instead, turn off the oven, crack the door open by about an inch, and allow the cheesecake to cool slowly inside the warm oven for at least 30 minutes. This allows the cheesecake to adjust to the temperature change gradually. After this period, remove it from the oven and continue cooling on a wire rack until it reaches room temperature, then transfer it to the refrigerator.
- Avoid Overbaking: An overbaked cheesecake will have a rubbery texture and is much more susceptible to cracking. Look for edges that are set but a center that still has a slight jiggle. It will continue to cook slightly as it cools.
How To Effortlessly Remove Your Cheesecake From the Pan
The moment of truth arrives when it’s time to unmold your beautiful cheesecake. With proper preparation and a little patience, this step can be surprisingly simple:
First and foremost, the crucial preparation steps begin *before* baking. Always spray your springform pan thoroughly with a non-stick baking spray. Then, line the bottom of the pan with a 9-inch parchment paper circle. This small detail provides a barrier that prevents the crust from sticking to the pan bottom. After placing the parchment paper, spray it again with baking spray for extra assurance.
Once your cheesecake has thoroughly chilled in the refrigerator, ideally overnight, the springform pan should release with ease. Unclasp the sides of the pan; they should pop right off. If you find any resistance or slight sticking around the edges, very gently run a thin, warm knife along the inside perimeter of the cheesecake before unclasping. This helps to loosen any parts that might be clinging to the pan.
After the sides are removed, you should be able to carefully slide the cheesecake off the bottom of the pan and the parchment circle. Many find it easiest to carefully tilt the cheesecake onto its side to peel away the parchment, or to slide it onto a serving plate from the pan base.

Customization and Variations for Your Nutella Cheesecake
While this Nutella cheesecake recipe is perfect as is, it also serves as a fantastic canvas for your creativity. Here are some ideas to customize and vary your cheesecake:
- Alternate Crusts: Instead of Oreos, consider a Graham cracker crust for a classic touch, or a shortbread cookie crust for a buttery flavor. You could also use digestive biscuits or even crushed hazelnut wafers to further enhance the Nutella theme.
- Topping Adventures: Beyond the Ferrero Rocher, unleash your imagination! Drizzle with extra chocolate syrup, sprinkle with chopped toasted hazelnuts, or add a dollop of whipped cream. For a contrasting flavor, a sprinkle of sea salt flakes can enhance the chocolate notes. Fresh raspberries or strawberries also offer a beautiful color contrast and a hint of tartness.
- Swirls of Flavor: Before baking, reserve a small portion of the plain cheesecake batter and mix it with a different flavor, such as a raspberry purée or caramel. Gently swirl it into the Nutella batter for an elegant marbled effect.
- Mini Cheesecakes: As mentioned in the FAQ, this recipe can be adapted for mini cheesecakes. This is great for portion control and individual servings. Follow specific instructions for mini cheesecakes to adjust baking times.
- Nutella Cheesecake Bars: For easier serving at a party, halve the recipe and bake it in an 8×8 or 9×9 inch baking pan. This will yield delicious Nutella cheesecake bars that are quick to cut and serve.
- Espresso Boost: For coffee lovers, dissolve a teaspoon of instant espresso powder in a tiny bit of hot water and add it to the Nutella cheesecake batter. This will deepen the chocolate flavor beautifully.
FAQ: Your Nutella Cheesecake Questions Answered
Absolutely! This recipe can be easily scaled down to make individual mini cheesecakes. You’ll want to divide the recipe into thirds to yield approximately 12 mini cheesecakes. Bake them in a standard muffin pan lined with paper liners for about 18-20 minutes. For more detailed instructions on baking times, pan preparation, and cooling specifically for mini cheesecakes, you can refer to our Mini Oreo Cheesecakes recipe.
This versatile recipe can be adapted for different pan sizes. If you prefer cheesecake bars, you can halve the recipe and bake it in an 8×8 or 9×9 inch baking pan. For this option, use approximately 16 ounces of cream cheese. An 8-inch springform pan can also be used for a slightly thicker cheesecake; baking time may need minor adjustments. If you’re using a smaller 6-inch springform pan, half the recipe is recommended, but you’ll still use 16 oz of cream cheese. Remember to always adjust the baking time when using a different size pan, as thinner cheesecakes in larger pans will bake faster, while thicker ones in smaller pans will require more time.
Achieving clean, elegant slices is simple with a few key tricks. First, ensure your cheesecake is very cold – ideally, it should have chilled in the refrigerator for at least 6 hours or overnight. A well-chilled cheesecake is firm and much easier to cut neatly. Second, use a very sharp, thin knife. For the cleanest cuts, dip your knife in hot water and wipe it clean after every single slice. This prevents crumbs and filling from dragging and creating a messy cut, ensuring each piece looks as perfect as it tastes.
Absolutely! Cheesecake is an excellent make-ahead dessert. You can bake and chill the cheesecake (before decorating) up to 2-3 days in advance. Simply keep it tightly wrapped in plastic wrap in the refrigerator. Decorate it just before serving for the freshest appearance. This makes it a stress-free option for entertaining.
Cracks in cheesecake are common and often result from rapid temperature changes, overmixing, or overbaking. Ensure your ingredients are at room temperature, beat the batter only until just combined (especially after adding eggs), use a water bath, and allow for a slow, gradual cooling process inside the oven before moving it to a wire rack, and then to the fridge. Refer to our “Preventing Cheesecake Cracks” section for more in-depth tips.
Storing and Freezing Your Nutella Cheesecake
Proper storage is key to maintaining the delicious flavor and creamy texture of your Nutella cheesecake. Whether you’re planning to enjoy it over a few days or save it for a special occasion, here’s how to do it:
Store this delectable Nutella cheesecake in the refrigerator. It’s best kept in an airtight container, such as a specialized cake carrier, to prevent it from absorbing any odors from other foods and to maintain its freshness. When stored correctly, your cheesecake will remain fresh and delicious for up to 5 days, making it a wonderful make-ahead dessert for entertaining or simply enjoying throughout the week.
Freezing Instructions
Freezing cheesecake is an excellent option for long-term storage, allowing you to enjoy a slice of this heavenly dessert whenever a craving strikes:
- Freezing Individual Slices: For ultimate convenience, you can freeze the Nutella cheesecake in individual slices. First, cut the cheesecake into your desired serving sizes. Place each slice in an airtight container, separating layers with parchment paper if stacking. You can freeze individual slices for up to 30 days. When ready to eat, simply thaw a slice for 1-2 hours at room temperature or in the refrigerator until it reaches your preferred consistency.
- Freezing the Whole Cheesecake (Undecorated): If you plan to freeze the entire cheesecake, it’s best to do so before adding the melted Nutella and Ferrero Rocher topping. Once the cheesecake has fully cooled to room temperature and has chilled overnight in the refrigerator (this is crucial for setting), remove it from the springform pan. Wrap the cooled cheesecake tightly first in plastic wrap, and then again in aluminum foil to protect it from freezer burn. This method allows you to freeze the cheesecake for up to 30 days. To serve, thaw the wrapped cheesecake in the refrigerator overnight, or at room temperature for 1-2 hours, before unwrapping and decorating with melted Nutella and chopped Ferrero Rocher.
Other Cheesecake Recipes To Try
We hope you loved this recipe! If so, please consider leaving a STAR REVIEW below. Your feedback helps us grow! You can also share your beautiful creations by tagging us on Instagram @stephaniesweettreats. For more delicious dessert inspiration and ideas, be sure to follow us on Pinterest. Happy baking!
Nutella Cheesecake
Print Recipe | Pin Recipe | Leave a Review
Ingredients
Oreo Crust
- 2 1/2 cups Oreo crumbs (about 2 rolls of regular Oreos)
- 4 TBSP Unsalted butter, melted
Nutella Cheesecake
- 24 oz Cream cheese, room temperature
- 3/4 cup White granulated sugar
- 2 TBSP Unsweetened cocoa powder (Dutch process recommended)
- 1 cup Nutella
- 1/2 cup Heavy cream, room temperature
- 1 tsp Pure vanilla extract
- 4 Large eggs, room temperature
- 1/2 cup Nutella, melted for decoration
- Ferrero Rocher, chopped for decoration
Instructions
Oreo Crust
- Preheat the oven to 325℉ (160°C). Spray a 9-inch springform pan with baking nonstick spray. Line the bottom with a 9-inch parchment paper circle, then spray again.
- Use a food processor to blend 2 1/2 cups of Oreos into fine crumbs. In a small bowl, mix the crumbs with 4 TBSP melted unsalted butter using a fork until fully combined.
- Pour the crumb mixture into the prepared pan. Use your hands to press the crust halfway up the sides of the pan. Compact the bottom using the back of a measuring cup.
- Bake for 12 minutes to set the crust.
Nutella Cheesecake
- Using an electric mixer, beat 24 oz room temperature cream cheese, 3/4 cup white granulated sugar, 2 TBSP unsweetened cocoa powder, and 1 cup Nutella on high speed for 2 minutes until smooth. Scrape down the bowl with a rubber spatula.
- Add 1/2 cup heavy cream and 1 tsp pure vanilla extract. Mix on medium speed until combined. Add 4 large room temperature eggs, mixing on low speed until just combined. Remove from mixer and gently stir batter with a rubber spatula.
- Prepare a water bath using one of the methods described in the Water Bath Tips section. Pour the cheesecake batter onto the baked Oreo crust.
- Bake for 70-80 minutes, or until edges are set with a slight jiggle in the center.
- Turn off the oven, crack the door open, and let the cheesecake cool slowly inside for 30 minutes. Then, remove from the water bath and cool completely on a wire rack.
- Wrap the pan with foil and chill in the fridge for at least 6 hours or overnight. If using Ferrero Rocher, place them unwrapped in a bowl and freeze for 15 minutes before decorating.
- Once chilled, remove the pan sides and parchment paper. In a microwave-safe bowl, melt 1/2 cup Nutella for 30 seconds.
- Pour the melted Nutella over the cheesecake and spread evenly with an offset spatula. Chop the frozen Ferrero Rocher and sprinkle on top of the cheesecake.
Notes
Nutrition Information (per serving)
Calories: 389kcal, Carbohydrates: 30g, Protein: 5g, Fat: 29g, Saturated Fat: 20g, Polyunsaturated Fat: 1g, Monounsaturated Fat: 5g, Trans Fat: 0.1g, Cholesterol: 59mg, Sodium: 148mg, Potassium: 189mg, Fiber: 2g, Sugar: 26g, Vitamin A: 769IU, Vitamin C: 0.04mg, Calcium: 78mg, Iron: 1mg
Did you make this recipe?
Please leave a star rating and review below!
