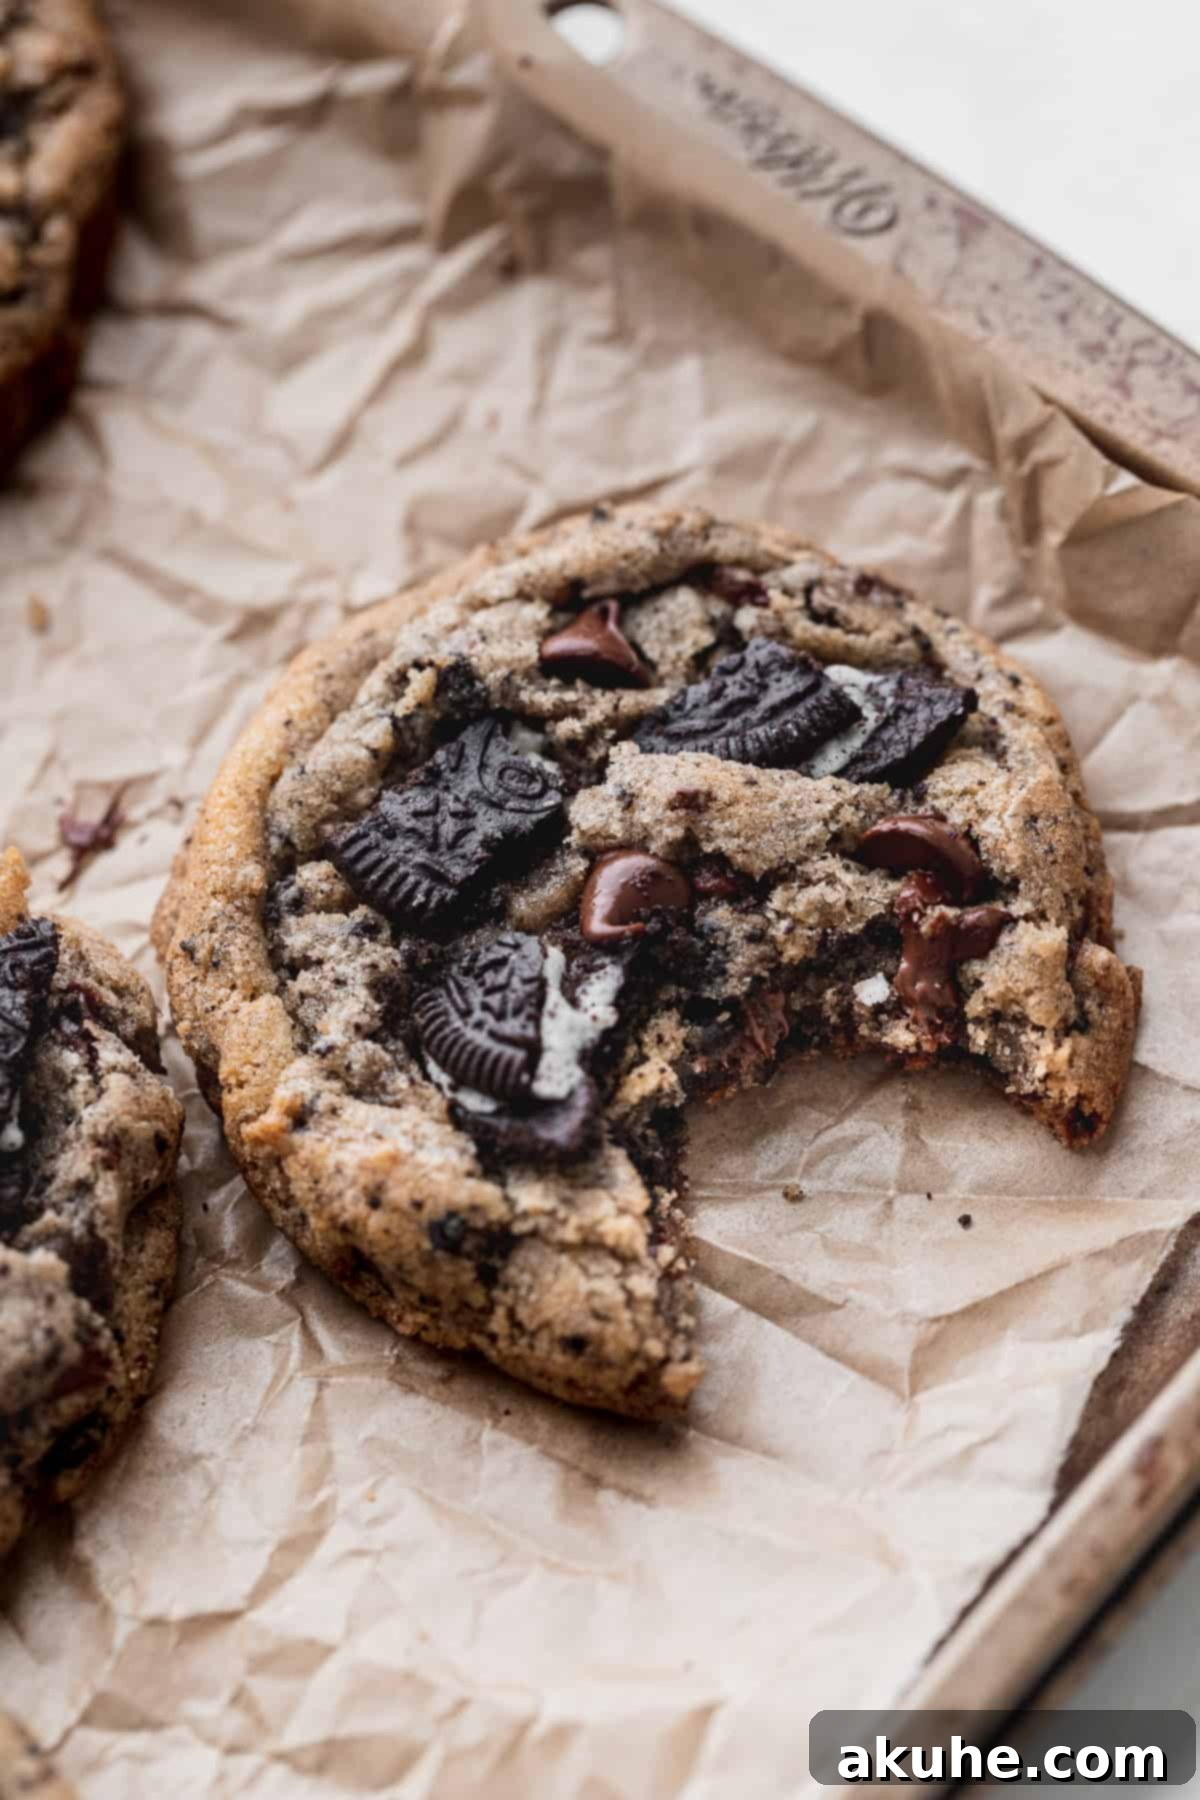
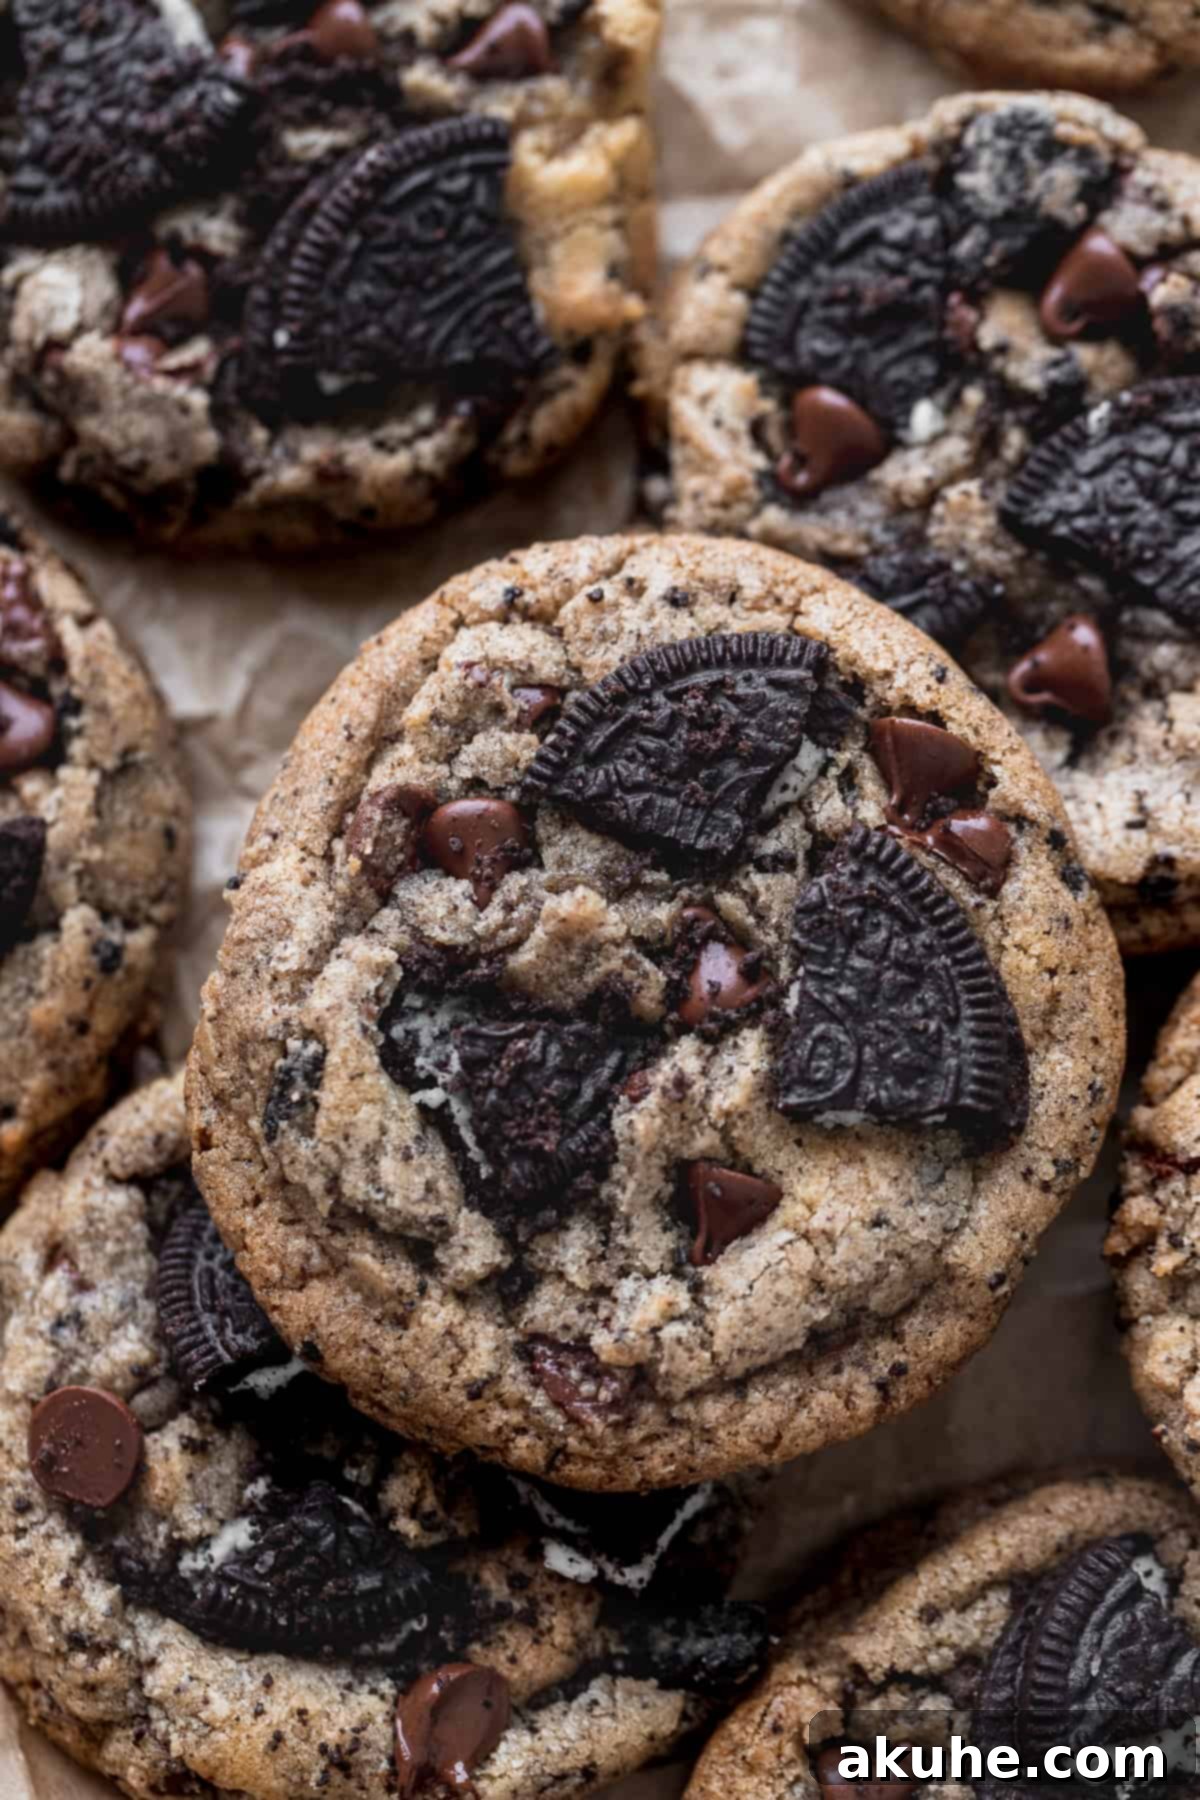
Welcome to the ultimate guide for creating truly sensational **Oreo Chocolate Chip Cookies** that rival any bakery masterpiece. These aren’t just ordinary cookies; they are a delightful fusion of two beloved treats, meticulously crafted to deliver a generously sized, chewy, and irresistibly gooey center with perfectly crisp edges. Each bite is a symphony of textures and flavors, absolutely loaded with a generous triple dose of Oreo goodness – crunchy crumbs, delectable pieces, and classic chocolate chips. If you consider yourself an Oreo aficionado, prepare to fall in love with your new favorite cookie recipe!
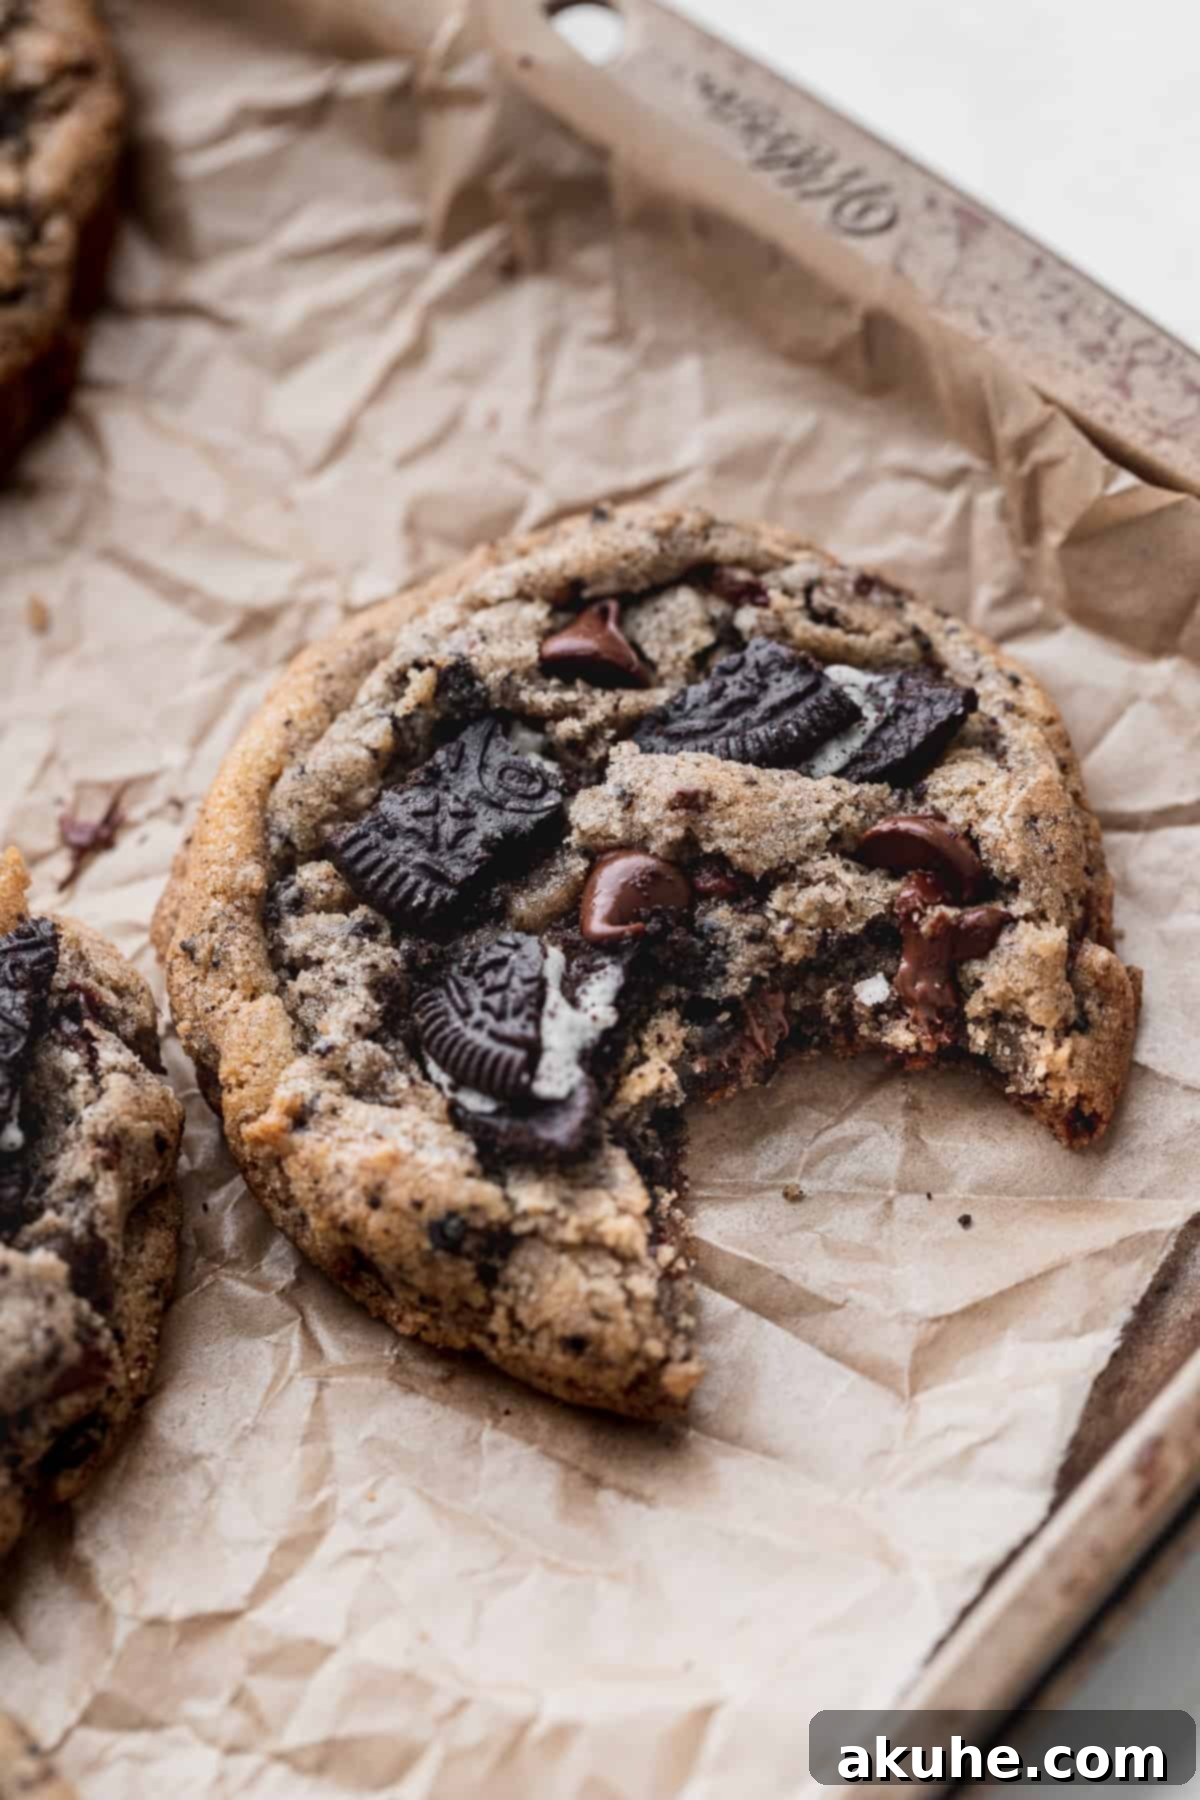
Our journey to perfect these cookies began by drawing inspiration from classic favorites, particularly our acclaimed brown butter chocolate chip cookies. While those offer a rich, nutty depth, these Oreo cookies pivot to a different kind of decadence, replacing the brown butter with an explosion of Oreo flavor. The brilliant idea to incorporate both fine Oreo crumbs and larger Oreo pieces was directly inspired by our popular Oreo cheesecake recipe, ensuring an unparalleled Oreo experience in every single mouthful. This dual-texture approach ensures that the distinct flavor and satisfying crunch of Oreos are present throughout the cookie, from its chewy core to its slightly crisp edges.
Despite their sophisticated bakery-style appeal, these **homemade Oreo chocolate chip cookies** are surprisingly straightforward to prepare. While they do require a crucial chill time – a non-negotiable step for achieving that signature chewy, gooey texture and preventing excessive spreading – every minute of waiting is absolutely worth it for the incredible results. For those who appreciate a smaller batch or other delightful variations, you might also enjoy our small batch chocolate chip cookies or the indulgent Oreo Brookies, but for a truly grand, bakery-quality treat, these **chewy Oreo cookies** are unmatched.
Why You Will Absolutely Love This Oreo Chocolate Chip Cookie Recipe
Get ready to discover why these **bakery-style Oreo chocolate chip cookies** are about to become your new go-to indulgence:
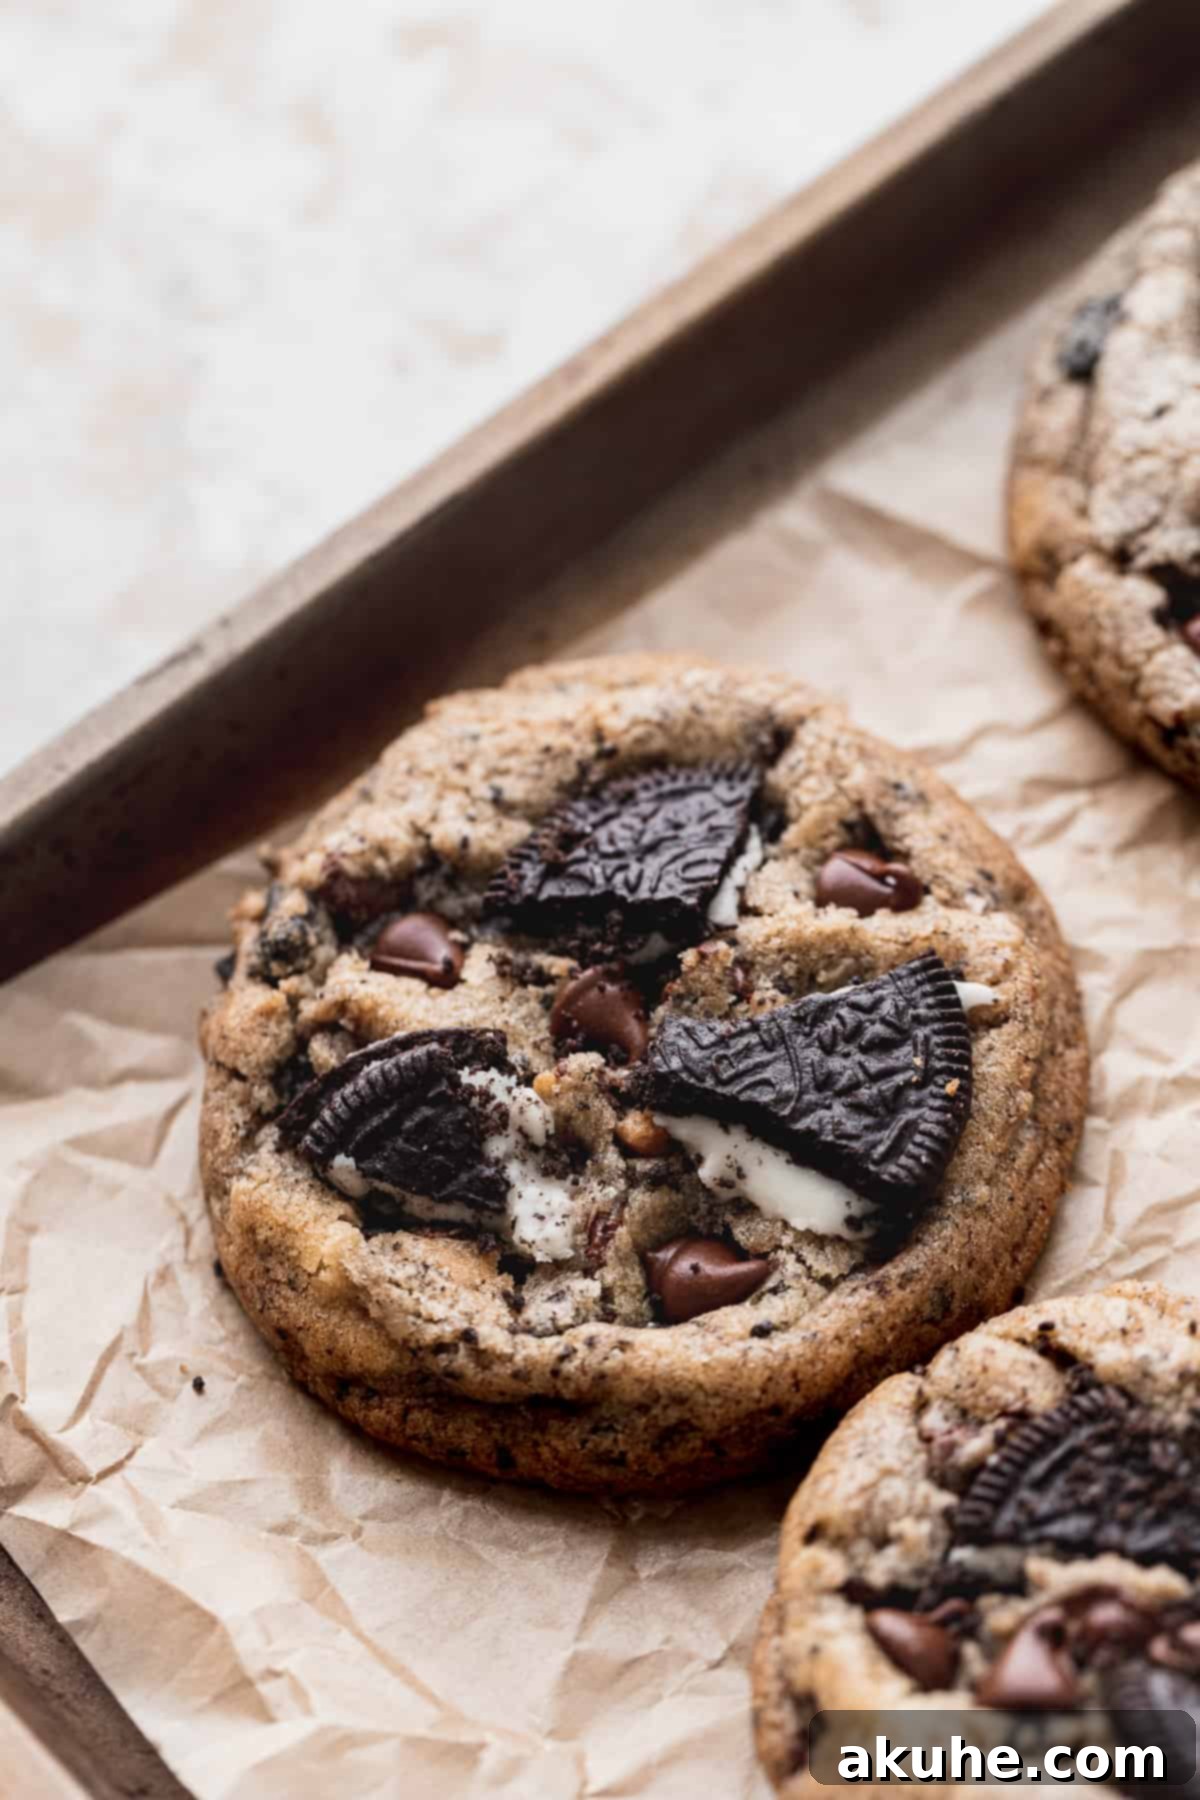
- Triple Oreo Delight: These cookies are an Oreo lover’s dream! We don’t just sprinkle in a few pieces; we thoughtfully incorporate three distinct layers of Oreos. You’ll find fine Oreo crumbs blended into the dough, larger Oreo chunks scattered throughout, and a final flourish of crushed Oreos pressed into the warm cookies for maximum impact and visual appeal. This ensures a rich, authentic Oreo flavor profile in every single bite.
- Generously Sized for Ultimate Gooeyness: We bake these cookies large, not just for aesthetic appeal, but to guarantee that coveted chewy and gooey center that defines a truly exceptional cookie. The larger surface area allows the edges to crisp up beautifully while the interior remains wonderfully soft and molten, creating a perfect contrast.
- The Perfect Balance of Texture: While the centers are delightfully soft and gooey, these cookies also boast those irresistible crisp edges. This textural harmony provides a satisfying crunch that complements the tender interior, making each bite a multifaceted experience. It’s the hallmark of a professionally baked cookie, achieved right in your own kitchen.
- Remarkably Easy to Make: Don’t let their impressive appearance fool you; these **easy Oreo chocolate chip cookies** are incredibly simple to put together. With clear, step-by-step instructions and readily available ingredients, even novice bakers can achieve spectacular results. The process is straightforward, ensuring a rewarding baking experience from start to finish.
Step By Step Oreo Cookie Recipe Video Guide

Sometimes, seeing is believing, especially when it comes to mastering baking techniques. Our comprehensive video guide provides clear, step-by-step instructions, showing you exactly how to mix the dough, prepare the Oreos, and bake your cookies to perfection. Follow along to ensure every detail is covered, from achieving the ideal dough consistency to knowing when your cookies are perfectly golden and ready to cool. This visual aid is designed to make your baking journey as smooth and successful as possible, culminating in these spectacular **chocolate chip Oreo cookies**.
Essential Ingredient Notes for Your Perfect Oreo Cookies
Understanding the role of each ingredient is key to baking success. Here are some detailed notes to ensure your **homemade Oreo cookies** turn out flawlessly:
- All-Purpose Flour: We use standard all-purpose flour for this recipe. For best results, measure your flour by spooning it into the measuring cup and then leveling it off with a straight edge, or use a kitchen scale for ultimate precision. Over-packed flour can lead to dry, dense cookies. If you’re looking for a gluten-free option, a good quality 1:1 gluten-free baking flour blend should work beautifully, though results may vary slightly.
- Unsalted Butter: Always opt for high-quality unsalted butter, as its flavor truly shines through. It’s crucial for the butter to be at true room temperature (soft enough to indent with a finger but not melted) before you begin. This allows it to cream properly with the sugars, incorporating air and creating a lighter, more tender cookie texture. Remember to pull your butter and eggs out of the refrigerator at least 2 hours before you plan to start baking.
- Brown Sugar: We’ve specifically used light brown sugar in this recipe, and you’ll notice a higher ratio of brown sugar to granulated sugar. This isn’t accidental; brown sugar adds moisture, which is essential for achieving that delightful chewiness and gooey texture that defines these **bakery-style cookies**. Its molasses content also imparts a richer, more complex flavor. Dark brown sugar can also be used for an even deeper flavor profile.
- Egg + Egg Yolk: Initially, this recipe was tested with two full eggs, but we found it led to excessive spreading and a dough that was too wet, likely due to the cream in the Oreos adding extra moisture. Reducing one egg to just an egg yolk provides crucial richness and binding power without introducing too much liquid, helping to create a thicker, chewier cookie. We also slightly increased the flour to compensate for the added moisture from the Oreos and achieve the perfect dough consistency.
- Oreo Cookies: This recipe uses nearly an entire standard pack of Oreos, as we need them for both the dough and for topping the finished cookies. While classic Oreos are fantastic, feel free to experiment with different flavors (e.g., mint, peanut butter, seasonal varieties) for a unique twist. However, it’s important to avoid using “Double Stuffed” Oreos, as the extra cream can alter the dough’s moisture balance and affect the cookie’s structure.
- Semi-Sweet Chocolate Chips: High-quality chocolate chips melt beautifully and provide a wonderful counterpoint to the Oreo flavor. Semi-sweet is our preferred choice for its balanced sweetness, but you can adjust this to your liking.
Creative Ingredient Substitutions to Personalize Your Cookies
Baking is all about experimentation! Here are some substitution ideas to tailor these **Oreo chocolate chip cookies** to your preferences or dietary needs:
- Dairy-Free: You can absolutely make these cookies dairy-free! Simply substitute unsalted butter with your favorite plant-based butter alternative (stick form works best) and use dairy-free chocolate chips. Ensure all other ingredients are naturally dairy-free.
- Gluten-Free: While we haven’t extensively tested a gluten-free version ourselves, many bakers have success using a 1:1 gluten-free all-purpose flour blend (one that contains xanthan gum). If you try this, we’d love to hear about your results! Adjustments to liquid might be necessary.
- Brown Sugar Variations: Feel free to use dark brown sugar instead of light brown sugar. Dark brown sugar will lend a deeper, more robust molasses flavor and an even chewier texture to your cookies.
- Chocolate Chip Choices: Customize your chocolate experience! Instead of semi-sweet, you could use milk chocolate chips for a sweeter cookie, dark chocolate chips for a more intense cocoa flavor, or even white chocolate chips for a different visual and taste contrast. Chocolate chunks or chopped chocolate bars also work wonderfully for larger pockets of melted chocolate.
Step-by-Step Instructions: Crafting Your Perfect Oreo Cookie Dough
Follow these detailed steps to create the most incredible **Oreo chocolate chip cookie** dough:
- STEP 1: Prepare Dry Ingredients and Oreos. In a medium mixing bowl, whisk together the all-purpose flour, baking soda, and salt. For an extra smooth dough and to eliminate any flour lumps, it’s highly recommended to sift these dry ingredients. Set aside. Next, prepare your Oreos. Using a food processor, blend about 5 Oreo cookies until they form a fine, consistent crumb. Measure out ½ cup of these crumbs for the dough and set aside any remainder for topping. Then, pulse another 6 Oreo cookies a few times in the food processor until they break into small and medium-sized pieces; these will add delightful texture to your cookies.
- STEP 2: Cream Butter and Sugars. In a large mixing bowl, using an electric mixer, beat the room temperature unsalted butter with both the light brown sugar and granulated white sugar. Beat on medium-high speed for 3-5 minutes until the mixture is visibly lightened in color, fluffy, and well-creamed. This step is crucial for incorporating air, which contributes to the cookie’s texture. Scrape down the sides of the bowl to ensure even mixing.
- STEP 3: Add Wet Ingredients. Reduce the mixer speed to low. Add the pure vanilla extract, the large egg, and the egg yolk to the creamed butter and sugar mixture. Mix until just combined, being careful not to overmix at this stage. The mixture should be smooth and emulsified.
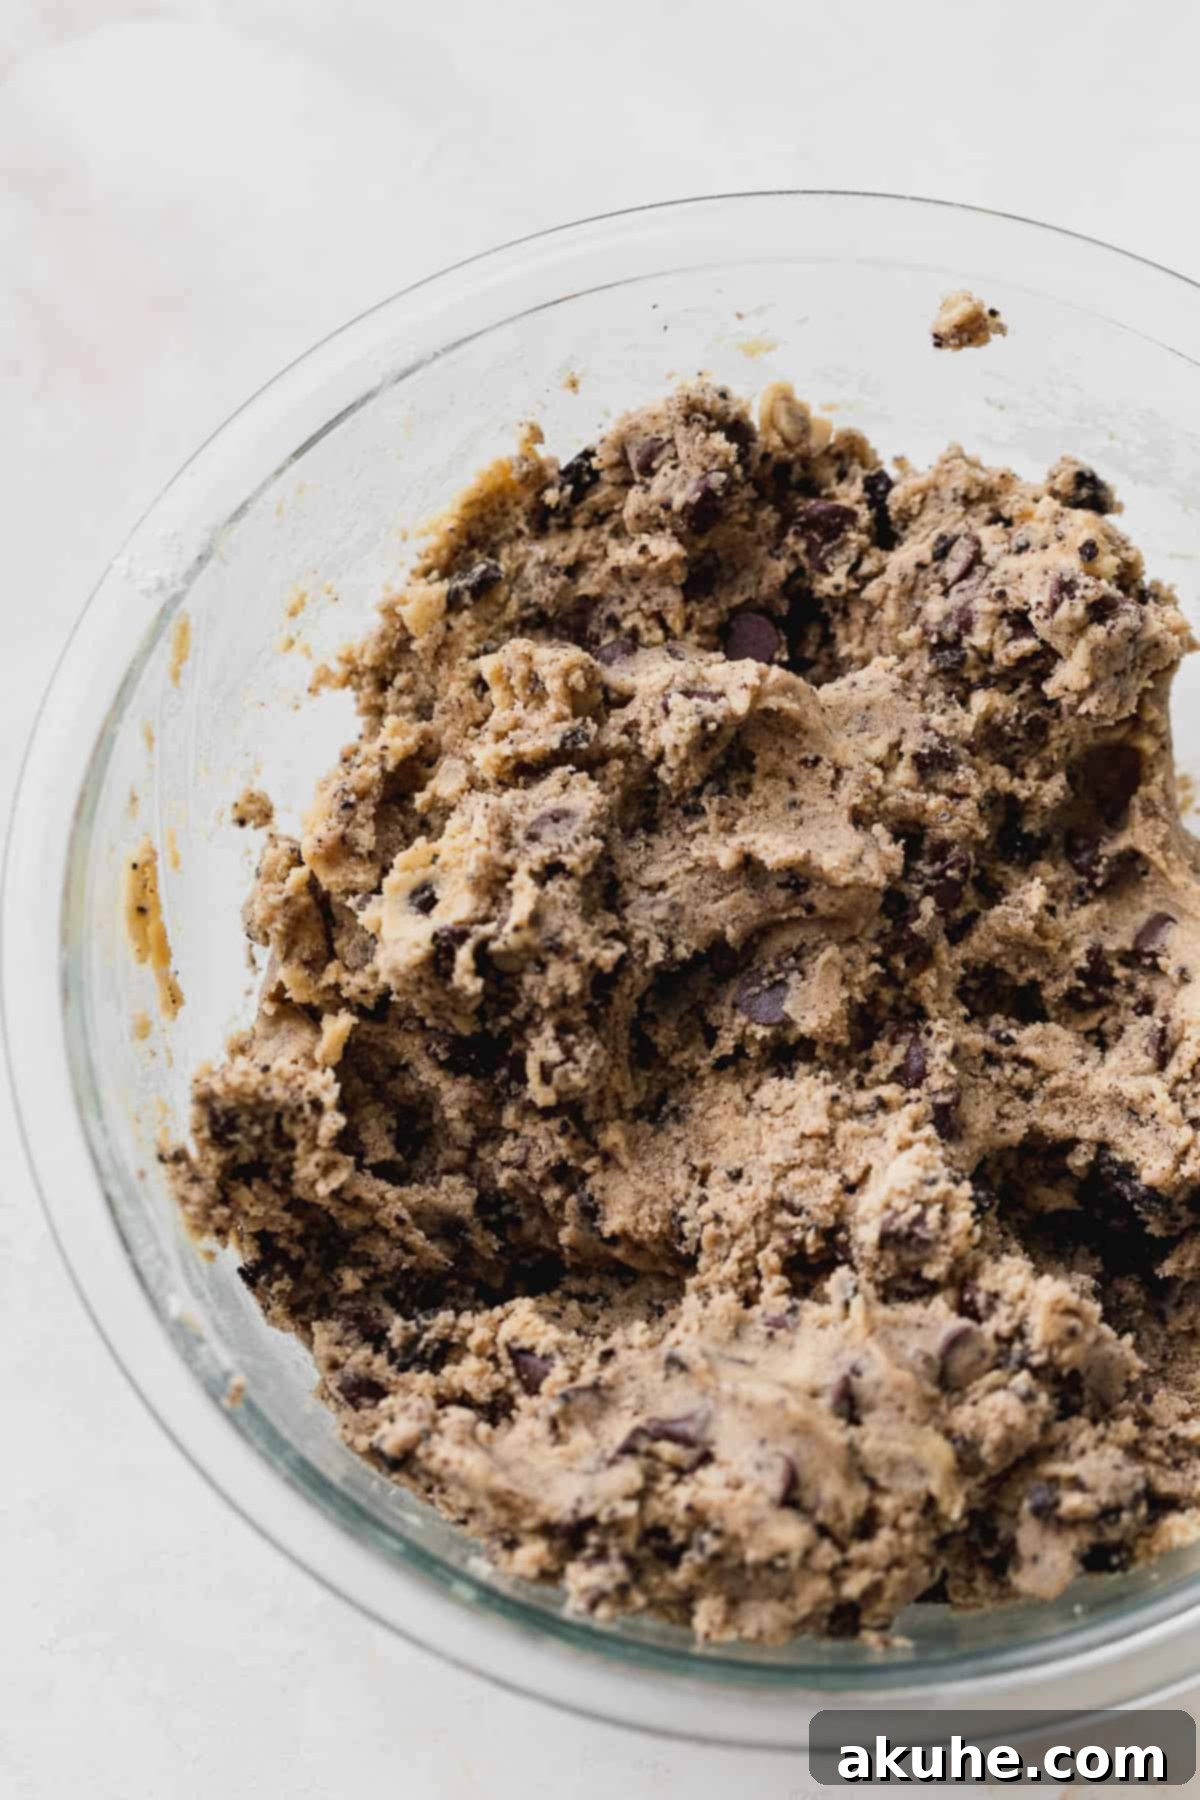
- STEP 4: Incorporate Dry Ingredients and Mix-ins. Gradually add the reserved dry ingredients to the wet mixture, mixing on low speed until just combined and no streaks of flour remain. Be careful not to overmix the dough, as this can develop the gluten too much, resulting in tough cookies. Finally, gently fold in the semi-sweet chocolate chips, the ½ cup of Oreo crumbs, and the prepared Oreo pieces until evenly distributed throughout the dough.
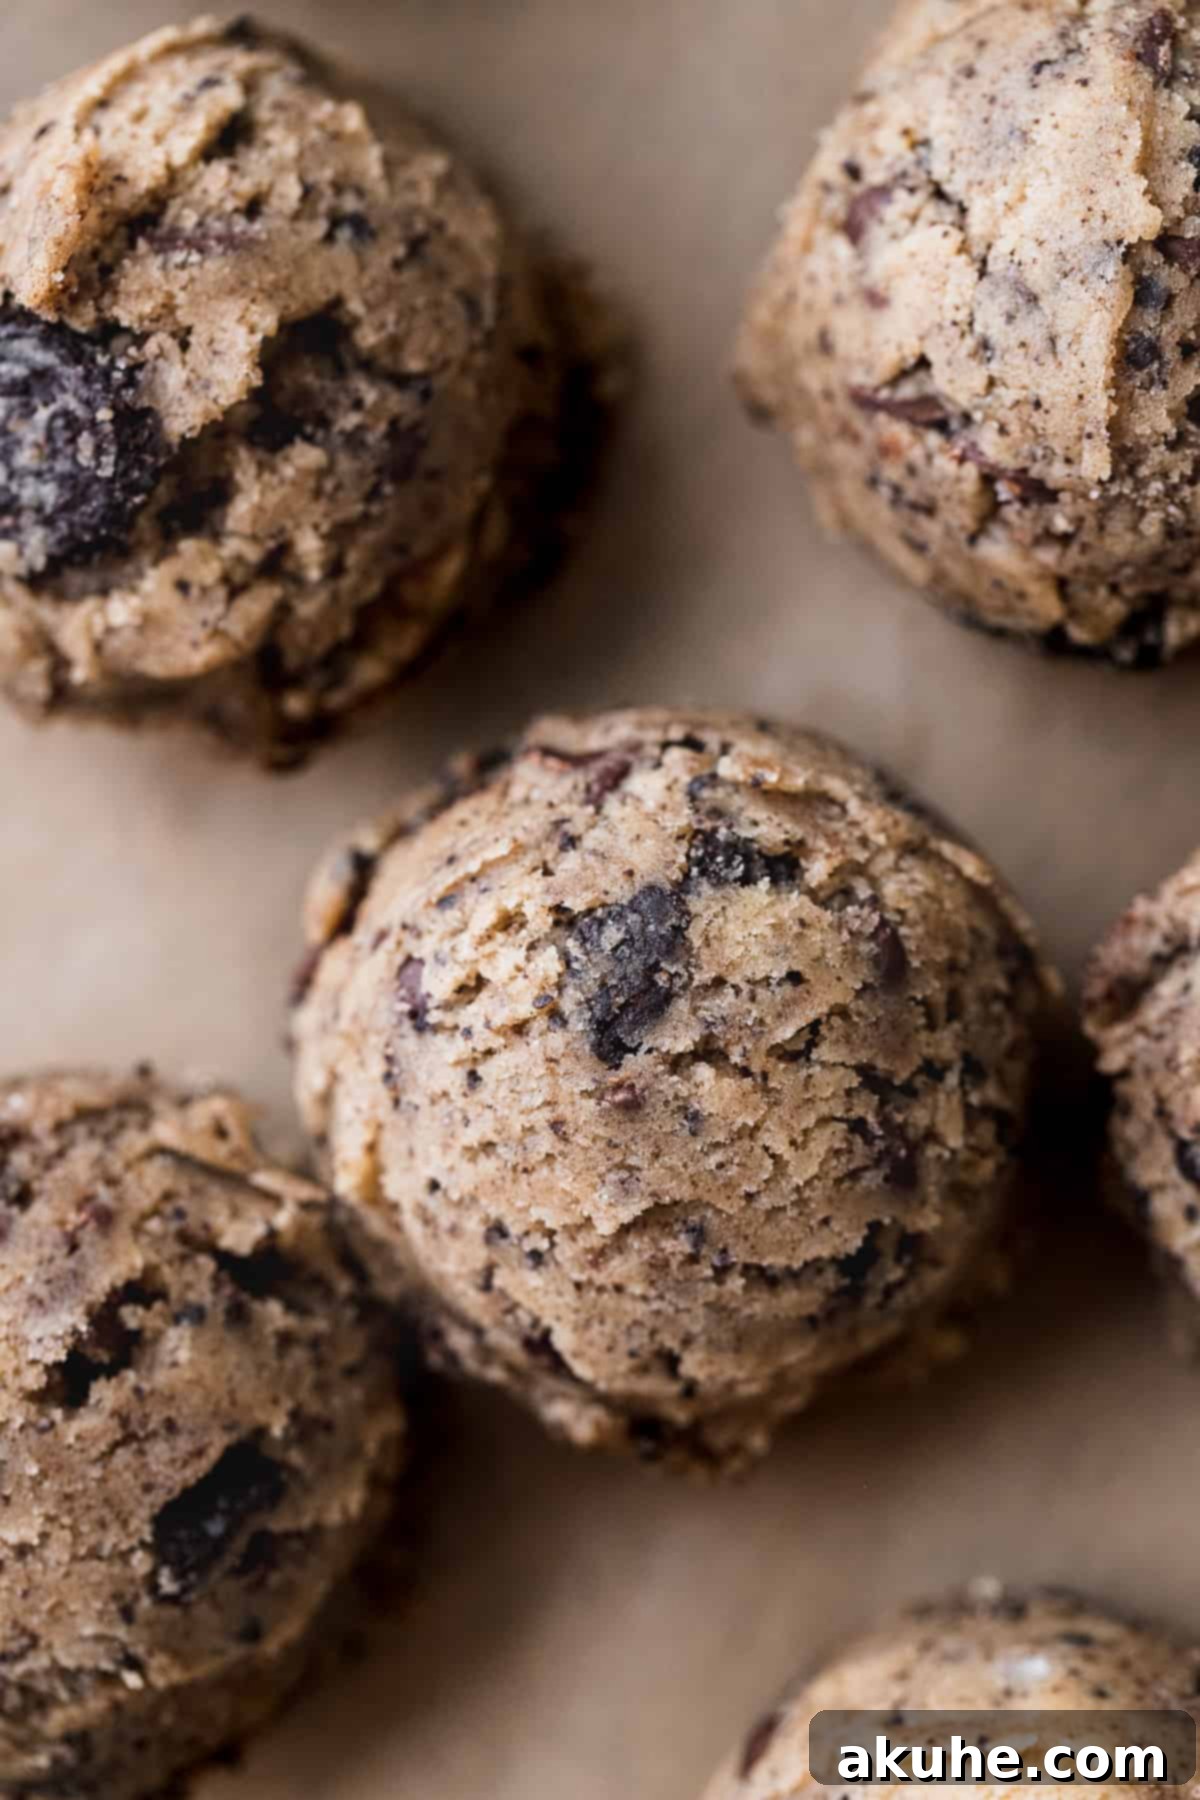
- STEP 5: Chill the Dough. This step is absolutely essential for **bakery-style Oreo chocolate chip cookies**! Cover the mixing bowl with plastic wrap and chill the cookie dough in the refrigerator for at least 40 minutes. This chilling period allows the flavors to meld, the butter to firm up, and the flour to fully hydrate, which prevents the cookies from spreading too much in the oven and helps achieve that perfect chewy texture.
- STEP 6: Scoop and Bake. Preheat your oven to 350°F (175°C). Line two large baking sheets with parchment paper. Using a large cookie scoop (approximately 3-3.5 oz or about 1/4 cup), scoop rounded heaps of cookie dough onto the prepared baking sheets, leaving ample space between each cookie (about 6 cookies per sheet). For the first batch, place the scooped dough balls in the freezer for 10-15 minutes while the oven preheats. This extra chilling step further reduces spreading. Keep the remaining dough in the refrigerator until ready to bake. Bake the cookies for 13-15 minutes, or until the edges are lightly golden brown and the centers still appear slightly soft and underdone. This ensures a gooey interior.
Expert Baking Tips for Unforgettable Oreo Chocolate Chip Cookies
Achieving bakery-level perfection for your **chewy Oreo cookies** involves a few key techniques:
Room Temperature Ingredients are Non-Negotiable: Always remember to pull your butter and eggs out of the refrigerator at least 2 hours before you plan to bake. This allows them to reach a uniform temperature, which is critical for proper emulsion. Room temperature ingredients combine more smoothly and evenly, creating a consistent dough texture and preventing clumpy butter or curdled mixtures. This seamless integration of ingredients ultimately contributes to a chewier, more uniform cookie.
The Power of Chilling: The dough absolutely NEEDS to be chilled. This isn’t just a suggestion; it’s a vital step for preventing excessive spreading in the oven, ensuring your cookies stay thick and chewy. A minimum of 40 minutes is required, but you can chill the dough for longer, even overnight, to deepen the flavors and improve the texture further. Another fantastic tip is to wait until the dough has completed its initial chill time, then scoop the entire batch of cookie dough into individual balls. This makes the next step even easier.
Strategic Freezing for Zero Spread: For truly minimal spreading and an incredibly thick cookie, here’s a pro tip: once you’ve scooped your cookie dough balls, place the first batch (typically 6 cookies) directly into the freezer while your oven preheats. This rapid chill firms them up significantly. For the remaining cookie dough balls, keep them in the refrigerator until it’s their turn to bake. This staggered chilling technique helps to maintain the dough’s structure, resulting in beautifully thick and perfectly shaped **bakery-style cookies** every time.
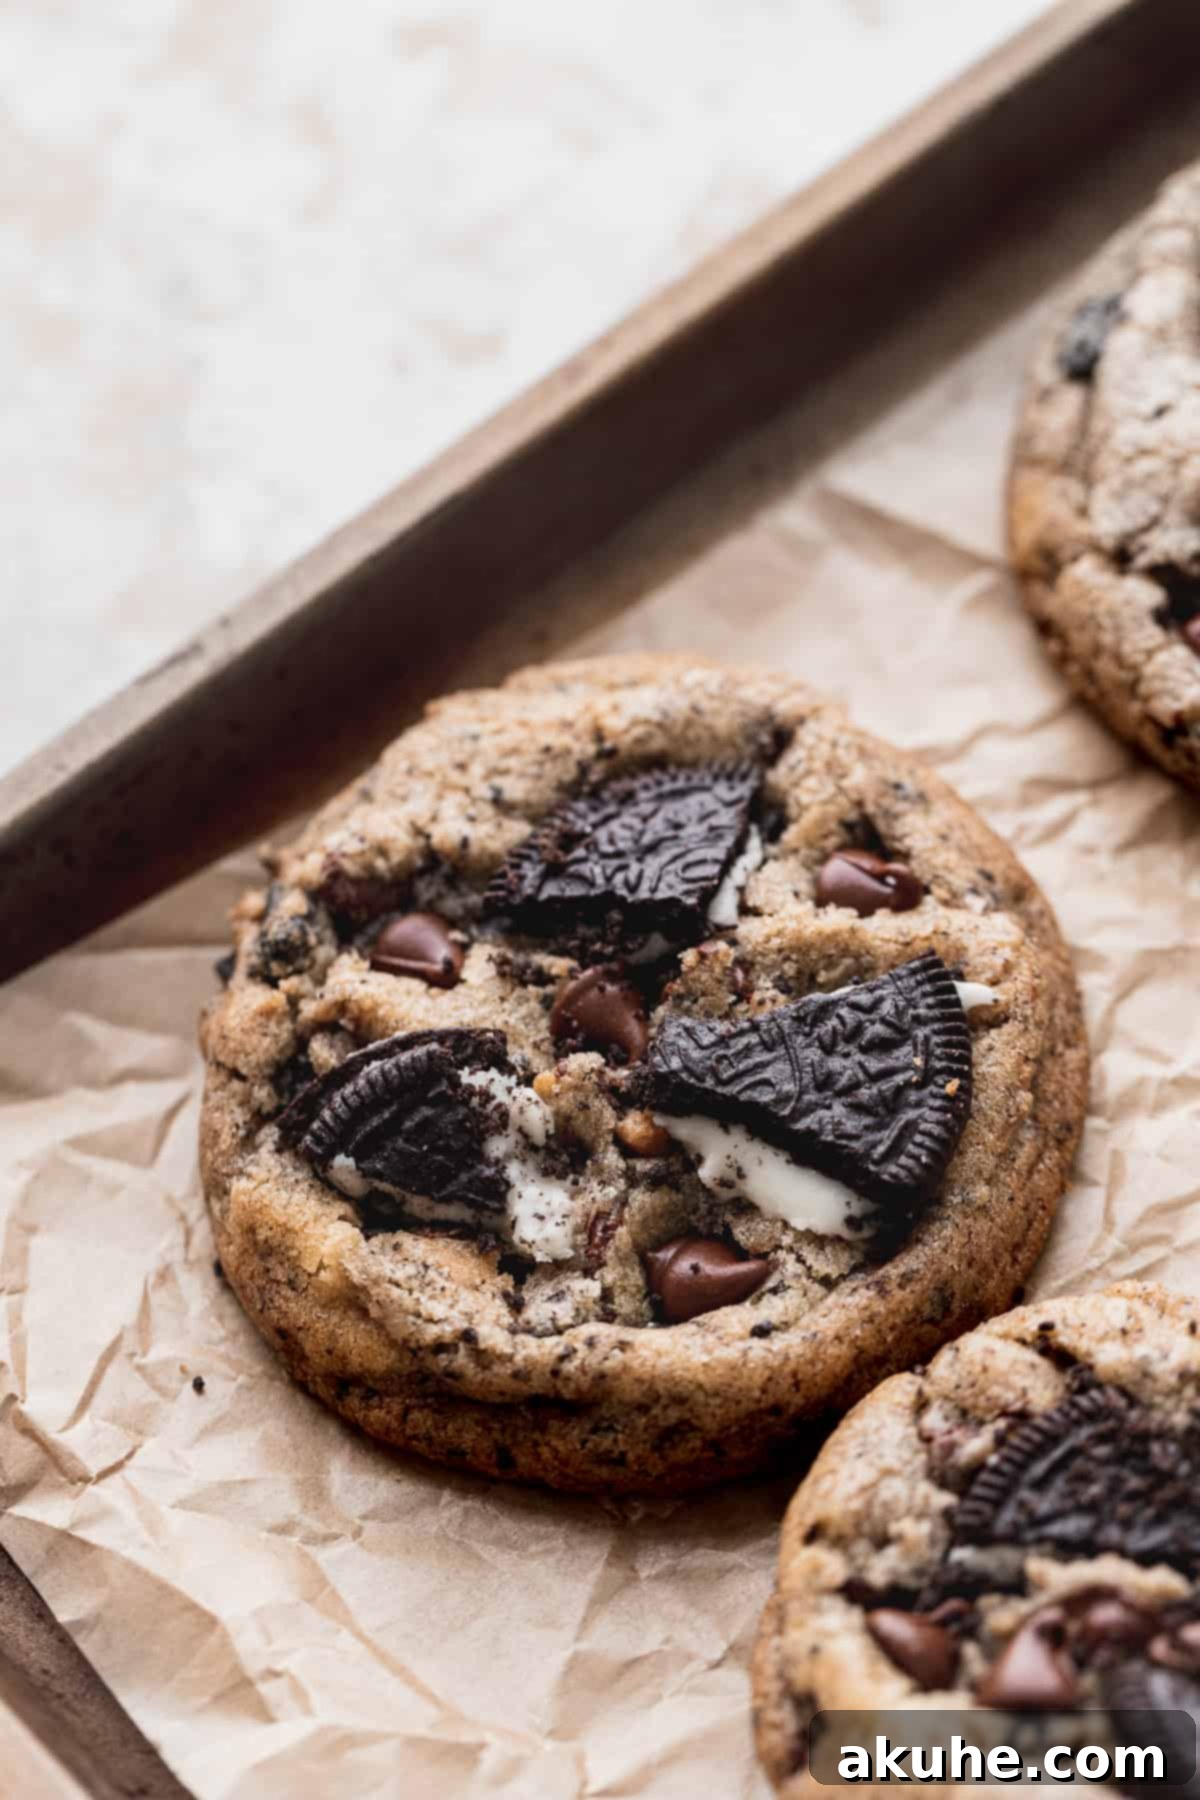
Don’t Overbake: For that signature gooey center, it’s crucial to pull the cookies from the oven when the edges are set and lightly golden, but the centers still look slightly soft and underdone. They will continue to bake slightly on the hot pan as they cool.
The Biscuit Cutter Trick: Immediately after taking the cookies out of the oven, while they are still warm and pliable, use a large biscuit cutter or a wide-mouthed glass that is slightly larger than your cookies. Place it over a cookie and gently swirl it around the cookie. This simple trick helps to round out any irregular edges, creating perfectly circular, **bakery-quality cookies**.
Topping Your Cookies for Extra Appeal and Flavor
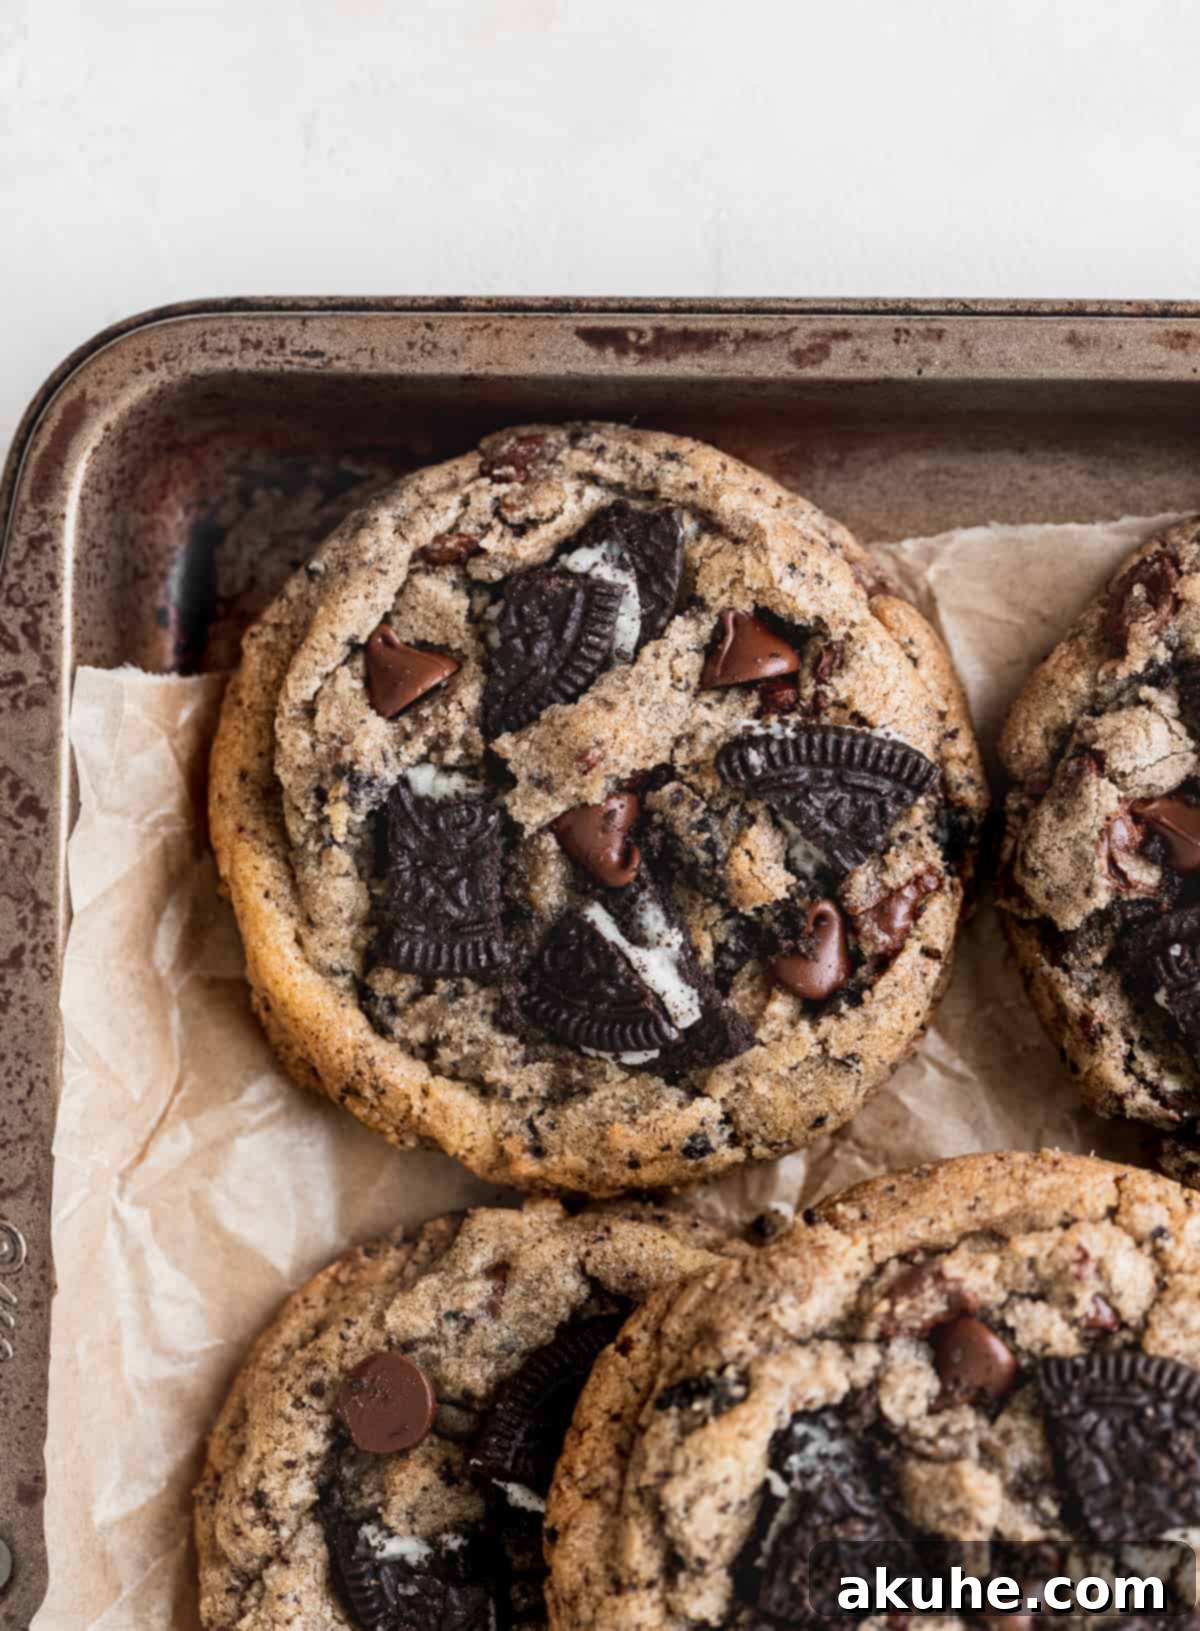
While entirely optional, taking a few extra moments to top your warm cookies will elevate their appearance and enhance their flavor, making them truly **bakery-style Oreo chocolate chip cookies**.
As soon as the cookies come out of the oven, while they are still warm and the chocolate is melty, gently press extra Oreo pieces and a few additional chocolate chips onto the tops. The residual heat will slightly melt the chocolate, making it look incredibly appealing and enticing. This also adds another layer of texture and an intensified burst of flavor. For an ultimate finish, sprinkle a generous amount of the reserved fine Oreo crumbs over the top of each cookie. This final touch provides a beautiful visual contrast and reinforces the rich Oreo flavor, ensuring every aspect of your cookie is perfect.
Frequently Asked Questions (FAQ) About Oreo Chocolate Chip Cookies
Yes, absolutely! You can experiment with various Oreo flavors to create unique variations of these **Oreo chocolate chip cookies**. Classic Oreos are always a hit, but imagine the possibilities with Golden Oreos, Mint Oreos, Peanut Butter Oreos, or even seasonal flavors! The only type we recommend avoiding are “Double Stuffed” Oreos, as their increased cream filling can add too much moisture to the dough, potentially altering the texture and causing the cookies to spread excessively during baking.
Yes, making the dough ahead of time is a fantastic option for these **chewy Oreo cookies**! After the initial 40-minute chill time, you can scoop the dough into individual balls. Tightly wrap these dough balls in plastic wrap or place them in an airtight container and store them in the refrigerator for up to 3-4 days. If you plan to bake them beyond this timeframe, it’s best to freeze the scooped dough balls. When ready to bake from frozen, simply place them on your prepared baking sheet and add an extra 1-3 minutes to the baking time, without thawing.
While we haven’t personally tested a fully vegan version of this specific recipe, it should be possible with a few adjustments. You would need to substitute the butter with a high-quality vegan butter substitute (stick form), use a flax egg or other egg replacer for the egg and egg yolk, and ensure your chocolate chips are dairy-free. Many Oreo varieties are accidentally vegan, but always double-check the ingredient list for hidden dairy. If you give it a try, please let us know how they turn out!
Excessive spreading is a common issue, but there are several troubleshooting tips. Firstly, ensure your butter and eggs were not too warm (verging on melted). Secondly, make sure your dough was adequately chilled for the full 40 minutes, or even longer. For an extra safeguard, try the freezer chill method for the scooped dough balls mentioned in our baking tips. Also, ensure your oven temperature is accurate; a too-low oven can cause spreading. Adding an extra tablespoon or two of flour can sometimes help if the dough consistently spreads.
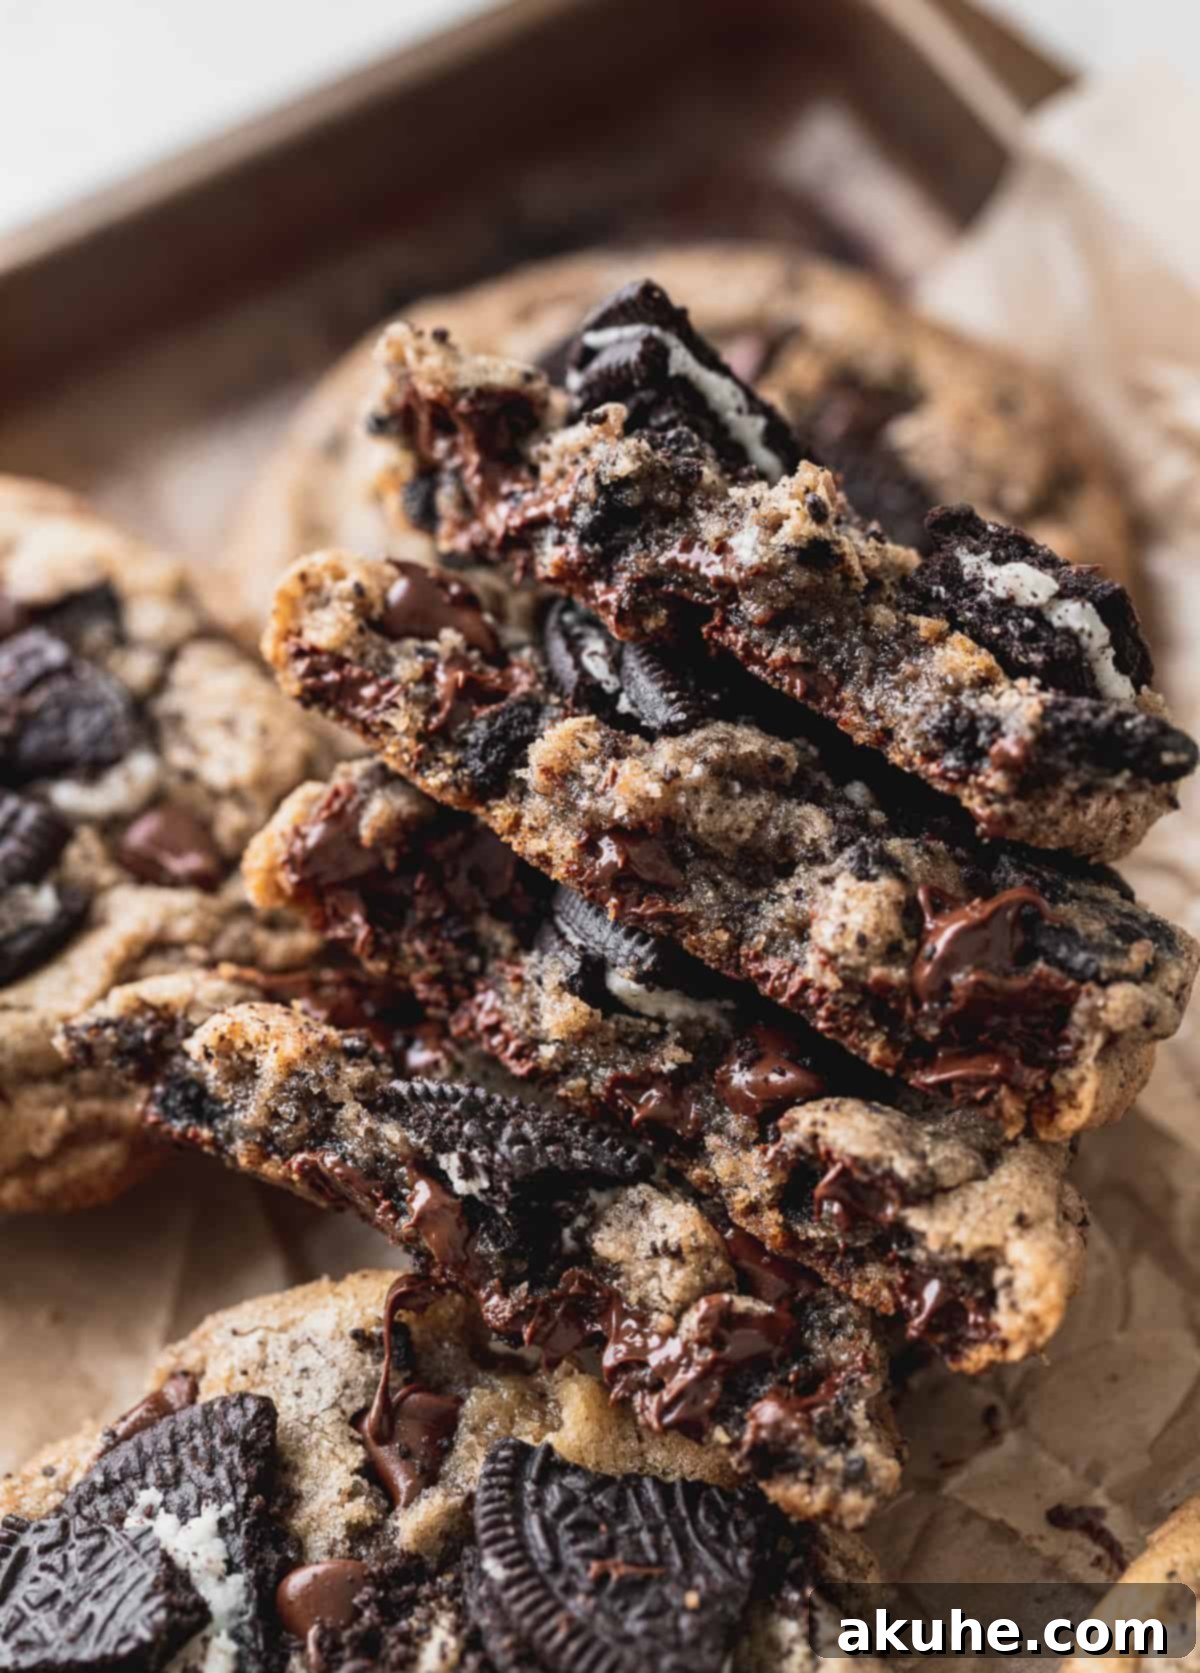
The secret to a chewy, gooey center lies in a few critical steps. Using a higher ratio of brown sugar to granulated sugar contributes moisture and chewiness. Baking the cookies large helps keep the center soft while the edges set. Most importantly, avoid overbaking! Pull the cookies from the oven when their edges are just set and lightly golden, but the centers still look slightly underbaked and soft. They will continue to cook and set on the hot baking sheet for a few minutes after removal, resulting in that irresistible gooeyness.
Exciting Recipe Variations for Your Oreo Cookies
Unleash your creativity and customize your **Oreo chocolate chip cookies** with these delicious variations:
- Endless Oreo Flavors: The simplest variation is to switch up your Oreo flavor! Beyond classic, consider gluten-free Oreos, vanilla (Golden) Oreos for a lighter flavor, or festive Halloween/Christmas Oreos for seasonal fun. The possibilities are truly endless!
- Nutty Additions: Introduce a delightful crunch by folding in ½ cup of chopped toasted pecans, walnuts, or almonds along with the chocolate chips and Oreos.
- Different Chocolate Combos: Instead of just semi-sweet, try a mix of different chocolate chips – white chocolate, milk chocolate, or even dark chocolate chunks for varying levels of sweetness and intensity.
- Extract Experiments: Add a different flavor dimension by substituting half of the vanilla extract with peppermint extract for a mint-Oreo cookie, or a hint of almond extract for a subtle, sophisticated twist.
- Sprinkle Fun: For a festive touch, especially around holidays, fold in ½ cup of colorful sprinkles with the chocolate chips.
Special Tools to Elevate Your Baking Experience
While not strictly necessary, these tools can make baking your **Oreo chocolate chip cookies** much easier and more consistent:
- Parchment Paper: We highly recommend using premade sheets of parchment paper rather than rolls. They lay flat, prevent your cookies from sticking to the baking sheet, and make cleanup an absolute breeze. This ensures your cookies maintain their perfect shape and lift off the pan effortlessly.
- Large Cookie Scoop: A large cookie scoop (like the OXO brand) is invaluable for creating uniformly sized cookies. Consistent size means your cookies will bake evenly, ensuring every single **bakery-style Oreo cookie** has that perfect chewy center and crisp edge. A 3-3.5 oz scoop is ideal for these large cookies.
- Food Processor: Essential for quickly and efficiently transforming your Oreos into both fine crumbs and chunky pieces, a food processor ensures you get the perfect texture for maximum Oreo flavor distribution.
Storing and Freezing Your Delicious Oreo Chocolate Chip Cookies
To keep your **Oreo chocolate chip cookies** fresh and delightful, proper storage is key:
These baked cookies should be stored at room temperature in an airtight container. Placed properly, they will retain their freshness and delicious texture for up to 3-4 days. For optimal enjoyment, try gently warming them in the microwave for a few seconds before serving to bring back that freshly baked, gooey center.
Freezing Baked and Unbaked Dough
Freezing Baked Cookies: These **bakery-style Oreo chocolate chip cookies** freeze exceptionally well after they’ve been baked. Once completely cooled, wrap individual cookies tightly in cling film, then place them in an airtight freezer-safe container or freezer bag. They can be frozen for up to 30 days. To enjoy, simply let the cookies thaw on the counter for about an hour, or microwave them briefly (15-30 seconds) until warm and soft.
Freezing Unbaked Dough: For future batches, you can freeze the scooped cookie dough balls. After chilling the dough and scooping it, place the dough balls on a baking sheet and freeze for about an hour until solid. Once firm, transfer them to a freezer-safe bag or airtight container. They can be stored in the freezer for up to 3 months. When you’re ready to bake, place the frozen dough balls on a parchment-lined baking sheet and add an additional 1-3 minutes to the baking time. This method allows you to have fresh, warm cookies whenever the craving strikes!
Other Irresistible Cookie Recipes to Try
More Decadent Oreo Desserts to Explore
If you can’t get enough of that classic Oreo flavor, be sure to explore these other fantastic Oreo-infused desserts:
- Oreo Cake (Cookies and Cream Cake)
- Oreo Cheesecake Bars
- Classic Oreo Cheesecake
- No-Bake Oreo Cheesecake
- Fudgy Oreo Brownies
We hope you thoroughly enjoy baking and devouring these incredible **Oreo Chocolate Chip Cookies**! Your feedback means the world to us. Please make sure to leave a star review below once you’ve tried the recipe.
Don’t forget to tag us on Instagram @stephaniesweettreats with photos of your creations. We love seeing what you bake! For more delicious ideas and inspiration, be sure to follow us on Pinterest.

Oreo Chocolate Chip Cookies
Stephanie Rutherford
Print Recipe |
Pin Recipe |
Leave a Review
15 mins
14 mins
40 mins
1 hr 9 mins
17 large cookies
Ingredients
- 2 3/4 cup All-purpose flour
- 1 tsp Baking soda
- 1 tsp Salt
- 1 cup Unsalted butter, room temperature
- 1 cup Brown sugar, packed light or dark
- 1/2 cup White granulated sugar
- 1 tsp Pure vanilla extract
- 1 Large egg, room temperature
- 1 Egg yolk, room temperature
- 1 1/2 cups Semi-sweet chocolate chips
- 1/2 cup Oreo crumbs (from about 5 cookies, blended until fine)
- 3/4 cup Oreo pieces (from about 6 cookies, broken into small and medium pieces)
Instructions
- In a medium bowl, whisk together the 2 3/4 cups all-purpose flour, 1 tsp baking soda, and 1 tsp salt. Sift for best results. Prepare your Oreos: blend 5 Oreos into fine crumbs (yielding about 1/2 cup) using a food processor. Reserve any extra for topping. Pulse 6 Oreos into small and medium pieces for chunky texture.
- Using an electric mixer, beat the 1 cup room temperature unsalted butter with 1 cup brown sugar and 1/2 cup white granulated sugar on medium-high speed until light and fluffy (about 3-5 minutes). Scrape down the sides of the bowl. Add 1 tsp pure vanilla extract, 1 large room temperature egg, and 1 room temperature egg yolk. Mix until just combined.
- Gradually add the dry ingredients to the wet mixture, mixing on low speed until just combined. Fold in the 1 1/2 cups semi-sweet chocolate chips, 1/2 cup Oreo crumbs, and 3/4 cup Oreo pieces. Cover the dough and chill in the refrigerator for at least 40 minutes. This is crucial for texture and to prevent spreading.
- Preheat oven to 350°F (175°C). Line 2 cookie sheets with parchment paper. Using a large 3-3.5 oz cookie scoop, scoop rounded heaps of cookie dough. Place about 6 dough balls on one cookie sheet and freeze while the oven preheats for superior shape. Keep the remaining dough in the fridge until ready to bake.
- Bake the cookies for 13-15 minutes. The edges should be lightly golden brown, and the centers should still appear slightly underdone and soft. Let the cookies sit on the baking pan for 4 minutes to set. While warm, use a biscuit cutter or large glass to gently swirl around each cookie to perfect its round shape. Immediately press extra Oreo pieces and chocolate chips onto the warm tops, then sprinkle with reserved Oreo crumbs. Transfer to a wire rack to cool completely or until slightly warm.
Notes
High Altitude Baking: If baking at high altitudes, consider adding an extra 2 tablespoons of all-purpose flour to help maintain cookie structure.
Small Batch Version: For a smaller yield, try this scaled-down recipe:
– 1/2 cup melted butter (cooled to room temperature)
– 1/2 cup brown sugar
– 1/4 cup granulated sugar
– 1 tsp vanilla extract
– 1 large egg (room temperature)
– 1 1/2 cups all-purpose flour
– 1/4 tsp baking soda
– 1/4 tsp baking powder
– 1/2 tsp salt
– 3/4 cup chocolate chips
– 1/4 cup Oreo crumbs
– 1/3 cup Oreo pieces
For the small batch, mix wet ingredients, then fold in dry ingredients, chocolate chips, Oreo crumbs, and pieces. No chilling is required for this smaller dough. Scoop and bake following the directions above.
Nutrition Information (per large cookie):
- Calories: 337 kcal
- Carbohydrates: 42g
- Protein: 3g
- Fat: 17g
- Saturated Fat: 10g
- Polyunsaturated Fat: 1g
- Monounsaturated Fat: 5g
- Trans Fat: 1g
- Cholesterol: 41mg
- Sodium: 209mg
- Potassium: 134mg
- Fiber: 2g
- Sugar: 24g
- Vitamin A: 357 IU
- Calcium: 28mg
- Iron: 2mg
(Nutritional information is an estimate and may vary based on ingredients used and preparation methods.)
