The Ultimate Chocolate Peanut Butter Cake: A Decadent Homemade Delight
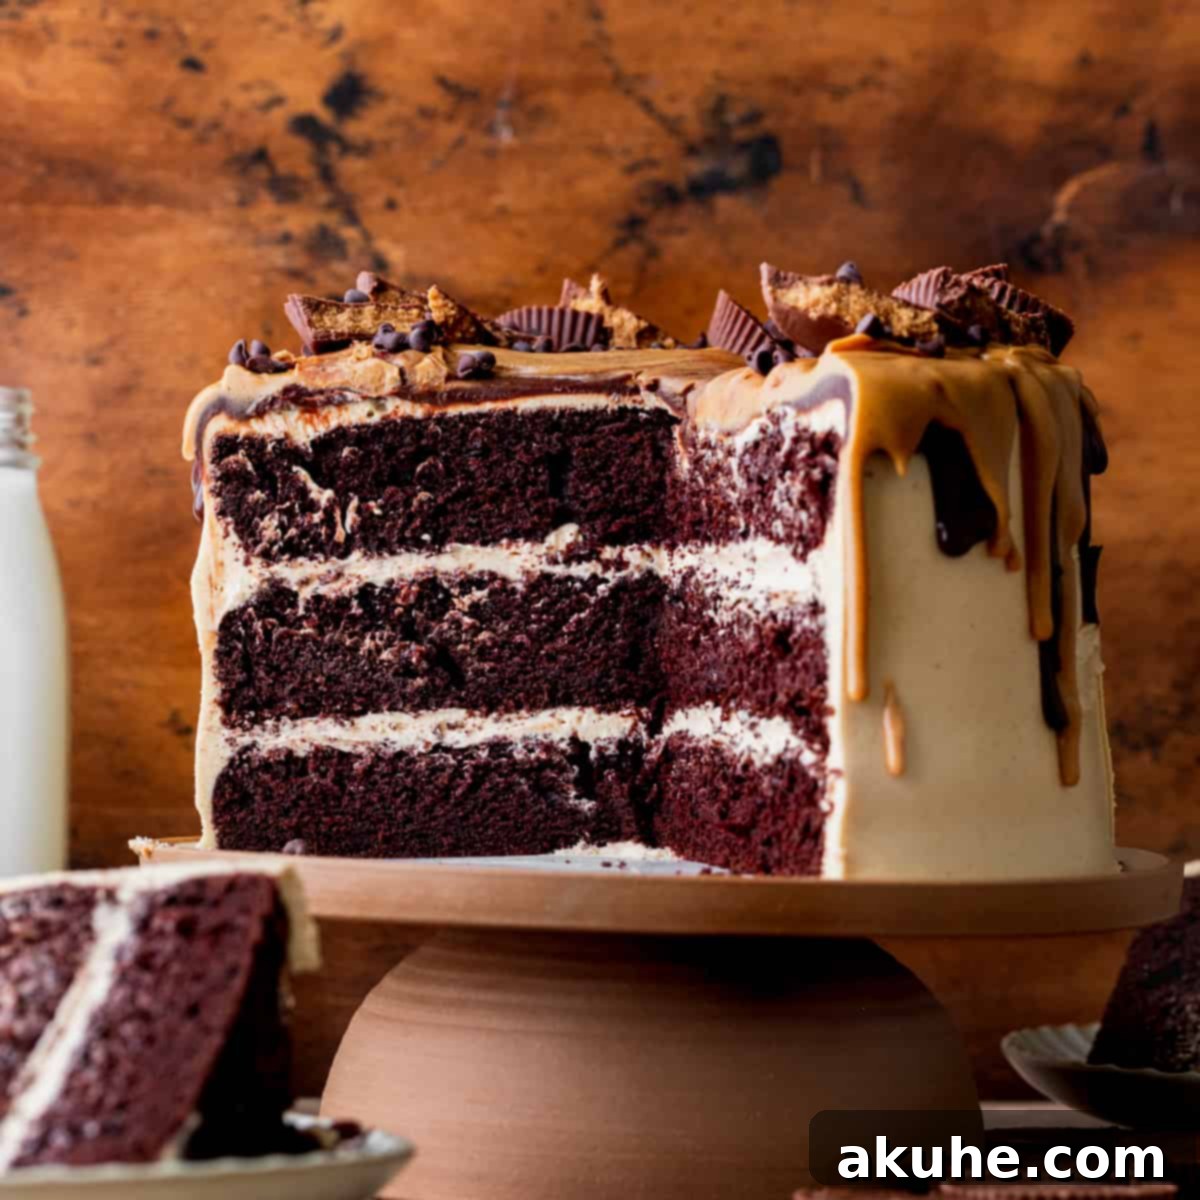
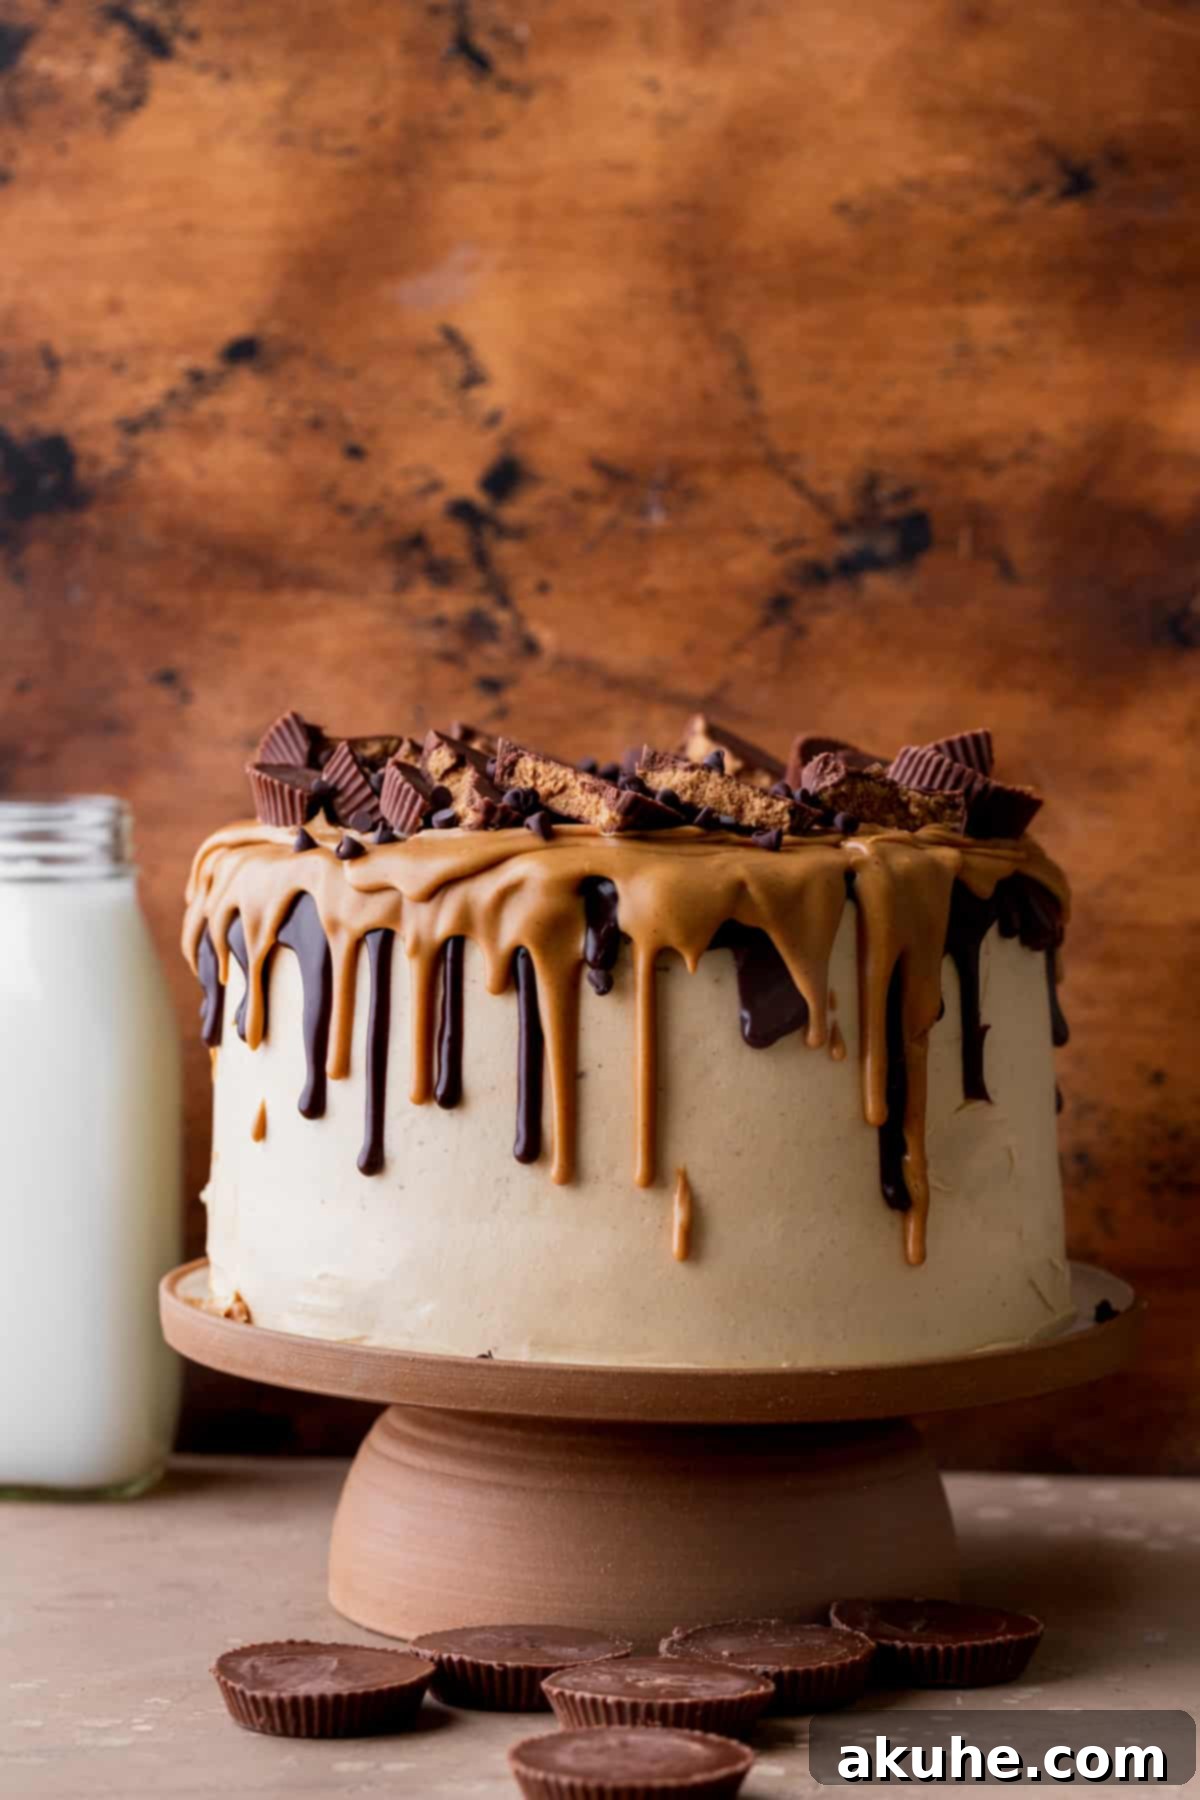
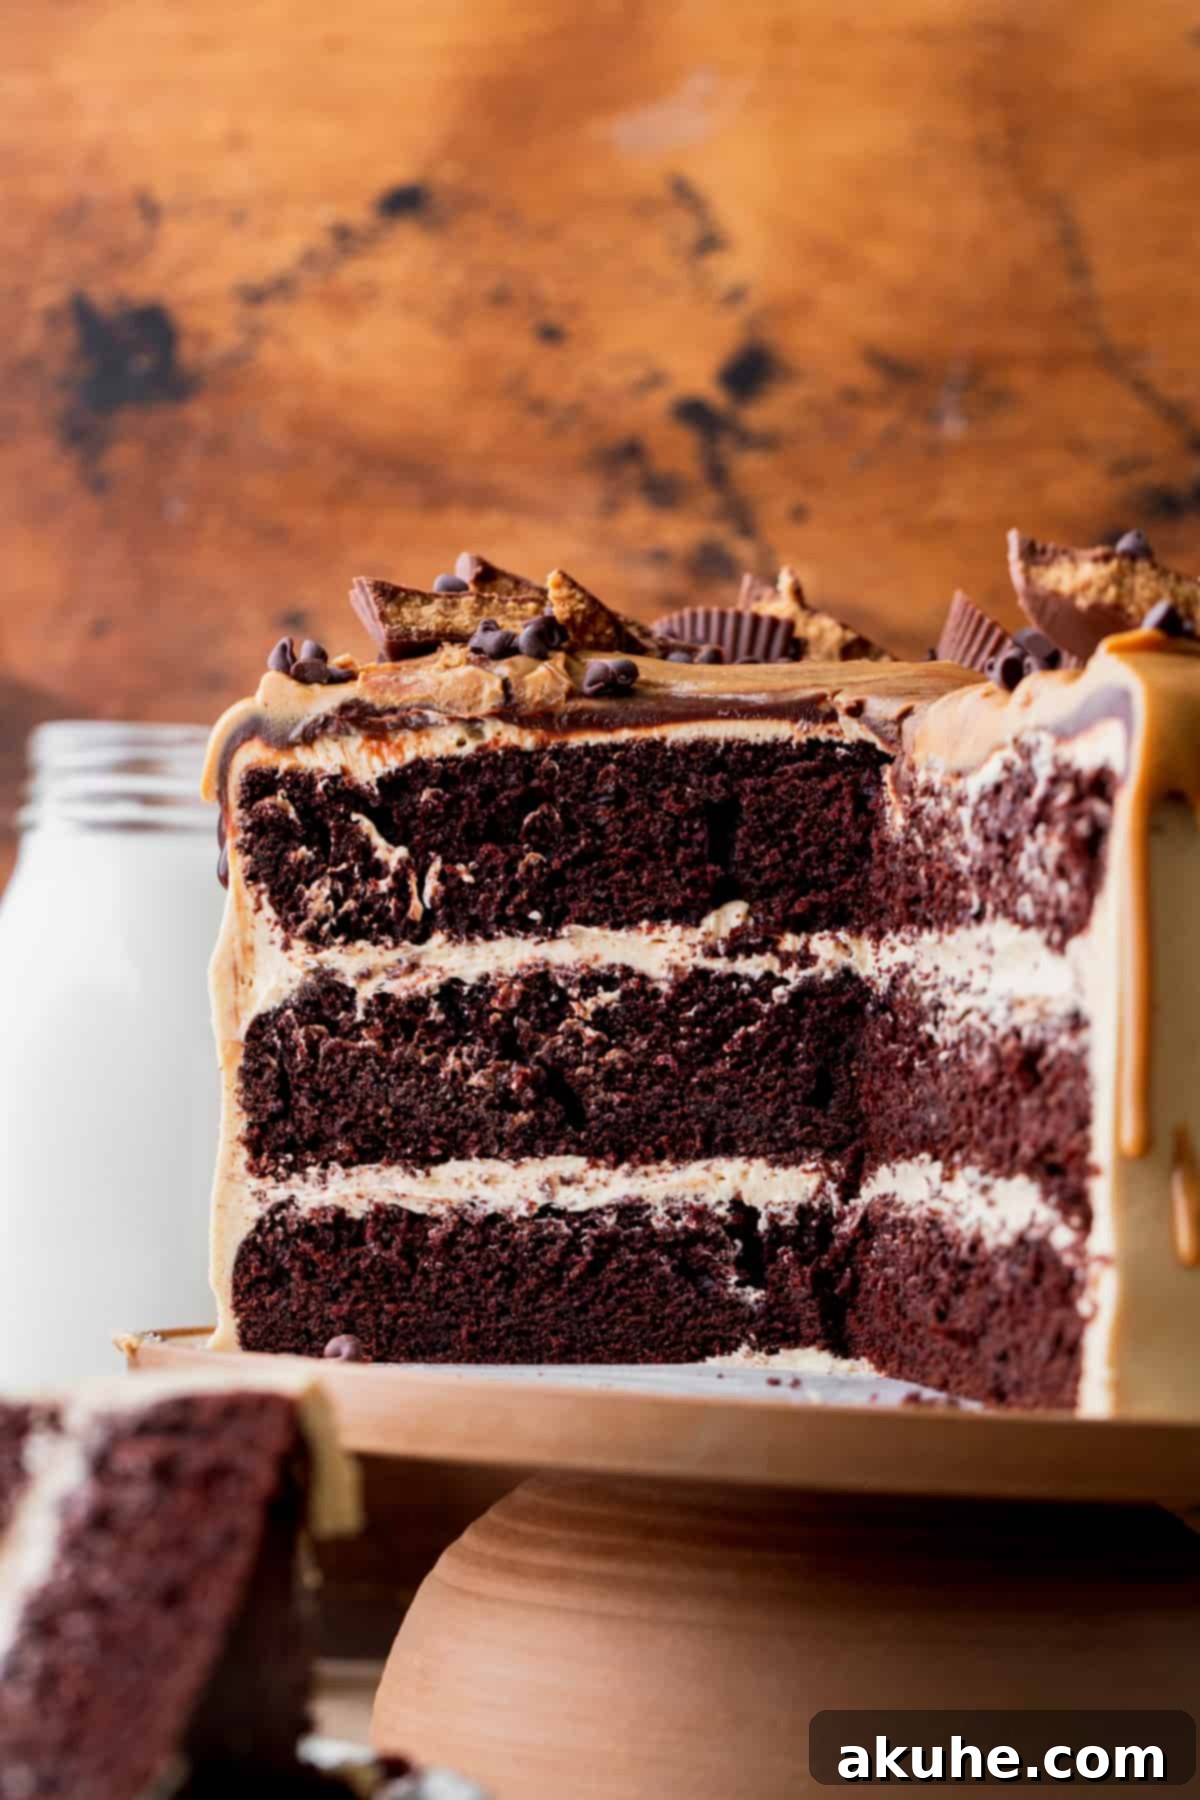
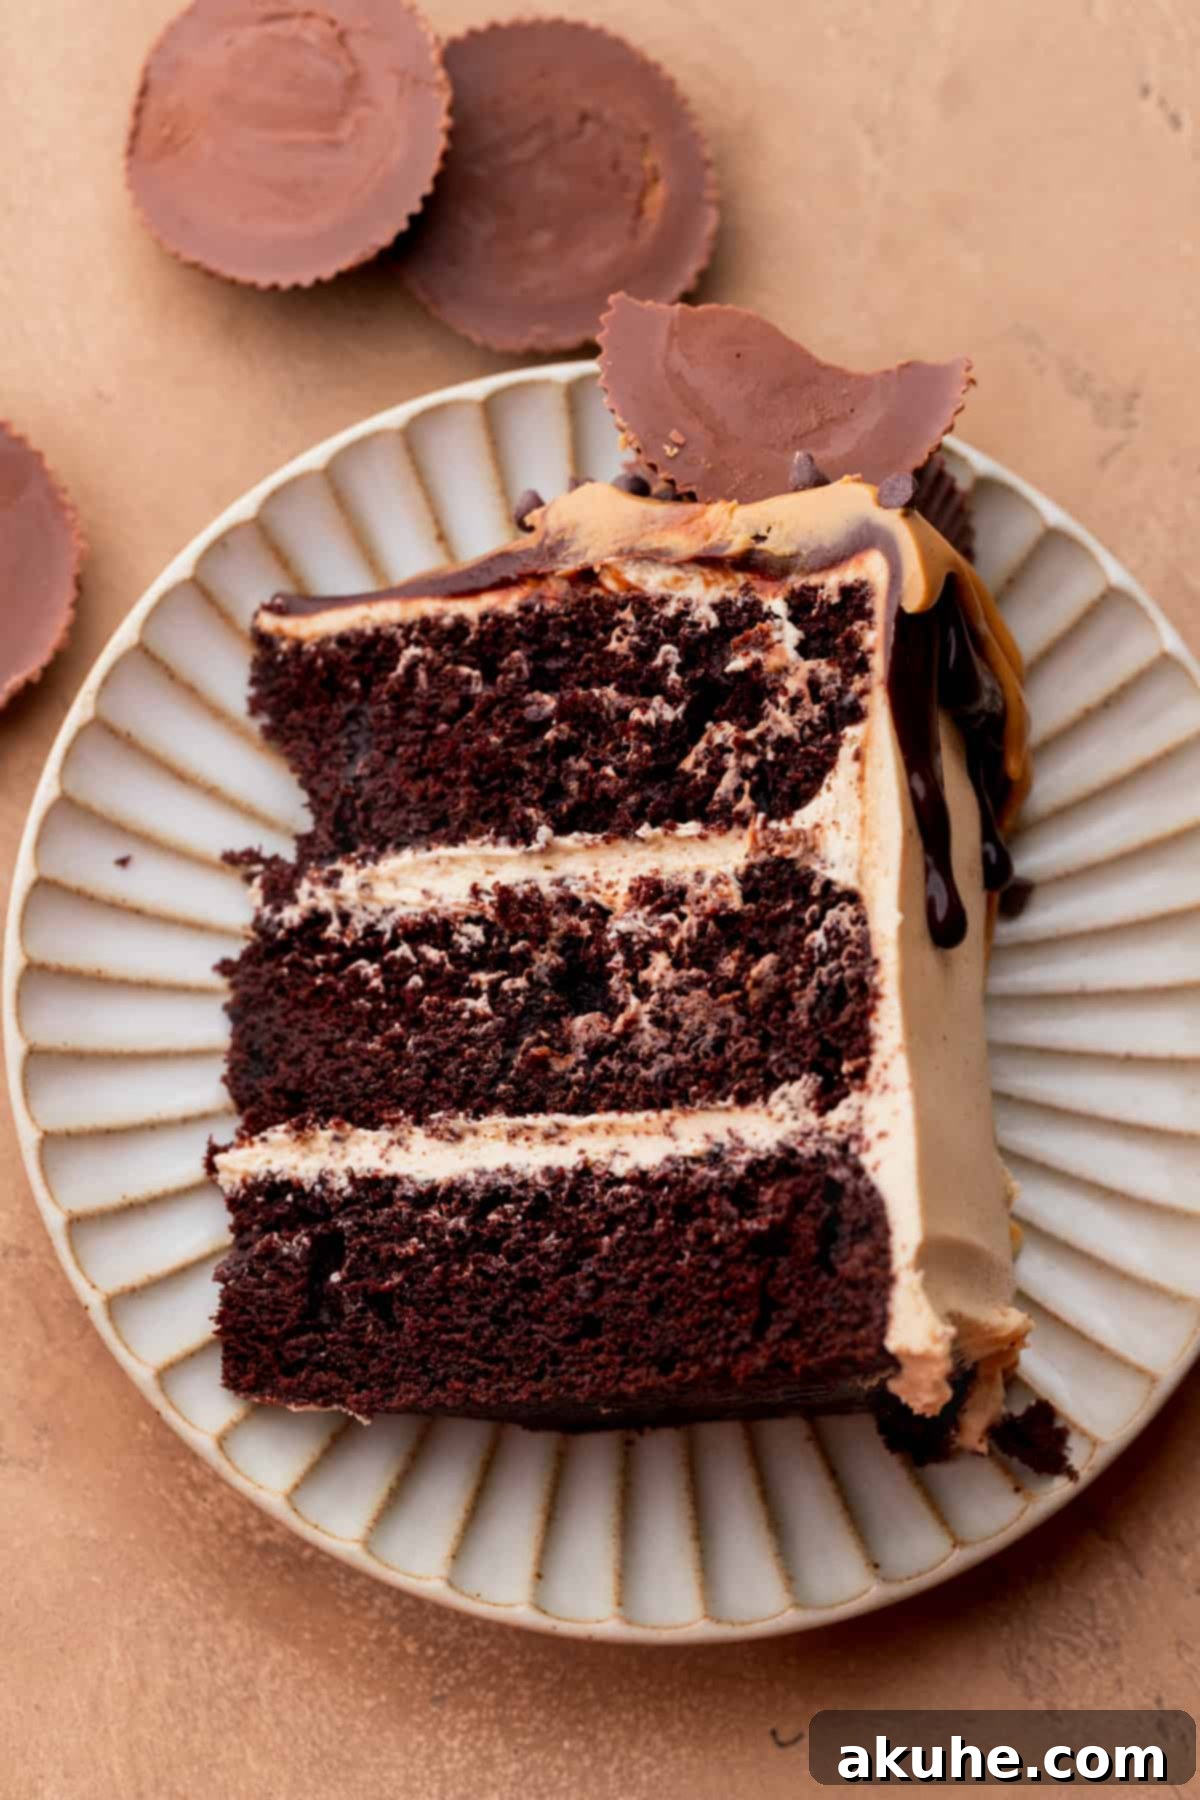
Prepare to indulge in the ultimate dessert experience with this show-stopping chocolate peanut butter cake. This recipe delivers a perfectly layered, incredibly moist chocolate cake crowned with a rich, fluffy peanut butter frosting. To elevate its appeal and flavor, it’s adorned with a glossy chocolate drip, a creamy peanut butter drip, and an abundance of extra peanut butter cups. It’s truly a celebration of two beloved flavors coming together in perfect harmony.
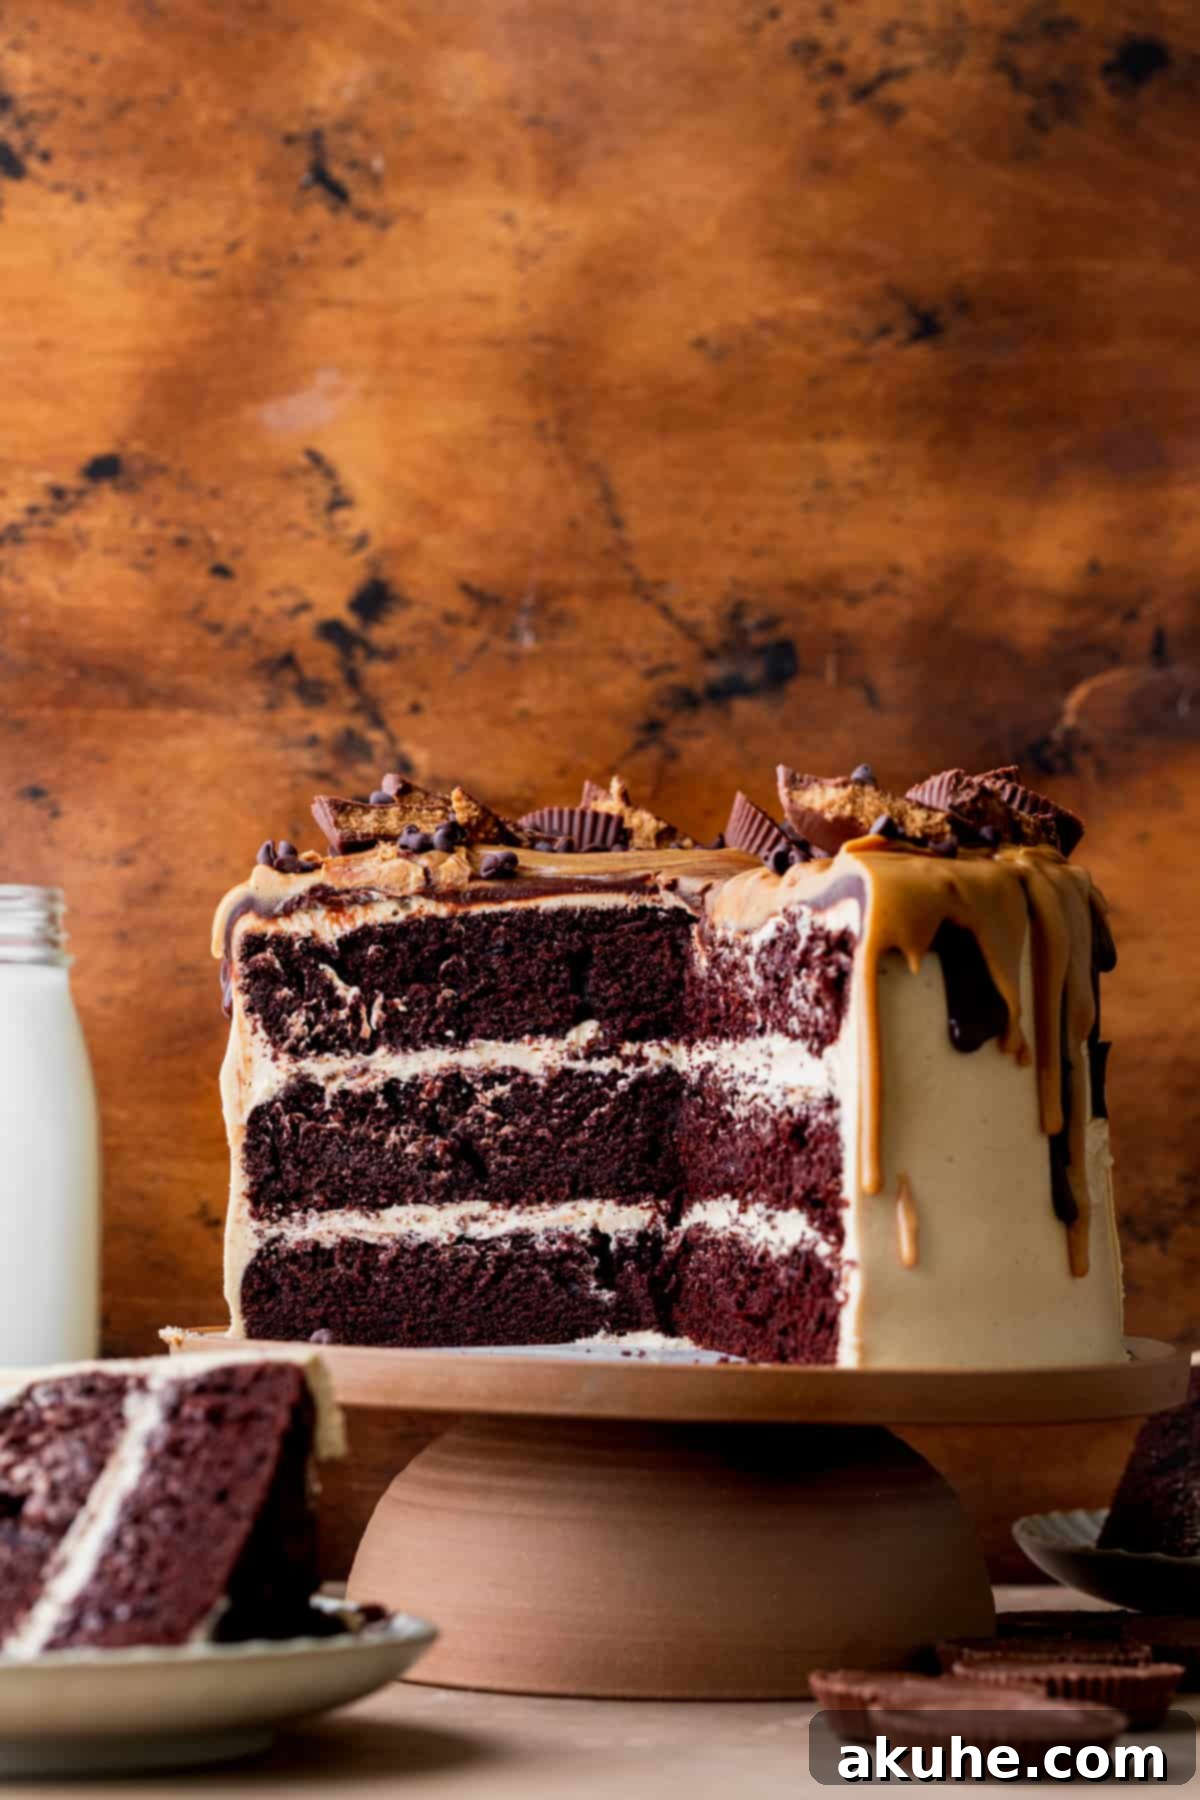
This chocolate peanut butter cake isn’t just a dessert; it’s an unforgettable experience. The velvety texture of the chocolate cake layers pairs exquisitely with the irresistible sweetness and saltiness of the peanut butter frosting. Every component of this masterpiece has been meticulously tested and refined to ensure it stands out as the best chocolate peanut butter cake you’ll ever bake. Whether you’re planning a grand celebration, a casual gathering, or simply craving a truly special treat, this cake is guaranteed to be a sensational hit. Its luxurious taste and stunning presentation make it the ideal centerpiece for any special occasion, especially as a birthday cake.
If you’re a devoted fan of peanut butter, be sure to explore our other delightful recipes: Peanut Butter Cheesecake, Banana Peanut Butter Cookies, and Peanut Butter Chocolate Chip Cookies. Each offers a unique way to enjoy this versatile and beloved ingredient.
Why This Chocolate Peanut Butter Cake Recipe is a Must-Try
We believe every baker, from novice to expert, deserves a recipe that consistently delivers spectacular results. This chocolate peanut butter cake recipe is designed to do just that, offering key elements that guarantee success and a truly delicious outcome.
- Unbelievably Moist Chocolate Cake: The foundation of this cake is a chocolate cake recipe that has been perfected over countless trials. We’ve dedicated significant effort to developing layers that are not just moist, but incredibly tender and rich in chocolate flavor. You’ll be amazed by its soft crumb and how it beautifully complements the frosting without being overly dense or dry. This is achieved through a careful balance of wet and dry ingredients and the addition of hot liquid, which helps to bloom the cocoa powder for a deeper chocolate taste.
- Dreamy Peanut Butter Frosting: This isn’t just any peanut butter frosting; it’s a light, fluffy, and intensely flavorful creation that’s good enough to eat by the spoonful! Its smooth, creamy texture and perfect balance of sweet and salty notes are designed to meld seamlessly with the chocolate cake. It provides a delightful contrast in texture and taste, bringing the entire cake together into a harmonious symphony of flavors. We ensure it’s easy to make and pipe, giving your cake a professional finish.
- Dual Decadent Drips – Chocolate & Peanut Butter: What truly sets this cake apart visually and gastronomically are the two distinct drips. A smooth, glossy chocolate ganache drip cascades down the sides, offering a rich chocolate accent. This is beautifully complemented by a creamy peanut butter drip, adding another layer of visual appeal and a burst of nutty flavor. This dual-drip technique not only makes the cake look stunning and professional but also enhances the overall sensory experience, ensuring every bite is as beautiful as it is delicious. The combination of these two elements creates a visually striking cake that tastes even better than it looks.
Essential Ingredient Notes for Perfection
Using the right ingredients and preparing them correctly is crucial for the best possible chocolate peanut butter cake. Here are some detailed notes to guide you:
- Unsweetened Cocoa Powder: For an exceptionally rich, deep chocolate flavor and a darker color, we highly recommend using Dutch-processed cocoa powder. Unlike natural cocoa, Dutch-processed cocoa is less acidic and interacts differently with baking soda, resulting in a smoother, mellower chocolate taste. This is an excellent option we often use.
- Oil: Any neutral-flavored oil will work beautifully in this recipe. Canola oil, vegetable oil, or a light olive oil are all great choices. Oil contributes significantly to the cake’s moistness and tender crumb, keeping it from drying out over time, more so than butter in cake batters.
- Eggs: Always use large eggs for consistent results. It’s imperative that your eggs are at room temperature. Take them out of the refrigerator at least 2 hours before you plan to start baking. Room temperature eggs emulsify better with other ingredients, creating a smoother batter and a more uniform cake texture.
- Buttermilk: Full-fat or reduced-fat buttermilk can be used, but like the eggs, it must be at room temperature. Room temperature buttermilk blends more evenly and contributes to the cake’s tender texture and slight tang, which balances the sweetness. If you don’t have buttermilk, you can make a substitute by adding 1 tablespoon of white vinegar or lemon juice to a measuring cup, then filling the rest with milk to make 1 cup. Let it sit for 5-10 minutes until it slightly curdles.
- Hot Water (or Coffee): The water needs to be steaming hot, but not boiling rapidly. Hot water is essential for “blooming” the cocoa powder, which deepens its chocolate flavor significantly. Alternatively, hot brewed coffee can be used to further intensify the chocolate notes without adding a distinct coffee taste.
- Unsalted Butter: For the frosting, use unsalted butter that has been softened to room temperature. This means it should be pliable enough to indent with your finger but not melted or greasy. Room temperature butter is crucial for achieving a smooth, fluffy, and well-emulsified frosting. Pull it out of the fridge at least 2 hours before you begin preparing the frosting.
- Powdered Sugar (Confectioners’ Sugar): Sifting the powdered sugar is a non-negotiable step for the frosting. This prevents any lumps and ensures your peanut butter frosting is perfectly smooth and creamy, without any gritty texture.
- Chocolate Chips: We recommend using semi-sweet or dark chocolate chips for the chocolate drip. These varieties provide a balanced chocolate flavor that isn’t overly sweet, especially when paired with the rich chocolate cake and peanut butter frosting. Milk chocolate chips tend to be too sweet and can overpower the other flavors.
- Peanut Butter: For the frosting, always opt for creamy peanut butter, not chunky. The smoothness of creamy peanut butter ensures a silky frosting. We also advise against using natural peanut butter (the kind that separates) as its oil content and consistency can be unpredictable and lead to a greasy or unstable frosting. Stick with a conventional, processed creamy peanut butter for the best results.
Step-By-Step Instructions: Crafting the Perfect Chocolate Cake Layers
Baking these moist chocolate cake layers is surprisingly simple and doesn’t even require an electric mixer for the batter! You’ll achieve tender, flavorful layers that are the perfect base for our decadent frosting.
While the cake layers can be mixed by hand, we highly recommend using a stand mixer with a paddle attachment or a hand mixer for the peanut butter frosting to ensure optimal creaminess and fluffiness.
Chocolate Cake Preparation:
- Prepare Your Pans and Preheat Oven: Begin by preheating your oven to 350°F (175°C). Lightly grease and flour three 8-inch round cake pans, or spray them thoroughly with baking nonstick spray. To prevent sticking and ensure easy release, line the bottoms of the pans with 8-inch parchment paper circles, then spray again. This extra step guarantees your beautiful cake layers come out perfectly.
- Combine Dry Ingredients: In a large mixing bowl, sift together the all-purpose flour, Dutch-processed cocoa powder, baking powder, baking soda, and salt. Sifting is important to remove any lumps and ensure all ingredients are evenly distributed. Once sifted, add the granulated white sugar and whisk everything together until thoroughly combined. Set this bowl aside.
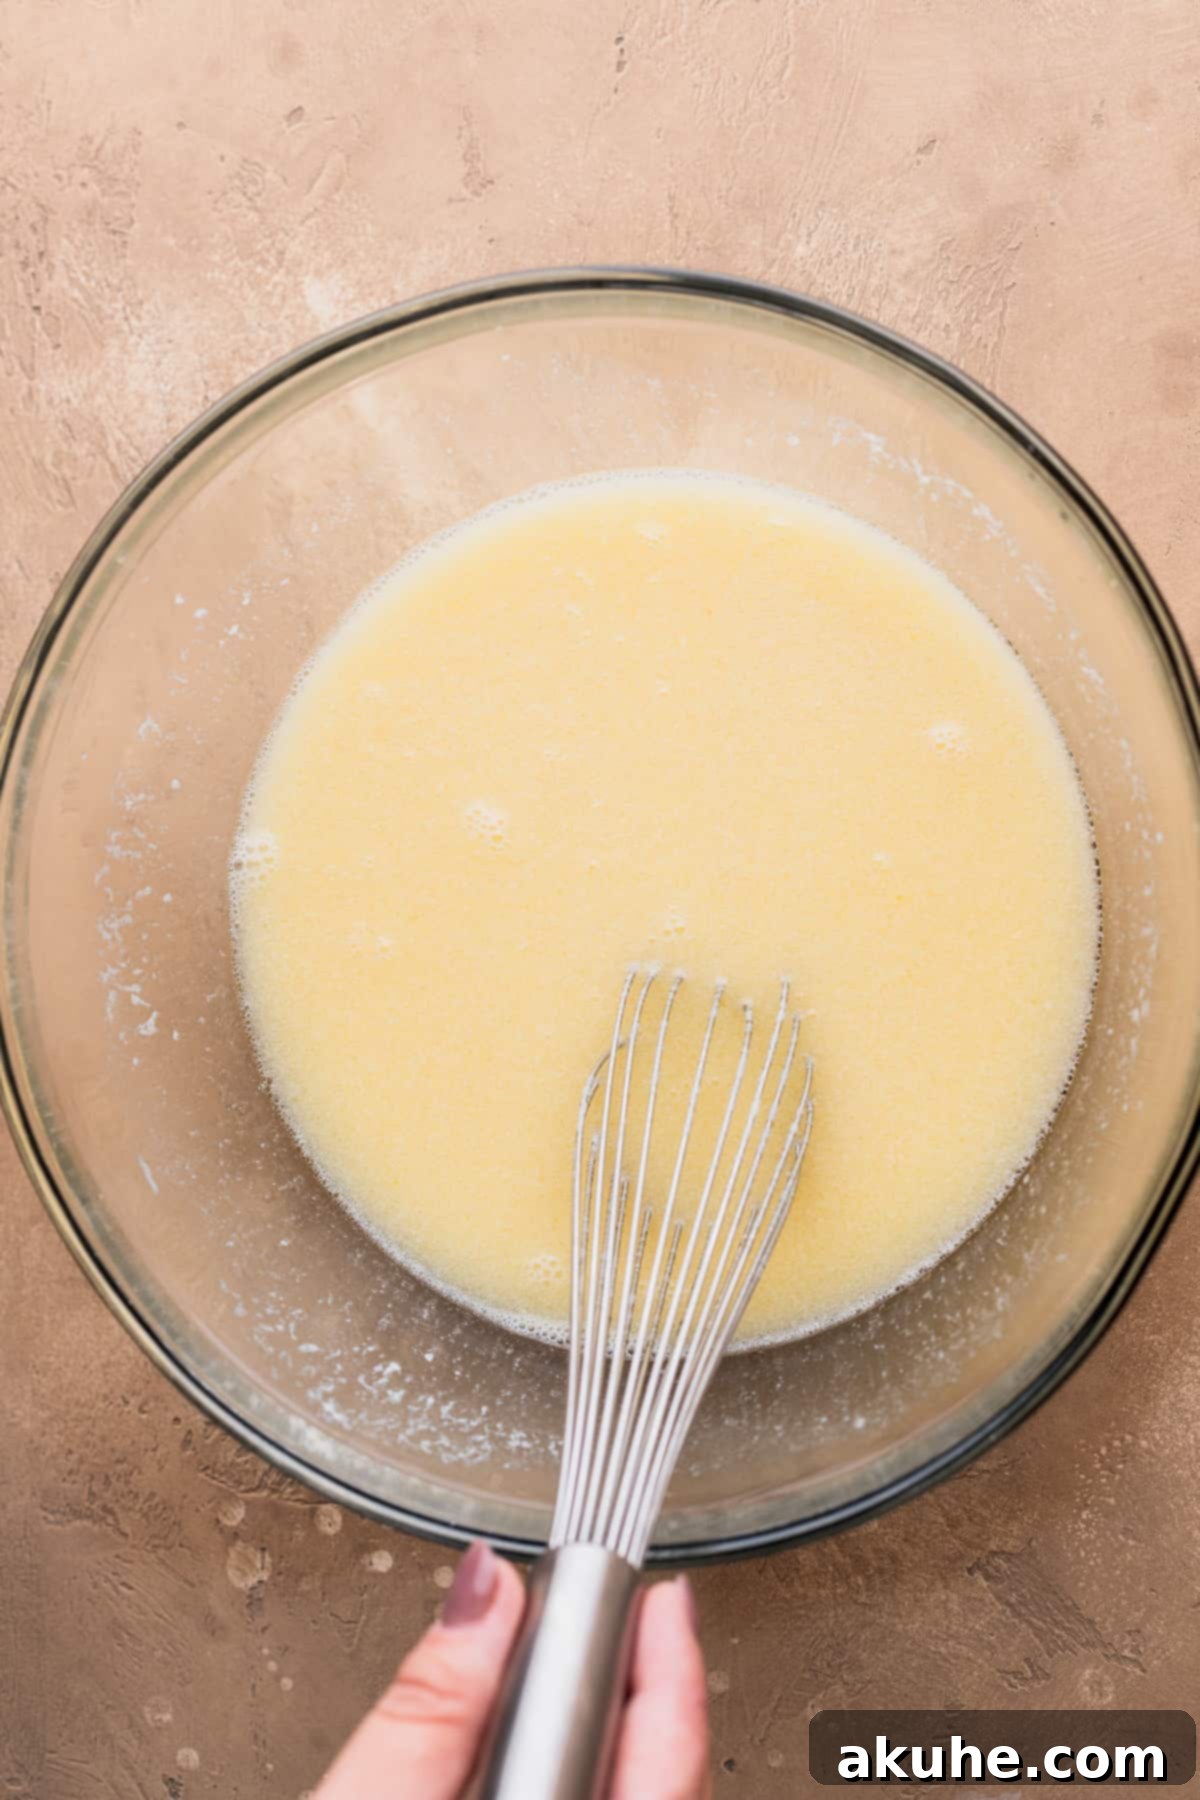
- Mix Wet Ingredients (and Bloom the Cocoa): In a separate medium bowl, whisk together the oil, pure vanilla extract, room temperature eggs, and room temperature buttermilk. Meanwhile, heat 1 cup of water in a small saucepan on the stove until it’s steaming hot (just before boiling). Slowly and carefully whisk the hot water into the wet ingredient mixture. The warmth of the water will help bloom the cocoa powder that will soon be introduced, deepening its flavor.
- Combine Wet and Dry & Pour: Pour the wet ingredient mixture directly into the bowl with the dry ingredients. Using a whisk or a rubber spatula, mix until the ingredients are just combined. Be careful not to overmix the batter; overmixing can develop the gluten in the flour, resulting in a tough or dry cake. A few small lumps are perfectly fine. The batter will be relatively thin, which is normal for a moist cake. Divide the cake batter evenly among your three prepared cake pans.
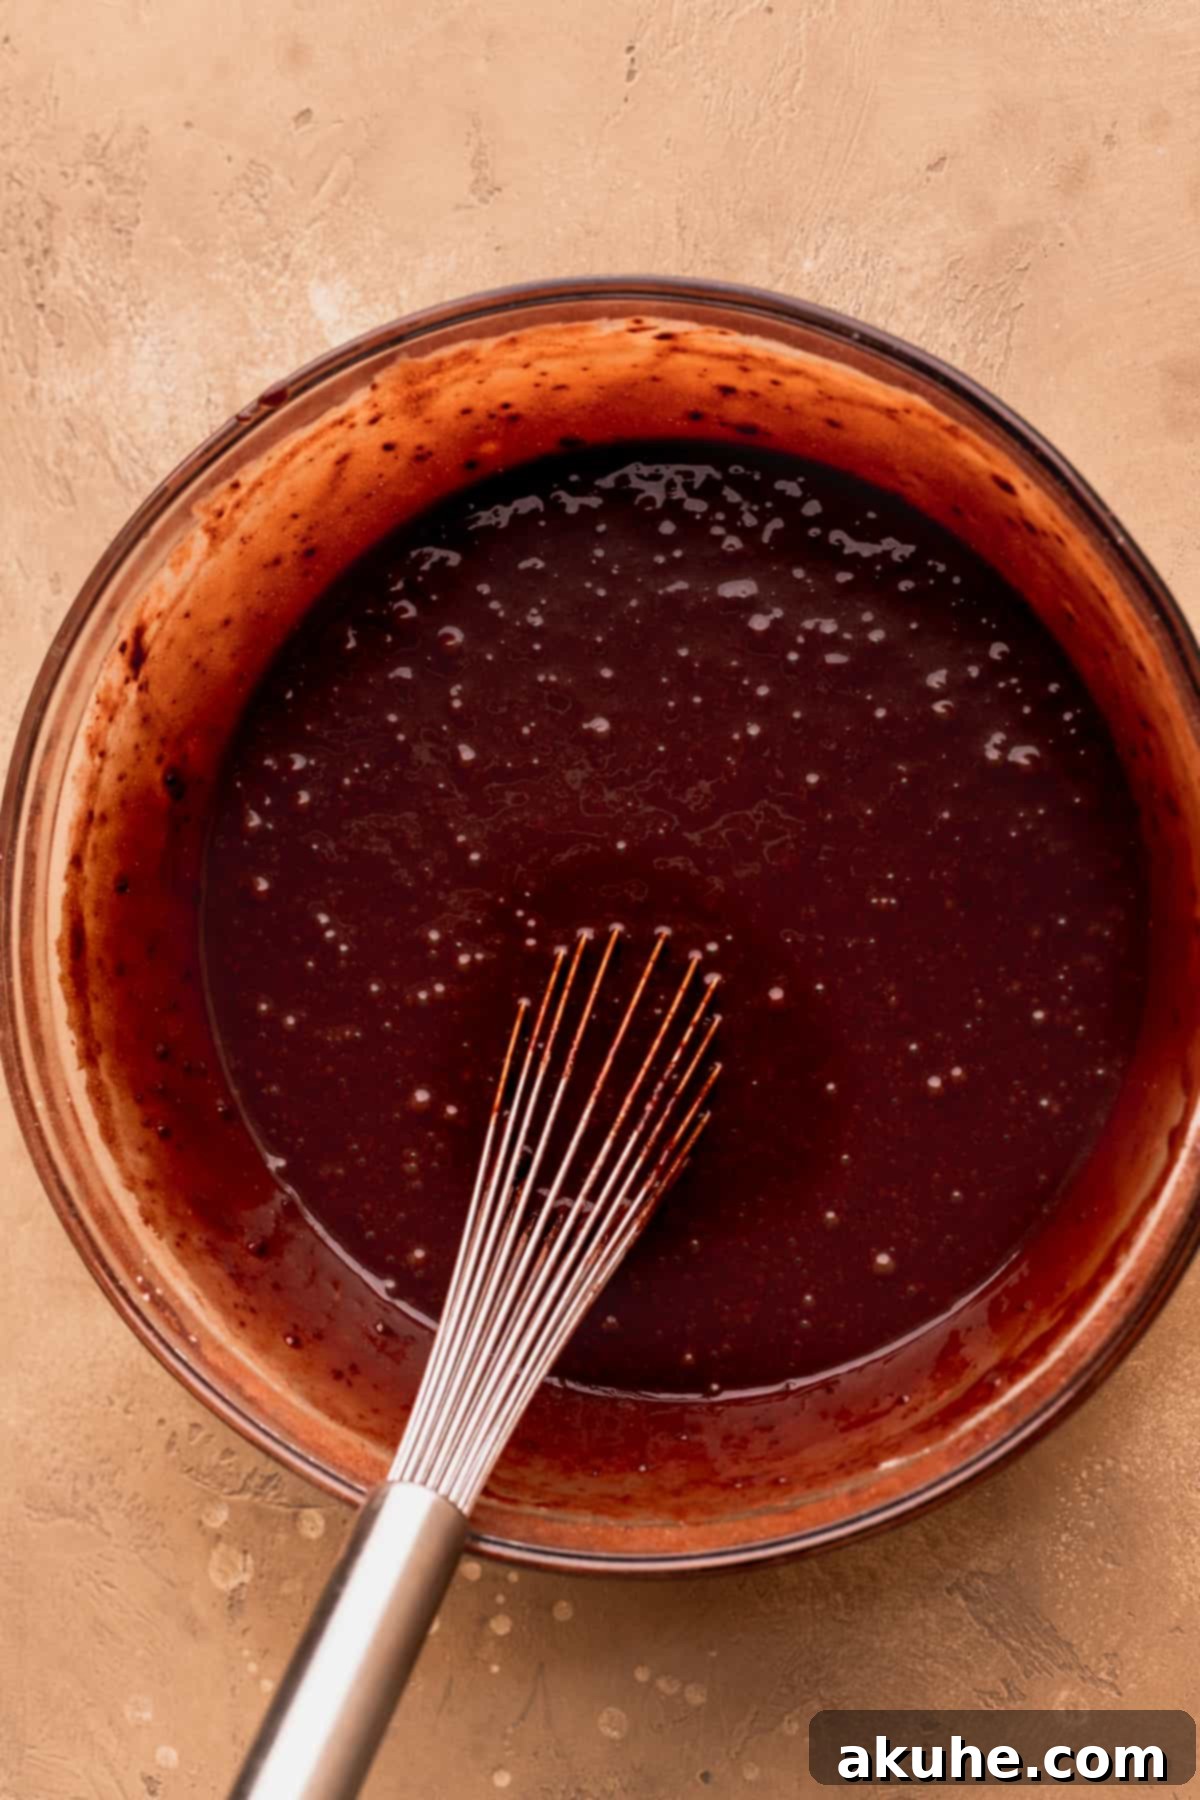
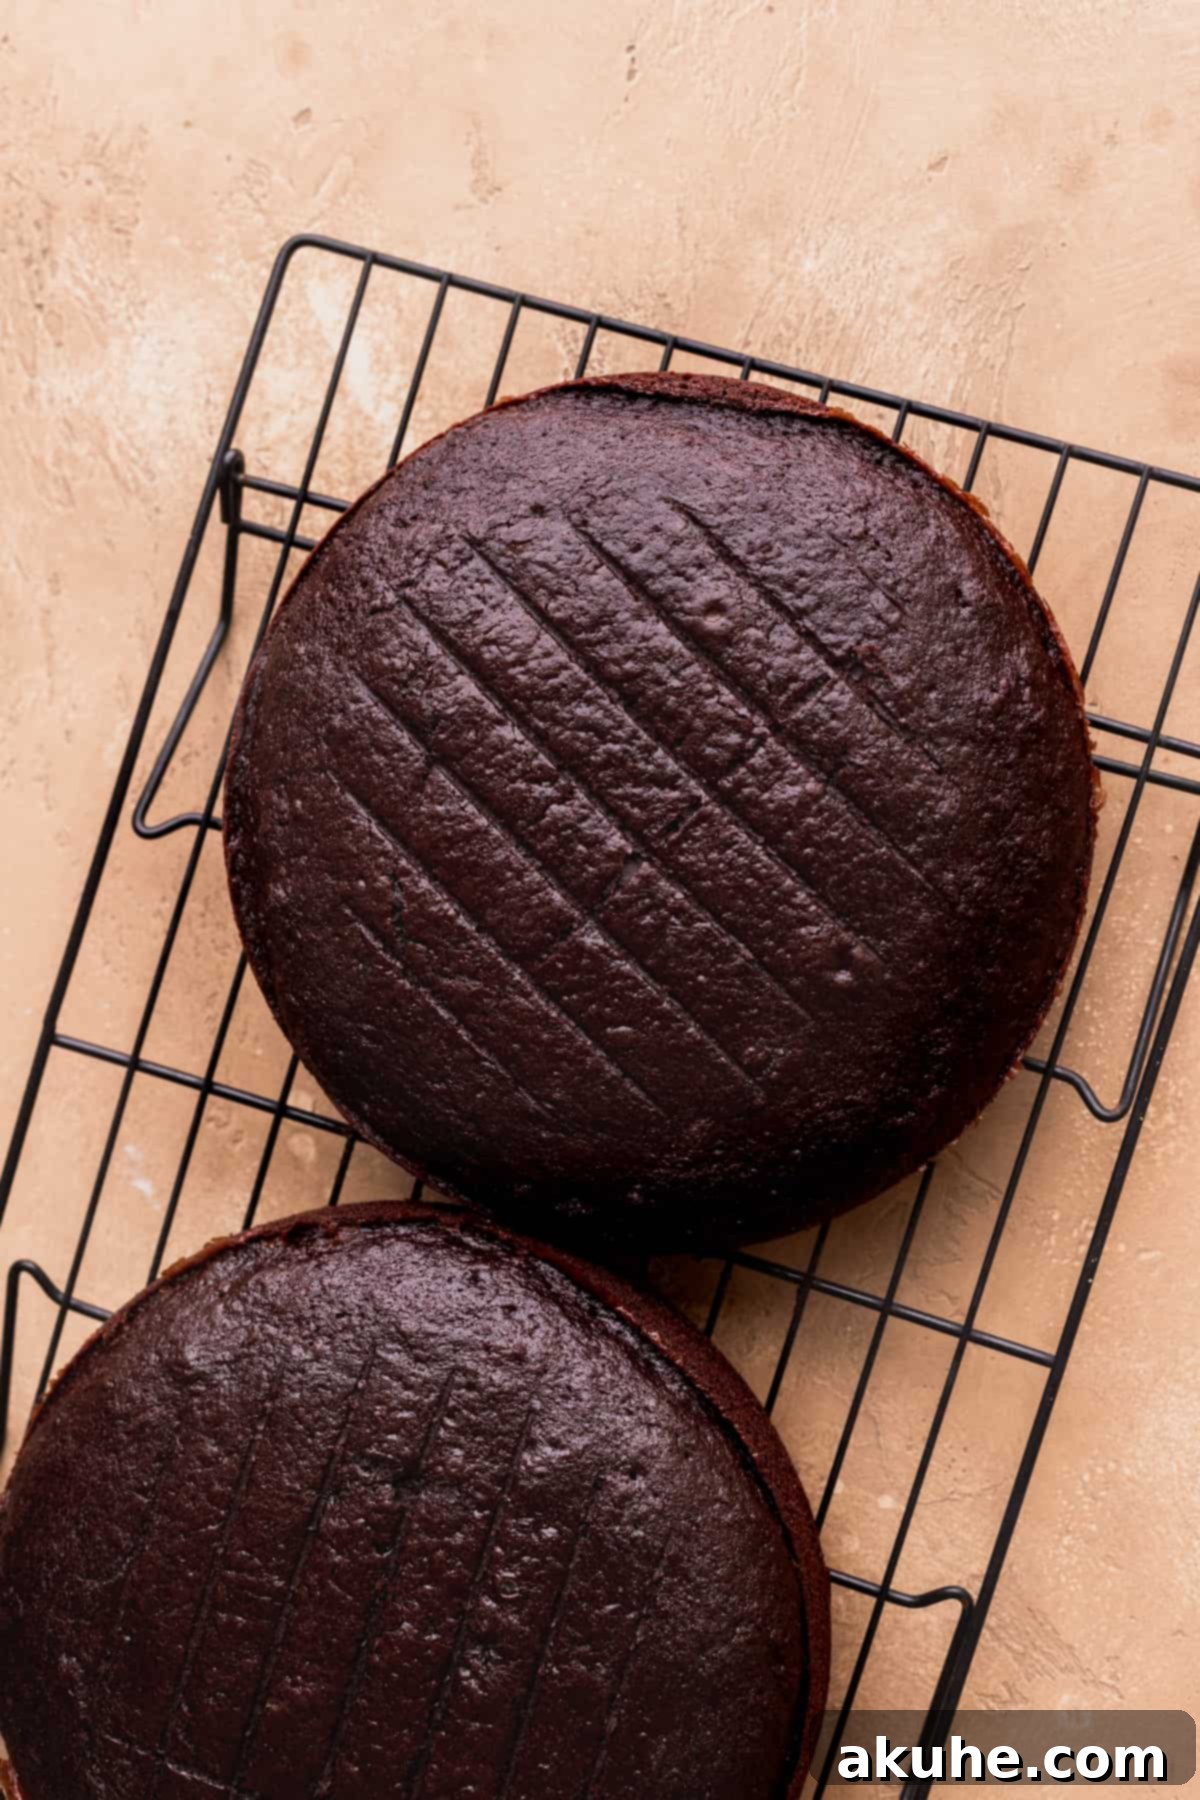
- Bake and Cool: Bake the cake layers for 24-28 minutes, or until a wooden toothpick inserted into the center of a cake comes out clean or with a few moist crumbs attached. Avoid opening the oven door too frequently during baking. Once baked, remove the pans from the oven and let the cakes cool in their pans on a wire cooling rack for about 10-15 minutes. This allows them to firm up slightly before you attempt to invert them. After this initial cooling, carefully invert the cakes onto the wire rack, remove the parchment paper, and let them cool completely to room temperature before decorating. This step is crucial; attempting to frost warm cakes will cause the frosting to melt and slide off.
Step-By-Step Instructions: Mastering the Frosting and Drips
Once your cake layers are cool, it’s time to create the velvety peanut butter frosting and the luscious chocolate and peanut butter drips that make this cake truly special.
Peanut Butter Frosting and Drip Preparation:
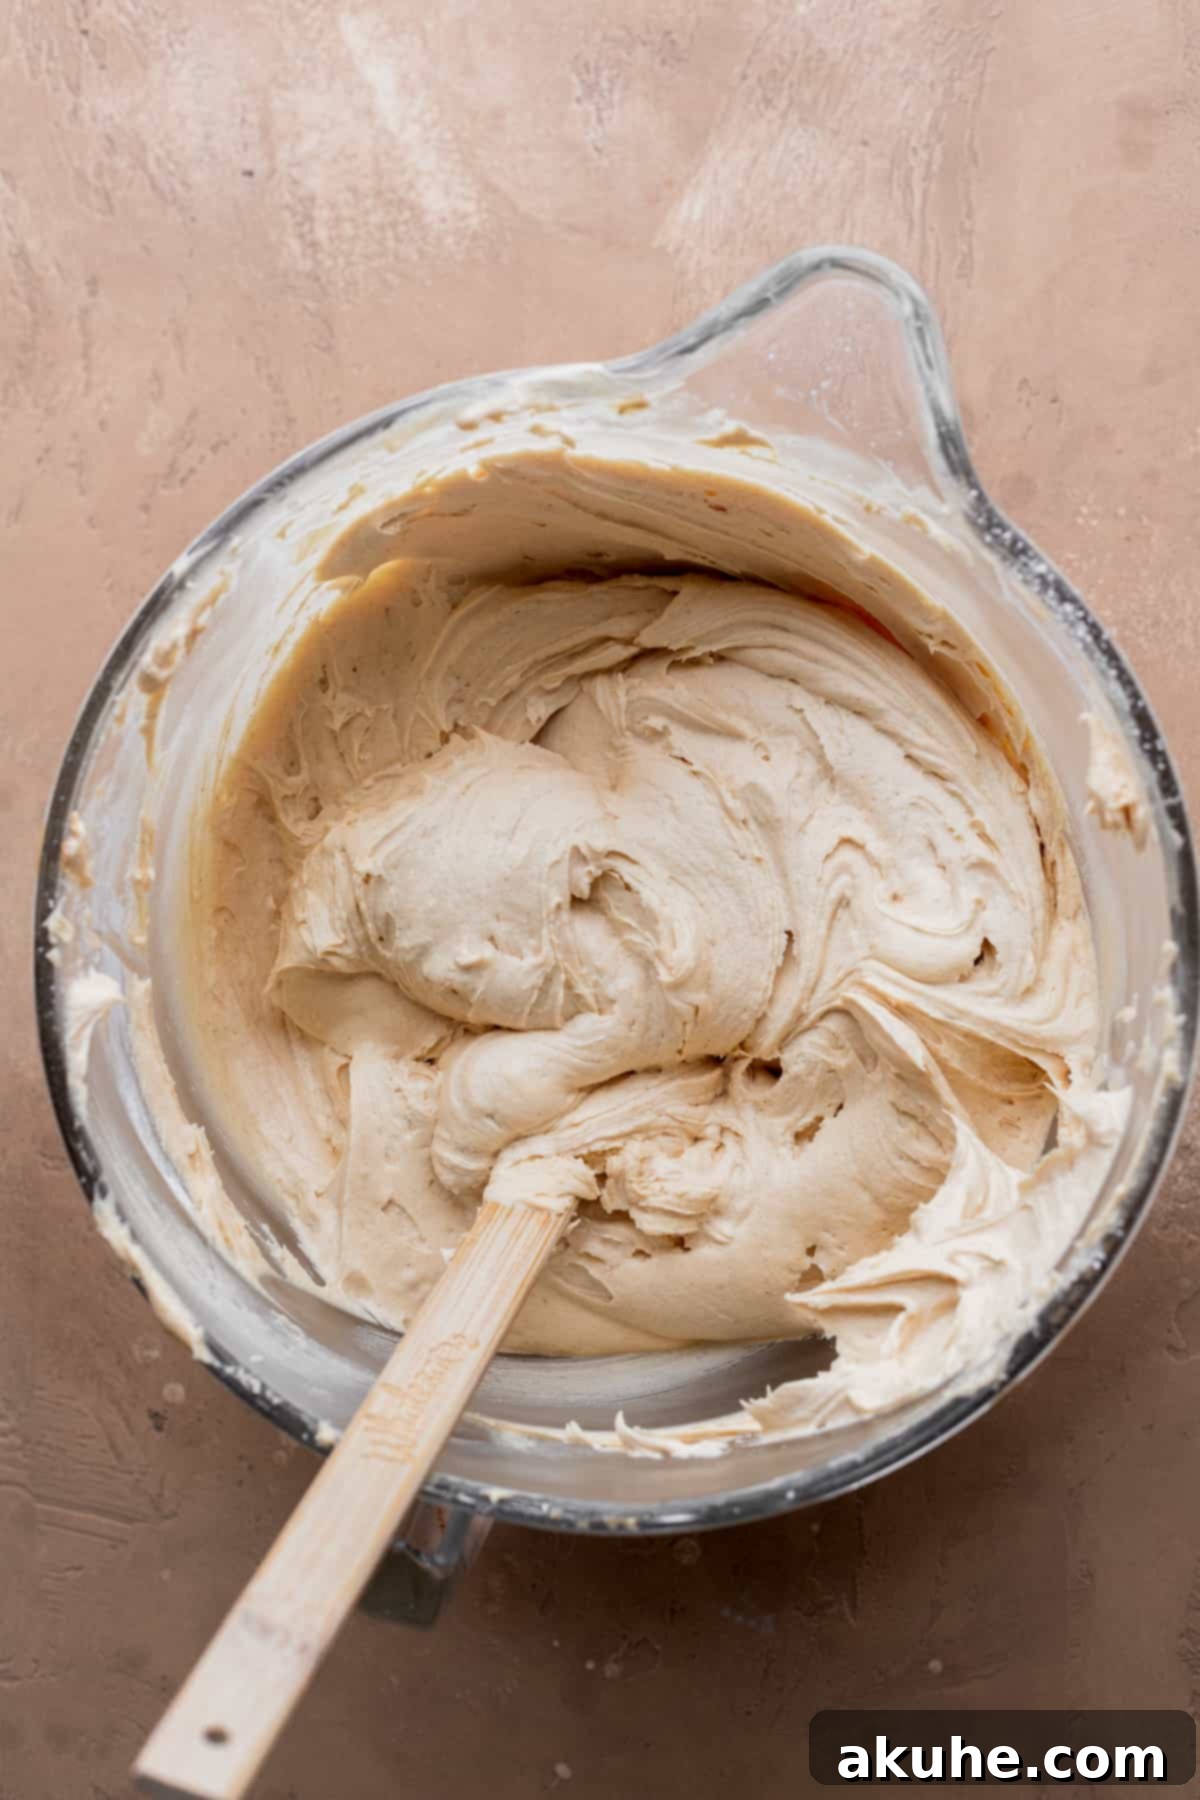
- Prepare the Frosting Base: In a large mixing bowl, or the bowl of your stand mixer, first sift your powdered sugar and set it aside. This step is vital for a smooth, lump-free frosting. Then, add the room temperature unsalted butter and creamy peanut butter to the mixer bowl. Beat them together on high speed for at least 3 minutes, until the mixture is light, fluffy, and pale in color. This process incorporates air and creates a wonderfully creamy base.
- Beat in Powdered Sugar and Flavorings: With the mixer on low speed, gradually add about half of the sifted powdered sugar. Mix until it’s just incorporated, scraping down the sides of the bowl as needed. Then, add the remaining powdered sugar and continue mixing on low until combined. Once the sugar is mostly incorporated, add the pure vanilla extract and salt. Increase the mixer speed to high and beat for another 2-3 minutes, until the frosting is incredibly creamy, smooth, and light. Taste and adjust sweetness or saltiness if desired.
- Crafting the Chocolate Drip (Ganache): This step should be done just before you are ready to decorate the cake. Place the semi-sweet chocolate chips in a heat-proof bowl. In a small saucepan, heat the heavy cream over medium-low heat until it just begins to steam and simmer around the edges (do not bring it to a rolling boil). Immediately pour the hot cream over the chocolate chips. Let it sit undisturbed for 2 minutes to allow the chocolate to melt. After 2 minutes, use a rubber spatula to gently stir the mixture from the center outwards until it’s completely smooth and glossy. If any small chocolate chunks remain, microwave the ganache in 10-second intervals, stirring after each, until fully melted. Allow the ganache to cool slightly to a warm but not hot temperature; it should be thick enough to cling to a spoon but still pourable. If it’s too hot, it will melt your frosting.
- Preparing the Peanut Butter Drip: For the peanut butter drip, simply place the creamy peanut butter in a microwave-safe bowl. Heat it in the microwave in 15-20 second intervals, stirring well after each, until it is melted and pourable, but not scorching hot. You want a consistency that can easily be drizzled or spread.
Expert Tips for Assembling Your Decadent Chocolate Peanut Butter Cake
Assembling a layered cake can seem daunting, but with these tips and the right tools, you’ll achieve a professional-looking finish. Patience is key!
- Helpful Tools for Cake Decoration: Investing in a few basic tools can make a significant difference in your cake decorating journey. Consider acquiring a cake turntable for easy rotation, an offset icing spatula for smooth spreading, a straight icing spatula for flat surfaces, a cake scraper for perfectly even sides, and a cake leveler (or a long serrated bread knife) for trimming. Finally, a cake carrier is invaluable for safe transport and storage.
- Level Your Cake Layers: Using a serrated knife or a cake leveler, carefully trim the domed tops off each chocolate cake layer. This ensures that your cake layers stack flat and evenly, preventing leaning and creating a beautifully consistent presentation. Aim for layers that are as flat and uniform as possible.
- First Layer and Frosting: Place your first leveled cake layer onto your serving plate or cake stand. Using your offset spatula, spread approximately 1 cup of the peanut butter frosting evenly over the top of this layer, extending almost to the edges.
- Second Layer and Frosting: Carefully place the second cake layer on top of the first, aligning it as precisely as possible. Gently press down to ensure it’s secure. Repeat the frosting process, spreading another 1 cup of peanut butter frosting evenly over this layer.
- Third Layer Placement: Position the final cake layer on top, but this time, place it upside down (bottom facing up). This often creates the flattest, smoothest surface for the top of your cake, which is ideal for decorating.
- Initial Chill for Stability: Once all layers are stacked, place the entire cake in the freezer for about 10-15 minutes. This quick chill helps to firm up the layers and frosting, making it more stable for the subsequent frosting steps.
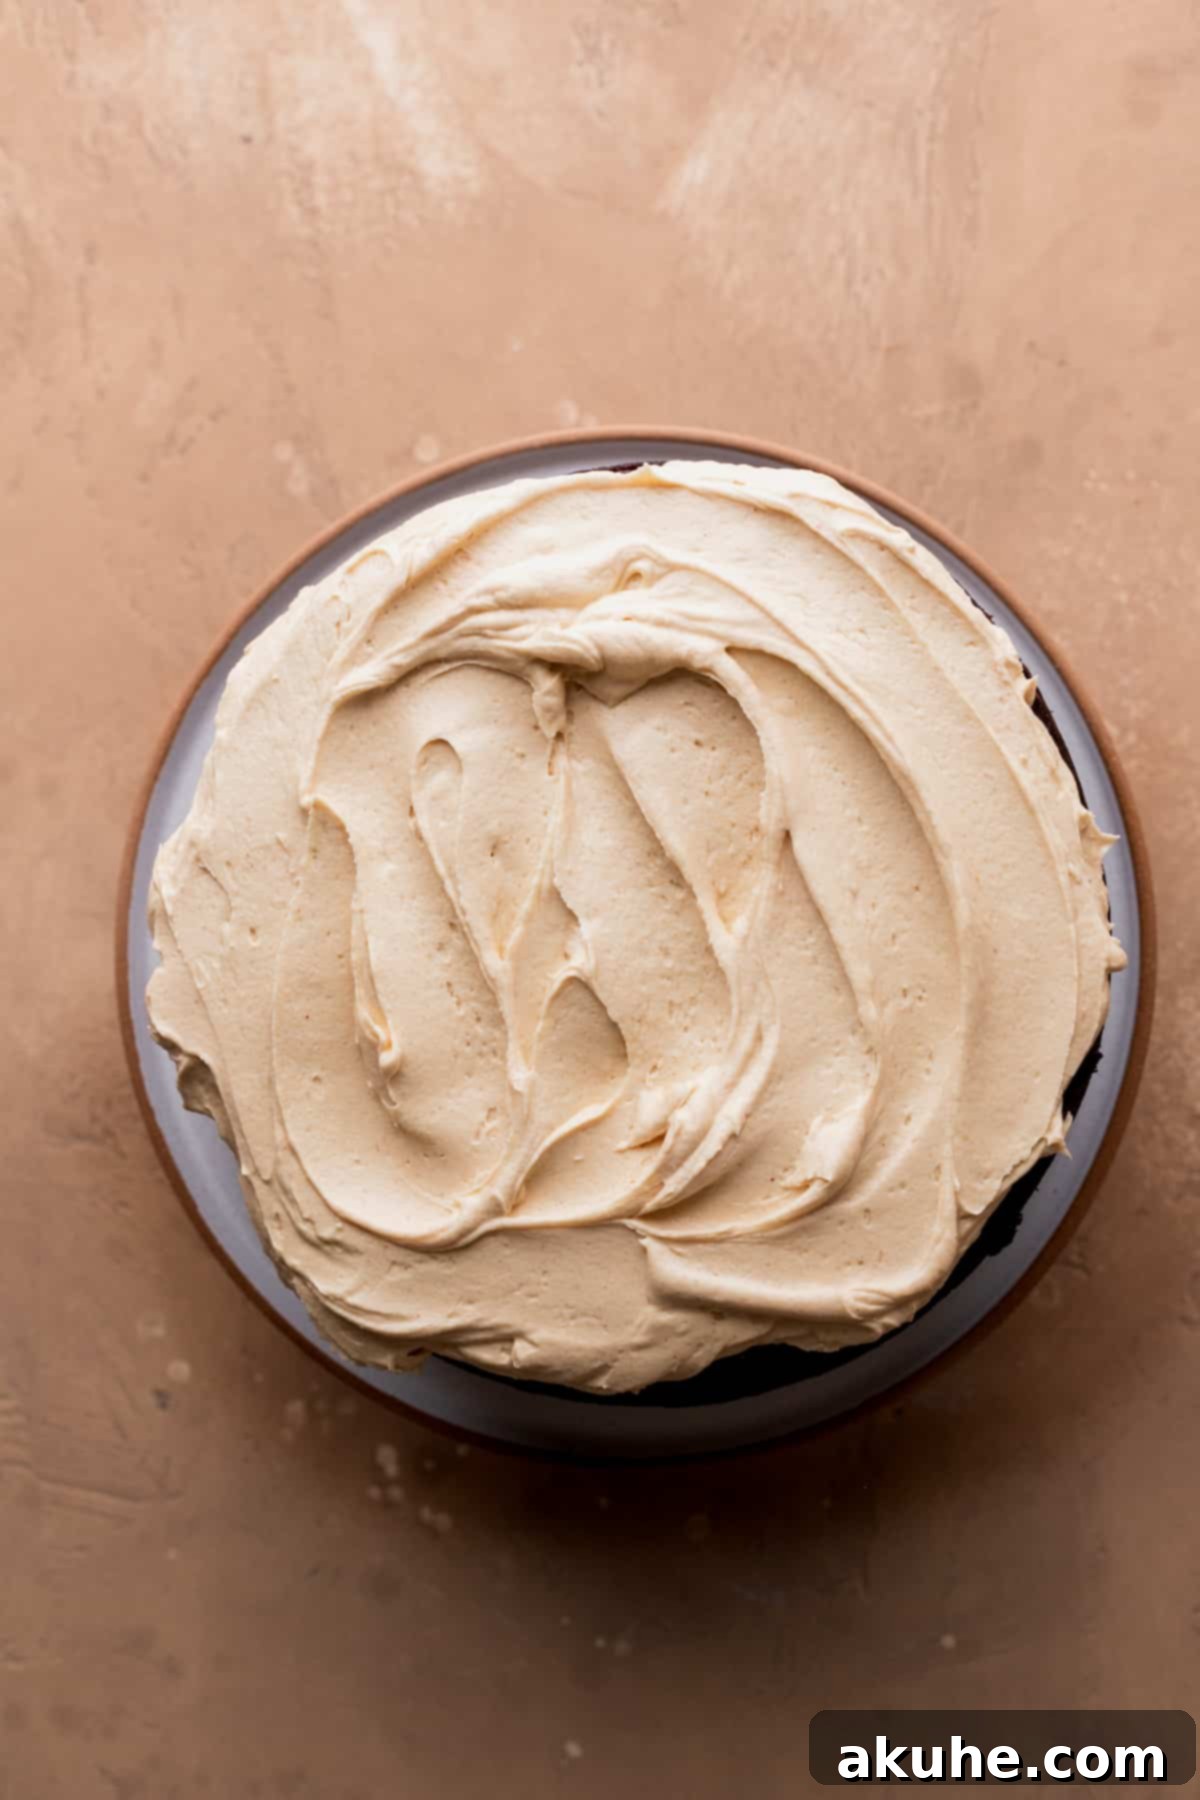
- Crumb Coat & Second Chill: Remove the cake from the freezer. Apply a very thin, even layer of peanut butter frosting all over the outside of the cake, including the top and sides. This is called a “crumb coat,” and its purpose is to trap any loose cake crumbs, preventing them from mixing into your final, visible layer of frosting. Once the crumb coat is applied, return the cake to the freezer for another 10-15 minutes to allow it to set firmly. This creates a smooth, clean canvas for your final frosting.
- Final Frosting & Chocolate Drip: Remove the cake from the freezer. Apply the remaining peanut butter frosting to the top and sides of the cake, using your spatulas and cake scraper to create a smooth and even finish. Next, transfer your cooled chocolate ganache (it should still be pourable but not hot) to a piping bag with a small round tip (or a Ziploc bag with a corner snipped off). Carefully pipe drips down the sides of the cake, controlling the length of each drip. Once the sides are done, pour the remaining chocolate ganache on top of the cake and gently spread it to the edges with an offset spatula, allowing it to naturally meet the drips. Freeze the cake again for 10-15 minutes to set the chocolate drip.
- Peanut Butter Drip & Final Touch: After the chocolate drip has set, remove the cake from the freezer. Pour the melted peanut butter (ensure it’s not hot) onto the top of the cake. Use an offset spatula to gently push and spread the peanut butter towards the edges, allowing it to drip down the sides in a similar fashion to the chocolate. This dual drip creates an incredible visual effect. Freeze the cake for a final 10-15 minutes to ensure both drips are set.
- Garnish with Peanut Butter Cups: This step is optional but highly recommended for an extra flourish! Once the drips are set, arrange your favorite peanut butter cups (Reese’s Peanut Butter Cups are a classic choice!) decoratively on top of the cake. This adds another layer of texture, flavor, and visual appeal, truly completing this magnificent dessert.
Frequently Asked Questions About Our Chocolate Peanut Butter Cake
Can this chocolate peanut butter cake recipe be adapted for cupcakes?
Absolutely! This recipe is incredibly versatile and can easily be transformed into delicious chocolate peanut butter cupcakes. Simply halve the layer cake recipe to yield approximately 12 standard-sized cupcakes. Bake them in a muffin tin lined with paper liners for 18-20 minutes, or until a toothpick inserted comes out clean. The baking time will be significantly shorter than for a full cake.
What other cake pan sizes can I use with this recipe?
This recipe is designed for three 8-inch round cake pans. However, you have several options for alternative pan sizes:
- Two 9-inch Round Cake Pans: The batter should work well, but you may need to adjust baking time slightly (likely 2-5 minutes longer).
- Four 6-inch Round Cake Pans: This will create a taller, more elegant cake. The baking time will be similar to the 8-inch pans.
- One 9×13-inch Rectangular Pan: This is a great option for a sheet cake style. For this size, you will likely only need about half of the frosting recipe. Adjust baking time as needed (often 30-35 minutes).
If you prefer smaller cakes or square cakes, you can halve the recipe to fit:
- Three 6-inch round cake pans
- One 8×8-inch square pan
- One 9×9-inch square pan
Always monitor the cakes closely for doneness when adjusting pan sizes, as baking times will vary.
Can the cake layers be made ahead of time?
Yes, absolutely! Preparing the cake layers in advance is a fantastic way to break up the baking process and save time on the day of assembly. Once your cake layers have cooled completely to room temperature, wrap each layer tightly in several layers of plastic cling wrap. Ensure they are airtight to prevent them from drying out. You can then store them at room temperature for up to 2 days, or freeze them for up to 30 days. When you’re ready to decorate, simply pull the frozen layers out about 1 hour before you plan to frost them to allow them to thaw slightly, making them easier to level and handle.
Can I use natural peanut butter for the frosting or drip?
While natural peanut butter is great for many uses, we strongly recommend against using it for this frosting and drip. Natural peanut butter tends to separate and has a different oil content and consistency compared to conventional creamy peanut butter (like Jif or Skippy). Using it can result in a frosting that is greasy, less stable, or does not emulsify properly, and a drip that is too thin or separates.
Storing and Freezing Your Chocolate Peanut Butter Cake
To ensure your chocolate peanut butter cake stays as fresh and delicious as possible, proper storage is key. This cake, with its rich frosting and layers, benefits from being kept cool.
Store the assembled cake in an airtight cake carrier or a large container. This will protect it from drying out and absorbing any unwanted odors from the refrigerator. Keep it in the fridge for up to 5 days. For the best flavor and texture, allow the cake to come to room temperature for about 30-60 minutes before serving.
Freezing Instructions
This cake also freezes beautifully, allowing you to enjoy slices long after baking. For best results, freeze individual cake slices rather than the entire cake.
- Wrap Individual Slices: Once the cake is completely chilled and firm, cut it into individual slices.
- Double Wrap: Wrap each slice tightly in plastic cling wrap, ensuring no air is exposed to the cake. Then, wrap it again in aluminum foil. This double layer of protection helps prevent freezer burn.
- Airtight Container: Place the double-wrapped slices in an airtight freezer-safe container.
- Freeze: Store in the freezer for up to 30 days.
- Thawing: When you’re ready to enjoy a slice, simply remove it from the freezer and let it thaw at room temperature for a few hours, or overnight in the refrigerator, before unwrapping and serving.
Other Layered Cake Recipes to Try
If you fall in love with this recipe, please make sure to leave a STAR REVIEW below! We’d also love to see your creations – tag us on Instagram @stephaniesweettreats. For more delicious baking ideas and inspiration, be sure to follow us on Pinterest. Happy baking!
Chocolate Peanut Butter Cake
Print Recipe
Pin Recipe
Leave a Review
Ingredients
Chocolate Cake
- 2 1/2 cups All-purpose flour
- 1 cup Unsweetened cocoa powder
- 1 3/4 cups White granulated sugar
- 2 1/2 tsp Baking powder
- 1 1/2 tsp Baking soda
- 1 tsp Salt
- 3/4 cup Oil, use canola or vegetable oil
- 1 tsp Pure vanilla extract
- 4 Large eggs, room temperature
- 1 cup Buttermilk, room temperature
- 1 cup Hot water, steaming
Peanut Butter Frosting
- 2 1/2 cups Unsalted butter, room temperature
- 1 1/2 cups Peanut butter, creamy
- 5 cups Powdered sugar, sifted
- 1 tsp Pure vanilla extract
- 1/2 tsp Salt
Chocolate Drip and Peanut Butter Drip
- 1 cup Semi-sweet chocolate chips
- 3/4 cup Heavy cream
- 3/4 cup Peanut butter, melted
- Peanut butter cups, for decoration
Instructions
Chocolate Cake
- Preheat the oven to 350°F. Spray three 8-inch cake pans with baking spray. Line the bottoms of the pan with 8-inch parchment paper and spray again.
- In a large bowl, mix the flour, cocoa powder, sugar, baking powder, baking soda, and salt. Set aside.
- Heat the water on the stove until steaming. In a medium bowl, mix the oil, vanilla, eggs, and buttermilk. Slowly add in the hot water.
- Pour the wet ingredients into the dry. Mix until just combined. The batter will be runny. Separate between the three cake pans.
- Bake for 24-28 minutes until a toothpick inserted comes out clean. Let the cakes sit in the hot pan for 10 minutes before transferring to a cooling rack. Cool the cake layers completely before using.
Peanut Butter Frosting
- In a large bowl, sift the powdered sugar. Using a mixer, beat the butter and peanut butter on high speed for 3 minutes.
- Add in half of the powdered sugar and mix on low until combined. Add in the rest of the powdered sugar and mix. Add the vanilla and salt and mix on high speed until frosting is creamy and smooth.
Chocolate Drip and Peanut Butter Drip
- Start these right when you need them. Chocolate Drip: pour the chocolate chips into a bowl. Heat the heavy cream on the stove on medium-low heat until steaming.
- Pour the hot cream over the chocolate chips and let it sit for 2 minutes. Then, use a rubber spatula to mix until smooth. If any chocolate chip chunks remain, heat in the microwave for 10-second intervals until melted. Before applying the drip, make sure it isn’t warm; if it is warm, it will spill off the cake.
- Peanut butter drip: heat the peanut butter in a microwave-safe bowl until melted.
Assembly
- Cut the domes off the cake layers using a serrated knife.
- Place the first cake layer down. Spread 1 cup of frosting over the cake. Repeat with the second cake layer. Place the last layer of cake with the bottom of the cake facing up.
- Freeze for 10 minutes. Frost the rest of the cake. Freeze for 10 minutes to set the cake.
- Use a piping bag to pipe the chocolate drips on the sides of the cake. Top the cake with the rest of the chocolate. Freeze for 10 minutes before adding the peanut butter drip.
- Pour the peanut butter on top of the cake, use an offset icing spatula to spread the peanut butter down the edge of the cake. Freeze for 10 minutes to set the drip.
- Optional: top the cake with peanut butter cups.
Notes
High altitude baking: Add an extra 2 TBSP of flour.
Pull out dairy ingredients 2 hours before baking to reach room temperature.
Nutrition Information (per slice, approximate):
- Calories: 845 kcal
- Carbohydrates: 94g
- Protein: 13g
- Fat: 68g (Saturated Fat: 28g, Polyunsaturated Fat: 9g, Monounsaturated Fat: 26g, Trans Fat: 1g)
- Cholesterol: 91mg
- Sodium: 568mg
- Potassium: 412mg
- Fiber: 5g
- Sugar: 31g
- Vitamin A: 1081 IU
- Vitamin C: 0.1mg
- Calcium: 105mg
- Iron: 3mg
We hope you thoroughly enjoy baking and sharing this incredible Chocolate Peanut Butter Cake. It’s truly a labor of love that brings together classic flavors in an unforgettable way. Happy baking!
