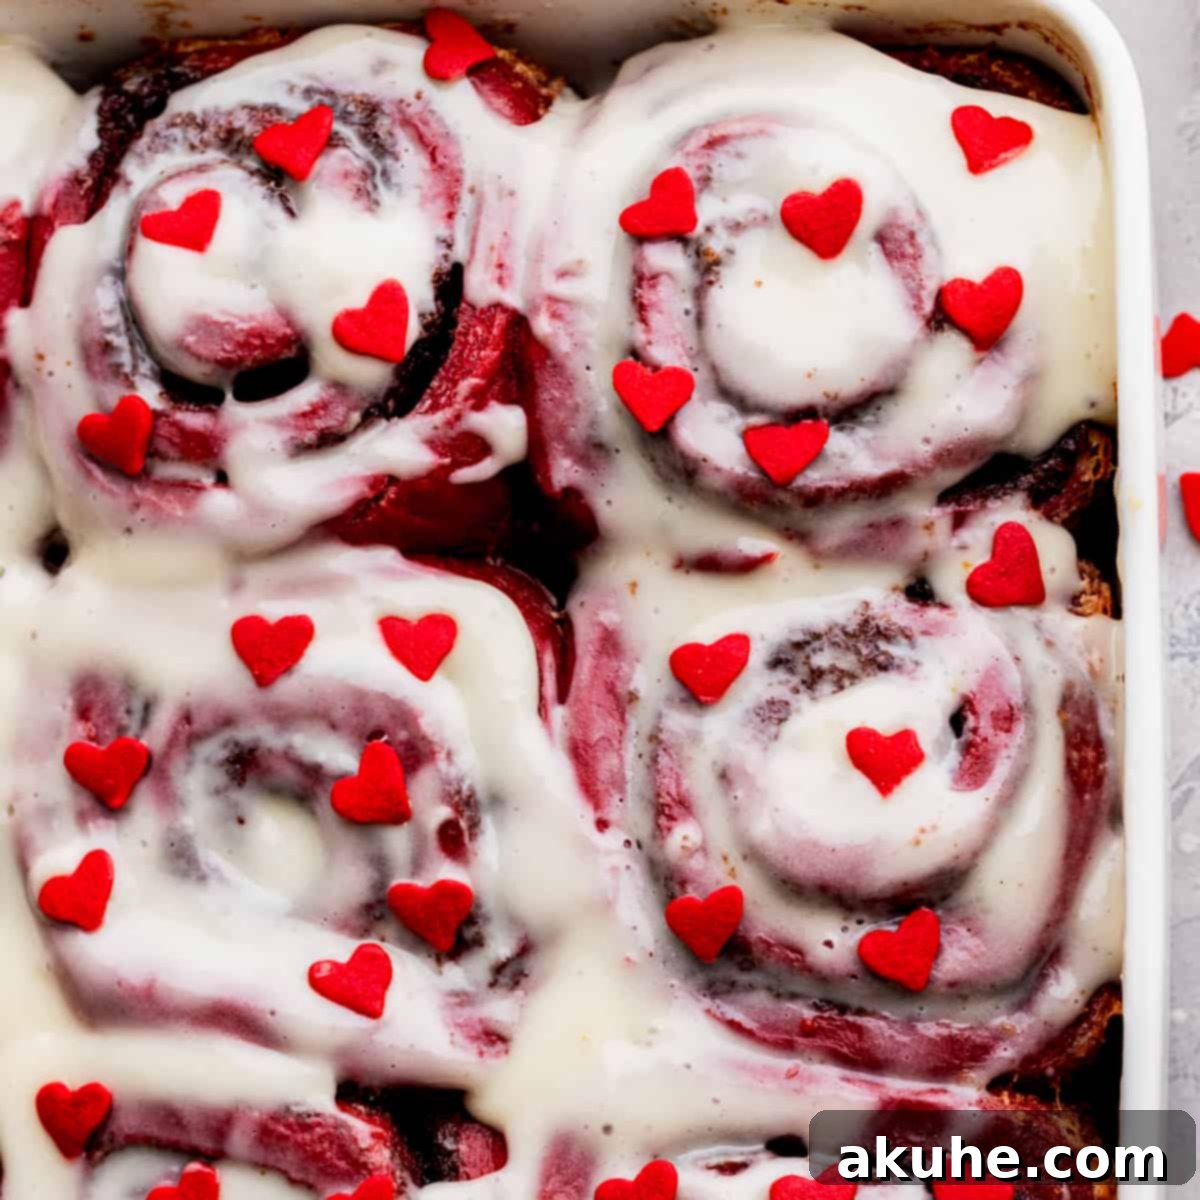
Decadent Red Velvet Cinnamon Rolls with Tangy Cream Cheese Icing
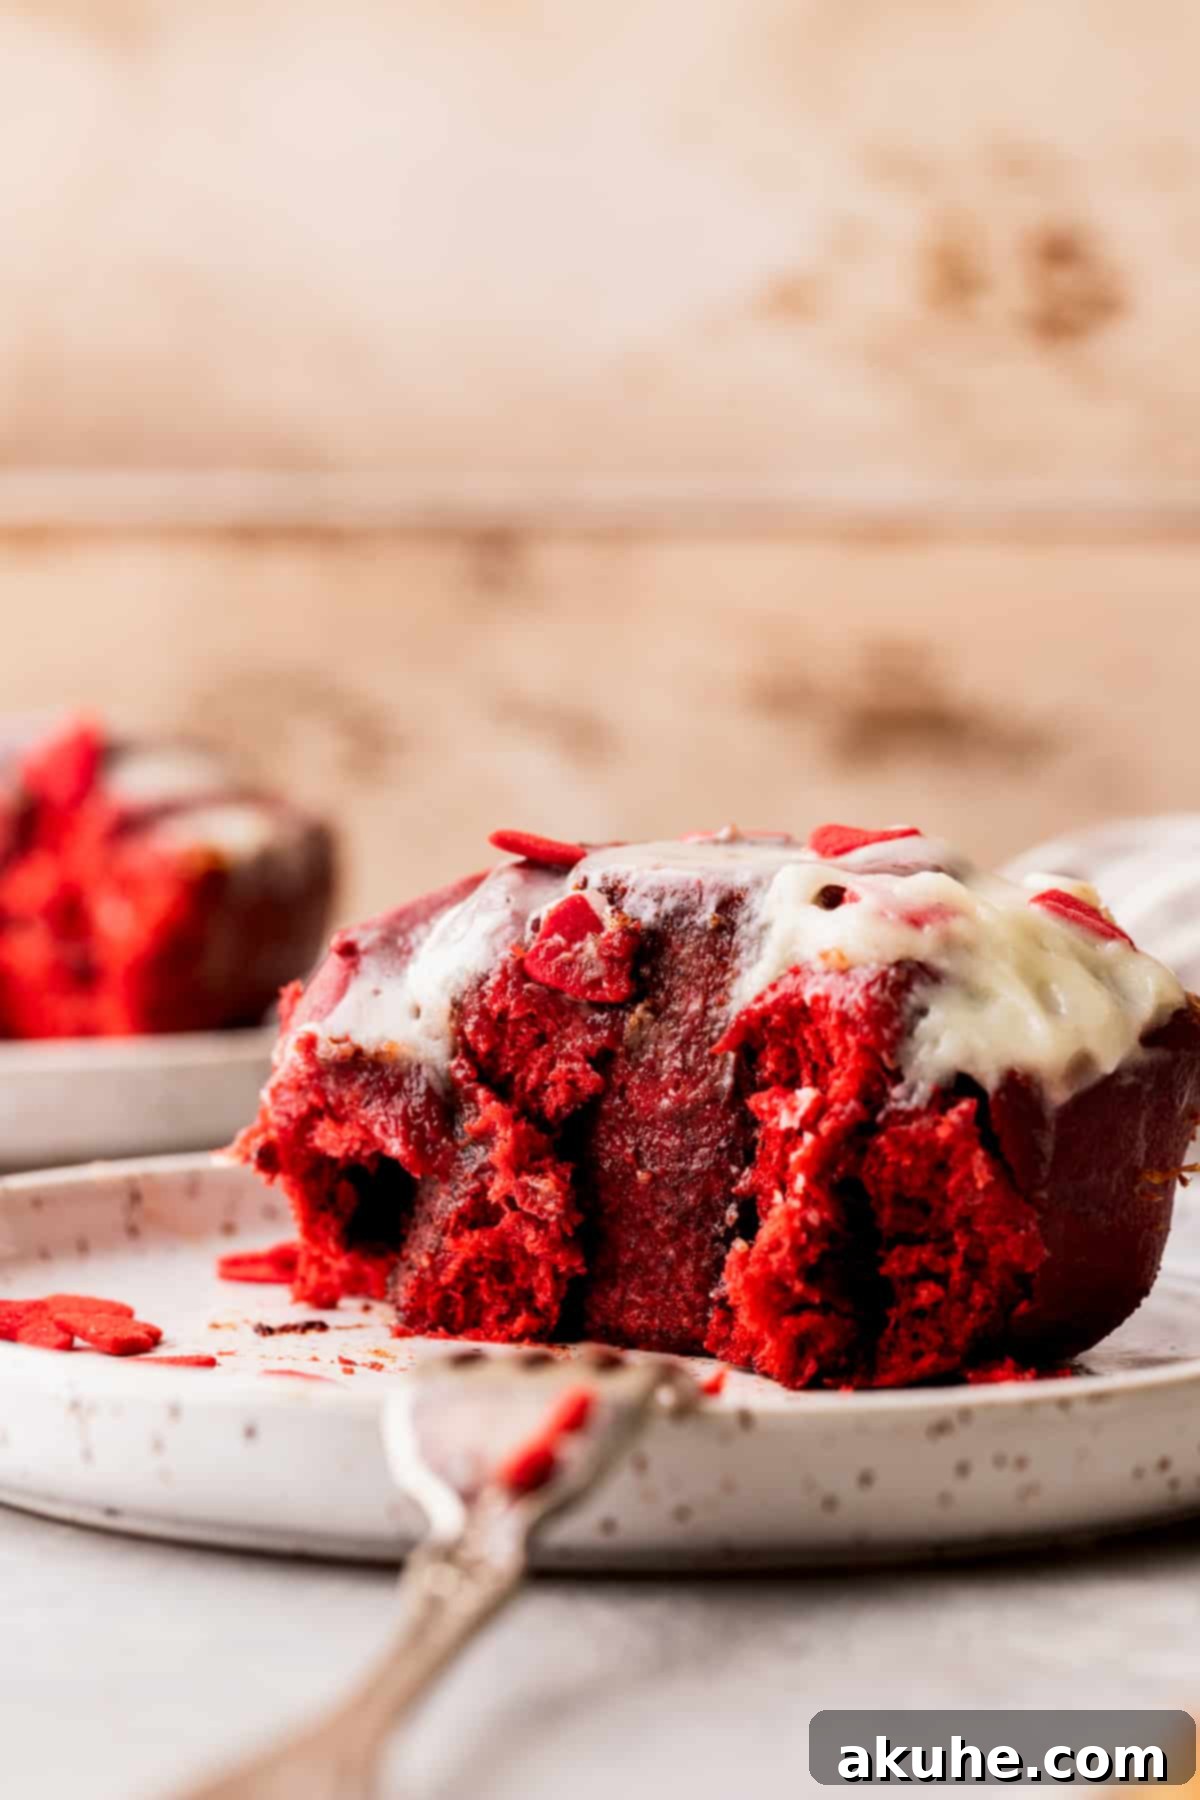
Prepare to be enchanted by these truly extraordinary Red Velvet Cinnamon Rolls! Imagine super soft, pillowy cinnamon rolls made with a beautiful, rich red velvet dough, generously swirled with a warm, spiced cinnamon filling, and crowned with a luscious, tangy cream cheese icing. These delightful treats are more than just breakfast; they’re an experience, perfect for making any morning feel like a special occasion. Whether you’re planning a romantic Valentine’s Day brunch or a festive Christmas morning feast, these vibrant rolls are sure to convey your love and thoughtfulness from the moment your cherished ones awaken.
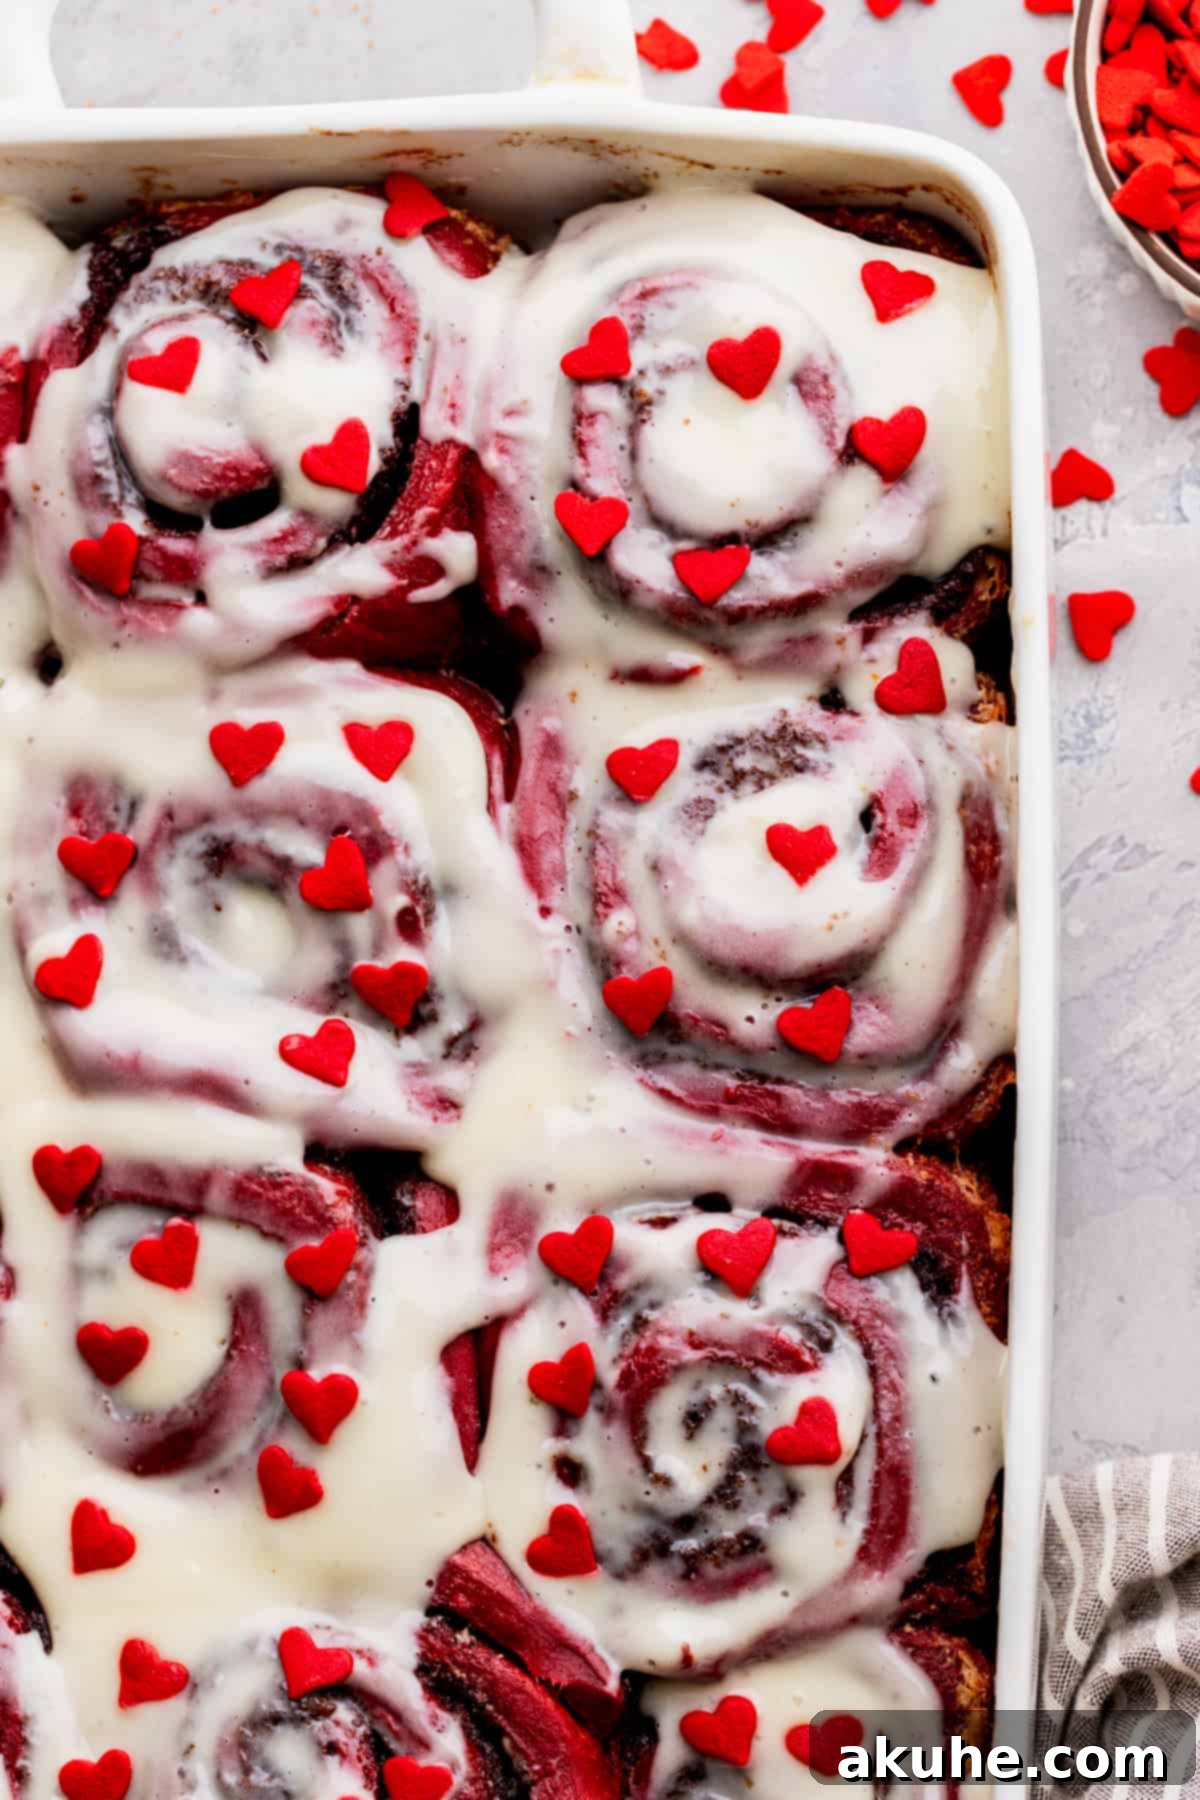
What truly sets these red velvet cinnamon rolls apart is the harmonious blend of flavors and textures. The distinctive, subtle chocolate notes of the red velvet dough are beautifully complemented by the comforting warmth of the cinnamon and brown sugar filling. This decadent combination then meets its perfect match in the bright, tangy cream cheese frosting, creating a taste sensation that’s both rich and refreshing. If you or someone special in your life is a devoted fan of red velvet, then this recipe offers the ultimate, most indulgent way to kickstart your day.
Beyond their irresistible taste, this red velvet cinnamon roll recipe is surprisingly straightforward to make. We’ve included an option to prepare the dough in advance, allowing you to enjoy a stress-free morning without compromising on freshness or flavor. Simply follow the overnight preparation steps, and you’ll wake up to a nearly ready-to-bake batch of pure bliss.
For those who love exploring different cinnamon roll variations, be sure to try our Homemade Cinnamon Rolls, delightful Apple Cinnamon Rolls, and festive Gingerbread Cinnamon Rolls.
Why You’ll Adore This Red Velvet Cinnamon Roll Recipe
These Red Velvet Cinnamon Rolls aren’t just another sweet treat; they’re a carefully crafted masterpiece designed to deliver an unforgettable baking and eating experience. Here’s why this recipe will become a cherished favorite:
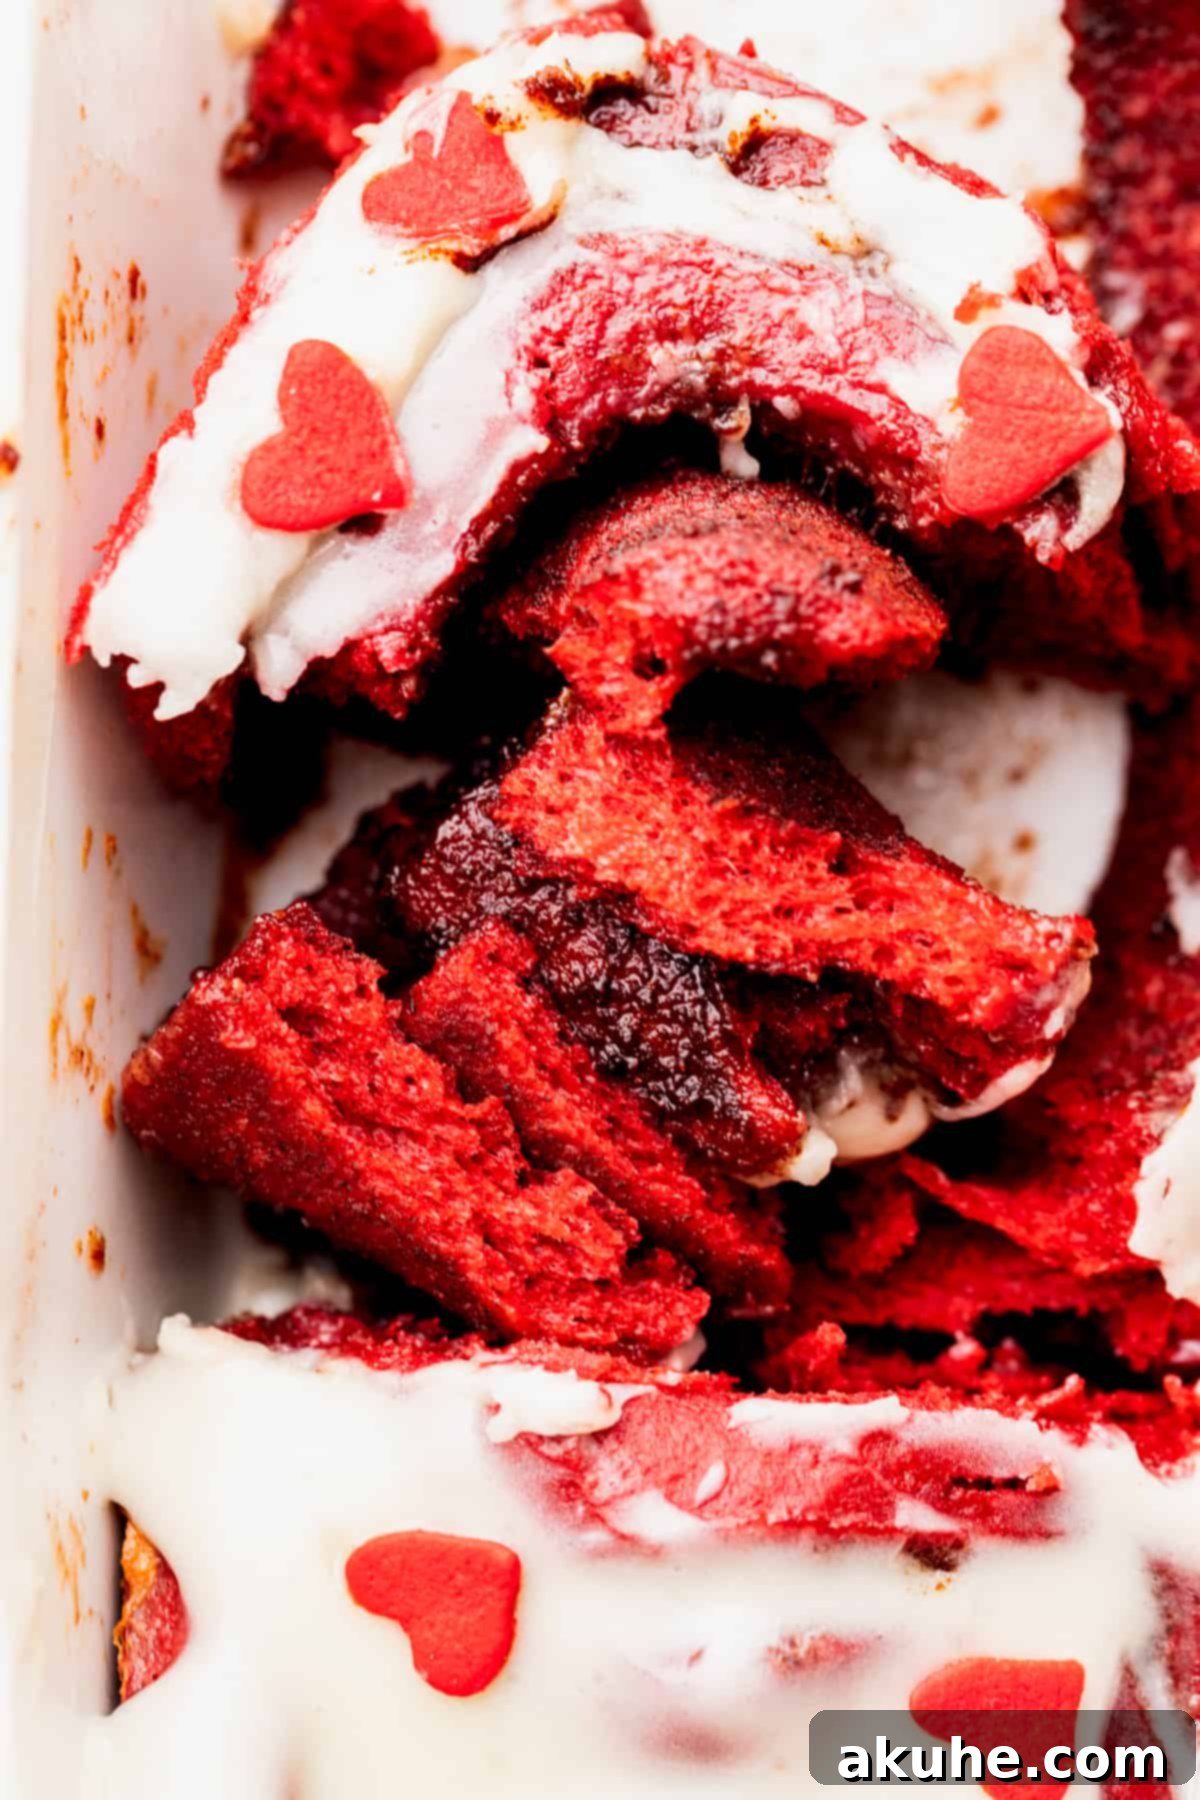
- Unparalleled Fluffy Texture: Forget dry, dense rolls. Our recipe guarantees the softest, most tender cinnamon rolls you’ve ever tasted. The secret lies in a perfectly balanced dough and specific rising techniques that result in an incredibly airy and delightful texture that practically melts in your mouth. Each bite is a testament to perfect baking.
- Signature Red Velvet Flavor: Experience the true essence of red velvet. The dough boasts that classic, subtle cocoa flavor with a hint of tang, perfectly balanced by its vibrant red hue. This unique base provides a sophisticated contrast to the sweet cinnamon filling, elevating the traditional cinnamon roll to a gourmet delight. It’s a flavor profile that’s both familiar and wonderfully unique.
- Effortless Overnight Preparation: Life is busy, but delicious breakfasts shouldn’t be. This recipe offers a convenient overnight option, allowing you to prepare the dough the day before. Wake up to the hardest part already done, giving you precious extra time to relax or enjoy your morning without the rush of extensive baking. Fresh, warm cinnamon rolls are achievable even on the busiest mornings.
- Visually Stunning Presentation: The striking red color of the dough, paired with the creamy white icing, makes these rolls incredibly photogenic and a showstopper on any breakfast table. They are naturally festive, ideal for holiday gatherings, special celebrations, or simply to add a splash of color to your weekend brunch.
- Versatile for Any Occasion: While perfect for Valentine’s Day or Christmas, these red velvet rolls are truly suitable for any time you want to impress. Birthdays, anniversaries, or simply a treat for a lazy Sunday morning – they fit every bill. Their elegant appearance and rich flavor make them a versatile option for both casual and formal settings.
Essential Ingredient Notes for Perfect Rolls
Achieving baking perfection often comes down to understanding your ingredients. Here are some detailed notes to ensure your Red Velvet Cinnamon Rolls turn out flawlessly:
- Unsalted Butter: Always use unsalted butter for baking, as it gives you complete control over the salt content in your recipe. For best results in both the dough and the filling, ensure your butter is at room temperature. This means pulling it out of the refrigerator at least two hours before you plan to use it. Softened butter incorporates more easily, creating a smooth, cohesive dough and a creamy, spreadable filling.
- Milk: Any type of milk (whole, 2%, or even a non-dairy alternative) will work. The crucial step is to warm it to a precise 110°F (43°C). This temperature is ideal for activating active dry yeast. If the milk is too hot, it will kill the yeast, preventing your dough from rising. If it’s too cool, the yeast’s activity will be dramatically slowed down, leading to a much longer rise time or a less fluffy final product. A reliable kitchen thermometer is highly recommended here.
- Active Dry Yeast: This recipe calls for one standard packet of active dry yeast, which typically contains 2 1/4 teaspoons. Ensure your yeast is fresh; old yeast may not activate properly, leading to flat rolls. You’ll know it’s active when it creates a foamy layer on top of the warm milk after 5-10 minutes.
- Eggs: Large eggs are specified for a reason – they provide the right amount of moisture and richness. Like butter, eggs should be at room temperature before adding them to the dough. This allows them to incorporate more evenly into the mixture, resulting in a more uniform and tender crumb. Remember to lightly beat them before adding to the flour mixture.
- Brown Sugar: Whether you choose light or dark brown sugar, make sure it’s packed tightly when measuring. Brown sugar adds a deep, molasses-rich sweetness and moisture to the cinnamon filling, contributing to that irresistible gooey texture.
- Powdered Sugar: For the smoothest, silkiest cream cheese icing, sifting your powdered sugar is a non-negotiable step. This removes any lumps, ensuring a uniformly smooth frosting that spreads beautifully without a gritty texture.
- Cream Cheese: Full-fat cream cheese is recommended for the richest, most stable frosting. Just like butter, ensure your cream cheese is at room temperature. Cold cream cheese will result in a lumpy frosting that’s difficult to spread and won’t emulsify properly with the butter.
- Red Food Dye: To achieve that iconic, vibrant red velvet color without compromising on taste, invest in a high-quality gel food coloring. Cheap liquid food coloring often requires large quantities to achieve a deep red, which can introduce an unpleasant flavor or thin out your dough. Gel colors like Americolor Super Red are concentrated, deliver intense color with just a small amount, and won’t affect the dough’s consistency or flavor.
Step-by-Step Instructions: Crafting the Red Velvet Dough and Irresistible Filling
Embark on the journey of creating these spectacular red velvet cinnamon rolls by first mastering the dough and filling. This section guides you through each stage with precision for a truly delectable outcome.
For optimal results, the dough is best made using a stand mixer equipped with a dough hook attachment. If you don’t have an electric mixer, don’t worry! Consult the “Making by Hand” instructions in the Recipe Notes section further down for an alternative method.
- Prepare the Yeast Mixture: Begin by gently warming your milk in the microwave until it reaches precisely 110°F (43°C). A kitchen thermometer is your best friend here, ensuring the temperature is perfect – warm enough to awaken the yeast, but not so hot as to kill it. Once warmed, sprinkle the active dry yeast over the milk and allow it to sit undisturbed for 10 minutes. This crucial step, known as proofing, ensures your yeast is active and will produce a light, airy dough. By the end of 10 minutes, you should observe a lovely, foamy layer on the surface, indicating the yeast is alive and thriving.
- Combine Dry Ingredients and Butter: In a spacious mixing bowl, thoroughly whisk together the all-purpose flour, unsweetened cocoa powder, granulated sugar, and salt. This ensures an even distribution of flavor. Next, incorporate the room-temperature unsalted butter. Using either a pastry cutter or your fingertips, work the butter into the dry ingredients until the mixture resembles coarse crumbs, with the butter pieces no larger than the size of small peas. This technique creates pockets of butter, which contribute to the flakiness and tenderness of the final rolls.
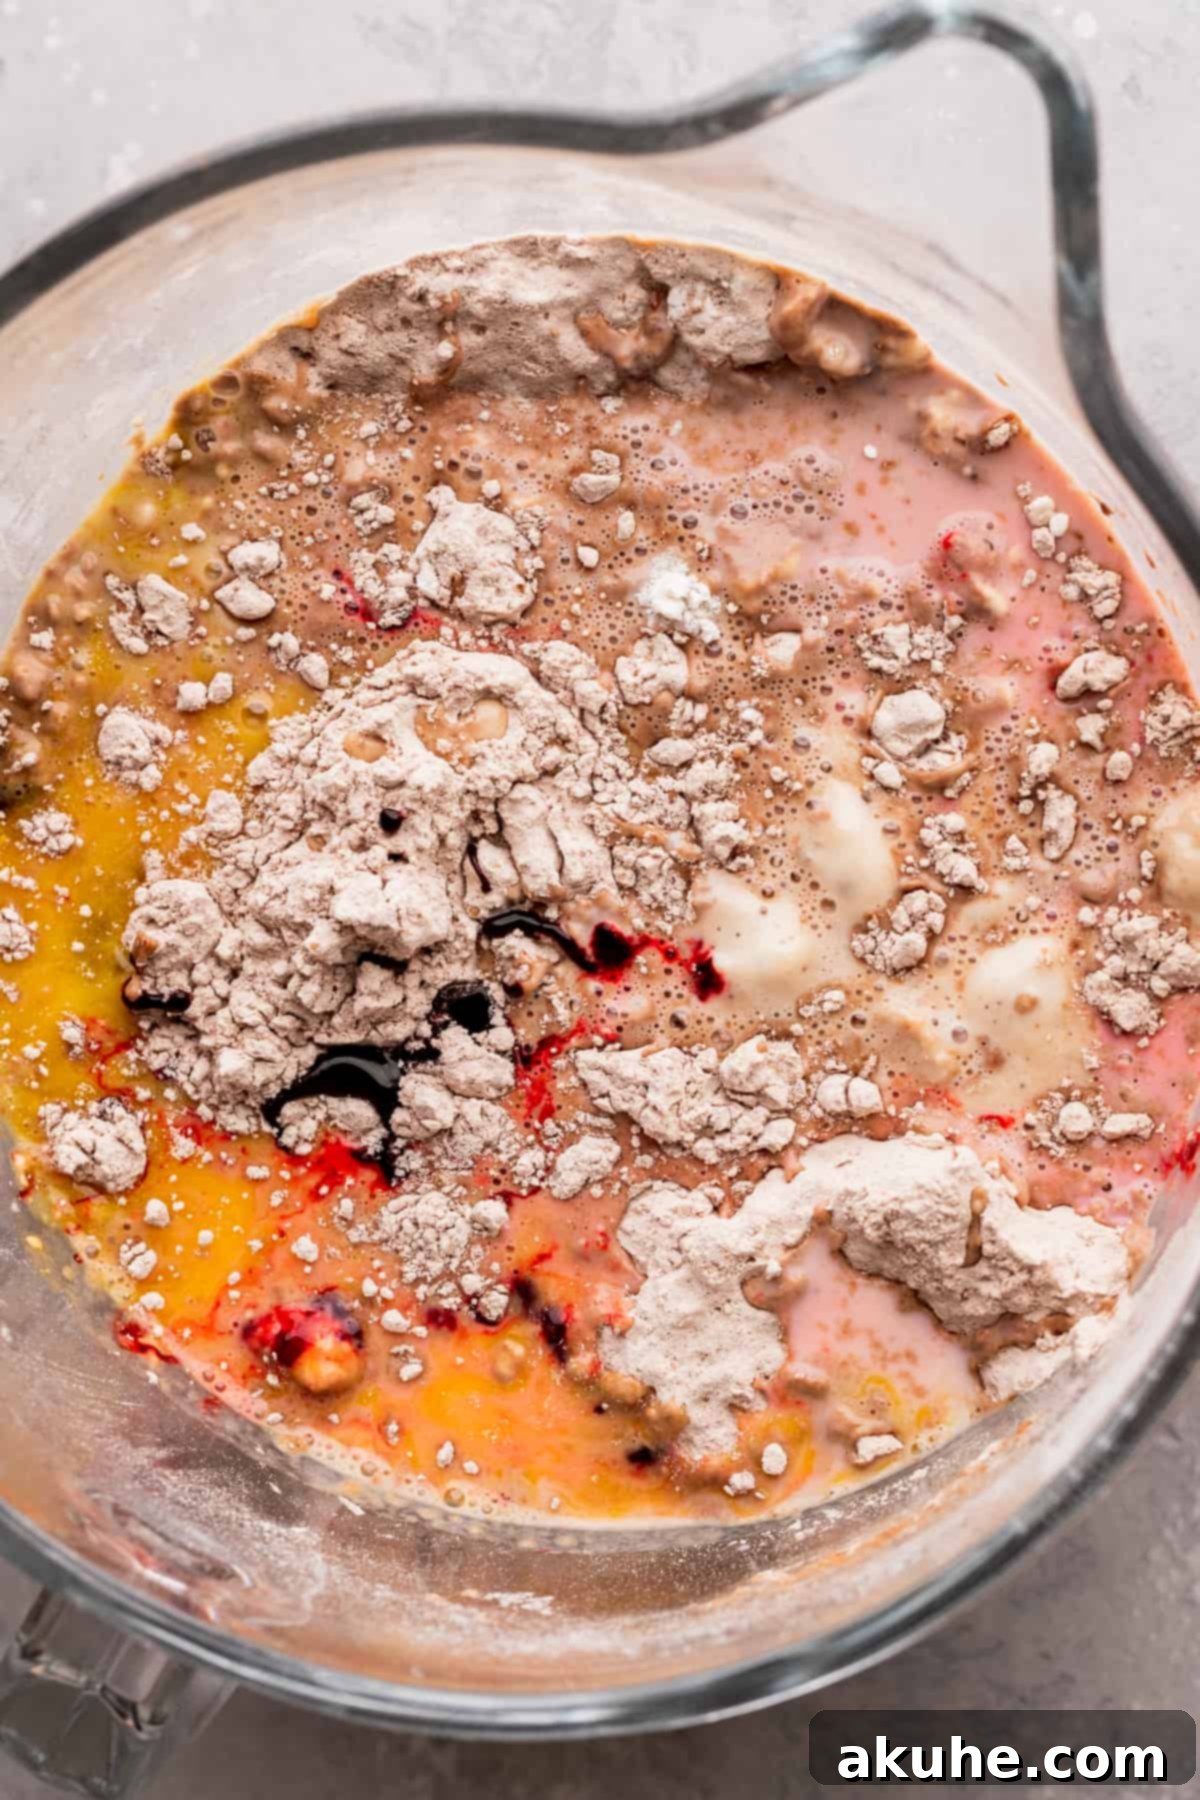
- Introduce Wet Ingredients and Color: In a separate small bowl, lightly beat your large, room-temperature eggs. Now, add the beaten eggs, the activated yeast mixture, and the vibrant red gel food coloring to your dry ingredients. Attach the dough hook to your stand mixer and begin mixing on a low speed. Continue mixing until a cohesive dough starts to form and most of the flour has been incorporated into the wet mixture. Don’t worry if it looks a bit shaggy at this stage; it’s exactly what you want.
- Knead the Dough to Perfection: Increase the mixer speed to medium and knead the dough for a full 5 minutes. As it kneads, you’ll witness the dough transform into a beautiful, bright red, smooth, and elastic ball. It should feel slightly tacky to the touch but should not excessively stick to your hands or the sides of the bowl. Proper kneading develops the gluten, which is essential for that signature soft and fluffy texture.
- First Rise (Proofing): Lightly spray a large clean bowl with nonstick cooking spray. Gently form your kneaded dough into a ball and place it into the prepared bowl, turning once to ensure it’s lightly coated. Cover the bowl securely with a clean kitchen towel. For an optimal rise, find a warm, draft-free spot. A great trick is to preheat your oven to 200°F (93°C), then immediately turn it off, leaving the door slightly ajar to allow some residual heat to escape. Place your covered dough bowl inside the warm, turned-off oven. Allow the dough to rise for approximately 1 hour, or until it has visibly doubled in size.
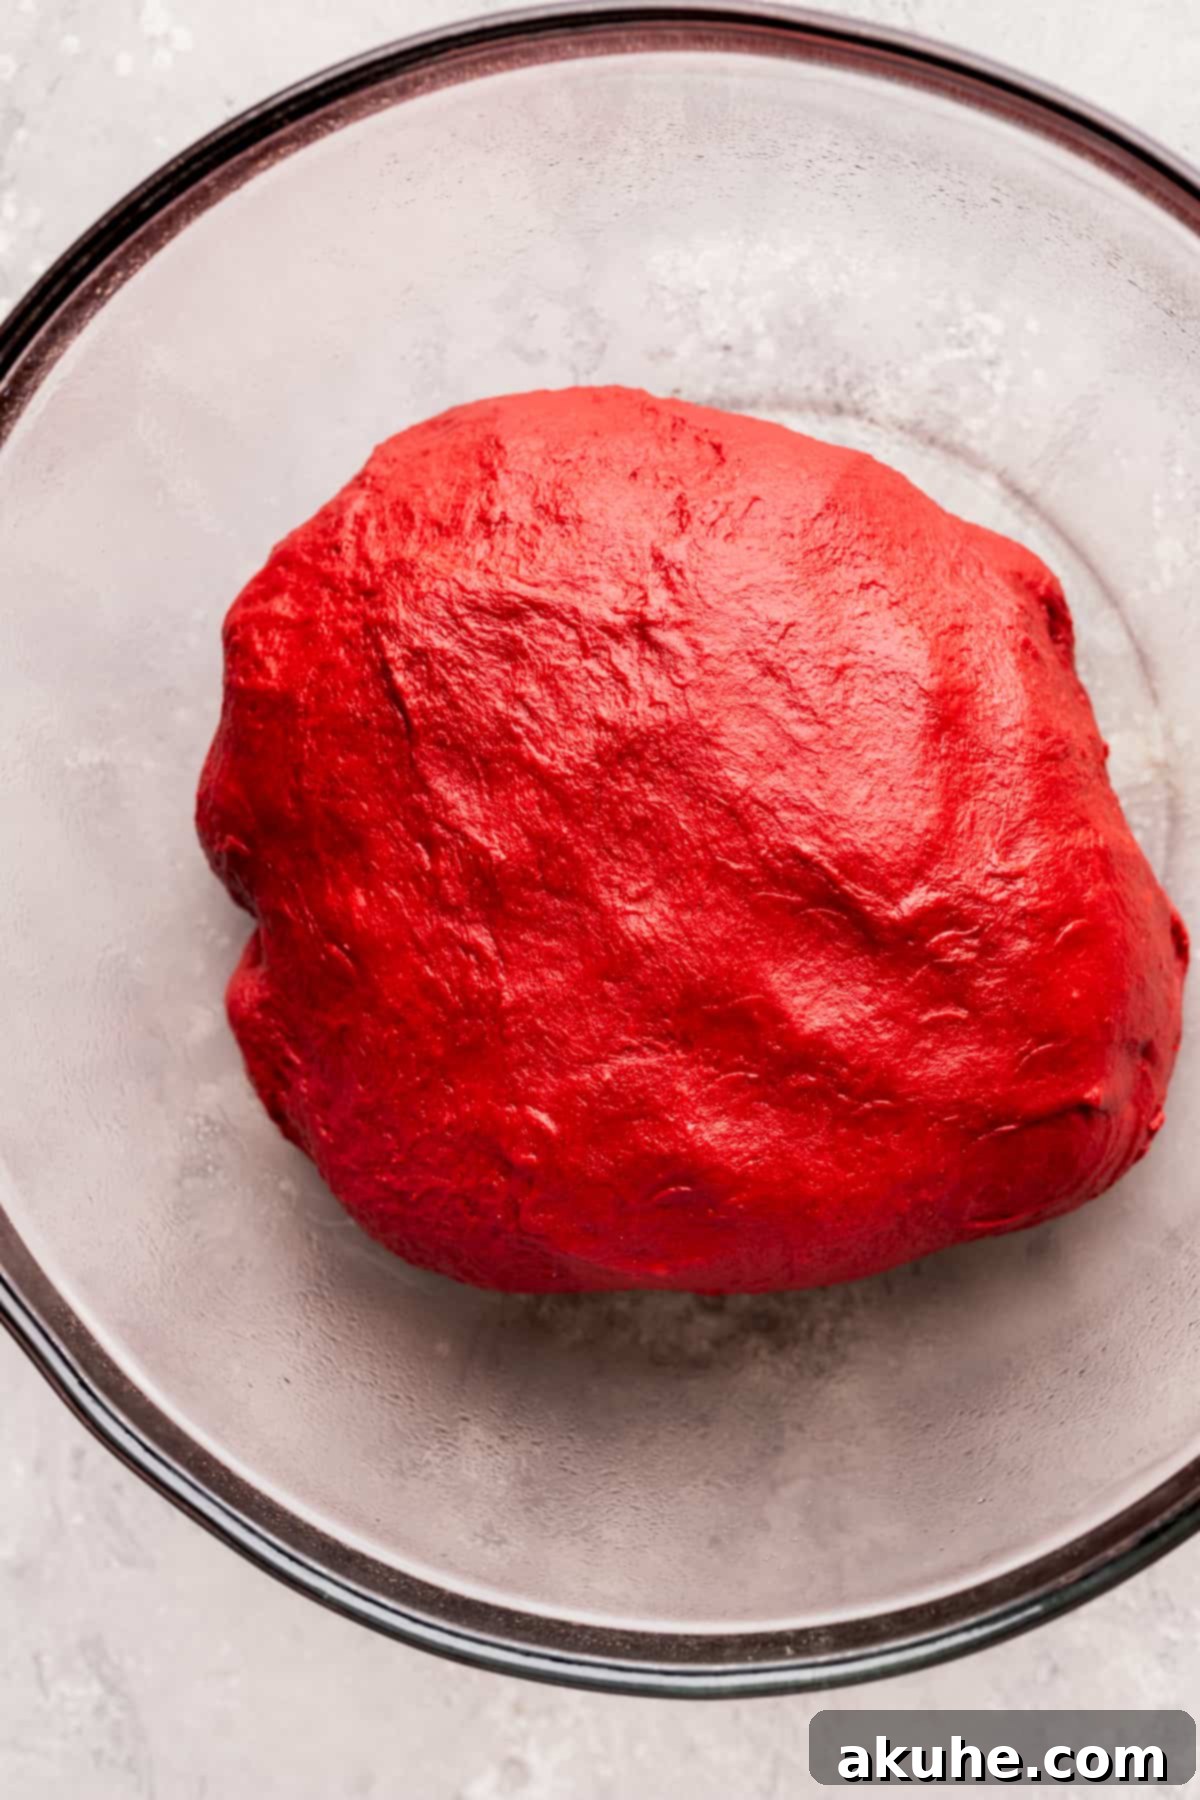
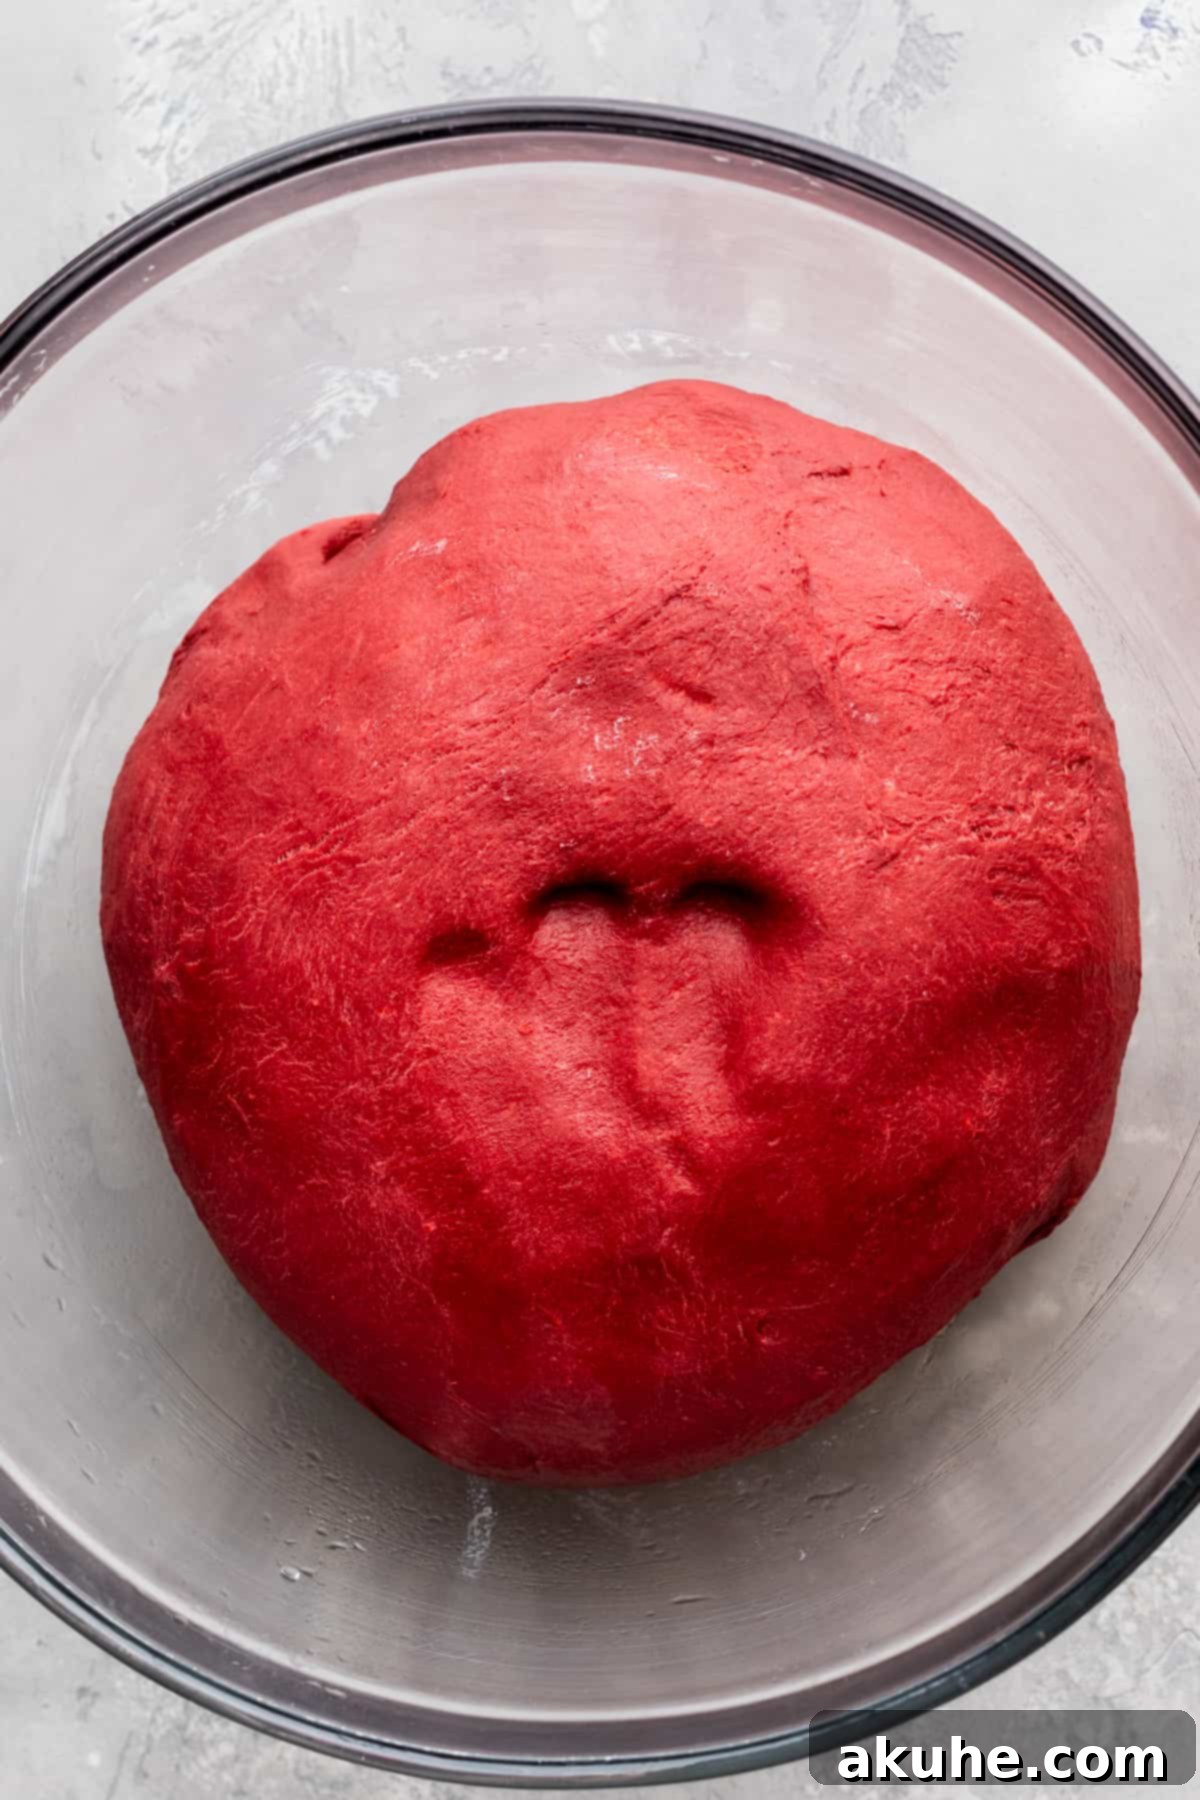
- Prepare the Cinnamon Filling: While your dough is rising, you can prepare the aromatic cinnamon filling. In a small bowl, using an electric hand mixer, combine the room-temperature unsalted butter, packed brown sugar, and ground cinnamon. Beat these ingredients together on medium speed until the mixture is smooth, creamy, and well-combined. This will form a thick, irresistible paste that will be spread generously over your red velvet dough.
Assembling and Baking Your Beautiful Rolls
With your vibrant red velvet dough perfectly risen and your cinnamon filling ready, it’s time for the exciting assembly process that brings these cinnamon rolls to life, culminating in a perfect bake.
- Roll Out the Dough: First, gently punch down the risen dough to release the air. Transfer the dough to a lightly floured clean surface. Using a rolling pin, carefully roll the dough into a large, even rectangle, aiming for approximately 1/4 inch thickness. Consistency in thickness is key here for evenly sized rolls.
- Spread the Filling Evenly: Once your dough rectangle is perfectly shaped, it’s time to spread that aromatic cinnamon filling. Using an offset spatula (or the back of a spoon if you don’t have one), evenly distribute the filling across the entire surface of the dough, making sure to spread it all the way to the edges. This ensures every bite of your cinnamon roll is packed with delicious flavor.
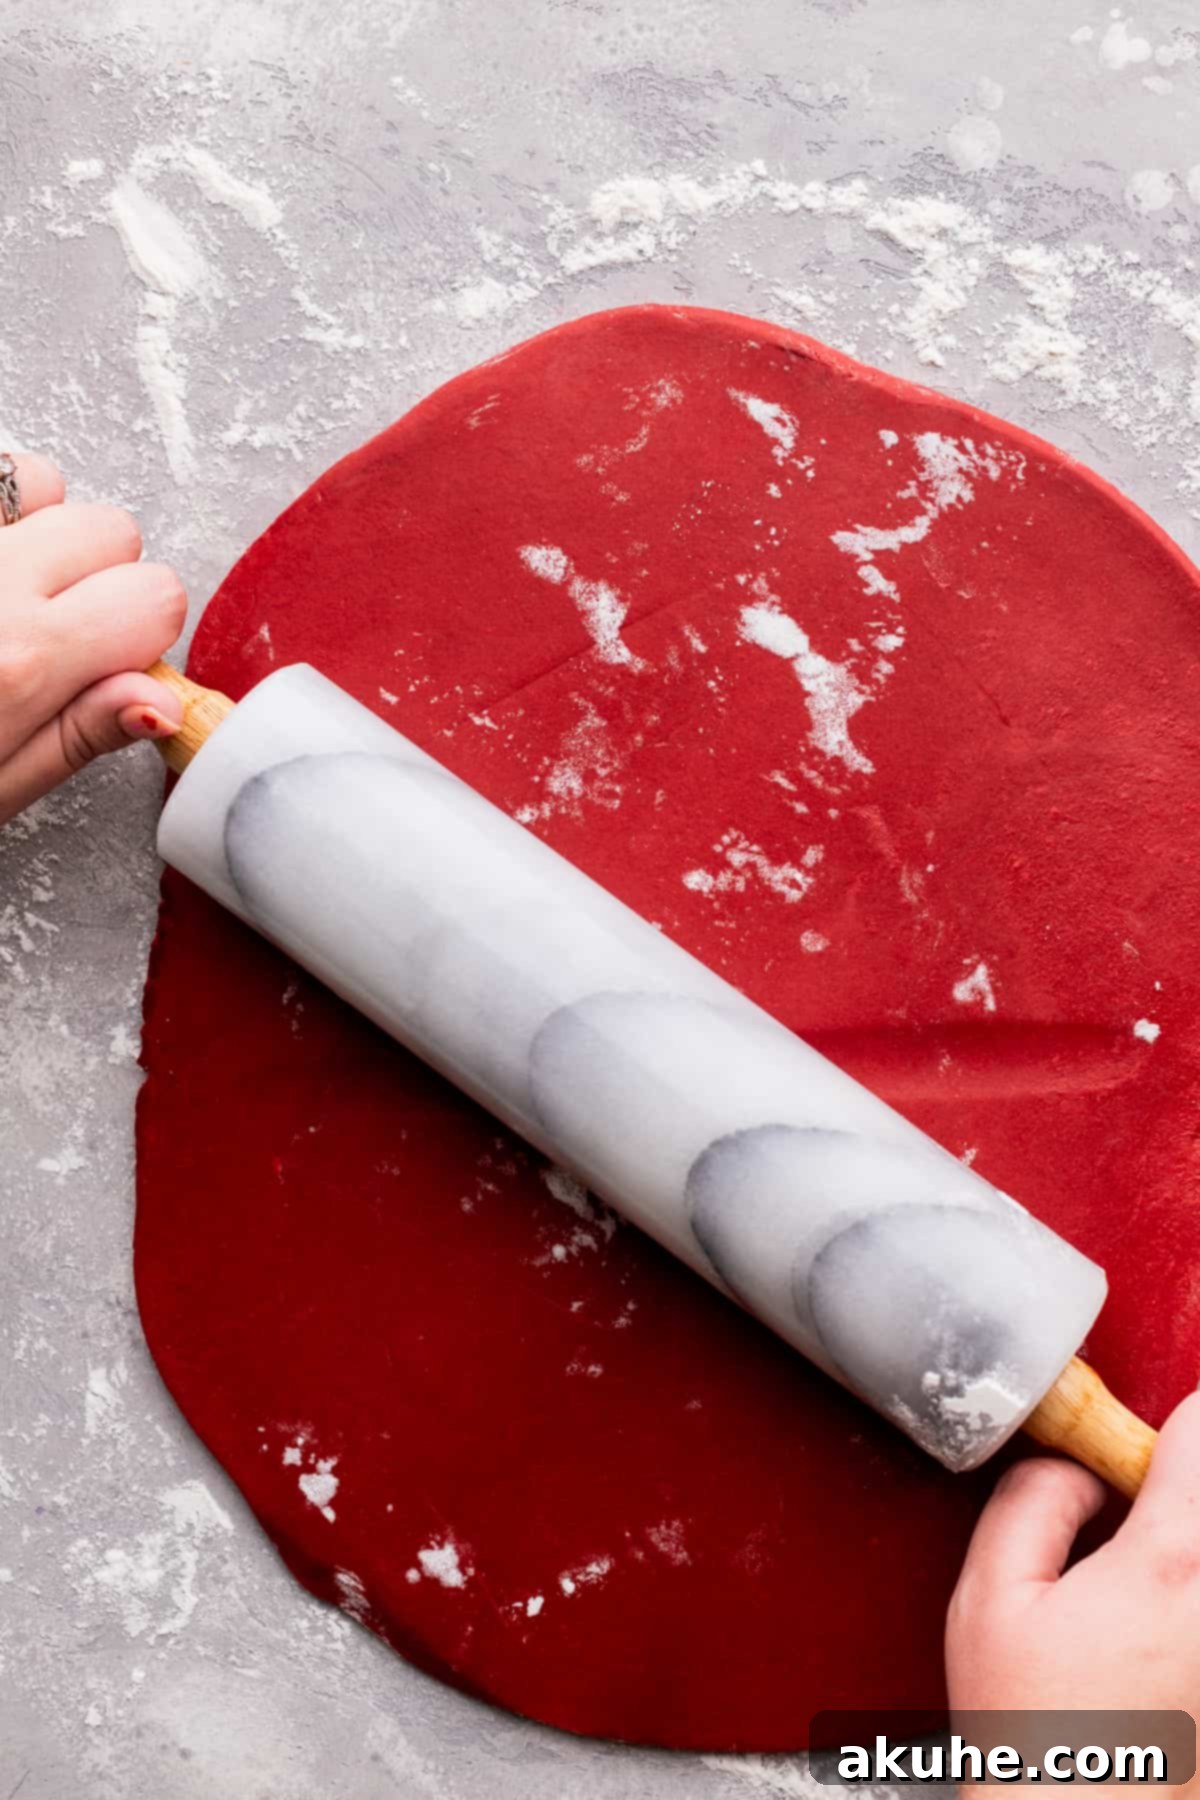
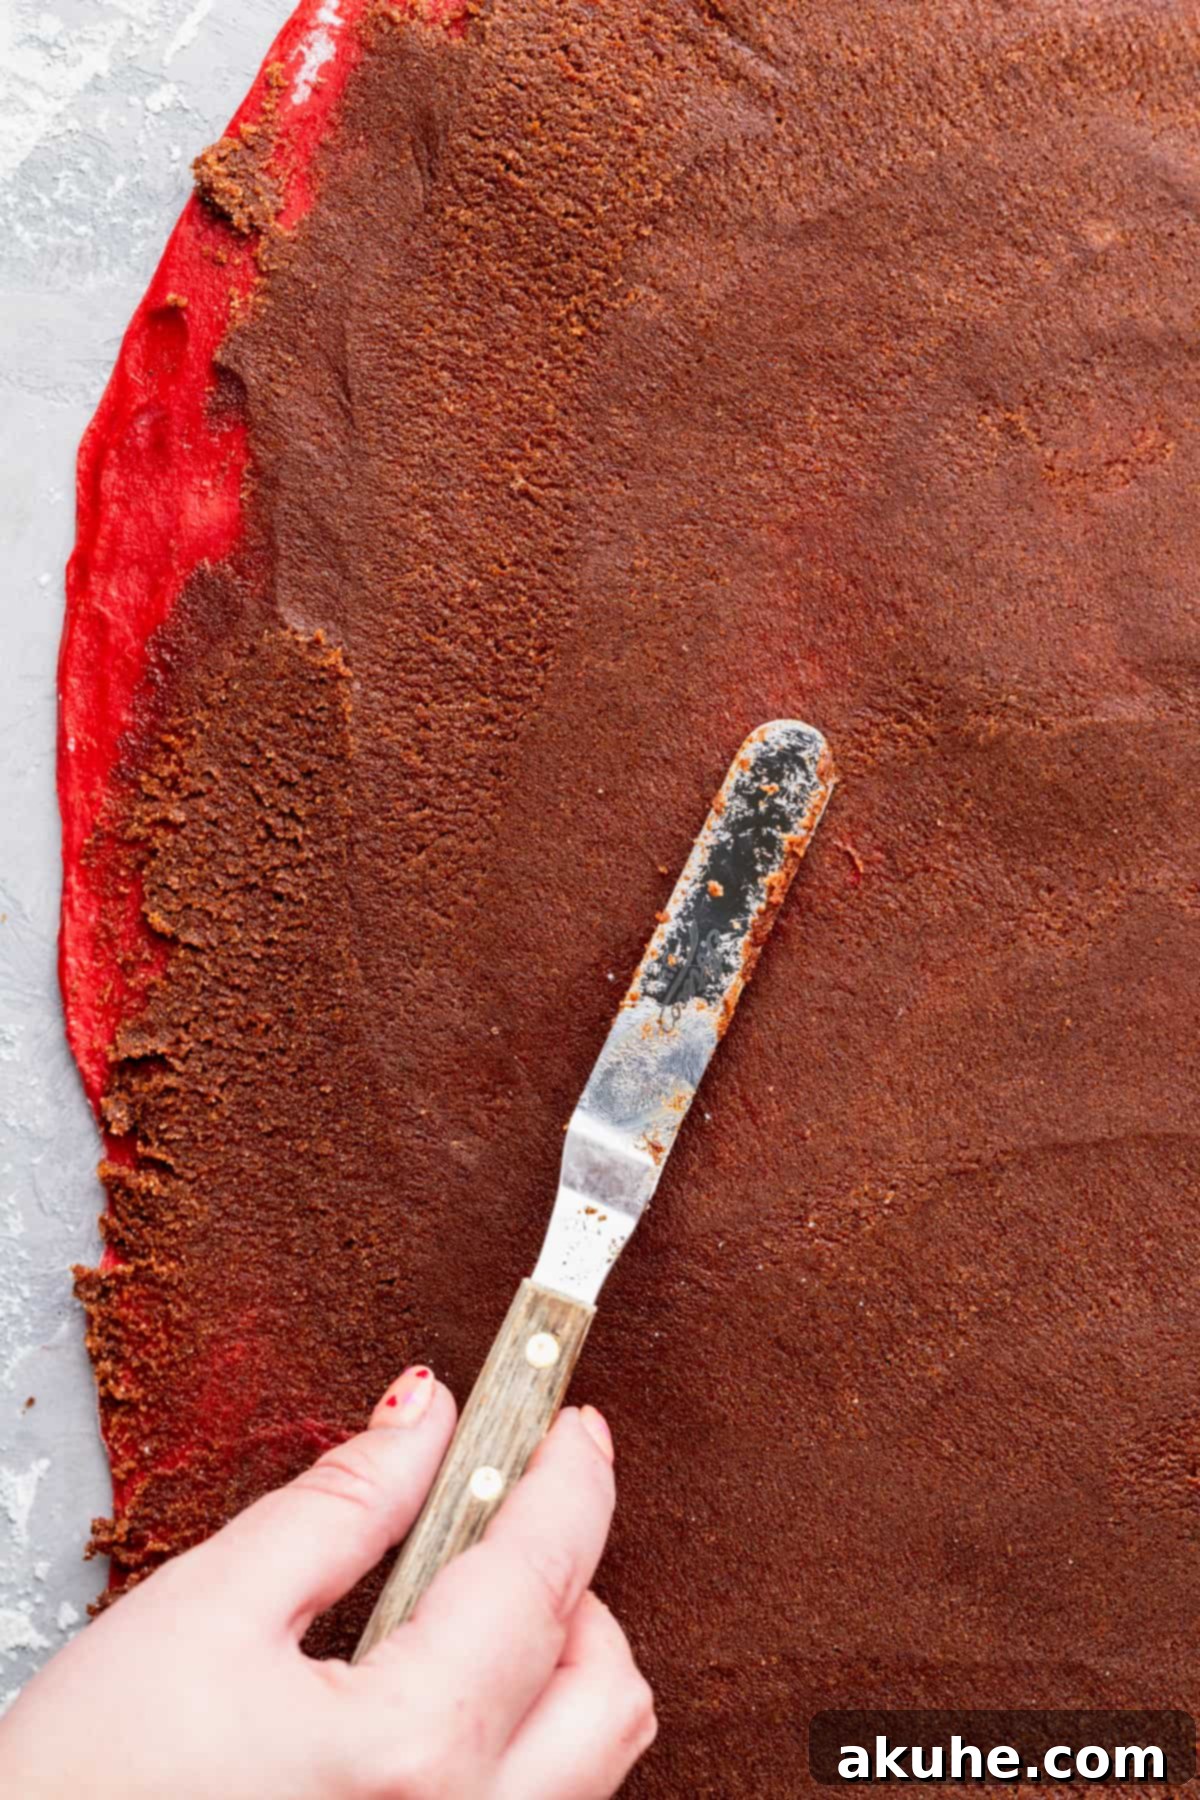
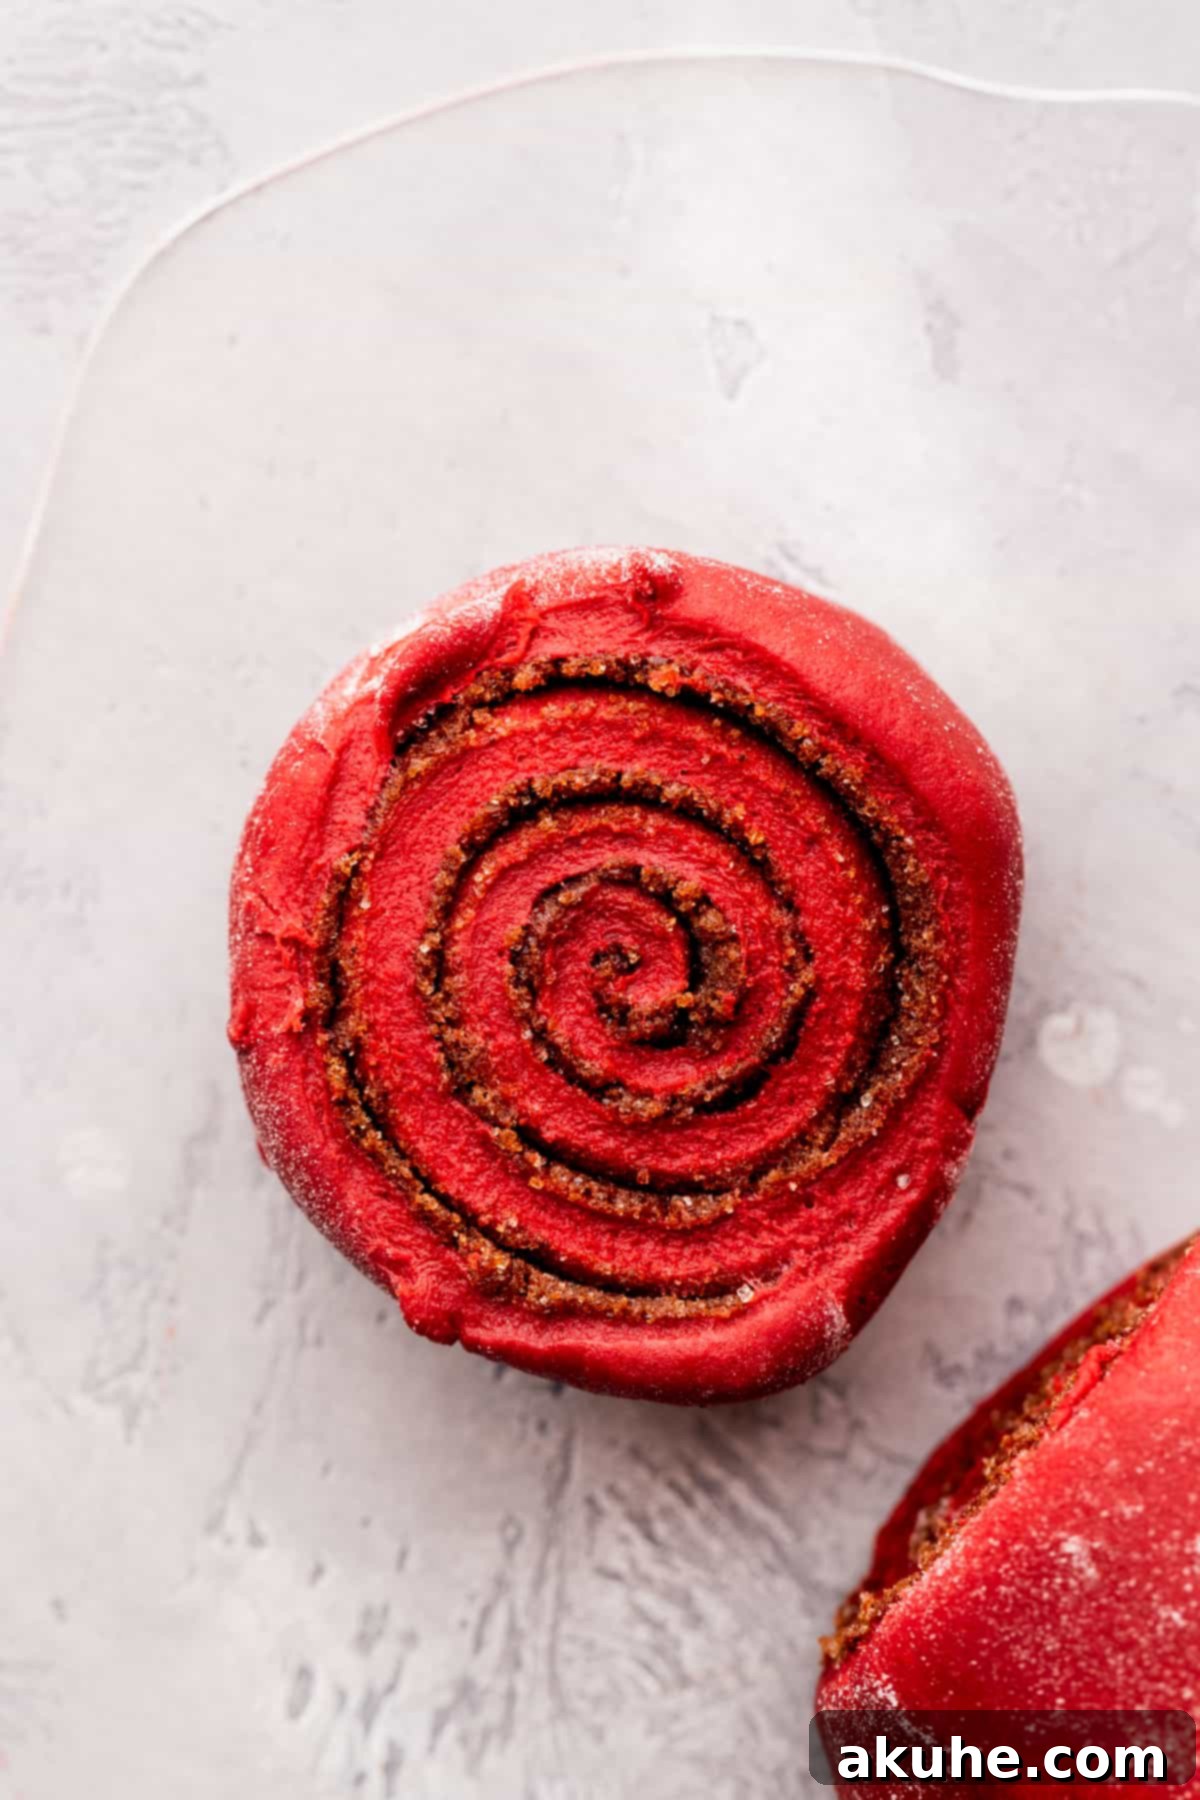
- Roll into a Tight Log: Starting from one of the shorter sides of the rectangle, carefully and tightly roll the dough into a log. Rolling from the short side will give you more beautiful spirals in your finished cinnamon rolls. Ensure the roll is firm enough to hold its shape, but not so tight that it compresses the dough too much, which could hinder its rise.
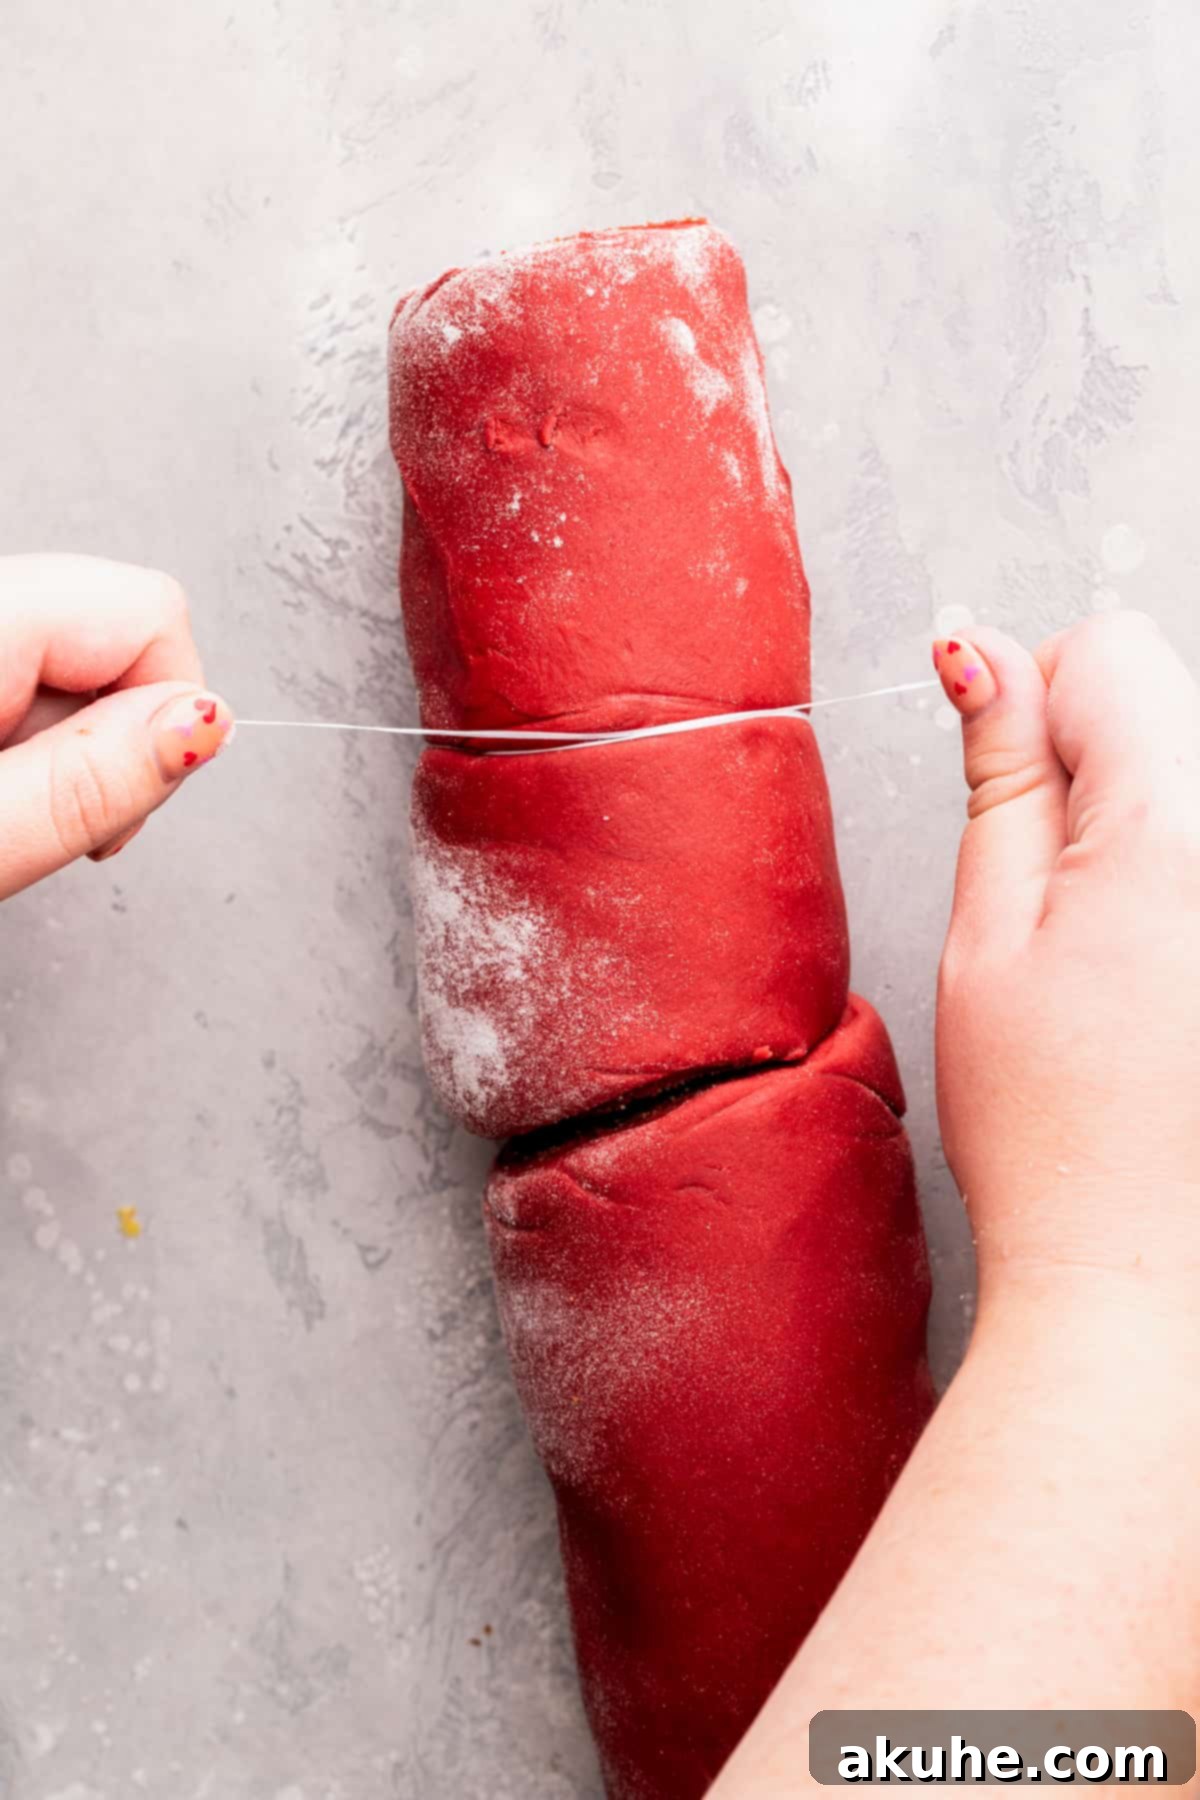
- Slice the Rolls with Precision: Now for the cutting! You have two excellent options: a serrated knife or unflavored dental floss. If using a serrated knife, employ gentle sawing motions to make clean cuts, avoiding squishing the delicate dough. For best results, clean your knife after each cut, as the filling can make it quite messy. If using dental floss, slide it under the log, cross the ends over the top, and pull to slice through the dough cleanly. Aim for 12 equally sized rolls.
- Second Rise and Cream Bath: Lightly spray a 9×14-inch casserole pan (or a 9×13-inch baking pan) with baking spray. Arrange your cut cinnamon rolls evenly within the pan. Cover the pan with a clean kitchen towel and allow the rolls to undergo their second rise for approximately 20 minutes in a warm place. This brief second rise helps them become extra fluffy.
- The Heavy Cream Secret: Just before baking, pour the heavy cream generously around the base of the rolls in the pan. This is a game-changer! The heavy cream creates a moist, steamy environment as the rolls bake, resulting in incredibly gooey bottoms and an even more tender crumb.
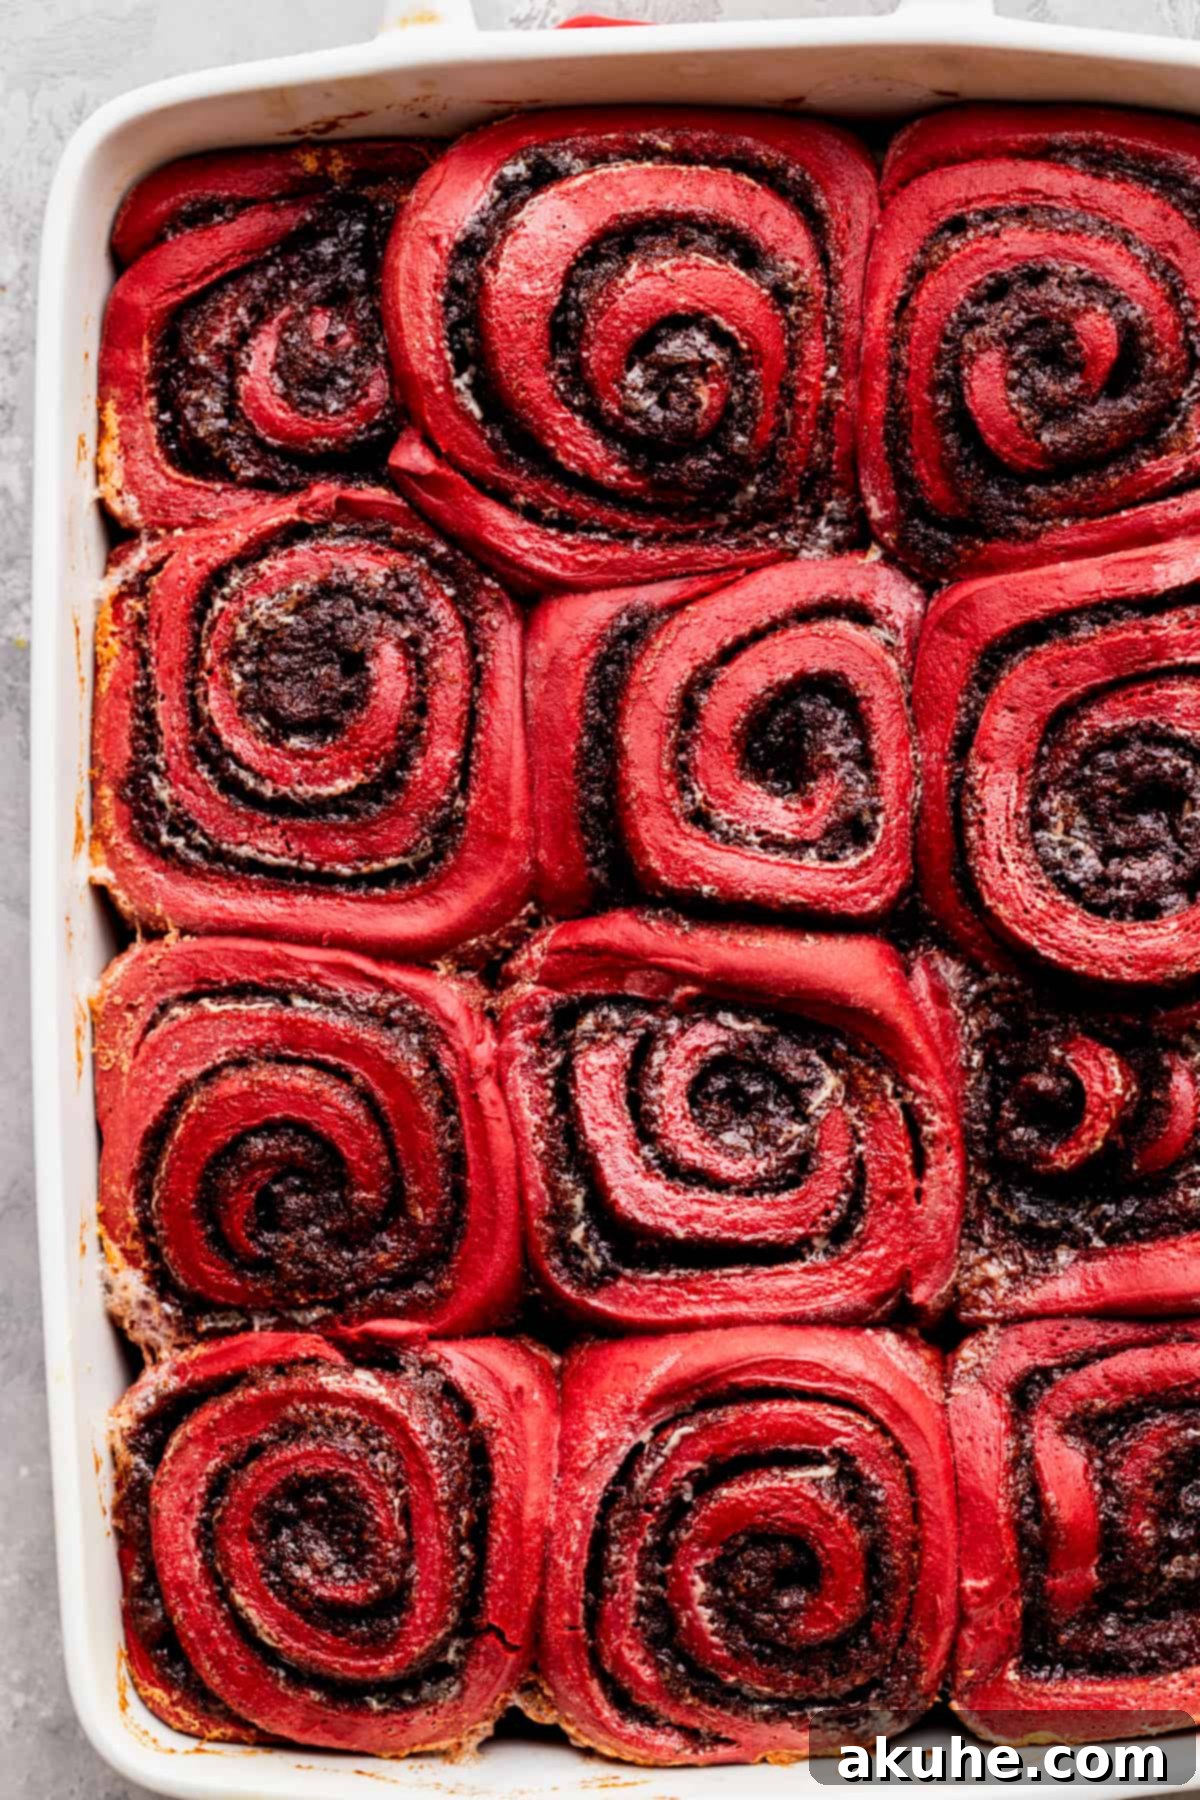
- Bake to Golden Perfection: Preheat your oven to 375°F (190°C). Place the pan of rolls into the preheated oven and bake for 25-27 minutes. The rolls are ready when their tops are a delicate light golden brown, and a quick check with an instant-read thermometer inserted into the center of a roll registers 160°F (71°C). This internal temperature ensures they are fully cooked through while remaining wonderfully soft.
Icing the Rolls for Ultimate Indulgence
The crowning glory of these red velvet cinnamon rolls is the rich, tangy cream cheese icing. The timing of when you apply this luscious frosting can make all the difference in achieving maximum gooeyness and flavor absorption.
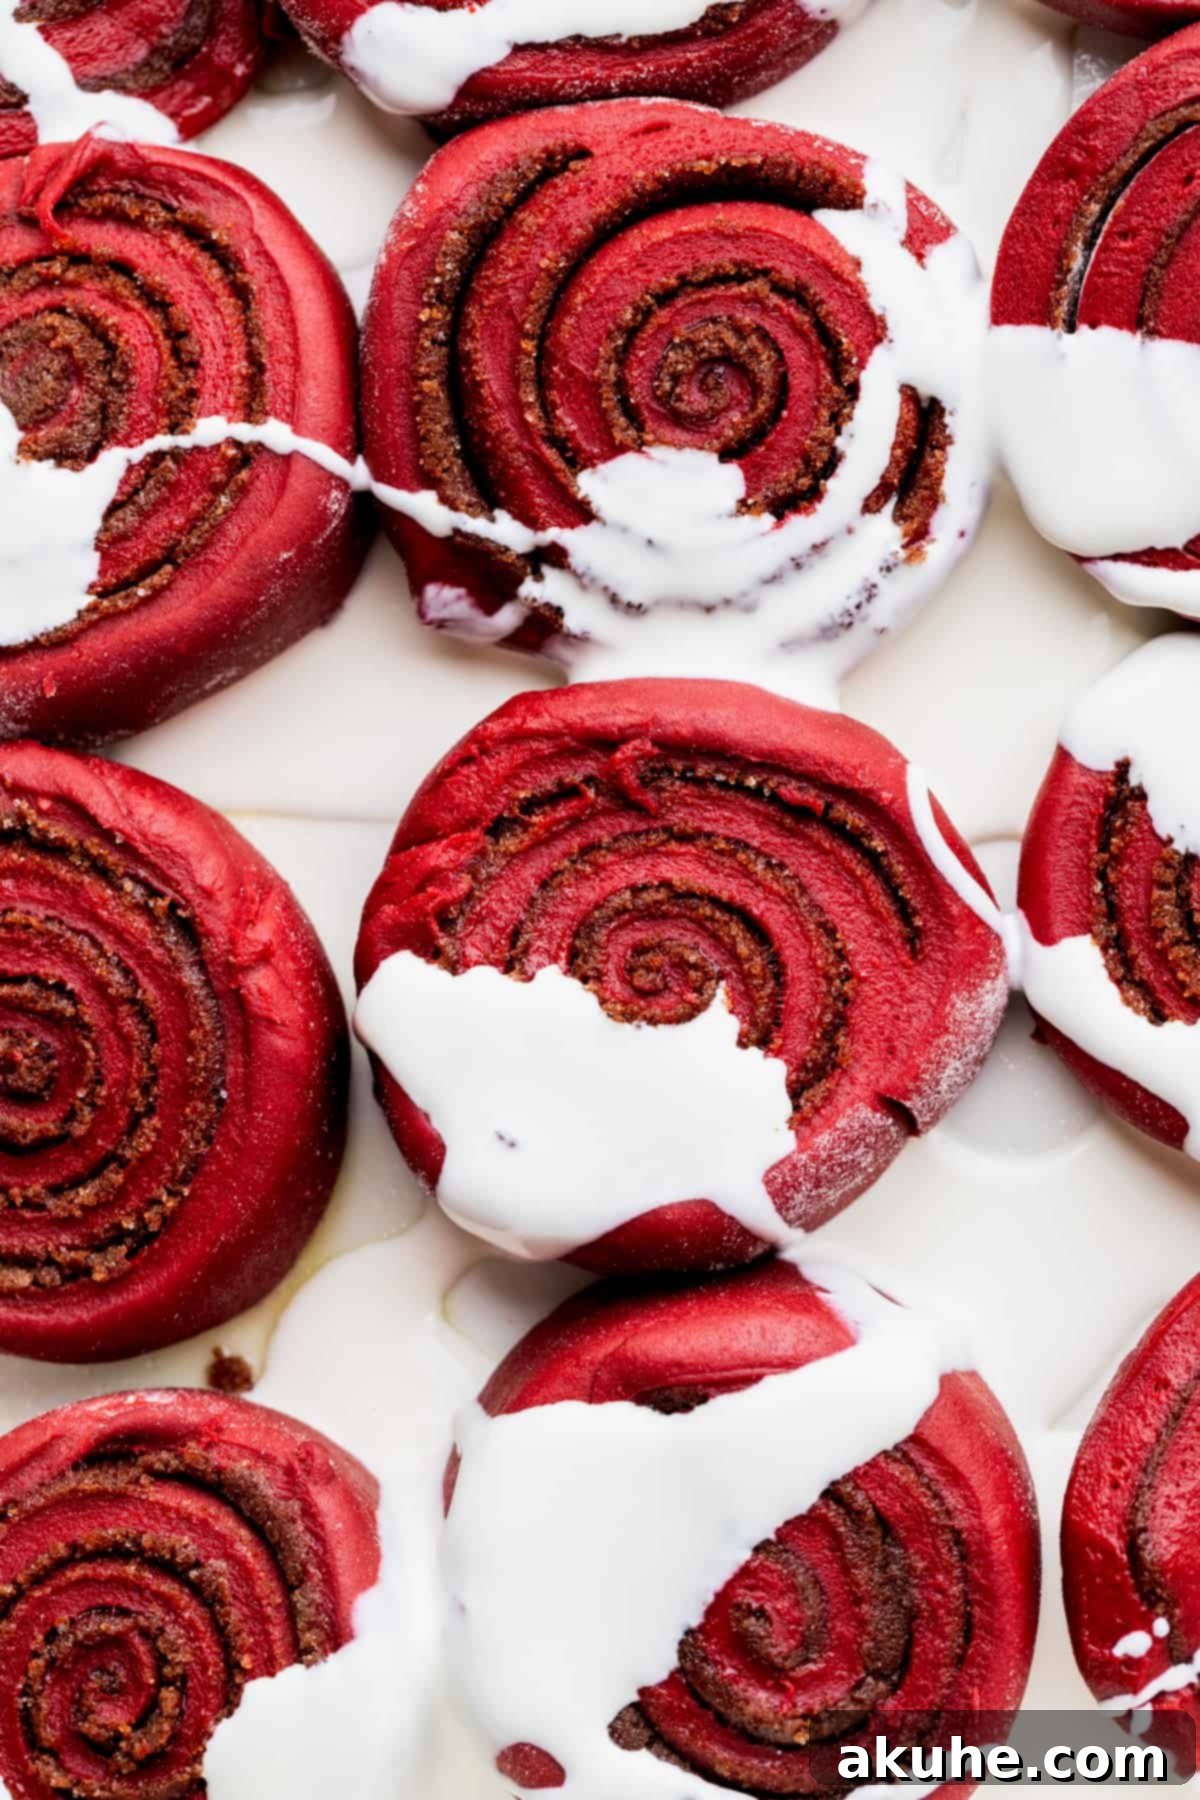
From extensive testing, we’ve discovered a secret to truly irresistible cinnamon rolls: icing them while they are still piping hot from the oven. When the warm rolls meet the cool, creamy icing, the frosting gently melts into all the wonderful cracks and crevices of the roll. This not only saturates every layer with flavor but also contributes significantly to that incredibly gooey, melt-in-your-mouth texture that makes homemade cinnamon rolls so beloved.
To prepare the cream cheese icing, start by beating the room-temperature cream cheese and unsalted butter together on high speed in a small bowl with an electric hand mixer. Continue until the mixture is completely smooth and free of any lumps. Next, reduce the speed to low and gradually add the sifted powdered sugar, mixing until it’s fully incorporated and smooth. Finally, stir in the pure vanilla extract and milk, continuing to mix on low speed until the icing reaches a smooth, pourable consistency. It should be thick enough to cling to the rolls but fluid enough to spread easily.
As soon as you pull your beautifully baked red velvet cinnamon rolls from the oven, immediately spoon or spread the prepared cream cheese frosting generously over the entire pan. Watch as it lovingly drapes over each roll, seeping into the warm dough to create an unforgettably moist and flavorful experience.
Overnight Rolls: Your Secret to Stress-Free Mornings
Imagine waking up to the aroma of freshly baked cinnamon rolls without the morning rush. Our overnight option makes this dream a delicious reality, allowing you to prepare most of the work in advance.
After you have completed the kneading process for the red velvet dough (Step 4 of “Step By Step Instructions: Dough and Filling”), instead of letting it rise at room temperature, prepare it for an overnight chill. Lightly spray a large bowl with nonstick spray, place your beautifully kneaded dough inside, and cover the bowl tightly with plastic wrap. This airtight seal is crucial to prevent the dough from drying out in the refrigerator.
Store the covered dough in the refrigerator overnight. For best results and flavor development, allow it to chill for a maximum of 16 hours. This slow, cold fermentation not only deepens the flavor of the dough but also develops its texture, making it even more tender.
The next morning, simply retrieve the dough from the fridge. You can then proceed with the “Assembling the Rolls” steps: punch down the dough, roll it out, spread the filling, and cut your rolls. The key difference for overnight dough is the second rise: instead of just 20 minutes, you will let the assembled rolls rise for a full 1 hour at room temperature or in a warm spot. This extended rise time allows the chilled dough to warm up and become wonderfully puffy before baking. Then, you can pour on the heavy cream and bake as instructed, enjoying fresh, warm cinnamon rolls with minimal morning effort!

Frequently Asked Questions About Red Velvet Cinnamon Rolls
Here are some common questions and helpful answers to ensure your red velvet cinnamon roll baking experience is a complete success:
While a warm oven (turned off, with the door slightly ajar) provides an ideal, consistent environment for yeast activation and rising, it’s not strictly mandatory. Dough rises best in any warm area free from drafts. If your oven is otherwise occupied, or you prefer not to use it for rising, you can certainly let the dough rise at room temperature. Just ensure your kitchen isn’t excessively cold, as a chilly environment will significantly slow down the rising process, requiring more time.
For reheating individual cinnamon rolls, place one on a microwave-safe plate and heat for 20-30 seconds. This will warm it through, making the icing soft and gooey again. If you’re reheating an entire tray or several rolls, preheat your oven to 350°F (175°C). Cover the tray loosely with foil to prevent the tops from browning too much and bake for about 5-10 minutes, or until the rolls are warmed through to your liking. The foil helps retain moisture, keeping them soft.
Yes, you absolutely can! This is a fantastic option for even more convenience. Follow all the instructions up to the baking step. Instead of baking them completely, bake the rolls for only 10 minutes. At this point, they will be partially cooked but not browned. Remove them from the oven and let them cool completely, then chill them in the refrigerator. The next morning, you can finish baking them. Preheat your oven to 350°F (175°C) and bake for an additional 10-18 minutes, or until they are golden brown and heated through. This method allows you to have warm, fresh-baked rolls with minimal morning effort.
Certainly! The sweetness of the icing can be adjusted to your preference. You can start by reducing the amount of powdered sugar by 1/4 cup. Taste the icing, and if you desire more sweetness, gradually add more powdered sugar a tablespoon at a time until you reach your ideal balance. Remember that the tanginess of the cream cheese helps to cut through the sweetness, so a slightly sweeter icing often balances well.
Storing and Freezing Your Red Velvet Cinnamon Rolls
To enjoy these delectable red velvet cinnamon rolls for longer, proper storage is key. Here’s how to keep them fresh and delicious:
Storing
Once cooled, store any leftover red velvet cinnamon rolls in an airtight container in the refrigerator. This will keep them fresh for up to 5 days. For the best experience, we recommend gently reheating them in the microwave for 20-30 seconds until warm before serving. This revives their soft texture and melts the icing into a wonderfully gooey consistency.
Freezing
These red velvet cinnamon rolls are excellent candidates for freezing, offering you two convenient methods to enjoy them later:
- Freezing Unbaked Rolls: After you have rolled, filled, and sliced the dough, place the unbaked rolls onto a baking sheet and freeze until solid (about 2-3 hours). Once solid, transfer them to a freezer-safe airtight container or heavy-duty freezer bag. They can be stored for up to 30 days. When you’re ready to bake, transfer the frozen rolls to your baking pan, cover them, and let them thaw and rise in a warm place for 2-3 hours (or overnight in the fridge, then 1 hour at room temperature) until they’ve doubled in size. While they may not rise quite as much as fresh dough, the results will still be wonderfully soft and delicious.
- Freezing Already Baked and Iced Rolls: You can also freeze the cinnamon rolls after they have been fully baked and iced. Allow the rolls to cool completely, then place them on a baking sheet and freeze until the icing is solid. Once frozen, transfer individual rolls to freezer-safe bags or an airtight container, separating layers with parchment paper if stacking. Freeze for up to 30 days. To enjoy, thaw the rolls at room temperature for about 1 hour, then gently reheat in the microwave or oven until warm and soft.
Other Festive & Valentine’s Day Recipes to Try
If you’re looking for more delightful treats to celebrate special moments or simply sweeten your day, explore our collection of other festive and romantic recipes. From decadent chocolates to charming pastries, you’ll find plenty of inspiration.
Make sure to leave a STAR REVIEW if you loved this recipe! Make sure to tag me on Instagram @stephaniesweettreats. To get more ideas follow me on Pinterest.

Red Velvet Cinnamon Rolls
Print Recipe |
Pin Recipe |
Leave a Review
Ingredients
Red Velvet Dough
- 1 cup Milk, warmed to 110°F
- 2 1/4 tsp Active dry yeast, or 1 full packet
- 2 Large eggs, room temperature
- 1 tsp Red gel food dye, I used americolor super red.
- 4 1/4 cup All-purpose flour
- 1/3 cup Unsweetened cocoa powder
- 1 tsp Salt
- 1/4 cup White granulated sugar
- 10 TBSP Unsalted butter, room temperature
Cinnamon Filling
- 1/2 cup Unsalted butter, room temperature
- 3/4 cup Brown sugar, packed light or dark
- 1 TBSP Ground cinnamon
- 1/3 cup Heavy cream
Cream Cheese Icing
- 4 oz Cream cheese, room temperature
- 4 TBSP Unsalted butter, room temperature
- 1 cup Powdered sugar, sifted
- 2 tsp Pure vanilla extract
- 2 TBSP Milk
Instructions
Red Velvet Dough
- In a small bowl, heat the milk in the microwave until it reaches 110°F. It should be warm, but not too hot or too cold. Pour in the yeast and let it sit for 10 minutes. (1 cup Milk, 2 1/4 tsp Active dry yeast)
- In a large bowl, mix the flour, cocoa powder, sugar, and salt. Add in the cubed butter into the dry ingredients. Use a pastry blender or your fingers, blend the butter into the dough until the butter is the size of a pea. (4 1/4 cup All-purpose flour, 1/3 cup Unsweetened cocoa powder, 1 tsp Salt, 1/4 cup White granulated sugar, 10 TBSP Unsalted butter)
- This recipe uses a stand mixer with a dough hook, for mix by hand instructions, see the recipe notes. Add in the milk/yeast mixture, lightly beaten eggs, and red food dye. Mix on low speed until a dough starts to form. (2 Large eggs, 1 tsp Red gel food dye)
- Then, switch to medium speed and knead the dough for 5 minutes. It should be a bright red dough.
- Preheat the oven to 200°F, spray a large mixing bowl with nonstick spray. Grab the dough and form it into a ball and place in the bowl. Cover with a kitchen towel.
- Let it rise for 1 hour until double in size.
Cinnamon Filling & Assembly
- In a small bowl using a hand mixer, beat the butter, brown sugar, and cinnamon. Beat until smooth. It will be a thick paste. (1/2 cup Unsalted butter, 3/4 cup Brown sugar, 1 TBSP Ground cinnamon)
- Roll the dough out on a lightly floured surface. Roll into a large rectangle until it is 1/4 inch thick.
- Use an offset icing spatula to spread the cinnamon filling over the dough. Make sure to get the edges.
- Roll the dough starting at the short side. Roll into a tight log. Rolling from the short side lets you get more swirls.
- Use unflavored dental floss or a serrated knife to cut the log. First, cut off the uneven ends. Then, cut evenly into 12 rolls. If using a serrated knife, make sure to make very very gentle sawing motions to not squish the rolls.
- Spray a large pan (9X14 inch casserole pan is best, you can use a 9X13 inch baking pan) with baking nonstick spray. Place the rolls in the pan. Cover with a towel and rise for 20 minutes.
- Preheat the oven to 375℉ Pour the heavy cream around the rolls in the pan. Bake for 25-27 minutes until the tops of the rolls are lightly golden. Or when the middle of the cinnamon rolls reach 160°F. (1/3 cup Heavy cream)
Cream Cheese Icing
- Start this while the rolls are in the oven. In a small bowl using a hand mixer, beat the cream cheese and butter on high speed until smooth. (4 oz Cream cheese, 4 TBSP Unsalted butter)
- Add in the powdered sugar and mix on low until smooth. Then, add in the vanilla and milk. It should be a great consistency to use a spoon to spread it on. (1 cup Powdered sugar, 2 TBSP Milk, 2 tsp Pure vanilla extract)
- As soon as the rolls are out of the oven, top with the icing. This will allow the icing to melt into the cracks of the rolls.
Notes
Flour- Make sure flour is spooned and leveled or use a kitchen scale. Compacted flour can dry out the rolls.
High altitude baking- Add an extra 3 TBSP of flour.
Pull out dairy ingredients 2 hours before baking.
Making by hand:
Mix the wet ingredients into the dry by using a rubber spatula. Switch to using your hands to mix until a dough starts to form.
Place dough on a lightly floured surface. Knead using your hands for 5-8 minutes.
It is done when you can spread the dough apart thinly using your fingers. Hold the dough to the light. If you can see light through it, then it is done.
Calories: 519kcal,
Carbohydrates: 72g,
Protein: 8g,
Fat: 28g,
Saturated Fat: 17g,
Polyunsaturated Fat: 1g,
Monounsaturated Fat: 7g,
Trans Fat: 1g,
Cholesterol: 75mg,
Sodium: 245mg,
Potassium: 196mg,
Fiber: 3g,
Sugar: 24g,
Vitamin A: 910IU,
Vitamin C: 0.1mg,
Calcium: 87mg,
Iron: 3mg
Please leave a star rating and review below!
