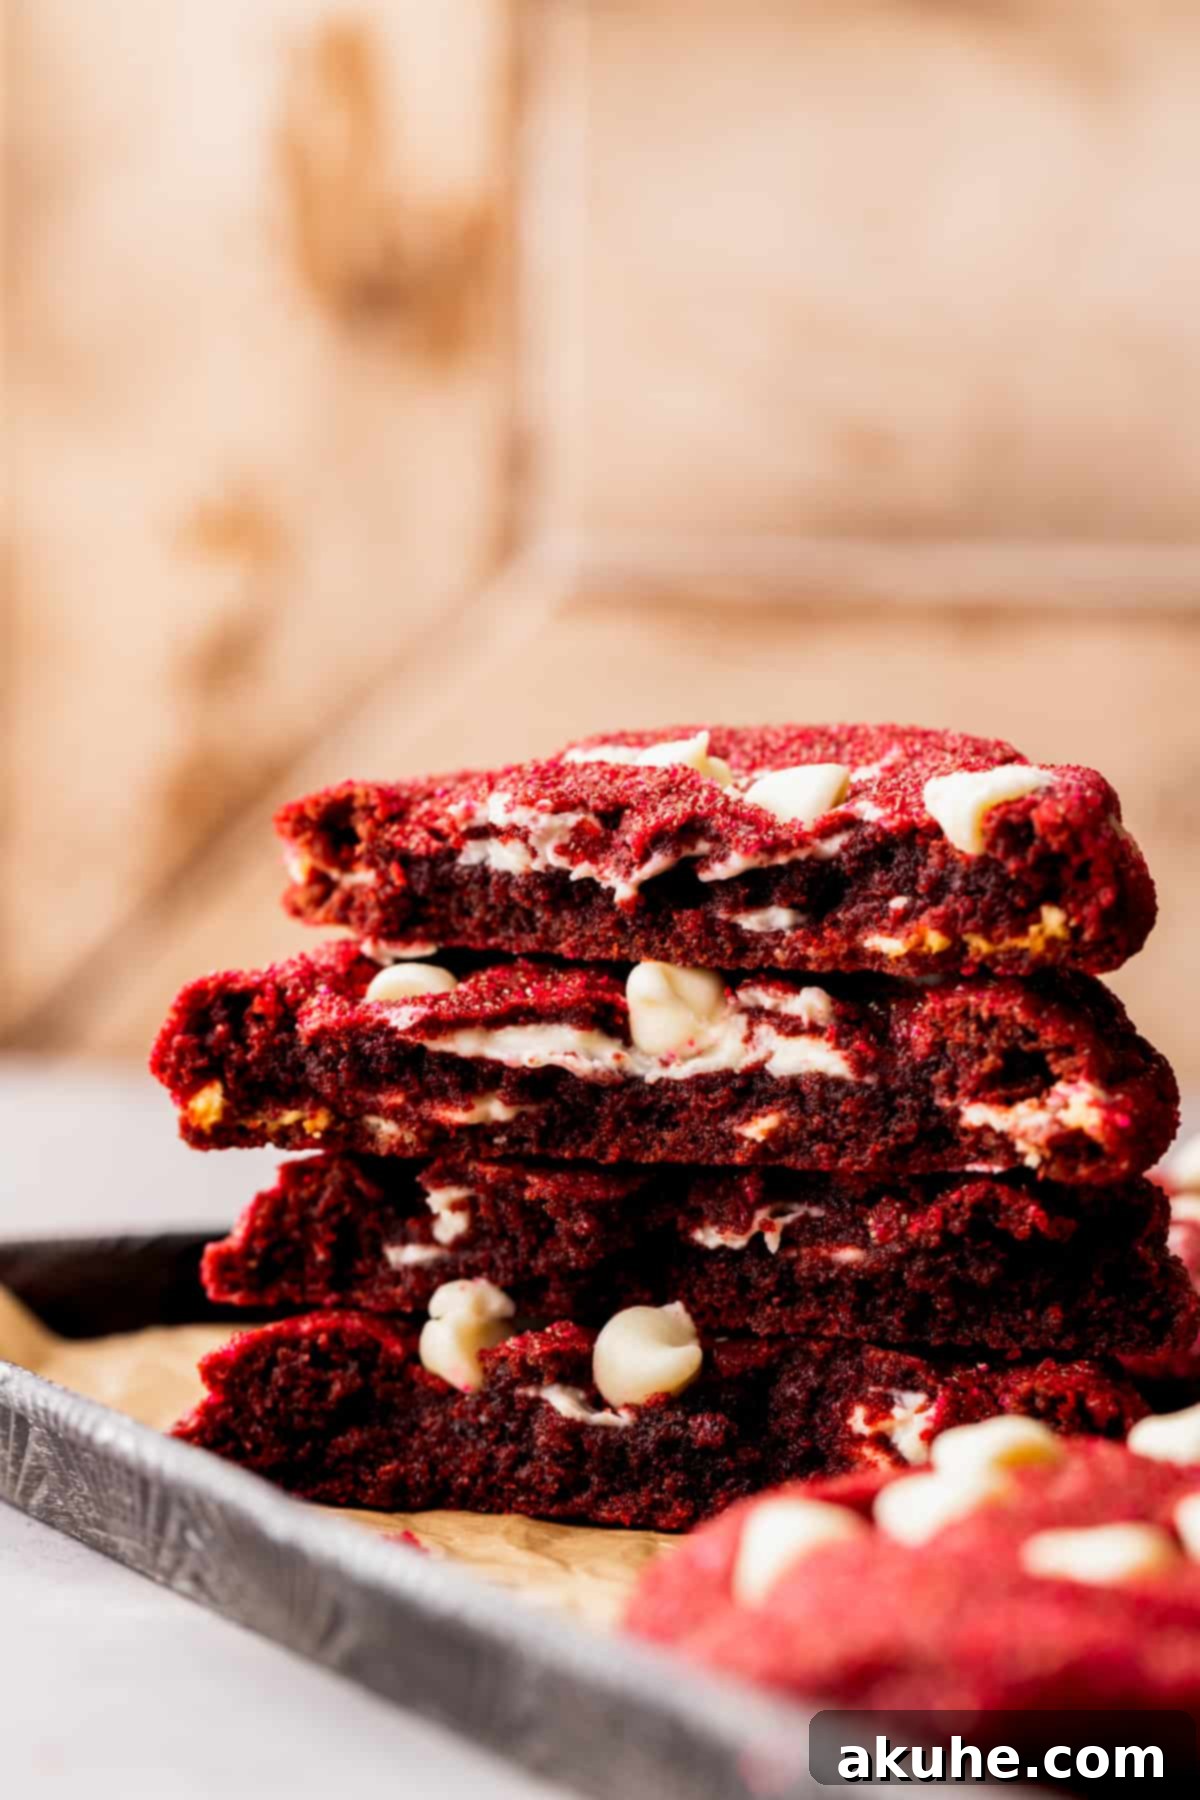
Indulge in the luxurious allure of homemade Red Velvet Cookies, a treat that marries the classic appeal of red velvet cake with the delightful convenience of a chewy cookie. These exquisite cookies are a symphony of textures and flavors, featuring a soft, tender crumb, a satisfying chewiness, and a rich, deep red hue that captivates the eye. Each cookie is generously rolled in sparkling red sugar, adding a delightful crunch and a festive shimmer, before being baked to perfection with pockets of luscious white chocolate. This combination creates an irresistible dessert that is both visually stunning and incredibly delicious, making it an ideal choice for any occasion where you want to express love and appreciation, or simply treat yourself to something truly special.

Embrace the vibrant essence of red velvet with this remarkably easy-to-follow cookie recipe. Designed for home bakers of all skill levels, these Red Velvet Cookies promise an amazing flavor experience that has even converted the most skeptical palates into devoted red velvet fans. Their striking appearance and delightful taste make them an absolute showstopper, particularly perfect for Valentine’s Day or any romantic celebration. Imagine presenting these beautifully crafted cookies, each one a testament to homemade goodness, brimming with sweet white chocolate and a subtle hint of cocoa. This recipe isn’t just about baking; it’s about creating joyful moments and sharing unforgettable flavors.
For those who love to explore diverse cookie creations, be sure to try some of our other cherished recipes: Irresistible Toffee Cookies, The Ultimate Chocolate Chip Cookies, and the playful Fun Fruity Pebble Cookies. Each recipe offers a unique taste adventure!
Why This Red Velvet Cookie Recipe Stands Out
Our Red Velvet Cookie recipe is more than just a sweet treat; it’s a baking experience crafted for success and pure enjoyment. Here’s why these chewy, white chocolate-filled delights will become your new favorite:
- Effortlessly Easy to Make: Forget complicated techniques and endless hours in the kitchen. This recipe is designed for simplicity, allowing you to create impressive, bakery-quality cookies without any fuss. From mixing to baking, each step is straightforward, ensuring a stress-free baking adventure.
- Incredibly Delicious Flavor Profile: Prepare for an explosion of flavor that will leave everyone craving more. These cookies strike the perfect balance between the mild chocolatey notes of red velvet and the creamy sweetness of white chocolate. The taste is so captivating that even those who typically shy away from red velvet desserts find themselves reaching for a second, third, or even fourth cookie!
- Perfect for Valentine’s Day and Beyond: With their iconic deep red color and luscious white chocolate accents, these cookies naturally exude a romantic and celebratory vibe. They are an absolute must-have for Valentine’s Day, but their charm isn’t limited to a single holiday. They bring a touch of elegance and joy to birthdays, anniversaries, holiday gatherings, or simply a cozy evening at home.
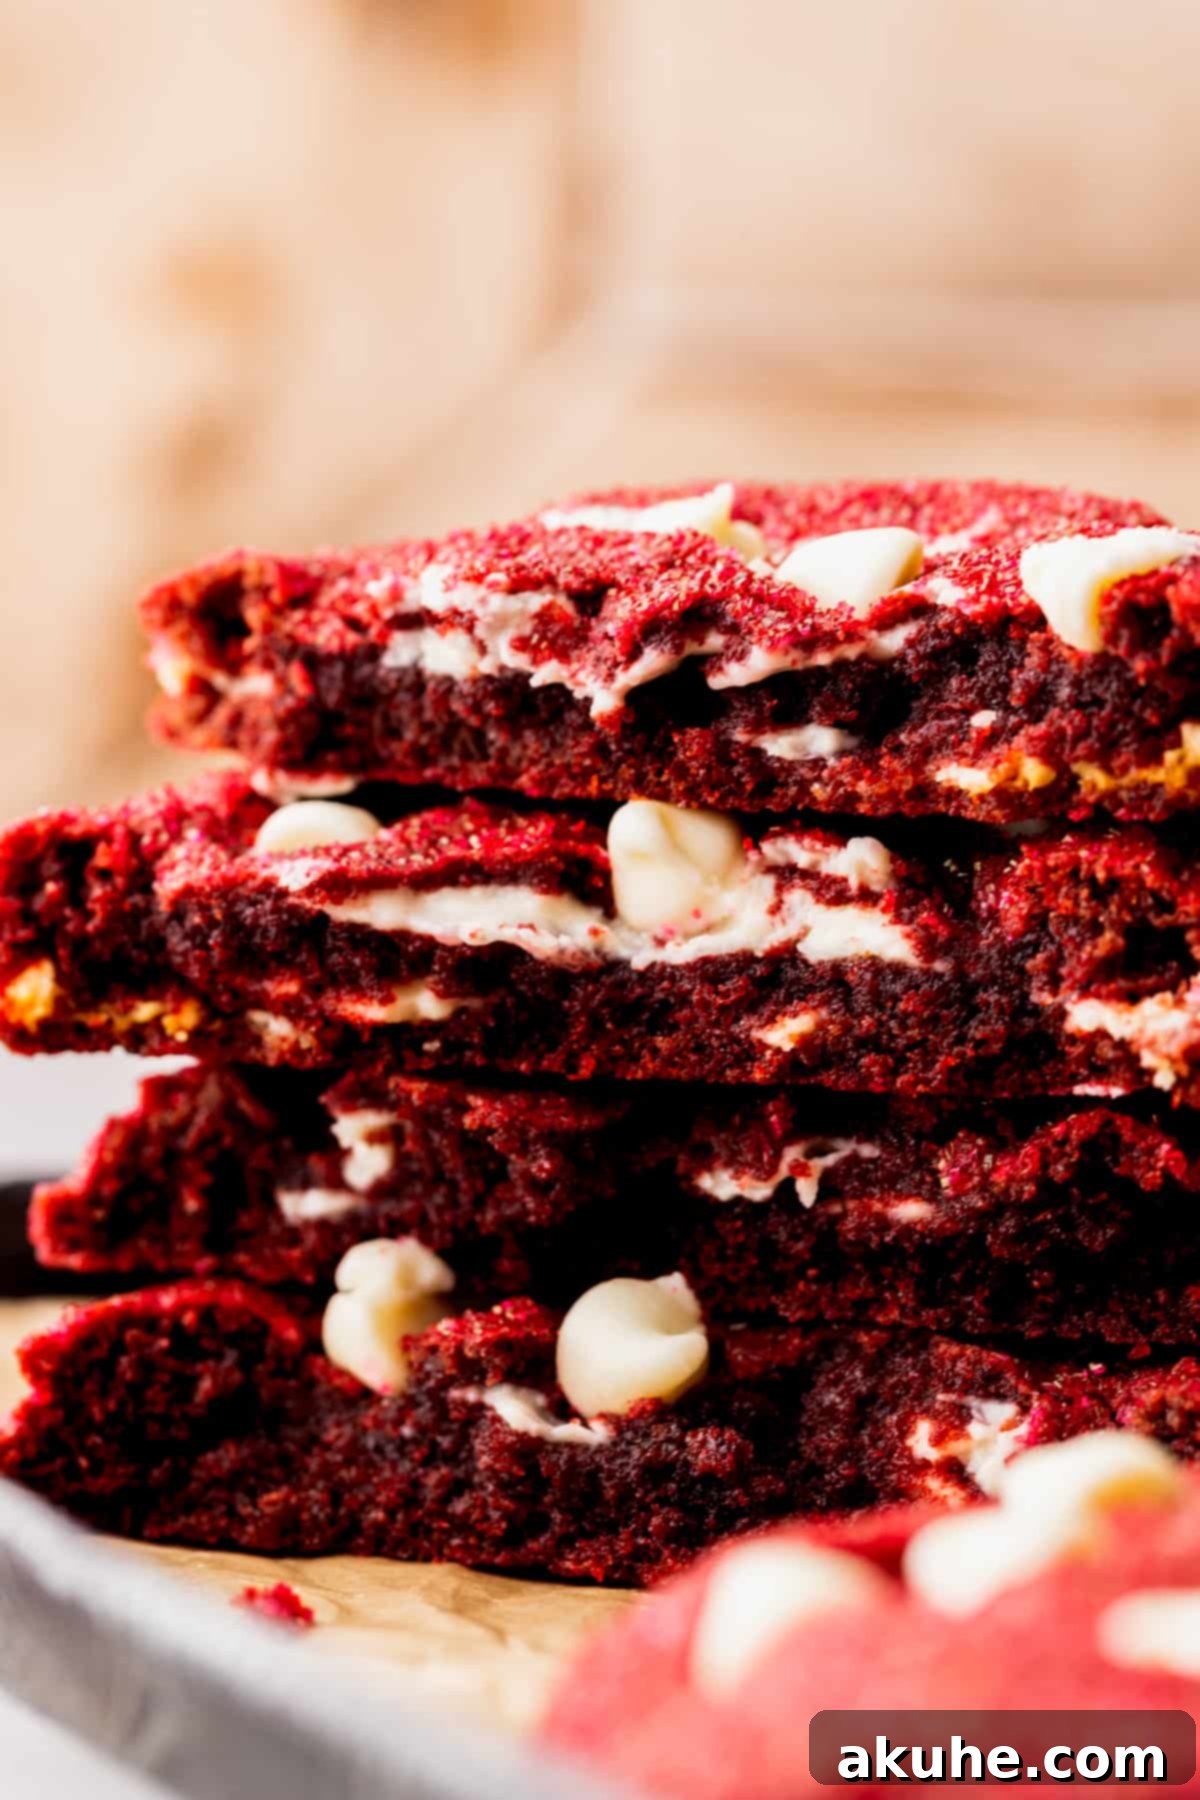
- Unmatched Soft and Chewy Texture: The texture of these red velvet cookies is pure perfection. They boast a wonderfully soft interior that yields to every bite, coupled with an irresistible chewiness that makes them incredibly satisfying. Rolled in red sanding sugar, they also offer a delicate, sugary crispness on the outside, creating a delightful textural contrast that elevates the entire experience.
Essential Ingredient Notes for Perfect Red Velvet Cookies
Understanding your ingredients is key to achieving baking excellence. Here are some detailed notes to ensure your Red Velvet Cookies turn out perfectly. For a complete list with exact measurements, please refer to the recipe card below.
- Unsweetened Cocoa Powder: The cocoa powder is crucial for the signature red velvet flavor. For the richest, most decadent chocolate taste and a deeper red color, we highly recommend using a Dutch-processed cocoa powder. This type of cocoa has been treated to reduce its acidity, resulting in a smoother, less bitter chocolate flavor. A quality brand like Hershey’s Dutch-processed cocoa works wonders.
- Brown Sugar: We use light brown sugar in this recipe. Its molasses content adds moisture and a subtle caramel note, contributing to the cookies’ chewy texture and depth of flavor. Ensure it’s packed firmly when measuring.
- Unsalted Butter: Always opt for unsalted butter to have full control over the salt content in your baking. For this recipe, melt the butter first, then allow it to cool completely to room temperature. Using butter that is too warm can affect the cookie dough’s consistency and lead to excessive spreading during baking.
- Eggs: Room temperature eggs are vital for creating a smooth, emulsified batter. Cold eggs can cause the butter to seize and result in a lumpy mixture. Take your eggs out of the refrigerator at least two hours before you plan to start baking.
- Red Food Dye: Achieving that iconic vibrant red color is paramount for red velvet. Avoid cheap liquid food colorings, as they often require large quantities to achieve a good shade, which can dilute the flavor and alter the dough’s consistency. Instead, invest in a high-quality gel food coloring. Americolor Super Red is an excellent choice for its intense color without affecting taste or texture.
- White Chocolate: The luscious white chocolate chunks are a highlight of these cookies. We prefer using good quality white chocolate bars, such as Lindt, chopped into medium-sized pieces. This allows for delightful pockets of gooey melted chocolate throughout the cookie. If bars aren’t available, high-quality white chocolate chips can also be used.
- Red Decorating Sugar: This adds a beautiful sparkle and a slight crunch to the exterior of the cookies. Red sanding sugar or any coarse red decorating sugar found at your local grocery store or craft supply shop will work wonderfully. It’s a simple step that significantly enhances the visual appeal.
Step-by-Step Instructions for Baking Perfect Red Velvet Cookies
Get ready to create the most decadent Red Velvet Cookies! This detailed guide will walk you through each step, ensuring a successful and enjoyable baking experience. You’ll need an electric mixer for best results – either a stand mixer fitted with a paddle attachment or a hand mixer will work perfectly.
STEP 1: Prepare Dry Ingredients and White Chocolate. In a medium-sized bowl, begin by sifting together your all-purpose flour, unsweetened cocoa powder, baking soda, and salt. Sifting helps to remove any lumps and ensures these dry ingredients are evenly distributed, leading to a perfectly textured cookie. Set this bowl aside. Next, take your chosen white chocolate (bars or chips) and chop them into medium-sized pieces. Uniform pieces will melt consistently and distribute well throughout the dough.
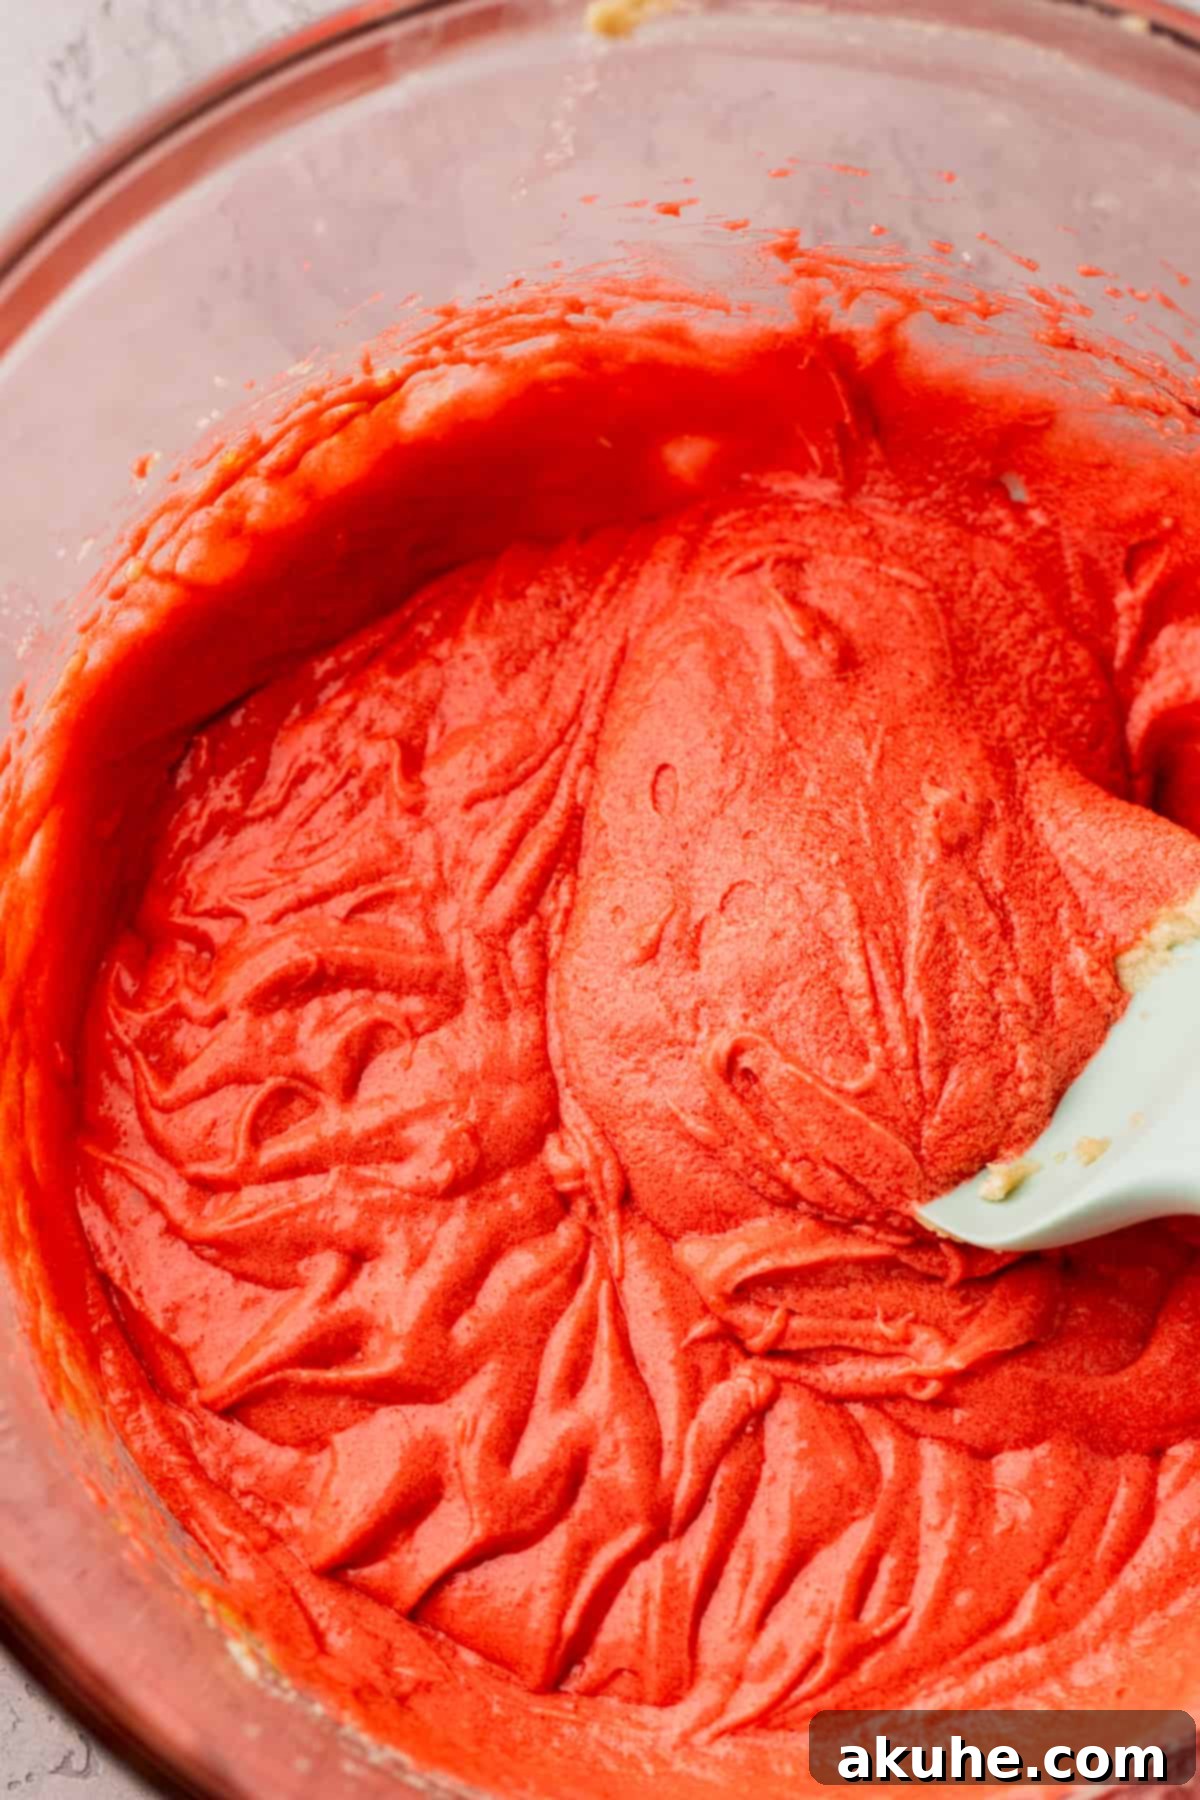
STEP 2: Cream the Butter and Sugars. In a large mixing bowl, combine the melted (and cooled to room temperature) unsalted butter with both the granulated white sugar and light brown sugar. Beat this mixture on high speed with your electric mixer for approximately 2 minutes. During this process, the sugars will dissolve slightly into the butter, and the mixture will become visibly lighter in color and fluffier in texture. This step incorporates air, which contributes to the cookies’ soft and chewy consistency.
STEP 3: Incorporate Wet Ingredients. Reduce your mixer speed to low, then add the room temperature eggs one at a time, ensuring each is fully incorporated before adding the next. Follow with the pure vanilla extract and the vibrant red food dye. Mix until all the wet ingredients are well combined and the mixture boasts a uniform, rich red color. Scrape down the sides of the bowl as needed to ensure everything is thoroughly mixed.
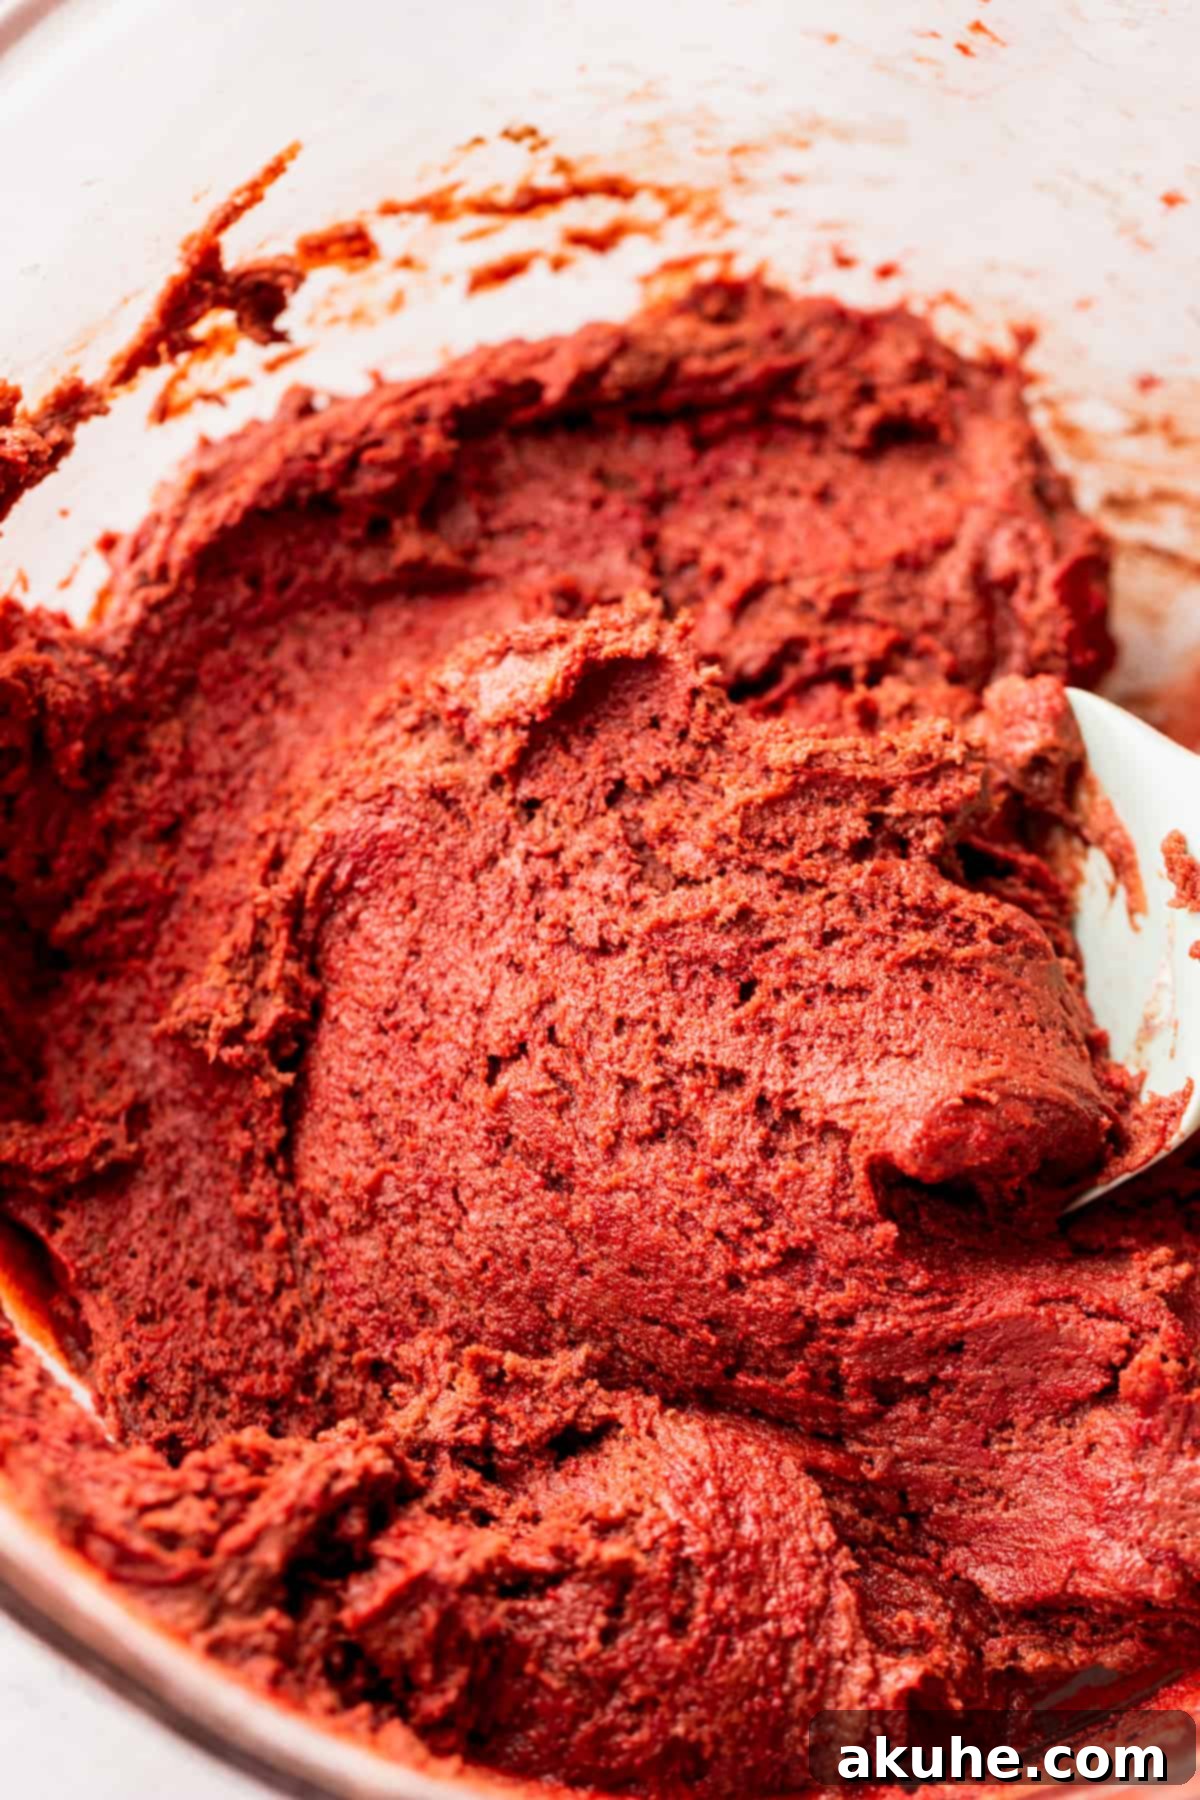
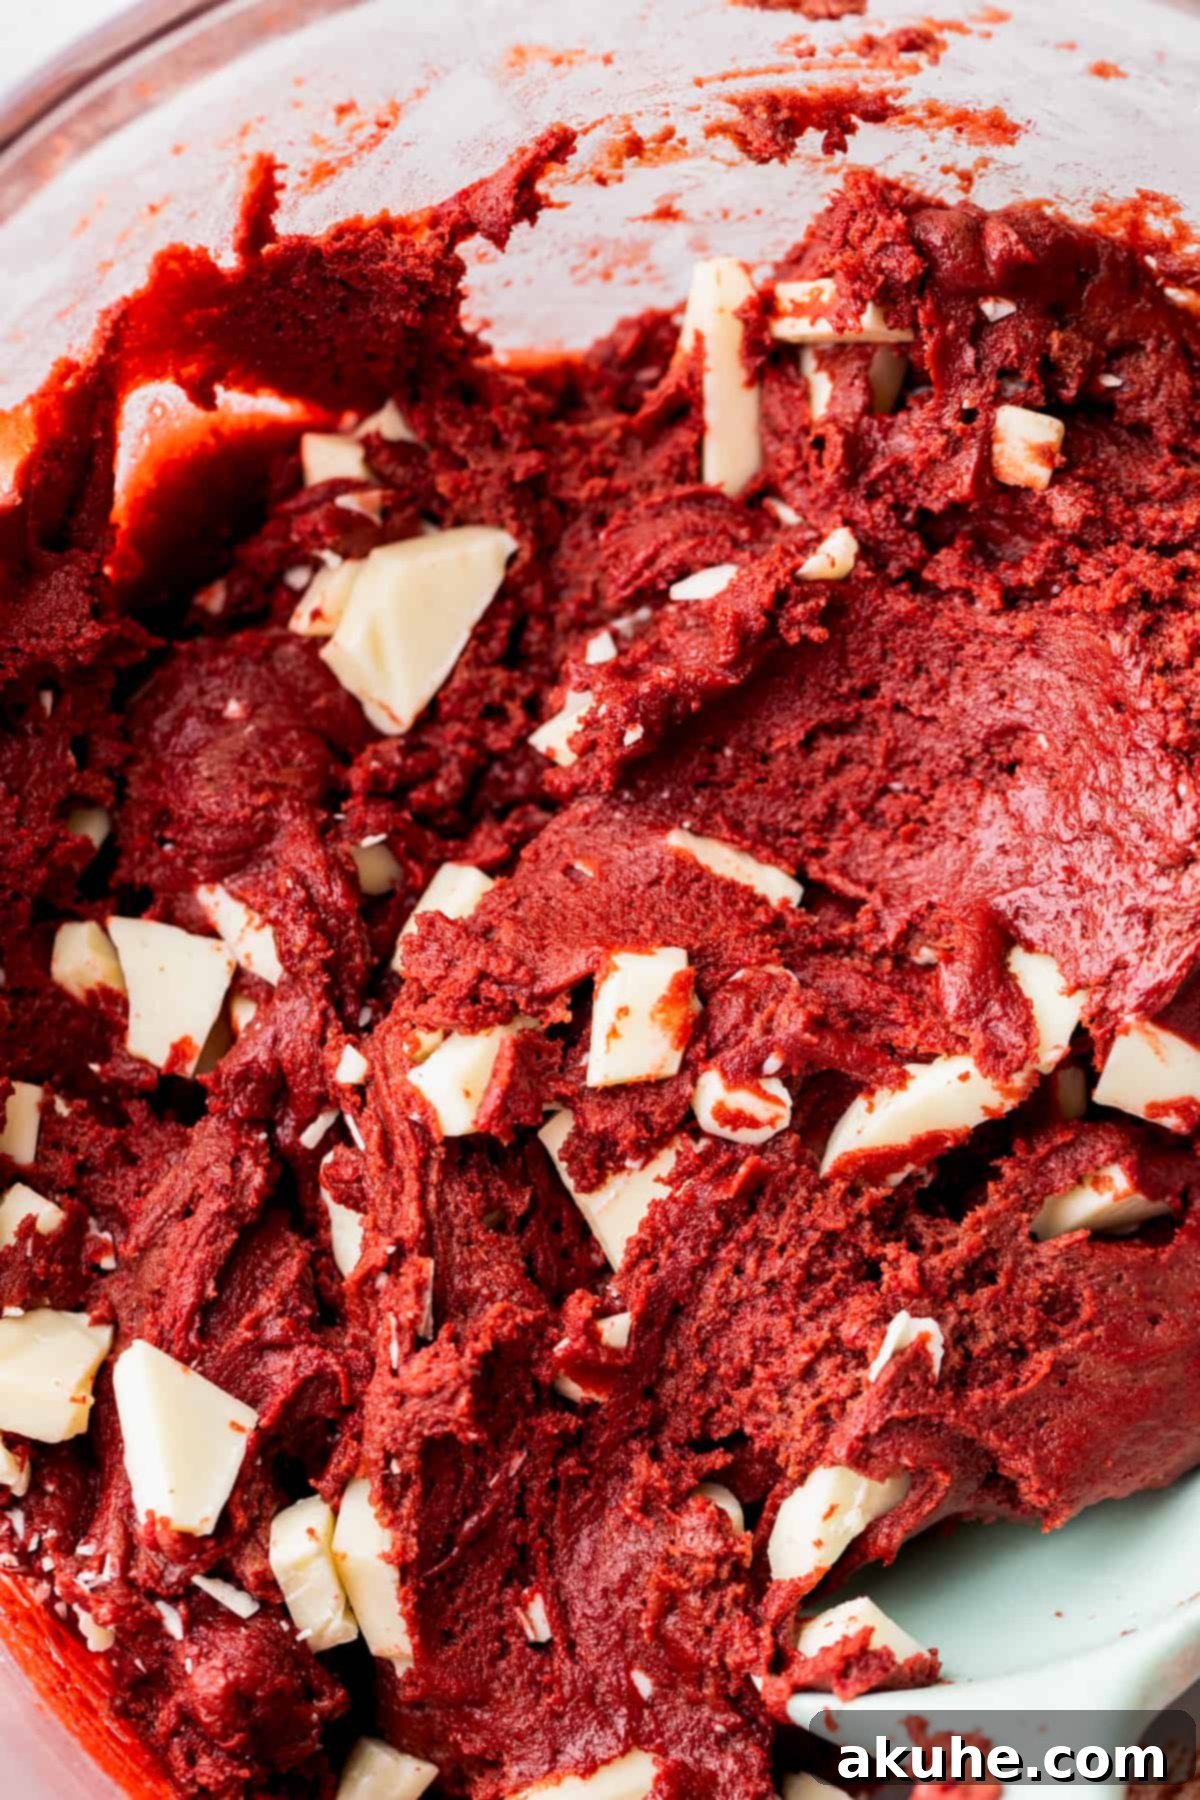
STEP 4: Combine Wet and Dry Mixtures. Gradually add the sifted flour mixture to the wet ingredients in the large bowl. Mix on low speed until the dry ingredients are just combined with the wet, being careful not to overmix. Overmixing can develop the gluten in the flour, leading to tough cookies. As soon as no streaks of flour remain, remove the bowl from the mixer. Using a sturdy spatula, gently fold in the chopped white chocolate until it’s evenly distributed throughout the red velvet cookie dough.
STEP 5: Preheat Oven and Rest Dough. Preheat your oven to 350°F (175°C). While the oven is heating, line two large cookie sheets with parchment paper. This prevents sticking and ensures even baking. Allow your cookie dough to rest at room temperature for 10-15 minutes while the oven preheats. This crucial resting period allows the flour to fully hydrate, which helps prevent the cookies from spreading too much during baking, resulting in beautifully thick, chewy cookies.
STEP 6: Scoop and Decorate. Pour your red decorating sugar into a shallow bowl. Using a large cookie scoop (approximately 3 tablespoons or 2 ounces of dough), portion out your cookie dough balls. Roll each dough ball generously in the red sugar, ensuring it’s completely coated for that dazzling, festive finish. Place approximately 6 cookie dough balls per prepared cookie sheet, leaving ample space between them to allow for spreading.
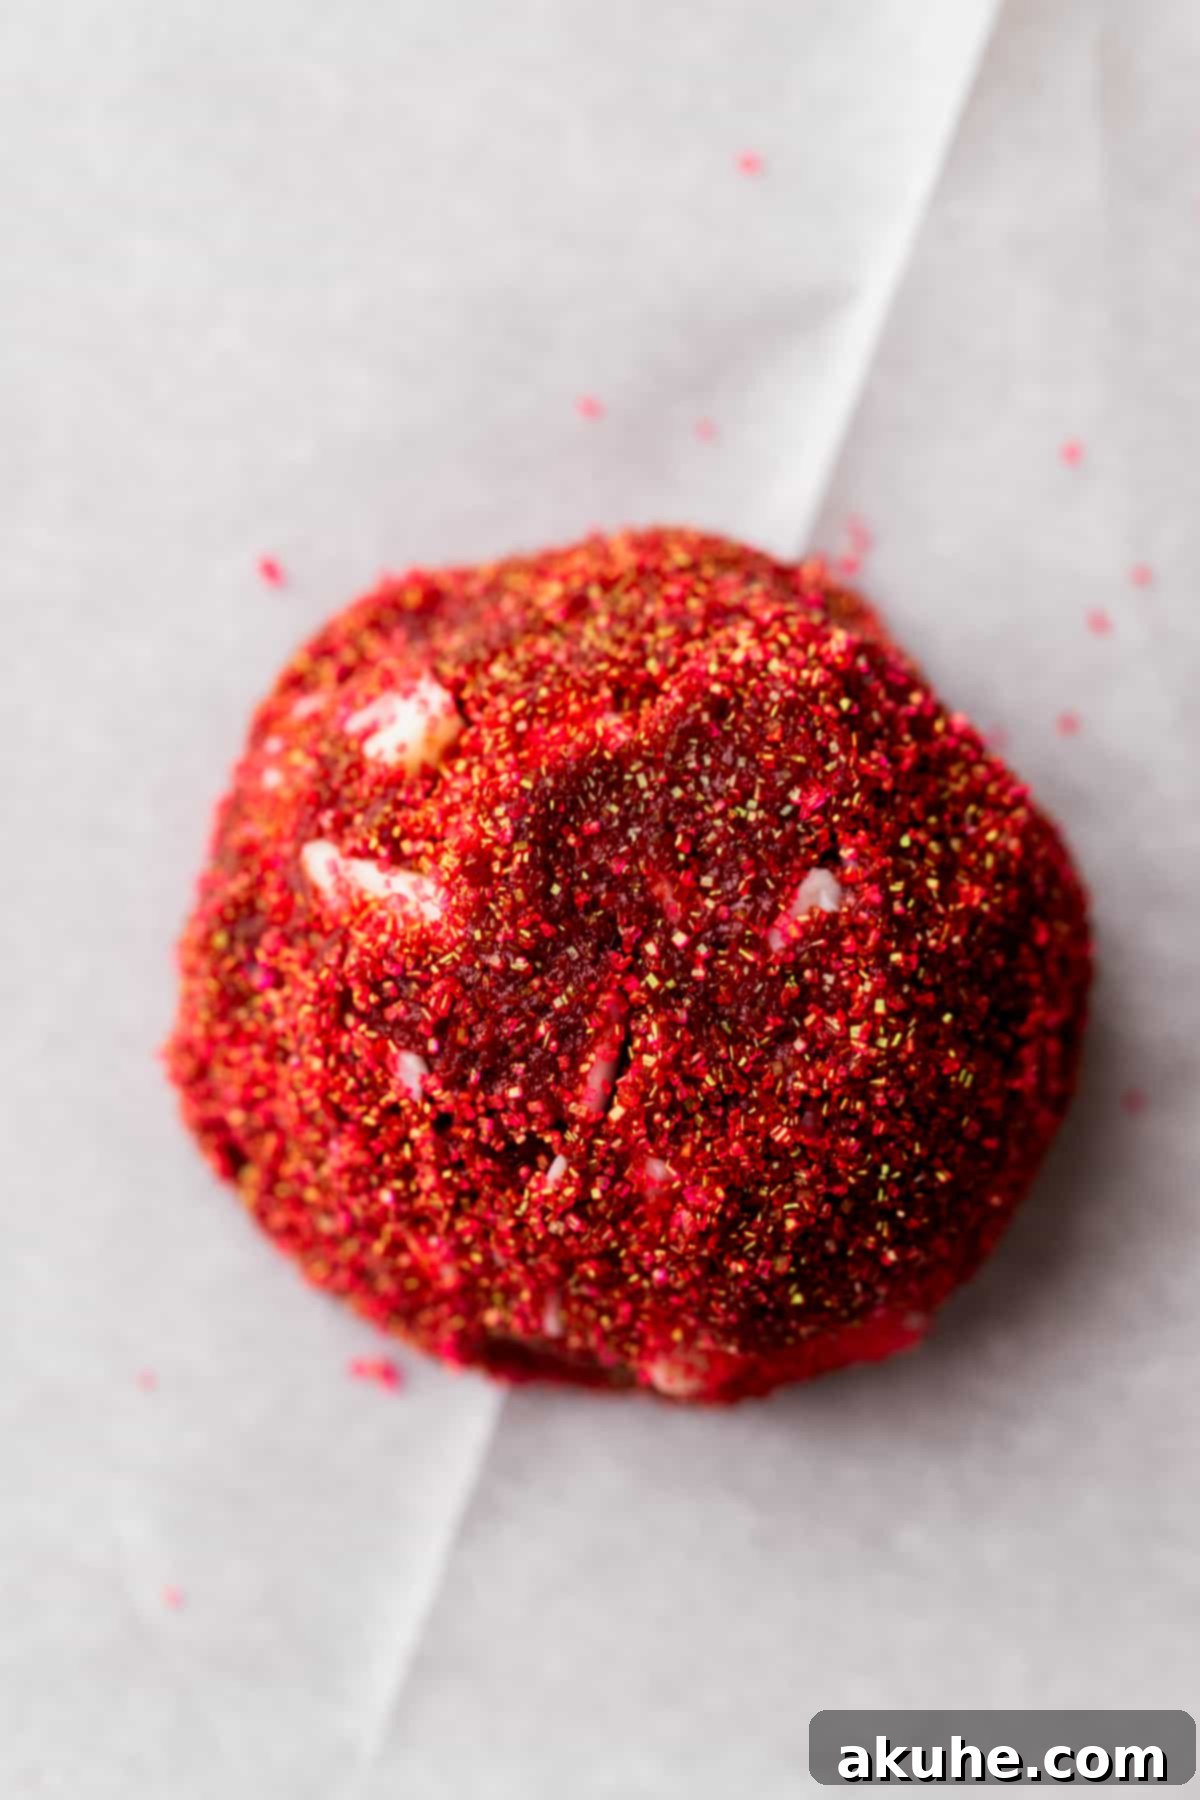
STEP 7: Bake the Cookies. Bake one cookie sheet at a time in your preheated oven for 13-15 minutes. Baking one sheet at a time ensures even heat distribution and consistent results. The edges of the cookies should be lightly set, but the centers should still look slightly soft and puffy. For an extra touch of indulgence and visual appeal, optionally top the warm cookies with a few extra white chocolate chips or chunks immediately after they come out of the oven. The residual heat will melt them slightly, creating a beautiful, glossy finish.
STEP 8: Cool and Enjoy. Once baked, allow the cookies to cool on the baking sheet for a crucial 5 minutes. This allows them to set up properly and prevents them from breaking when transferred. After 5 minutes, carefully transfer the warm cookies to a wire rack to cool completely. This ensures air circulation, preventing the bottoms from becoming soggy and maintaining their perfect chewy texture.
Expert Baking Tips for Flawless Red Velvet Cookies
Achieving bakery-perfect cookies is within reach with these expert tips and tricks. Pay attention to these details, and your Red Velvet Cookies will be nothing short of spectacular every time.
- Precision in Flour Measurement: The way you measure flour profoundly impacts cookie texture. Always spoon your all-purpose flour into the measuring cup, then level it off with the back of a knife. Never scoop directly from the bag with your measuring cup, as this compacts the flour, adding too much to the recipe. Excess flour can lead to dry, crumbly cookies that don’t spread properly during baking. For ultimate accuracy, consider using a kitchen scale to measure flour by weight (grams) if your recipe provides those measurements.
- Troubleshooting Cookie Spreading: If you find your cookies spreading too much, there are a few things to check. Firstly, always use parchment paper on your cookie sheets. It provides a non-stick surface and helps regulate heat for even baking. Excessive spreading can also be caused by butter that was too warm when incorporated into the dough. Ensure your melted butter has cooled to room temperature before mixing. If spreading is still an issue, chilling the scooped cookie dough balls for 10-15 minutes (or even up to an hour) before baking can firm up the butter and prevent over-spreading.
- High Altitude Adjustments: Baking at high altitudes can present unique challenges, often causing cookies to spread more or bake differently due to lower atmospheric pressure. To counteract this, add an extra 2 tablespoons of all-purpose flour to the dry ingredients. This small adjustment helps stabilize the dough and maintain the cookie’s structure, preventing excessive spreading and ensuring a desirable chewy texture.
- Room Temperature Ingredients: Beyond eggs, ensure all dairy ingredients like butter are at room temperature as specified. This allows them to emulsify correctly with other ingredients, creating a smooth, uniform dough that bakes evenly and contributes to the cookies’ desirable texture.
- Do Not Overbake: Red velvet cookies are best when they are soft and chewy. Pull them from the oven when the edges are just set and lightly golden, but the centers still look slightly underbaked or puffy. They will continue to cook slightly from residual heat on the baking sheet.
Frequently Asked Questions About Red Velvet Cookies
Absolutely! To create smaller, more delicate cookies, use a small cookie scoop (about 1.5 tablespoons of dough) to portion your dough balls. You can typically fit about 12 smaller cookie dough balls per cookie sheet. Adjust the baking time accordingly, usually for 8-11 minutes, or until the edges are set and the centers are still slightly soft.
Yes, freezing the cookie dough balls is an excellent way to prepare ahead! Simply scoop the dough balls as directed, roll them in red sugar if desired, then place them on a parchment-lined baking sheet and freeze until firm. Once frozen, transfer them to an airtight container or a freezer-safe plastic bag. They can be stored in the freezer for up to 30 days. When you’re ready to bake, let the frozen cookie dough balls thaw at room temperature for about 30-60 minutes before baking according to the recipe instructions.
You can certainly chill the cookie dough overnight to enhance its flavors and firm up the butter for less spreading. For the best results, we recommend portioning the dough into balls first before chilling. Roll them in red sugar, then arrange them on a baking sheet and cover tightly with plastic wrap. Refrigerate overnight. Before baking, make sure the cookie dough balls come to room temperature for about 30-60 minutes to ensure even baking and the perfect chewy texture.
Storing and Freezing Your Red Velvet Cookies
To keep your delicious Red Velvet Cookies fresh and delightful for as long as possible, proper storage is key. Following these guidelines will ensure their soft, chewy texture and rich flavor remain intact.
Store baked Red Velvet Cookies at room temperature in an airtight container. A cookie jar or a sealed plastic container works perfectly. Properly stored, these cookies will maintain their freshness and delightful texture for up to 5 days. For optimal enjoyment, consume them within 2-3 days.
Freezing Baked Red Velvet Cookies
If you wish to extend the life of your Red Velvet Cookies, they freeze beautifully. Once the cookies have completely cooled to room temperature, place them in a single layer on a baking sheet and freeze for about 1-2 hours until solid. This step prevents them from sticking together. Then, transfer the frozen cookies to an airtight freezer-safe container or a heavy-duty freezer bag. They can be frozen for up to 30 days without compromising quality. When you’re ready to enjoy them, simply thaw the cookies at room temperature for 1-2 hours before serving. They’ll taste almost as fresh as the day they were baked!

More Delightful Valentine’s Recipes To Try
We hope you loved making these Red Velvet Cookies! We’d be thrilled if you could leave a STAR REVIEW below to share your experience. Don’t forget to tag us on Instagram @stephaniesweettreats with your beautiful creations. For more baking inspiration and sweet ideas, make sure to follow us on Pinterest. Happy baking!

Red Velvet Cookies
Print Recipe
Pin Recipe
Leave a Review
20 minutes
14 minutes
34 minutes
14 large cookies
Ingredients
- 2 1/2 cups All-purpose flour
- 1/4 cup Unsweetened cocoa powder
- 1 tsp Baking soda
- 1 tsp Salt
- 1 cup Unsalted butter, melted and cooled
- 3/4 cup Brown sugar, packed light or dark
- 3/4 cup White granulated sugar
- 2 Large eggs, room temperature
- 1 tsp Pure vanilla extract
- 1 tsp Red velvet dye., Use a gel dye. Americolor super red is recommended for best results.
- 1 1/2 cups Chopped white chocolate, Lindt white chocolate bars or quality white chocolate chips.
- Red decorating sugar, for rolling the cookies.
Instructions
- In a medium bowl, sift the all-purpose flour, cocoa powder, baking soda, and salt. Set aside. Chop the white chocolate into medium pieces.2 1/2 cups All-purpose flour, 1/4 cup Unsweetened cocoa powder, 1 tsp Baking soda, 1 tsp Salt, 1 1/2 cups Chopped white chocolate
- Using an electric mixer, beat the melted butter (ensure it’s cooled to room temperature), white granulated sugar, and brown sugar. Beat on high for 2 minutes until the mixture lightens in color and becomes fluffy.1 cup Unsalted butter, 3/4 cup Brown sugar, 3/4 cup White granulated sugar
- Add the room temperature eggs, vanilla extract, and red food dye. Mix until thoroughly combined. Gradually add the dry ingredients and mix on low speed until just combined. Remove from the mixer and fold in the chopped white chocolate with a spatula.2 Large eggs, 1 tsp Pure vanilla extract, 1 tsp Red velvet dye.
- Preheat your oven to 350°F (175°C). Line two cookie sheets with parchment paper. While the oven preheats, let the cookie dough rest for 10-15 minutes to help prevent excessive spreading.
- Pour the red decorating sugar into a shallow bowl. Use a large cookie scoop (3 tablespoons or 2 oz) to portion dough balls, then roll each ball in the red sugar until fully coated. Place 6 cookie dough balls per cookie sheet, ensuring adequate space between them.Red decorating sugar
- Bake one cookie sheet at a time for 13-15 minutes, or until the edges are lightly set and the centers are still slightly soft. Optionally, top with extra white chocolate chips or chunks immediately after removing from the oven for a beautiful finish.
- Allow the cookies to cool on the baking sheet for 5 minutes before carefully transferring them to a wire rack to cool completely.
Notes
High Altitude Baking: Add an extra 2 tablespoons of flour to help with dough stability and prevent spreading.
Room Temperature Ingredients: For best results, pull out dairy ingredients at least 2 hours before baking.
