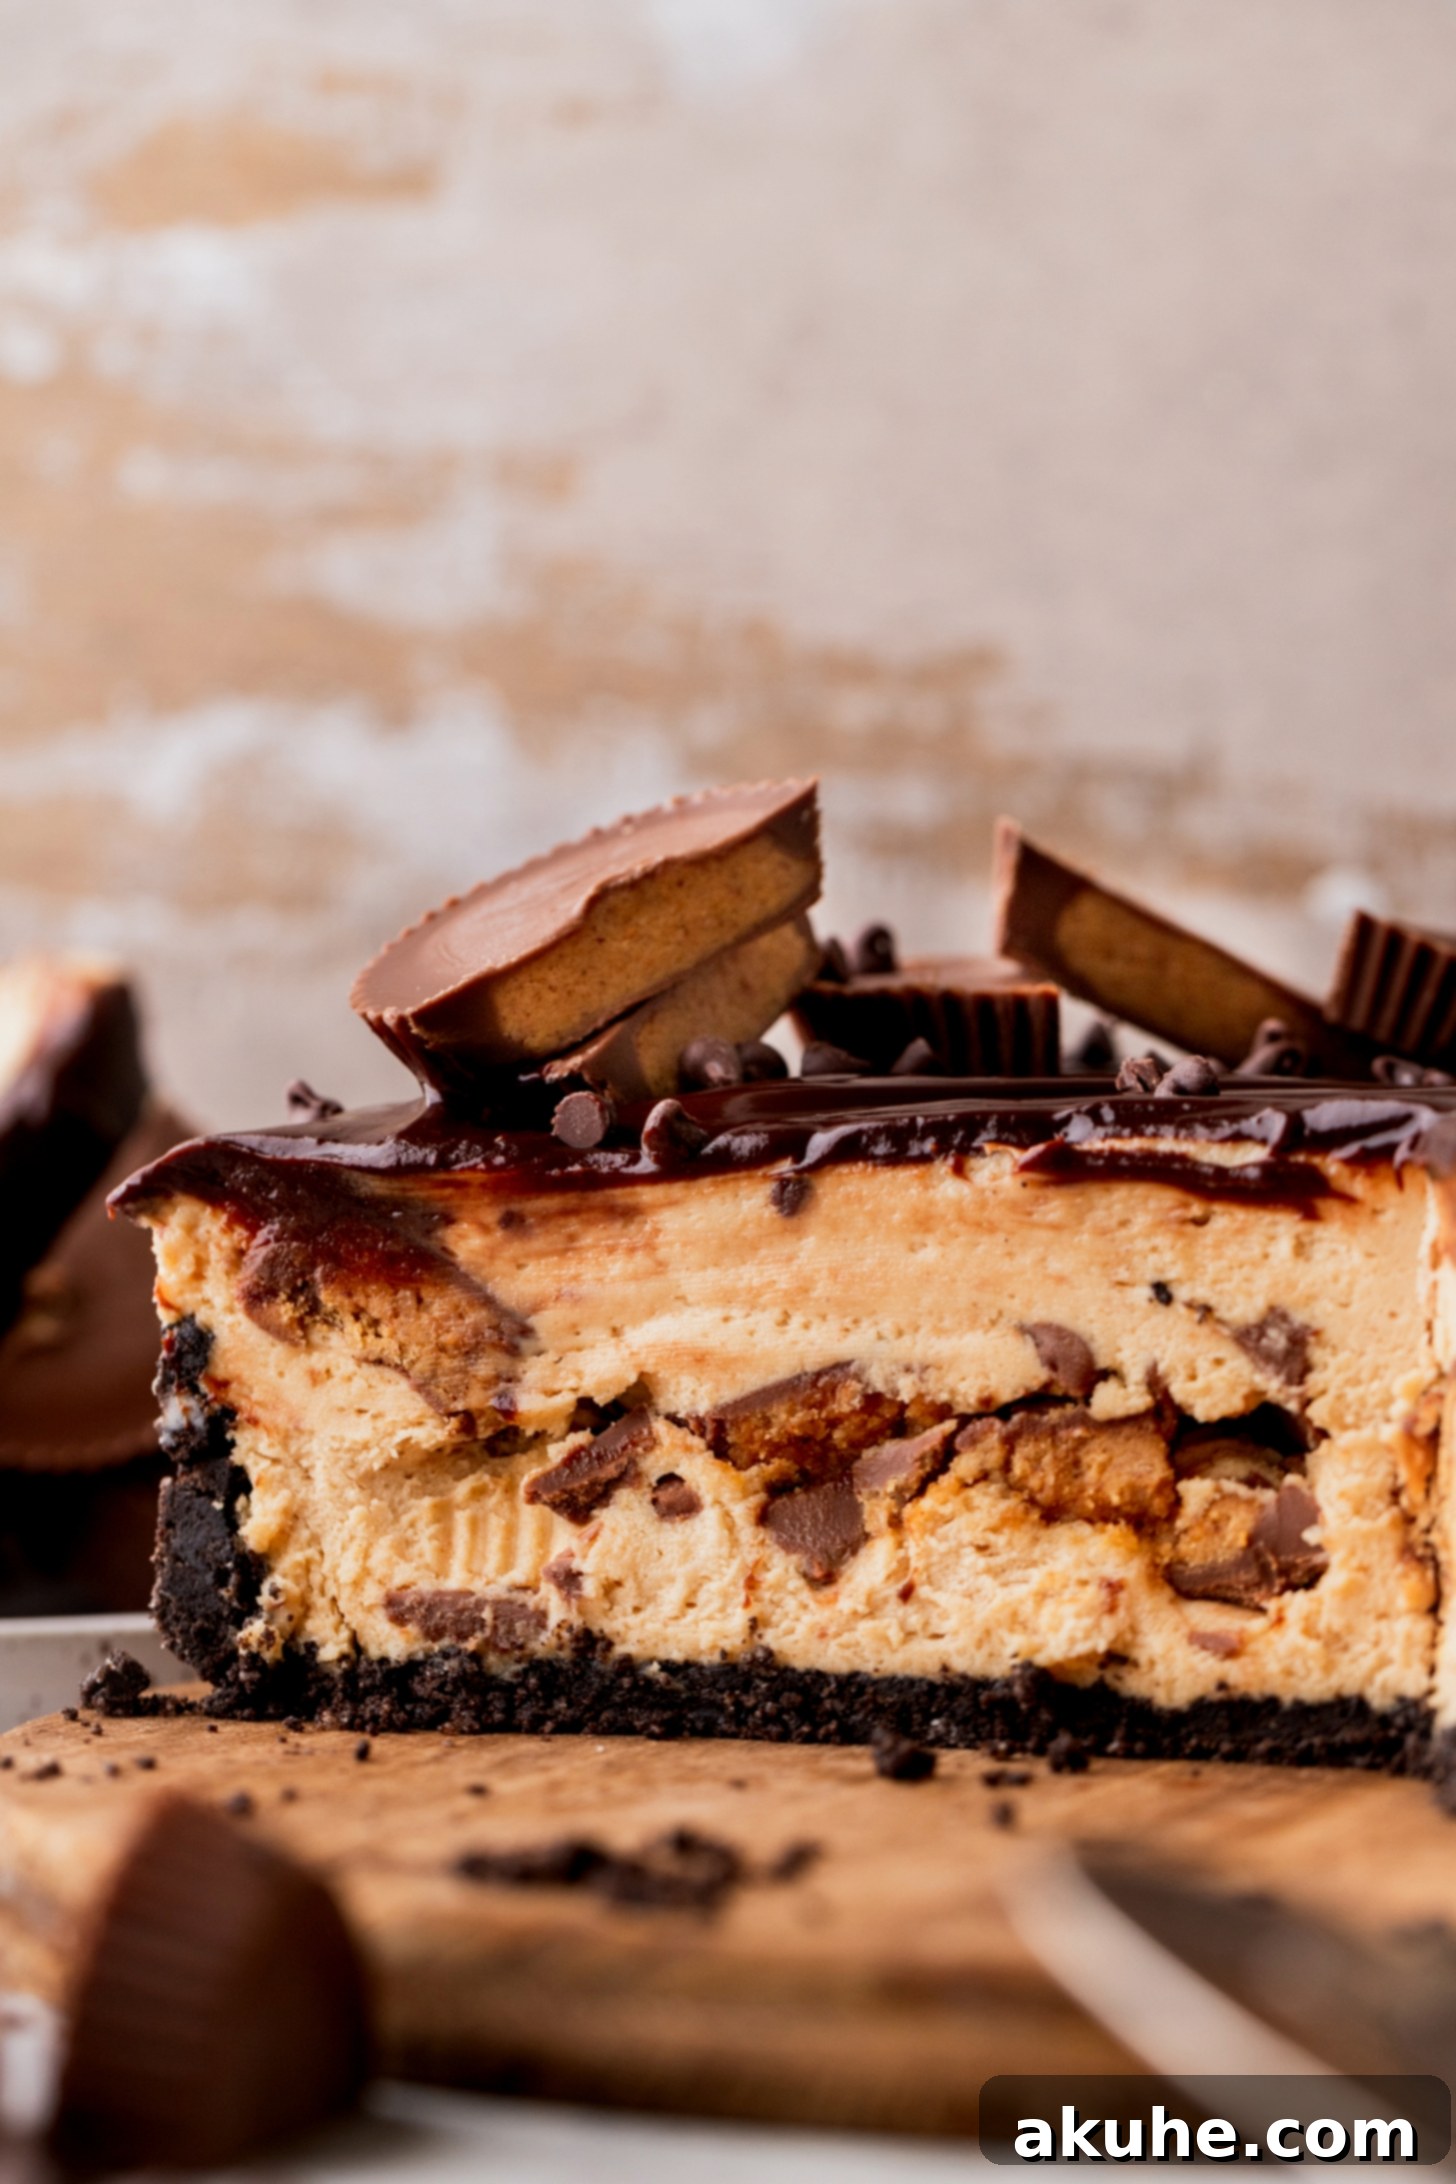
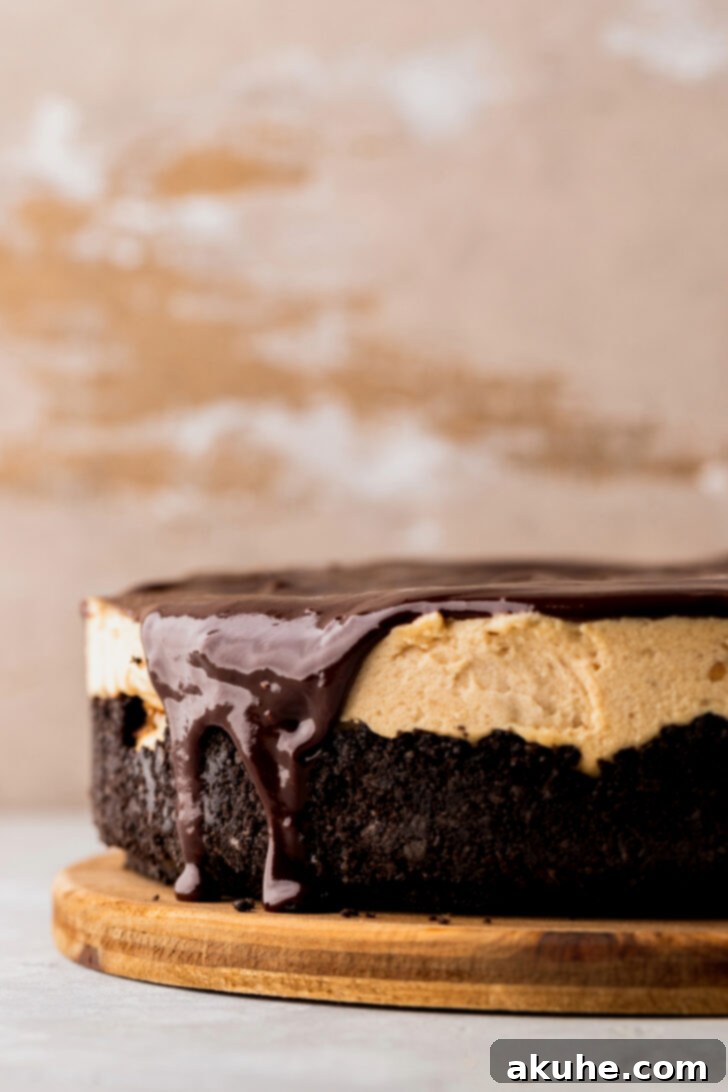
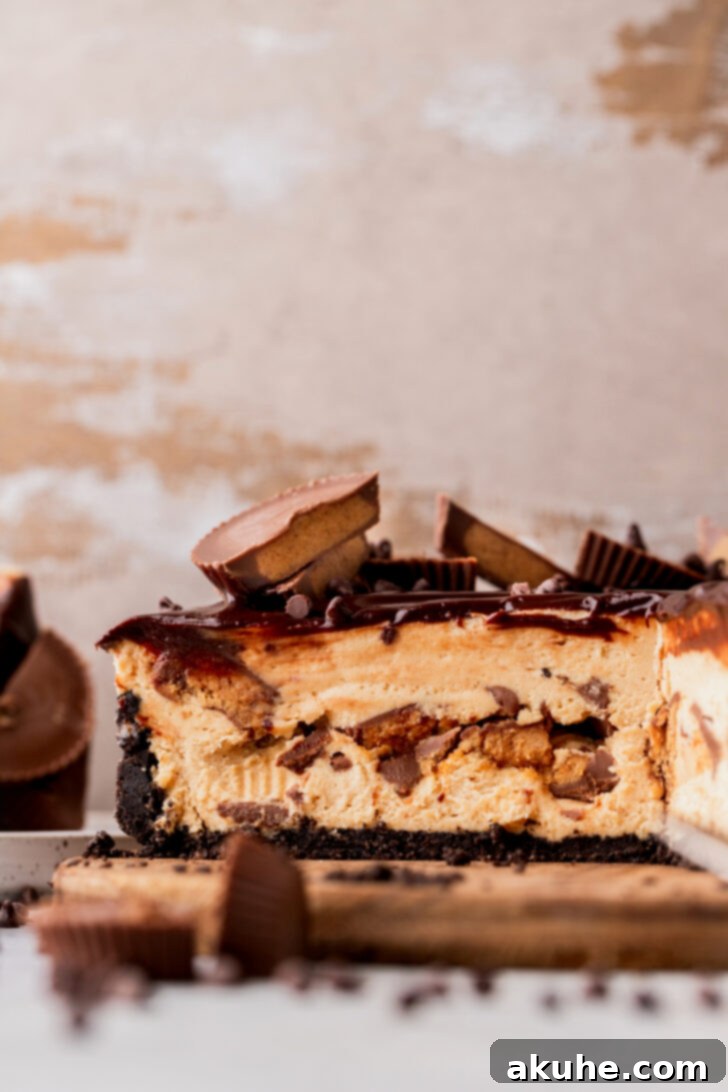
Indulge in the pure bliss of a no-bake Reese’s Peanut Butter Pie, a dessert that perfectly marries the iconic flavors of chocolate and peanut butter. This show-stopping treat features a crumbly Oreo crust, a luxuriously smooth and creamy peanut butter filling, a delightful surprise of Reese’s peanut butter cups tucked inside, and a glossy, rich chocolate ganache topping. It’s an unforgettable dessert that’s surprisingly easy to make, guaranteed to be a hit with both peanut butter and chocolate enthusiasts alike.
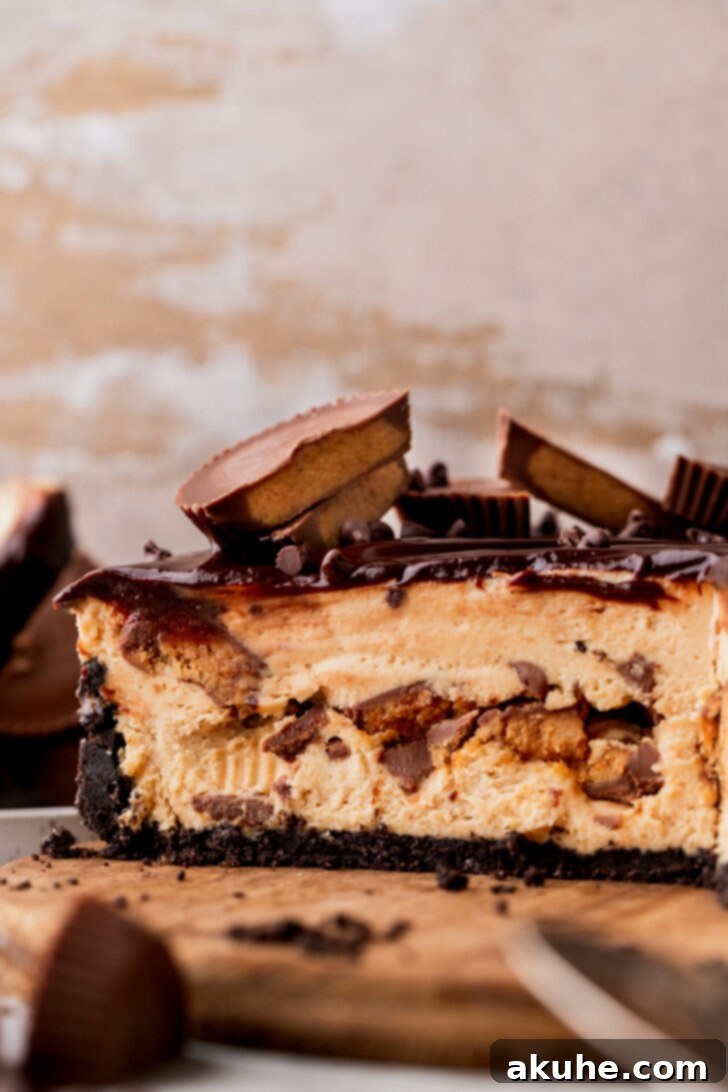
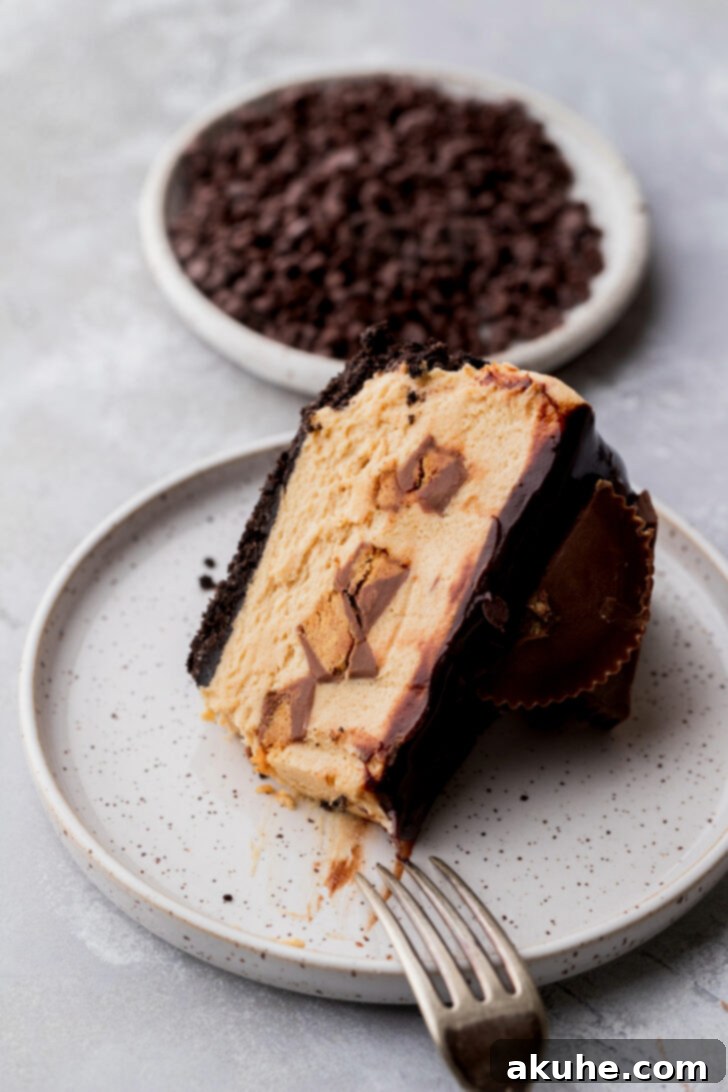
This Reese’s Peanut Butter Pie is more than just a dessert; it’s an experience. Imagine the satisfying crunch of a rich Oreo cookie crust yielding to an incredibly creamy, sweet, and salty peanut butter filling. But the real star? Those delightful Reese’s peanut butter cups hidden within, adding an extra burst of peanut butter goodness. Topped with a silky, homemade chocolate ganache that cascades gracefully over the edges, every slice is a harmonious blend of textures and flavors. Whether you’re a lifelong peanut butter aficionado or a dedicated chocolate lover, this pie is designed to impress and satisfy.
I’m here to guide you every step of the way with essential tips, clever tricks, and detailed process photos, ensuring your pie turns out absolutely perfect. If your heart truly belongs to peanut butter desserts, you simply must explore my chocolate peanut butter pie, which offers another dimension of this beloved flavor pairing.
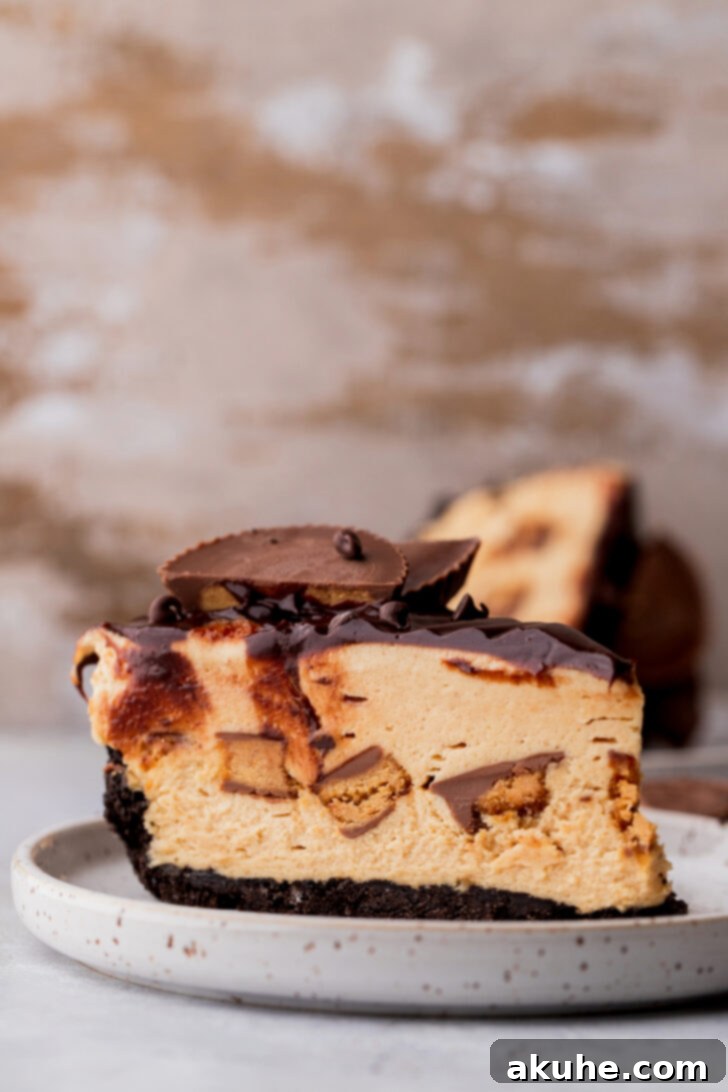
Why This No-Bake Reese’s Peanut Butter Pie Is a Must-Try
Prepare to fall in love with this incredible no-bake dessert! This Reese’s Peanut Butter Pie isn’t just another sweet treat; it’s a culinary delight that promises ease, indulgence, and pure satisfaction. Here’s why it’s destined to become your go-to recipe:
- Effortlessly Delicious & No-Bake: Skip the oven and enjoy a simple, stress-free dessert. Perfect for hot summer days or when you need a show-stopping treat without the baking fuss. The “no-bake” aspect makes it incredibly accessible for all skill levels.
- Irresistible Flavor Combination: The timeless pairing of rich chocolate and creamy peanut butter is elevated in this pie. Each bite delivers a perfect balance of sweet, salty, and decadent notes that Reese’s fans adore.
- Luxuriously Creamy Texture: The filling is whipped to perfection, creating an airy yet substantial consistency that melts in your mouth. It’s smooth, luscious, and utterly divine.
- Hidden Peanut Butter Cup Surprise: What’s better than peanut butter pie? Peanut butter pie with actual Reese’s Peanut Butter Cups layered inside! This unexpected addition provides bursts of intense peanut butter and chocolate flavor, making every forkful an exciting discovery.
- Decadent Chocolate Ganache Topping: A homemade chocolate ganache provides a beautiful, glossy finish and an extra layer of chocolatey richness, perfectly complementing the peanut butter. Its slight drip over the edges adds a professional and inviting touch.
- Perfect for Any Occasion: Whether it’s a birthday, holiday gathering, potluck, or just a casual weeknight dessert, this pie is a crowd-pleaser. Its impressive appearance belies its simple preparation, making you look like a pastry chef with minimal effort.
Essential Tips for Making Your Reese’s Peanut Butter Pie Flawless
Achieving the perfect no-bake pie is simpler than you think when you follow these insider tips. These suggestions are designed to ensure your Reese’s Peanut Butter Pie turns out beautifully creamy, well-set, and utterly delicious, just like the one pictured!
- Tip 1: Timing is Key for Creaminess. Once your Oreo crust is nestled in the freezer and firming up (this allows the butter to set and prevents a crumbly base), immediately begin preparing your filling. Start by whipping the heavy cream until stiff peaks form. Having the whipped cream ready means you can gently fold it into the peanut butter mixture as soon as it’s prepared, preventing any ingredients from sitting too long and ensuring maximum creaminess and volume.
- Tip 2: Embrace the Springform Pan. For effortless serving and a truly stunning presentation, I highly recommend using a springform pan. A 9-inch springform pan allows you to easily release the pie from its sides, revealing clean, beautiful edges without the struggle of trying to pry slices from a traditional pie dish. This dramatically simplifies slicing and serving, especially for a no-bake pie where the crust can be delicate.
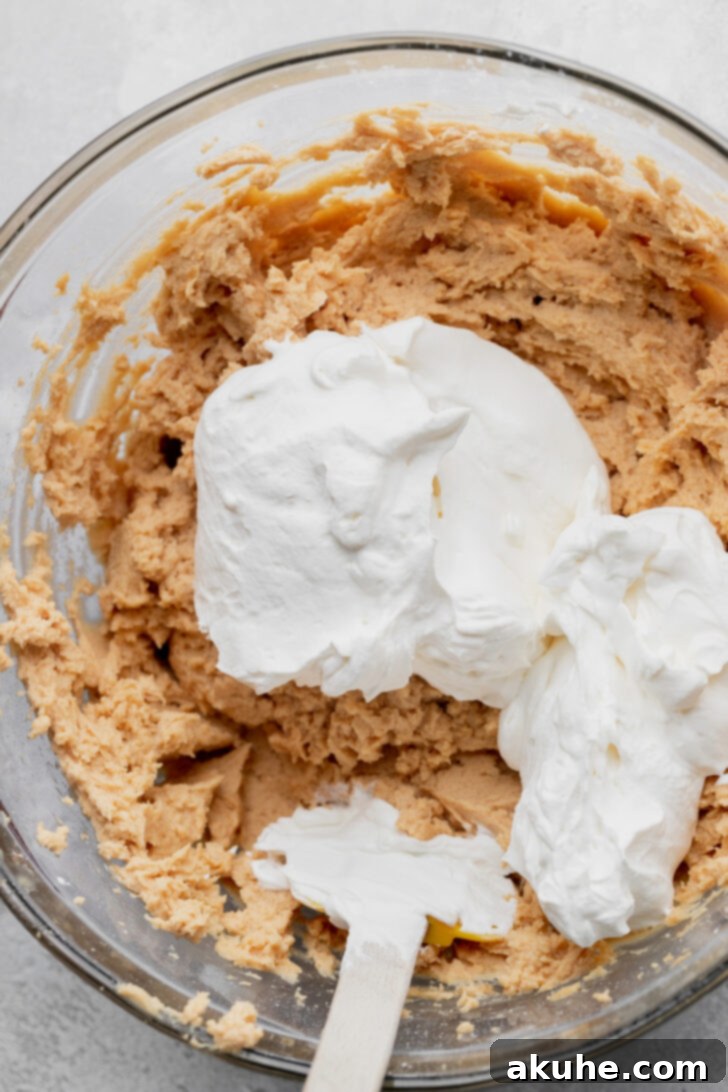
- Tip 3: Master the Gentle Fold. When incorporating the whipped cream into the peanut butter filling, gentleness is paramount. Use a rubber spatula and a folding motion – scooping from the bottom and bringing it over the top – rather than vigorous stirring. Over-mixing can deflate the air from your perfectly whipped cream, resulting in a dense, less creamy filling that may not set properly. Take your time with this step to maintain that light, airy texture.
- Tip 4: Patience with Chilling for Stability. While it might be tempting to dive in sooner, a long chill time is crucial for the pie to fully set and achieve its firm, sliceable consistency. For the best results, I strongly recommend chilling the pie overnight. This allows all the layers to firm up beautifully. Once thoroughly chilled and set, you can then top it with the luscious chocolate ganache and any additional decorations you desire, ensuring a picture-perfect finish.
- Tip 5: Room Temperature Cream Cheese for Smoothness. Ensure your cream cheese is at proper room temperature before you begin mixing the peanut butter filling. Cold cream cheese will result in a lumpy filling, no matter how much you beat it. Softened cream cheese blends smoothly with the peanut butter, creating that desired velvety texture.
- Tip 6: Quality Ingredients Make a Difference. While this recipe is straightforward, using good quality ingredients can elevate your pie from great to unforgettable. Opt for a creamy, good-quality peanut butter (not natural peanut butter that separates, unless you want a different texture), semi-sweet chocolate chips that melt smoothly for the ganache, and full-fat heavy cream for the best whip.
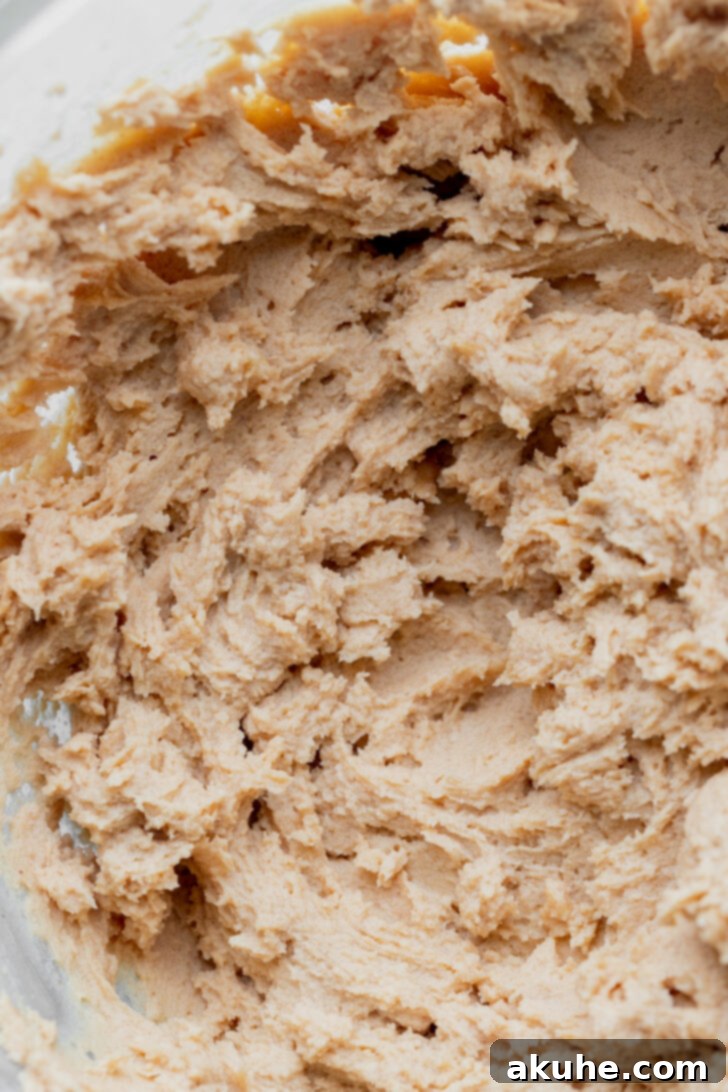
For more delectable peanut butter creations, be sure to try my rich peanut butter cheesecake and these heavenly chocolate peanut butter rolls. They are perfect for expanding your peanut butter dessert repertoire!
Serving Suggestions & Delightful Variations
This Reese’s Peanut Butter Pie is fantastic on its own, but a few simple additions can elevate it even further:
- Classic Presentation: Serve chilled slices with a dusting of cocoa powder or a few mini chocolate chips on top.
- Ice Cream Pairing: A scoop of vanilla bean or chocolate ice cream alongside a slice creates an even more decadent experience.
- Extra Drizzle: Drizzle a little extra melted peanut butter or warm chocolate sauce over each slice just before serving.
- Whipped Cream Garnish: A dollop of extra homemade whipped cream (or store-bought for convenience) and a sprinkle of chopped Reese’s peanut butter cups makes for a beautiful finish.
Feeling adventurous? Try these variations:
- Graham Cracker Crust: If Oreos aren’t your favorite, a simple graham cracker crust makes a wonderful alternative.
- Nutella Swirl: Swirl a bit of Nutella into half of your peanut butter filling before layering for a chocolate-hazelnut twist.
- White Chocolate Ganache: For a different look and flavor, top your pie with a white chocolate ganache instead of dark.
- Mini Pies: Press the Oreo crust into muffin tins lined with paper liners for individual mini Reese’s peanut butter pies. Adjust chilling time accordingly.
How to Store Your Reese’s Peanut Butter Pie
Proper storage ensures your delicious pie remains fresh and delightful for days:
- Refrigeration: Cover the pie loosely with plastic wrap or aluminum foil and store it in the refrigerator for up to 3-5 days. Ensure it’s well-covered to prevent it from absorbing any refrigerator odors.
- Freezing: This pie freezes wonderfully! For best results, freeze the pie uncovered for about an hour until firm. Then, wrap it tightly in several layers of plastic wrap, followed by a layer of aluminum foil. It can be frozen for up to 1-2 months. Thaw in the refrigerator overnight before serving. Slices can also be individually wrapped and frozen for single servings.
Frequently Asked Questions (FAQs)
Here are some common questions you might have about making this irresistible pie:
- Can I make this Reese’s Peanut Butter Pie ahead of time?
- Absolutely! This is an excellent make-ahead dessert. In fact, it’s highly recommended to prepare it the day before you plan to serve it to allow ample chilling time for the best texture and stability. The flavors also meld beautifully overnight.
- Why didn’t my pie set properly?
- The most common reasons for a pie not setting are insufficient chilling time or over-mixing the whipped cream into the peanut butter filling. Ensure you chill the pie for at least 6 hours, preferably overnight. When folding in the whipped cream, be very gentle to maintain its airiness, which contributes to the filling’s structure.
- Can I use crunchy peanut butter instead of creamy?
- While creamy peanut butter is recommended for the smoothest, most luxurious filling texture, you can certainly use crunchy peanut butter for a different experience. It will add a pleasant textural contrast, but the overall filling won’t be as uniformly smooth.
- How do I get clean slices of pie?
- For picture-perfect slices, make sure your pie is thoroughly chilled. Use a sharp knife and run it under hot water, then wipe it clean before each slice. This warms the blade slightly, allowing it to cut through the ganache and filling more smoothly. Wipe the knife clean between each cut for the cleanest edges.
- Do I have to use a springform pan?
- While a springform pan is highly recommended for easy removal and presentation, you can use a regular 9-inch pie plate. Just be aware that serving slices might be a bit more challenging, as you’ll need to scoop them out. The taste, however, will be just as amazing!
If you adored this recipe, please consider leaving a star review below! We love seeing your creations, so make sure to tag me on Instagram @stephaniesweettreats. For even more delicious ideas and inspiration, be sure to follow me on Pinterest.
Recipe Video (Placeholder)
A video tutorial for making this Reese’s Peanut Butter Pie would be embedded here, guiding you through each step visually.
Enjoyed by many! Average rating: 5 out of 5 stars from 19 reviews.
Reese’s Peanut Butter Pie
This Reese’s peanut butter pie features an Oreo crust with a super creamy peanut butter pie filling. It has peanut butter cups generously stuffed in the middle and is elegantly topped with a rich chocolate ganache, creating a truly unforgettable no-bake dessert.
Print Recipe | Pin Recipe | Leave a Review
Ingredients
Oreo Crust
- 2 1/2 cups Oreos, crumbled into a fine crumb
- 5 TBSP Unsalted butter, melted
Peanut Butter Pie Filling
- 1 1/2 cups Heavy cream, cold
- 1/2 cup Powdered sugar (for whipped cream)
- 16 oz Cream cheese, room temperature
- 2 cups Peanut butter, creamy (ensure good quality)
- 1 tsp Pure vanilla extract
- 1/2 cup Powdered sugar, sifted (for peanut butter mixture)
- 16 Reese’s peanut butter cups, broken into pieces (snack size recommended; adjust quantity for smaller cups)
Chocolate Ganache
- 1 cup Semi-sweet chocolate chips (high quality for best melt)
- 1/2 cup Heavy cream
- Additional Reese’s peanut butter cups, for decoration (optional)
Instructions
Oreo Crust Preparation
- Spray a 9-inch springform pan or a 9-inch pie pan generously with baking nonstick spray. If using a springform pan, place a parchment paper circle on the bottom for easier removal, then spray again.
- In a food processor or blender, pulse the Oreos until they form a fine, sand-like crumb. Transfer the crumbs to a bowl and mix with the melted unsalted butter using a fork until fully combined and resembling wet sand.
- Press the Oreo crumb mixture firmly into the bottom and up the sides of your prepared pan. Use the bottom of a flat measuring cup or glass to compact the crust tightly.
- Place the pan in the freezer for at least 15-20 minutes while you prepare the filling. This helps the crust set and prevents crumbling.
Crafting the Creamy Peanut Butter Filling
- Prepare the Whipped Cream: Using a stand mixer fitted with a whisk attachment (or a hand mixer), combine the cold heavy cream and 1/2 cup of powdered sugar in a chilled metal bowl. Beat on high speed until stiff peaks form. Set aside.
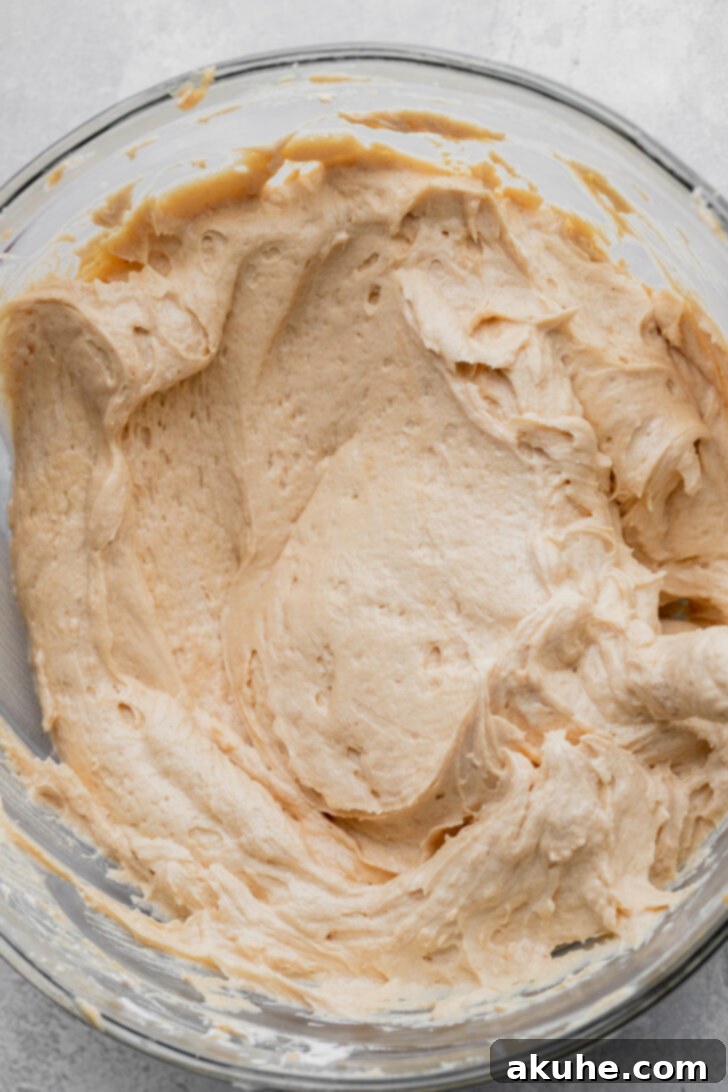
- Make the Peanut Butter Base: In a separate large mixing bowl, beat the softened cream cheese, creamy peanut butter, vanilla extract, and the remaining 1/2 cup of sifted powdered sugar on high speed for about 2 minutes, until the mixture is light, fluffy, and completely smooth. Ensure no lumps remain.
- Combine Gently: Add about half of the prepared whipped cream to the peanut butter mixture. Using a rubber spatula, gently fold it in until just combined. Then, add the remaining whipped cream and fold until the mixture is uniform and creamy, being careful not to overmix to maintain the airy texture.
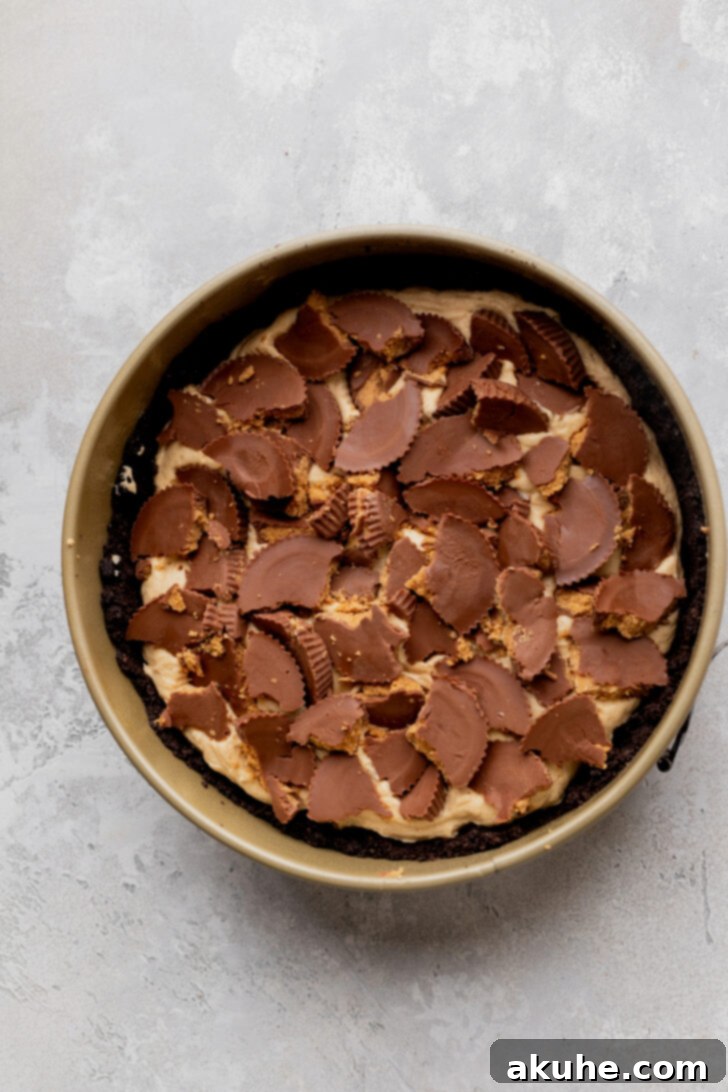
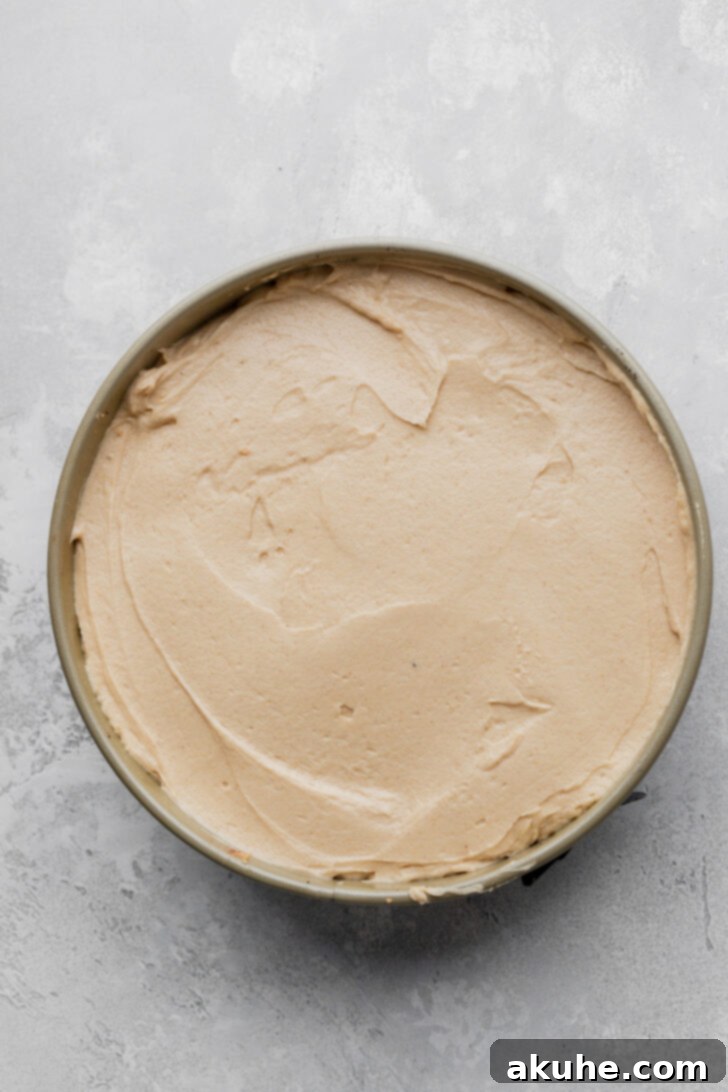
- Assemble the Layers: Retrieve the chilled Oreo crust from the freezer. Pour half of the peanut butter filling evenly over the crust. Sprinkle the broken Reese’s peanut butter cups generously over this layer. Then, carefully spread the remaining peanut butter filling on top, smoothing it out with an offset spatula.
- Chill Thoroughly: Cover the pie loosely with aluminum foil or plastic wrap. Place it in the refrigerator and chill overnight, or for a minimum of 6 hours, to allow the pie to fully set and firm up.
Decadent Chocolate Ganache & Finishing Touches
- Optimal Ganache Timing: For the best results and a clean finish, prepare and pour the ganache only after the pie filling has chilled and set overnight. If using a springform pan, carefully remove the pie from the pan before applying the ganache. If using a standard pie pan, it can remain in the pan. While you *can* pour ganache over a semi-set pie, it truly looks best on a fully chilled, firm surface.
- Make the Ganache: Place the semi-sweet chocolate chips in a small, heatproof bowl. In a small saucepan, heat the heavy cream over medium-low heat until it’s hot and just begins to steam, but do not boil. Pour the hot cream over the chocolate chips and let it sit undisturbed for 2 minutes to allow the chocolate to melt.
- Whisk to Perfection: After 2 minutes, use a rubber spatula or a small whisk to gently mix the chocolate and cream until the ganache is completely smooth, glossy, and silky.
- Apply Ganache: Carefully pour the warm (but not hot) ganache over the top of the chilled, set pie. Gently spread it with an offset spatula to cover the entire surface, allowing some to drip artfully over the edges if desired.
- Final Chill & Decorate: Return the pie to the refrigerator for at least 10-15 minutes to allow the ganache to set. Optional: Before serving, decorate with extra chopped Reese’s peanut butter cups, mini chocolate chips, or a drizzle of melted peanut butter.
Notes
It is crucial to ensure the pie is chilled for at least 6 hours (preferably overnight) before cutting into it. This lengthy chill time allows all the ingredients to firm up, resulting in clean, solid slices that hold their shape beautifully.
Nutrition Information (per serving, estimated):
Calories: 606kcal, Carbohydrates: 41g, Protein: 12g, Fat: 50g, Saturated Fat: 22g, Polyunsaturated Fat: 6g, Monounsaturated Fat: 18g, Trans Fat: 0.2g, Cholesterol: 72mg, Sodium: 334mg, Potassium: 371mg, Fiber: 3g, Sugar: 20g, Vitamin A: 934IU, Vitamin C: 0.2mg, Calcium: 76mg, Iron: 4mg
Did you make this recipe?
Please consider leaving a star rating and review below! Your feedback is incredibly valuable and helps other home bakers discover this delicious recipe.
