The Ultimate Triple Chocolate Cheesecake: A Decadent Delight
Prepare yourself for an unparalleled chocolate experience with this magnificent Triple Chocolate Cheesecake. Far beyond a mere dessert, this creation is a symphony of rich flavors and luxurious textures, boasting not three, but a lavish four layers of chocolatey goodness. From its crunchy Oreo crust to the creamy baked chocolate cheesecake, a silky chocolate ganache topping, and a delicate chocolate whipped cream finish, every single bite promises pure indulgence. You’ll definitely want a tall glass of cold milk to accompany this extraordinary treat! It’s the very definition of a special occasion dessert, absolutely worth every effort and every blissful mouthful.
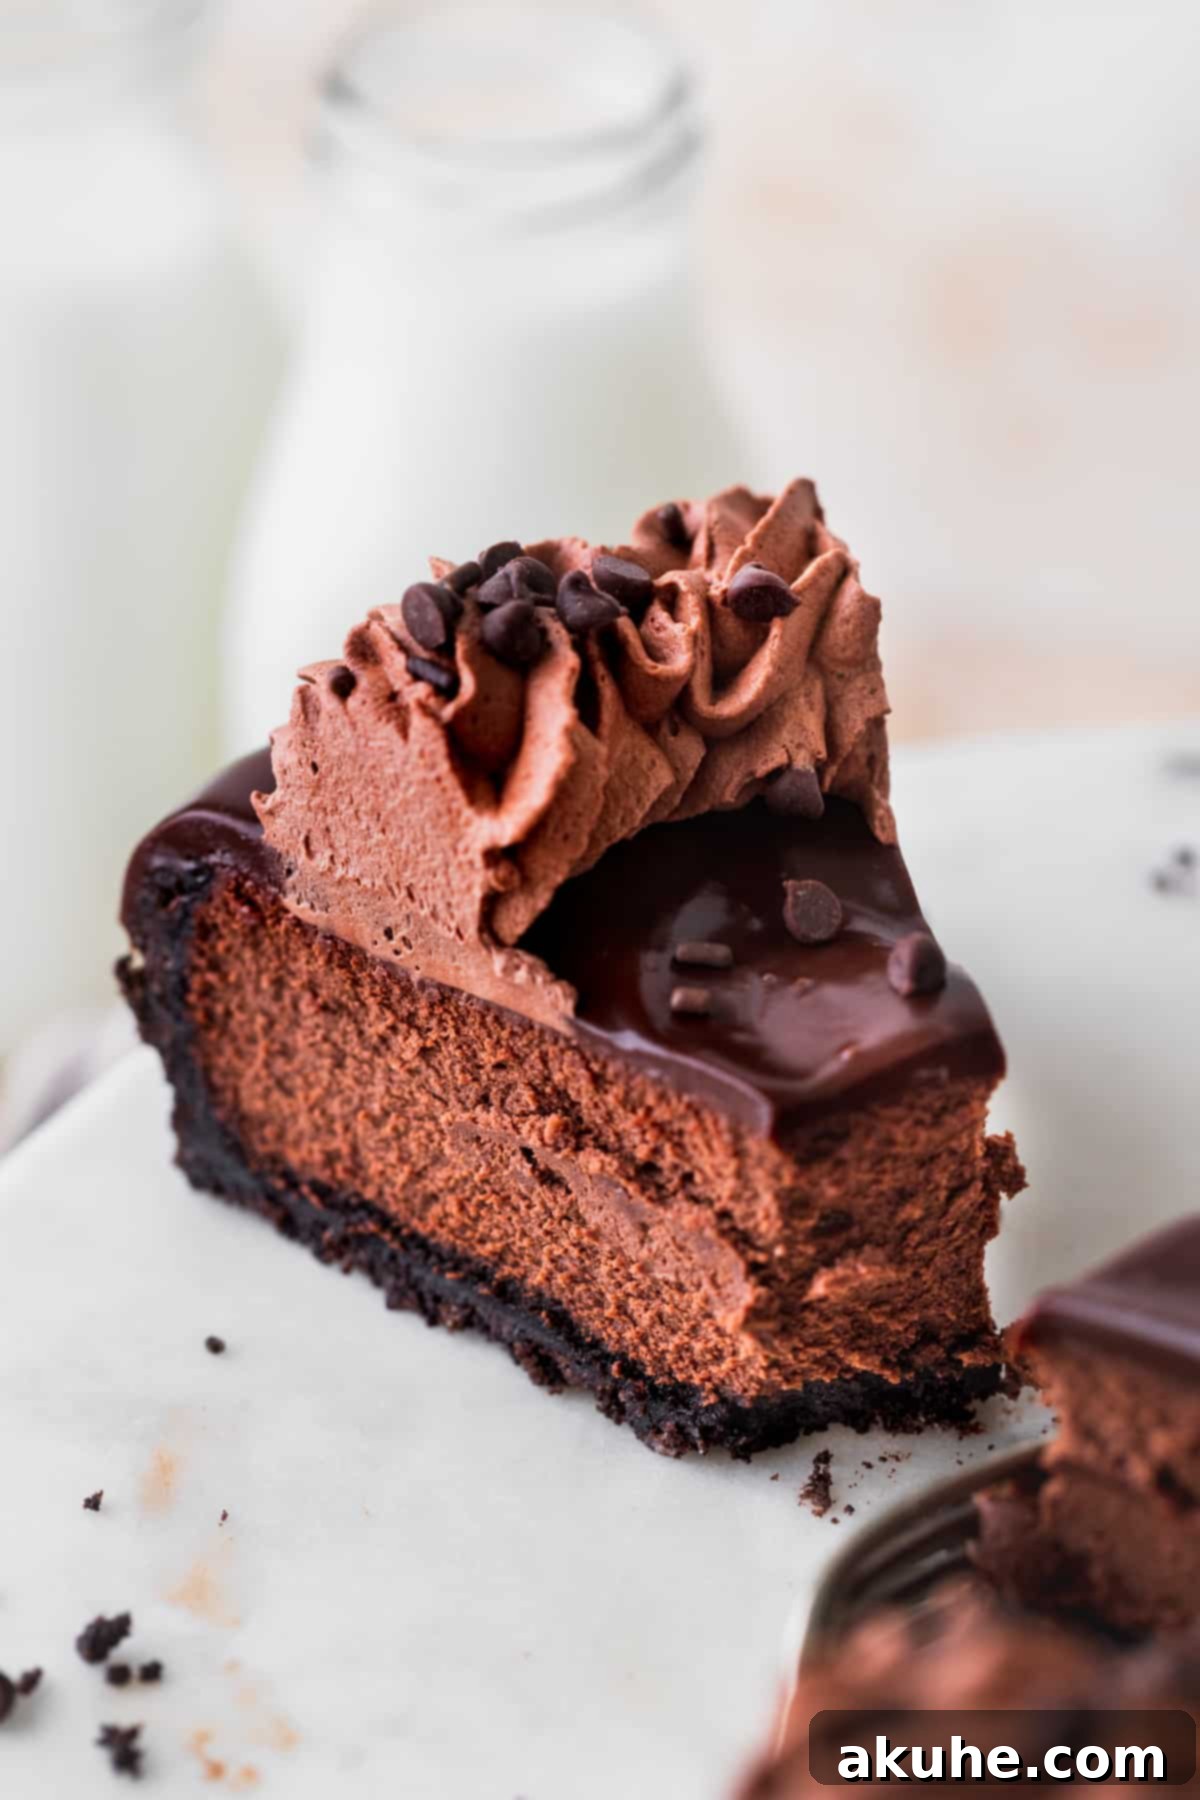
This beloved triple chocolate cheesecake recipe has been a staple in my kitchen and on this blog for quite some time, but it recently received a fresh new look and an enhanced write-up to truly capture its magic. It remains my absolute go-to chocolate cheesecake recipe, cherished for its incredibly creamy consistency and deeply rich, satisfying chocolate flavor that consistently earns rave reviews.
If you’re craving more exquisite chocolate recipes to add to your repertoire, be sure to explore these other delectable options: Chocolate Covered Strawberry Cake, a luscious Layered Blueberry Chocolate Cake, or for a quicker treat, a delightful No-Bake Chocolate Cheesecake.
Why You’ll Fall in Love with This Triple Chocolate Cheesecake
This cheesecake isn’t just another dessert; it’s an experience built on carefully crafted layers. Here’s what makes it truly special and why you’ll want to make it again and again:
- Irresistible Oreo Crust: A true chocolate cheesecake demands a foundation as rich and delightful as the filling itself. Our crust is made with classic Oreos, including their creamy filling, ensuring a perfectly sweet, slightly salty, and delightfully crunchy base that perfectly complements the smooth cheesecake. It’s pressed firmly into the pan, creating a sturdy yet crumbly texture.
- Deeply Flavorful Baked Chocolate Cheesecake: The heart of this dessert is a velvety smooth, baked chocolate cheesecake. We specifically use high-quality Dutch process cocoa powder, which provides a profound, intense chocolate flavor and a beautiful dark color, making each bite incredibly rich and luxurious. The baking process ensures a custardy, melt-in-your-mouth texture that is simply divine.
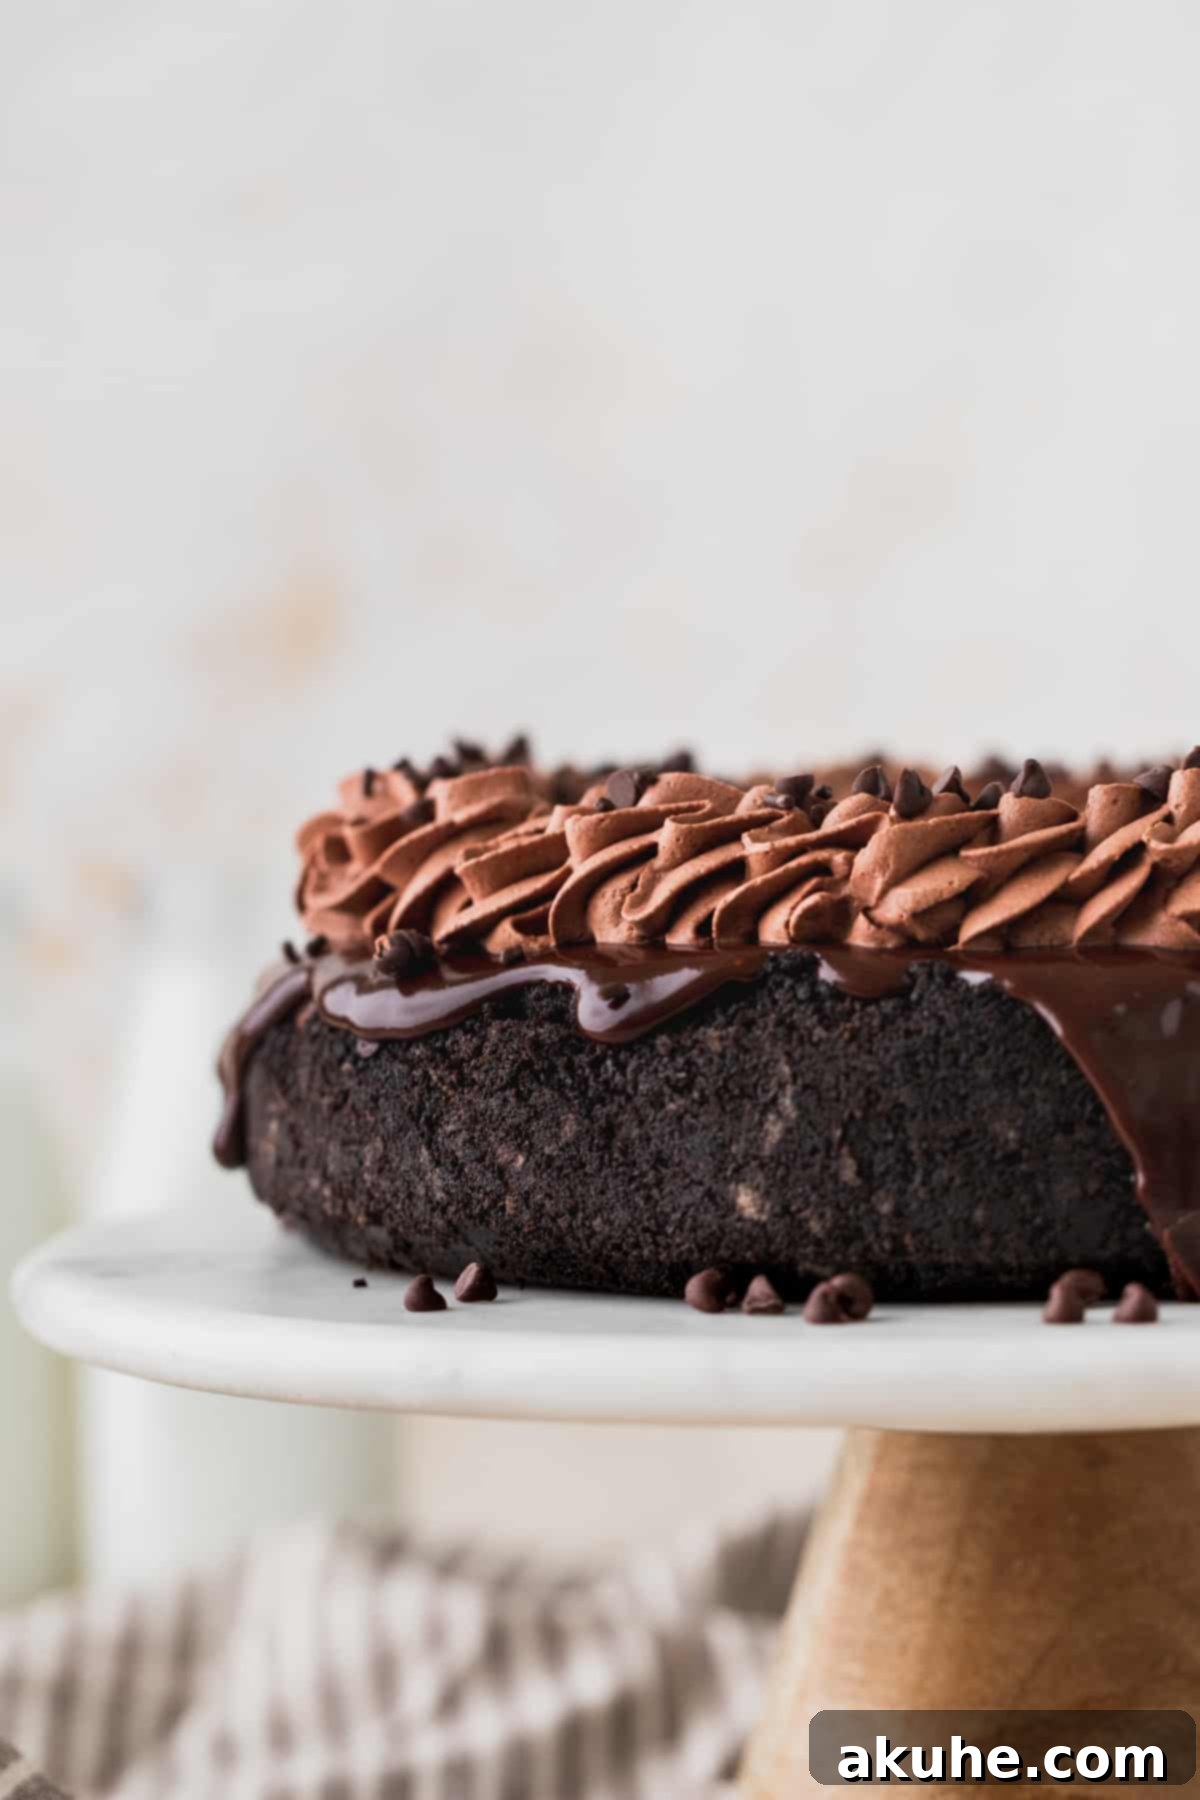
- Silky Chocolate Ganache Topping: Elevating the chocolate factor even further, the baked cheesecake is crowned with a glossy, opulent chocolate ganache. This smooth, decadent layer adds another dimension of intense chocolate flavor and a beautiful finish, gently dripping down the sides for an elegant presentation.
- Light and Creamy Chocolate Whipped Cream: To perfectly balance the richness, the entire cheesecake is artfully finished with a homemade chocolate whipped cream. This airy, creamy topping offers a subtle yet distinct chocolate flavor, adding a delicate contrast and a visually appealing flourish that ties all the layers together harmoniously. It’s the perfect light touch to complete this indulgent masterpiece.
Essential Ingredient Notes for Success
Achieving the perfect texture and flavor for your triple chocolate cheesecake starts with understanding your ingredients. Here are some key notes to ensure your baking goes smoothly:
- Oreos: Stick to regular Oreos for the crust. Avoid using double-stuffed varieties as the extra cream can alter the crust’s texture, making it too soft or greasy. The ratio of cookie to cream in regular Oreos is ideal for a perfectly crumbly yet cohesive crust.
- Cream Cheese: Always opt for full-fat cream cheese for the best results. The fat content is crucial for achieving that signature rich, creamy, and smooth cheesecake texture. Remember to take it out of the refrigerator at least 2 hours before you plan to start baking, allowing it to reach room temperature. This ensures it beats smoothly without lumps, which can lead to cracks.
- Cocoa Powder: For a truly deep and dark chocolate flavor, Dutch process cocoa powder is highly recommended. Unlike natural cocoa, Dutch process cocoa has been alkalized to reduce its acidity, resulting in a richer, milder chocolate taste and a darker color. You can find the specific one I used here.
- Sour Cream: Just like the cream cheese, full-fat sour cream is essential for the cheesecake batter. It adds a delightful tang and contributes significantly to the cheesecake’s incredibly moist and tender crumb. Ensure it’s at room temperature for at least 2 hours before mixing for a perfectly uniform batter.
- Heavy Cream: For the cheesecake batter, bring your heavy cream to room temperature as well (approximately 2 hours prior). This helps it emulsify better with the other ingredients, creating a smoother and more stable batter. For the whipped cream topping, however, you’ll want your heavy cream to be chilled straight from the fridge for optimal whipping.
- Eggs: Large eggs, brought to room temperature, are vital. Room temperature eggs blend more evenly into the batter and help prevent overmixing, which can incorporate too much air and lead to cracks during baking. Pull them out at least 2 hours before you begin.
Crafting Your Triple Chocolate Cheesecake: A Step-by-Step Guide
Creating this show-stopping triple chocolate cheesecake is a rewarding process, broken down into manageable steps. Follow this detailed guide for a perfectly smooth, rich, and crack-free dessert.
The Foundation: Building the Oreo Crust
- Preparation is Key: Begin by preheating your oven to 325°F (160°C). Prepare a 9-inch springform pan by spraying it generously with a non-stick baking spray. To ensure easy removal and prevent sticking, line the bottom of the pan with a 9-inch parchment paper circle, then spray the parchment again. Set the prepared pan aside.
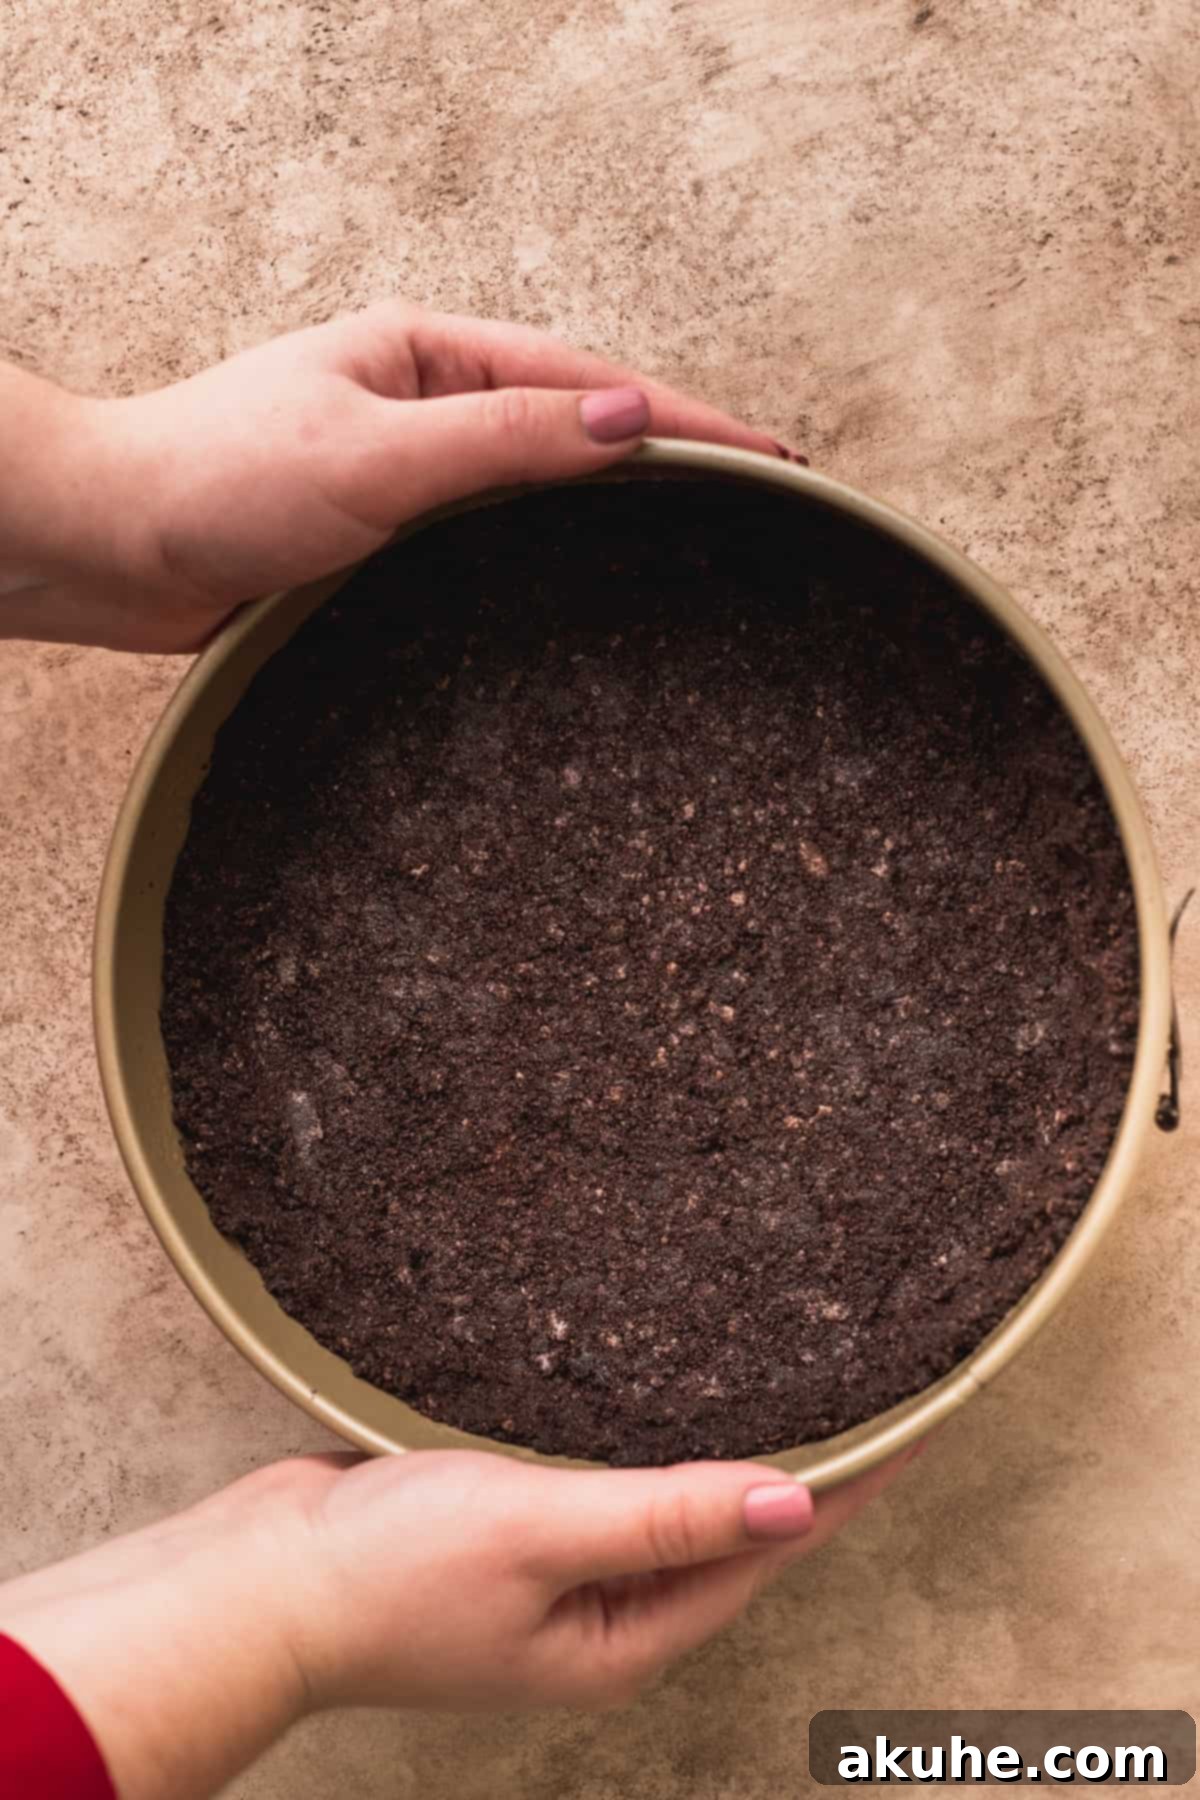
- Crush and Combine: Take your regular Oreos and pulse them in a blender or food processor until they form fine, even crumbs. In a medium bowl, combine these Oreo crumbs with the melted unsalted butter. Use a fork to mix thoroughly until the crumbs are uniformly moistened and hold together when pressed.
- Forming the Crust: Pour the buttery Oreo crumbs into your prepared springform pan. Using your hands, gently but firmly press the mixture across the bottom of the pan and halfway up the sides. For an extra compact and even crust, use the flat bottom of a measuring cup or glass to press down firmly. Bake this crust for 12 minutes. Once baked, remove it from the oven and let it cool slightly while you prepare the cheesecake batter.
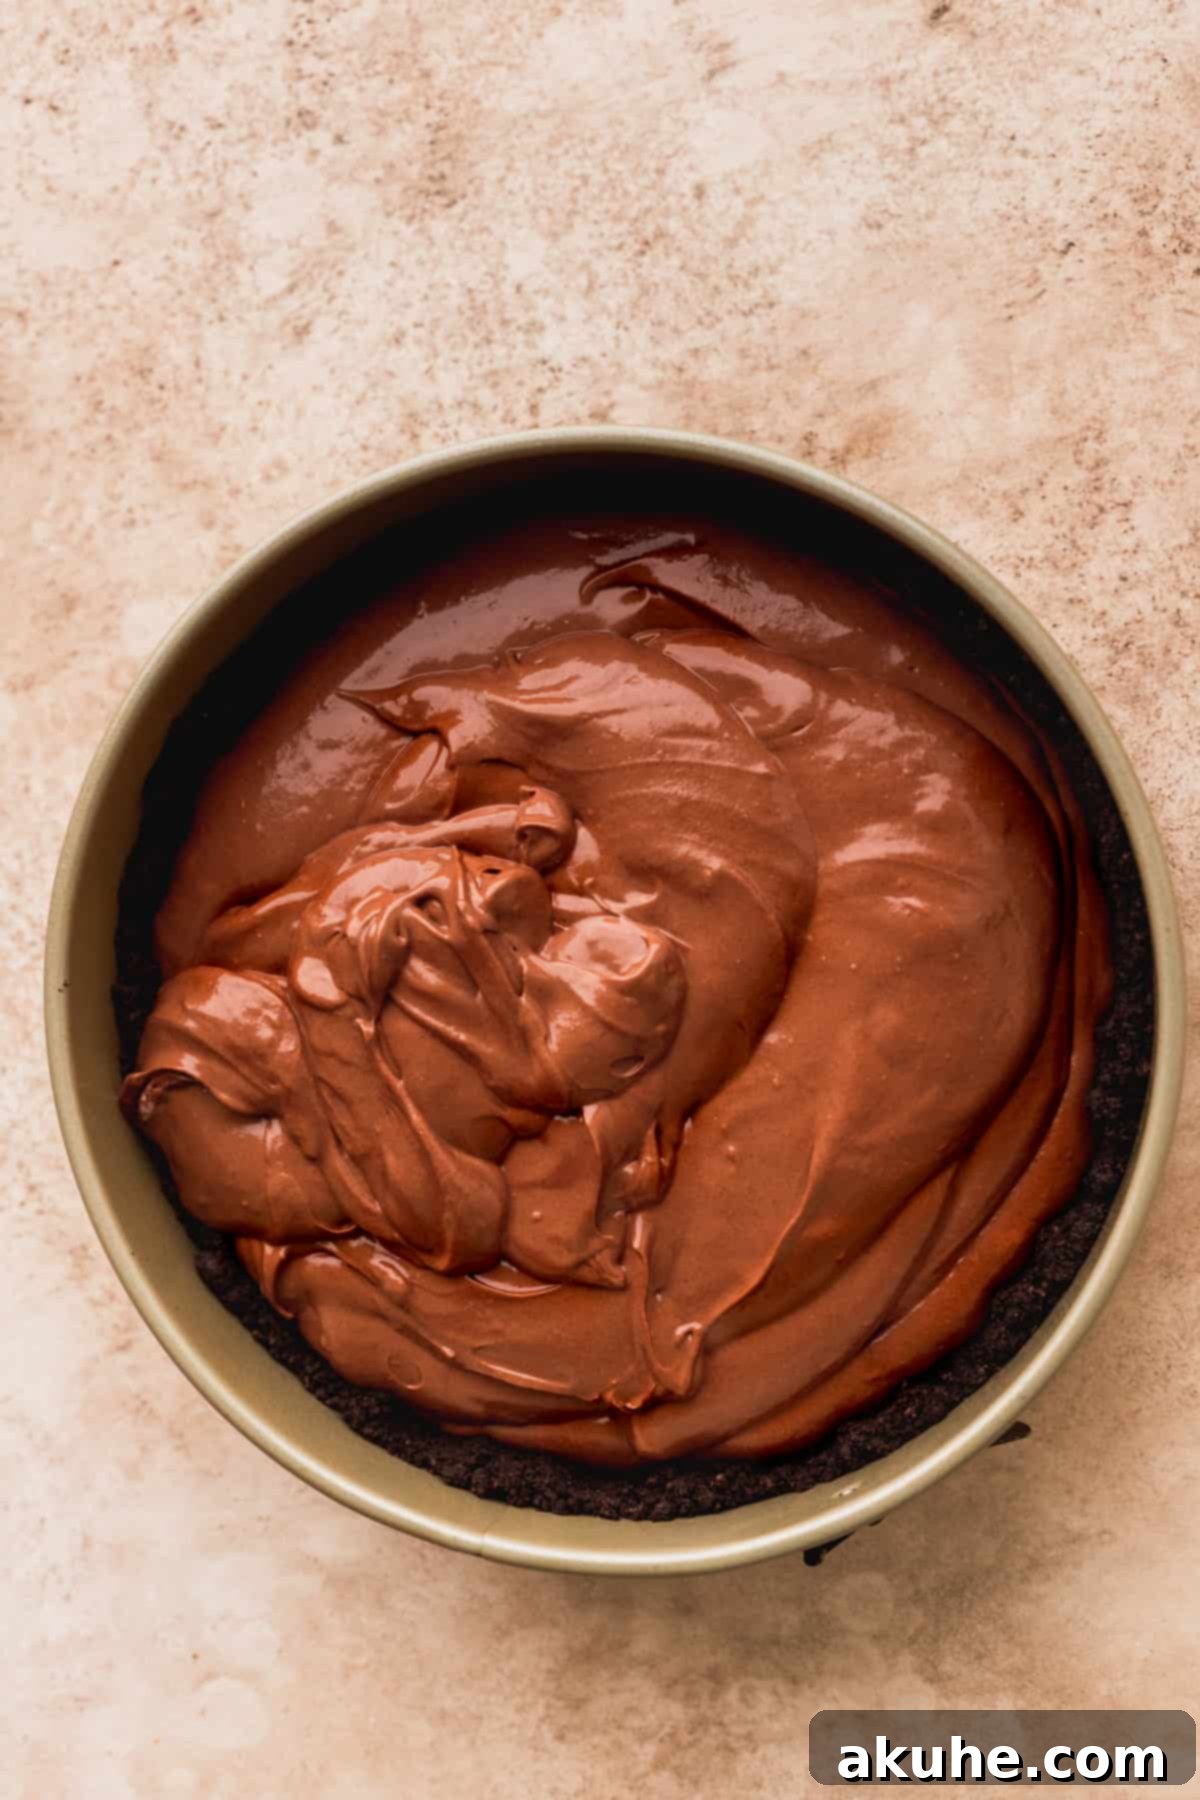
Crafting the Silky Chocolate Cheesecake Batter
- Prepare for the Water Bath: As you start mixing the batter, begin boiling water for your essential water bath. This will create a moist baking environment, crucial for a crack-free cheesecake.
- Beat the Cream Cheese: In the bowl of a stand mixer fitted with the paddle attachment, or using a hand mixer, beat the room temperature cream cheese on high speed for about 1 minute until it becomes noticeably light and fluffy. This step is critical for a smooth cheesecake.
- Incorporate Dry Ingredients: Reduce the mixer speed to low and add the granulated sugar and sifted Dutch process cocoa powder. Mix until the cocoa powder is just combined, then scrape down the sides and bottom of the bowl thoroughly. Increase the speed to high and beat for another minute, ensuring the mixture is creamy and smooth, with no lumps of cream cheese. Scrape the bowl once more.
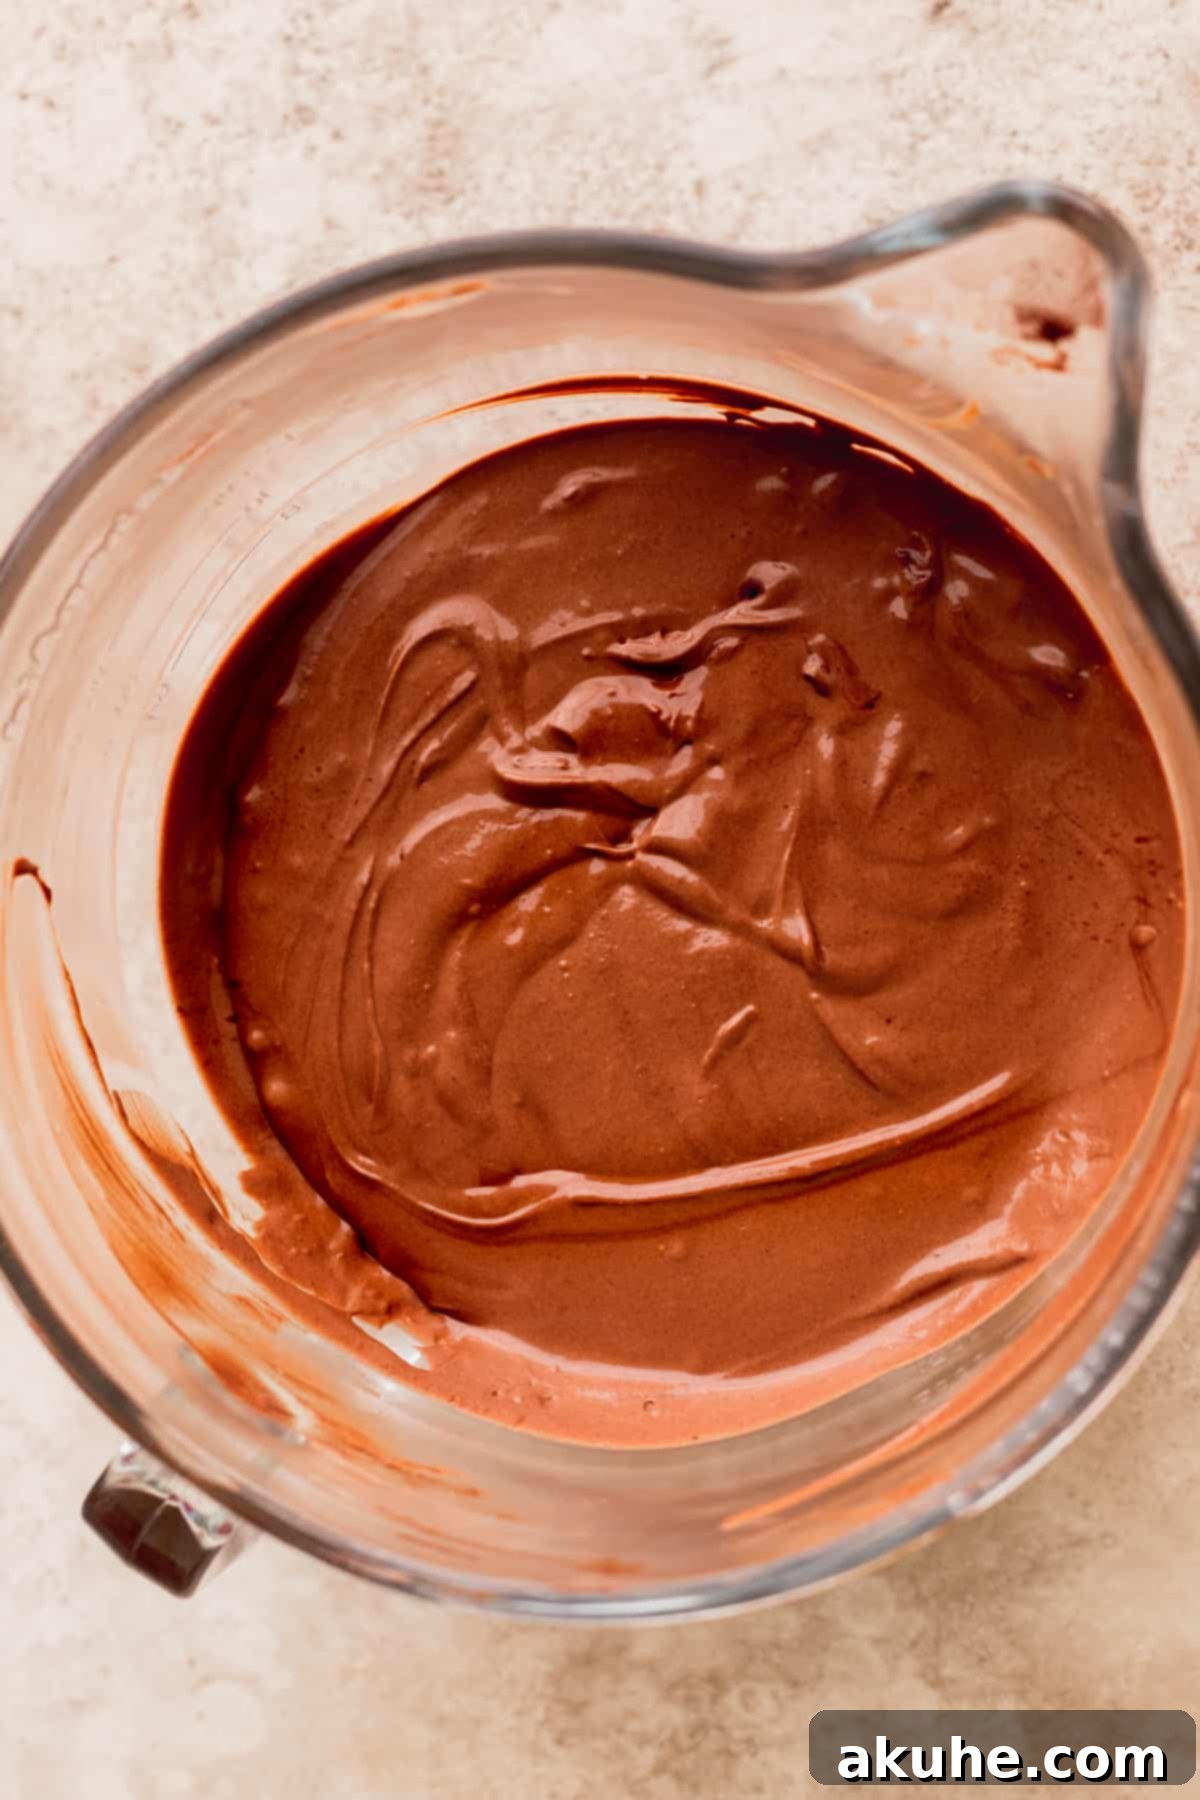
- Add Wet Ingredients (Carefully): With the mixer on medium speed, add the room temperature sour cream, heavy cream, and vanilla extract. Beat for 1 minute until well combined and the batter is beautifully smooth. If you spot any small chunks, scrape the bowl and beat for another 30 seconds. Now, reduce the mixer speed to its lowest setting and add the room temperature eggs, one at a time. Mix each egg just until it’s incorporated before adding the next. Overmixing eggs can introduce too much air, leading to cracks. Scrape the bowl halfway through adding the eggs.
- Final Mix and Pour: Remove the bowl from the mixer. Use a rubber spatula to gently fold the batter a few times, ensuring everything is perfectly combined from the bottom up without incorporating excess air. Pour the smooth, rich chocolate cheesecake batter into your prepared Oreo crust. Use the spatula to gently smooth the top surface of the batter.
Baking to Perfection with a Water Bath
- Set Up the Water Bath: This step is non-negotiable for preventing cracks and achieving a beautifully smooth texture. Use a large roasting pan (approximately 12×16 inches). Choose one of the following methods:
- Preferred Method (Highly Recommended): Place your springform pan inside a slightly larger 10-inch cake pan. Then, place this assembly into the roasting pan. Carefully fill the roasting pan with boiling water, ensuring the water comes about halfway up the sides of the 10-inch cake pan. This method completely safeguards your crust from any water seepage.
- Alternative Method: Tightly wrap your springform pan twice with heavy-duty aluminum foil, ensuring no water can penetrate. Place the foil-wrapped springform pan directly into the roasting pan. Fill the roasting pan with boiling water about halfway up the sides of the springform pan. While effective, there’s always a slight chance of water seeping in with this method.
Immediately transfer the roasting pan with the cheesecake and hot water to your preheated oven.
- Bake and Cool Slowly: Bake the cheesecake for 70-90 minutes. The cheesecake is done when the edges are set and appear firm, but the very center still has a slight, delicate jiggle (it should not be liquid). If the center jiggles significantly, continue baking in 10-minute increments, checking after each. Once baked, turn off the oven and prop the oven door open by about 3-4 inches. Allow the cheesecake to cool slowly in the oven for 30 minutes. This gradual cooling is crucial for preventing cracks.
- Chill Overnight: After the oven cool-down, carefully remove the springform pan from the roasting pan and transfer it to a wire cooling rack. Let it cool completely to room temperature. Once cooled, wrap the entire springform pan tightly in plastic wrap or foil and refrigerate for a minimum of 6 hours, or ideally, overnight. Adequate chilling is essential for the cheesecake to fully set and achieve its perfect dense, creamy texture.


The Finishing Touches: Ganache and Whipped Cream
- Prepare the Ganache: Once the cheesecake is thoroughly chilled, gently run a thin knife around the edge of the pan before releasing the springform ring. Carefully remove the parchment circle from the bottom. Place your semi-sweet chocolate chips in a small, heatproof bowl. In a small saucepan, heat the heavy cream over medium-low heat until it’s hot and steaming, but not boiling.
- Create Silky Ganache: Pour the hot cream directly over the chocolate chips, ensuring they are fully submerged. Let it sit undisturbed for 1 minute and 30 seconds to allow the chocolate to melt. Then, stir gently with a whisk or spatula until the mixture is completely smooth and glossy. If any chocolate chunks remain, microwave in 15-second intervals, stirring after each, until smooth. Allow the ganache to cool to room temperature; it should still be pourable but slightly thickened.
- Apply the Ganache: Carefully pour the cooled chocolate ganache over the top of the chilled cheesecake. Using an offset spatula, gently spread the ganache evenly to the edges, allowing some to drip artfully down the sides. Smooth the top surface of the ganache. Place the cheesecake in the freezer for about 10 minutes (or the fridge for 20-30 minutes) to allow the ganache to set slightly before adding the whipped cream.
- Whip the Chocolate Cream: For the best chocolate whipped cream, place your metal mixing bowl and whisk attachment in the freezer for 10 minutes to chill thoroughly. Once cold, add the cold heavy cream, sifted powdered sugar, sifted unsweetened cocoa powder, and vanilla extract to the bowl.
- Pipe the Whipped Cream: Start beating on medium-low speed until all the dry ingredients are fully incorporated, scraping the bowl several times as needed. Increase the speed to medium-high and beat until stiff peaks form. Transfer the chocolate whipped cream to a piping bag fitted with a Wilton 1M tip (or your preferred tip) and beautifully pipe it onto the set chocolate ganache.
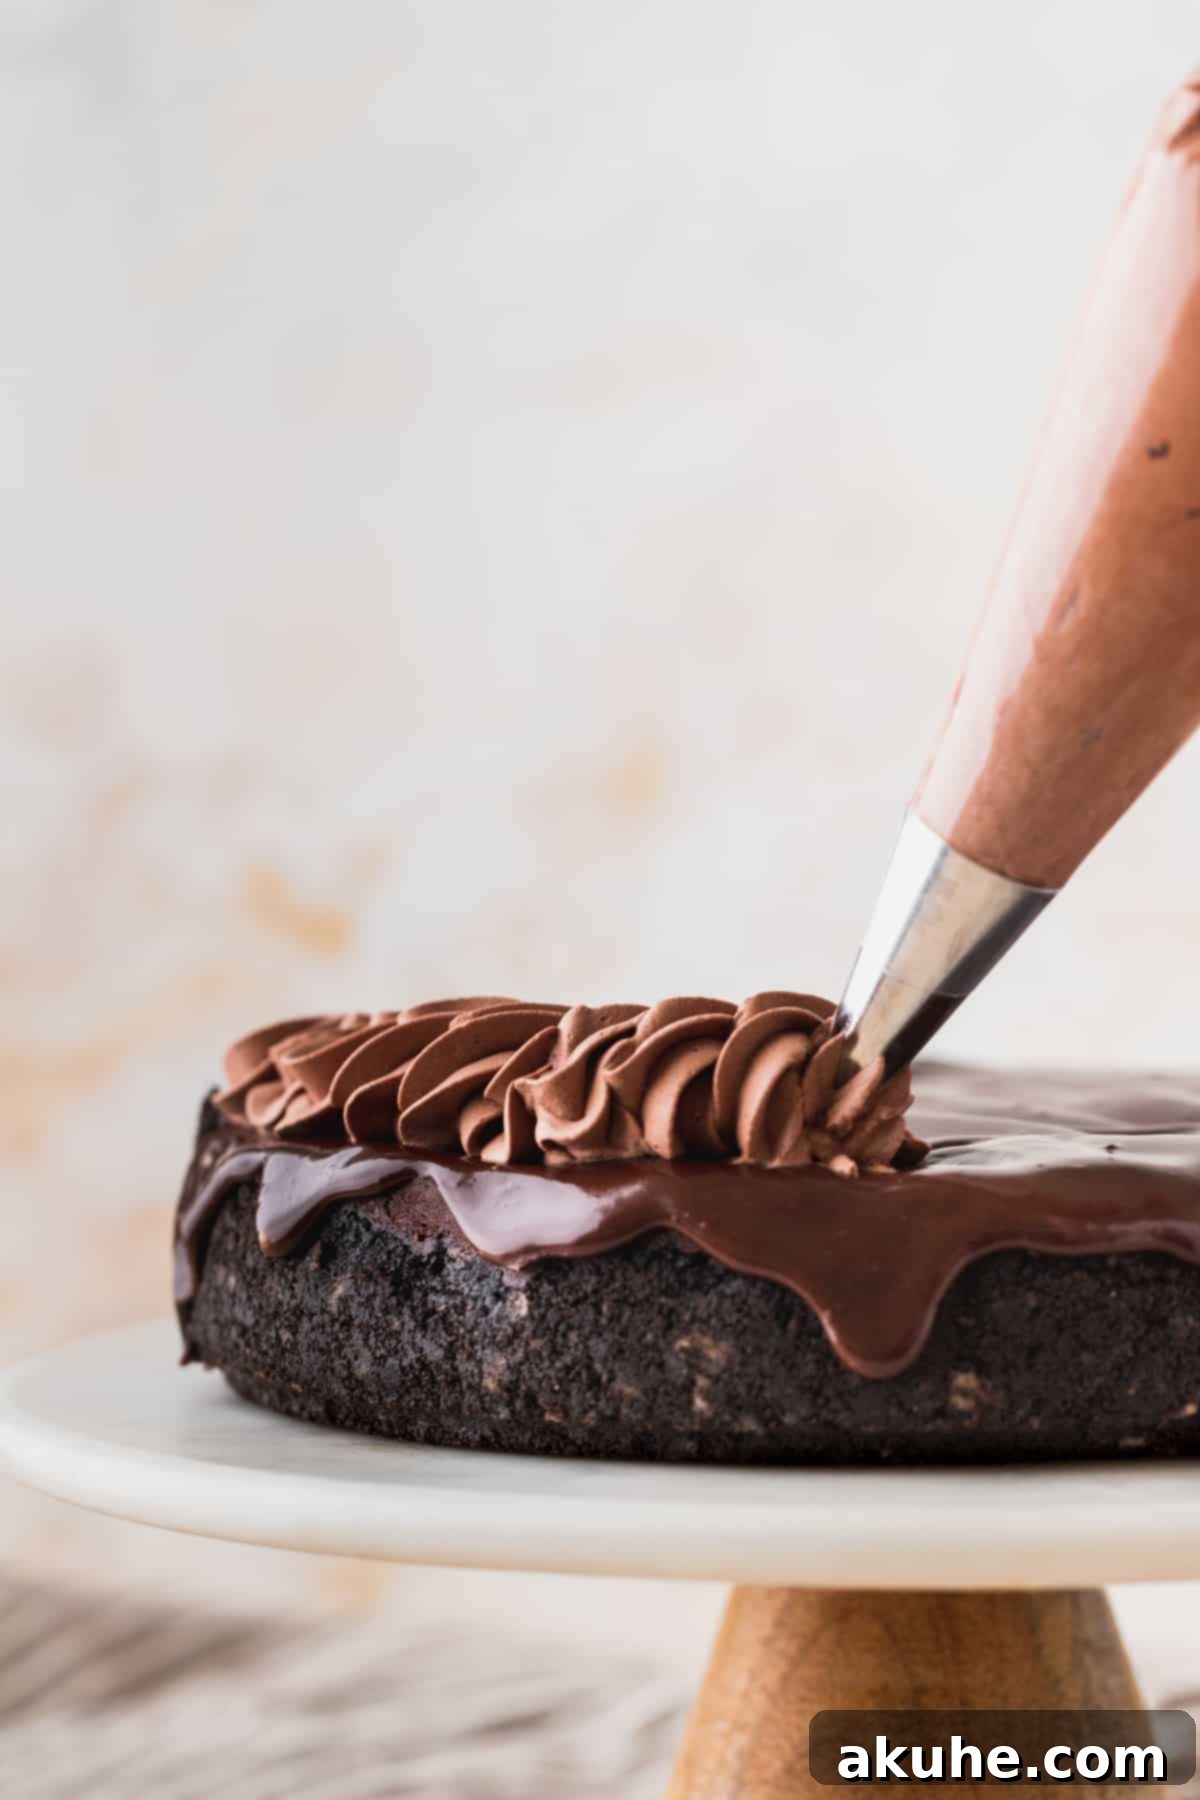
Mastering the Art of Preventing Cracks in Cheesecake
One of the most common challenges in cheesecake baking is preventing those unsightly cracks. Achieving a perfectly smooth, unblemished surface is entirely possible by following a few critical steps:
- Room Temperature Ingredients & Smooth Batter: This is paramount. All dairy ingredients (cream cheese, sour cream, heavy cream, and eggs) must be at true room temperature. Cold ingredients don’t emulsify properly, leading to lumps in the batter. Any cream cheese chunks, even small ones, will expand during baking and then contract during cooling, inevitably causing cracks. Beat your cream cheese alone first on high until fluffy, then mix in other ingredients (except eggs) on high until completely smooth.
- Gentle Egg Incorporation: Eggs are delicate. Once you add them to the batter, mix them on the lowest speed possible, just until they are combined. The goal is to incorporate minimal air into the eggs. Air bubbles in the eggs will expand rapidly in the oven’s heat, creating pockets that collapse during cooling, resulting in cracks.
- The Indispensable Water Bath: A water bath (bain-marie) is not optional for a truly crack-free cheesecake. It provides a moist, steamy environment, ensuring the cheesecake bakes slowly and evenly from the edges to the center. This gentle cooking prevents the edges from setting and drying out too quickly while the center is still baking, a primary cause of cracking.
- Gradual Cooling is Key: The transition from a hot oven to a cool countertop is a shock to a delicate cheesecake, often leading to immediate cracks. Instead, once the cheesecake is baked, turn off the oven and crack open the oven door (about 3-4 inches). Let the cheesecake cool down slowly inside the oven for at least 30 minutes. This gradual temperature change allows the cheesecake to settle and firm up without sudden contraction, significantly reducing the risk of cracks.
Effective Water Bath Techniques for Cheesecake Perfection
The water bath creates a humid, steamy baking environment that is crucial for a smooth, crack-free cheesecake. It acts as an insulator, ensuring the cheesecake bakes gently and evenly without drying out. Here are two reliable techniques to achieve this:
- The Inner Pan Method (My Favorite): This is the most foolproof method for protecting your crust from water. Place your 9-inch springform pan (with the crust and batter) inside a slightly larger 10-inch cake pan. Then, place this entire setup into a large roasting pan. Carefully fill the roasting pan with hot, steaming water (preferably boiling water), ensuring the water level comes about halfway up the sides of the 10-inch cake pan. This method completely eliminates any risk of water seeping into your delicious Oreo crust, making cheesecake baking incredibly stress-free.
- The Foil-Wrapped Springform Method: This technique requires careful wrapping. Begin by wrapping your springform pan tightly with two layers of heavy-duty aluminum foil. Ensure the foil covers the bottom and extends well up the sides, crimping it securely to create a watertight seal. Place the foil-wrapped springform pan directly into a large roasting pan. Fill the roasting pan halfway up with hot, steaming water. While this method is generally effective, there’s always a slight chance, if the foil isn’t perfectly sealed, for water to seep in, potentially leading to a soggy crust.
I personally prefer the first method as it provides complete peace of mind, guaranteeing that absolutely no water will reach your meticulously prepared crust. It truly simplifies the process of baking a perfect cheesecake!

Frequently Asked Questions (FAQ)
No, it is not safe to leave cheesecake out overnight. Cheesecake is a dairy-based dessert, which means it requires refrigeration to remain safe to eat and to preserve its quality. Leaving it at room temperature for an extended period, especially overnight, will cause it to spoil. Always store your cheesecake in the fridge to keep it fresh and delicious!
Absolutely! This recipe can certainly be adapted to make delightful mini chocolate cheesecakes. In fact, I have a dedicated post with a very similar recipe specifically designed for mini chocolate cheesecakes. I recommend referring to that recipe for precise instructions and baking times for smaller portions.
Yes, you can use an 8-inch springform pan for this recipe. Keep in mind that using a smaller pan will result in a thicker cheesecake. You might need to adjust the baking time slightly longer, as the thicker batter will take more time to cook through. However, it is crucial to use a springform pan specifically; baking this type of cheesecake in a standard cake pan is not recommended due to the difficulty of removal and potential structural issues.
Your cheesecake is perfectly baked when the edges are set and appear firm, while the very center (about 2-3 inches in diameter) still has a slight, delicate jiggle when you gently shake the pan. It should not look wet or liquid in the center. The residual heat will continue to cook the center as it cools, resulting in that signature creamy texture. If it jiggles significantly throughout, bake for another 10 minutes and check again.

Storing and Freezing Your Triple Chocolate Cheesecake
To keep your delicious triple chocolate cheesecake fresh and enjoyable for as long as possible, proper storage is key. Store any leftover cheesecake in an airtight container in the refrigerator for up to 5 days. This prevents it from drying out and absorbing other odors from the fridge.
Freezing for Future Indulgence
This triple chocolate cheesecake is also suitable for freezing, especially if you want to prepare it ahead of time or save some for later. For best results, freeze the cheesecake *before* it has been decorated with the ganache and whipped cream.
After baking, ensure the cheesecake has been thoroughly chilled overnight in the refrigerator. Once firm, carefully remove it from the springform pan. Wrap the cheesecake tightly, first in several layers of plastic cling wrap, and then with a layer of aluminum foil. This double-layer protection helps prevent freezer burn. You can freeze the cheesecake for up to 30 days.
When you’re ready to enjoy it, thaw the cheesecake gradually in the refrigerator for approximately 24 hours. Alternatively, for a quicker thaw, you can place it on the counter for 1-2 hours, though refrigeration is preferred for texture integrity. Always allow the cheesecake to thaw completely before proceeding with the ganache and chocolate whipped cream decoration.

Discover More Cheesecake Creations
If you’ve loved this recipe, I encourage you to explore other delightful cheesecake variations on my blog!
Did you make this recipe? Please be sure to leave me a star review below! Your feedback means the world. Don’t forget to tag me on Instagram @stephaniesweettreats with your creations; I love seeing them! For more baking inspiration and sweet ideas, be sure to follow me on Pinterest.

Triple Chocolate Cheesecake
This triple chocolate cheesecake is a rich, creamy, baked cheesecake featuring an Oreo crust, velvety chocolate cheesecake filling, decadent chocolate ganache, and a delicate chocolate whipped cream topping.
Print Recipe
Pin Recipe
Leave a Review
Ingredients
Oreo Crust
- 3 cups Oreos, crushed into fine crumbs
- 5 TBSP Unsalted butter, melted
Chocolate Cheesecake
- 24 oz Cream cheese, room temperature
- 1 cup White granulated sugar
- 3/4 cup Unsweetened cocoa powder, sifted
- 1/2 cup Sour cream, room temperature
- 1/4 cup Heavy cream, room temperature
- 1 tsp Vanilla extract
- 3 Large eggs, room temperature
Chocolate Ganache
- 1 cup Semi-sweet chocolate chips
- 3/4 cup Heavy cream
Chocolate Whipped Cream
- 1 cup Heavy cream, cold
- 5 1/2 TBSP Powdered sugar, sifted
- 3 TBSP Unsweetened cocoa powder, sifted
- 1/2 tsp Vanilla extract
Instructions
Oreo Crust
- Preheat oven to 325°F. Spray a 9-inch springform pan with non-stick baking spray. Line the bottom with a 9-inch parchment circle. Spray the pan again. Set aside.
- Use a blender or food processor to crush the Oreos into fine crumbs. Combine the Oreo crumbs and melted butter together using a fork. The crumbs should be wet and hold together. (3 cups Oreos, 5 TBSP Unsalted butter)
- Pour the crumbs into the pan. Use your hands to press the crust on the bottom and halfway up the sides of the pan. Use the back of a measuring cup to compact the crust down. Bake for 12 minutes. Then, allow to cool slightly while you make the cheesecake batter.
Chocolate Cheesecake
- Start boiling some water for a water bath while you make the batter.
- Using a mixer, beat the cream cheese for 1 minute on high. It should be noticeably fluffy. Add sugar and cocoa powder. Blend on low until cocoa powder is mixed in. Scrape the bowl. Then, beat for 1 minute on high. Scrape the bowl again to make sure it’s all mixed in. (24 oz Cream cheese, 1 cup White granulated sugar, 3/4 cup Unsweetened cocoa powder)
- Add in sour cream, heavy cream, and vanilla. Beat on medium for 1 minute. The cream cheese should be creamy and smooth. If there are any chunks, scrape the bowl and beat again for 30 seconds until smooth. Add in eggs one at a time on low. Mix until just combined. Scrape the bowl halfway through adding the eggs. (1/2 cup Sour cream, 1/4 cup Heavy cream, 1 tsp Vanilla extract, 3 Large eggs)
- Take the bowl off the mixer. Use a rubber spatula to fold the batter to make sure everything is combined. Pour batter into the pan. Use the spatula to smooth the batter.
- For the water bath use a large roasting pan (about 12×16 inches). Then do 1 of the 2 methods:
1. My preferred method: Use a 10-inch cake pan. Place spring form pan inside the cake pan. Then fill the roasting pan with boiling water about halfway up the cake pan. This method makes sure no water gets inside the crust.
2. Wrap spring form pan twice in foil. Make sure it is tight! Place in the roasting pan and fill with hot water about halfway up the spring form pan.
Put the pan in the oven as soon as you put the hot water in. Bake for 70-90 minutes. The cheesecake is done baking when the edges are set and the middle has a slight jiggle. If there is a big jiggle in the middle, bake for another 10 minutes and check again.
- Turn off the oven and prop open the oven door about 3-4 inches. Let the cheesecake sit in the oven for 30 minutes. This helps the cheesecake slowly cool. Then, transfer spring form pan to a cooling rack. Allow to cool completely. Then, wrap in foil and place in the fridge. It needs to chill for 6 hours or overnight before decorating.
Chocolate Ganache
- Take off the spring form pan and remove the parchment circle. Then, pour chocolate chips into a small bowl. Heat the heavy cream in a saucepan over medium-low heat until hot and steaming.
- Pour the cream over the chocolate chips and make sure the chocolate chips are covered in the cream. Let it sit for 1 minute and 30 seconds. Then, stir until silky smooth. If there are any chunks remaining, heat in the microwave for 15-second intervals. Cool to room temperature before using. (1 cup Semi-sweet chocolate chips, 3/4 cup Heavy cream)
- Pour the chocolate ganache over the top of the cheesecake. Use an offset spatula to spread the chocolate gently over the edge of the cheesecake to have it drip down. Then, smooth the chocolate.
- Chill in the fridge while you make the chocolate whipped cream.
Chocolate Whipped Cream
- Freeze the metal bowl and whisk attachment for 10 minutes. A cold bowl makes it easier to whip up whipped cream. Using a mixer, pour in heavy cream, sifted powdered sugar, sifted cocoa powder, and vanilla. (1 cup Heavy cream, 5 1/2 TBSP Powdered sugar, 3 TBSP Unsweetened cocoa powder, 1/2 tsp Vanilla extract)
- Beat the heavy cream on medium-low until everything is mixed together. You may need to scrape the bowl several times to make sure all of the dry ingredients are mixed in. Turn the mixer to medium-high and beat until stiff peaks form.
- Use a Wilton 1M tip and pipe the whipped cream on top of the ganache.
Notes
Oreo Crust:
If the crust seems too dry, add an extra 1/2 TBSP to 1 TBSP of unsalted melted butter until it holds together well in your hands.
Chocolate Cheesecake:
Ensure all dairy ingredients are at room temperature before baking. Pull them out at least 2 hours prior to preparation.
Scrape the bowl frequently during mixing to guarantee a thoroughly combined, lump-free batter.
Carbohydrates: 51g,
Protein: 7g,
Fat: 43g,
Saturated Fat: 24g,
Cholesterol: 103mg,
Sodium: 313mg,
Potassium: 313mg,
Fiber: 4g,
Sugar: 33g,
Vitamin A: 1189IU,
Vitamin C: 1mg,
Calcium: 93mg,
Iron: 4mg
Did you make this recipe?
Please leave a star rating and review below!