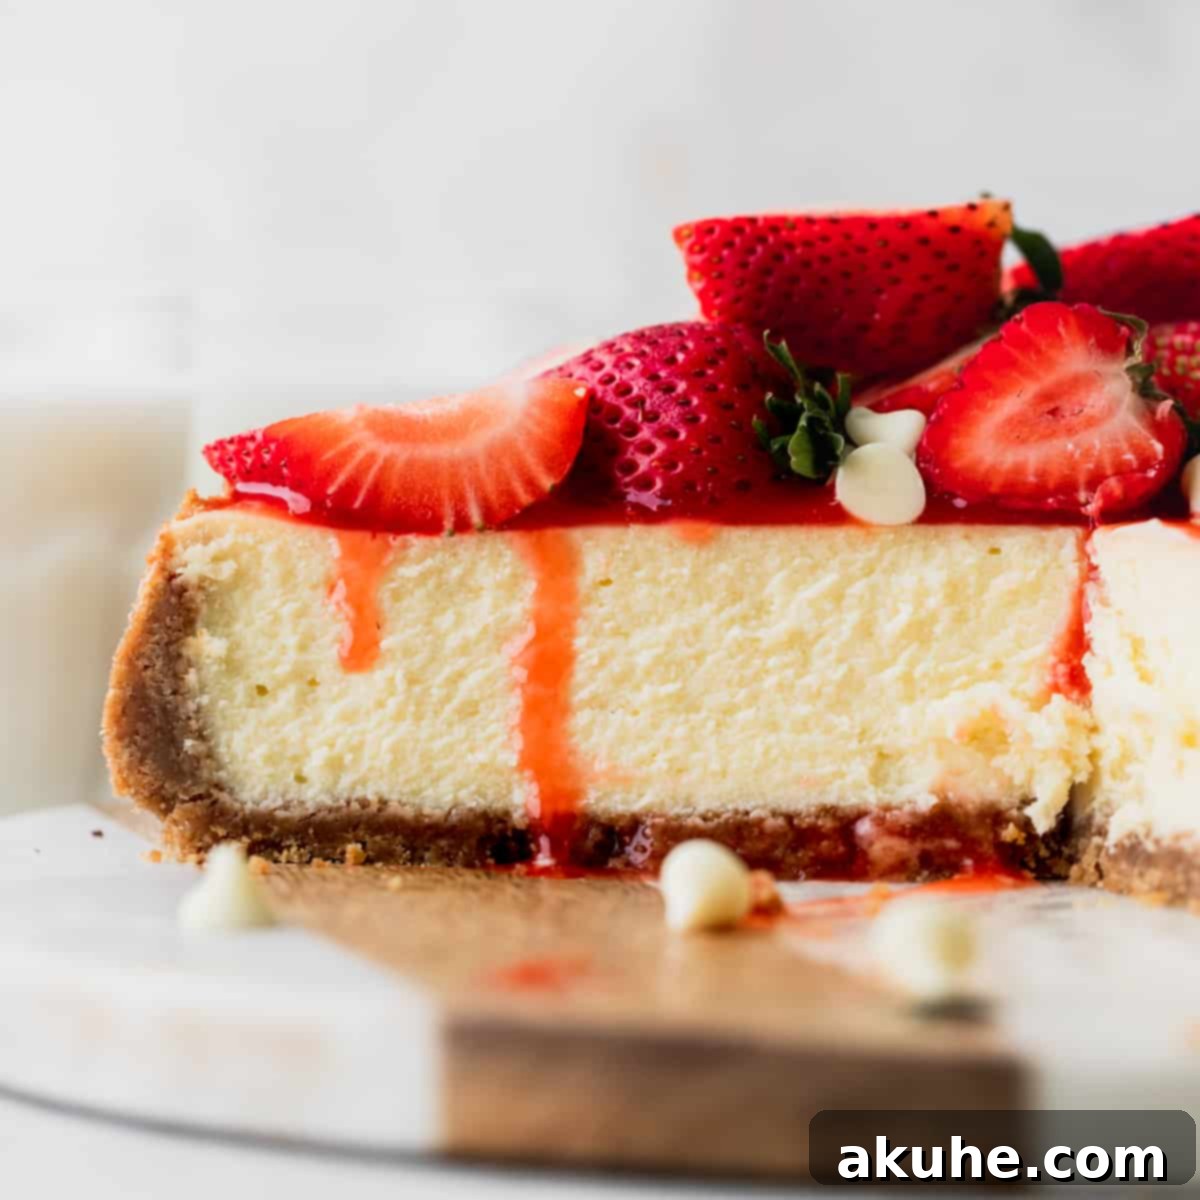
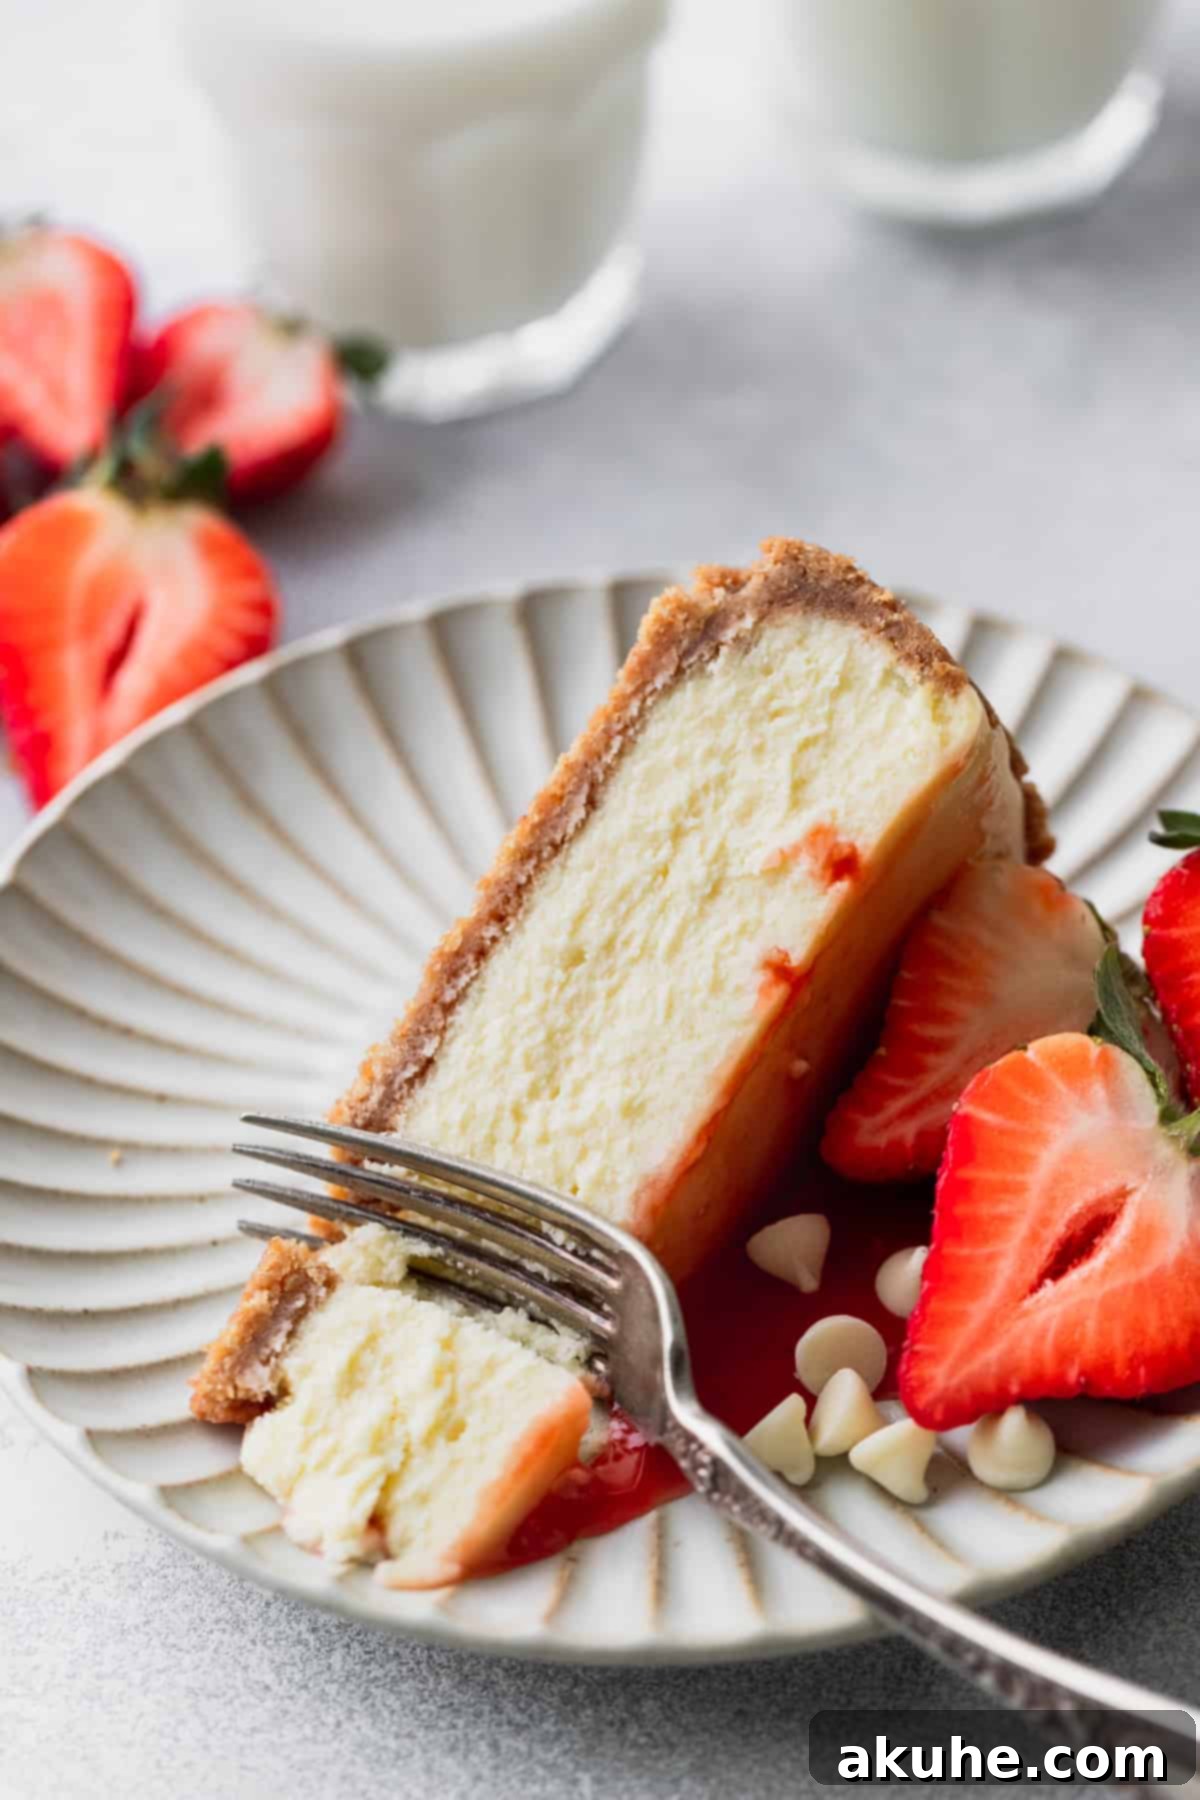
Indulge in the sublime harmony of flavors with this extraordinary White Chocolate Cheesecake with Strawberry Glaze. This dessert masterpiece features a rich, creamy baked white chocolate cheesecake nestled atop a classic graham cracker crust, all crowned with a vibrant, homemade strawberry glaze and an abundance of fresh strawberries. It’s a true celebration of textures and tastes, designed to captivate your senses and impress at any gathering.
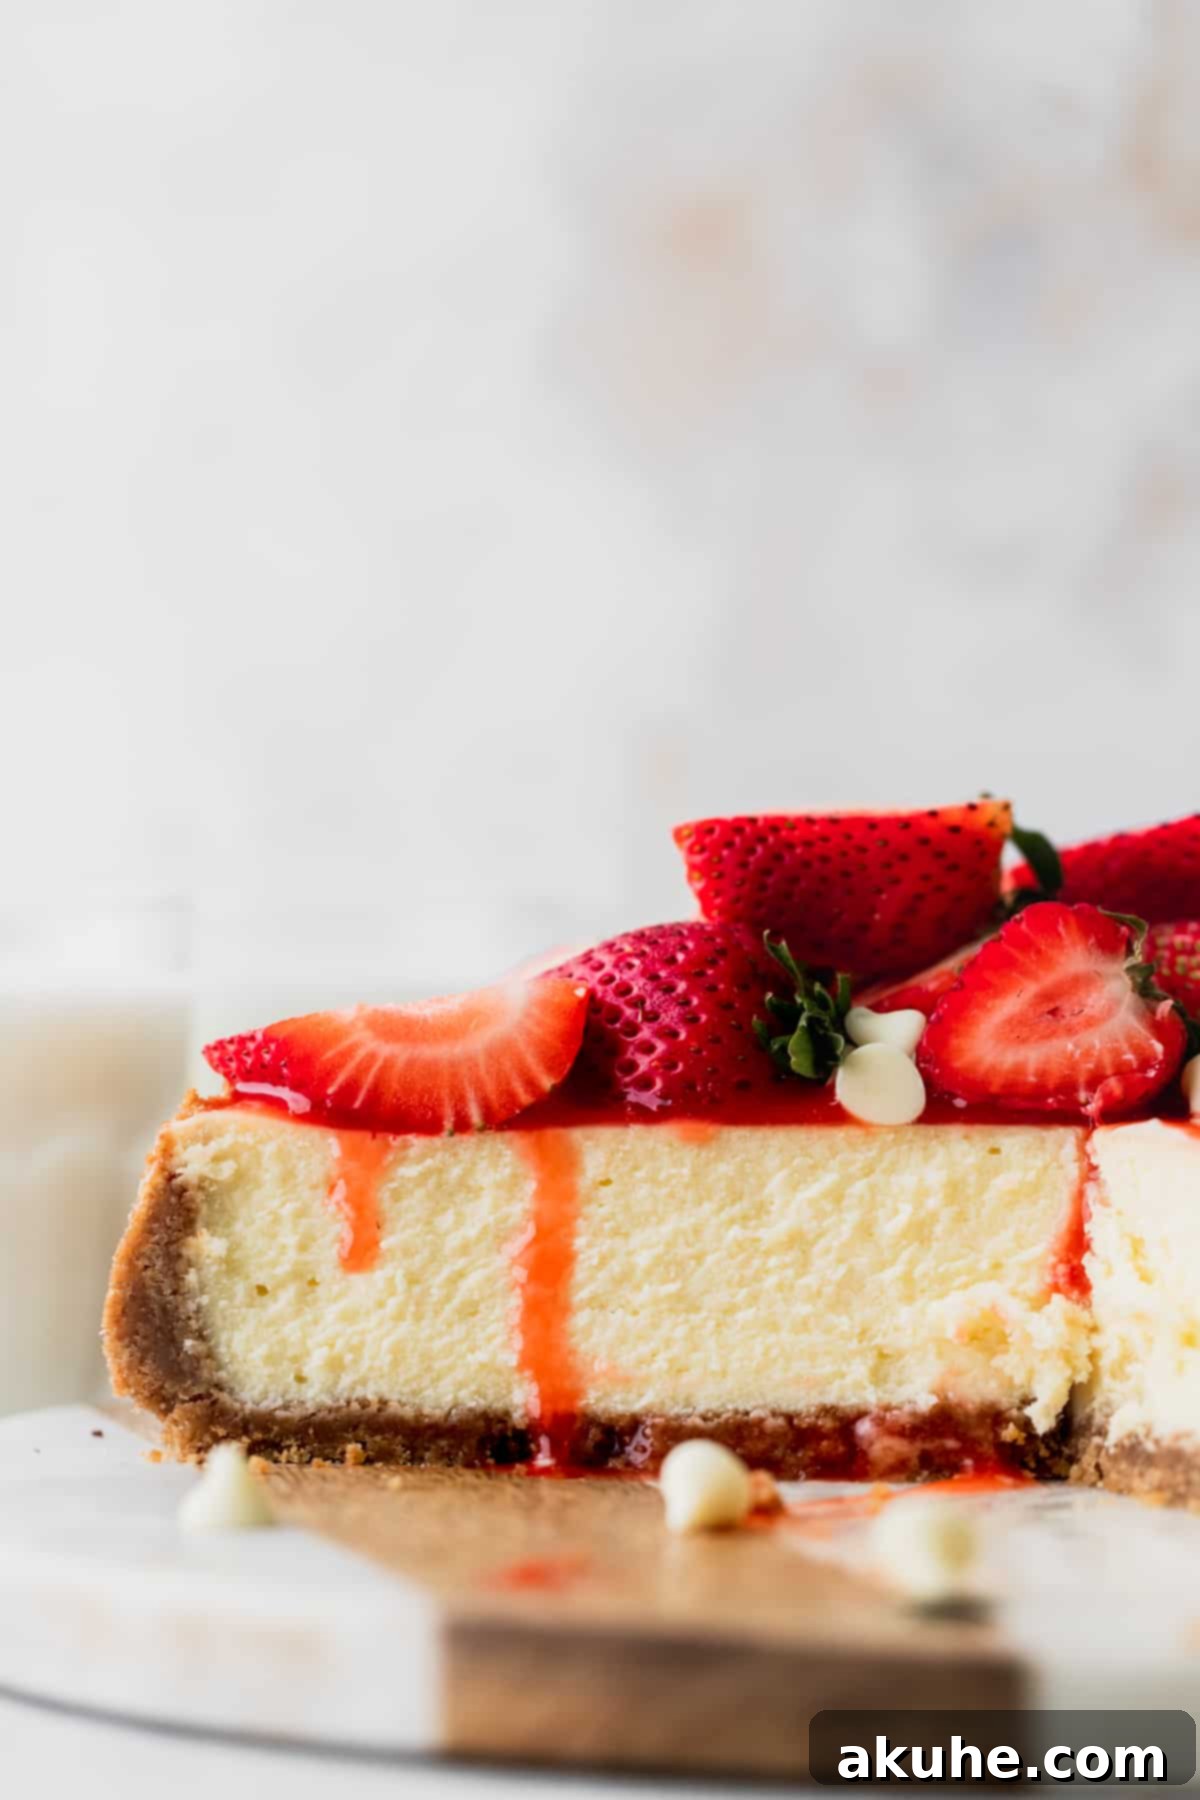
Crafting the perfect white chocolate cheesecake requires a delicate balance, and this recipe delivers just that. During extensive recipe testing, our primary goal was to achieve a robust and unmistakable white chocolate flavor, which is why this recipe generously incorporates two melted high-quality white chocolate bars into the filling. This ensures every bite is infused with that luxurious, sweet, and slightly buttery essence unique to white chocolate.
However, we understood the importance of balance. To prevent the cheesecake from being overly sweet, we’ve carefully added a touch of extra salt. This subtle addition beautifully counteracts the sweetness of the white chocolate, creating a depth of flavor that is truly remarkable. When paired with the bright, tart homemade strawberry glaze, the contrast is simply divine, making each spoonful an unforgettable experience.
This creamy white chocolate cheesecake isn’t just a dessert; it’s an event. Whether you’re planning for a special occasion, celebrating a holiday, or simply craving an indulgent treat, this recipe promises to be a showstopper. Its elegant appearance is matched only by its incredible taste, making it the perfect centerpiece for your dessert table. Get ready to receive rave reviews and requests for the recipe!
If you’re looking to explore more delightful strawberry creations, be sure to try our Chocolate Covered Strawberry Cake, the charming Strawberry Semi-Naked Cake, and our flaky Strawberry Danish.
Why You Will Love This White Chocolate Cheesecake Recipe
This isn’t just another cheesecake recipe; it’s a meticulously developed guide to cheesecake perfection. Here’s why this white chocolate and strawberry creation will quickly become a cherished favorite:
- Buttery Graham Cracker Crust: Forget soggy bottoms! Our graham cracker crust is buttery, perfectly crisp, and provides the ideal foundation for the rich cheesecake. Its slightly sweet and earthy notes beautifully complement the creamy white chocolate, offering a satisfying crunch with every forkful. This crust is easy to prepare and ensures your cheesecake stands tall and proud.
- Intensely Flavorful White Chocolate Cheesecake: We don’t shy away from flavor here. This cheesecake boasts a strong, authentic white chocolate taste, achieved by using quality white chocolate bars that melt smoothly and integrate seamlessly into the batter. The texture is the epitome of classic cheesecake—incredibly creamy, dense, and velvety, melting in your mouth without being overly sweet. It’s a delicate balance that highlights the nuanced notes of white chocolate.
- Vibrant Homemade Strawberry Glaze: The crown jewel of this dessert is undoubtedly the fresh strawberry glaze. Made from real strawberries, it’s bursting with bright, fruity flavor and a beautiful ruby-red hue. It’s surprisingly simple to prepare and offers a delightful tart counterpoint to the sweetness of the white chocolate, elevating the entire dessert to a new level of culinary excellence.
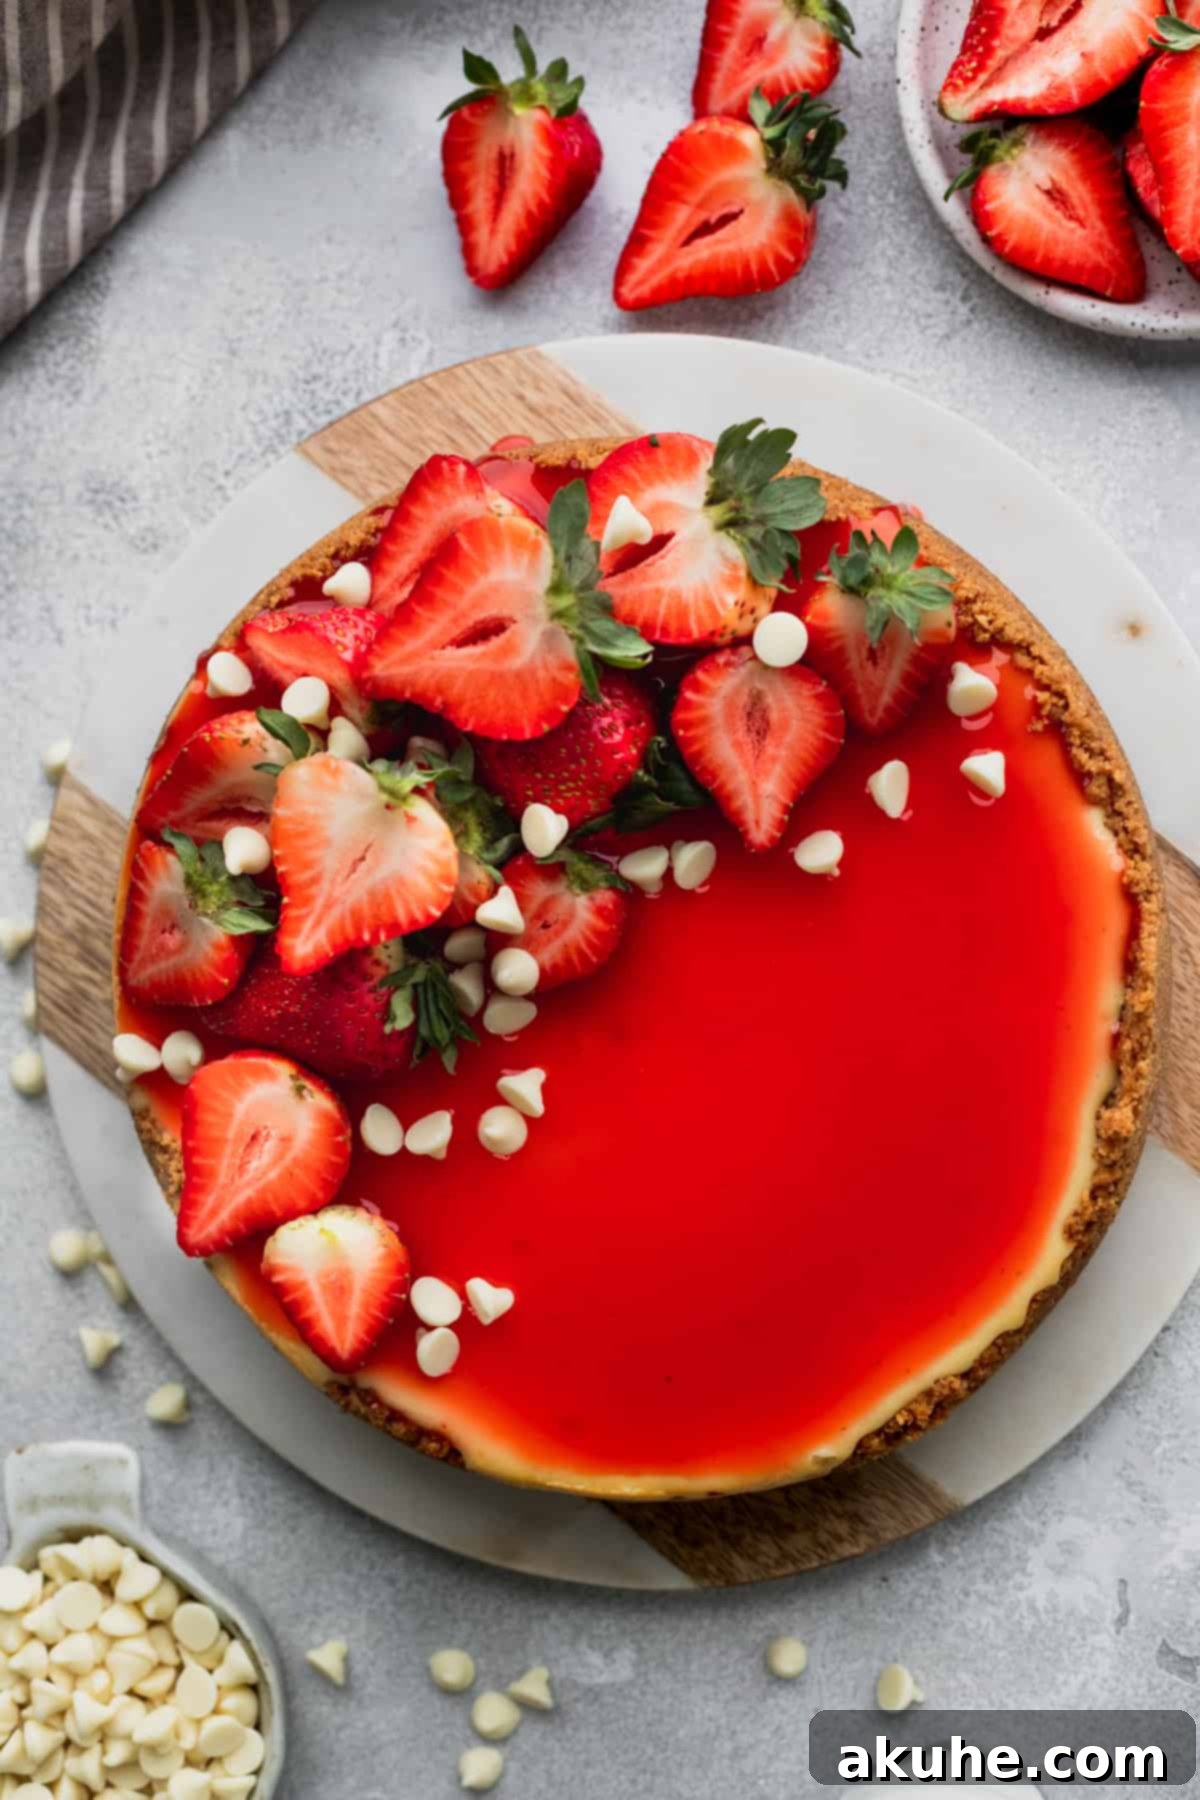
- Showstopping Presentation: This cheesecake is as beautiful as it is delicious. With its smooth, white filling, glistening strawberry glaze, and fresh berry garnish, it makes for an impressive dessert that’s perfect for any holiday celebration, special occasion, or simply to treat yourself and your loved ones.
Essential Ingredient Notes for Your White Chocolate Cheesecake
Understanding the role of each ingredient is key to achieving cheesecake perfection. Here are some detailed notes to guide you:
- Graham Crackers: We recommend using two full sleeves of graham crackers to ensure you have enough for a robust and thick crust. Process them into very fine crumbs using a food processor for a uniform texture that binds well and prevents a crumbly crust. The finer the crumbs, the more compact and delicious your crust will be.
- Brown Sugar: Light brown sugar is preferred for the crust as it adds a subtle molasses flavor and helps the crust crisp up beautifully. However, dark brown sugar can be used for a slightly deeper, more intense caramel note, if desired. Always make sure it’s packed firmly when measuring.
- Cream Cheese: Absolutely essential for a rich, creamy cheesecake. Always opt for full-fat cream cheese (block style, not whipped or spread) and ensure it’s at room temperature. This is crucial for a smooth batter, free of lumps, as cold cream cheese will not cream properly. Plan to pull it out of the fridge at least two hours before baking.
- Sour Cream: Full-fat sour cream contributes significantly to the cheesecake’s luxurious texture and provides a delicate tang that balances the sweetness. Like cream cheese, it must be at room temperature to ensure it incorporates smoothly into the batter without curdling or creating lumps.
- White Chocolate: The quality of your white chocolate directly impacts the flavor of your cheesecake. We strongly recommend using high-quality white chocolate bars (like Lindt) rather than white chocolate chips. Bars contain more cocoa butter, leading to a smoother melt and a superior, more pronounced white chocolate flavor in the finished cheesecake. Chips often contain stabilizers that prevent them from melting as smoothly.
- Eggs: Use large eggs and ensure they are at room temperature. This helps them emulsify better with the other ingredients, leading to a smoother batter and a more consistent texture. Cold eggs can cause the batter to curdle or become lumpy. Gently incorporate them one at a time to minimize air incorporation, which helps prevent cracks.
- Strawberries: For the homemade strawberry glaze, both fresh or frozen strawberries work wonderfully. If using frozen, thaw them first. For decorating the top of your cheesecake, however, fresh, vibrant strawberries are a must for their appealing aesthetic and crisp texture.
- Cornstarch: This acts as a thickening agent for the strawberry glaze, ensuring it reaches a perfect, pourable consistency that coats the back of a spoon beautifully without being too runny or overly thick.
- Unsalted Butter: Crucial for the crust, unsalted butter gives you control over the overall saltiness of your cheesecake. Salted butter can make the crust too salty, overpowering the delicate flavors of the cheesecake and glaze. Ensure it’s melted for easy mixing with the graham cracker crumbs.
Ingredient Substitutions for Dietary Needs
- Gluten-Free Crust: To make this cheesecake gluten-free, simply swap out the traditional graham crackers for a gluten-free alternative. Many brands now offer delicious gluten-free graham crackers that will work perfectly. Alternatively, for a different gluten-free crust option, you can explore recipes like our Gluten-Free Cheesecake for inspiration on almond flour or cookie-based crusts.
Step-By-Step Instructions for Perfect White Chocolate Cheesecake
Creating this creamy, dreamy cheesecake is a rewarding process. Follow these detailed steps to ensure a flawless result. Remember, patience is a key ingredient in cheesecake baking!
Before you begin, ensure all your dairy ingredients and eggs are at room temperature. This is critical for a smooth, lump-free batter and helps prevent cracks in your finished cheesecake. Preheat your oven to 325°F (160°C) and prepare your springform pan as directed below.
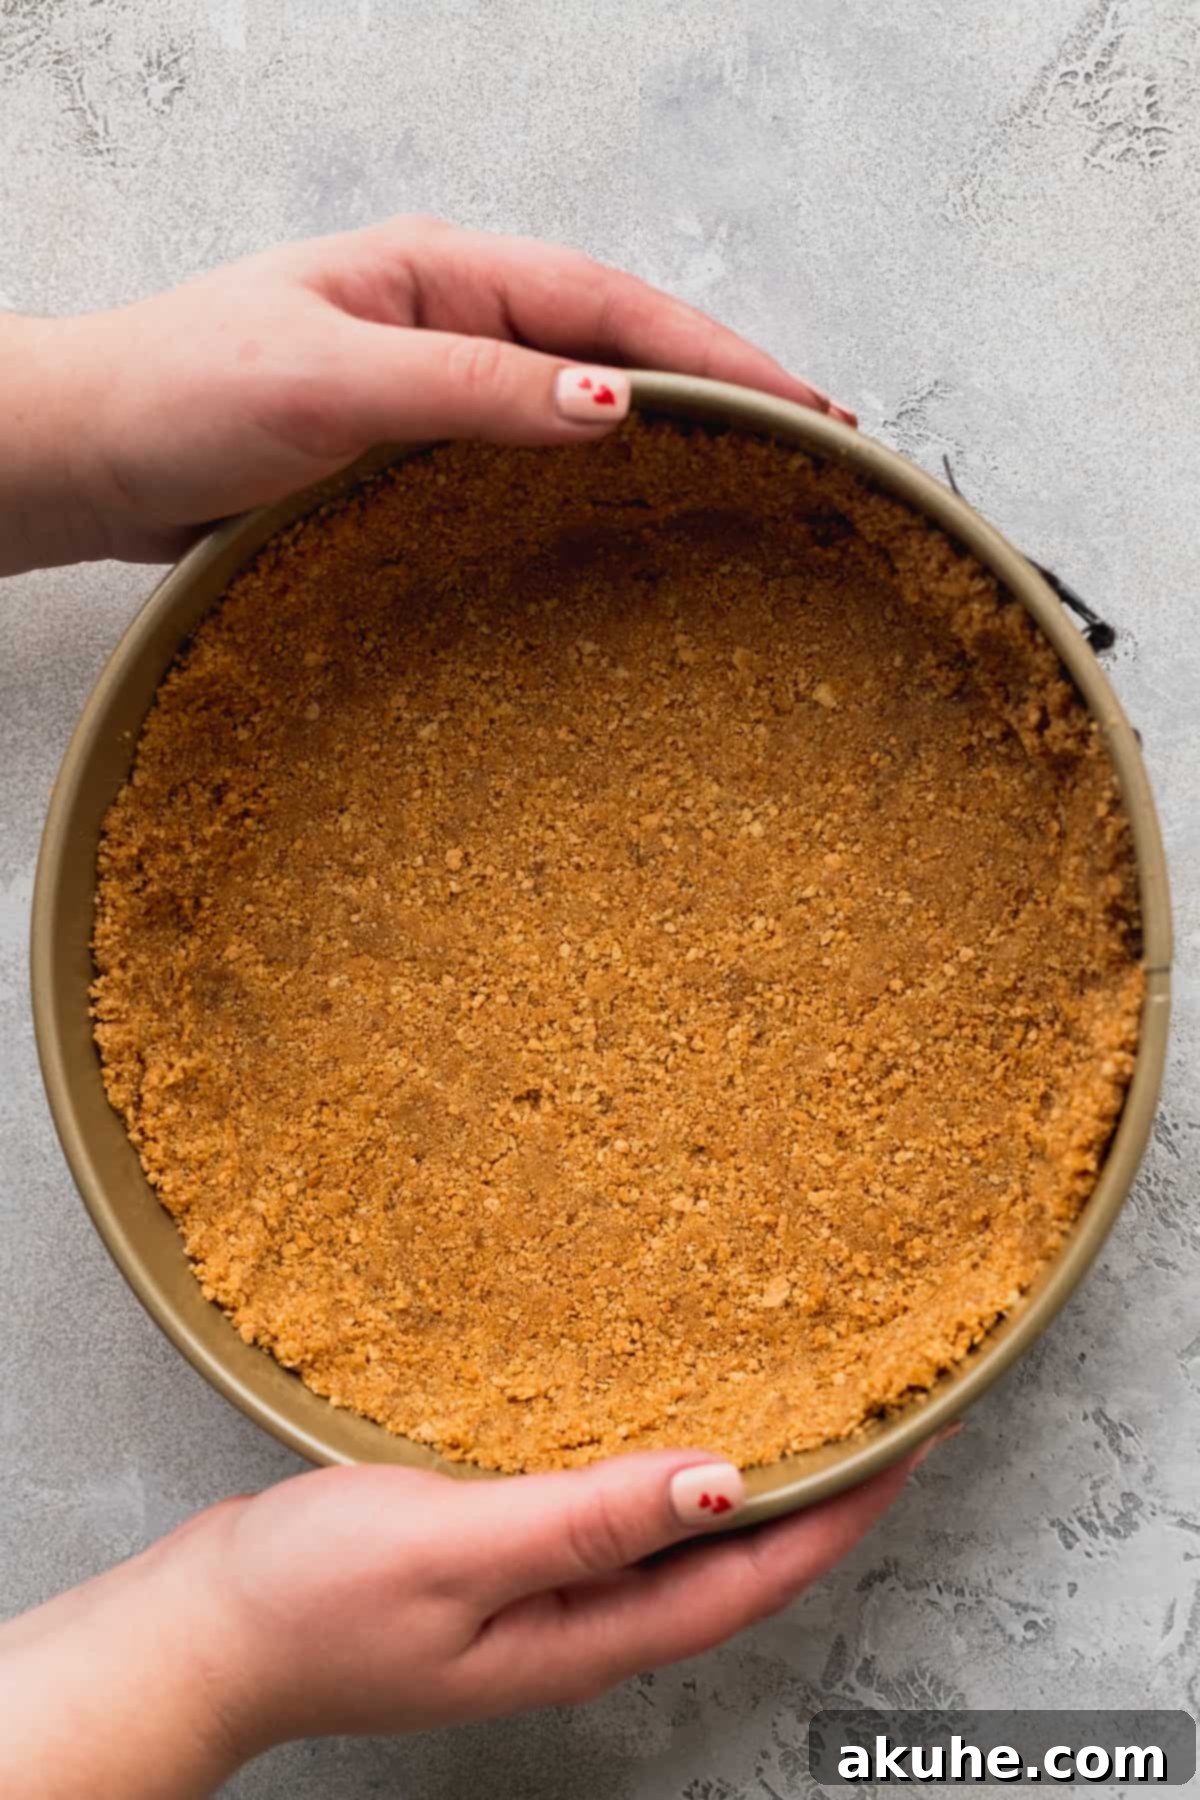
STEP 1: Prepare the Graham Cracker Crust. In a food processor, blend your graham crackers until they form very fine, uniform crumbs. This fine texture is essential for a cohesive and sturdy crust. In a medium bowl, combine these graham cracker crumbs with the melted unsalted butter and brown sugar. Mix thoroughly with a fork until all the crumbs are evenly moistened and resemble wet sand. This ensures a buttery and flavorful base for your cheesecake.
Carefully pour the crust mixture into your prepared 9-inch springform pan. Use the back of a measuring cup or a flat-bottomed glass to firmly compact the crumbs onto the bottom of the pan. Then, use your fingers to gently press the remaining crust mixture about halfway up the sides of the pan. This creates a beautiful border and helps hold the cheesecake filling.
STEP 2: Bake the Crust. Place the springform pan with the compacted graham cracker crust into the preheated oven. Bake for precisely 12 minutes. This brief baking time helps to set the crust, preventing it from becoming soggy once the cheesecake filling is added. After baking, remove the crust from the oven and set it aside to cool slightly while you prepare the filling.
STEP 3: Begin the Cheesecake Batter. In a large mixing bowl, using either a stand mixer fitted with the paddle attachment or an electric hand mixer, beat the room temperature cream cheese on high speed for 1 minute until it’s perfectly smooth and lump-free. Add the white granulated sugar and continue to beat on high speed for another 1 minute. It’s crucial at this stage to achieve a smooth, creamy base without any visible cream cheese chunks. Scrape down the sides and bottom of the bowl with a rubber spatula to ensure everything is well combined.
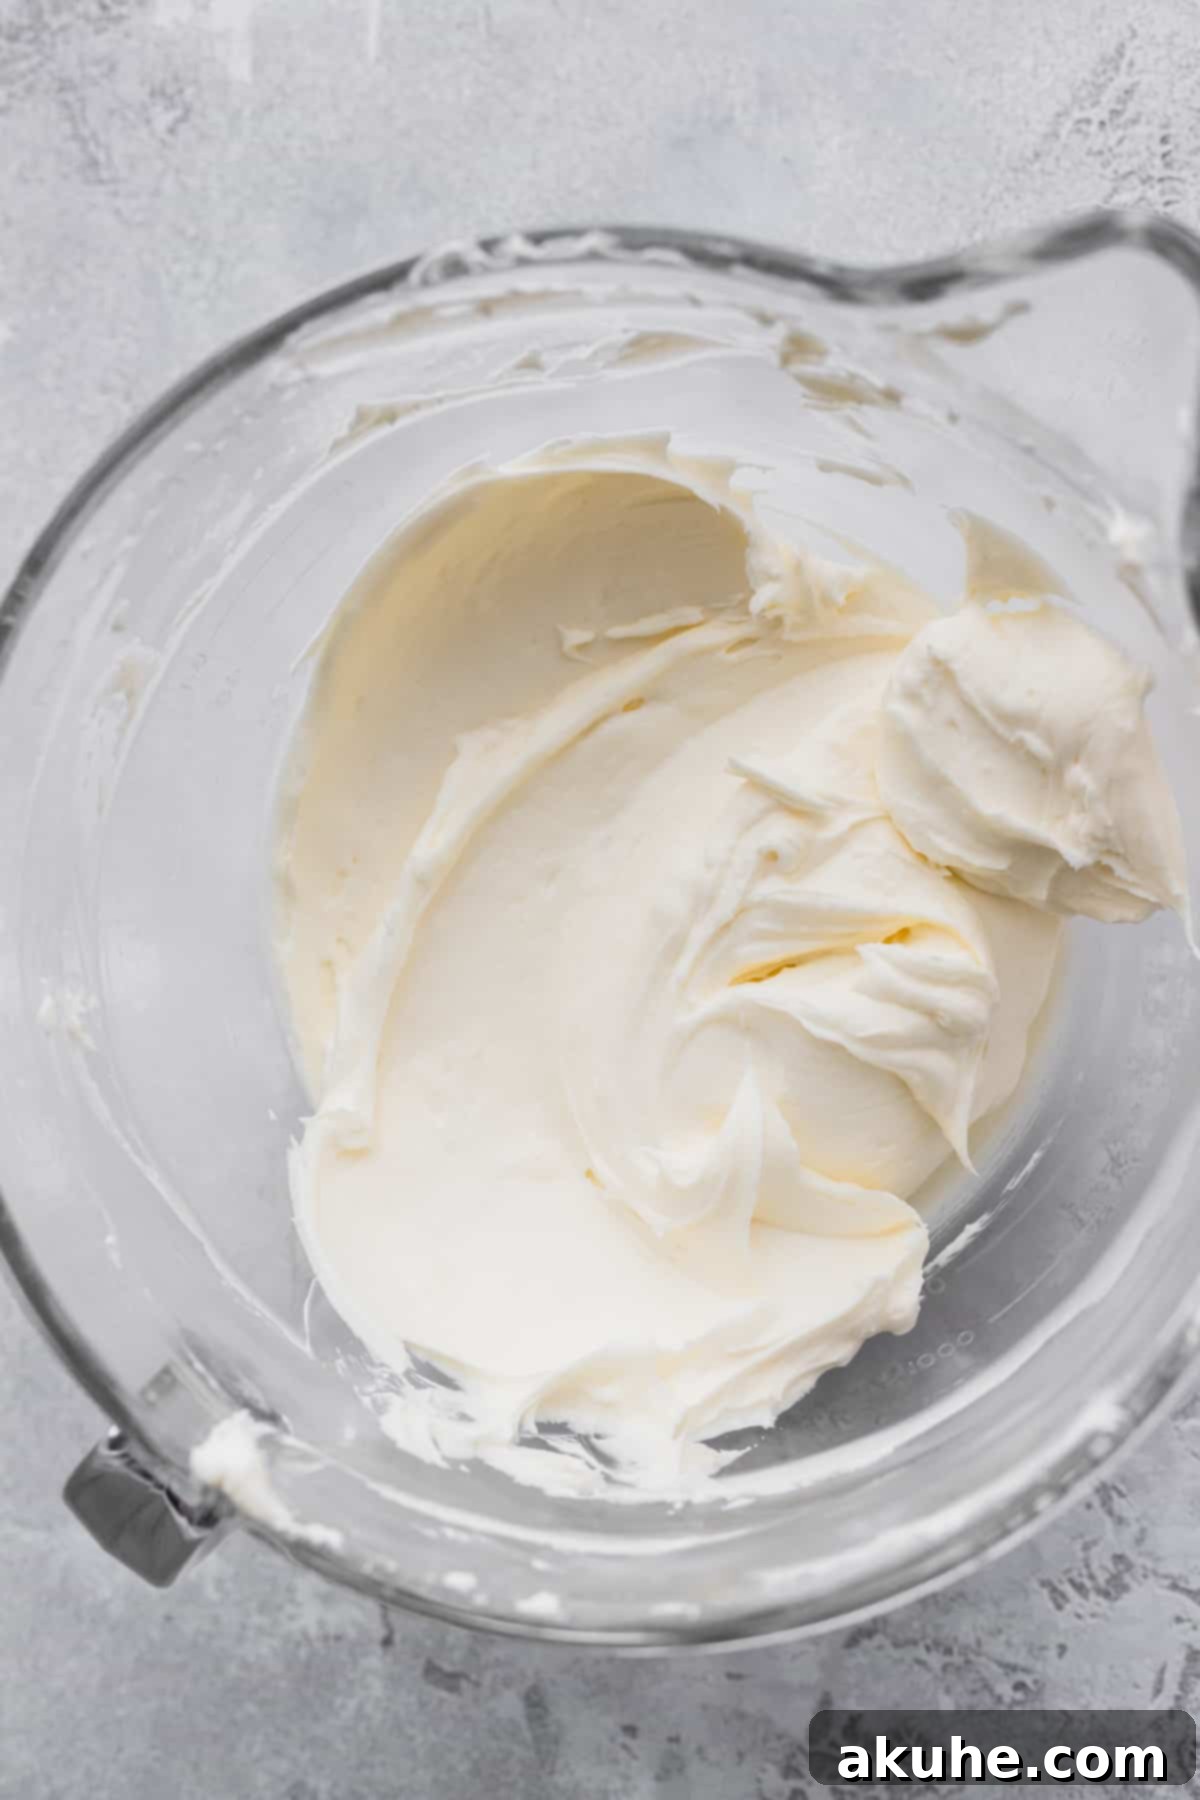
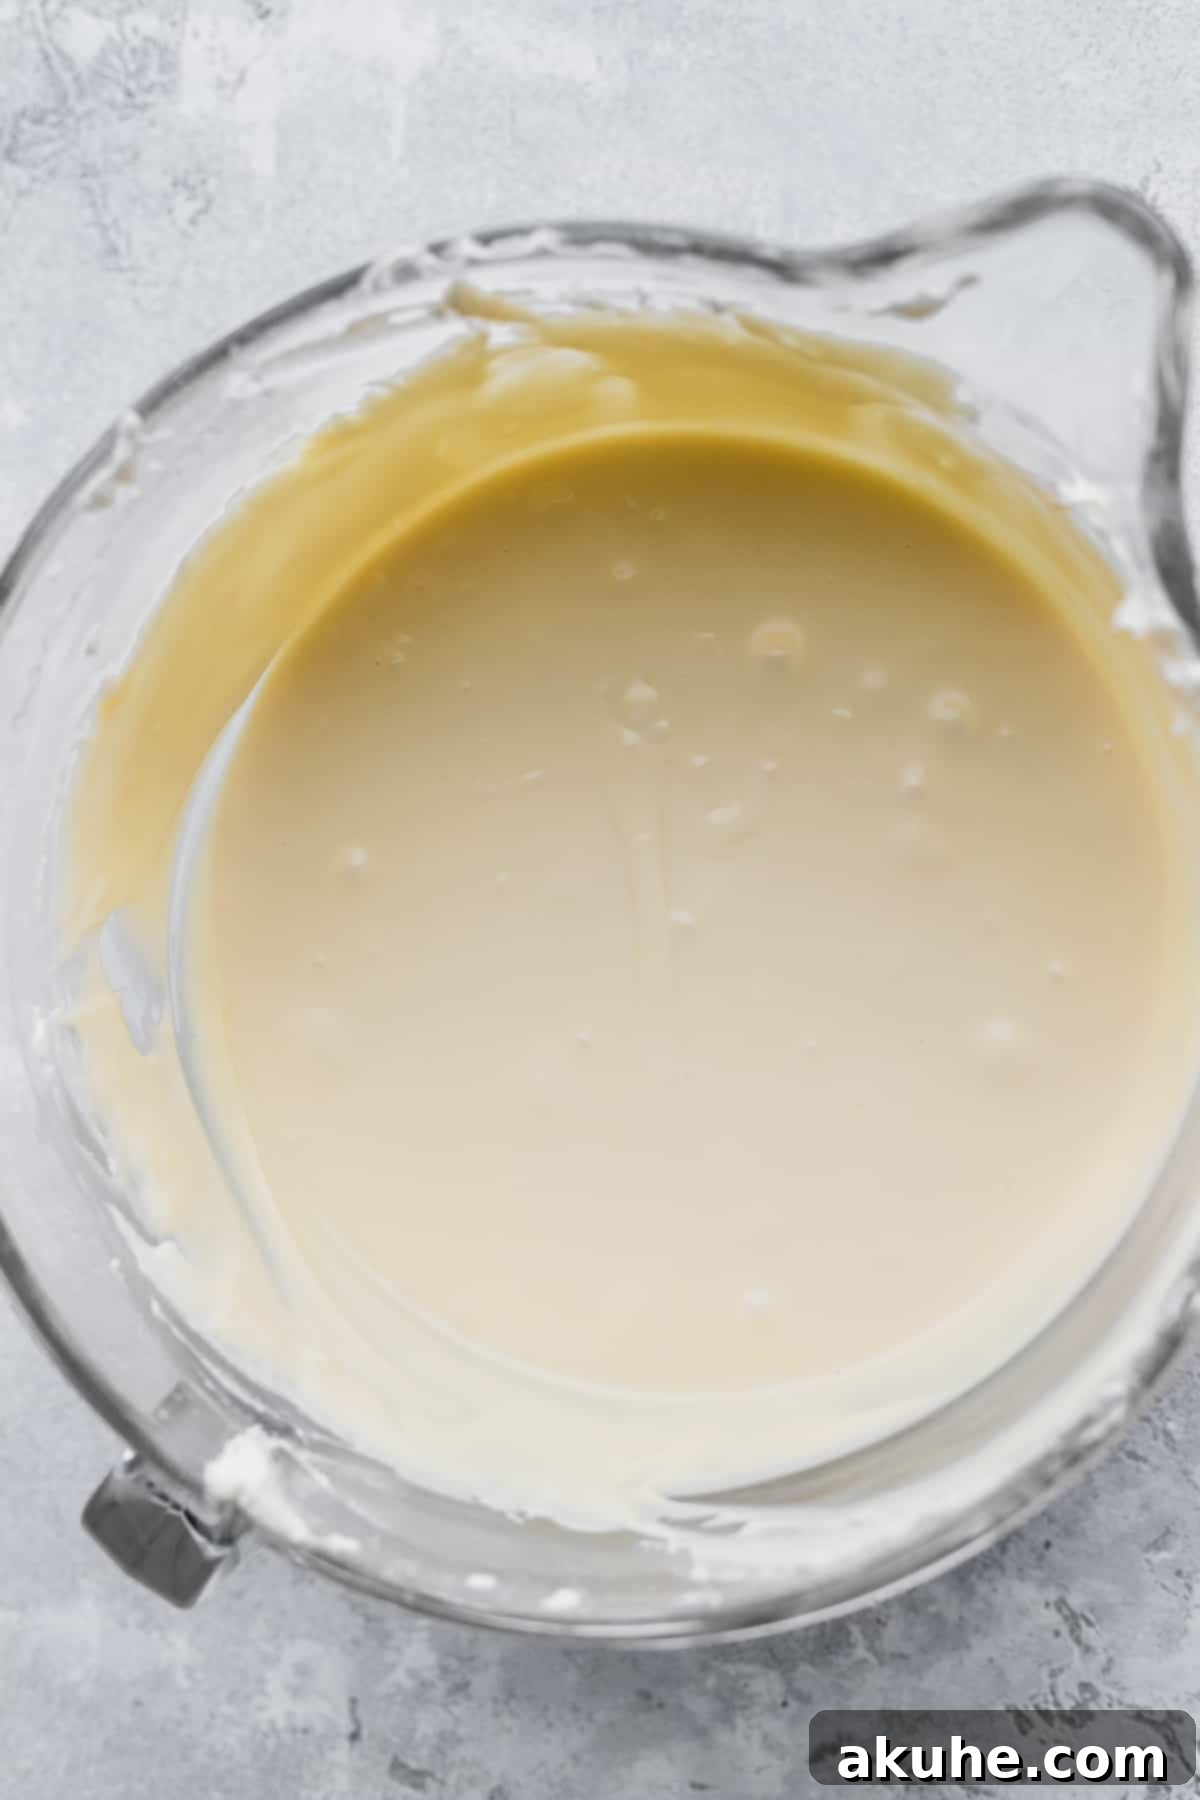
STEP 4: Incorporate Wet Ingredients and Eggs. Reduce the mixer speed to medium. Add the room temperature sour cream, pure vanilla extract, salt, and the cooled melted white chocolate into the cream cheese mixture. Beat until all ingredients are just combined and the mixture is smooth. Avoid overmixing at this stage to prevent incorporating too much air. Once combined, reduce the mixer speed to low. Add the room temperature eggs, one at a time, mixing only until each egg is just incorporated before adding the next. The goal here is to add as little air as possible into the batter, as excessive air can lead to cracks during baking. After all eggs are added, give the bowl a final scrape with your rubber spatula to ensure everything is homogenous.
STEP 5: Bake the Cheesecake. Carefully pour the creamy cheesecake mixture into the partially baked graham cracker crust in the springform pan. Now, it’s time to prepare a water bath, which is indispensable for preventing cracks and ensuring a silky-smooth, evenly baked cheesecake. (See detailed water bath tips below.)
Bake the cheesecake for 75-90 minutes. The cheesecake is done when the edges are set, but the center still has a slight, delicate jiggle. Avoid overbaking, as this can also lead to cracks and a dry texture. The residual heat will continue to cook the center as it cools.
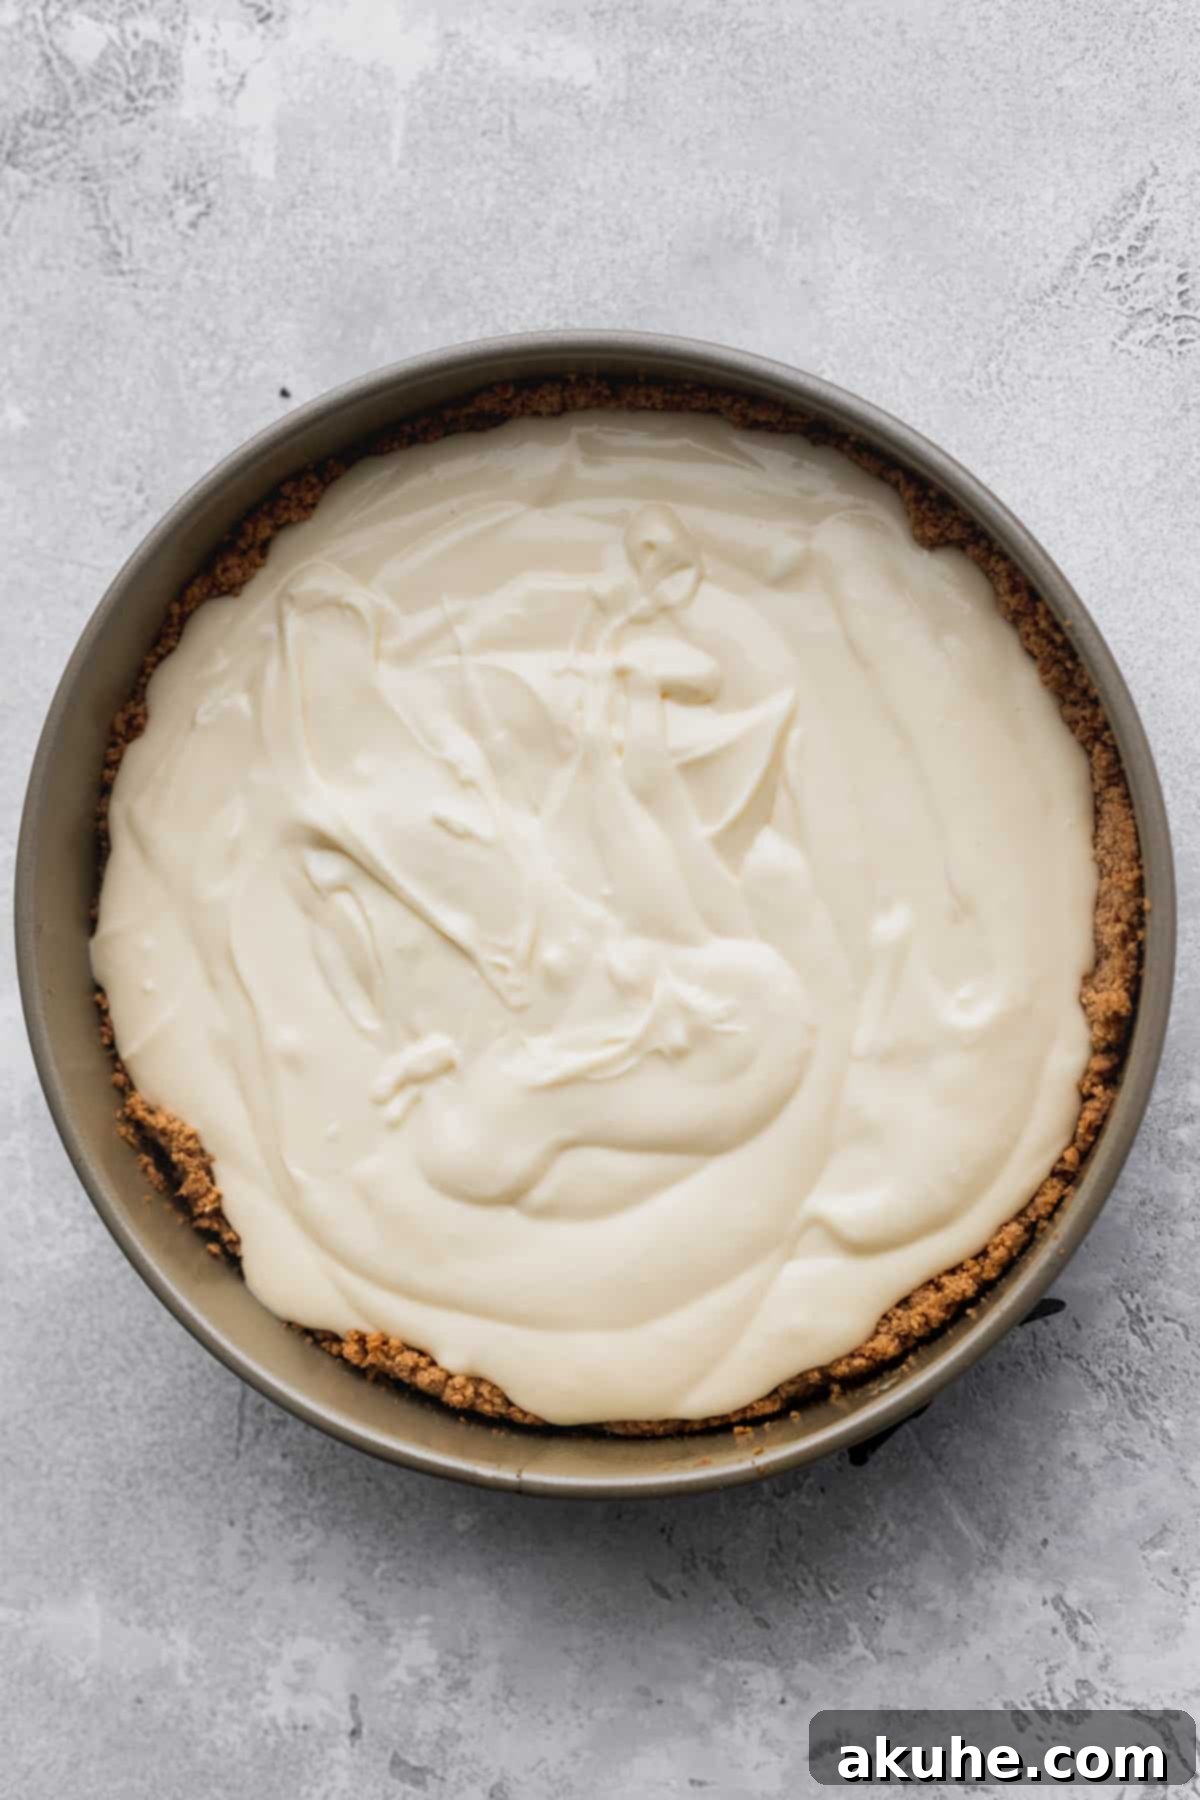
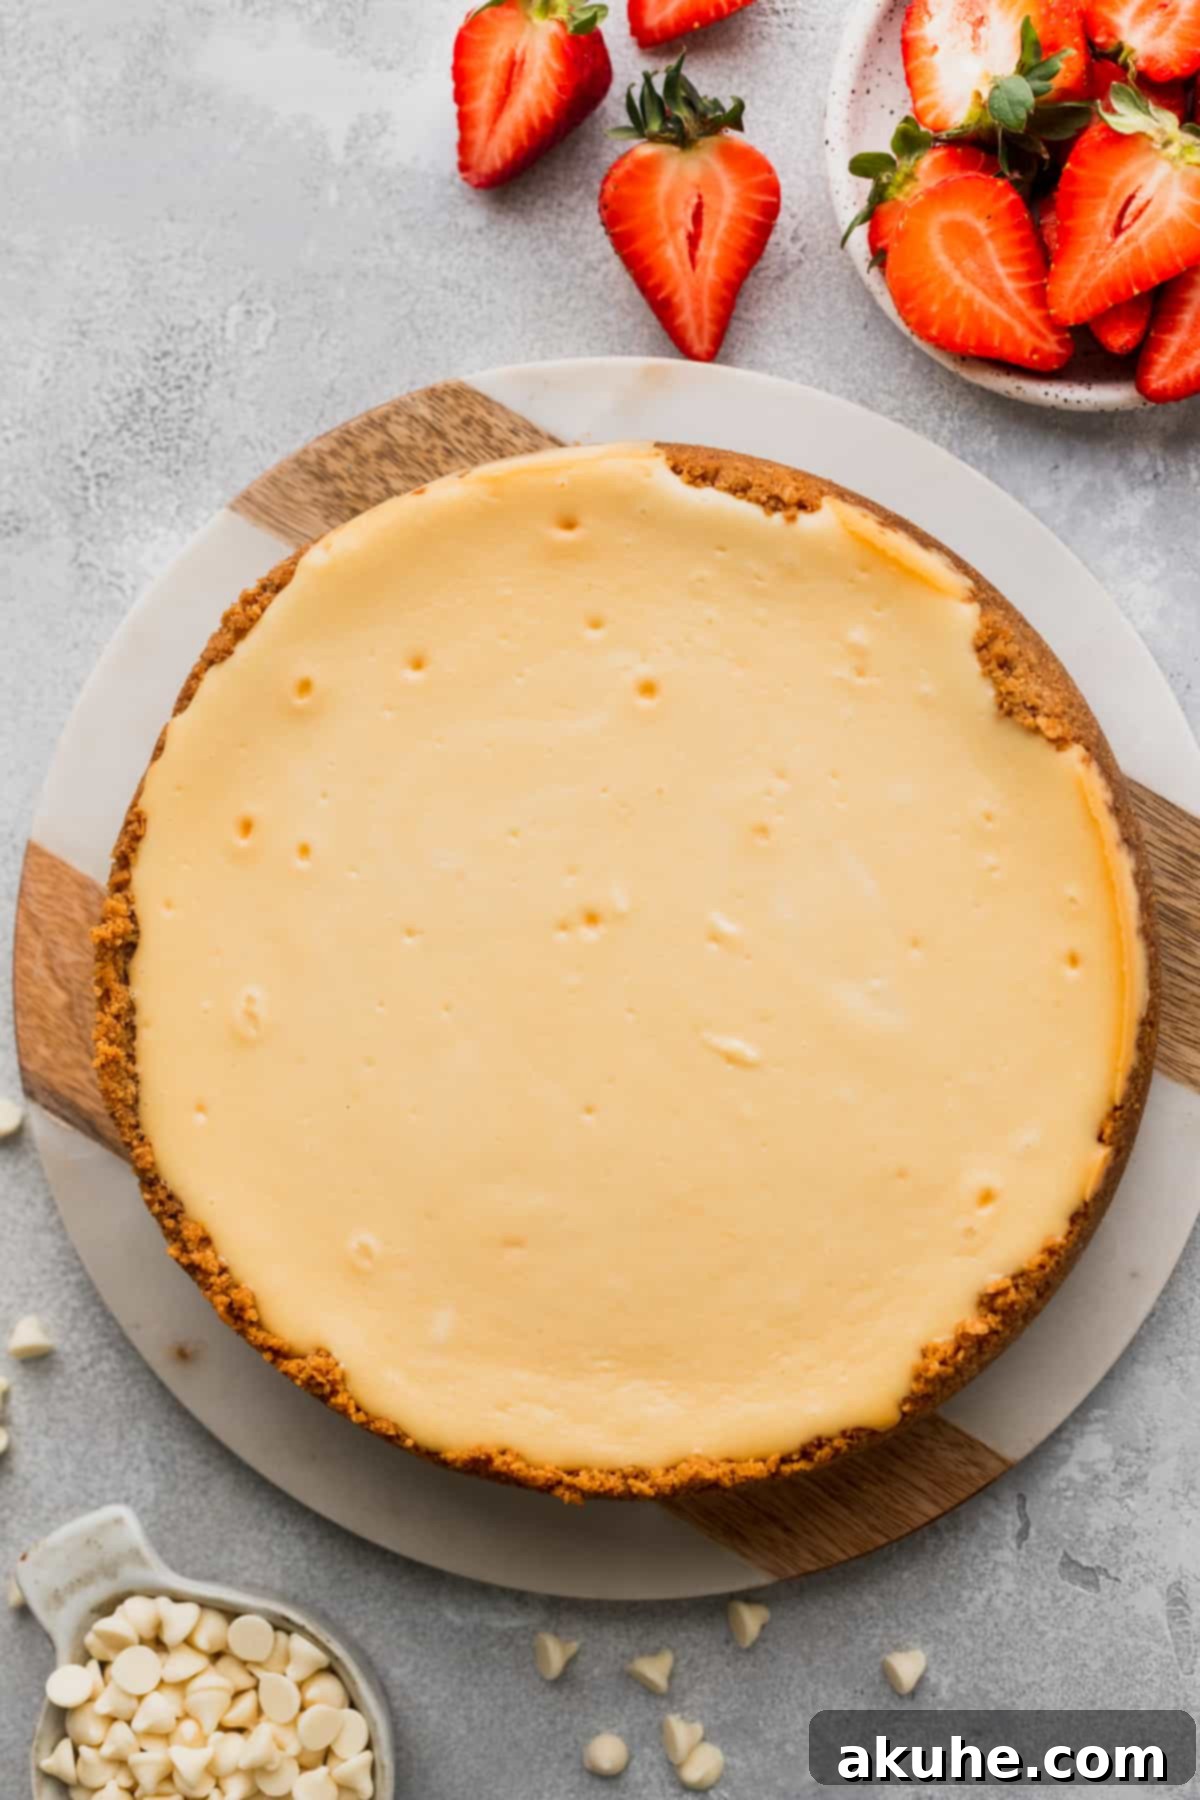
STEP 6: Cool the Cheesecake Gradually. Once baked, turn off the oven but leave the cheesecake inside the water bath, with the oven door slightly ajar, for an additional 30 minutes. This slow, gradual cooling within the warm, moist environment of the oven is crucial to prevent sudden temperature changes that can cause cracks. After 30 minutes, remove the springform pan from the water bath and oven, and let it cool completely on a wire rack at room temperature. Once cooled, cover the cheesecake with plastic wrap and chill it in the refrigerator overnight for the best results. It absolutely needs a minimum of 6 hours of chill time to firm up and develop its full flavor and luscious texture.
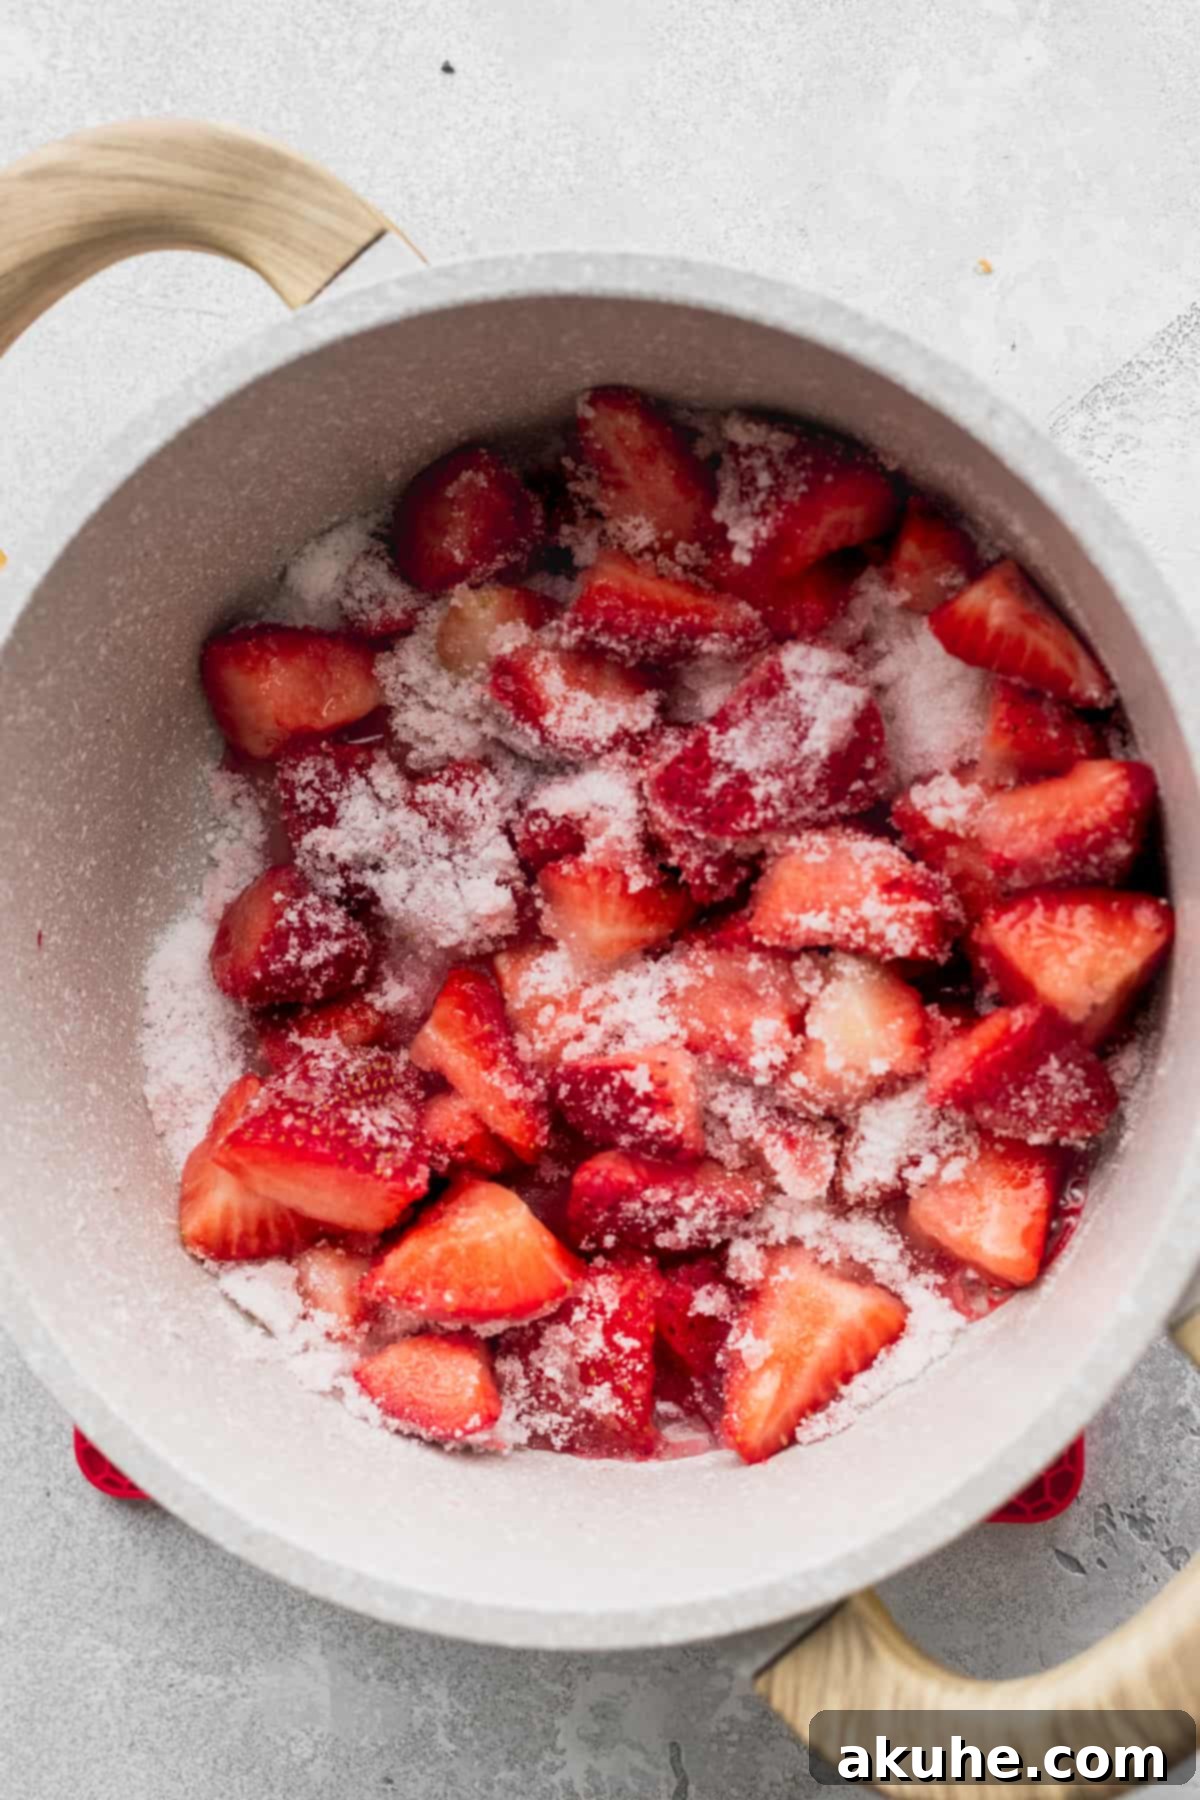
STEP 7: Prepare the Homemade Strawberry Glaze. In a medium saucepan over medium heat, combine the washed and quartered strawberries with the white granulated sugar. Cook, stirring occasionally, until the strawberries soften and release their juices, creating a syrupy mixture. Use the back of a wooden spoon or a potato masher to thoroughly mash the strawberries as much as possible. This helps extract maximum flavor and color. Remove the pan from the heat.
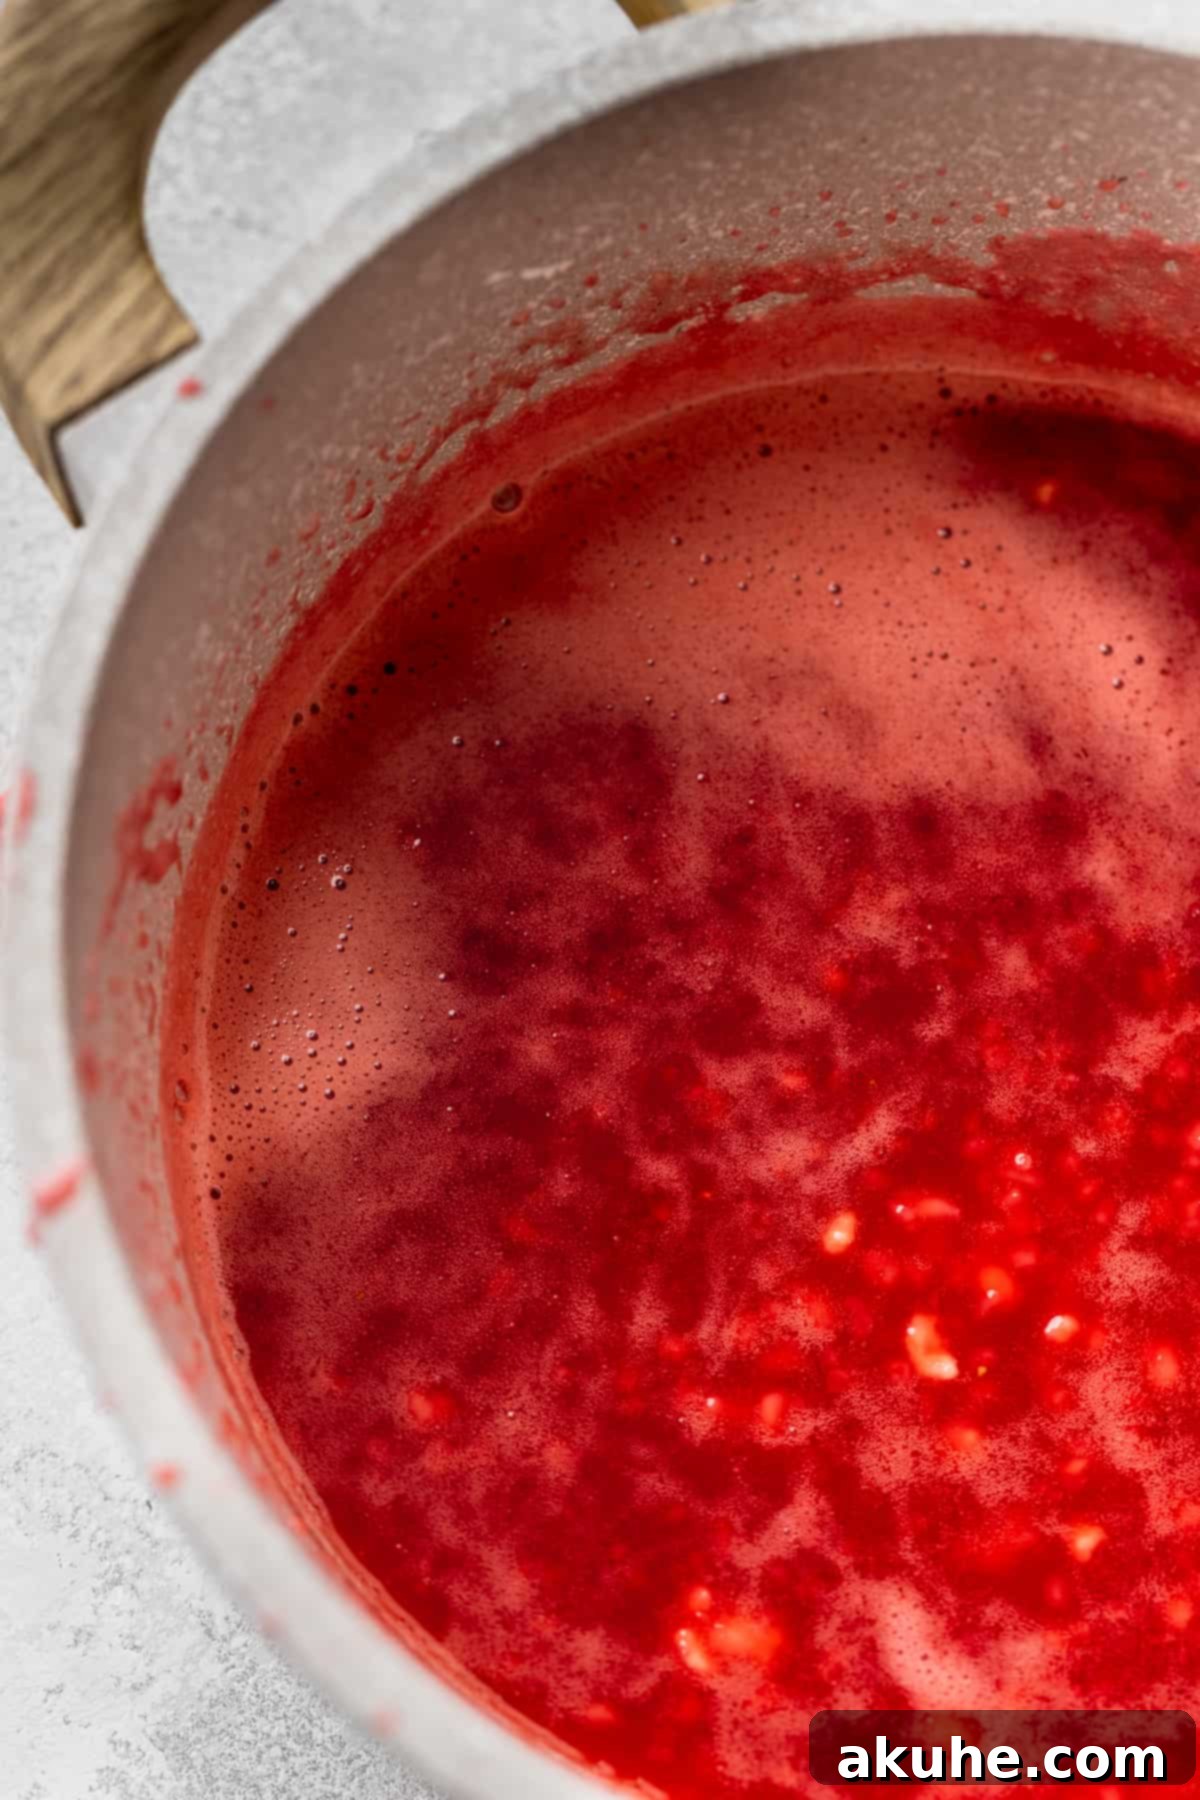
To achieve a perfectly smooth glaze, push the strawberry mixture through a fine-mesh sieve or sifter into a clean bowl, discarding any remaining pulp or seeds. Return the smooth strawberry juice to the saucepan. Whisk in the cornstarch, pure vanilla extract, and salt until completely dissolved and smooth. Return the pan to medium heat and cook, stirring constantly, until the glaze thickens slightly and darkens in color. It should coat the back of a spoon. Remove from heat and allow the strawberry sauce to cool completely before using. As it cools, it will thicken further.
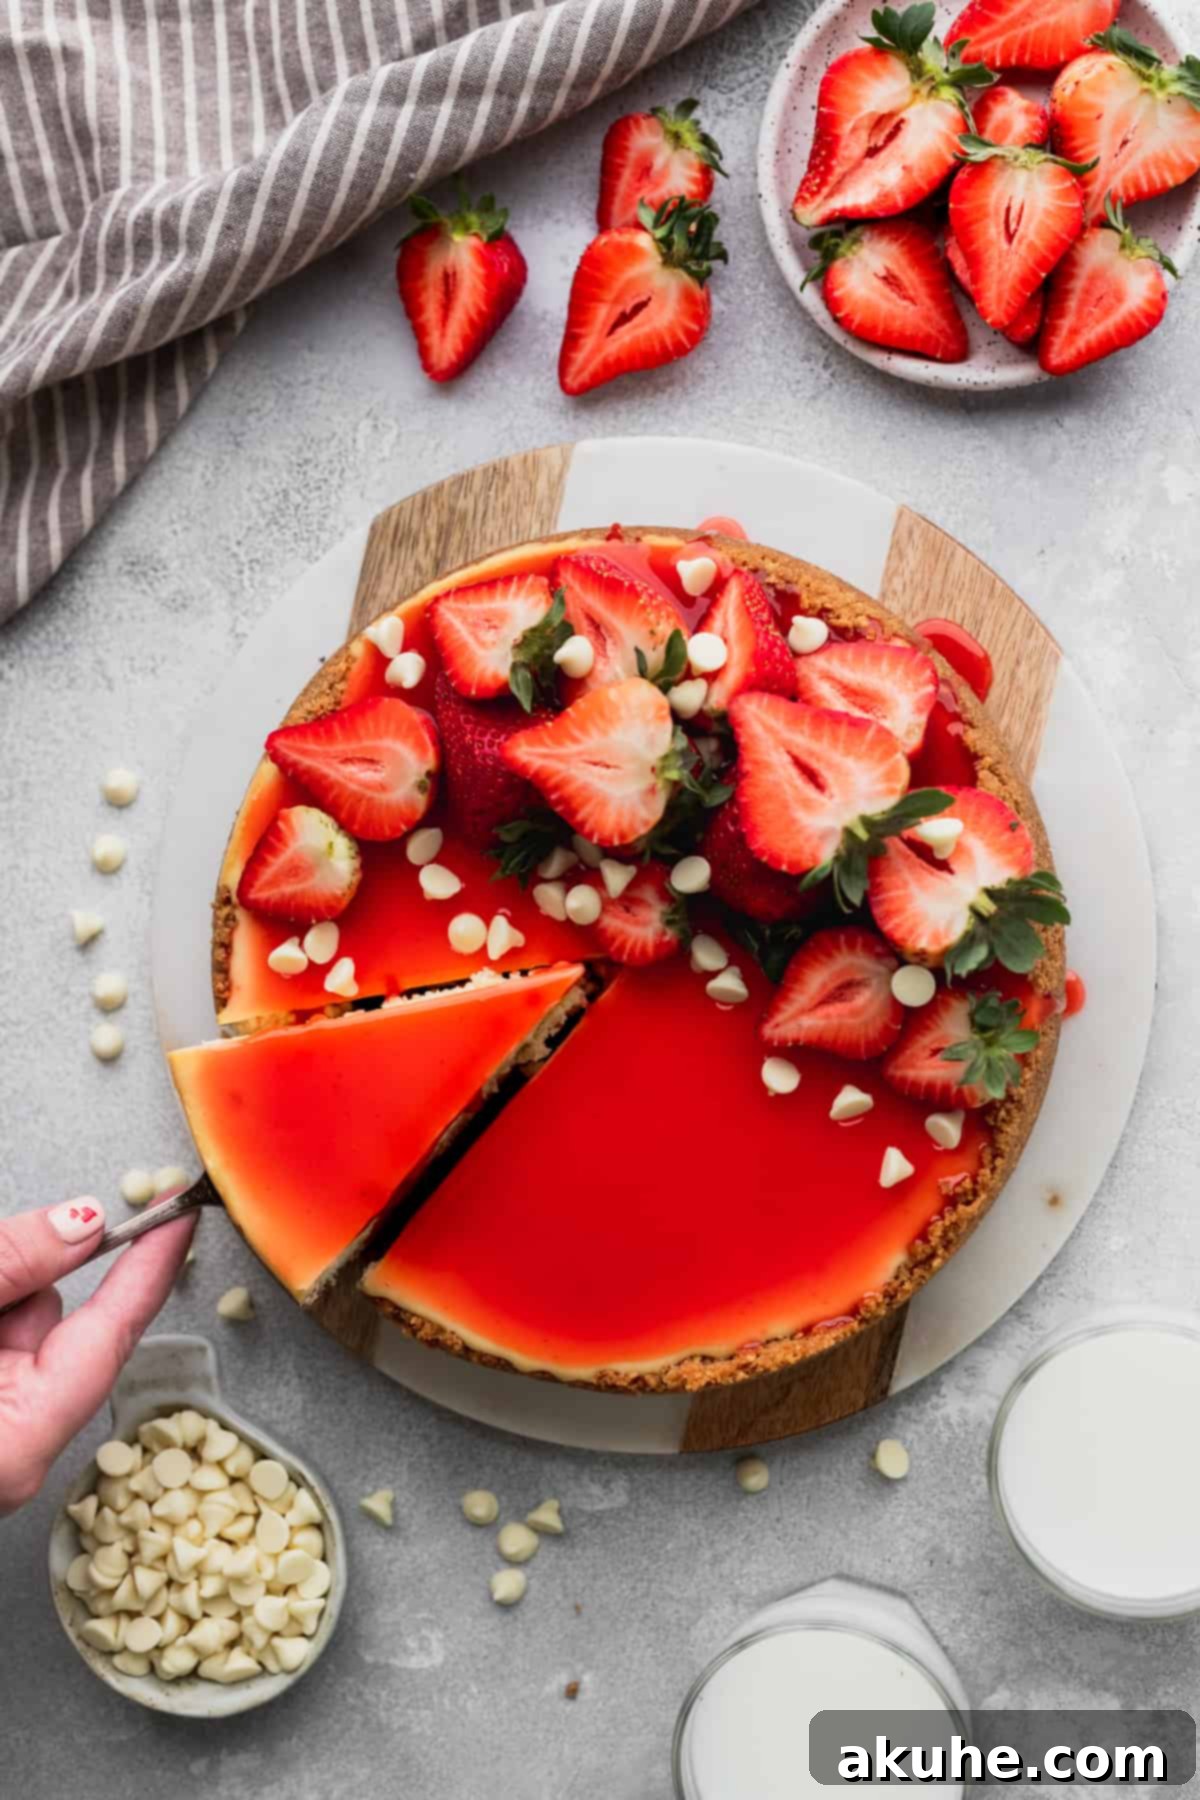
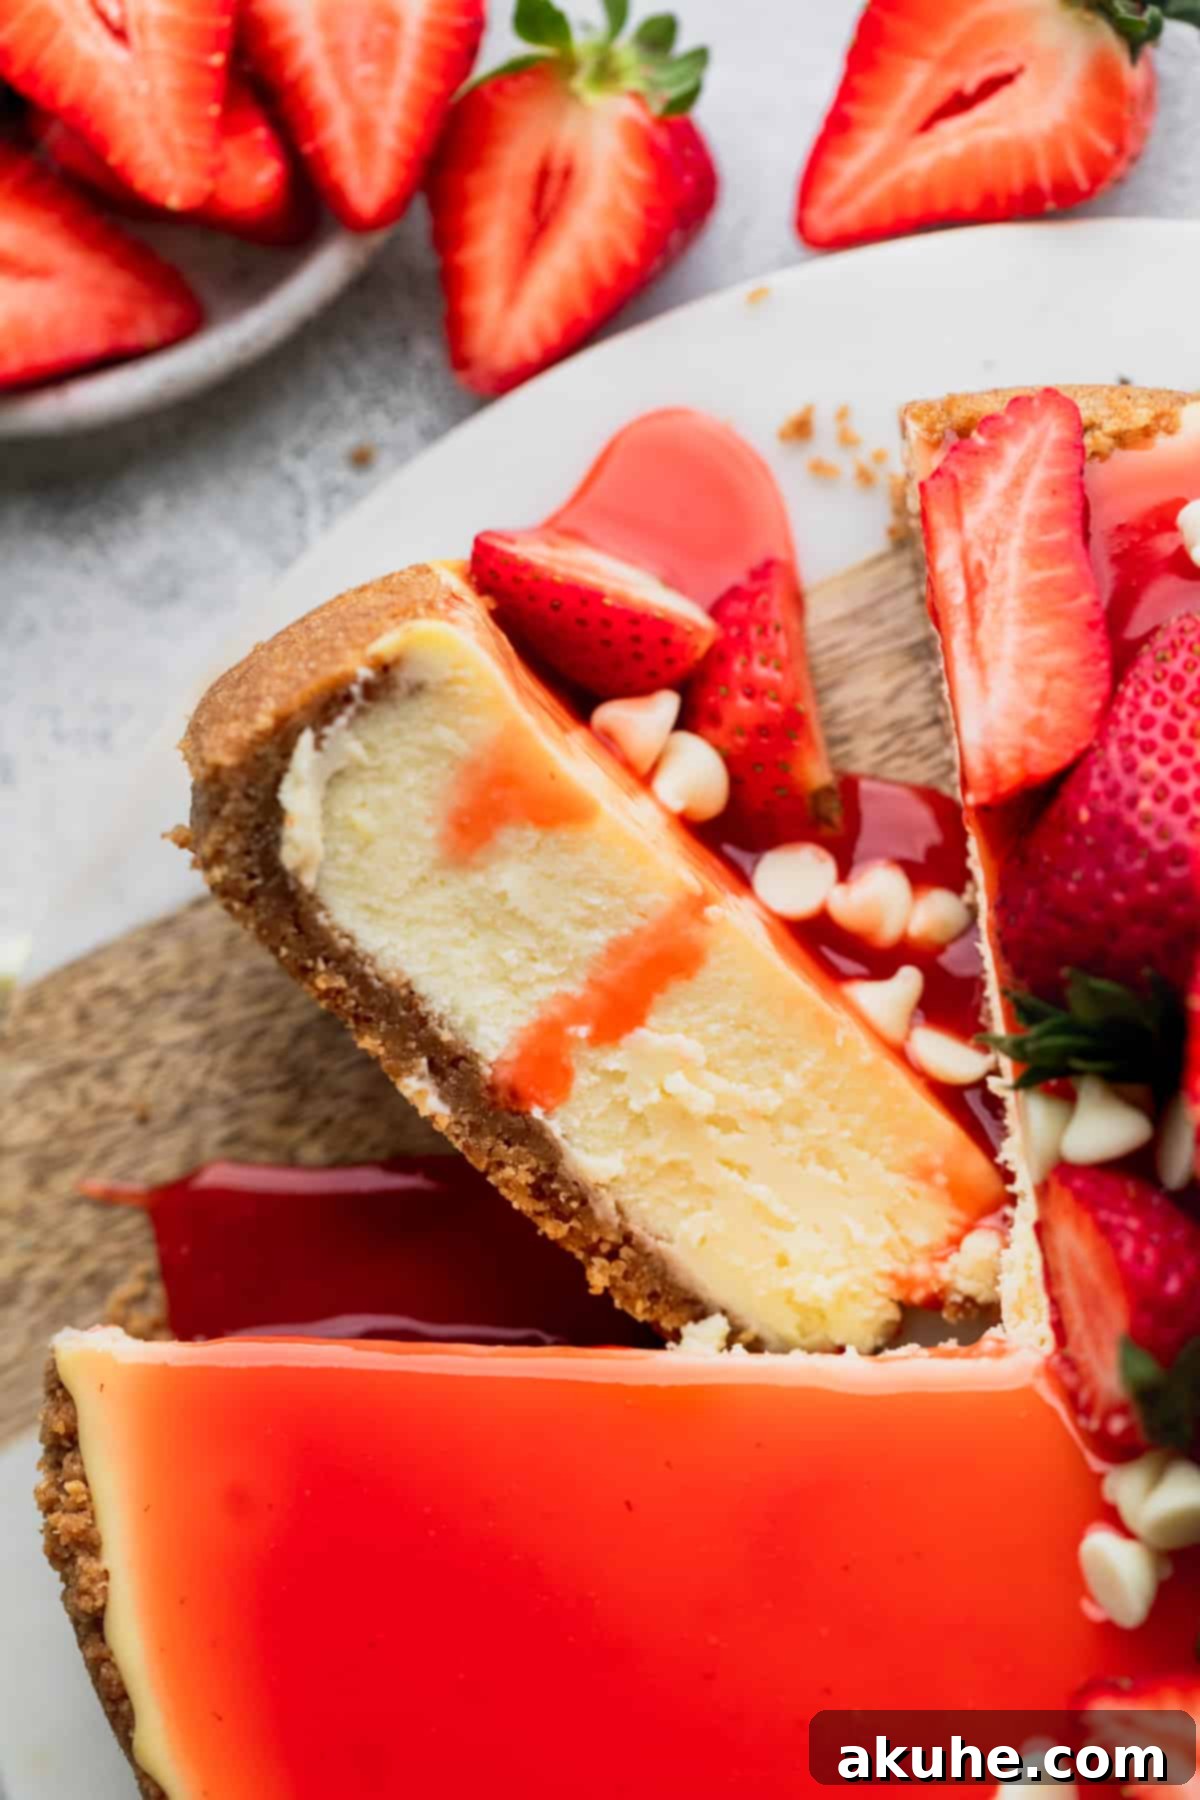
STEP 8: Decorate and Serve. Once the cheesecake is thoroughly chilled and the glaze is completely cooled, carefully remove the cheesecake from the springform pan (see tips below for easy removal). Gently pour the cooled strawberry glaze over the top of the cheesecake, spreading it evenly to the edges. For an extra touch of elegance, decorate with fresh strawberries, sliced in half with a thin paring knife, and a sprinkle of white chocolate chips. Chill the decorated cheesecake in the refrigerator for at least 30 minutes to allow the glaze to set before slicing and serving. This ensures a beautiful presentation and perfect slices.
How To Easily Remove Cheesecake From Pan
A pristine cheesecake presentation starts with a clean release from the pan. First, prepare your springform pan by generously spraying it with a non-stick baking spray. Next, line the bottom of the pan with a 9-inch parchment paper circle. Then, give the parchment paper and the sides of the pan another light spray. This double layer of protection is your best defense against sticking.
After your cheesecake has chilled overnight, it should be firm enough to easily remove. To release it, gently unclip the springform pan’s side and lift it straight up. If there’s any resistance, run a thin, sharp knife very gently around the edge of the cheesecake between the cake and the pan before unclipping. Once the side ring is removed, you can carefully slide a thin spatula between the cheesecake and the parchment paper circle on the base to transfer it to a serving platter. Then, you should be able to carefully lay the cheesecake on its side to peel off the bottom of the pan and the parchment circle.
How To Prevent Cracks in Your Cheesecake
Cracks are a common concern for cheesecake bakers, but they are entirely preventable with the right techniques. Achieving a perfectly smooth, uncracked surface is all about minimizing air and controlling temperature changes:
- Room Temperature Ingredients: This is fundamental. Ensure all dairy ingredients (cream cheese, sour cream) and eggs are at room temperature. Cold ingredients don’t emulsify well, leading to lumps in the batter. These lumps can expand and contract unevenly during baking, creating weak spots that result in cracks.
- Beat Cream Cheese Smooth: Before adding anything else, beat the cream cheese on its own until it’s incredibly smooth and fluffy. Then, add sugar and beat again until fully incorporated and no chunks remain. This ensures a uniform base.
- Minimize Air with Eggs: When incorporating eggs, switch to the lowest speed on your mixer and add them one at a time. Mix only until just combined. Over-beating the eggs incorporates too much air into the batter. This air expands rapidly in the hot oven and then collapses during cooling, causing fissures and cracks.
- The Essential Water Bath: A water bath is non-negotiable for crack-free cheesecakes. It creates a moist, steamy environment in the oven, which helps the cheesecake bake gently and evenly. The steam also prevents the top surface from drying out and cracking prematurely.
- Gradual Cooling: Sudden temperature drops are a primary culprit for cracks. Once the cheesecake is baked, do not immediately pull it out of the hot oven. Turn off the oven, crack open the oven door slightly, and let the cheesecake cool slowly within the water bath for about 30 minutes. This gradual transition from hot oven to room temperature prevents the cheesecake from contracting too rapidly, which would inevitably lead to cracks. After this period, remove it and cool completely on a wire rack before chilling.
Mastering Water Bath Techniques for Cheesecake
A water bath is an invaluable tool for baking cheesecakes, providing a moist environment through steam, which prevents the surface from drying out and cracking, and ensures even baking. Here are two effective techniques, both utilizing a larger roasting pan filled with hot water:
- The Double-Pan Method (Recommended): Place your springform pan inside a slightly larger 10-inch round cake pan. Then, place this cake pan (with the springform inside) into a larger roasting pan. Carefully fill the roasting pan with hot, steaming water, ensuring the water level comes about halfway up the sides of the cake pan. This method provides an extra layer of protection, guaranteeing that no water seeps into your graham cracker crust, resulting in a perfectly crisp base every time. This is my preferred method for foolproof cheesecake baking!
- The Foil-Wrapped Method: Tightly wrap the exterior of your springform pan with two layers of heavy-duty aluminum foil. Ensure the foil extends completely up the sides of the pan to create a watertight seal. Then, place the wrapped springform pan directly into your roasting pan. Carefully fill the roasting pan with hot water, again ensuring the water level comes about halfway up the sides of the springform pan. While effective, this method carries a slight risk of water seeping through the foil and potentially making the crust soggy, especially if the foil isn’t wrapped perfectly.
My favorite method is the first one because it offers superior protection against water leakage, ensuring your crust remains perfectly crisp and your cheesecake bakes flawlessly without any worry of a soggy bottom.
Can This White Chocolate Cheesecake Be Made Mini?
Absolutely! This recipe is wonderfully adaptable for making individual-sized cheesecakes. To create mini versions, divide the recipe into thirds (or adjust as needed) and bake them in a muffin tin lined with paper liners. Baking times will be significantly shorter. For precise guidance on baking temperatures and times for mini cheesecakes, you can refer to our Mini Oreo Cheesecakes or Mini Chocolate Cheesecakes recipes, adjusting for the white chocolate and strawberry flavors.
Frequently Asked Questions (FAQ) About White Chocolate Cheesecake
Absolutely! This recipe is incredibly versatile. You can easily transform this into a decadent white chocolate raspberry cheesecake by simply switching out the strawberries for fresh or frozen raspberries in the glaze. The tartness of raspberries pairs beautifully with white chocolate.
Yes, you certainly can. If white chocolate isn’t your preference, you can substitute the melted white chocolate with an equal amount of good quality semi-sweet or dark chocolate. This will create a rich, classic chocolate cheesecake with a delightful strawberry topping.
While white chocolate chips can be used for decoration, we highly recommend using high-quality white chocolate bars for the cheesecake recipe itself. White chocolate bars typically contain more cocoa butter, allowing them to melt much smoother and integrate better into the cheesecake batter, resulting in a superior flavor and texture compared to chips, which often contain stabilizers.
Delicious Recipe Variations to Try
- Alternate Toppings: While the strawberry glaze is divine, feel free to customize your cheesecake with other toppings! Consider a luscious white chocolate ganache for an extra layer of decadence, a rich dark chocolate ganache for a striking contrast, fresh mixed berries (blueberries, raspberries, blackberries) for a colorful medley, or even crushed peanut butter cups or Oreos for a playful twist.
- Citrus Zest: Add a teaspoon of lemon or orange zest to the cheesecake batter for a subtle, bright citrus note that complements the white chocolate beautifully.
- Infused Glaze: Experiment with adding a splash of Chambord (raspberry liqueur) or Grand Marnier (orange liqueur) to your strawberry glaze after it cools for an adult-friendly flavor boost.
Special Tools for Cheesecake Success
Having the right tools can make all the difference in your cheesecake baking journey:
- Springform Pan: A good quality springform pan is essential for easily releasing your cheesecake. We typically use a 9-inch springform pan for standard height, but an 8-inch springform pan can be used if you desire a taller, more dramatic cheesecake.
- Parchment Paper Circles: These pre-cut 8-inch parchment paper circles are a lifesaver for lining the bottom of your pan. They ensure a clean release and save you the hassle of cutting out circles from a roll of parchment paper.
- Baking Spray with Flour: A nonstick spray that contains flour, like this one, provides an extra layer of non-stick protection for your springform pan, further guaranteeing an effortless release.
- Offset Spatula: An offset spatula is incredibly handy for evenly spreading your cheesecake batter into the pan and later for smoothly applying the strawberry glaze over the top. Its angled blade makes it easy to maneuver and achieve a professional finish.
Storing and Freezing Your White Chocolate Cheesecake
Proper storage is key to keeping your cheesecake fresh and delicious. Store any leftover white chocolate cheesecake in an airtight container in the refrigerator for up to 5 days. This will maintain its creamy texture and prevent it from absorbing any unwanted odors from the fridge.
Freezing Instructions
Yes, this entire white chocolate cheesecake can be frozen! To do so, first, ensure the cheesecake has been thoroughly chilled in the refrigerator overnight. This helps it firm up completely. Once firm, wrap the cheesecake tightly in several layers of plastic wrap, followed by a layer of aluminum foil. This double wrapping protects against freezer burn. It can be stored in the freezer for up to 30 days.
When you’re ready to enjoy it, thaw the cheesecake in the refrigerator overnight, or for 1-2 hours on the counter at room temperature if you’re in a hurry. Once thawed, you can then proceed with decorating it with the strawberry glaze and fresh strawberries, as the glaze is best applied just before serving.
Other Cheesecake Recipes To Try
If you’ve fallen in love with cheesecake, explore more of our delightful recipes to satisfy every craving.
Explore More White Chocolate Recipes
For those who adore the sweet, creamy taste of white chocolate, we have a collection of recipes perfect for you:
- Decadent White Chocolate Cupcakes
- Chewy White Chocolate Cinnamon Blondies
- Zesty Lemon White Chocolate Cake
- Crunchy White Chocolate Toffee Cookies
- Sweet and Tart Raspberry White Chocolate Cookies
We hope you love this incredible white chocolate cheesecake as much as we do! Please make sure to leave us a star review below to share your experience!
Don’t forget to tag us on Instagram @stephaniesweettreats with your beautiful creations. For more baking inspiration and ideas, be sure to follow us on Pinterest!
White Chocolate Cheesecake
Print Recipe
Pin Recipe
Leave a Review
Ingredients
Graham Cracker Crust
- 2½ cups Graham cracker crumbs, from 2 sleeves of crackers
- 10 TBSP Unsalted butter, melted
- ⅛ cup Brown sugar, light or dark, packed
White Chocolate Cheesecake
- 24 oz Cream cheese, full fat, room temperature
- ¾ cup White granulated sugar
- ¼ cup Sour cream, full fat, room temperature
- 1 tsp Pure vanilla extract
- ⅛ tsp Salt
- 8 oz White chocolate, high quality bars, melted and cooled (e.g., Lindt)
- 3 Large eggs, room temperature
Strawberry Glaze
- 1 lb Strawberries, washed and quartered (fresh or frozen/thawed)
- 1 cup White granulated sugar
- 2 TBSP Cornstarch
- 1 tsp Pure vanilla extract
- ⅛ tsp Salt
- Fresh strawberries, for decoration
Instructions
Graham Cracker Crust
- Preheat oven to 325°F (160°C). Generously spray a 9-inch springform pan with nonstick baking spray. Line the bottom with a 9-inch parchment paper circle, then spray again. This ensures an easy release.
- In a food processor, blend the graham crackers into very fine crumbs. In a medium bowl, combine the crumbs with the melted butter and brown sugar. Mix thoroughly with a fork until moist and well combined.2½ cups Graham cracker crumbs, 10 TBSP Unsalted butter, ⅛ cup Brown sugar
- Pour the crumb mixture into the prepared springform pan. Use your hands to press the crumbs firmly onto the bottom and about halfway up the sides of the pan. Compact the bottom thoroughly with the back of a measuring cup.
- Bake the crust for 12 minutes. Remove from oven and let cool slightly while you prepare the filling.
White Chocolate Cheesecake
- While the crust bakes, prepare the white chocolate. Chop the white chocolate bars into small pieces and place them in a microwave-safe bowl. Heat in the microwave for 30 seconds, then stir. Continue heating in 15-second intervals, stirring well after each, until completely melted and smooth. Let it cool slightly before adding to the batter.8 oz White chocolate
- Using a stand mixer or electric hand mixer, beat the room temperature cream cheese on high speed for 1 minute until completely smooth and free of lumps. Add the white granulated sugar and beat for another 1 minute. Scrape down the sides and bottom of the bowl with a rubber spatula to ensure thorough mixing.24 oz Cream cheese, ¾ cup White granulated sugar
- Reduce mixer speed to medium. Add the room temperature sour cream, vanilla extract, salt, and the slightly cooled melted white chocolate. Mix until just combined and smooth. Do not overmix. Then, reduce speed to low and add the room temperature eggs one at a time, mixing only until each egg is just incorporated. Overmixing eggs can introduce too much air, leading to cracks. Scrape the bowl once more.¼ cup Sour cream, 1 tsp Pure vanilla extract, ⅛ tsp Salt, 3 Large eggs
- Carefully pour the cheesecake batter into the prepared springform pan with the cooled crust. Prepare a water bath (refer to “Water Bath Techniques” above for detailed methods).
- Bake for 75-90 minutes, or until the edges are set and the center has a slight, gentle jiggle when the pan is lightly tapped.
- To prevent cracks, turn off the oven but leave the cheesecake inside the water bath with the oven door slightly ajar for 30 minutes. This allows for gradual cooling. After 30 minutes, remove the cheesecake from the oven and water bath, and cool completely on a wire rack at room temperature.
- Once completely cooled, cover the cheesecake with plastic wrap and chill in the refrigerator for at least 6 hours, or preferably overnight, to allow it to firm up and develop its full flavor.
Strawberry Glaze
- In a medium saucepan over medium heat, combine the washed and quartered strawberries and white granulated sugar. Cook, stirring occasionally, until the strawberries soften and release their juices. Use the back of a wooden spoon to mash the strawberries thoroughly.1 lb Strawberries, 1 cup White granulated sugar
- Remove the pan from the heat. Press the strawberry mixture through a fine-mesh sieve or sifter into a clean bowl, discarding any remaining pulp or seeds. Return the smooth strawberry juice to the saucepan.
- Add the cornstarch, pure vanilla extract, and salt to the saucepan with the strawberry juice. Whisk well until completely smooth. Return to medium heat and cook, stirring constantly, until the glaze thickens slightly and darkens in color. It should coat the back of a spoon. Remove from heat.2 TBSP Cornstarch, 1 tsp Pure vanilla extract, ⅛ tsp Salt
- For an extra-smooth glaze, push it through a sieve again after cooking. Let the glaze cool completely at room temperature before using; it will thicken further as it cools.
- Once the cheesecake is chilled and the glaze is cool, carefully remove the cheesecake from its pan. Pour the cooled strawberry glaze over the top, spreading it evenly. Decorate with fresh strawberries, sliced or whole, as desired. Chill for another 30 minutes to set the glaze before serving.Fresh strawberries
Notes
Carbohydrates: 90g,
Protein: 9g,
Fat: 37g,
Saturated Fat: 19g,
Polyunsaturated Fat: 2g,
Monounsaturated Fat: 10g,
Trans Fat: 1g,
Cholesterol: 80mg,
Sodium: 633mg,
Potassium: 287mg,
Fiber: 3g,
Sugar: 54g,
Vitamin A: 937IU,
Vitamin C: 19mg,
Calcium: 144mg,
Iron: 3mg
Did you make this recipe?
Please leave a star rating and review below!
