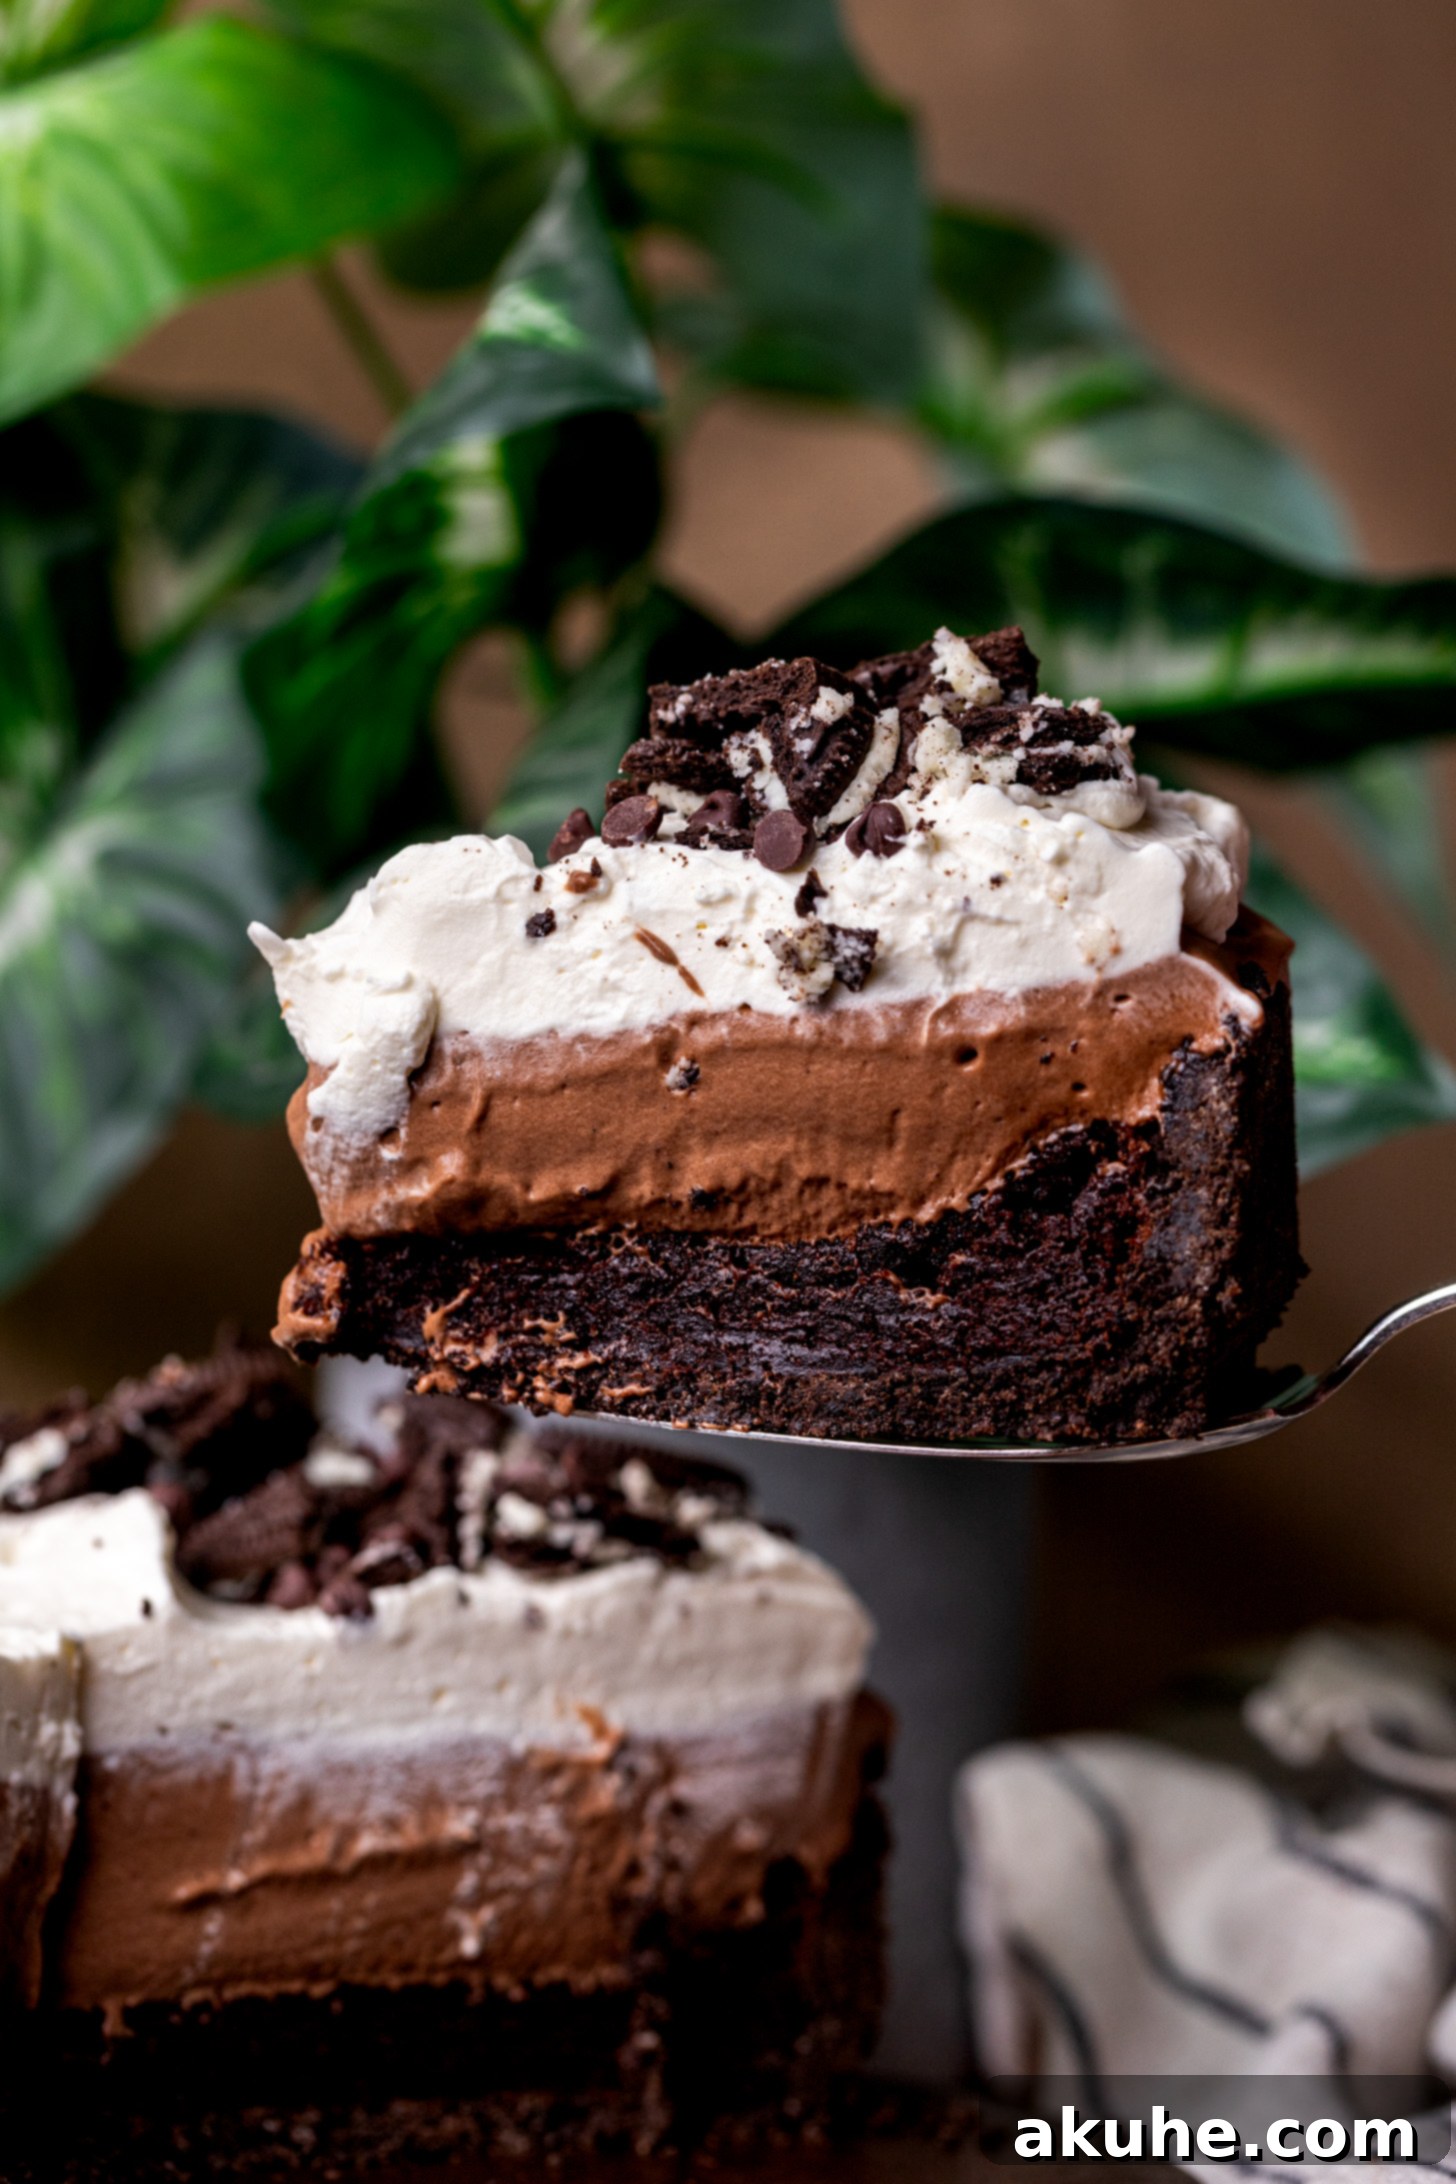
The Ultimate Decadent Mississippi Mud Pie: A Chocolate Lover’s Dream
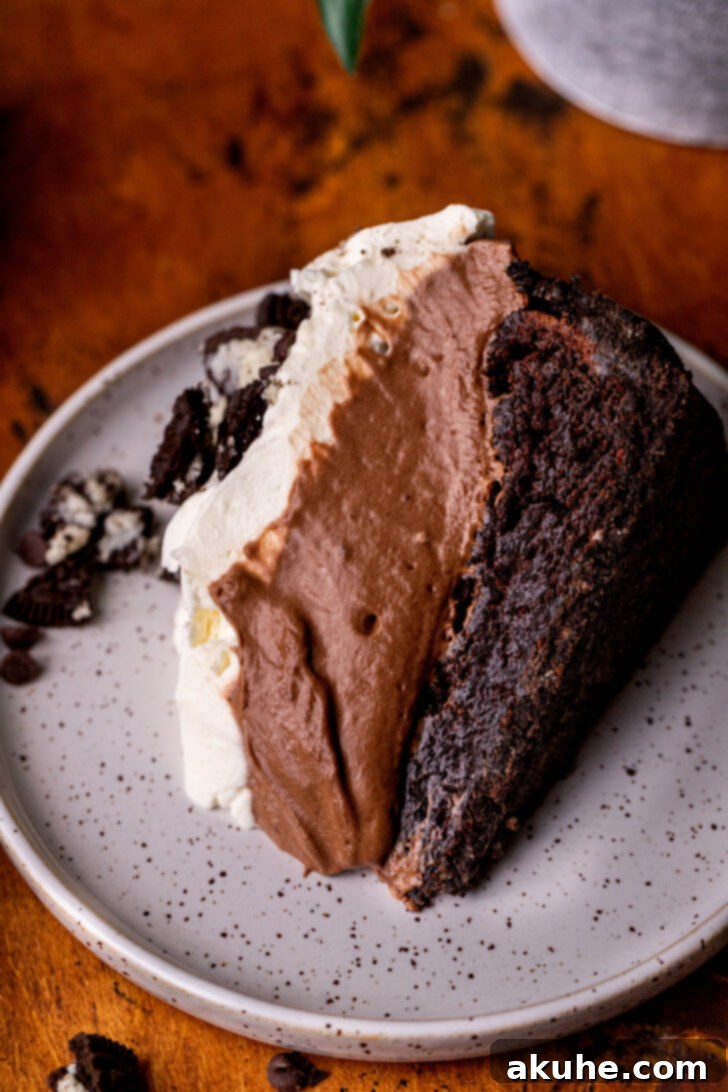
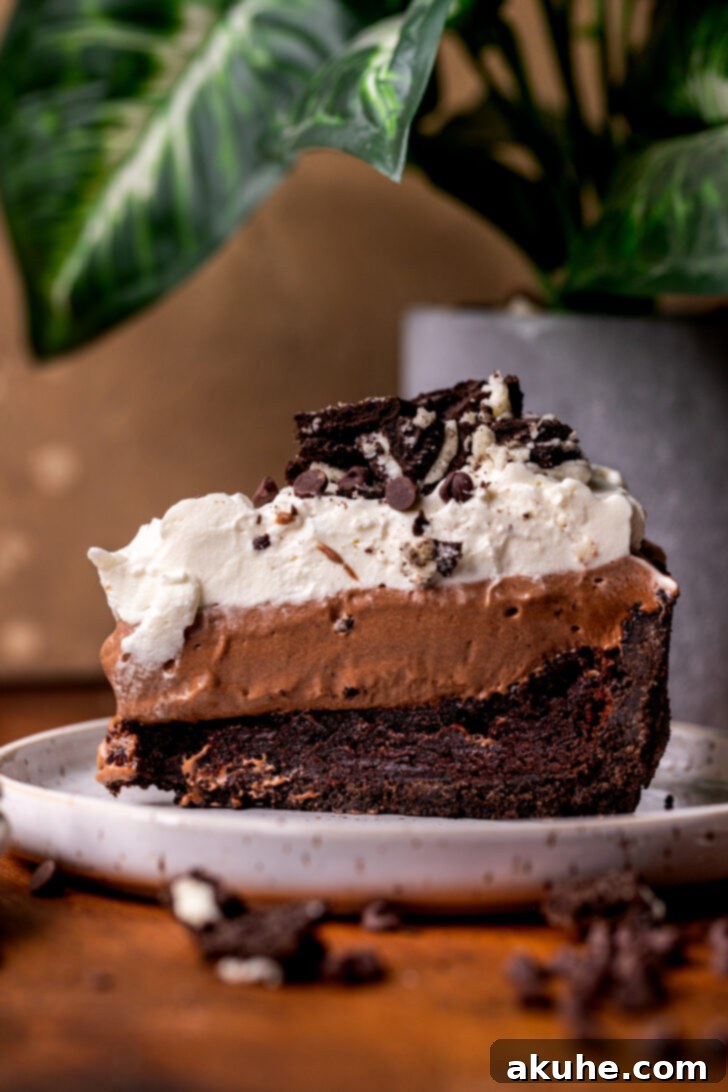
Prepare to embark on an unforgettable journey into the heart of Southern dessert magic with this incredible Mississippi Mud Pie recipe! More than just a pie, it’s a symphony of textures and intensely rich chocolate flavors, designed to delight every true chocolate connoisseur. Imagine a robust, crunchy Oreo cookie crust, cradling a layer of intensely fudgy, chewy brownie. On top of that, a velvety smooth chocolate pudding layer adds a cooling, creamy contrast, all crowned with a generous, cloud-like pile of stabilized whipped cream. This is not just a dessert; it’s an experience—a truly creamy chocolate lover’s pie that promises to be the star of any gathering.
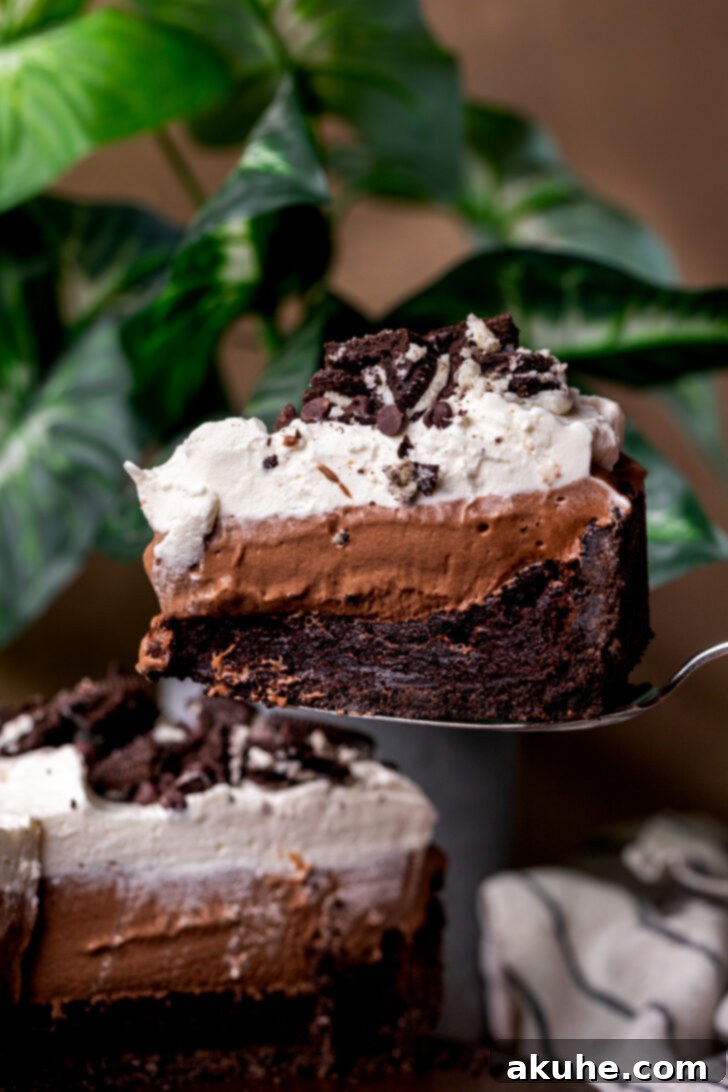
Originating from the American South, Mississippi Mud Pie is renowned for its irresistibly decadent nature. While it boasts multiple distinct layers, the beauty of this recipe lies in the simplicity of each component, making it surprisingly accessible for home bakers. It’s the quintessential dessert for grand occasions like Thanksgiving, Christmas, or any festive celebration where an impressive yet comforting treat is desired. When I first set out to craft my own rendition of this beloved classic, my primary goal was an unparalleled chocolate intensity, and this recipe absolutely delivers. The standout, for me, remains the brownie layer—it retains its delightful softness and rich fudginess even when thoroughly chilled, creating a sublime textural experience with every bite.
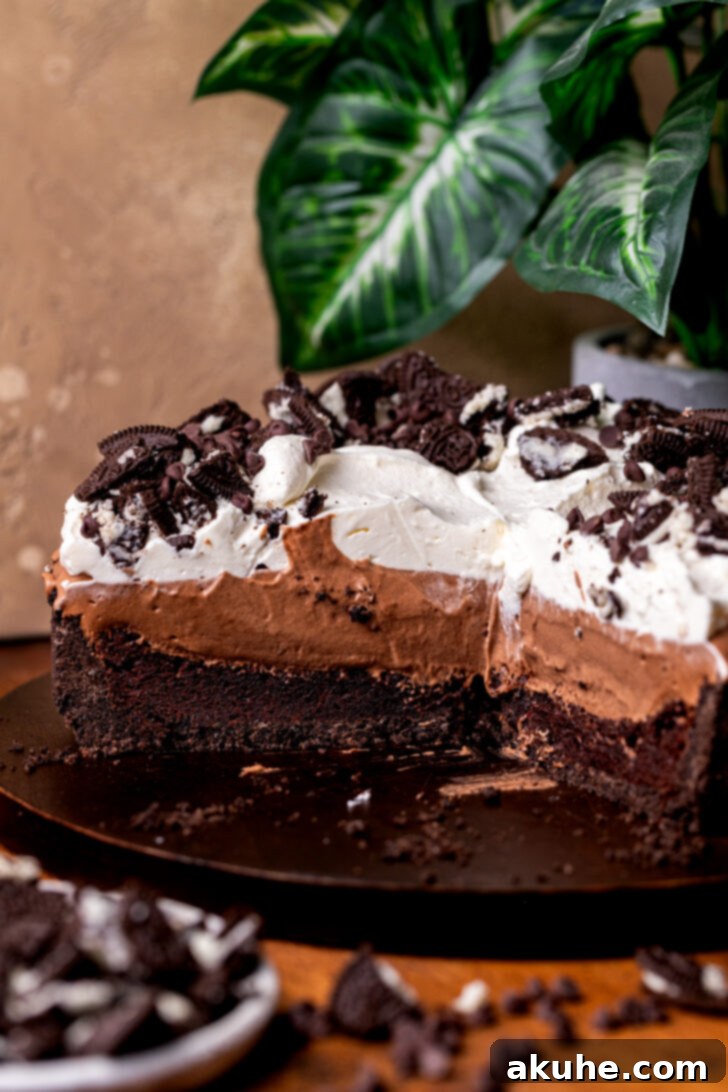
Why You’ll Absolutely Love This Mississippi Mud Pie
There are countless reasons why this particular Mississippi Mud Pie recipe will become a cherished favorite in your kitchen. First and foremost, it offers an unparalleled chocolate experience, blending different chocolate elements into a harmonious, rich symphony. The combination of the crunchy Oreo crust, the dense, chewy brownie, the silky chocolate pudding, and the airy whipped cream creates a dynamic textural contrast that keeps every spoonful exciting.
Despite its elaborate appearance, this pie is surprisingly easy to assemble. Each layer comes together quickly, and the overall process is broken down into manageable steps, making it perfect for both seasoned bakers and enthusiastic beginners. It’s an ideal make-ahead dessert, with the chilling time actually enhancing the flavors and allowing the layers to set perfectly, reducing stress on the day of your event. Plus, its stunning presentation makes it a showstopper, guaranteeing gasps of delight from your guests.
Mastering the Layers: Key Components of Your Mud Pie
Understanding the role of each layer is crucial to appreciating the genius behind Mississippi Mud Pie. Let’s delve into what makes each component special:
- The Unbeatable Oreo Crust: This isn’t just any pie crust; it’s a foundation of crushed Oreo cookies blended with melted butter, creating a wonderfully crisp and flavorful base that perfectly complements the rich fillings. The genius of using whole Oreos (filling included) is that it adds an extra depth of flavor and helps achieve that perfectly sturdy, yet crumbly, texture.
- The Fudgy Brownie Heart: Unlike many mud pies that use a cakey base, our version features a dense, moist, and incredibly fudgy brownie layer. This is where the magic truly happens, providing a substantial, deeply chocolatey center that remains soft and decadent, even when served cold straight from the fridge. It’s a testament to the careful balance of ingredients and precise baking.
- The Silky Chocolate Pudding Layer: This isn’t your average pudding. Enriched with additional cocoa powder and carefully whisked with a touch of whipped cream, it achieves an extraordinary creaminess and intensified chocolate flavor. The specific milk ratio is key here, ensuring it sets to a firm, yet luscious, consistency that won’t disappoint.
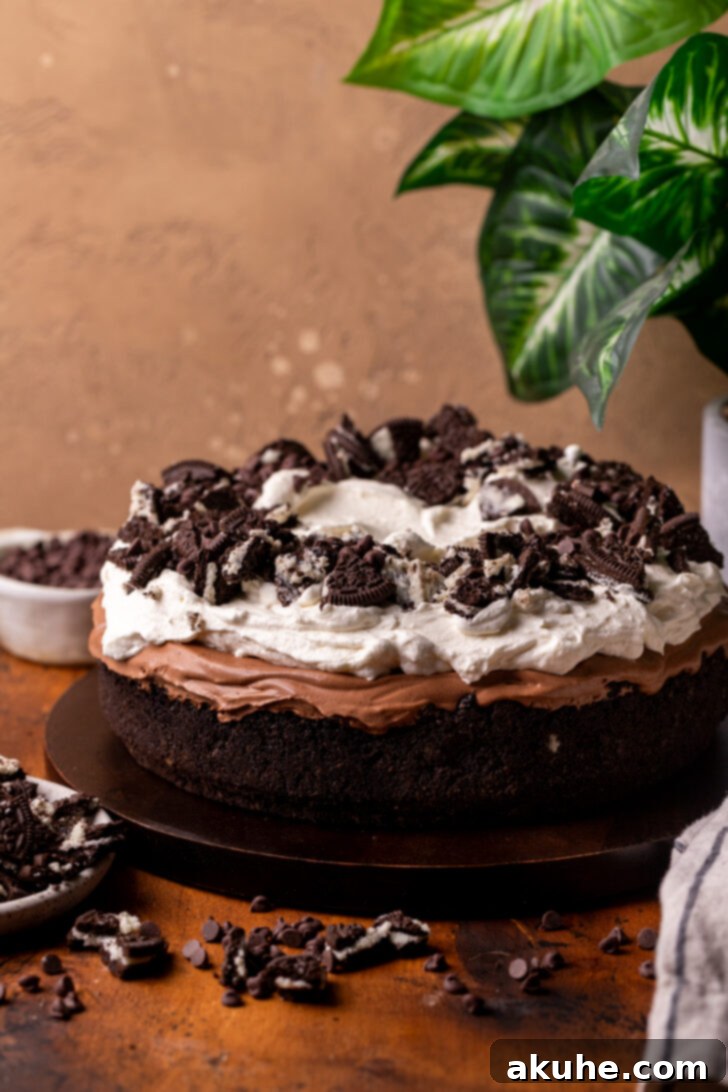
- The Cloud-Like Whipped Cream Topping: No mud pie is complete without a generous crown of whipped cream. Our recipe takes it a step further by incorporating cream cheese, creating a stabilized whipped cream that holds its shape beautifully, offering a light, airy contrast to the dense chocolate layers below without becoming watery. It’s the perfect canvas for extra sprinkles or chocolate shavings!
Expert Tips for Making the Perfect Mississippi Mud Pie
To ensure your Mississippi Mud Pie turns out absolutely flawless and as stunning as the ones pictured, pay close attention to these vital tips. I highly recommend using a 9-inch springform pan for this recipe. While a regular pie pan can be used, a springform pan significantly simplifies the process of unmolding and presenting your beautiful, multi-layered creation.
- Tip 1: For the Sturdy Oreo Crust. You’ll need about 2/3rds of a regular pack of Oreo cookies. A common question I receive is whether you need to remove the cream filling from the Oreos. The answer is a resounding no! Keeping the filling actually adds to the flavor and helps bind the crumbs together. The crust is baked first, which ensures it becomes a firm, sturdy layer capable of holding up all the decadent fillings. Pulse the cookies in a food processor until fine crumbs form, then mix thoroughly with melted butter before pressing firmly into your prepared pan.
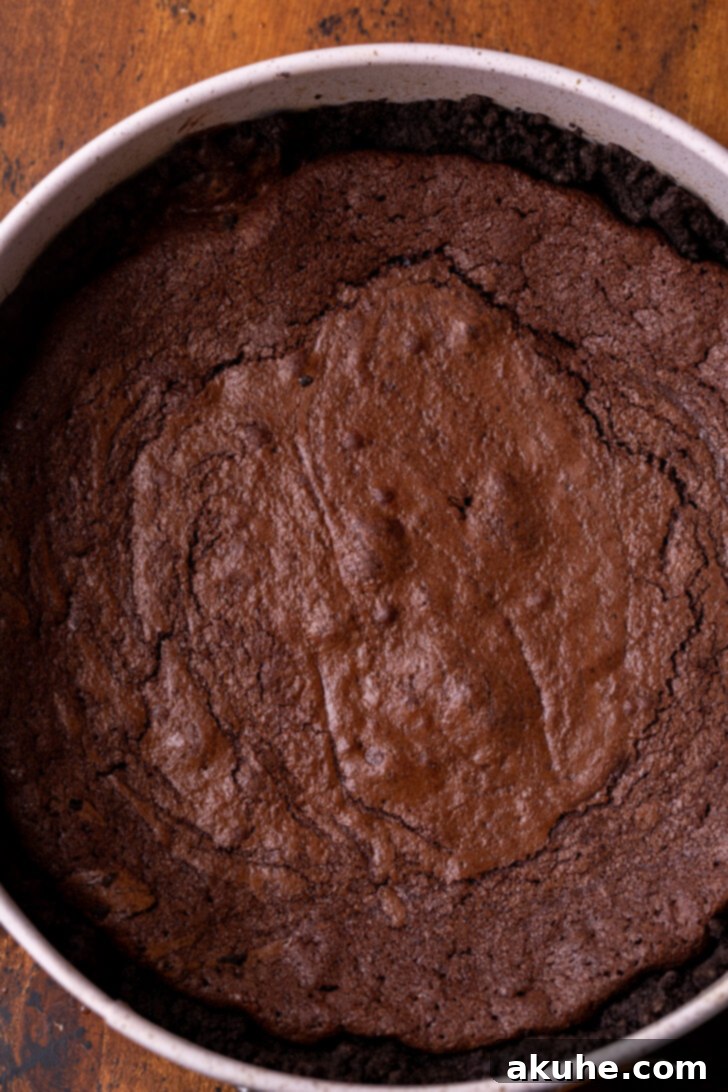
- Tip 2: Achieving the Fudgy Brownie Layer. The ultimate goal for this layer is to slightly underbake it. This technique is crucial for maintaining that irresistible soft, fudgy texture, even after chilling. For my oven, 28 minutes was the sweet spot, but oven temperatures can vary. Start checking around 27 minutes. When a toothpick is inserted into the center, it should come out with moist crumbs, not raw batter. If it’s still raw, add another 3-5 minutes of baking time, checking frequently. Remember, a little underbaked is perfect for fudgy brownies; overbaked leads to a dry, cakey texture.
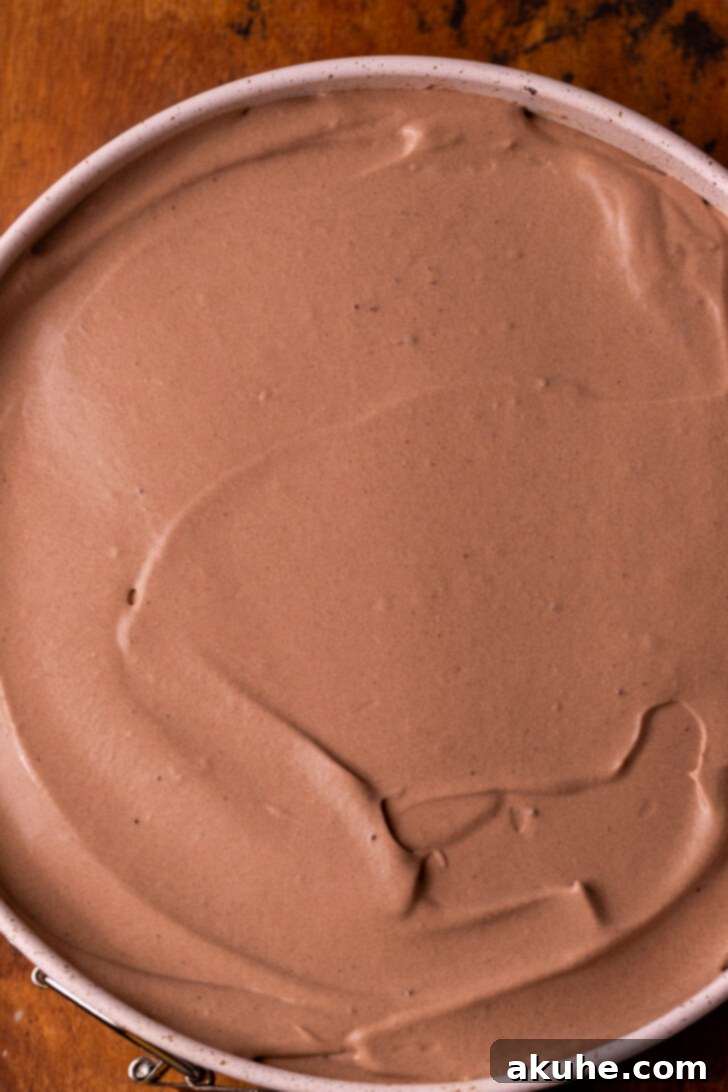
- Tip 3: The Secret to a Set Pudding Layer. To achieve a perfectly set, creamy chocolate pudding layer, it’s absolutely critical to use precisely 1 cup of milk (I recommend whole milk for richness). Adding any more milk than specified will result in a pudding that simply won’t set properly, becoming too thin. For the best results and a truly firm, well-chilled pudding, plan to make the pie ahead of time, allowing the pudding layer to chill in the refrigerator overnight. This extended chilling period guarantees a perfect set. The next day, you can then effortlessly top it with your whipped cream and any fun add-ons like chocolate shavings or additional Oreo pieces.
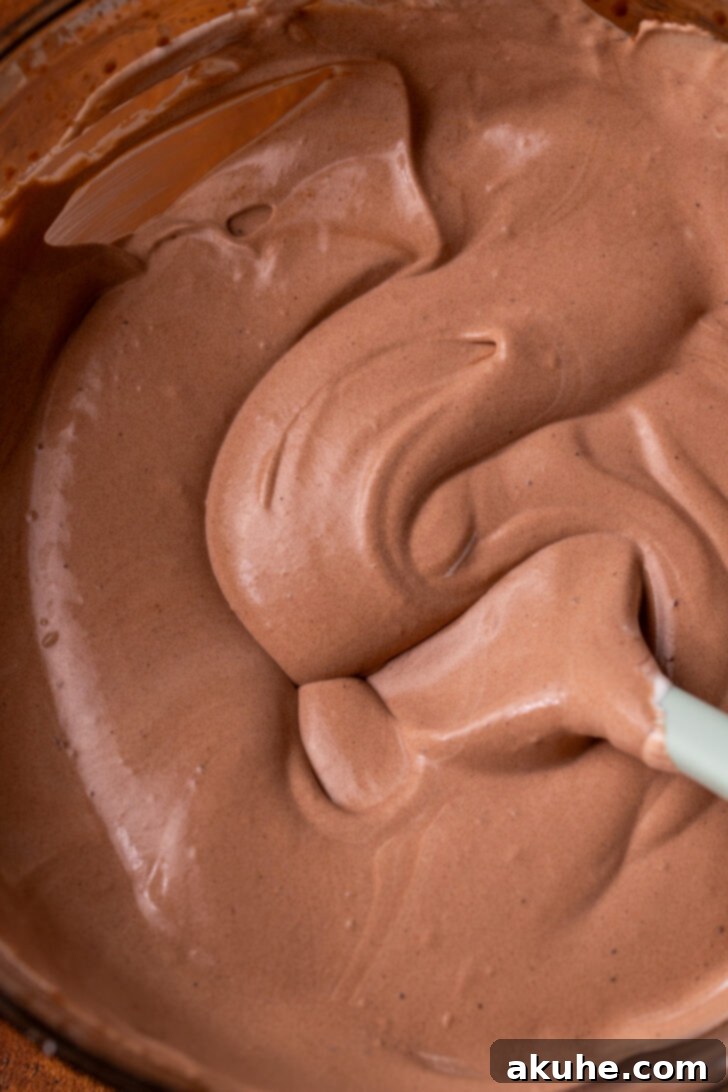
- Tip 4: The Art of Folding. When it comes to incorporating the whipped cream into the pudding mixture, or even making the final whipped cream topping, gentle folding is paramount. If you are too rough, you will knock out all the air that you’ve carefully whipped into the cream, resulting in a runny, soup-like consistency that won’t set or hold its shape. Use a rubber spatula and a light hand, gently incorporating the ingredients until just combined.
- Tip 5: Stabilized Whipped Cream. Our recipe for the top layer includes a touch of cream cheese. This is a brilliant trick to stabilize the whipped cream, ensuring it remains fluffy and holds its peaks beautifully without deflating or weeping, even after several hours in the fridge. Make sure the cream cheese is softened and beaten smooth separately before adding it to the whipped cream for a lump-free result.
Serving and Storing Your Mississippi Mud Pie
Once your magnificent Mississippi Mud Pie has properly chilled and set, it’s ready to be enjoyed! For the cleanest slices and best presentation, ensure your pie has been thoroughly refrigerated, ideally overnight. Run a sharp knife under hot water and wipe it clean between each slice to prevent sticking and create beautiful, defined portions. This pie is best served cold, allowing the contrast of its distinct layers to truly shine.
Store any leftover pie covered tightly with plastic wrap or in an airtight container in the refrigerator for up to 3-4 days. While it’s best enjoyed fresh, the flavors can actually deepen a bit on the second day. Due to the dairy-rich components, freezing is not generally recommended as it can affect the texture of the pudding and whipped cream upon thawing.
If you’re a fan of rich chocolate desserts, you’ll be pleased to know that I also utilize a similar pudding recipe in my chocolate mousse cake. And for those seeking to perfect their brownie-making skills, be sure to try my better than boxed fudge brownies for more expert tips and a truly exceptional treat.
We truly hope you adore this Mississippi Mud Pie recipe! If you loved making and tasting it, please consider leaving a star review below to share your experience. Don’t forget to tag me on Instagram @stephaniesweettreats so I can see your beautiful creations! For even more baking inspiration and delicious ideas, be sure to follow me on Pinterest.
Recipe Video Guide
Mississippi Mud Pie
Print Recipe
Pin Recipe
Leave a Review
Ingredients
Oreo Crust
- 2 1/2 cups Oreos, fine crumb keep the fillings
- 5 TBSP Unsalted butter, melted
Brownie Layer
- 1/2 cup All-purpose flour
- 1/2 cup Unsweetened cocoa powder, dutch process
- 1/2 TBSP Cornstarch
- 1/2 tsp Salt
- 1 cup White granulated sugar
- 2 Large eggs
- 1/4 cup Unsalted butter, melted
- 1/4 cup Oil, canola or vegetable
- 1 tsp Pure vanilla extract
Pudding Layer
- 3.9 oz Instant chocolate pudding mix
- 2 TBSP Unsweetened cocoa powder
- 1 cup Milk
- 1 tsp Pure vanilla extract
- 1/2 cups Heavy cream
- 1/4 cup White granulated sugar
- 1 tsp Pure vanilla extract
Whipped Cream Layer
- 1 1/2 cup Heavy cream
- 1/4 cup Powdered sugar
- 1 tsp Pure vanilla extract
- 2 oz Cream cheese
Instructions
Oreo Crust
- Preheat your oven to 350℉ (175°C). Prepare a 9-inch springform pan by spraying it thoroughly with nonstick baking spray. For springform pans, line the bottom with a parchment paper circle, then spray the parchment paper again. This step helps prevent sticking and ensures easy removal later.
- In a food processor, blend the Oreo cookies until they form fine, even crumbs. Transfer the crumbs to a small bowl, add the melted butter, and mix well with a fork until all crumbs are moistened. Pour this mixture into your prepared pan. Press the crust firmly and evenly onto the bottom and slightly up the sides of the pan. The base of a measuring cup or a flat-bottomed glass works wonderfully for compacting the crust.2 1/2 cups Oreos, 5 TBSP Unsalted butter
- Bake the Oreo crust for 11 minutes. This step helps to set the crust, making it sturdy and less prone to crumbling when sliced. Once baked, remove from the oven and let it cool slightly while you prepare the brownie layer.
Brownie Layer
- While the Oreo crust is baking, begin preparing the brownie batter. In a medium mixing bowl, sift together the all-purpose flour, unsweetened Dutch process cocoa powder, cornstarch, and salt. Sifting prevents lumps and ensures an even distribution of dry ingredients. Set this bowl aside.1/2 cup All-purpose flour, 1/2 cup Unsweetened cocoa powder, 1/2 TBSP Cornstarch, 1/2 tsp Salt
- Using an electric mixer, beat the white granulated sugar and large eggs together on high speed for approximately 2 minutes until the mixture is light and fluffy. This aerates the eggs, contributing to the brownie’s texture. Then, add the melted unsalted butter, canola or vegetable oil, and pure vanilla extract. Mix on low speed until all wet ingredients are just combined.1 cup White granulated sugar, 2 Large eggs, 1/4 cup Unsalted butter, 1 tsp Pure vanilla extract, 1/4 cup Oil
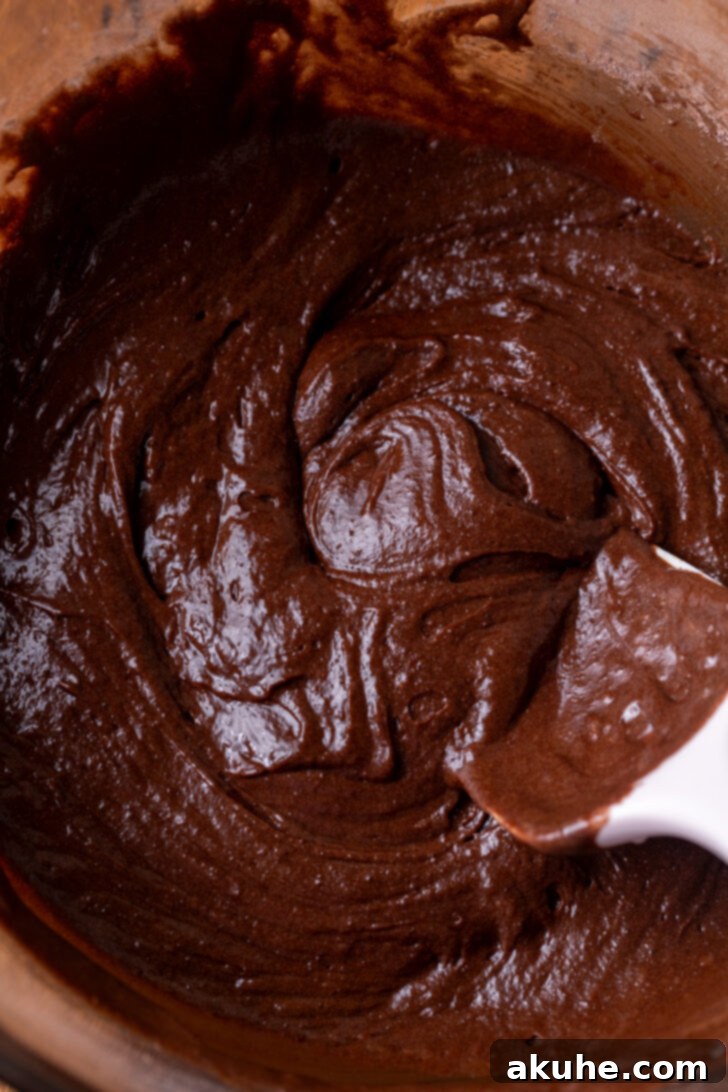
- Gradually add the sifted dry ingredients to the wet mixture. Mix on low speed until the ingredients are almost fully combined. Remove the bowl from the mixer and use a baking rubber spatula to gently fold and finish mixing by hand. Be careful not to overmix, as this can lead to a tougher brownie.
- Carefully pour the brownie batter over the baked and slightly cooled Oreo crust in the pan. Use the spatula to spread the batter into an even layer, ensuring it covers the entire crust.
- Bake for 27-29 minutes. The key is to slightly underbake for a truly fudgy texture. To check for doneness, insert a toothpick into the center; it should come out with moist crumbs attached, but no wet batter. Once baked, transfer the pie pan to a wire rack and allow the brownie layer to cool completely. This is crucial before adding the next layers.
Pudding Layer
- Once the brownie layer has cooled completely, begin preparing the pudding layer. Using a chilled metal bowl and whisk attachment (cold equipment helps whip cream faster), beat 1/2 cup heavy cream, 1/4 cup white granulated sugar, and 1 tsp pure vanilla extract on high speed until stiff peaks form. Set this whipped cream aside.1/2 cups Heavy cream, 1/4 cup White granulated sugar, 1 tsp Pure vanilla extract
- In a separate bowl, combine the 3.9 oz instant chocolate pudding mix, 2 TBSP unsweetened cocoa powder, 1 cup milk (preferably whole milk for richness), and 1 tsp pure vanilla extract. Beat on high speed for exactly 2 minutes. The cocoa powder enhances the chocolate flavor of the pudding.3.9 oz Instant chocolate pudding mix, 2 TBSP Unsweetened cocoa powder, 1 cup Milk, 1 tsp Pure vanilla extract
- Gently add the reserved whipped cream to the chocolate pudding mixture. Using a baking rubber spatula, carefully fold in the whipped cream. It’s important to go gentle so you don’t knock out the air from the whipped cream, which helps keep the pudding light and set correctly. Over-mixing here can result in a thinner, less appealing pudding.
- Spread the finished pudding mixture evenly over the cooled brownie layer (still in the pan). Cover the pie tightly with plastic wrap, making sure the wrap touches the surface of the pudding to prevent a skin from forming. Chill in the fridge for at least 2 hours, or ideally overnight, to allow the pudding to set completely and for all the flavors to meld beautifully.
Whipped Cream Layer
- When the pie has thoroughly chilled and you’re ready to serve, prepare the final whipped cream layer. Using a cold metal bowl with a whisk attachment, beat 1 1/2 cups heavy cream, 1/4 cup powdered sugar, and 1 tsp pure vanilla extract on high speed until soft peaks begin to form.1 1/2 cup Heavy cream, 1/4 cup Powdered sugar, 1 tsp Pure vanilla extract
- In a separate small bowl, beat the 2 oz cream cheese until it is completely smooth and free of any lumps. This step is critical; if the cream cheese isn’t smooth beforehand, it will remain clumpy in your whipped cream. Once smooth, add the beaten cream cheese to the whipped cream mixture. Continue beating on high speed until medium peaks form, indicating a beautifully stabilized and fluffy whipped cream.2 oz Cream cheese
- Remove the chilled pie from the fridge. If using a springform pan, carefully release and remove the sides of the pan, and then gently slide off the parchment paper from the bottom. Spread the stabilized whipped cream evenly and generously over the chocolate pudding layer. For an extra flourish and texture, I topped my pie with crushed Oreo pieces and a sprinkle of mini chocolate chips. Serve immediately and enjoy the ultimate chocolate experience!
Notes
High Altitude Baking: If you are baking at a high altitude, you may need to adjust the recipe slightly. Try adding an extra 1 tablespoon of all-purpose flour to the brownie batter to help with structure and moisture retention.
Carbohydrates: 48g,
Protein: 4g,
Fat: 28g,
Saturated Fat: 14g,
Polyunsaturated Fat: 3g,
Monounsaturated Fat: 10g,
Trans Fat: 0.3g,
Cholesterol: 56mg,
Sodium: 295mg,
Potassium: 189mg,
Fiber: 2g,
Sugar: 32g,
Vitamin A: 708IU,
Vitamin C: 0.2mg,
Calcium: 55mg,
Iron: 4mg
