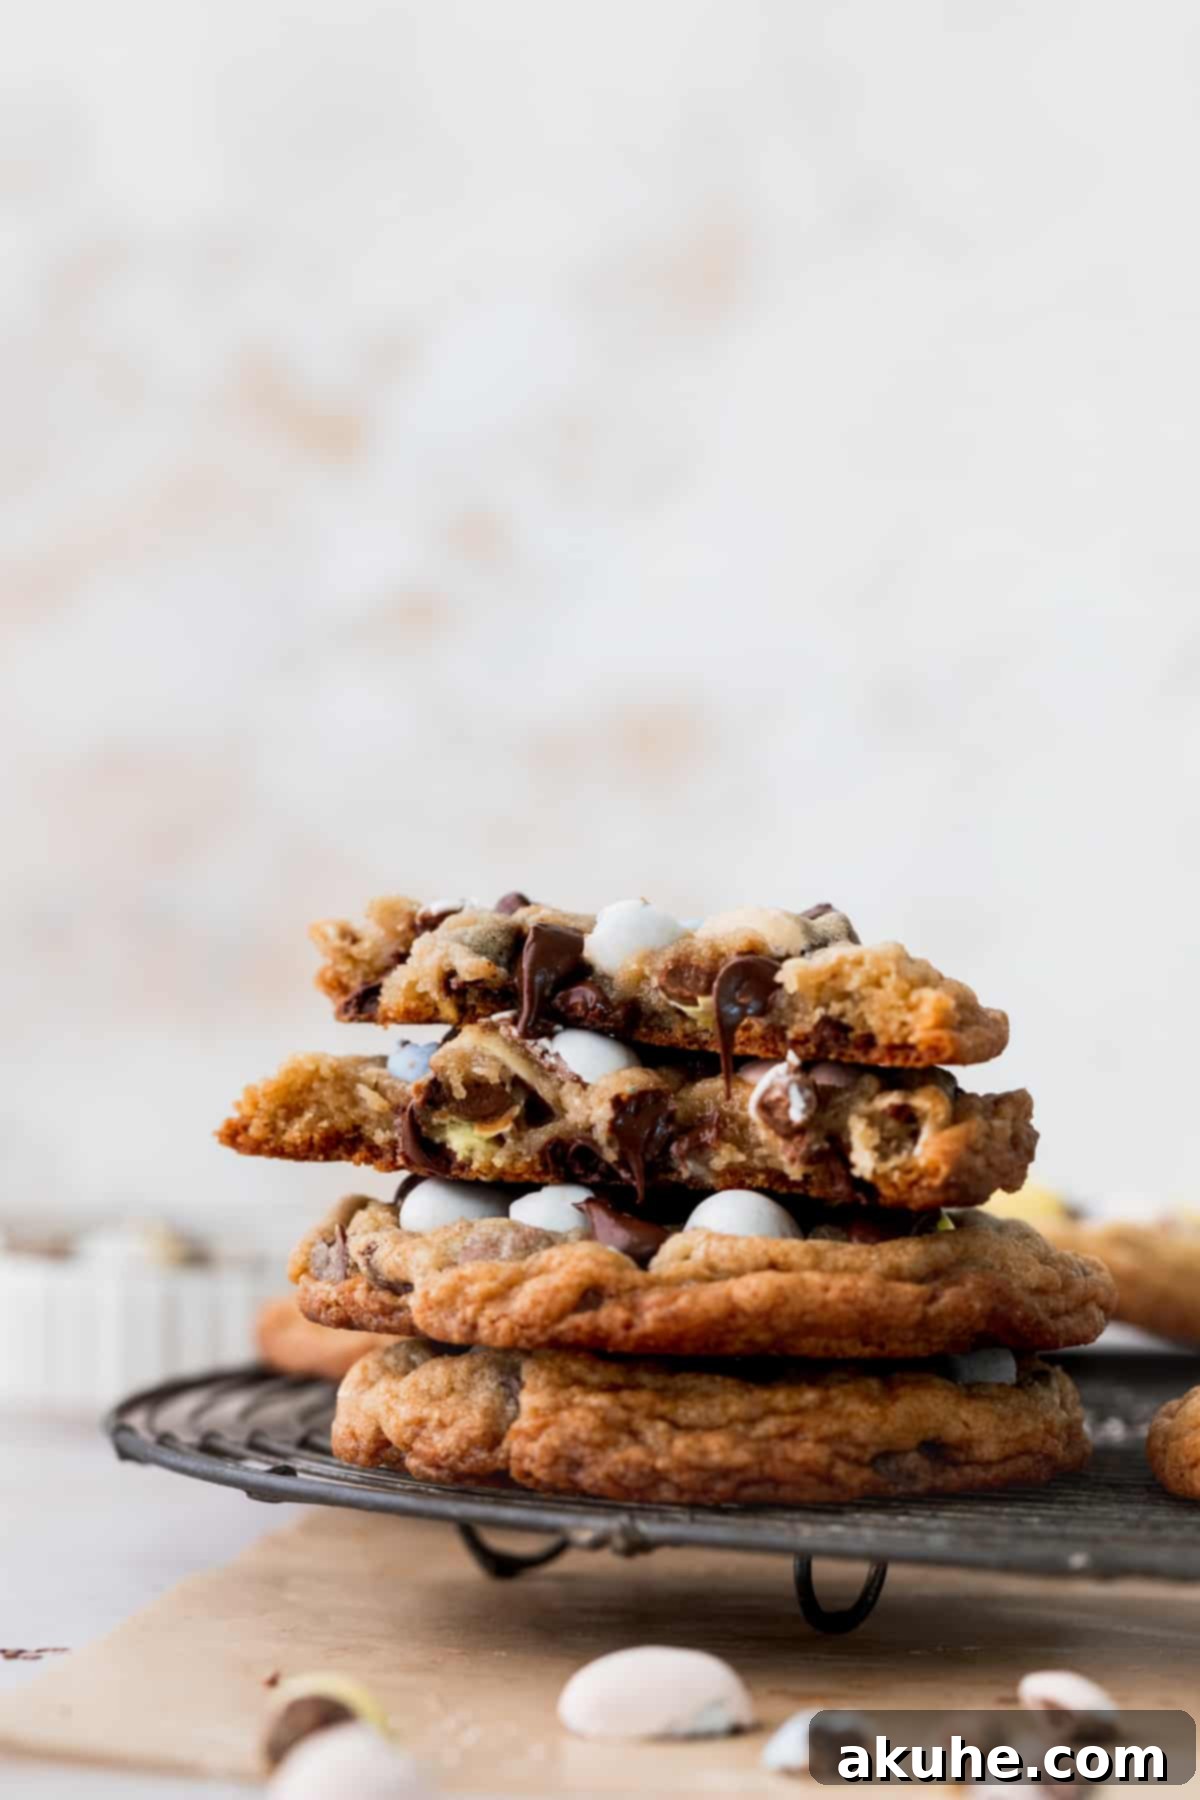
Welcome to the ultimate guide for crafting the most delightful Mini Egg Cookies – your perfect treat for Easter celebrations and beyond! Imagine biting into a large, bakery-style chocolate chip cookie with a perfectly chewy center and delightfully crisp edges, generously studded with crunchy, colorful chopped Cadbury Mini Eggs. These aren’t just cookies; they’re a celebration in every bite, designed to bring joy and festive spirit to your spring gatherings.
Our recipe uses a tried-and-true chocolate chip cookie base, renowned for its incredible chewiness and a subtle crispness around the edges. We’ve elevated this classic by incorporating chopped mini eggs both into the dough and as a vibrant topping. While these cookies offer a wonderfully sweet experience thanks to the milk chocolate in the mini eggs, we’ll share a secret tip to perfectly balance that sweetness: a sprinkle of flaky sea salt on top, enhancing all the flavors beautifully.

If you’re eager to explore more spring-inspired baking, don’t miss our other fantastic recipes such as the charming Mini Carrot Cake, the zesty Chewy Lemon Blueberry Cookies, and the fragrant Lemon Poppy Seed Cupcakes. But first, let’s dive into what makes these Cadbury Mini Egg Cookies an absolute must-bake this season!
Why These Cadbury Mini Egg Cookies Will Become Your Spring Favorite
There are countless reasons why this particular Mini Egg cookie recipe stands out and is guaranteed to be a hit with everyone, from seasoned bakers to enthusiastic beginners. We’ve fine-tuned every aspect to ensure a perfect cookie experience every time.
- Irresistibly Chewy Chocolate Chip Cookie Base: The foundation of these spectacular treats is a classic chocolate chip cookie recipe engineered for maximum chewiness. Using softened butter is key to achieving this coveted texture, contributing to a rich, melt-in-your-mouth interior. While a brief chill time is required, it’s a small step that makes a monumental difference, preventing excessive spreading and ensuring your cookies hold their perfect shape.
- The Festive Fun of Mini Eggs: Cadbury Mini Eggs are not just a seasonal delight; they bring a unique crunch and vibrant color to these cookies. Their creamy milk chocolate and crisp candy shell add an exciting textural contrast and a burst of springtime cheer. Remember to chop them up before incorporating them into the dough and sprinkling them on top for maximum distribution and visual appeal.
- Achieving the Perfect Texture Harmony: Beyond just chewiness, these cookies boast a truly remarkable overall texture. The centers are wonderfully tender and soft, while the edges bake to a delightful crispness. This combination creates a sensory experience that keeps you reaching for more, balancing different mouthfeels in every single bite.
- Remarkably Easy and Family-Friendly: Despite their gourmet appearance and exquisite taste, this recipe is surprisingly straightforward to follow. It’s designed to be approachable for bakers of all skill levels and is guaranteed to be “kid-approved,” making it a fantastic activity to enjoy with the whole family during holiday breaks or any sunny spring afternoon. The simple steps ensure a stress-free baking process, letting you focus on the fun and delicious outcome.

Essential Ingredients for Perfect Mini Egg Cookies
The quality and preparation of your ingredients are crucial to achieving bakery-quality results. Here are some detailed notes on what you’ll need to make these incredible Mini Egg cookies. For a complete list of quantities, refer to the full recipe card below.
- Unsalted Butter: Always opt for unsalted butter when baking, as it gives you complete control over the salt content in your recipe. It’s vital that your butter is at room temperature – not melted, but soft enough that a finger pressed lightly will leave an indentation. This typically requires pulling it out of the fridge at least two hours before you plan to bake. Room temperature butter creams beautifully with sugar, creating a light, airy base for your cookie dough, which contributes significantly to the cookie’s final texture and spread.
- Brown Sugar (Light or Dark): We recommend using light brown sugar for this recipe. Brown sugar contributes moisture and a delicious caramel-like flavor, which enhances the chewiness of the cookies. You can also use dark brown sugar for a deeper molasses flavor, but ensure it’s packed firmly when measuring.
- Granulated Sugar: Regular white granulated sugar works in conjunction with brown sugar to create the perfect balance of sweetness and texture. It contributes to the crispness around the edges of the cookie.
- Large Eggs: Like butter, eggs should also be at room temperature. Cold eggs can cause your batter to curdle and affect the emulsification process, leading to a less cohesive dough. Remove them from the refrigerator at least two hours prior to baking to allow them to warm up gently. Eggs bind the ingredients together and add richness.
- All-Purpose Flour: Proper flour measurement is key to cookie consistency. Always spoon and level your flour rather than scooping directly from the bag. Scooping can compact the flour, leading to an excess amount that results in dry, crumbly cookies that don’t spread correctly.
- Baking Soda: This leavening agent is responsible for the cookies’ slight rise and contributes to their soft, chewy texture. It reacts with the acidic components (like brown sugar) in the dough, helping the cookies spread just enough without becoming flat.
- Salt: A pinch of salt is absolutely essential! It balances the sweetness from the sugars and chocolates, enhancing all the other flavors. Skipping it will result in cookies that taste overly sweet and one-dimensional. We use standard table salt in the dough, but flaky sea salt sprinkled on top provides an extra layer of flavor and a gourmet touch.
- Pure Vanilla Extract: Use good quality pure vanilla extract for the best flavor. It adds warmth and depth, complementing the chocolate and mini egg flavors.
- Semisweet Chocolate Chips: For a balanced sweetness, semisweet or dark chocolate chips are highly recommended. Milk chocolate chips might make the cookies excessively sweet, especially when combined with the milk chocolate in the Cadbury Mini Eggs. The slight bitterness of semisweet chocolate provides a wonderful contrast.
- Cadbury Mini Eggs: These are the star of the show! For the best quality and flavor, stick to Cadbury Mini Eggs. Their chocolate is superior, and their candy shell offers a more satisfying crunch compared to other brands like Hershey’s, which can sometimes be too sweet or have a different texture. Make sure to chop them into smaller, bite-sized pieces so they are evenly distributed throughout the dough and on top.
Step-By-Step Guide to Baking Irresistible Mini Egg Cookies
Get ready to create some magic in your kitchen! This detailed guide will walk you through each step of making these delicious Cadbury Mini Egg Cookies. You’ll need a stand mixer with a paddle attachment or a reliable electric hand mixer to make the process smoother.
STEP 1: Prepare Your Mini Eggs. The easiest and most satisfying way to chop your mini eggs is to place them in a sturdy ziplock bag. Then, use a rolling pin to gently but firmly smash them until they are broken into various sized pieces – some fine crumbs and some larger chunks, which adds wonderful texture to the cookies. Alternatively, you can place them on a cutting board and use the bottom of a heavy measuring cup to crush them.
STEP 2: Combine the Dry Ingredients. In a medium-sized bowl, begin by sifting your all-purpose flour. Sifting helps to aerate the flour and remove any lumps, ensuring a light and uniform texture in your cookies. After sifting, add the baking soda and salt to the flour, then whisk them together thoroughly. Set this bowl aside for later.
STEP 3: Cream Butter and Sugars. In a large mixing bowl, using your stand mixer or electric hand mixer, combine the softened unsalted butter with both the brown sugar and white granulated sugar. Beat these ingredients on high speed for approximately 2 minutes. During this process, the mixture will transform, becoming visibly lighter in color and developing a fluffy, creamy consistency. This creaming process incorporates air, which is essential for a tender cookie.
STEP 4: Incorporate the Wet Ingredients. Next, reduce the mixer speed to medium. Add the pure vanilla extract and the room temperature large eggs, one at a time, beating well after each addition. Continue to beat on medium speed for about 1 minute until the mixture is fully incorporated and becomes even fluffier and pale. Don’t forget to scrape down the sides of the bowl with a spatula to ensure all ingredients are evenly mixed.
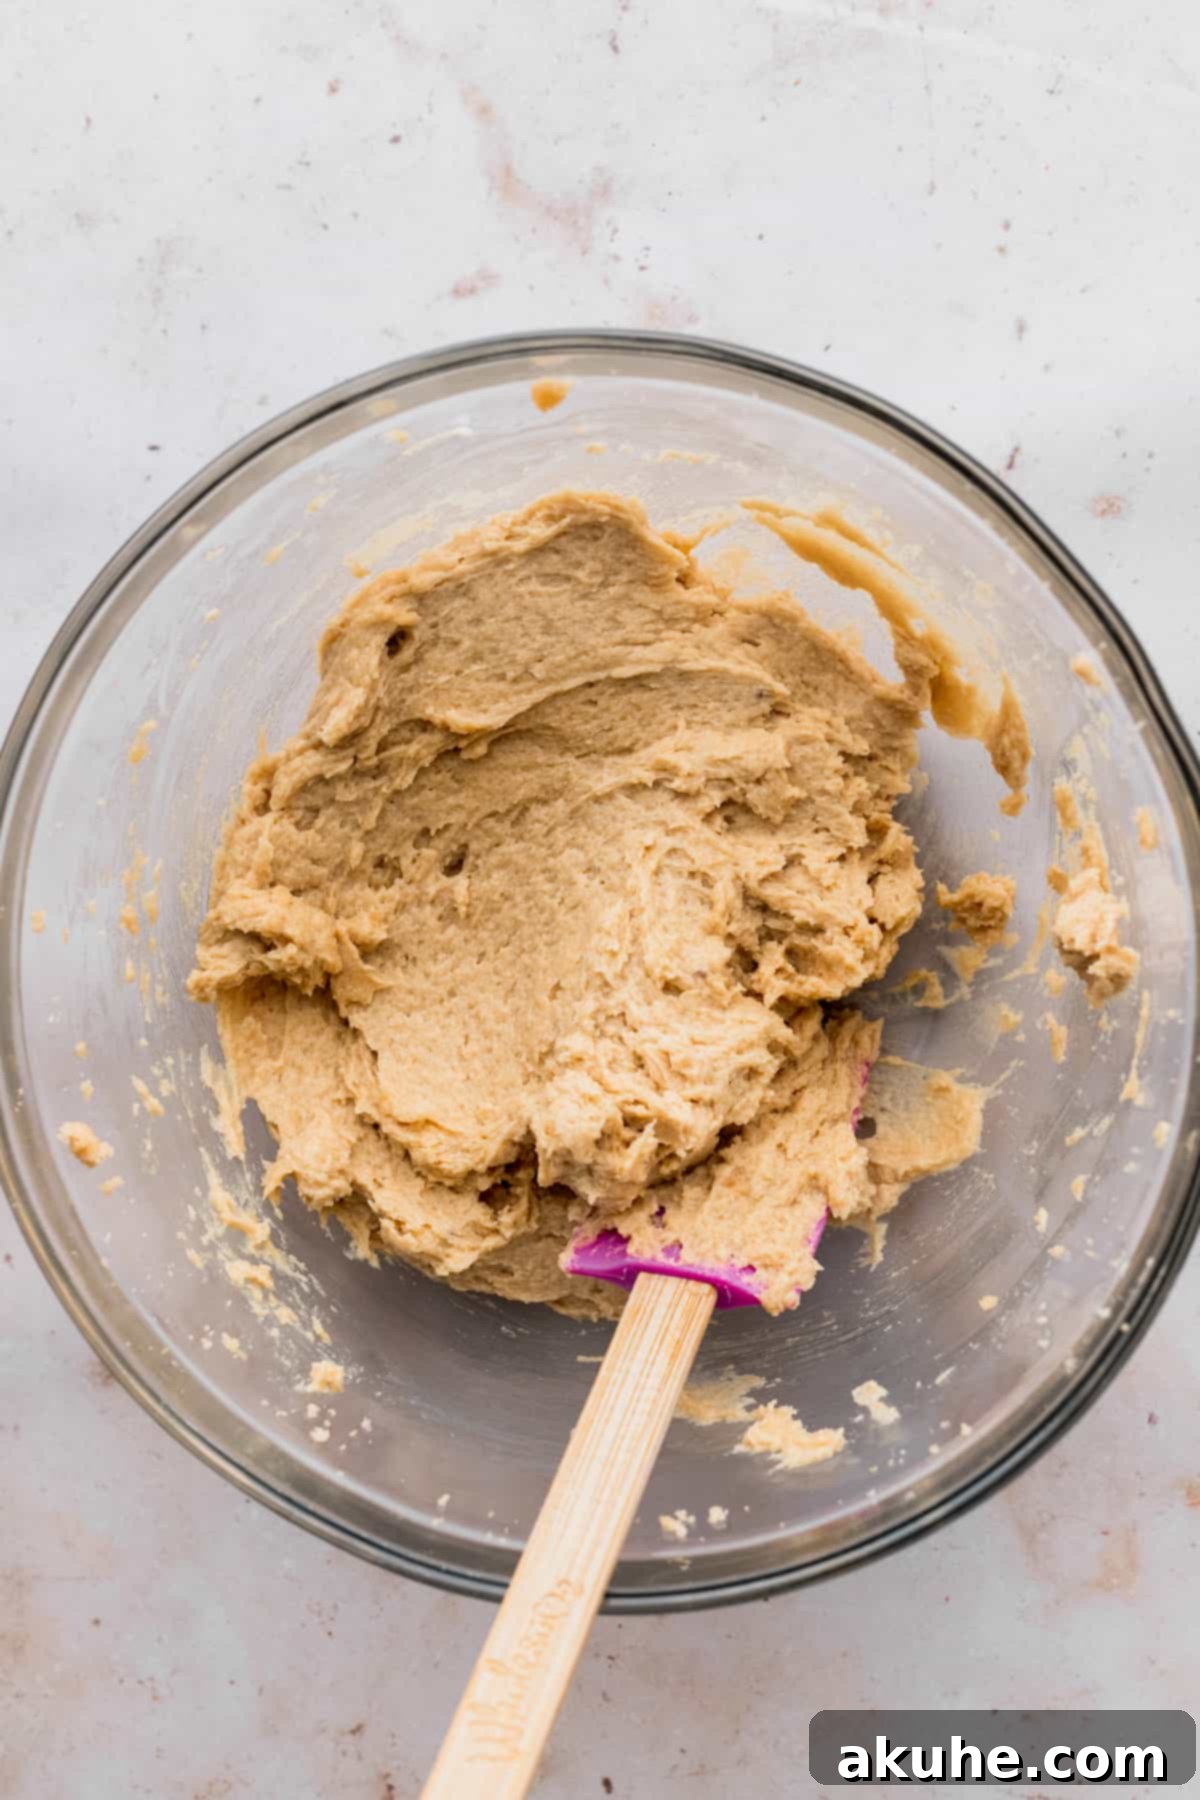
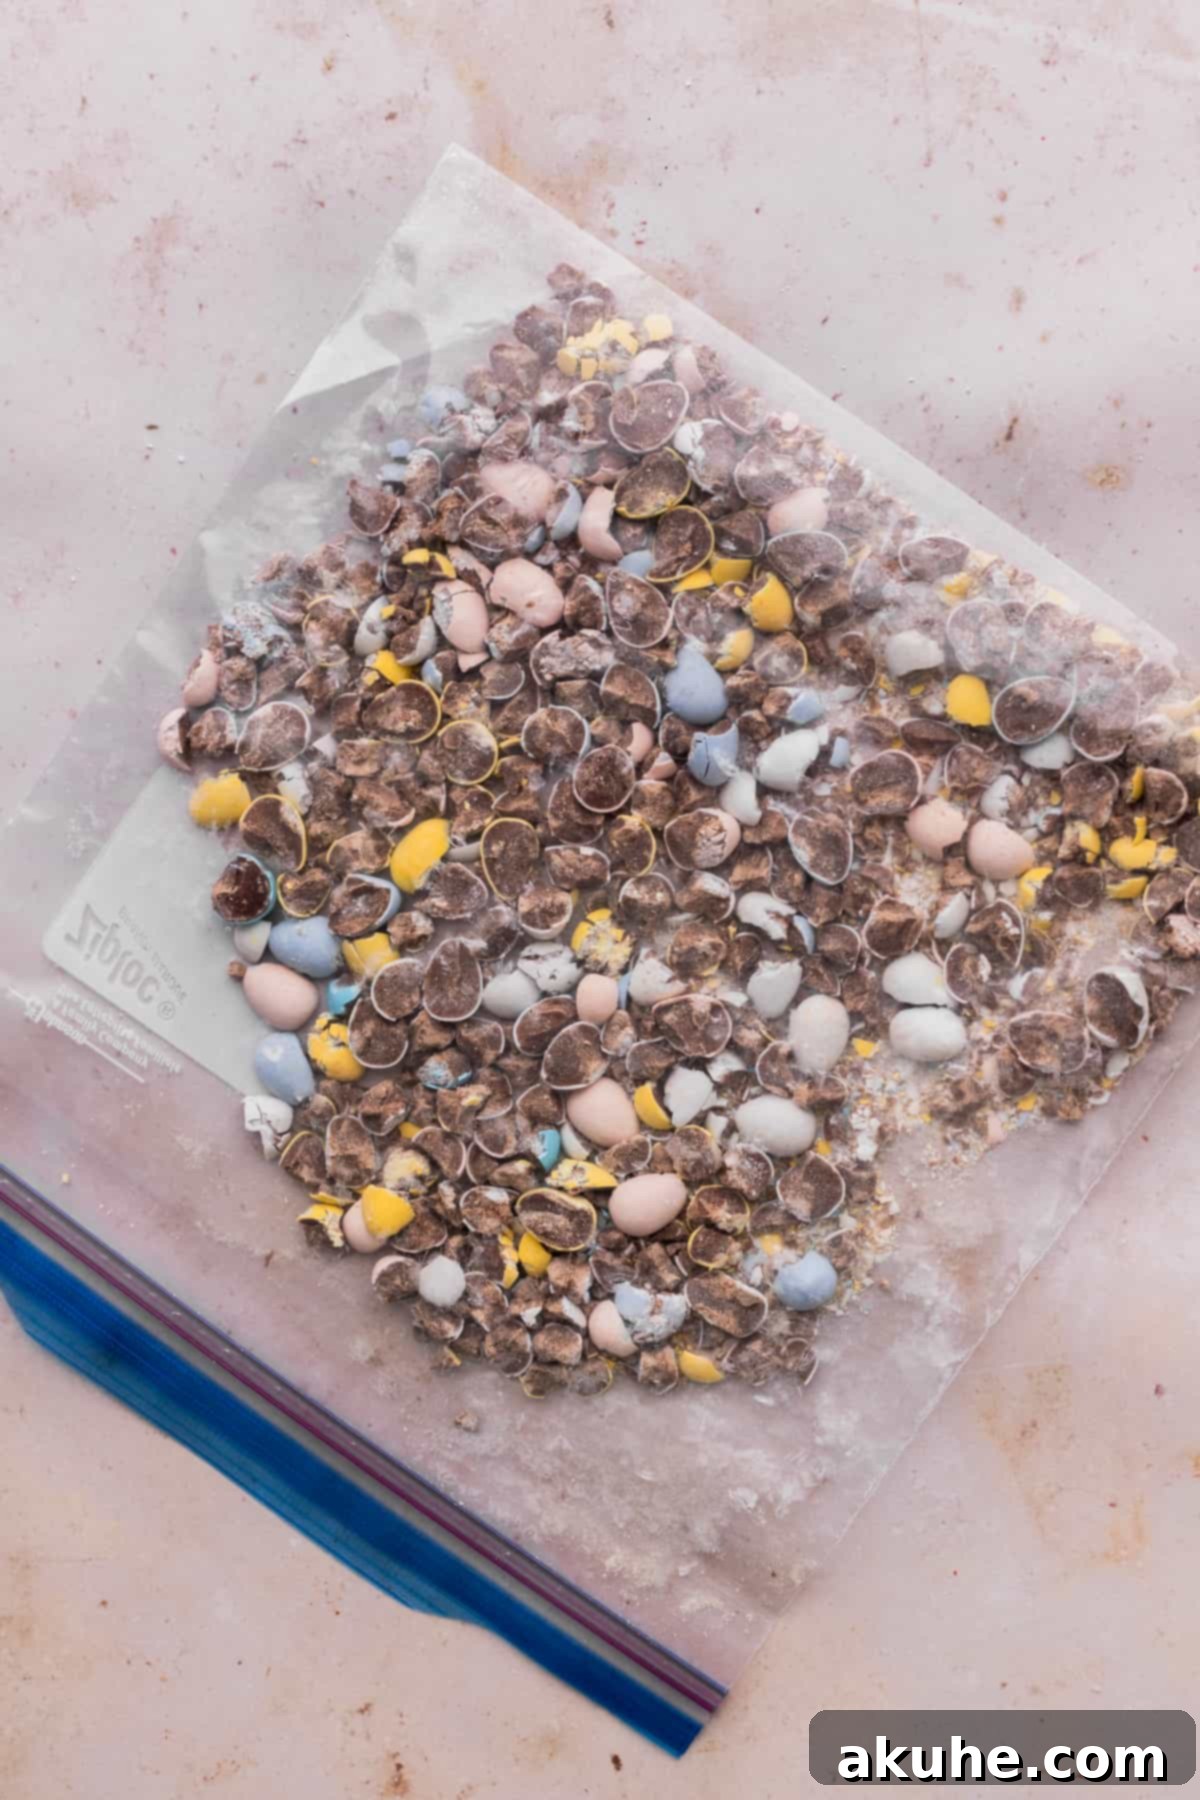
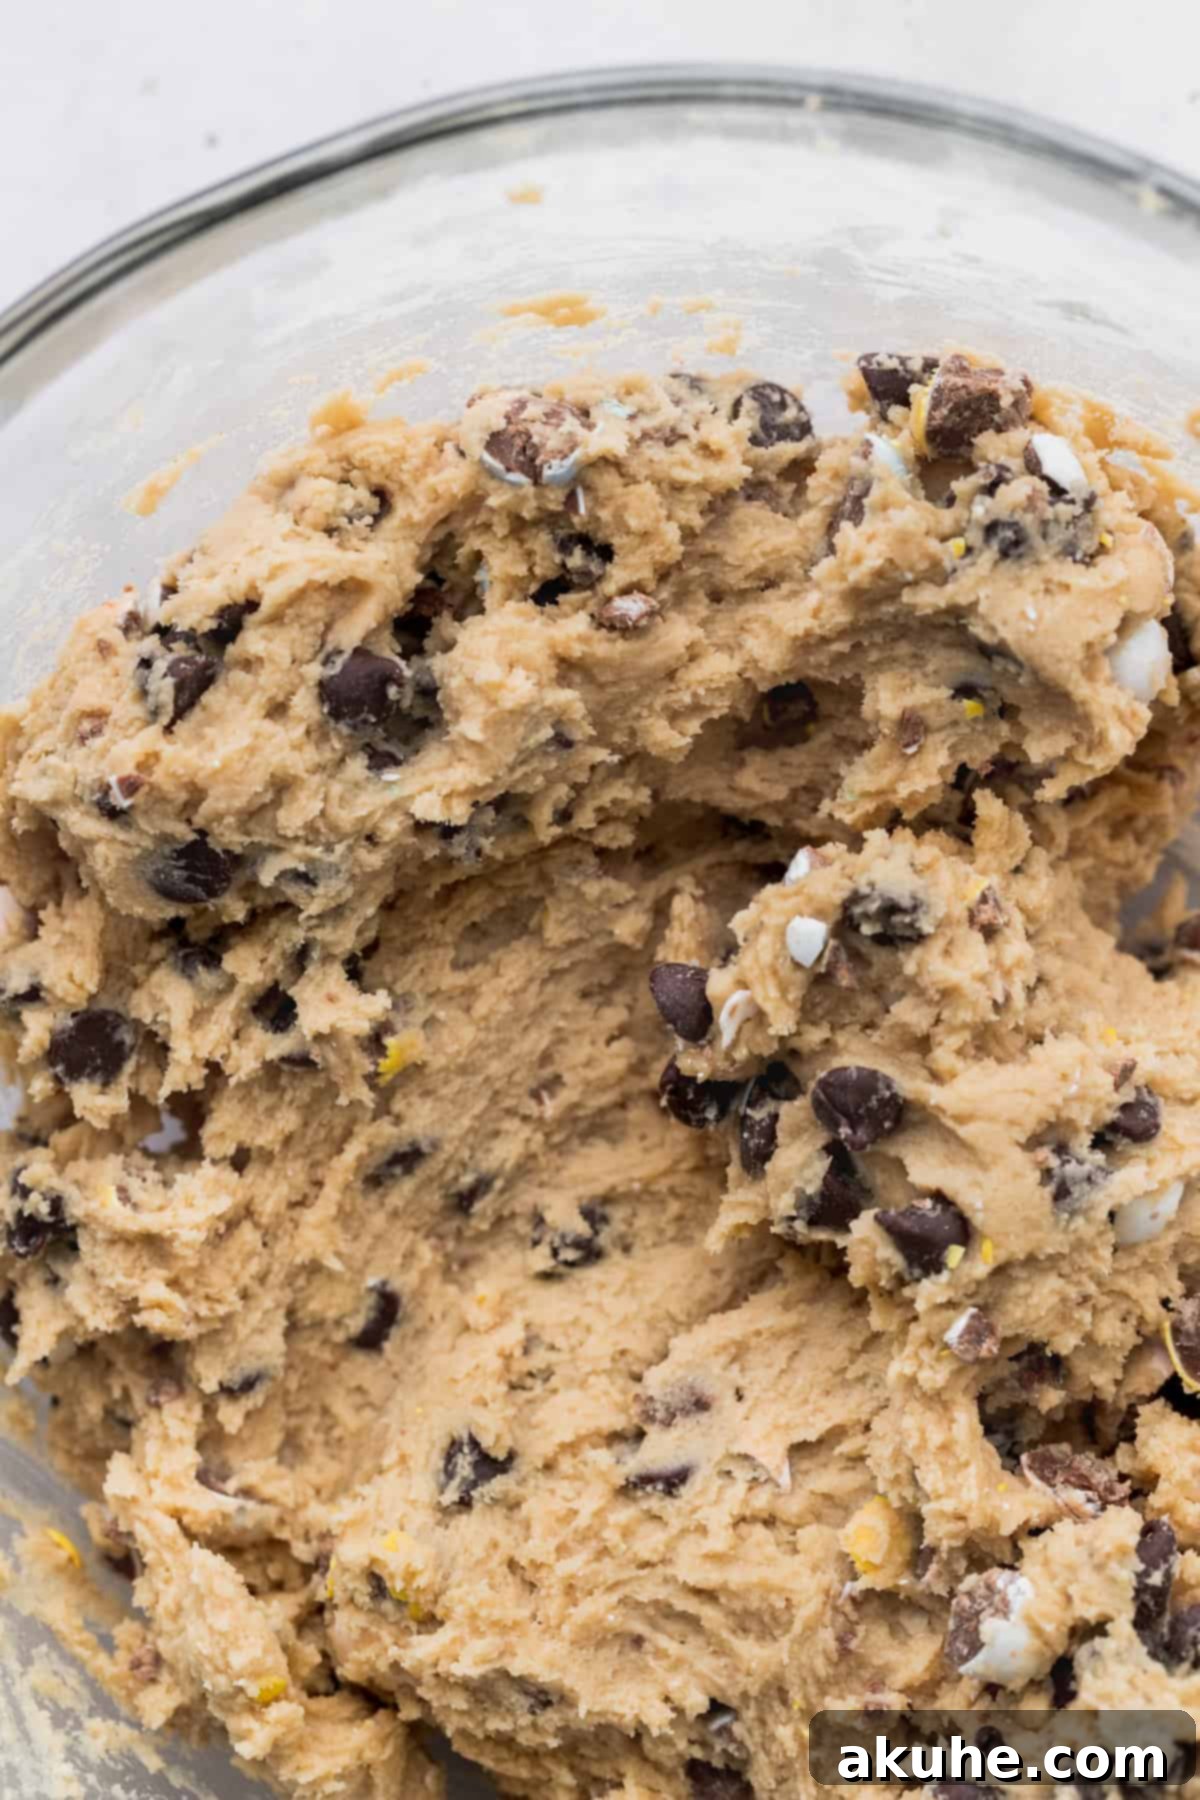
STEP 5: Add Dry Ingredients and Mix-ins. Reduce your mixer speed to low. Gradually add the reserved flour mixture (the dry ingredients) into the wet batter. Mix until the flour is *just* combined. Be careful not to overmix, as this can develop the gluten too much, leading to tough cookies. Once the flour is mostly incorporated, fold in the semisweet chocolate chips and the chopped mini eggs. Continue mixing on low speed until they are evenly distributed throughout the dough, again taking care not to overmix.
STEP 6: Chill the Cookie Dough. This step is critical for preventing your cookies from spreading too much during baking and ensures a thicker, chewier cookie. Cover the bowl with plastic wrap and chill the cookie dough in the refrigerator for at least 30 minutes. You can chill it for longer, up to several hours or even overnight, for even better results.
STEP 7: Scoop and Prepare for Baking. Preheat your oven to 350°F (175°C). Line two large baking sheets with parchment paper; this prevents sticking and helps with even baking. Using a large cookie scoop (a 3-ounce scoop is ideal for bakery-style cookies), portion out the chilled cookie dough into uniform balls. Place no more than 6 cookie dough balls on each prepared cookie sheet, ensuring ample space between them for spreading. For the first batch going into the oven, place the scooped dough balls in the freezer for 5-8 minutes to firm up even more. Keep any remaining dough in the refrigerator while the first batch bakes.

STEP 8: Bake and Finish. Bake the cookies for 13-15 minutes, or until the edges are lightly golden brown and the centers still look slightly soft. Remember, cookies continue to cook slightly as they cool on the baking sheet. Immediately after removing the hot cookies from the oven, quickly press a few extra chocolate chips and larger pieces of chopped mini eggs onto the tops of each cookie. This step is purely for aesthetics, making your cookies look even more irresistible. Allow the cookies to cool on the hot baking sheet for 5 minutes before carefully transferring them to a wire cooling rack to cool completely. This resting period allows them to set without breaking apart.
Expert Baking Tips for Flawless Cookies
Achieving the perfect cookie is a skill refined with a few key techniques. Incorporate these expert tips into your baking routine, and you’ll be churning out consistently amazing Mini Egg cookies every time.
- Accurate Flour Measurement is Paramount: The most common mistake in cookie baking is incorrect flour measurement. Always use the “spoon and level” method: gently spoon flour into your measuring cup until it overflows, then use a straight edge (like a knife or the back of a spoon) to level off the excess. Never scoop flour directly from the bag, as this compacts it, resulting in too much flour. Excess flour can lead to dry, crumbly cookies that don’t spread properly, instead of the desired chewy texture. Alternatively, for ultimate accuracy, use a kitchen scale to weigh your flour.
- Keep Your Dough Cold: Chilled dough is the secret to preventing excessive spreading and ensuring your cookies retain their thickness and chewiness. When baking in batches, always keep the dough you’re not immediately using in the refrigerator. For an extra safeguard, place the baking sheet with the first batch of scooped cookie dough balls into the freezer for 5-8 minutes just before placing them in the hot oven. This extra chill helps them hold their shape better.
- The “Cookie Scoot” Trick: If your freshly baked cookies come out of the oven a little irregularly shaped, don’t fret! While they are still warm and soft on the baking sheet, use a large round cookie cutter (or even a glass) that is slightly larger than your cookies. Gently place the cutter around the cookie and swirl it in a circular motion. This clever trick “scootches” the warm edges into a perfectly round shape, making your cookies look professionally baked.
- Embrace Under-Baking: For that coveted chewy interior, it’s often best to slightly underbake your cookies. When you remove them from the oven, the centers might appear a little soft or gooey. This is perfectly normal! Cookies continue to cook from residual heat as they cool on the hot baking sheet. Taking them out when they’re just set around the edges and slightly soft in the middle ensures they won’t dry out and will develop that ideal chewy texture as they cool.
- Room Temperature Ingredients Matter: Ensure all dairy ingredients (butter and eggs) are at true room temperature. This allows them to emulsify properly, creating a smooth, cohesive dough that traps air effectively, leading to a better texture and spread.

Frequently Asked Questions About Mini Egg Cookies
Absolutely! You can easily adjust the size of these cookies. Instead of a large 3-ounce scoop, use a smaller cookie scoop (around 1.5 ounces). When baking smaller cookies, you can typically fit about 12 per cookie sheet. Reduce the baking time to approximately 8-11 minutes, keeping a close eye on them until the edges are lightly golden.
Several factors contribute to cookie spread, but here are the most important tips to ensure thick, chewy cookies:
- Always bake your cookies on a baking sheet lined with parchment paper or a silicone baking mat. This provides a consistent, non-stick surface that helps prevent excessive spreading.
- Ensure your cookie dough balls are adequately chilled before baking. Cold dough spreads slower in the oven, allowing the edges to set before the center collapses.
- Use unsalted butter. Salted butter contains a higher water content and also introduces more sodium, both of which can lead to increased spreading.
- Avoid overmixing the dough once the flour is added. Overmixing develops gluten, making the dough tough and more prone to spreading.
- Make sure your oven temperature is accurate. A too-low oven can also cause cookies to spread excessively before setting.
Yes, absolutely! While Cadbury Mini Eggs offer a unique flavor and texture, M&M’s are a fantastic alternative. You can use any variety of M&M’s – classic milk chocolate, peanut, or even seasonal colors – to customize your cookies. The baking time and method will remain the same, just swap the mix-ins!
Storing and Freezing Your Delicious Mini Egg Cookies
To keep your Mini Egg cookies fresh and delicious for as long as possible, proper storage is key. Whether you’re planning to enjoy them over a few days or save some for later, here’s how to do it right.
Once completely cooled, store these delightful Mini Egg cookies in an airtight container at room temperature. They will maintain their delicious chewy texture and crisp edges for up to 5 days. For optimal freshness, a cookie jar or a sealed plastic container works perfectly.
Freezing Baked Cookies
These cookies freeze beautifully, making them perfect for meal prep or enjoying a homemade treat whenever a craving strikes. Once fully baked and completely cooled, arrange the cookies in a single layer on a baking sheet and flash freeze them for about 30 minutes until solid. This prevents them from sticking together. Then, transfer the frozen cookies to an airtight freezer-safe container or a heavy-duty freezer bag. They can be frozen for up to 30 days. When you’re ready to enjoy them, simply thaw the cookies at room temperature for about an hour before serving. You can also warm them slightly in the microwave or a low oven for a “fresh out of the oven” experience.
Freezing Cookie Dough Balls
Preparing the cookie dough in advance is a fantastic time-saver! After you’ve scooped the dough into individual balls, place them on a parchment-lined baking sheet and flash freeze until they are firm (about 30-60 minutes). Once solid, transfer the frozen cookie dough balls to an airtight freezer-safe container or freezer bag. They can be stored in the freezer for up to 30 days. When you’re ready to bake, there’s no need to fully thaw them. Simply place the frozen dough balls on a prepared baking sheet and let them sit on the counter for about 20 minutes while your oven preheats. You may need to add an extra 1-3 minutes to the baking time.
Other Irresistible Cookie Recipes To Try
If you’ve loved baking these Mini Egg Cookies, be sure to explore our other fantastic cookie creations perfect for any occasion! There’s always a new sweet treat to discover and share.
We’d love to hear about your baking success! If you enjoyed this recipe, please consider leaving a STAR REVIEW below. Your feedback helps other bakers in our community. Don’t forget to tag us on Instagram @stephaniesweettreats with your delicious creations. For more baking inspiration and ideas, make sure to follow us on Pinterest.

Mini Egg Cookies
By Stephanie Rutherford
These mini egg cookies are large bakery-style chocolate chip cookies. They are full of chopped mini eggs. These cookies have a chewy center and crisp edges.
Rated 4.93 out of 5 stars by 13 reviewers.
Print Recipe |
Pin Recipe |
Leave a Review
Prep Time: 15 mins
Cook Time: 14 mins
Chilling Time: 30 mins
Total Time: 59 mins
Servings: 17 Large cookies
Ingredients
- 2 1/2 cups All-purpose flour
- 1 tsp Baking soda
- 1 tsp Salt
- 1 cup Unsalted butter, room temperature
- 1 cup Brown sugar, packed light or dark
- 1/2 cup White granulated sugar
- 1 tsp Pure vanilla extract
- 2 Large eggs, room temperature
- 1 cup Semisweet chocolate chips
- 1 cup Mini eggs, slightly chopped plus more to top the cookies
Instructions
- In a large bowl, sift the flour. Add in baking soda and salt. Set aside. Chop the mini eggs.
- Using a mixer, beat the butter, brown sugar, and sugar on high speed for 2 minutes. Scrape the bowl. Add in vanilla and eggs. Beat this on medium-high speed for 1 minute. Scrape the bowl.
- Add in the dry ingredients and mix on low until just combined. Add in chocolate chips and chopped mini eggs. Mix until just combined.
- Chill for 30 minutes.
- Preheat the oven to 350°F (175°C). Line two cookie sheets with parchment paper.
- Use a large cookie scoop (3 oz scoop) to scoop the dough. Place 6 cookie dough balls per cookie sheet. Place the 1st batch of cookies in the freezer for 5-8 minutes until cold. Place the second and third batch of cookie dough balls in the fridge while the first batch bakes.
- Bake for 13-15 minutes. Bake until the edges are lightly golden brown. Top with extra mini eggs and chocolate chips while hot.
- Let the cookies sit for 5 minutes on the hot pan before transferring to a cooling rack.
Notes
Flour: Make sure flour is spooned and leveled or use a kitchen scale. Compacted flour can dry out the cookies and cause them not to spread.
High altitude baking: Add an extra 2 tablespoons of flour.
Room Temperature Ingredients: Pull out dairy ingredients 2 hours before baking.
Preventing Spread: If your cookies spread too much, make sure the cookie dough balls are cold before baking and bake these on parchment paper.
Nutrition Information (per serving)
Calories: 296kcal, Carbohydrates: 38g, Protein: 3g, Fat: 15g, Saturated Fat: 9g, Polyunsaturated Fat: 1g, Monounsaturated Fat: 4g, Trans Fat: 1g, Cholesterol: 29mg, Sodium: 208mg, Potassium: 101mg, Fiber: 1g, Sugar: 22g, Vitamin A: 339IU, Calcium: 23mg, Iron: 2mg
