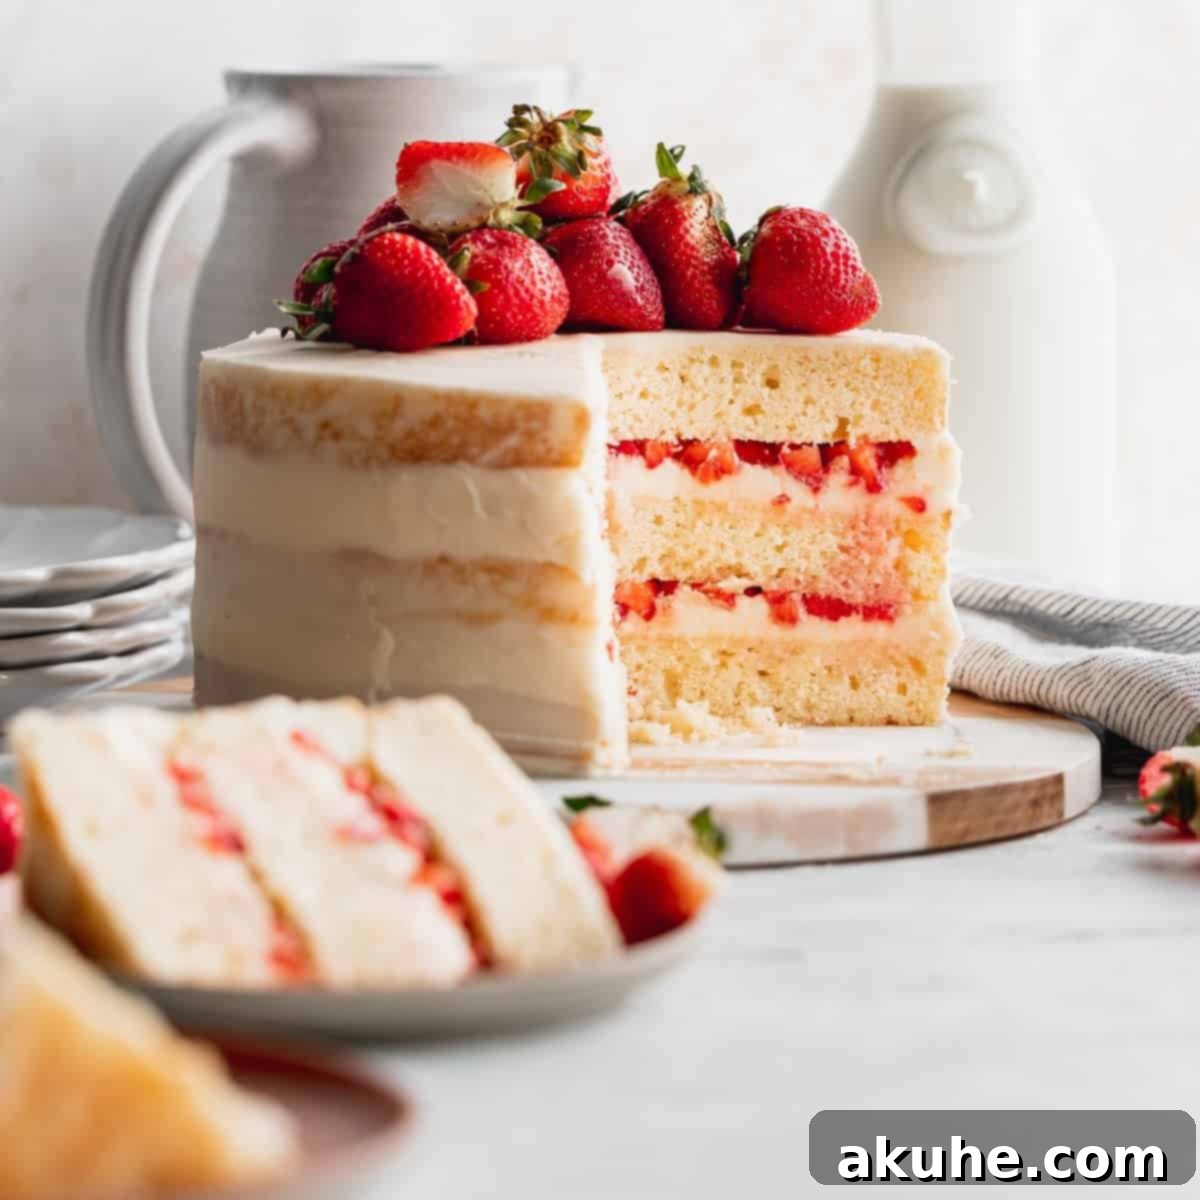
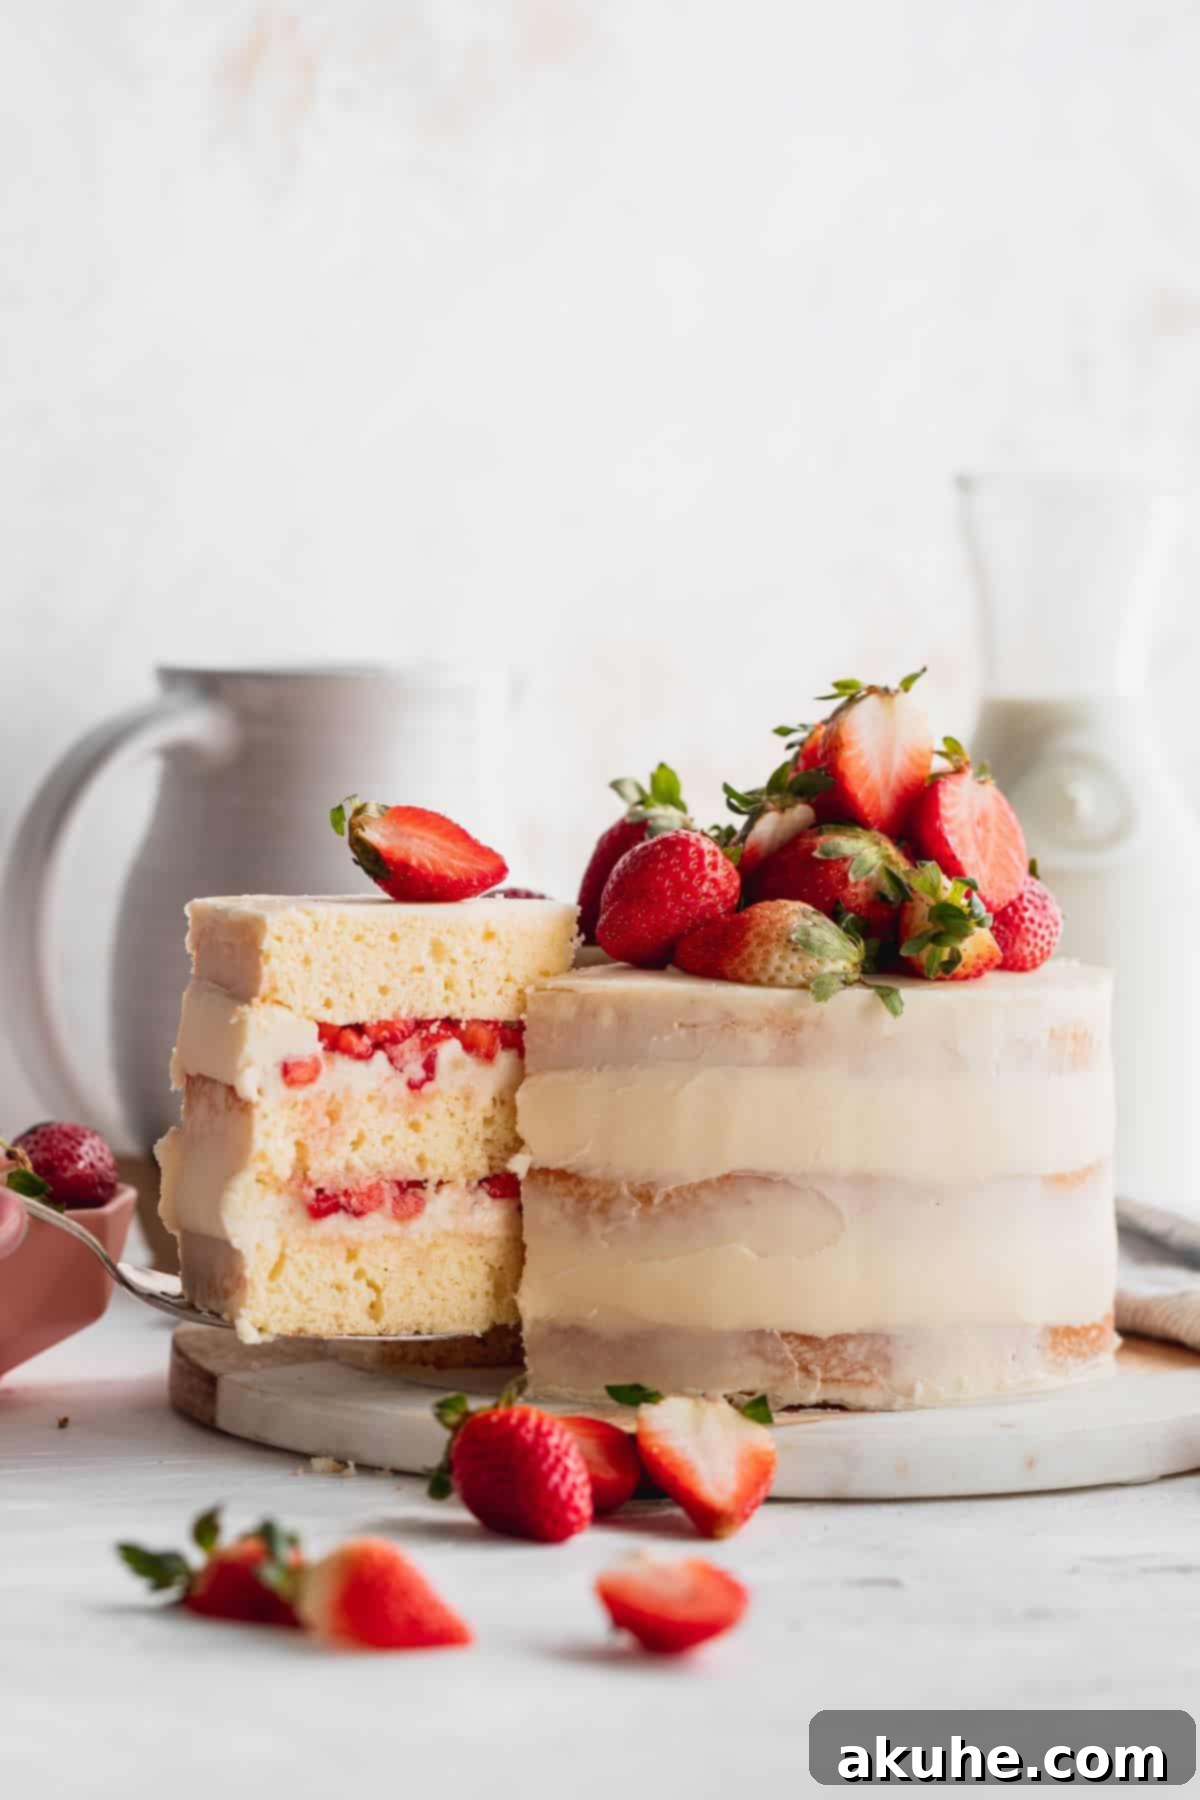
Indulge in the pure delight of our exquisite Strawberry Semi-Naked Cake, a true centerpiece that marries classic charm with refreshing flavors. This stunning layered vanilla cake is a celebration of spring and summer, generously filled with sweet, diced fresh strawberries and draped in a luscious, tangy cream cheese frosting. Its signature “semi-naked” appearance, with hints of the soft vanilla cake peeking through the delicate frosting, offers a rustic elegance that is both inviting and effortlessly beautiful. Topped with an abundance of vibrant whole and halved strawberries, this cake is not just a dessert; it’s an experience waiting to be savored.
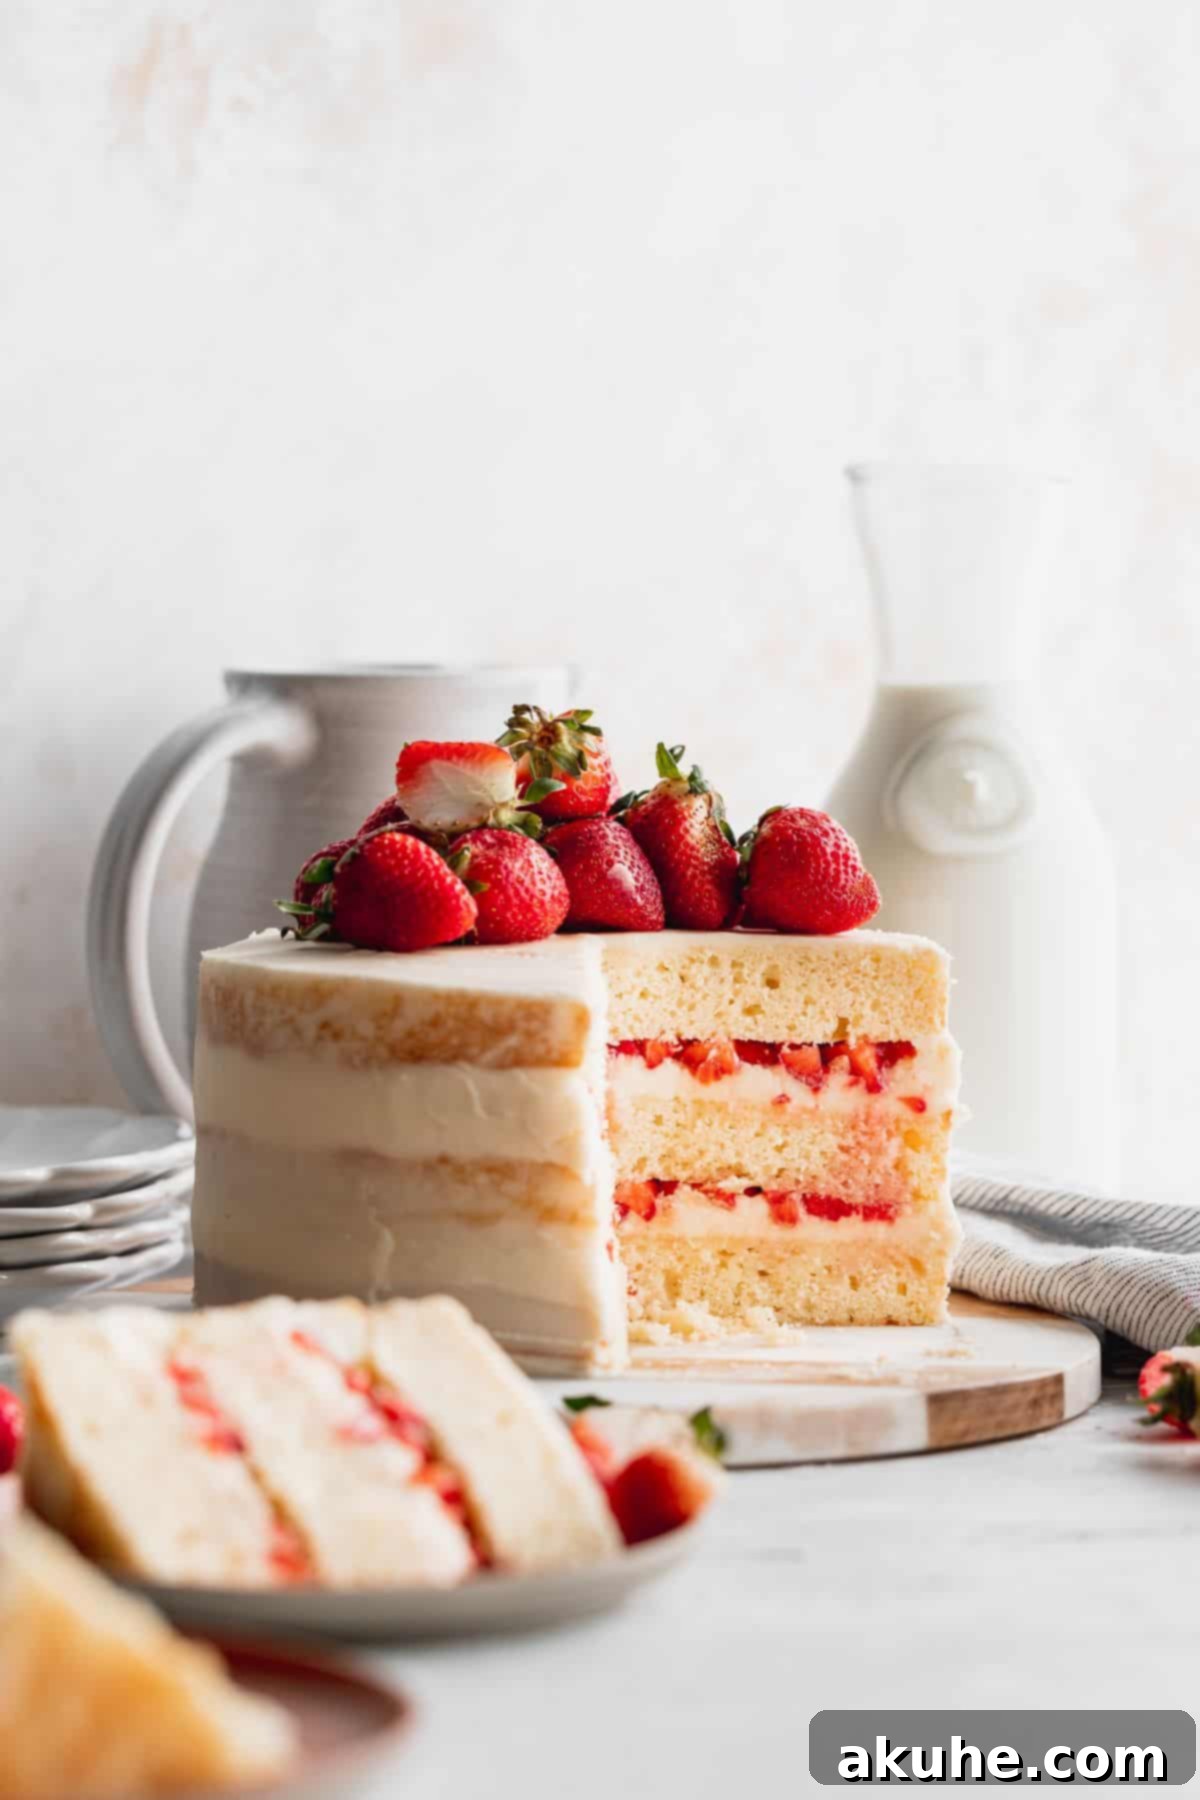
The Strawberry Semi-Naked Cake has earned its place as a beloved classic for good reason. It combines the comforting familiarity of a moist vanilla cake with the invigorating burst of fresh strawberries, all brought together by the creamy richness of a homemade cream cheese frosting. The semi-naked decorating style makes it approachable for home bakers while still achieving a professional and highly appealing finish. Whether you’re hosting a garden party, celebrating a birthday, or simply craving a taste of seasonal perfection, this cake is guaranteed to impress with its balanced flavors and charming presentation.
If your heart desires more berry-infused delights, explore our other delightful strawberry recipes like the decadent Chocolate Covered Strawberry Cake, the flaky and sweet Strawberry Danish, or the perfectly portioned Strawberry Filled Cupcakes. Each offers a unique way to enjoy the vibrant taste of fresh strawberries.
Why This Strawberry Semi-Naked Cake Recipe Will Be Your Favorite
This recipe isn’t just about making a cake; it’s about crafting a memorable dessert that’s as delightful to look at as it is to eat. Here’s why this particular Strawberry Semi-Naked Cake will become a staple in your baking repertoire:
- Unbelievably Moist Vanilla Cake Layers: The foundation of this cake is a vanilla cake that’s anything but ordinary. We’ve perfected a recipe that yields incredibly soft, tender, and moist layers, ensuring every bite is pure bliss. The rich vanilla flavor complements the strawberries without overpowering them, creating a harmonious blend.
- Vibrant Fresh Strawberry Filling: Forget artificial flavors! Our filling heroes diced fresh strawberries, bursting with natural sweetness and a slight tang. This creates a bright, summery flavor profile that tastes incredibly fresh and light, making it the perfect contrast to the creamy frosting.
- Dreamy Cream Cheese Frosting: A truly exceptional cream cheese frosting is key, and this recipe delivers. It’s wonderfully creamy with just the right amount of tang from the cream cheese, which cuts through the sweetness of the cake and fruit. It’s the perfect pairing for the strawberries, creating a flavor combination that’s simply irresistible.
- Effortless Semi-Naked Design: The beauty of a semi-naked cake lies in its rustic charm and, surprisingly, its ease of decoration. Unlike a fully frosted cake that demands impeccable smoothness, the semi-naked look embraces imperfections, allowing the natural beauty of the cake layers to shine through. This makes it a fantastic option for bakers who want a show-stopping cake without the stress of intricate frosting techniques.
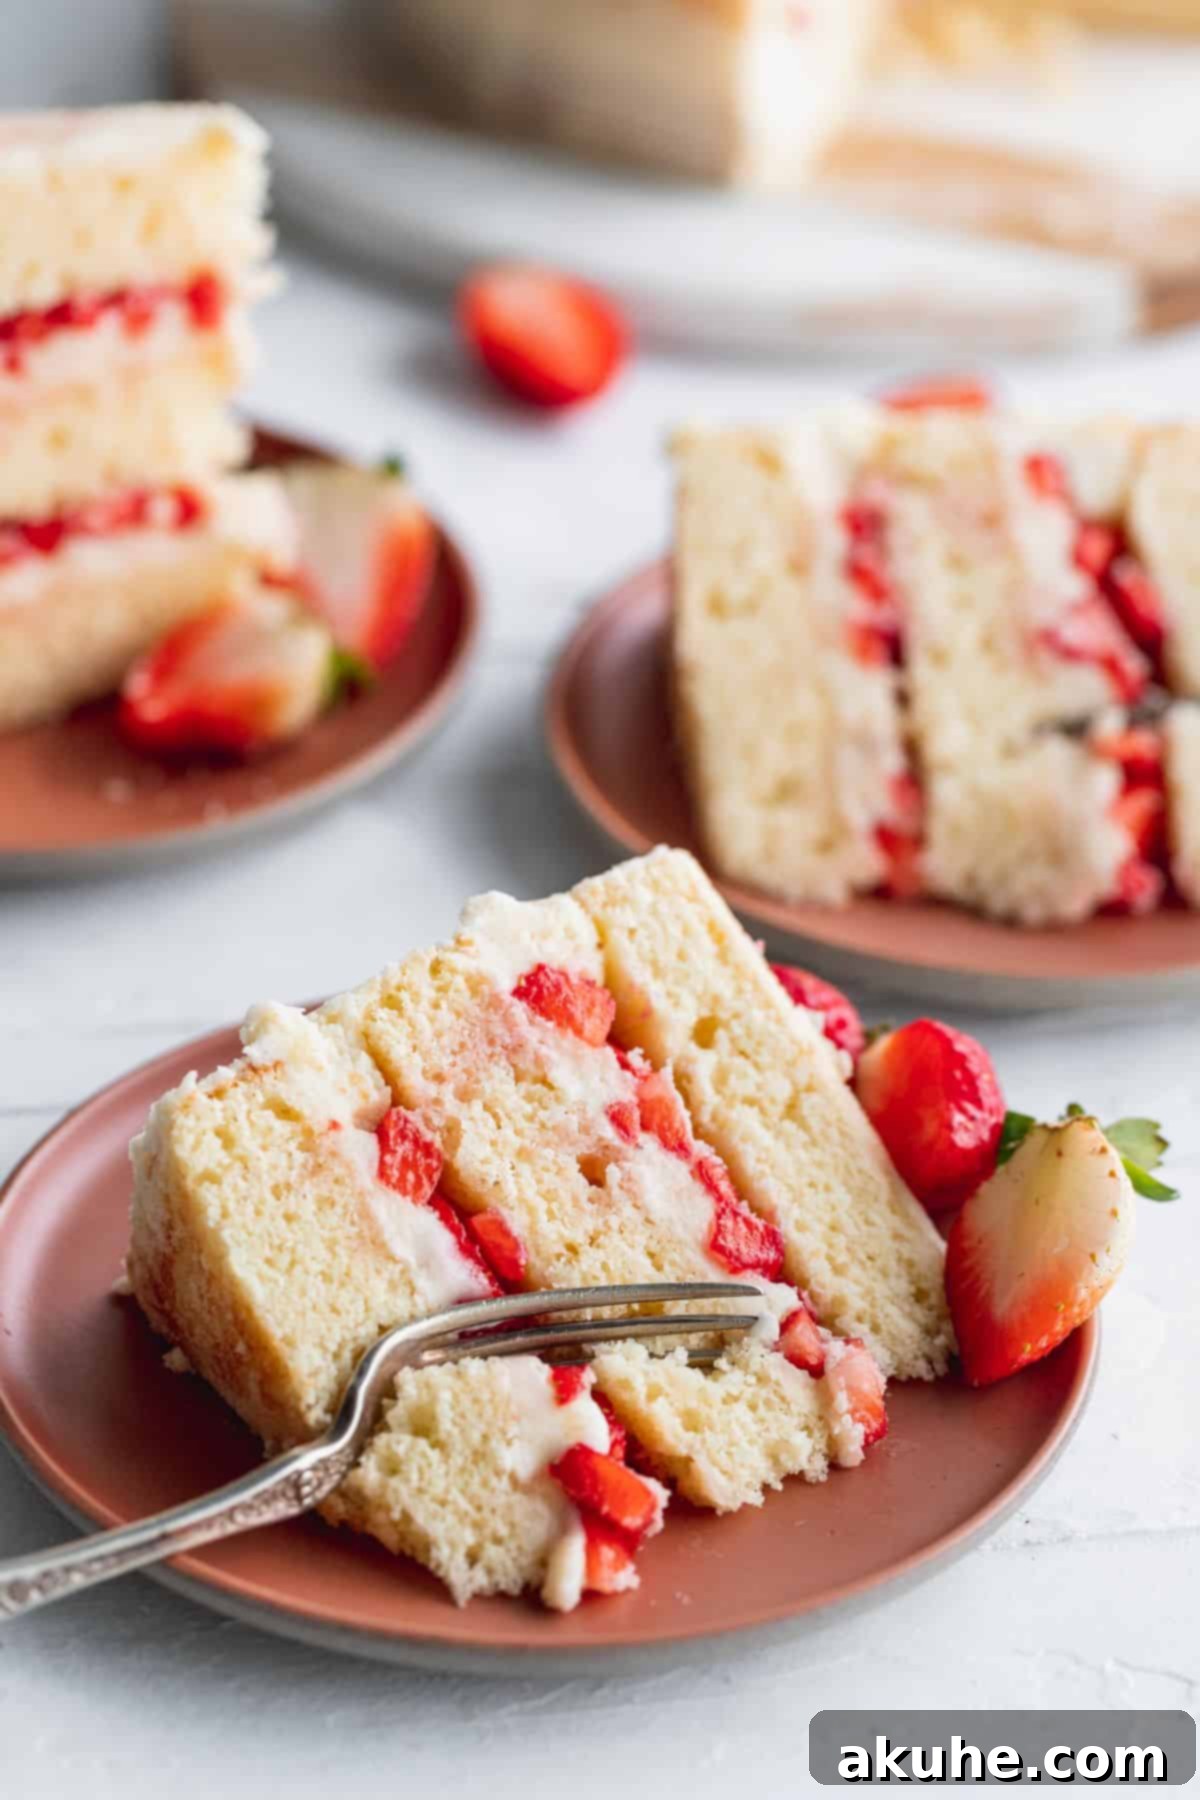
Mastering Your Ingredients: Key Notes for the Perfect Bake
Success in baking often hinges on understanding your ingredients and preparing them correctly. Pay close attention to these notes to ensure your Strawberry Semi-Naked Cake turns out perfectly every time:
- Dairy Ingredients at Room Temperature: For both the cake batter and the frosting (cream cheese, sour cream, buttermilk, butter), it’s crucial to have dairy ingredients at room temperature. This allows them to emulsify properly, creating a smooth, lump-free batter and a fluffy, cohesive frosting. Pull them out of the fridge at least 2 hours before you plan to start baking.
- Full-Fat Sour Cream: Opt for full-fat sour cream in your cake batter. The higher fat content contributes significantly to the cake’s moistness and rich flavor, preventing it from drying out.
- Cake Flour for Superior Texture: While all-purpose flour can work in a pinch, cake flour is highly recommended for this recipe. Its lower protein content results in a much softer, finer, and more tender crumb. If you don’t have cake flour, you can create a substitute by removing 2 tablespoons from each cup of all-purpose flour and replacing it with 2 tablespoons of cornstarch, then sifting well.
- Buttermilk for Tenderness and Flavor: Buttermilk reacts with the baking powder to create a light and airy texture. If you don’t have buttermilk on hand, you can easily make your own: simply combine 3/4 cup of whole milk with 1 tablespoon of lemon juice or white vinegar. Let it sit for 10 minutes until it slightly curdles, then stir and use as directed.
- Fresh, Ripe Strawberries are Non-Negotiable: This recipe truly shines with fresh strawberries. Their natural sweetness, vibrant color, and firm texture are essential for both the filling and the topping. While frozen strawberries *can* be used in a pinch for the filling (thawed and drained well), fresh are always preferred for the best flavor and presentation.
- Full-Fat Cream Cheese for Stable Frosting: Just like sour cream, full-fat cream cheese is vital for the frosting. It provides the best flavor, texture, and most importantly, stability. Low-fat or whipped cream cheese will result in a runny, unstable frosting that won’t hold its shape.
- Sifted Powdered Sugar: To achieve a silky-smooth cream cheese frosting free of any grittiness, sifting your powdered sugar is a must. Don’t skip this step!
Step-by-Step Guide: Crafting Your Strawberry Semi-Naked Cake
Creating this beautiful Strawberry Semi-Naked Cake is a rewarding journey. Follow these detailed instructions carefully to ensure a delicious and visually stunning result.
Vanilla Cake Layers: The Foundation of Flavor
The vanilla cake layers are the heart of this dessert. Precision and patience in these initial steps will guarantee a tender and flavorful base.
- Prepare Your Oven and Pans: Begin by preheating your oven to 350°F (175°C). Prepare three 8-inch round cake pans by thoroughly spraying them with baking non-stick spray. Line the bottom of each pan with an 8-inch parchment paper circle, then spray over the parchment as well. This double layer of protection ensures your cakes release easily.
- Combine Dry Ingredients: In a large mixing bowl, sift together the cake flour, baking powder, and salt. Sifting helps to aerate the flour and remove any lumps, contributing to a finer cake crumb. Whisk them gently to ensure they are well combined, then set this bowl aside.
- Cream Butter and Sugar: In the bowl of an electric stand mixer fitted with the paddle attachment (or using a hand mixer), beat the softened, room temperature unsalted butter and white granulated sugar on high speed for at least 4 minutes. This extended creaming process incorporates air into the mixture, resulting in a light and fluffy texture, which is crucial for a tender cake. Stop and scrape down the sides of the bowl midway through.
- Incorporate Wet Ingredients: Add the room temperature sour cream and pure vanilla extract to the creamed butter and sugar mixture. Beat on medium speed until just combined. The mixture may appear slightly lumpy at this stage, which is normal. Scrape down the bowl thoroughly to ensure all ingredients are incorporated. Then, add the large eggs one at a time, beating well after each addition until fully combined. Again, scrape the bowl down to ensure no butter remains unmixed at the bottom.
- Alternate Dry and Buttermilk: With the mixer on low speed, begin adding the dry ingredients and buttermilk in alternating batches. Start by adding approximately one-third of the dry ingredients, mixing until just combined. Follow with half of the buttermilk, mixing until smooth. Repeat with another one-third of the dry ingredients, then the remaining buttermilk. Finish by adding the last one-third of the dry ingredients. Mix only until just combined after each addition, being careful not to overmix, as overmixing can lead to a tough cake.
- Bake to Golden Perfection: Divide the prepared cake batter evenly among the three prepared 8-inch cake pans. For precision, a kitchen scale can be used to ensure uniform layers. Bake for 16-19 minutes. The cakes are done when a wooden skewer or toothpick inserted into the center comes out clean. Be careful not to overbake, as this can dry out the cake.
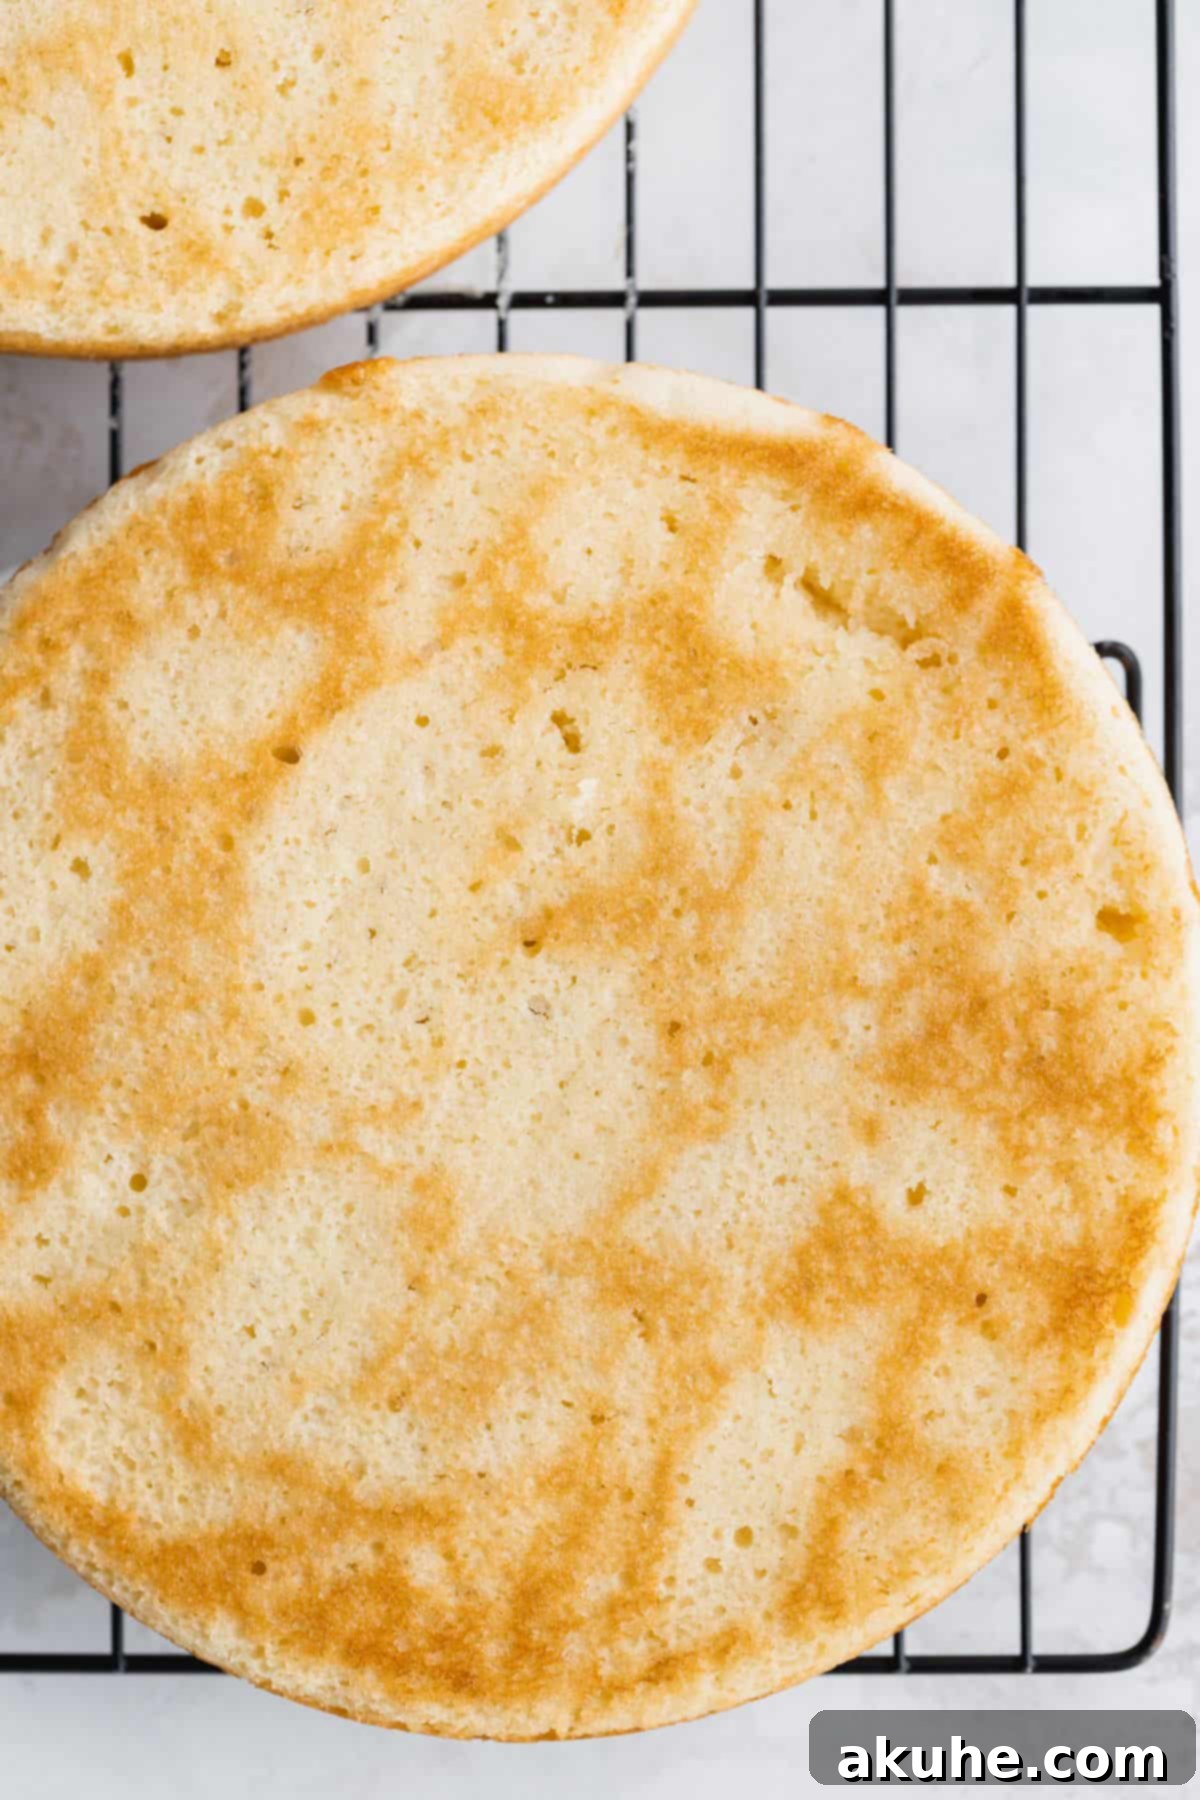
- Cooling Process: Once baked, let the cake layers cool in their pans for a full 10 minutes. This allows them to firm up slightly before you attempt to move them. After 10 minutes, carefully invert the cakes onto a wire cooling rack and allow them to cool completely to room temperature before decorating. Attempting to frost warm cakes will cause your frosting to melt.
Decadent Cream Cheese Frosting: A Tangy Sweet Delight
This rich and tangy cream cheese frosting is the perfect partner for the vanilla cake and fresh strawberries.
- Prepare Butter and Sift Powdered Sugar: For the best consistency, take your unsalted butter out of the refrigerator about 30 minutes before you start making the frosting. It should be slightly cold but pliable, not fully at room temperature. While waiting, sift your powdered sugar into a separate bowl to eliminate any lumps.
- Beat the Cream Cheese: In the bowl of your electric stand mixer, beat the room temperature full-fat cream cheese on high speed for 1 minute until it’s smooth and creamy.
- Combine with Butter: Add the slightly cold unsalted butter to the cream cheese and beat on high speed for 3 minutes until the mixture is light, soft, and fluffy. Scrape down the bowl periodically to ensure even mixing.
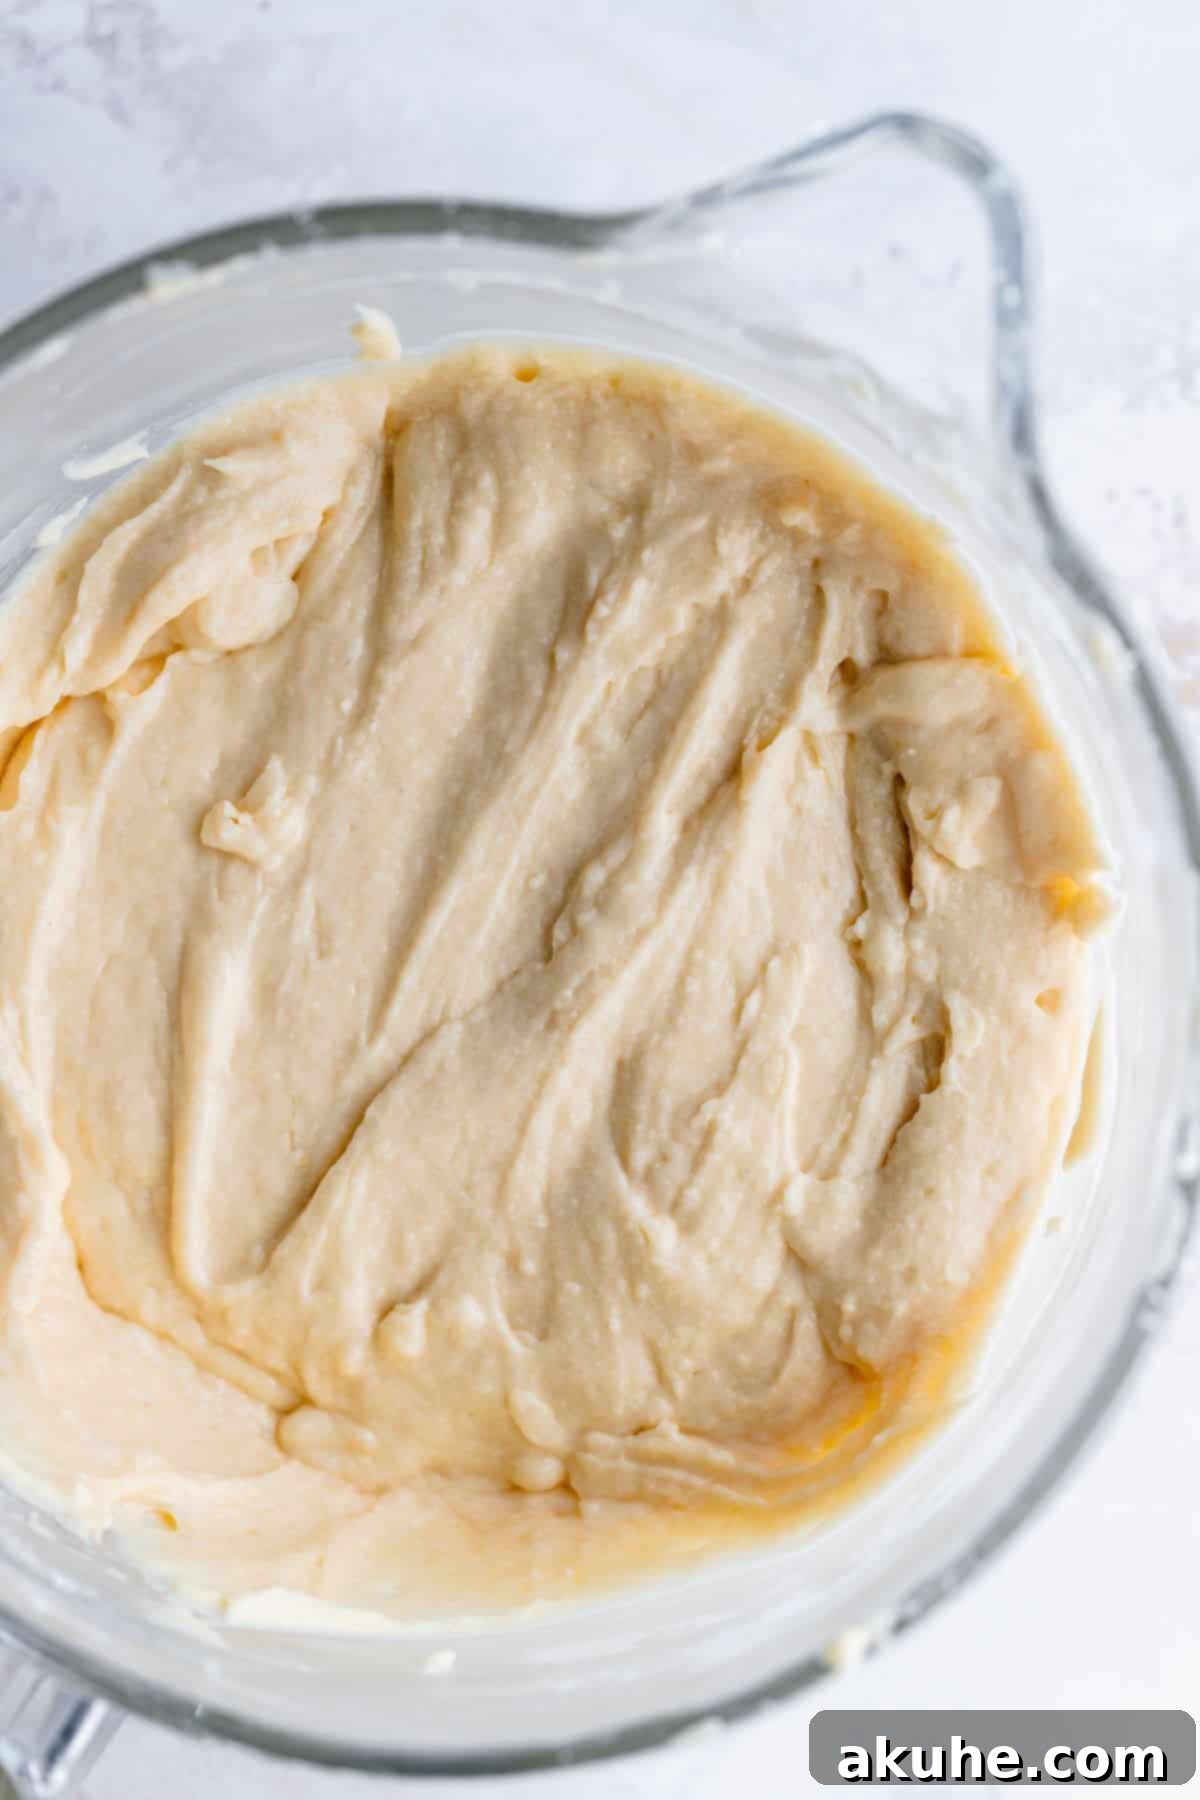
- Add Flavor and Smooth: With the mixer on low speed, slowly add the sifted powdered sugar until it is fully incorporated. Then, add the pinch of salt, pure vanilla extract, and heavy cream. Mix on low until just combined. Increase the speed to high and beat for another 3 minutes until the frosting is incredibly light and airy. To remove any large air bubbles and achieve a super smooth consistency, switch to a wooden spoon and stir the frosting vigorously by hand for a minute or two.
Choosing the Right Cake Pans: Size Matters
This recipe is designed to yield three perfectly sized 8-inch cake layers, resulting in a beautiful, tall, and impressive cake. However, if you prefer thicker cake layers or a slightly smaller diameter, you can easily use three 6-inch cake pans. Be aware that using 6-inch pans will require a longer baking time; start checking for doneness around 25-30 minutes, or until a toothpick comes out clean.
Regardless of the pan size you choose, proper pan preparation is paramount to prevent sticking and ensure beautifully intact layers. Always spray your pans generously with baking non-stick spray and then line the bottom of each pan with a parchment paper circle. The parchment acts as an extra layer of protection, guaranteeing a smooth release. Spraying over the parchment again provides an additional non-stick surface.
Assembling Your Stunning Semi-Naked Strawberry Cake
Now for the fun part – bringing all the components together to create your masterpiece! The assembly process is where the semi-naked look truly comes to life.
- Secure the First Layer: Start by placing a small dollop of cream cheese frosting in the center of your cake board or serving platter. This acts as an adhesive, securely holding your cake in place during the decorating process. Place the first cooled cake layer directly onto this frosting, bottom side down. If your cake layers have domed slightly during baking, use a serrated knife or a cake leveler to gently trim the top to create a perfectly flat surface.
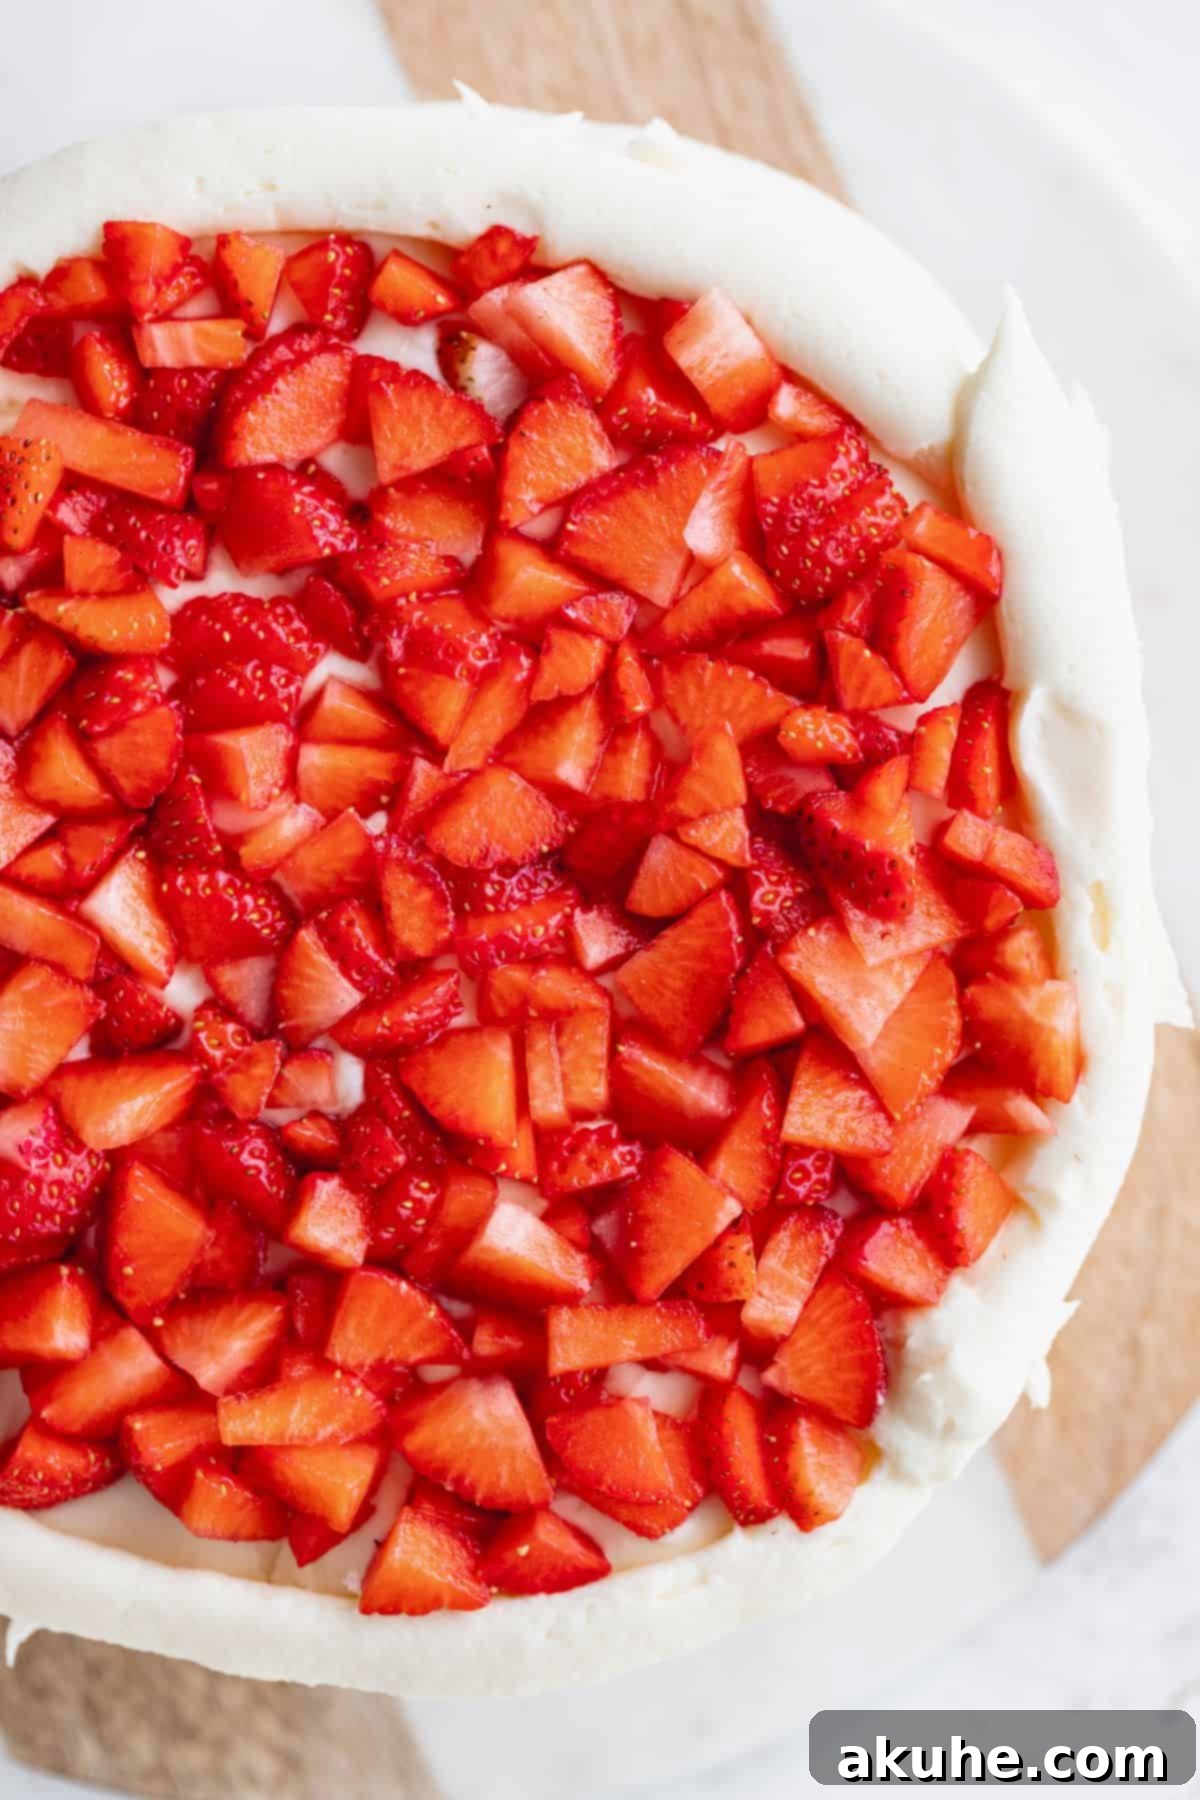
- Frosting Border and Strawberry Filling: Spread approximately 1 cup of cream cheese frosting evenly over the first cake layer. Next, using a piping bag fitted with a round tip (or simply snip off the corner of a Ziploc bag), pipe a sturdy border of frosting around the entire circumference of the cake layer. This border is crucial as it creates a dam to keep the diced fresh strawberry filling securely inside and prevents it from oozing out when subsequent layers are stacked. Generously fill the entire center of the cake layer with your diced strawberries. Gently compact them slightly to ensure an even, flat layer, but don’t crush them.
- Stacking Subsequent Layers: Carefully place the second cake layer on top of the strawberry filling, aligning it precisely. Repeat the process of spreading 1 cup of frosting, piping a border, and filling with diced strawberries. For the final, topmost layer, place it bottom side up. This technique typically provides the flattest and smoothest surface for the top of your cake, making it easier to achieve a neat finish.
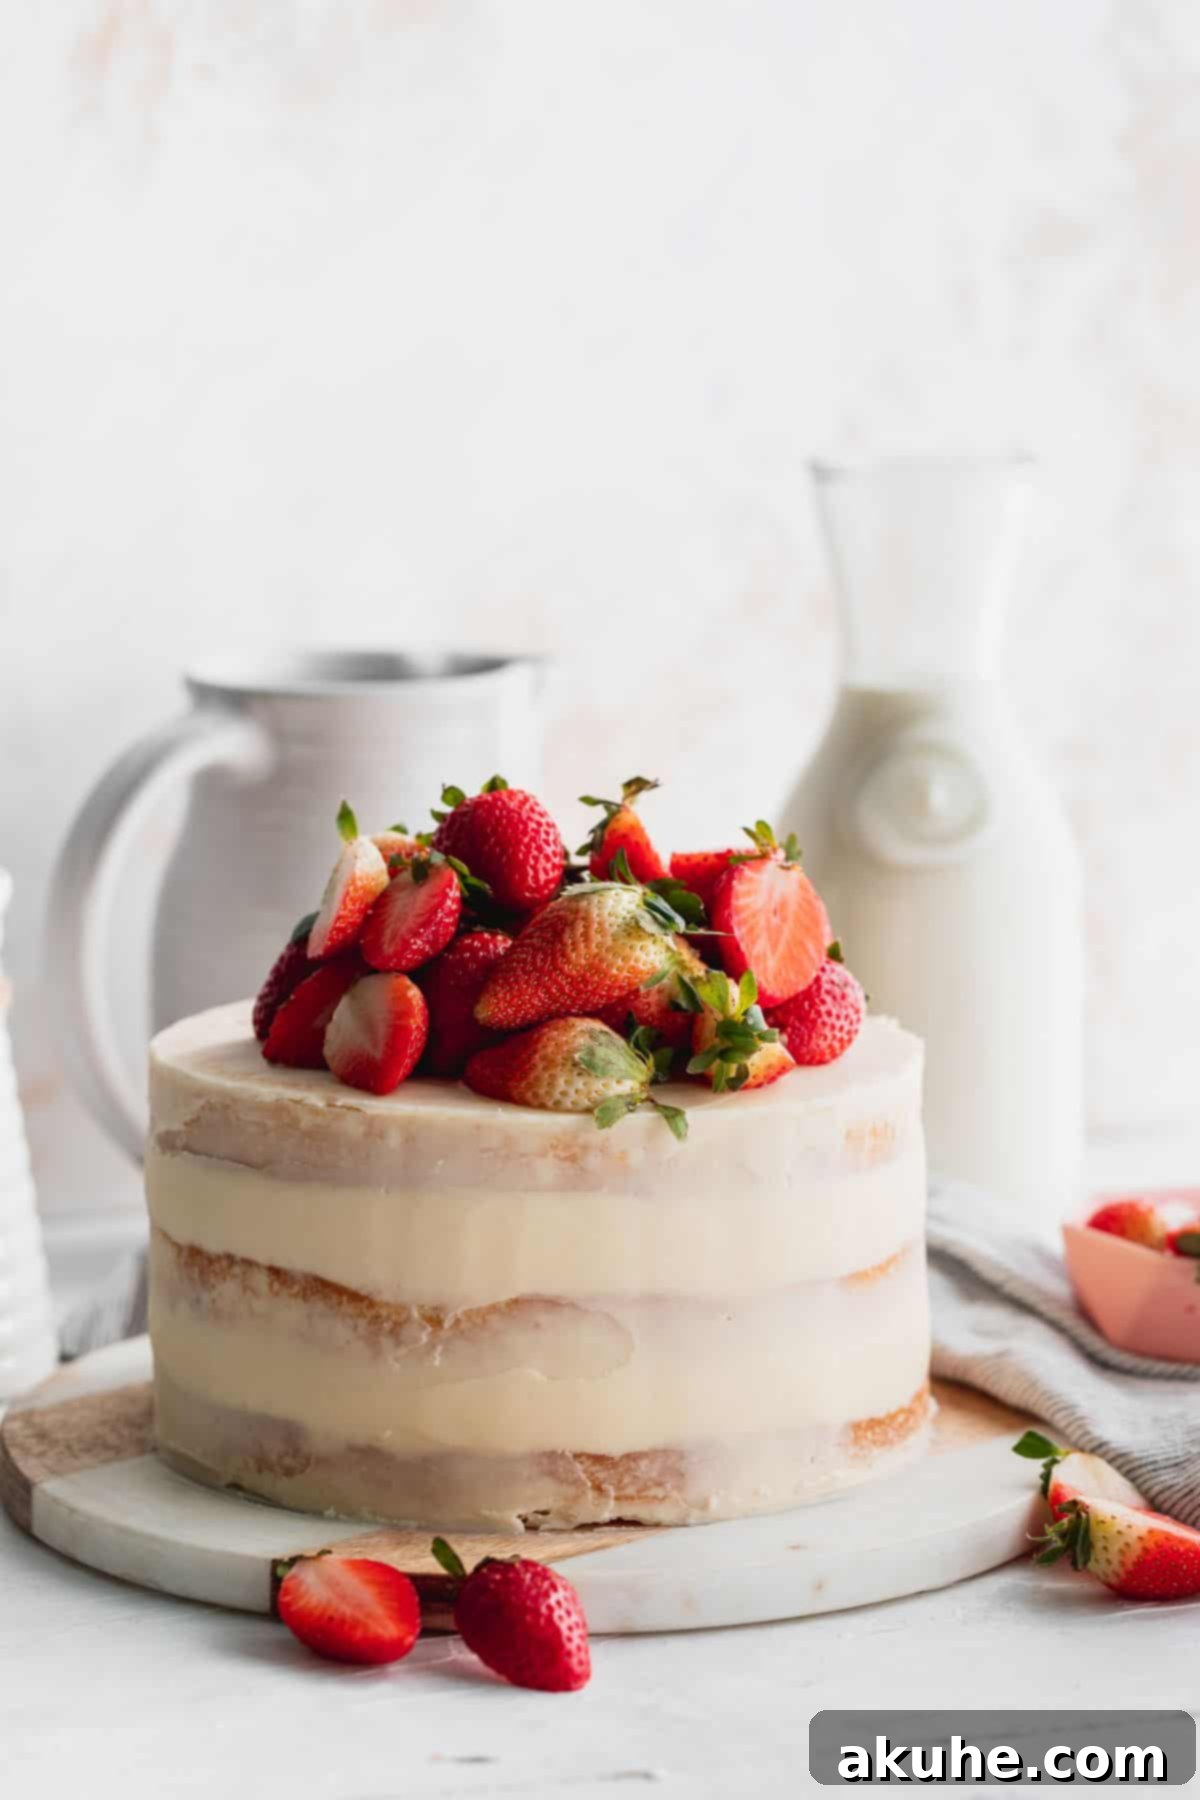
- The Signature Semi-Naked Finish: Take a moment to fill any visible gaps between your cake layers and the frosting border with extra frosting, then smooth them out with an offset spatula. For added stability, especially with the fresh fruit filling, place the assembled cake in the freezer for about 10 minutes. This helps to set the filling and firm up the frosting. After chilling, apply a very thin, light layer of cream cheese frosting all around the sides and top of the cake. Use a long offset spatula or a cake scraper to smooth the frosting. The key to the “semi-naked” look is to ensure that parts of the cake layers still peek through the frosting, creating that charming rustic effect. Don’t aim for perfect coverage; embrace the exposed cake!
- Garnish with Abundant Fresh Strawberries: The final touch and a highlight of this cake is the generous topping of fresh strawberries. Arrange whole and halved strawberries artistically on top of the cake. The more fresh strawberries you use, the more beautiful and inviting your cake will look and taste. Feel free to get creative with your arrangement!
Frequently Asked Questions (FAQ)
- Can this recipe be adapted for cupcakes?
- Absolutely! This recipe can be easily halved to make approximately 12 delightful cupcakes. The baking time will be significantly shorter, typically 18-22 minutes. Keep a close eye on them and test for doneness with a toothpick.
- Can I make a square cake from this recipe?
- Yes, you can! The full recipe will comfortably fit into a 9×13 inch rectangular baking pan, creating a beautiful sheet cake. If you prefer a smaller 8×8 inch square cake, simply divide the entire recipe in half.
- Will 9-inch cake pans work for this recipe?
- Yes, this recipe can be baked in two 9-inch cake pans instead of three 8-inch pans. The layers will be slightly thinner, and the baking time might be marginally shorter (around 20-25 minutes). Just remember to adjust your expectations for the height of the finished cake.
- Can I use frozen strawberries for the filling?
- While fresh strawberries are highly recommended for their texture and vibrant flavor, you can use frozen strawberries for the filling if needed. Ensure they are fully thawed and thoroughly drained to remove excess moisture, which can make your cake soggy. Pat them dry with paper towels before dicing and adding to the cake.
- How do I prevent my cream cheese frosting from becoming too soft?
- The key to a stable cream cheese frosting is using full-fat cream cheese and butter that is slightly cold, not fully room temperature, when you start creaming it with the cream cheese. Also, ensure your heavy cream is very cold. If your kitchen is warm, you can chill the mixing bowl and beaters for 15 minutes before starting. If the frosting becomes too soft during assembly, pop it into the refrigerator for 15-20 minutes to firm up.
Storage & Freezing Tips for Maximum Freshness
To ensure your delicious Strawberry Semi-Naked Cake stays fresh and delightful for as long as possible, follow these storage and freezing guidelines.
Storing Your Cake
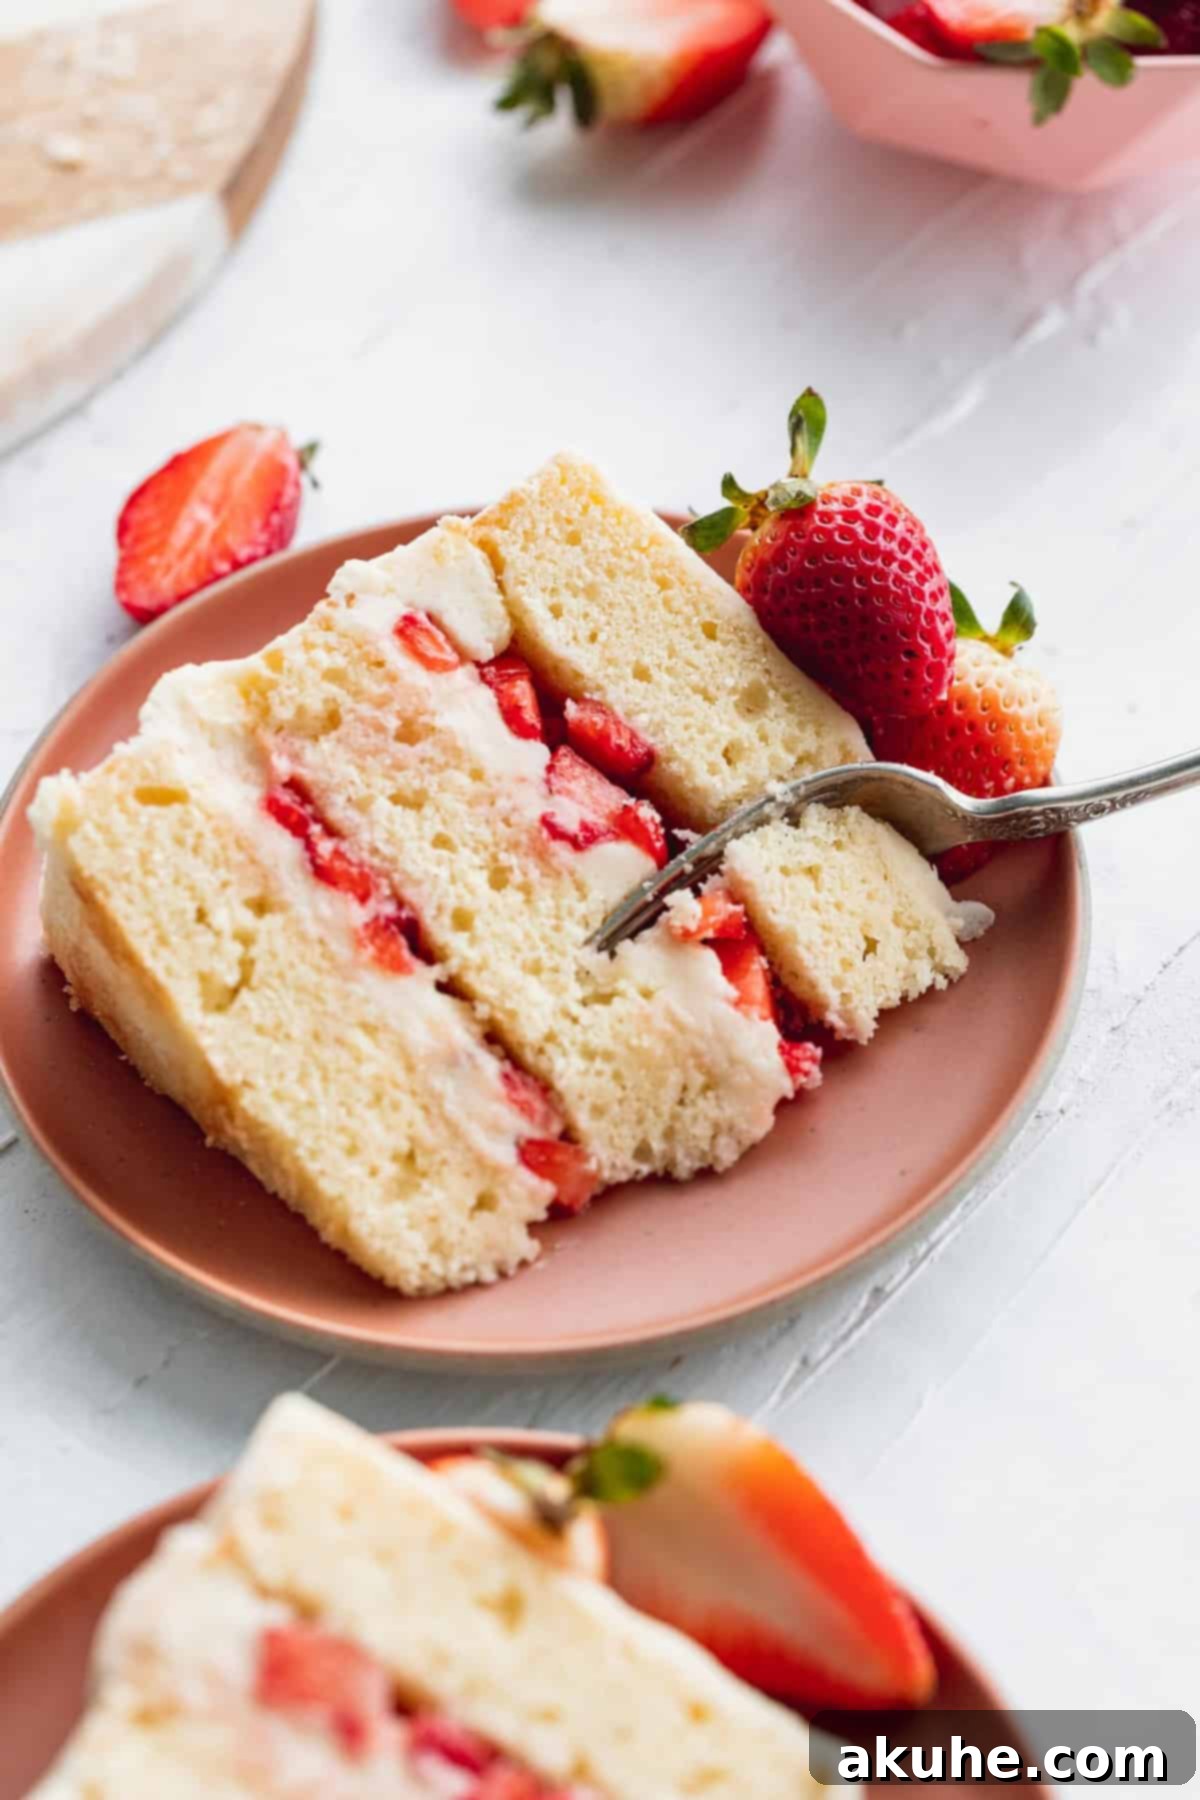
Once assembled and frosted, this strawberry semi-naked cake should be stored in an airtight container to prevent it from drying out or absorbing other odors from your refrigerator. Place it in the fridge, where it will remain fresh and delicious for up to 5 days. Remember that the fresh strawberries on top are best enjoyed within the first 2-3 days.
Freezing Cake Components
Planning ahead? You can prepare the vanilla cake layers in advance and freeze them. Once the cakes have completely cooled to room temperature, wrap each layer individually and tightly in several layers of plastic cling wrap, then a layer of aluminum foil. Store them in the freezer for up to one week. When you’re ready to decorate, simply pull the wrapped cake layers out of the freezer about 1 hour before you plan to assemble, allowing them to thaw at room temperature before unwrapping.
You can also freeze individual slices of the finished Strawberry Semi-Naked Cake. This is perfect for enjoying a treat whenever a craving strikes! Wrap each slice tightly in cling wrap, then place them in an airtight freezer-safe container. They can be frozen for up to 30 days. To enjoy, simply remove a slice from the freezer and let it thaw at room temperature for about 1 hour before eating.
Delightful Variations & Serving Suggestions
While this Strawberry Semi-Naked Cake is perfect as is, you can always get creative with small additions to customize it to your liking:
- Lemon Zest Infusion: Add a teaspoon of fresh lemon zest to both the vanilla cake batter and the cream cheese frosting for an extra bright and zesty flavor that pairs beautifully with strawberries.
- Chocolate Drizzle: For chocolate lovers, a delicate drizzle of melted dark or white chocolate over the top of the cake, along with the strawberries, can add an extra layer of decadence.
- Fresh Mint Garnish: A few fresh mint leaves scattered among the strawberries on top can add a touch of sophistication and a refreshing aroma.
Serve slices of this cake chilled or at room temperature, perhaps with an extra dollop of whipped cream or a small scoop of vanilla bean ice cream for an ultimate indulgence. Its charming appearance makes it ideal for celebrations, afternoon tea, or simply as a special weeknight dessert.
Other Tempting Cake Recipes To Explore
If you’ve loved baking this cake, be sure to check out my other delightful cake recipes. There’s always something new and delicious to try!
Strawberry Semi-Naked Cake
By Stephanie Rutherford
This strawberry semi-naked cake is a fluffy vanilla layered cake, generously filled with a luscious cream cheese frosting and diced fresh strawberries. A true classic, perfect for any celebration, offering a delightful balance of flavors and a beautifully rustic appearance.
Overall Rating: 5 out of 5 stars (based on 10 reviews)
- Prep Time: 1 hour 30 minutes
- Cook Time: 18 minutes
- Decorating Time: 1 hour
- Total Time: 2 hours 48 minutes
- Servings: 16 slices
Ingredients
Vanilla Cake
- 1 cup Unsalted butter, room temperature
- 1 1/2 cups White granulated sugar
- 1 TBSP Pure vanilla extract
- 1/4 cup Sour cream, room temperature
- 4 Large eggs, room temperature
- 3 cups Cake flour
- 2 tsp Baking powder
- 1 tsp Salt
- 3/4 cup Buttermilk, room temperature (or homemade alternative)
Cream Cheese Frosting
- 8 oz Cream cheese, room temperature, full-fat
- 1 1/2 cups Unsalted butter, slightly cold
- 8 cups Powdered sugar, sifted
- 1 TBSP Pure vanilla extract
- 1/4 cup Heavy cream, cold
- Pinch of salt
- 3 cups Diced fresh strawberries (for filling)
- Extra fresh strawberries, whole and halved (for topping)
Instructions
Vanilla Cake Preparation
- Preheat oven to 350°F (175°C). Prepare three 8-inch cake pans by spraying thoroughly with baking non-stick spray and lining the bottoms with 8-inch parchment paper circles. Spray over the parchment again for extra non-stick insurance.
- In a large bowl, whisk together the sifted cake flour, baking powder, and salt. Set this dry mixture aside.
- In a separate large mixing bowl, using an electric mixer, beat the softened unsalted butter and white granulated sugar on high speed for 4 minutes until the mixture is light, pale, and fluffy. Be sure to scrape down the sides of the bowl midway through.
- Add the room temperature sour cream and pure vanilla extract to the butter mixture, beating until just combined. Scrape the bowl again. Add the large eggs one at a time, beating thoroughly after each addition until fully incorporated. Ensure all butter is mixed in from the bottom of the bowl.
- With the mixer on low speed, alternately add the dry ingredients and buttermilk to the wet mixture, starting and ending with the dry. Begin by adding 1/3 of the dry ingredients, mixing until just combined. Follow with half of the buttermilk, mixing until smooth. Add another 1/3 of the dry ingredients, then the remaining buttermilk, and finally the last 1/3 of the dry ingredients. Mix only until just combined, being careful not to overmix.
- Divide the cake batter evenly among the three prepared cake pans. For precision, use a kitchen scale to ensure each pan receives the same amount of batter. Bake for 16-19 minutes, or until a wooden skewer inserted into the center of a cake comes out clean.
- Allow the baked cake layers to cool in their pans for 10 minutes before carefully inverting them onto a wire cooling rack to cool completely. It is crucial for the cakes to be entirely cool before proceeding with frosting and assembly.
Cream Cheese Frosting Preparation
- Place the unsalted butter on the counter for about 30 minutes before starting, allowing it to soften slightly but remain cool to the touch. Simultaneously, sift the powdered sugar to ensure a smooth, lump-free frosting.
- Using an electric mixer, beat the room temperature cream cheese on high speed for 1 minute until it is completely smooth and creamy.
- Add the slightly cold unsalted butter to the beaten cream cheese and continue to beat on high for 3 minutes, or until the mixture is soft, light, and fluffy.
- With the mixer on low speed, gradually add the sifted powdered sugar until it is fully incorporated. Then, add the pinch of salt, pure vanilla extract, and cold heavy cream. Mix on low until just combined. Increase the speed to high and beat for another 3 minutes until the frosting is light and airy. To achieve a perfectly smooth consistency and remove any air bubbles, use a wooden spoon to vigorously stir the frosting by hand for a minute.
Cake Assembly Instructions
- Place a small amount of cream cheese frosting on the center of your cake board or serving platter. This will act as an anchor to keep your cake secure during decoration.
- Place the first cooled cake layer onto the frosted spot, bottom side down. Spread approximately 1 cup of cream cheese frosting evenly over this layer. Using a piping bag (or a Ziploc bag with a corner snipped), pipe a sturdy border of frosting around the edge of the cake layer to create a dam. Fill the entire inner layer with diced fresh strawberries, compacting them gently to form an even surface. Repeat this exact process with the second cake layer.
- For the final cake layer, place it on top of the second layer with the bottom side facing up. This ensures the flattest possible surface for the top of your cake.
- Fill any small gaps between the cake layers and the strawberry filling with extra frosting, and smooth with an offset spatula. For increased stability and to allow the filling to set, place the cake in the freezer for 10 minutes.
- Apply a very light, thin layer of cream cheese frosting around the entire cake, using a cake scraper or offset spatula to smooth it. The goal is a “semi-naked” look, where parts of the cake layers are visible through the frosting. Don’t strive for perfect coverage. Finally, generously top the cake with whole and halved fresh strawberries for a beautiful, vibrant finish.
Notes
- Flour Measurement: For accurate and consistent results, always spoon and level your cake flour into the measuring cup, or for superior accuracy, use a kitchen scale to weigh it. Compacted flour can lead to a dense, dry cake.
- High-Altitude Baking: If you are baking at a high altitude, consider adding an extra 3 tablespoons of cake flour to the vanilla cake batter to provide additional structure and prevent collapsing.
Nutrition Information (per serving)
Calories: 492kcal, Carbohydrates: 100g, Protein: 4g, Fat: 36g, Saturated Fat: 22g, Trans Fat: 1g, Cholesterol: 100mg, Sodium: 265mg, Potassium: 77mg, Fiber: 1g, Sugar: 20g, Vitamin A: 1173IU, Vitamin C: 1mg, Calcium: 75mg, Iron: 1mg
I hope you adored creating and tasting this delightful Strawberry Semi-Naked Cake! Remember to share your baking successes and tag me on Instagram @stephaniesweettreats. For more inspiring baking ideas and recipes, be sure to follow me on Pinterest!
