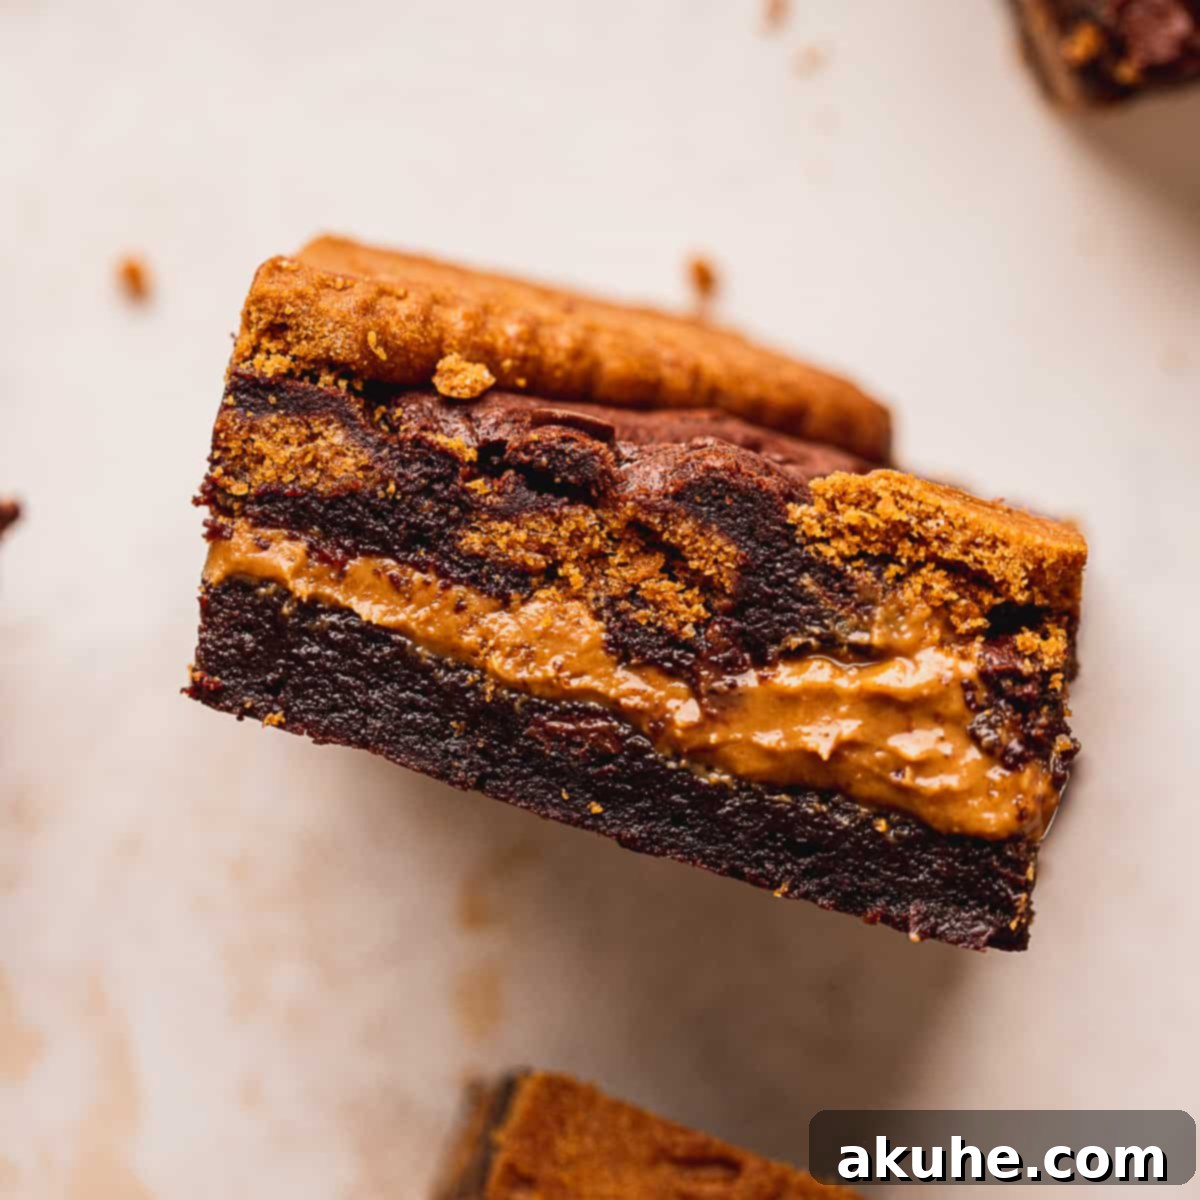
Prepare to be captivated by the ultimate indulgence: these incredibly fudgy Biscoff brownies. Far more than just a simple brownie, this recipe elevates the classic treat with the irresistible, caramelized notes of Lotus Biscoff. Imagine a deeply rich, chocolatey brownie base, expertly crafted for peak fudginess, then generously studded with crunchy Biscoff cookies and delicate mini chocolate chips. But the true showstopper? A luscious core of molten Biscoff cookie butter, creating an enchanting “ooze” with every decadent bite. If you’re a devoted fan of Biscoff cookies or their creamy spread, these brownies are destined to become your new obsession. They are a symphony of texture and flavor, promising an unforgettable dessert experience that’s surprisingly easy to achieve at home.
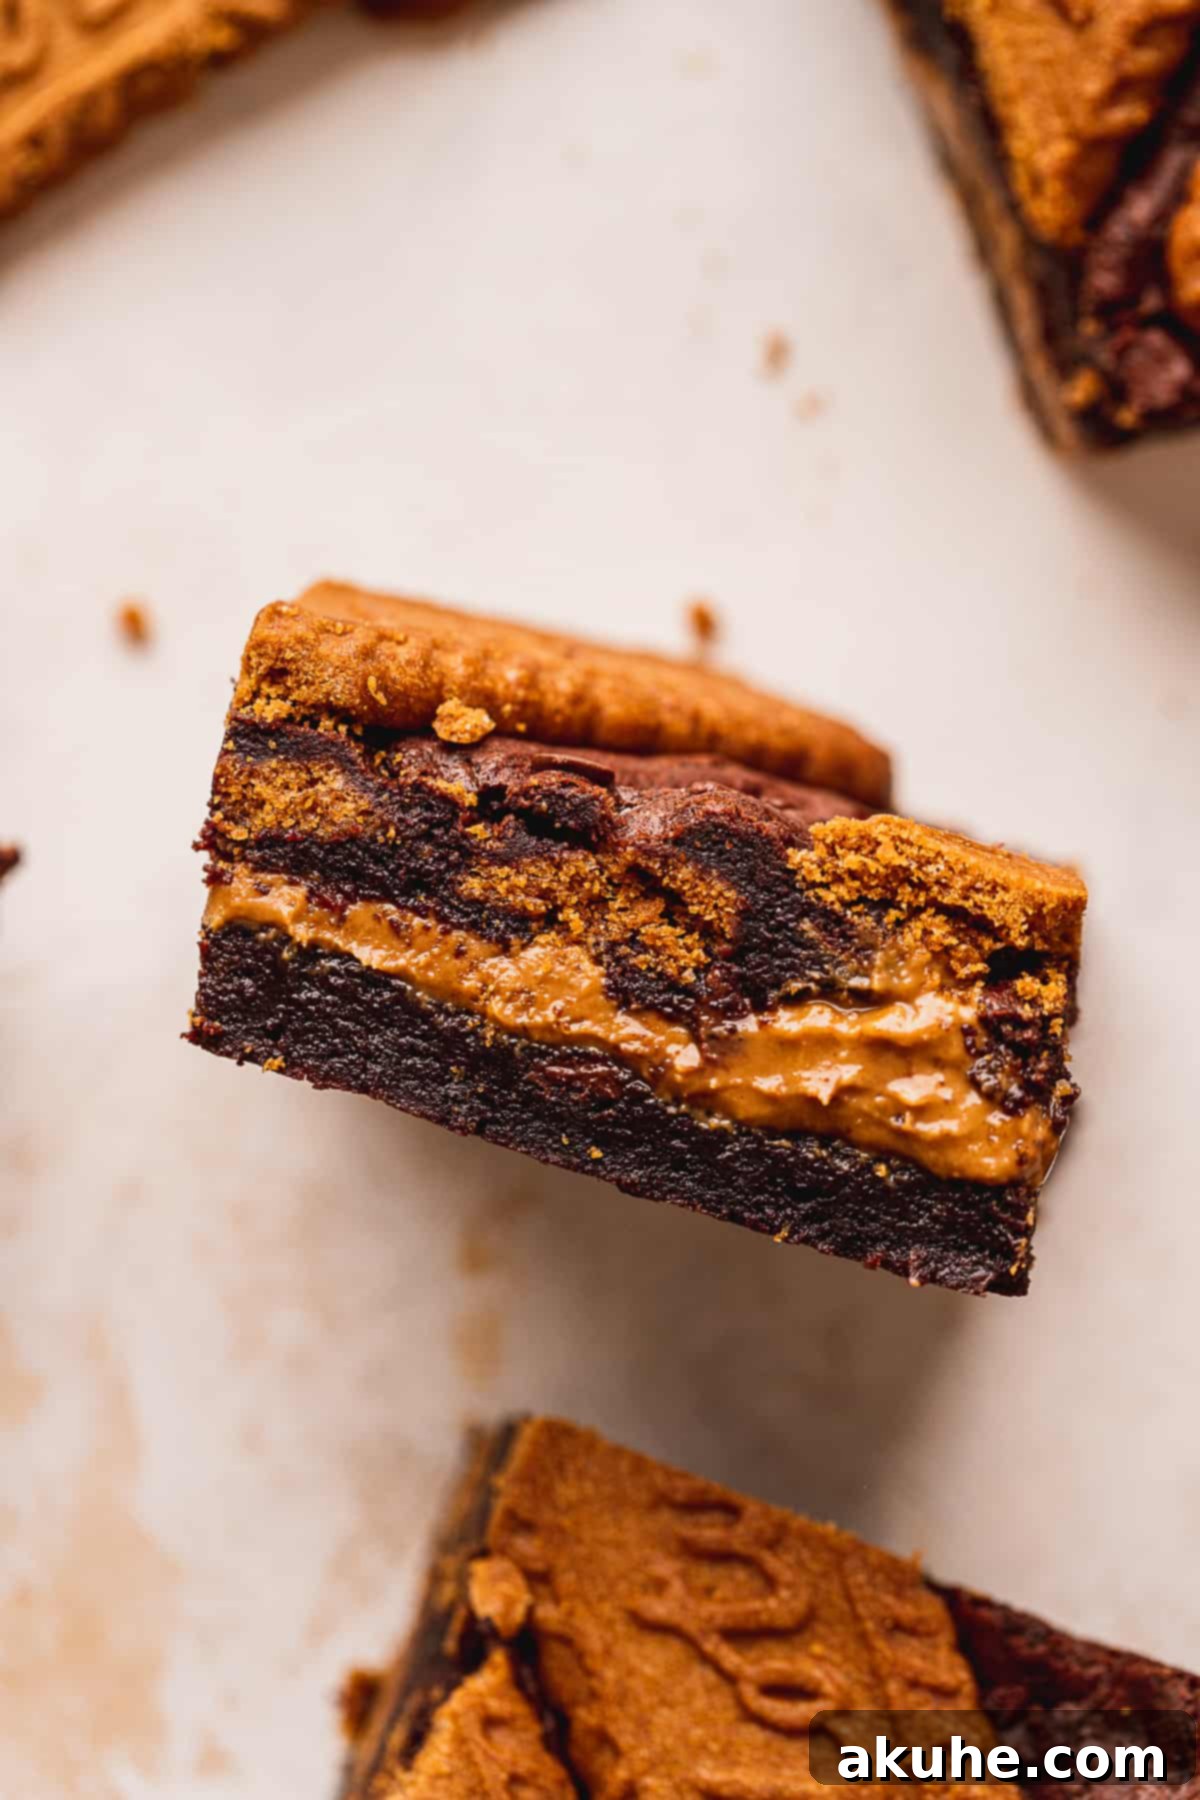
Crafted to be supremely fudgy and moist, these Biscoff brownies boast a deep chocolate flavor that perfectly complements the unique spice of Biscoff. Despite their gourmet appeal, the recipe is straightforward and accessible, making it an ideal project for bakers of all skill levels. My goal in developing this recipe was to create brownies where the signature cookie butter wasn’t just an addition, but a delightful surprise at the heart of each square, creating that coveted molten center. We use a generous amount of Biscoff cookie butter to ensure its distinctive flavor shines through, making these brownies an absolute dream for any cookie butter enthusiast.
If your cravings for rich, chocolatey desserts extend beyond these magnificent brownies, be sure to explore more delightful creations. Consider whipping up a no-bake chocolate cheesecake for a cool, creamy treat, or indulge in the perfect combination of crunchy cookies and melty chocolate with our Oreo chocolate chip cookies. For a comforting breakfast or snack, our double chocolate muffins are always a hit. Each recipe is designed to bring joy to your kitchen and satisfy your sweet tooth.
Why You Will Love This Fudgy Biscoff Brownie Recipe
There are countless reasons why these homemade Biscoff brownies are about to become your favorite go-to dessert:
- Unmatched Biscoff Flavor: If you find yourself reaching for Lotus Biscoff cookies or spreading that divine cookie butter on everything, then this recipe is tailor-made for you. It delivers an intense, unmistakable Biscoff flavor that permeates every layer, from the crunchy cookie pieces to the gooey, spiced cookie butter core. It’s a true celebration of all things Biscoff.
- Irresistibly Fudgy Chocolate Brownies: These aren’t just any brownies; they are the epitome of fudginess. By combining both high-quality cocoa powder and melted dark chocolate, we achieve an incredibly dense, moist, and deeply rich chocolate base that contrasts beautifully with the sweet, spiced Biscoff. Each bite is a luxurious experience, striking the perfect balance between chocolate intensity and caramelized cookie goodness.
- Surprisingly Easy to Make: Despite their impressive appearance and complex flavor profile, these Biscoff cookie butter brownies are remarkably simple to prepare. With clear, step-by-step instructions and readily available ingredients, even novice bakers can confidently create these show-stopping treats. While a stand mixer or electric hand mixer will simplify the process, the method itself is forgiving and fun.
- Perfect for Sharing (or Not!): Whether you’re baking for a special occasion, a casual get-together, or simply to treat yourself, these brownies are sure to impress. They’re a unique twist on a beloved classic, offering a sophisticated flavor that appeals to everyone. Plus, they store and freeze beautifully, ensuring you can enjoy that Biscoff magic whenever a craving strikes.
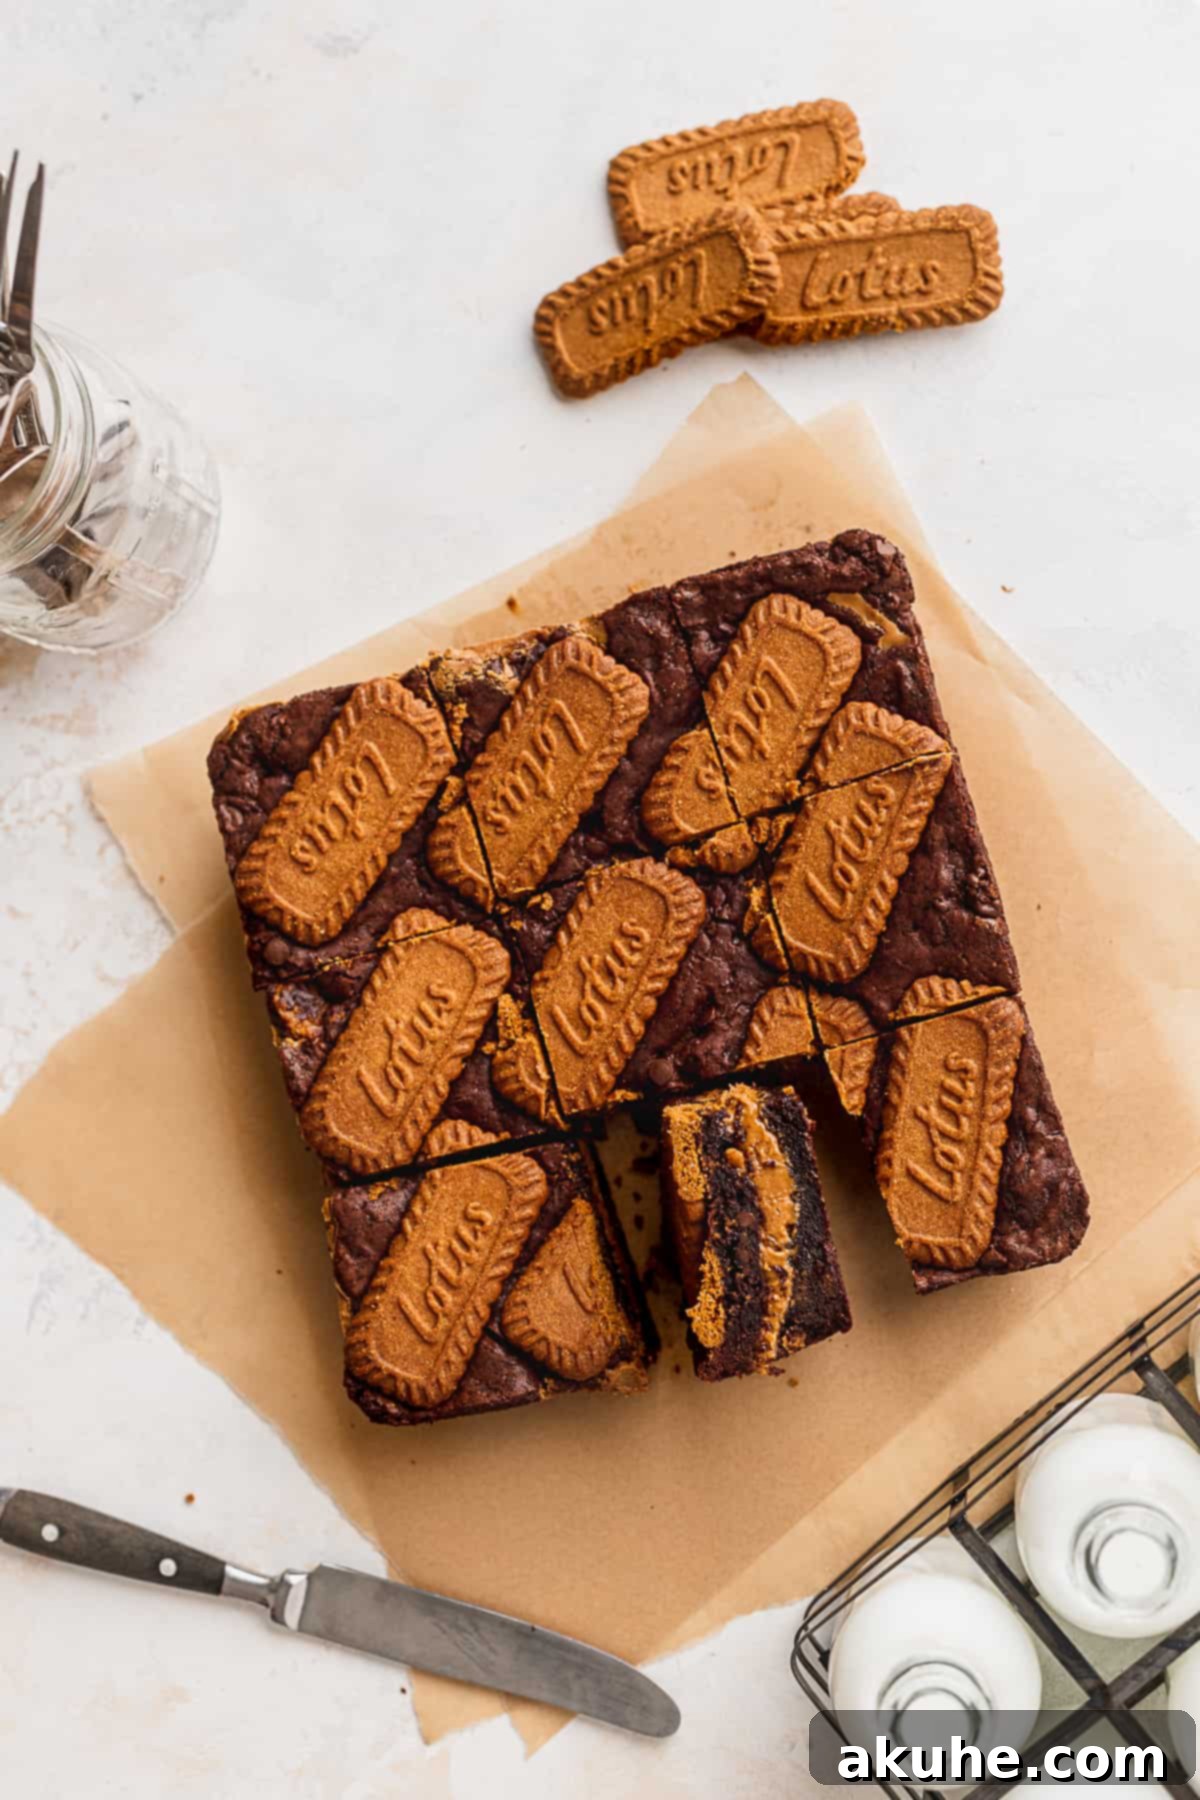
Essential Ingredients for Perfect Biscoff Brownies
Success in baking often comes down to understanding your ingredients. Here are some key notes on the components that make these fudgy Biscoff brownies so exceptional:
- Biscoff Spread: This is the star of the show! For the luscious, gooey center, I used a substantial portion of a jar of Biscoff cookie butter. Its rich, caramelized flavor is truly irreplaceable, providing that signature taste and incredible texture.
- Lotus Biscoff Cookies: Beyond the spread, actual Biscoff cookies are crushed and incorporated into the brownie batter, adding delightful pockets of crunchy texture and intensifying the Biscoff flavor throughout the brownie. One standard pack of cookies is usually sufficient.
- Unsalted Butter: Good quality unsalted butter is melted with the chocolate, contributing to the brownie’s rich fat content and overall fudgy texture. Using unsalted butter allows you to control the total salt content in the recipe.
- High-Quality Chocolate: The choice of chocolate greatly impacts the final flavor and fudginess. I highly recommend using a premium Lindt 70% dark chocolate bar or another dark chocolate with a similar cocoa percentage. This level of dark chocolate provides a deep, complex flavor that balances the sweetness of the Biscoff. Avoid milk chocolate, as it tends to make the brownies overly sweet and can compromise the fudgy texture.
- Eggs + Extra Egg Yolk: The eggs provide structure and moisture. The addition of an extra egg yolk is a secret weapon for achieving maximum fudginess. It adds richness and moisture without increasing the leavening too much, resulting in that dense, chewy brownie texture we all love.
- Dutch Process Cocoa Powder: For an intensely dark, rich chocolate flavor and a beautiful deep color, Dutch process cocoa powder is essential. Unlike natural cocoa, it’s processed to be less acidic, which creates a smoother, milder chocolate taste that allows the other flavors to shine without bitterness.
- Cornstarch: A small amount of cornstarch is added to the dry ingredients to enhance the fudginess of the brownies. It helps to tenderize the crumb and keep the brownies incredibly moist and chewy, preventing them from becoming cakey.
- Mini Chocolate Chips: These tiny morsels are folded into the batter, ensuring extra pockets of melted chocolate goodness throughout the brownies, complementing both the rich chocolate base and the spiced Biscoff.
Ingredient Substitutions and Dietary Considerations
While this recipe is crafted for optimal results, here are some potential adjustments if you have dietary needs or ingredient limitations:
- Dairy-Free: To make these Biscoff brownies dairy-free, you can easily substitute the unsalted butter with your favorite plant-based butter (like a good quality vegan butter stick) and use dairy-free chocolate chips. Ensure your Biscoff spread is also dairy-free (most are, but always check labels).
- Gluten-Free: I have not personally tested this recipe with gluten-free flour. However, many readers have success with a 1:1 gluten-free baking flour blend (one that contains xanthan gum) as a direct substitute for all-purpose flour. If you decide to try a gluten-free version, please let me know your results in the comments!
- Chocolate Type: While dark chocolate is recommended for depth of flavor, if you prefer a slightly sweeter brownie, you can use a semi-sweet chocolate bar, ensuring it’s still good quality.
- Oil: Canola or vegetable oil is specified for its neutral flavor, but any neutral-tasting oil like grapeseed oil would also work.
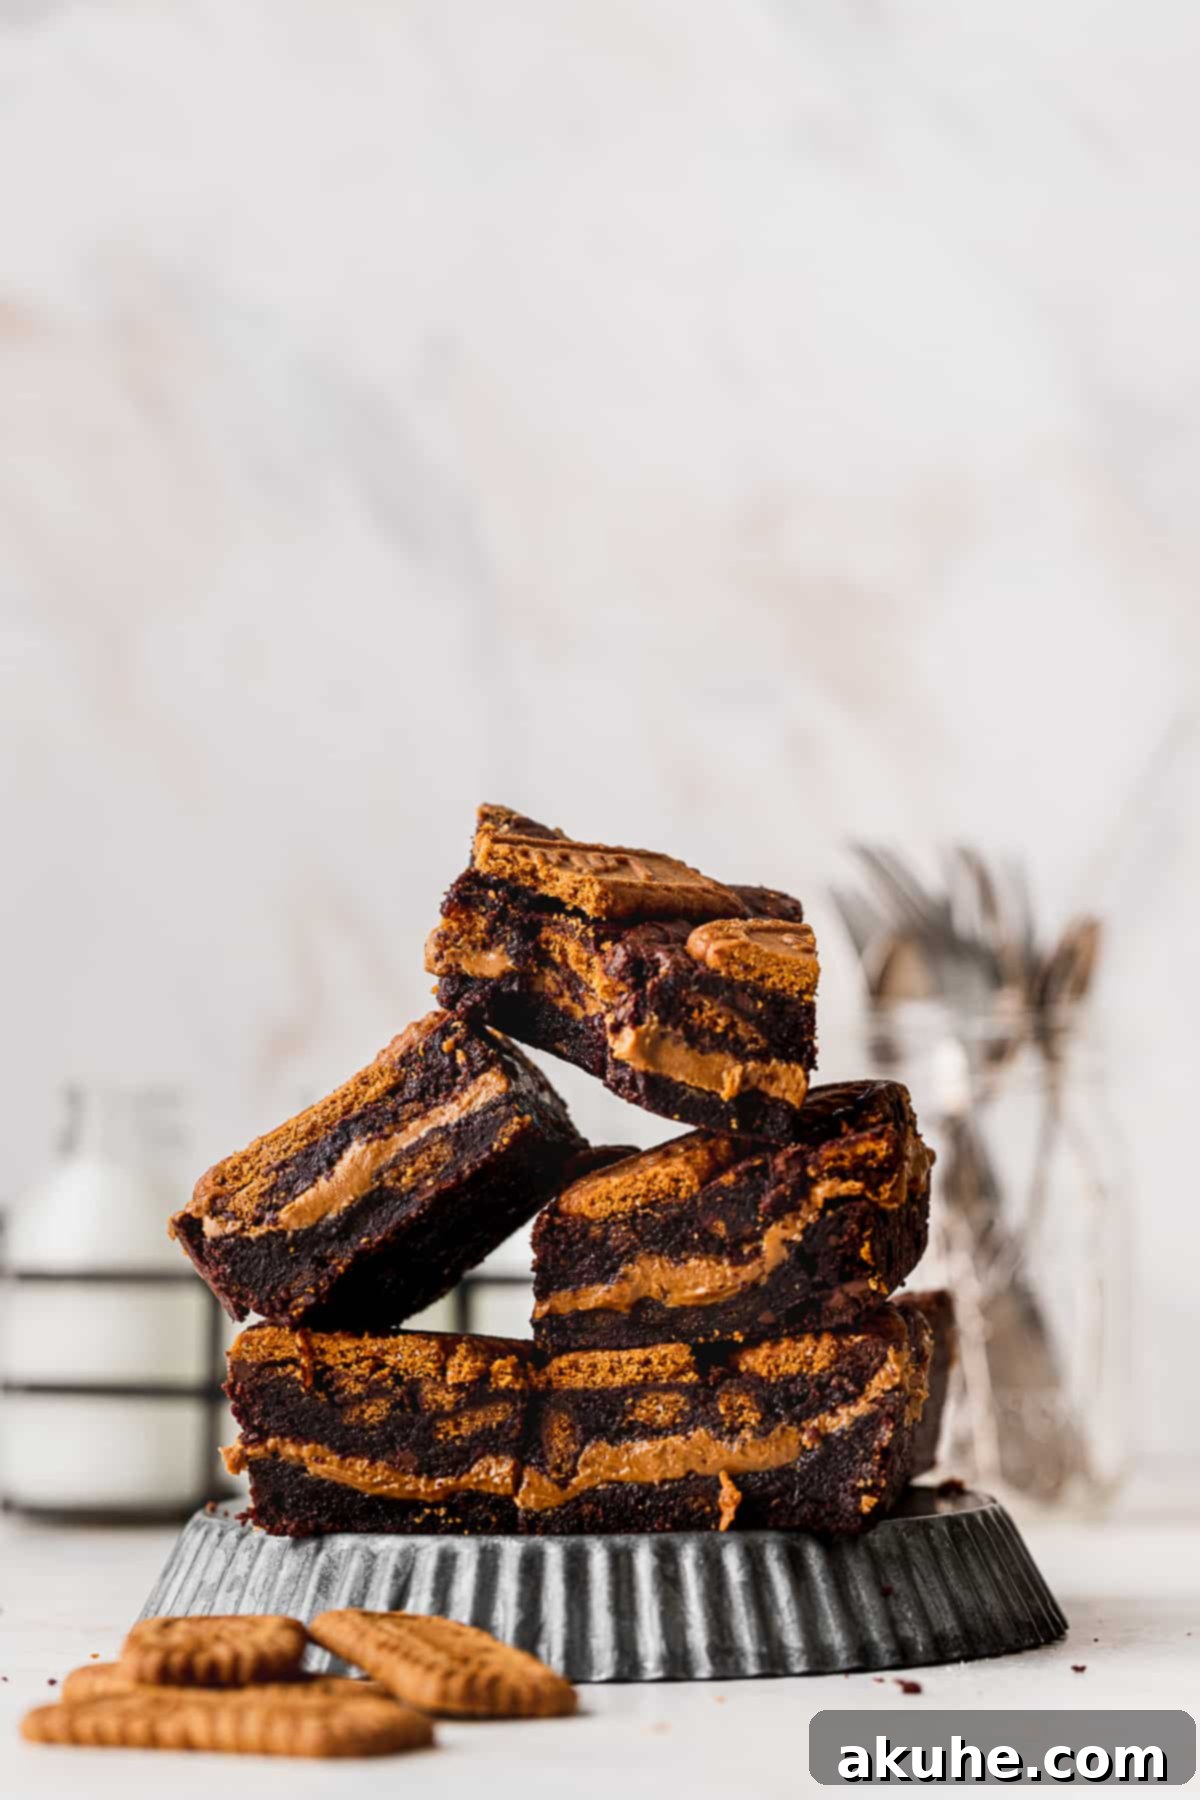
Step-by-Step Instructions: Crafting Your Fudgy Biscoff Brownies
Get ready to bake! These instructions will guide you through creating the perfect Biscoff brownie batter, ensuring a rich, fudgy result with that signature crackle top. This recipe utilizes either a stand mixer with a whisk attachment or an electric hand mixer for optimal aeration. For complete, printable instructions, please refer to the recipe card below.
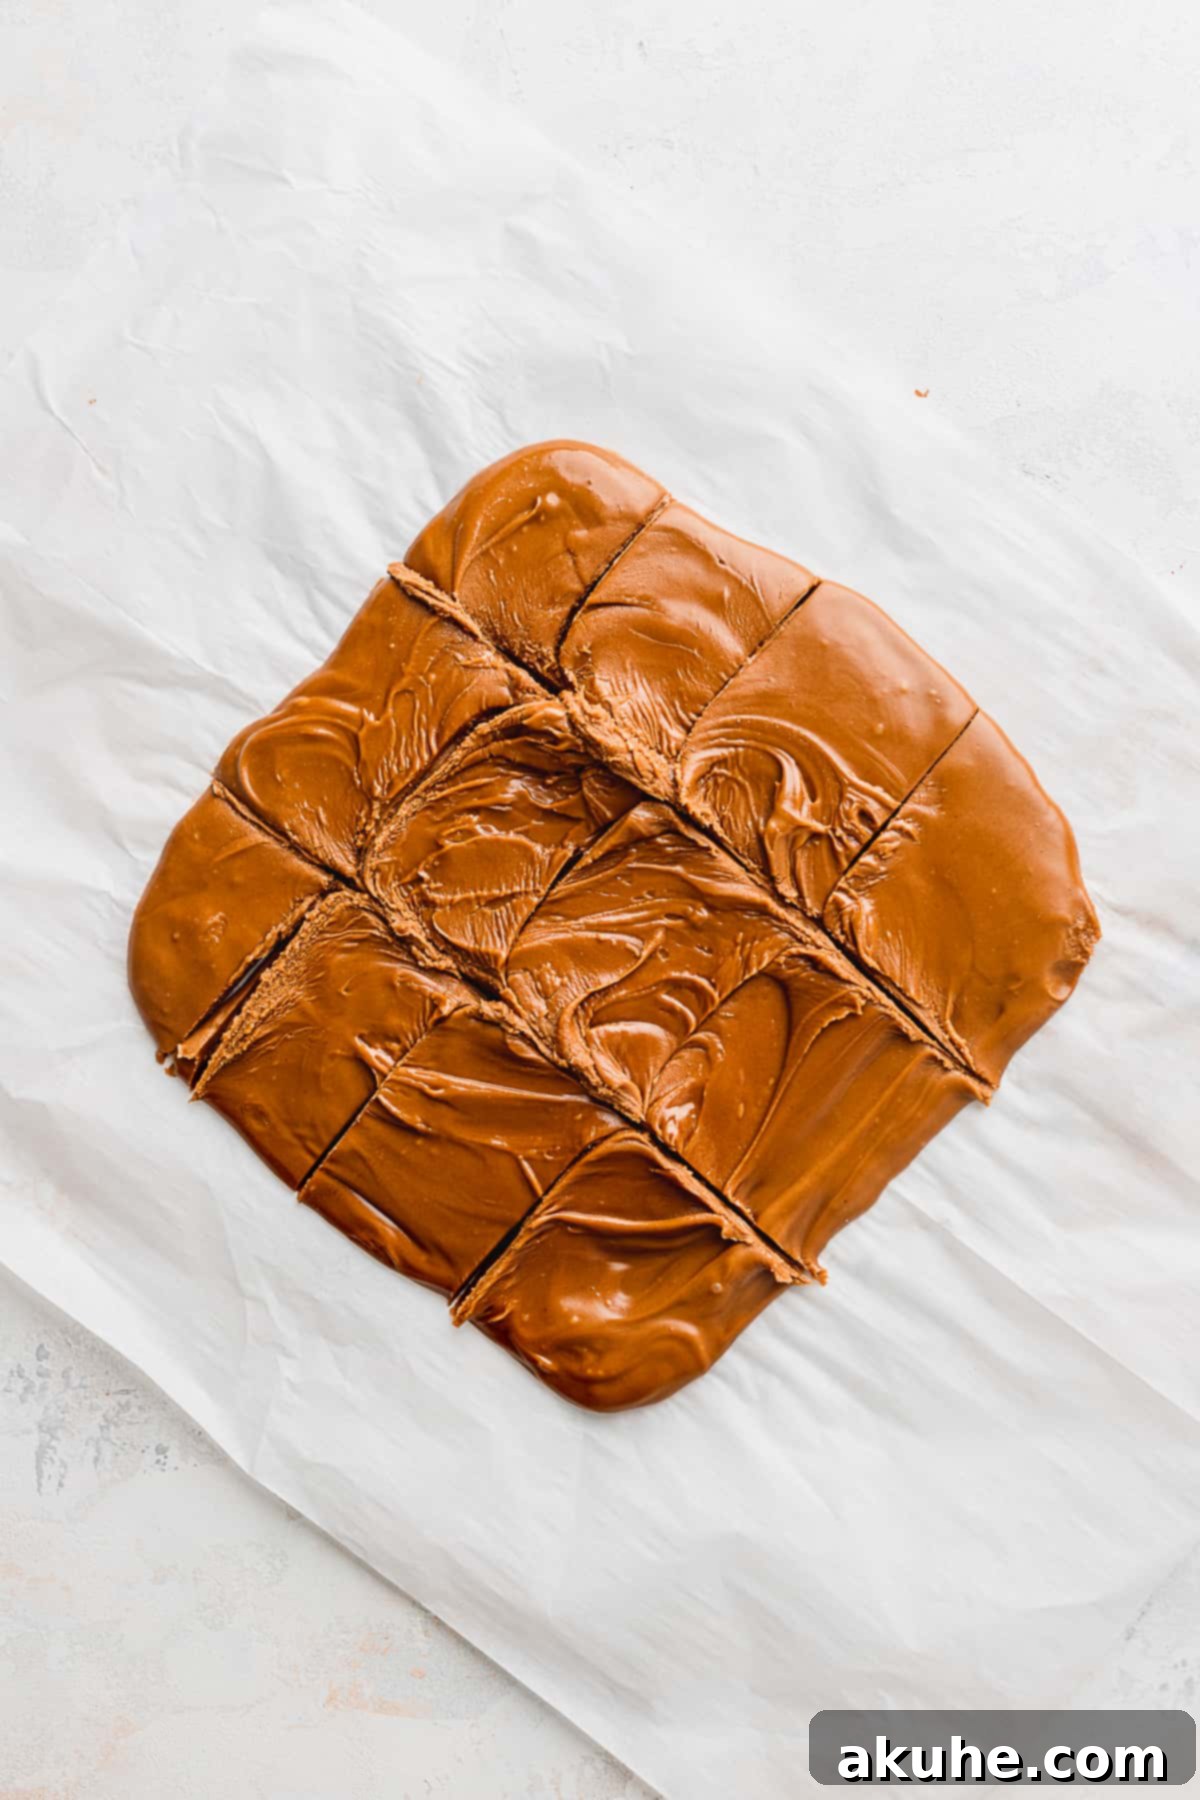
STEP 1: Prepare and Freeze the Biscoff Cookie Butter Core. This crucial first step ensures that your Biscoff cookie butter layer remains distinct and gooey within the brownie. Begin by pressing a sheet of parchment paper into an 8×8 inch baking pan, allowing enough overhang to create “slings” for easy removal later. Lightly melt the Biscoff cookie butter spread in the microwave for about 15 seconds, just enough to make it spreadable. Spread this slightly melted cookie butter evenly onto the parchment paper within the pan. Freeze this for at least 2 hours, or until completely solid. Once frozen, carefully lift the parchment paper out, cut the cookie butter into squares (this makes it much easier to handle), and return it to the freezer while you prepare the brownie batter. This quick freezing prevents it from simply dissolving into the batter during baking.
STEP 2: Achieve the Signature Crinkle Top by Beating Sugar and Eggs. Preheat your oven to 325°F (160°C). Prepare your 8×8 inch baking pan by spraying it with non-stick baking spray, then lining the bottom and two sides with fresh parchment paper, allowing an overhang. Spray the parchment paper again. In a large mixing bowl, combine the granulated sugar, large eggs, and the extra egg yolk. Using a whisk attachment on your stand mixer or an electric hand mixer, beat these ingredients on high speed for a full 5 minutes. This prolonged beating incorporates air into the mixture, creating a light and fluffy base that is essential for achieving that desirable shiny, crackly crust on top of your brownies.
STEP 3: Melt Butter and Chocolate to Create a Rich Base. While the egg mixture is whipping, gently melt the unsalted butter and chopped dark chocolate together. You can do this in a microwave-safe bowl, heating in 30-second intervals and stirring until completely smooth, or in a saucepan over very low heat, stirring constantly. It’s important to avoid scorching the chocolate. Once fully melted and smooth, remove it from the heat and allow it to cool slightly before adding it to the egg mixture. This prevents the hot chocolate from “cooking” the eggs.
STEP 4: Combine Wet Ingredients for a Harmonious Blend. With the mixer on low speed, slowly add the pure vanilla extract, neutral oil (canola or vegetable), and the cooled melted butter and chocolate mixture to the aerated egg and sugar mixture. Mix just until everything is combined and uniform in color. Overmixing at this stage can start to deflate the air you’ve worked hard to incorporate. Once combined, remove the bowl from the mixer.
STEP 5: Gently Fold in Dry Ingredients, Biscoff Pieces, and Chocolate Chips. In a separate medium bowl, sift together the all-purpose flour, Dutch process cocoa powder, cornstarch, and salt. Sifting helps to prevent lumps and ensures an even distribution of ingredients. Gradually add these dry ingredients to the wet mixture in two additions. Using a spatula, gently fold the dry into the wet ingredients. Be very careful not to overmix the batter; overmixing develops gluten, which can lead to tough, cakey brownies rather than fudgy ones. Stop folding as soon as no streaks of flour remain. Finally, gently fold in the crushed Biscoff cookie pieces and the mini chocolate chips, distributing them evenly throughout the batter without overworking it.
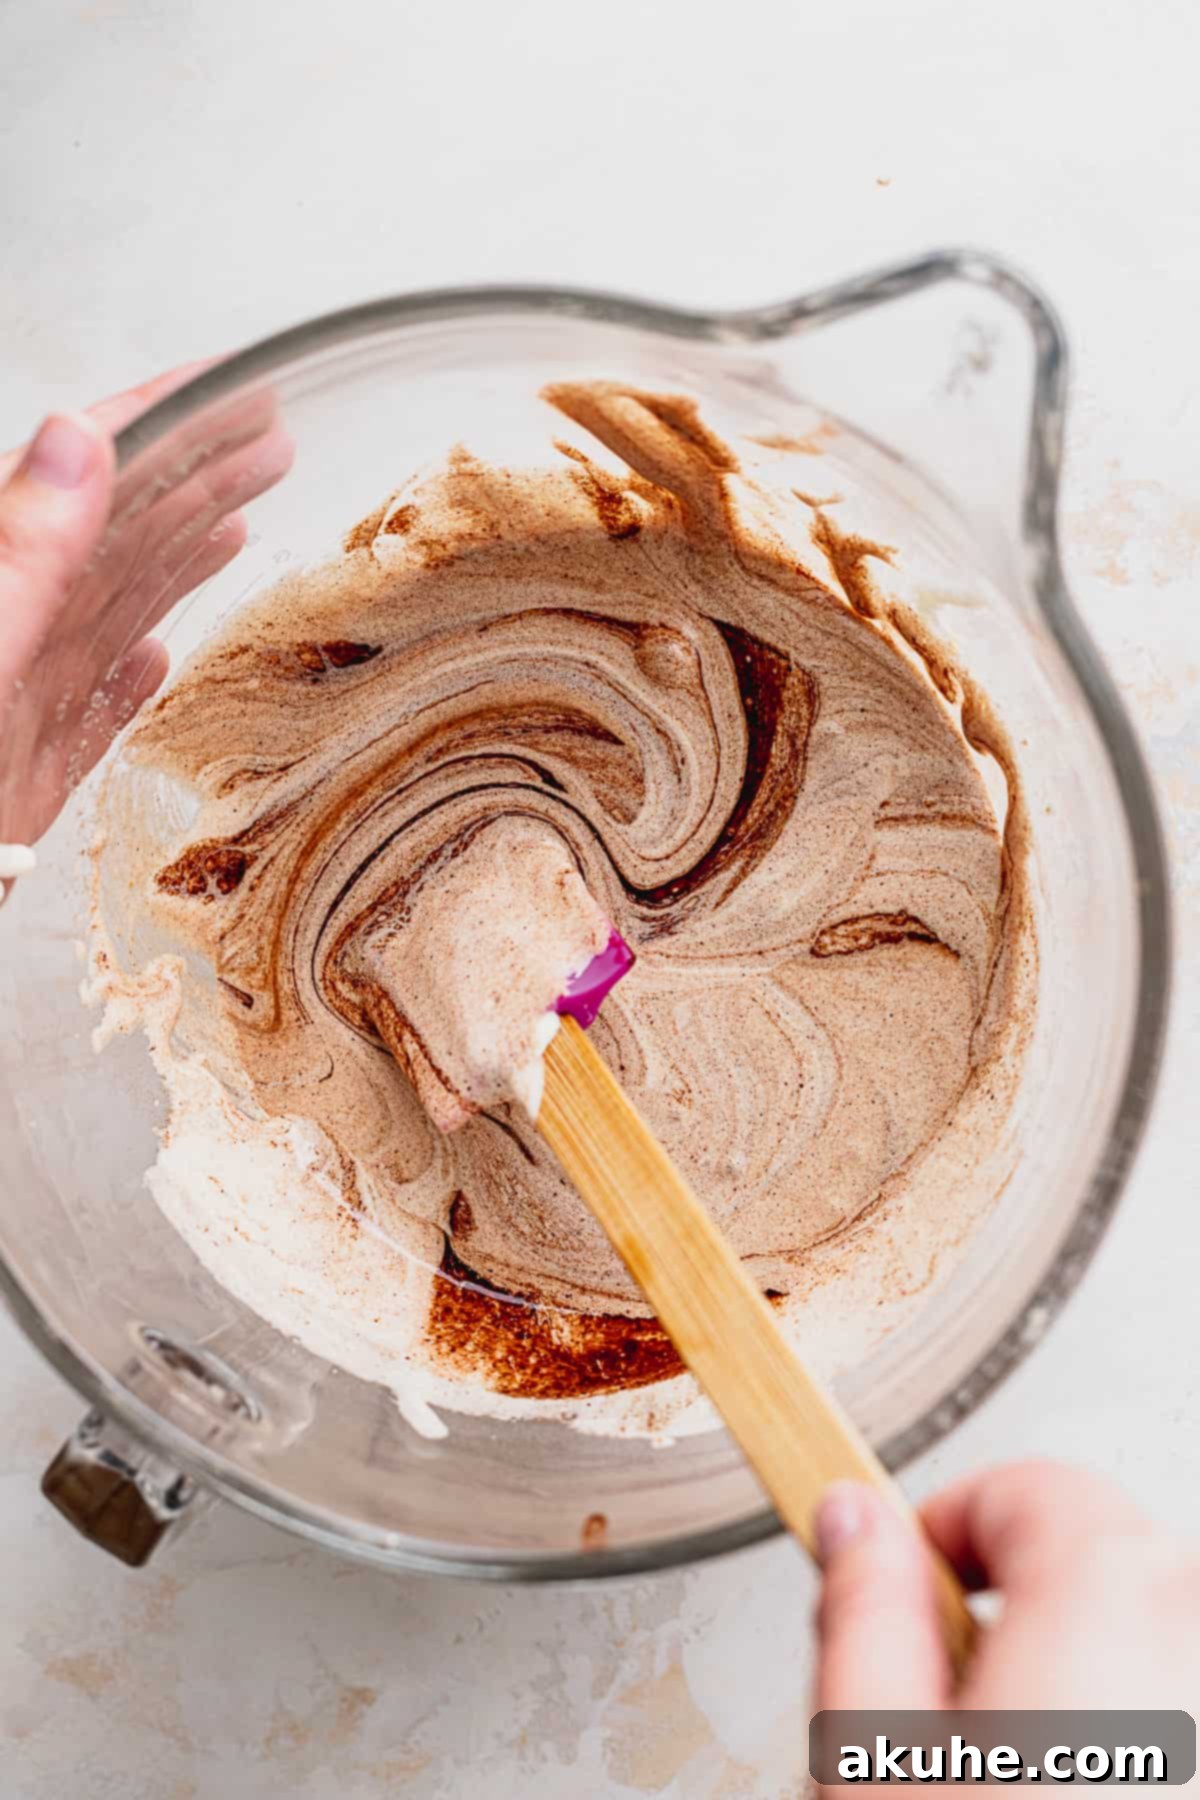
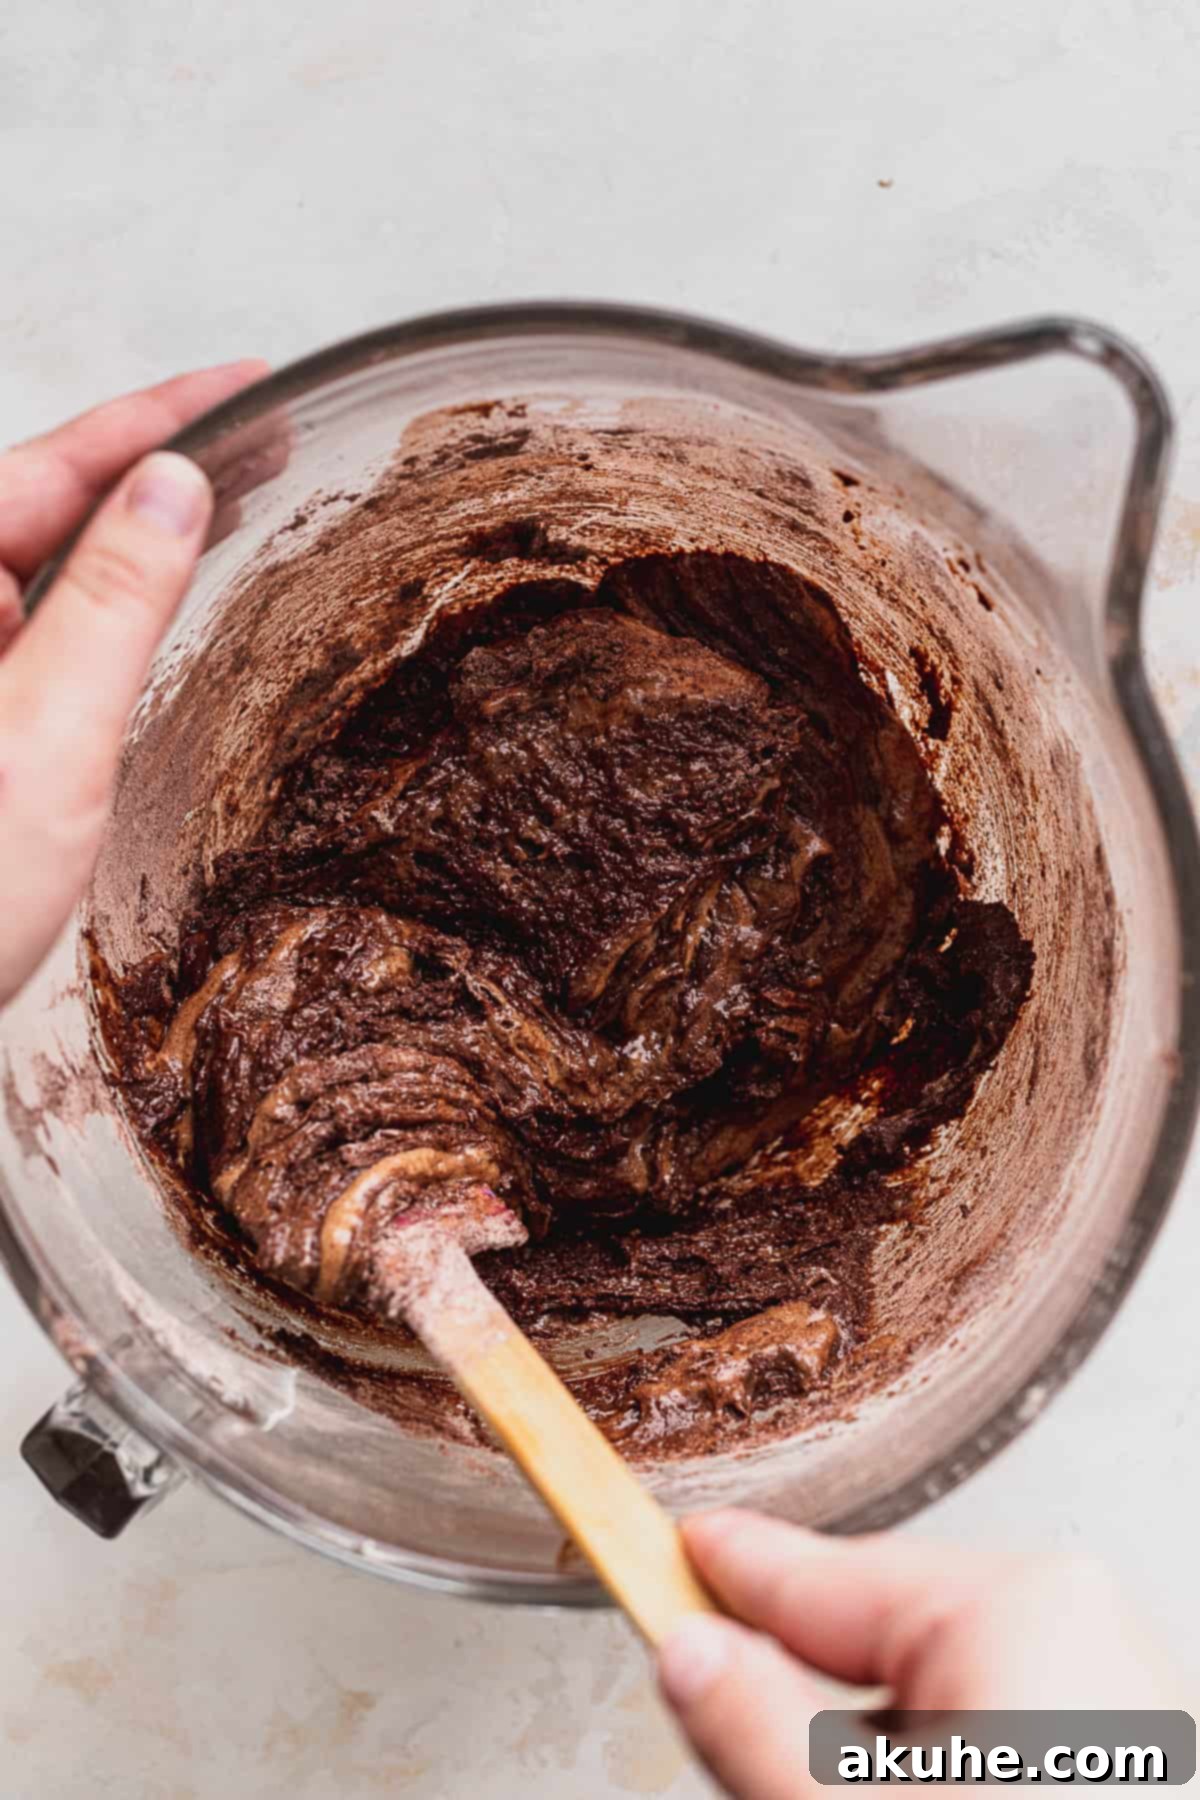
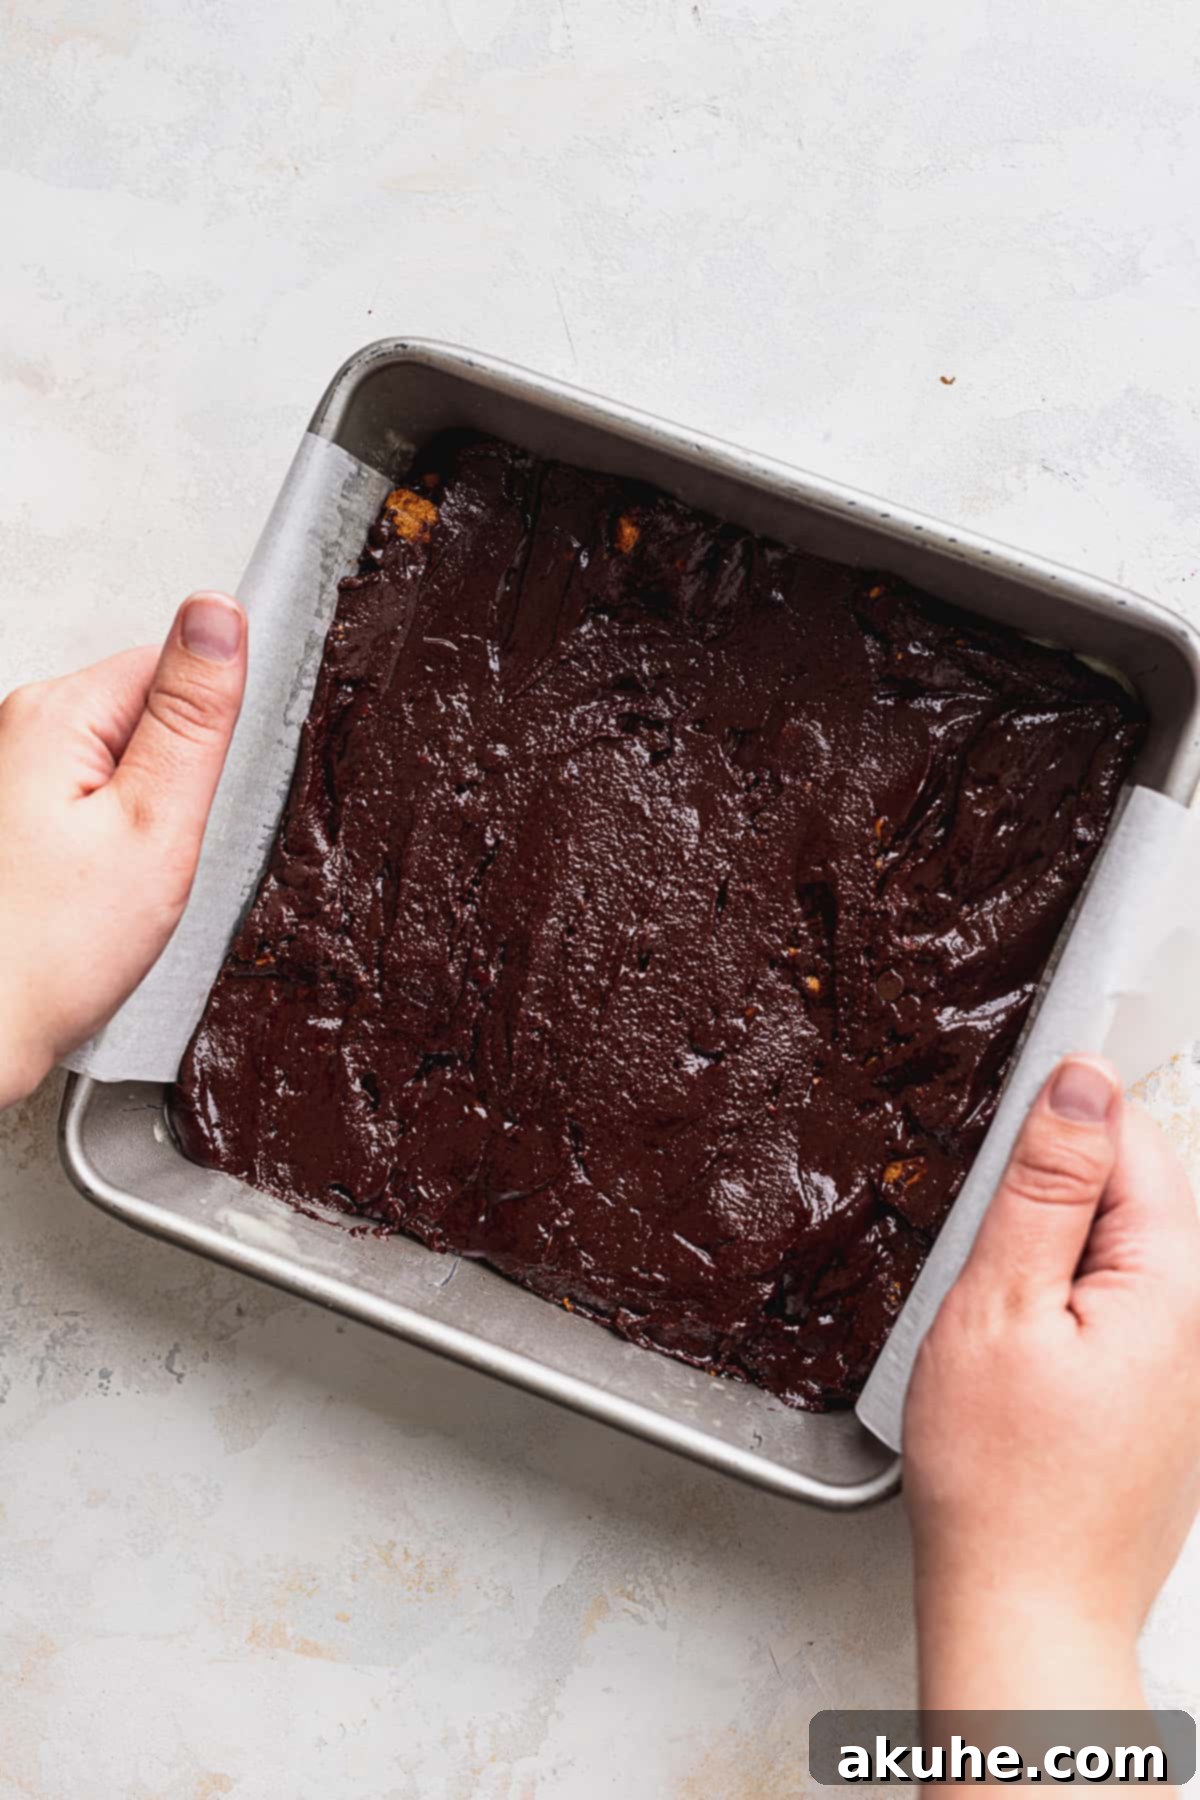
STEP 6: Layer the Batter and Frozen Biscoff Core. Pour approximately half of your rich brownie batter into the prepared 8×8 inch pan, spreading it evenly to form the bottom layer. Now, working very quickly, retrieve the frozen Biscoff cookie butter squares from the freezer. Peel them off the parchment paper and arrange them in a single layer over the brownie batter in the pan. Speed is key here, as the frozen cookie butter melts rapidly at room temperature. Immediately spread the remaining brownie batter evenly over the frozen Biscoff layer, gently covering it completely.
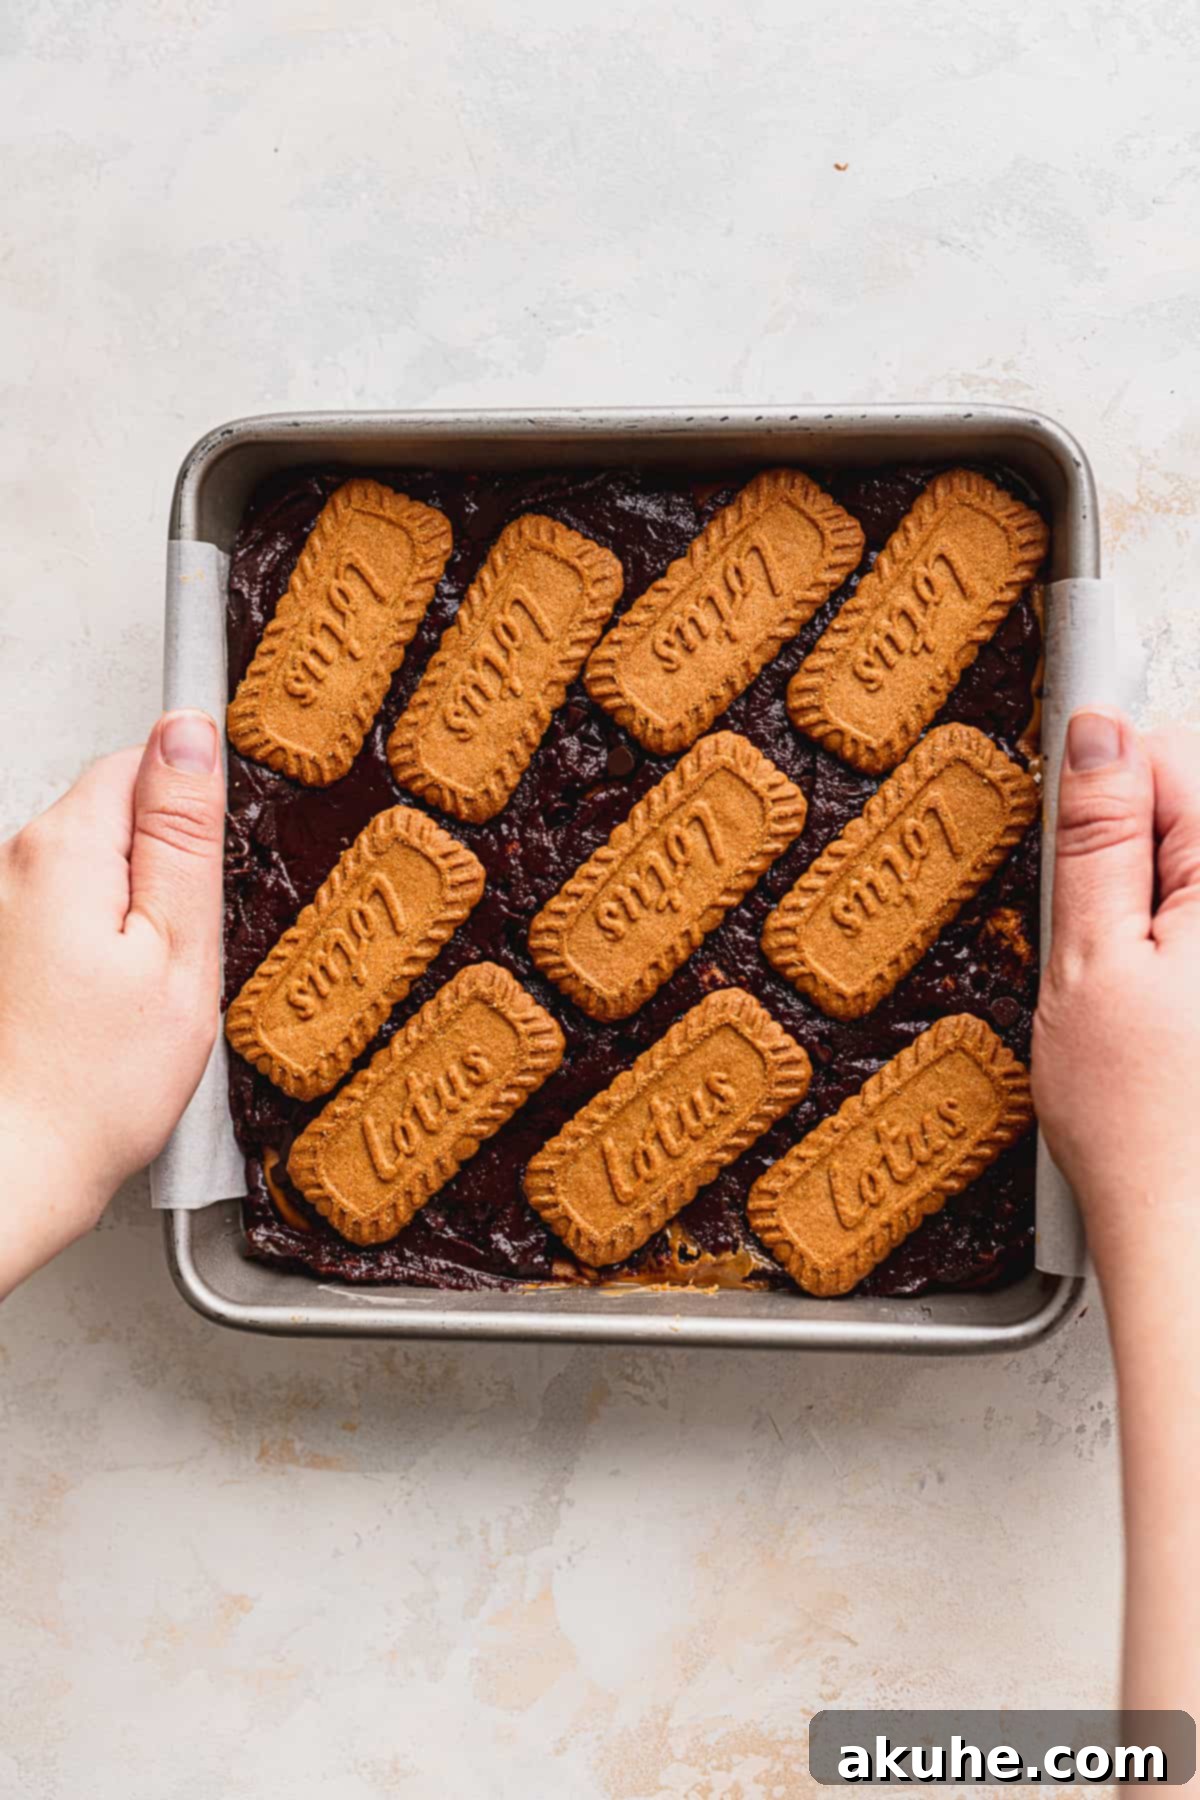
STEP 7: Add Extra Toppings and Bake to Perfection. For an extra touch of Biscoff delight and visual appeal, place a few whole or broken Biscoff cookies on top of the brownie batter before baking. This adds a beautiful caramelized crust to your brownies. Transfer the pan to your preheated oven and bake for 40-50 minutes. The brownies should appear set around the edges but remain slightly underdone and gooey in the very center. This is crucial for achieving that ultimate fudgy texture, as the residual heat of the hot pan will continue to cook them as they cool. Once baked, remove the pan from the oven and allow the Biscoff cookie butter brownies to cool completely on a wire rack before attempting to cut them. Patience is a virtue here, as cooling ensures they set properly and are easy to slice into clean, fudgy squares.

Expert Baking Tips for Ultimate Fudgy Biscoff Brownies
Achieving perfectly fudgy Biscoff brownies is all about a few key techniques. Follow these expert tips for success:
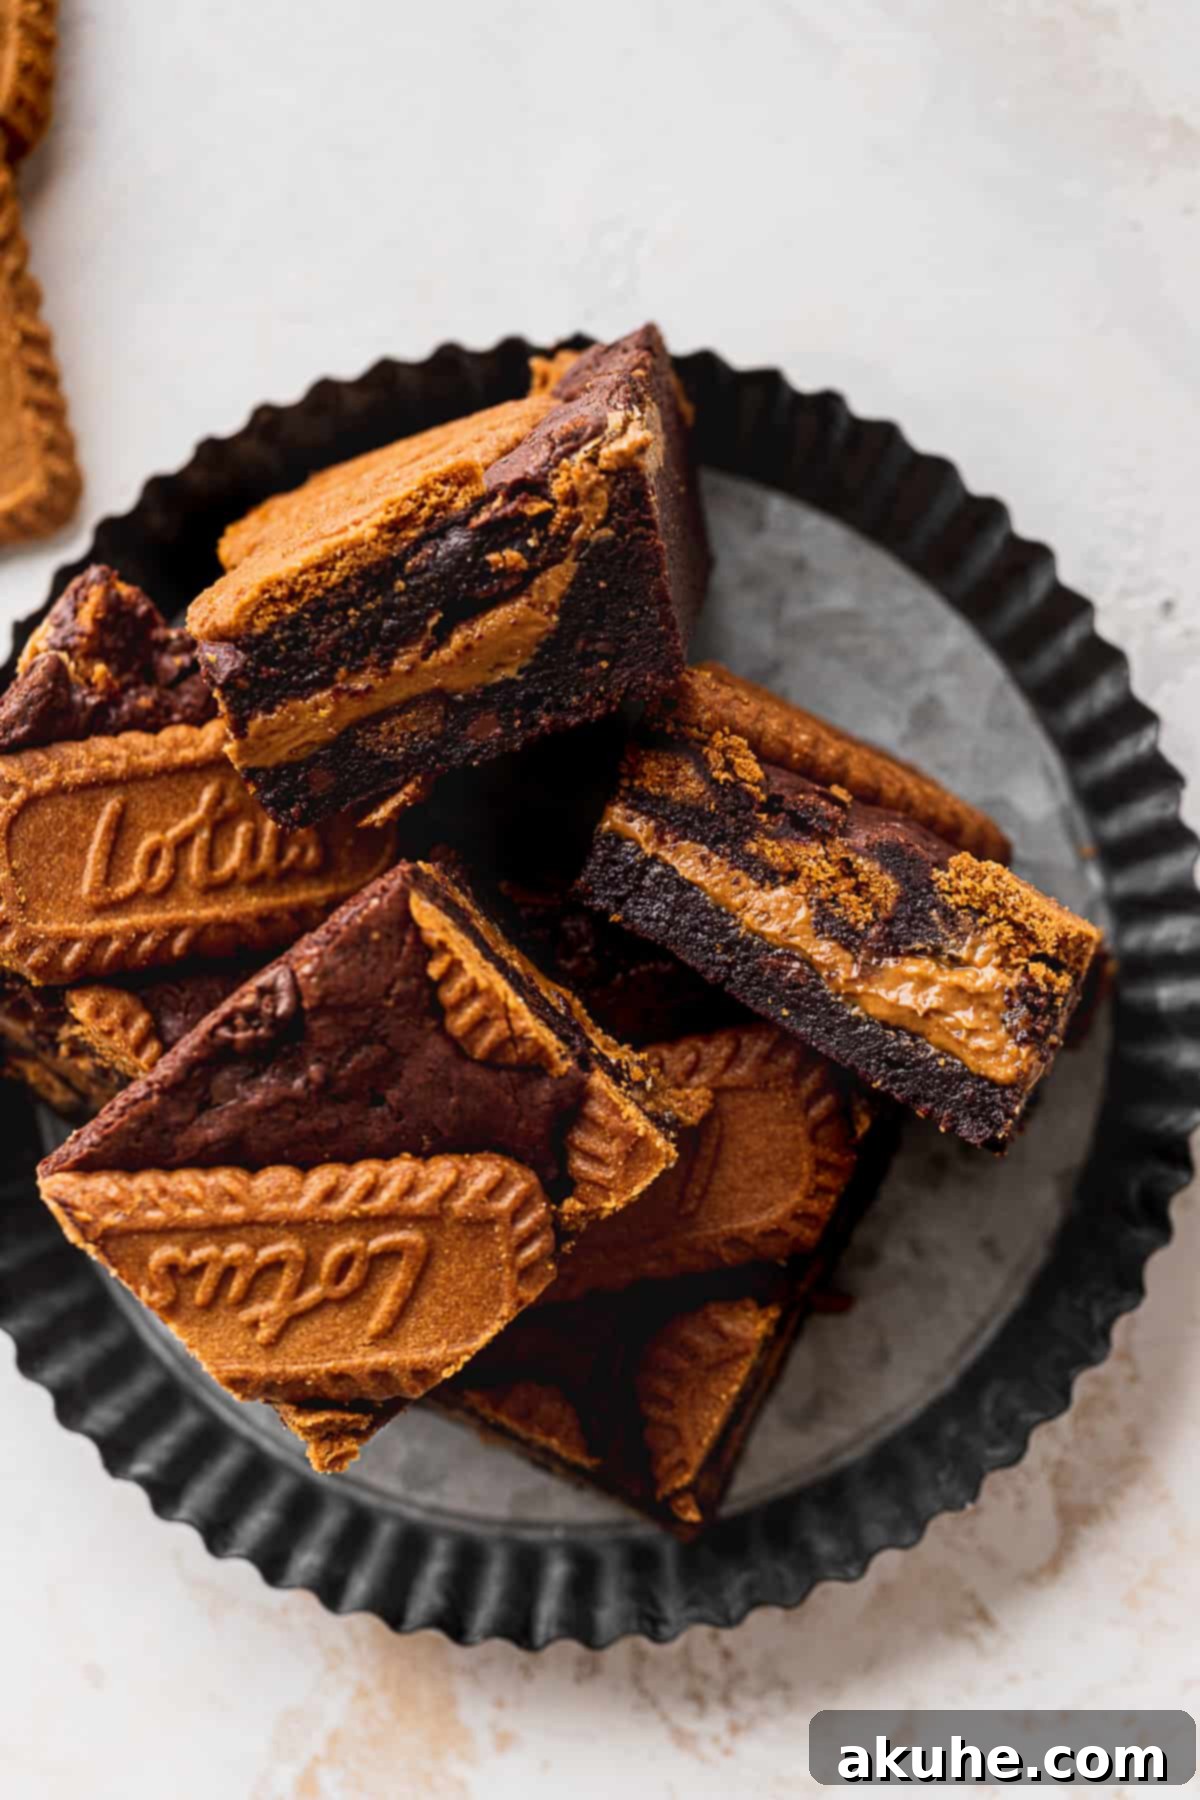
- Mastering the Frozen Biscoff Core: The Biscoff cookie spread is prone to melting very quickly once removed from the freezer. This is why it’s crucial to freeze it in a thin layer on parchment paper for at least 2 hours until it’s completely solid. When you’re ready to assemble, cut it into smaller, manageable strips or squares while still frozen. Work swiftly when transferring it to the brownie batter and covering it. If it starts to soften, pop it back into the freezer for 10-15 minutes before proceeding. A truly frozen core ensures a distinct, gooey center in your baked brownies.
- Properly Chopping Biscoff Cookies: For the cookies mixed into the batter, aim for finely crushed or very small chopped pieces. If the Biscoff cookie pieces are too large, they can absorb too much moisture from the batter, potentially leading to a brownie that feels slightly dry or crumbly around those larger cookie bits. Small pieces integrate better, providing texture without compromising the fudginess. You can use a food processor for a quick, even chop.
- The Art of Underbaking: This is perhaps the most important tip for fudgy brownies. These Lotus Biscoff brownies need to be slightly underdone when you take them out of the oven. The edges should be set, but a toothpick inserted into the center (avoiding the Biscoff core) should still come out with moist crumbs, not raw batter. Brownies continue to bake from residual heat as they cool in the hot pan. Overbaking will result in dry, cakey brownies, losing that coveted fudgy texture.
- Cool Completely for Clean Slices: Resisting the urge to cut into warm brownies is tough, but essential. Allowing the brownies to cool completely on a wire rack—preferably for several hours or even overnight—enables them to set up properly. This results in cleaner, more defined slices and a truly dense, fudgy texture. Warm brownies will be too soft and messy to cut cleanly.
- Accurate Flour Measurement: Always measure your flour by spooning it into your measuring cup and then leveling it off with a straight edge (the “spoon and level” method), or even better, use a kitchen scale for precision. Scooping flour directly from the bag can compact it, leading to too much flour in your recipe, which will dry out the brownies.
Frequently Asked Questions About Biscoff Brownies
Here are answers to some common questions you might have about making these delectable Biscoff brownies:
I have not extensively recipe tested a completely egg-free version of these fudgy Biscoff brownies. Eggs play a crucial role in providing structure, moisture, and that signature crackly top. While some egg substitutes exist, substituting all eggs (including the extra yolk) might significantly alter the texture and outcome. If you experiment with an egg substitute, please share your results! For best results, I recommend following the recipe as written if eggs are not a dietary concern.
Absolutely! While the generous layer of Biscoff cookie butter in the middle is one of the highlights of this recipe, you can certainly adjust the amount to your preference. If you want a less intense Biscoff experience, you can reduce the quantity of cookie butter for the middle layer. You can also choose to omit the middle layer entirely if you prefer a purely Biscoff-infused chocolate brownie without the gooey core. The brownie batter itself, with the crushed Biscoff cookies, will still provide plenty of delicious Biscoff flavor.
Yes, you can use a 9×9 inch pan for this recipe. However, be aware that using a larger pan will result in a thinner layer of brownies. The baking time might also need to be adjusted slightly, likely decreasing by a few minutes, so keep a close eye on them to prevent overbaking. If you desire brownies that are as thick and substantial as those made in an 8×8 pan, you would need to scale up the recipe by 1.5 times the ingredients when using a 9×9 pan. This will yield a similar thickness and fudge factor.
The key to a beautiful, shiny, crackly top is the method of beating the sugar and eggs. Ensure you beat them on high speed for the full 5 minutes specified in the recipe. This process incorporates a significant amount of air into the mixture and creates a meringue-like foam that sets on top during baking, resulting in that desirable crust. Also, don’t overmix the dry ingredients once added, as this can disrupt the delicate structure of the batter.
Creative Recipe Variations for Your Biscoff Brownies
This fudgy Biscoff brownie recipe is delicious as is, but it’s also wonderfully adaptable! Feel free to experiment with these variations to suit your taste or simplify the process:
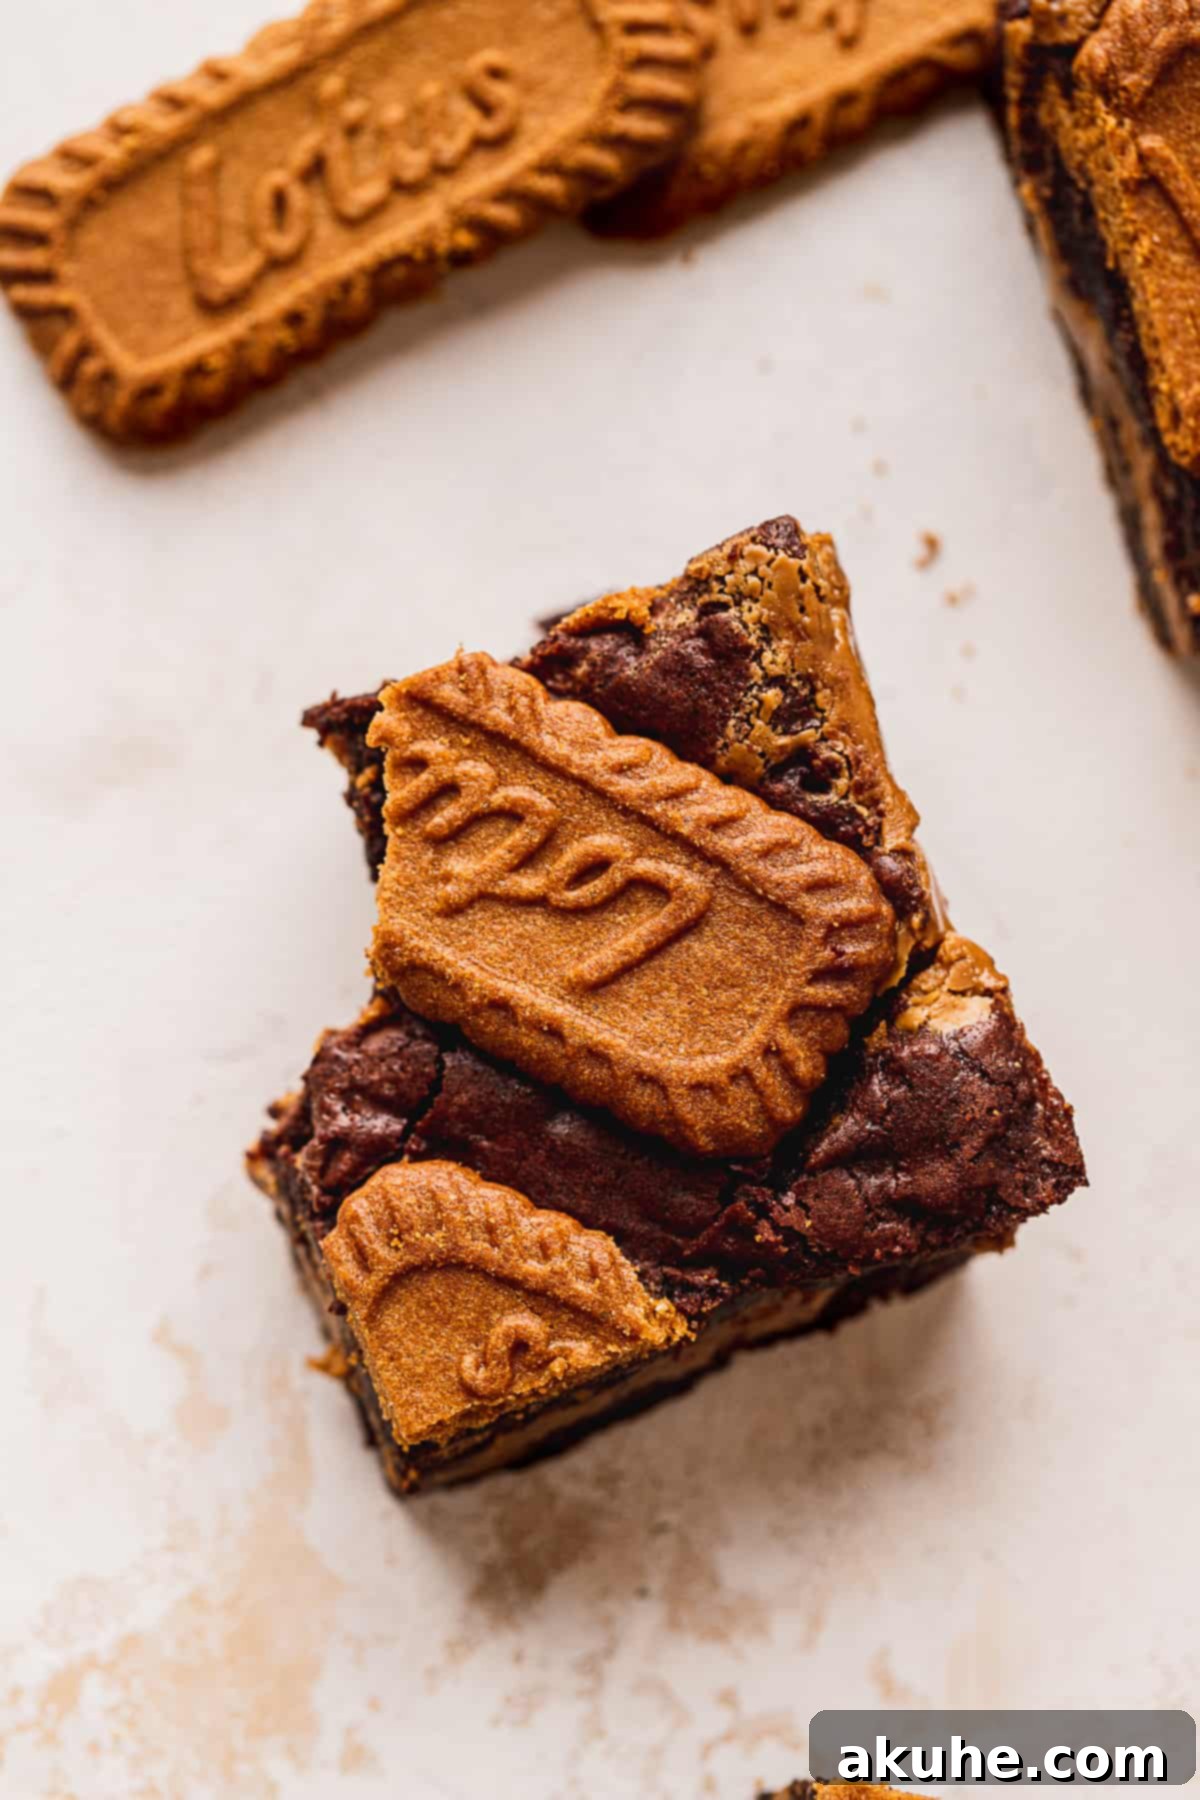
- Skip the Extra Biscoff Cookies on Top: While they add a lovely visual and textural element, you can easily omit the additional Biscoff cookies on top of the batter to save a little time or if you prefer a smoother top. The brownies will still be packed with Biscoff flavor from the internal cookie pieces and the spread.
- Omit Chopped Cookies in the Batter: If you prefer a smoother brownie texture without the crunch of cookie pieces, you can choose to skip adding the chopped Biscoff cookies into the batter. This will result in a more uniform, pure chocolate-and-Biscoff-spread brownie.
- Swirl Extra Cookie Butter on Top: For an even more dramatic presentation and an extra burst of Biscoff flavor, after you’ve spread the top layer of brownie batter, drizzle a tablespoon or two of slightly melted Biscoff cookie butter over the top. Then, use a skewer or knife to gently swirl it into the batter before baking, creating beautiful patterns.
- Add a Pinch of Spice: Enhance the warm, caramelized notes of Biscoff by adding a pinch of cinnamon or a tiny dash of ground ginger to your dry ingredients. These spices perfectly complement the Biscoff flavor profile.
- White Chocolate Chip Twist: Instead of mini chocolate chips, or in addition to them, consider folding in white chocolate chips. Their creamy sweetness would provide a delightful contrast to the dark chocolate and spiced Biscoff.
Special Tools for Baking Success
While not all are strictly necessary, certain tools can make your brownie-baking experience smoother and yield better results:
- 8×8 or 9×9 Inch Baking Pan: A good quality square baking pan is essential. I personally recommend using metal square pans for baking brownies and bars. Metal conducts heat more evenly than glass, which can often lead to overbaked edges and an underbaked center. For this recipe, an 8×8 pan yields thicker, fudgier brownies, while a 9×9 will make them slightly thinner.
- Parchment Paper: Lining your pan with parchment paper is a game-changer for easy removal and clean-up. I find that pre-cut sheets of parchment paper are incredibly convenient and save time compared to tearing from a roll, making your baking process much smoother.
- Baking Spray with Flour: To ensure your brownies never stick, even with parchment paper, I highly recommend using a nonstick baking spray that contains flour. This provides an extra layer of non-stick protection, especially important for rich, dense batters.
- Offset Spatula: This handy tool is perfect for spreading batters and fillings evenly. An offset spatula allows you to spread batter smoothly without disturbing the layers underneath, which is particularly useful when working with the Biscoff cookie butter core.
- Stand Mixer or Electric Hand Mixer: While possible to do by hand, a mixer is highly recommended for properly aerating the eggs and sugar, which is key to achieving the crackly top and light texture.
Storing and Freezing Your Delicious Biscoff Brownies
These fudgy Biscoff brownies are so good, you’ll want to enjoy them for as long as possible! Here’s how to properly store and freeze them to maintain their deliciousness:
For optimal freshness, these fudgy Biscoff brownies should be stored at room temperature. Place them in an airtight container to prevent them from drying out. When stored correctly, they will remain wonderfully moist and delicious for up to 4 days. Keep them away from direct sunlight or excessive heat.
Freezing Your Biscoff Brownies
If you’ve made a large batch or simply want to save some for later, these fudgy Biscoff brownies freeze beautifully! Allow the brownies to cool completely before freezing. You can freeze them whole, or cut them into individual squares. Wrap each brownie tightly in plastic wrap, then place them in an airtight freezer-safe container or a heavy-duty freezer bag. This double layer of protection helps prevent freezer burn. They can be frozen for up to 30 days without significant loss of quality. To enjoy, simply remove them from the freezer and let them thaw at room temperature for about 1 hour before serving. You can also gently warm them in the microwave for a few seconds for an extra gooey treat.
Other Brownie Recipes To Try
If you’ve fallen in love with these Biscoff brownies and are eager for more delightful brownie variations, explore our collection of other brownie recipes! From classic fudgy creations to unique flavor combinations, there’s always a new brownie adventure waiting.
Indulge in More Biscoff Recipes
Can’t get enough of that unique caramelized Biscoff flavor? We understand completely! Explore more delicious ways to incorporate Lotus Biscoff into your baking with these tempting recipes:
- Biscoff Layered Cake: A show-stopping cake featuring layers of moist cake and creamy Biscoff frosting.
- Biscoff Cupcakes: Perfectly portioned treats bursting with Biscoff flavor, topped with a luscious Biscoff buttercream.
- Ultimate Biscoff Cheesecake: A rich and creamy cheesecake with a Biscoff crust and a swirl of cookie butter goodness.
- Biscoff Butter Cookies: Simple yet addictive cookies that highlight the buttery, spiced notes of Biscoff.
I hope you absolutely adore these fudgy Biscoff brownies! They are truly a treat for any occasion. Once you’ve tried them, please make sure to leave me a star review below to share your thoughts!
I love seeing your creations! Make sure to tag me on Instagram @stephaniesweettreats when you share your delicious brownies. To get even more baking inspiration and sweet ideas, be sure to follow me on Pinterest.
Biscoff Brownies
Print Recipe
Pin Recipe
Leave a Review
Ingredients
- 3/4 cup Biscoff cookie spread, slightly melted
- 5 TBSP Unsalted butter
- 4 oz Chopped semi-sweet chocolate, I used 70%
- 1 1/3 cup White granulated sugar
- 2 Large eggs
- 1 Egg yolk
- 1 tsp Pure vanilla extract
- 3 1/2 TBSP Oil, canola or vegetable
- 3/4 cup All-purpose flour
- 3/4 cup Dutch process cocoa powder
- 1 TBSP Cornstarch
- 1/2 tsp Salt
- 1/2 cup Biscoff cookie pieces, blended slightly into pieces then measured
- 1/2 cup Mini chocolate chips
- Biscoff cookies, for decoration
Instructions
- Press parchment paper into an 8X8 pan. Use your finger to create creases into the parchment paper. Melt the cookie butter for 15 seconds in the microwave. Take out the parchment paper and spread the cookie butter in the square. Freeze for at least 2 hours. Cut the cookie spread into squares for easy removal. Put it back in the freezer while you make the batter.3/4 cup Biscoff cookie spread
- Preheat oven to 325°F. Spray an 8X8 pan with baking non-stick spray. Line the bottom and 2 sides with parchment paper and spray again. In a saucepan over medium-low heat. Melt the butter and chopped chocolate. Mix constantly until completely melted. Take off heat and allow to cool.5 TBSP Unsalted butter, 4 oz Chopped semi-sweet chocolate
- In a mixing bowl, sift the flour, cocoa powder, cornstarch, and salt. Set aside. Using a mixer with a whisk attachment. Mix the sugar, eggs, and egg yolk. Mix on high for 5 minutes to get light and fluffy.1 1/3 cup White granulated sugar, 2 Large eggs, 3/4 cup All-purpose flour, 3/4 cup Dutch process cocoa powder, 1 TBSP Cornstarch, 1 Egg yolk
- Add in the vanilla, oil, and melted chocolate/butter. Mix on low until combined. Take off the mixer. Add in the dry ingredients and fold gently. Mix until smooth. Add in cookie pieces and chocolate chips.1 tsp Pure vanilla extract, 3 1/2 TBSP Oil, 1/2 tsp Salt, 1/2 cup Biscoff cookie pieces
- Spread half of the brownie mixture into pan. Very quickly, peel the cookie butter from the parchment paper and place in the pan. Work quickly because it melts fast. Spread the rest of the batter on top. Top with extra cookies.1/2 cup Mini chocolate chips, Biscoff cookies
- Bake for 40-50 minutes. The middle will be slightly underdone because it will continue to cook while cooling. Allow it to cool completely before cutting into it and serving.
Notes
High altitude baking- Add an extra 1 TBSP of flour.
