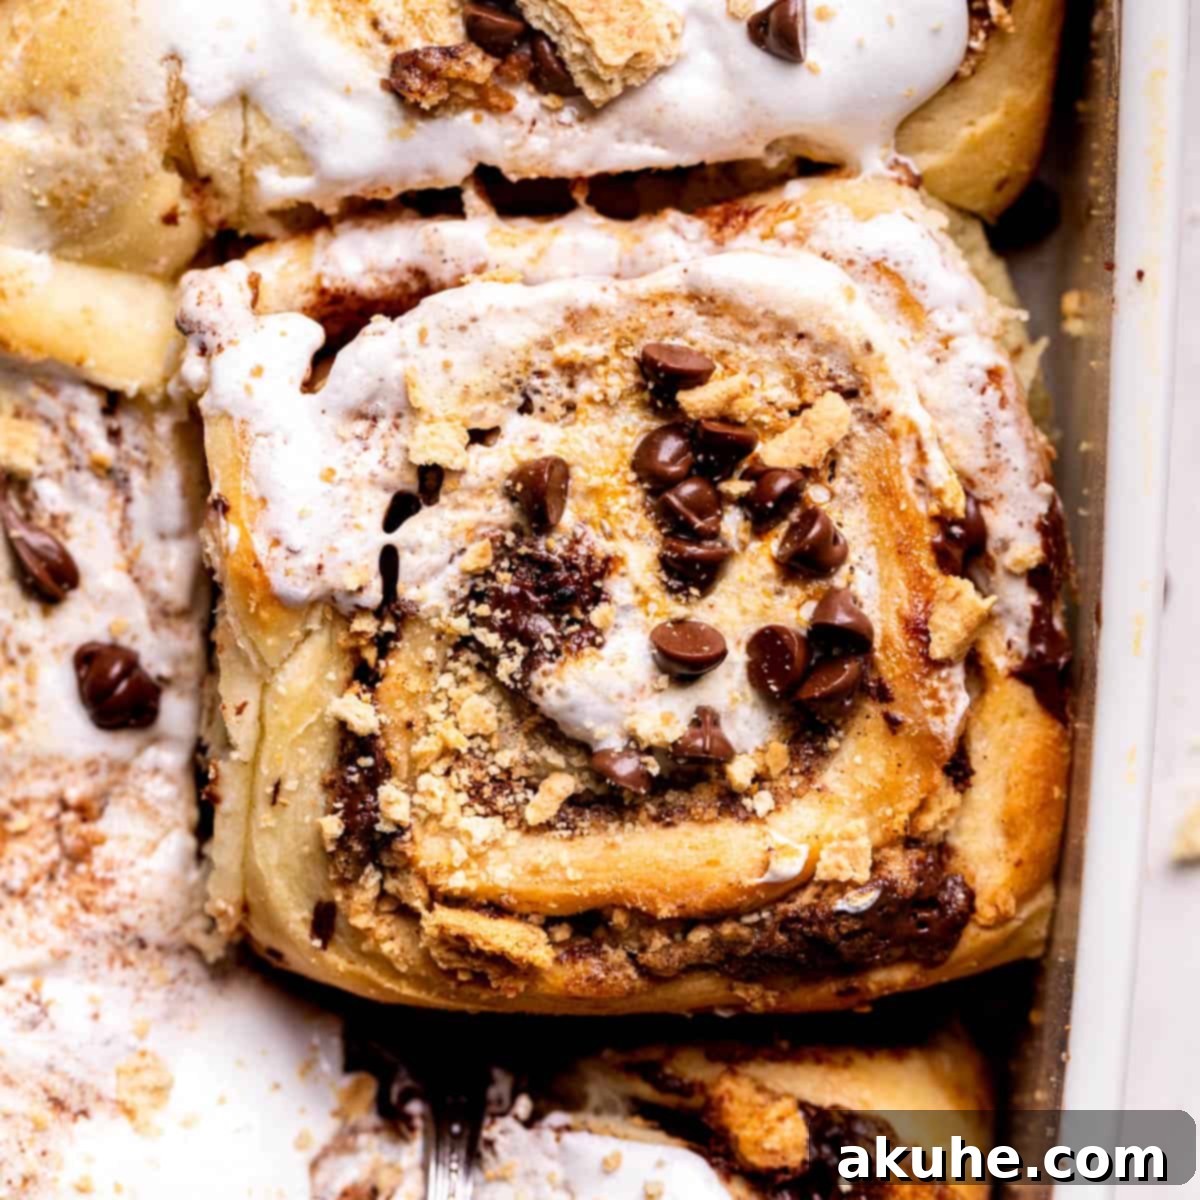
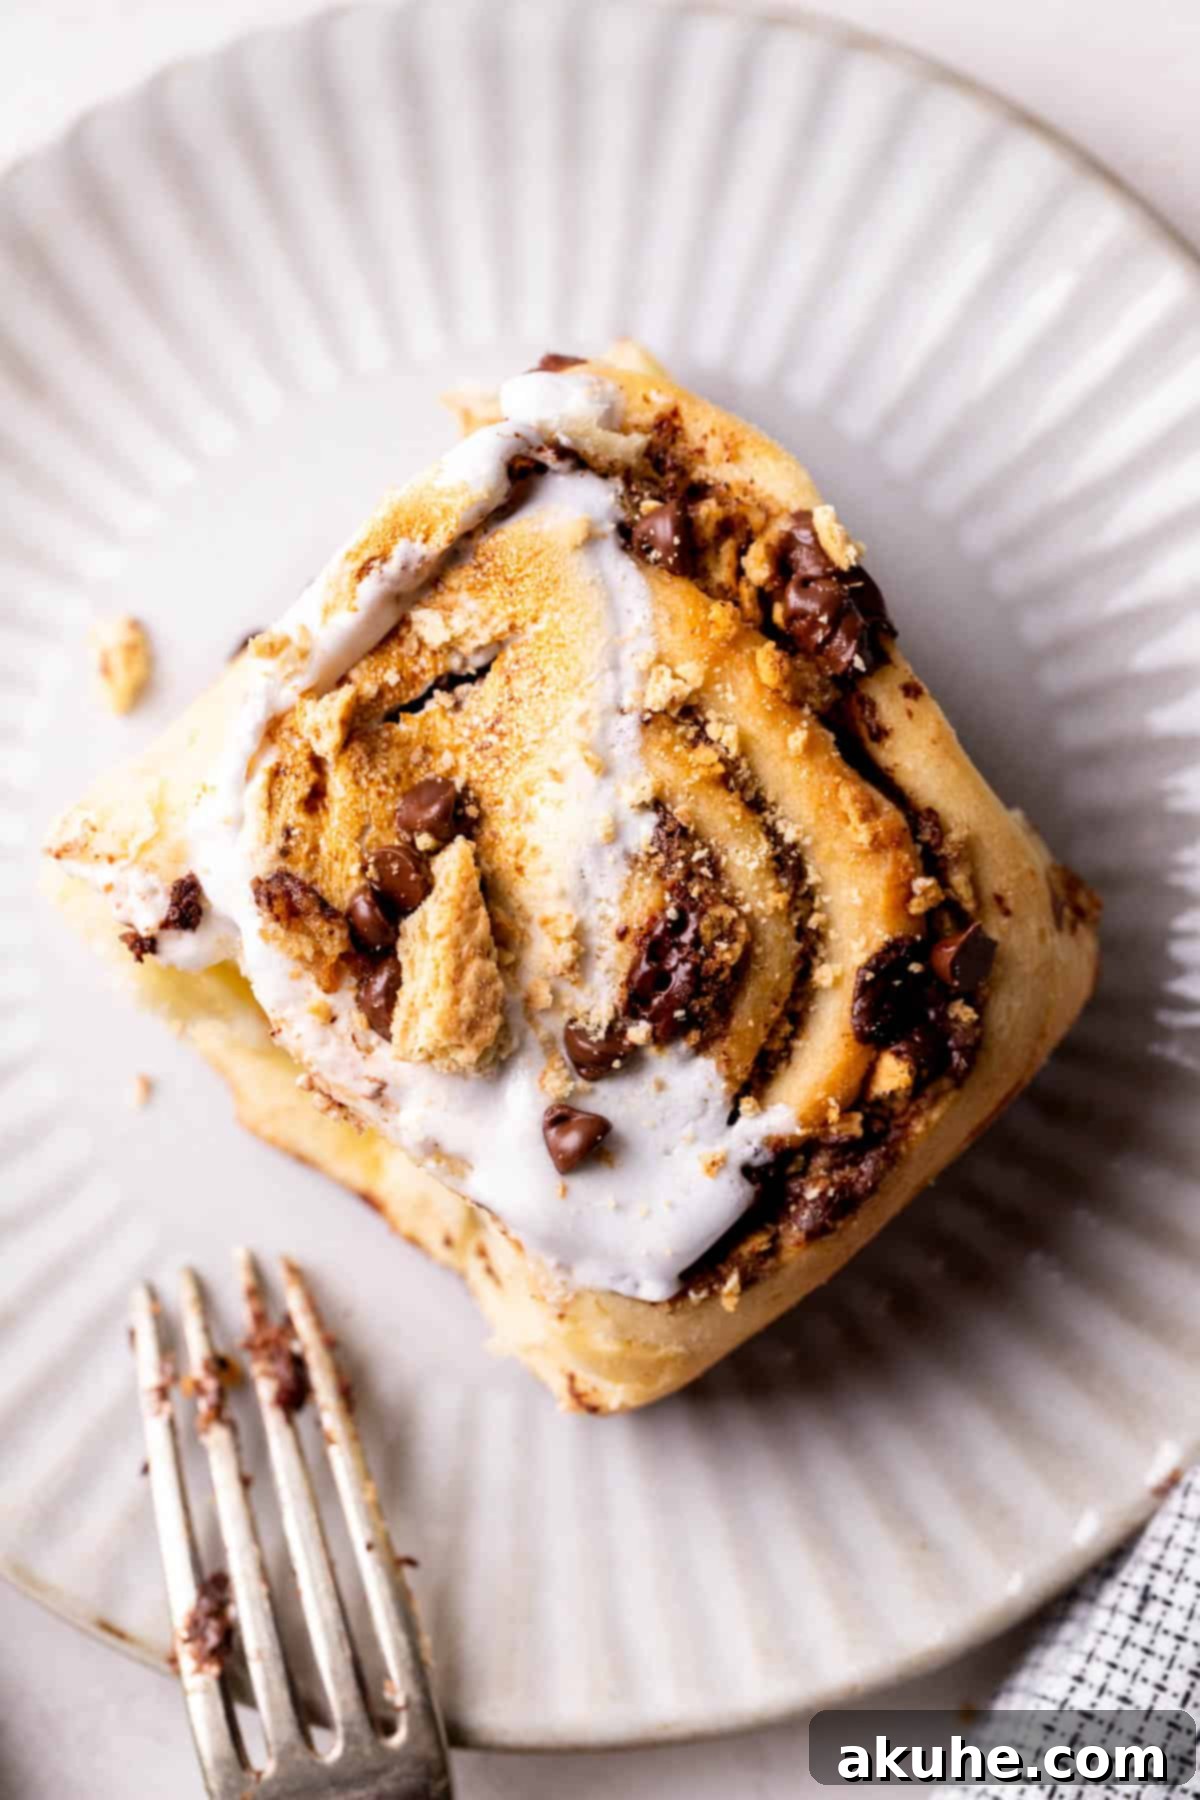
S’mores are the quintessential campfire treat, a delightful combination of toasted marshmallow, melted chocolate, and crisp graham crackers. But what if you could enjoy that nostalgic flavor profile in a warm, gooey cinnamon roll, fresh from your oven, right at breakfast time? Introducing these incredible S’mores Cinnamon Rolls – a revolutionary twist on a classic, offering a unique blend of breakfast comfort and dessert decadence. These rolls boast an exceptionally soft and tender dough, generously filled with a classic cinnamon swirl, rich chopped chocolate, and delightful graham cracker pieces, all crowned with a perfectly toasted marshmallow creme topping.
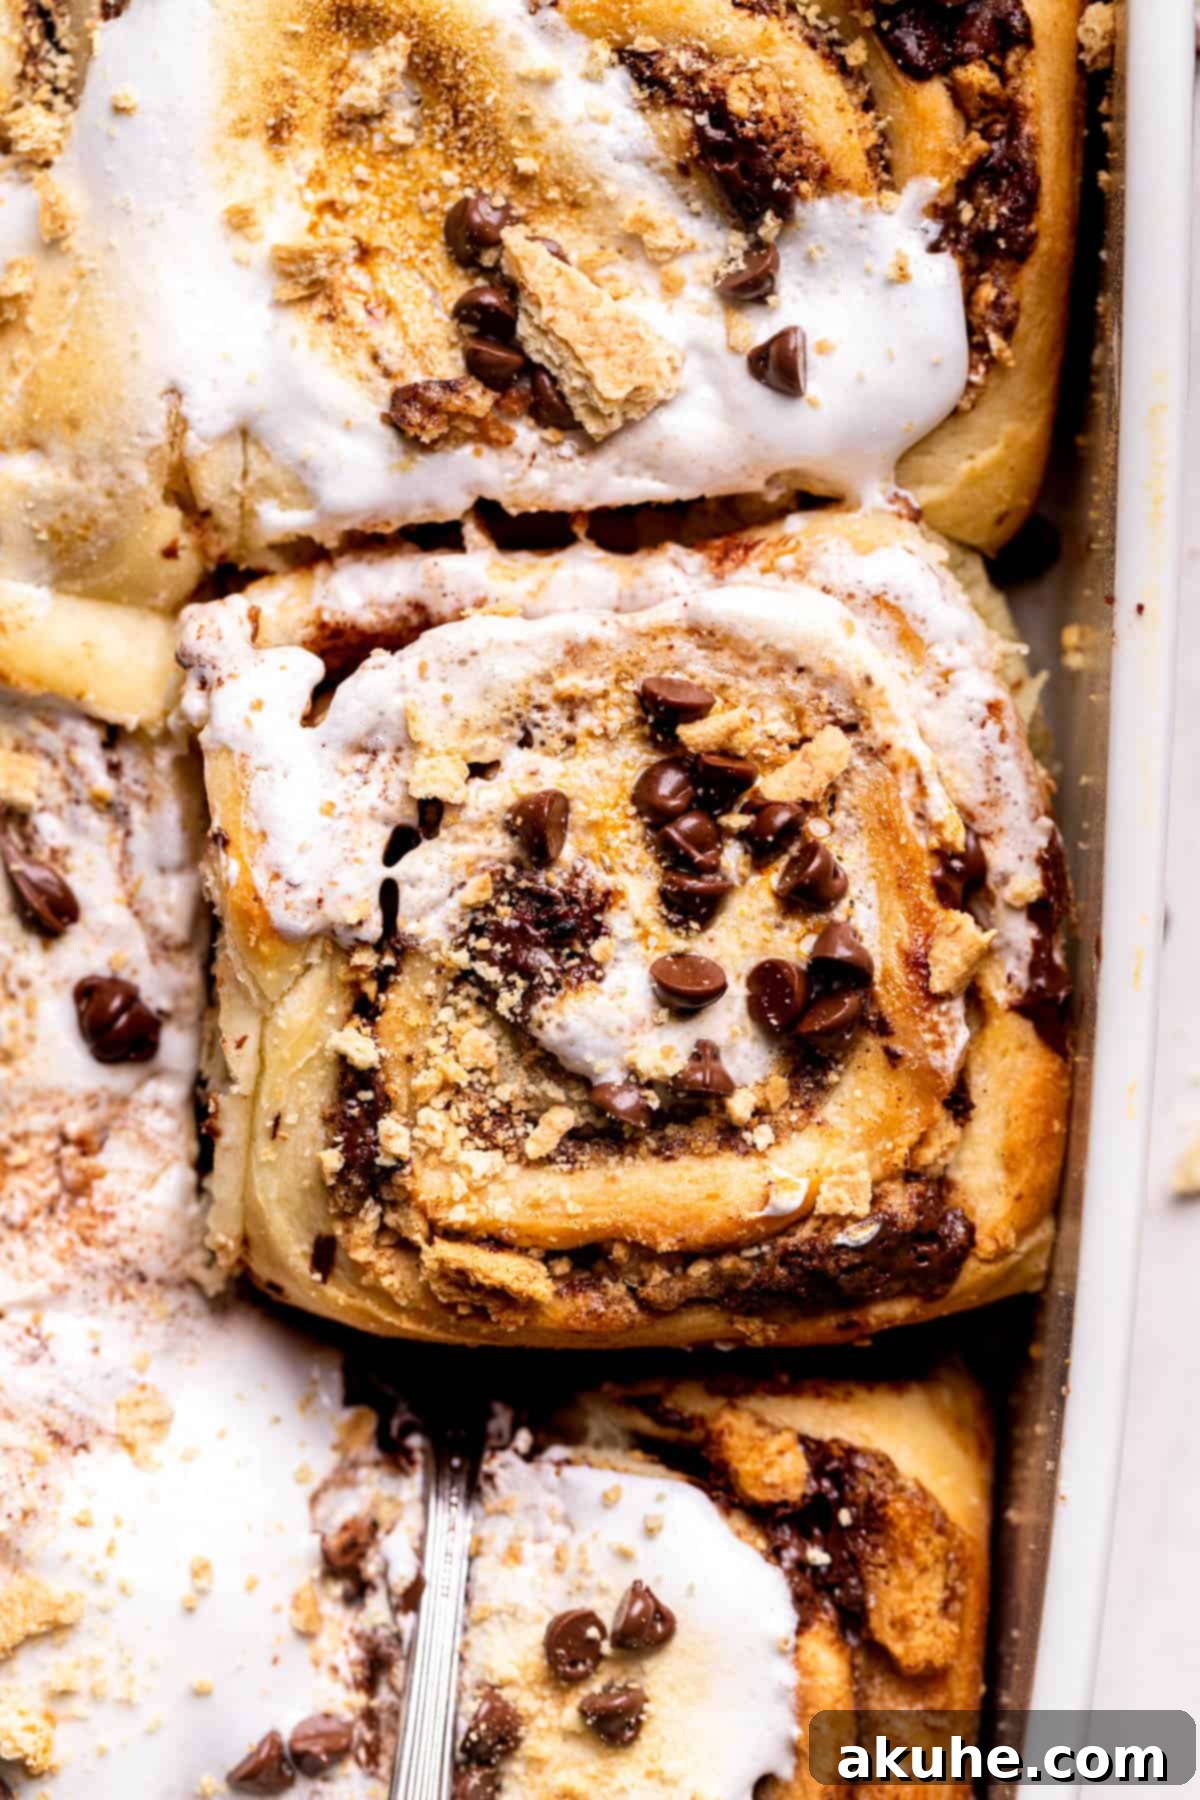
Imagine waking up to the aroma of freshly baked cinnamon rolls, but with an added layer of excitement: the sweet, smoky notes of s’mores. These aren’t just any sweet rolls; they are a celebration of flavor and texture, transforming your morning routine into a truly special occasion. Each bite offers a symphony of warmth from the roll, the delightful chewiness of marshmallow, and the indulgent richness of melted chocolate, perfectly complemented by the comforting spice of cinnamon and the crunch of graham cracker. It’s the ultimate breakfast indulgence, perfect for weekend brunches, holiday mornings, or simply when you crave something extraordinary. Prepare to impress your family and friends with this innovative and utterly delicious treat that brings the joy of a campfire right to your kitchen.
If you’re a devoted fan of the iconic s’mores flavor, be sure to explore more of our delightful s’mores-inspired recipes. Extend your culinary adventure with our S’mores Chocolate Chip Cookies for a chewy delight, or indulge in the fluffy sweetness of Toasted S’mores Cupcakes. For a crowd-pleasing, shareable dessert, our S’mores Cookie Bars are always a guaranteed hit.
Why You’ll Love Making These S’mores Cinnamon Rolls
These S’mores Cinnamon Rolls are more than just a recipe; they’re an experience waiting to happen in your kitchen. Here’s why they will quickly become a cherished favorite in your baking repertoire and a highlight of your breakfast table:
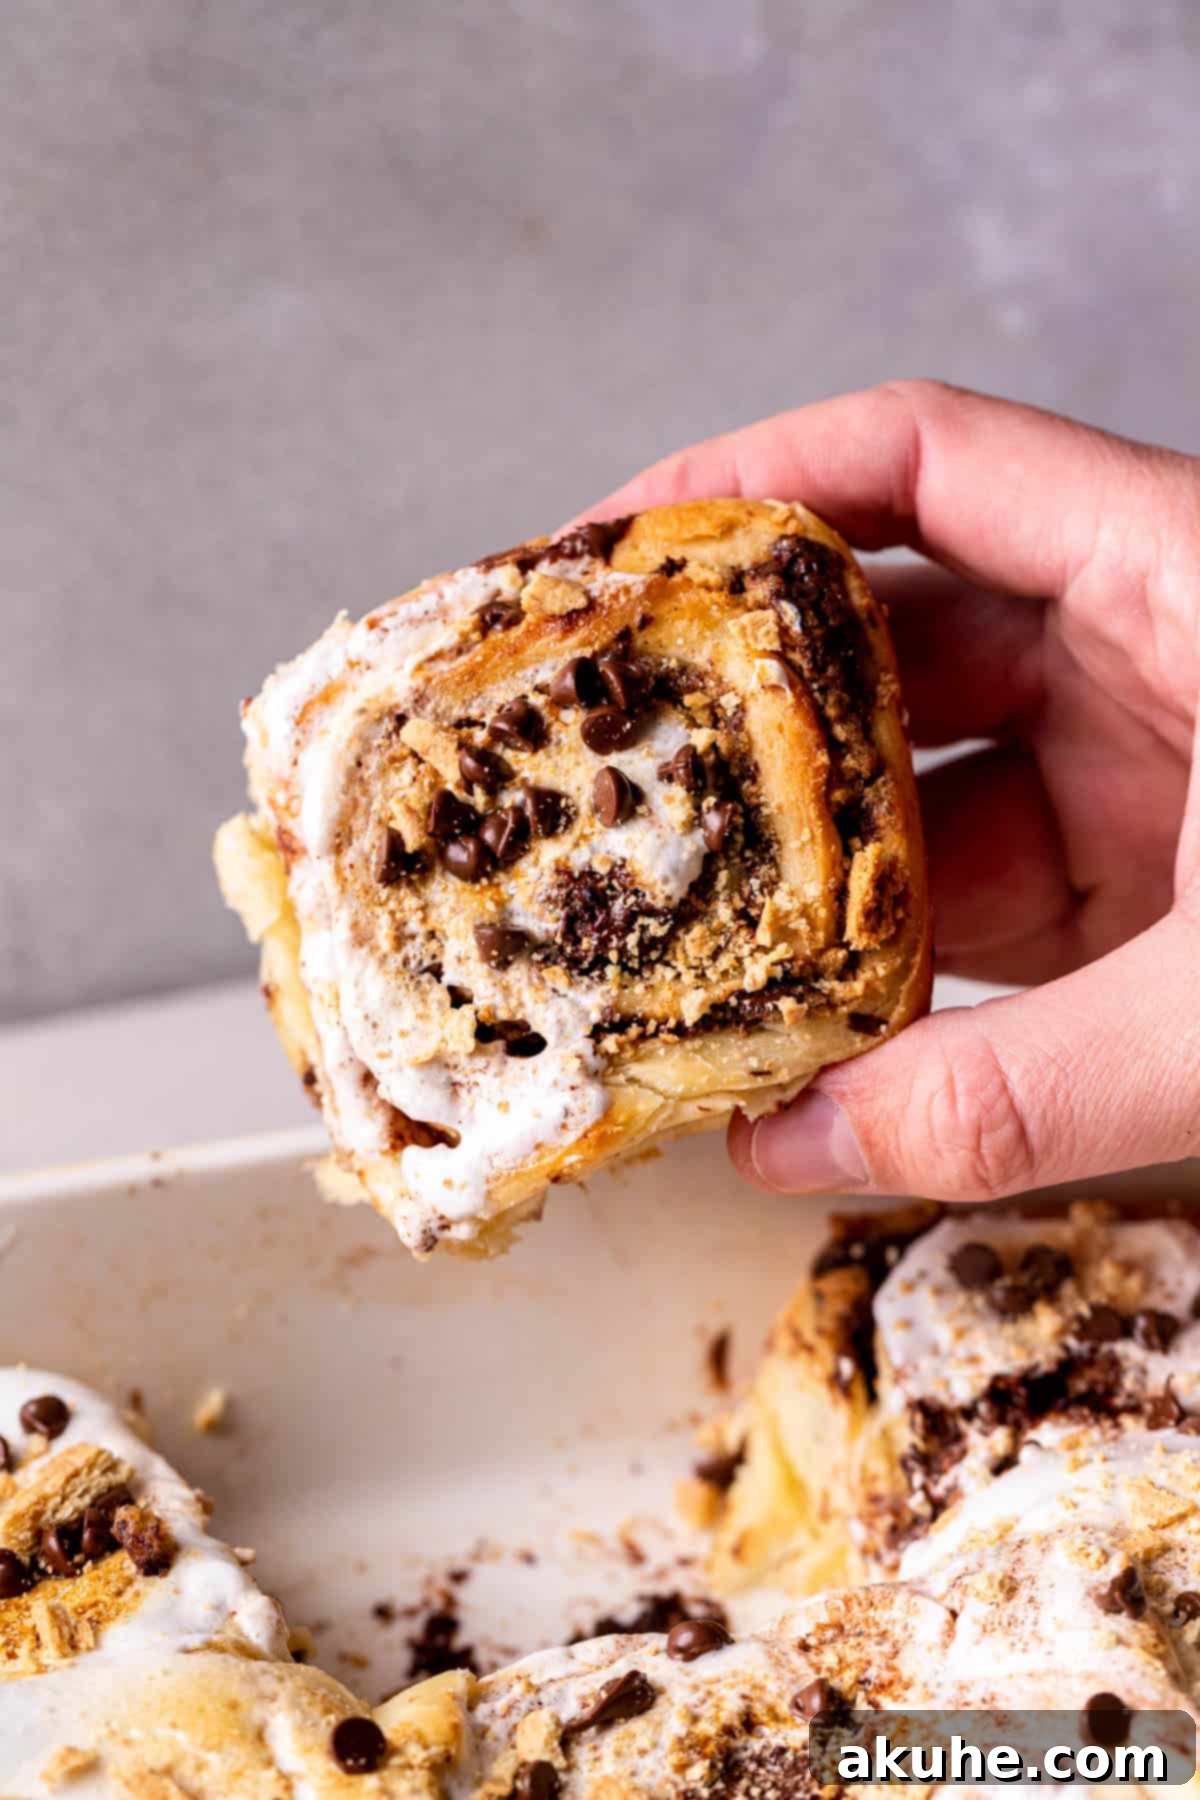
- Irresistible S’mores Flavor Fusion: This recipe masterfully combines two beloved treats into one spectacular dessert-for-breakfast. Every component of a classic s’more is thoughtfully integrated: the warm, ooey-gooey marshmallow creme topping that gets perfectly toasted, generous pockets of rich, melted chocolate nestled within the roll’s spirals, and the subtle, crumbly crunch of graham cracker pieces distributed throughout the cinnamon filling. It’s a nostalgic flavor explosion that will make any morning feel like a special occasion, evoking cherished memories of campfires and sweet summer nights. The balance of sweetness, chocolatey depth, and spiced warmth is truly unparalleled.
- Authentic Homemade Comfort, Elevated: There’s nothing quite like the taste and comforting aroma of homemade cinnamon rolls, and this recipe takes that feeling to a whole new level. We guide you through creating a remarkably soft, pillowy, and perfectly tender yeast dough from scratch. The dedication and effort put into crafting these rolls truly shines through, resulting in a superior texture, incredible freshness, and a depth of flavor that store-bought or pre-made versions simply cannot match. It’s the ultimate comfort food, elevated with a playful and irresistible s’mores twist.
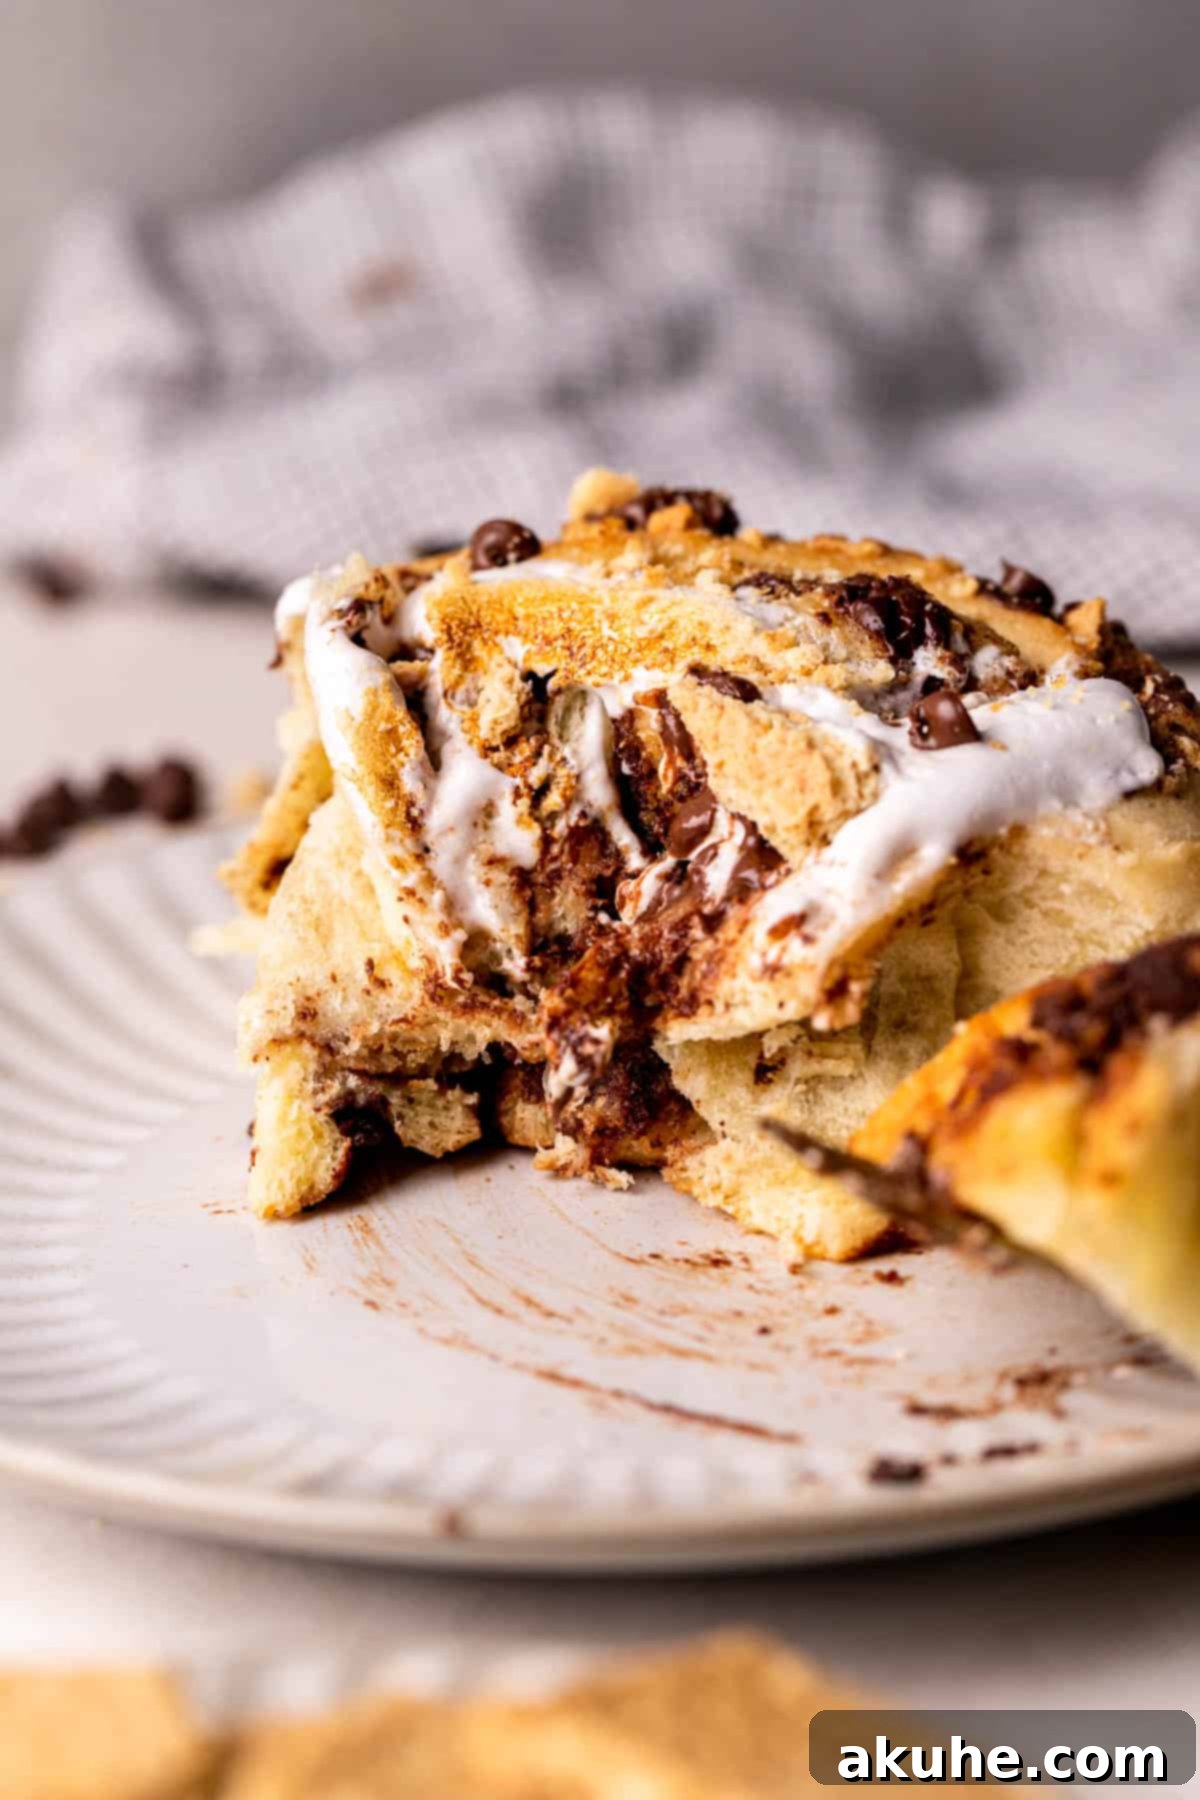
- Unbeatable Warm, Soft Texture: The magic of a truly exceptional cinnamon roll lies in its texture, and these S’mores Cinnamon Rolls deliver an unparalleled experience. Fresh out of the oven, they boast a warm, cloud-like softness that practically melts in your mouth, indicative of a perfectly proofed and baked dough. The tender, yielding dough contrasts beautifully with the gooey, spiced filling, the pockets of molten chocolate, and the slightly crisp yet wonderfully chewy toasted marshmallow topping. This creates a multi-layered textural delight that is truly impossible to resist, inviting you for just one more bite.
- Convenient Overnight Preparation Option: Life gets busy, but that doesn’t mean you have to sacrifice a freshly baked, decadent breakfast. This recipe offers a fantastic overnight option, allowing you to prepare the dough the day before and let it slowly proof in the refrigerator. This means you can wake up, simply roll out, fill, and bake your prepped rolls with minimal morning effort, enjoying warm, homemade S’mores Cinnamon Rolls without an early start. It’s absolutely perfect for holiday mornings, leisurely weekend brunches, or any time you want to savor a stress-free yet utterly delicious breakfast.
- Impressive Presentation for Any Occasion: With their beautifully golden-brown edges, enticing swirls of cinnamon and chocolate filling, and the crowning glory of toasted marshmallow peaks, these rolls are as visually appealing as they are delicious. They make a stunning and unique centerpiece for any breakfast or brunch spread, and are sure to garner enthusiastic compliments and requests for the recipe from everyone who tries them. They look gourmet but are surprisingly approachable to make!
Essential Ingredient Notes for Perfect S’mores Cinnamon Rolls
Achieving bakery-quality S’mores Cinnamon Rolls starts with understanding your ingredients. Paying close attention to these notes will ensure your dough is soft, your filling is rich, and your topping is perfectly toasted. For a complete list of precise quantities, please refer to the detailed recipe card at the end of this article.
- Unsalted Butter: This recipe calls for unsalted butter in both the dough and the filling. Using unsalted butter gives you complete control over the salt content in your recipe. For best results, ensure your butter is at proper room temperature (softened but not melted) for both uses. For the dough, softened butter incorporates smoothly into the flour, contributing to a tender crumb. For the filling, it whips into a creamy, spreadable paste. Remember to pull your butter out of the refrigerator at least two hours before you plan to start baking.
- Milk: Any type of milk (whole, 2%, or even a non-dairy alternative like almond or oat milk) will work for this recipe. The absolute key, however, is its temperature. You must warm the milk to precisely 110°F (43°C). Use a reliable kitchen thermometer for accuracy; guessing can lead to issues. If the milk is too hot (above 115°F/46°C), it will unfortunately kill the active dry yeast, preventing your dough from rising properly. If it’s too cool (below 105°F/40°C), the yeast will activate too slowly, leading to a significantly longer and sluggish rise, or potentially an under-proofed dough.
- Active Dry Yeast: This recipe specifically calls for one standard packet of active dry yeast, which typically measures 2 ¼ teaspoons or 11 grams. Active dry yeast requires “proofing” – activating it in warm liquid (our milk) before combining with other ingredients – to ensure it’s alive and ready to make your dough rise. While often interchangeable with instant yeast in some recipes, avoid using “fast-rise” or “rapid-rise” yeast for this particular recipe, as it contains different additives that can affect the texture and rise time of your cinnamon rolls, potentially leading to a less ideal result.
- Eggs: Large eggs are specified because they contribute vital richness, moisture, and structure to the dough, helping to create that coveted soft and fluffy texture. Like the butter, it is crucial that your large eggs are at room temperature. Cold eggs can seize or stiffen the softened butter in your dough mixture, making it harder to mix evenly and potentially impacting the dough’s final texture. Lightly beat the eggs before adding them to the mixture for easier and more uniform incorporation into the dough.
- Brown Sugar: The filling benefits immensely from the rich, molasses-infused caramel notes of brown sugar. Light brown sugar is generally preferred for its balanced flavor, offering sweetness without overpowering the other s’mores elements. However, if you enjoy a deeper, more robust molasses taste, dark brown sugar can be used as a delicious alternative. When measuring, always ensure you pack the brown sugar firmly into the measuring cup to get the correct amount, as air pockets can lead to an inaccurate measurement.
- Chocolate Bar: For the ultimate, authentic s’mores experience within your cinnamon rolls, the quality of your chocolate matters. I personally love using Lindt 70% dark chocolate for its intense, slightly bitter flavor that perfectly balances the sweetness of the marshmallow and cinnamon. However, feel free to use your favorite chocolate bar – semi-sweet or even milk chocolate are great options. If you opt for milk chocolate, be aware that the rolls will be significantly sweeter overall. For convenience, good quality chocolate chips can also be used as a substitute; just ensure they are fresh and flavorful.
- Graham Crackers: These are the essential “cracker” element that truly completes the s’mores profile. You’ll need to pulse them into fine crumbs to ensure they integrate well into the filling and provide a subtle, textural crunch without being too chunky. A food processor or blender works best for achieving fine crumbs; alternatively, crushing them in a sealed bag with a rolling pin works too. Ensure you have enough to create a generous layer in your filling.
- Marshmallow Creme: Also widely known as marshmallow fluff, this sweet, sticky topping is the crowning glory of these rolls. Store-bought marshmallow creme is typically quite thick and dense, which is why we thin it out with a small amount of water. This crucial thinning process makes it much easier to spread evenly over the warm rolls, ensuring every surface is coated. More importantly, it allows the marshmallow creme to achieve that perfect toasted, slightly caramelized texture under the broiler without burning too quickly, creating a delightful contrast to the soft roll beneath.
Step-by-Step Instructions: Crafting the Perfect Dough for S’mores Cinnamon Rolls
Creating the tender, yielding dough is the foundation of these incredible S’mores Cinnamon Rolls. This section details the precise process using a stand mixer with a dough hook attachment, which is highly recommended for ease, efficiency, and consistent results. For those preferring to knead by hand, please refer to the detailed notes in the recipe card at the end of this article for specific, helpful instructions.
- Activate the Yeast: Begin by gently warming your milk. Heat it in the microwave for approximately one minute, or until it reaches a precise temperature of 110°F (43°C). A kitchen thermometer is your absolute best friend here to ensure accuracy! Once the milk is at the correct temperature, carefully sprinkle the active dry yeast over the surface. Allow this mixture to sit undisturbed for about 10 minutes. During this crucial time, the yeast will activate, begin to bubble, and form a foamy layer, which indicates it’s alive and ready to work its magic in making your dough rise beautifully. It is paramount that the milk does not exceed 110°F, as excessively hot temperatures will kill the yeast, rendering it ineffective and preventing your dough from rising.
- Prepare the Dry Ingredients and Cut in Butter: In a large mixing bowl, sift together the all-purpose flour, white granulated sugar, and salt. Sifting helps to aerate the flour, removing any clumps and ensuring a smoother, more uniform dough texture. Next, add the cubed, room-temperature unsalted butter to the dry mixture. Using a pastry cutter or your fingertips, work the butter into the flour until the mixture resembles coarse meal with small, pea-sized butter clumps. This “cutting in” method is essential as it creates pockets of butter within the dough that melt during baking, contributing significantly to the rolls’ incredibly flaky, tender, and rich texture.
- Combine Wet and Dry Ingredients: Create a small well in the center of your prepared flour and butter mixture. Carefully pour in the activated yeast mixture (milk and yeast) and the lightly beaten, room-temperature eggs. Attach your mixing bowl to your stand mixer and, using the dough hook attachment, begin mixing on low speed. Continue to mix until all the ingredients are just combined and a shaggy dough starts to form, gathering around the hook. It’s important to avoid overmixing at this initial stage.
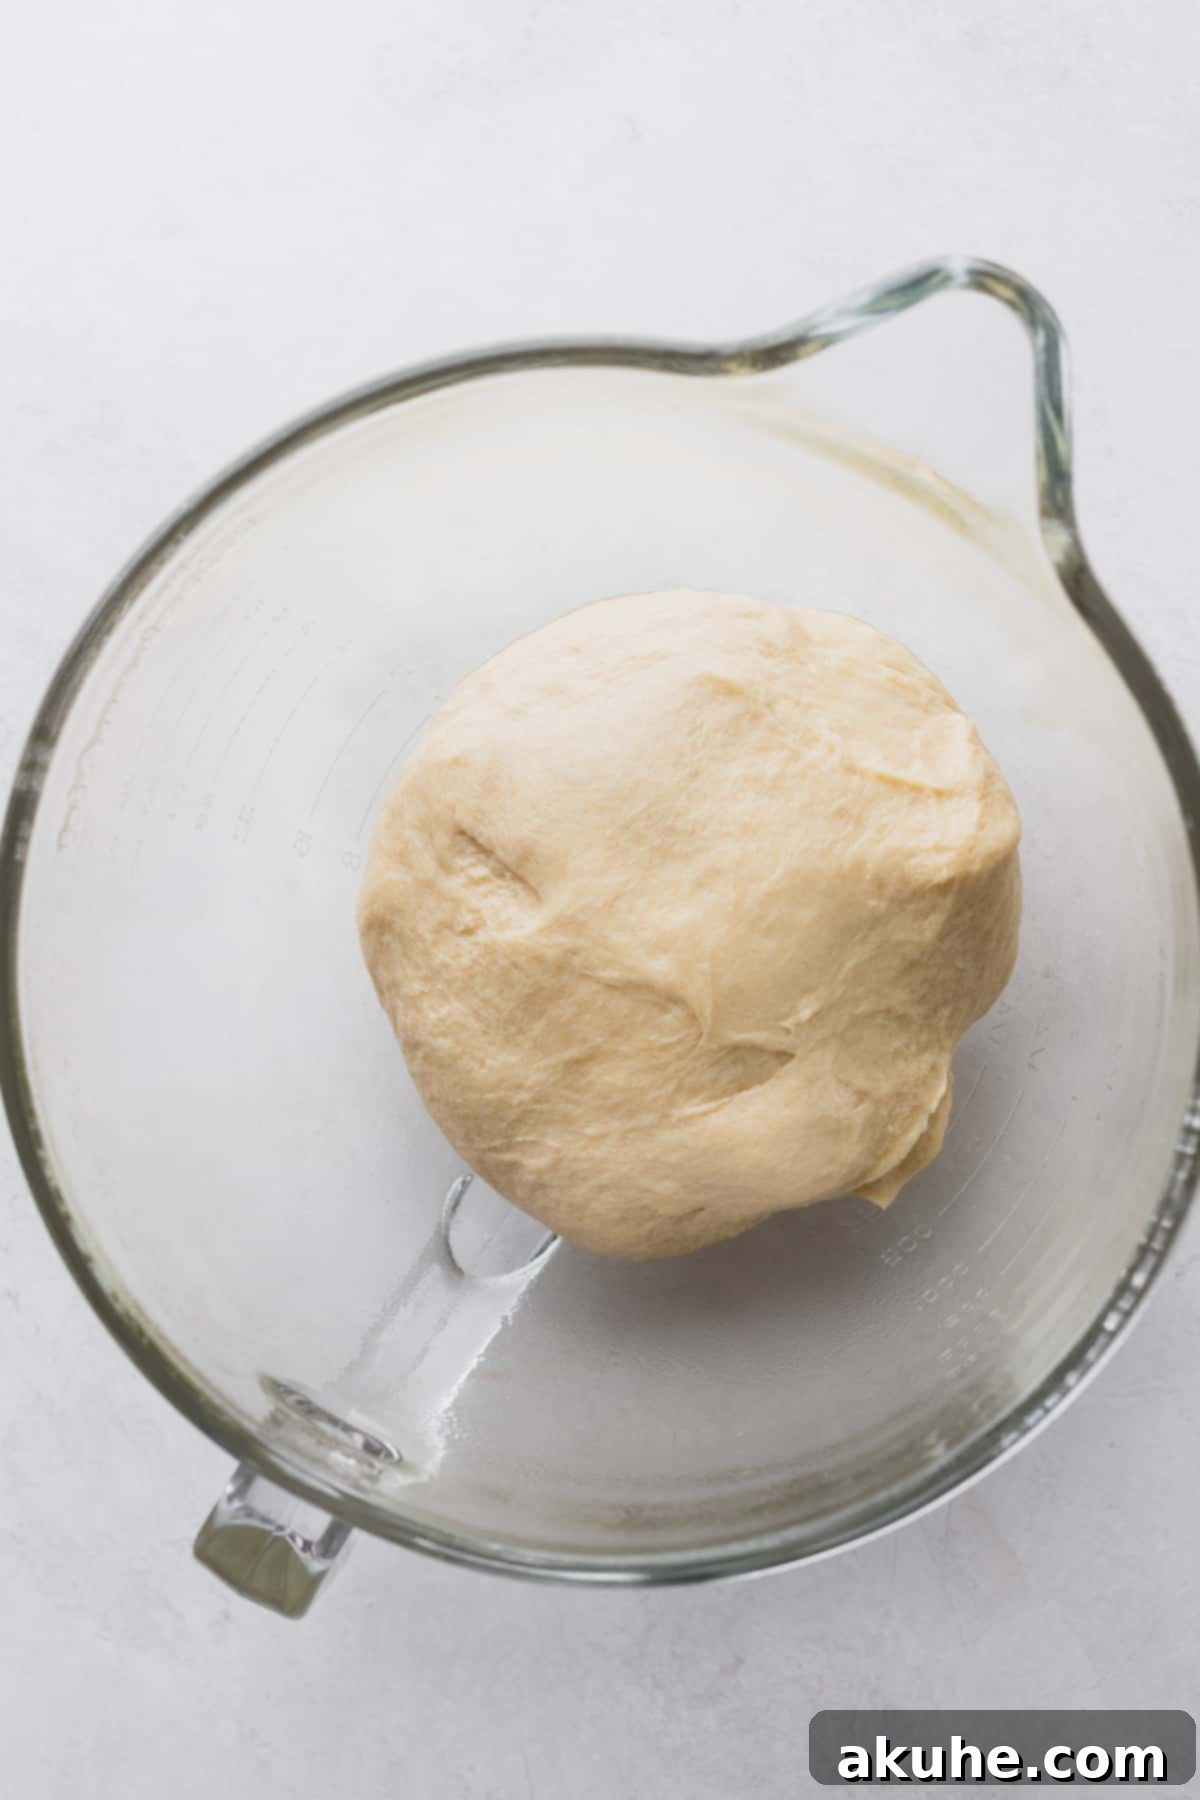
- Knead for Optimal Dough Development: Once the dough has come together, increase the mixer speed to medium and continue kneading for a full 5 minutes. This dedicated kneading process is absolutely vital for developing the gluten strands within the flour, which in turn gives the cinnamon rolls their characteristic chewy yet wonderfully tender texture. After 5 minutes of kneading, you should have a very soft, smooth, and slightly tacky dough that pulls cleanly away from the sides of the bowl. Resist the urge to add more flour unless the dough is excessively sticky and unmanageable; a slightly tacky dough is generally considered ideal for soft rolls.
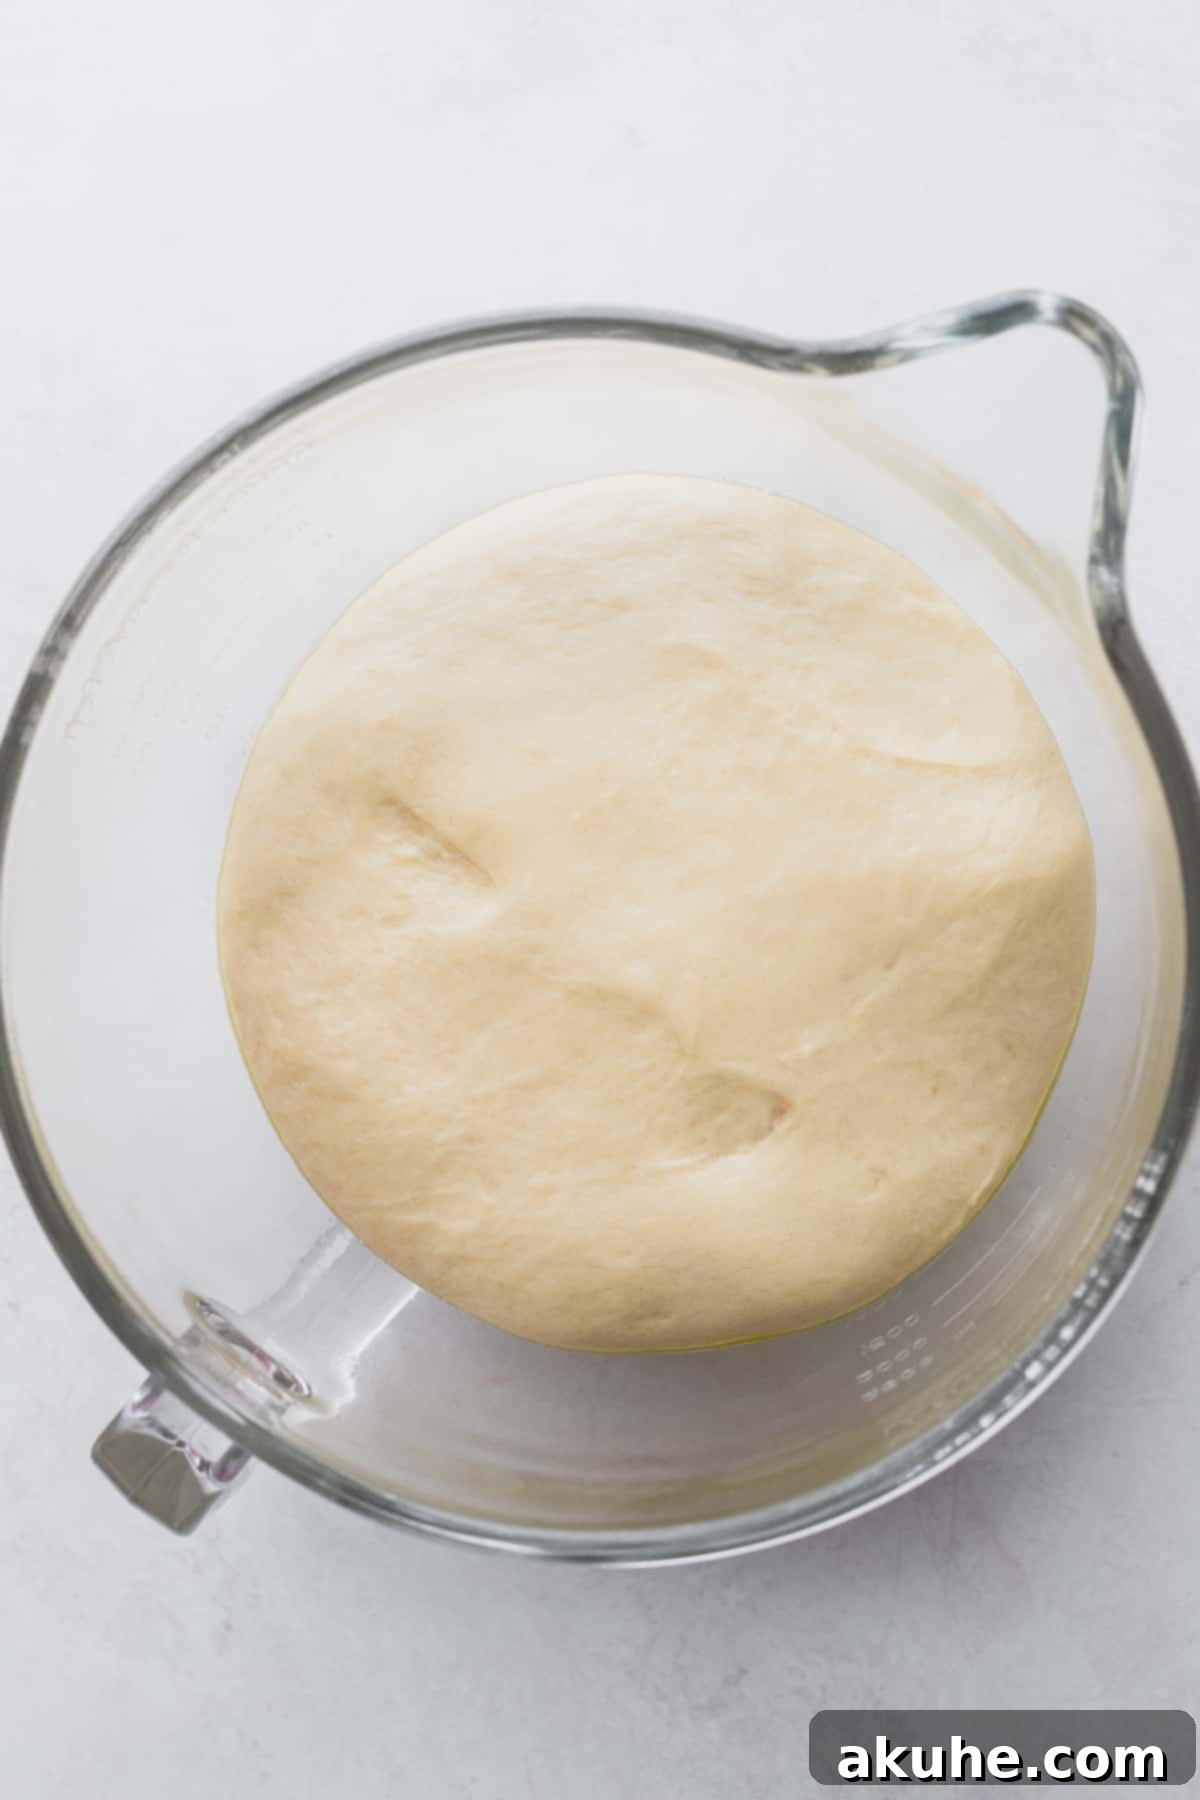
- First Dough Rise (Bulk Fermentation): Preheat your oven to its lowest possible setting, typically around 200°F (95°C), then immediately turn it OFF. This ingenious method creates a perfectly warm, draft-free environment that is ideal for dough rising. Lightly spray a large, clean mixing bowl with non-stick cooking spray, then gently transfer your kneaded dough into it. Cover the bowl securely with a clean kitchen towel or plastic wrap. Place the bowl into the turned-off, slightly warm oven with the door cracked open just a tiny bit (this helps maintain a consistent, gentle warmth without getting too hot). Let the dough rise for approximately 1 hour, or until it has visibly doubled in size. This first rise, also known as bulk fermentation, is crucial for developing deep flavors and creating a light, airy texture in your final rolls.
- Prepare the S’mores Components: While your dough is undergoing its essential first rise, take this opportunity to prepare the delicious s’mores elements for the filling. Finely chop your chosen chocolate bar into small, manageable pieces. For the graham cracker component, place the graham crackers in a food processor or blender and pulse them until they form fine, uniform crumbs. Alternatively, you can place them in a sturdy zip-top bag and crush them with a rolling pin until finely crumbled. Set both the chopped chocolate and graham cracker crumbs aside in separate bowls until the dough is perfectly risen and ready for assembly.
Step-by-Step Instructions: Assembling and Baking Your S’mores Cinnamon Rolls
With your perfectly risen dough and all the delectable s’mores components prepared, it’s time for the exciting part: assembling these unique cinnamon rolls and getting them into the oven to bake to golden perfection!
- Prepare the Cinnamon Filling: In a small mixing bowl, using a hand mixer or a sturdy whisk, beat the room-temperature unsalted butter on high speed until it becomes noticeably light, fluffy, and smooth. This aeration is key for creating a luscious, easy-to-spread filling. Gradually add the packed brown sugar and fragrant ground cinnamon to the whipped butter. Continue mixing on high speed until all ingredients are thoroughly combined and incorporated, resulting in a thick, sweet, and wonderfully aromatic paste. This creamy mixture forms the delicious, spiced heart of your cinnamon roll.
- Roll Out the Dough: Lightly flour a clean, spacious work surface. Gently transfer your risen dough onto it. Using a rolling pin, carefully and evenly roll the dough into a large rectangle. Aim for a consistent thickness of approximately 1/4 inch (about 0.6 cm) across the entire rectangle to ensure your rolls bake uniformly. Use a sharp serrated knife to carefully trim any uneven edges, creating clean, straight lines that will make the subsequent rolling and cutting steps much easier and result in more uniform rolls.
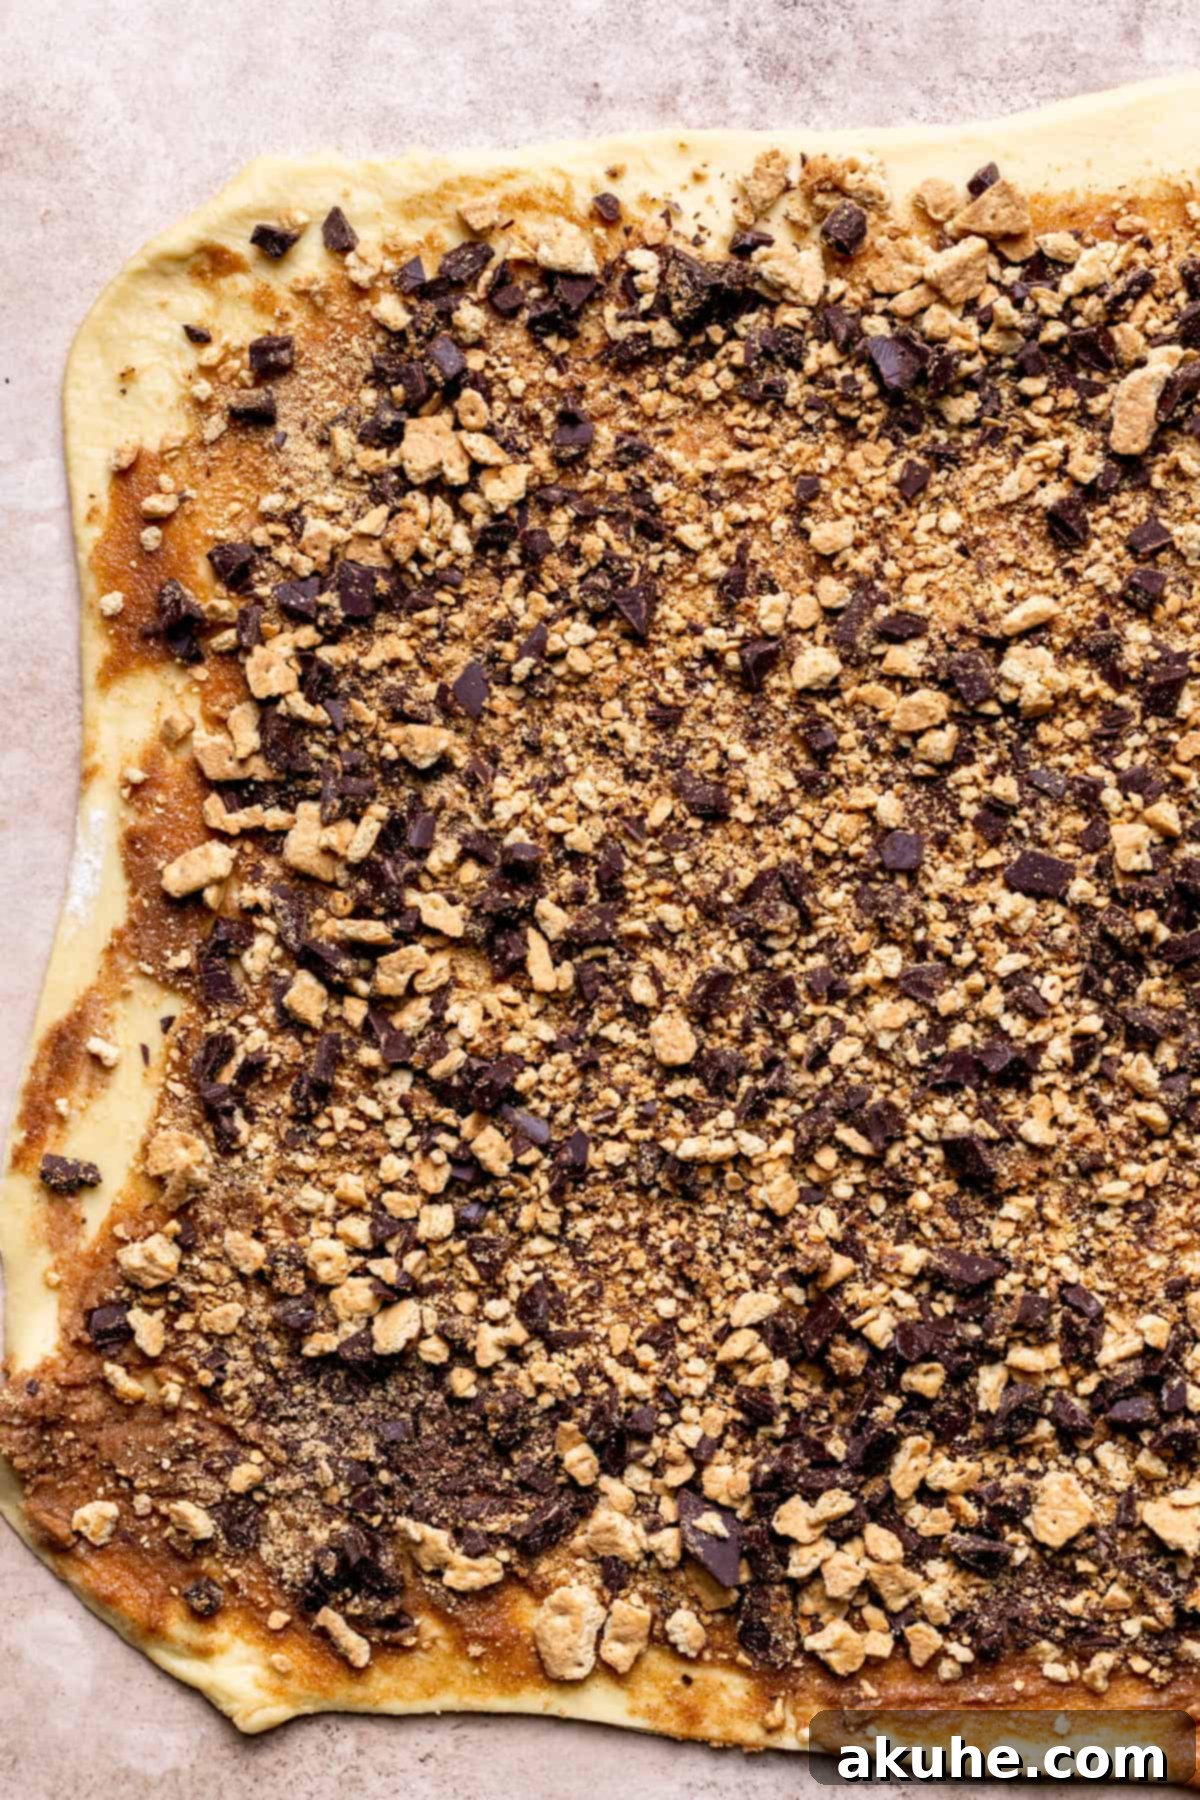
- Spread the S’mores Filling: With an offset spatula or the back of a spoon, evenly spread the prepared cinnamon-butter mixture over the entire surface of the rolled-out dough. Make sure to leave a small border (about half an inch or 1-2 cm) along one of the long edges; this border will help you create a neat seal when you roll the dough. Next, generously sprinkle the finely chopped chocolate and graham cracker pieces evenly over the cinnamon filling. Ensure good coverage across the dough so that every single bite of your finished cinnamon roll gets a taste of that signature s’mores goodness.
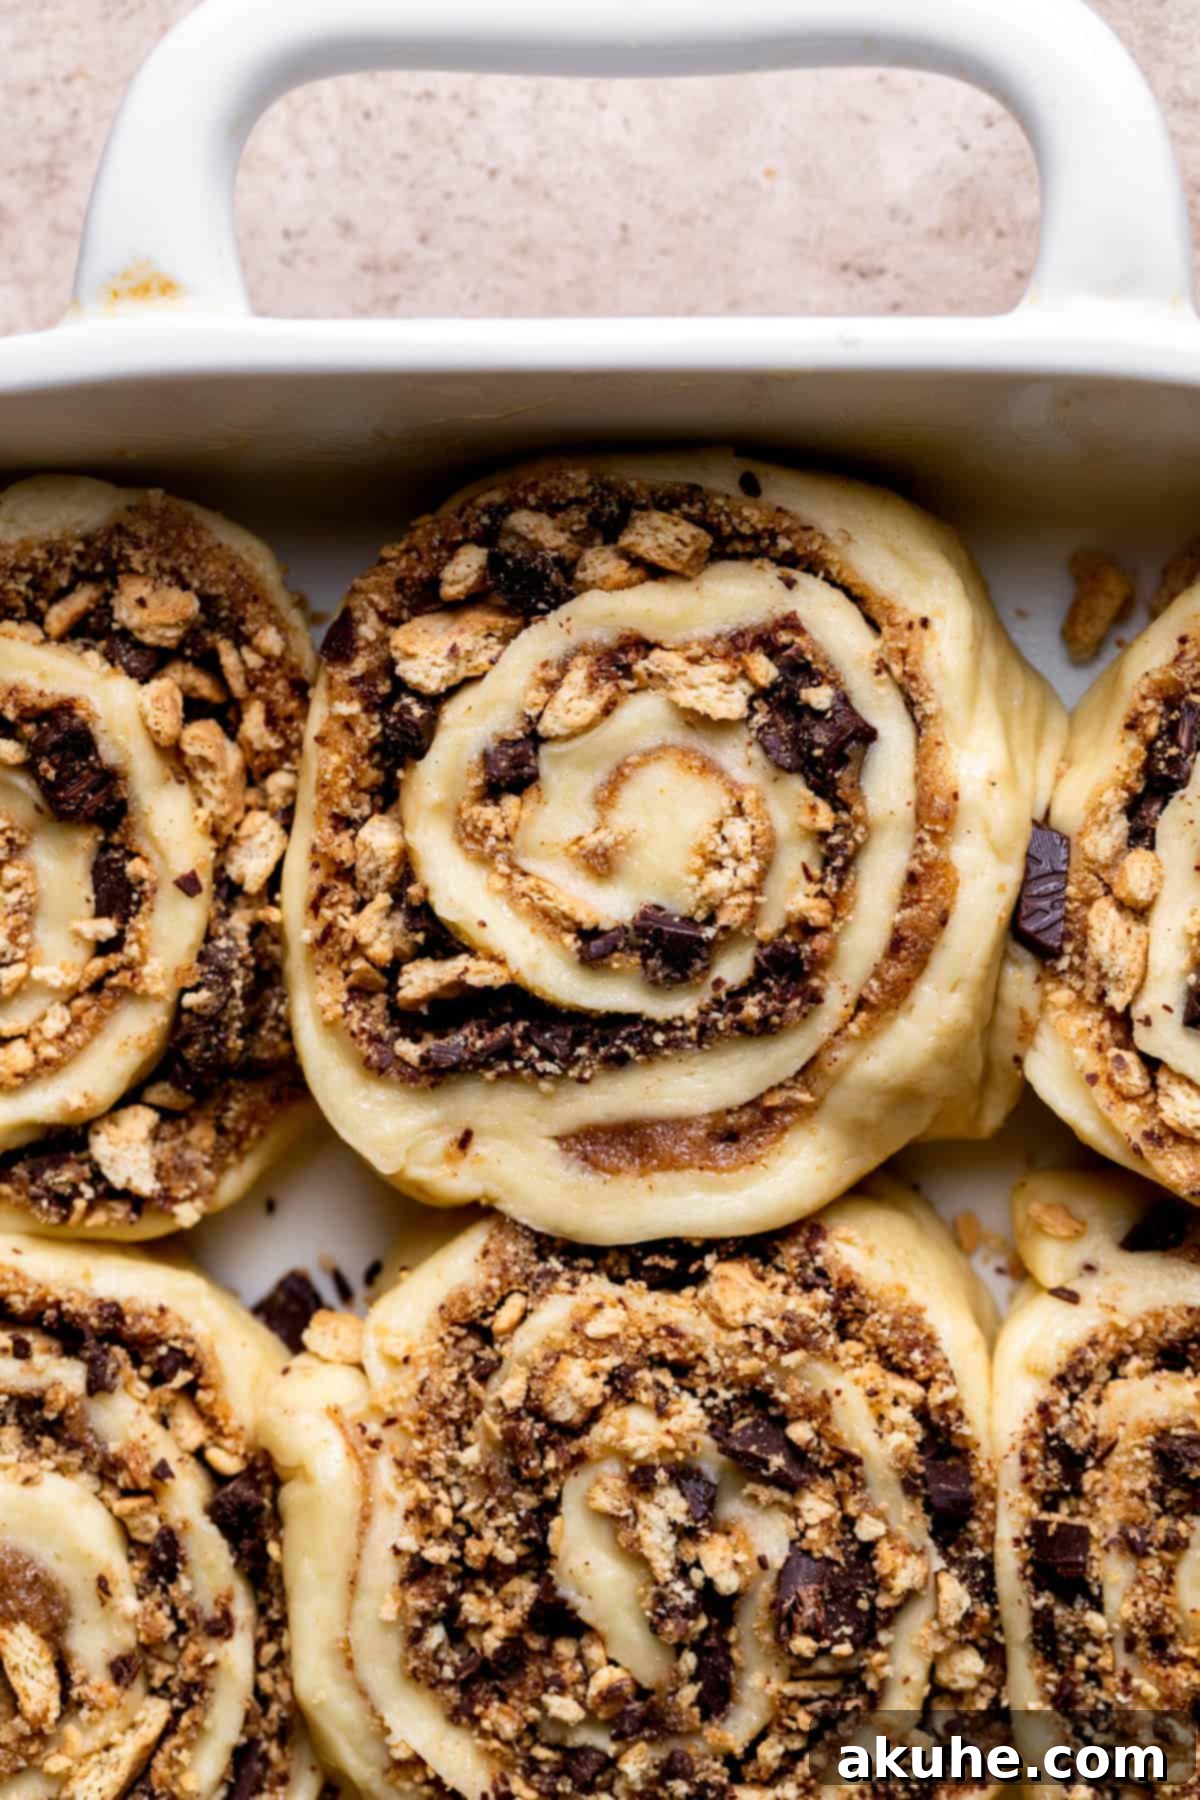
- Form and Cut the Rolls: Starting from one of the short sides of your dough rectangle, begin tightly rolling the dough into a log. The tighter you roll, the better your cinnamon swirls will look and hold together, preventing gaps and ensuring a beautiful spiral. Once you have a firm log, use a sharp serrated knife to carefully trim off any uneven ends from the log, which you can discard or bake as a little cook’s treat. Then, gently slice the log into 12 equal pieces, aiming for roughly 1.5-inch (about 4 cm) thick rolls. When cutting, use a gentle sawing motion rather than pressing down hard, as pressing can squish the rolls and push out the delicious filling. Don’t worry if a few graham cracker pieces fall out; simply toss any that escape during this process.
- Second Rise (Proofing) and Oven Preheat: Lightly spray a 9×13 inch (23×33 cm) baking pan with non-stick baking spray. Carefully arrange the 12 cut cinnamon rolls in the prepared pan, ensuring you leave a small amount of space between each roll, as they will expand significantly during their second rise. Cover the pan loosely with a clean kitchen towel. Allow the rolls to rise in a warm, draft-free spot for an additional 20 minutes. During this second proofing, the rolls will become visibly puffy and softer to the touch. While the rolls are proofing, preheat your oven to 375°F (190°C) so it’s perfectly ready when your rolls are.
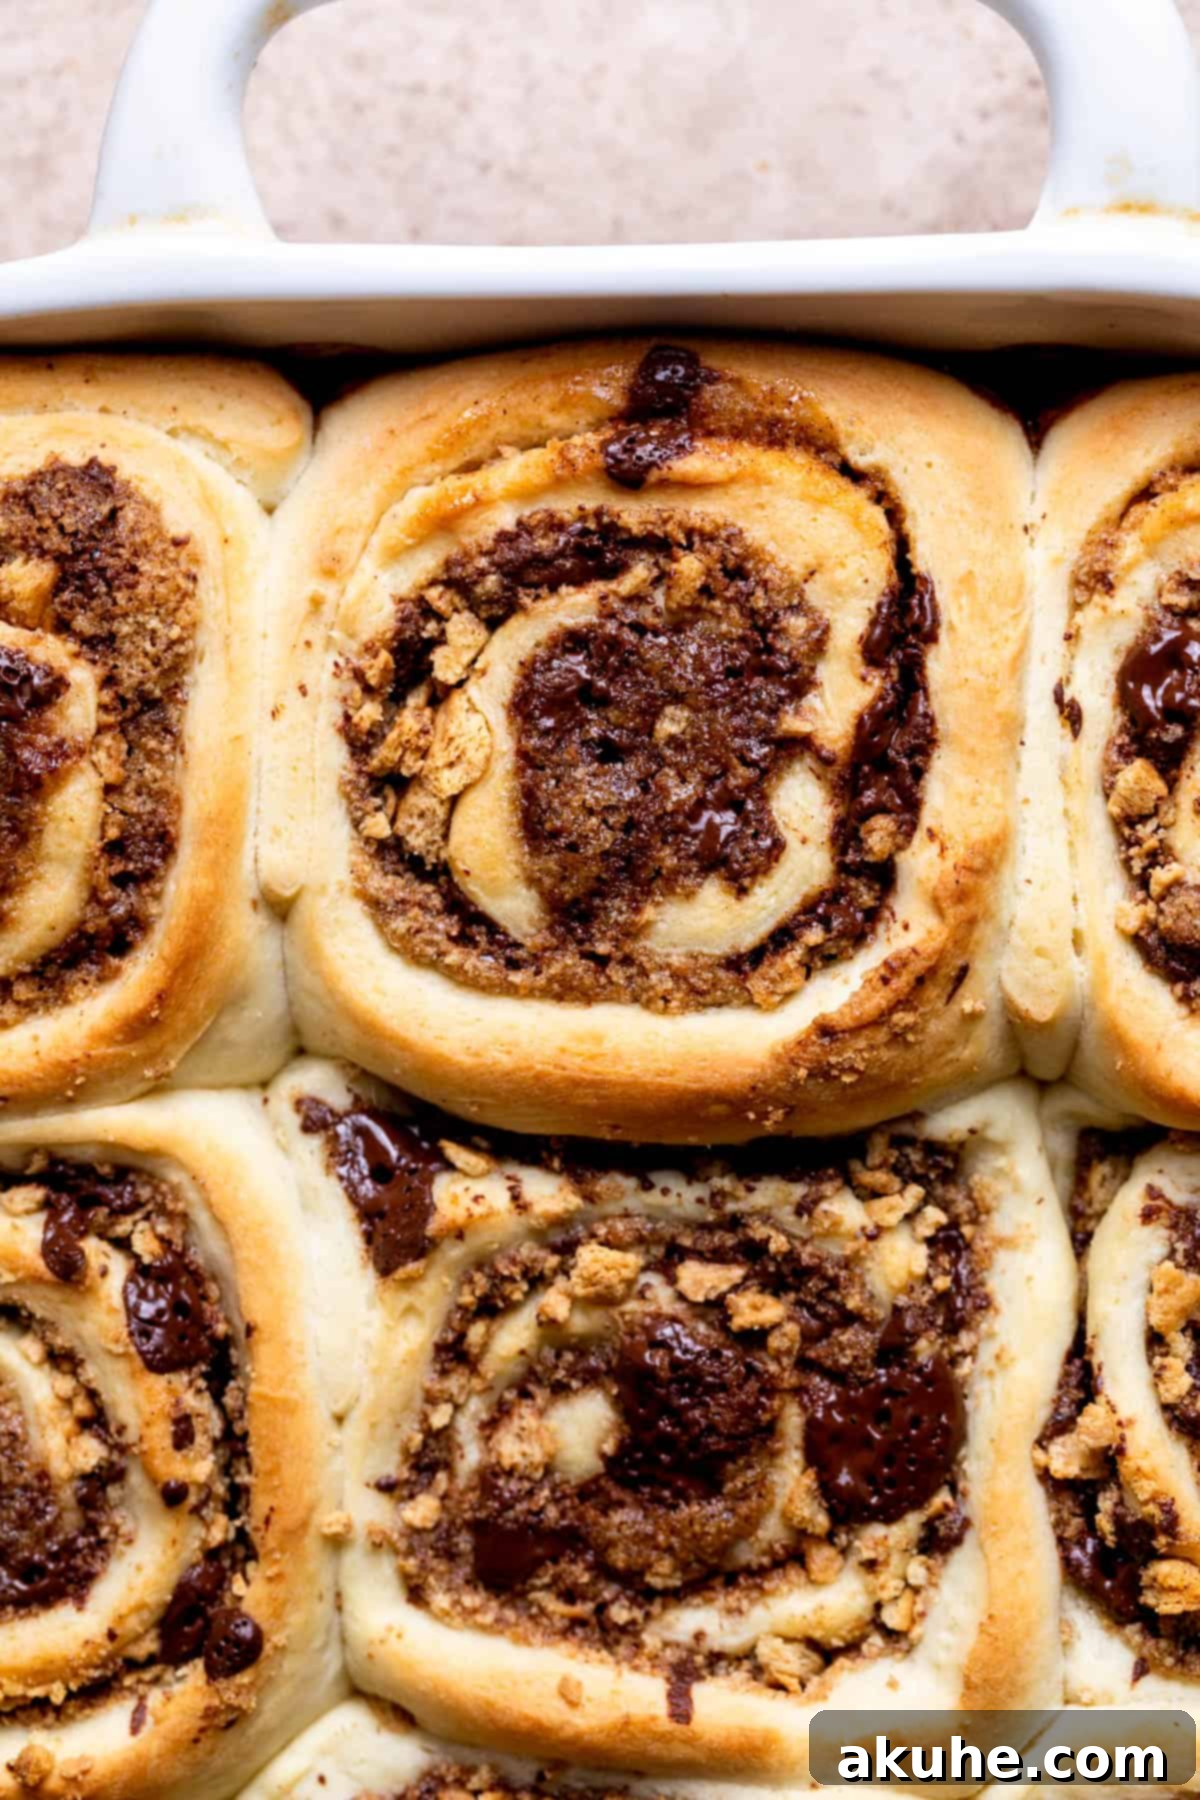
- Bake to Golden Perfection: Carefully place the pan of risen S’mores Cinnamon Rolls into your preheated oven. Bake for approximately 20-25 minutes. Keep a close eye on them during the final minutes; they are perfectly baked when their tops achieve a beautiful, light golden-brown hue and the rolls feel set but are still delightfully soft and slightly springy to the touch when gently pressed. It is crucial to avoid overbaking, as this can lead to dry, less enjoyable rolls.
The Grand Finale: Toasted Marshmallow Topping
The signature s’mores element truly comes alive with the toasted marshmallow topping. This final step transforms your already delicious cinnamon rolls into an unforgettable, show-stopping treat that perfectly mimics a campfire s’more.
- Prepare the Marshmallow Topping: While your rolls are still warm and fresh from the oven, spoon the marshmallow creme (or fluff) into a microwave-safe bowl. Heat it in the microwave for approximately 30 seconds, or until it visibly softens and becomes easy to stir and pour. Add the specified amount of water to the marshmallow creme and mix thoroughly until you have a smooth, pourable, yet still wonderfully thick marshmallow mixture. This thinning is a crucial step as it ensures even coverage over all your rolls.
- Toast the Marshmallow: Generously spoon the prepared warm marshmallow topping over the hot baked cinnamon rolls, ensuring each roll is beautifully and evenly covered. For that authentic, caramelized s’mores experience, carefully place the pan back into the oven under the broiler setting. This step requires your undivided attention: broilers can toast incredibly quickly, and marshmallows can go from golden to burnt in a matter of seconds. Keep a very close eye on them, watching continuously until the marshmallow topping achieves a beautiful, lightly golden-brown hue and begins to bubble slightly. This creates a delightful, slightly crispy, and caramelized exterior that gives way to a wonderfully gooey interior. Serve immediately and savor the magical combination of flavors and textures!
Make Ahead Marvel: Overnight S’mores Cinnamon Rolls
Planning a special breakfast or simply want to minimize your morning prep time? This S’mores Cinnamon Roll recipe is incredibly adaptable and offers a convenient overnight option, allowing you to enjoy freshly baked, warm rolls without the need for an early start. It’s perfect for holidays or lazy weekend mornings.
After you’ve successfully finished kneading the dough (following Step 4 of the “Crafting the Perfect Dough” section), instead of allowing it to rise at room temperature, prepare it for an overnight chill. Lightly spray a large mixing bowl with non-stick spray, carefully place the kneaded dough inside, and cover it tightly with plastic wrap to prevent a skin from forming. Transfer the covered bowl to the refrigerator and let it chill overnight. The dough can be safely stored in the fridge for a maximum of 16 hours. This slow, cold rise (known as cold fermentation) is fantastic for developing incredible depth of flavor in the dough and also makes it exceptionally easy to handle and roll out the next morning.
The following morning, pull the chilled dough out of the refrigerator. It will be much firmer, denser, and less puffy than a room-temperature risen dough. Proceed with rolling out the dough, spreading the filling, and cutting the cinnamon rolls as precisely described in the “Assembling and Baking Your S’mores Cinnamon Rolls” section. Once the rolls are arranged in the baking pan, cover them loosely with a clean kitchen towel and allow them to rise at room temperature for a longer period – approximately 1 to 1.5 hours, instead of the standard 20 minutes. This extended rise time is essential to allow the cold dough to warm up, relax, and become fully proofed before baking. Once risen, bake as directed and add your toasted marshmallow topping for a truly spectacular, stress-free, and incredibly delicious breakfast that will impress everyone.
Frequently Asked Questions (FAQ) About S’mores Cinnamon Rolls
While using a slightly warmed (and then turned off) oven is an excellent and highly recommended way to create a consistently warm and draft-free environment for dough to rise, it’s not strictly mandatory. Yeast thrives in warmth, so if your kitchen is generally warm (around 70-75°F or 21-24°C), you can certainly let the dough rise at room temperature. Just ensure it’s in a spot away from drafts, open windows, or cold surfaces, as cold spots can significantly slow down or even halt the proofing process. The preheated, turned-off oven method simply provides a reliable and uniform temperature, helping to ensure a successful and timely rise every time.
Reheating these delicious rolls properly helps preserve their soft, gooey texture and prevents them from drying out. If you’re only enjoying one or two rolls, the microwave is your best friend for a quick warm-up: place a single roll on a microwave-safe plate and heat for 20-30 seconds, or until it’s warmed through and the chocolate is melty again. For reheating an entire tray, preheat your oven to 350°F (175°C). Cover the baking dish loosely with aluminum foil to prevent the marshmallow topping from over-browning, and let the rolls warm in the oven for about 5-10 minutes, or until hot and soft throughout. This method ensures even heating and a delightful return to their freshly baked goodness.
Yes, you can absolutely pre-bake these rolls to get a head start, especially for entertaining! Follow all the instructions for preparing the dough, assembling, and the second rise. Then, instead of baking for the full 20-25 minutes, bake them for only about 10 minutes until they are lightly set but not fully browned. Remove them from the oven, let them cool completely, and then cover the pan tightly and chill in the refrigerator. In the morning, simply remove from the fridge, and bake them for the remaining 15-20 minutes at 375°F (190°C) until they are golden brown and hot. For the best experience, I highly recommend adding the marshmallow topping *after* the final bake, so you can toast it fresh and achieve that perfect gooey, slightly crisp marshmallow layer right before serving.
Achieving soft, pillowy cinnamon rolls depends on a few key factors. Firstly, ensure your yeast is active by proofing it correctly in warm milk; a foamy yeast mixture is a happy yeast mixture! Secondly, don’t skimp on kneading; proper gluten development is absolutely essential for that tender, chewy crumb. Thirdly, be incredibly mindful of your flour measurement – too much flour is a common culprit for dry, dense rolls. Always spoon and level your flour, or better yet, use a kitchen scale for the most accurate results. Finally, avoid overbaking. Pull the rolls from the oven when they are just lightly golden, as they will continue to cook slightly from residual heat once removed.
Absolutely! While dark chocolate offers a lovely sophisticated contrast to the sweetness of the marshmallow, feel free to experiment with your favorite chocolate. Milk chocolate chips or even white chocolate chips would be delicious, though they will naturally make the rolls sweeter. You could also try adding a sprinkle of mini chocolate chips along with the chopped chocolate for varying textures and melt consistency. For an extra layer of flavor, consider adding a tiny pinch of espresso powder to the chocolate filling to deepen its notes, or a dash of fresh nutmeg to the cinnamon filling for added warmth. The beauty of homemade baking is the freedom to customize and make it your own!
Storing and Freezing Your S’mores Cinnamon Rolls
These S’mores Cinnamon Rolls are undeniably at their absolute best when enjoyed fresh and warm from the oven, but proper storage allows you to savor their deliciousness for several days, or even longer if frozen.
- Storing Baked Rolls: Once the rolls have completely cooled to room temperature, transfer any leftovers to an airtight container. This will protect them from drying out. Store them in the refrigerator for up to 5 days. To enjoy them again, simply reheat individual rolls in the microwave for 20-30 seconds until warm and gooey; this brings back their soft texture and melts the chocolate beautifully.
Convenient Freezing Options for Future Enjoyment
These S’mores Cinnamon Rolls are remarkably freezer-friendly, offering two fantastic methods to ensure you always have a batch of these delectable treats ready to go, whenever the craving strikes:
- Freeze Unbaked Rolls: This is a fantastic option for future fresh-baked treats with minimal effort on baking day. After you’ve cut the rolls and arranged them in the baking pan (but before their second rise), cover the pan tightly with plastic wrap, then an additional layer of aluminum foil to prevent freezer burn. You can freeze them for up to 30 days. When you’re ready to bake, transfer the frozen rolls to the refrigerator the night before to thaw slowly. The next morning, remove them from the fridge, uncover, and let them rise at room temperature for about 1.5 to 2 hours (or until visibly puffy and soft). Then, proceed with baking as directed. While they may not rise quite as much as fresh dough, they will still yield incredibly delicious results.
- Freeze Already Baked Rolls: If you find yourself with leftover baked rolls, you can certainly freeze them for later enjoyment. Once the rolls have cooled completely to room temperature, wrap each one individually in plastic wrap, ensuring they are tightly sealed. Then, place the wrapped rolls in an airtight freezer-safe bag or container. They can be frozen for up to 30 days. To reheat, thaw the rolls for about an hour at room temperature. Then, you can warm them in the microwave for 30-60 seconds, or in a preheated oven at 350°F (175°C) for 10-15 minutes until heated through and soft again.
Other Irresistible Cinnamon Roll Recipes To Explore
If you’ve fallen in love with the rewarding art of making homemade cinnamon rolls, you’ll be delighted to know there are endless variations and flavors to explore beyond these S’mores Cinnamon Rolls. From classic sticky buns laden with pecans to seasonal fruit-filled delights and savory options, the world of sweet rolls is vast and deliciously creative. Dive into new baking adventures and discover other fantastic cinnamon roll recipes to broaden your baking horizons and find new favorites for every occasion, from simple breakfasts to elaborate brunches.
Loved this recipe? Please consider leaving a STAR REVIEW below to share your experience and help other bakers! We’d also absolutely love to see your beautiful creations; tag us on Instagram @stephaniesweettreats. For even more inspiring baking ideas, tips, and delightful recipes, make sure to follow us on Pinterest. Happy baking, and enjoy every sweet moment!
S’mores Cinnamon Rolls
A delightful fusion of classic s’mores and soft, gooey cinnamon rolls, featuring a tender dough filled with cinnamon, chopped chocolate, and graham cracker pieces, all crowned with a perfectly toasted marshmallow creme topping.
Author: Stephanie Rutherford
Print Recipe |
Pin Recipe |
Leave a Review
Recipe Details
- Prep Time: 1 hour
- Cook Time: 23 minutes
- Resting Time: 1 hour 20 minutes
- Total Time: 2 hours 43 minutes
- Servings: 12 rolls
Ingredients
Dough
- 1 cup Milk, warmed to 110℉ (43°C)
- 2 1/4 tsp Active dry yeast (equivalent to 11 grams or 1 whole packet)
- 2 Large eggs, room temperature, lightly beaten
- 4 1/2 cups All-purpose flour (spooned and leveled)
- 1 tsp Salt
- 1/4 cup White granulated sugar
- 10 TBSP Unsalted butter, cubed, room temperature
Filling
- 1/2 cup Unsalted butter, room temperature
- 1/2 cup Brown sugar, packed (light or dark)
- 1/2 TBSP Ground cinnamon
- 1 1/2 cups Chopped chocolate (equivalent to two 4oz chocolate bars)
- 1 1/2 cups Graham cracker crumbs (from 1 packet of graham crackers)
Marshmallow Topping
- 7 oz Marshmallow creme (1 standard tub)
- 2 TBSP Water
Instructions
Dough Preparation
- Warm the milk in the microwave for about 1 minute until it reaches precisely 110℉ (43°C). Sprinkle the active dry yeast on top and let it sit for 10 minutes to activate until foamy.
- This recipe is optimized for a stand mixer with a dough hook. For hand-kneading instructions, please refer to the “Chef’s Notes & Tips” section below.
- In a large mixing bowl, sift together the all-purpose flour, white granulated sugar, and salt. Add the cubed, room-temperature unsalted butter. Use a pastry cutter or your hands to cut the butter into the flour until the mixture resembles coarse crumbs with pea-sized butter pieces.
- Add the activated milk/yeast mixture and the lightly beaten eggs to the flour mixture. Mix on low speed with the dough hook until a shaggy dough begins to form. Increase the speed to medium and knead for 5 minutes until the dough is soft, smooth, and slightly tacky.
- Preheat your oven to 200℉ (95°C), then immediately turn it off. Lightly spray a large mixing bowl with non-stick spray, place the dough in it, and cover with a clean kitchen towel or plastic wrap. Place the bowl in the turned-off oven with the door cracked open. Let the dough rise for 1 hour, or until it has visibly doubled in size.
Filling and Baking
- In a small bowl, using a hand mixer, beat the room-temperature unsalted butter on high speed until smooth and creamy. Add the brown sugar and ground cinnamon, then mix on high speed until a thick, uniform paste forms.
- Finely chop the chocolate into small pieces. Pulse the graham crackers in a blender or food processor until they become fine crumbs. Set both aside.
- Transfer the risen dough to a lightly floured surface. Use a rolling pin to roll it into a large rectangle, approximately 1/4 inch (0.6 cm) thick. Use a serrated knife to trim any uneven edges to create a clean rectangle.
- Evenly spread the cinnamon-butter filling over the dough with an offset spatula, leaving a small border along one long edge. Generously sprinkle the chopped chocolate and graham cracker crumbs over the filling.
- Starting from a short side, tightly roll the dough into a log. Use a serrated knife to cut off any uneven ends. Then, gently slice the log into 12 equal rolls, using a sawing motion to avoid squishing them. Discard any graham cracker pieces that fall out during cutting.
- Lightly spray a 9×13 inch (23×33 cm) baking pan with non-stick spray. Arrange the 12 rolls in the pan, leaving a little space between them. Cover the pan with a kitchen towel and let the rolls rise for a second time for 20 minutes. Meanwhile, preheat your oven to 375℉ (190°C).
- Bake the rolls in the preheated oven for 20-25 minutes, or until their tops are lightly golden brown and they are soft to the touch.
Marshmallow Topping Application
- In a microwave-safe bowl, pour the marshmallow creme. Microwave for about 30 seconds, or until melted and easy to stir. Add the water and mix until fully combined and smooth.
- Generously spoon the warm marshmallow topping over the hot baked cinnamon rolls. For a toasted effect, place the pan back into the oven under the broiler setting. Watch extremely carefully, broiling until the marshmallow is lightly golden brown. Be vigilant to prevent burning! Serve immediately.
Chef’s Notes & Tips
- Accurate Flour Measurement: For the softest rolls, always measure flour by spooning it into your measuring cup and leveling it off, or use a kitchen scale for the most accurate results. Compacted flour can lead to a dry, dense dough.
- Room Temperature Ingredients: Ensure all dairy ingredients (butter, milk, eggs) are at room temperature before you begin. This allows them to emulsify better and combine smoothly, leading to a more consistent and tender dough structure.
- Hand Kneading Instructions: If you don’t have a stand mixer, you can mix the wet ingredients into the dry by using a sturdy rubber spatula. Once a shaggy dough forms, transfer it to a lightly floured surface and knead by hand for 5-8 minutes. The dough is properly kneaded when it passes the “windowpane test”: you should be able to stretch a small piece of dough very thinly between your fingers (like a windowpane) so that light can pass through it without tearing.
- Preventing Dry Rolls: Avoid overbaking! Rolls are done when lightly golden; pulling them from the oven at this stage ensures maximum softness.
- Perfect Yeast Temperature: Always use a thermometer to ensure your milk is precisely 110°F (43°C) for optimal yeast activation.
- Tight Rolling: Roll the dough log as tightly as possible from the short side to ensure beautiful, well-defined spirals in your finished cinnamon rolls.
Nutrition Information (Per Serving – 1 roll)
- Calories: 481 kcal
- Carbohydrates: 72 g
- Protein: 6 g
- Fat: 19 g
- Saturated Fat: 11 g
- Polyunsaturated Fat: 1 g
- Monounsaturated Fat: 5 g
- Trans Fat: 1 g
- Cholesterol: 48 mg
- Sodium: 277 mg
- Potassium: 118 mg
- Fiber: 2 g
- Sugar: 27 g
- Vitamin A: 562 IU
- Vitamin C: 0.01 mg
- Calcium: 57 mg
- Iron: 3 mg
Please note: Nutritional information is an estimate and may vary based on specific ingredients, brands used, and preparation methods.
