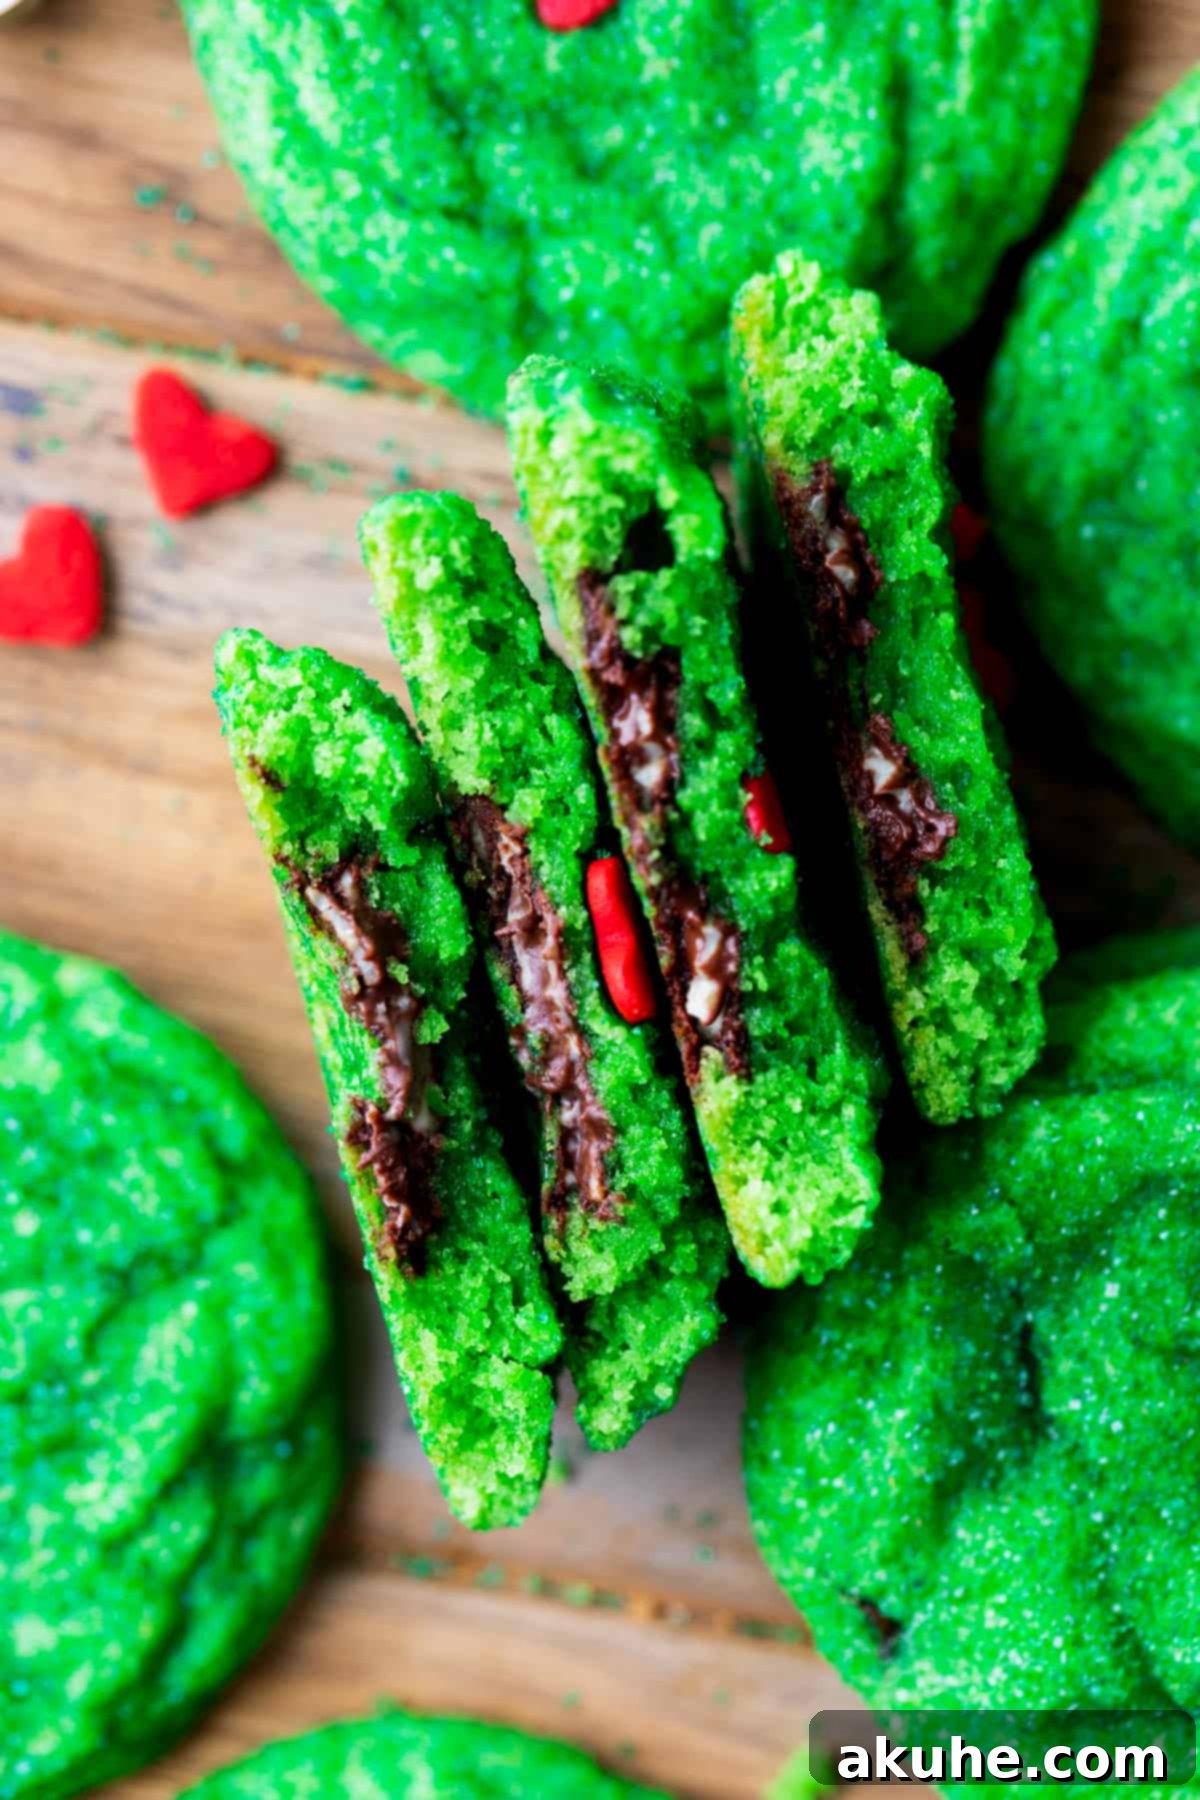
As the holiday season draws near, the air fills with the delightful scent of freshly baked goods and the spirit of festive cheer. Among the many traditions that bring warmth and joy, few are as cherished as gathering with loved ones to watch classic Christmas movies and share delicious treats. This year, why not add a whimsical touch to your celebrations with our enchanting Grinch Cookies? These aren’t just any ordinary sugar cookies; they are vibrant green, infused with the refreshing taste of Andes mints, rolled in sparkling green sugar, and topped with an adorable jumbo heart sprinkle – a sweet nod to the Grinch’s transformation.

Inspired by the beloved holiday classic, “How the Grinch Stole Christmas,” these charming Grinch Christmas cookies are designed to warm even the coldest of hearts. Just like the Grinch’s heart grew three sizes that fateful day, these delightful treats are sure to expand everyone’s holiday spirit. Imagine cozying up for a family movie night, the classic tale playing in the background, as you bite into one of these chewy, mint-filled delights. They are the perfect embodiment of holiday magic and a fantastic way to create lasting memories.
If you’re looking for more festive baking inspiration, explore some of our other delightful holiday cookie recipes, such as Hot Cocoa Cookie Blossoms, Pecan Pie Cookies, and Chewy Monster Cookies. But for now, let’s focus on bringing these iconic Grinch-themed cookies to life!
Why You’ll Fall in Love with This Grinch Cookie Recipe
These aren’t just cookies; they’re an experience! Here’s why this Grinch cookie recipe is destined to become a cherished part of your holiday baking repertoire:
- Irresistibly Festive & Visually Stunning: With their vivid green hue and a prominent red heart, these cookies instantly capture the whimsical spirit of the Grinch and the joy of Christmas. They are an absolute showstopper on any holiday dessert table and are guaranteed to bring smiles and spark conversations, just like the Grinch’s heartwarming transformation.
- A Refreshing Minty Surprise Inside: Forget plain sugar cookies! These treats boast a delightful secret – a generous filling of chopped Andes mints that melt into a cool, creamy, and chocolatey center as they bake. This unique minty twist elevates the classic sugar cookie, offering a refreshing contrast to the sweetness that is truly unforgettable.
- Surprisingly Simple to Master: Don’t let their impressive appearance fool you; these Grinch cookies are incredibly easy to make. You don’t need fancy equipment like a hand mixer or stand mixer, making them accessible even for novice bakers. The step-by-step instructions ensure a smooth baking process, allowing you to focus on the fun of holiday baking without stress.
- Perfect Chewy Texture: Each bite offers a wonderfully soft and chewy texture that melts in your mouth. The green sugar coating adds a subtle crunch and sparkle, while the moist interior ensures these cookies are utterly satisfying.
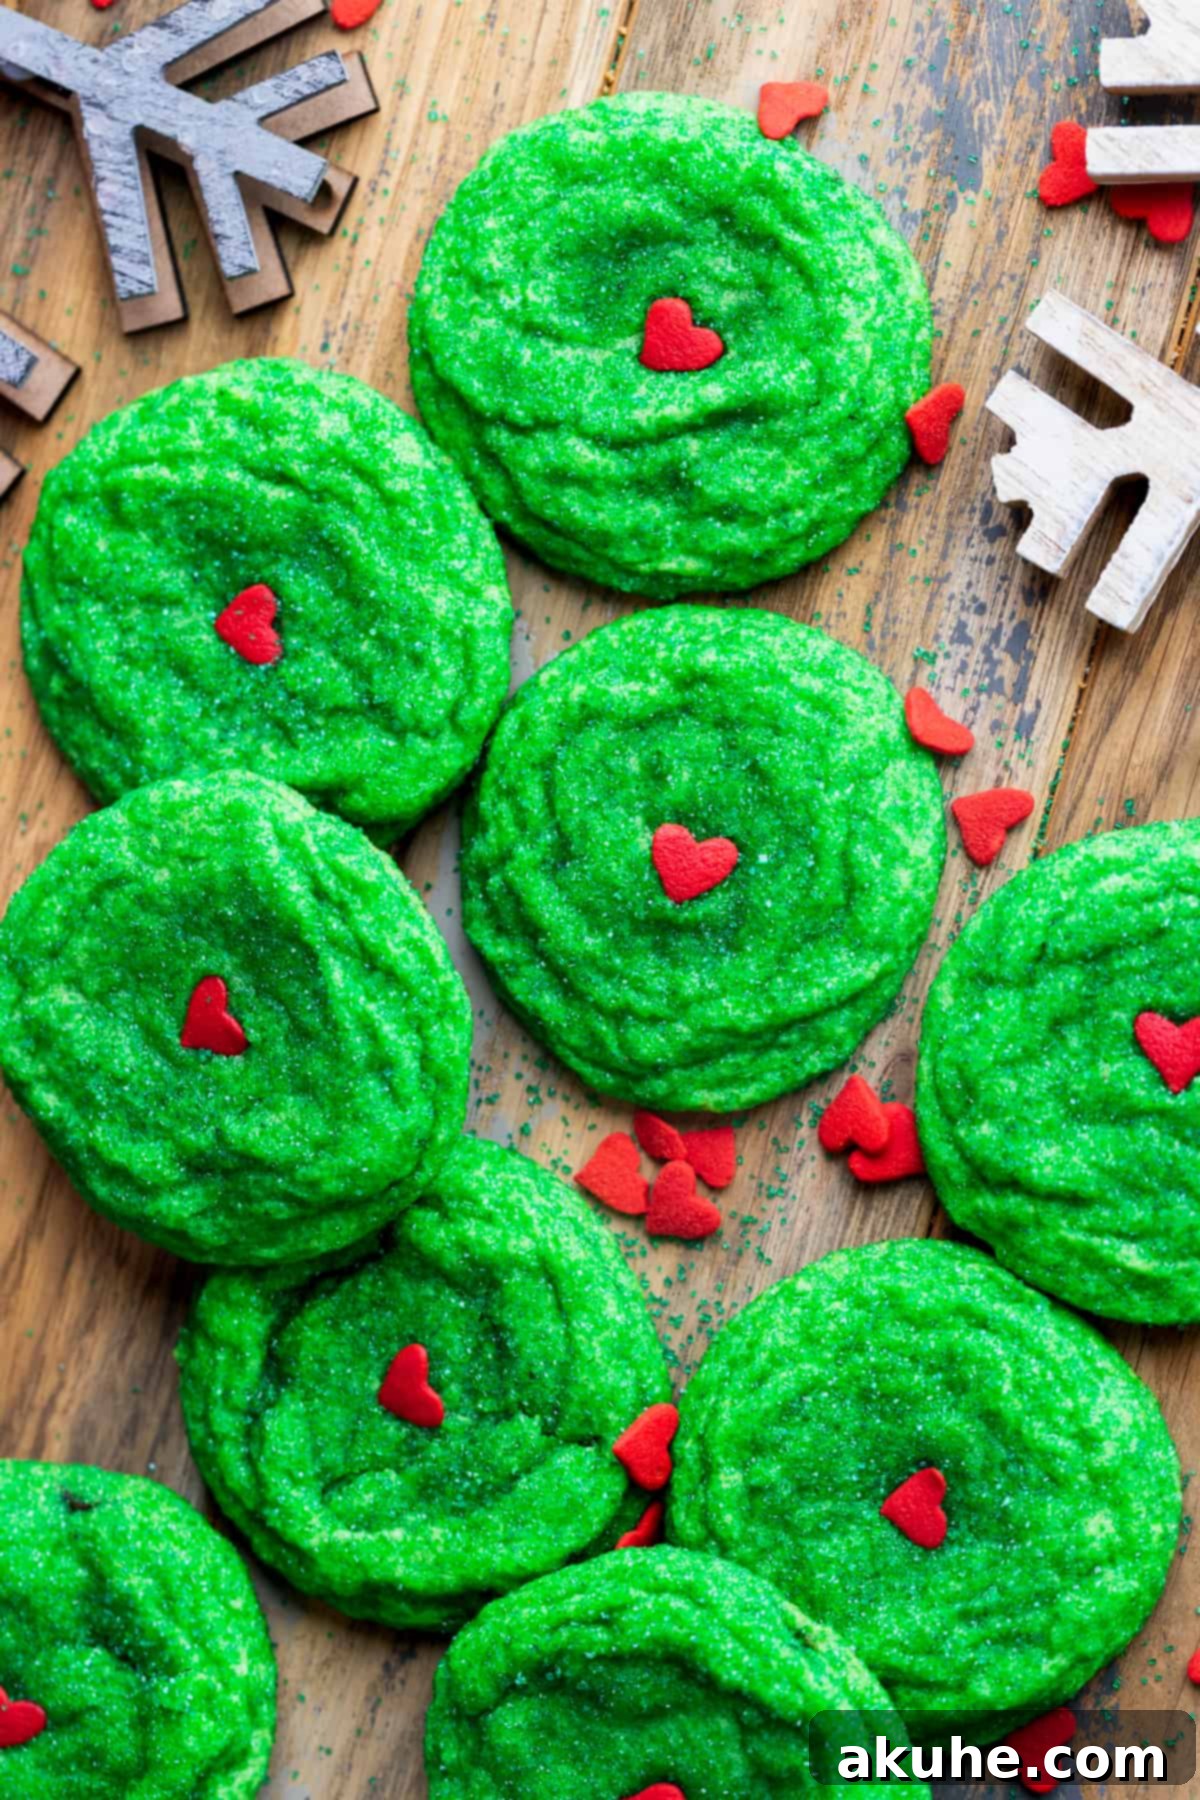
Essential Ingredient Notes for Perfect Grinch Cookies
To ensure your Grinch cookies turn out perfectly, paying attention to a few key ingredient details can make all the difference. Here are some helpful notes, with a full list available in the recipe card below:
- Unsalted Butter: For this recipe, you’ll need to melt the butter first and then allow it to cool to room temperature. Using melted butter helps achieve that wonderfully chewy texture, while ensuring it’s cooled prevents it from scrambling the eggs or affecting the dough’s consistency too much.
- Large Eggs: Always bring your eggs to room temperature before incorporating them into the dough. Room temperature eggs emulsify better with other ingredients, creating a smoother, more uniform batter and contributing to a lighter, softer cookie texture. Pull them out of the refrigerator at least 30 minutes to 2 hours before you plan to bake.
- Green Gel Food Coloring: For that iconic, vibrant Grinch green, gel food coloring is your best friend. Unlike liquid food coloring, gel dyes are highly concentrated, meaning you’ll achieve a brilliant color with just a few drops without altering the cookie’s flavor or texture. Brands like Americolor are excellent for achieving rich, deep hues.
- Green Sugar: This festive sprinkle is essential for the visual appeal and adds a lovely textural element. It’s typically found in the baking aisle of most grocery stores, especially during the holiday season. If you can’t find it, you can create your own by mixing a few drops of green food coloring with regular granulated sugar, then letting it dry slightly.
- Andes Mints: These classic mint chocolate candies are the star of the filling, offering a refreshing burst of mint and chocolate in every bite. Feel free to use your favorite brand of chocolate mints or even other mini chocolate bars if Andes mints aren’t available.
- Jumbo Heart Sprinkles: These red heart sprinkles are the ultimate finishing touch, symbolizing the Grinch’s famously growing heart. They add a pop of color and an adorable, recognizable element to each cookie. You can find these at specialty baking stores or online, such as these red heart sprinkles.
Thoughtful Ingredient Substitutions
Baking should be adaptable! Here are a few common substitutions you can consider:
- Dairy-Free Options: To make these Grinch cookies dairy-free, simply substitute the unsalted butter with your favorite plant-based butter alternative. Ensure it’s a brand suitable for baking to achieve similar results.
- Gluten-Free Baking: While this recipe hasn’t been specifically tested with gluten-free flour, many bakers have success using a 1:1 gluten-free baking flour blend that contains xanthan gum. If you try this, please let us know your results!
- Mint Alternatives for Filling: If Andes mints aren’t your preference, feel free to get creative! Small pieces of white chocolate, milk chocolate chips, peanut butter chips, or even chopped caramels can make wonderful alternative fillings, though they will change the flavor profile from the classic mint.
Step-By-Step Guide: Crafting Your Green Grinch Cookie Dough
Creating these magical Grinch cookies is a fun and straightforward process. Follow these detailed steps to achieve perfect, festive results:
STEP 1: Prepare Your Dry Ingredients. In a medium-sized mixing bowl, combine the all-purpose flour, baking powder, baking soda, and salt. Whisk them together thoroughly to ensure all leavening agents and salt are evenly distributed. Set this bowl aside for later.
STEP 2: Combine the Wet Ingredients. In a large bowl, whisk together the cooled melted unsalted butter, granulated sugar, pure vanilla extract, the room-temperature large egg, and a few drops of green gel food coloring. Start with a couple of drops and add more gradually until you achieve a vibrant, deep green color reminiscent of the Grinch himself. Continue whisking until the mixture is smooth and well combined.
STEP 3: Gently Combine Wet and Dry Mixtures. Gradually add the dry ingredient mixture to the wet ingredients. Using a rubber spatula, mix until they are just combined. Be careful not to overmix the dough, as this can lead to tougher cookies. Stop mixing as soon as no streaks of flour are visible.
Before you proceed, preheat your oven to 350°F (175°C). Line two baking sheets with parchment paper to prevent sticking and ensure even baking. While the oven is preheating, take this time to chop your Andes mints into small, manageable pieces for the filling. Allowing the dough to rest briefly while the oven heats can also help prevent excessive spreading during baking.


STEP 4: Scoop, Fill, and Shape. Use a 1-tablespoon cookie scoop to portion out the dough. While the dough ball is still in the scoop, use your thumb to gently press a small indentation or “hole” in the center. Carefully fill this indentation with the chopped Andes mints. Then, gently press the surrounding cookie dough back over the mints, enclosing them completely within the ball. You shouldn’t need to add extra dough; simply use what’s already in the scoop to seal the filling.
STEP 5: Roll in Green Sugar. Take each filled cookie dough ball and roll it thoroughly in the green sugar until it is completely coated. This not only adds a beautiful sparkle but also provides a pleasant textural crunch to the exterior of the cookie. Place the coated dough balls onto your prepared baking sheets, leaving about 2 inches between each to allow for spreading.
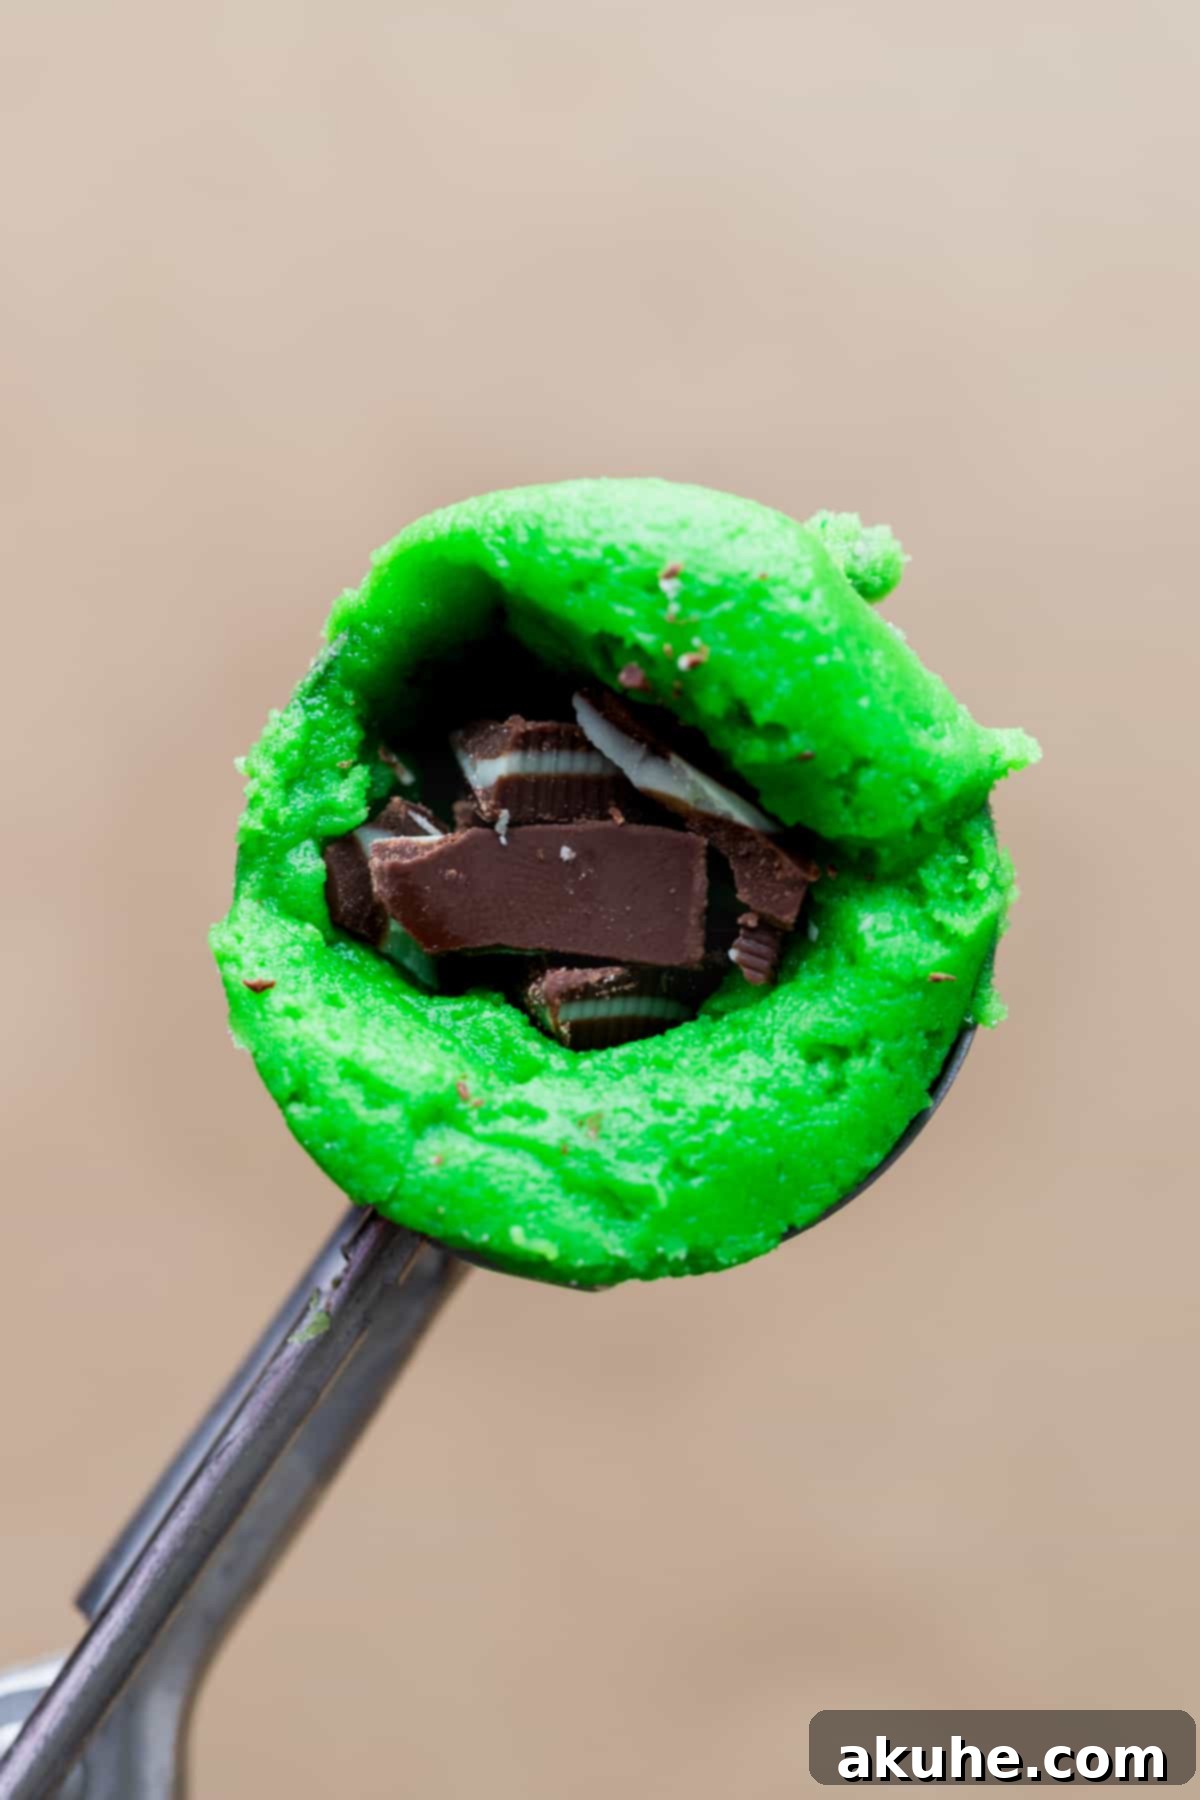

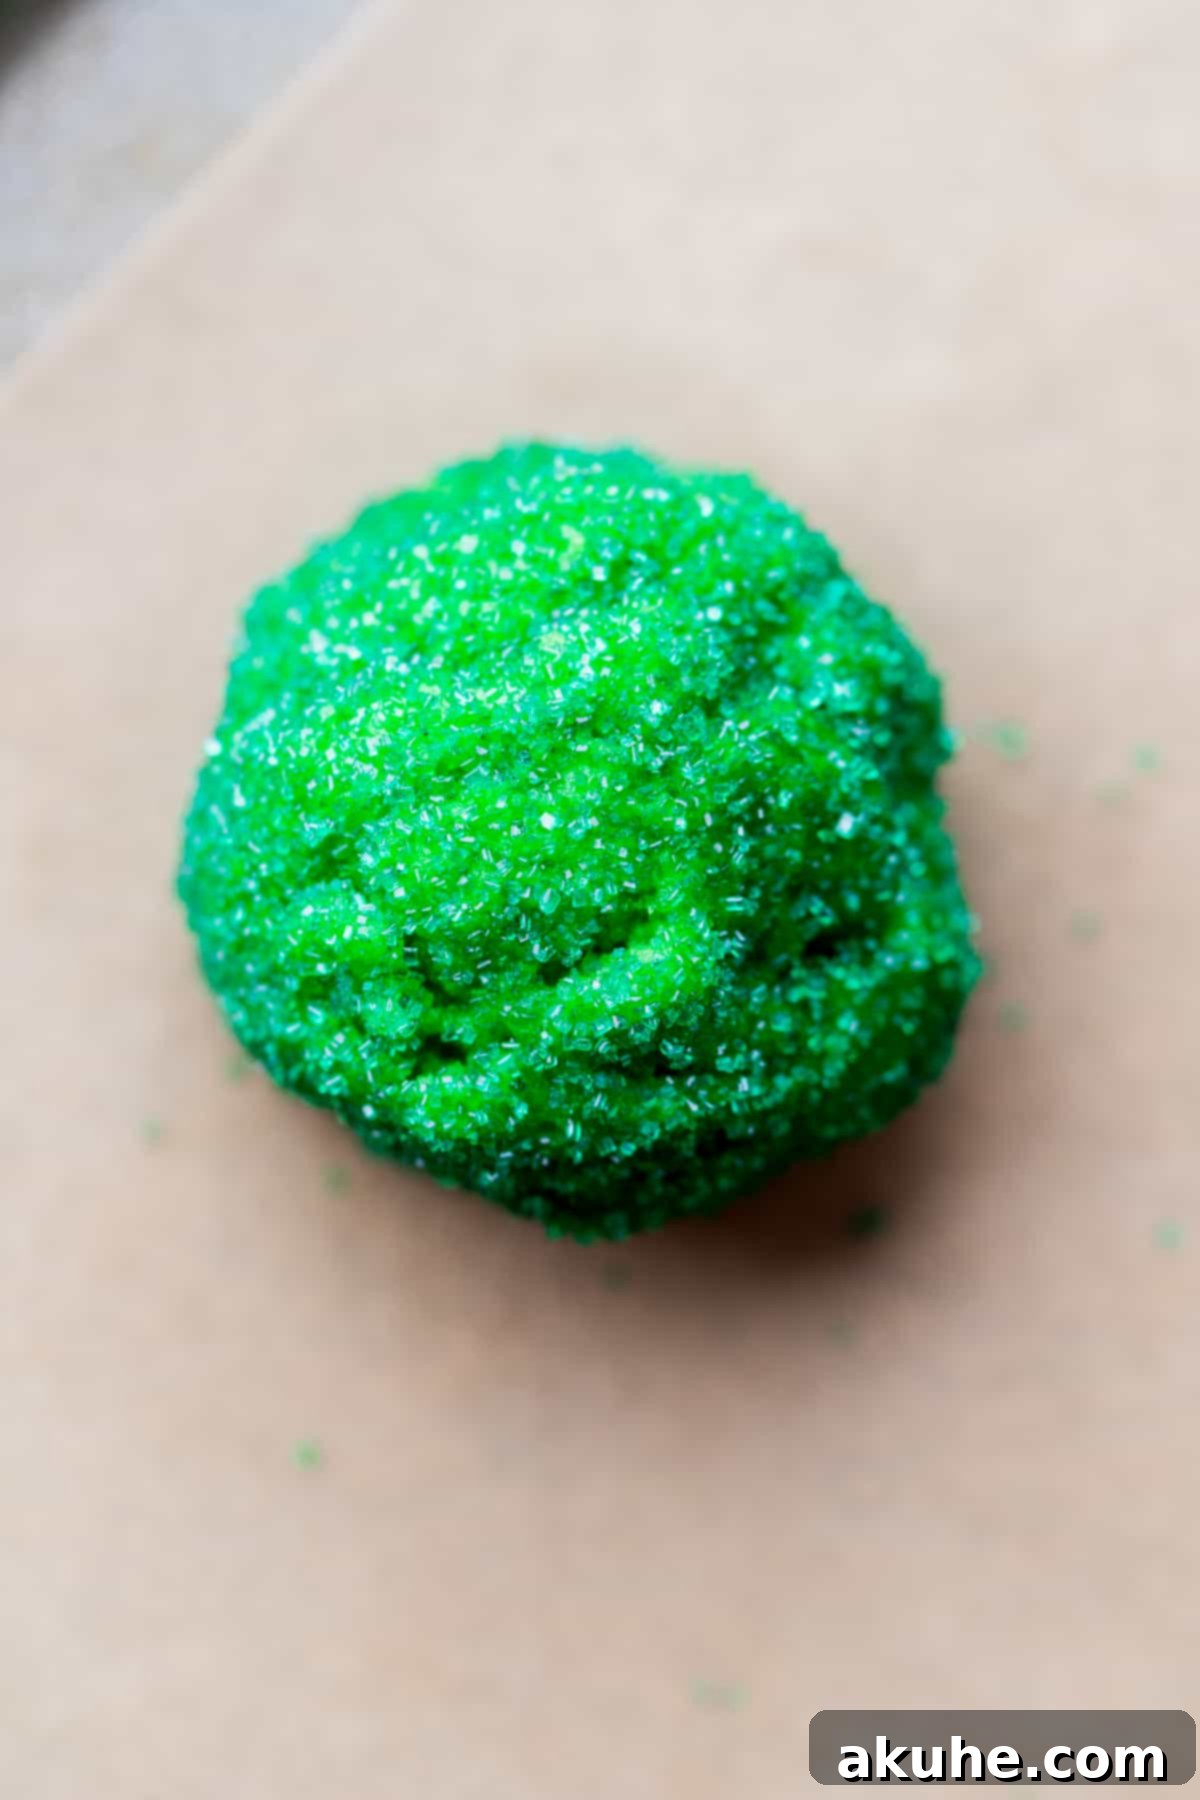
STEP 6: Bake to Perfection. Place the baking sheet with 12 cookie dough balls into the preheated oven. Bake for approximately 8-10 minutes. The cookies are done when their edges are lightly set, but the centers still look slightly soft and puffy. Overbaking can lead to dry cookies, so keep a close eye on them.
STEP 7: Decorate and Cool. As soon as the cookies come out of the oven, while they are still warm and pliable, gently press one jumbo heart sprinkle onto the top of each cookie. The residual heat will help the sprinkle adhere. Allow the cookies to cool on the baking sheet for a few minutes before carefully transferring them to a wire rack to cool completely. This ensures they maintain their shape and develop a delightful texture.
Now, your festive Grinch heart cookies are ready to be enjoyed! Prepare to delight your family and friends with these charming and delicious holiday treats.
Expert Baking Tips for Ultimate Grinch Cookie Success
Achieving bakery-worthy cookies is all about precision and a few clever tricks. Here are some expert tips to help you bake the most perfect Grinch cookies every time:
- Measure Your Flour Accurately: This is arguably one of the most critical steps for cookie success. Always spoon your flour into the measuring cup and then level it off with the back of a knife. Never scoop flour directly with your measuring cup, as this compacts the flour, leading to an excess amount. Too much flour can result in dry, crumbly cookies that don’t spread properly during baking. For ultimate accuracy, consider using a kitchen scale to measure flour by weight.
- Prevent Excessive Cookie Spreading: If your cookies are spreading too much, there are a few common culprits.
- Ensure you’re using parchment paper on your baking sheets. It provides a non-stick surface and helps regulate heat.
- The butter might have been too warm when added to the ingredients. Melted butter should be cooled to room temperature, not still warm or hot.
- If spreading is still an issue, try chilling the formed cookie dough balls in the refrigerator for 10-15 minutes before baking. This solidifies the butter, helping the cookies hold their shape.
- Overmixing the dough can also develop gluten too much, contributing to spread. Mix just until combined.
- High Altitude Baking Adjustments: For bakers living at high altitudes (typically above 3,500 feet), recipes often require minor adjustments. To combat excessive spread and ensure your cookies hold their shape, add an extra 1-2 tablespoons of all-purpose flour to the dough. This helps to strengthen the cookie structure.
- Do Not Overbake: These Grinch cookies are best when they are soft and chewy in the center. Bake them just until the edges are lightly set and very subtly golden, but the centers still look slightly soft and puffed. They will continue to set as they cool on the baking sheet.
- Room Temperature Ingredients Are Key: As mentioned, ensuring your butter is cooled melted and your eggs are at room temperature is crucial. This allows for proper emulsification, leading to a smoother dough and a more consistent, tender texture in your finished cookies.
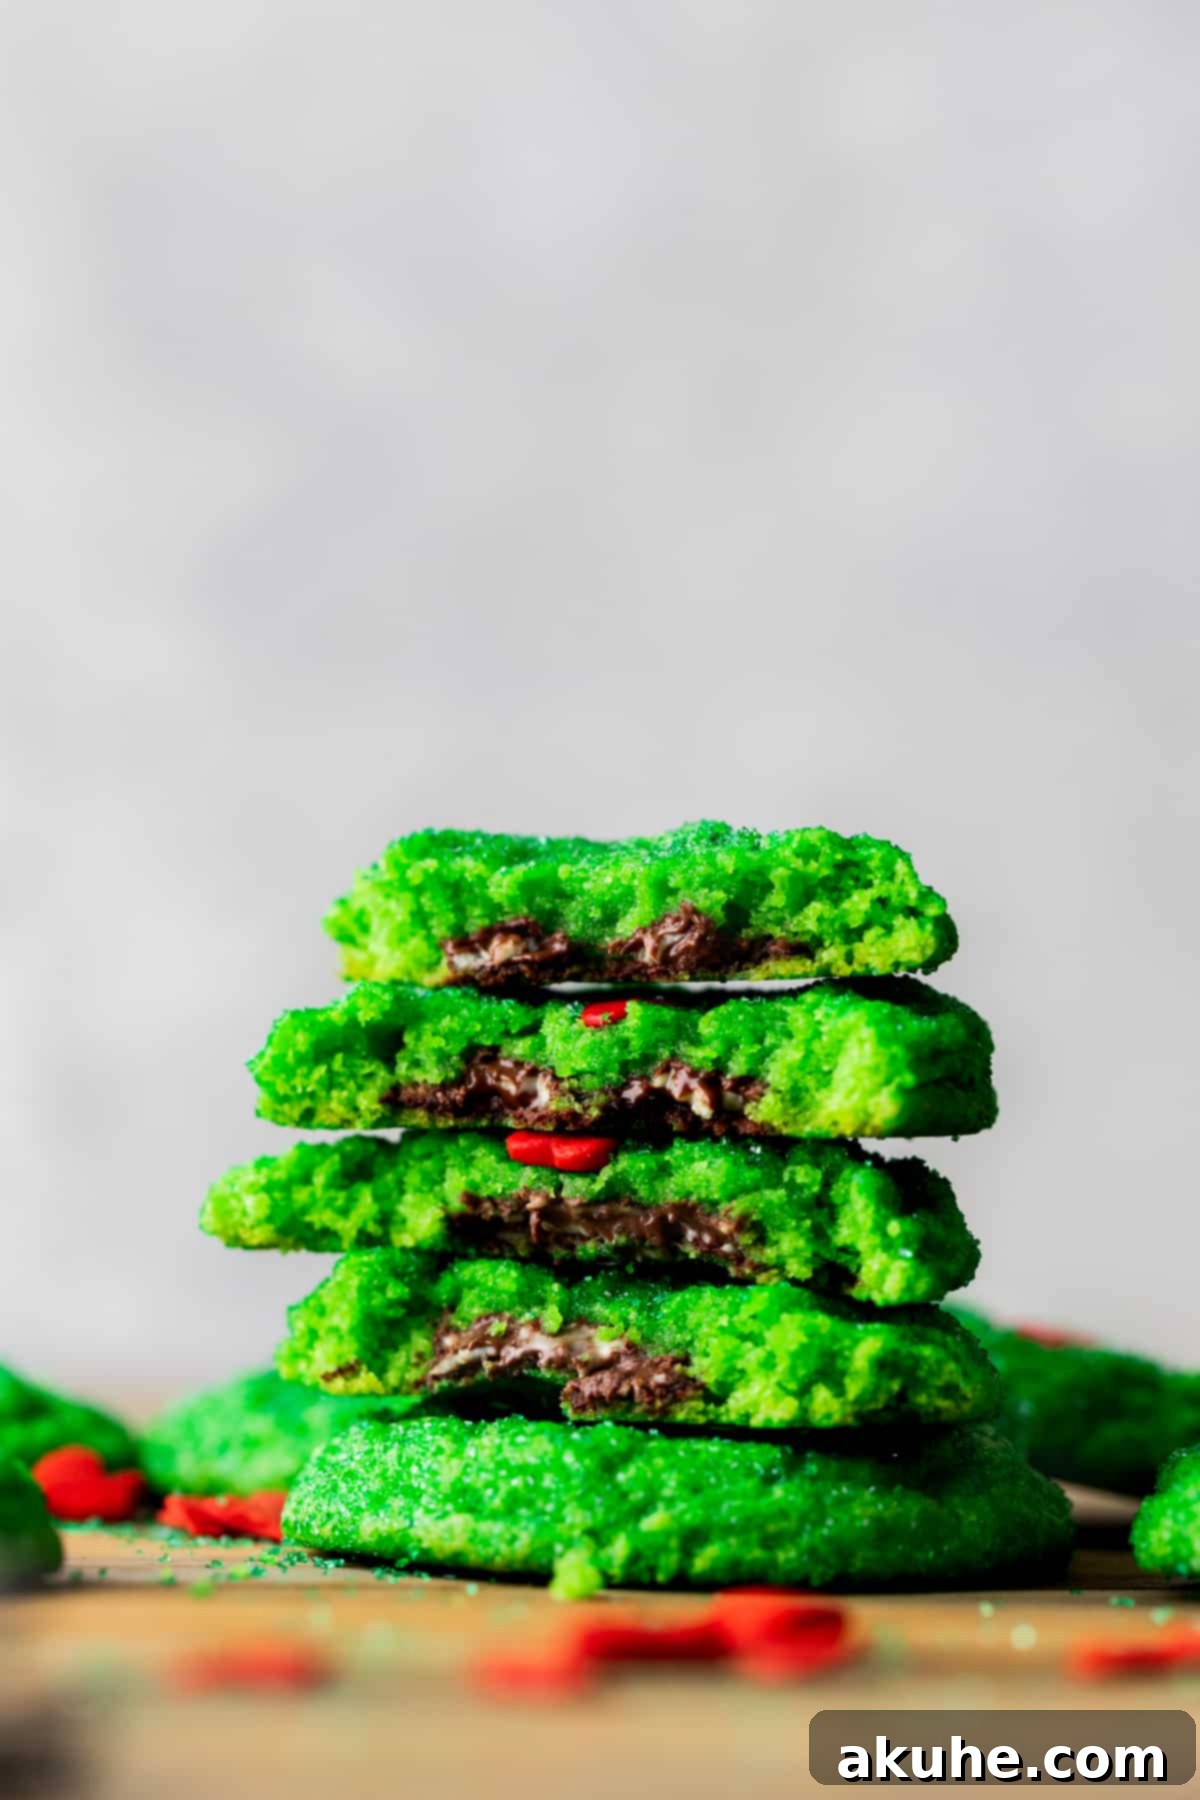
Frequently Asked Questions (FAQ) About Grinch Cookies
Here are answers to some common questions you might have while baking these delightful Grinch cookies:
While technically possible, we generally do not recommend significantly changing the size of these cookies. The recipe is designed to perfectly encase the chopped Andes mints within a 1-tablespoon dough ball. Making them much larger might result in an inadequate filling-to-cookie ratio, or the filling might be too small for the cookie. Smaller cookies might make it difficult to properly enclose the mints.
Absolutely! Freezing cookie dough balls is a fantastic way to prepare ahead. Once you’ve scooped and filled the dough balls (before rolling in green sugar), place them on a parchment-lined baking sheet and freeze until solid. Then, transfer the frozen dough balls to an airtight container or a freezer-safe bag. They can be stored in the freezer for up to 30 days. When you’re ready to bake, let the cookie dough balls thaw at room temperature for about 30 minutes before rolling in green sugar and baking as directed.
Yes, you can chill the dough overnight, which can actually help deepen the flavors and prevent spreading. However, for best results with this particular recipe, we recommend forming the dough into individual cookie balls and filling them with mints *before* chilling them overnight. Wrap the shaped dough balls tightly in plastic wrap or place them in an airtight container. Make sure they come to room temperature for about 30-60 minutes before rolling in green sugar and baking, as very cold dough may require slightly longer baking times.
No green sugar? No problem! You have a couple of options. You can use regular granulated sugar and simply omit the colored sugar coating, though you’ll lose some of the festive sparkle. Alternatively, you can create your own green sugar by placing regular granulated sugar in a zip-top bag with a few drops of green gel food coloring, shaking vigorously until the color is even, and then spreading it out on a plate to dry for a few minutes before rolling your cookie dough in it.
The key to a truly vibrant Grinch green is using high-quality gel food coloring. Start with a few drops and gradually add more, mixing thoroughly after each addition, until you achieve your desired shade. Gel food coloring provides intense color without thinning your dough, unlike liquid food coloring. Remember, the color will generally remain consistent after baking.
Exciting Grinch Cookie Recipe Variations
While the original Grinch cookie recipe is perfect as is, you can always experiment with fun variations to customize them for your taste or occasion:
- Alternative Chocolate Fillings: Instead of Andes mints, consider filling your cookies with other delightful chocolates! Try mini peanut butter cups, chopped Snickers bars, small pieces of caramel, white chocolate chunks, or even classic milk or dark chocolate chips for a different flavor profile.
- Mint Extract Boost: For an even more intense mint flavor, add about ¼ to ½ teaspoon of pure mint extract to your wet ingredients along with the vanilla. Adjust to your taste preference.
- Skipping the Filling: If you prefer a simpler sugar cookie, you can certainly decide to skip the chocolate filling altogether. The green sugar cookie base is delicious on its own! You could even add a simple mint frosting or a vanilla glaze on top.
- Different Sprinkles or Decorations: While the jumbo heart sprinkles are iconic, feel free to use other festive sprinkles! Red and green nonpareils, edible glitter, or even a light dusting of powdered sugar can add a unique touch.
- Grinch Cookie Sandwiches: Take these cookies to the next level by sandwiching two together with a creamy mint buttercream frosting or a simple vanilla frosting tinted green.
Special Tools for Baking Grinch Cookies
While many baking projects require specialized equipment, these Grinch cookies are relatively simple. However, a few tools can make the process even smoother and more enjoyable:
- Parchment Paper: Using parchment paper is a game-changer for baking cookies. It prevents sticking, ensures even baking, and makes cleanup a breeze. We highly recommend using premade sheets of parchment paper; they lie flat and are incredibly convenient compared to rolls that curl.
- Large Cookie Scoop (1 Tablespoon): A cookie scoop ensures that all your cookies are uniform in size, which leads to even baking. For this recipe, a 1-tablespoon cookie scoop is perfect for creating consistently sized dough balls that hold the mint filling perfectly.
- Wire Cooling Rack: Essential for allowing your cookies to cool properly. A wire rack promotes air circulation, preventing the bottoms from becoming soggy and helping the cookies achieve that ideal chewy-yet-crisp texture.
- Rubber Spatula: Great for scraping down the sides of the bowl and mixing ingredients gently, especially when combining the wet and dry dough without overmixing.
Storing and Freezing Your Delicious Grinch Cookies
To keep your Grinch cookies fresh and delicious for as long as possible, proper storage is key:
Store the baked Grinch cookies in an airtight container at room temperature. They will remain wonderfully fresh and chewy for up to 5 days. For best results, place a piece of parchment paper between layers of cookies if stacking them to prevent sticking.
Freezing Baked Grinch Cookies
If you’ve baked a large batch or simply want to enjoy these festive treats beyond the immediate holiday season, you can easily freeze the baked cookies. Place the cooled cookies in a single layer on a baking sheet and freeze until solid. Once frozen, transfer them to an airtight freezer bag or container, separating layers with parchment paper. They will keep well in the freezer for up to 30 days. To enjoy, simply thaw them at room temperature for 1-2 hours before eating. You can also warm them slightly in the microwave for a few seconds for that fresh-baked feel.
Discover More Festive Holiday Recipes
The holiday season is a perfect time to explore new baking adventures. If you loved making these Grinch cookies, you’ll surely enjoy these other delightful Christmas cookie recipes:
- Charming Snowman Cookies
- Decadent Chocolate Peppermint Cookies
- Sweet Cherry Cookies
- Cozy Hot Cocoa Cookie Blossoms
- Irresistible Pecan Pie Cookies
We hope you adore these Grinch Cookies as much as we do! If you loved this recipe, please take a moment to leave a STAR REVIEW below. We’d also love to see your creations! Make sure to tag us on Instagram @stephaniesweettreats. For more delicious baking ideas and inspiration, be sure to follow us on Pinterest. Happy baking and happy holidays!

Grinch Cookies
These festive Grinch Christmas cookies are vibrant green sugar cookies generously loaded with chopped Andes mints. Each cookie is rolled in sparkling green sugar and beautifully topped with a jumbo heart sprinkle, making them a perfect holiday treat.
Ingredients
- 1 1/3 cups All-purpose flour
- 1/4 tsp Baking soda
- 1/4 tsp Baking powder
- 1/2 tsp Salt
- 1/2 cup Unsalted butter, melted and cooled to room temperature
- 3/4 cup White granulated sugar
- 1 tsp Pure vanilla extract
- 1 Large egg, room temperature
- Green gel food dye, a couple drops (e.g., Americolor)
- Green sugar, for rolling the cookies
- 17 Andes mints, chopped
- 16 Jumbo heart sprinkles
Instructions
In a medium bowl, sift or whisk together the all-purpose flour, baking powder, baking soda, and salt. Set aside.
In a large bowl, mix the cooled melted butter, granulated sugar, vanilla extract, room-temperature egg, and a couple of drops of green gel food coloring. Whisk until smooth and the color is even and vibrant.
Gradually add the dry ingredients to the wet mixture. Use a rubber spatula to mix until just combined. Be careful not to overmix.
Preheat your oven to 350°F (175°C) and line 2 cookie sheets with parchment paper. Let the dough rest while the oven preheats, and chop the Andes mints into small pieces.
Using a 1-tablespoon cookie scoop, scoop a portion of dough. While still in the scoop, press a hole in the center of the dough ball with your thumb. Fill this hole with chopped Andes mints, then gently press the dough around the mints to enclose them fully (no need for extra dough).
Roll each filled dough ball completely in the green sugar. Place 12 cookie dough balls on each prepared cookie sheet, spaced about 2 inches apart.
Bake for 8-10 minutes, until the edges are lightly set and the centers are still slightly soft. Immediately after removing from the oven, gently press one jumbo heart sprinkle onto the top of each warm cookie. Transfer to a wire rack to cool completely.
Notes
Flour Measurement: Always spoon and level your flour, or use a kitchen scale for precise measurement. Compacted flour can lead to dry cookies and prevent proper spreading.
High Altitude Baking: If you live at a high altitude, consider adding an extra 1-2 tablespoons of flour to your dough to help maintain the cookie’s structure and prevent excessive spreading.
Room Temperature Ingredients: For optimal dough consistency and a superior cookie texture, ensure all dairy ingredients (butter and eggs) are at room temperature before mixing. This allows them to emulsify better and create a smoother batter.
Nutrition Information (per serving)
Carbohydrates: 18g
Protein: 1g
Fat: 6g
Saturated Fat: 4g
Polyunsaturated Fat: 0.3g
Monounsaturated Fat: 2g
Trans Fat: 0.2g
Cholesterol: 15mg
Sodium: 98mg
Potassium: 13mg
Fiber: 0.3g
Sugar: 10g
Vitamin A: 177IU
Calcium: 7mg
Iron: 1mg
