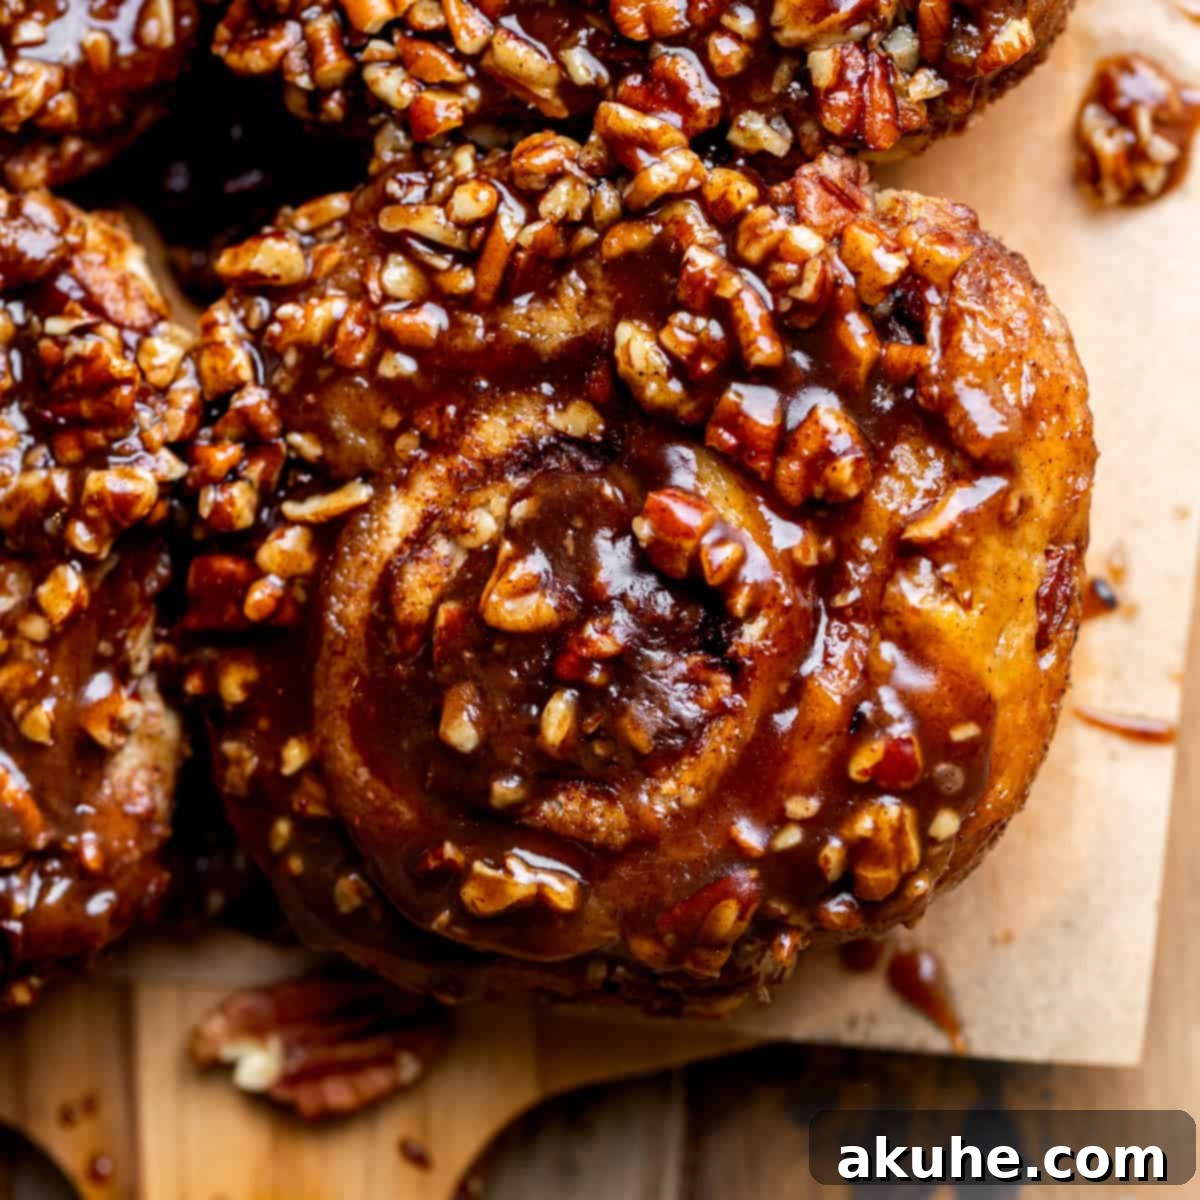
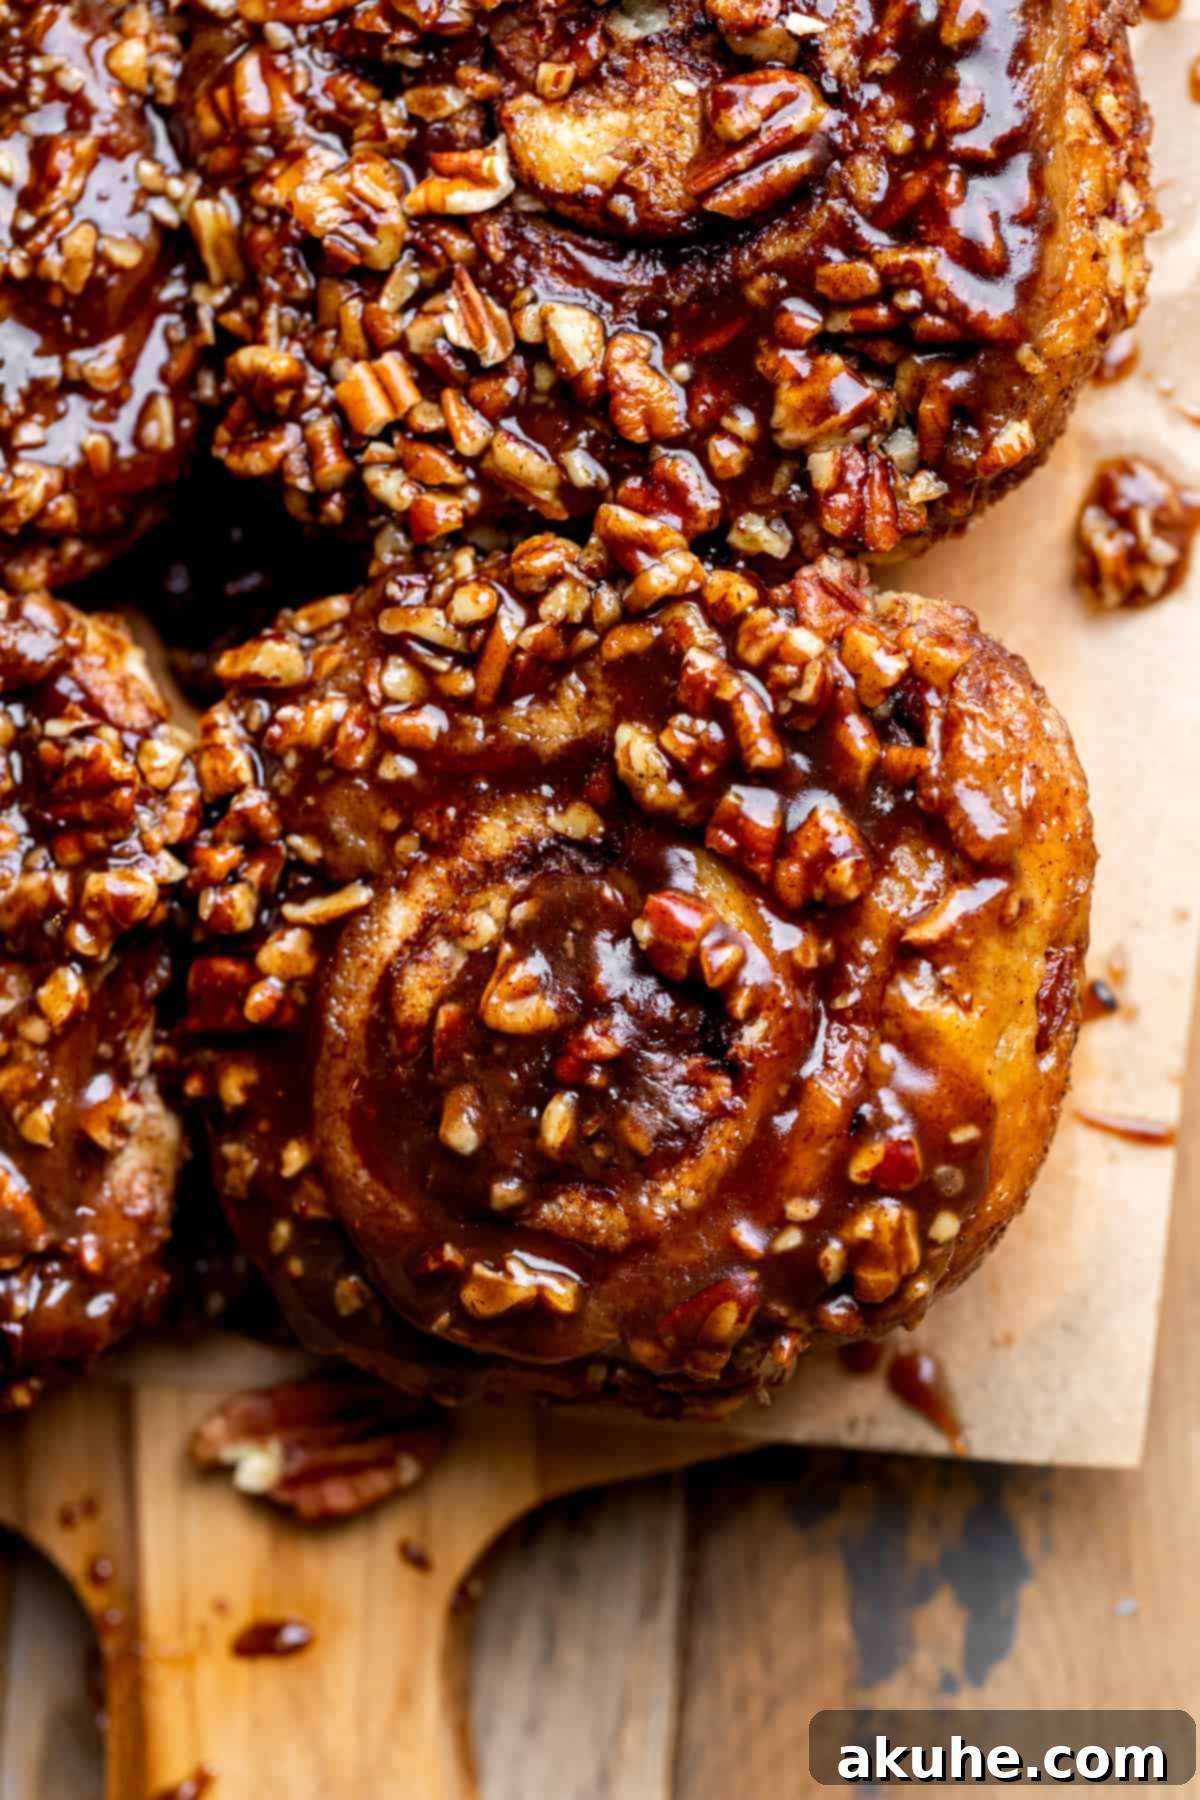
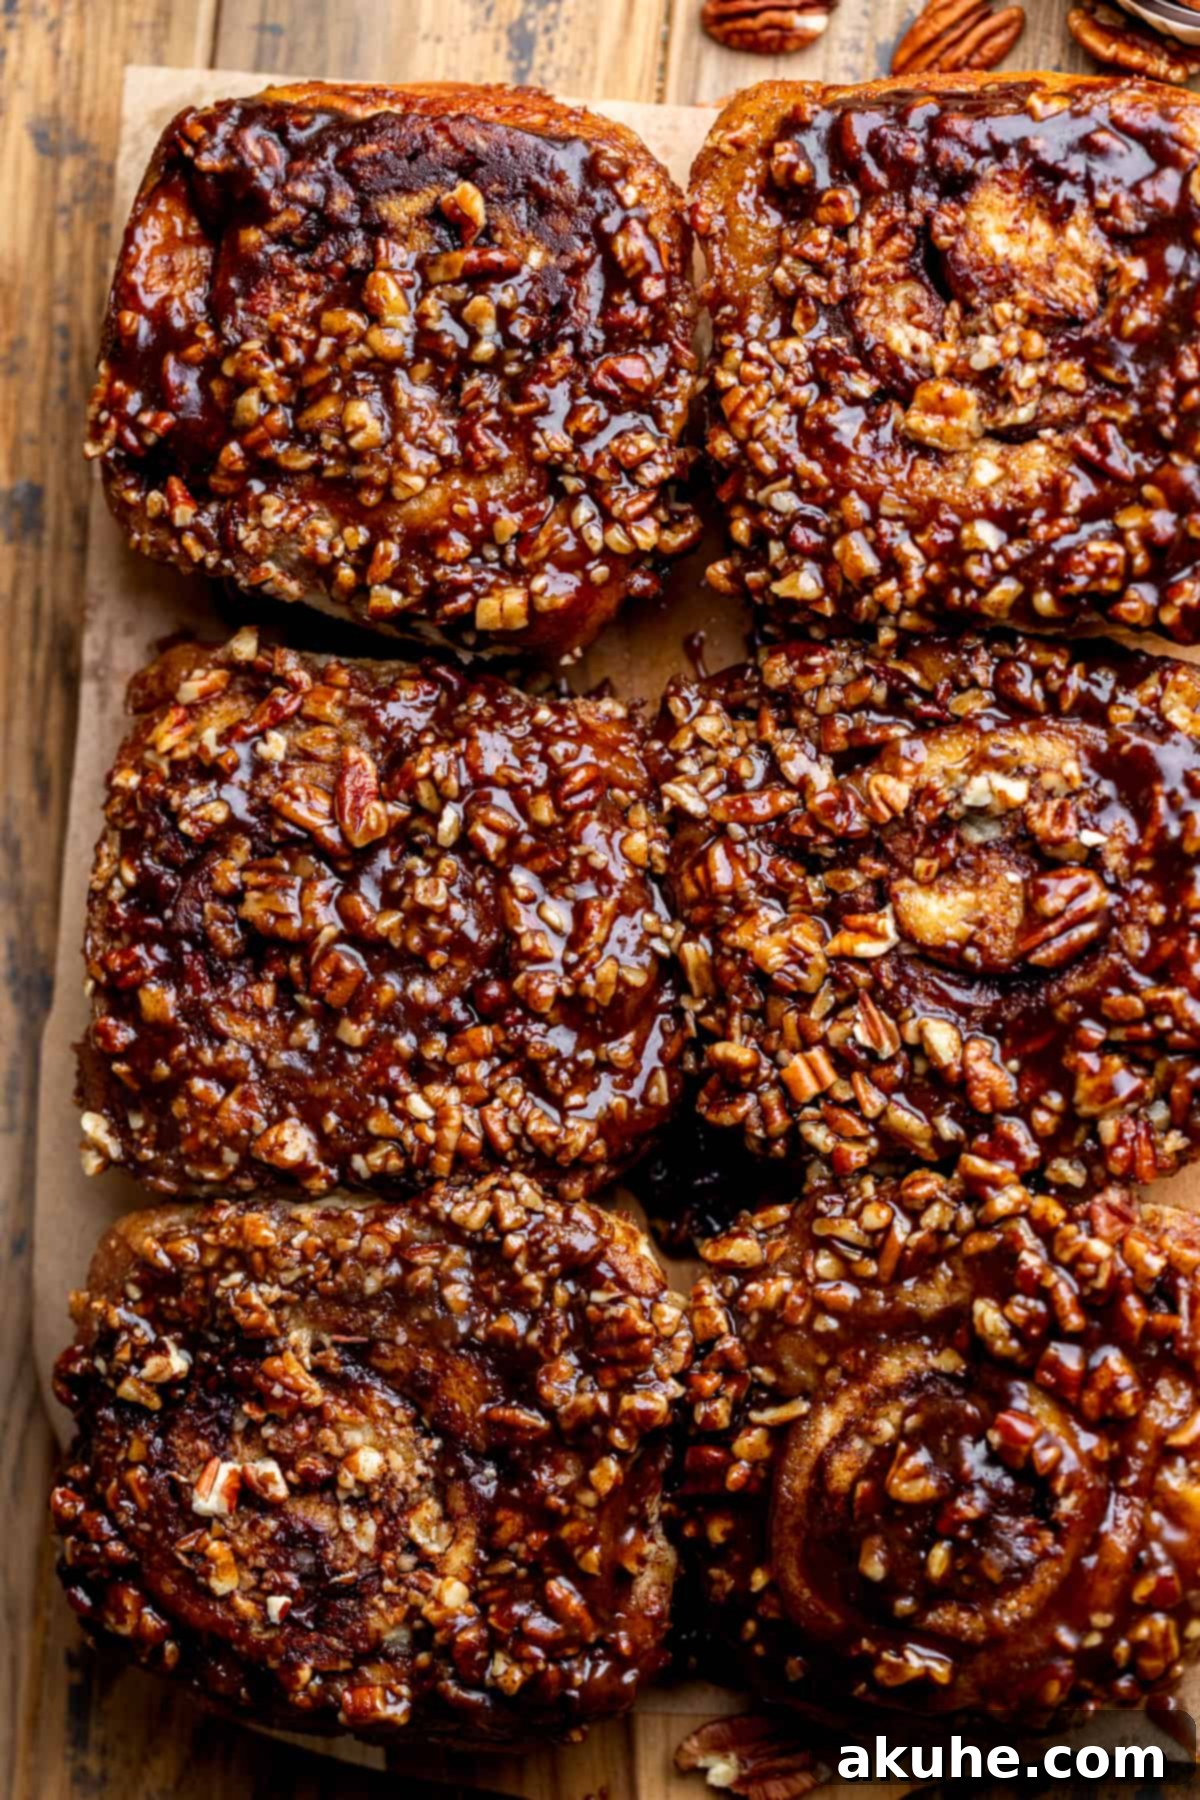
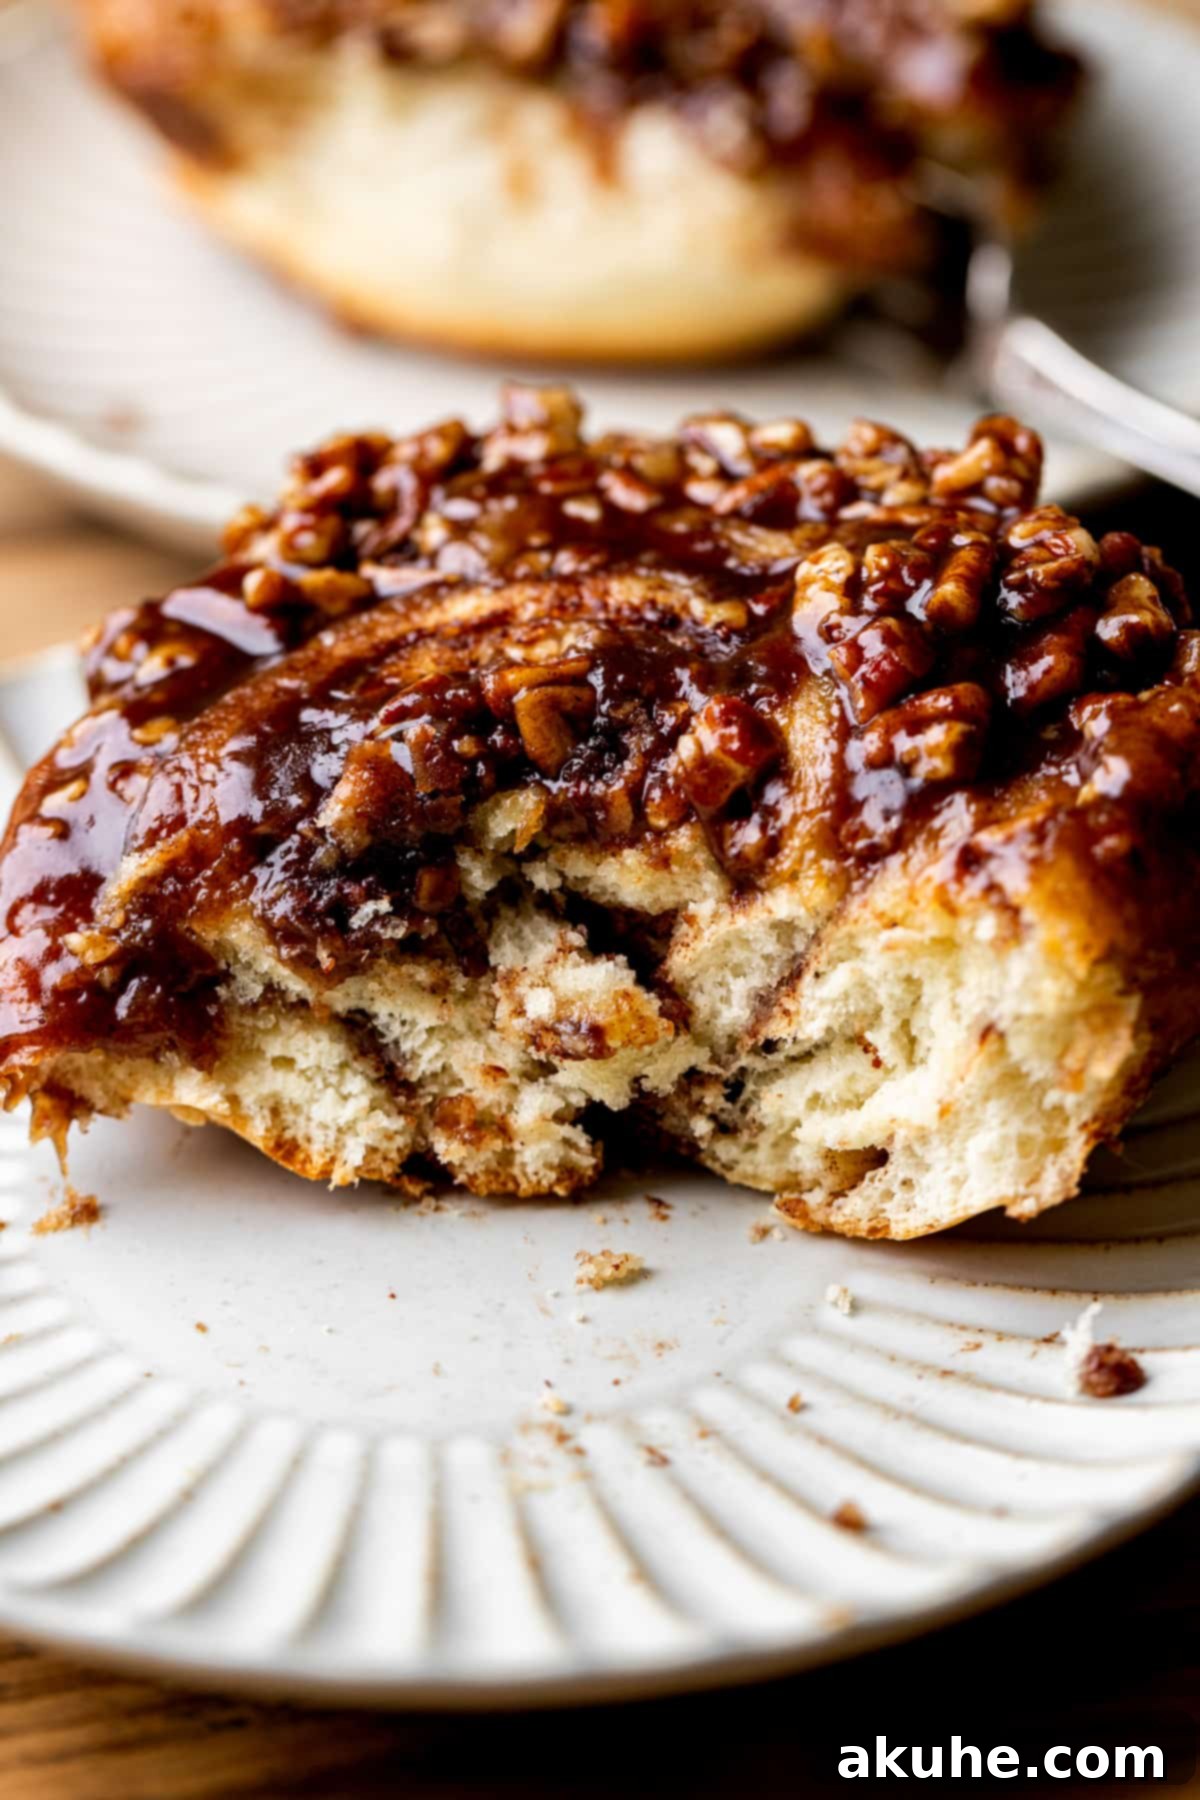
Welcome to the ultimate guide for creating magnificent, Giant Sticky Buns! These aren’t your average cinnamon rolls; we’re talking about colossal, incredibly soft, and generously topped sweet rolls designed to deliver that coveted gooey center with every bite. Imagine waking up to the aroma of warm cinnamon, sweet maple, and toasted pecans – that’s the promise of these homemade sticky buns. This recipe yields six extraordinarily large buns, each bathed in a decadent maple pecan sticky topping that bakes right onto the bottom, transforming into a glorious glaze when flipped.
There’s a reason these classic sweet rolls have stood the test of time, and this supersized version elevates the experience to new heights. The dough is tender and fluffy, the cinnamon filling is rich and fragrant, and the maple pecan topping provides the perfect balance of sweetness and crunch. What’s even better? You can prepare the dough the day before, making it incredibly convenient to bake fresh sticky buns on a busy morning. They’re perfect for a special breakfast, a festive brunch, or a comforting treat any time you crave something truly extraordinary.
If you’re a fan of delightful bread recipes and crave more baking adventures, be sure to explore our Chocolate Glazed Donuts, Soft Pretzel Bites, and Chocolate Zucchini Bread for more irresistible treats.
Why This Giant Sticky Bun Recipe is a Must-Try
Our Giant Sticky Buns stand out from other sweet roll recipes, offering a unique combination of flavor, size, and convenience. Here’s what makes this recipe truly special:
- Unbelievably Giant Buns: Forget small, fiddly rolls! These sticky buns are intentionally extra-large, ensuring that you get a generous portion of that soft, tender, and incredibly gooey center in every single bite. The increased size means more surface area for the cinnamon swirl and more indulgent topping.
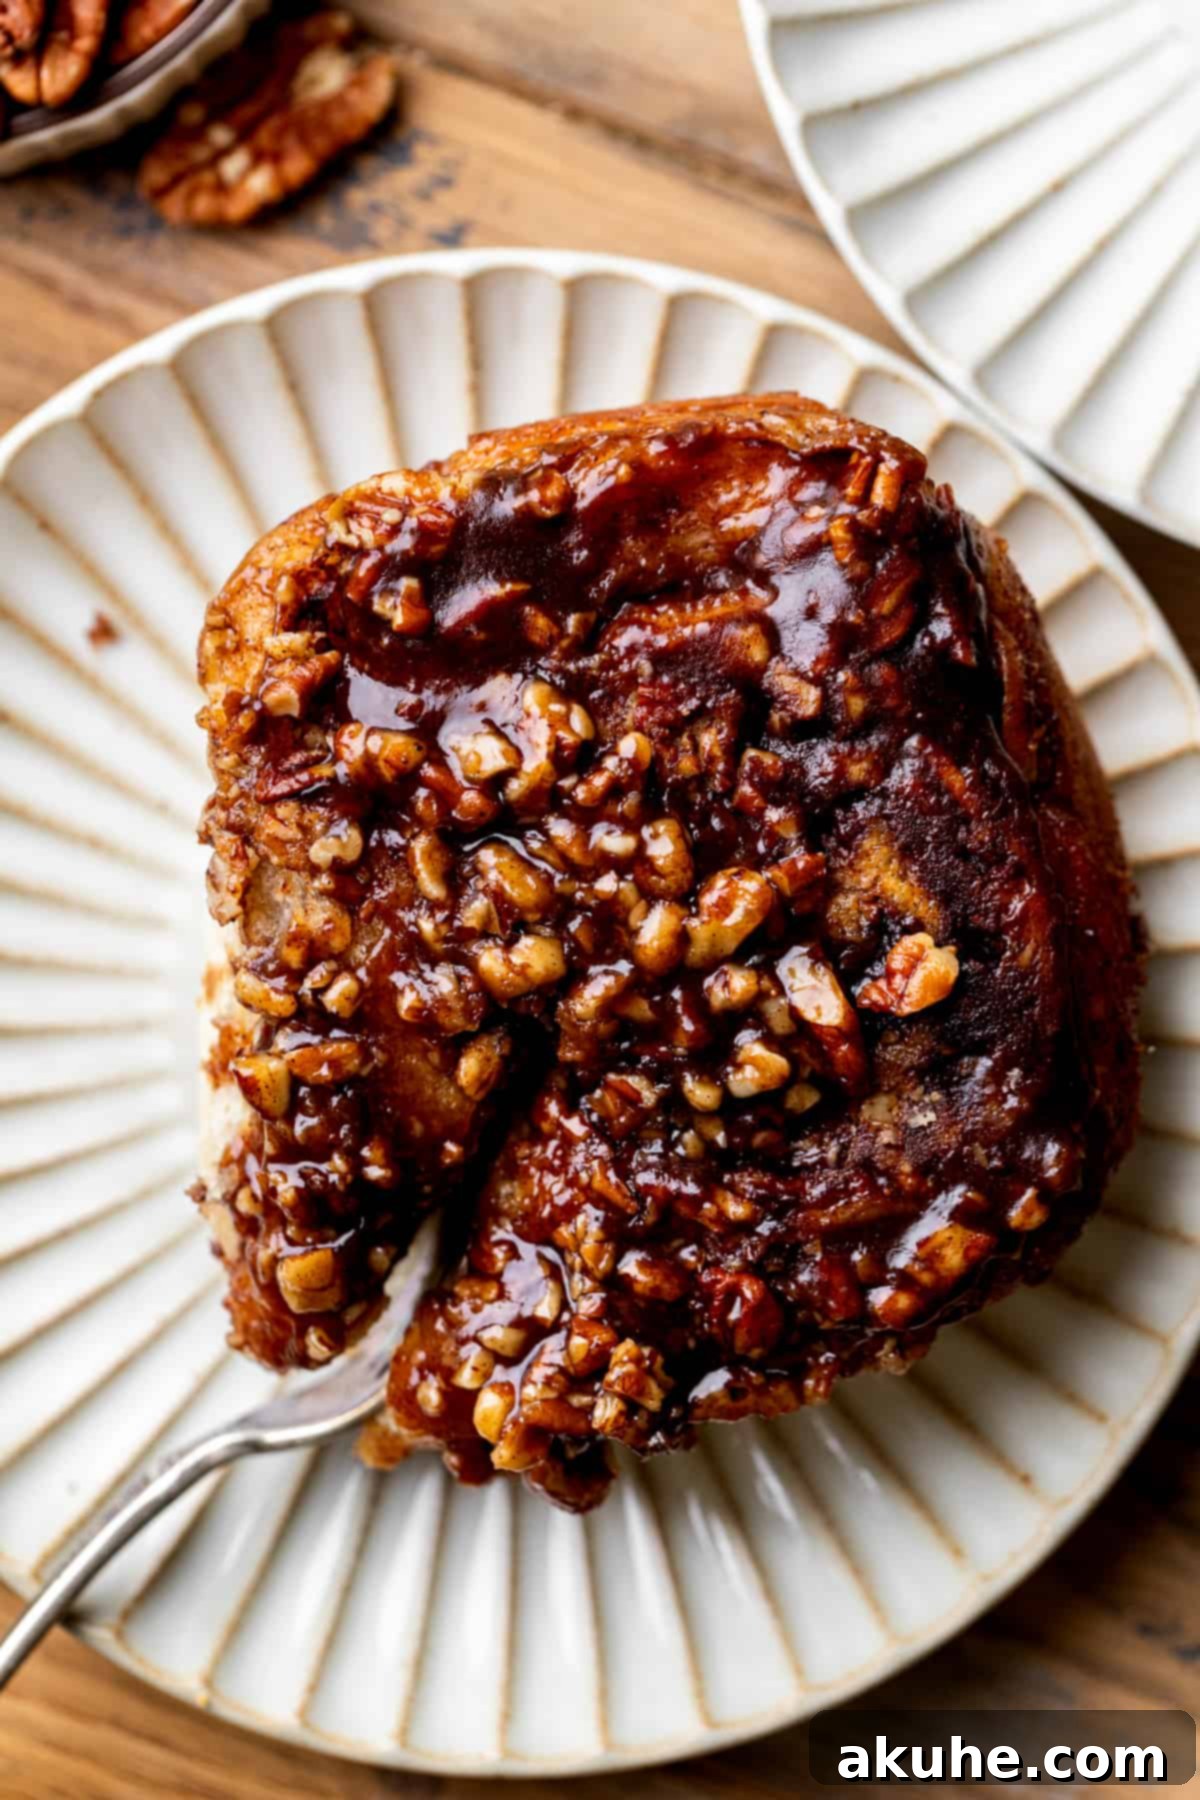
- Irresistible Maple Pecan Topping: The star of the show! A rich, buttery maple and pecan sticky topping bakes directly onto the bottom of the rolls. When you flip them out of the pan, this glorious, caramelized glaze coats the top, adding a sweet, nutty flavor and a satisfying crunch that perfectly complements the soft, fluffy buns.
- Convenient Make-Ahead Option: Life is busy, but delicious homemade treats don’t have to be a distant dream. This recipe offers the flexibility to prepare the dough the day before and let it rise slowly overnight in the refrigerator. This not only makes morning baking a breeze but also enhances the flavor and texture of the dough, allowing you to wake up to fresh-from-the-oven sticky buns with minimal effort.
- Classic Comfort with a Twist: While rooted in the beloved tradition of sticky buns, our recipe’s emphasis on “giant” proportions and a perfectly balanced maple pecan glaze offers a fresh, exciting take on a timeless classic. It’s comfort food elevated for a truly memorable experience.
Essential Ingredient Notes for Perfect Pecan Sticky Buns
Understanding your ingredients is key to successful baking. Here are some detailed notes to ensure your giant sticky buns turn out perfectly. For a complete list of quantities, refer to the full recipe card below.
- Unsalted Butter: Always use unsalted butter unless specified otherwise, as it gives you control over the salt content. For optimal dough texture and easy incorporation, ensure your butter is softened to room temperature. This typically means pulling it out of the fridge at least 2 hours before you plan to use it. Cubing it beforehand can help it soften more evenly.
- Milk: The type of milk (whole, 2%, skim, or even non-dairy alternatives) can affect the richness, but the temperature is critical. Warm your milk to precisely 110°F (43°C). If it’s too hot, it will kill the active dry yeast, preventing your dough from rising. If it’s too cool, the yeast will activate too slowly, leading to a long or incomplete rise. Use a thermometer for accuracy!
- Active Dry Yeast: This recipe calls for 1 packet of active dry yeast, which is generally equivalent to 2 ¼ teaspoons. While instant yeast can often be substituted directly, avoid “fast-rise” or “rapid-rise” yeast as it behaves differently and might affect the final texture and proofing times in this specific recipe. Always check the expiration date on your yeast; old yeast won’t activate properly.
- Eggs: Like butter, eggs should be at room temperature. This allows them to incorporate more smoothly and evenly into the dough, leading to a more consistent and tender crumb. Lightly beat them before adding to the flour mixture to ensure they are fully combined without overmixing the dough.
- Brown Sugar: We recommend light brown sugar for its balanced molasses flavor, which complements the cinnamon beautifully. However, dark brown sugar can also be used for a deeper, richer molasses taste in both the filling and the topping. Ensure it’s packed firmly when measuring to get the correct amount.
- All-Purpose Flour: Proper flour measurement is crucial for the right dough consistency. Always spoon your flour into the measuring cup and level it off with a straight edge. Scooping directly from the bag can compact the flour, leading to an excess amount that will result in a dry, dense dough.
Ingredient Substitutions
Need to make a few tweaks? Here are some simple substitutions:
- Dairy-Free Option: This recipe can easily be adapted for dairy-free diets. Simply substitute your favorite dairy-free milk (e.g., almond milk, soy milk) and dairy-free butter alternatives. Ensure they are suitable for baking.
- Pecans: If pecans aren’t your preference or readily available, walnuts make an excellent substitute in the sticky topping, offering a similar crunch and nutty flavor.
Step-by-Step Instructions: Dough and Cinnamon Filling
Creating these luscious giant sticky buns is a rewarding process. Follow these detailed instructions for crafting the perfect dough and flavorful cinnamon filling.
STEP 1: Activate the Yeast. In a microwave-safe mug or bowl, warm the milk for about 45 seconds, or until it reaches precisely 110°F (43°C). This warm temperature is ideal for activating the yeast. Sprinkle the active dry yeast evenly over the surface of the warm milk. Do not stir it in. Allow it to sit undisturbed for 10 minutes. During this time, the yeast should bloom, forming a foamy layer on top, indicating it is active and ready to use.
STEP 2: Prepare Dry Ingredients and Incorporate Butter. Sift the all-purpose flour into a large mixing bowl. Sifting helps to aerate the flour and prevent lumps, contributing to a lighter dough. Stir in the granulated white sugar and salt until well combined. Add the cubed, room-temperature unsalted butter to the flour mixture. Using a pastry blender or your fingertips, work the butter into the flour until the mixture resembles coarse crumbs with butter pieces no larger than small peas. This technique creates pockets of butter in the dough, resulting in a tender texture.
STEP 3: Form the Dough. Once your yeast mixture is foamy, add the lightly beaten room-temperature eggs and the activated yeast mixture to the large bowl with the flour and butter. If using a stand mixer, attach the dough hook and mix on low speed. Continue mixing until all ingredients are combined and a cohesive dough starts to form, pulling away from the sides of the bowl. (For hand-mixing instructions, refer to the “Notes” section of the recipe card below).
STEP 4: Knead the Dough. Increase the mixer speed to medium and let the dough knead for 5 minutes. Proper kneading develops the gluten in the flour, which is essential for the dough’s elasticity and soft texture. The dough should become smooth and elastic. Lightly spray a separate large mixing bowl with nonstick cooking spray, then transfer the kneaded dough into it.
STEP 5: First Rise (Proofing).
- For Overnight Rise (Recommended): For maximum convenience and enhanced flavor, cover the bowl tightly with plastic wrap or aluminum foil. Place the covered bowl in the refrigerator and let the dough rise slowly overnight (8-12 hours). This cold fermentation develops deeper flavors and a wonderful texture.
- For Same-Day Rise: If you’re eager to bake right away, preheat your oven to 200°F (93°C). Once it reaches temperature, turn the oven off immediately. Cover the dough bowl with a clean kitchen towel, then place it inside the warm (but off) oven with the door slightly ajar. Allow it to rise for 1 hour, or until it has roughly doubled in size.
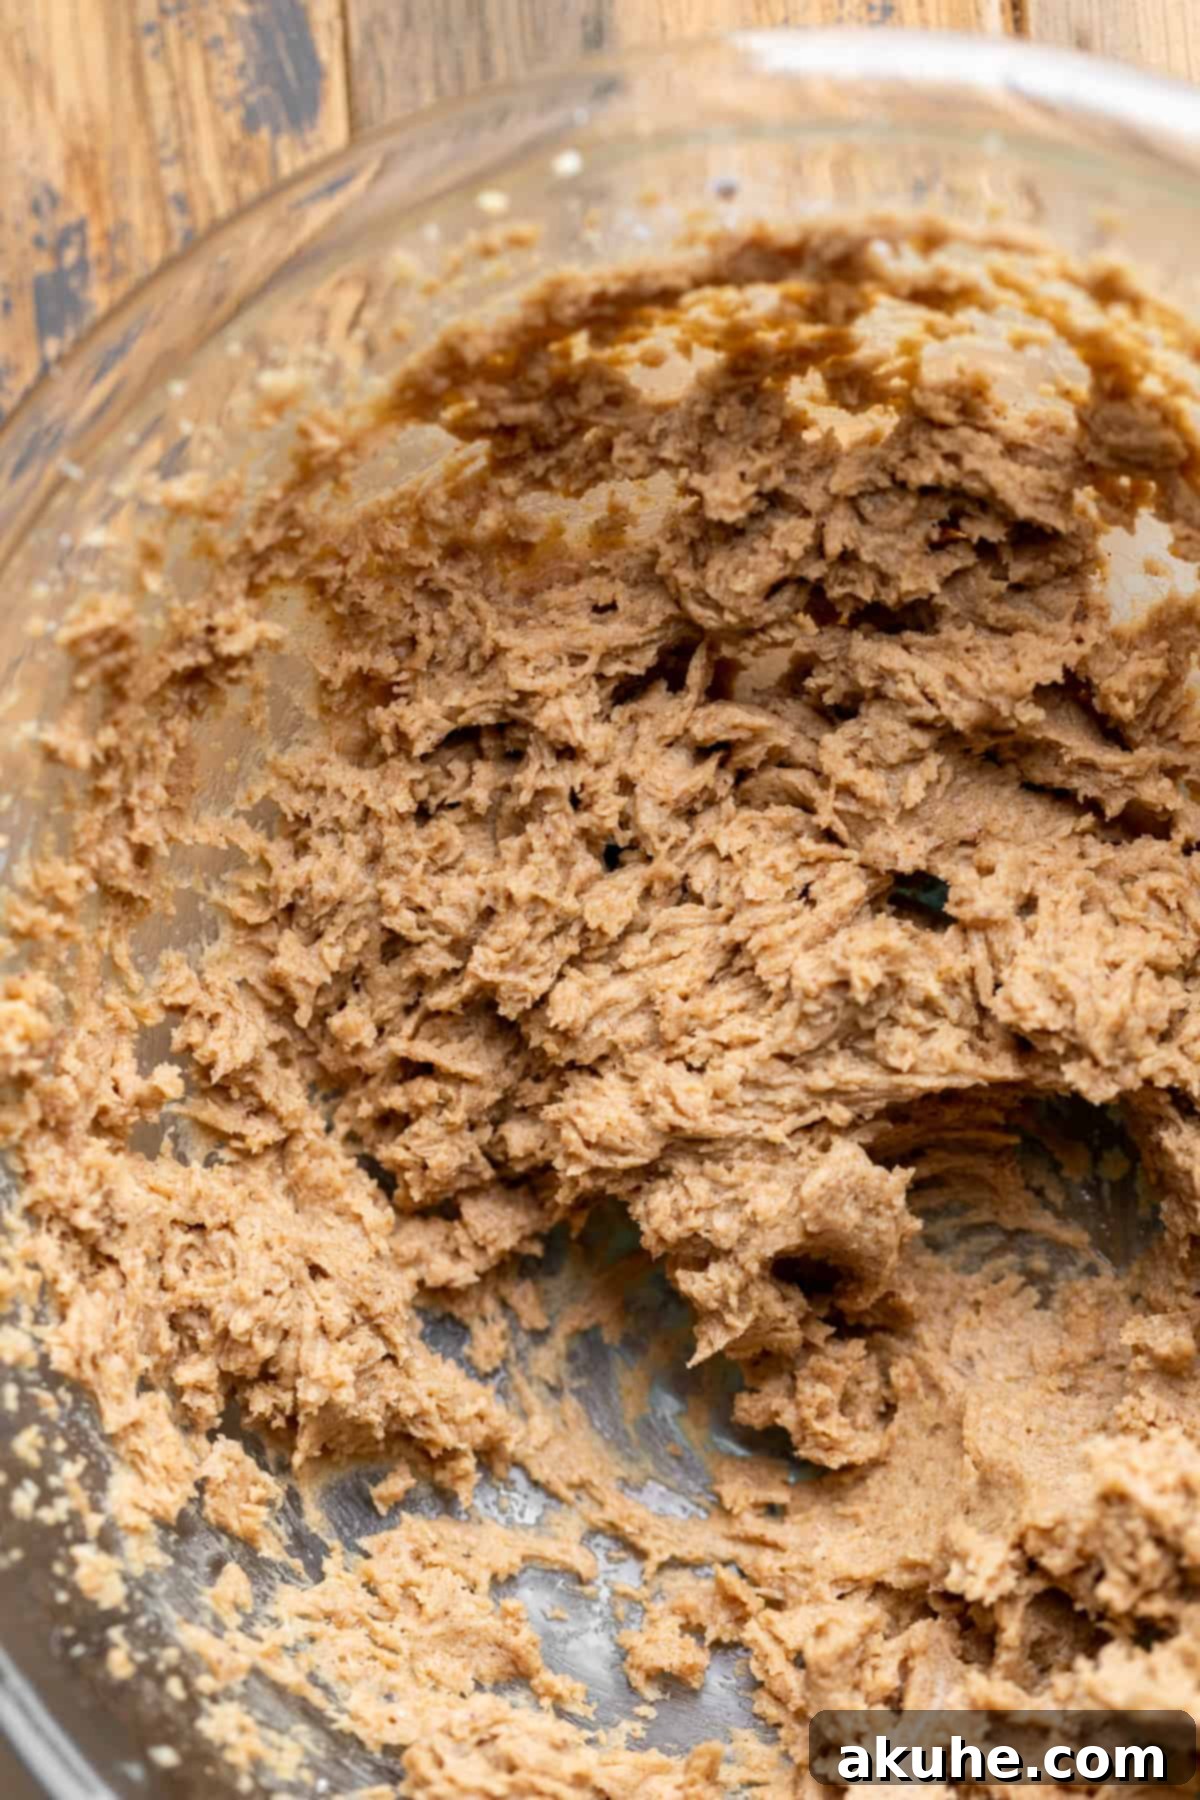
STEP 6: Prepare the Cinnamon Filling. While the dough is on its first rise, prepare the irresistible cinnamon filling. In a small bowl, use a hand mixer to beat the room-temperature unsalted butter on high speed until it’s light and creamy. Add the brown sugar and ground cinnamon, then beat again until the mixture is completely smooth and well combined. Set aside at room temperature.
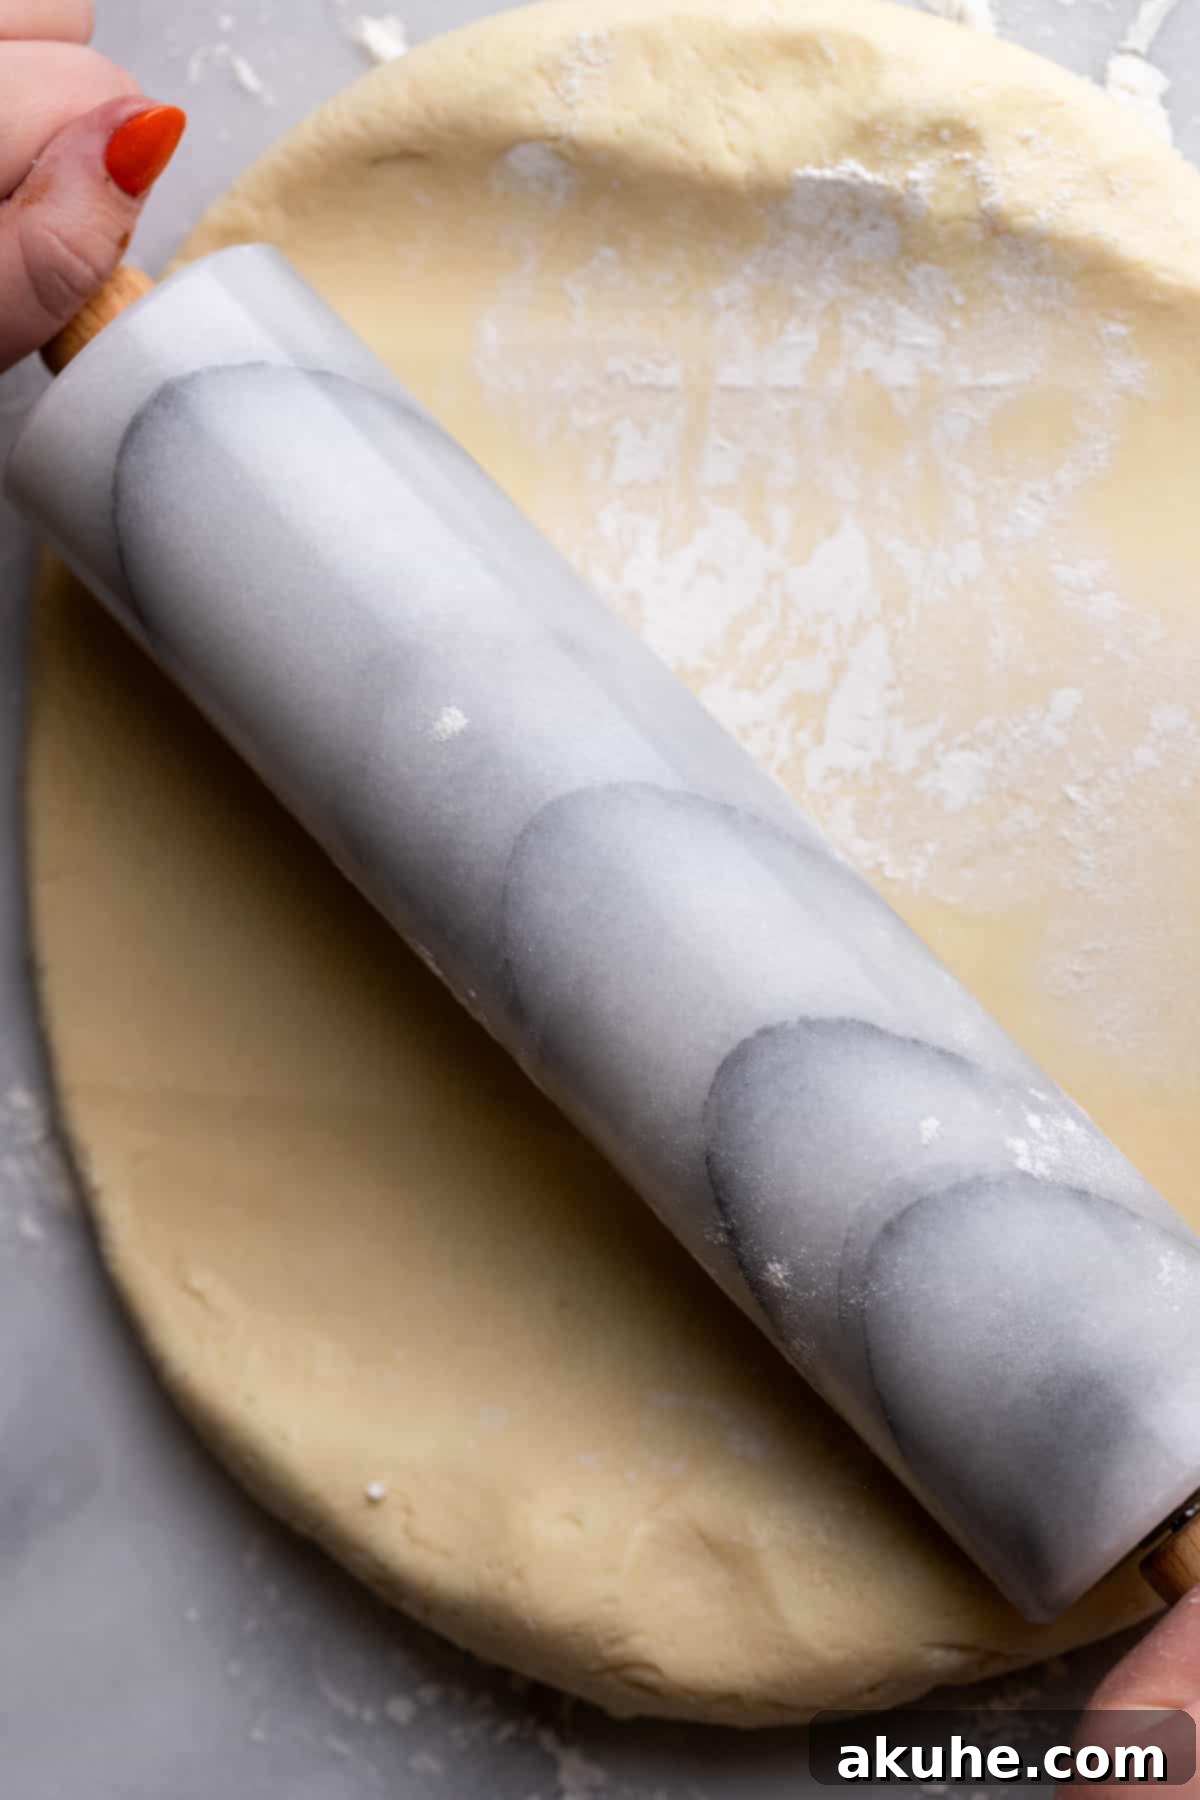
Step-by-Step Instructions: Maple Pecan Sticky Topping and Baking
Now that your dough is ready and the cinnamon filling is prepared, it’s time to assemble and bake these magnificent giant sticky buns with their signature maple pecan topping.
STEP 1: Beat Butter and Sugar for Topping. In a medium bowl, use a mixer to beat the room-temperature unsalted butter and brown sugar on high speed for 2 minutes. This creates a light and fluffy base for the topping.
STEP 2: Combine Remaining Topping Ingredients. Add the pure vanilla extract, rich maple syrup, heavy cream, a pinch of salt, cornstarch (which helps thicken the topping), and ground cinnamon to the butter and sugar mixture. Mix until all ingredients are thoroughly combined and smooth.
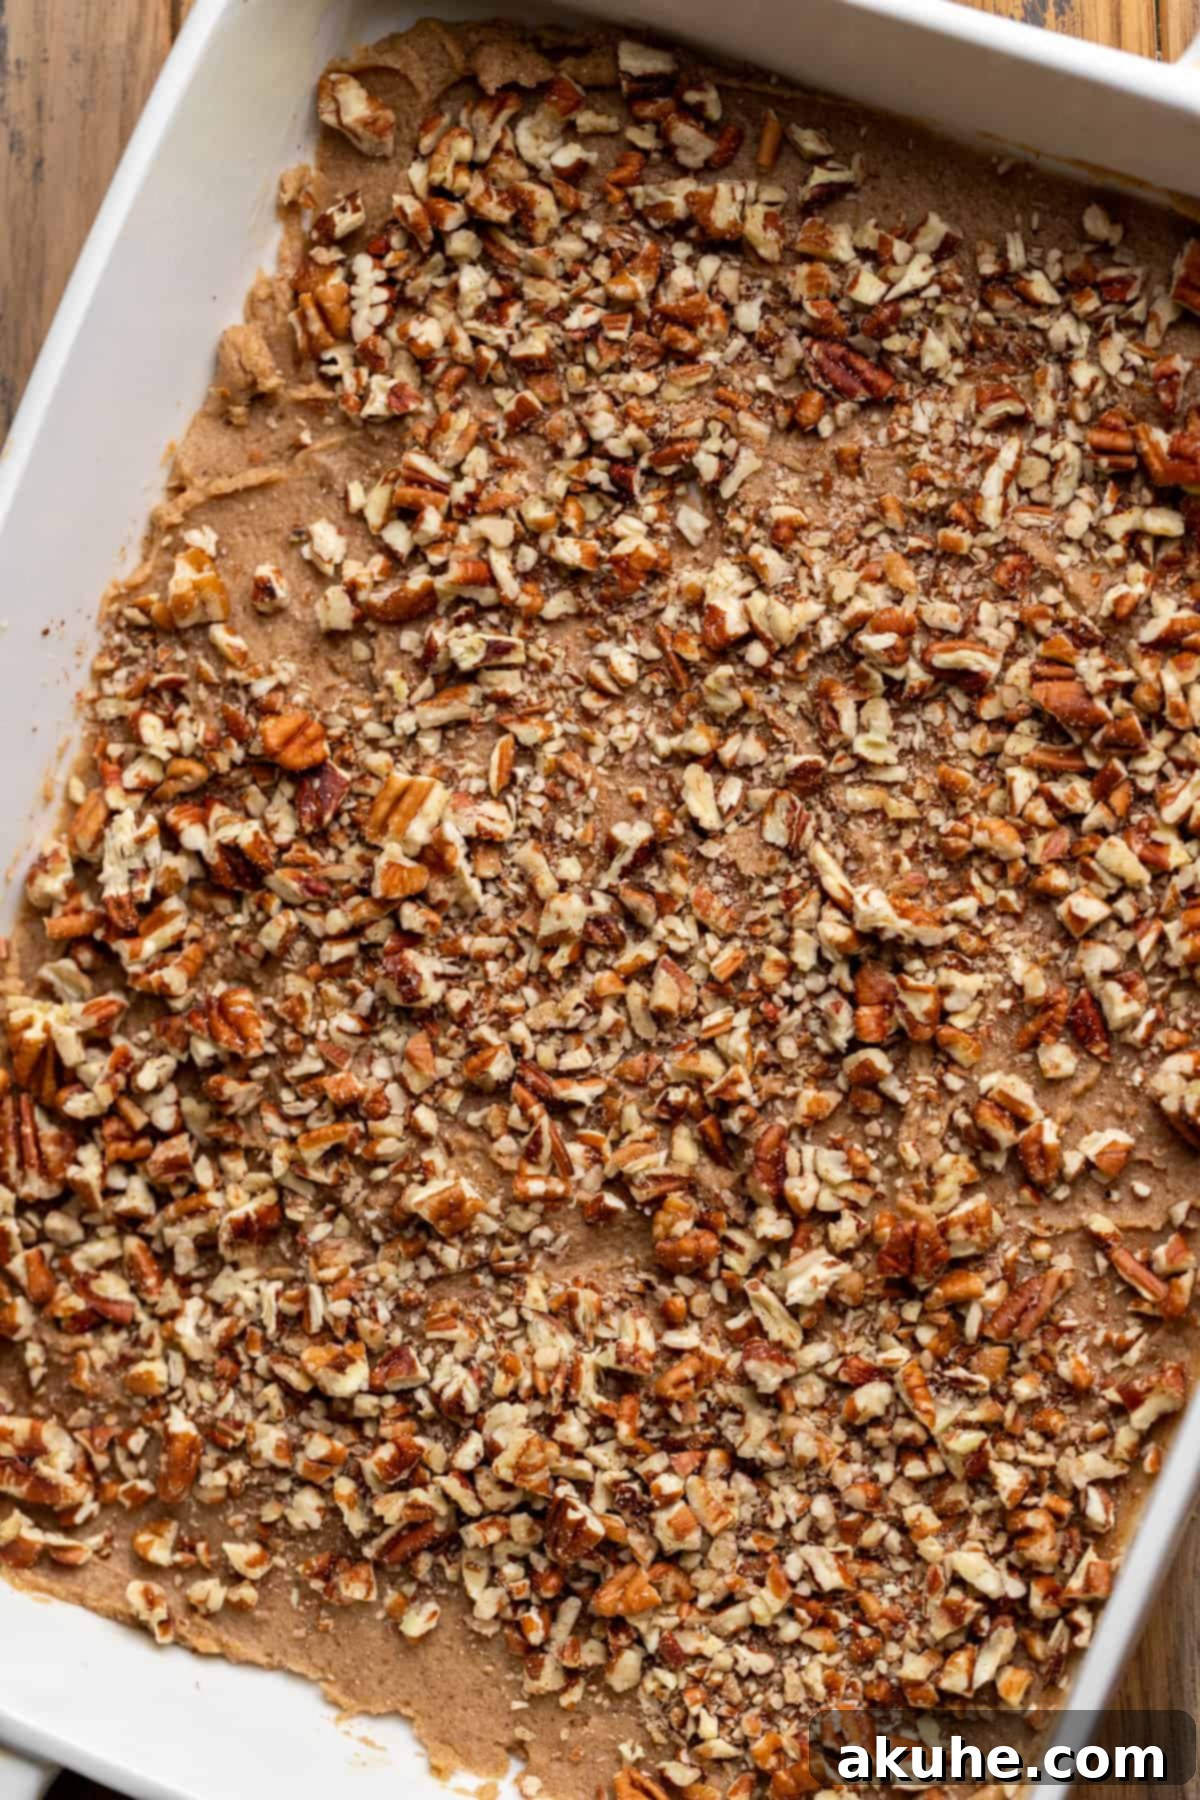
STEP 3: Prepare the Baking Pan. Liberally spray a 9×13 inch baking pan with nonstick cooking spray. Evenly spread the prepared maple pecan sticky topping mixture across the entire bottom of the pan. Then, sprinkle the chopped pecans generously over the sticky topping. This creates the delicious foundation for your buns.

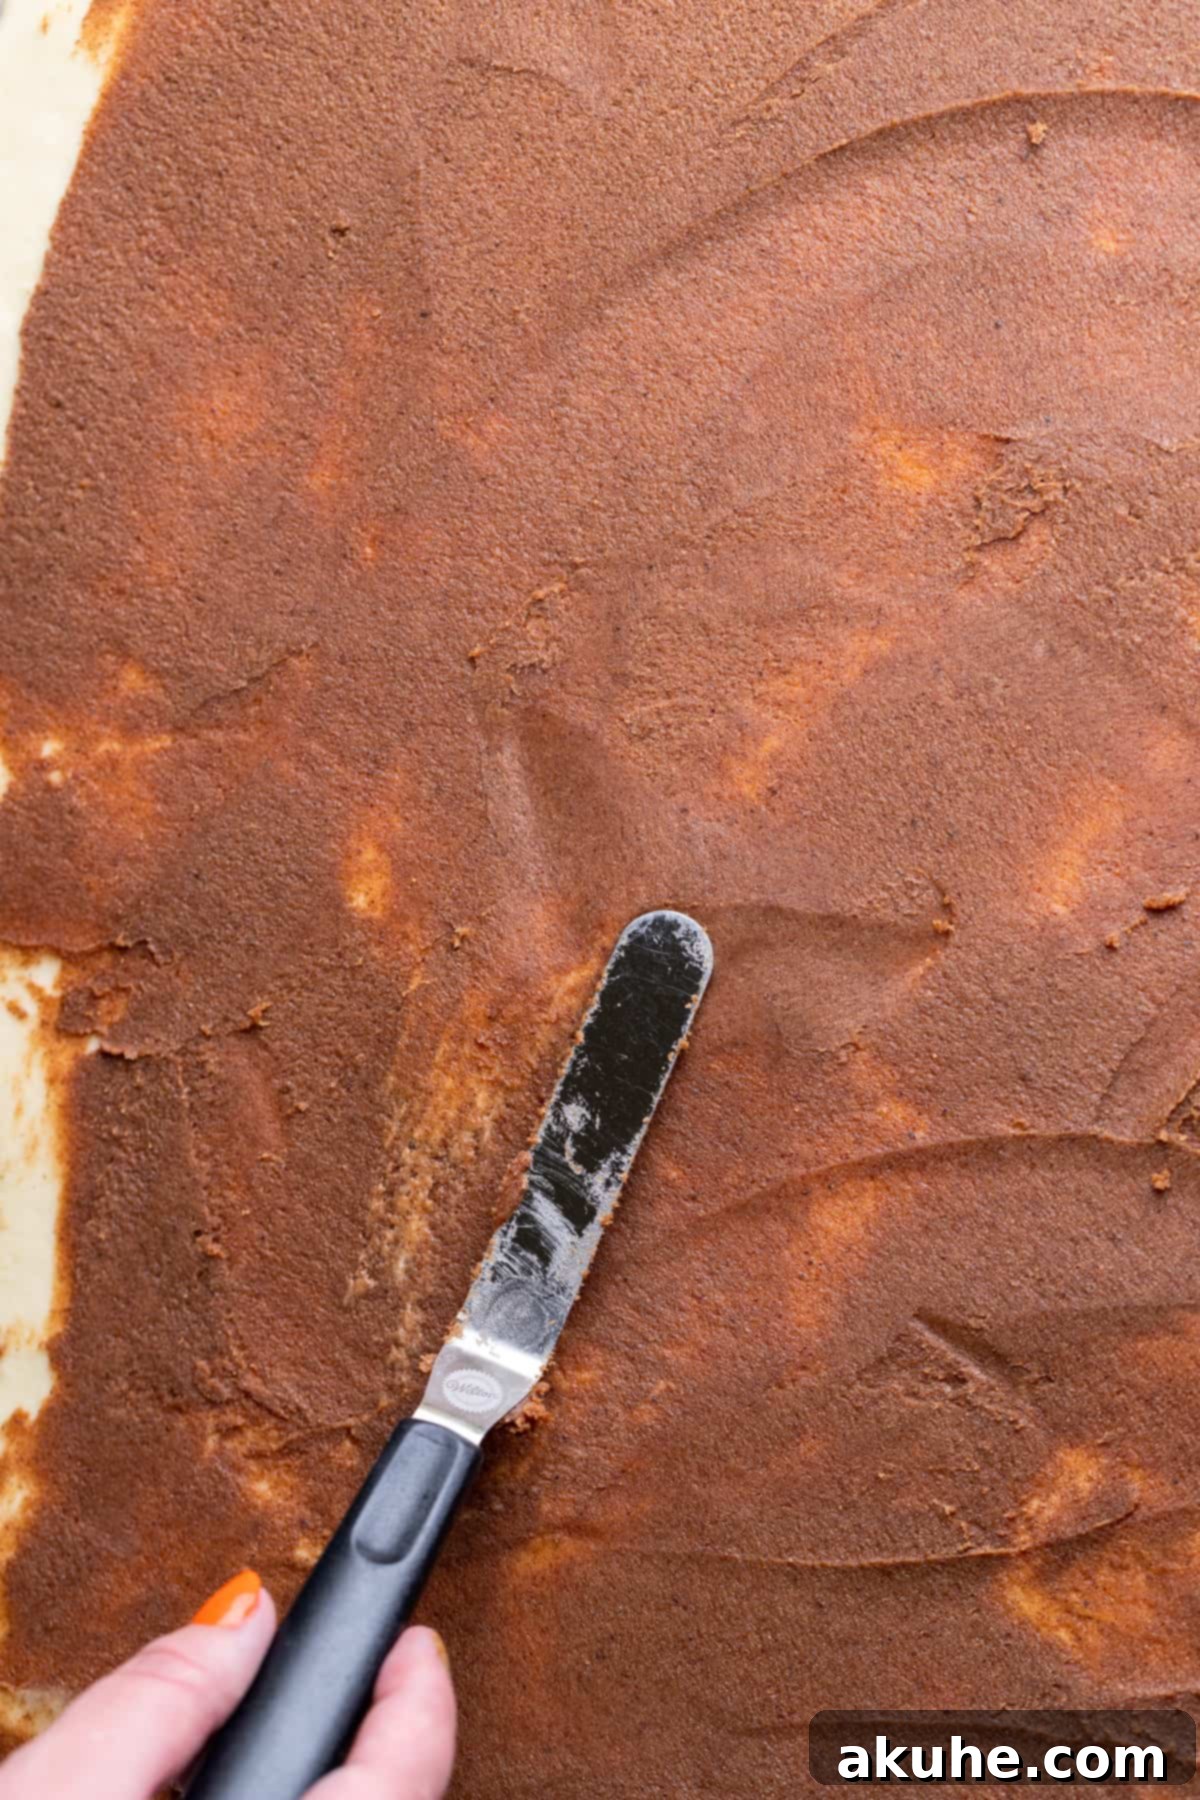
STEP 4: Roll and Spread the Dough. Once your dough has completed its first rise, gently punch it down to release the air. Lightly flour a clean work surface and your rolling pin. Roll the dough out into a large rectangle, aiming for approximately 1/4 inch thickness. The exact dimensions will depend on your dough, but focus on achieving an even thickness. Next, using an offset spatula or the back of a spoon, evenly spread the prepared cinnamon filling over the entire surface of the rolled-out dough, making sure to go all the way to the edges.
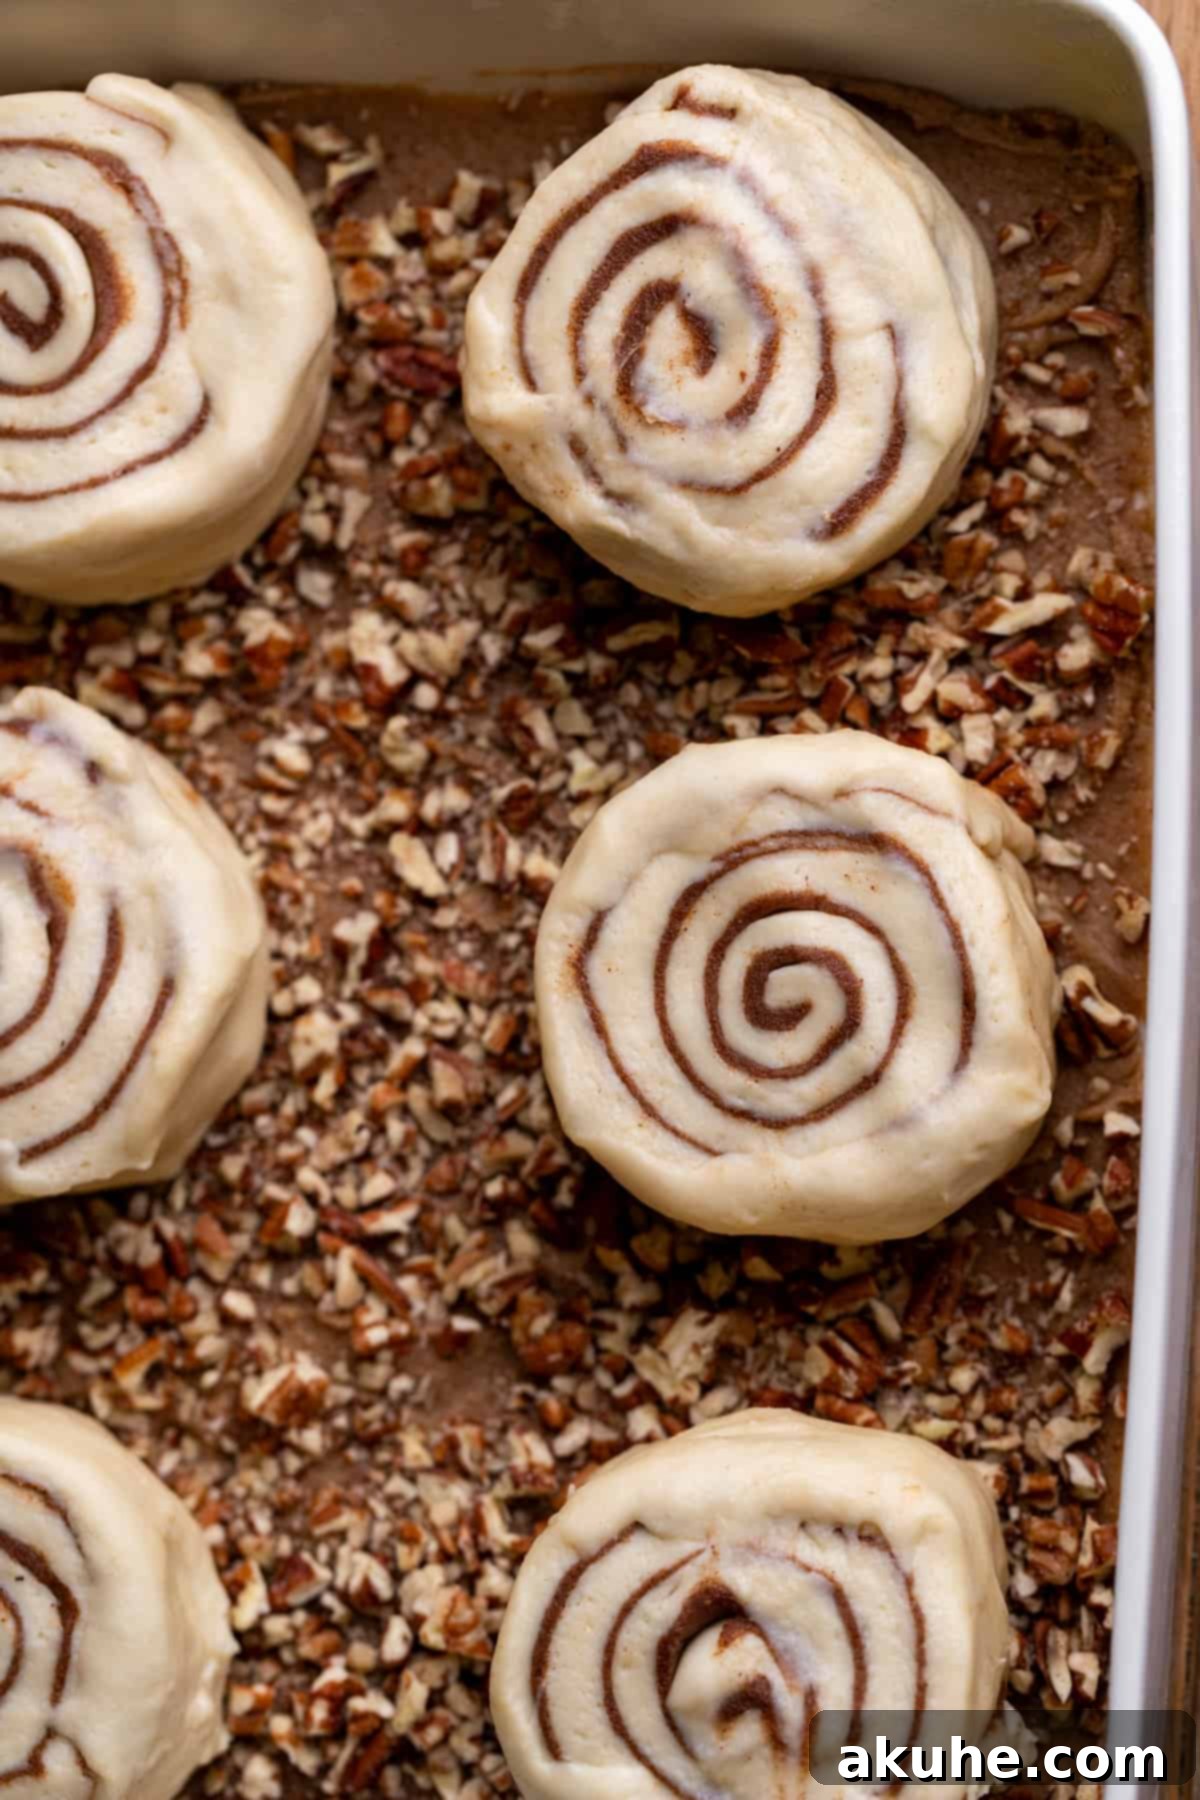
STEP 5: Roll and Cut the Buns. Starting from one of the short sides of the rectangle, carefully roll the dough tightly into a log. Aim for a snug roll to ensure beautiful spirals in your finished buns. Use a serrated knife to gently trim off any uneven ends from the log, creating neat edges. Then, cut the log into 6 equal, thick pieces. These will be your giant sticky buns.

STEP 6: Second Rise. Carefully arrange the 6 cut rolls into the prepared 9×13 inch pan, placing them on top of the sticky topping and pecans. Leave a little space between each roll, as they will expand significantly during this second rise. Cover the pan loosely with a clean kitchen towel and let the rolls rise in a warm spot for about 20 minutes, or until visibly puffy.
STEP 7: Bake to Golden Perfection. While the buns are on their second rise, preheat your oven to 375°F (190°C). Once preheated, place the pan of sticky buns into the oven and bake for 28-30 minutes. The baking time is longer than for smaller rolls due to their impressive size and the presence of the thick sticky topping. The buns are done when their tops are beautifully golden brown and the internal temperature reaches around 200-205°F (93-96°C).
STEP 8: Cool and Flip. This step is crucial for achieving that perfect gooey topping! Remove the hot pan from the oven and let the giant sticky buns cool for exactly 10 minutes in the pan. This allows the sticky topping to set slightly but remain warm and fluid. After 10 minutes, carefully place a large cutting board or serving platter upside down over the pan. Using oven mitts, firmly grasp both the pan and the board, then quickly and confidently flip them over. Lift the pan, allowing the magnificent, sticky, pecan-laden topping to cascade over your perfectly baked buns. Serve warm and enjoy!
Expert Baking Tips for Flawless Sticky Buns
Achieving bakery-quality giant sticky buns is easier with these expert tips:
- Precision in Flour Measurement: This cannot be stressed enough! Always measure your flour by spooning it into the measuring cup and then leveling off the top with a straight edge (like the back of a knife). Dipping the measuring cup directly into the flour bag will compact it, adding too much flour to your dough. Excess flour leads to a dry, dense, and difficult-to-work-with dough. For ultimate accuracy, consider using a kitchen scale to measure flour by weight (usually 120-125g per cup).
- Ensure Your Yeast is Active: Yeast is a living organism, and its freshness is vital for a good rise. Always check the expiration date on your yeast packet. Furthermore, follow the milk temperature guideline (110°F) meticulously. If the milk is too hot, it will kill the yeast; if it’s too cold, it will significantly slow down or prevent activation. If your yeast mixture doesn’t foam after 10 minutes, your yeast may be old or the milk temperature was off, and it’s best to start again with fresh yeast.
- Don’t Rush the Dough’s First Rise: Whether you opt for the quick oven method or the overnight chill, allow the dough its full rising time. A proper first rise (bulk fermentation) develops flavor, texture, and strength in the dough. If you choose the same-day rise, place the dough in a warm, draft-free spot.
- Master the Windowpane Test: For perfectly kneaded dough, perform the “windowpane test.” After kneading, pinch off a small piece of dough and gently stretch it with your fingers. If you can stretch it thin enough to see light through it without it tearing, your gluten is well-developed, and the dough is ready. If it tears easily, knead for another minute or two and test again.
- Room Temperature Ingredients are Key: Beyond butter and eggs, aim for all dairy ingredients (like heavy cream for the topping) to be at room temperature. This ensures they combine smoothly and evenly, preventing curdling and promoting a uniform texture in your dough and topping.
- Don’t Overbake: While the bake time for giant buns is longer, be careful not to overbake. Overbaking will dry out the rolls, making them less soft and gooey. Keep an eye on the golden-brown color of the tops and use a thermometer if you have one.
Common Questions About Giant Sticky Buns
Here are answers to some frequently asked questions about making and enjoying these delicious sticky buns:
- Does the dough have to rise in the oven?
- No, not necessarily, but a warm environment speeds up the rising process considerably. If your oven is busy or you prefer another method, you can let the dough rise at room temperature. Just ensure your house isn’t too cold, as this will dramatically slow down the yeast. Finding a consistently warm, draft-free spot (like near a sunny window or on top of a warm appliance) will yield the best results for a quicker rise. However, the preheated (then turned off) oven method offers a reliably warm and consistent environment. For the best flavor development and convenience, rising overnight in the fridge is often the preferred method.
- What is the best way to reheat sticky buns?
- To enjoy warm, soft sticky buns, reheating is simple! If you’re just enjoying a single bun, place it on a plate and warm it in the microwave for 20-30 seconds. Microwave wattages vary, so adjust the time until it’s perfectly warm and gooey. If you’re reheating an entire tray, preheat your oven to 350°F (175°C). Place the baking dish of buns (covered loosely with foil to prevent over-browning) in the oven for about 5-10 minutes, or until heated through. This method helps maintain their soft texture.
- Can I prebake these sticky buns?
- Yes, you can absolutely prebake them for added convenience! Follow all the instructions up to the baking step. Then, bake the rolls for only about 10 minutes—just enough for them to set slightly and begin to color. Remove them from the oven, allow them to cool completely in the pan, then cover and chill them. In the morning, you can continue baking them for the remaining 20-25 minutes (or until golden brown and heated through) to finish them fresh. This is a fantastic option for entertaining!
Recipe Variations & Customizations
Get creative with your giant sticky buns!
- Extra Creamy Topping: If you desire an even richer, creamier maple pecan topping, simply add an extra tablespoon of heavy cream to the topping mixture in Step 2 of the “Maple Pecan Sticky Topping and Baking” instructions.
- Smaller Buns: While these are designed to be giant, you can easily make 12 regular-sized buns instead of 6 large ones. Just cut the rolled log into 12 equal pieces after spreading the cinnamon filling. Adjust baking time accordingly (they will bake faster).
- Nut-Free Option: If you or your guests have a nut allergy, you can omit the pecans entirely for a delicious, classic maple sticky bun. Alternatively, toasted coconut flakes can make a delightful substitute for pecans, offering a different texture and flavor profile.
- Chocolate Swirl: For chocolate lovers, consider adding mini chocolate chips to your cinnamon filling before rolling the dough.
Essential Tools for Baking Giant Sticky Buns
Having the right tools can make your baking experience much smoother:
- 9×13 Inch Baking Pan: A sturdy casserole pan or a standard metal baking pan of this size is essential for baking these six giant buns. The deep sides of a casserole pan are especially helpful for containing the sticky topping as it bubbles during baking.
- Rolling Pin: Any standard rolling pin will work perfectly for rolling out your dough evenly. A good, heavy rolling pin can make the task much easier.
- Offset Spatula: An offset spatula is incredibly useful for evenly spreading the cinnamon filling across the dough without tearing it. Its angled blade provides precise control, making sure every part of the dough gets its share of delicious filling. If you don’t have one, the back of a spoon can work in a pinch.
- Stand Mixer with Dough Hook: While hand-mixing is possible (see notes), a stand mixer with a dough hook attachment makes the kneading process effortless, ensuring a perfectly developed dough with minimal effort.
- Kitchen Thermometer: Crucial for accurately checking the milk temperature for yeast activation. A reliable thermometer will prevent common yeast-related baking failures.
Storing and Freezing Your Giant Sticky Buns
To enjoy your giant sticky buns for longer, proper storage is key.
Store any leftover baked giant sticky buns in an airtight container in the refrigerator for up to 5 days. They are always best when gently warmed in the microwave or oven until soft and gooey again.
Freezing Options
These magnificent sticky buns can be frozen in two convenient ways, extending their shelf life for up to 30 days:
- Freeze Unbaked Rolls: After cutting the rolls and placing them into the pan with the sticky topping (before the second rise), cover the pan tightly with plastic wrap and then aluminum foil. Freeze for up to 30 days. When ready to bake, thaw the rolls overnight in the refrigerator, then let them come to room temperature and complete their second rise before baking as directed. Note that frozen and thawed dough may not rise quite as much as fresh dough but will still yield delicious results.
- Freeze Already Baked Buns: Once the buns are baked and have cooled completely, you can freeze individual buns or the entire pan. For individual buns, wrap each tightly in plastic wrap, then aluminum foil. For the whole pan, wrap tightly. Freeze for up to 30 days. To enjoy, thaw for about an hour at room temperature, then reheat in the microwave or oven until warm and soft.
Other Roll Recipes To Try
Expand your baking repertoire with more delightful roll recipes.
Indulge in These Pecan Recipes
- Pecan Pie Cookies
- Pecan Pie Cake
- Pecan Pie Cheesecake
- Pecan Chocolate Chip Cookies
We hope you love making and devouring these giant sticky buns! If you enjoyed this recipe, please make sure to leave a STAR REVIEW in the recipe card below! We love hearing from you! Don’t forget to tag us on Instagram @stephaniesweettreats with your creations. For more delightful baking ideas, be sure to follow us on Pinterest. Happy baking!
Giant Sticky Buns (Maple Pecan)
These are giant sticky buns. They make 6 giant cinnamon rolls topped with a maple pecan sticky topping.
Author: Stephanie Rutherford
Print Recipe | Pin Recipe
Prep Time: 1 hour
Cook Time: 30 mins
Resting Time: 1 hour 20 mins
Total Time: 2 hrs 50 mins
Servings: 6 rolls
Ingredients
Dough
- 1 cup Milk, warmed to 110℉
- 2 1/4 tsp Active dry yeast
- 2 Large eggs, room temperature lightly beaten
- 4 1/2 cups All-purpose flour
- 1/4 cup White granulated sugar
- 1 tsp Salt
- 10 TBSP Unsalted butter, room temperature and cubed
Cinnamon Filling
- 1/2 cup Unsalted butter, room temperature
- 3/4 cup Brown sugar, packed light or dark
- 1 TBSP Ground cinnamon
Maple Pecan Sticky Topping
- 1/2 cup Unsalted butter, room temperature
- 3/4 cup Brown sugar, packed light or dark
- 1/4 cup Maple syrup
- 1 TBSP Heavy cream
- 1 tsp Pure vanilla extract
- 1/4 tsp Salt
- 1 TBSP Cornstarch
- 1 tsp Ground cinnamon
- 1 1/4 cups Pecans, chopped
Instructions
Dough
- Heat the milk in the microwave for 45 seconds, until warmed to 110℉. Sprinkle the yeast on top and let it sit for 10 minutes.
- In a large bowl, sift the flour. Add the sugar and salt. Add in the cubed butter. Use a pastry kneader or your hands to knead the butter into the flour until butter lumps are the size of a pea.
- Add in the lightly beaten eggs and milk/yeast mixture. Use a stand mixer with a dough hook attachment to mix on low speed until a dough starts to form.
- Switch to medium speed and knead for 5 minutes. Spray a large bowl with nonstick spray and place the dough inside.
- For making right away: Preheat the oven to 200℉. Cover the bowl with a kitchen towel. Turn off the oven, place the bowl in the oven, and crack open the door. Let rise for 1 hour.
- For overnight: Cover the bowl with foil or plastic wrap. Place in the fridge to rise overnight.
Cinnamon Filling
- In a small bowl, using a hand mixer, beat the butter on high speed until smooth. Add in the brown sugar and cinnamon. Beat until smooth.
Maple Pecan Sticky Topping
- Using a mixer, beat the butter and brown sugar on high speed for 2 minutes.
- Add in the vanilla extract, maple syrup, heavy cream, salt, cornstarch, and cinnamon. Mix until combined.
- Spray a 9×13 inch pan with non-stick baking spray. Spread the topping on the bottom of the pan. Sprinkle the pecans on top.
- Roll the dough out using a rolling pin on a lightly floured surface into a large rectangle about 1/4-inch thick.
- Spread the cinnamon filling evenly over the dough using an offset spatula, extending to the edges.
- Roll the dough into a log starting on the short side. Use a serrated knife to cut off any uneven ends. Then, cut it into 6 equal pieces.
- Place the rolls inside the prepared pan with the sticky topping. Cover with a kitchen towel and let rise for 20 minutes.
- Preheat the oven to 375℉.
- Bake for 28-30 minutes, or until the tops of the rolls are golden brown. It needs to bake longer because of the topping and the large size of the rolls.
- Let the rolls cool for 10 minutes in the hot pan. Then, flip the rolls onto a board or serving platter so the sticky topping is on top.
Notes
- Flour Measurement: Make sure flour is spooned and leveled, or use a kitchen scale for accuracy. Compacted flour can dry out the rolls.
- Room Temperature Ingredients: Pull out all dairy ingredients (butter, eggs, milk, heavy cream) at least 2 hours before baking for best results.
- Making by Hand Instructions (for Dough):
- Mix the wet ingredients into the dry by using a rubber spatula. Switch to using your hands to mix until a dough starts to form.
- Place dough on a lightly floured surface. Knead using your hands for 5-8 minutes.
- The dough is done when you can stretch it thinly using your fingers. Hold the dough to the light; if you can see light through it without it tearing, then it is ready (the “windowpane test”).
Nutrition Facts (per serving)
- Calories: 800kcal
- Carbohydrates: 151g
- Protein: 14g
- Fat: 68g
- Saturated Fat: 34g
- Polyunsaturated Fat: 7g
- Monounsaturated Fat: 22g
- Trans Fat: 2g
- Cholesterol: 139mg
- Sodium: 527mg
- Potassium: 386mg
- Fiber: 6g
- Sugar: 73g
- Vitamin A: 1648IU
- Vitamin C: 0.3mg
- Calcium: 173mg
- Iron: 5mg
