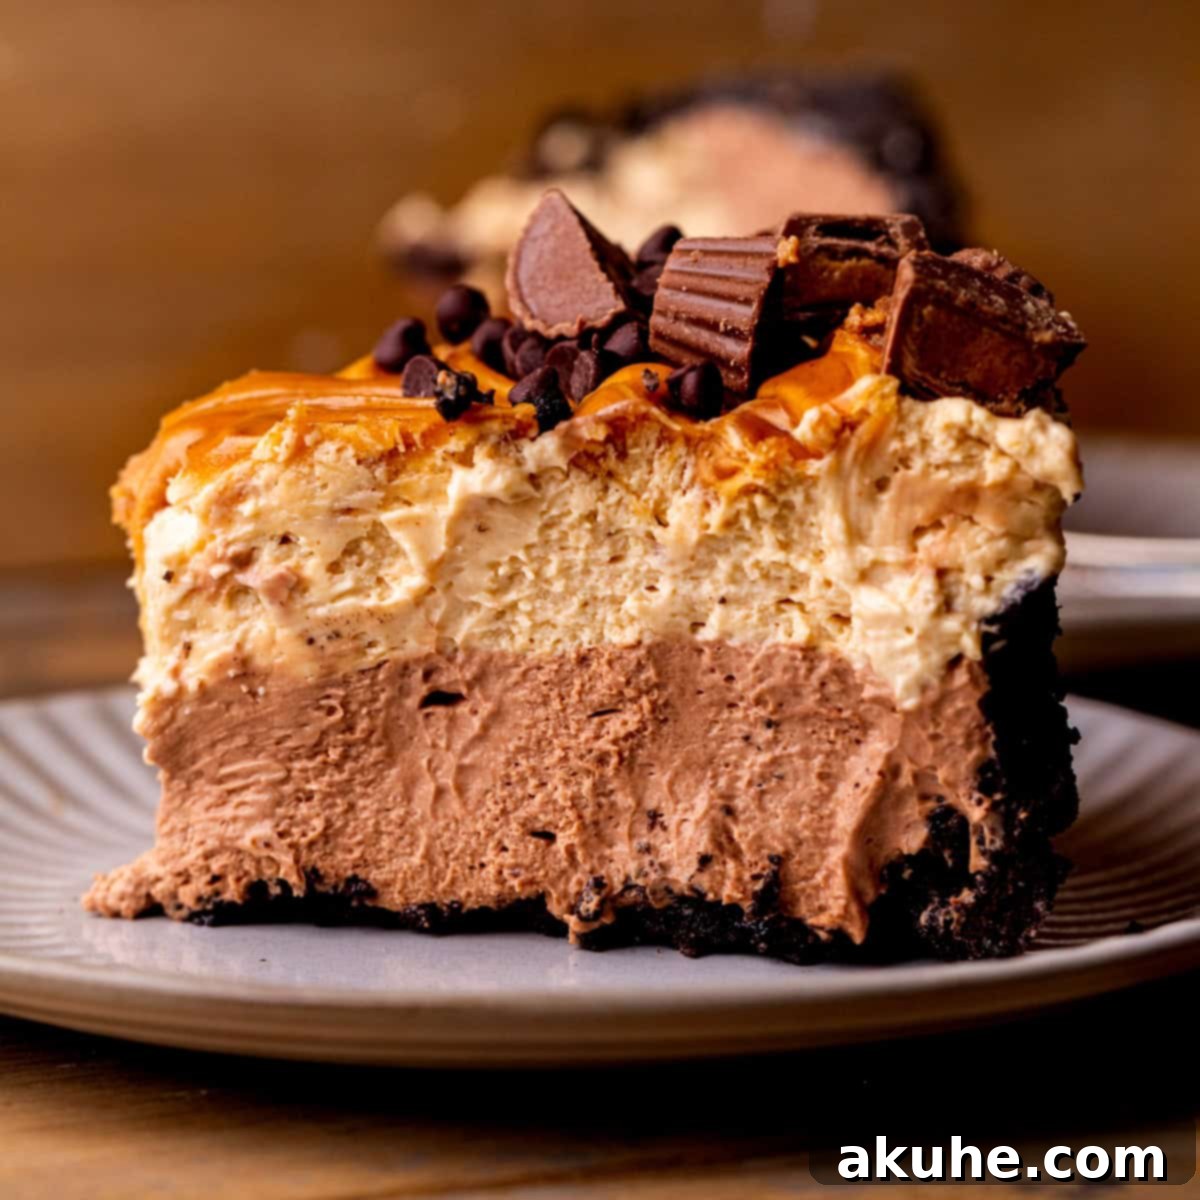
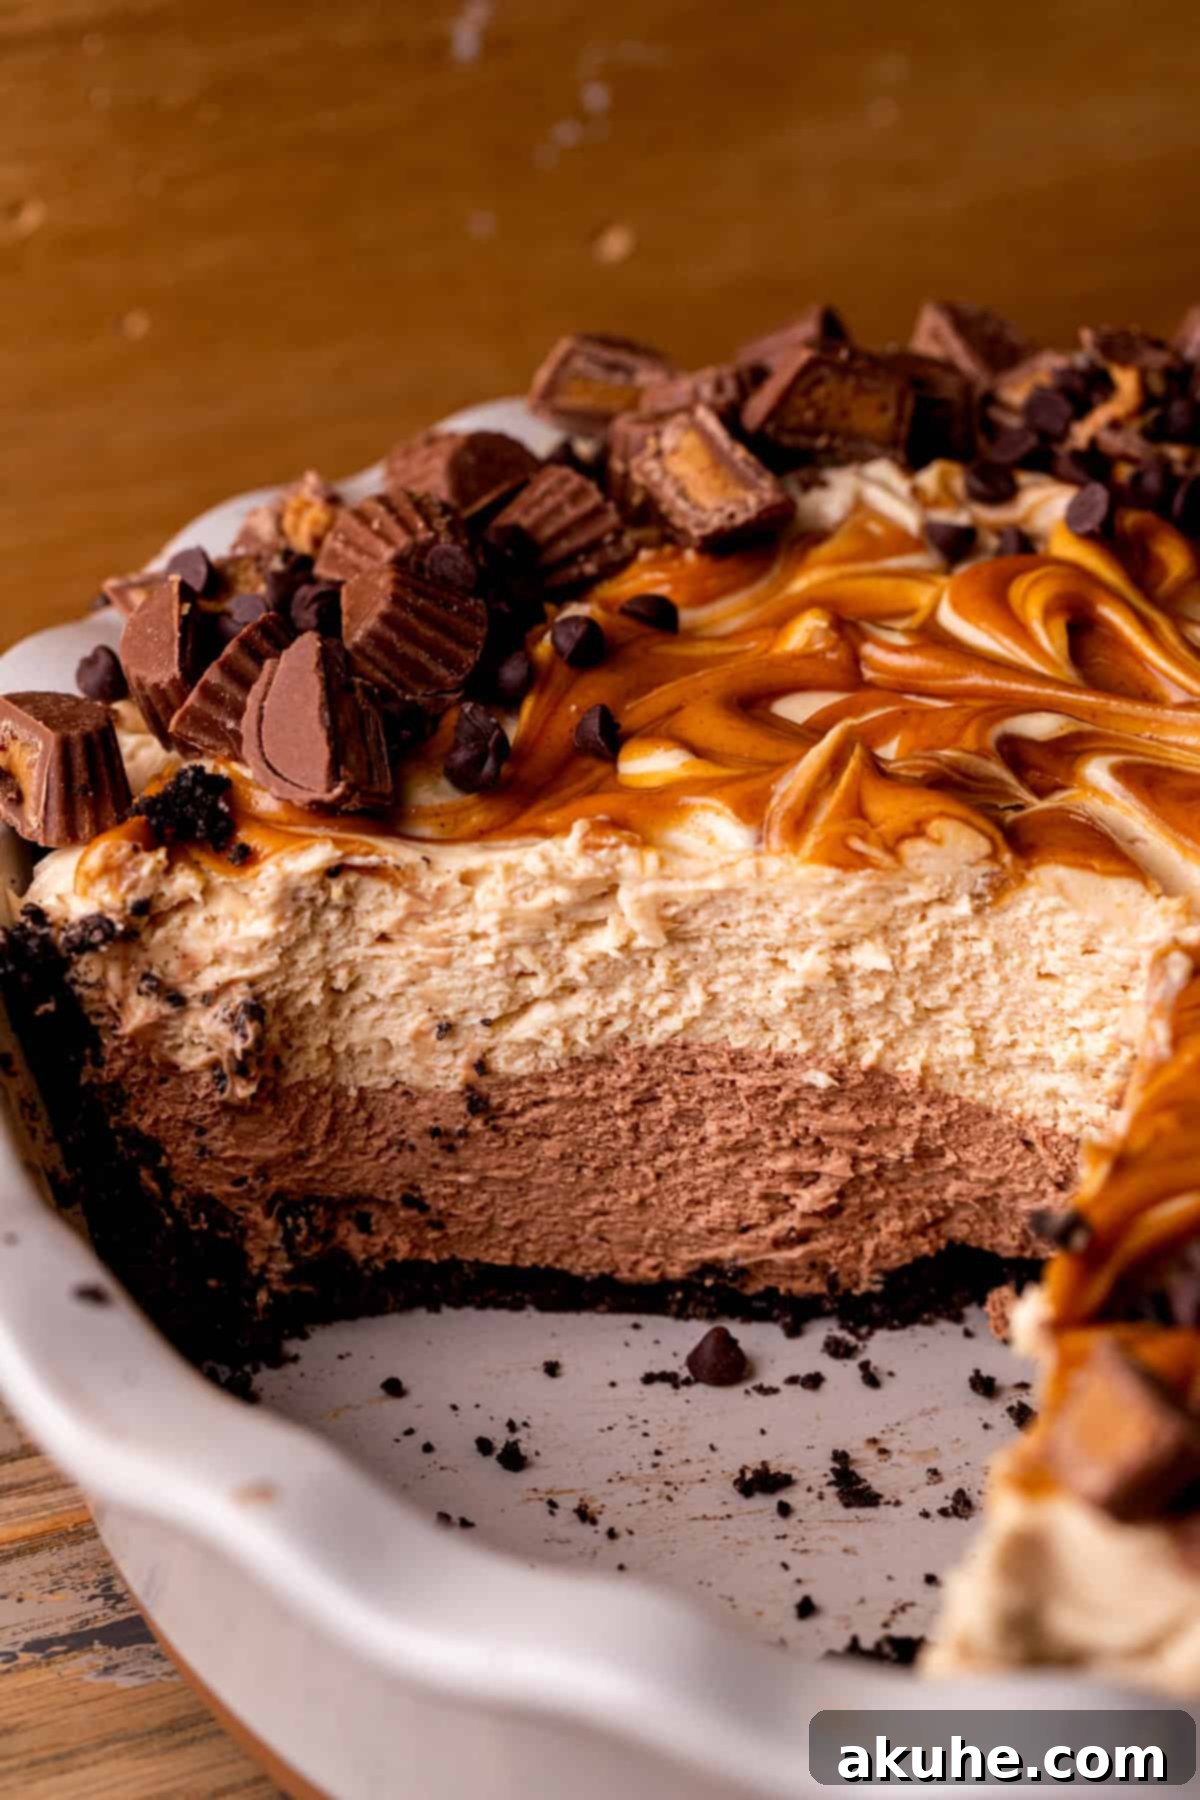
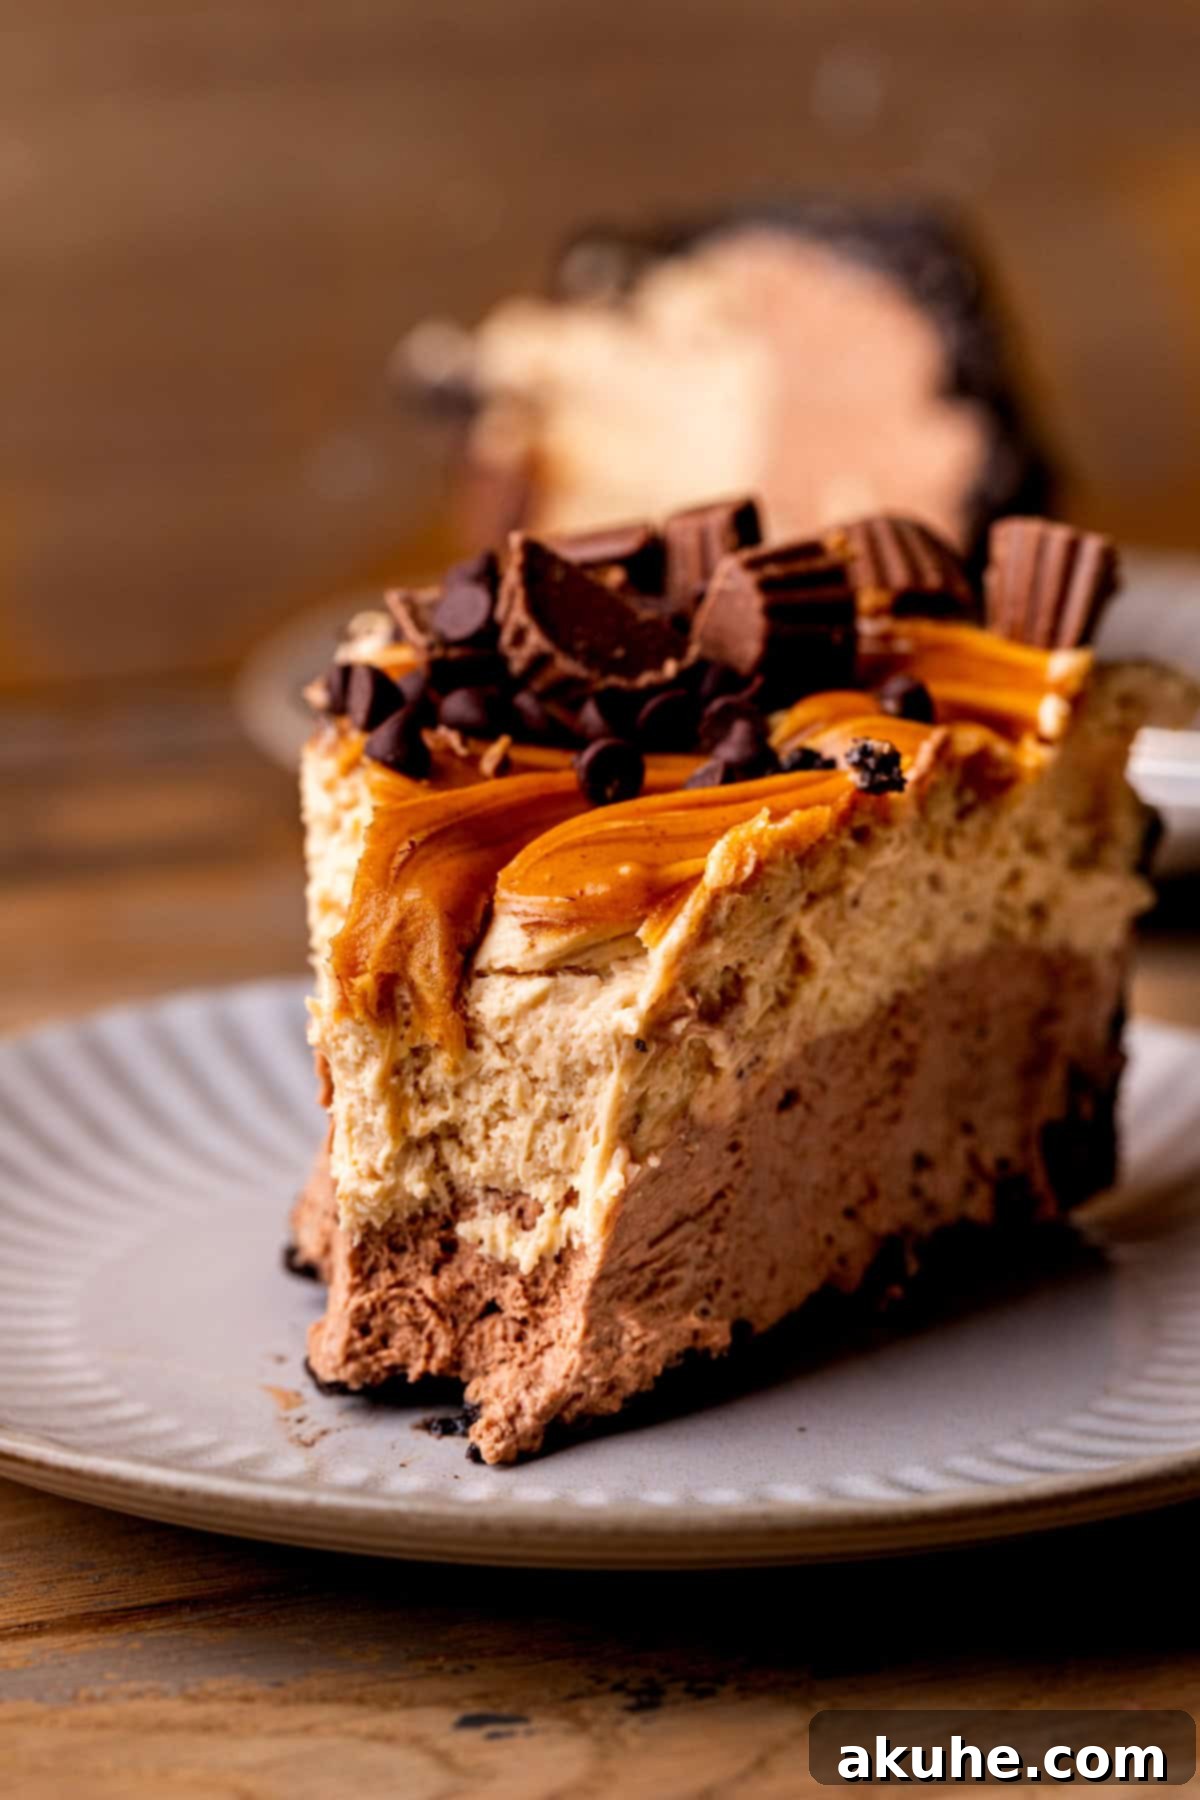
Indulge in the ultimate union of creamy chocolate and rich peanut butter with this exquisite No-Bake Chocolate Peanut Butter Pie. This dessert is an absolute dream come true for anyone craving a luxurious, yet effortless, sweet treat. Picture a perfectly crunchy Oreo cookie crust, generously layered with a light, airy chocolate filling, followed by an equally decadent and smooth peanut butter layer. The top is beautifully swirled with melted peanut butter and adorned with delightful peanut butter cups, making it a showstopper on any dessert table.
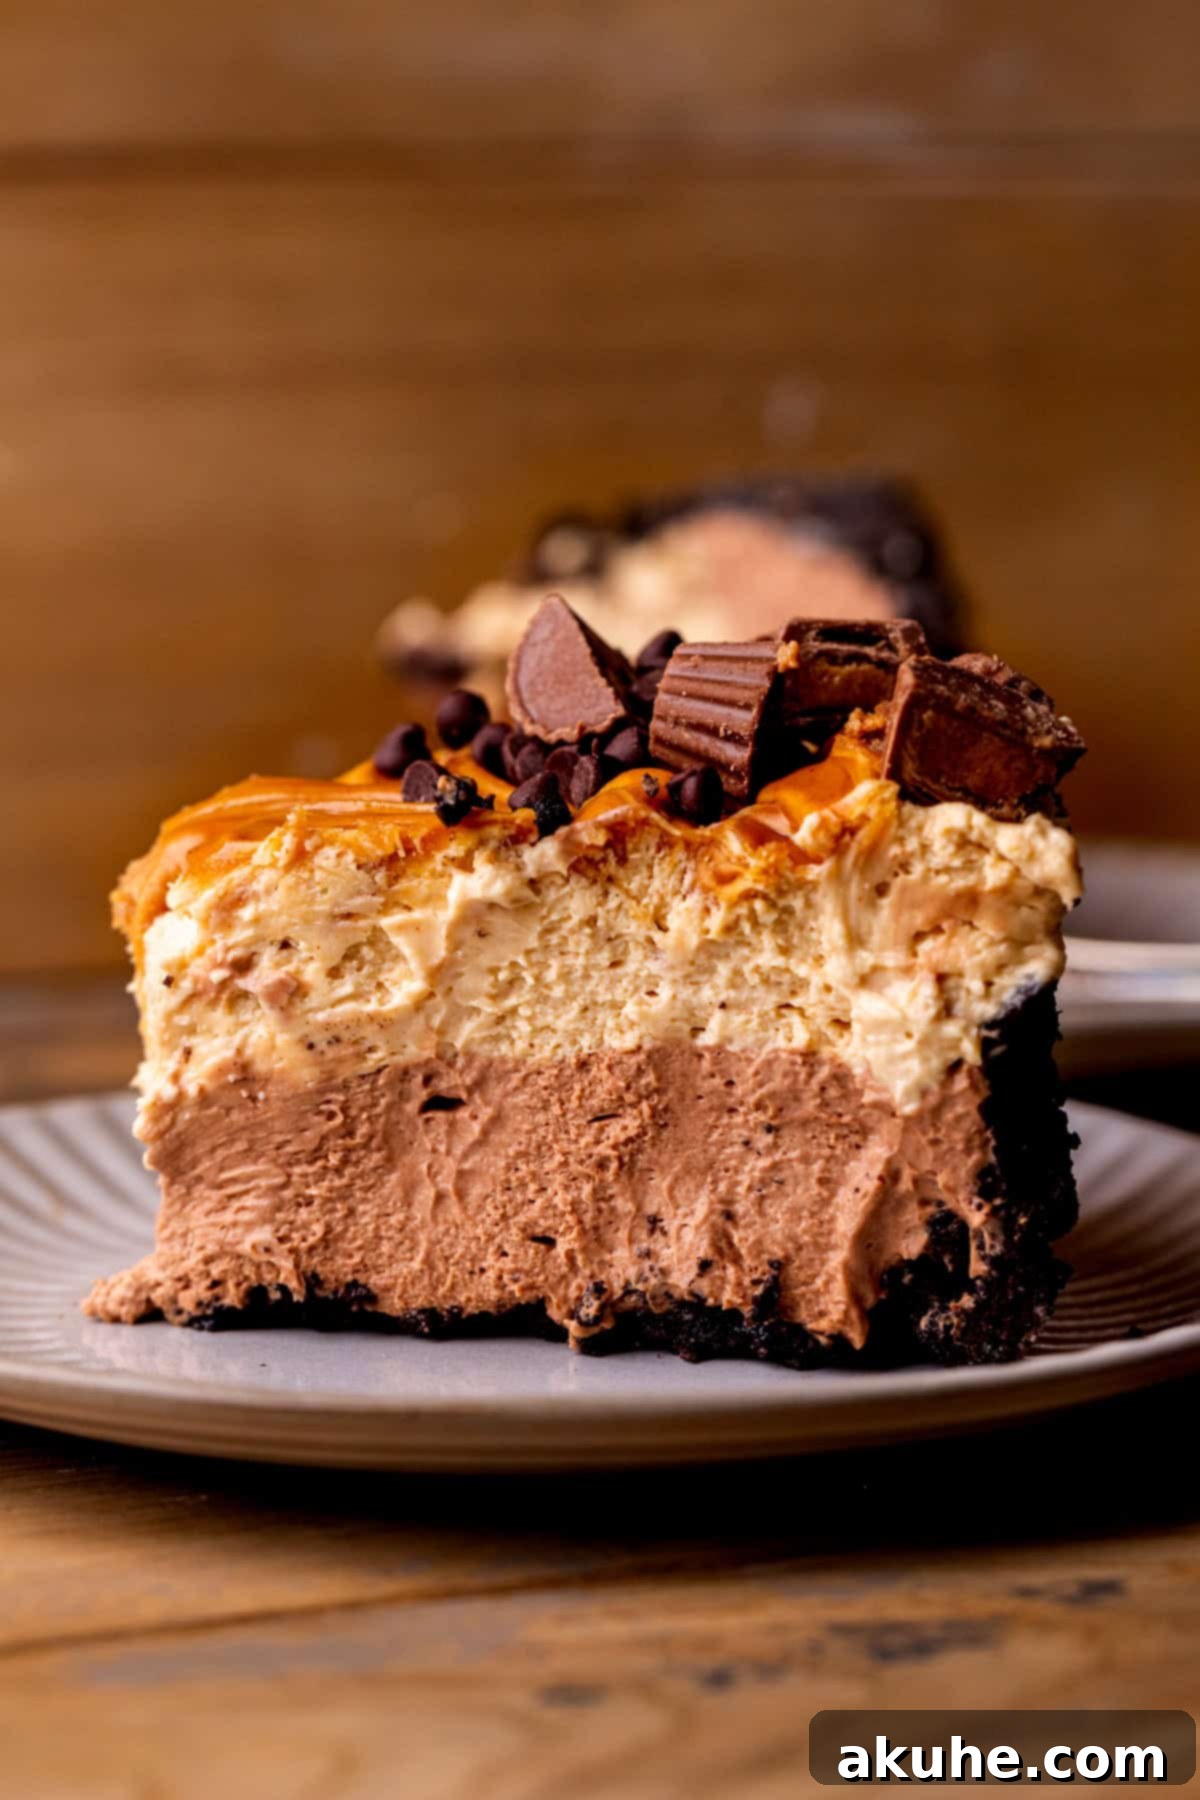
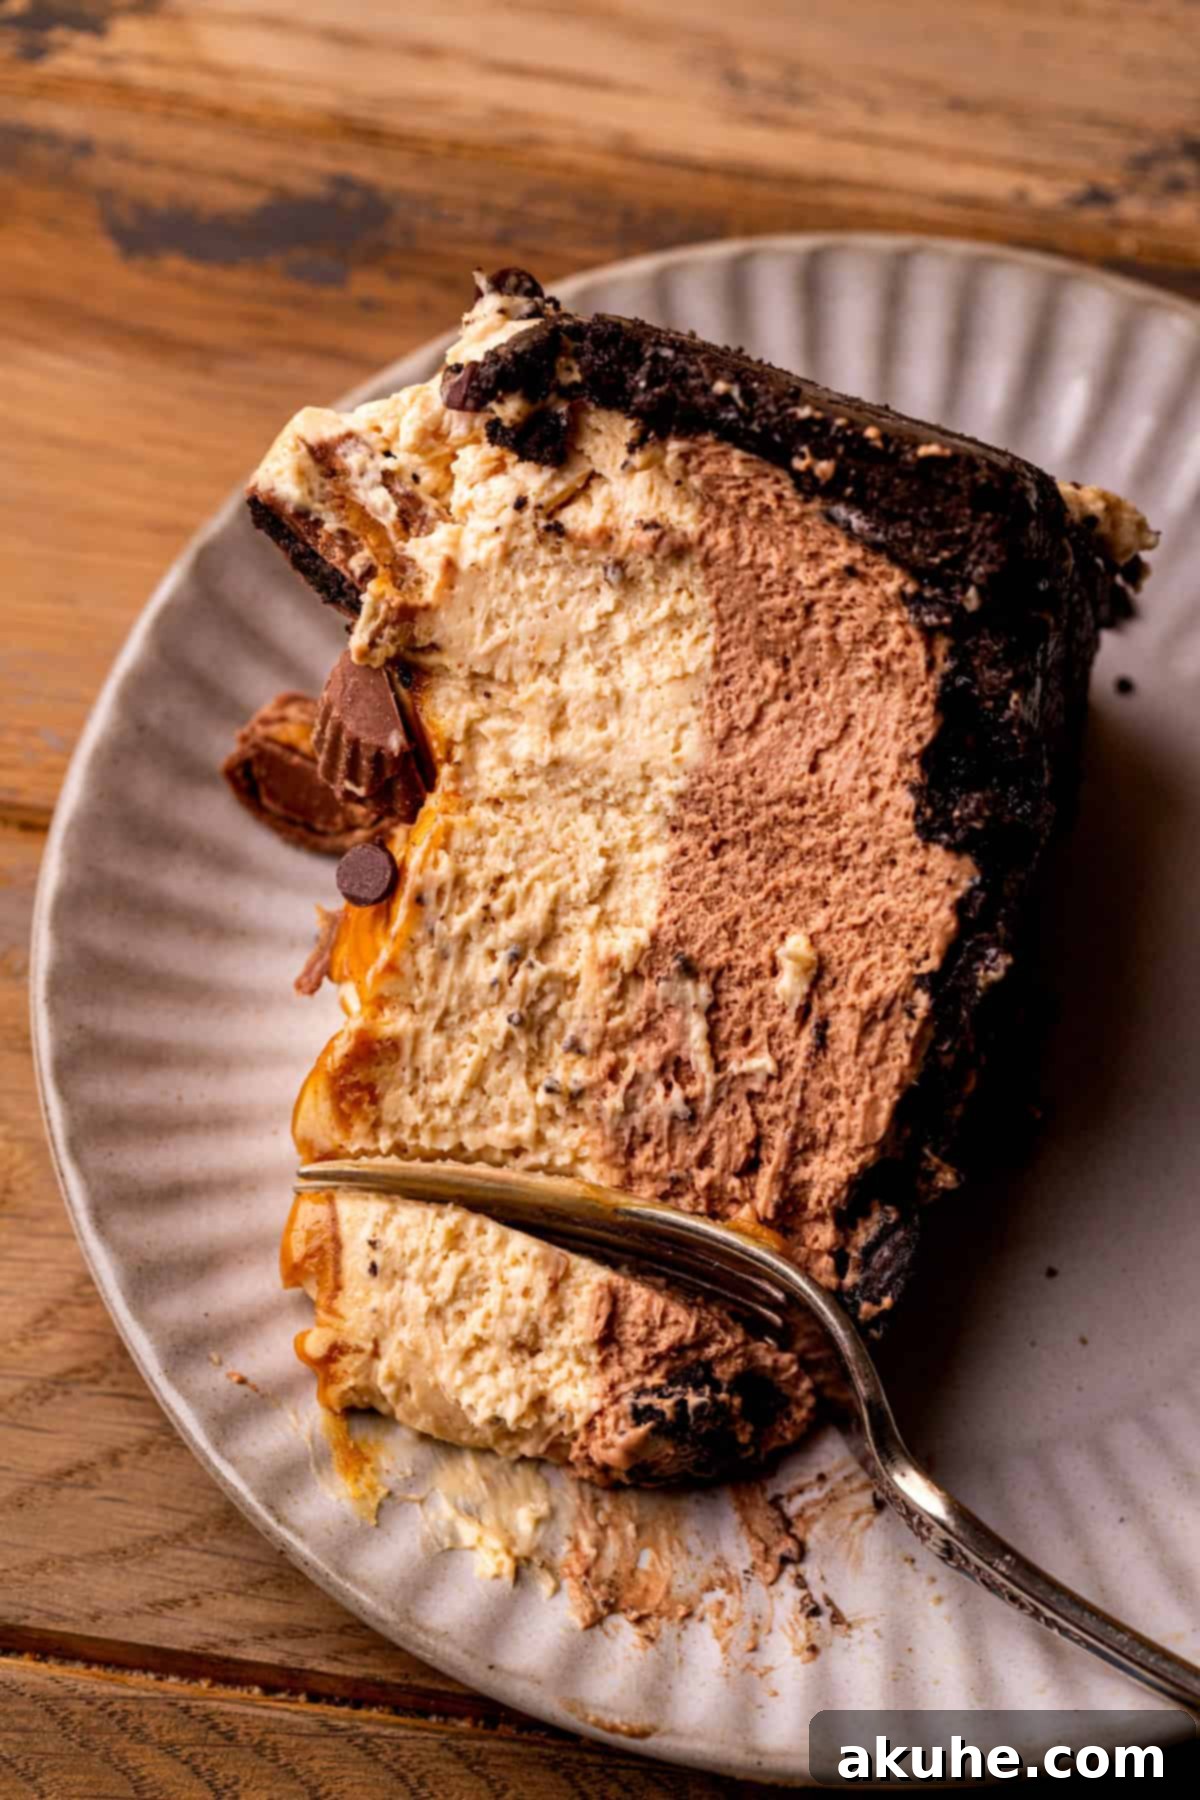
What makes this Chocolate Peanut Butter Pie recipe truly special is its incredible simplicity. There’s no need for an oven, making it the perfect dessert for warm weather, busy holidays, or when you just don’t want to heat up your kitchen. The balance of flavors is key here; neither the chocolate nor the peanut butter overpowers the other, allowing both to shine through with every spoonful. The result is a dessert that’s not only incredibly flavorful but also wonderfully light and fluffy, melting in your mouth with each bite. Whether you’re a devout chocolate aficionado or a loyal peanut butter enthusiast, this pie is guaranteed to satisfy your deepest cravings.
Looking for other divine chocolate dessert creations? Explore these delightful recipes: Chocolate Truffle Cake, a rich and intense experience; Turtle Cheesecake, combining pecans, caramel, and chocolate; and Chocolate Rolls, a perfect pastry indulgence.
Why You’ll Love This No-Bake Chocolate Peanut Butter Pie
This easy no-bake chocolate peanut butter pie isn’t just a dessert; it’s an experience. Here’s why it consistently earns rave reviews and becomes a go-to favorite:
- Irresistible Oreo Cookie Crust: The foundation of this pie is a buttery, crunchy crust made from crushed Oreo cookies. This rich chocolate base provides the perfect contrast to the creamy fillings, adding a delightful texture and an extra layer of chocolatey goodness that elevates the entire dessert. It’s simple to make and sets beautifully in the freezer.
- Remarkably Light and Creamy Texture: Unlike some dense pies, this recipe delivers a light and airy texture that’s simply divine. Infused with whipped cream, both the chocolate and peanut butter layers are incredibly fluffy, making each spoonful feel like a cloud of flavor. This delicate consistency prevents the pie from being overly heavy, allowing you to enjoy every bite without feeling weighed down.
- Perfectly Balanced Flavor Profile: This pie masterfully achieves the ideal harmony between sweet chocolate and salty-sweet peanut butter. Each layer is distinct yet complementary, ensuring that both beloved flavors are prominent and satisfying. It’s designed to please both chocolate lovers and peanut butter lovers alike, offering the best of both worlds in one incredible dessert.
- Effortless Make-Ahead Dessert: Planning ahead for a gathering or just want a convenient treat? This no-bake pie is your answer! It requires a chilling period before serving, making it an ideal candidate for preparing a day in advance. Simply pull it out of the refrigerator when you’re ready to serve, and enjoy a perfectly set, delicious dessert without any last-minute stress.
- No Baking Required: As a “no-bake” pie, this recipe frees you from the oven. This is especially advantageous during hot summer months or when your oven is already occupied. The entire process, from crust to filling, involves simple mixing and chilling, making it accessible even for novice bakers.
Essential Ingredients for Your Chocolate Peanut Butter Pie
Crafting this incredible Peanut Butter Chocolate Pie requires a few key ingredients. Here’s a detailed look at what you’ll need and why specific choices make a difference. For a complete list with precise measurements, please refer to the detailed recipe card below.
- Unsalted Butter: Essential for binding the Oreo crust. Melting the butter ensures it thoroughly coats the cookie crumbs, creating a firm and flavorful base. Using unsalted butter gives you control over the overall saltiness of the pie. It’s fine if the butter is still warm when you mix it with the crumbs.
- Full-Fat Cream Cheese: This is a crucial component for both the chocolate and peanut butter fillings, providing that signature rich, tangy, and creamy texture. Always opt for full-fat cream cheese for the best consistency and flavor. Remember to take it out of the refrigerator at least 2 hours before you start, allowing it to reach room temperature. This ensures it beats smoothly without lumps, resulting in a perfectly silky filling.
- Full-Fat Sour Cream: Adding sour cream introduces a subtle tang that beautifully balances the sweetness of the pie. Like cream cheese, using full-fat sour cream contributes to the creamy mouthfeel and overall richness. Bringing it to room temperature is important for easy incorporation into the batter. Alternatively, plain Greek yogurt can be used for a similar effect.
- Cold Heavy Cream: This is whipped into fluffy peaks and folded into both fillings, giving the pie its characteristic light and airy texture. It’s imperative that your heavy whipping cream is very cold, as this allows it to whip up properly and achieve stiff peaks. A cold metal bowl and whisk attachment can also aid in achieving the best results.
- Powdered Sugar (Confectioners’ Sugar): Used for sweetening the whipped cream, powdered sugar dissolves easily, ensuring a smooth, grit-free texture. Always sift powdered sugar before adding it, as it tends to clump, which can affect the final consistency of your whipped cream.
- Semi-Sweet Chocolate Bar: For the chocolate layer, a good quality semi-sweet chocolate bar is essential. I personally love a 72% Lindt bar for its balanced bitterness and sweetness, which prevents the chocolate layer from being overly saccharine. While other brands work well, avoid milk chocolate, which can be excessively sweet, and very dark chocolate, which might be too bitter for this specific pie.
- Creamy Peanut Butter: The star of the peanut butter layer! Use your favorite creamy peanut butter (not natural peanut butter that separates, as its oil content can make the pie too greasy or prevent it from setting properly). Ensure it’s a smooth variety for the best texture in the filling and for the decorative swirl on top.
- Unsweetened Cocoa Powder: This enhances the chocolate flavor in the chocolate filling, giving it depth and richness without adding extra sweetness.
- White Granulated Sugar: Used in both fillings to provide the right level of sweetness.
- Pure Vanilla Extract: A splash of vanilla rounds out the flavors in both the chocolate and peanut butter fillings, adding a touch of warmth and complexity.
Ingredient Substitutions & Dietary Adjustments
While this Chocolate Peanut Butter Pie recipe is fantastic as written, you might want to explore some substitutions based on dietary needs or preferences:
- Dairy-Free Options: To make this pie dairy-free, you can substitute your favorite dairy-free alternatives for butter, cream cheese, sour cream, and heavy cream. Look for plant-based butter sticks, dairy-free cream cheese alternatives, and coconut cream (chilled, solid part only) or other dairy-free whipping creams. Ensure all alternatives are designed for baking and have a similar consistency to their dairy counterparts.
- Gluten-Free Options: For a gluten-free version, the main substitution would be the Oreo crust. Use gluten-free chocolate sandwich cookies (many brands offer these) instead of regular Oreos. All other ingredients are typically gluten-free, but always double-check labels to be safe. While I haven’t personally tested a fully gluten-free version, many readers have had success with gluten-free cookie crusts.
Step-by-Step Guide: Crafting Your Oreo Crust
The foundation of this incredible No-Bake Chocolate Peanut Butter Pie is its rich and crunchy Oreo crust. It’s simple to prepare and sets perfectly to hold those luscious fillings. Follow these steps for success:
- STEP 1: Prepare Your Pie Pan. Begin by selecting a 9-inch pie pan. A ceramic pie pan works beautifully for this recipe. Generously spray the entire inside surface of the pan with a high-quality nonstick baking spray that contains flour. This crucial step helps prevent the crust from sticking and cracking when serving. Set the prepared pan aside.
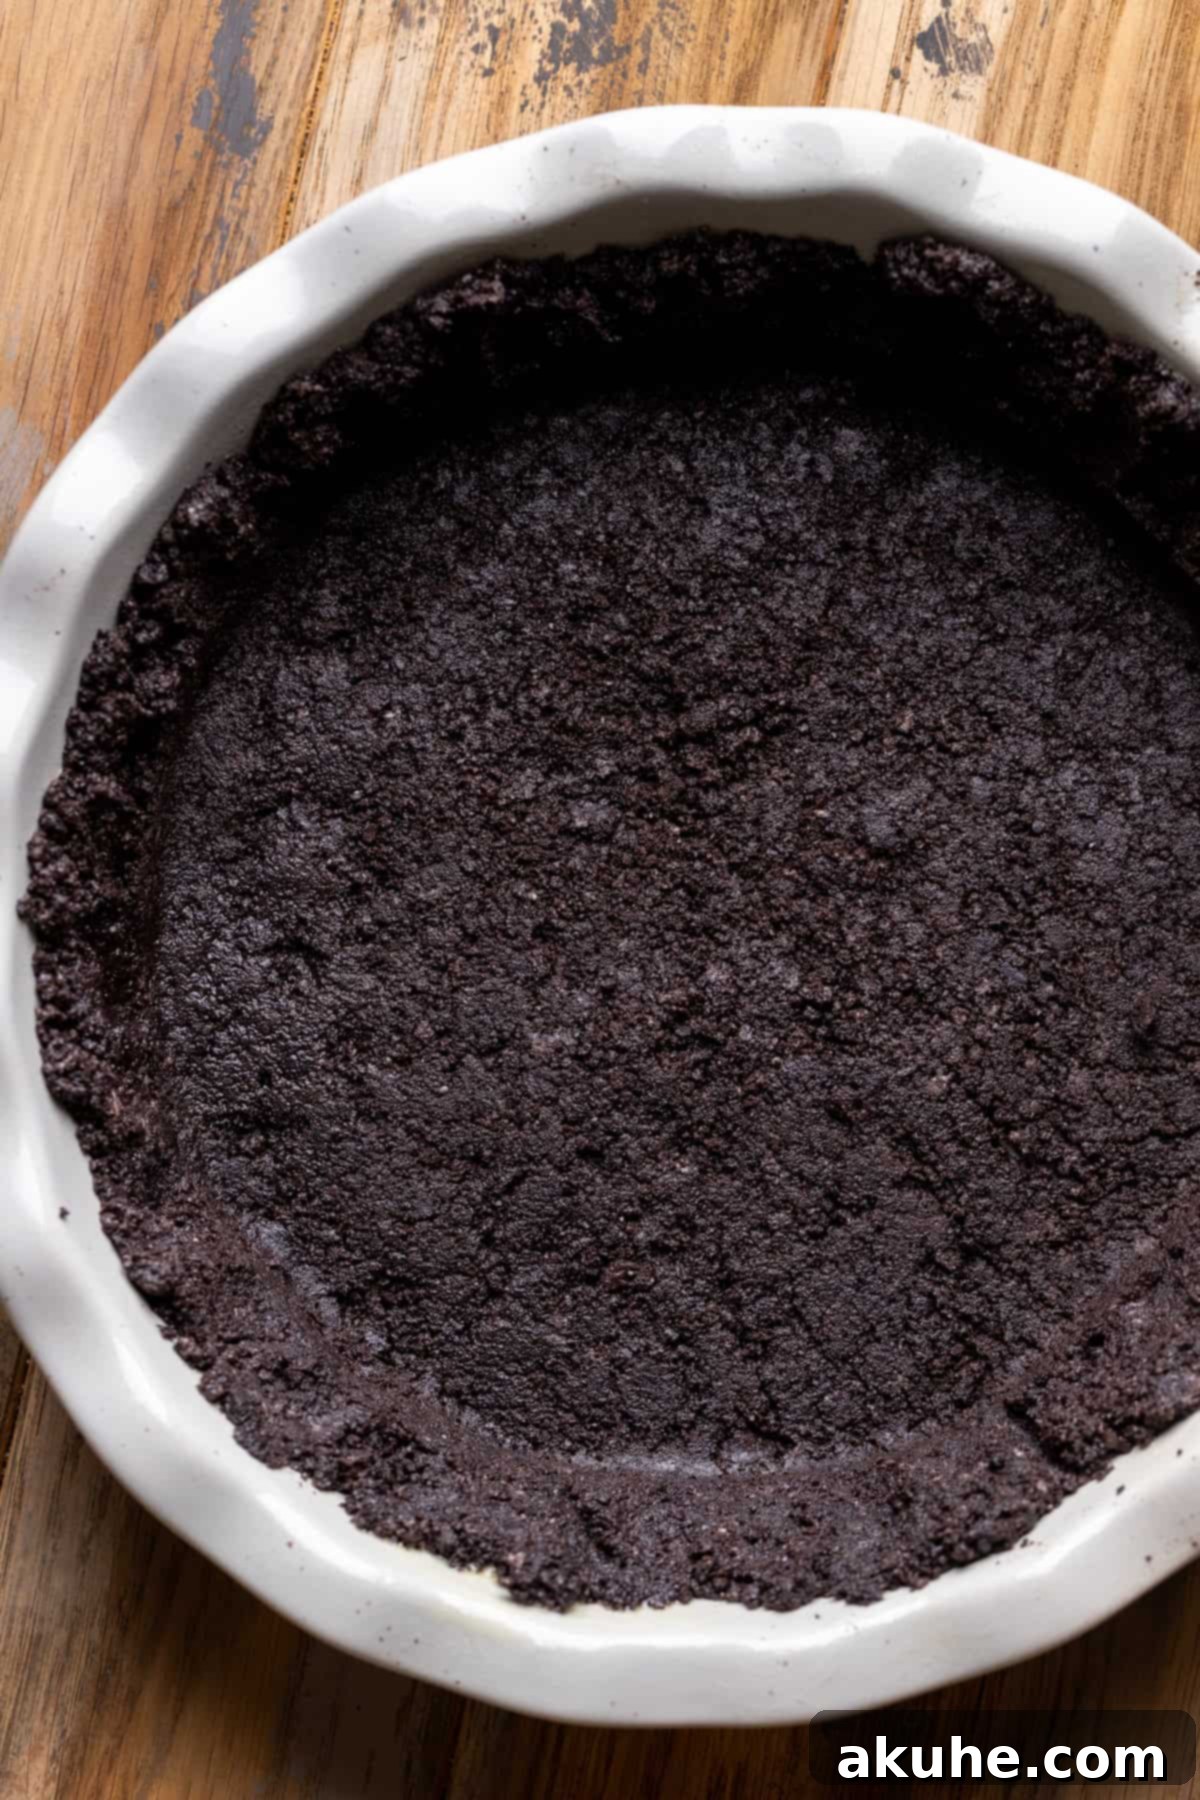
- STEP 2: Create Oreo Crumbs. Place 25 whole Oreo cookies (both cookie and cream filling) into a food processor. Pulse until the cookies are finely ground into even crumbs. There should be no large chunks remaining. Next, add the 5 tablespoons of melted unsalted butter to the food processor with the crumbs. Pulse again until the butter is fully incorporated and the mixture resembles wet sand.
- STEP 3: Form the Crust. Carefully pour the buttered Oreo crumb mixture into your prepared 9-inch pie pan. Using your hands, gently but firmly press the mixture evenly across the bottom of the pan and halfway up the sides. For a perfectly flat and compact bottom crust, use the flat bottom of a measuring cup or a glass to press down firmly. This compression is key to a stable crust.
- STEP 4: Chill the Crust. Once the crust is formed, place the pie pan into the freezer. Allow it to chill and firm up while you proceed with preparing the delicious pie fillings. This chilling step helps the crust hold its shape and prevents it from becoming crumbly.
Step-by-Step Guide: Preparing the Luscious Chocolate Layer
Here’s how to create the rich and creamy chocolate component of your Chocolate Peanut Butter Pie. This layer provides a deep cocoa flavor that perfectly complements the peanut butter.
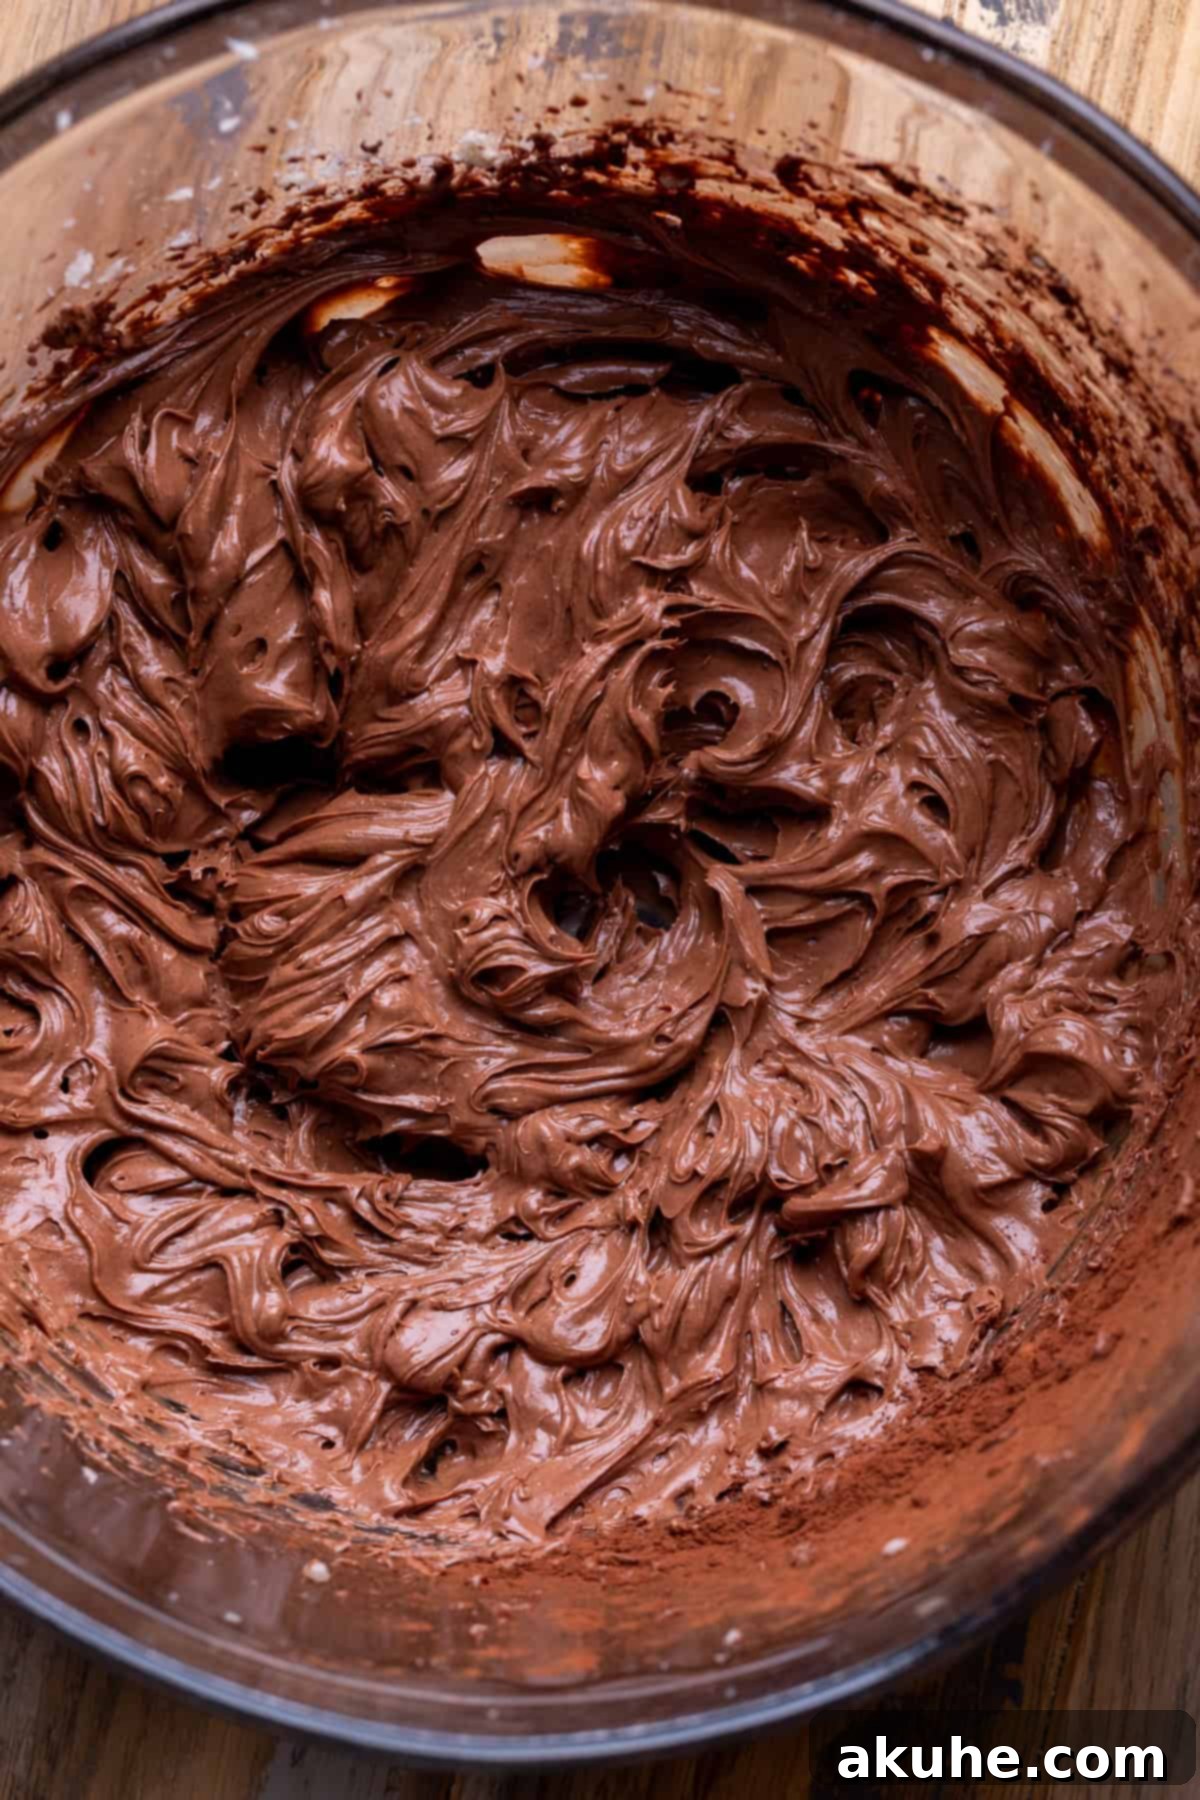
- STEP 1: Beat Cream Cheese, Sugar, and Cocoa. In a medium-sized mixing bowl, combine the 6 ounces of room-temperature cream cheese, 1/2 cup white granulated sugar, and 2 tablespoons of unsweetened cocoa powder. Using a hand mixer (or stand mixer with a paddle attachment), beat these ingredients together on high speed for approximately 2 minutes. The mixture should become smooth, light, and well combined, with no lumps of cream cheese remaining.
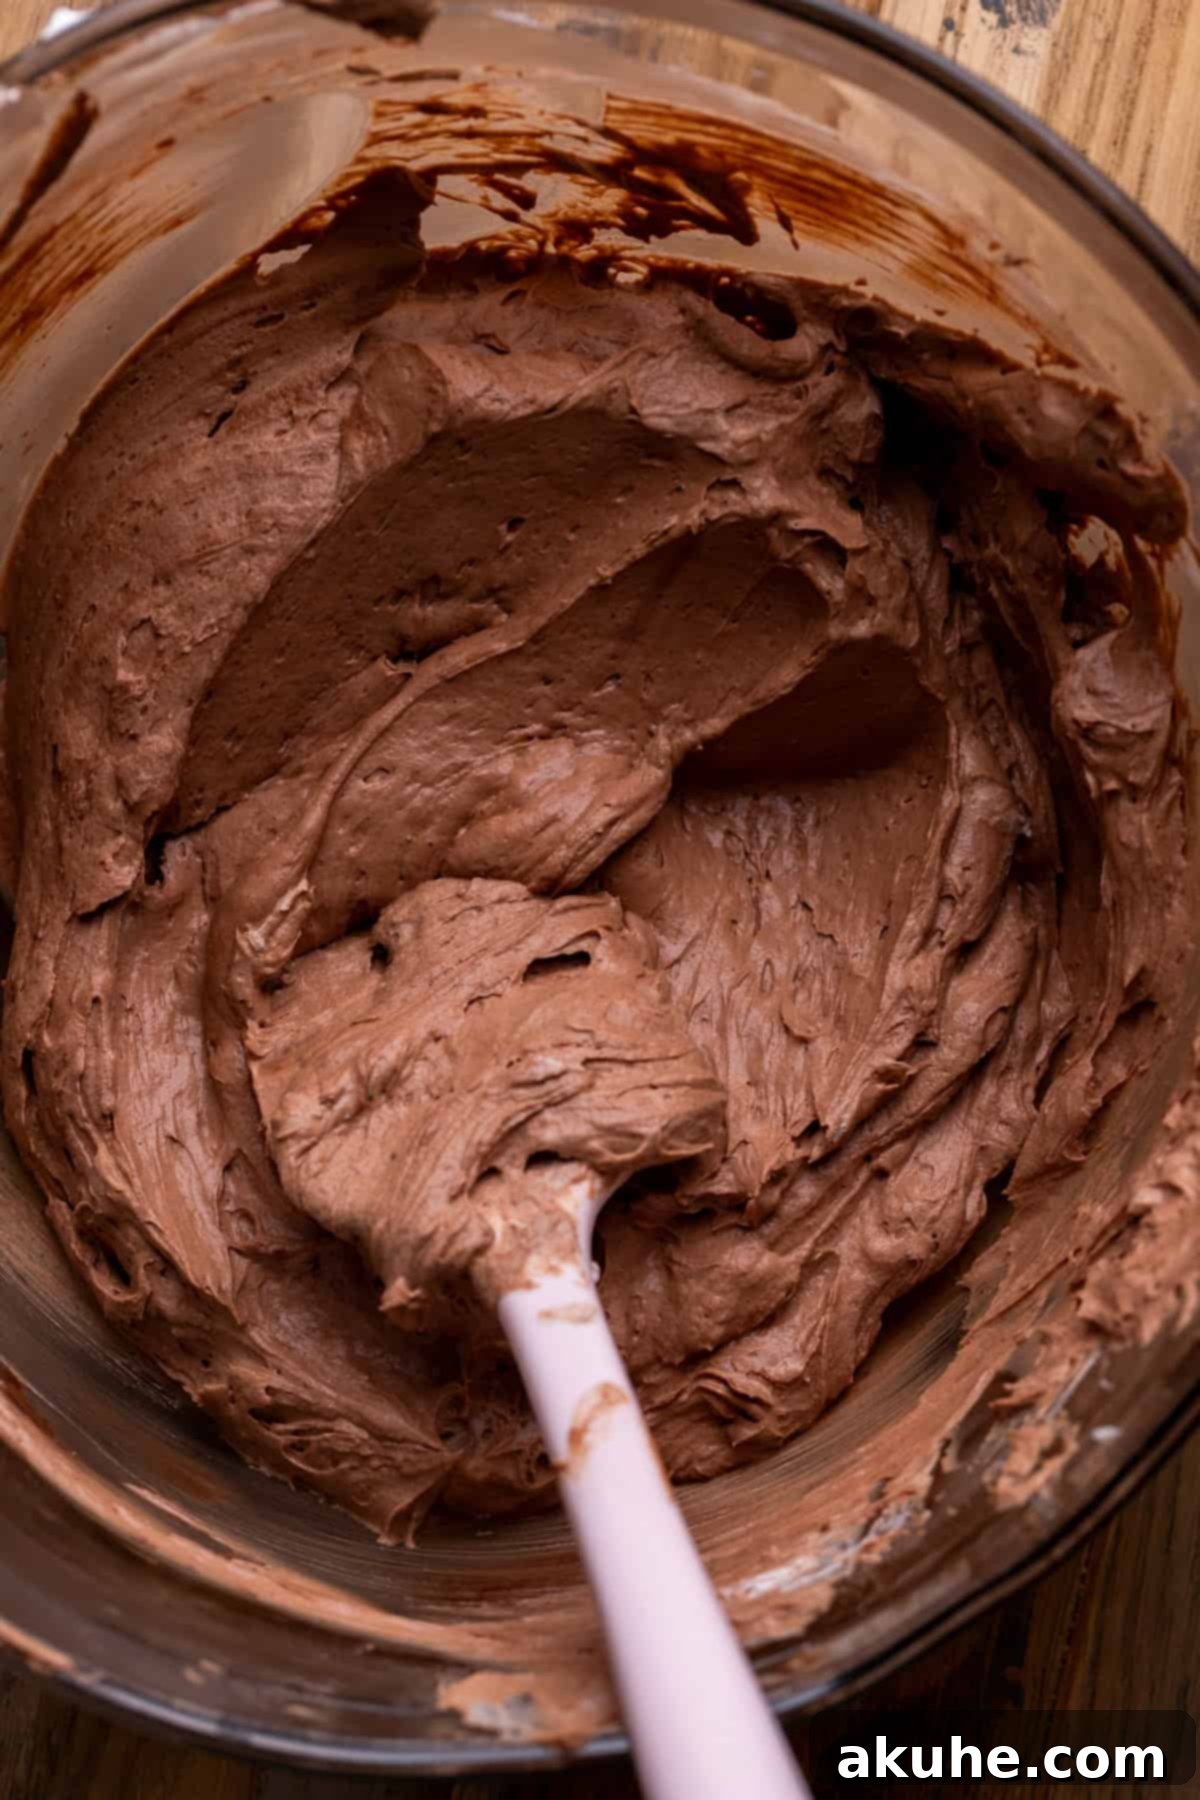
- STEP 2: Mix in Wet Ingredients. Add 1 teaspoon of pure vanilla extract, 1/3 cup of room-temperature sour cream (or Greek yogurt), and 3.5 ounces of melted semi-sweet chocolate bar (such as Lindt 72%). Continue mixing on medium speed until all ingredients are thoroughly combined and the mixture is uniformly chocolate-colored and smooth. Scrape down the sides of the bowl as needed to ensure everything is incorporated. Set this chocolate pie batter aside while you prepare the peanut butter layer and whip the cream.
Step-by-Step Guide: Creating the Creamy Peanut Butter Layer
Now, let’s create the equally delightful peanut butter layer for your Chocolate Peanut Butter Pie. This creamy, dreamy filling is what makes the dessert truly irresistible.
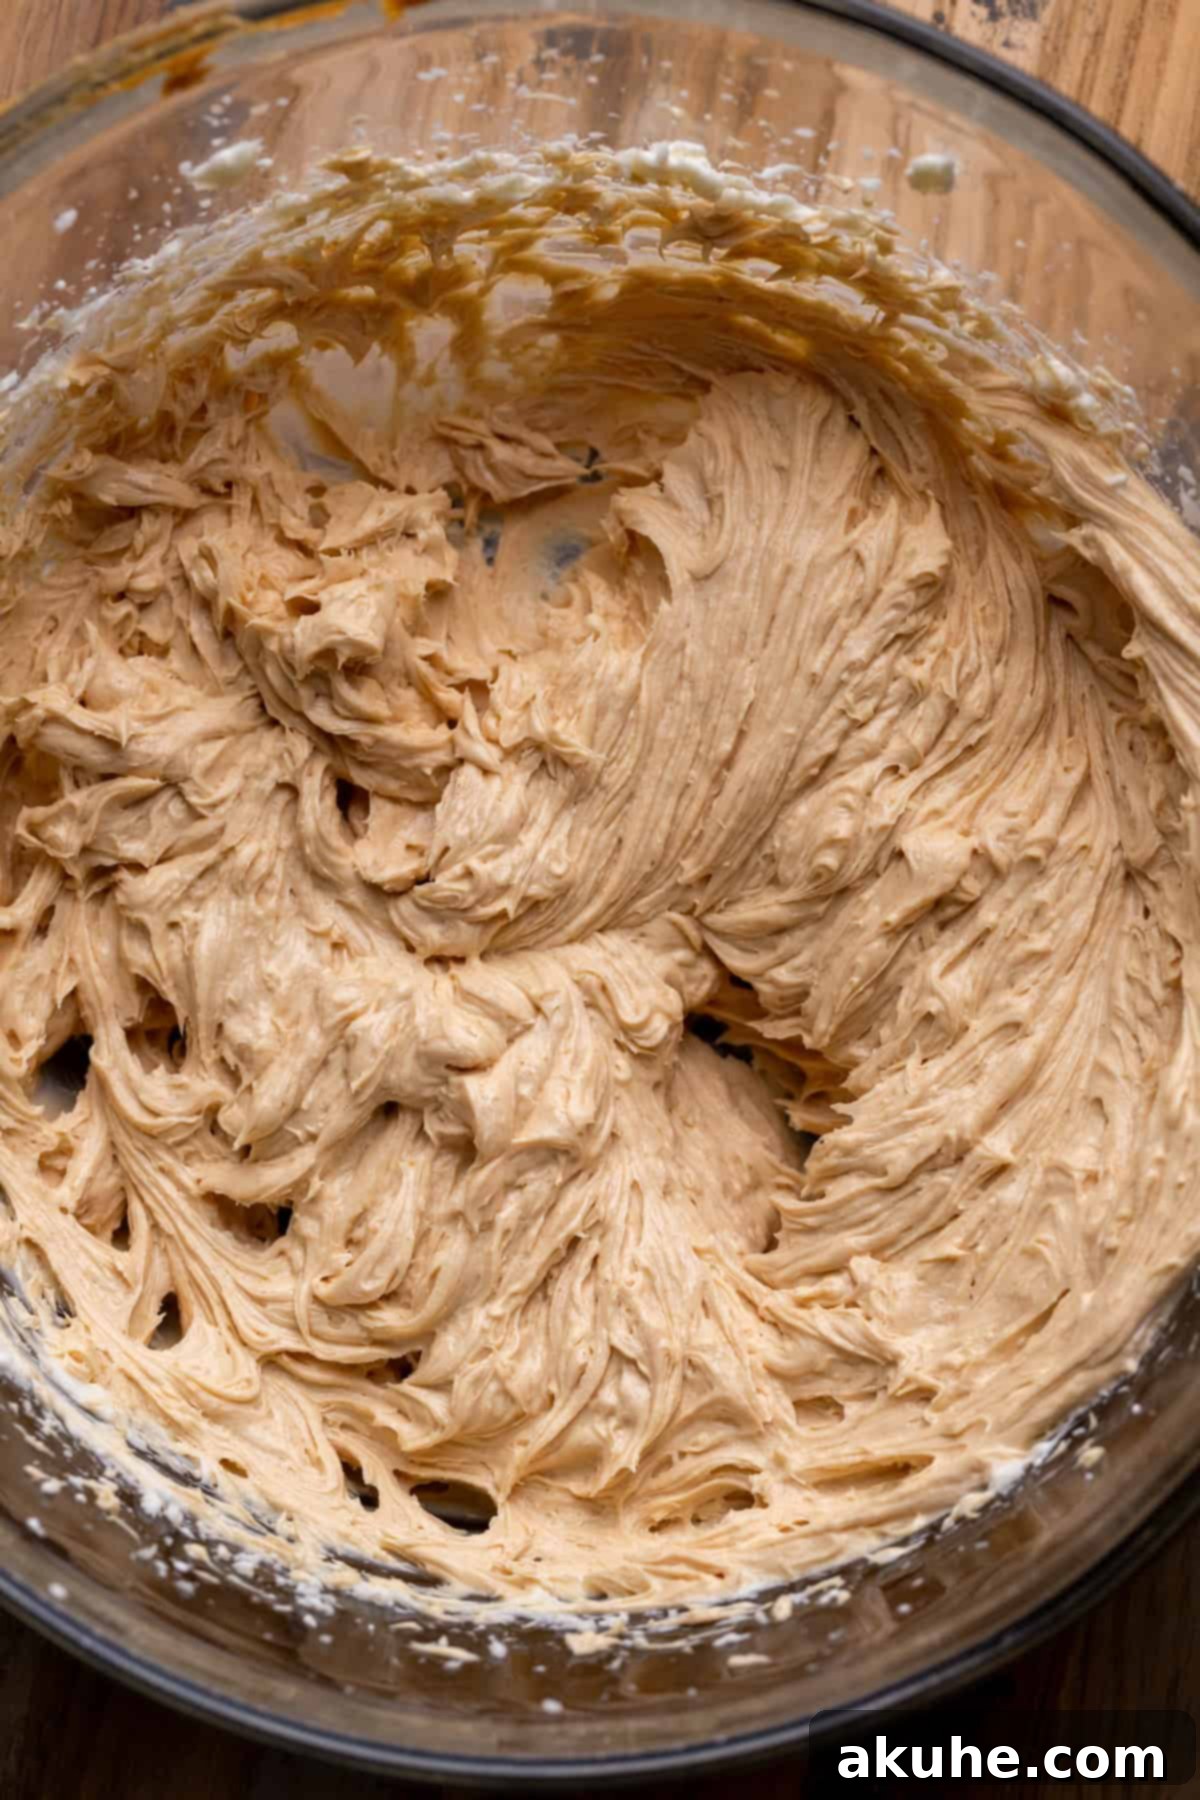
- STEP 1: Beat Cream Cheese and Sugar. In a separate medium-sized mixing bowl, combine 10 ounces of room-temperature cream cheese and 1/4 cup of white granulated sugar. Using your hand mixer, beat these ingredients together on high speed for 2 minutes, until the mixture is light, fluffy, and completely smooth.
- STEP 2: Mix in Peanut Butter and Wet Ingredients. Add 3/4 cup of creamy peanut butter, 1 teaspoon of pure vanilla extract, and 1/4 cup of room-temperature sour cream (or Greek yogurt) to the bowl. Continue mixing on medium speed until all the ingredients are well combined and the mixture is smooth and uniform. Scrape the sides of the bowl to ensure full incorporation.
- STEP 3: Whip the Heavy Cream. Get a chilled metal bowl and attach the whisk attachment to your stand mixer (or use a hand mixer). Pour in 2 cups of very cold heavy cream and 1/2 cup of sifted powdered sugar. Beat on high speed until stiff peaks form. This means when you lift the whisk, the peaks of cream will hold their shape firmly. Be careful not to over-whip, or it will turn grainy.
- STEP 4: Distribute Whipped Cream. Carefully pour half of the freshly whipped cream into your prepared chocolate pie batter and the remaining half into your peanut butter pie batter.
- STEP 5: Gently Fold in Whipped Cream. This is a critical step for maintaining the pie’s light texture. Using a rubber spatula, very gently fold the whipped cream into both the chocolate and peanut butter batters separately. Use a light, lifting motion from the bottom of the bowl upwards, being careful not to deflate the air from the whipped cream. This slow and gentle folding should take a couple of minutes for each batter, resulting in two incredibly airy and creamy fillings.
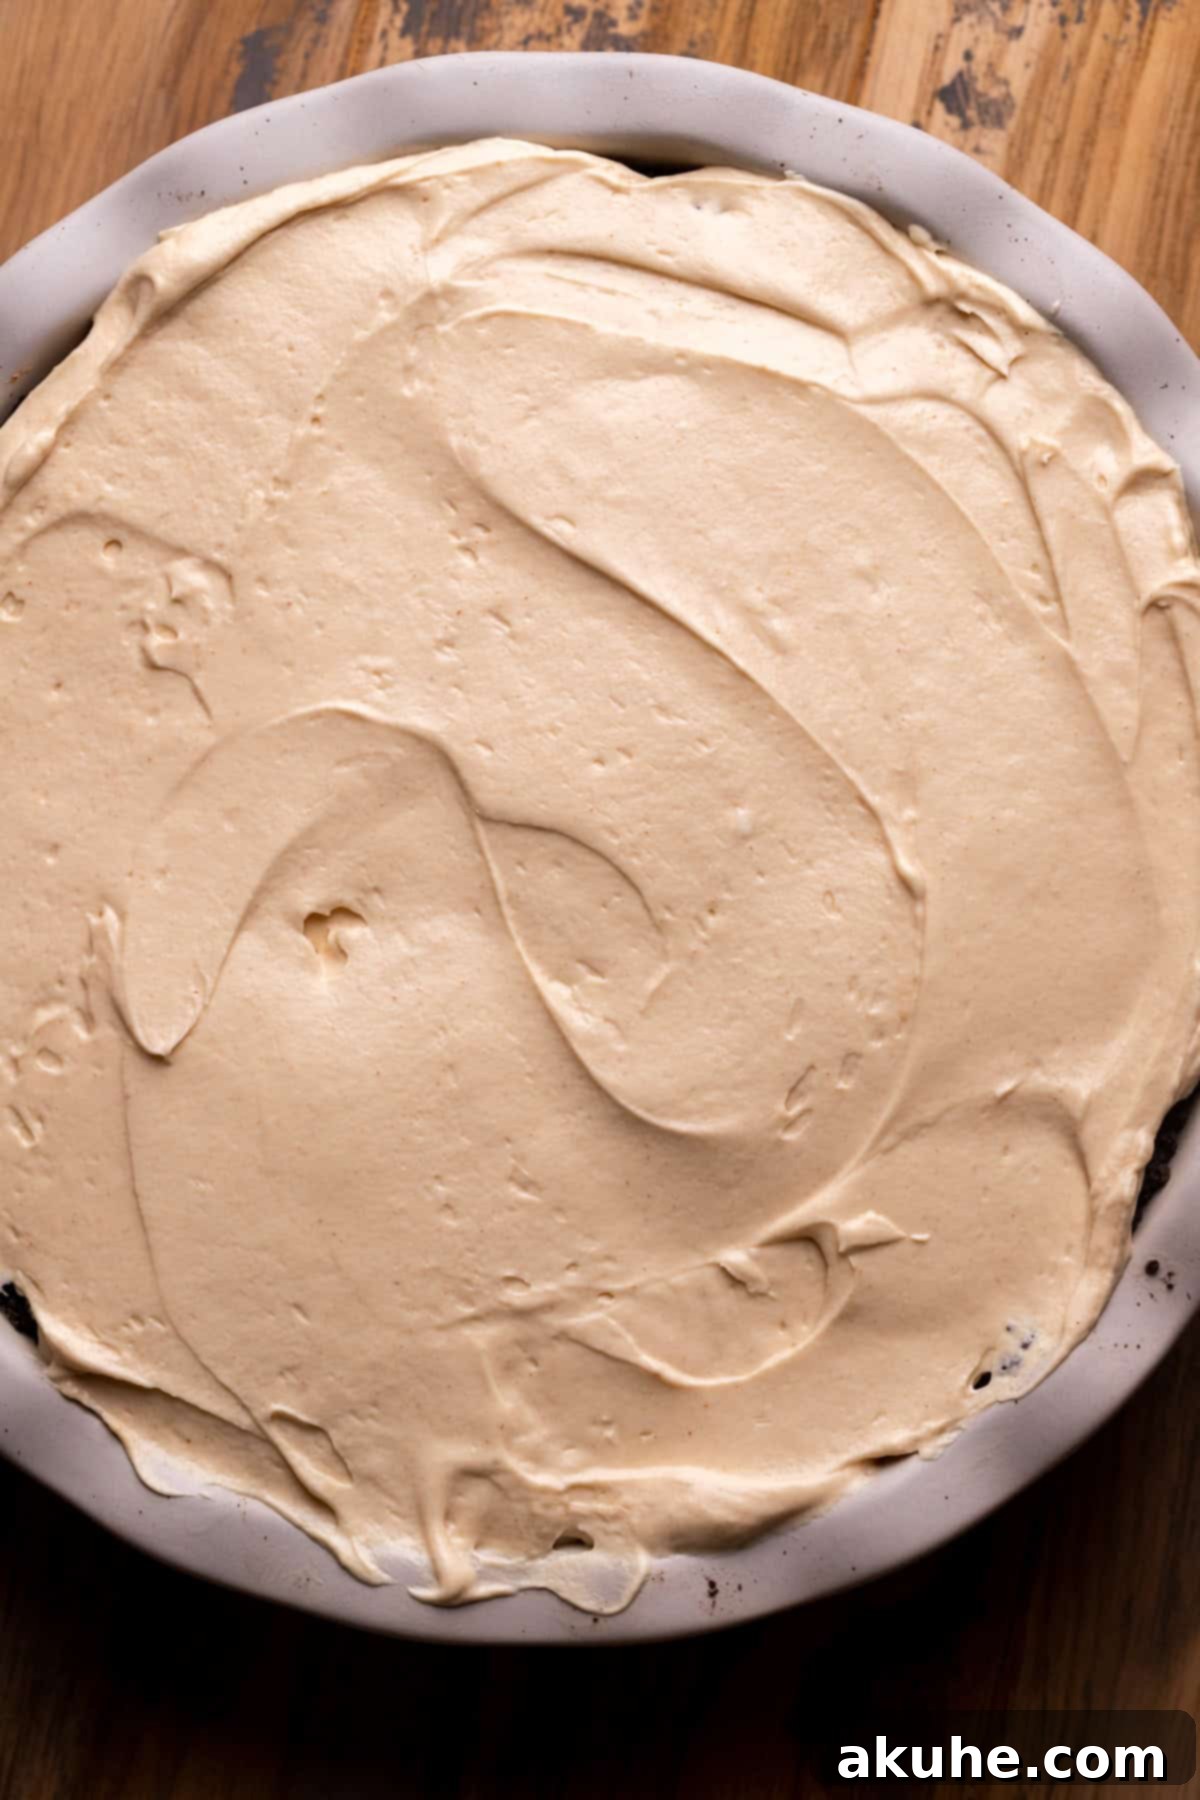
- STEP 6: Layer the Pie Fillings. Retrieve your chilled Oreo crust from the freezer. Evenly spread the chocolate pie filling over the bottom of the crust, creating a smooth and uniform layer. Next, carefully spread the peanut butter pie filling over the chocolate layer, ensuring it is also an even and smooth coating.
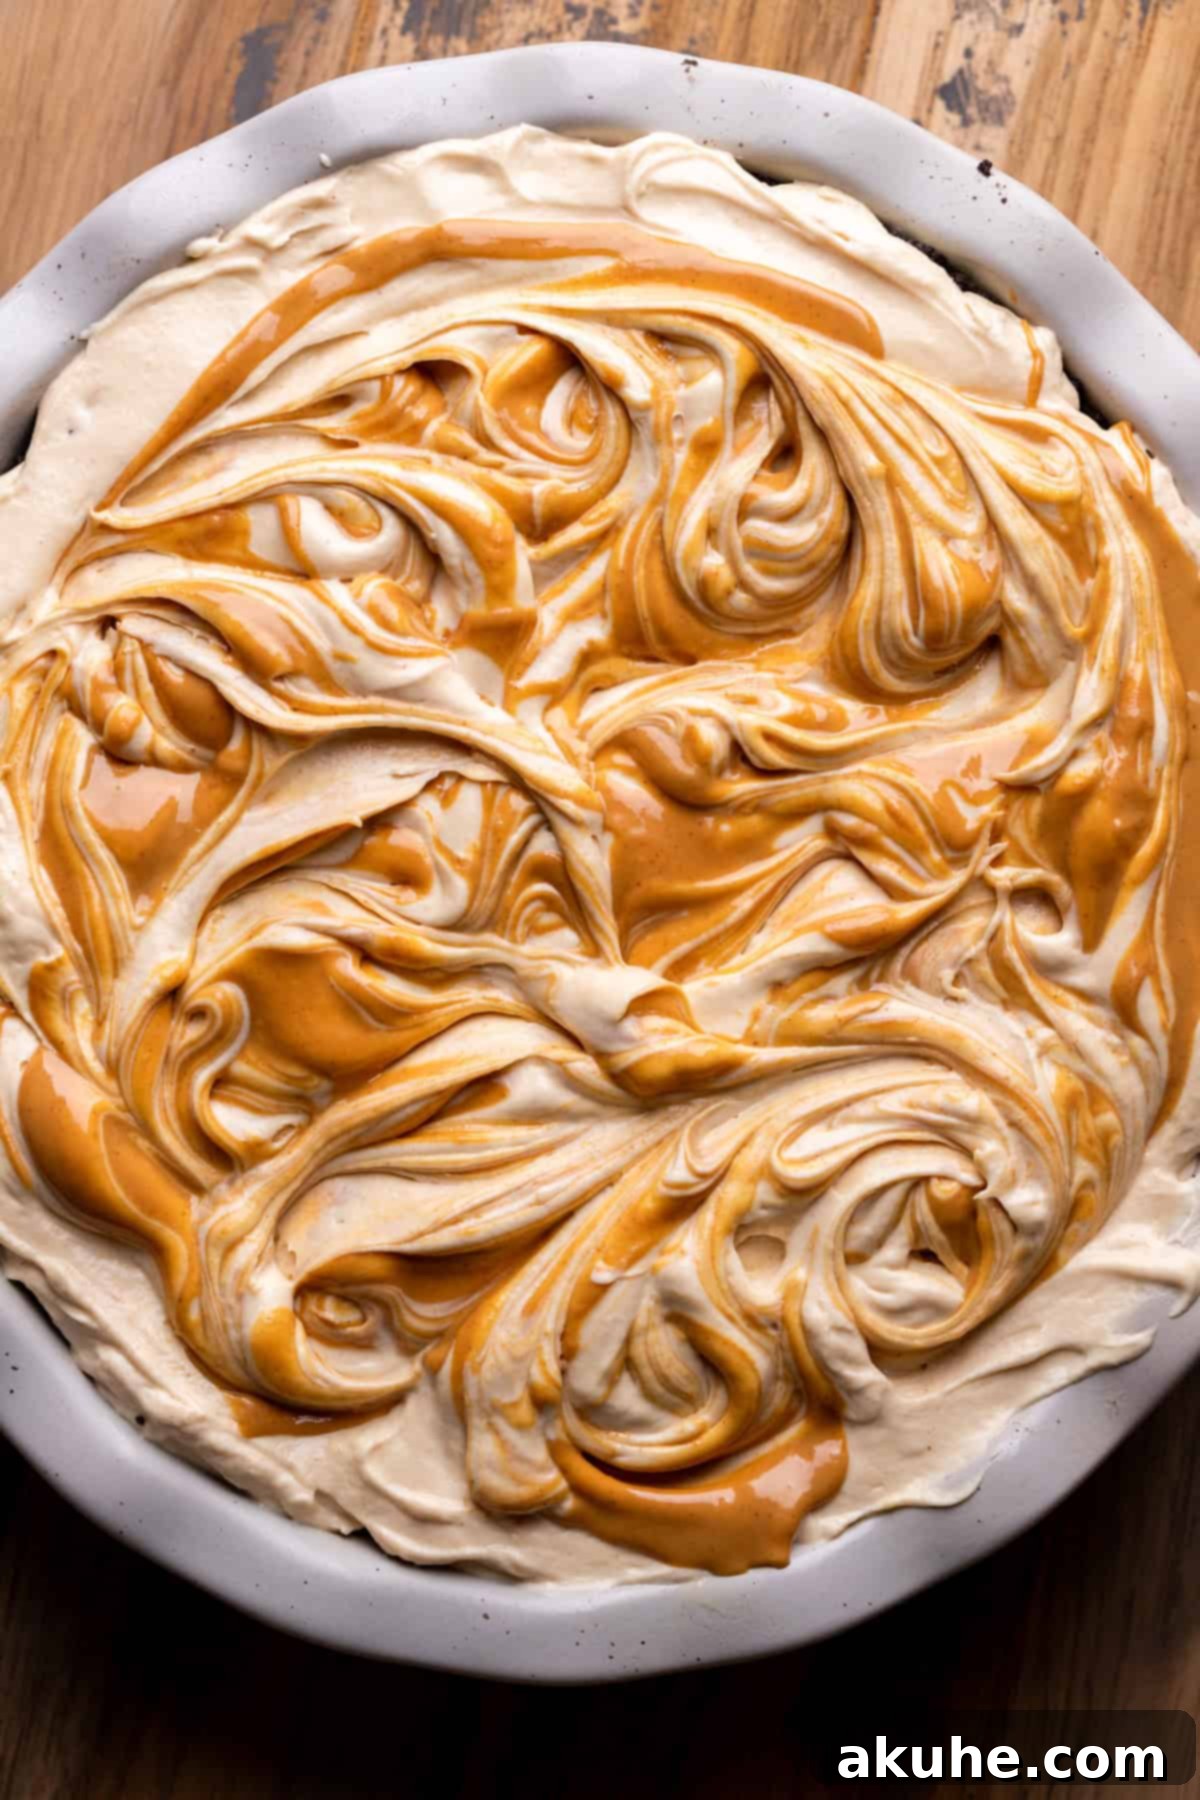
- STEP 7: Add Melted Peanut Butter Swirl. For an extra touch of peanut butter flavor and a beautiful presentation, gently drizzle 1/4 cup of melted creamy peanut butter over the top of the peanut butter layer. Then, take a butter knife or a skewer and lightly swirl the melted peanut butter into the top layer of the pie. Be careful not to dig too deep and disturb the layers underneath.
- STEP 8: Chill Thoroughly. Cover the pie pan tightly with aluminum foil to protect the surface and prevent any refrigerator odors from affecting the flavor. Place the pie in the refrigerator to chill for a minimum of 6 hours, or ideally, overnight. This extended chilling time is crucial for the pie to set properly and develop its firm, sliceable texture. Just before serving, arrange some peanut butter cups on top for a festive and delicious garnish. Keep the pie chilled until you are ready to present and enjoy this incredible dessert!
- Proper Pan Preparation is Paramount: Do not skimp on spraying your pie tin! Using a baking spray that contains flour is highly recommended. A well-greased and floured pan ensures that your delicate Oreo crust can be removed cleanly from the pan when slicing. If the crust sticks, it can crack, compromising the structural integrity of this soft, creamy dessert. The crust acts as the main support, so it must stay intact.
- Gentle Whipped Cream Folding: This is arguably the most crucial step for achieving that signature light and airy texture. When incorporating the whipped cream into both the chocolate and peanut butter batters, be exceedingly gentle. Use a rubber spatula to fold the cream in with a light, scooping motion, trying not to press out any of the air you worked so hard to whip in. If you are too rough, the air will be lost, and your pie fillings will be denser and might not set as firmly. Take your time with this step – a few minutes of careful folding can make all the difference.
- Patience with Chilling Time: This pie absolutely requires a long chilling period to set correctly. While 6 hours is the minimum, allowing it to chill overnight in the refrigerator is highly recommended for the best results. A properly chilled pie will be firm enough to slice cleanly and maintain its beautiful layers. Rushing the chilling process can lead to a pie that is too soft and collapses when served. Resist the urge to cut into it too early!
- Room Temperature Dairy for Smoothness: Ensure your cream cheese and sour cream are at proper room temperature. Cold dairy products are much harder to beat smooth and can leave lumps in your filling, affecting the overall silky texture of your pie. Plan ahead and take them out of the fridge at least 1-2 hours before you begin mixing.
- Sift Powdered Sugar: Always sift your powdered sugar, especially when adding it to the heavy cream for whipping. Powdered sugar is prone to clumping, and sifting prevents these lumps from ending up in your smooth whipped cream and ultimately in your pie.
- Quality Chocolate Matters: For the chocolate layer, a good quality semi-sweet chocolate bar (around 60-72% cocoa solids) will yield the best flavor. Avoid chocolate chips as they contain stabilizers that prevent them from melting as smoothly. Opt for a baking bar for superior results.
- Use Creamy Peanut Butter: For both the filling and the decorative swirl, stick to creamy, processed peanut butter (like Jif or Skippy). Natural peanut butter often separates, and its oil content can make the pie greasy or prevent it from setting properly.
- Skip the Melted Peanut Butter Drizzle: If you’re short on time or prefer a less intense peanut butter flavor, you can simply omit the melted peanut butter drizzle and swirl on top. The pie will still be wonderfully delicious, with a slightly milder peanut butter presence.
- Decadent Chocolate Whipped Cream Topping: For an extra layer of chocolatey indulgence, consider making a chocolate whipped cream for a topping instead of plain whipped cream. You can find specific instructions and ratios for making rich chocolate whipped cream in this brownie Nutella pie recipe. It adds another dimension of flavor and elegance.
- Convenient Store-Bought Crust: If you’re pressed for time or prefer not to make your own crust, a pre-made crust is a perfectly acceptable substitute. A standard graham cracker crust will work, offering a nice buttery flavor. However, for the most cohesive flavor profile, I highly recommend finding a pre-made chocolate cookie crust if available, as it will best complement the chocolate and peanut butter fillings.
- Add a Caramel Swirl: For an additional layer of sweetness and complexity, drizzle some store-bought or homemade caramel sauce over the chocolate layer before adding the peanut butter layer, or as an extra swirl on top alongside the peanut butter. This creates a “Turtle” inspired flavor.
- Crunchy Toppings: Instead of just peanut butter cups, consider adding other crunchy elements to the top for texture. Crushed peanuts, chocolate shavings, mini chocolate chips, or even a sprinkle of sea salt can elevate the presentation and taste.
- Nonstick Baking Spray with Flour: A good quality baking spray that includes flour is essential for ensuring your crust doesn’t stick. I frequently use this type of nonstick spray for reliable release.
- Offset Spatula: This handy tool is incredibly useful for evenly spreading the creamy fillings over the crust. Its angled blade allows for smooth and precise application, making sure your layers are perfectly flat. This offset spatula is a great choice for bakers.
- Food Processor or Blender: Crucial for transforming those Oreos into fine, uniform crumbs for the crust.
- Electric Hand Mixer or Stand Mixer: Essential for beating the cream cheese and whipping the heavy cream to achieve the desired light and airy texture for the fillings.
- 9-inch Pie Pan: A standard size for this recipe, a ceramic or glass pie pan works well.
- Rubber Spatula: Indispensable for gently folding in the whipped cream without deflating it, and for scraping down the sides of bowls.
- Peanut Butter Banana Muffins
- Peanut Butter and Jelly Cookies
- Reese’s Peanut Butter Cup Pie
- Peanut Butter Cheesecake
- Banana Peanut Butter Cookies
- 25 Oreos, the whole cookie with cream
- 5 TBSP Unsalted butter, melted
- 6 oz Cream cheese, room temperature
- 2 TBSP Unsweetened cocoa powder
- 1/2 cup White granulated sugar
- 1/3 cup Sour cream, room temperature or Greek yogurt
- 1 tsp Pure vanilla extract
- 3.5 oz Semi-sweet Chocolate bar, melted (Lindt 72% recommended)
- 10 oz Cream cheese, room temperature
- 1/4 cup White granulated sugar
- 3/4 cup Creamy Peanut butter
- 1 tsp Pure vanilla extract
- 1/4 cup Sour cream, room temperature or Greek yogurt
- 2 cups Heavy cream, cold
- 1/2 cup Powdered sugar, sifted
- 1/4 cup Creamy Peanut butter, melted (for drizzle)
- Peanut butter cups, for decoration
- Prepare a 9-inch pie pan (ceramic recommended). Spray generously with nonstick baking spray with flour. Set aside.
- In a food processor, blend 25 Oreos until fine crumbs form. Add 5 TBSP melted unsalted butter and mix until well combined.
- Press the crumb mixture into the prepared pie pan, pressing halfway up the sides. Compact the bottom firmly with a measuring cup.
- Place the crust in the freezer to chill while preparing the fillings.
- In a medium bowl, beat 6 oz room-temperature cream cheese, 1/2 cup white granulated sugar, and 2 TBSP unsweetened cocoa powder on high speed for 2 minutes until smooth.
- Add 1 tsp pure vanilla extract, 1/3 cup room-temperature sour cream, and 3.5 oz melted semi-sweet chocolate. Mix on medium speed until fully combined. Set aside.
- In a separate medium bowl, beat 10 oz room-temperature cream cheese and 1/4 cup white granulated sugar on high speed for 2 minutes until light and fluffy.
- Add 3/4 cup creamy peanut butter, 1 tsp pure vanilla extract, and 1/4 cup room-temperature sour cream. Mix on medium speed until combined.
- In a chilled metal bowl with a whisk attachment, beat 2 cups cold heavy cream and 1/2 cup sifted powdered sugar on high speed until stiff peaks form.
- Pour half of the whipped cream into the chocolate pie batter and the remaining half into the peanut butter pie batter.
- Using a rubber spatula, gently fold the whipped cream into both pie batters separately. Be very careful not to deflate the air; this should take a few minutes for each.
- Spread the chocolate pie filling evenly over the chilled Oreo crust. Then, spread the peanut butter pie filling evenly over the chocolate layer. Drizzle 1/4 cup melted creamy peanut butter over the top and gently swirl it in with a knife.
- Cover the pie tightly with aluminum foil and chill in the refrigerator for at least 6 hours, or preferably overnight, to allow it to set completely.
- Once chilled and set, garnish with peanut butter cups. Keep cold until ready to serve.


Pro Tips for the Perfect No-Bake Chocolate Peanut Butter Pie
Achieving a flawless no-bake chocolate peanut butter pie is easy with a few expert insights. Keep these tips in mind to ensure your pie turns out beautifully every time:
Frequently Asked Questions (FAQ)
There are two primary reasons why your pie might not have set. The most common is overmixing the whipped cream into the cream cheese mixtures. If the whipped cream is deflated too much during folding, the fillings will lose their airy structure and won’t firm up properly. The second reason is insufficient chilling time. This pie requires at least 6 hours, but ideally overnight, in the refrigerator to fully set. Be patient and ensure proper folding techniques.
Absolutely! For a much thicker, taller pie, you can use an 8-inch springform pan. This will result in more dramatic layers. Alternatively, you can halve the recipe and use an 8×8-inch square pan to create delicious pie bars that are easy to serve. Adjust chilling times slightly for thicker or thinner pies.
Yes, mini chocolate peanut butter pies are a fantastic idea! You can divide this recipe into thirds and use a standard muffin pan (lined with paper liners or greased well) to make approximately 12 individual mini pies. The crust will be formed by pressing the Oreo mixture into the bottom and up the sides of the muffin cups. Adjust chilling time as mini pies will set faster.
While the Oreo crust provides a classic chocolate base, you can experiment with other cookie crumbs. Graham cracker crumbs mixed with a little cocoa powder would work, or even chocolate chip cookies for a different flavor profile. Just ensure the cookie crumbs are fine and mixed with enough melted butter to hold together.
For best results, melt your chocolate bar using a double boiler method or carefully in the microwave. If using a microwave, heat in 20-30 second intervals, stirring well after each interval, until smooth and fully melted. Be careful not to overheat, as chocolate can seize and become lumpy.
Creative Variations for Your Peanut Butter Chocolate Pie
While the classic no-bake chocolate peanut butter pie is perfect as is, these variations allow you to customize it to your taste or simplify the process:
Recommended Tools for a Smooth Baking Experience
Having the right tools can make all the difference in preparing your Chocolate Peanut Butter Pie:
Storing and Freezing Your Delectable Pie
Proper storage is key to enjoying your No-Bake Chocolate Peanut Butter Pie for days to come. Here’s how to keep it fresh and delicious:
Refrigerator Storage: Store the entire pie or individual slices in an airtight container, such as a cake carrier, in the refrigerator. This will keep it fresh and prevent it from absorbing any unwanted odors. The pie will remain delicious for up to 5 days, though its texture is best within the first 2-3 days.
Freezing Individual Slices: To enjoy your pie over a longer period, individual slices can be frozen. Cut the pie into your desired serving sizes, then wrap each slice tightly in plastic wrap, followed by a layer of aluminum foil. Place the wrapped slices in a freezer-safe bag or container. They can be frozen for up to 30 days. To thaw, simply remove a slice from the freezer and let it sit at room temperature for 1-2 hours, or in the refrigerator for 3-4 hours, until softened to your liking.
Freezing the Whole Pie (Undecorated): You can also freeze the entire pie before adding any decorations like peanut butter cups. First, ensure the pie has been thoroughly chilled overnight in the refrigerator to fully set. Then, wrap the entire pie tightly in several layers of plastic wrap, followed by a layer of aluminum foil. This helps protect it from freezer burn. The whole pie can be frozen for up to 30 days. To thaw, transfer the wrapped pie to the refrigerator and let it thaw slowly for 24 hours before unwrapping and decorating with peanut butter cups. Keep it chilled until ready to serve.

Other Irresistible Chocolate Peanut Butter Recipes To Try
Explore These Peanut Butter Delights Too!
Loved this recipe? Please leave a STAR REVIEW and share your thoughts below! Don’t forget to tag me on Instagram @stephaniesweettreats. For more delicious ideas, make sure to follow me on Pinterest.

Chocolate Peanut Butter Pie
Ingredients
Oreo Crust
Chocolate Pie
Peanut Butter Pie
Instructions
Oreo Crust
Chocolate Pie
Peanut Butter Pie
Notes
Nutrition Information
Calories: 507kcal, Carbohydrates: 36g, Protein: 8g, Fat: 40g, Saturated Fat: 20g, Polyunsaturated Fat: 4g, Monounsaturated Fat: 13g, Trans Fat: 0.2g, Cholesterol: 77mg, Sodium: 244mg, Potassium: 266mg, Fiber: 2g, Sugar: 22g, Vitamin A: 982IU, Vitamin C: 0.3mg, Calcium: 74mg, Iron: 3mg
