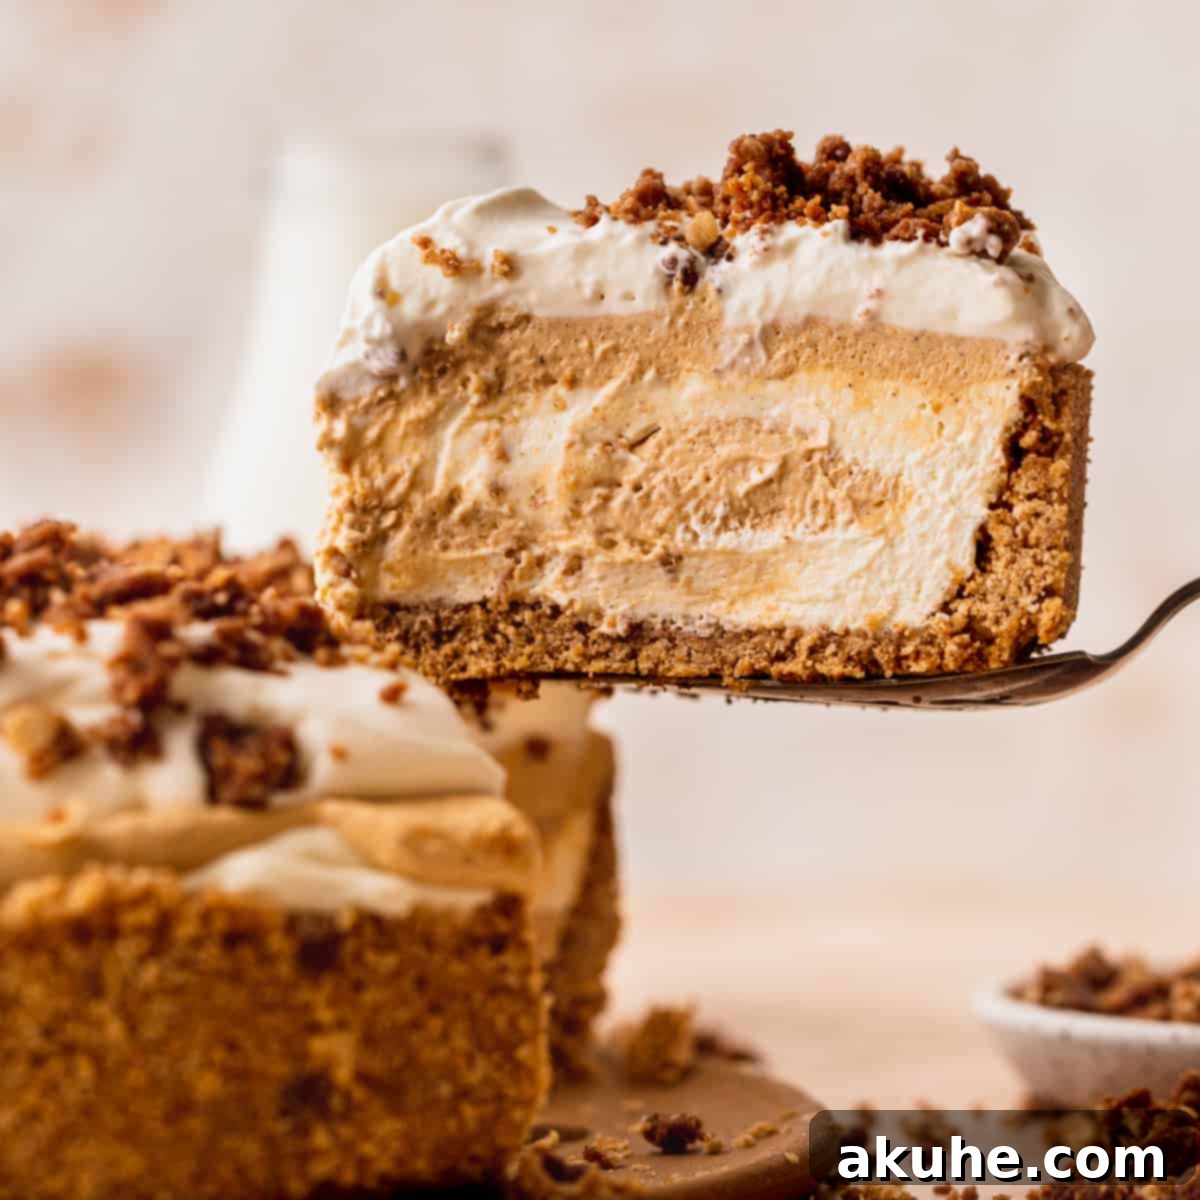
Welcome to the ultimate guide for crafting the most delectable Swirled No-Bake Pumpkin Cheesecake, a dessert that promises to be the star of your fall gatherings and holiday feasts. Forget the oven and the stress of traditional baking; this recipe delivers rich, creamy pumpkin and classic cheesecake layers, all beautifully swirled together, without ever needing to touch your oven (except for an optional, delightful crumble topping!).
Imagine a velvety smooth, spiced pumpkin cheesecake intricately mingled with a luscious, tangy traditional cheesecake. This masterpiece rests upon a perfectly spiced graham cracker crust, creating a harmonious blend of textures and flavors. To elevate it further, we crown it with a cloud of homemade whipped cream and a crunchy, cinnamon oat crumble that provides a delightful textural contrast. This isn’t just a dessert; it’s an experience, embodying the cozy, comforting essence of autumn in every single bite.
Perfect for Thanksgiving, Christmas, or any seasonal celebration, this no-bake wonder is designed for ease and maximum flavor. Whether you’re a seasoned baker looking for a simpler option or a beginner eager to impress, this recipe offers a foolproof path to a show-stopping dessert. Its appealing presentation and irresistible taste make it an instant favorite, especially for those who appreciate pumpkin flavors but seek an alternative to the classic pumpkin pie.
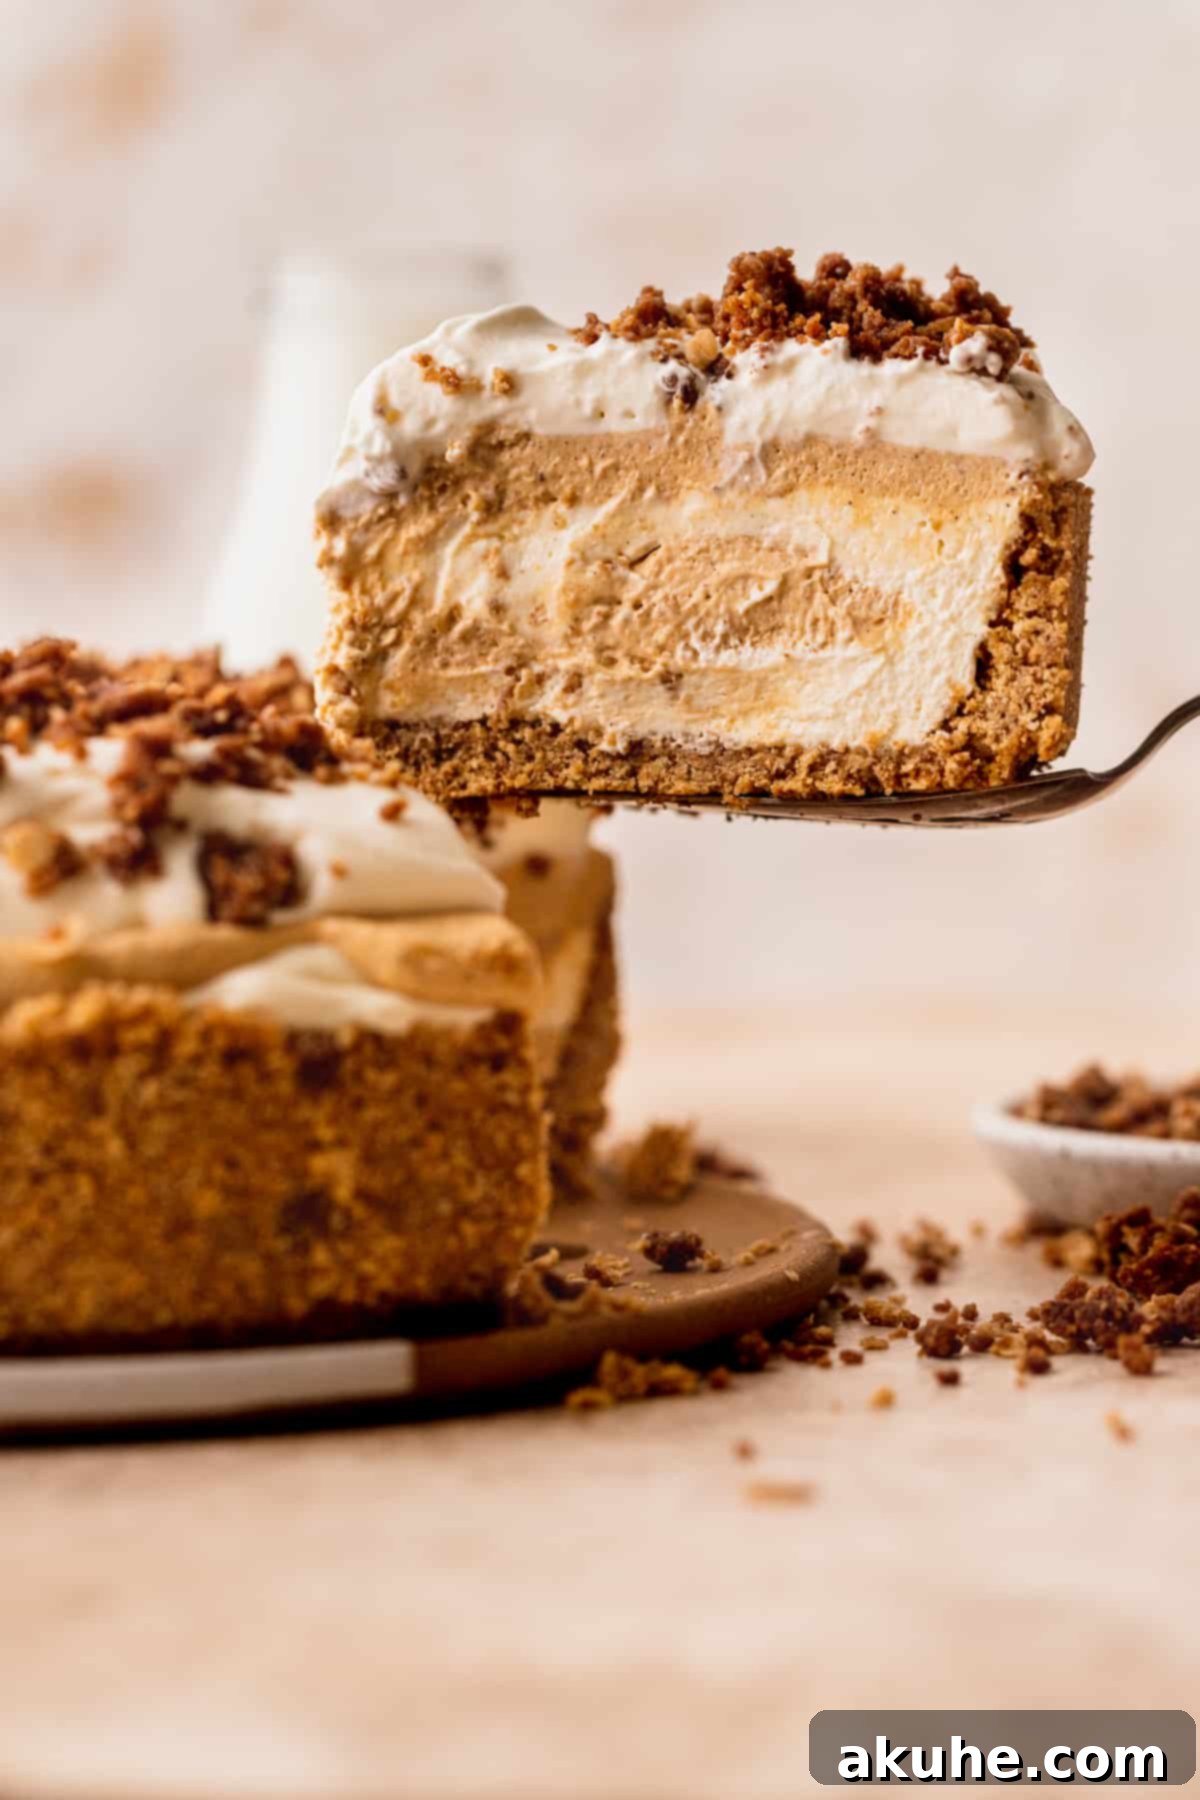
For those who adore the concept of cheesecake but shy away from the complexities of water baths and potential cracks that come with baking, this no-bake version is a dream come true. It captures all the beloved flavors of fall in a refreshing and effortlessly elegant format. The distinctive swirl of pumpkin and vanilla cheesecake offers a dynamic flavor profile that ensures every forkful is exciting, combining the sweet, earthy notes of pumpkin pie spice with the bright, creamy tang of traditional cheesecake.
If your heart desires a baked pumpkin cheesecake, we highly recommend exploring our Double Layer Pumpkin Cheesecake for a different, yet equally delightful, baking adventure. And for those who simply can’t get enough of pumpkin, discover more enchanting pumpkin-infused treats like our Pumpkin S’mores Cookies, fluffy Pumpkin Chocolate Chip Muffins, and comforting Pumpkin Oatmeal Cookies. There’s a pumpkin recipe for every craving!
Why This No-Bake Pumpkin Cheesecake Will Be Your New Favorite
This recipe isn’t just another dessert; it’s a culinary triumph designed for convenience, flavor, and visual appeal. Here’s why this Swirled No-Bake Pumpkin Cheesecake is destined to become a beloved staple in your recipe collection:
- Effortlessly No-Bake: The primary allure of this cheesecake is its sheer simplicity. Both the crust and the luxurious cheesecake filling require no oven time, saving you valuable energy and kitchen space, especially during busy holiday preparations. While the optional cinnamon oat crumble does require a quick bake, the main event remains wonderfully bake-free, making it an ideal choice for a stress-free dessert.
- Classic Graham Cracker Crust with a Twist: Starting with a sturdy and flavorful base, our homemade graham cracker crust is enriched with a hint of cinnamon. This provides the perfect counterpoint to the creamy filling, offering a satisfying crunch and a warm, inviting spice that truly signals autumn.
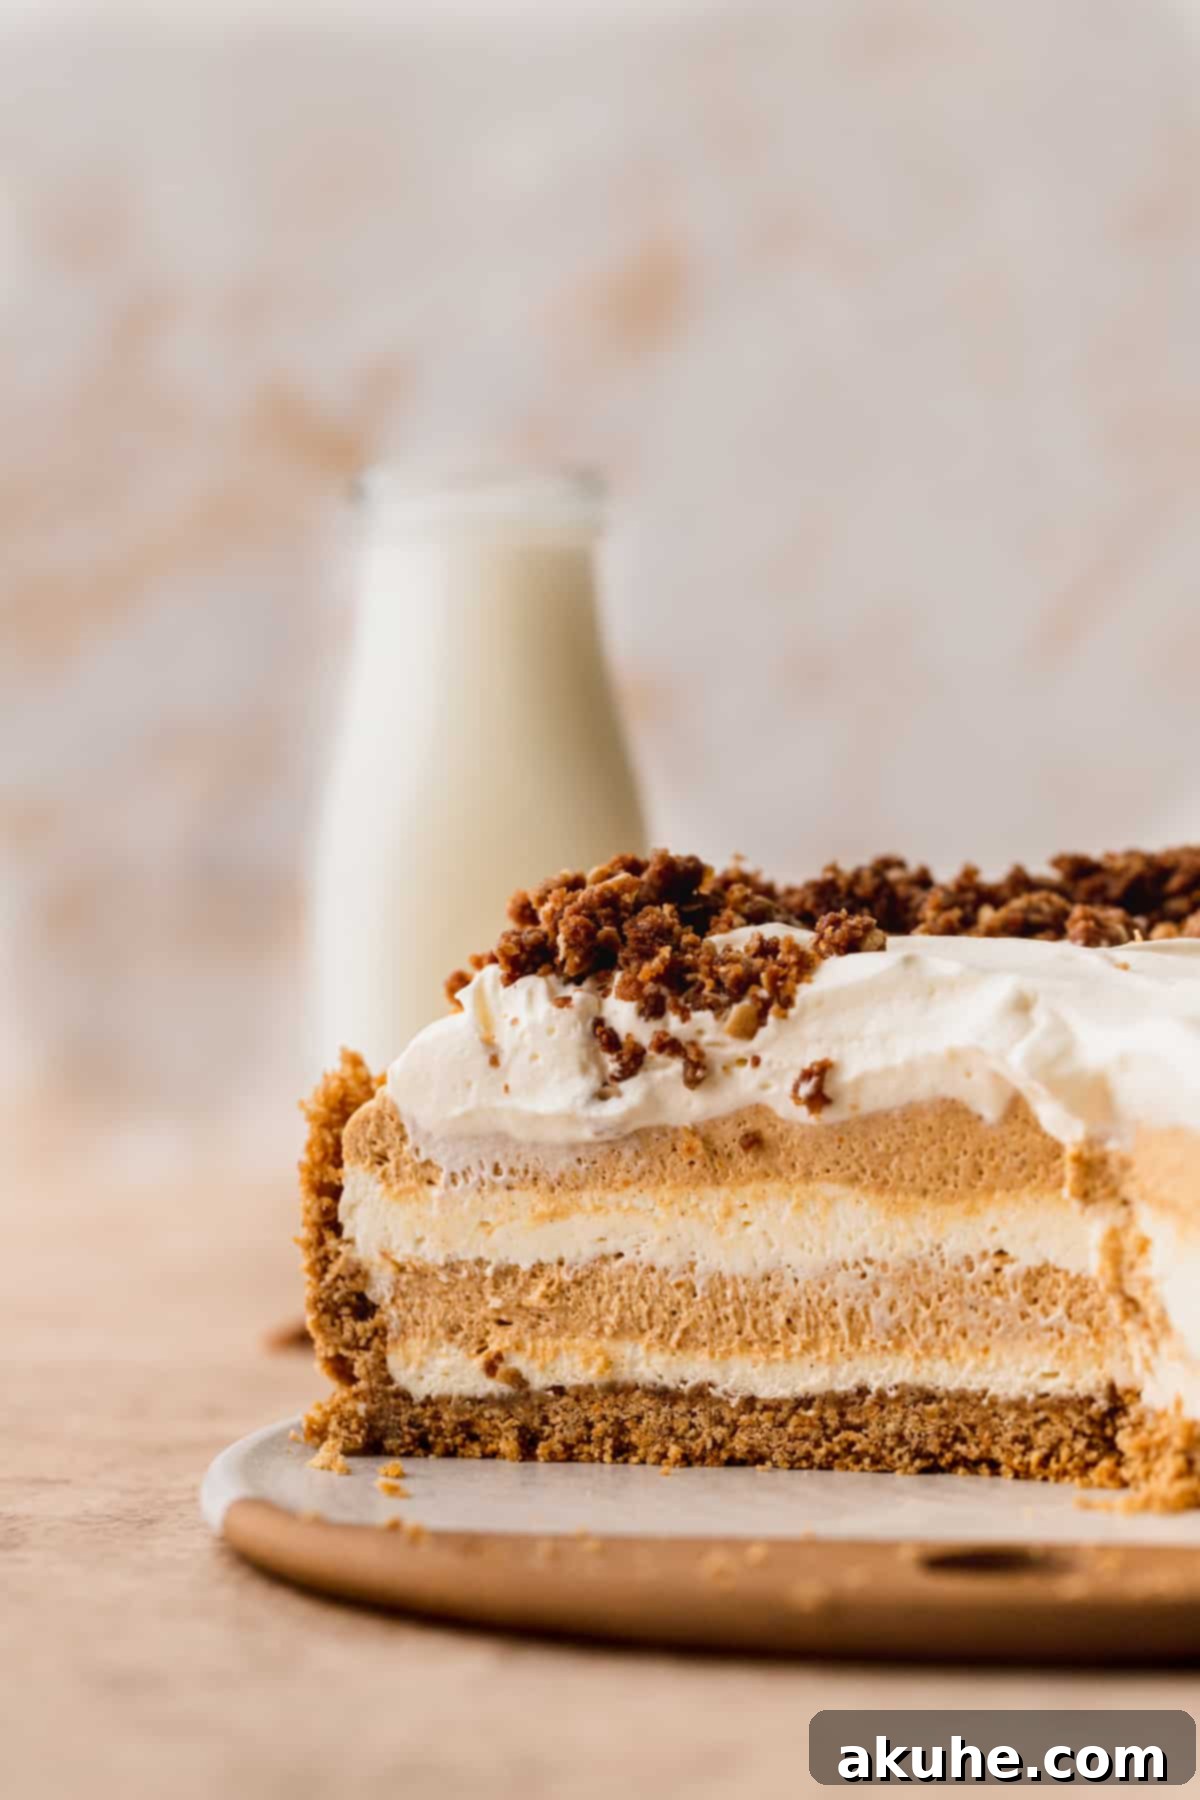
- Irresistible Pumpkin Swirls: The magic happens in the filling! We combine a classic, velvety no-bake cheesecake batter with a richly spiced pumpkin cheesecake batter, then artfully swirl them together. This creates a stunning visual effect and ensures a delightful balance of flavors in every slice, appealing to both traditional cheesecake lovers and pumpkin enthusiasts.
- Lush Whipped Cream Topping: No pumpkin dessert is truly complete without a generous dollop of freshly whipped cream. Our light and airy topping adds a layer of indulgence and balances the richness of the cheesecake, making each bite utterly divine.
- Crunchy Cinnamon Oat Crumble: For an exquisite textural dimension, this cheesecake is finished with a homemade cinnamon oat crumble. Baked to golden perfection, it adds a fantastic crunch and an extra layer of warm spice, taking this dessert from great to absolutely extraordinary.
Essential Ingredient Notes for the Perfect No-Bake Pumpkin Cheesecake
The success of any great recipe lies in understanding its ingredients. Here’s a closer look at the key components for your Swirled No-Bake Pumpkin Cheesecake, along with helpful tips for selection and preparation:
- Graham Crackers: You’ll need about two sleeves of graham crackers to yield the required 2 ½ cups of finely crushed crumbs. For an interesting twist or if graham crackers aren’t available, feel free to experiment with other cookie or cracker varieties like gingersnaps or Biscoff cookies for a different flavor profile.
- Brown Sugar: We recommend using dark brown sugar for both the crust and the crumble, as its deeper molasses notes complement the pumpkin and cinnamon beautifully. However, light brown sugar will also work well, offering a slightly milder sweetness. Ensure it’s packed firmly when measuring to achieve the correct consistency and sweetness.
- Cream Cheese: Opt for full-fat cream cheese, as this is crucial for achieving the rich, creamy texture and stability of a no-bake cheesecake. It’s imperative that your cream cheese is at room temperature before mixing – ideally, take it out of the refrigerator at least two hours prior to preparation. This ensures it beats smoothly, preventing lumps and guaranteeing a silky-smooth batter.
- Sour Cream: Similar to cream cheese, full-fat sour cream contributes significantly to the cheesecake’s luxurious texture and adds a subtle tang that balances the sweetness. Make sure it’s also at room temperature to blend seamlessly into the cream cheese mixture, preventing a curdled appearance.
- Pumpkin Puree: For consistent and reliable results, we highly recommend using canned pumpkin puree, such as Libby’s brand. It’s important to use pure pumpkin puree, not pumpkin pie filling, as the latter contains added spices and sweeteners that would alter the flavor balance of this recipe.
- Quick Oats: These are used in the cinnamon oat crumble and contribute to its delightful texture. If you only have old-fashioned oats on hand, simply pulse them a few times in a blender or food processor until they reach a slightly finer consistency, similar to quick oats.
- Pumpkin Pie Spice: This essential blend of cinnamon, nutmeg, ginger, and cloves (among others) infuses the cheesecake with classic fall warmth. It’s readily available in most grocery stores, especially during the autumn and holiday seasons.
- Heavy Whipping Cream: This is the secret to the cheesecake’s light, airy texture and crucial for setting. Always ensure your heavy whipping cream is very cold when you whip it; this helps it achieve stiff peaks quickly and holds its volume, which is vital for the no-bake setting process.
Smart Ingredient Substitutions and Variations
Flexibility is key in the kitchen! Here are some creative substitutions and variations to tailor this Swirled No-Bake Pumpkin Cheesecake to your dietary needs or taste preferences:
- For Dairy-Free: Many excellent dairy-free cream cheese and sour cream alternatives are available today. Choose your favorite brands for a delicious plant-based version of this cheesecake. Ensure your dairy-free heavy cream alternative whips to stiff peaks for the best results.
- For Gluten-Free: While this recipe hasn’t been specifically tested with gluten-free alternatives, it’s certainly adaptable. Use gluten-free graham cracker crumbs for the crust and ensure your oats are certified gluten-free. For the flour in the crumble, a 1:1 gluten-free all-purpose flour blend should work well. If you try it, please share your results!
Beyond dietary considerations, you can also play with the crust base:
- Gingersnap Cookies: For a more intense, spicier crust that perfectly complements the pumpkin, substitute graham cracker crumbs with crushed gingersnap cookies.
- Biscoff Cookies: These speculoos cookies offer a unique caramelized biscuit flavor that makes for an incredibly delicious and aromatic crust.
Important note on Pumpkin Pie Filling: As mentioned, do NOT substitute pumpkin puree with pumpkin pie filling. Pumpkin pie filling is pre-sweetened and spiced, and its consistency is different, which will alter the flavor and texture of your cheesecake significantly.
Step-By-Step Guide to Crafting Your Swirled No-Bake Pumpkin Cheesecake
Follow these detailed instructions to create a flawless and delicious cheesecake that will impress everyone.
STEP 1: Prepare the Graham Cracker Crust. Begin by thoroughly spraying a 9-inch springform pan with non-stick baking spray. For easier removal later, place a 9-inch parchment paper circle at the bottom of the pan, then spray it again. Using a food processor or blender, finely crush the graham crackers until they resemble fine sand. In a medium mixing bowl, combine the graham cracker crumbs, ground cinnamon, packed brown sugar, and melted unsalted butter. Mix thoroughly with a fork until all the crumbs are evenly moistened.
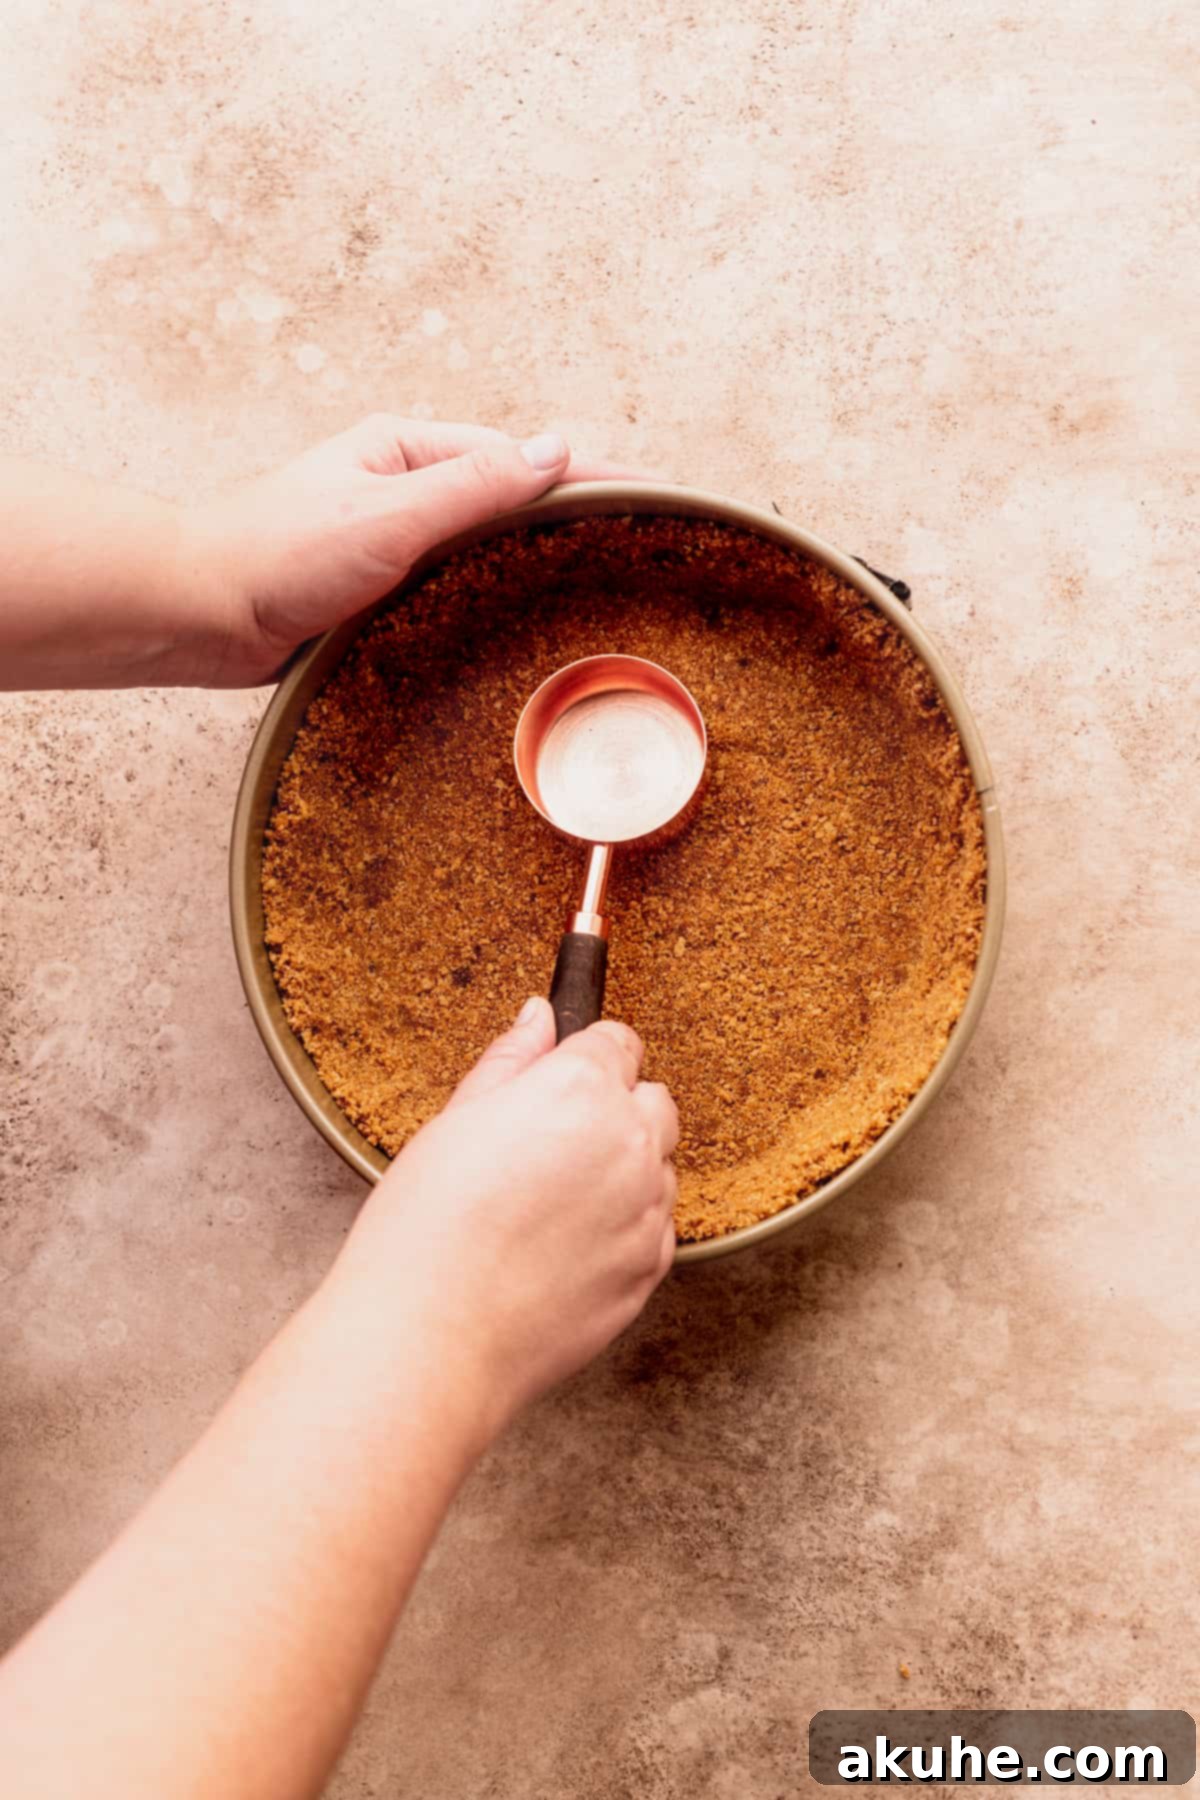
Next, pour the mixture into your prepared springform pan. Use the bottom of a flat measuring cup or a glass to firmly press the crumb mixture onto the bottom of the pan. Then, use your fingers to carefully press the crust halfway up the sides of the pan, creating a well-defined edge. This compact crust will hold your creamy filling beautifully.
STEP 2: Chill the Crust. Once the crust is formed, place the springform pan into the freezer. Allow it to chill while you prepare the cheesecake batter. This helps the butter solidify, creating a firm and stable base for your filling.
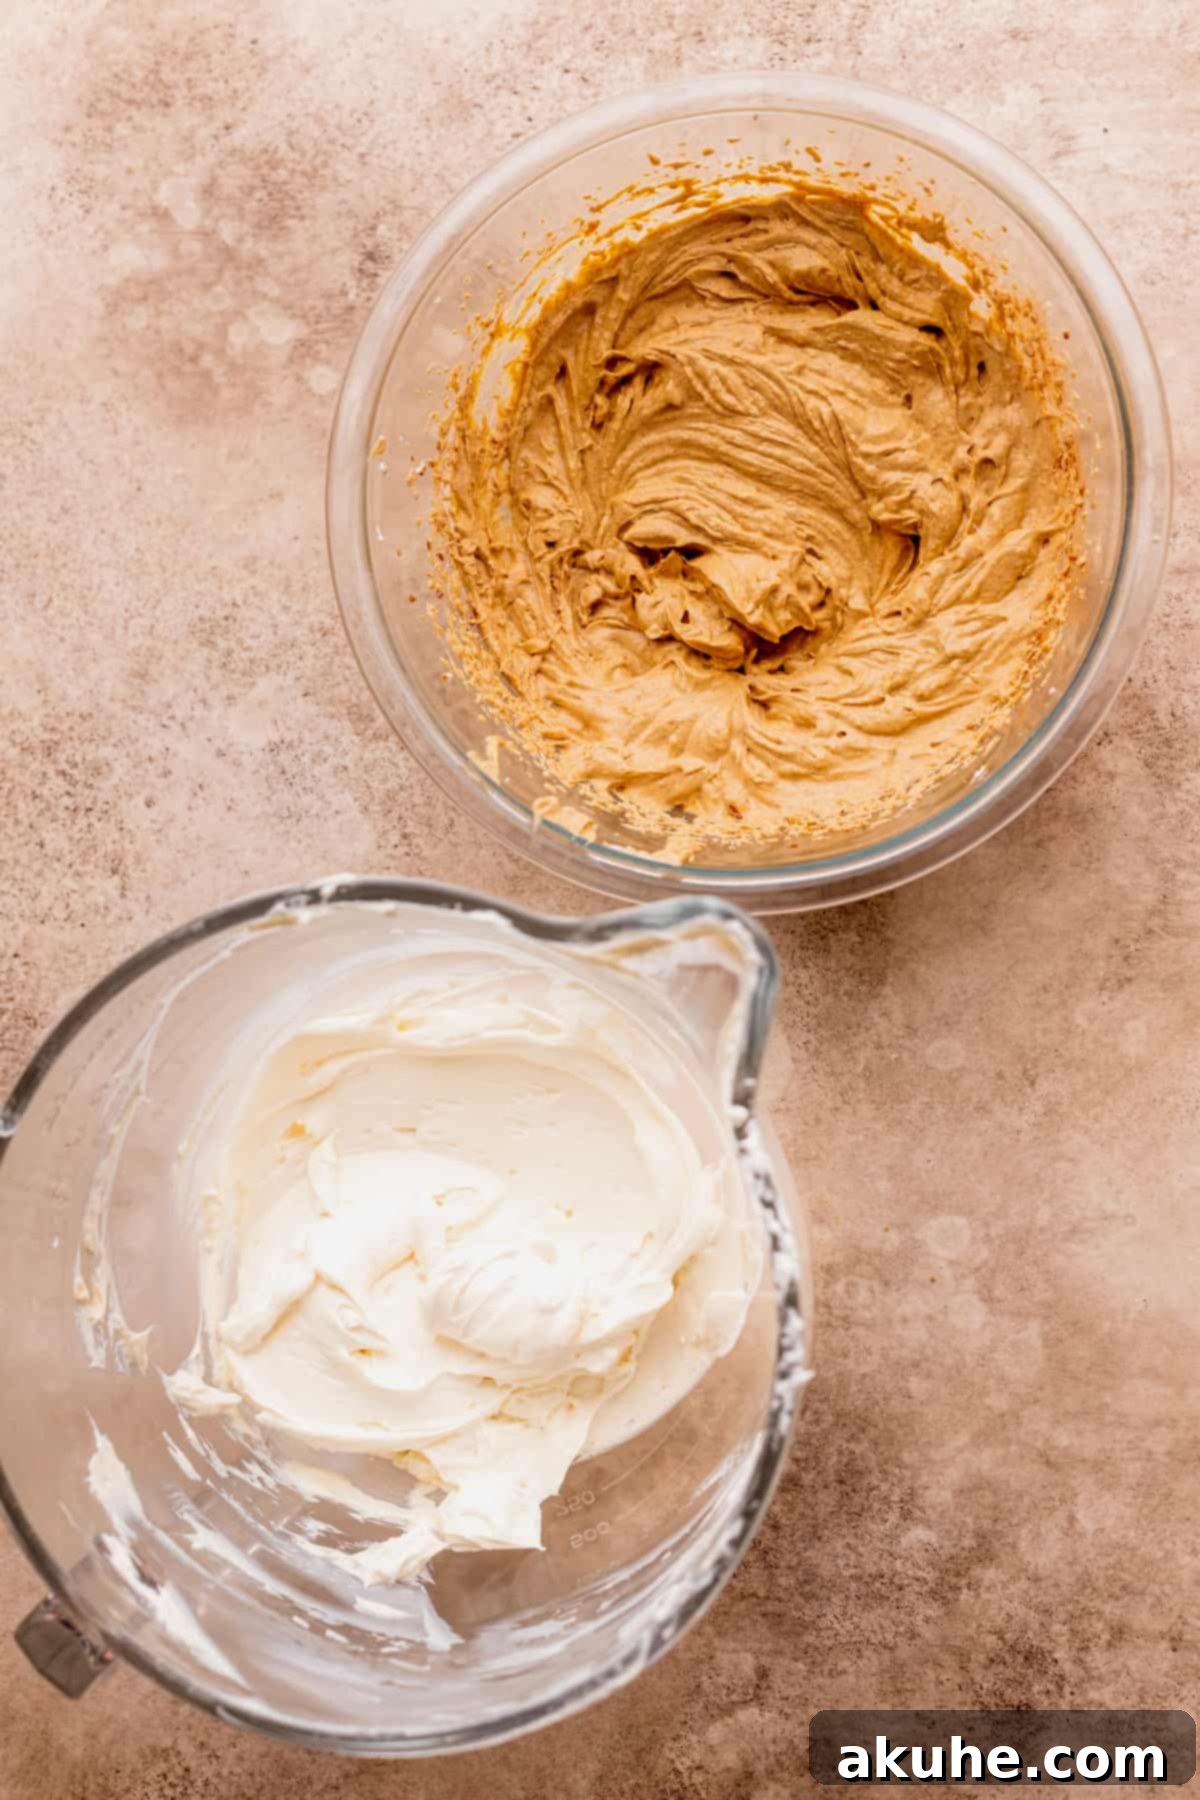
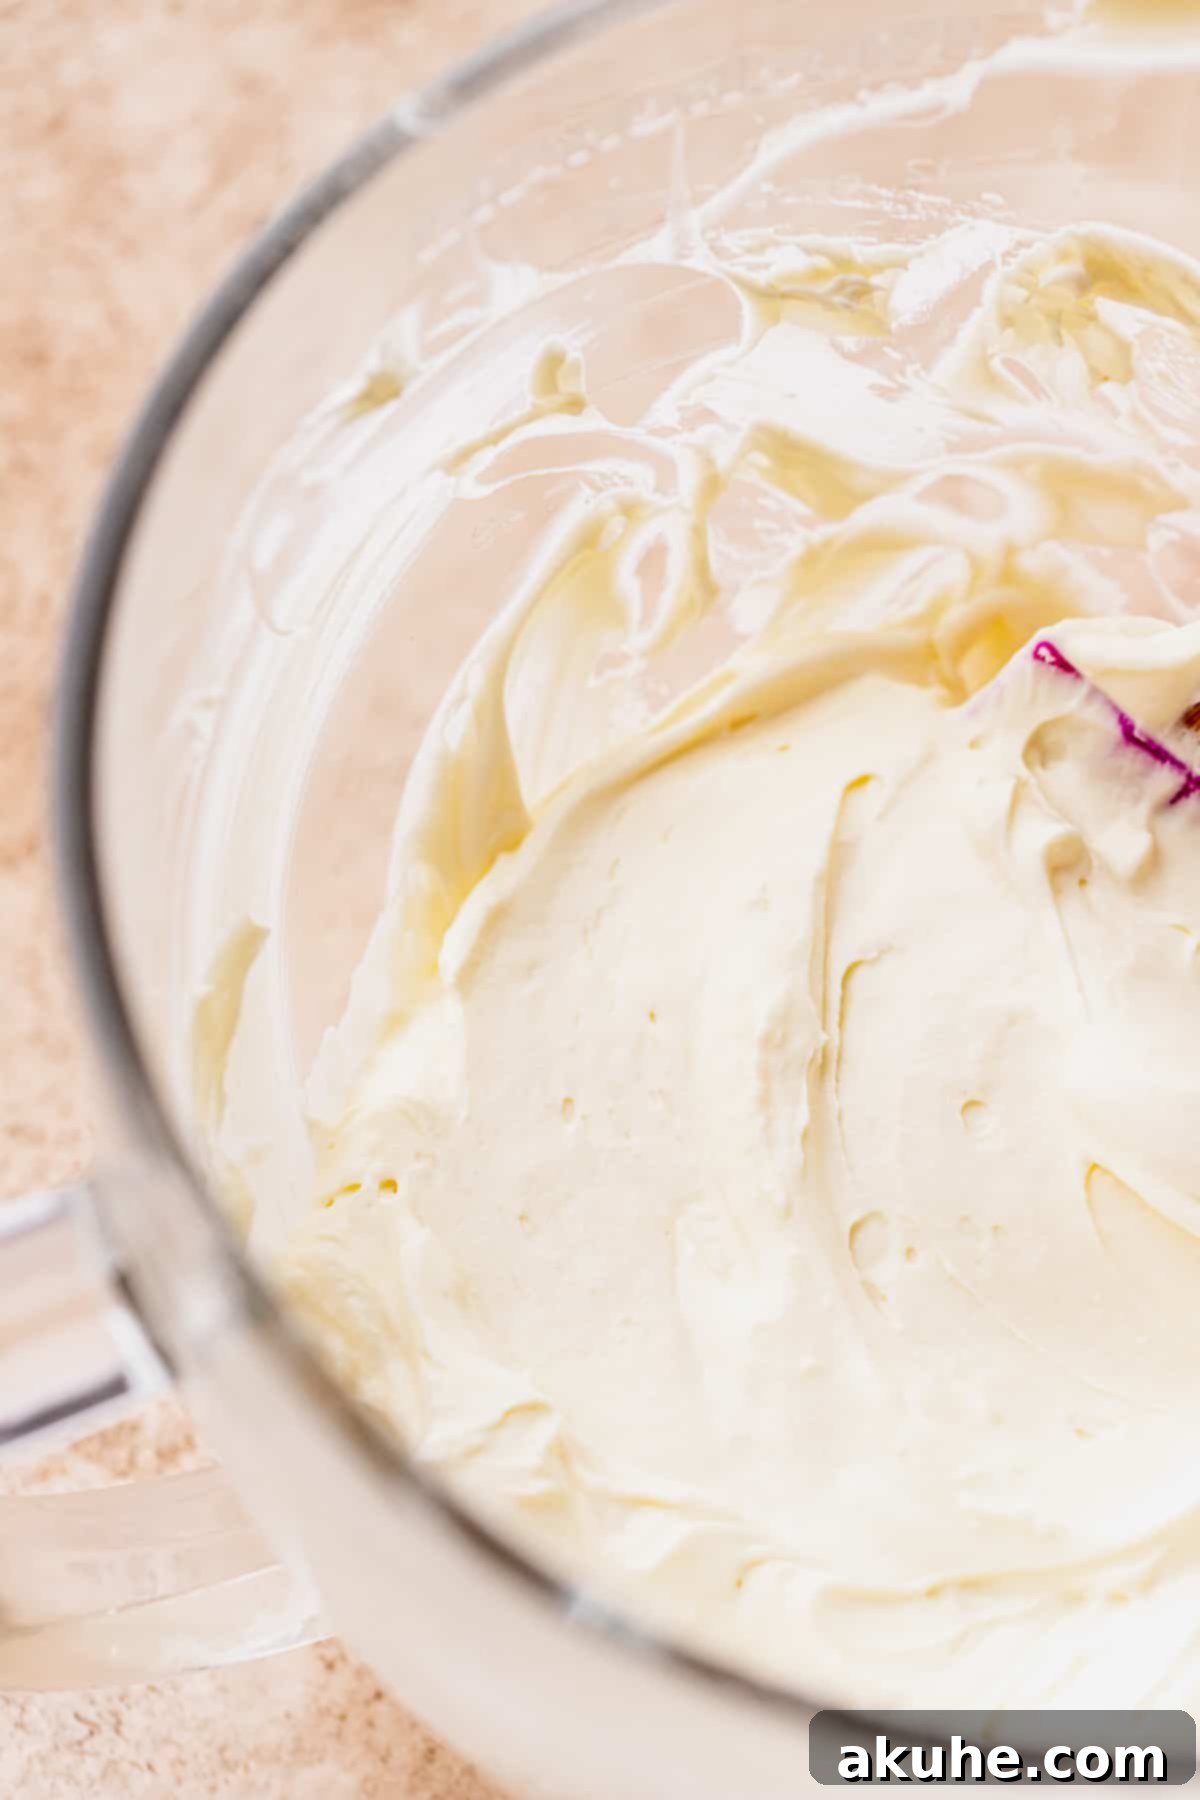
STEP 3: Craft the Regular Cheesecake Batter. In a large mixing bowl (preferably using a stand mixer with a paddle attachment or an electric hand mixer), beat the room-temperature cream cheese on high speed for about one minute until it’s smooth and creamy. Gradually add the granulated sugar and continue beating for another minute until well combined and light. Stop to scrape down the sides of the bowl thoroughly. Then, incorporate the vanilla extract and room-temperature sour cream, mixing on medium speed until just combined. Be careful not to overmix at this stage. Divide this smooth, regular cheesecake batter equally into two separate bowls.
STEP 4: Infuse the Pumpkin Cheesecake Batter. To one of the bowls containing half of the regular cheesecake batter, add the pumpkin puree, pumpkin pie spice, and additional ground cinnamon. Mix on low speed until the pumpkin and spices are fully incorporated and the batter is uniformly colored. Set aside both the plain and pumpkin-spiced batters.
STEP 5: Gently Fold in Whipped Cream. In a very cold metal bowl with a cold whisk attachment (chilled in the freezer for at least 10-15 minutes), combine the cold heavy cream and sifted powdered sugar. Beat on high speed until stiff peaks form – this means when you lift the whisk, the peaks of cream stand up firmly without collapsing. This properly whipped cream is crucial for the cheesecake’s structure.
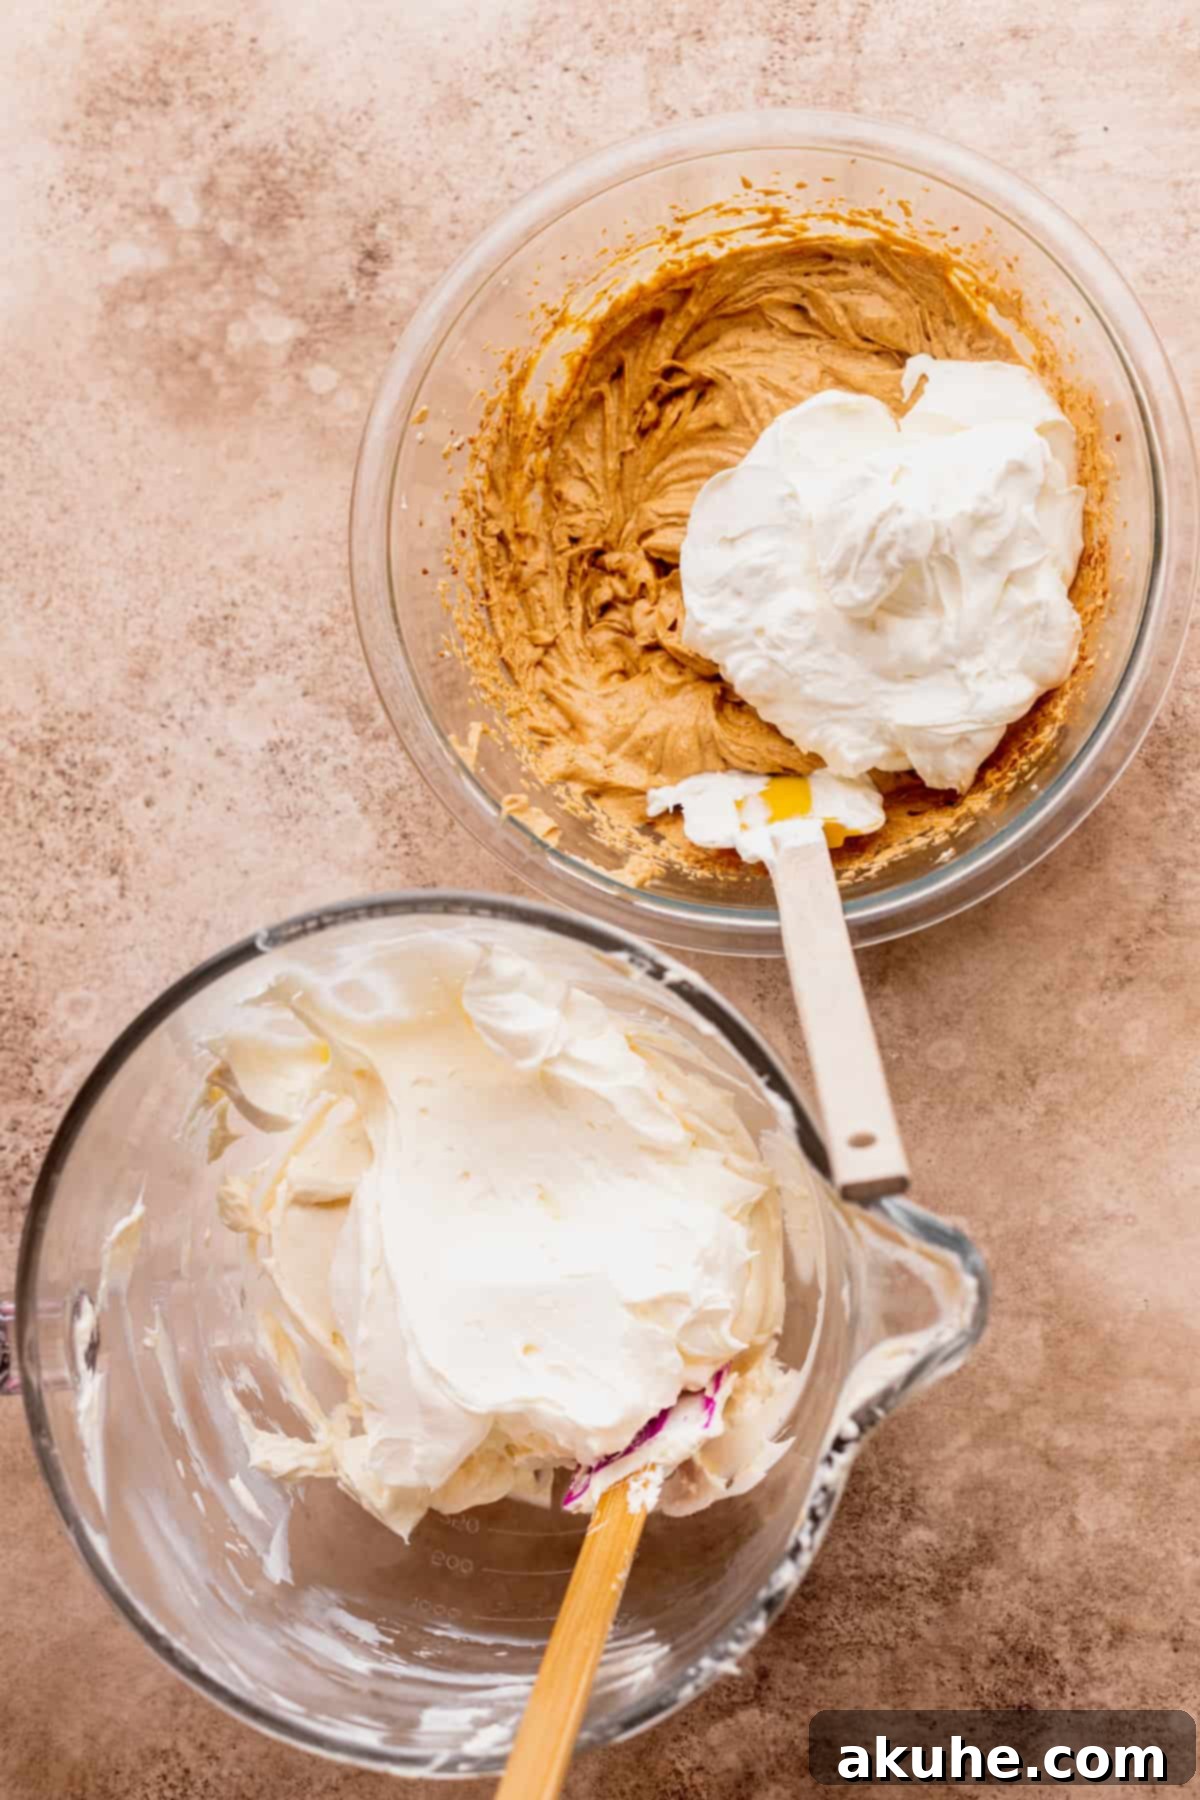
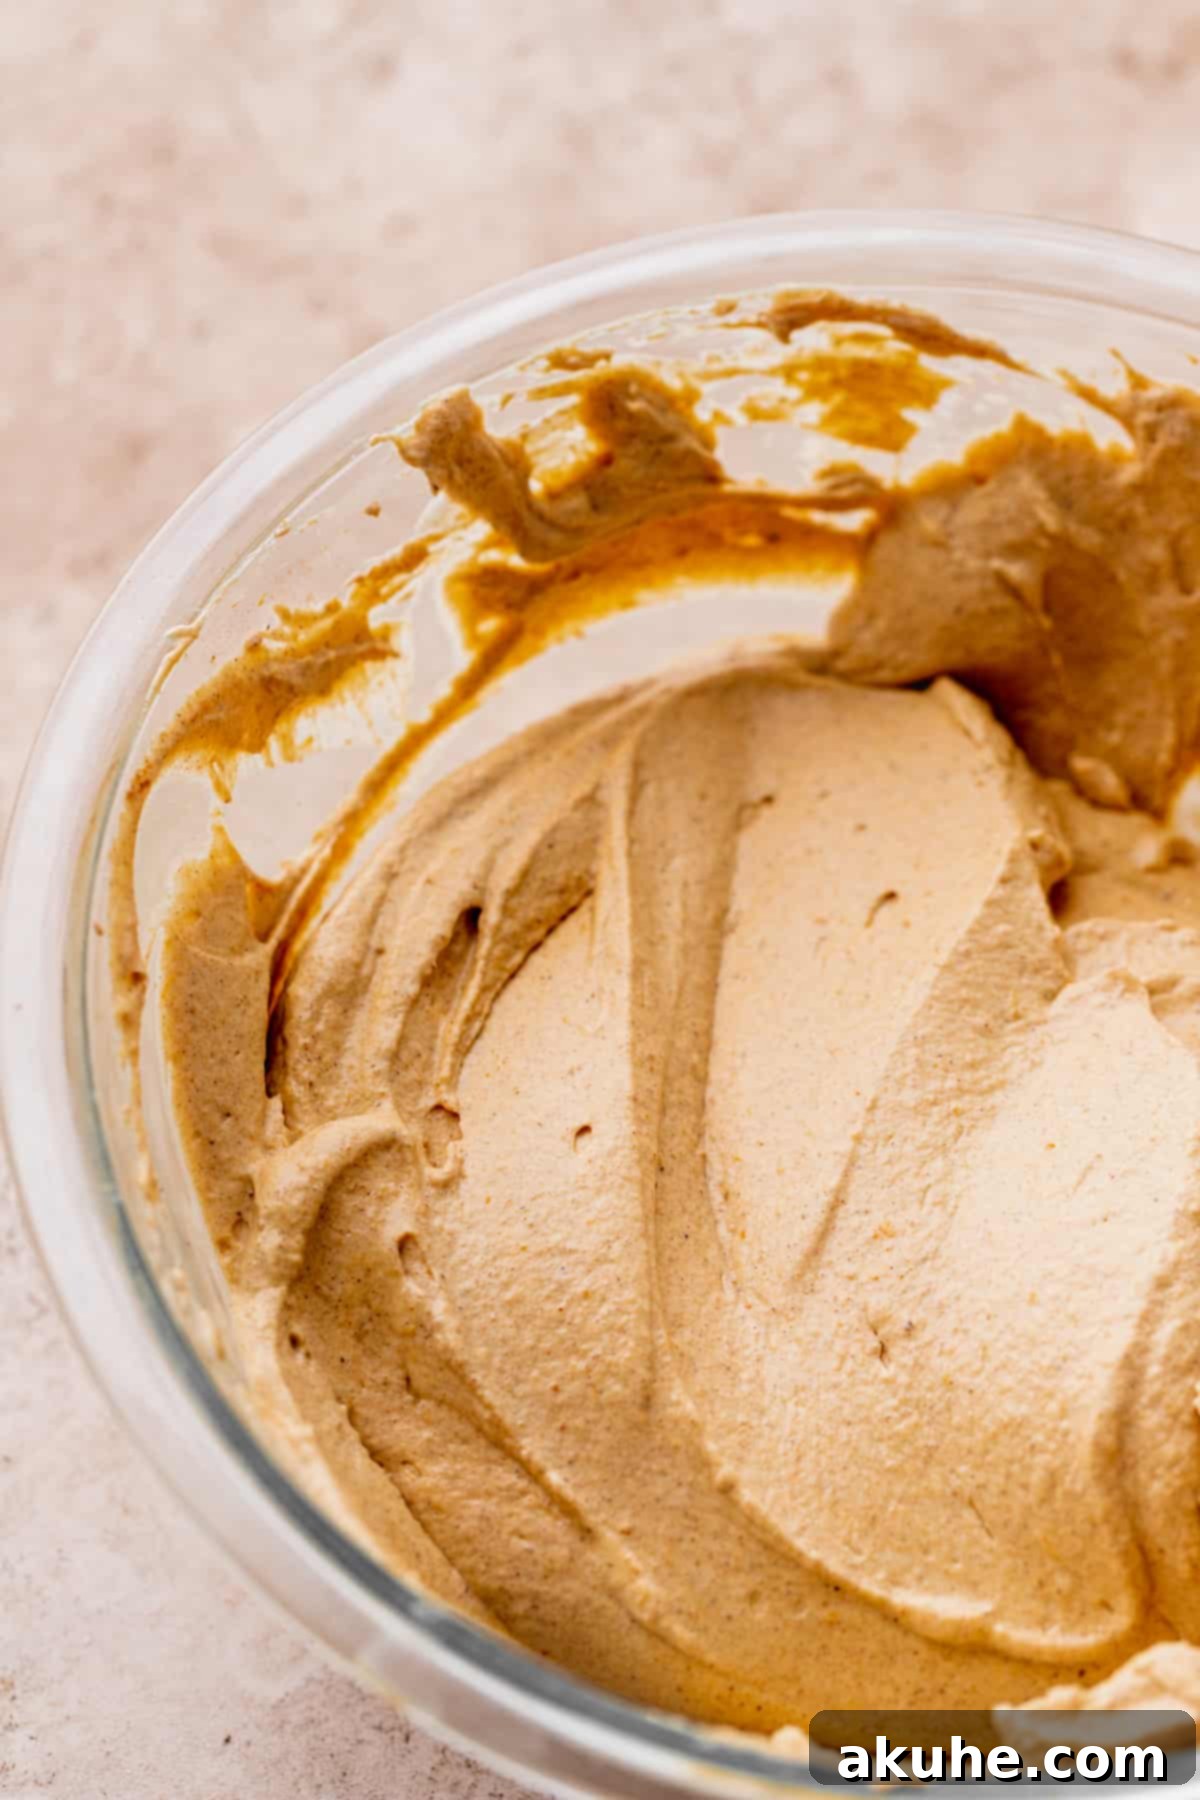
Now, this step requires a delicate hand. Divide the stiffly whipped cream in half and add one portion to the plain cheesecake batter and the other portion to the pumpkin cheesecake batter. Using a rubber spatula, gently fold the whipped cream into each batter until just combined. Use an upward lifting motion, being very careful not to deflate the air from the whipped cream. Overmixing here will cause the cheesecake to be runny and prevent it from setting properly.
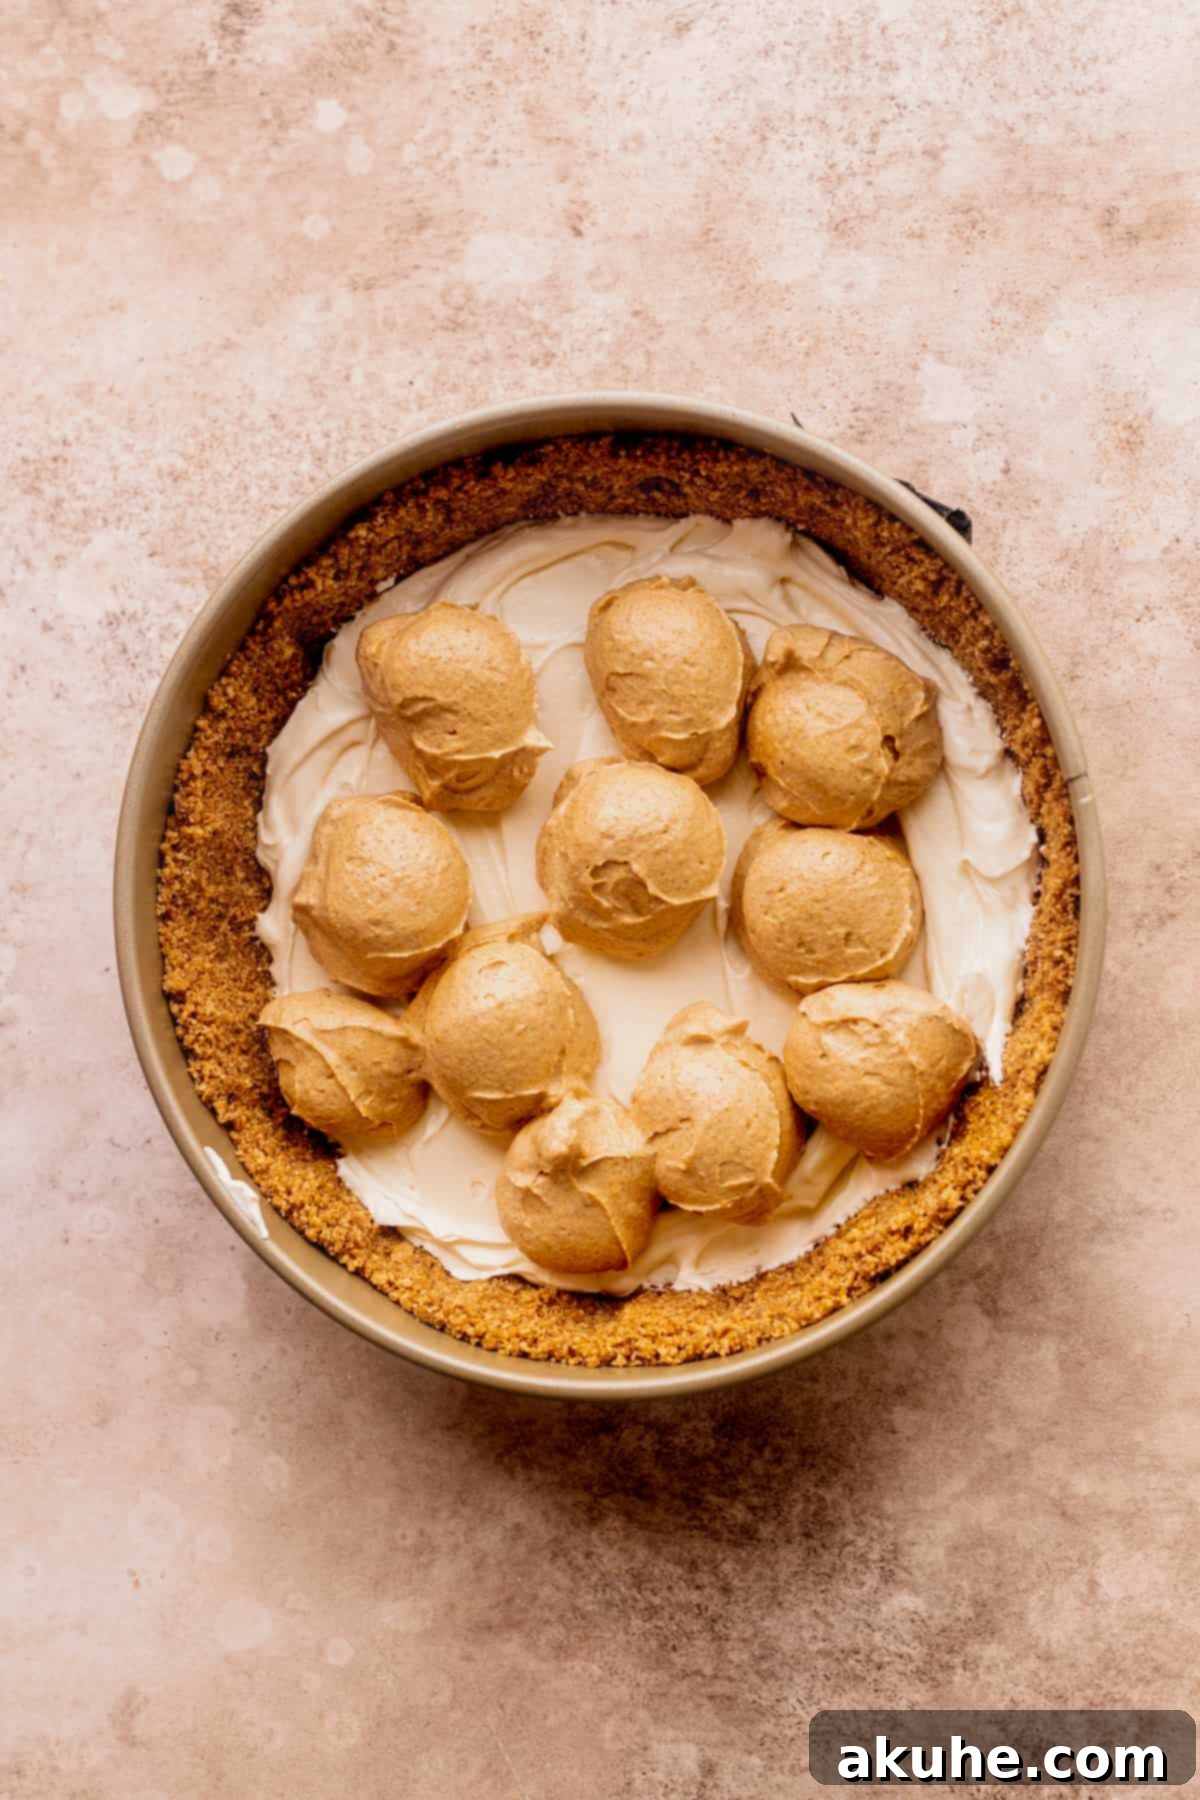
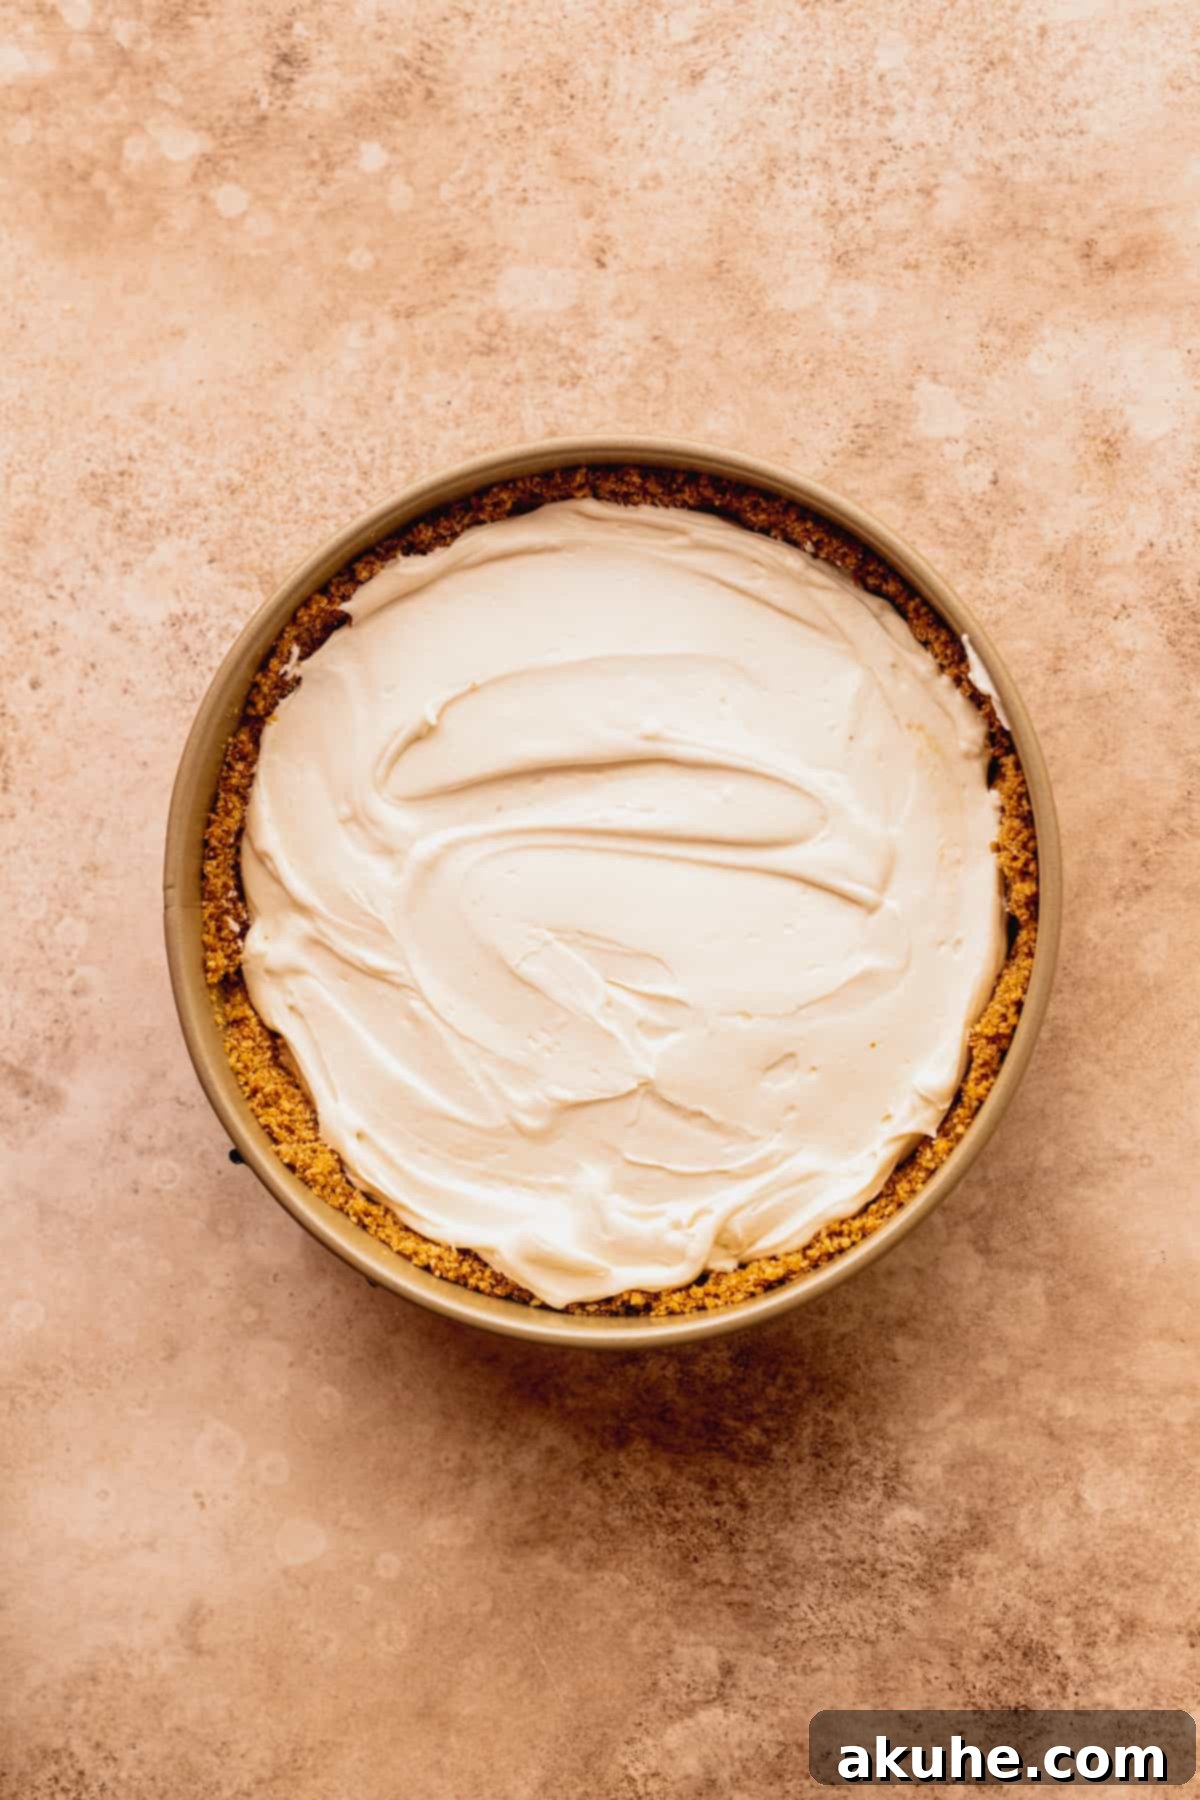
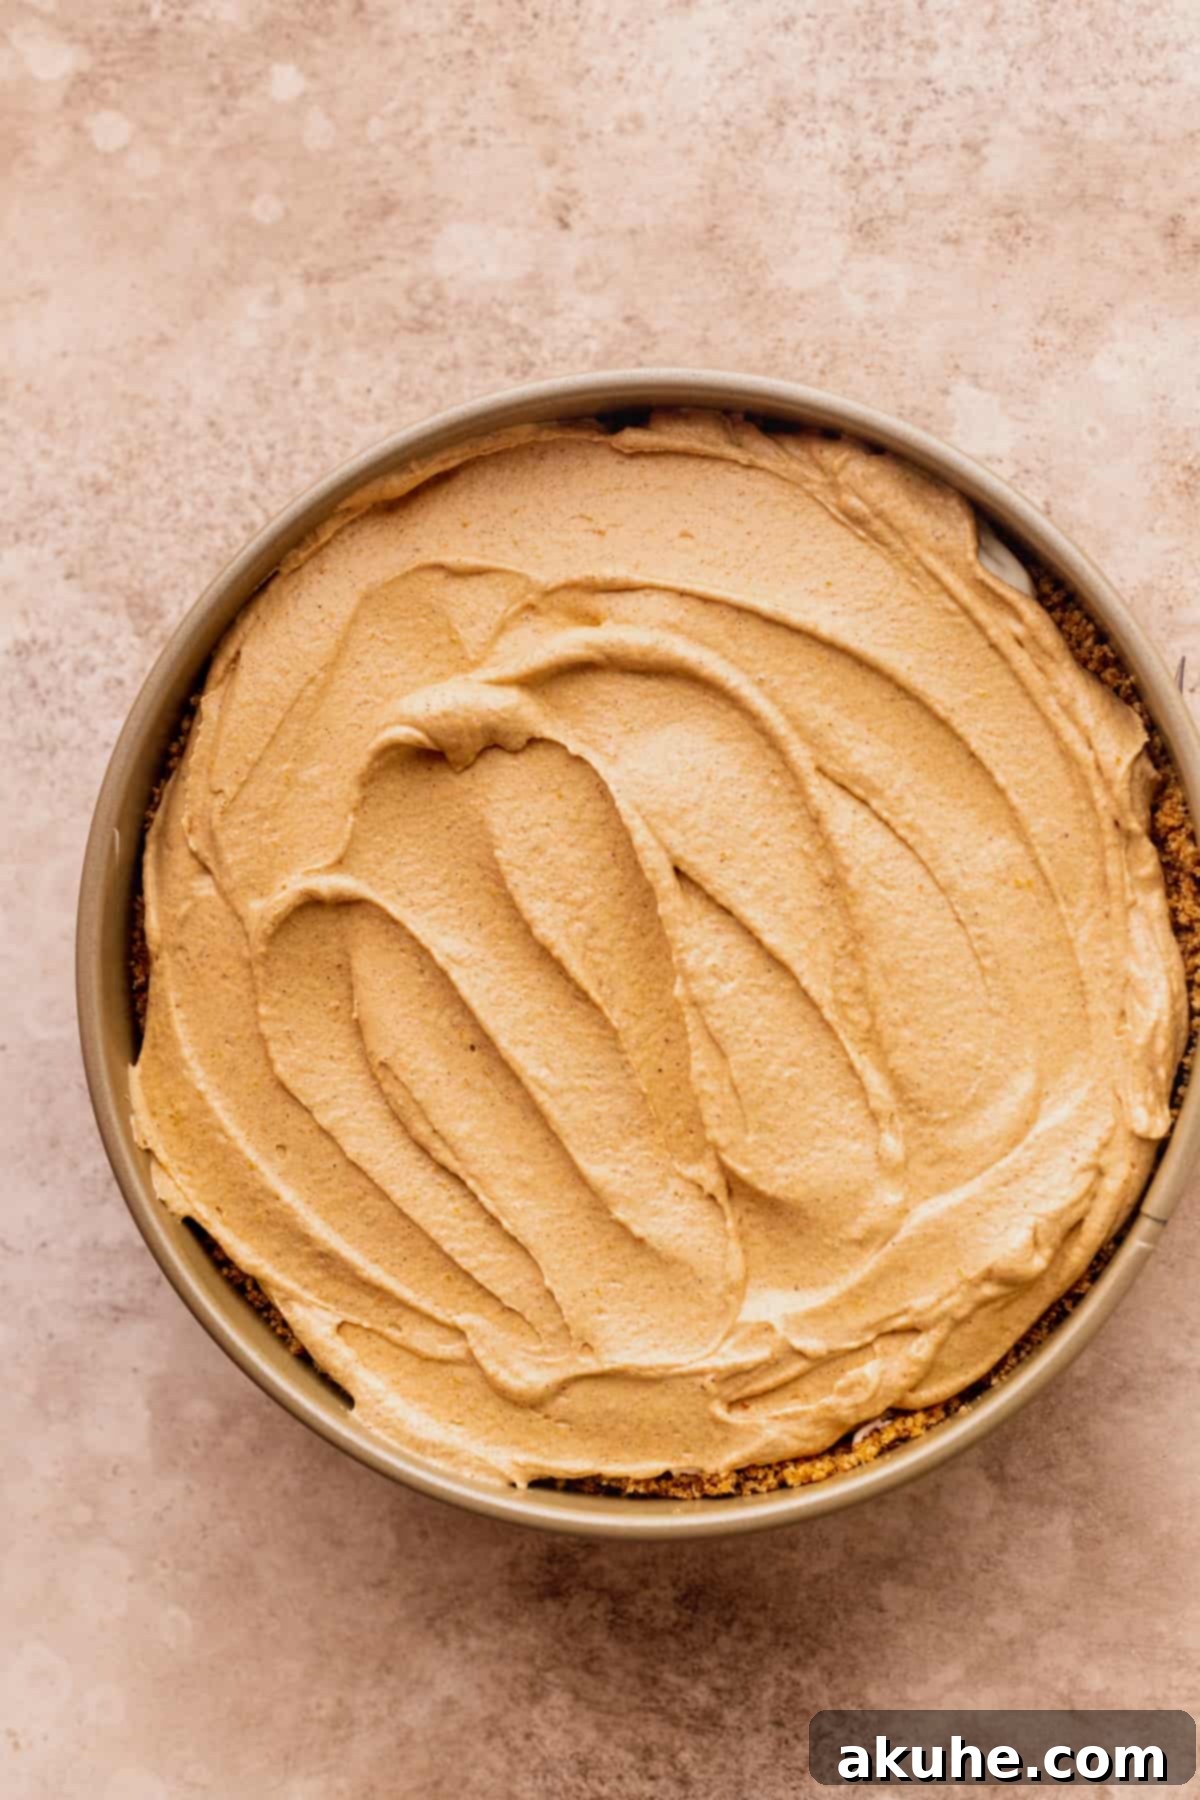
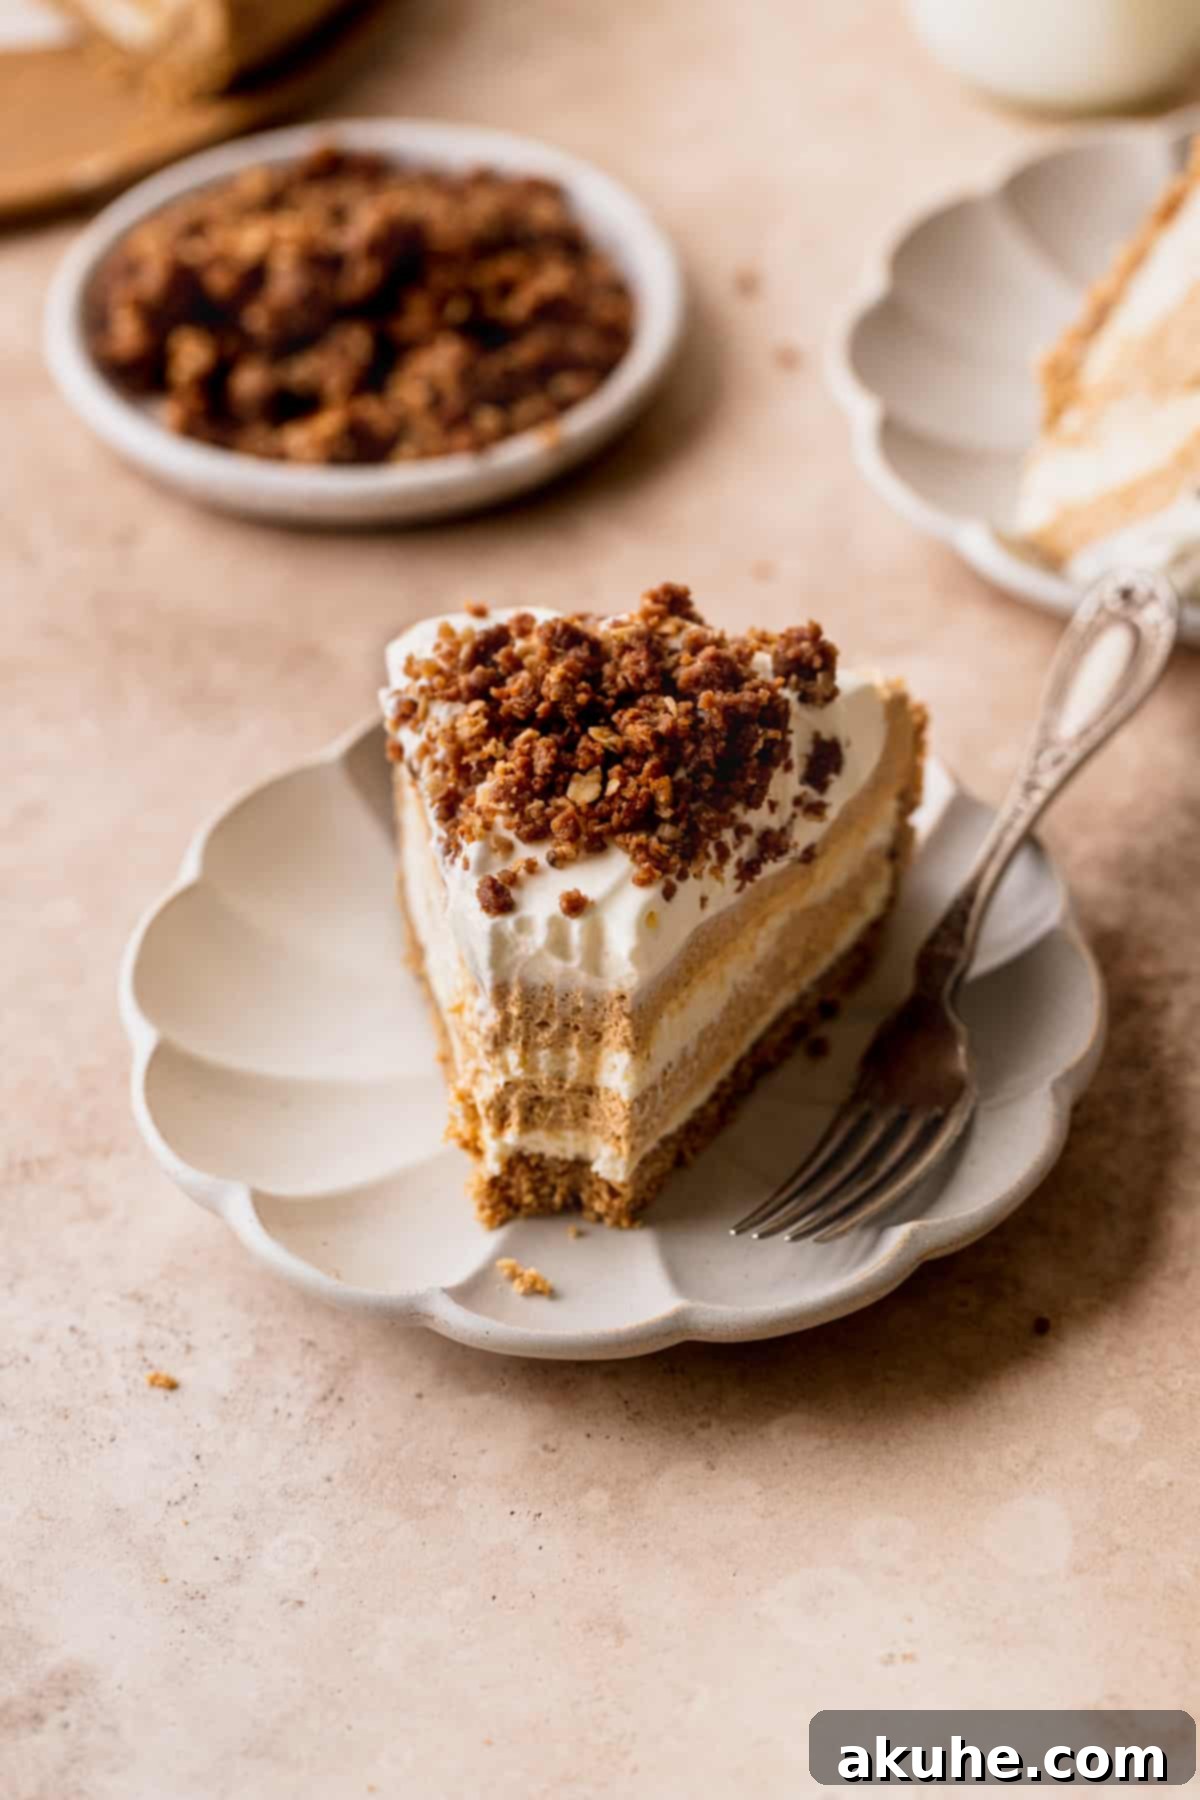
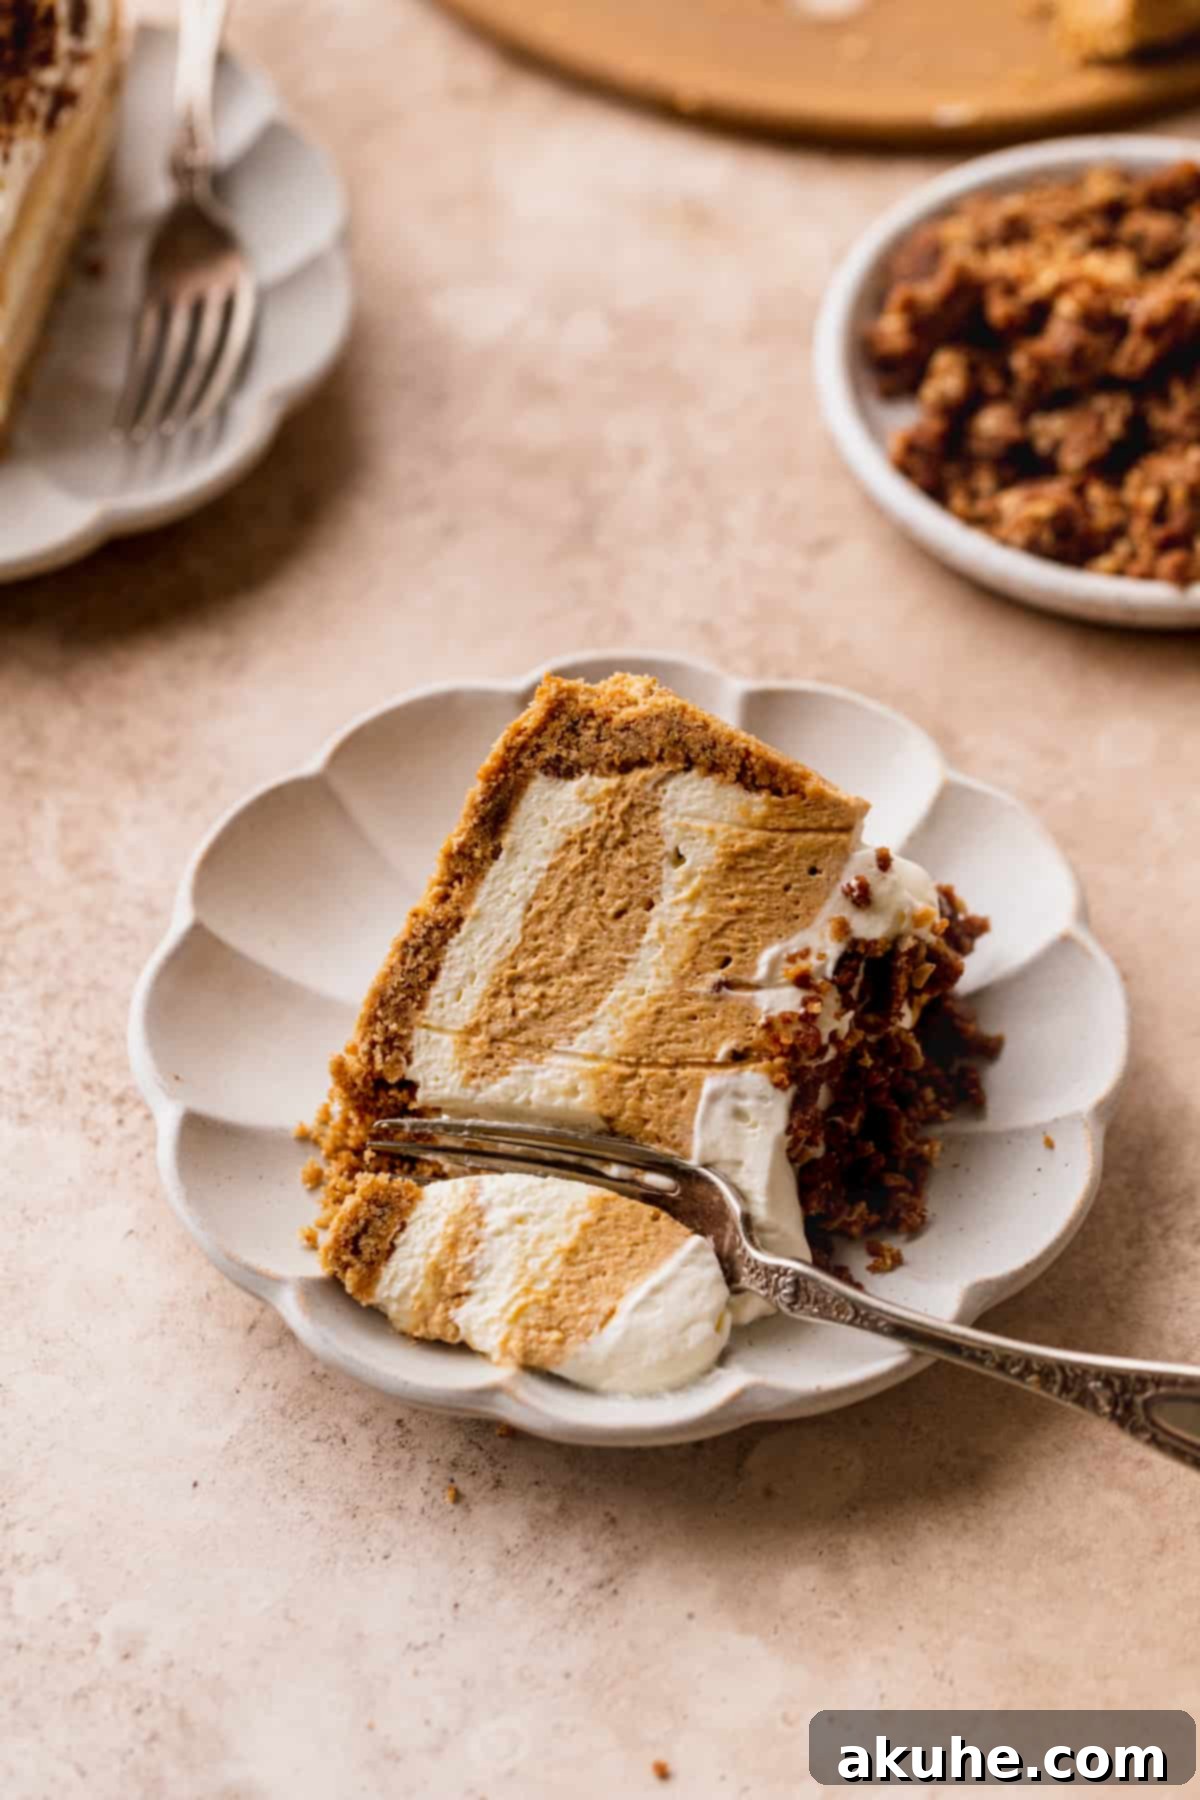
STEP 6: Layer and Swirl the Cheesecake. Retrieve the chilled crust from the freezer. Begin by spreading half of the regular (plain) cheesecake batter evenly over the graham cracker crust. Then, using a small cookie scoop or a spoon, drop small dollops of the pumpkin cheesecake batter on top of the plain layer, spacing them out randomly. Next, carefully spread the remaining half of the regular cheesecake batter over these pumpkin dollops, gently smoothing the surface. Finally, spread the remaining pumpkin cheesecake batter on top. To create the beautiful swirl effect, you can gently drag a knife or skewer through the layers in a swirling motion, being careful not to disturb the crust.
STEP 7: The Essential Chill. This is the most critical step for a perfectly set no-bake cheesecake. Cover the springform pan tightly with plastic wrap or aluminum foil to prevent any absorption of refrigerator odors. Chill the cheesecake in the refrigerator for a minimum of 6 hours, but ideally, overnight. Allowing ample time to chill ensures the cheesecake sets to a firm, sliceable consistency. Patience here will be rewarded!
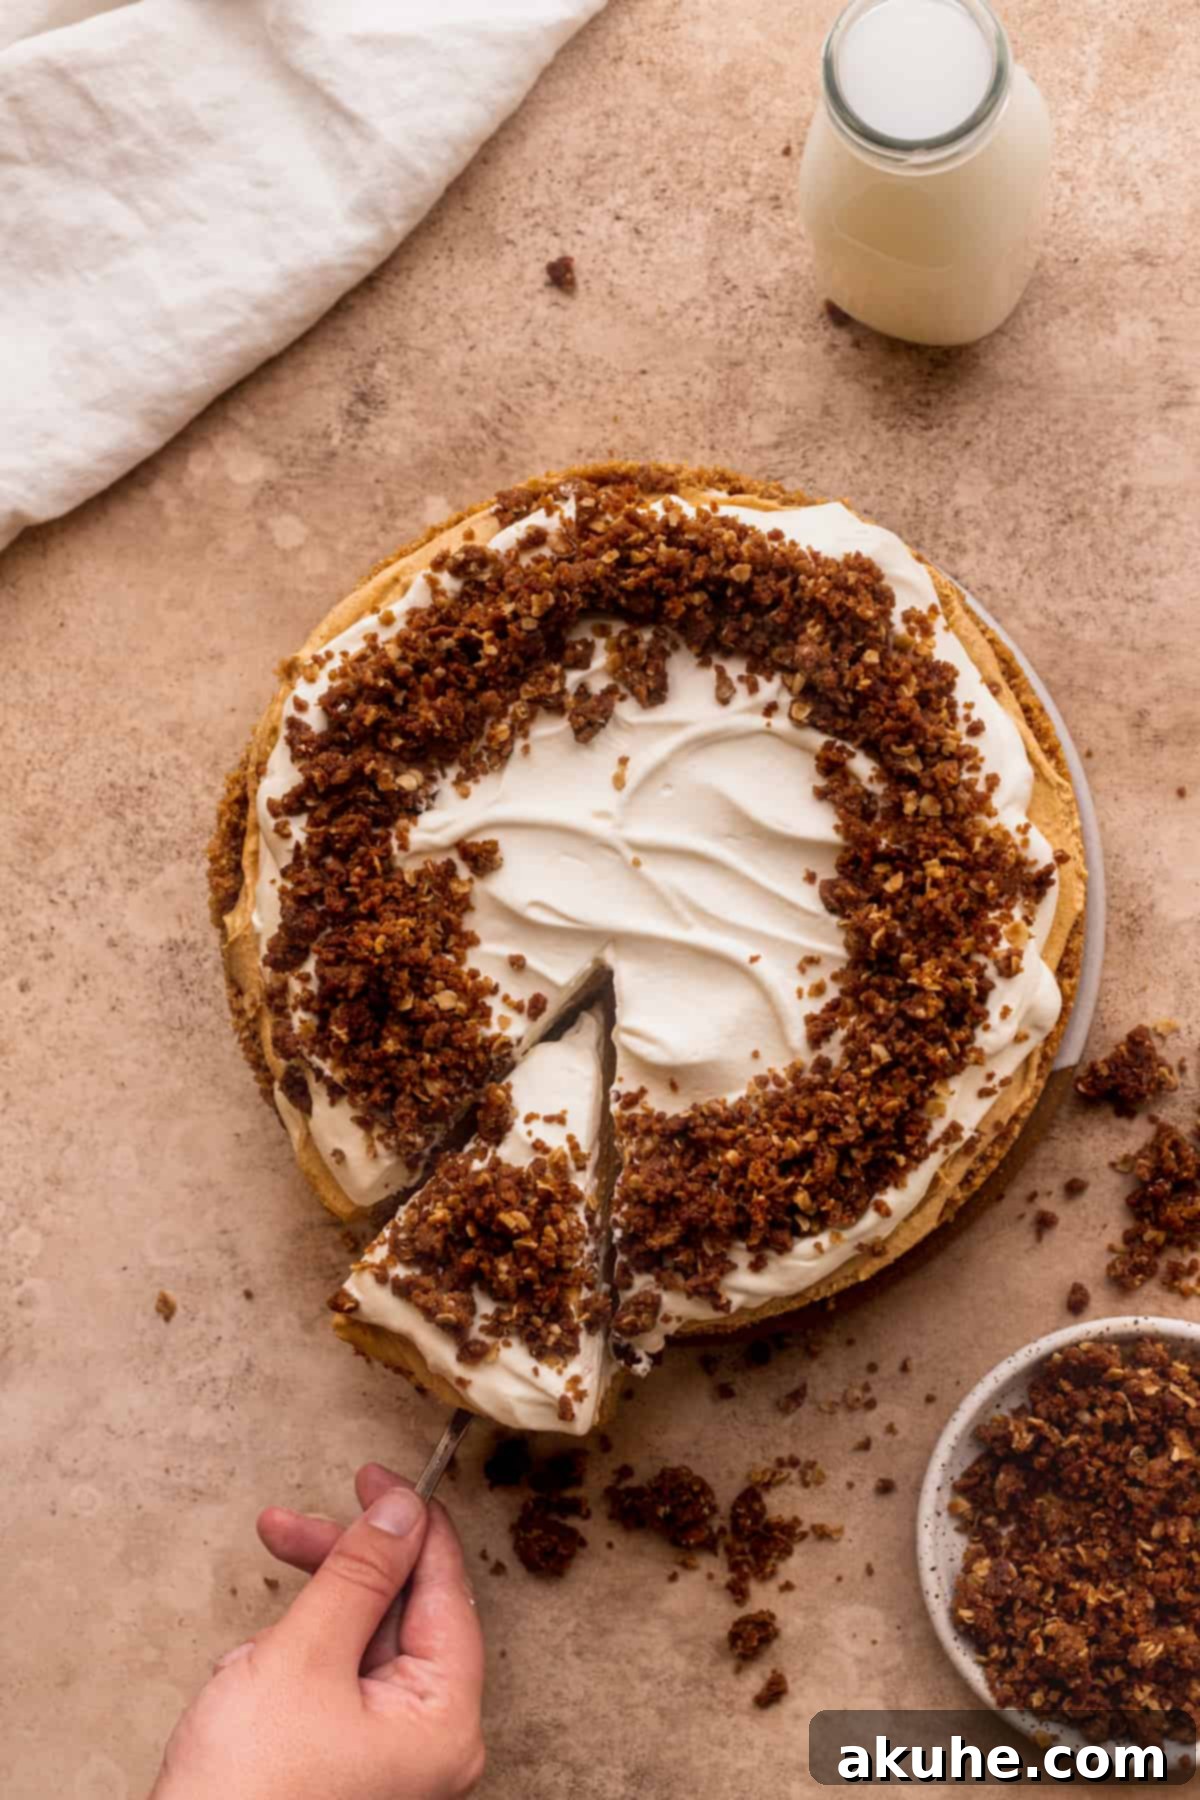
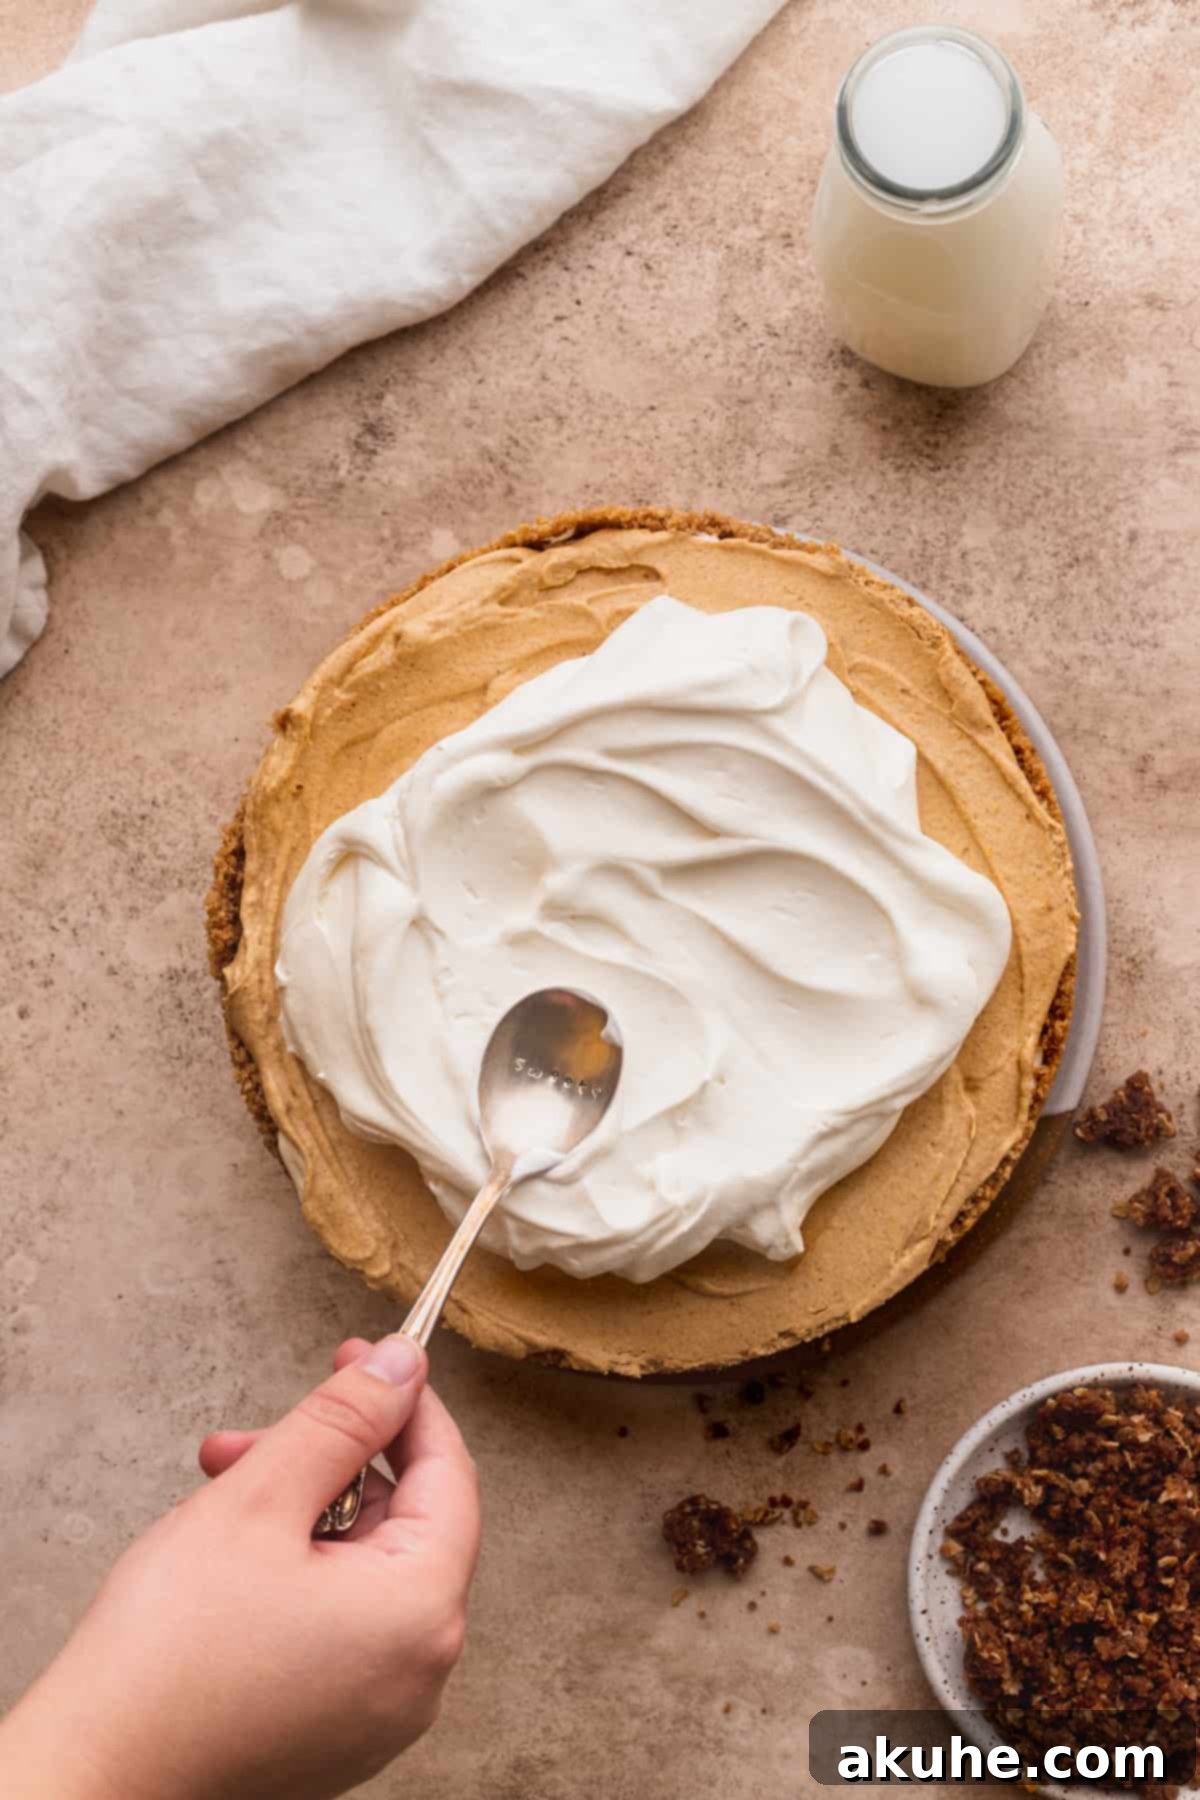
STEP 8: Decorate and Serve. Once the cheesecake is thoroughly chilled and firm, carefully remove it from the springform pan. If you used parchment paper at the bottom, gently slide the cheesecake onto your serving platter and remove the paper. Just before serving, top the elegant pumpkin spice cheesecake with a generous layer of freshly whipped cream and sprinkle with the irresistible cinnamon oat crumbles for added texture and flavor. Slice, serve, and enjoy!
Crucial Tips for No-Bake Cheesecake Success
No-bake cheesecakes are wonderful for their simplicity, but they do have a couple of common pitfalls. Understanding these can guarantee a perfectly set, creamy dessert every time:
- The Art of Folding Whipped Cream: The most frequent issue encountered with no-bake cheesecakes is that the filling doesn’t set properly, remaining too soft or “soupy.” This almost always points to overmixing the whipped cream into the cheesecake batter. The air incorporated into the heavy cream during whipping is what gives the cheesecake its light texture and, crucially, helps it to solidify when chilled. When you fold in the whipped cream, use a light, gentle hand with a rubber spatula, employing an upward lifting and turning motion. Stop as soon as no streaks of cream are visible. If you mix too vigorously or for too long, you’ll deflate all that precious air, essentially turning it back into liquid heavy cream, which won’t set the cheesecake.
- The Imperative of Chilling Time: Another key reason for a runny cheesecake is insufficient chilling. This no-bake recipe has a strict minimum chilling time of 6 hours, but for the absolute best results and a truly firm, sliceable cheesecake, an overnight chill (10-12 hours) is highly recommended. The colder the cheesecake gets, the firmer it will become. Plan ahead and make this dessert the day before you intend to serve it. A well-chilled cheesecake is a sturdy, delightful cheesecake!
Frequently Asked Questions (FAQ)
Here are answers to some common questions about making this Swirled No-Bake Pumpkin Cheesecake:
Can I use store-bought whipped topping (like Cool Whip) instead of making my own whipped cream?
Yes, you certainly can use store-bought whipped topping for convenience. Just measure out the equivalent amount needed for the cheesecake batter. However, we personally prefer homemade whipped cream for its superior flavor and lack of extra preservatives, which contributes to a fresher taste. If using Cool Whip, make sure it is thawed before gently folding it into the batter.
Can I transform this into mini cheesecakes?
Absolutely! This recipe adapts beautifully to mini cheesecakes. You can use a muffin tin lined with paper liners. Divide the crust mixture evenly among the liners (about 1-2 tablespoons each) and press down. Then, divide the cheesecake batter into thirds (or halves if you just want plain and pumpkin layers). Scoop the batters into the liners, swirling if desired. The chilling time might be slightly reduced for mini cheesecakes, but still aim for at least 4-6 hours until firm.
Do I need to use parchment paper in my springform pan?
If you plan to serve the cheesecake directly on the bottom base of the springform pan, parchment paper isn’t strictly necessary, though it does make for easier cleanup. However, if you intend to transfer the entire cheesecake to a separate serving platter, using a parchment paper circle on the bottom is highly recommended. It allows for effortless removal. When transferring, work quickly and confidently, as no-bake cheesecakes are generally less sturdy than their baked counterparts until fully chilled.
My cheesecake isn’t setting. What went wrong?
The two most common culprits for a cheesecake that won’t set are overmixing the whipped cream into the batter (which deflates the air needed for structure) or insufficient chilling time. Ensure you fold the whipped cream very gently and chill the cheesecake for a minimum of 6 hours, ideally overnight, for best results. If it’s still runny after overnight chilling, it was likely overmixed during the folding stage.
Can I make the cinnamon oat crumble ahead of time?
Yes, the cinnamon oat crumble can be made several days in advance. Once baked and completely cooled, store it in an airtight container at room temperature. This makes assembly even quicker on the day you plan to serve the cheesecake.
Delightful Recipe Variations
While this Swirled No-Bake Pumpkin Cheesecake is perfect as is, here are a couple of ideas to customize it to your liking:
- Simply Pumpkin: If you prefer a pure pumpkin experience, you can omit the “regular” cheesecake batter step and make the entire filling pumpkin-flavored. Just double the pumpkin puree and spices for the whole batch of cream cheese base.
- Skip the Swirl: For a more straightforward preparation or if you prefer distinct layers, you can spread the regular cheesecake batter as the first layer, then top it evenly with the pumpkin cheesecake batter.
- No Crumble, No Problem: To save time or if you prefer a smoother topping, you can absolutely skip the crunchy cinnamon oat crumble. The whipped cream alone provides a beautiful finish.
- Add a Chocolate Twist: For chocolate lovers, consider folding in mini chocolate chips into either the plain or pumpkin cheesecake batter. You could also drizzle melted chocolate on top before serving.
- Nutty Crunch: Incorporate finely chopped pecans or walnuts into the graham cracker crust for an extra layer of nutty flavor and crunch, or sprinkle them on top with the whipped cream.
Recommended Special Tools for Easy Baking
Having the right tools can make all the difference in your baking experience. These specific items will help you achieve the best results for your Swirled No-Bake Pumpkin Cheesecake:
- Springform Pan: A good quality 9-inch springform pan is essential for cheesecakes. It allows for easy release without damaging the sides. If you prefer a taller cheesecake with more dramatic layers, an 8-inch springform pan can be used, though it might require a slightly longer chilling time.
- Parchment Paper Circles: Save yourself time and hassle by using pre-cut 8-inch parchment paper circles for the bottom of your pan. These fit perfectly and ensure the cheesecake slides off cleanly onto your serving dish.
- Baking Spray with Flour: A reliable nonstick spray that contains flour is excellent for ensuring your crust doesn’t stick, especially up the sides of the pan.
- Offset Spatula: An offset spatula is incredibly useful for smoothly spreading the cheesecake batter evenly in the pan, ensuring consistent layers and a professional finish.
- Food Processor or Blender: Crucial for quickly and efficiently grinding graham crackers into fine crumbs for the crust.
- Electric Mixer (Stand or Handheld): Essential for thoroughly creaming the cream cheese and whipping the heavy cream to the perfect consistency.
Storing and Freezing Your Cheesecake
Proper storage is key to keeping your Swirled No-Bake Pumpkin Cheesecake fresh and delicious. Keep the cheesecake stored in an airtight container, such as a cake carrier, in the refrigerator. It will maintain its exquisite taste and texture for up to 5 days, making it an excellent make-ahead dessert.
Freezing Instructions
This cheesecake freezes beautifully, allowing you to enjoy it much later! There are two main ways to freeze it:
As Individual Slices (Decorated): Once the cheesecake is fully chilled and decorated with whipped cream and crumble, cut it into individual slices. Place each slice in an airtight container, separating layers with parchment paper if stacking. Freeze for up to 30 days. To enjoy, simply thaw individual slices at room temperature for about 1 hour before serving.
Whole Cheesecake (Before Decorating): If you want to make the cheesecake well in advance, freeze it after its initial overnight chill, but before adding the whipped cream and crumble topping. Wrap the entire cheesecake tightly in several layers of plastic wrap, then an additional layer of aluminum foil, ensuring it’s completely sealed. Freeze for up to 30 days.
To thaw a whole frozen cheesecake, you have a couple of options: either place it on the counter at room temperature for about 1 hour for a slightly firmer texture, or transfer it to the refrigerator for 24 hours to thaw slowly. Once thawed, you can then add your fresh whipped cream and cinnamon oat crumble before serving.
Other Cheesecake Recipes To Try
If you’re a cheesecake enthusiast, expand your repertoire with these tempting recipes:
- Classic Baked Pumpkin Cheesecake
- Caramel Pumpkin Cheesecake Bars
Explore More Delicious Pumpkin Recipes
Can’t get enough of pumpkin? Dive into these other seasonal delights:
- Pumpkin Pie Cookie Bars
- Chocolate Stuffed Pumpkin Cupcakes
- Pumpkin Pie Cookies
We hope you adore this Swirled No-Bake Pumpkin Cheesecake as much as we do! Please remember to leave a star review below and share your thoughts. Your feedback helps us grow!
Don’t forget to tag us on Instagram @stephaniesweettreats with your beautiful creations. For more baking inspiration and delightful dessert ideas, be sure to follow us on Pinterest.
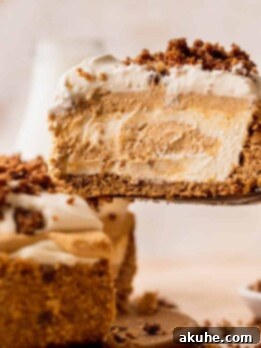
Swirled No-Bake Pumpkin Cheesecake
Author: Stephanie Rutherford
This swirled no-bake pumpkin cheesecake features a classic graham cracker crust, a creamy blend of no-bake cheesecake batter and spiced pumpkin cheesecake batter swirled together, topped with whipped cream and a cinnamon oat crumble.
Print Recipe | Pin Recipe | Leave a Review
Prep Time: 30 minutes
Cook Time: 15 minutes
Chilling Time: 6 hours
Total Time: 6 hours 45 minutes
Servings: 16 slices
Ingredients
Graham Cracker Crust
- 2 1/2 cups Graham cracker crumbs (from 2 packets of graham crackers)
- 1/2 tsp Ground cinnamon
- 1/4 cup Brown sugar (packed light or dark)
- 1/2 cup Unsalted butter (melted)
Pumpkin Cheesecake Filling
- 24 oz Cream cheese (room temperature)
- 1/2 cup White granulated sugar
- 1 tsp Pure vanilla extract
- 1/4 cup Sour cream (room temperature)
- 1/2 cup Pumpkin puree (not pumpkin pie filling)
- 2 tsp Pumpkin pie spice
- 2 tsp Ground cinnamon
- 1 1/2 cups Heavy cream (cold)
- 3/4 cup Powdered sugar (sifted)
Whipped Cream Topping
- 1 cup Heavy cream
- 2 TBSP Powdered sugar
- 1/2 tsp Pure vanilla extract
Cinnamon Oat Crumble
- 1/2 cup All-purpose flour
- 1/4 cup Quick oats
- 1/4 cup Brown sugar (packed light or dark)
- 1 tsp Ground cinnamon
- 5 TBSP Unsalted butter (melted)
Instructions
Graham Cracker Crust
- Spray a 9-inch springform pan with non-stick baking spray. Place a 9-inch parchment paper circle on the bottom and spray again.
- Blend graham crackers in a blender or food processor until fine crumbs form. In a bowl, mix the crumbs with 1/2 tsp cinnamon, 1/4 cup brown sugar, and 1/2 cup melted butter until combined.
- Pour crumbs into the pan. Press the crust halfway up the sides of the pan using the back of a measuring cup. Freeze the crust while preparing the batter.
Pumpkin Cheesecake Filling
- Place a metal bowl and whisk attachment in the freezer for 10 minutes.
- Using a mixer, beat 24 oz cream cheese on high for 1 minute. Add 1/2 cup granulated sugar and beat for another minute. Scrape the bowl. Add 1/4 cup sour cream and 1 tsp vanilla extract, mixing until just combined.
- Separate the batter into two equal bowls. In one bowl, mix in 1/2 cup pumpkin puree, 2 tsp pumpkin pie spice, and 2 tsp ground cinnamon.
- Using the cold bowl, pour in 1 1/2 cups cold heavy cream and 3/4 cup sifted powdered sugar. Beat on high until stiff peaks form.
- Pour half of the whipped cream into each cheesecake batter bowl. Fold very gently until just combined. Do not overmix.
- Spread half of the regular cheesecake batter on top of the crust. Use a cookie scoop to dollop small scoops of pumpkin cheesecake batter on top.
- Pour the rest of the regular cheesecake batter over the dollops, smoothing evenly. Then, pour the rest of the pumpkin cheesecake batter over that, smoothing again. All batter will be used.
- Cover and chill the cheesecake for at least 6 hours, or preferably overnight.
Cinnamon Oat Crumble
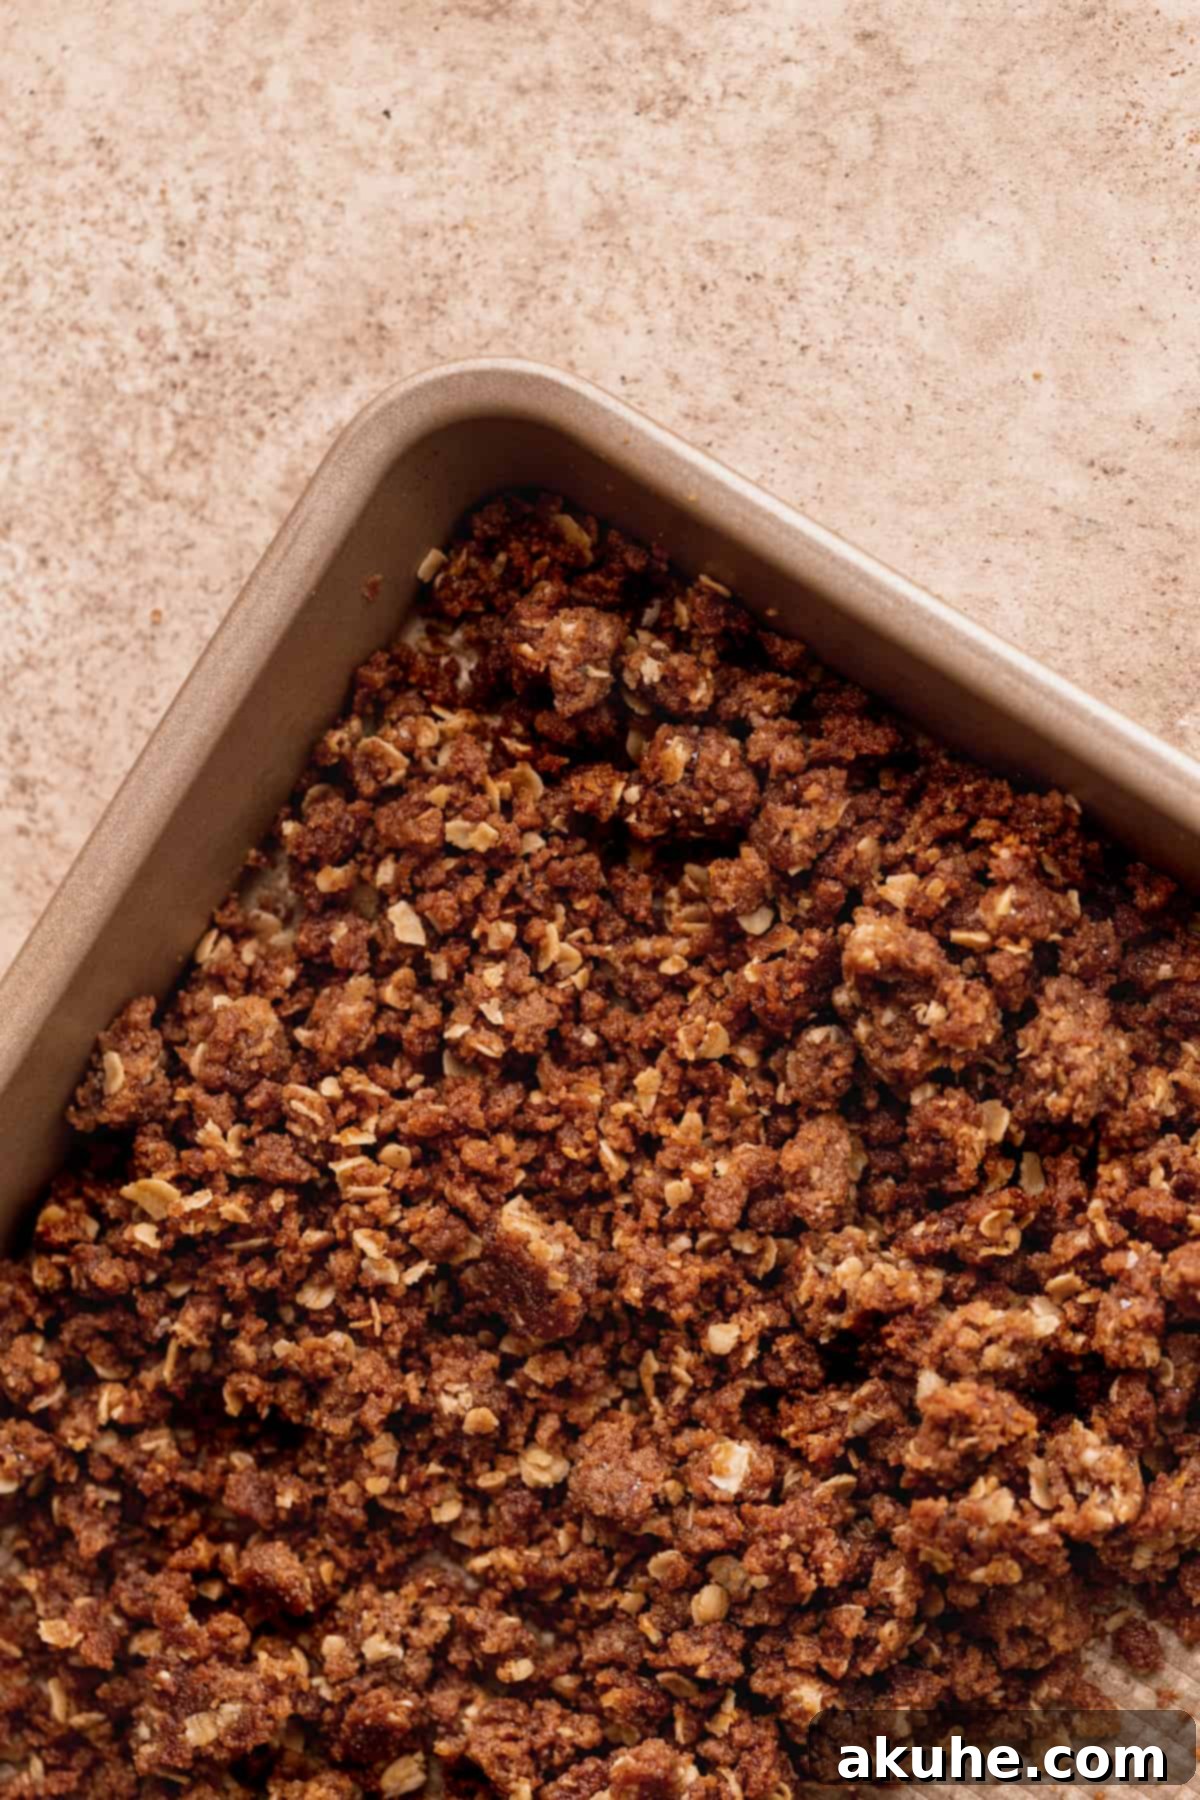
- Mix 1/2 cup all-purpose flour, 1/4 cup quick oats, 1/4 cup brown sugar, 1 tsp ground cinnamon, and 5 TBSP melted butter together. Chill for 15 minutes.
- Preheat the oven to 350°F (175°C). Spray a cookie sheet with non-stick baking spray. Pour the crumble mixture onto the sheet, breaking up large pieces with your fingers.
- Bake for 5-minute intervals, stirring the crumble after each interval, for a total of 3 times (15 minutes total). The crumble will appear very melty but will crisp as it cools.
- Cool completely before using.
Whipped Cream Topping
- Freeze a metal bowl and whisk attachment for 10 minutes.
- Pour 1 cup cold heavy cream, 2 TBSP powdered sugar, and 1/2 tsp pure vanilla extract into the cold bowl. Beat on high until medium peaks form, making it light and fluffy.
- Once the cheesecake is chilled, carefully remove it from the springform pan and remove the parchment paper.
- Spread whipped cream over the cheesecake and top with the cooled cinnamon oat crumble. Store the finished cheesecake in the fridge.
Notes
- Ensure cream cheese and sour cream are at room temperature (pulled out 2 hours before) for a smooth batter.
- Be extremely gentle when folding the whipped cream into the cheesecake batter. Overmixing will cause the air to deflate, resulting in a runny cheesecake that won’t set.
- If the cheesecake is still runny after chilling overnight, it indicates that the whipped cream was likely overmixed. A properly made no-bake cheesecake should be firm and sturdy.
Nutrition Information (per slice)
Calories: 493 kcal, Carbohydrates: 38g, Protein: 5g, Fat: 40g, Saturated Fat: 23g, Polyunsaturated Fat: 2g, Monounsaturated Fat: 11g, Trans Fat: 1g, Cholesterol: 124mg, Sodium: 244mg, Potassium: 155mg, Fiber: 1g, Sugar: 18g, Vitamin A: 2620IU, Vitamin C: 1mg, Calcium: 98mg, Iron: 1mg
